")
WordPress is one of the world’s most popular content management systems (CMS), powering close to 43% of the internet. As a web developer, there are times when you prefer to host WordPress locally. In this post, we’ll explain local hosting and its benefits and provide a few ways to do it. Let’s dive in.
What is Local Hosting?
Local hosting, often referred to as local development, is the process of creating a web server on your computer to build, test, and experiment with websites before hosting them on the internet. Local hosting is a great way to test your website’s design, functionality, and performance without needing a live connection.
Let’s break down the requirements before we get into the programs you can use to host your WordPress websites locally.
- A computer running either Windows, Linux, or MacOS
- A web browser
- Web server software
- A text editor for writing code
- A stable internet connection (for pushing your site live)
Subscribe To Our Youtube Channel
What Are the Benefits of Hosting WordPress Locally?
There are several reasons why you should host WordPress locally. It allows beginners to learn how WordPress works and how to develop websites without pressure. New users won’t have to worry about breaking a live website or paying for a hosting provider. Additionally, it allows developers to test a website before pushing it live. You can try out different themes and plugins, explore adding custom code and other functionalities, and determine how they affect your website’s performance.
4 Ways to Install WordPress Locally
There are multiple ways to install WordPress locally. The method you choose depends on the type of operating system you’re using and, in some cases, which host you plan to push your local sites to when they are ready to be deployed. Let’s walk through the methods you can use to install WordPress locally, so you can decide which way is best for your unique situation.
Installing WordPress on Windows with WampServer
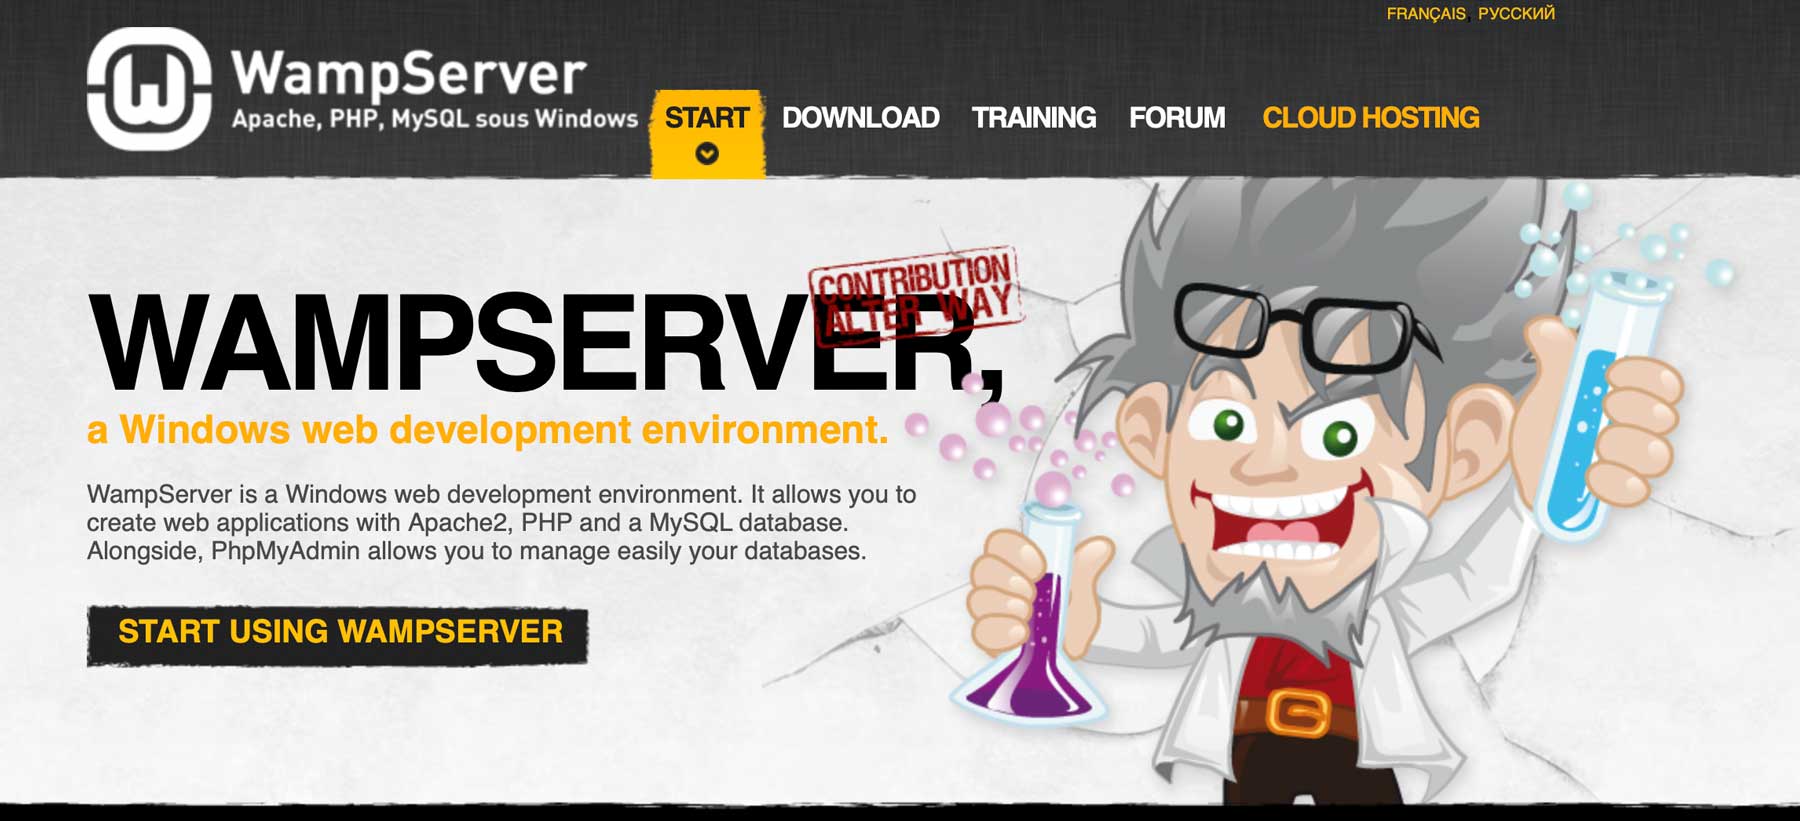
WampServer is a software for Windows that allows you to set up a local environment for WordPress. It integrates Apache, MySQL, and PHP on a Windows computer, so you can create and test web applications locally before pushing them live. The setup process is quite easy, only taking a few minutes. If you’d like to learn more about WampServer and how to install it, check out our post on how to install WordPress.
Installing WordPress on MacOS with MAMP
If you’re an Apple user, MAMP is an excellent choice for building WordPress websites locally. You can add as many sites as you like, personalize its settings to suit your needs, and connect MAMP to your remote host to push your sites live easily. We won’t go into depth on how to configure MAMP’s settings here, as we have the ultimate guide to MAMP Pro for WordPress users on our blog.
Using Local by Flywheel
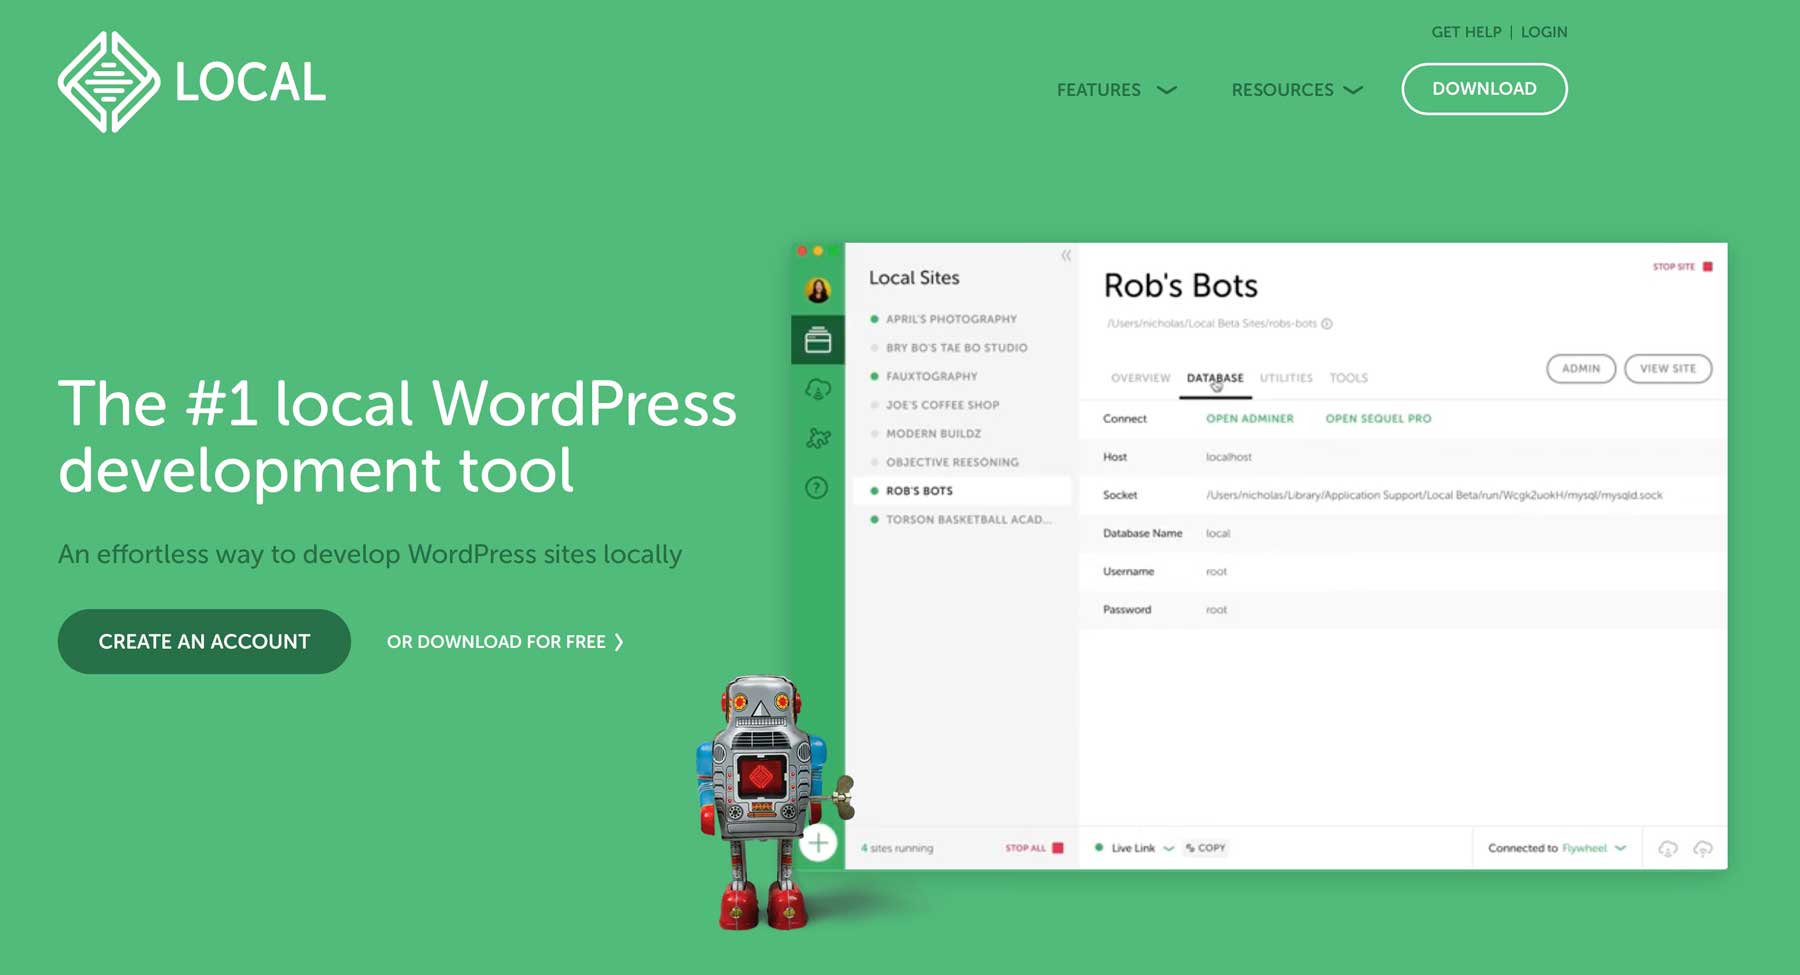
Another way to set up a local server for WordPress is by using a program provided by your hosting provider. One such program is Local by Flywheel. It easily allows you to set up a local environment and then effortlessly push your site live to Flywheel or WP Engine.
If you’re a Flywheel or WP Engine customer, Local is a no-brainer. It allows you to add as many sites as you wish and provides a straightforward route to installing WordPress locally. To learn more about how Local works and how to install it, check out our post Local by Flywheel: An Excellent Tools for Local WordPress Development.
Installing WordPress Locally with XAMPP
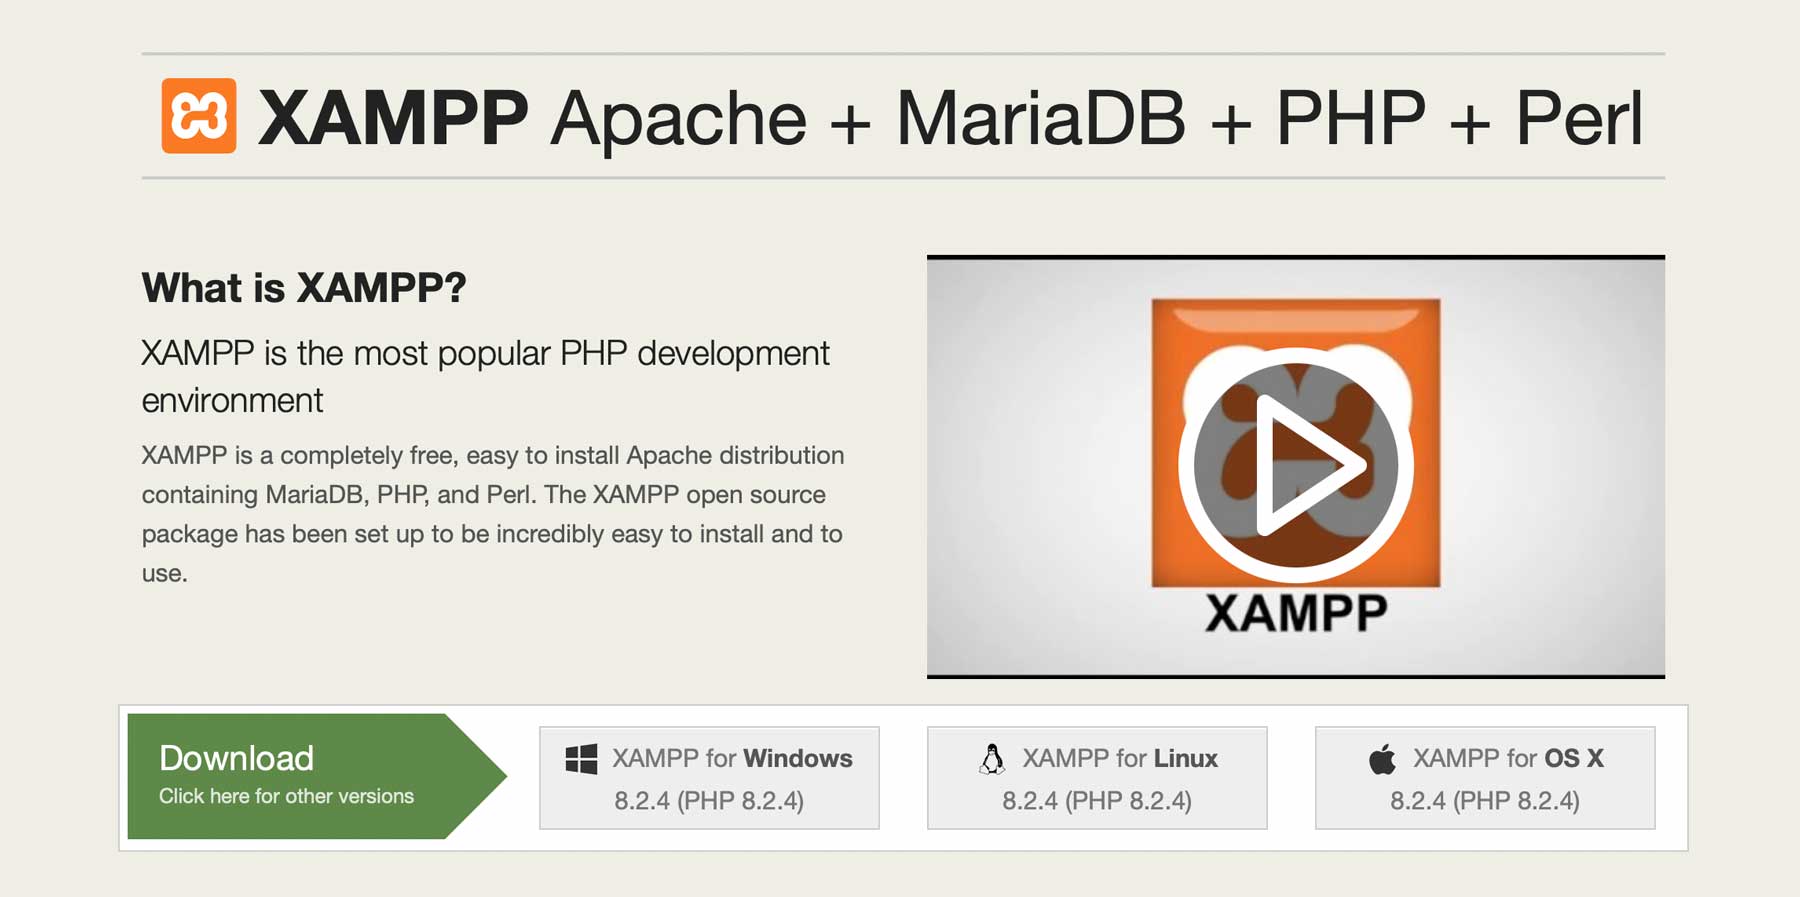
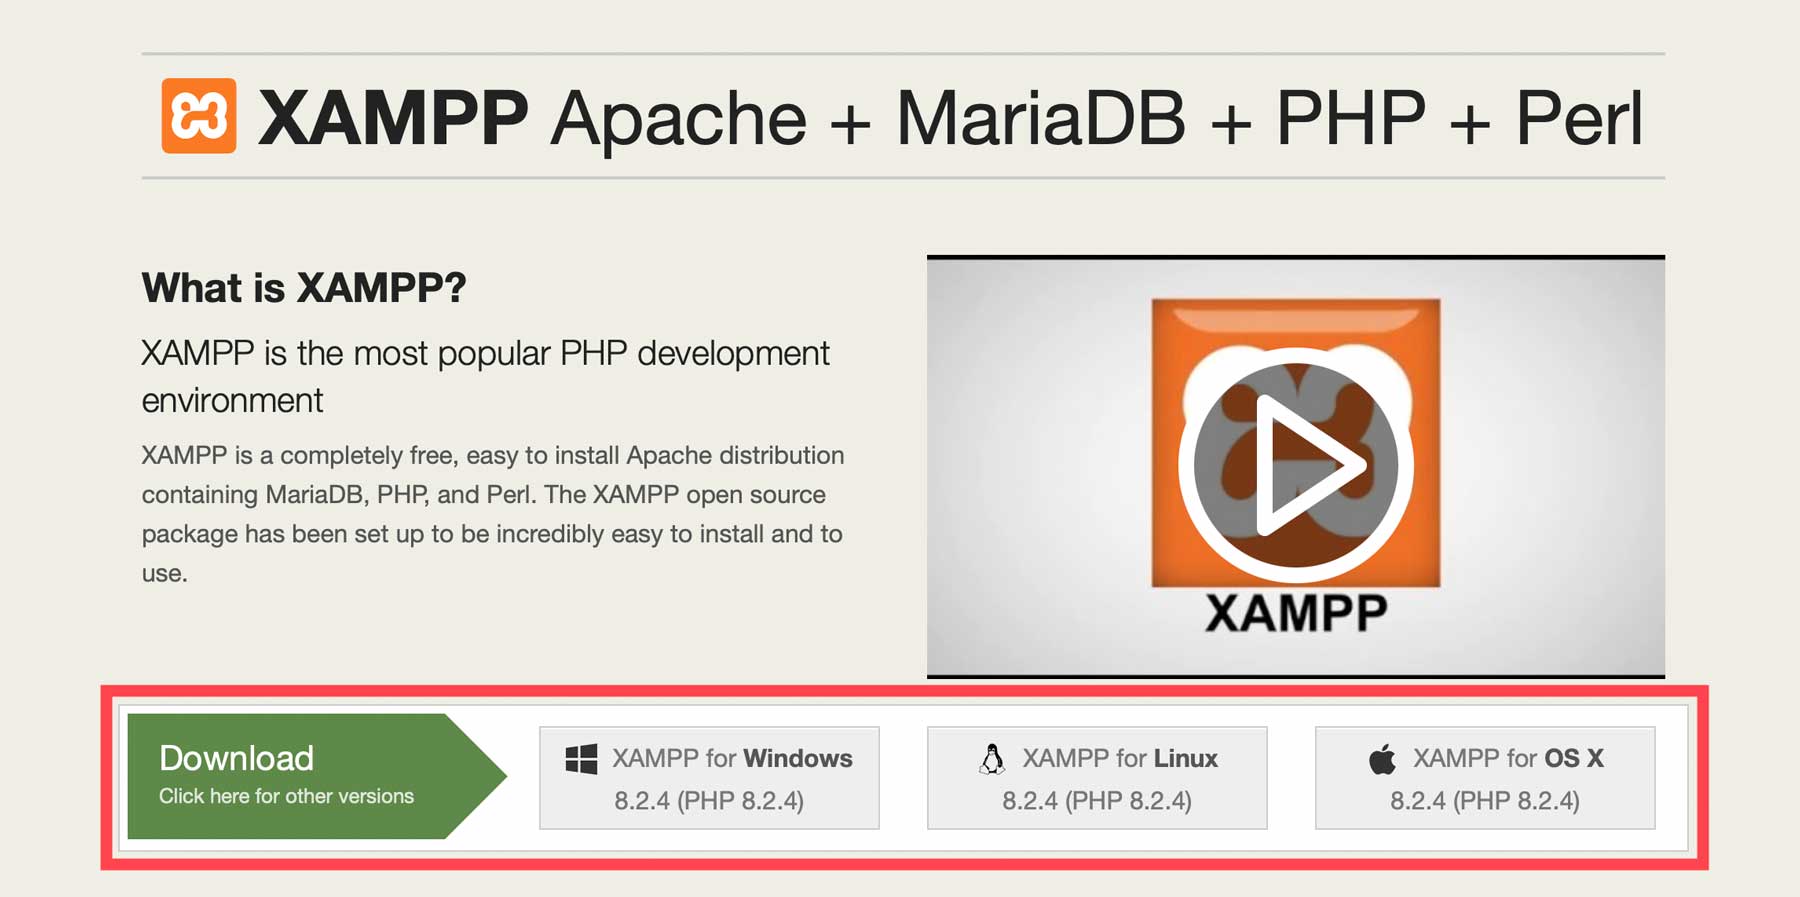
XAMPP is an open-source software platform that allows users to set up a local server environment. XAMPP, which is short for cross-platform (X), Apache (A), MySQL(M), PHP (P), and Perl (P), is available on Windows, MacOS, and Linux operating systems. It’s an incredible tool for developers to test websites or applications before deploying them to a live server. It’s easy to install and configure, allowing developers to mimic a server environment in a few minutes.
This guide will walk you through the steps to install XAMPP on your machine and configure its settings. Let’s get started.
Step 1: Downloading the Software
To download XAMPP, navigate to the Apache Friends website and select the appropriate version for your operating system. You can choose between Windows, Linux, or MacOS. For this tutorial, we’ll be using the MacOS version. Once downloaded, run the application installer.
MacOS has a safety feature that prohibits software from unverified developers from being downloaded and installed. If you get this notification, press and hold the option button on your Mac to reveal the options window. From there, click open. This will override Apple’s security settings and allow you to install the software.
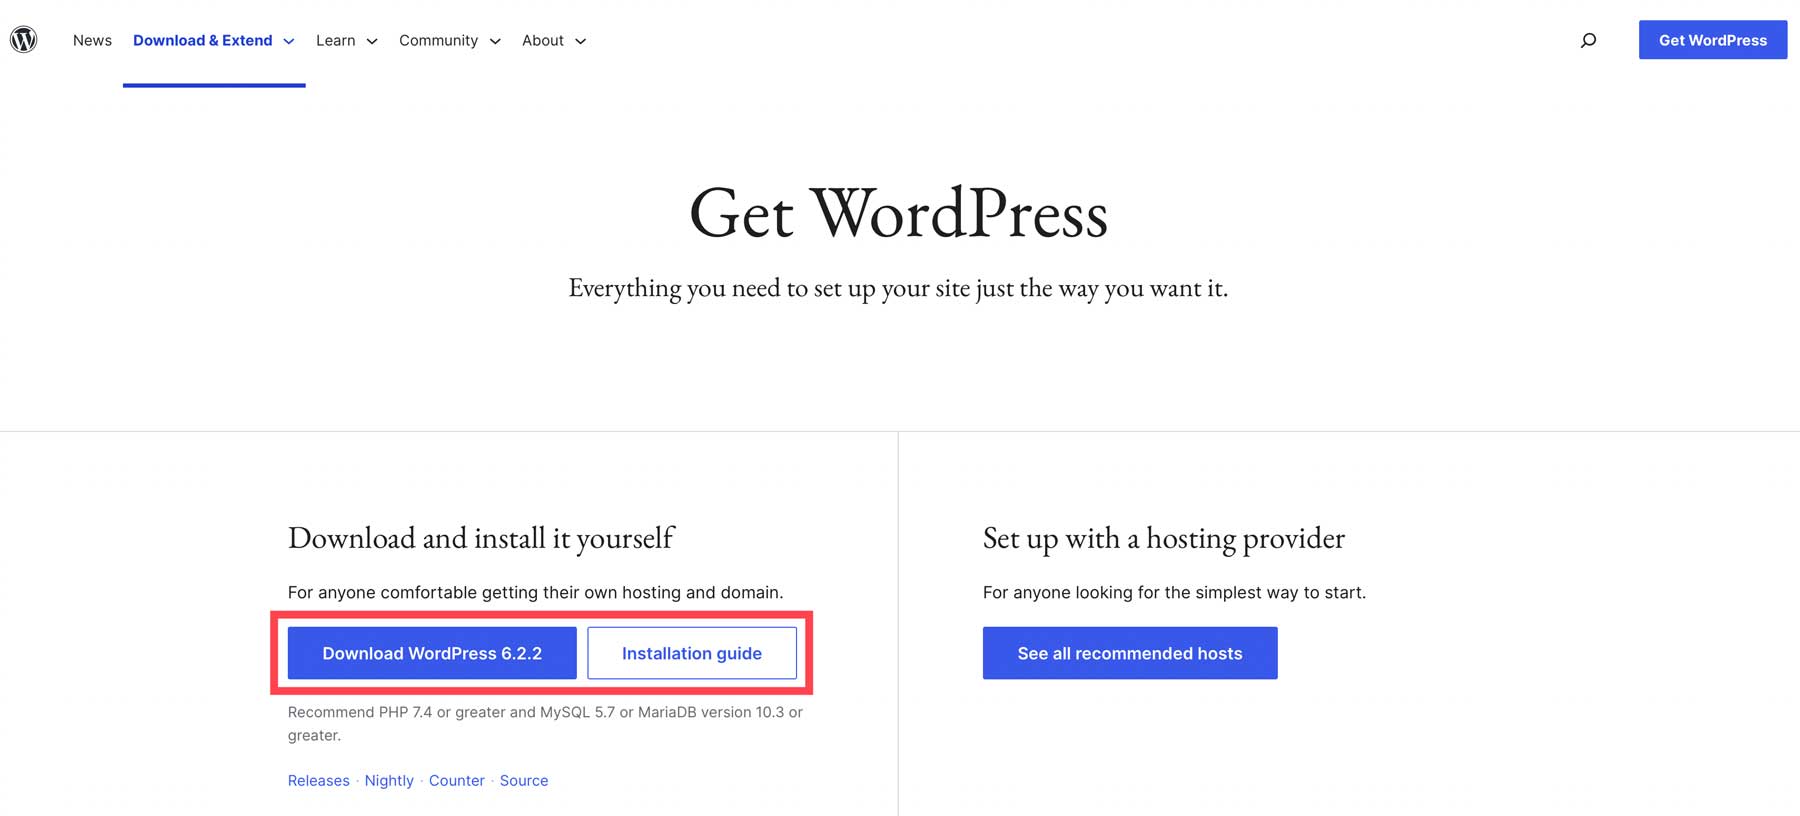
Step 2: Download WordPress and Add it to XAMPP
The next step is to download WordPress. Click the download WordPress 6.2.2 button to download WP to your computer.
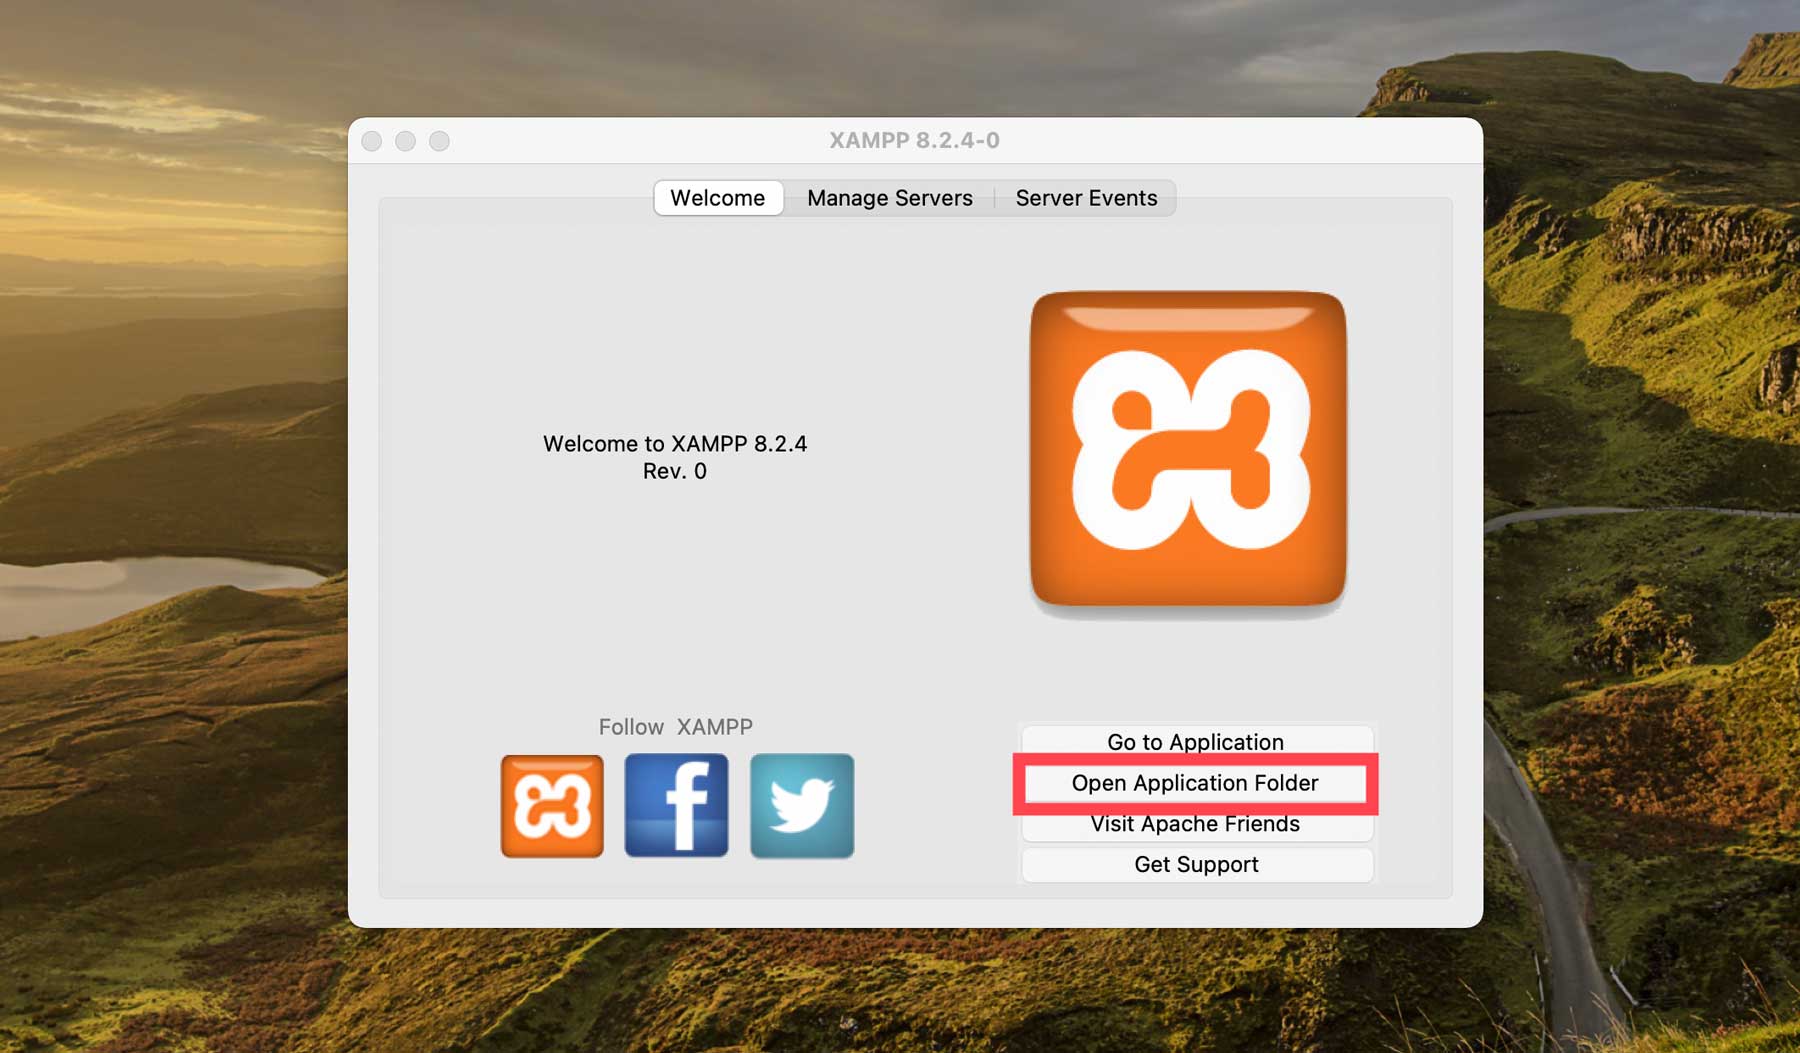
Next, we need to add WP to XAMPP. To do this, click the open application folder button on the XAMPP welcome screen.
When the folder opens, double-click the htdocs folder to open it.
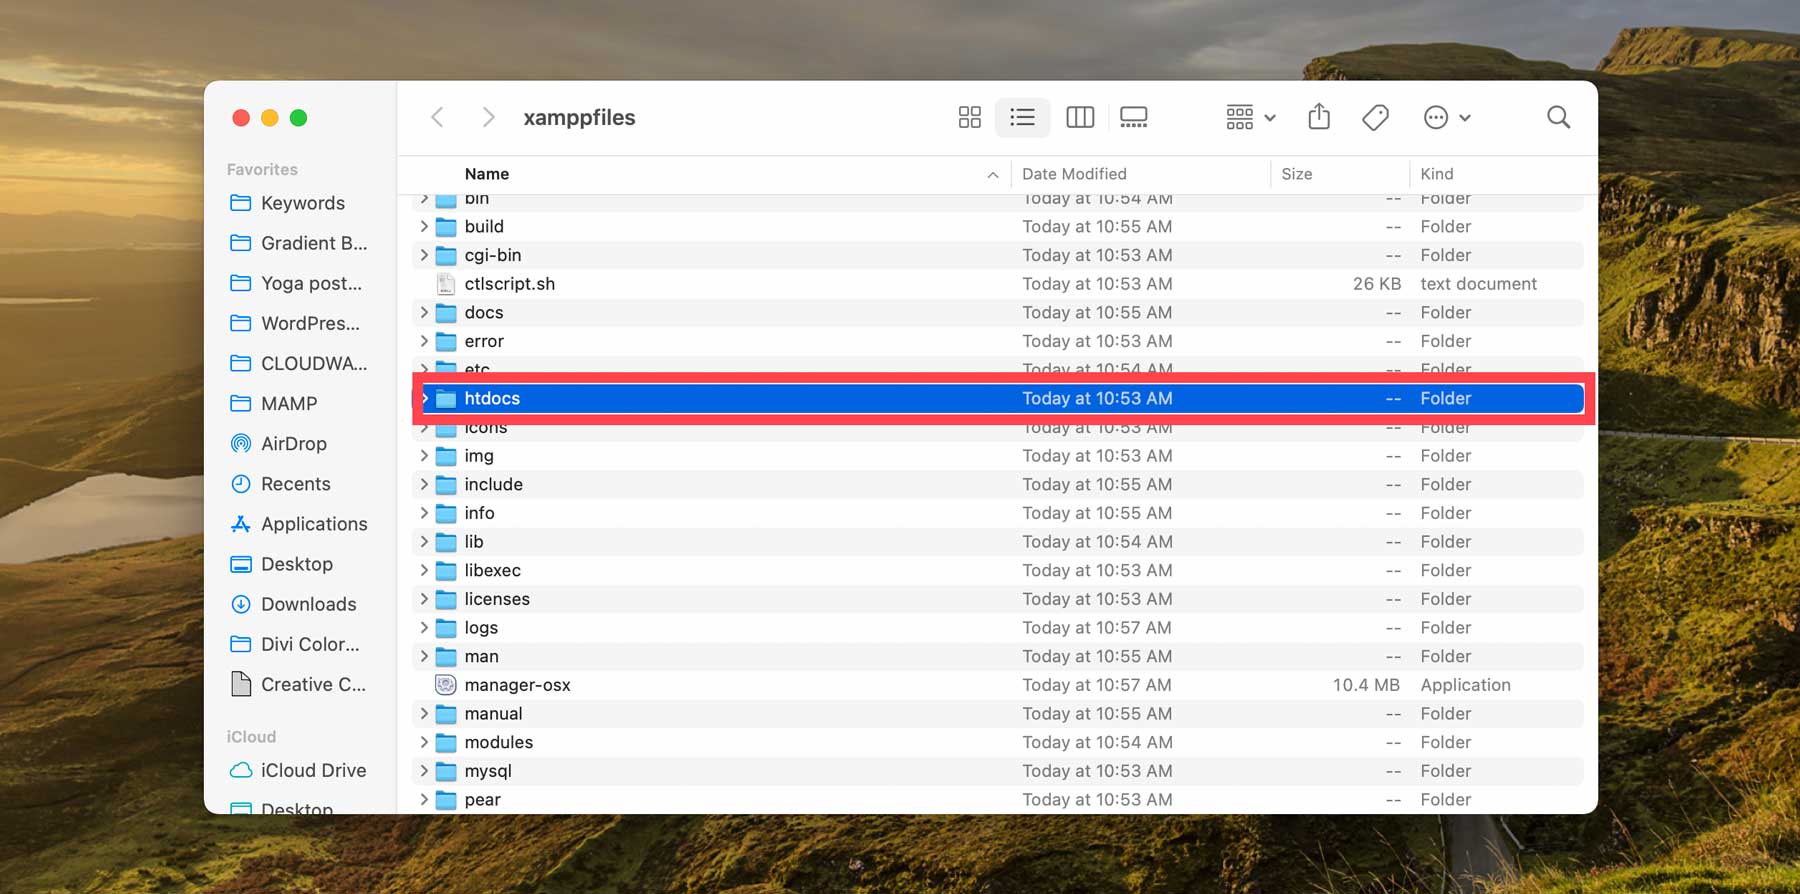
Then, you’ll right-click within the htdocs folder and click new folder to add a home for your WordPress files. Right-click on your new folder to rename it, then double-click to open it.
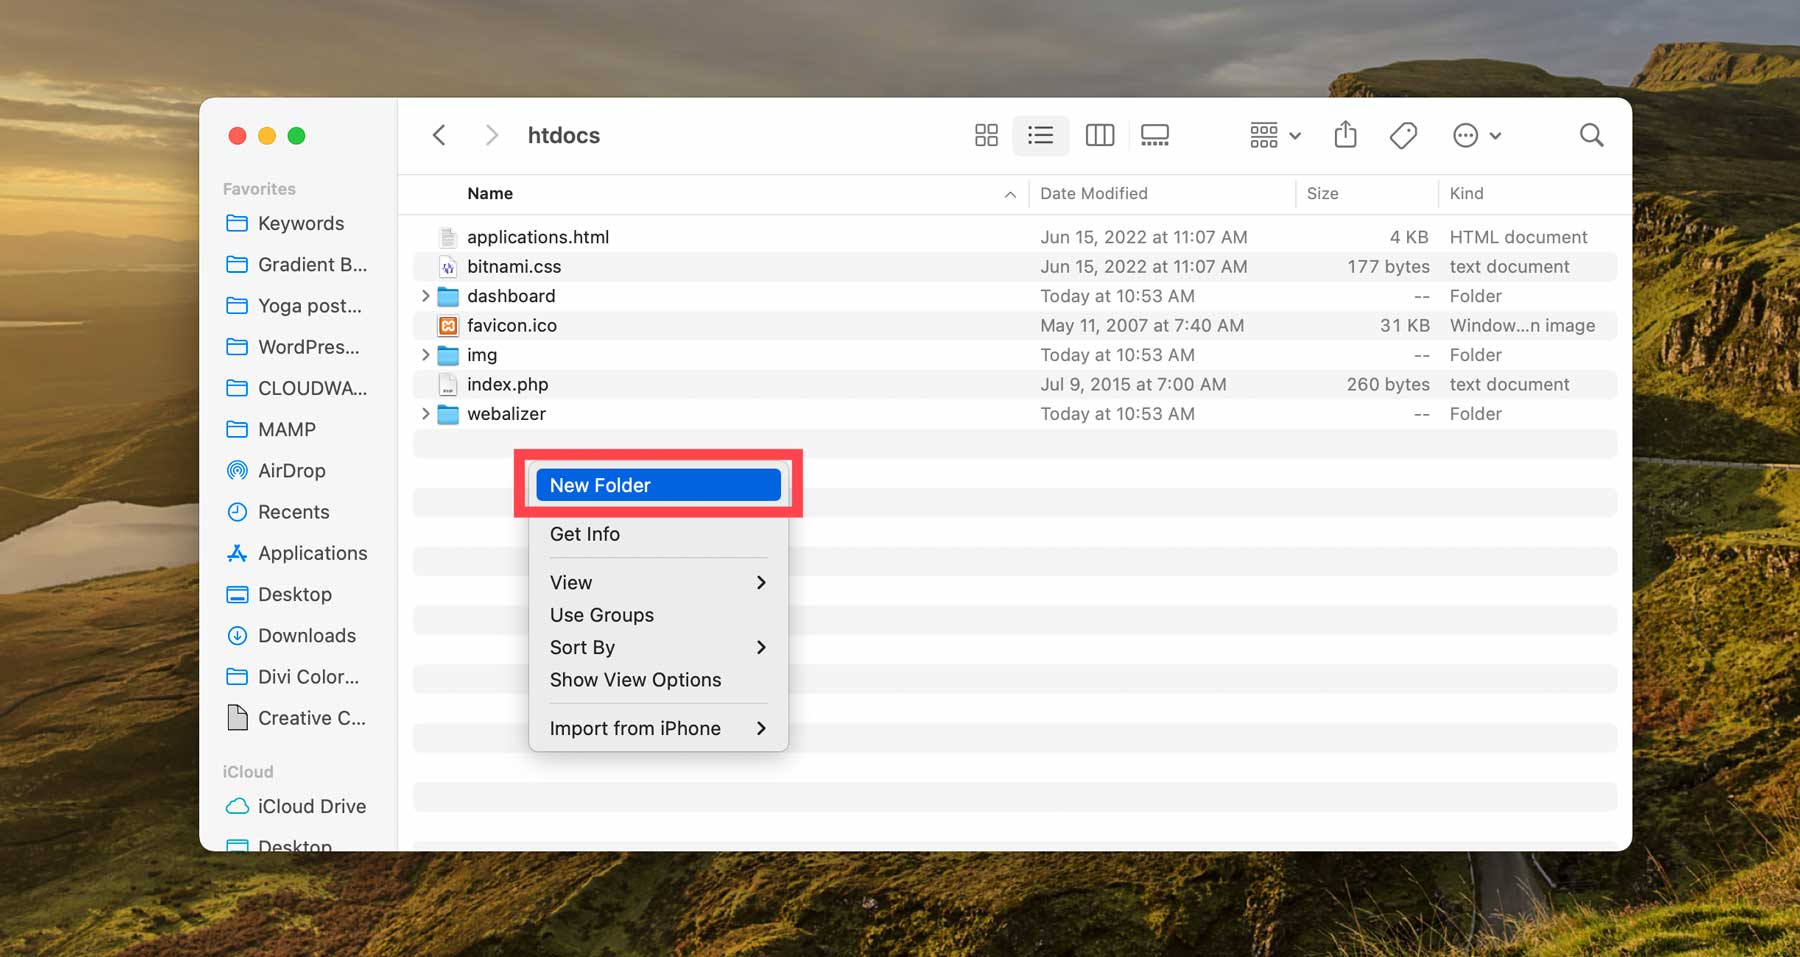
Finally, locate the WordPress zip file you downloaded from the WP repository. Double-click to unzip it, then drag the contents of the WordPress folder into the new folder you created within htdocs.
Step 3: Configuring the Settings
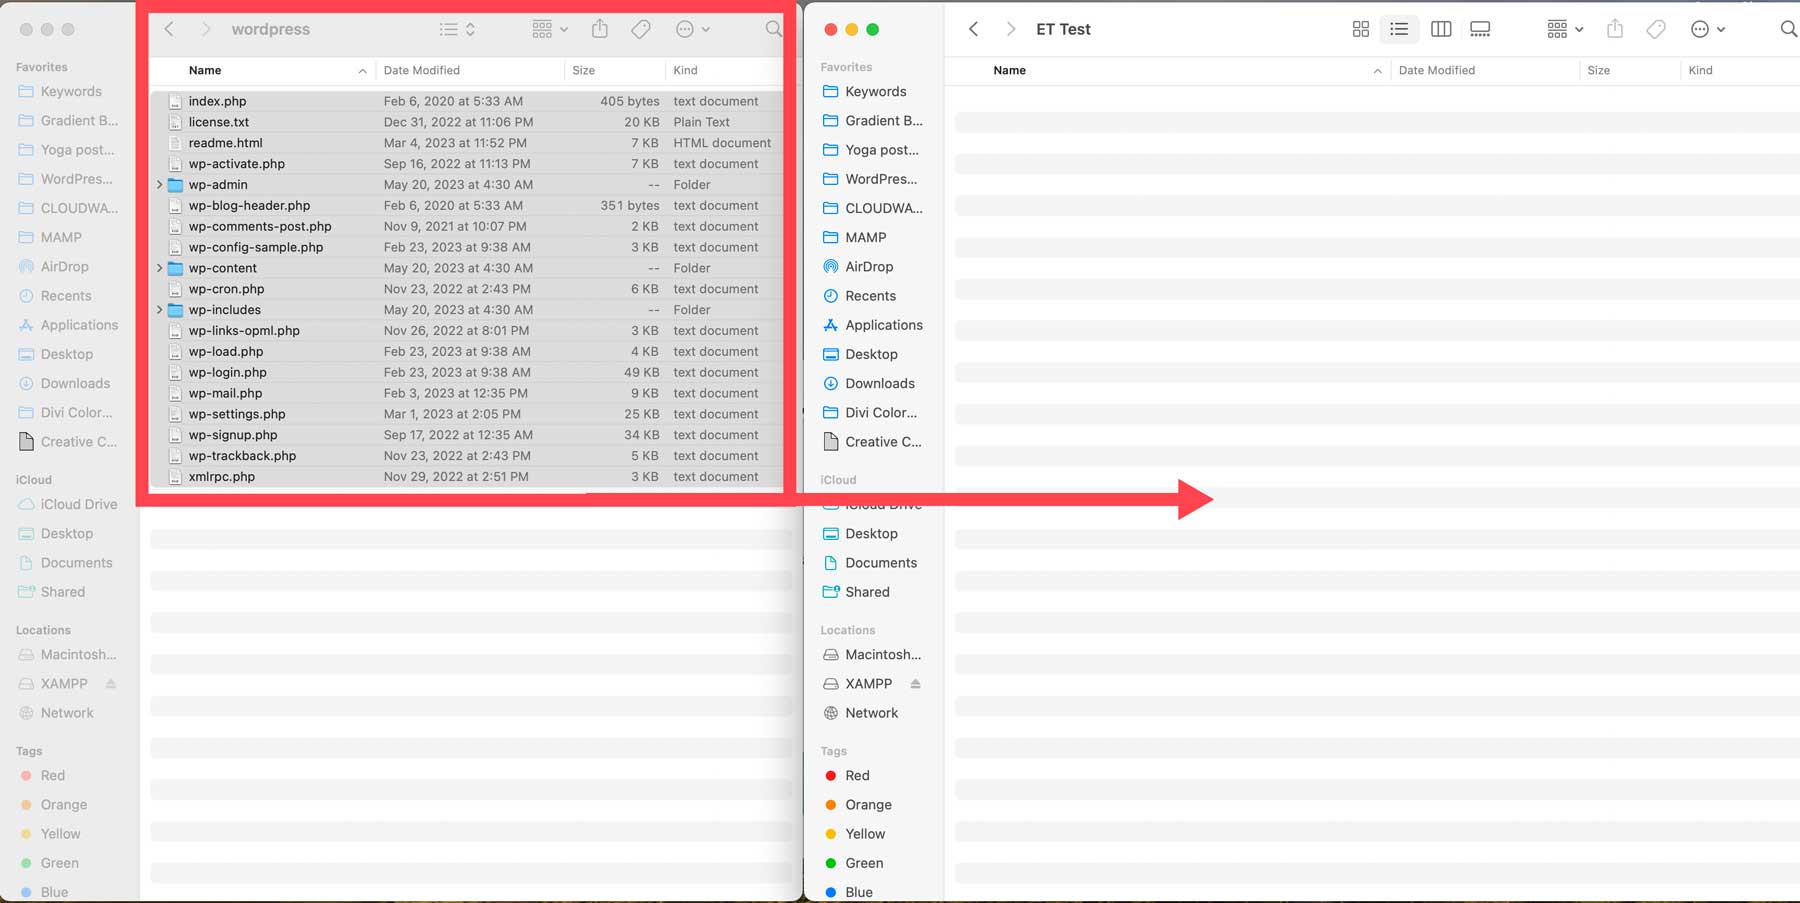
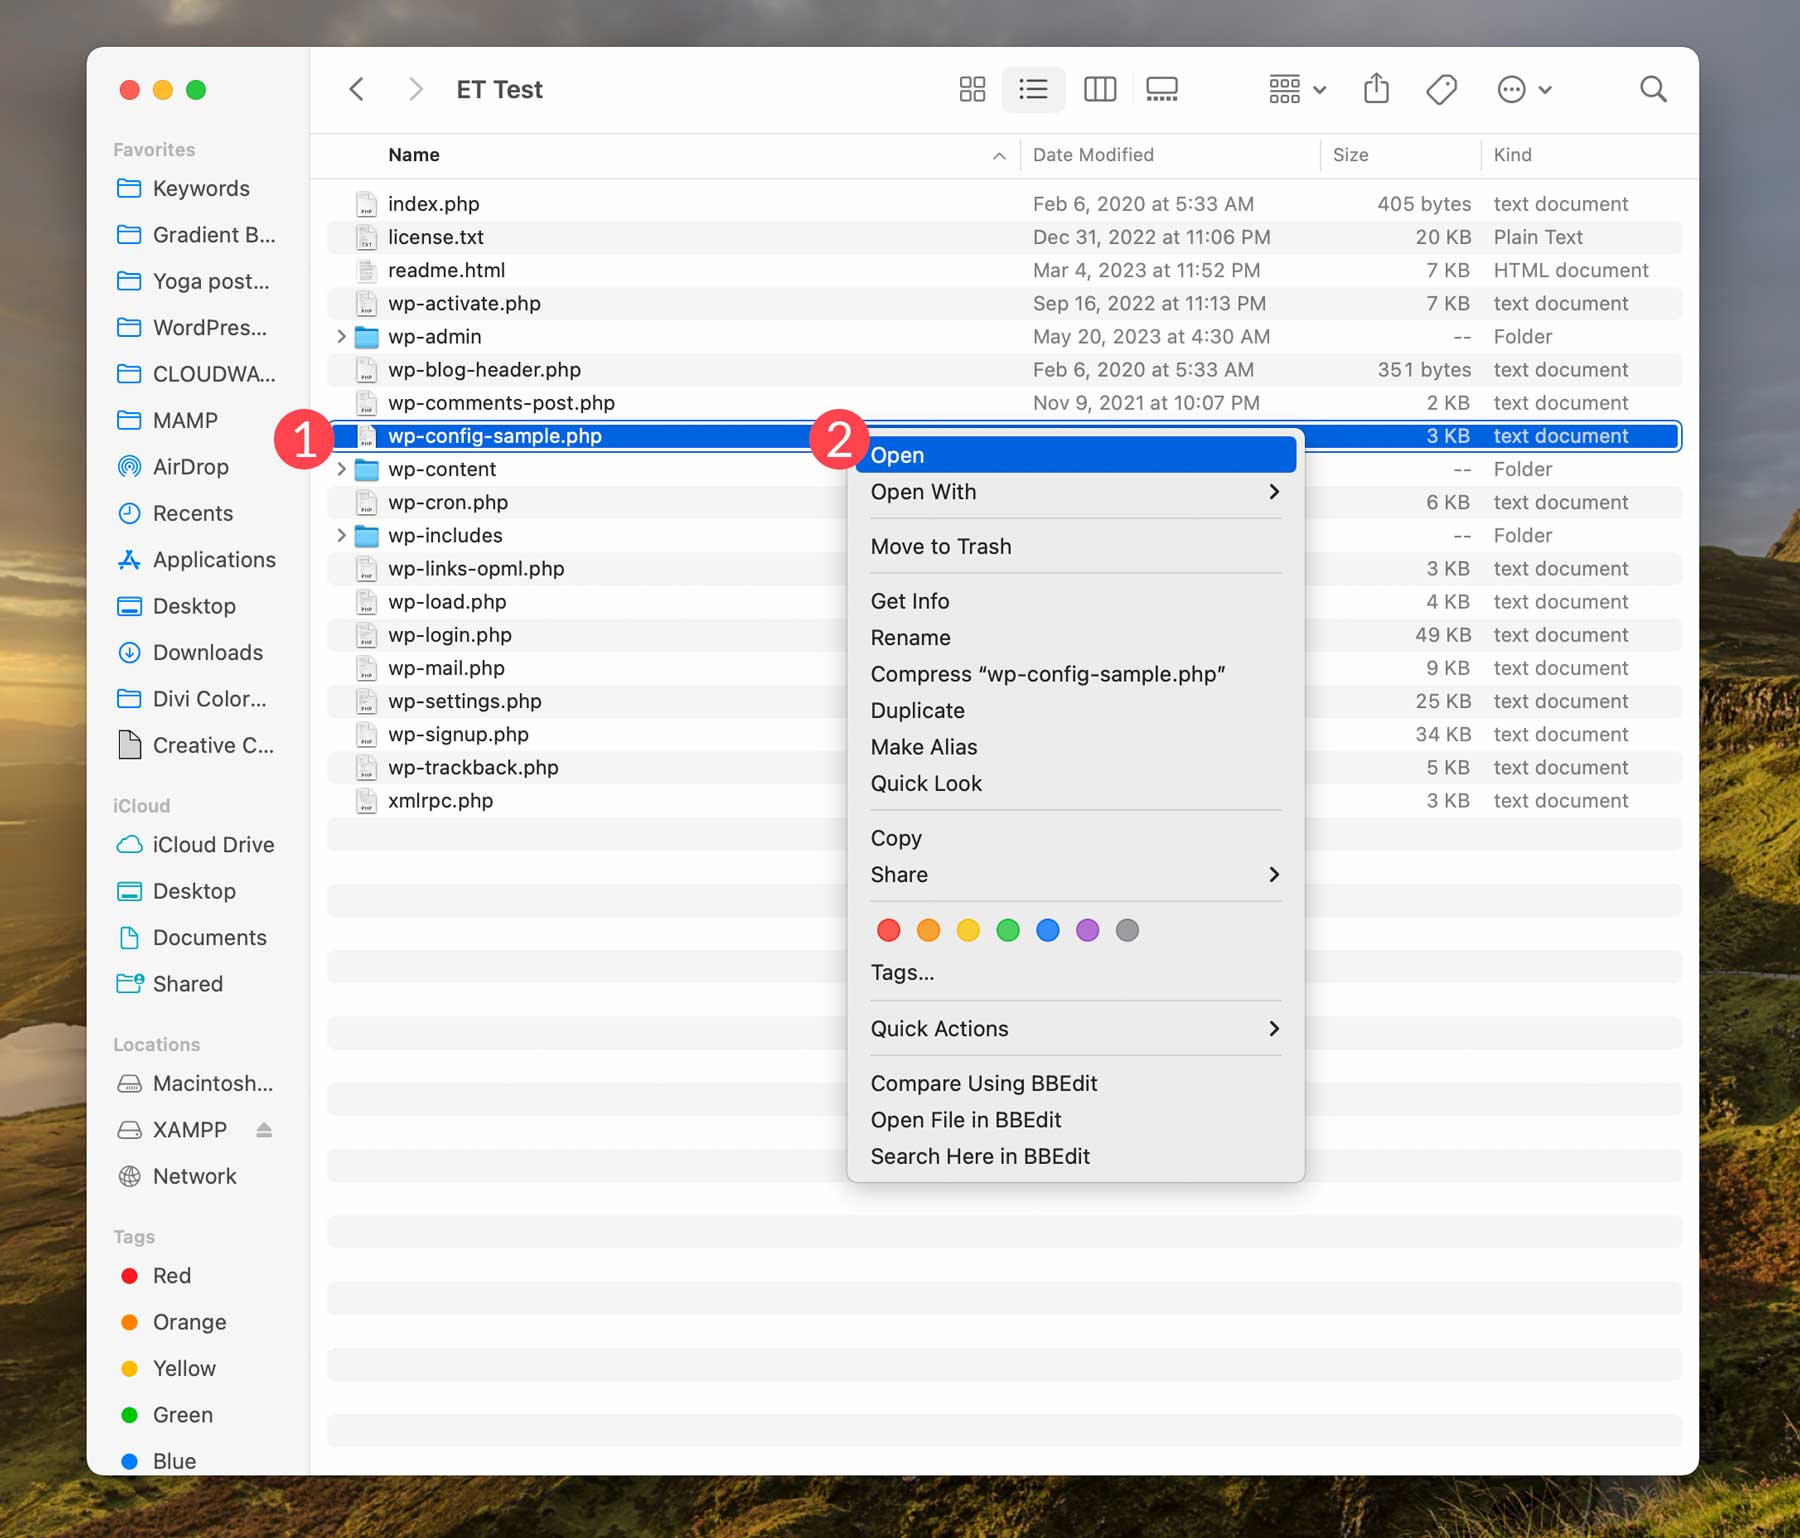
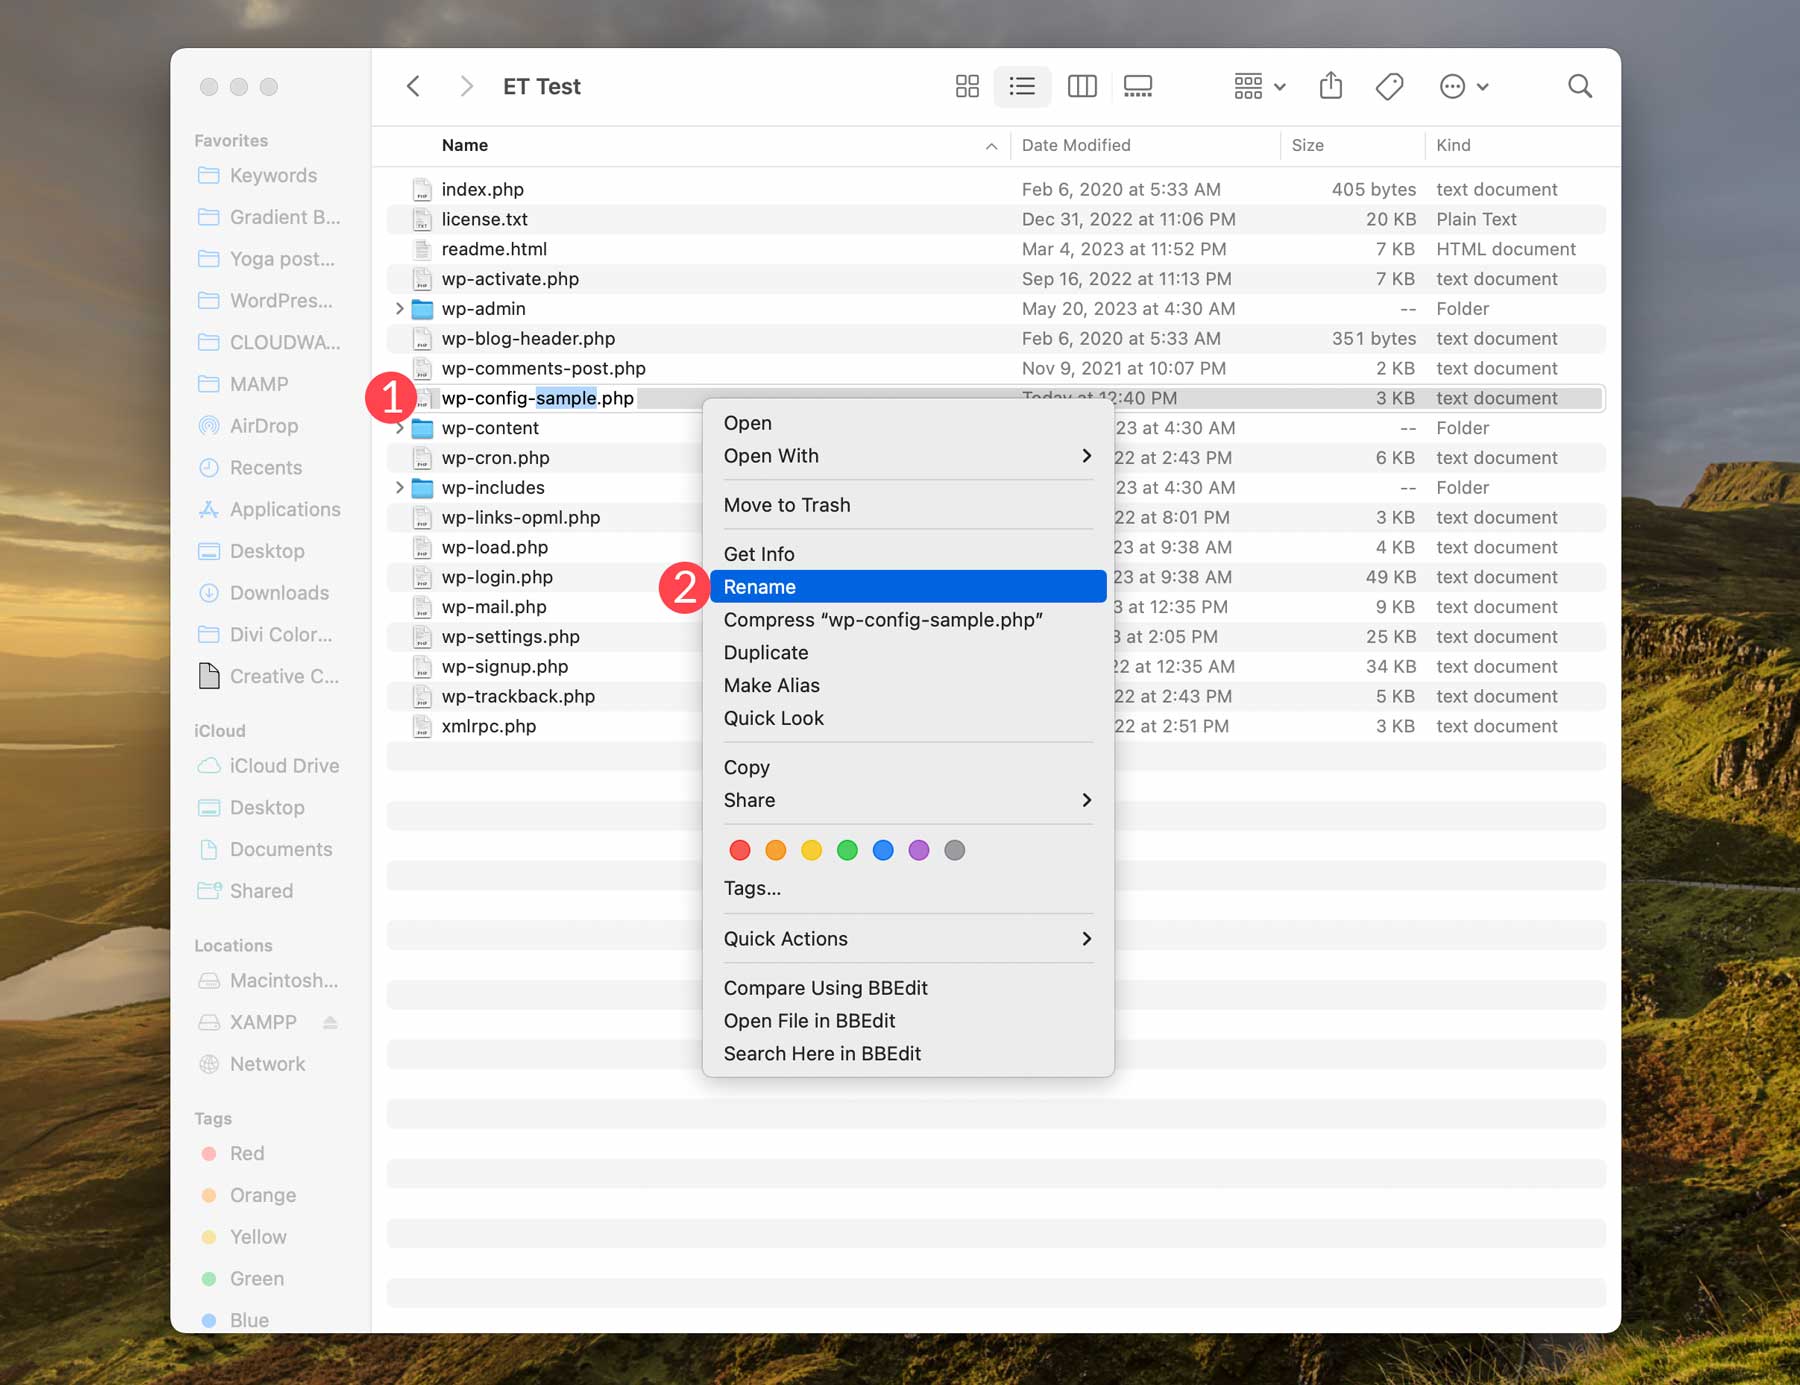
Now that you have the WordPress files where they need to go, you’ll need to configure the settings for it to work. Navigate to xampp/htdocs/your WordPress folder, then locate the wp-config-sample.php file. Right-click on it, then click open. This will allow you to open and edit the file with your favorite text editor.
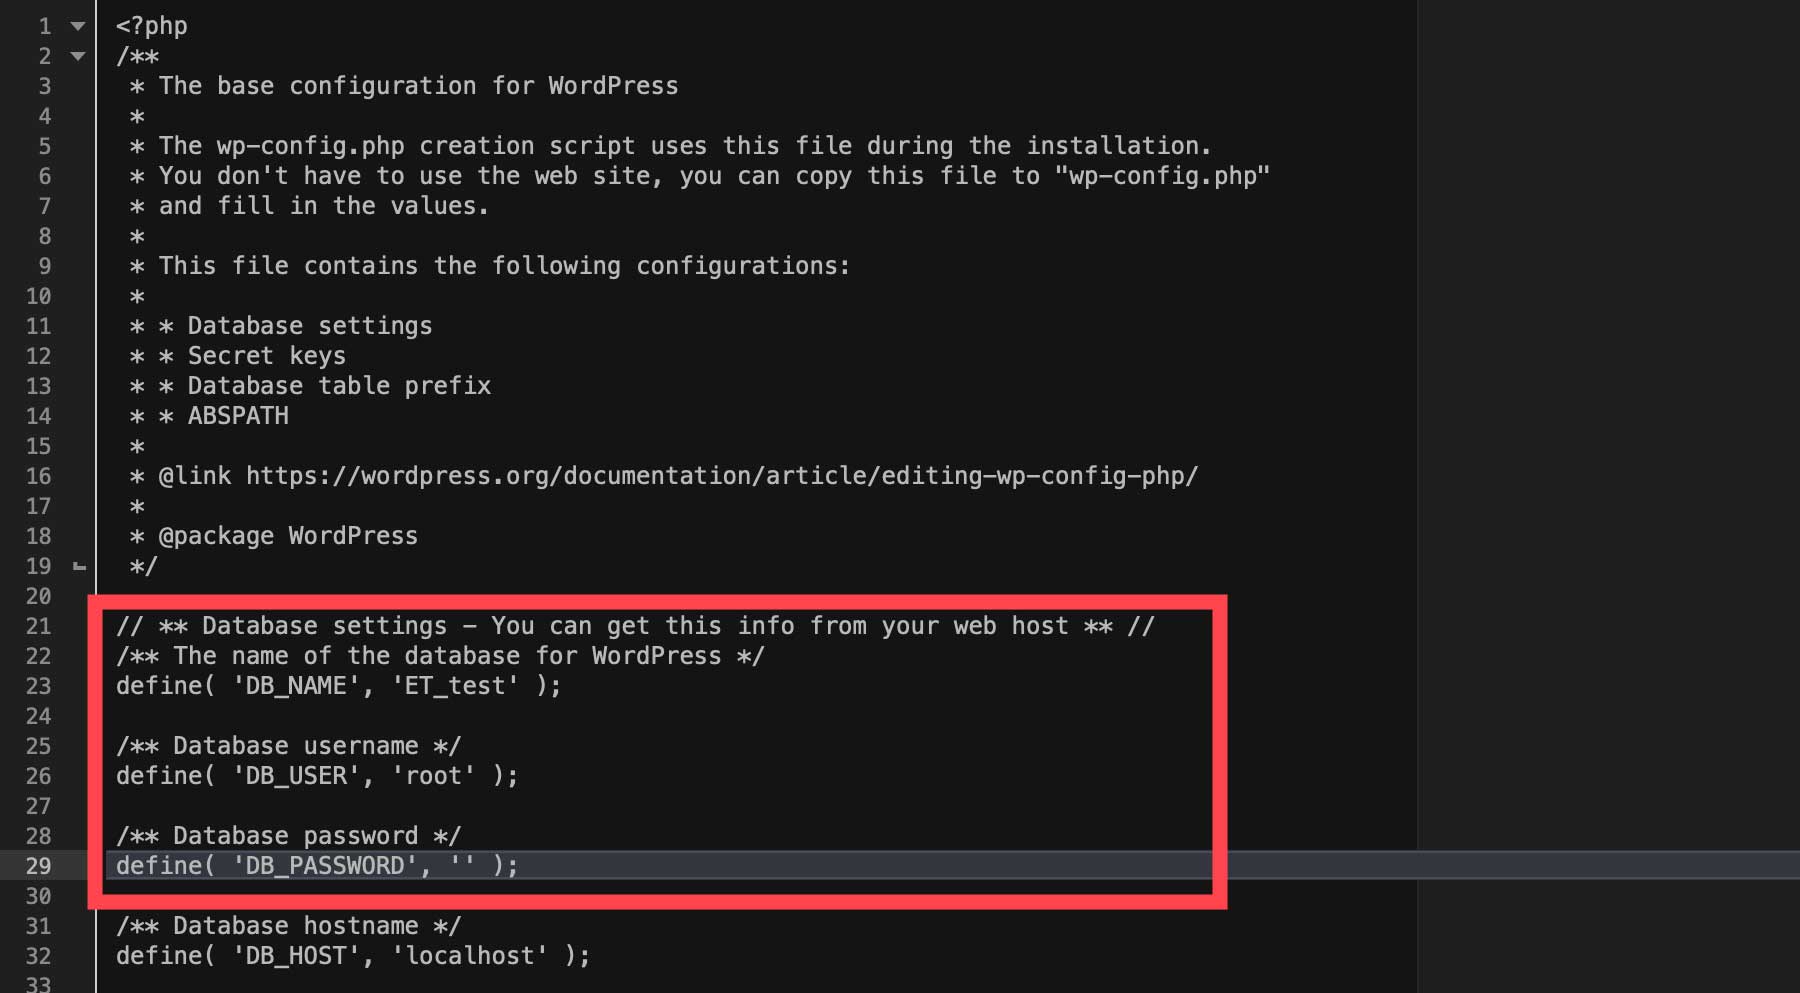
In the PHP file, locate the line that begins with // ** Database settings. Next, we’ll need to enter a database name on this line:
define( 'DB_NAME', 'xx' );
Swap xx with the database name of your choice. Write it down and keep it safe because you’ll need it in the next step. Next, we’ll need to specify a username and password for our database. Specify root for the database username. As for the password, you can leave it blank. Now, your wp-config file should look like this:
define( 'DB_NAME', 'your-DB-name' );

/** Database username **/
define( 'DB_USER', 'root' );

/** Database password **/
define( 'DB_PASSWORD', '');
Save the file and close it. Next, right-click on the wp-config-sample.php file to rename it wp-config.php.
Step 4: Launching the Control Panel
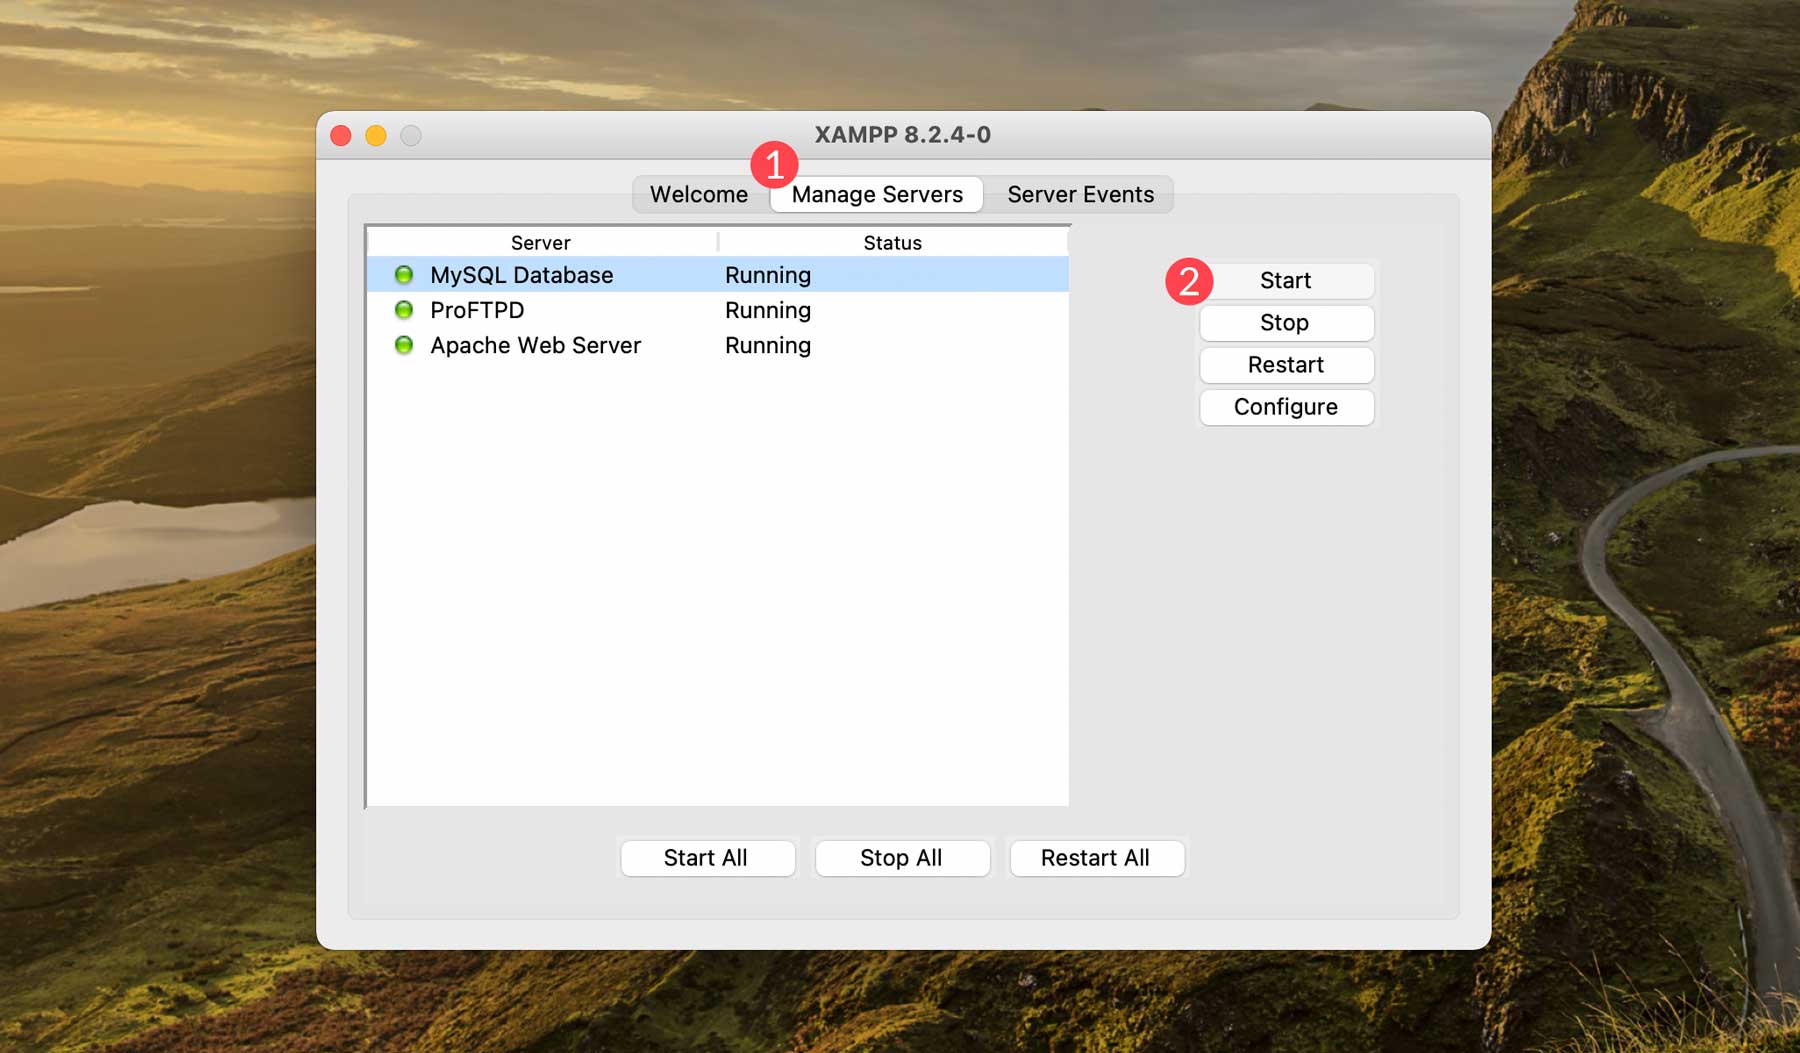
The next step is to start the XAMPP server. Start with opening XAMPP. Click the manage servers tab, then click Start to launch your server.
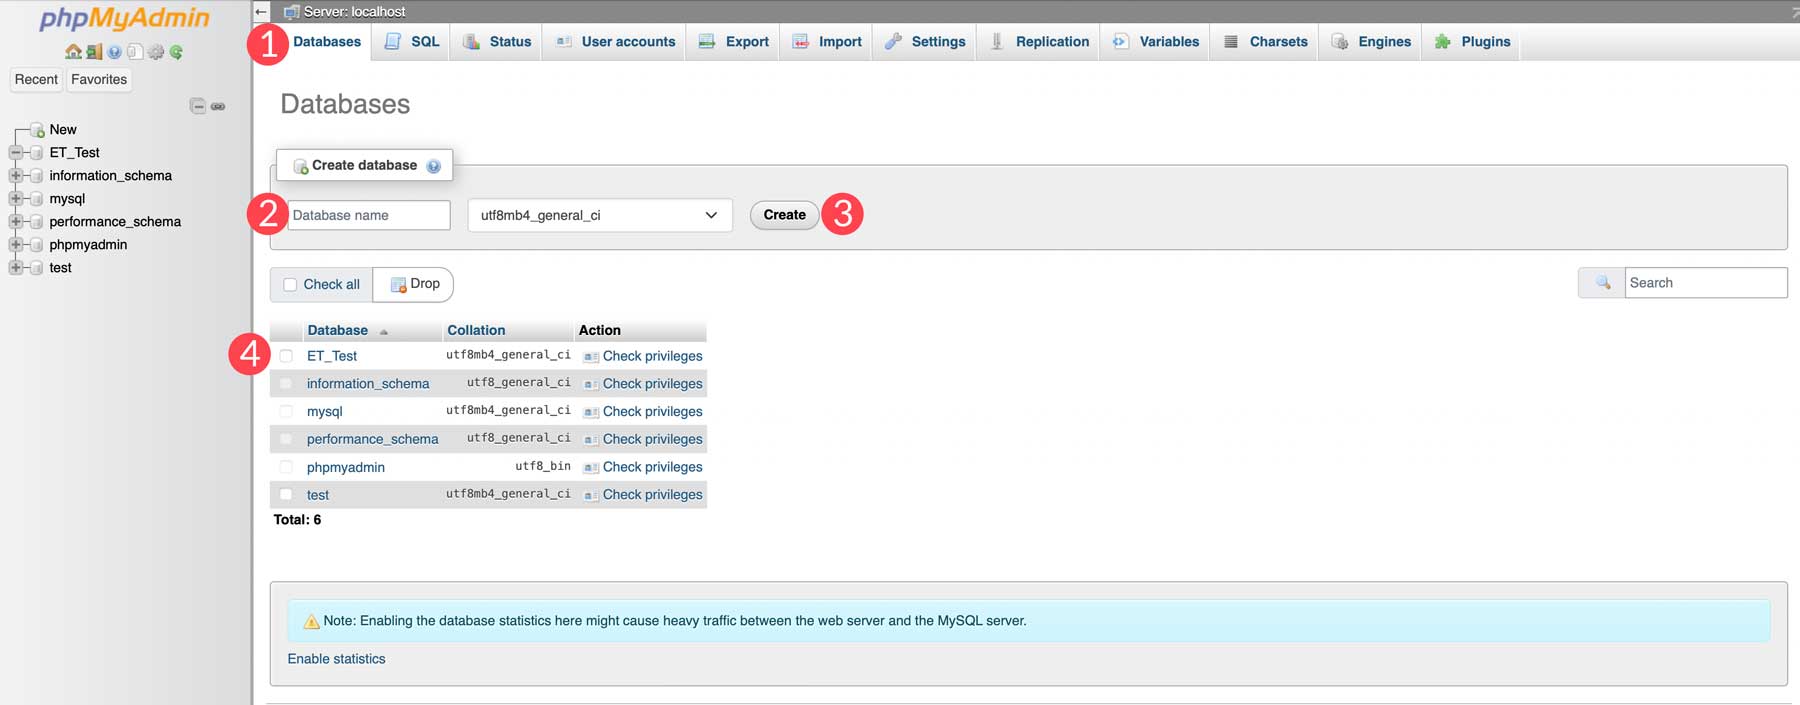
Open your browser, type localhost/phpmyadmin into the search, then press enter. This will bring up the pmpMyAdmin panel so that we can create a database for our WordPress site.
Step 5: Creating the Database
Using the database name from the wp-config.php file in step 3, click on Databases in phpmyAdmin. Next, under the Create database header, type in your database name from the previous steps and click create. After creating your database, look for it in the database list.
Step 6: Configuring WordPress
The final step to host WordPress locally is to configure the WordPress settings. Type localhost/yourwebsite in your browser. Be sure to change yourwebsite to whatever you named your WordPress folder in htdocs. When the page loads, you’ll see the WordPress configuration screen. Give your site a title, create a username and password, add your email, tick the search engine visibility checkbox, and then click Install WordPress. Note your username and password; you’ll need it to log in to WordPress.

Finally, you can log in to your site by navigating to localhost/yourwebsite/wp-admin. That’s it! You’ve successfully installed WordPress on your local machine.
Want to Host Your Website Online? Here Are Our Top Picks
As previously mentioned, hosting WordPress locally is a great way to build your new site in a private environment. Eventually, you must push your site live to a web host. If you are looking for a new host, read on because we have a few recommendations.
1. SiteGround
When we recommend hosting providers, SiteGround is usually at the top of our list. This is primarily due to the extensive security features that they offer, including daily backups, a free SSL certificate, and a web application firewall (WAF). Additionally, SiteGround’s servers are optimized for WordPress, resulting in lightning-fast loading times and improved web performance due to their cloud infrastructure. Because of this speedy setup, SiteGround is the fastest WordPress hosting company you can get.
Key Features of SiteGround:
- Free site migration, CDN, email, and SSL
- Daily backups
- Optimized for WordPress
- 30-day money-back guarantee
- Enhanced security features
Another thing that makes SiteGround shine is its customer support. It offers a convenient 24-hour, 7-day-a-week live chat feature and a knowledgeable support staff that can easily solve any problem. Plus, SiteGround is one of the most affordable solutions on the market. Their plans start at $14.99 per month but usually are offered at a steep discount for your first month.
Best For:
Overall, SiteGround is one of the best WordPress hosting platforms out there. They are suited for beginners, small businesses, and large agencies due to the different plans they offer. If you’re looking for a fast, reliable host to partner with, you’d be hard-pressed to find a better option.
Pricing: Starting at $14.99 per month.
2. WP Engine
Another excellent option is WP Engine. Those hosting their websites locally through Local by Flywheel software can easily push their site live to WP Engine with one click. This is an excellent feature for those looking to build their websites behind closed doors before revealing them to the world. Some stellar features of WP Engine are its speed boost through cloud hosting, EverCache, a proprietary CDN, a staging environment for making large changes to your sites, and free migration.
Key Features of WP Engine:
- Free migration, SSL, staging, and CDN
- Automatic WP and PHP updates
- 60-day money-back guarantee
- 10 Free WordPress themes
WP Engine has features to make hosting your WordPress website a dream. Security is a non-issue thanks to a global CDN with over 200 data centers, 24/7 customer support, auto-renewing SSL, and SSH access, daily malware scans, and advanced direct denial of service (DDoS) attacks. Plus, you’ll get instant access to a wealth of site-building tools, including 10 WordPress themes built on the Genesis framework, a 1-click staging environment, and the ability to easily transfer sites in and out. This feature is useful for freelancers or agencies who build client websites and want to pass them off when finished.
Best For:
Combining Local by Flywheel with WP Engine is a perfect solution for those who want to build websites locally and push them live with little effort. Plus, freelancers and web agencies will love the ease with which they can transfer sites to their clients once completed. If you’re looking for a solid cloud hosting provider, then WordPress is worth a try.
Pricing: Starting at $20 per month.
3. Flywheel
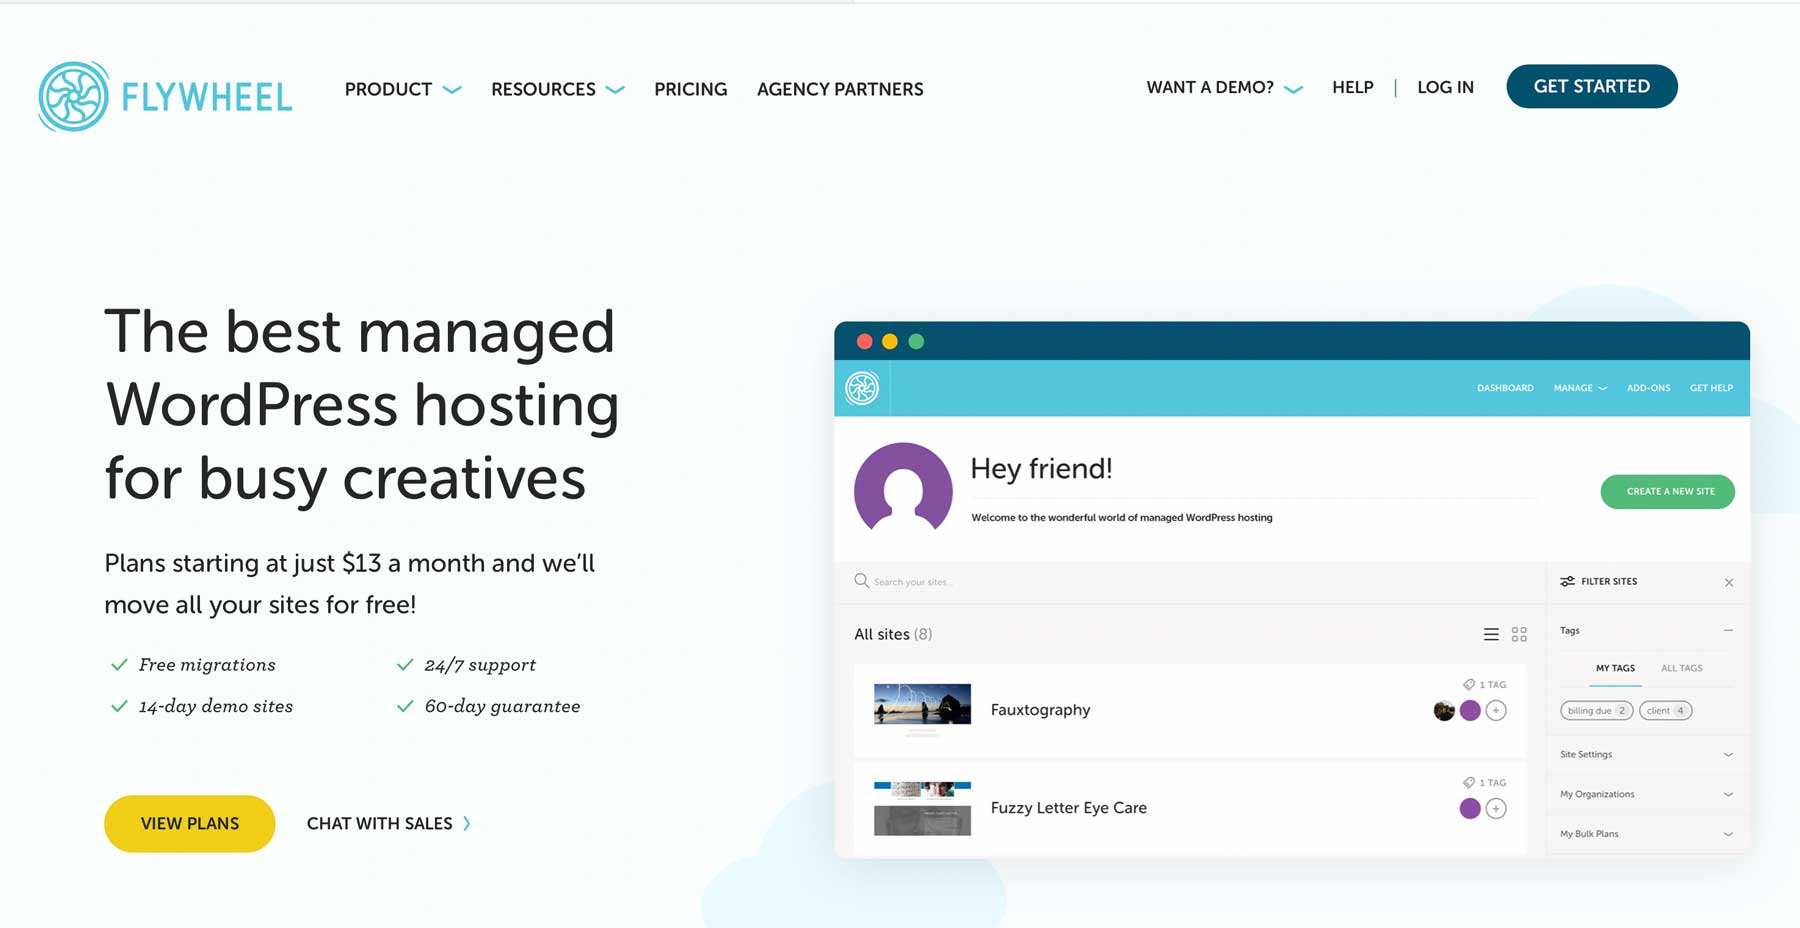
Our last recommendation, Flywheel, is a WordPress-optimized host built on a speedy Google Cloud environment. With Flywheel, users can easily manage their WordPress sites with features such as automatic nightly backups, easy 1-click staging environments, and site cloning. They offer free SSL certificates, malware removal, and daily site scans, so you can rest assured your site will be safe for visitors. Because of these incredible features, Flywheel is one of the best managed WordPress hosting providers available.
Key Features of Flywheel:
- Managed WordPress hosting
- Built on Google Cloud
- Free CDN, backups, staging, and SSL certificate
- Automatic nightly backups
Flywheel uses a blazing-fast Google Cloud infrastructure, which is constantly monitored for traffic spikes, then scales up instantly to allow maximum uptime. Combined with their custom caching solution, Flycache, your site will be one of the fastest. Flywheel’s server also employs auto-healing technology to fix itself in case of a hardware failure, giving you added peace of mind. Additionally, there’s no confusing cPanel to fool with, as Flywheel uses a custom interface, which is beginner-friendly, intuitive, and easy to navigate. They also offer the ability to white-label WordPress, which makes them one of the best reseller hosting providers out there.
Best For:
Flywheel is an excellent option for freelancers and small web agencies specializing in WordPress. Flywheel has perfected the hosting experience as a WordPress-only host to make green WordPress users feel right at home. With affordable pricing, a cloud infrastructure, and the ability to scale your plan with one click, you’re sites will be in good hands with Flywheel.
Pricing: Starting at $13 per month (billed annually).
Final Thoughts on Hosting WordPress Locally
Hosting your WordPress website locally is a great way to test your website before going live. You can explore different themes and plugins, learn the ins and outs of WordPress, and explore new functionalities without having to worry about breaking your live site. In this post, we’ve provided you with an easy-to-follow setup guide on different ways to host WordPress locally, so you’ll be confident to try it on your own. When you’re ready to push your site live, you can easily do so with XAMPP, WP Engine, or Flywheel.
Want to read up on more how-to articles? Check out a few of our popular WordPress-related posts here:
- How to Update PHP in WordPress: A Complete Guide
- How to Customize Your WordPress Header
- What is Keyword Research? (And How to Do It Right)
- How to Beta Test WordPress (& Why You Should)
Which method do you use to host WordPress locally? Let us know in the comments section below.
Featured Image via hasan as’ari / Shutterstock.com


I use Laragon for local development. Easy switching between PHP versions and the ability to share your local website to clients.