")
A great website doesn’t just display information, it also provides valuable insights. It responds to you. People who interact with your site expect instant feedback confirming their actions have been registered. Without these small responses, visitors get frustrated and leave.
In this post, we will explain why these elements matter and show you exactly how to add them without coding. We will also show you how Divi 5 makes adding microinteractions to your WordPress website as easy as building complete websites. Let’s get to it!
What Are Microinteractions
Microinteractions are the small responses your site provides when someone clicks, hovers, or scrolls. For example, when you press a button, it shifts slightly or changes color, which is an example of a microinteraction at work.
When you hover over an image and see it tilt or move, you’re experiencing the same effect. These quick visual changes let people know their actions are being registered, and the site acknowledges them.
How Microinteractions Improve Your Websites
These small details directly impact how long people stay on your site and whether they complete the desired actions. Sites with well-designed microinteractions see higher engagement and better conversion rates.
Our brains respond to instant feedback. Each small confirmation creates satisfaction that builds momentum. People who get these responses feel more in control, stay longer, and complete more tasks.
The effect compounds across your site; better usability leads to fewer support requests. Visitors who feel confident navigate deeper, rather than bouncing. Small wins at each interaction point add up to measurably better performance.
This happens without major redesigns or new features. You’re simply making existing actions feel more responsive and intentional.
Microinteractions vs Animations
These terms are often used interchangeably, as if they mean the same thing. They don’t, and the difference affects how your site performs. One tool responds to visitor actions, while the other runs independently. Knowing which tool does what helps you build sites that convert better.
The difference matters for what they do on your site:
| Microinteractions | Animations | |
|---|---|---|
| Purpose | Confirm your action worked | Create visual movement |
| Trigger | Your click, hover, or scroll | Plays automatically |
| Duration | Quick, one action | Runs longer with multiple steps |
| Main Job | Makes the site work better | Makes the site look better |
| Gives Feedback | Yes, tells you it registered | Not usually |
| Example | Button presses down when clicked | Hero image fades in on page load |
Both belong on modern sites. Microinteractions engage people by acknowledging their actions, while animations add polish and personality. When resources run tight, prioritize microinteractions first.
How To Add Microinteractions Without Code
Most modern website platforms now include interaction settings built directly into their editors. Webflow provides you with an Interactions panel with over 20 prebuilt animations.
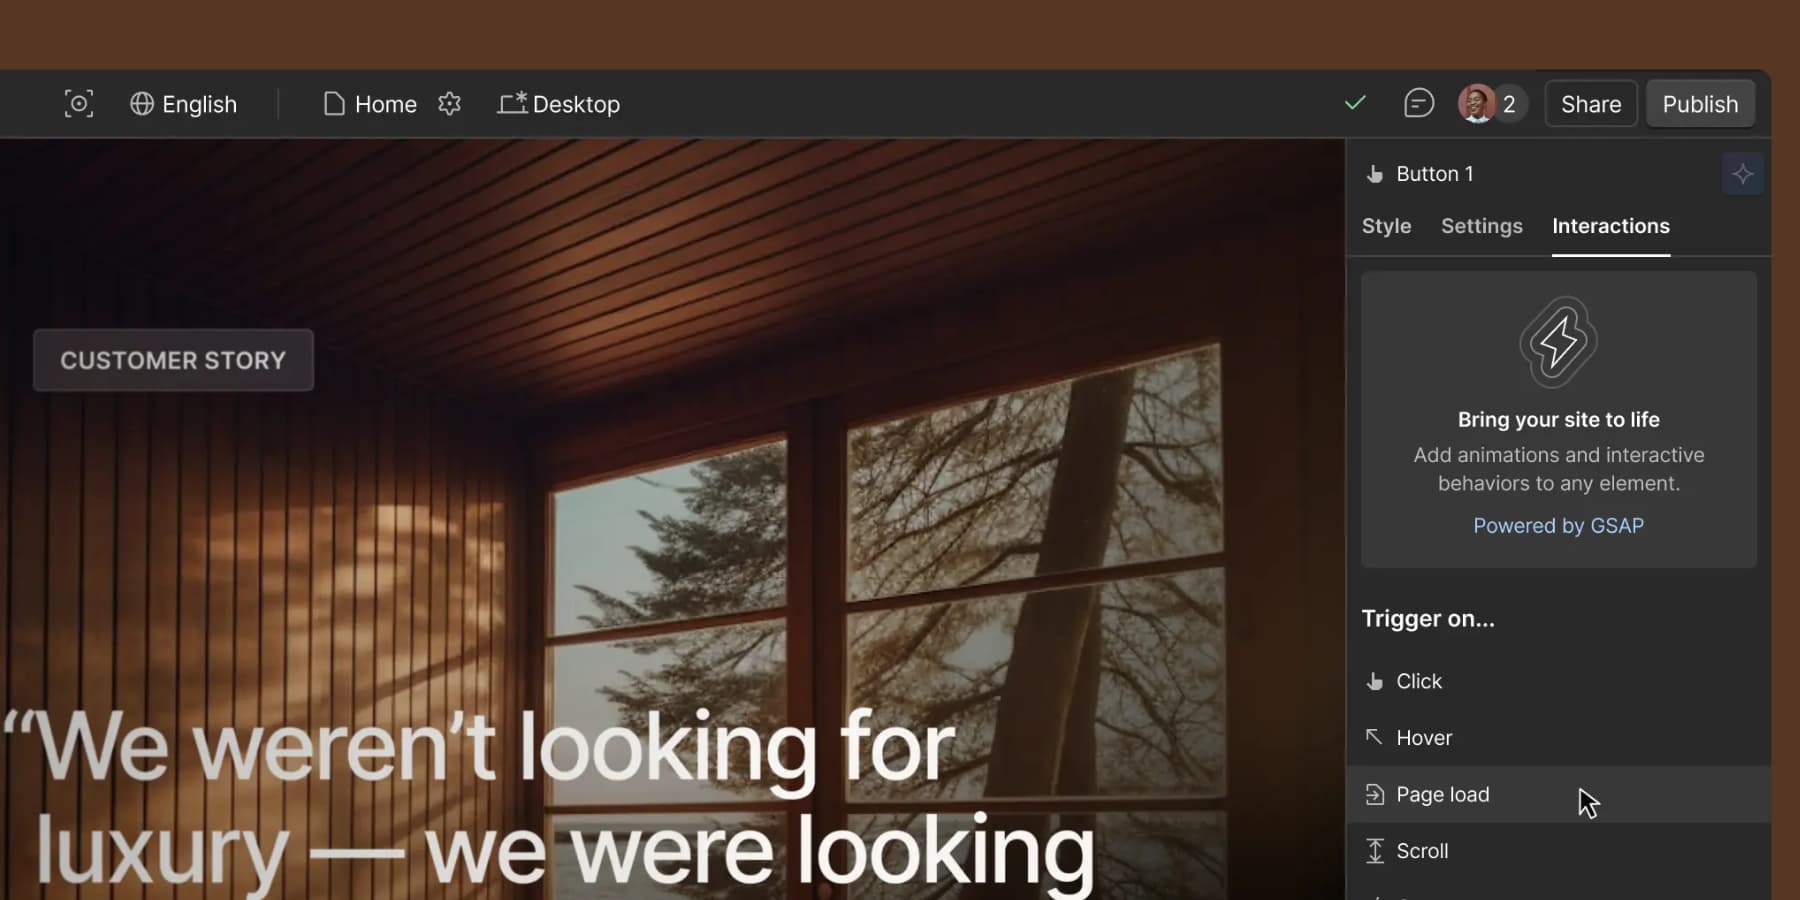
Image by Webflow.com
Framer works through component variants that automatically transition between states.
Image by Framer University
Wix Studio organizes everything under an Interactions tab, where you select triggers and adjust timing using sliders.
Even platforms without dedicated interaction features usually support basic hover states. When visitors move their cursor over elements, you can change colors, adjust sizes, and swap images. These simple state changes don’t require code and live in your platform’s style settings.
Animation Frameworks You Can Add Anywhere
You can add animation frameworks to any website if your platform lacks these features. This is not exactly no-code, but relatively low-code. If you spend some time familiarizing yourself with the documentation and plethora of YouTube tutorials, you can get started with no time.
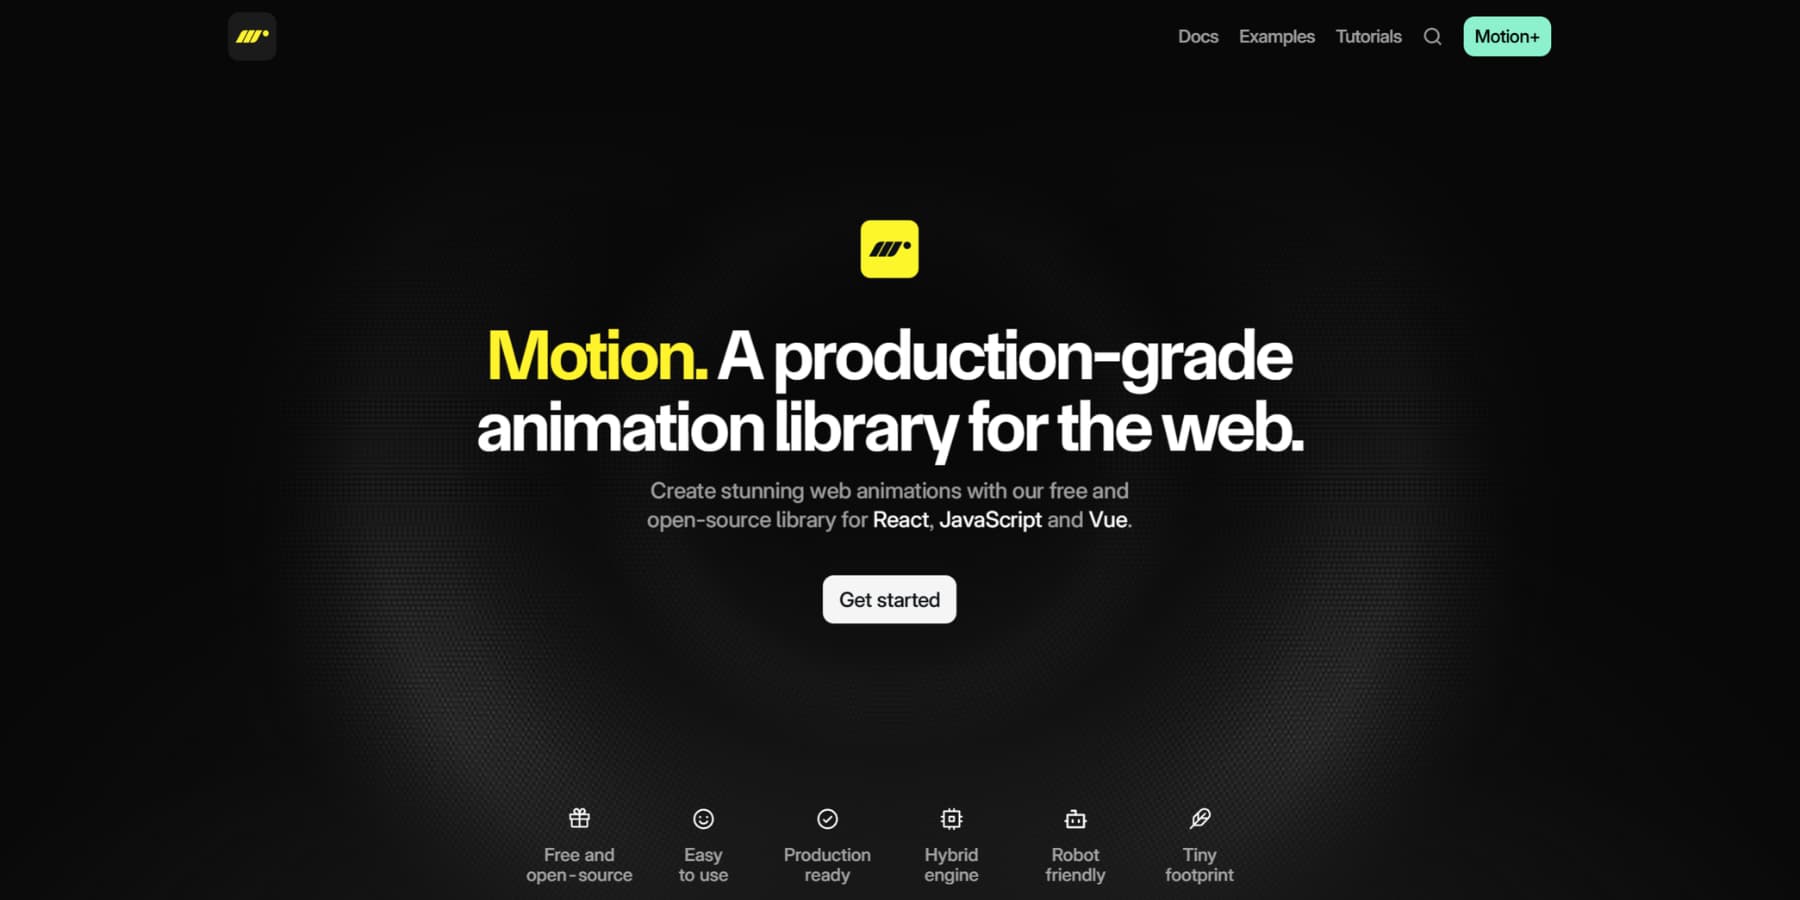
For example, Motion is an open-source animation library for React, JavaScript, and Vue that makes it easy to build smooth, high-performance web animations.
GSAP powers many of the web’s smoothest animations. You include the library, target your elements, and set your triggers. The framework handles browser compatibility and performance automatically.
These lightweight libraries add under 50KB to your site and work on any platform that lets you add custom code.
Adding Microinteractions In WordPress
WordPress handles interactions differently from other platforms. Instead of relying on external frameworks or built-in platform features, it offers an entire ecosystem of plugins that add interactions without code.
The Gutenberg editor includes basic hover state settings for some blocks.
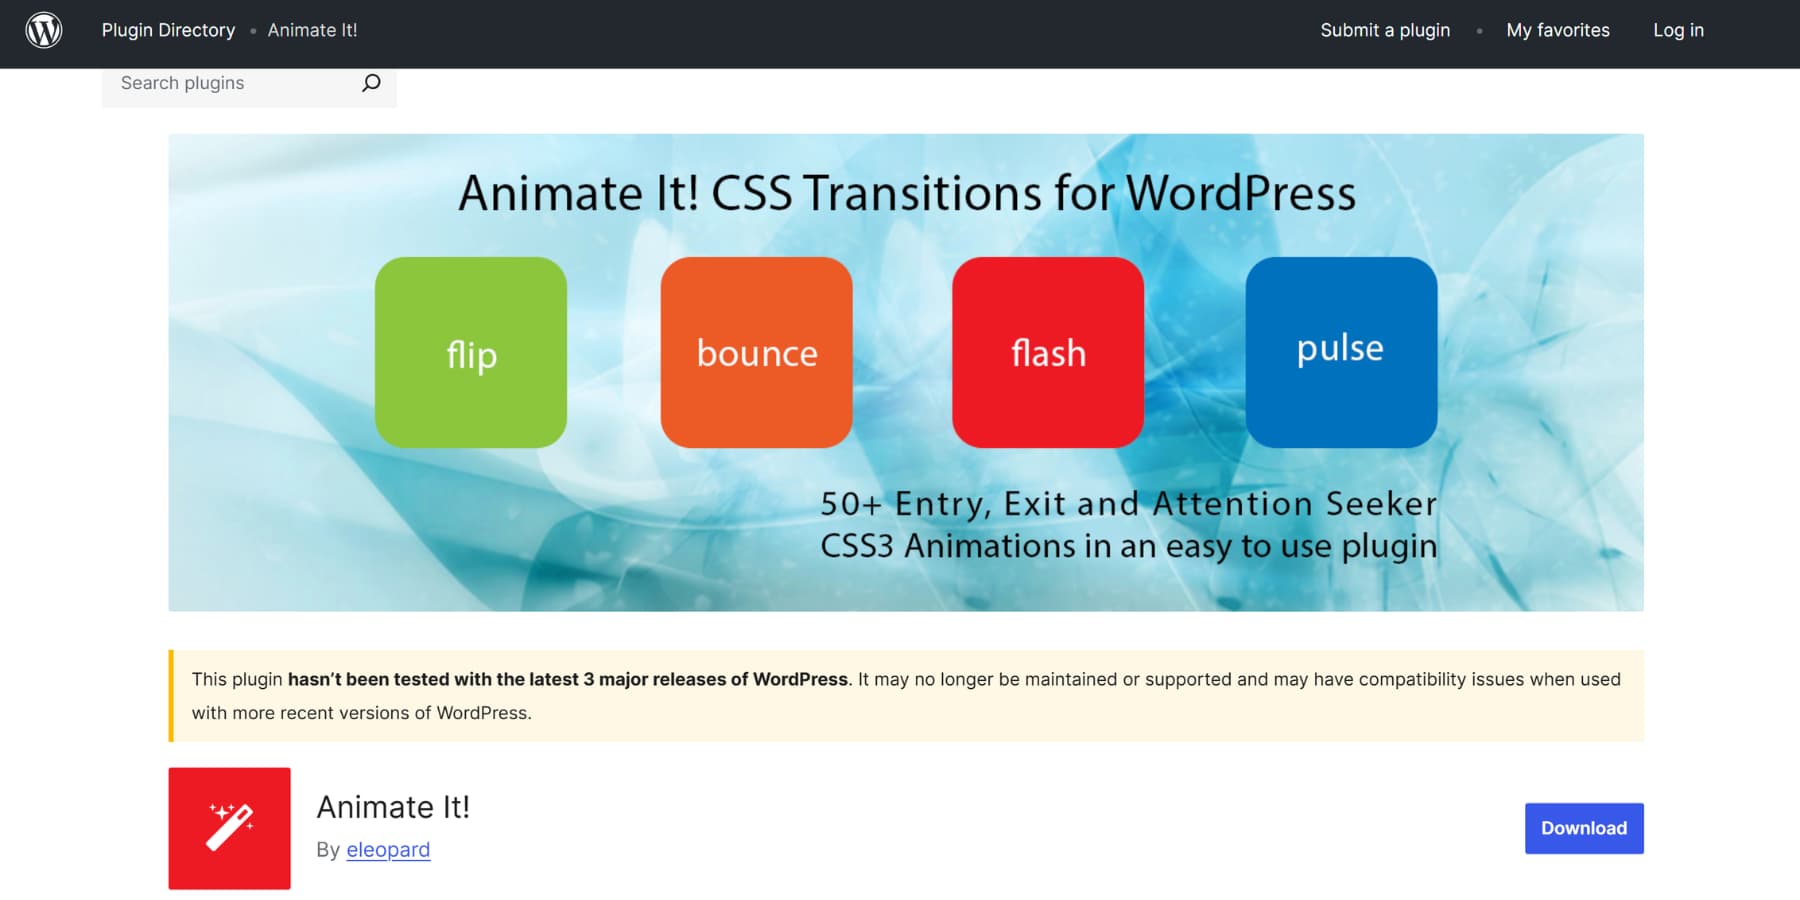
You can also use plugins like Animate It!, which applies CSS3 animations to any element on your site through an interface in your WordPress editor. You select what triggers the animation: scroll, click, or hover. The plugin includes over 50 animation styles. Amazing Hover Effects focuses on mouseover interactions with 20 prebuilt effects you apply through shortcodes. However, this plugin hasn’t been updated in years.
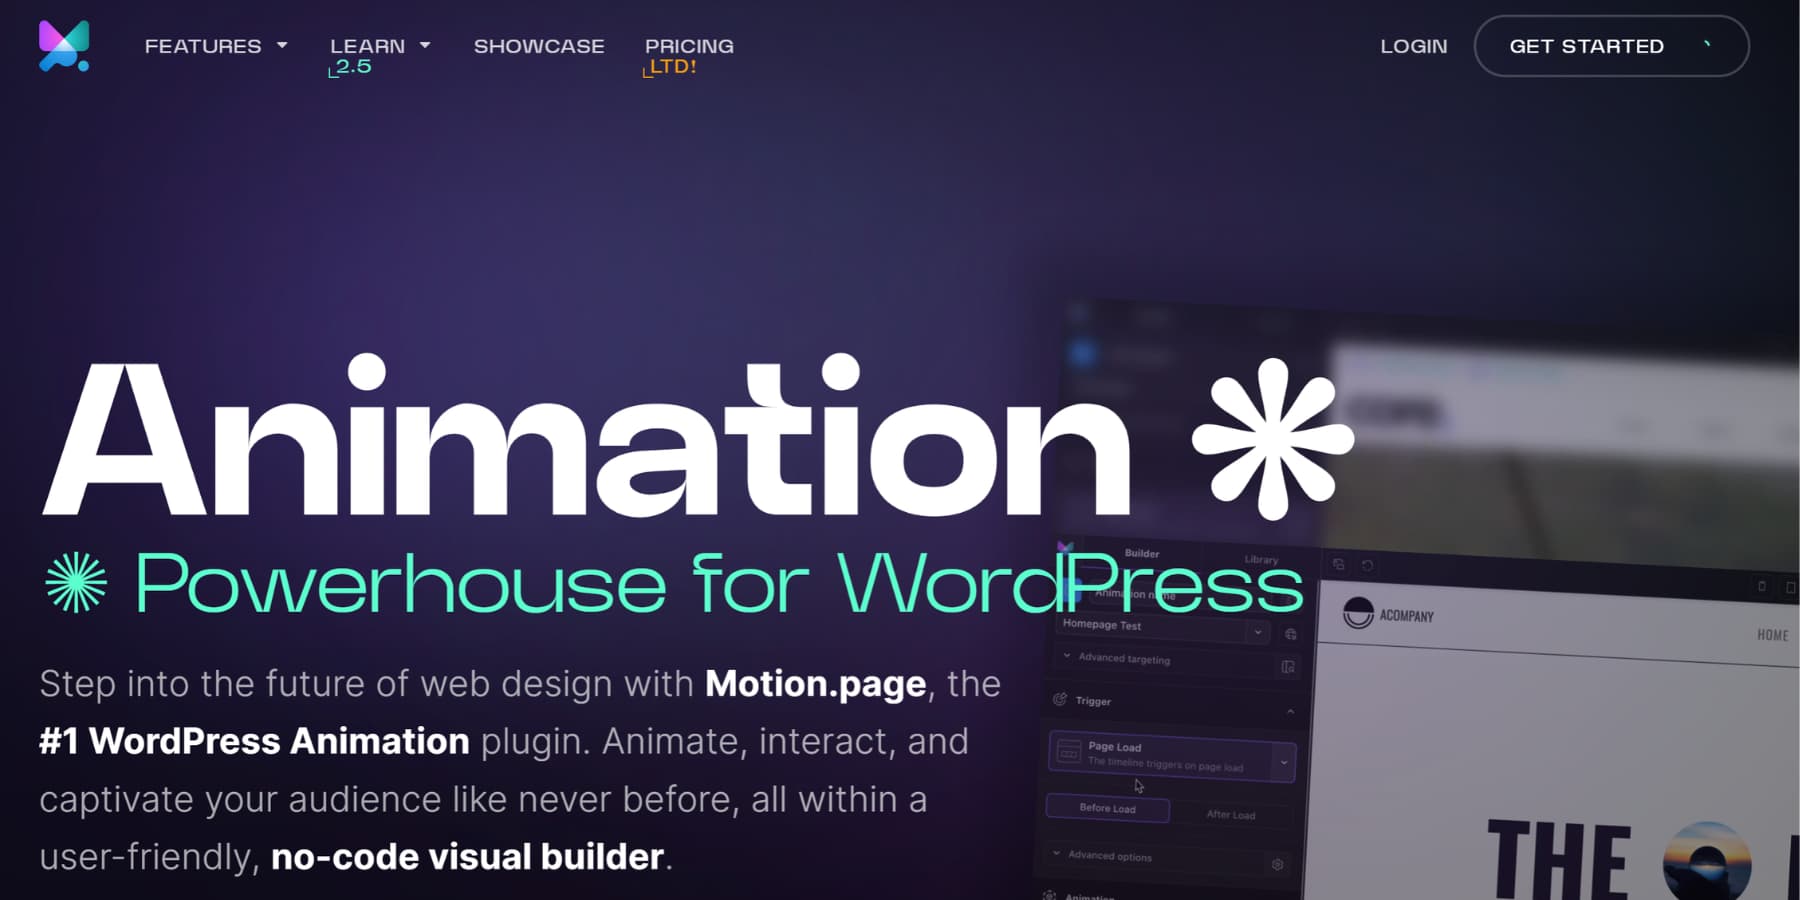
Motion.page offers a WordPress plugin version of their framework. You get their visual editor inside your dashboard instead of manually coding animations. It bridges the gap between frameworks and plugins.
GreenShift and Blocks Animation work directly with the Gutenberg block editor. You add microinteractions while editing content through settings panels on each block, so there is no need to switch between different tools.
The downside appears quickly. Most good animation plugins cost $39 to $99 per year. Updates don’t always sync, and conflicts happen. There’s always a risk that the plugin will be abandoned, which can lead to a slew of security issues.
And then there’s Gutenberg’s interface. Settings panels stack vertically, and animation options hide in nested menus. You scroll through dozens of settings to find the one you need. The workflow slows you down when trying to refine timing or adjust easing curves.
WordPress Page Builders Might Offer A Better Way
WordPress page builders combine layout design and interactions in one tool. Through the same interface, you build page structure and add animations. Some handle this better than others.
Elementor includes motion effects in its interface.

Beaver Builder also offers some animation modules. However, these are sometimes too limited and not very intuitive.
How Divi Makes It Easy To Add Microinteractions
Divi is a WordPress theme and visual builder used on thousands of websites.

Its interface is drag-and-drop, and you can choose from over 200 modules, including sliders, contact forms, pricing tables, and galleries. No coding is required.
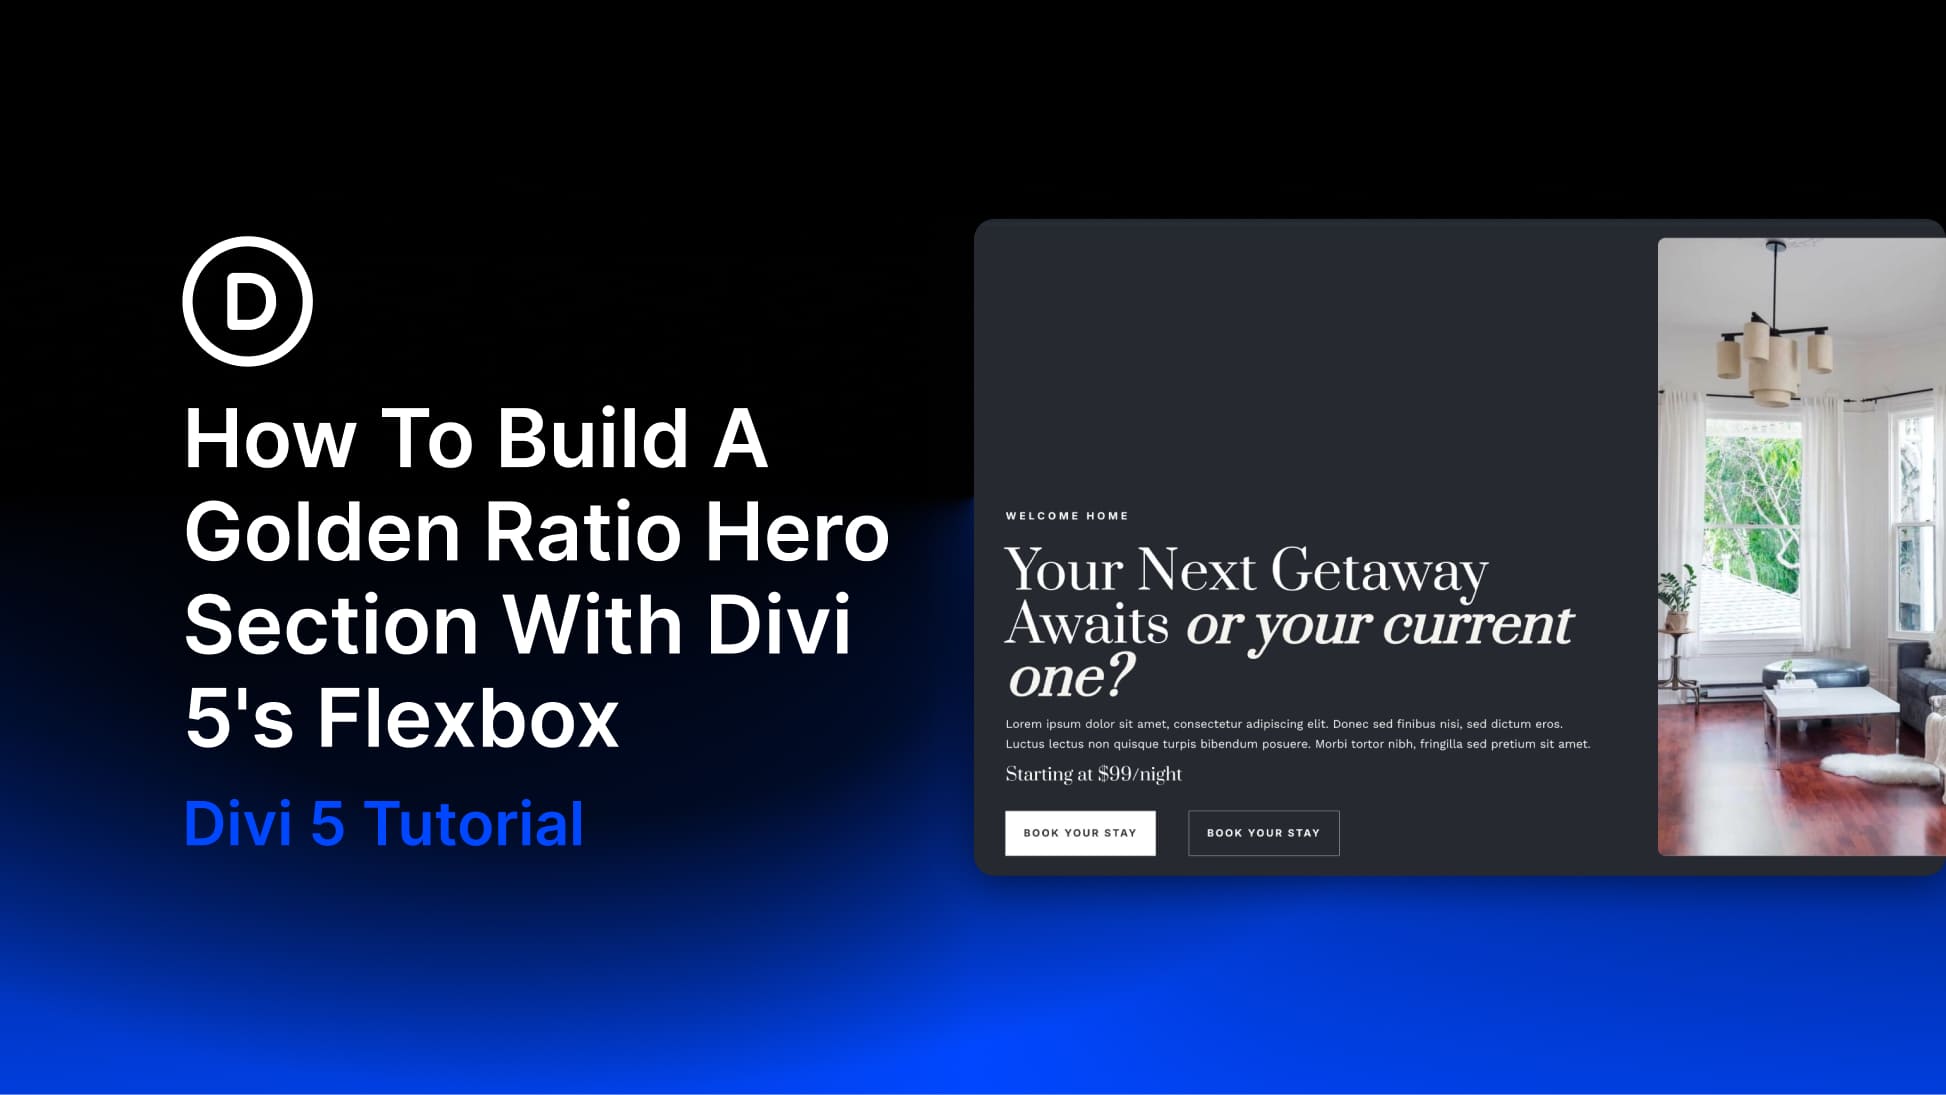
Divi’s latest version, Divi 5, is a complete rebuild of the Divi framework. The team rewrote the entire codebase to create a faster builder that handles complex pages without slowing down.

This version introduces architectural changes that speed up every part of the editing experience. Pages load quicker, the builder responds instantly to your actions, and updates only affect what you actually modify. Thus, you avoid the unnecessary refreshes that used to slow down the workflow.
You get new layout systems, such as CSS Grid and Flexbox, that align with modern web design practices. The interface feels smoother, too. Click directly into text to edit it, dock settings panels to the side, and track your location in the page structure with breadcrumbs.
Divi 5 recently entered beta status, which means the core functionality is solid and ready for production sites. The team releases updates every two weeks, adding features and polishing the experience as they move toward the stable release.
What’s New In Divi 5
Divi 5 packs years of improvements into one release. The team rebuilt the entire platform and added features that change how you work. Here’s a quick overview of what shipped so far:
- Inspector: Overview tool showing any element and all child elements. Bulk edit colors, fonts, sizes, content, and presets across everything at once.
- Woo Cart & Checkout Modules: Eight modules for customizing cart and checkout pages with full design control.
- Custom Attributes: To improve accessibility, add any HTML attribute like alt, title, rel, and aria-label to elements and sub-elements.
- Responsive Editor: View, modify, and reset responsive, hover, and sticky states for any setting while staying in any view mode.
- Loop Builder: Repeat any content with custom queries. Works with posts, custom post types, ACF fields, and nested loops.
- Nested Rows: Place rows inside columns with unlimited nesting depth for complex layouts.
- Advanced Units: Full CSS unit support (rem, em, vw, vh) plus functions like clamp(), calc(), min(), and max() through visual controls.
- Customizable Breakpoints: Seven breakpoints with custom pixel values and canvas scaling for testing any screen width.
- Option Group Presets: Save specific design properties as reusable presets that work across modules, columns, rows, and sections.
- Design Variables: Save six variable types (colors, fonts, numbers, text, images, links) and update them once to change your entire site.
- Attribute Management: Copy specific attributes between different module types using selective paste options.
Many more updates have been released or are coming soon!
Interactions & Lottie Animations Simplify Microinteractions
Divi 5 built two features specifically for microinteractions. Interactions handle the behavioral side. You pick a trigger and select an action, and the site responds. Someone clicks a button, and you can show a form. They scroll past halfway down the page, and an element fades in.
The system includes triggers for clicks, hovers, viewport changes, and page loads. You’d build interactions in the same place you adjust padding and colors.
Plus, adding Lottie animations is easier than ever with the new Lottie Module. They’re JSON files that stay under 50KB but scale to any resolution.
You upload one, set when it plays, and adjust the speed if needed. The files can loop, play once, or respond to scroll position.
How To Add Microinteractions To Your Divi 5 Site
Divi 5 includes two specific tools built for adding microinteractions to your site. Both work inside the Visual Builder, so you stay in one place while designing. The setup takes minutes, and you can control exactly when and how these interactions respond to your visitors. Here’s how to use them:
Adding Microinteractions Using Interactions
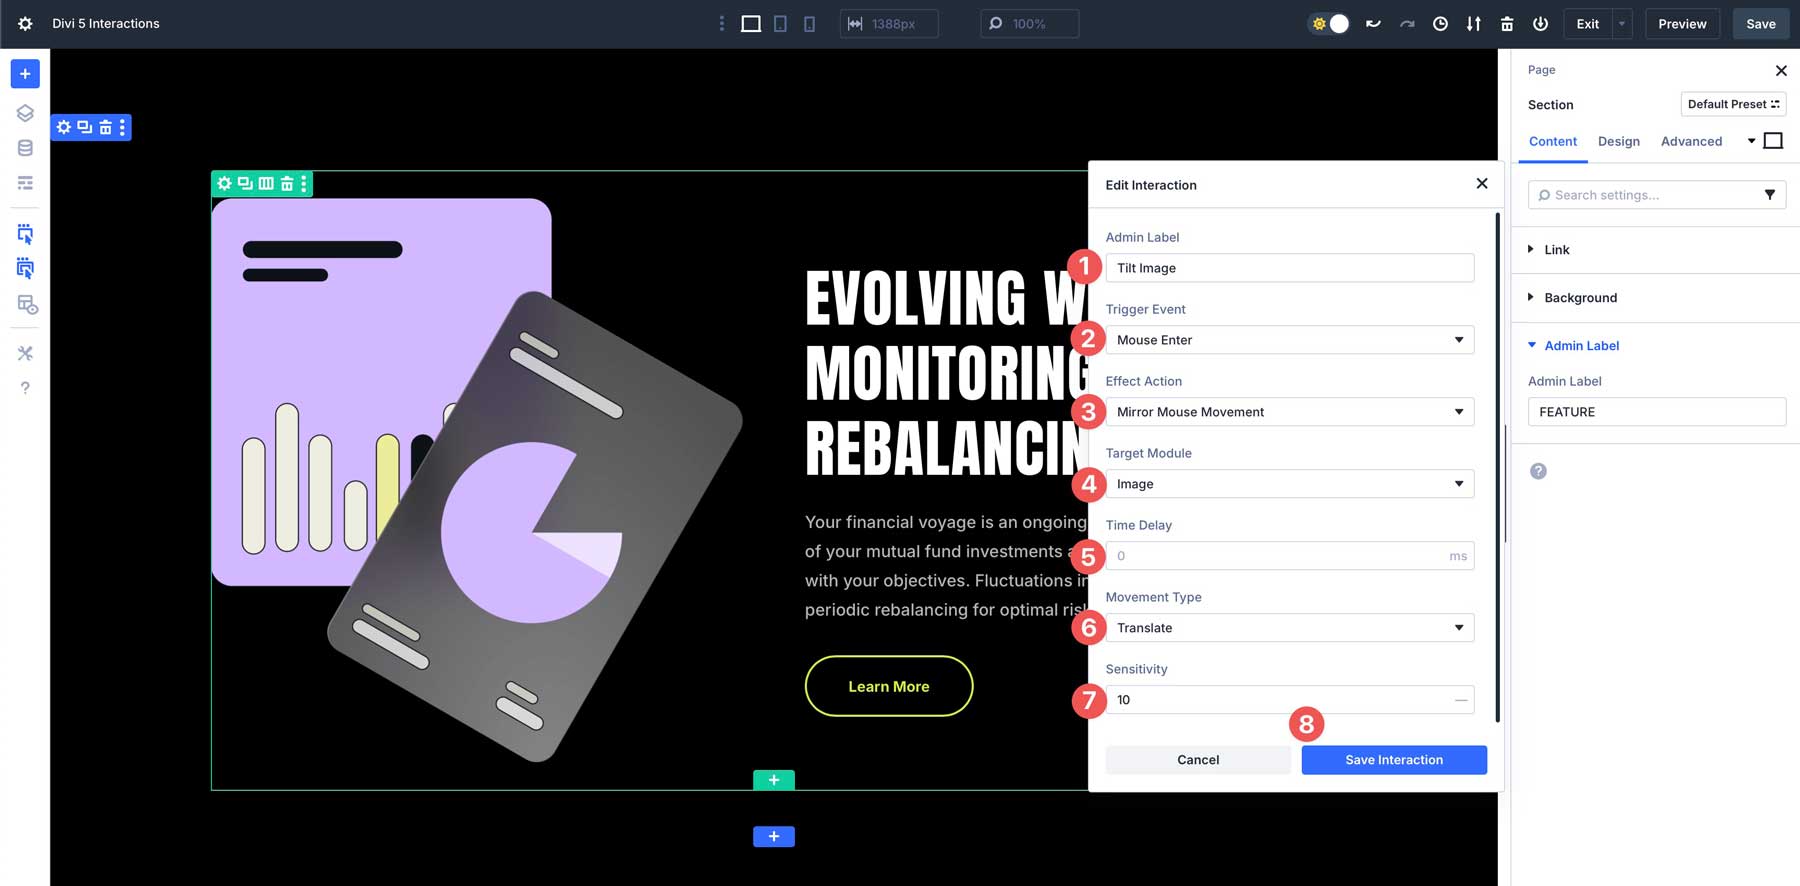
Open any module, row, column, or section in the Visual Builder and click the Advanced tab. Find the Interactions dropdown and hit the plus icon to add your first interaction.
Three fields control everything. The Trigger Event determines what starts the interaction, such as a click, hover, viewport entry, or page load.
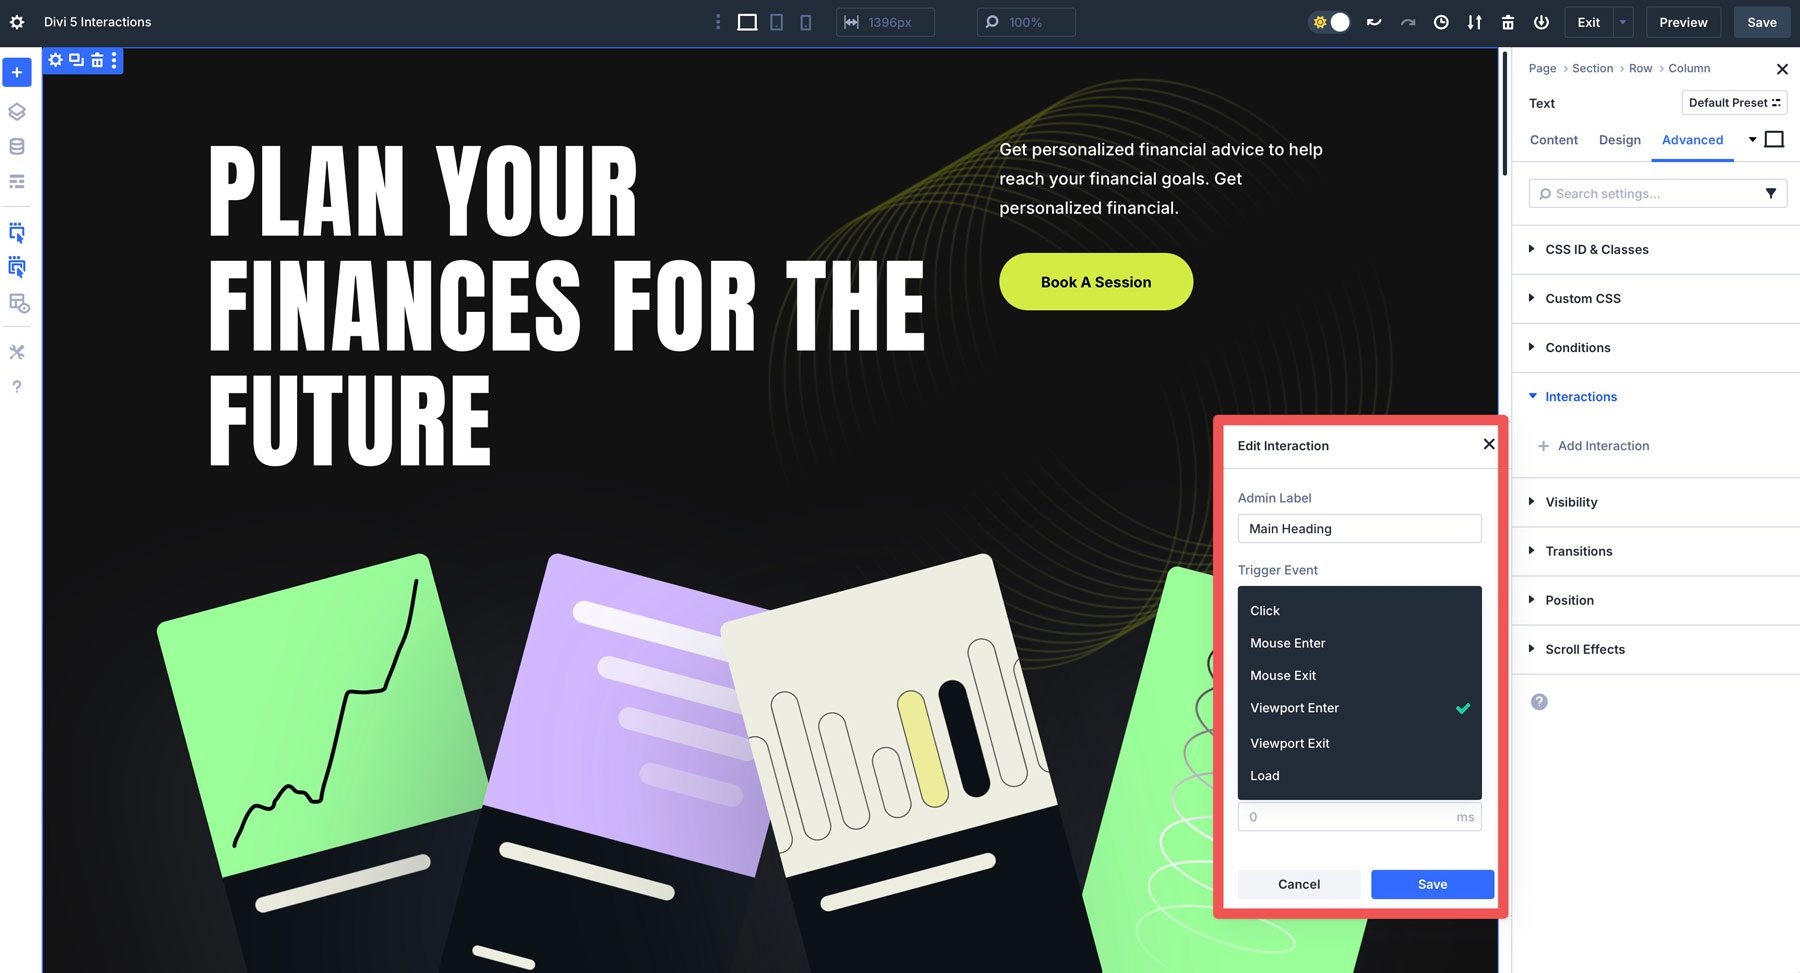
The Effect Action defines what happens next, whether showing elements, hiding them, toggling presets, adding attributes, or mirroring mouse movement.
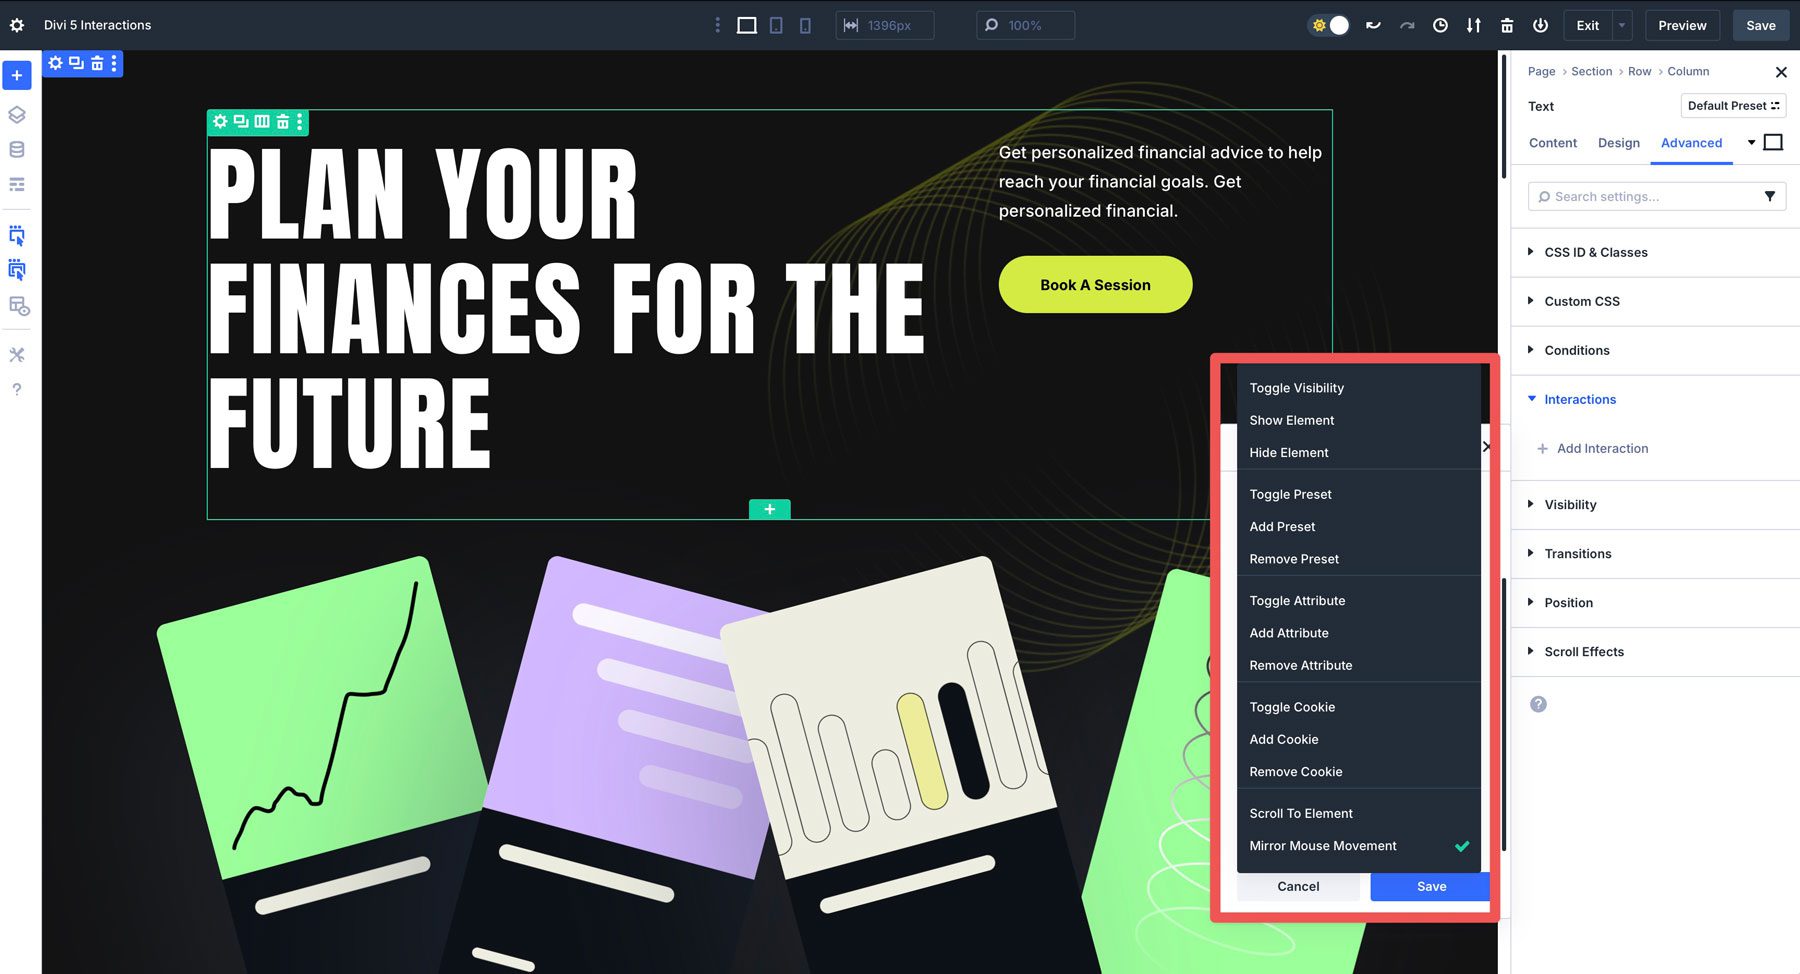
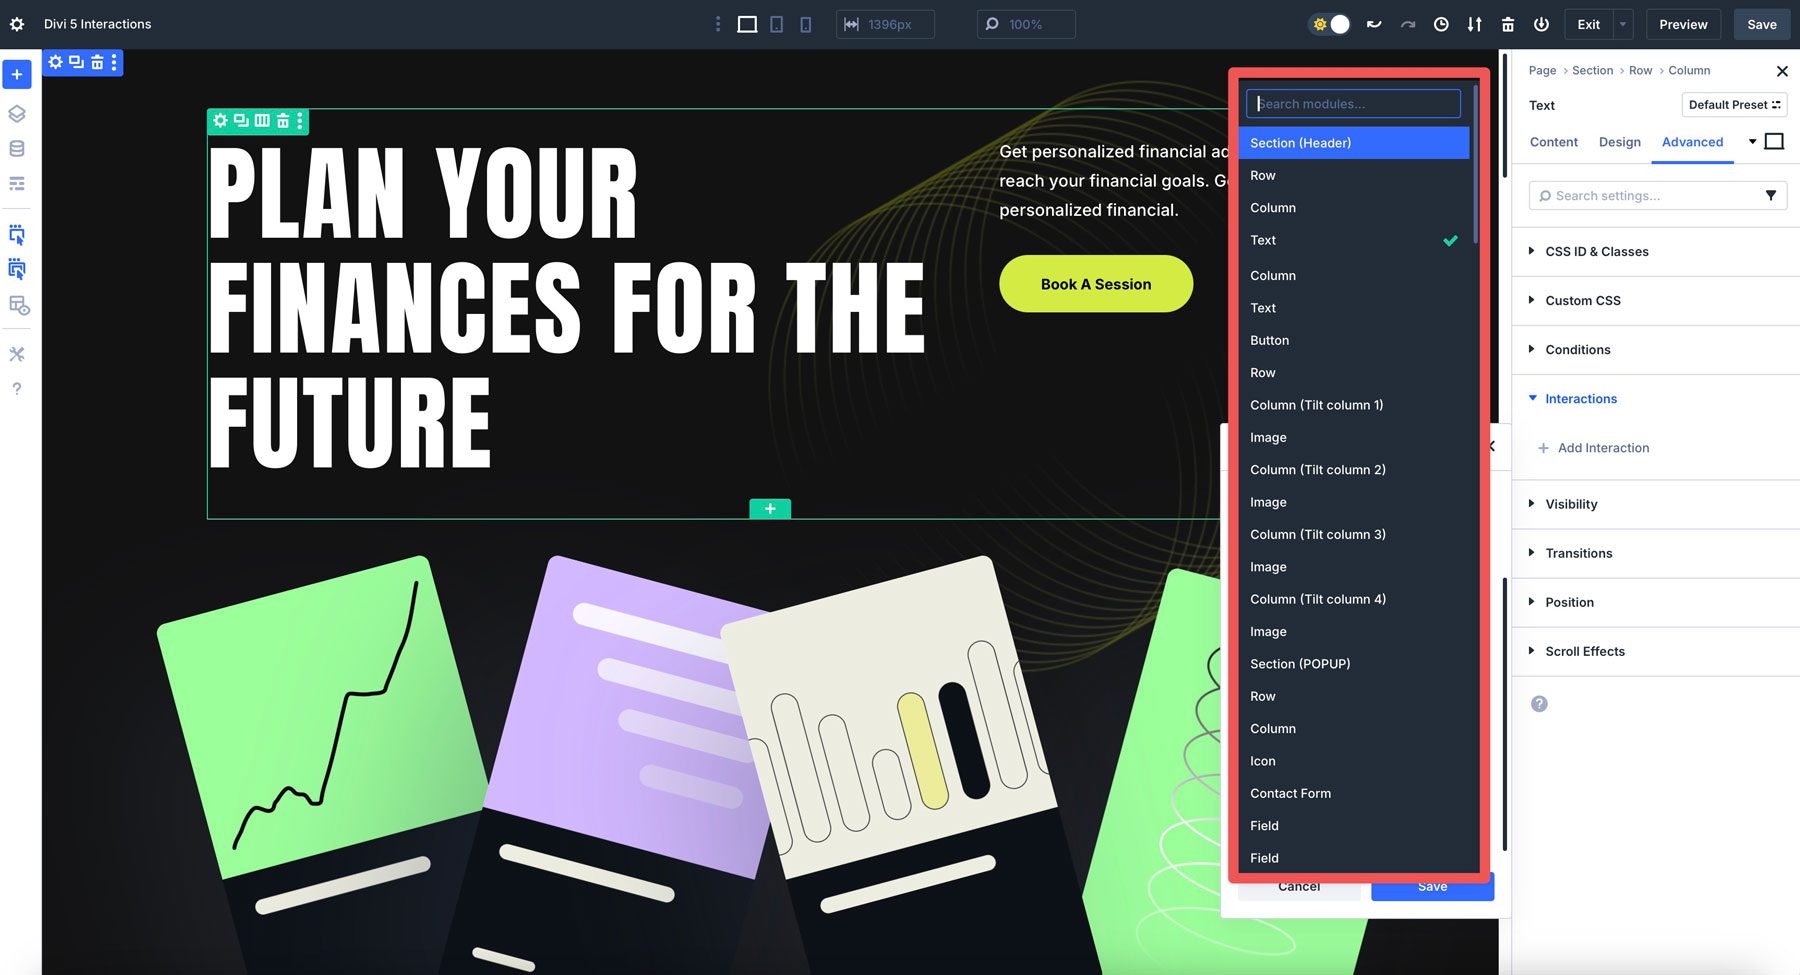
Target Module tells Divi which element receives the effect, but you need to name that target element first using its admin label in the Content tab to find it quickly. You may find it difficult to spot the module in the dropdown without a label.
Use the admin label field at the top of the interaction settings, too. Pages with multiple triggers turn chaotic without clear names. Label a button that reveals content as “Tilt Image” instead of leaving it as is.
Time delays add polish. Set popups to appear five seconds after load or pair viewport triggers with delays so animations sync with scroll position.
Save and use the preview button to test before publishing. If you want to learn more, here’s a detailed post on using this feature.
Setting Up Lottie To Be Interactive
The Lottie Module needs animation files to work, and you’ll find plenty of free options on sites like LottieFiles. Browse their libraries, select an animation that suits your design, and download the corresponding JSON file to your computer.

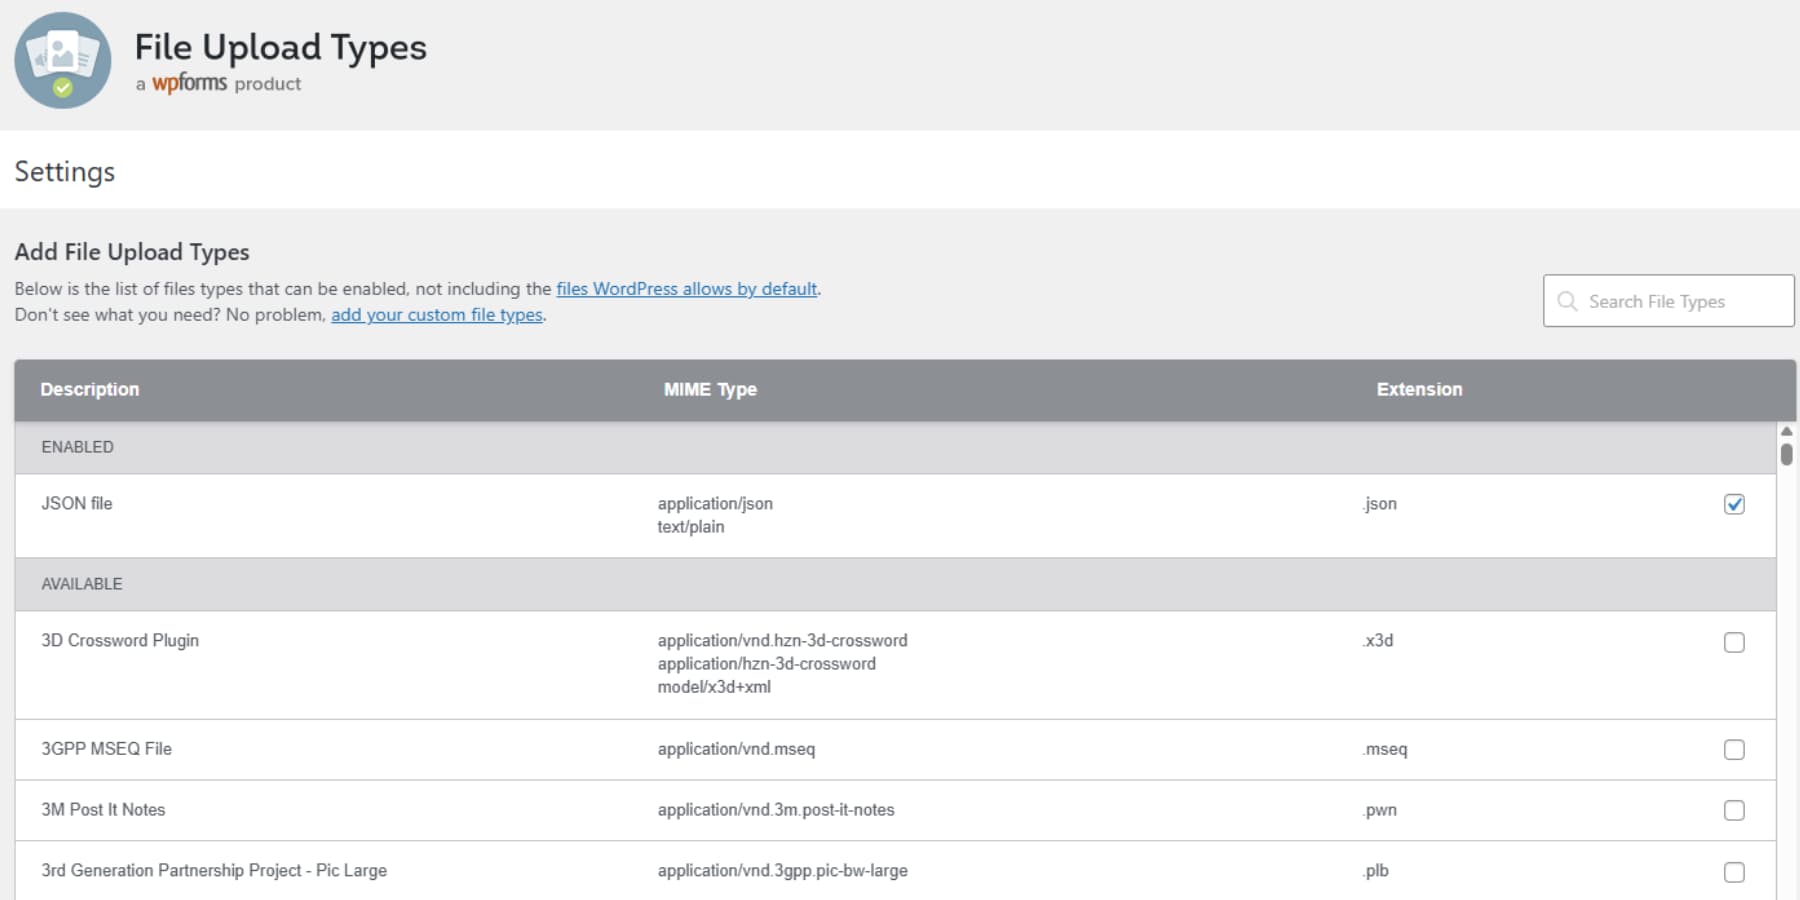
Before uploading, you need to tell WordPress to accept JSON files. The platform blocks them by default for security reasons. You can add a small code snippet to your child theme’s functions.php file, or if you’d rather skip the code, install a plugin like File Upload Types that handles it for you.
Head to the Visual Builder and add the Lottie Module where you want your animation.

Click the Content tab and upload your JSON file. It will be saved to your media library like any other image.
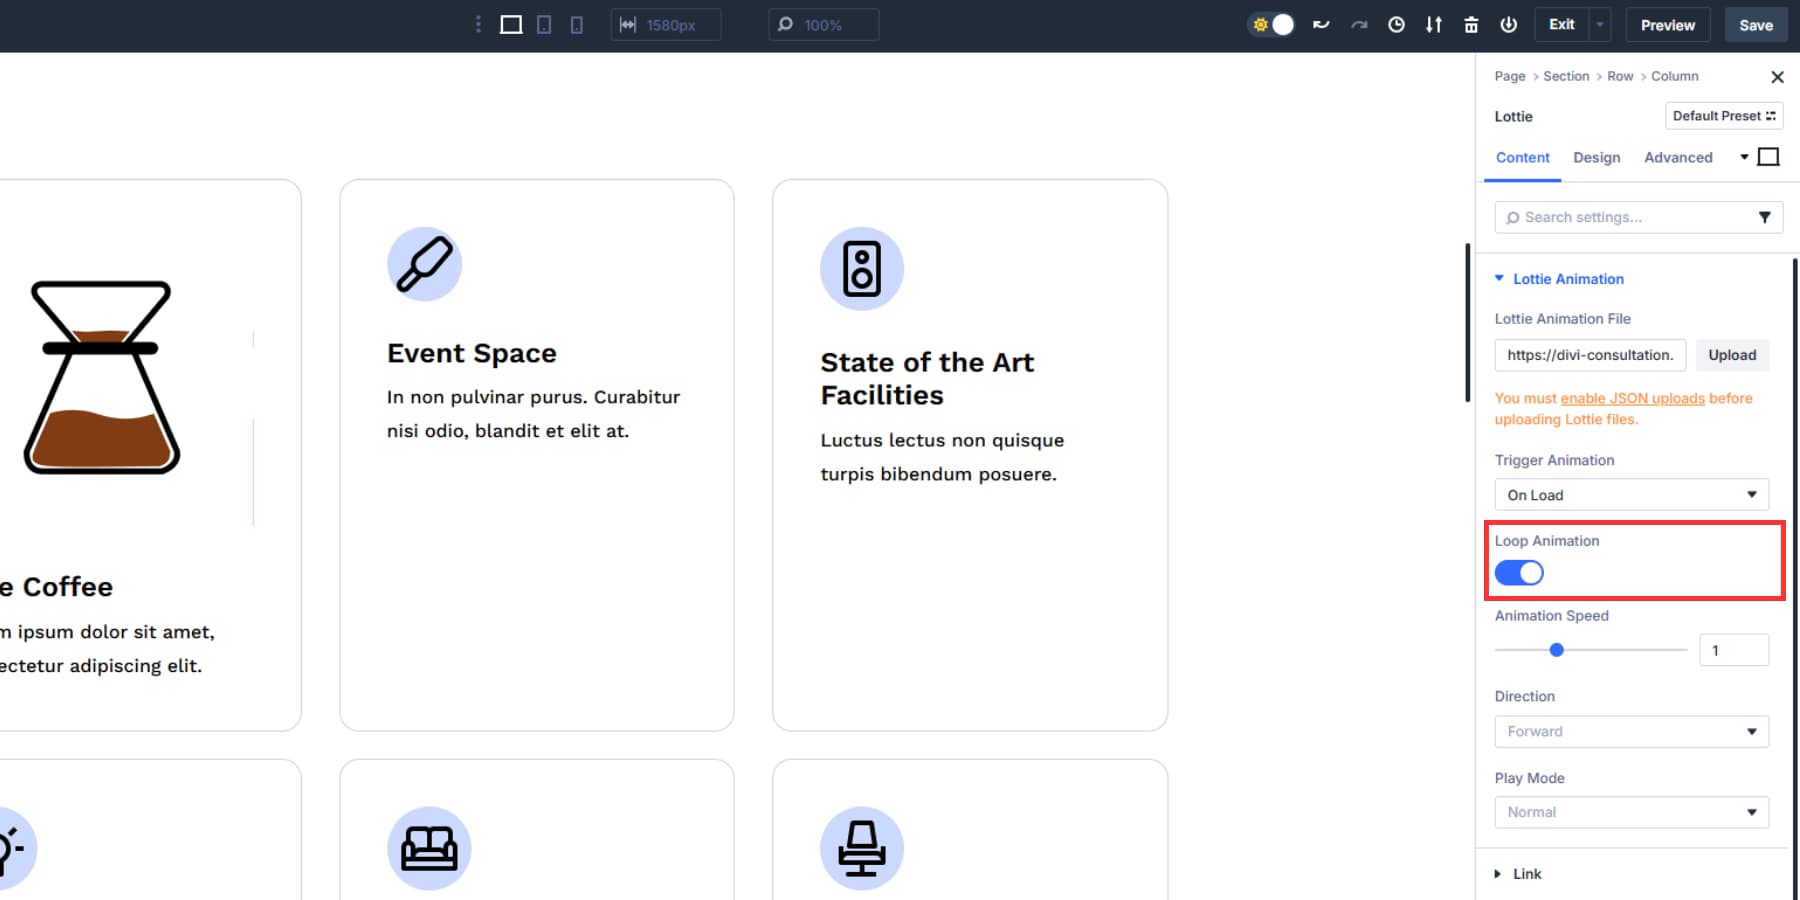
Now comes the fun part. The Trigger Animation dropdown decides when your animation plays. Choose Load to start it right when the page opens, or View to wait until visitors scroll down to that spot. Hover and Click both respond to mouse activity. Scroll to Animate links each frame to scroll position, creating effects that move as people navigate the page.
Loop Animation keeps the motion going continuously.
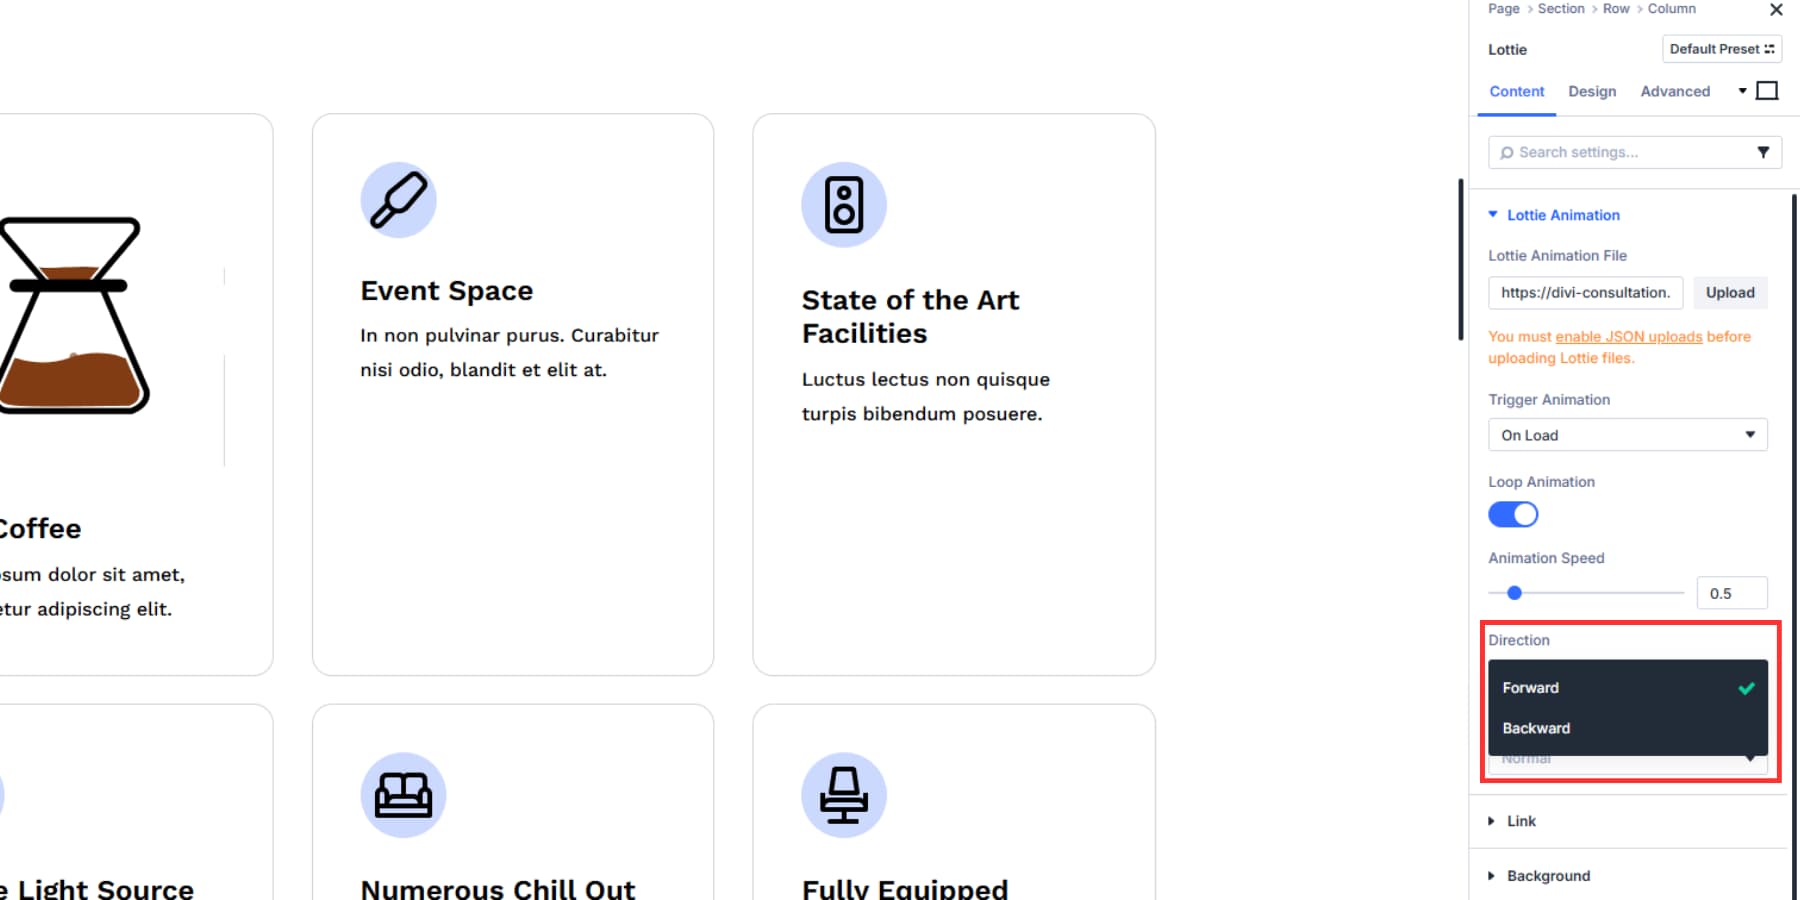
Animation Speed controls how fast it plays, and Direction runs it forward or in reverse.
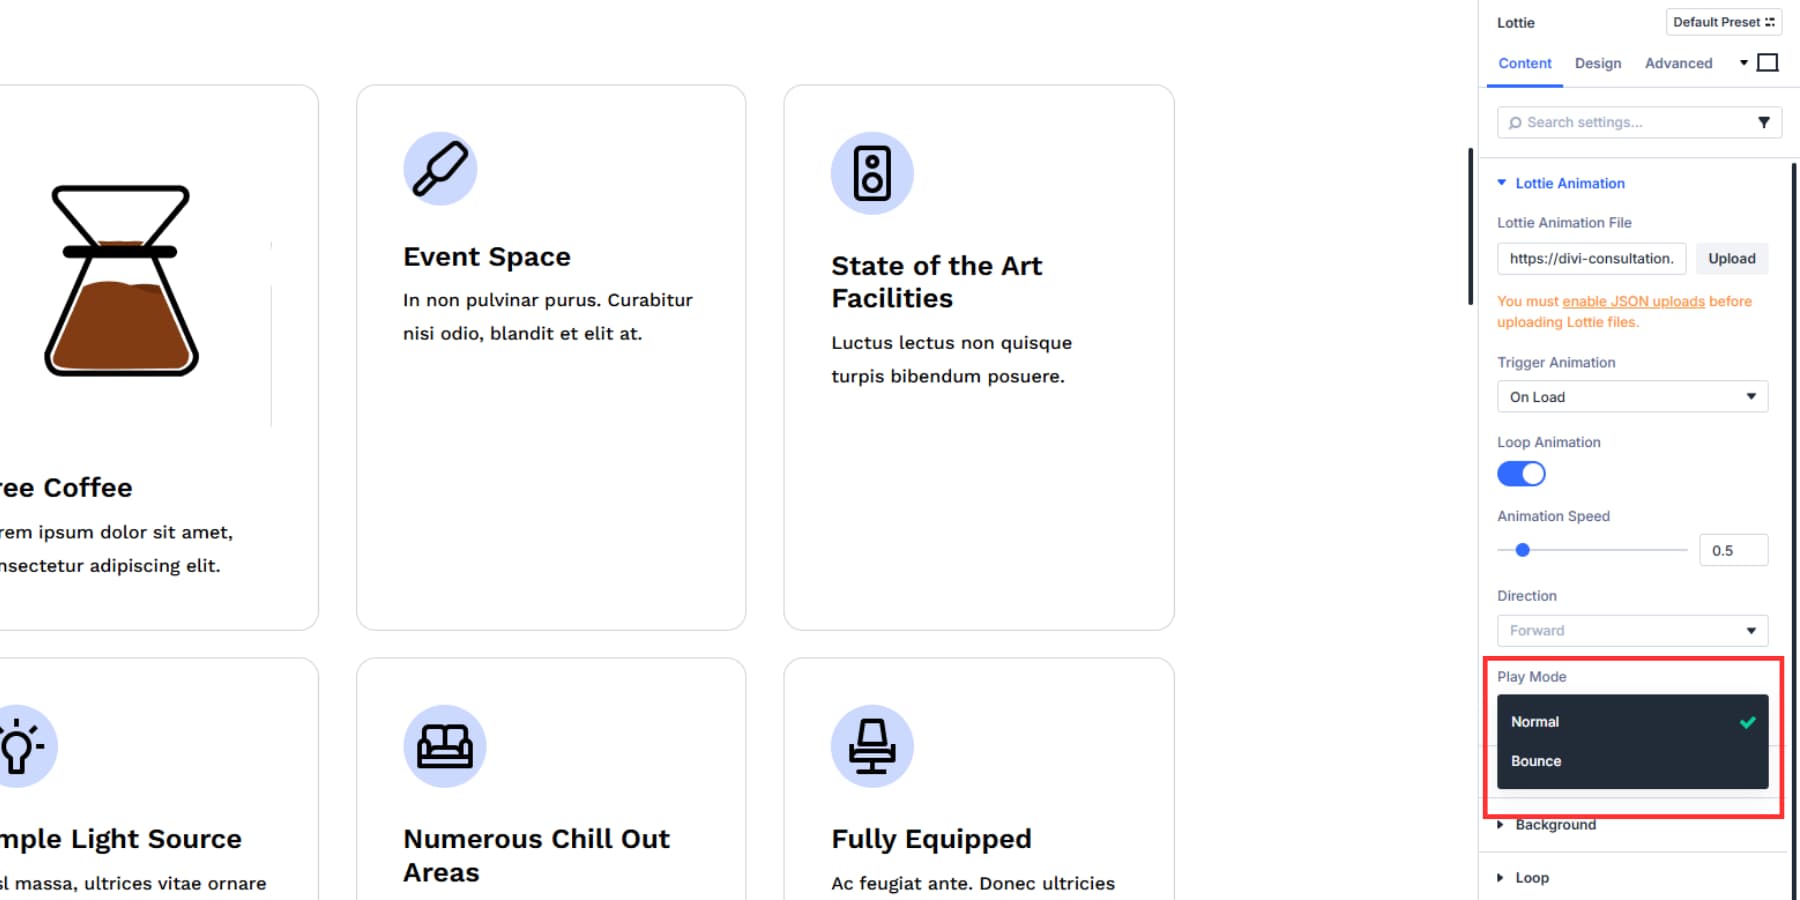
Play Mode switches between standard playback and a bounce effect that goes back and forth.
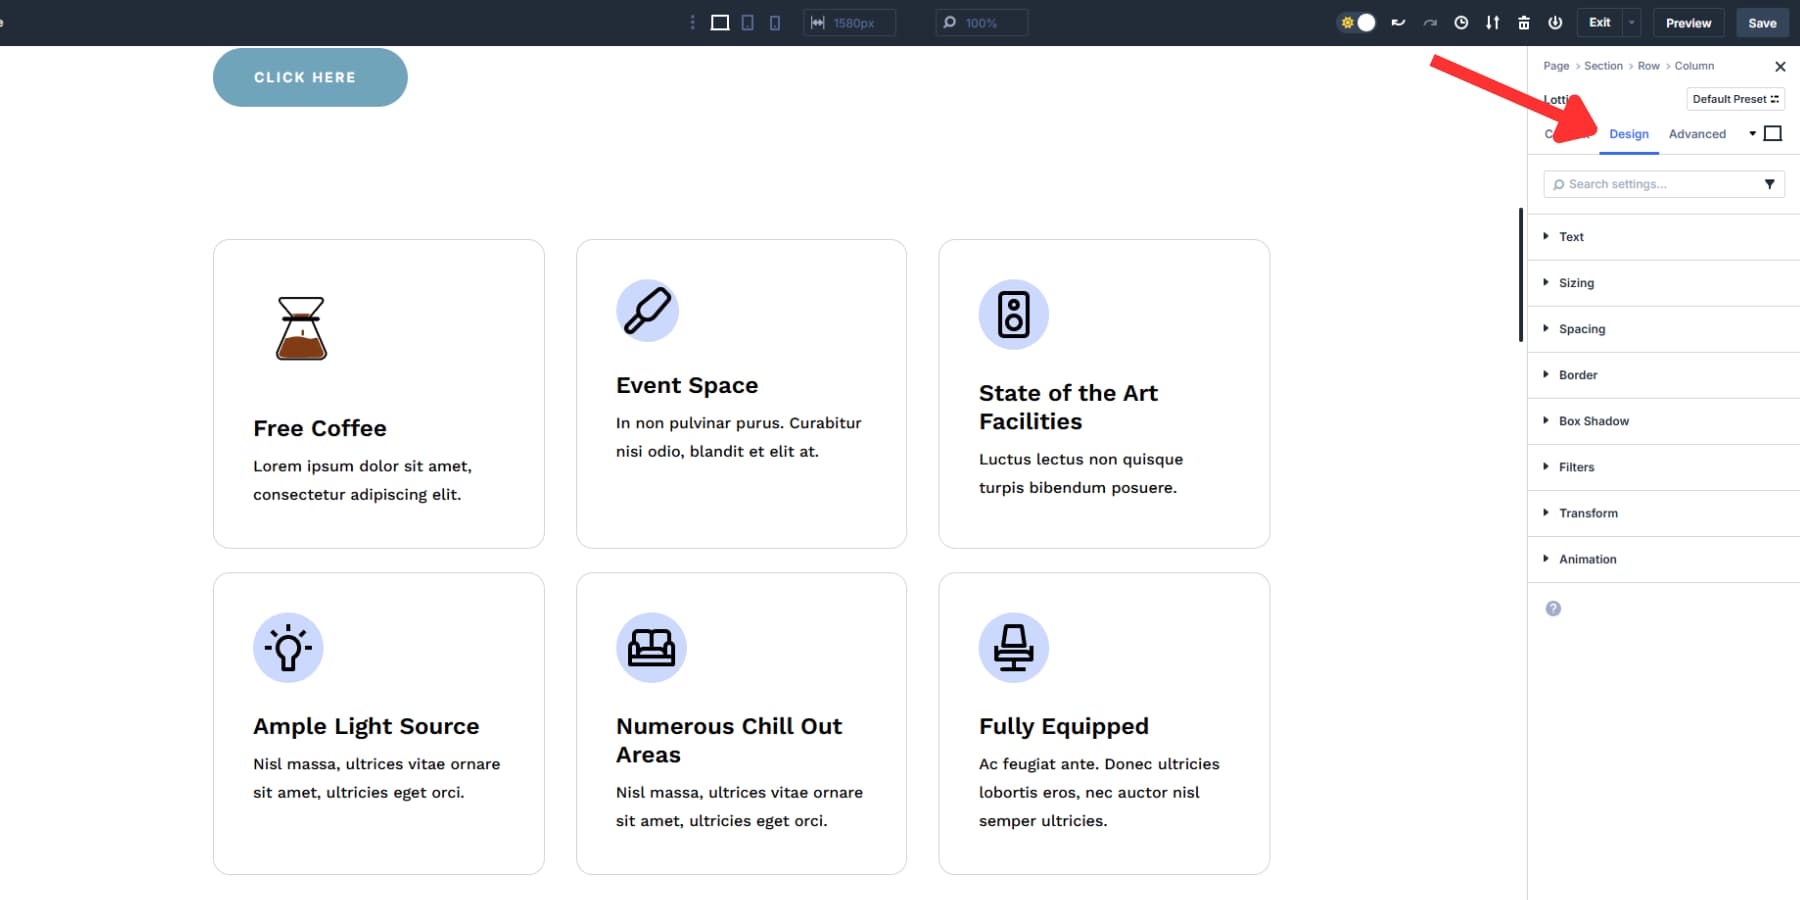
The Design tab functions similarly to other Divi modules, allowing for sizing, alignment, height, and spacing adjustments. You can’t change animation colors within Divi, but most Lottie sites allow you to select colors before downloading.
This post provides more detailed instructions on how to use Lottie in Divi 5.
Make Every Click Count
Small responses matter more than you think. A button confirming the press, a hover state showing something clickable, and a scroll effect that brings content to life. These interactions separate sites people trust from ones they abandon. The techniques we covered provide you with several ways to incorporate these responses in your web design.
Divi 5 combines Interactions and Lottie in the Visual Builder, where you can already create websites without ever touching code. Everything is included in one tool, so you can skip plugin subscriptions and avoid update conflicts or having to switch between different platforms.


Leave A Reply