WordPress is one of the most popular content management systems (CMS), especially among bloggers, freelancers, and small business owners. While WordPress does have a learning curve, it’s much easier and faster than creating a website with HTML or other programming languages. You can customize it in multiple ways, including through premium WordPress themes and popular plugins, to create any website your heart desires. In this post, we’ll show you how to make a WordPress website, from purchasing a custom domain to hosting to launching your brand-new site using Divi as your theme.
Let’s get to it.
What is WordPress?
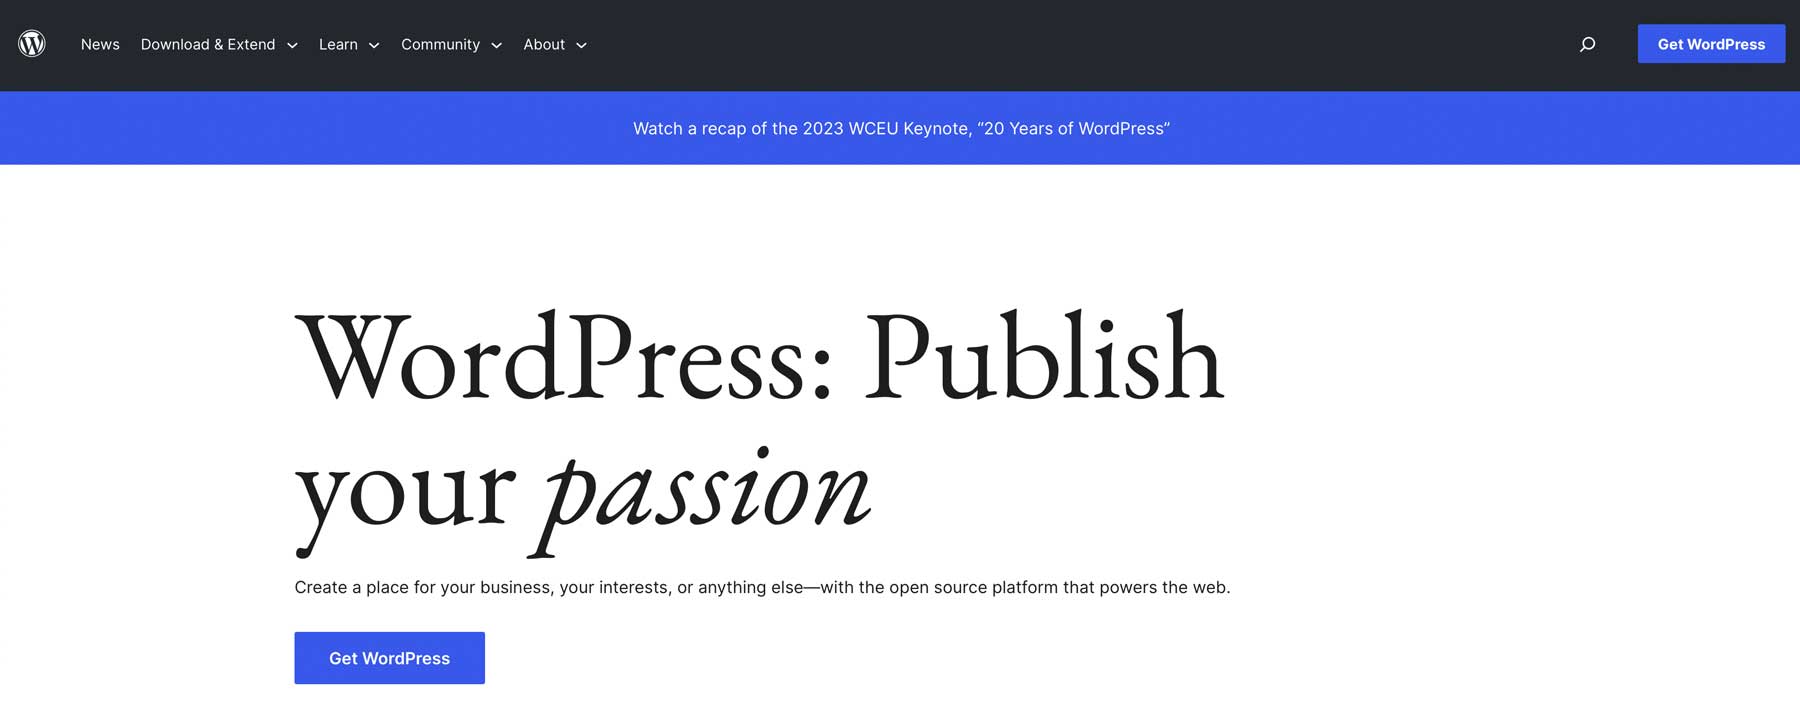
Originally created as a blogging platform in the 1990s, WordPress has evolved into a versatile CMS that can be used to build various types of websites, including membership sites, forums, learning management systems (LMS), ecommerce sites, and more. With its user-friendly interface, extensive theme and plugin options, and versatility, WordPress gives users the control they need to bring their website to life. WordPress offers a user-friendly and scalable solution for creating and maintaining your online store, blog, or business website, whether you’re a beginner or a tech-savvy web developer.
What You’ll Need to Get Started
When creating a new WordPress website, you’ll need a few things to get the process going, including a domain, web hosting, and determining the site’s structure. Let’s take a deeper look into the steps needed to be successful.
Step One: Purchase a Domain Name
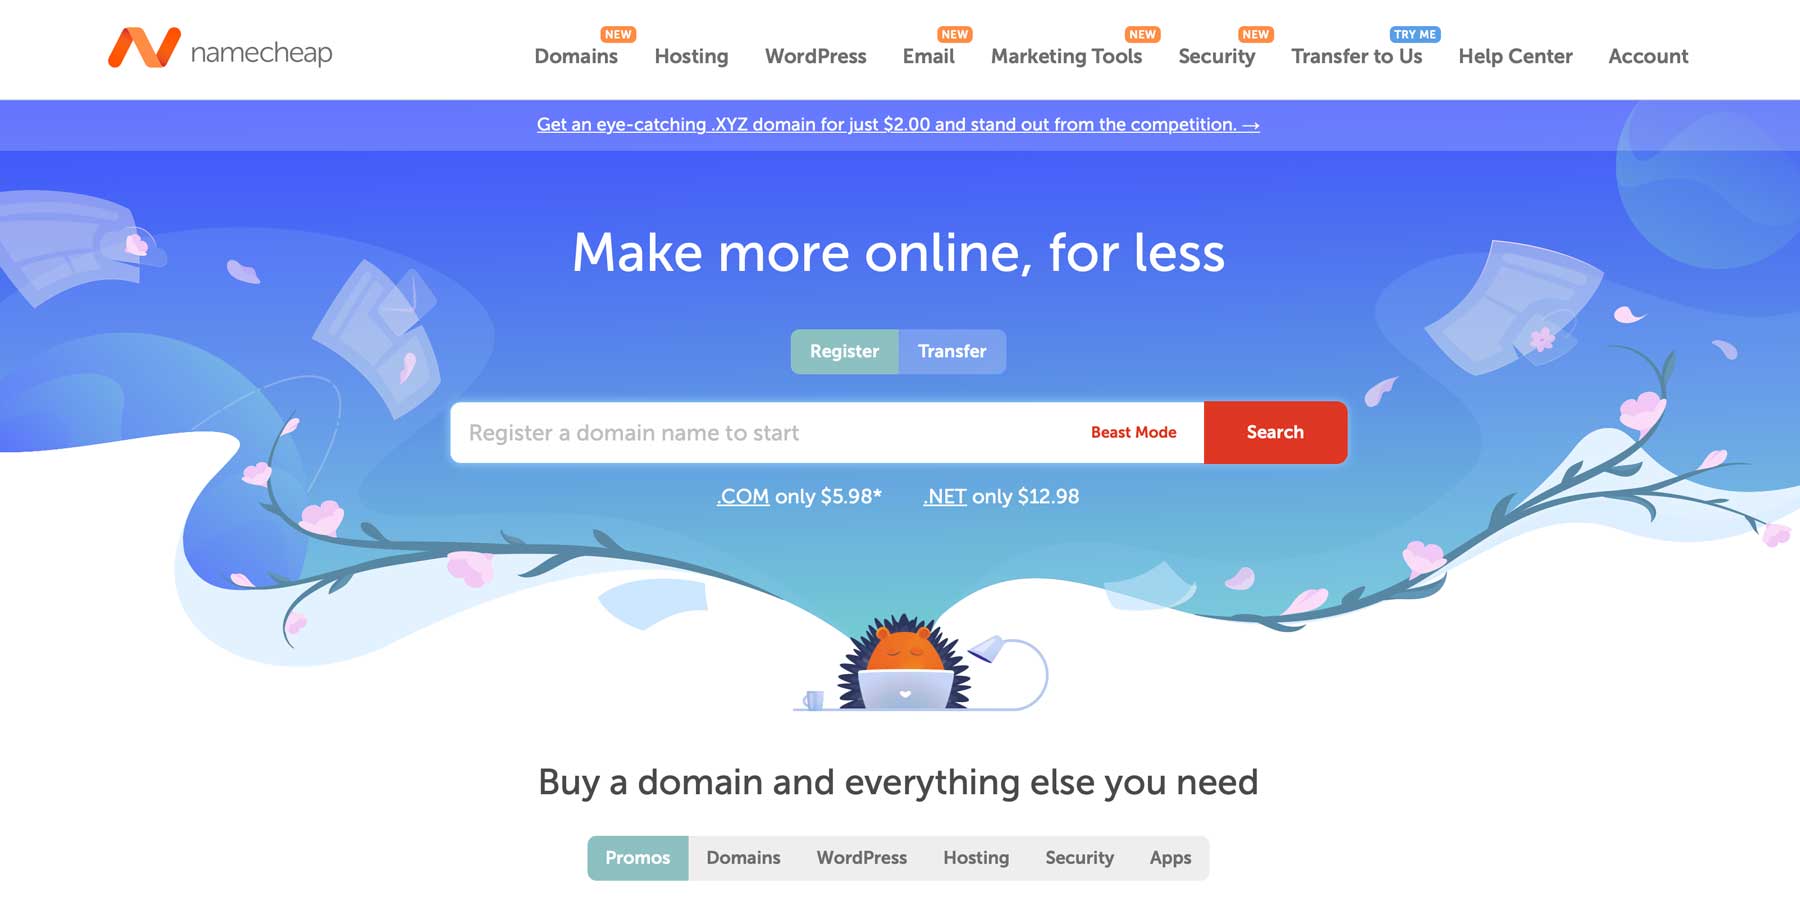
Choose the perfect domain name before considering where your website will live or its content. You’ll want it to stay true to your brand, so ensure you’re researching the best domain names for your business.
We suggest purchasing a domain from a registrar like Namecheap. It’s one of the most reputable registrars available and is an ICANN-accredited service that provides domain name registration, transfers, and management services. They also offer a domain name search to find the perfect one from generic or top-level domains at competitive prices.
Consider which top-level domain (TLD) extension you’d like to use, whether it be .com or something else. For most people, .com makes the most sense due to its recognizability and trustworthiness. TLDs are essential to the selection process for several reasons, including SEO.
After you’ve decided on your domain name, you’ll need to purchase it. The process isn’t difficult and is a crucial first step. However, it is generally advised to refrain from buying your domain from a hosting provider since it can complicate matters if you switch hosts for your website. Therefore, we recommend keeping the two separate to retain greater control over your domain.
Step Two: Purchase Hosting with Divi Ready Installation
Another critical step is purchasing a WordPress hosting plan for your website. You’ll want to arm yourself with information before making a final decision. First, learn about the different hosting types available to determine which is best for your unique situation.
Next, decide which host best meets your needs. You’ll want to choose one that fits your budget and has the most features. Good hosting providers guarantee at least 99% uptime, manage security patches and updates, and provide freebies such as SSL, emails, backups, staging sites, and good security.
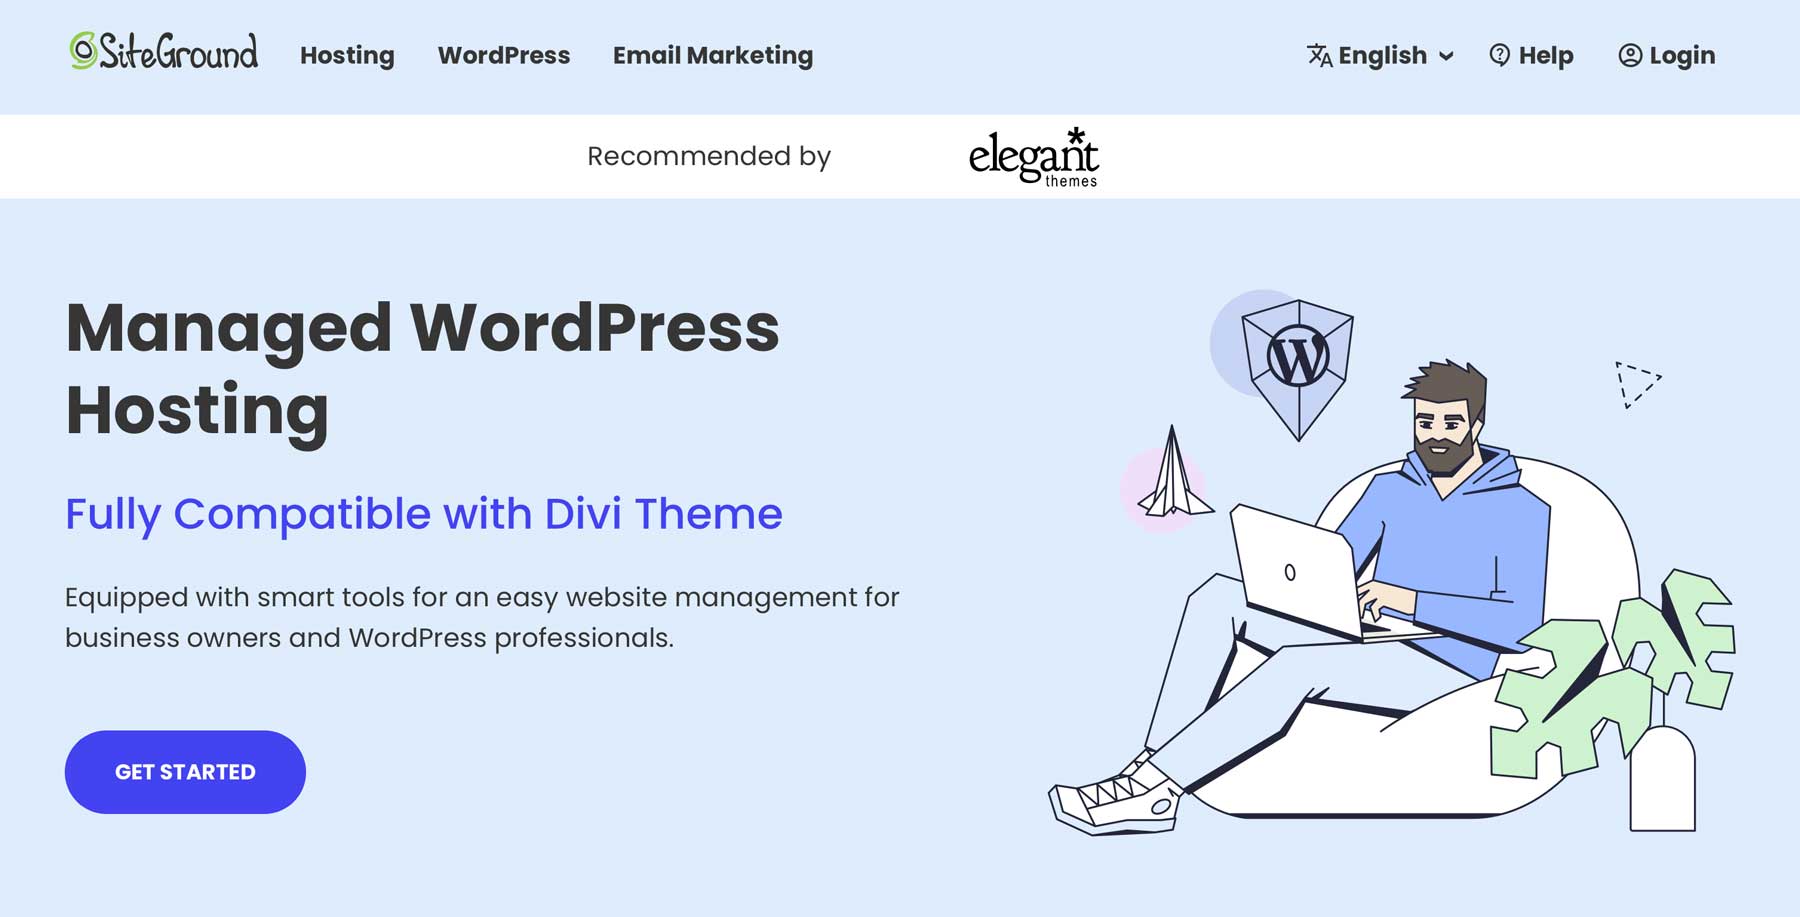
A rock-solid option that includes all of these features is SiteGround. Their hosting plans are optimized for WordPress and include fantastic support and affordable prices. For newcomers, SiteGround’s StartUp plan is an excellent jumping-off point. With 10 GB of storage, freebies such as an SSL, CDN, business email, migration, staging, and a free domain, you’ll have everything you need to get started for under $15 a month. As a bonus, based on our testing, it’s also the fastest WordPress hosting you can get.
As a proud hosting partner of Elegant Themes, SiteGround offers Divi-ready hosting plans. It comes with Divi pre-installed and activated with your Divi license, so you can skip the complicated setup process and start building your website immediately. SiteGround is also optimized specifically for Divi with optimized PHP settings, server setup, and resources.
Step Three: Install WordPress
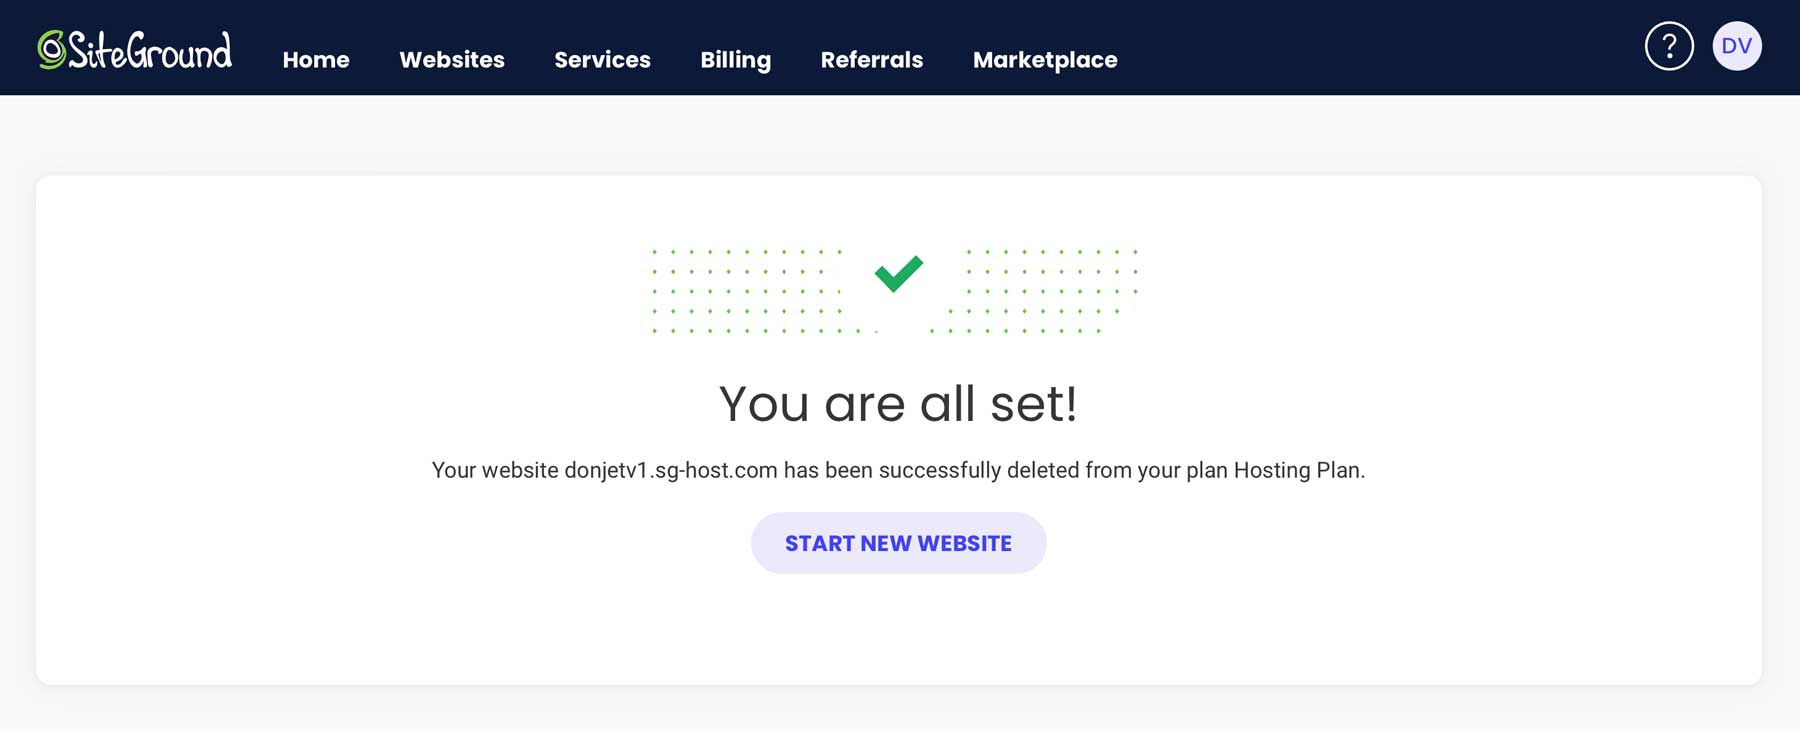
The first step to creating your masterpiece is by installing WordPress. This can be accomplished in several ways. If you opted for a VPS or dedicated hosting provider, you’ll likely need to install WordPress on your own. If you choose a managed hosting company, the steps to install WordPress are pretty different. For example, using SiteGround, you can install WordPress in just a few clicks. This is the method we plan to use in this tutorial. Check out our in-depth post, How to Install WordPress, if you’re looking for tips on other installation methods.
SiteGround provides a simple way to install WordPress. Once you set up your account, you’ll be directed to your account dashboard. Click the Start New Website button to install it.
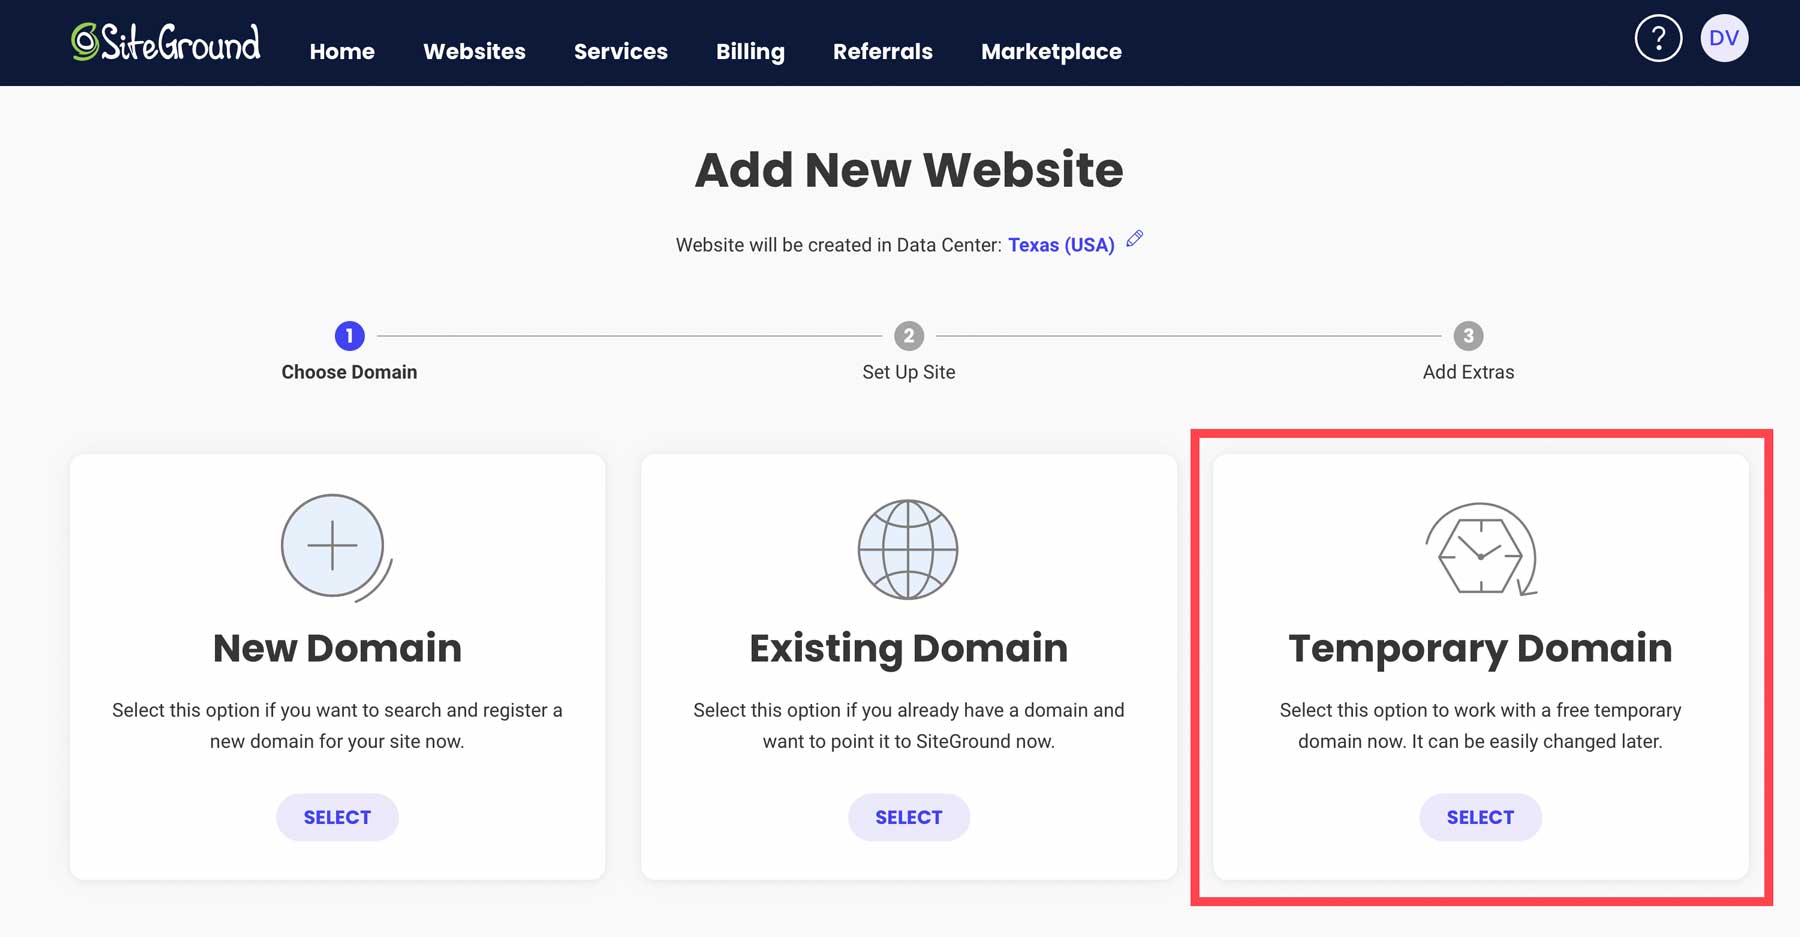
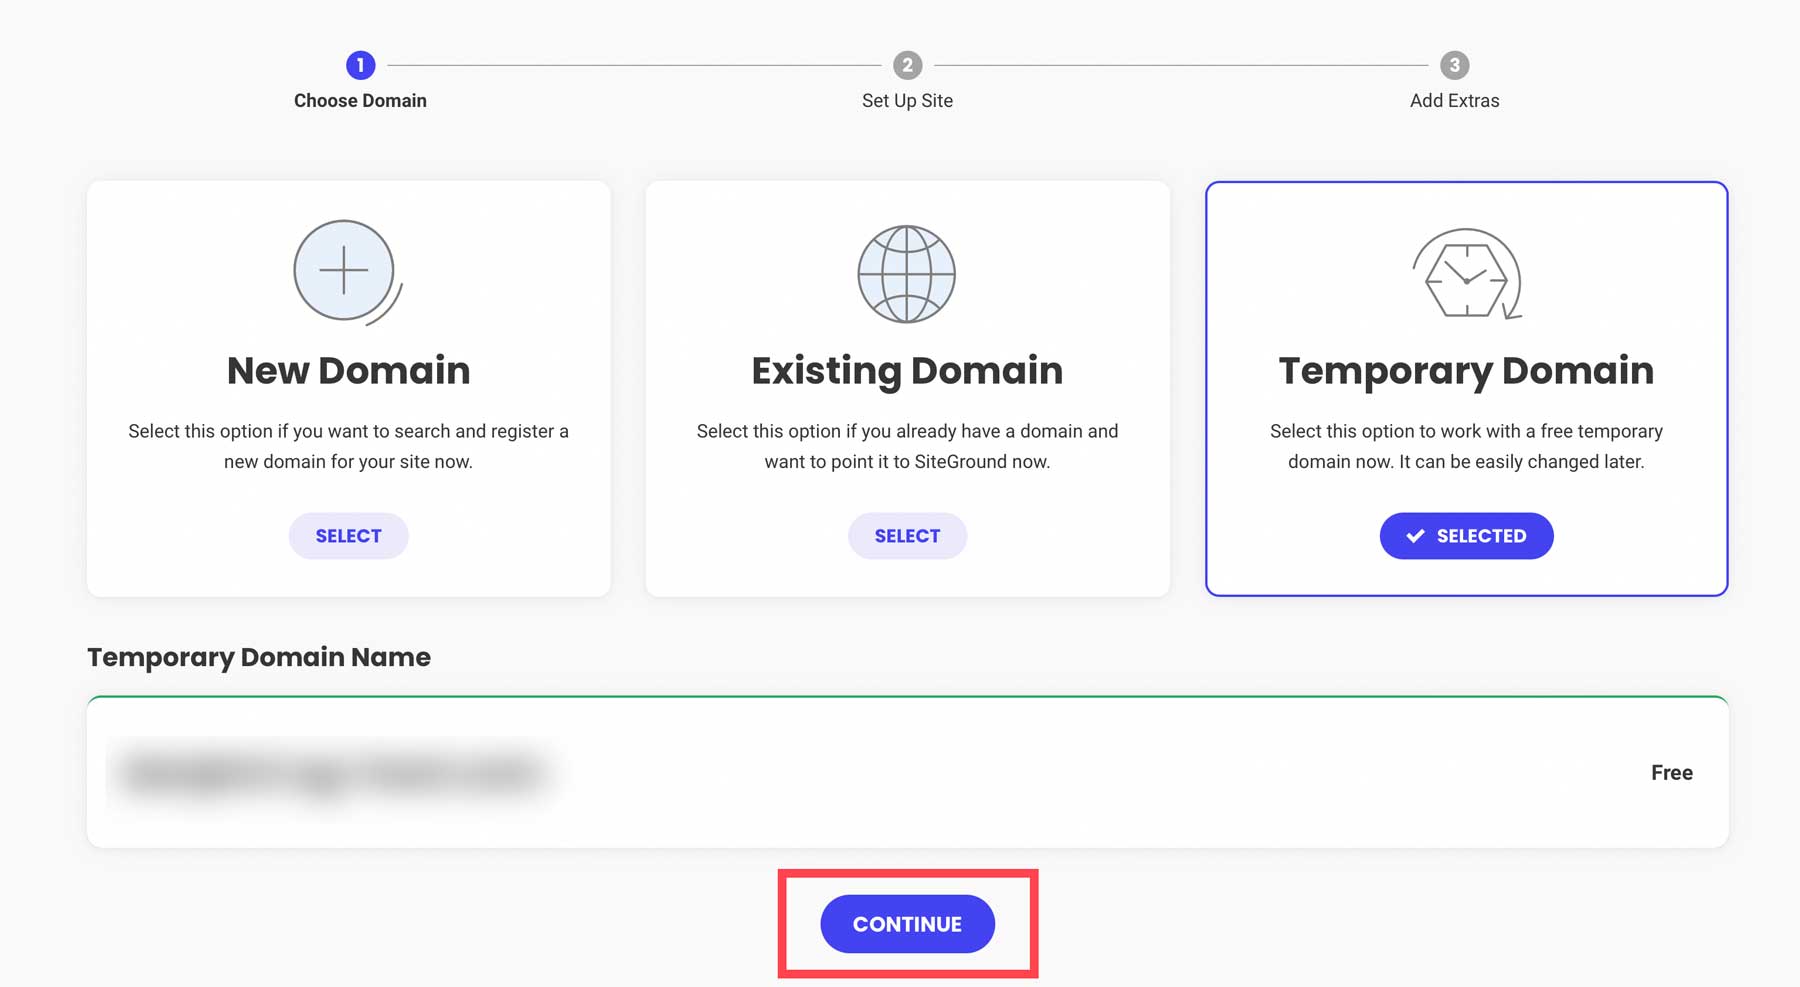
Next, choose whether to install WordPress on a new, existing, or temporary domain. We’ll build our new site on a temporary domain so we can design and perfect it before pushing it live.
When the screen refreshes, you’ll notice you’ve been assigned a temporary domain for your website. Proceed by clicking the continue button.
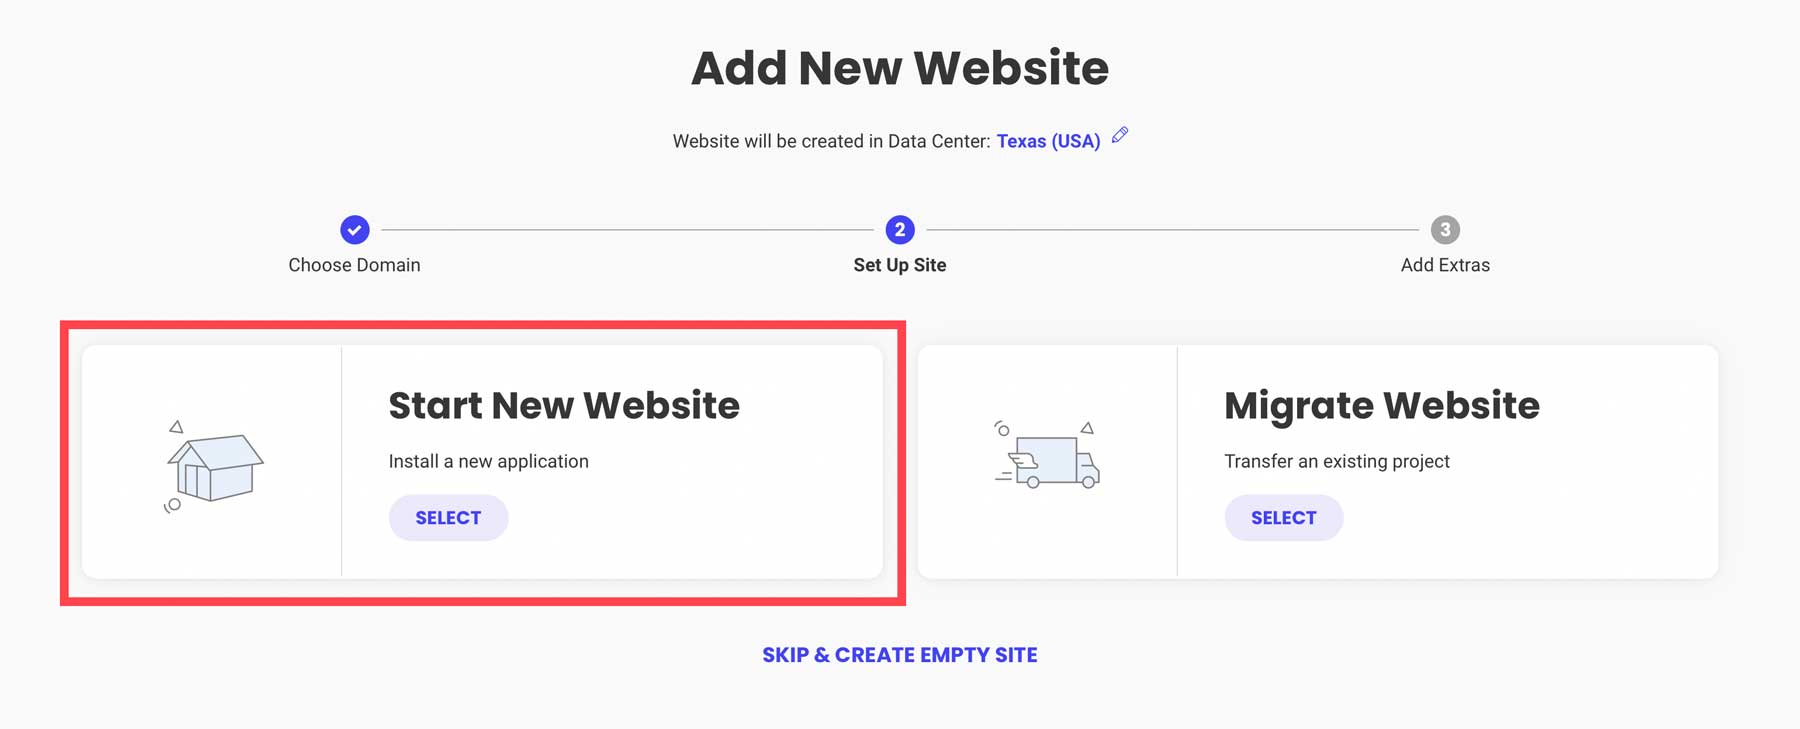
Next, click Start New Website.
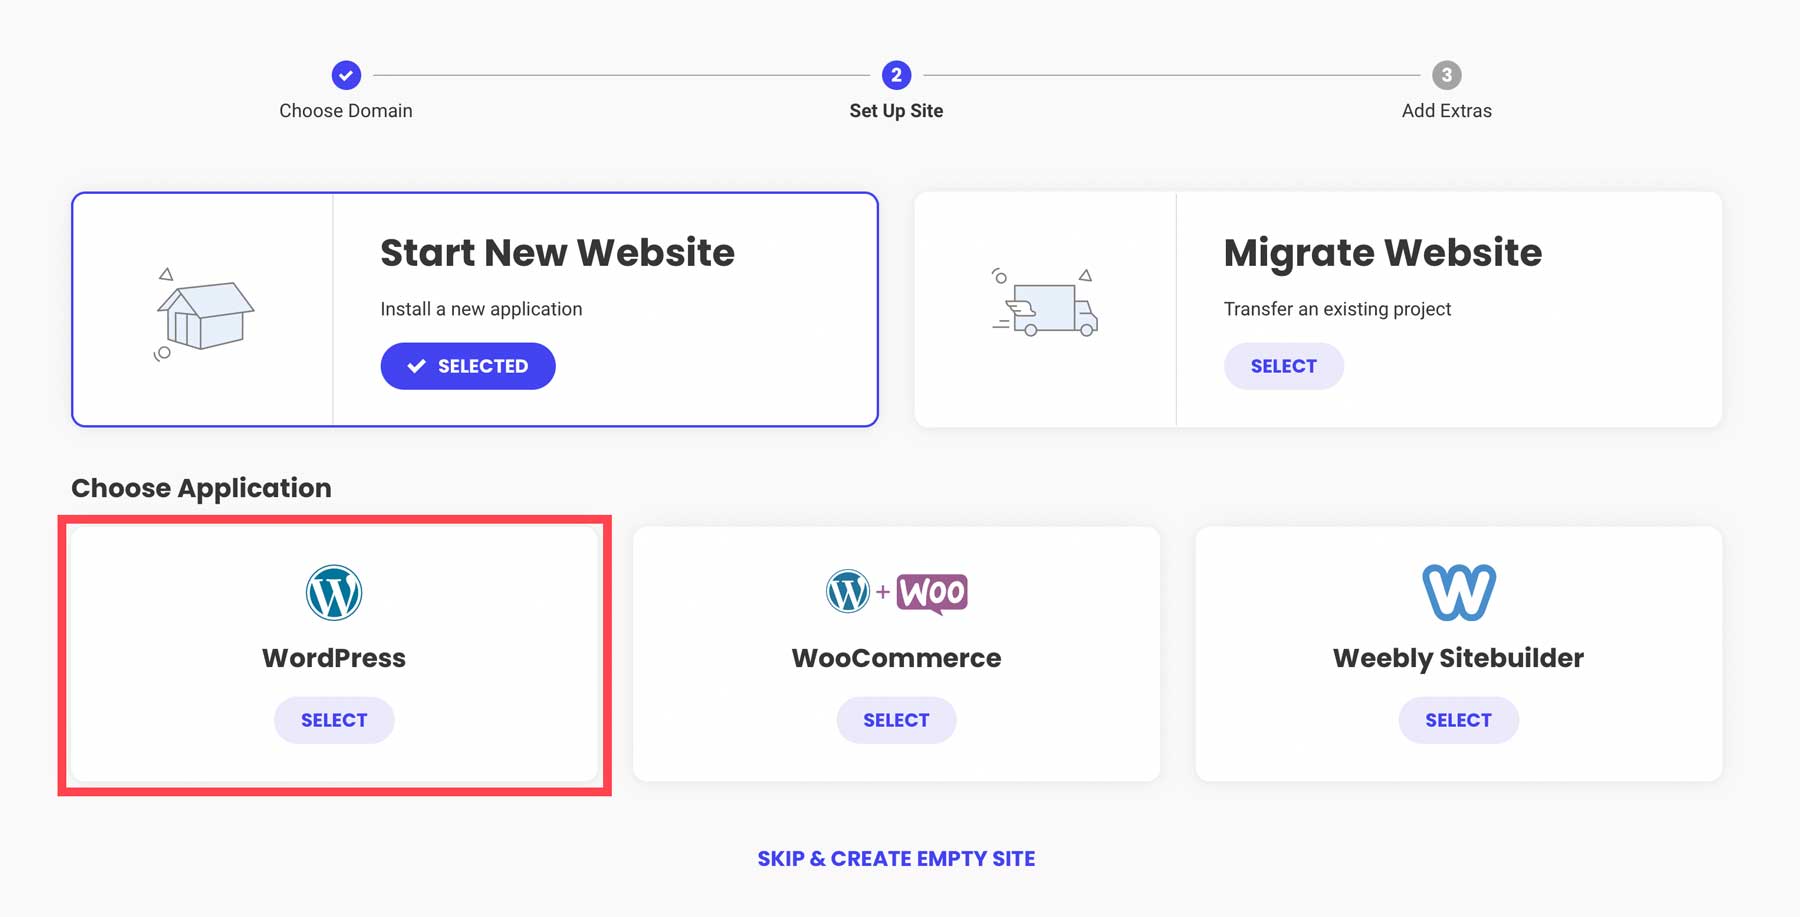
Then, choose WordPress as the application.
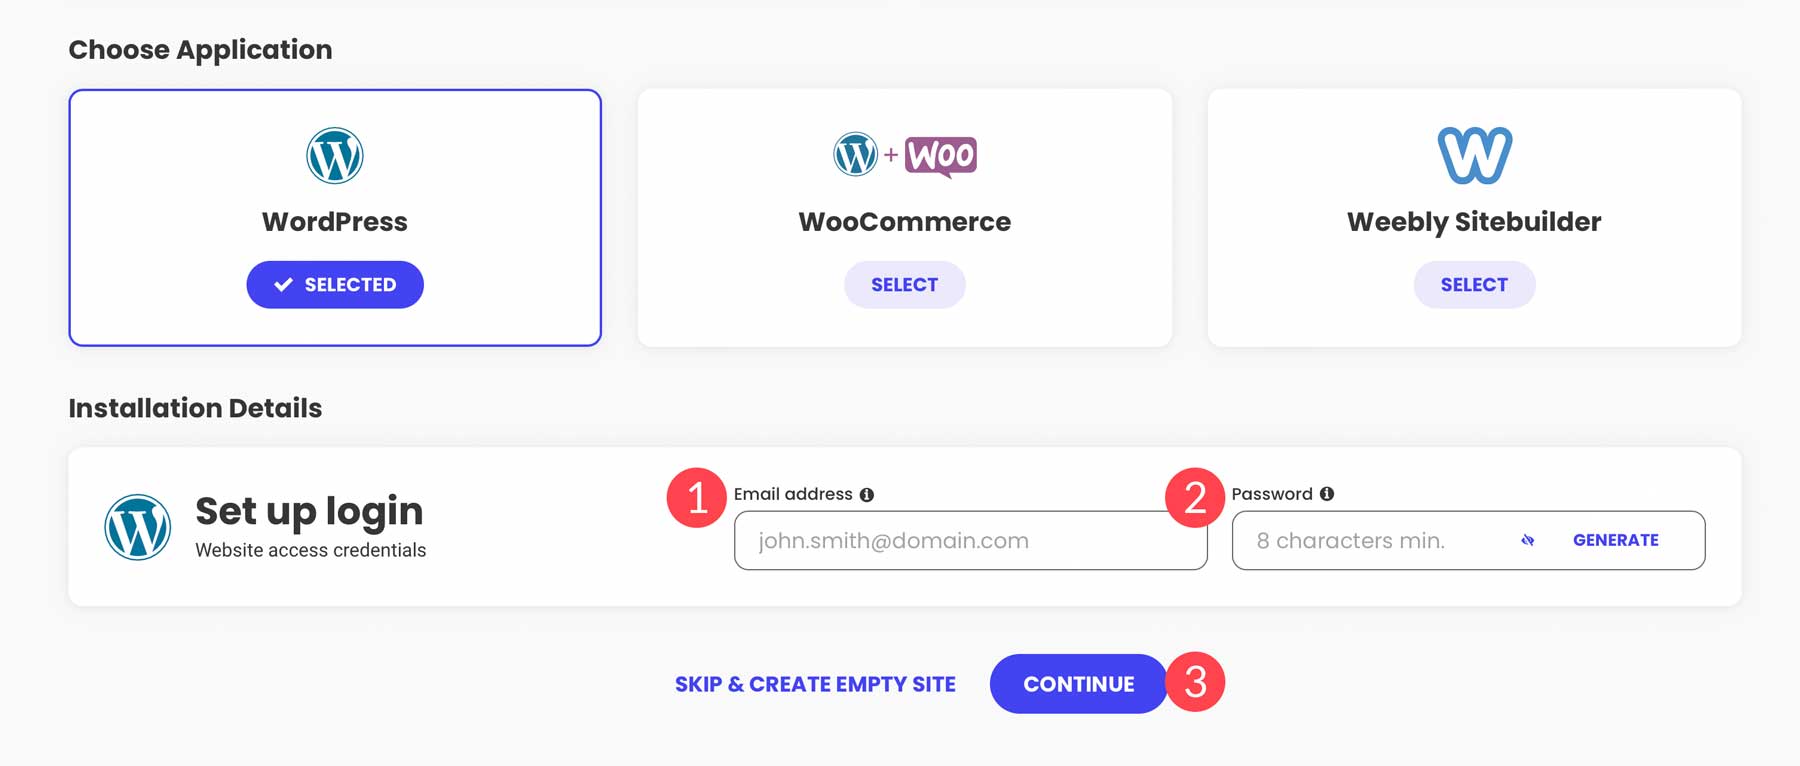
For the installation details, provide your email address, create a password (or generate a strong one), then click continue. Be sure to save your login information, as this is how you’ll log in to your WordPress admin dashboard.
Click the finish button to install WordPress.
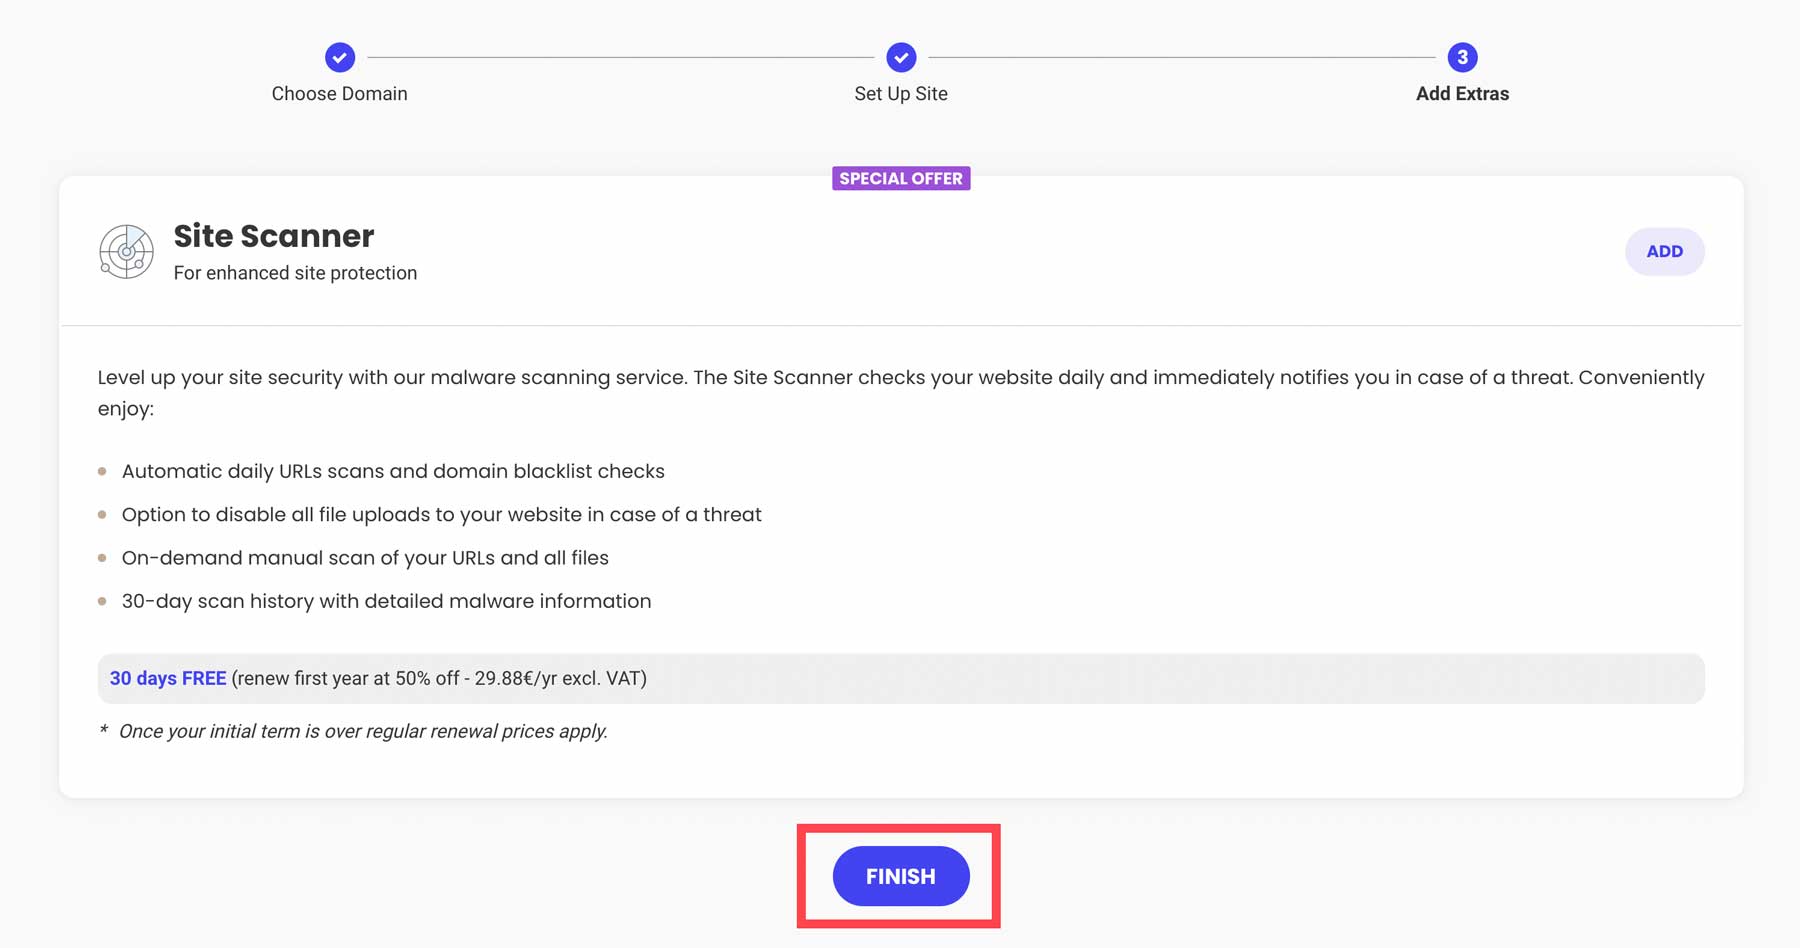
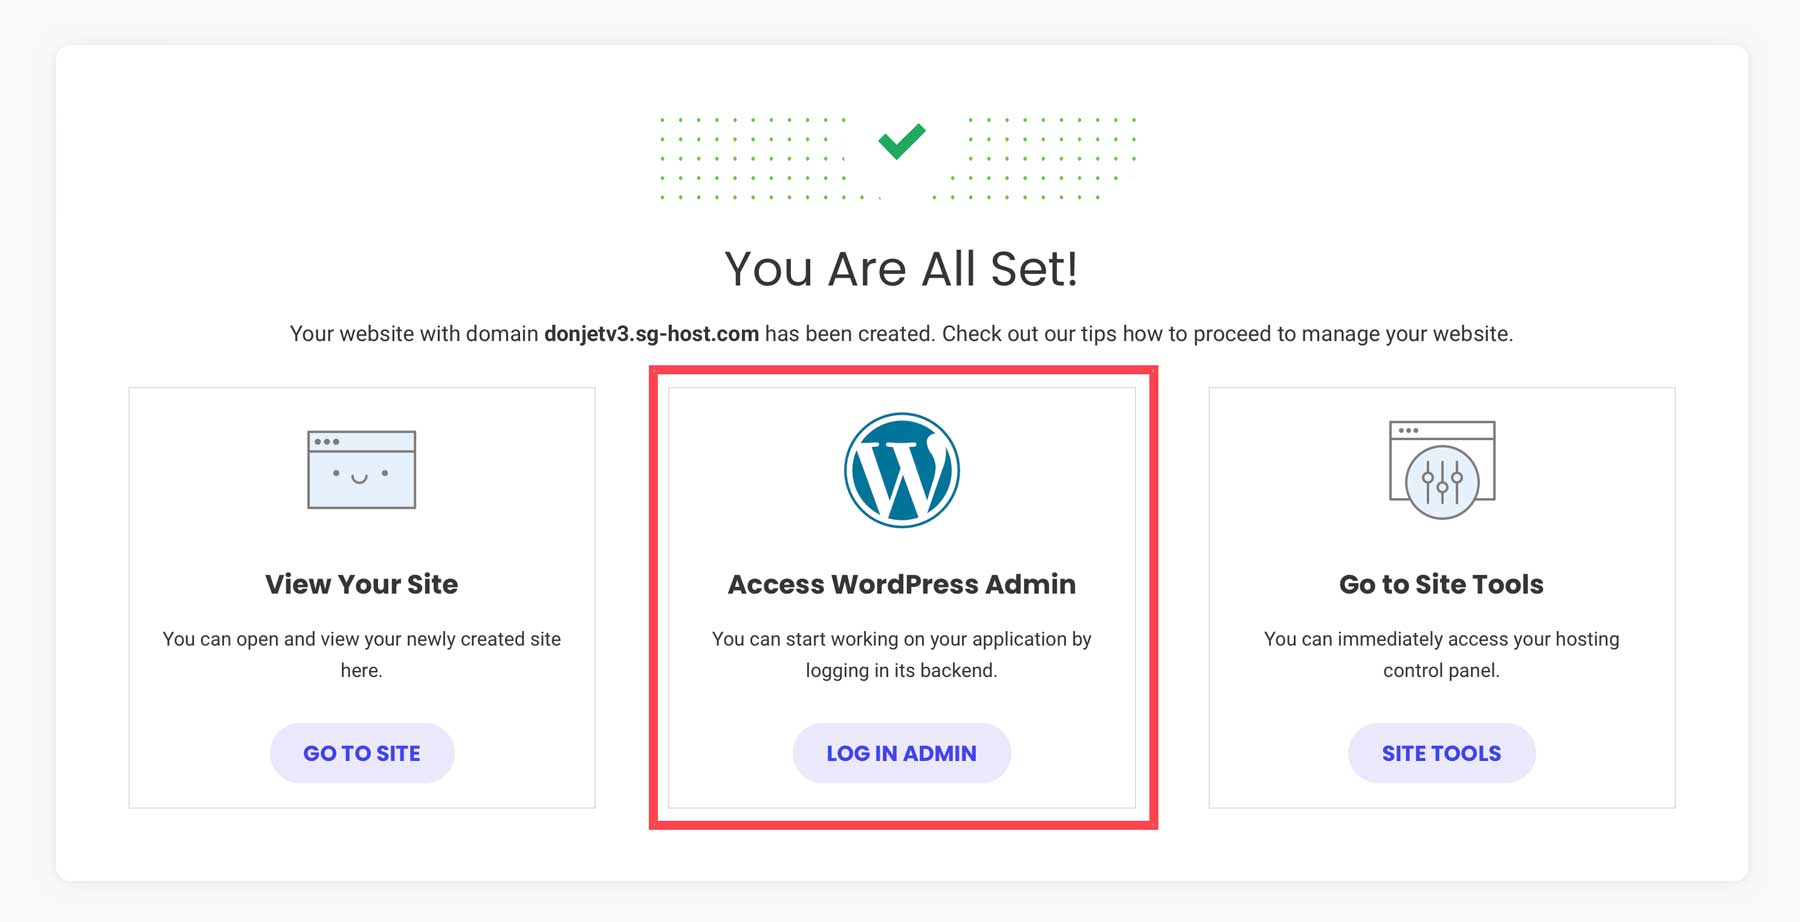
When your screen refreshes, you’ll have three options: view your site in a browser, log in to the WordPress admin panel, or head to SiteGround’s site tools dashboard. Click the log in admin button to view the admin panel.
How to Make a WordPress Website with Divi
There are many steps involved in building a WordPress website with Divi. From installing WordPress to taking your site live, we’re here to walk you through every step, giving you a great shot at success.
Subscribe To Our Youtube Channel
Step One: Purchase & Install Divi Theme
Divi allows you to change how your website looks to visitors. You can customize colors, the layout, fonts, and other design elements to match your branding or style. Divi is a premium theme due to its excellent features, such as no-code Visual Builder, full site editing capabilities, and premade layouts.
Divi’s Theme Builder allows you to design your website from top to bottom, including headers, footers, and page templates. For example, suppose you plan to have blog posts on your website. In that case, you can use Divi’s Theme Builder to design how your blog page will look, along with category, archive, and author pages.
Divi’s Additional Services and Plugins Make Creating a Website a Breeze
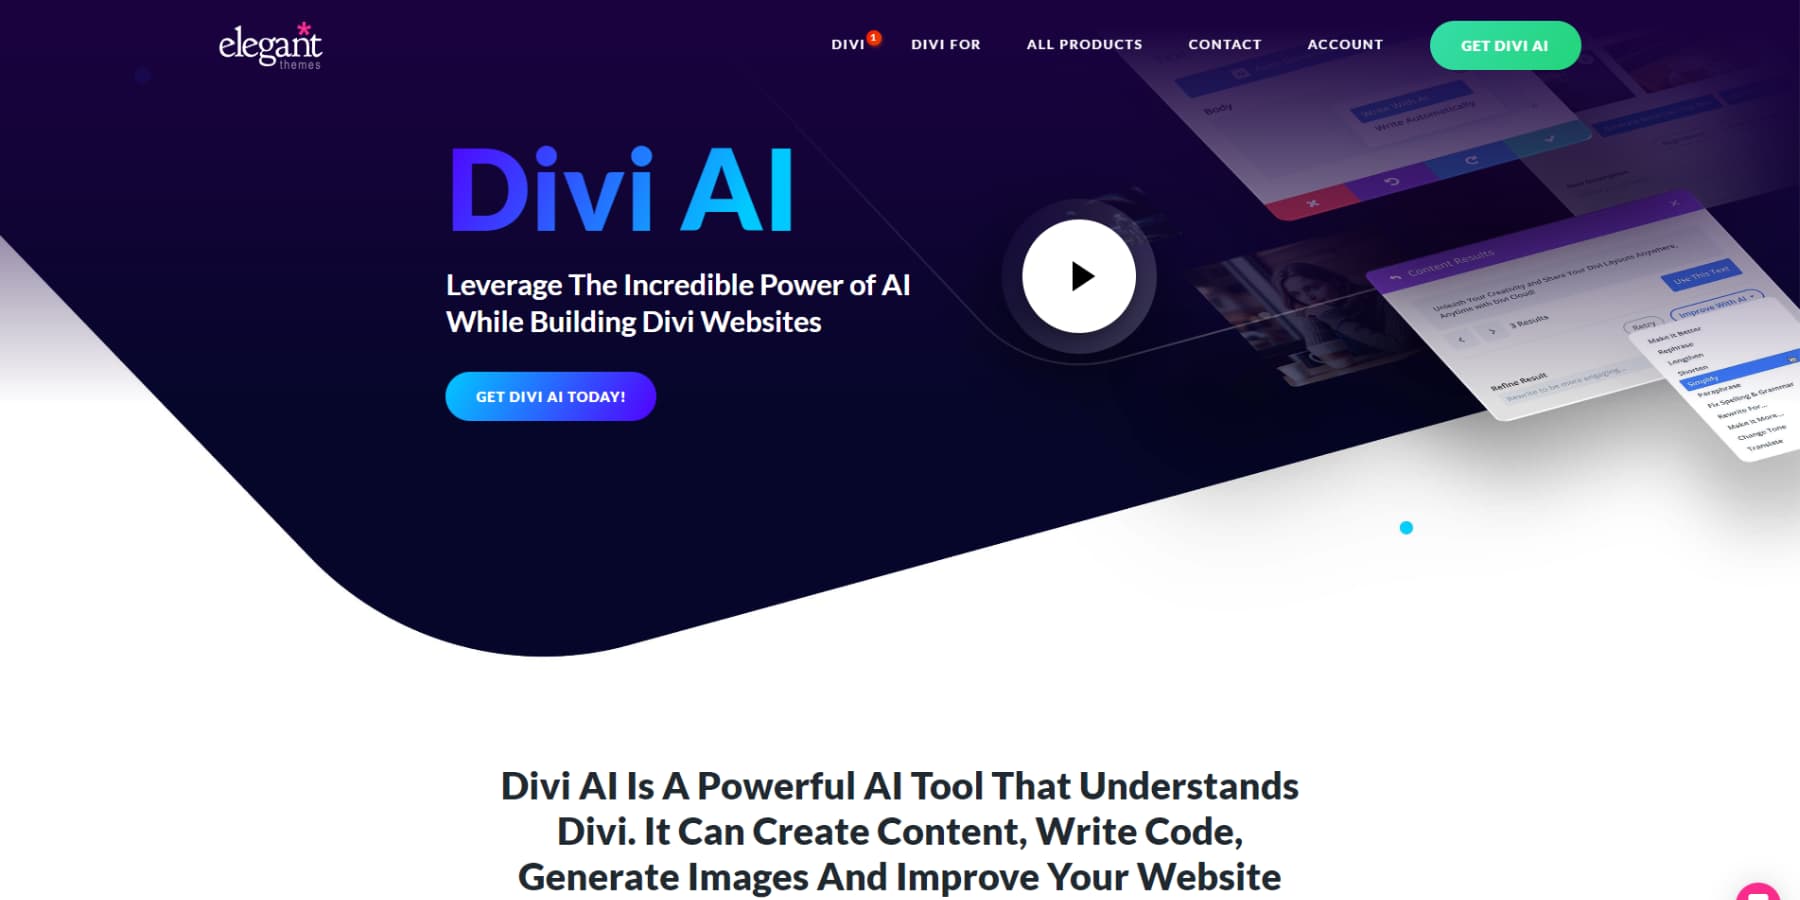
Divi also offers additional services to make the website creation process an incredible experience. For example, suppose you need to create content for your website (which you likely will). In that case, you can employ the power of artificial intelligence (AI) to do the hard work for you. Using Divi AI, you can create content, write code, and generate images all in one go. Divi can understand your website’s niche and uses AI to craft content based on your site title and tagline. It’s also privy to Divi’s module codebase, which means it can write code, generate custom CSS, and customize the design, thanks to the large language model (LLM) trained specifically on Divi’s codebase.
Another benefit of choosing Divi is its Divi-specific plugins, themes, and layouts, which are available through the Divi Marketplace. It is the official repository for all things Divi and is similar to the WordPress repository but for Divi-related products. The marketplace also features products, such as Divi Supreme Pro, which offers over 60 Divi modules, 8 extensions, and 40+ premium Divi layouts for the low price of $79.
Divi also offers Divi Pro, which provides a license for the Divi theme, and Divi AI, Divi Cloud, Divi Teams, and Divi VIP for $277 per year. That way, you can combine Divi with the power of Divi AI, get cloud storage for saving layouts, modules, and sections with Divi Cloud, and get premium support options through Divi VIP. Additionally, Divi Teams allows you to collaborate with co-workers in the cloud. You can assign permissions based on the individual user and give everyone on your team their own access. This is an excellent resource for agencies who need to be able to share access to Divi and its suite of products without the need to purchase individual ET licenses.
With Divi, the sky is the limit.
Installing Divi
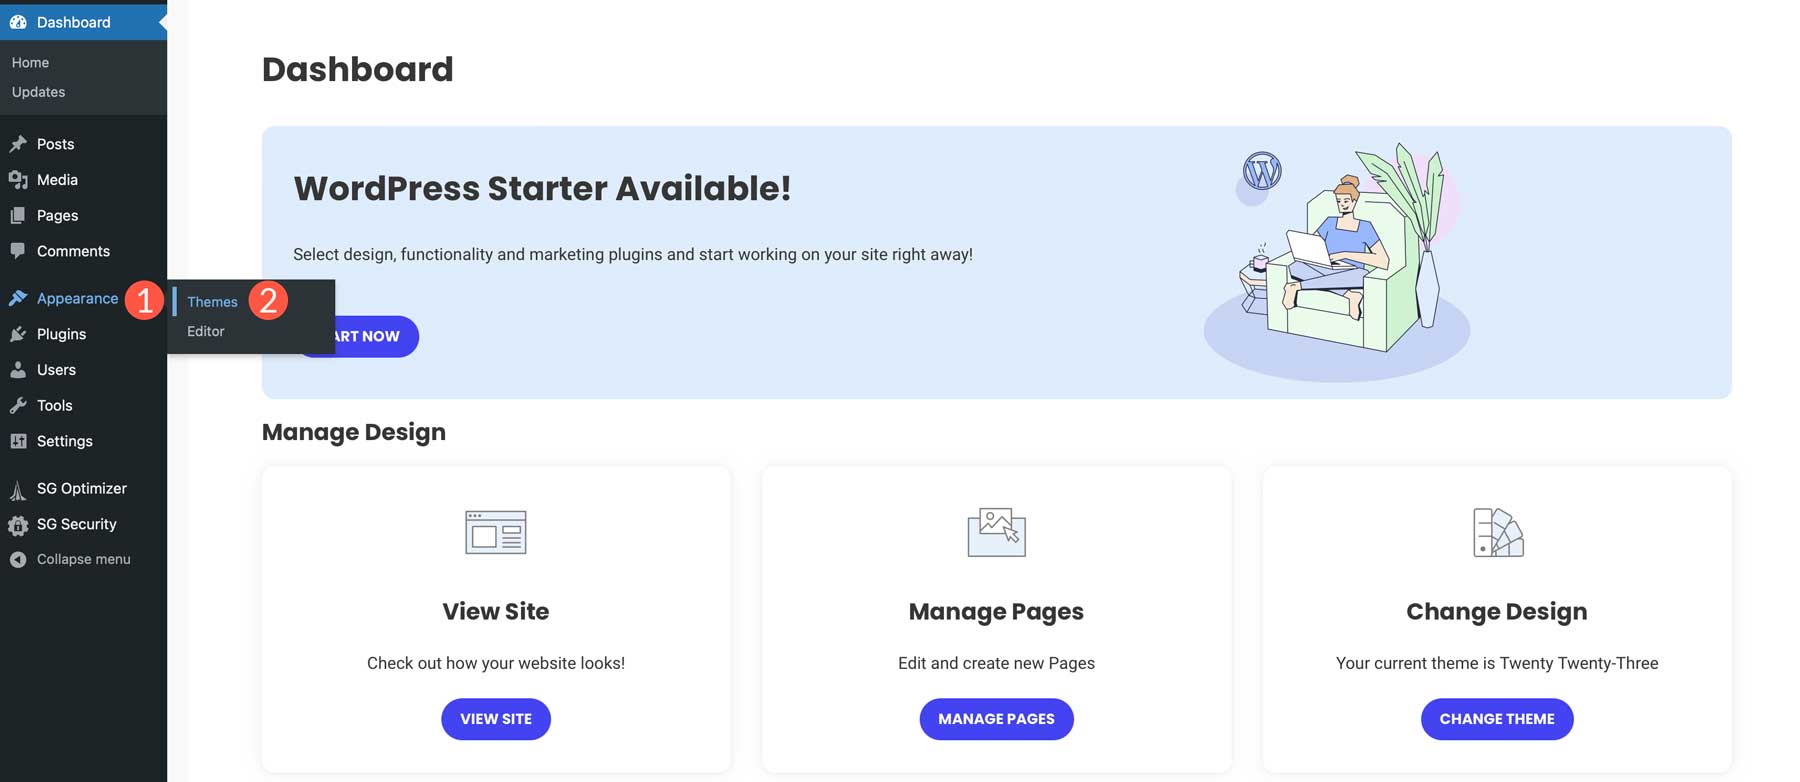
To install Divi, navigate to Appearance > Themes.
Click the Add New Theme button to add a new theme.

From here, you’ll want to upload Divi into your WordPress install. Click on the upload theme tab to upload a theme, then click choose file to upload your zipped WordPress theme file.

Finally, click Install Now to install Divi.

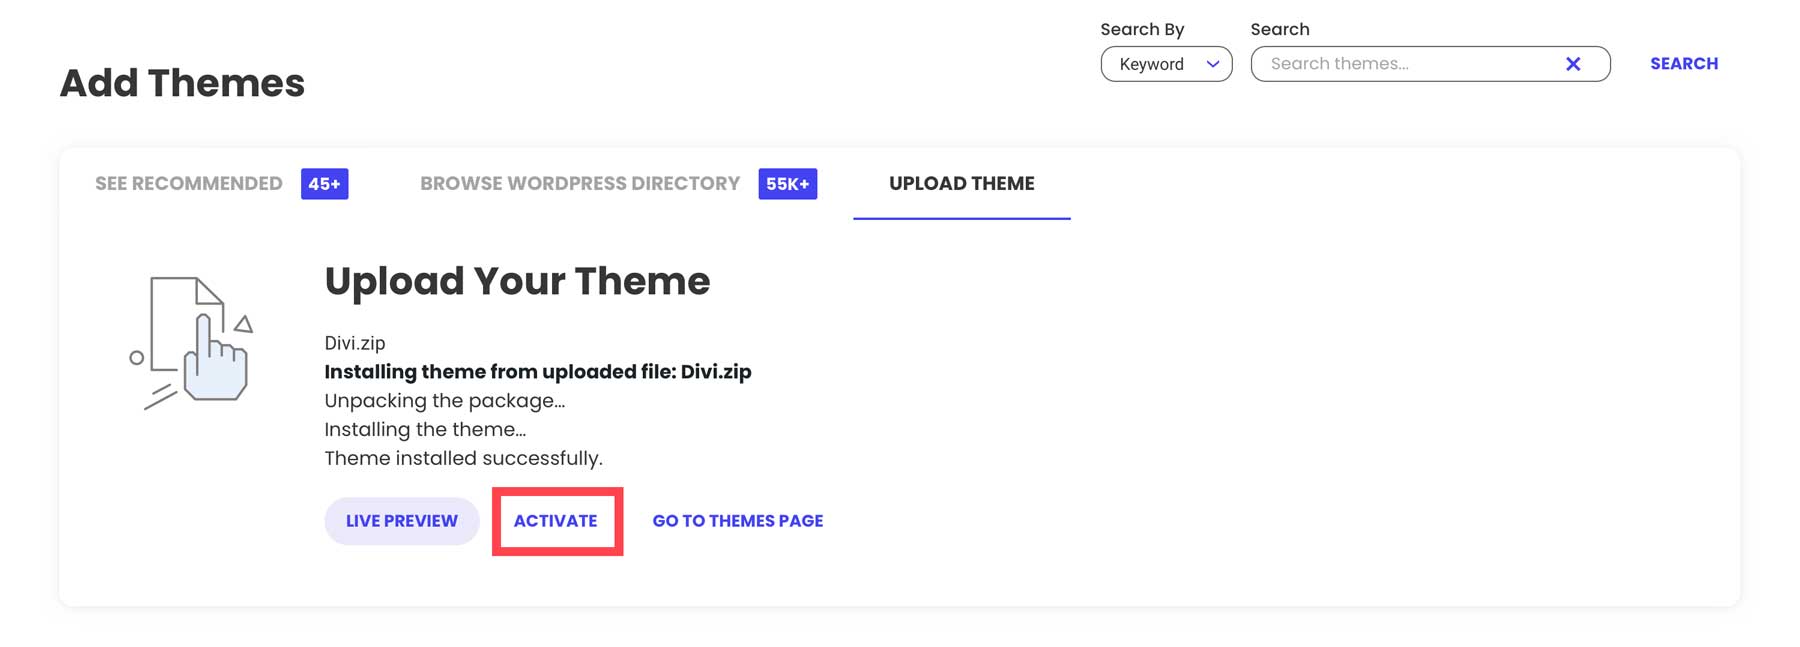
Click the activate button to make your theme live on your site.
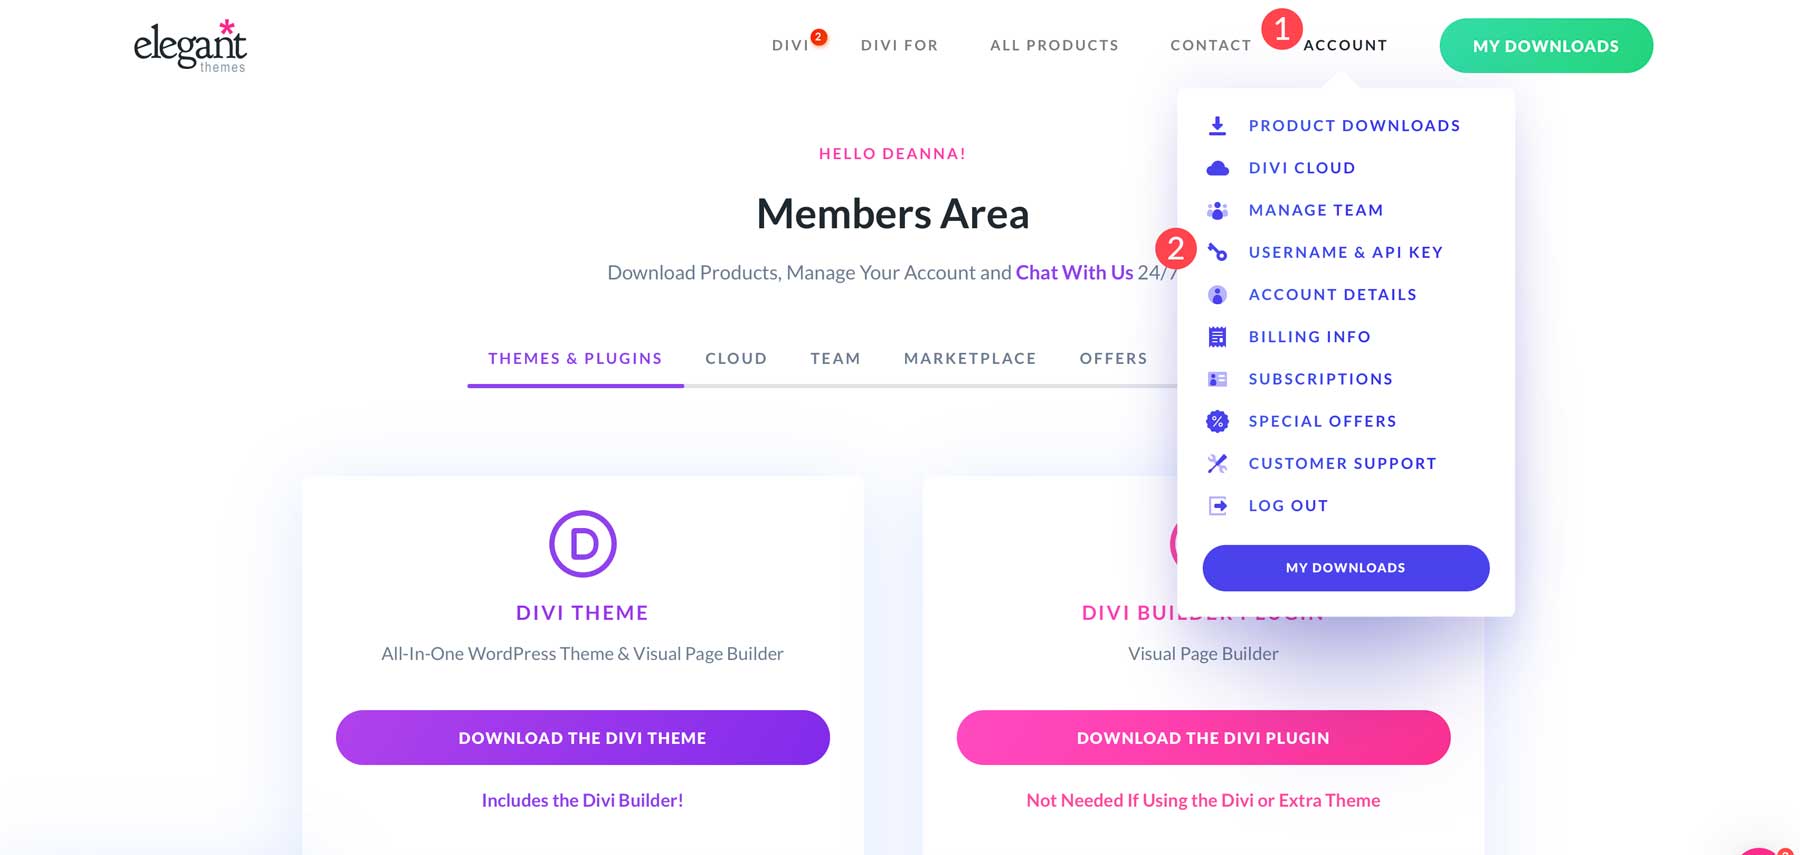
Once Divi is live, you’ll want to create an API Key for the installation. The API Key grants access to your Divi products, updates, and layout packs. Log in to your Elegant Themes account, click the Account tab (1), and select Username and API Key from the dropdown menu (2).
Next, copy your username (1) and paste it in a note (you’ll need this in the next section), and click the Generate New API Key button (2).
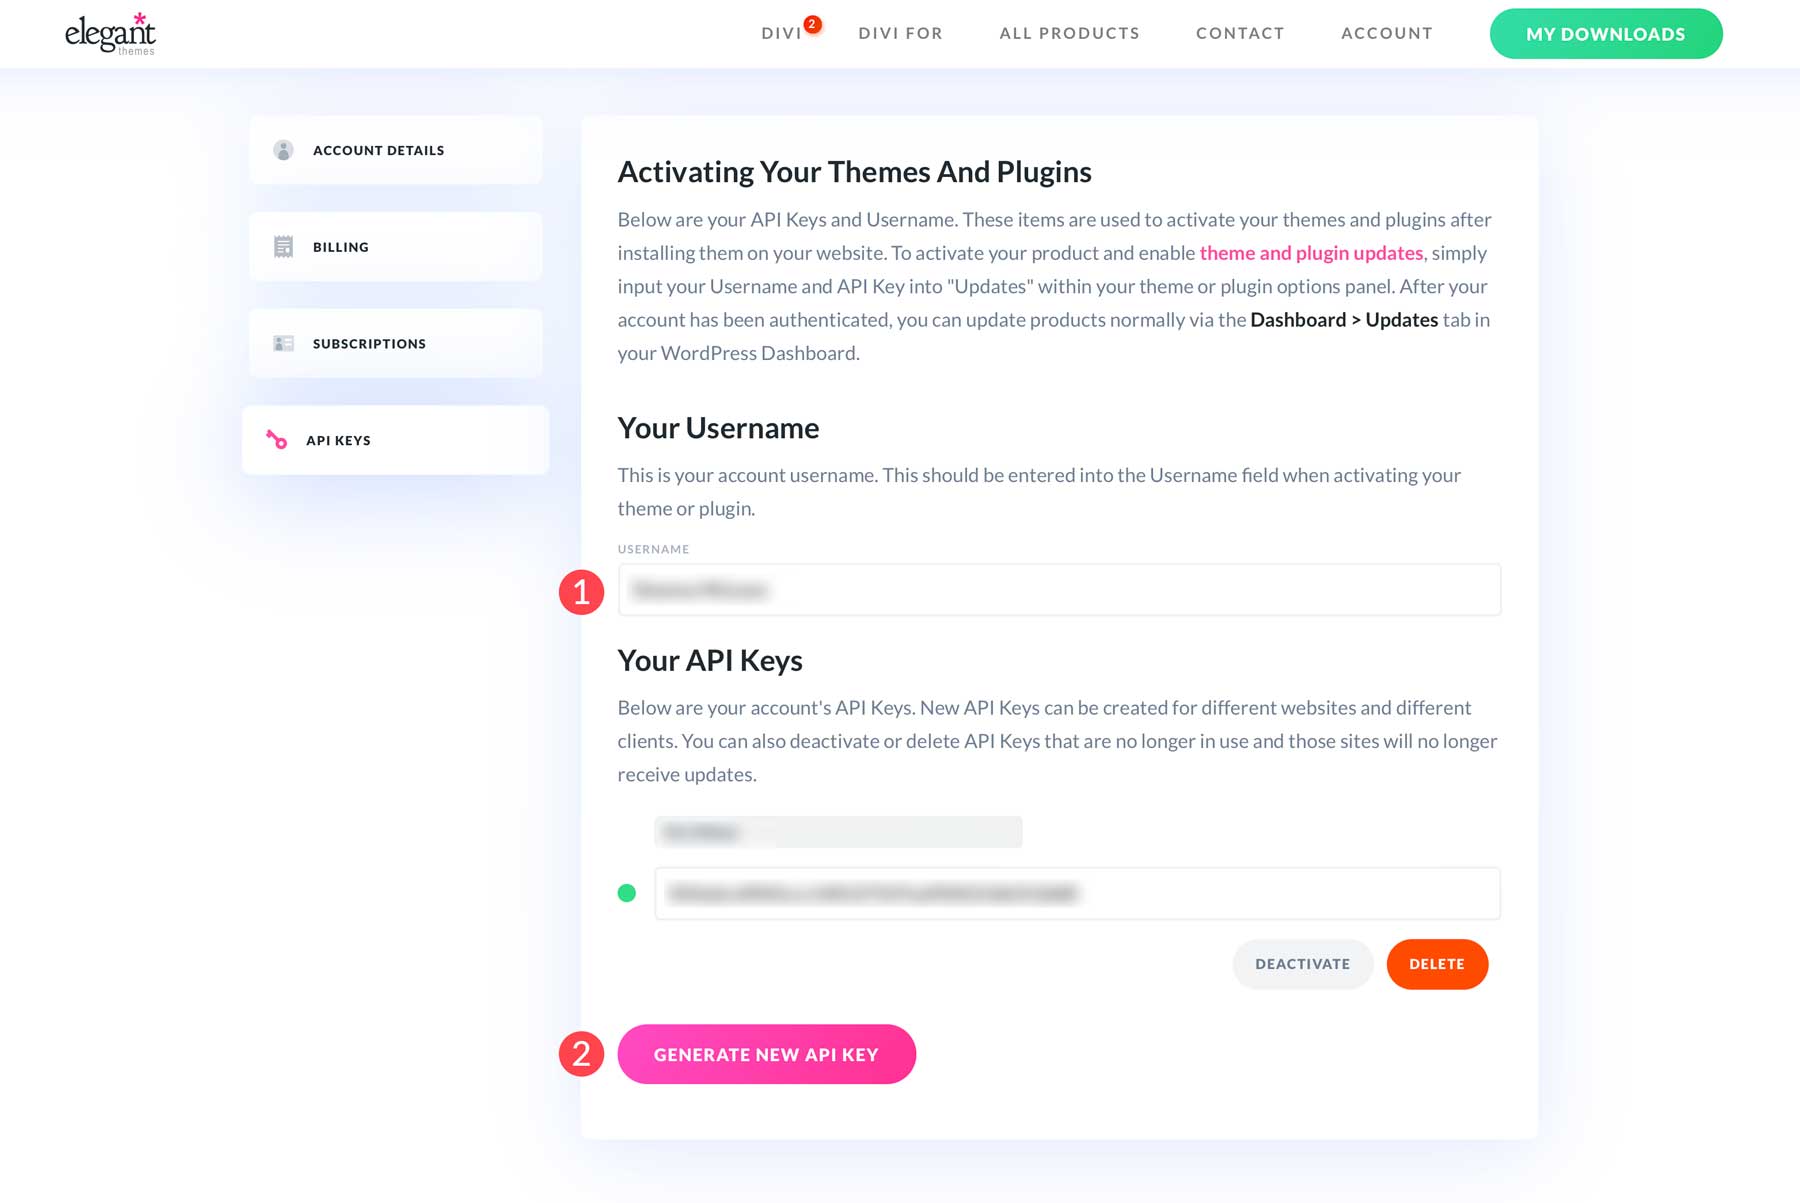
Copy and paste the API Key into the note with your username.
Step Two: Add Content and Pages
Now that your theme is installed and activated, we’ll create our pages. We’ll create a home, about, services, blog, and contact page for our site. This is a basic setup for most starter sites. We won’t add any content; we’ll just set up the page structure to import a Divi layout in the next step.
Creating your first page is simple. Navigate to All Pages (1) and then click Add New Page (2) in the WordPress dashboard.

Next, give your page a title (1) and click publish (2) to create the page.
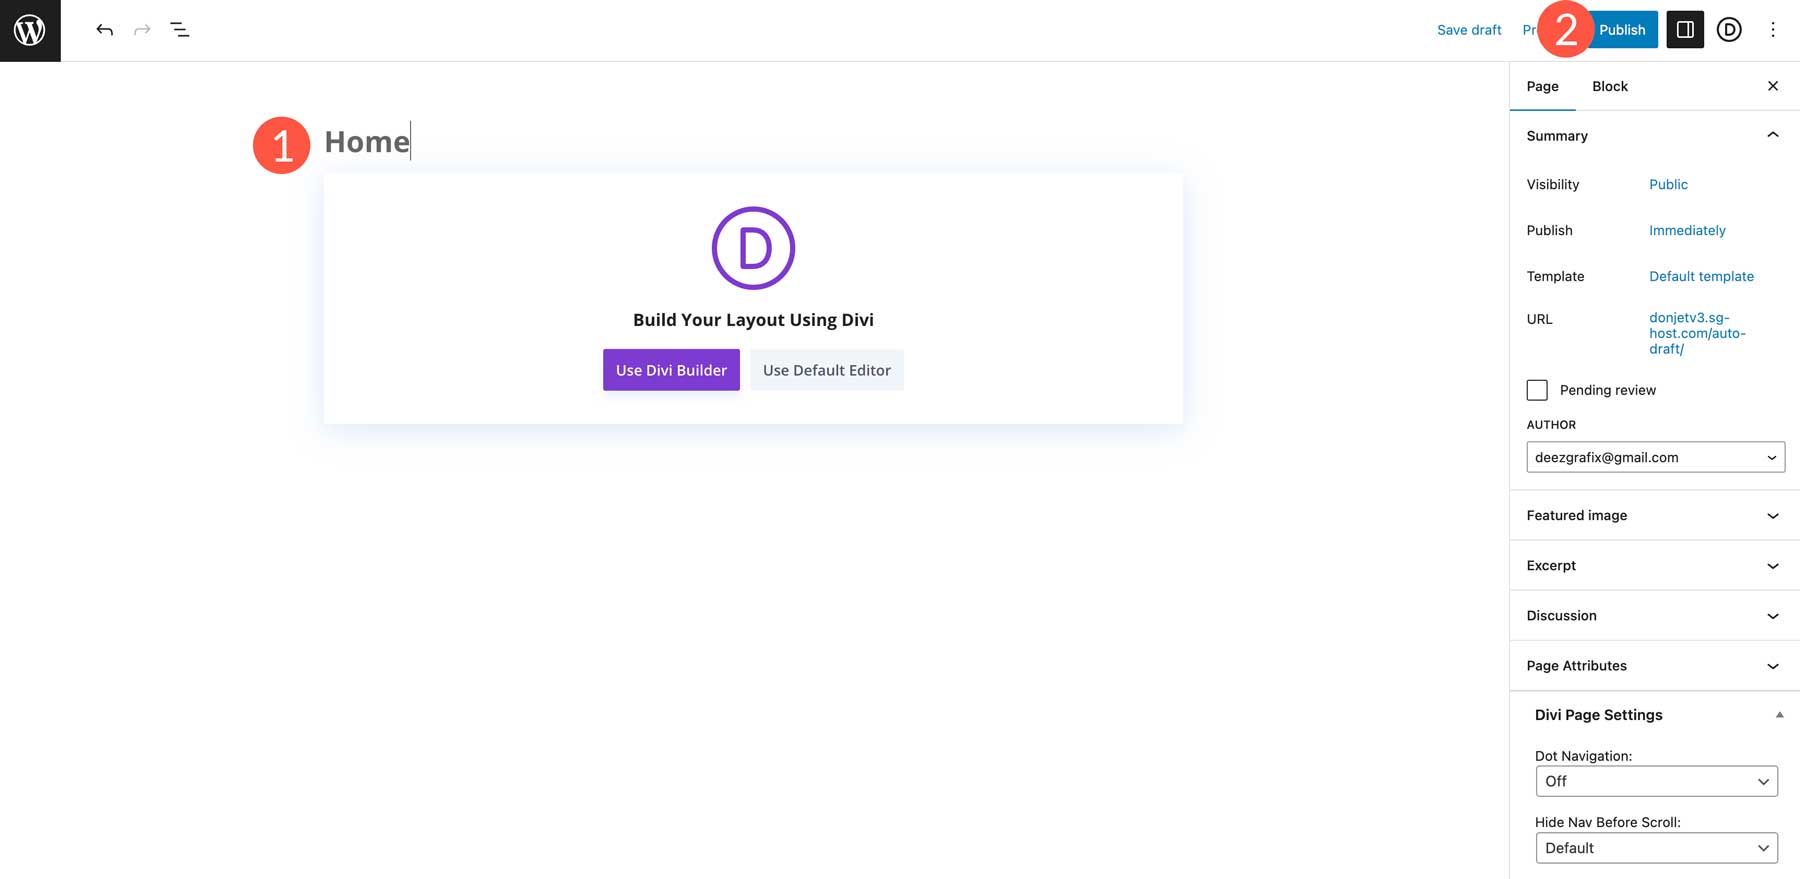
Click the WordPress logo at the top left of the page to return to the pages section in WordPress.

To add more pages, repeat the process above until all your pages are created.
Step Three: Choose a Pre-Made Layout & Or Build One with AI
As previously mentioned, Divi comes with nearly 2600 individual page layouts, so making your site unique is incredibly easy. Divi offers layout packs for every industry, including Business, Fashion & Beauty, Food & Drink, and more. They can be loaded with a few clicks into Divi’s Visual Builder. However, before installing a layout, you must connect your Divi installation to Elegant Themes using the API Key you generated in the last step.
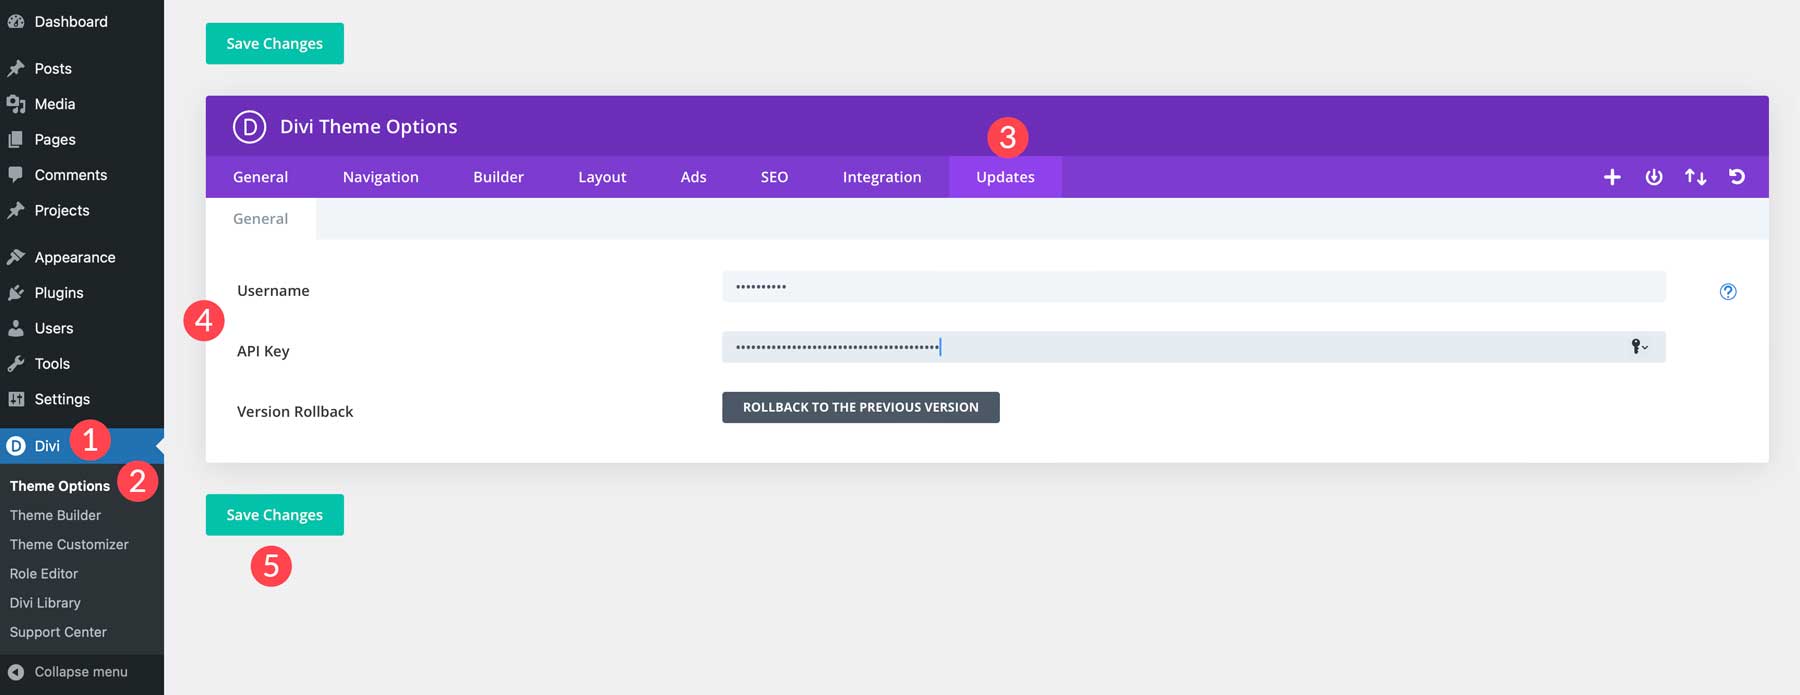
To do this, navigate to Divi (1), Theme Options (2), and then click the Updates tab (3). Enter the username and API Key you generated (4). Finally, click the Save Changes button (5) to activate your API Key.
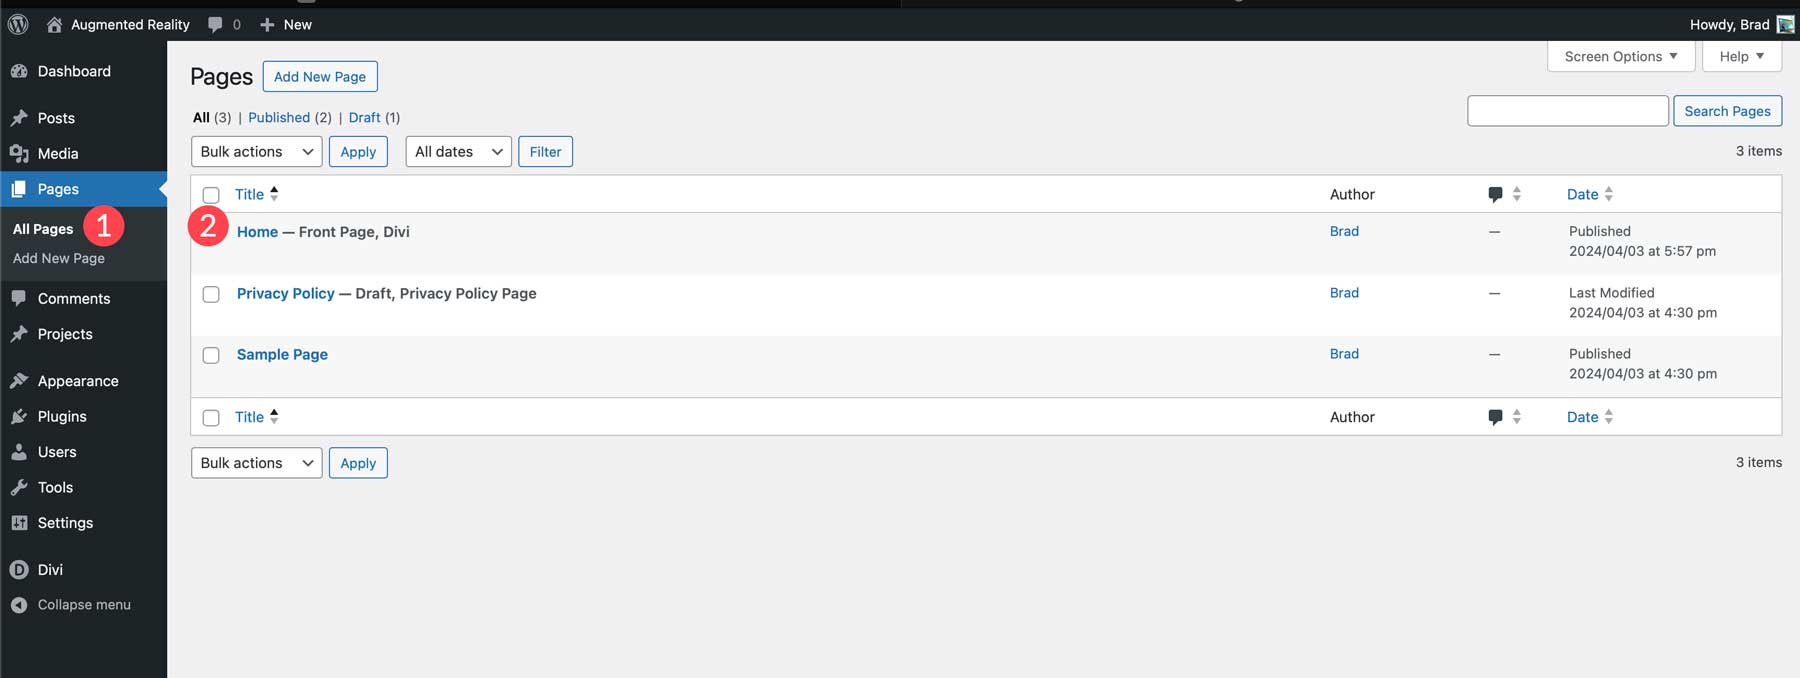
With your API Key activated, you can install a layout to our home page. Navigate to All Pages (1) and then click on the home page (2) to edit it.
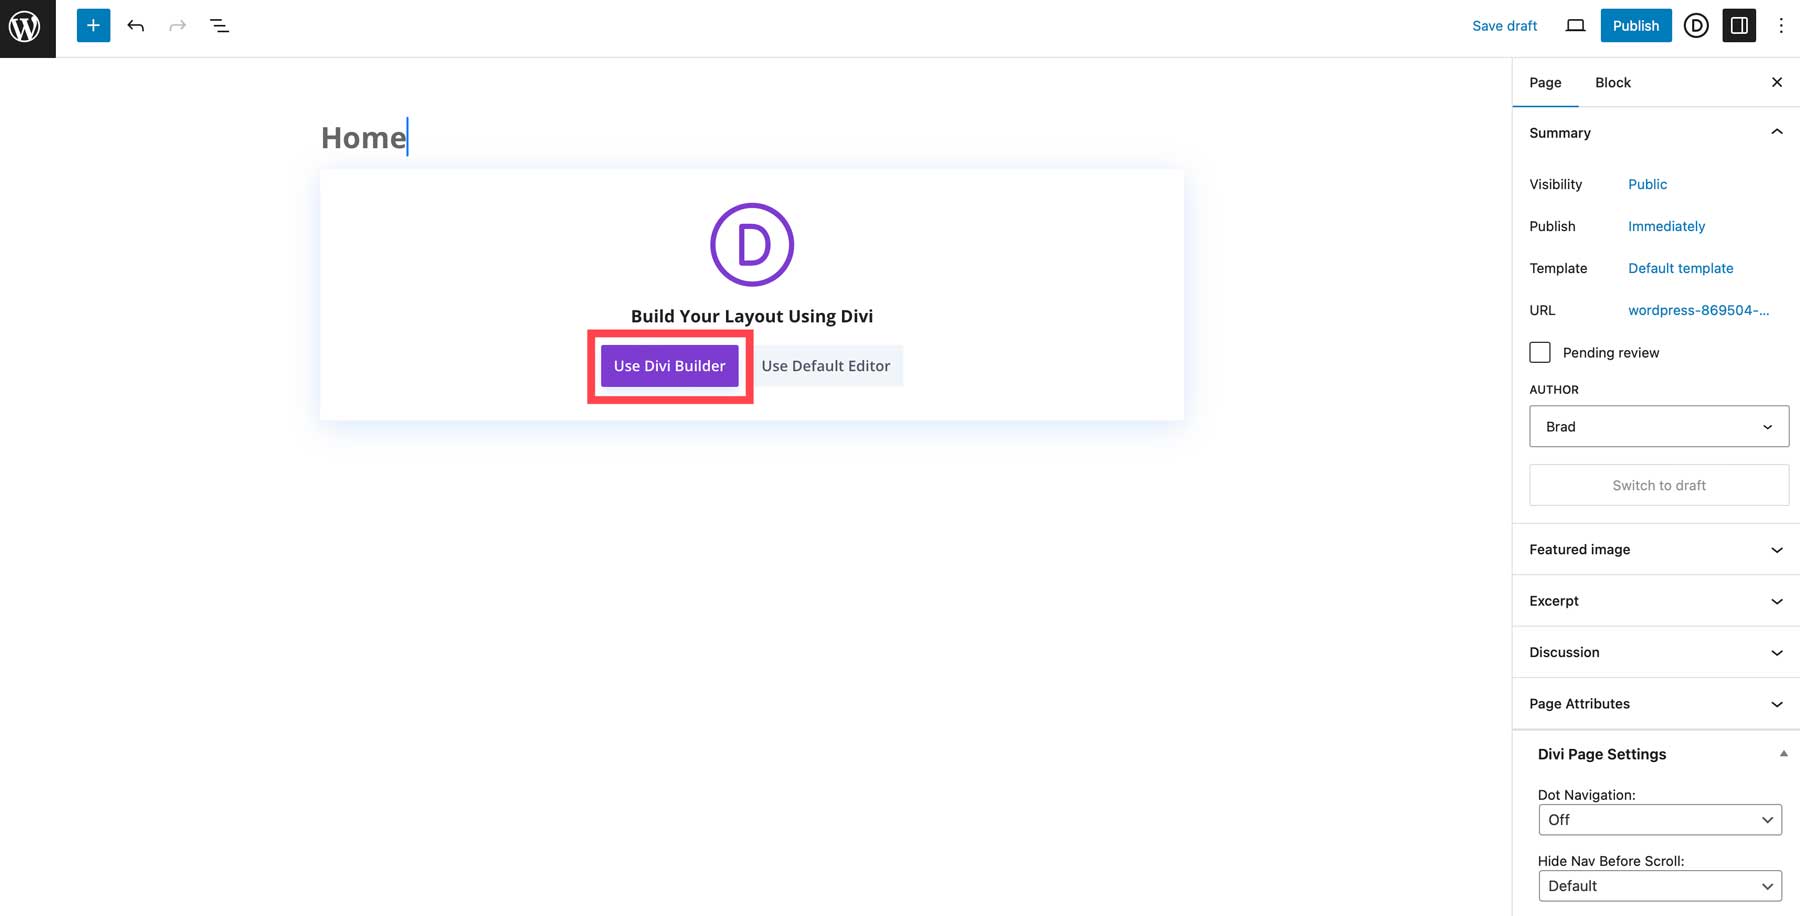
Click the Use Divi Builder button to launch the Visual Builder.
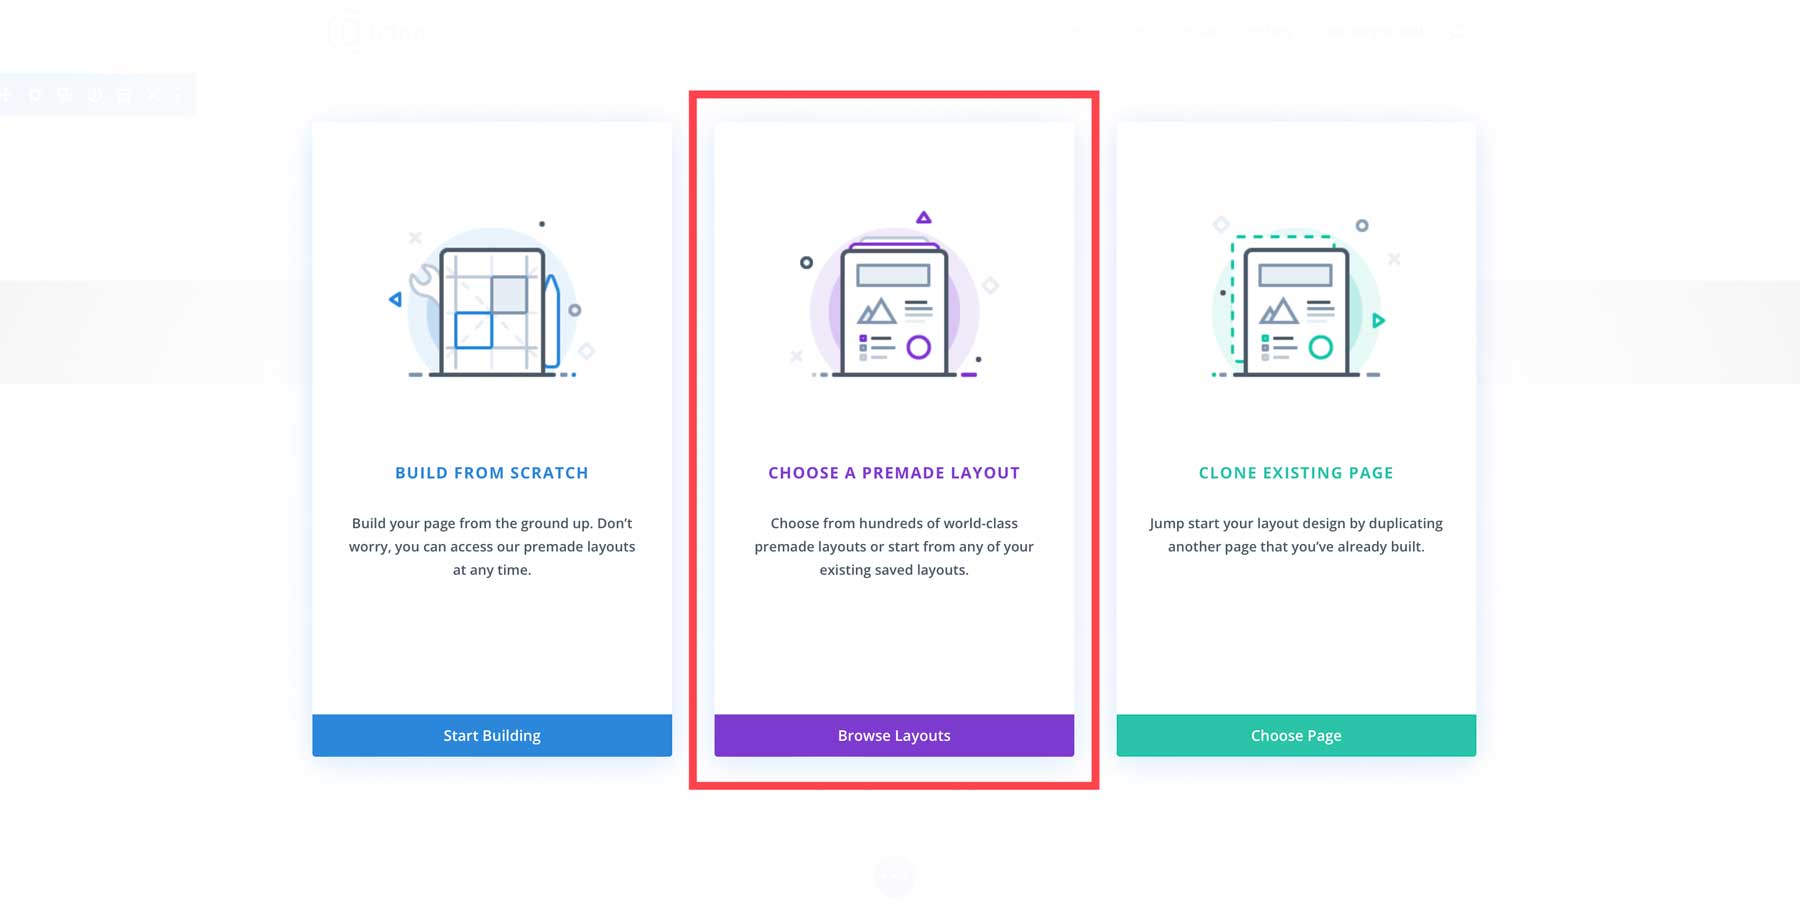
Next, click Choose a premade layout.
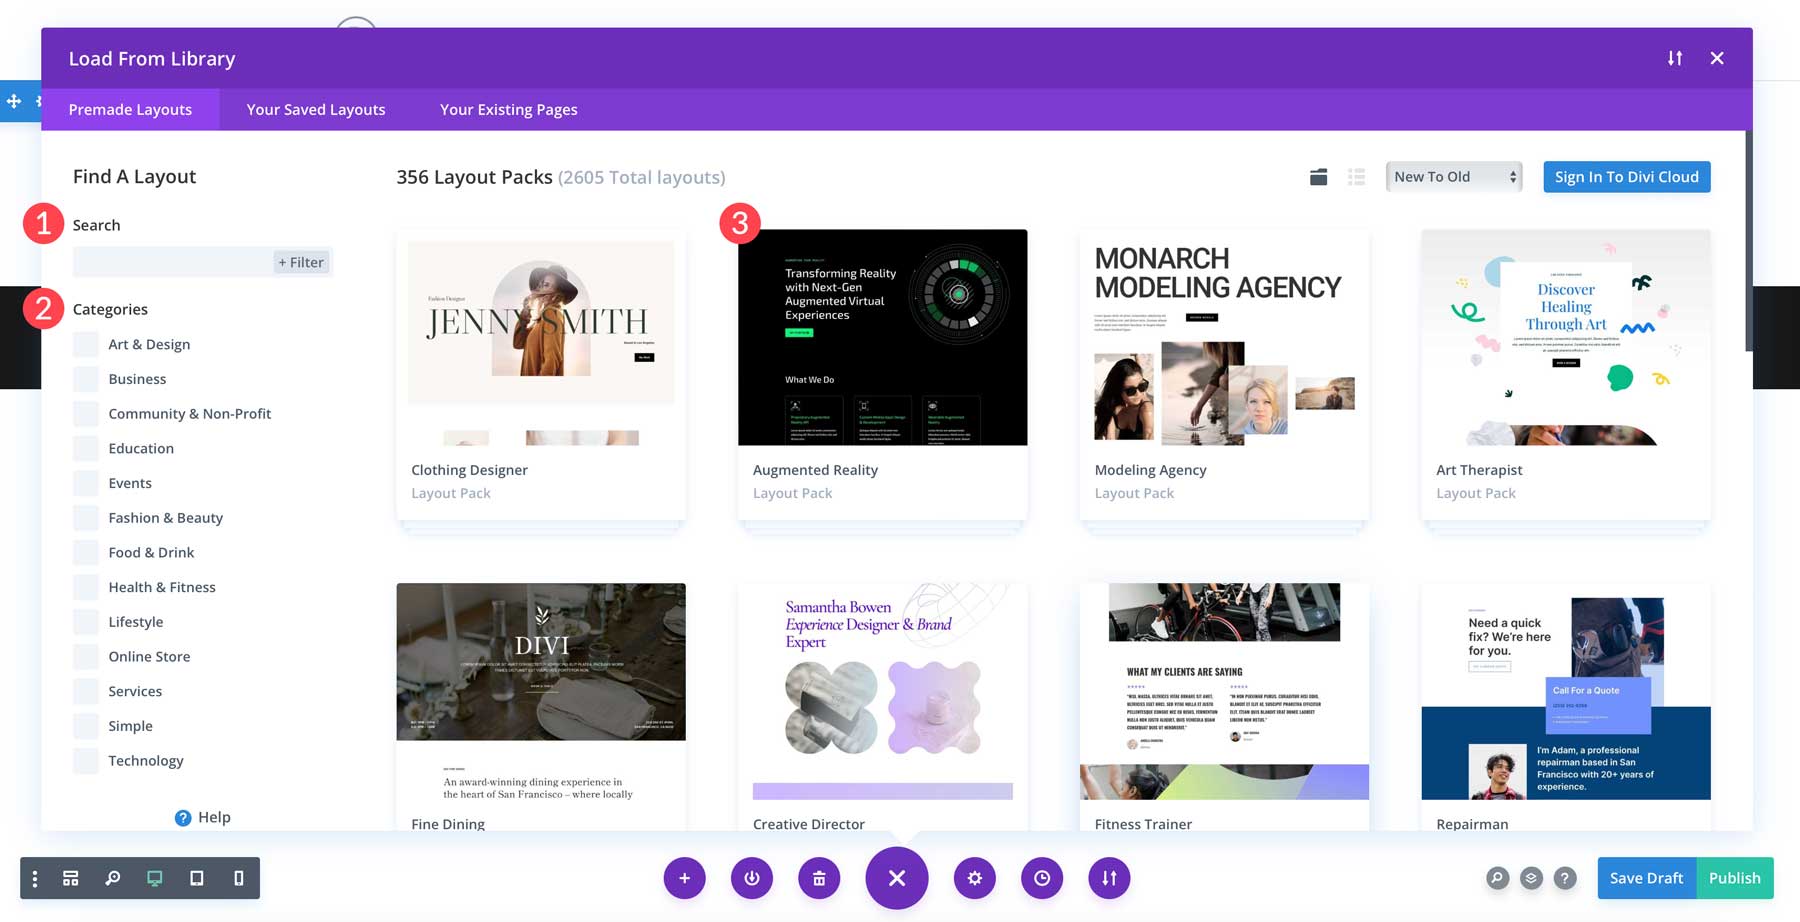
From there, you can search for a layout (1) or filter through categories (2) to find the one you want to install. You can click on an individual layout (3) to view all associated layouts with the pack. We’ll use the Augmented Reality Layout Pack for Divi.
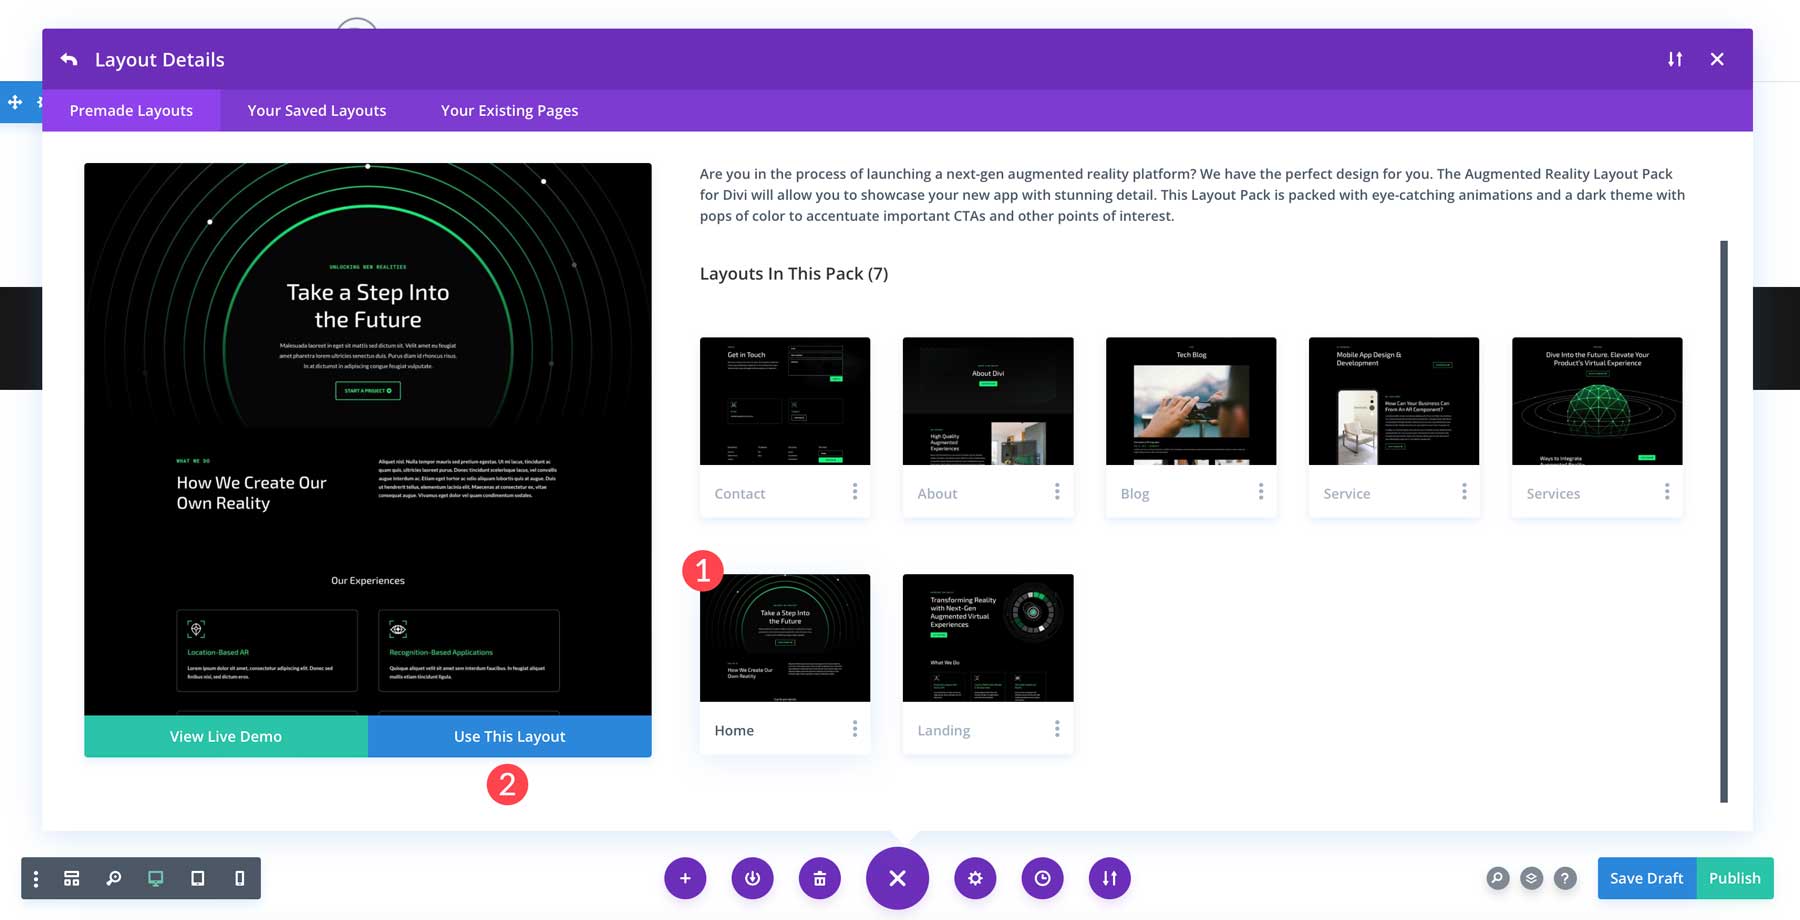
To install the home page layout, select it for a bigger preview, then click the use this layout button.
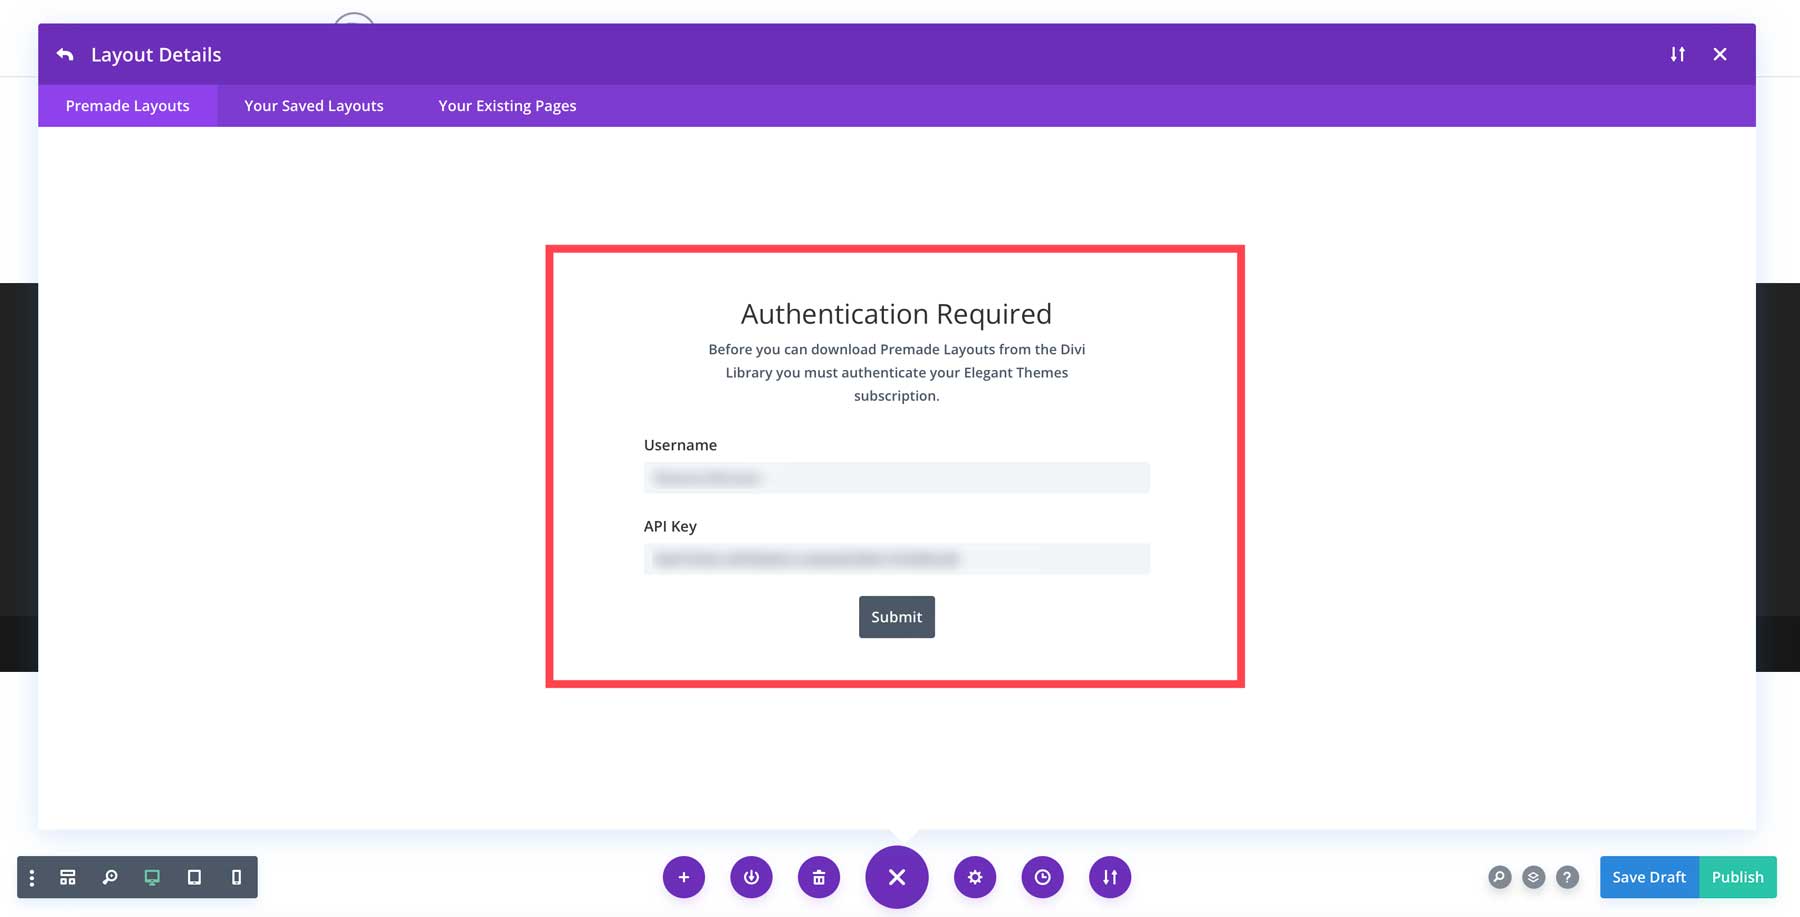
If you skipped adding your API Key previously, you can easily add it here before loading the layout.
Generate Your Page With Divi Layouts AI
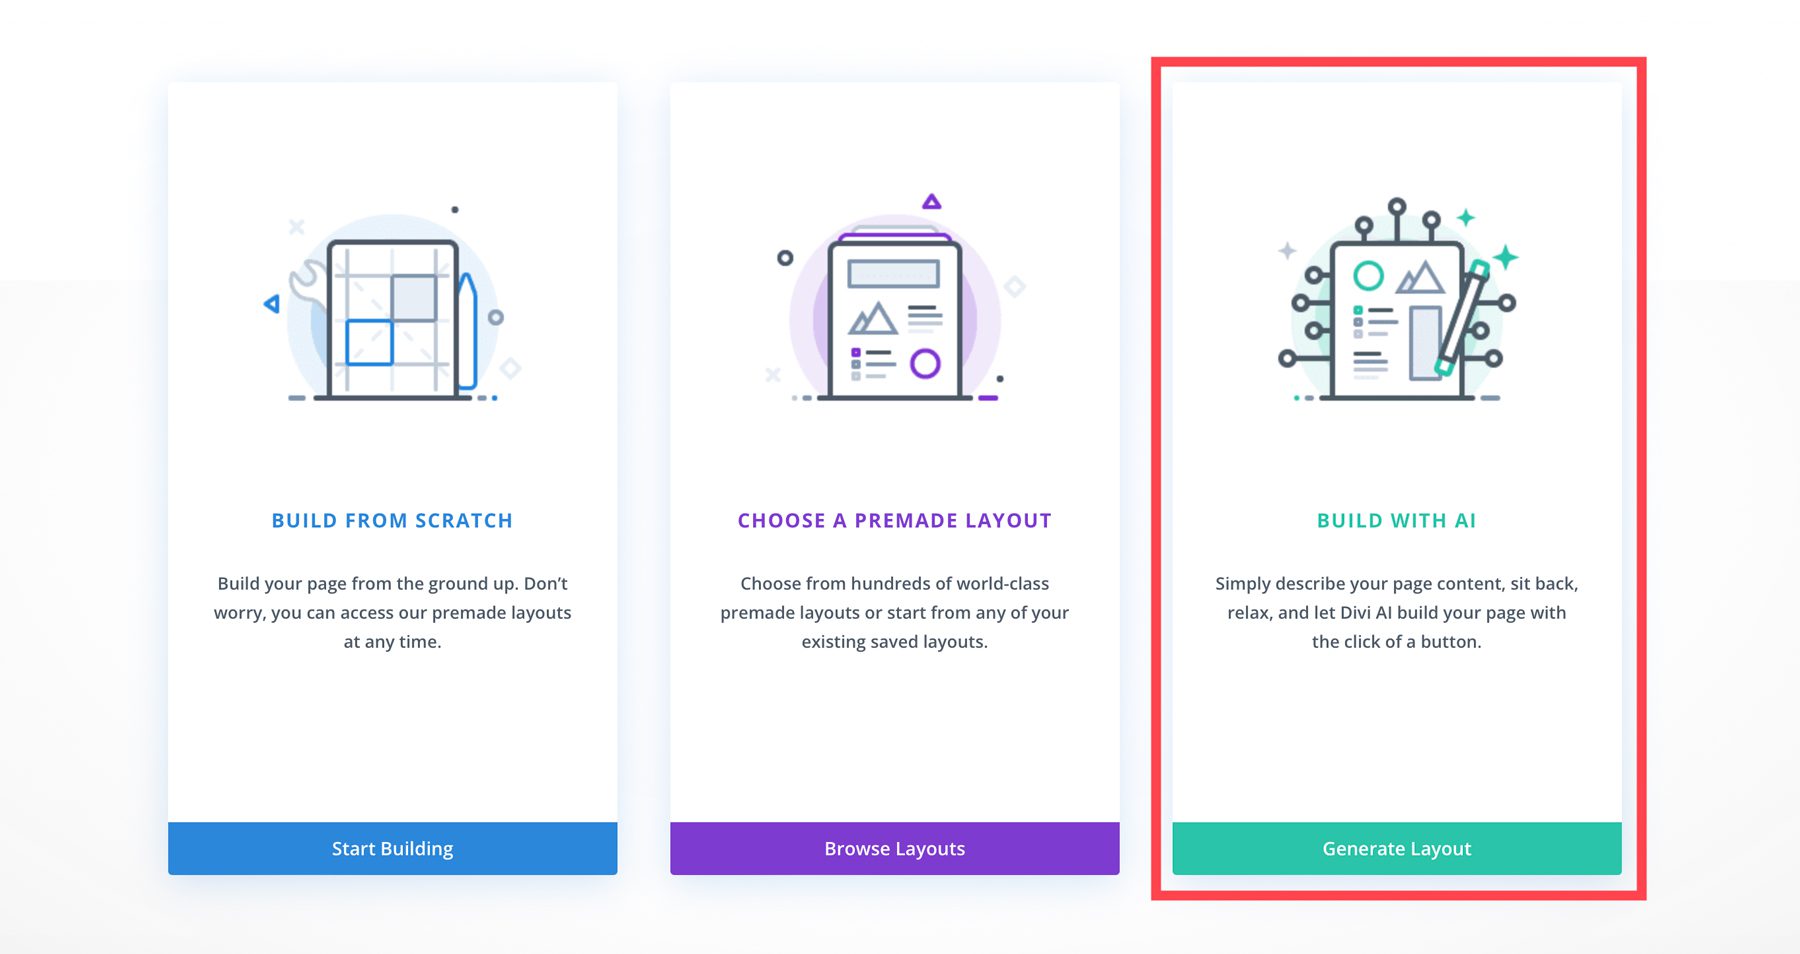
Rather than using one of Divi’s layout packs, you can generate a new page design using Divi Layouts AI. It’s a new feature that allows you to generate complete web page designs with a text prompt. To use Divi AI, you first need to purchase the add-on. It works within the Visual Builder, so you can use it the same as loading a layout pack design. After creating your first page and activating the Divi Builder, you’ll select Build With AI.
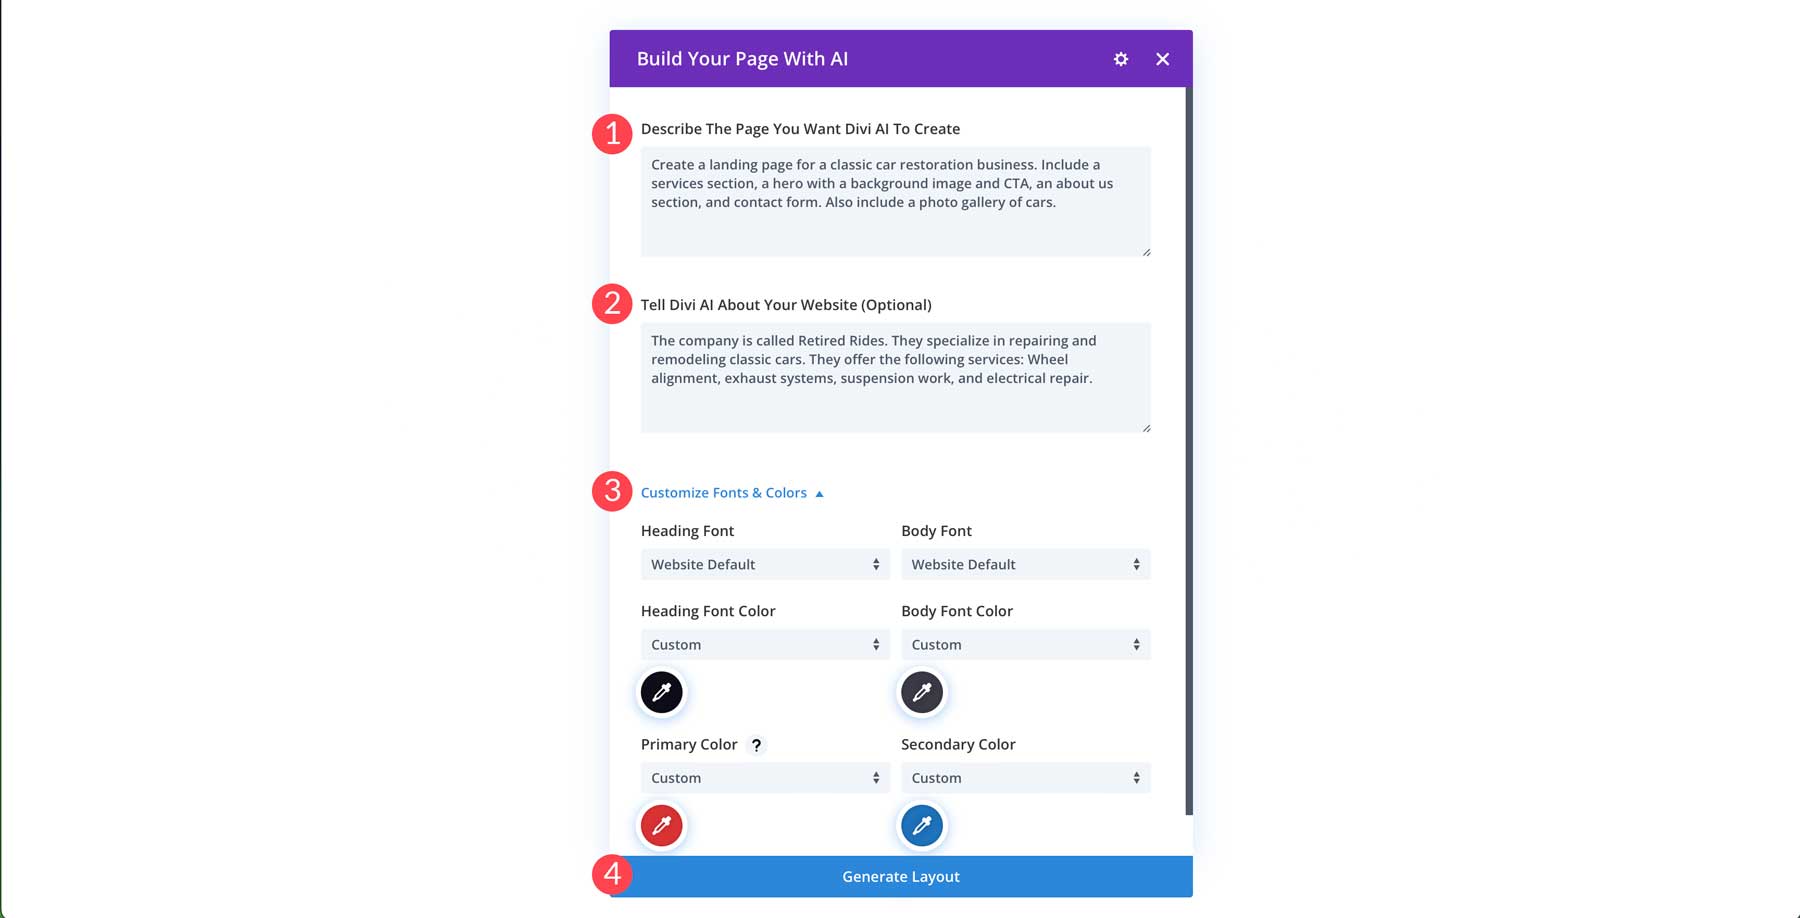
When the dialog box appears, you’ll enter a text prompt describing the type of page you wish to create (1). You can also add option information to provide Divi AI with more details (2). This can be the business name, its services, etc. Finally, Divi AI allows you to specify custom fonts, colors for the headline and body copy, and primary and secondary colors (3). Once you’ve entered all the information, click the Generate Layout button (4).
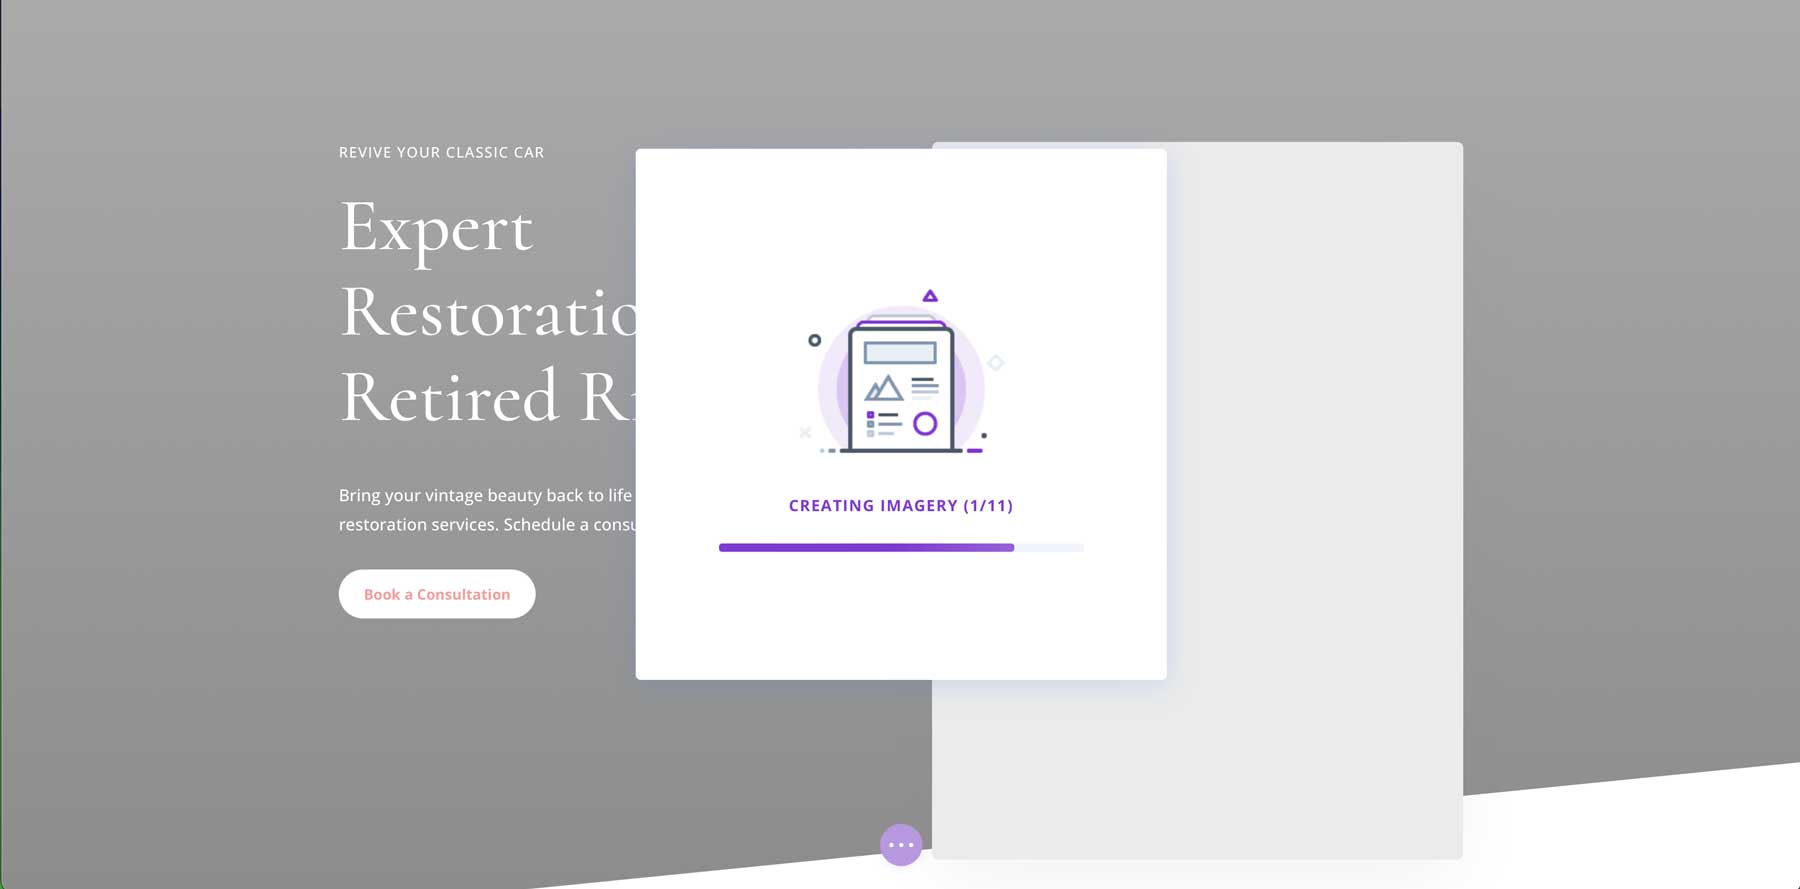
Divi AI will get to work to generate your web page. It will first apply the structure for your page, generate text, and create images.
Once completed, you can use the Visual Builder to add design modules, edit text and images with AI, change colors, and more.
Step Four: Customize Your Layout with Divi Builder
Once a layout is installed or generated, you can take steps to customize the design. Divi’s design prowess knows no boundaries, meaning you can design everything from choosing global fonts to adding custom colors to generating content with Divi AI right inside the Visual Builder. The great thing about Divi is that it’s simple, especially when using a premade layout.
With the Visual Builder activated, you can easily swap images, change out text, or even generate pictures, text, and CSS with Divi AI. Our layout packs are pretty robust, so you will only have to change a little in most cases. However, if you wish to add elements, it’s as easy as pie. Navigate to an area of the layout where you want to add a module and click the grey + symbol to add a new module.
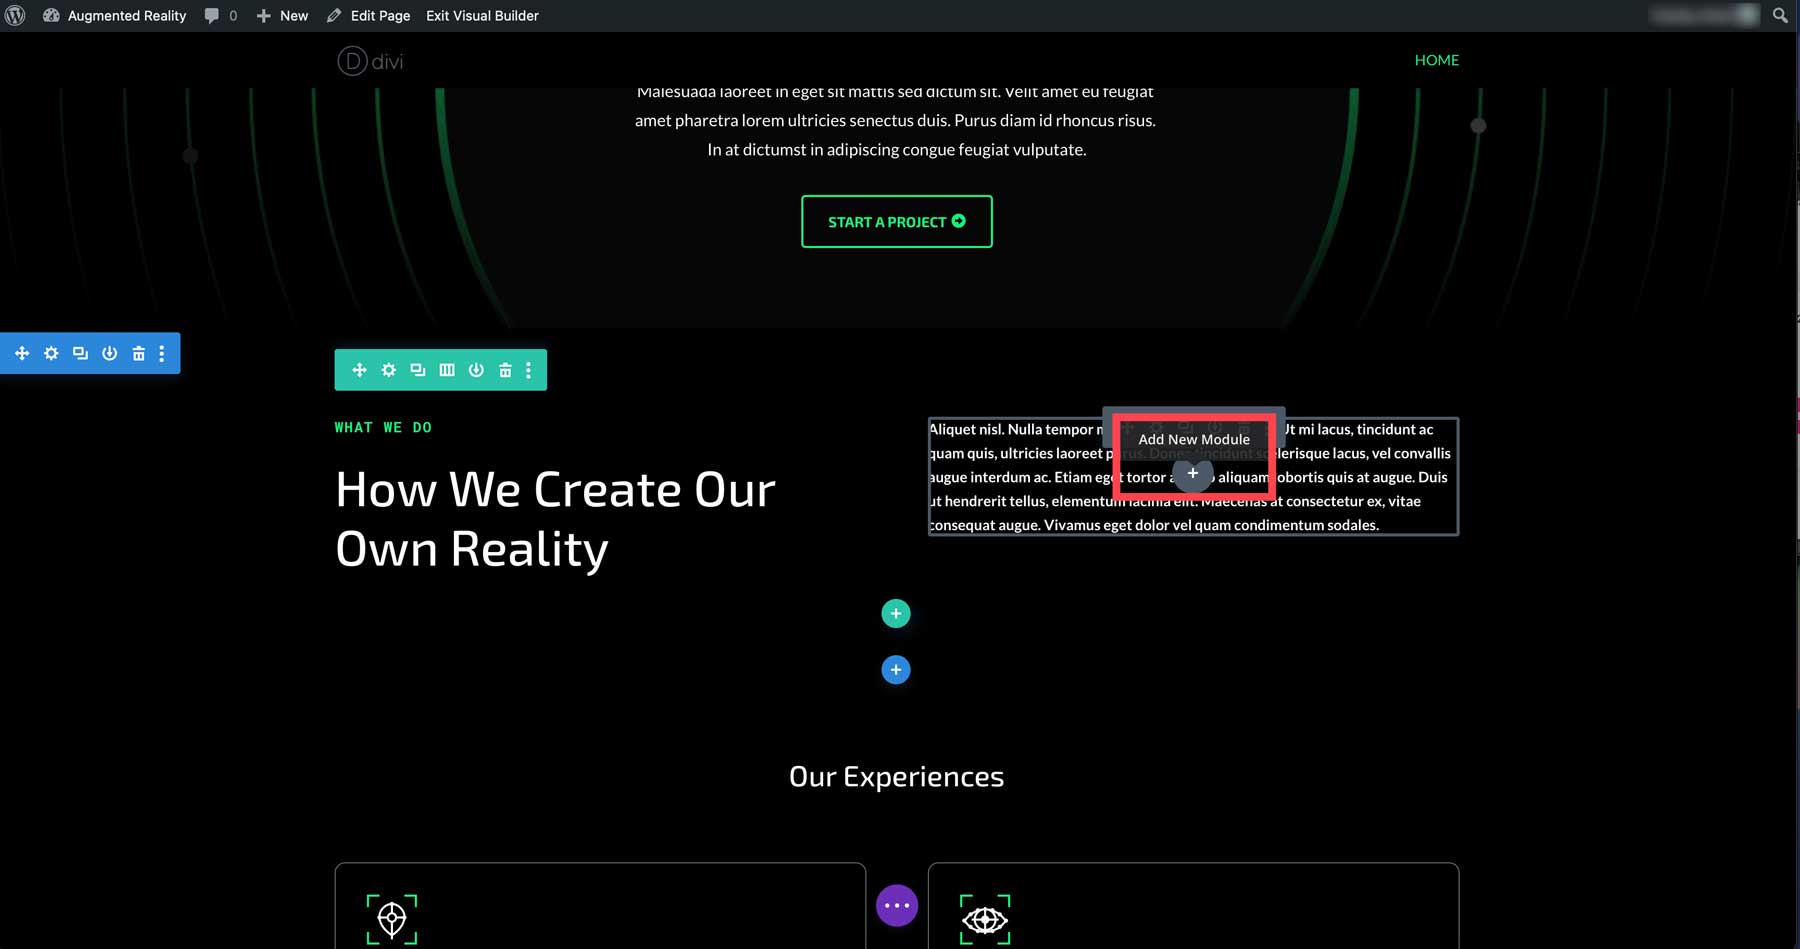
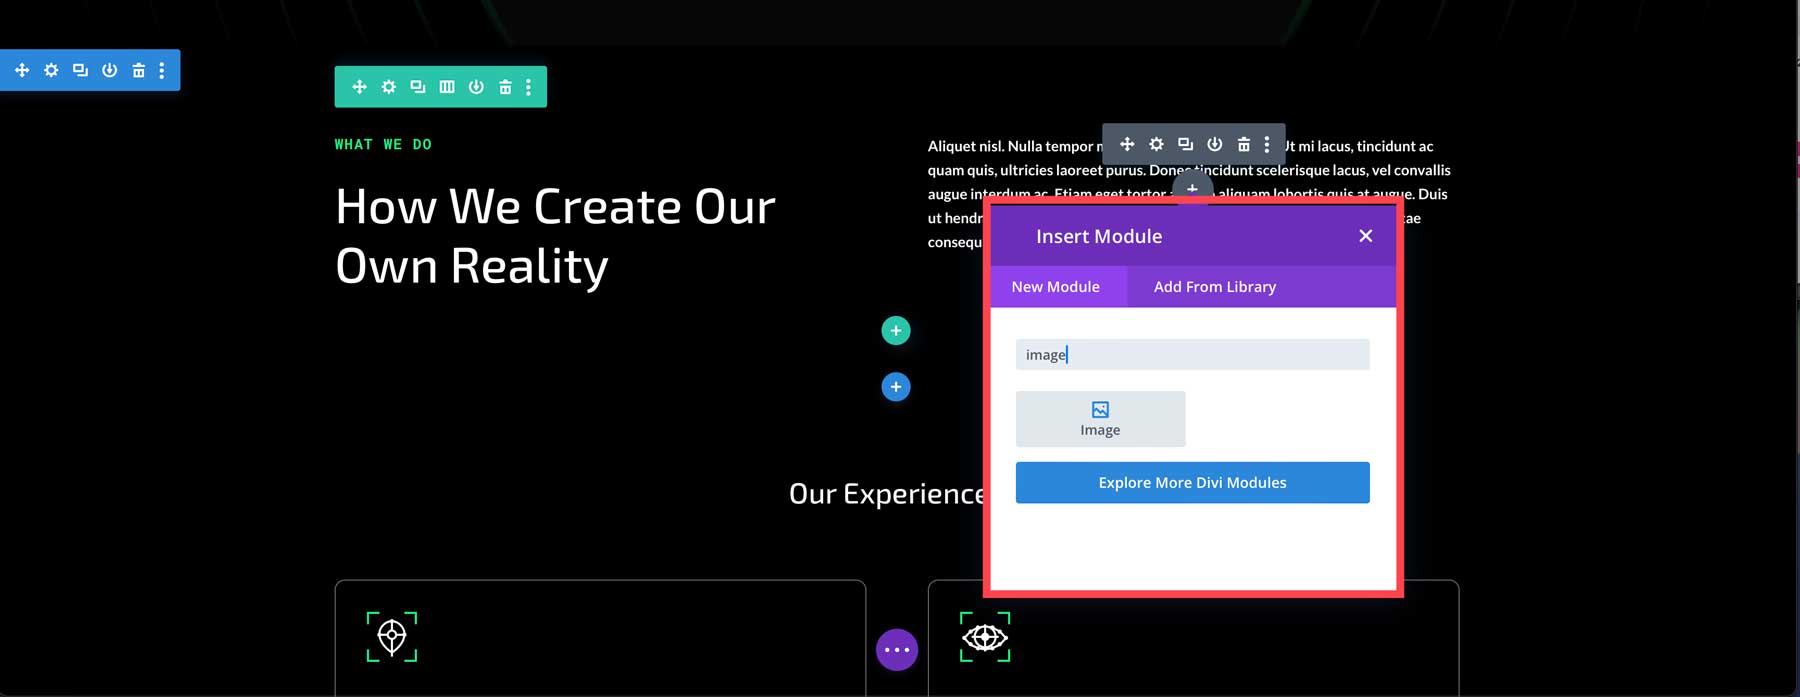
Clicking this icon brings up a list of over 200 design modules, including accordions, images, blurbs, pricing tables, and much more. Let’s add an image to our layout. With the insert module dialog box active, scroll to locate the image module or type image into the search bar. To insert the image module, click on it to add it to the page.
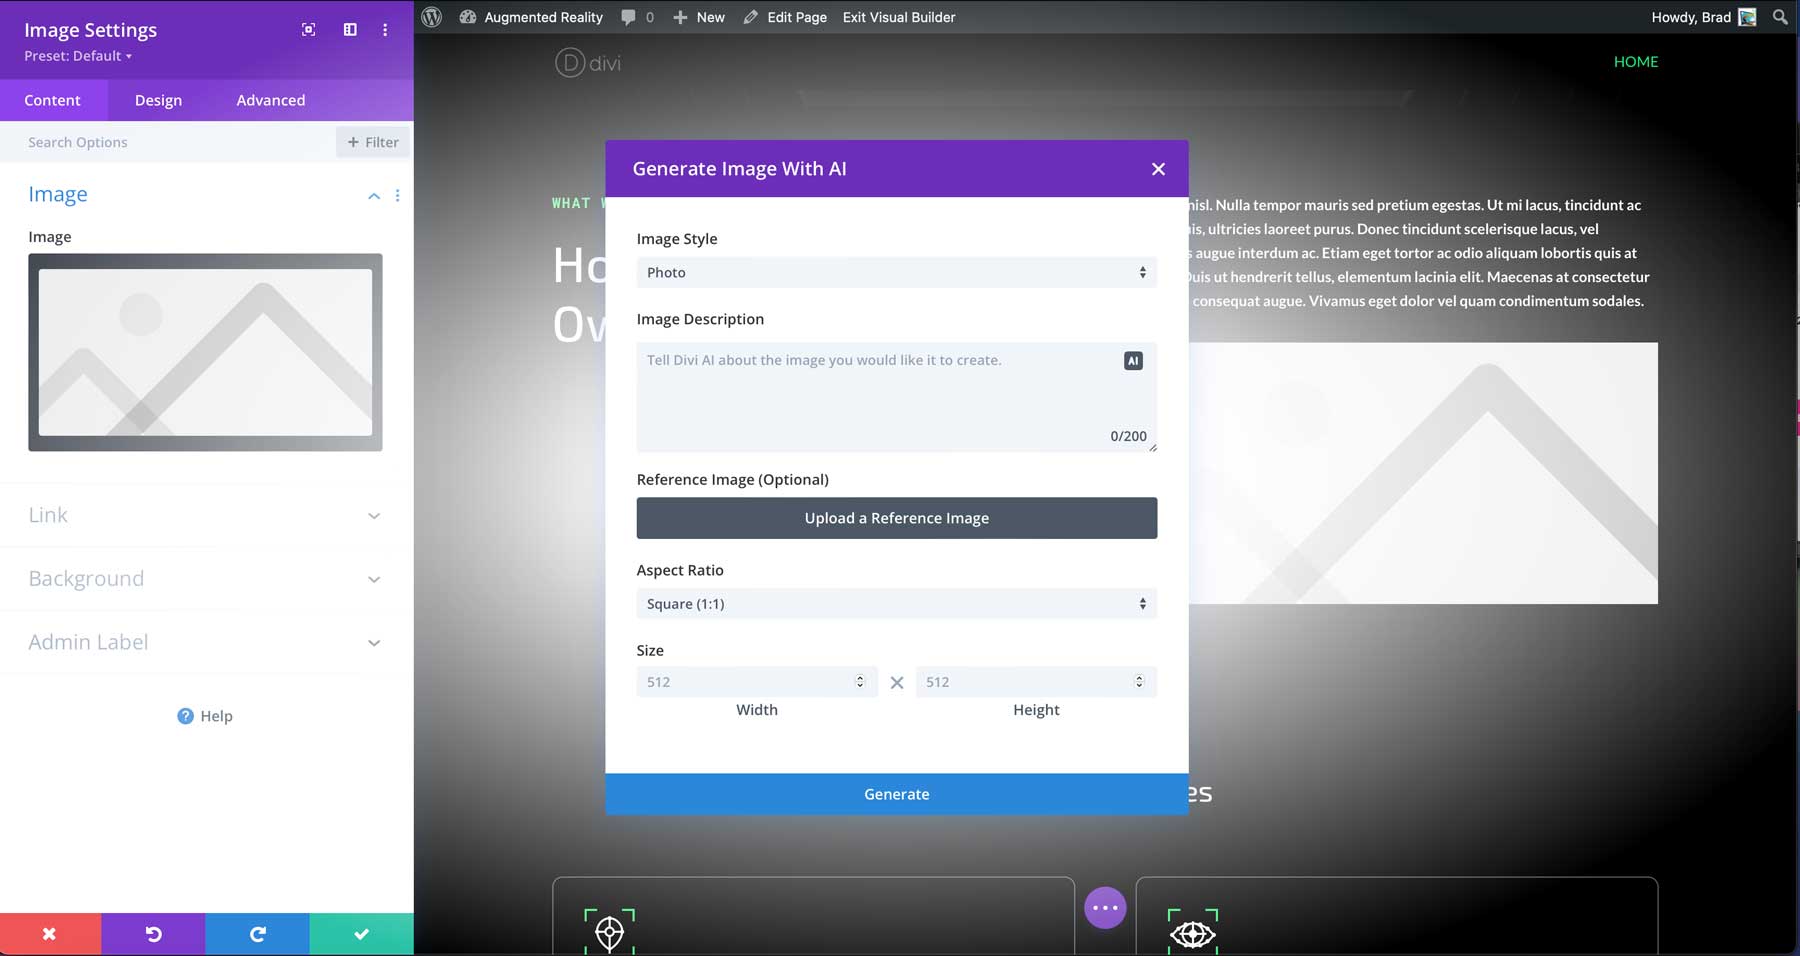
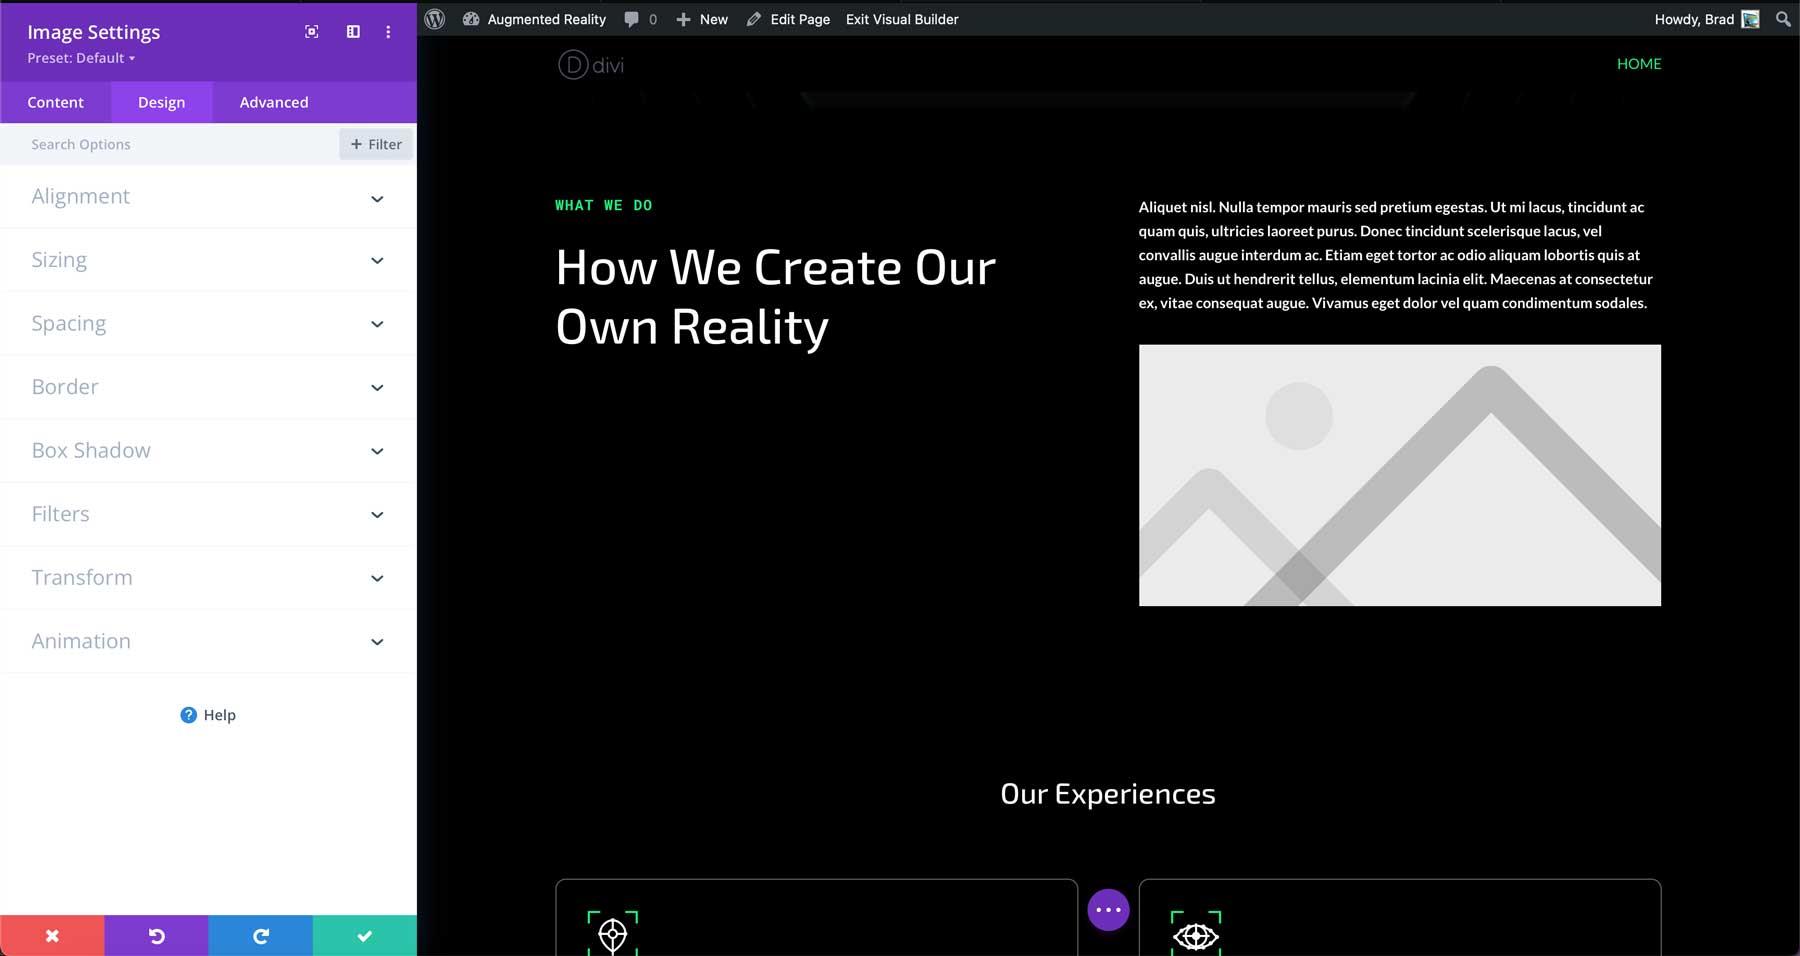
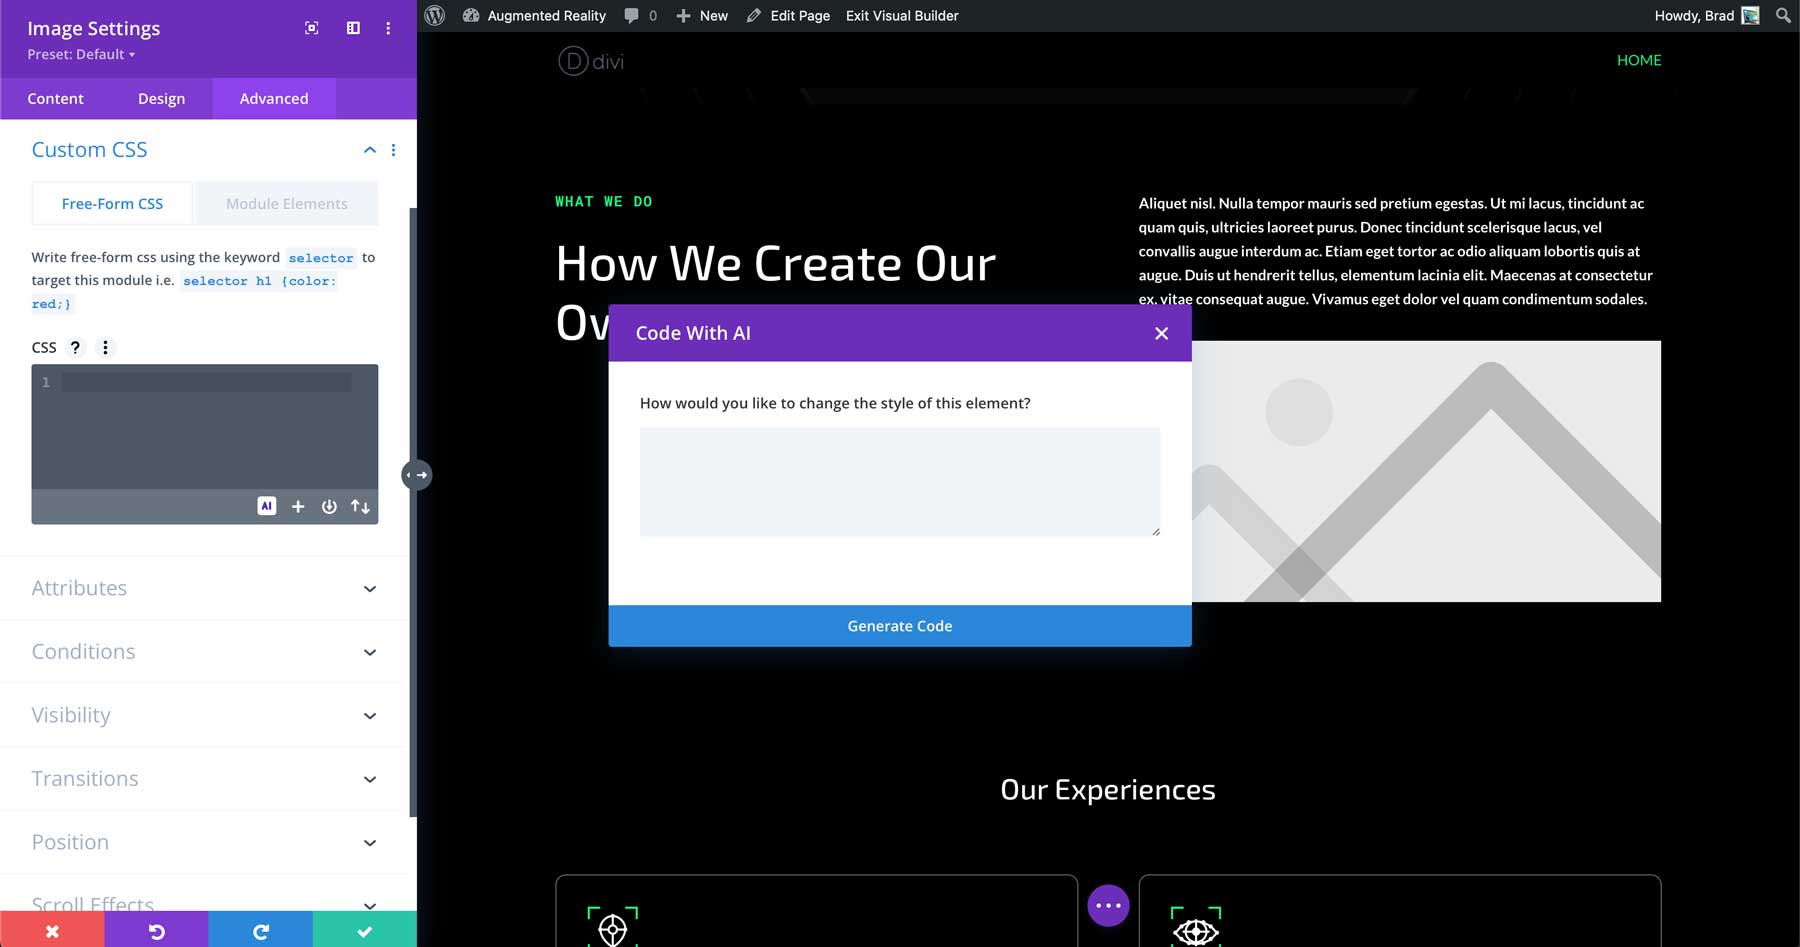
This brings up the module’s settings. All Divi modules have three tabs for customization, including content, design, and advanced.
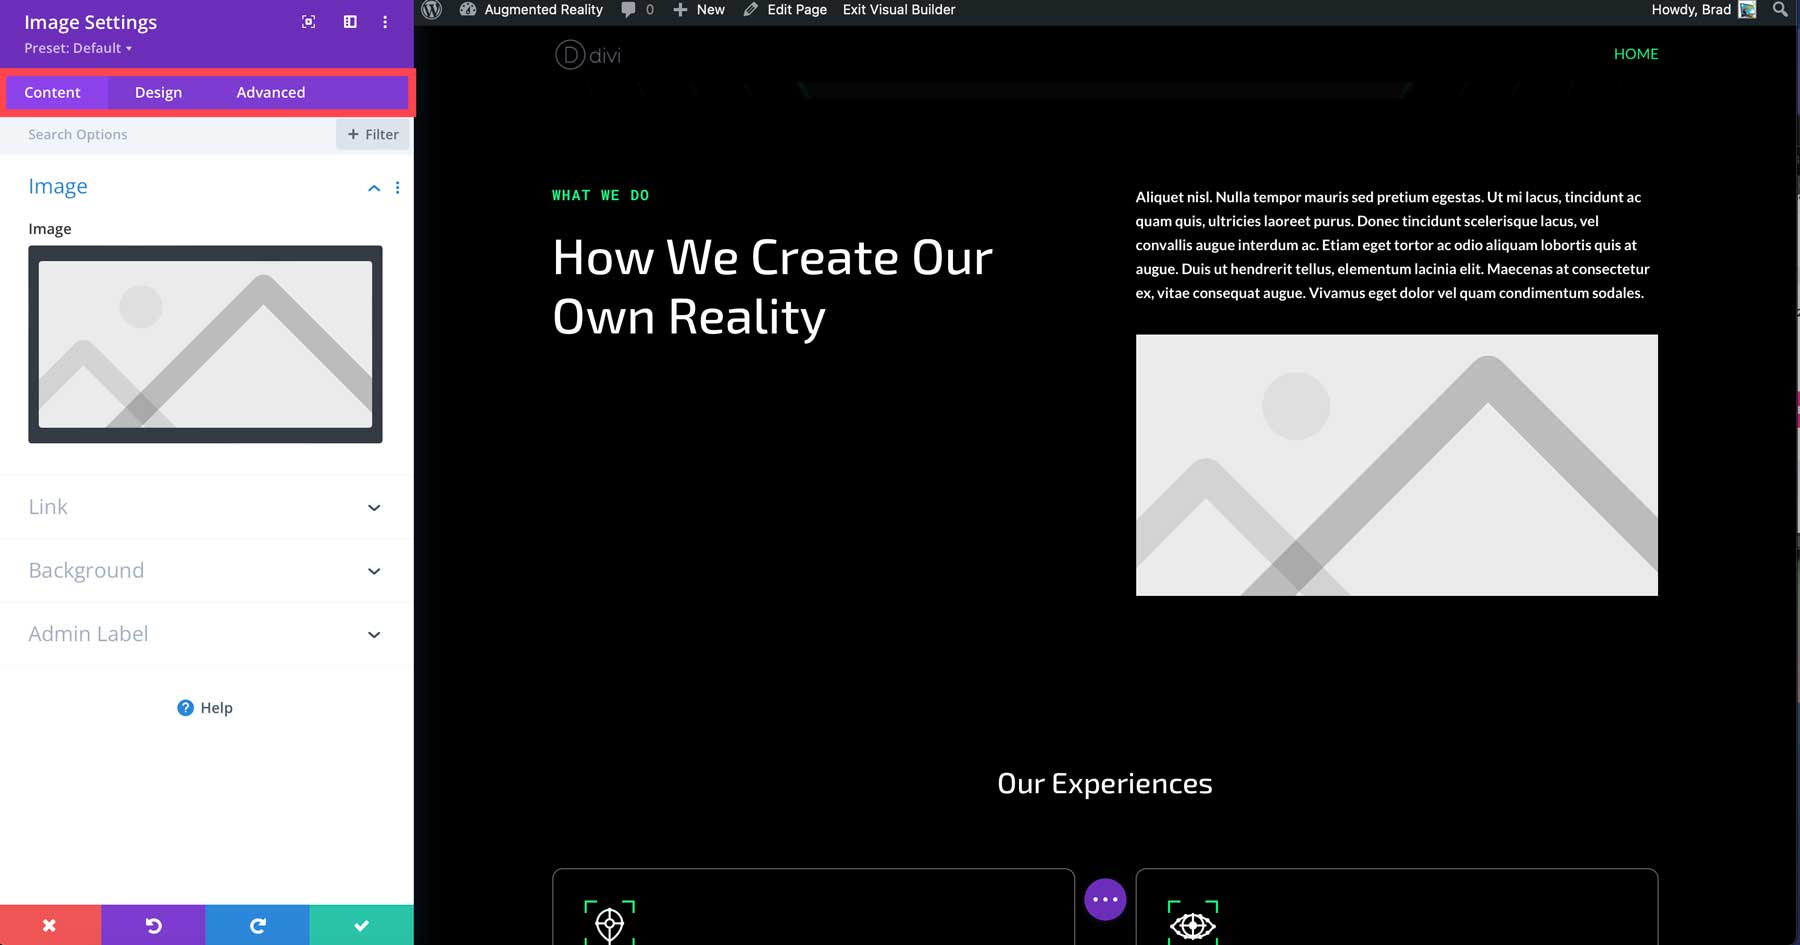
The content tab allows you to add an image from the media library or generate one with Divi AI. You can choose from different image styles and sizes and describe the image you want to create with a text prompt.
The design tab is where you can customize your modules. Although each Divi module has its own design settings, they remain relatively the same.
Finally, the advanced tab allows you to add custom CSS with Divi AI, set display conditions, adjust visibility on different devices, add transitions, and more.
Using Divi Layout Packs Are Perfect For Getting Your Site Up Fast
To simplify things, you can enhance Divi’s built-in design power by utilizing Divi’s companion products, such as Divi AI, Divi Cloud, and Divi VIP. As mentioned, you can get Divi Pro, an all-in-one solution for freelancers and agencies who want a seamless experience, whether generating images, getting VIP support when you next a hand, or saving your favorite layouts in the cloud.
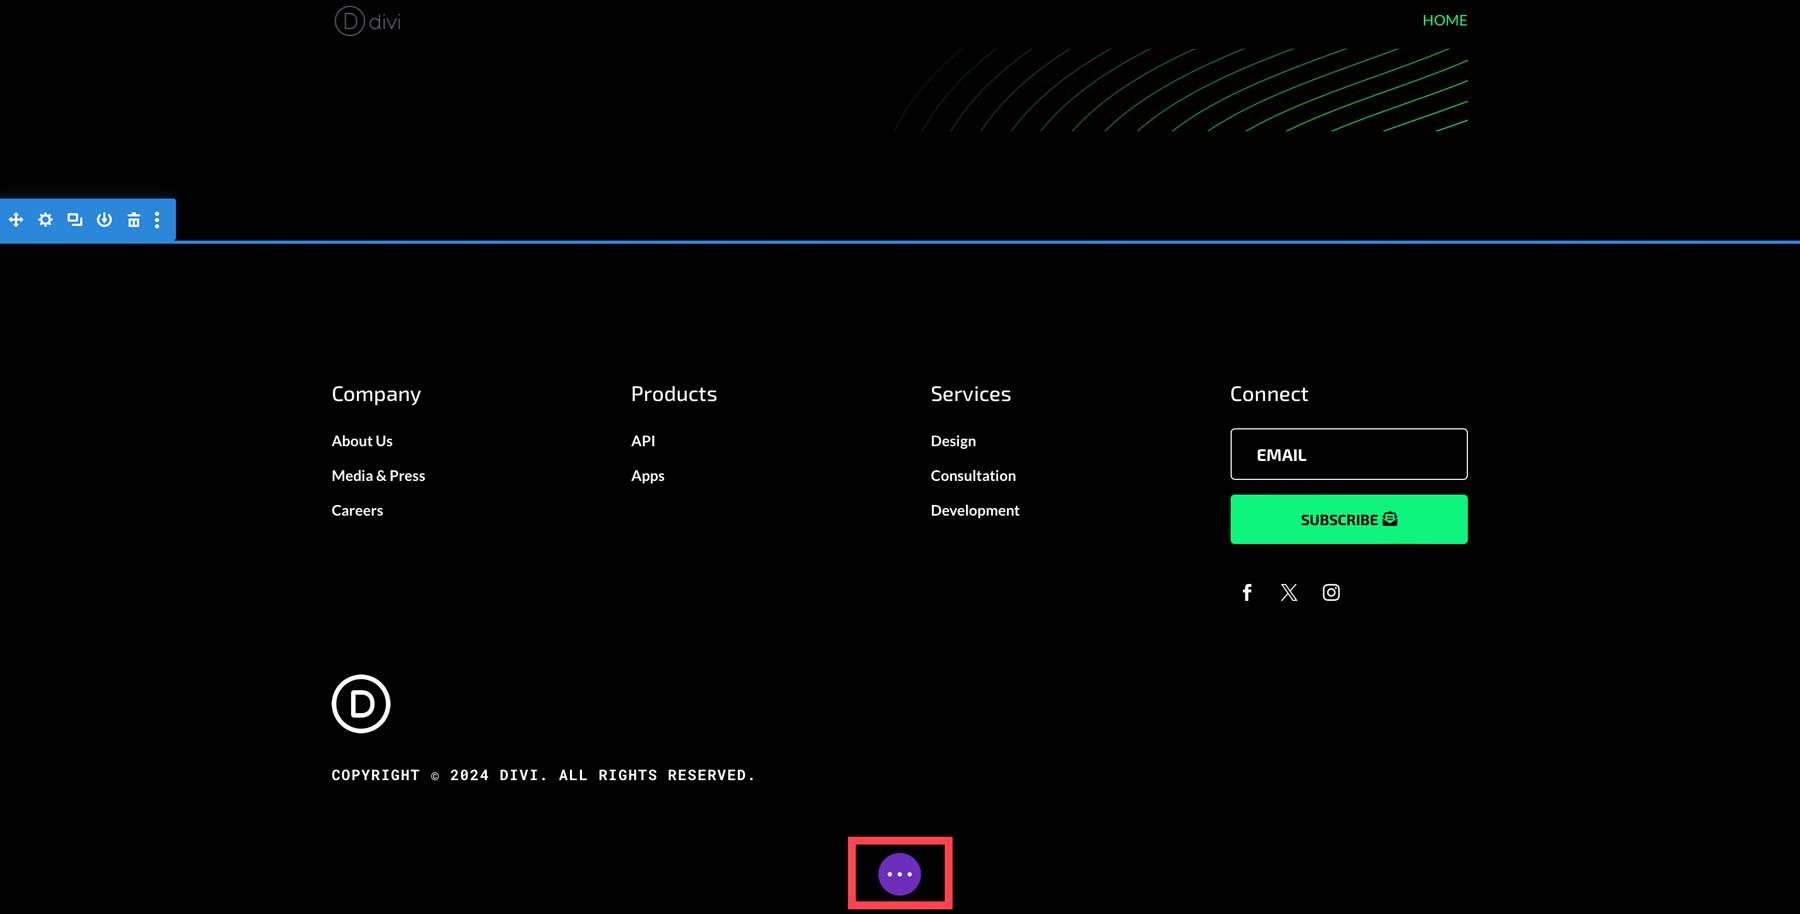
Once you have edited all text modules and replaced stock images and videos, you can save your page by clicking the purple ellipsis button at the bottom center of the page.
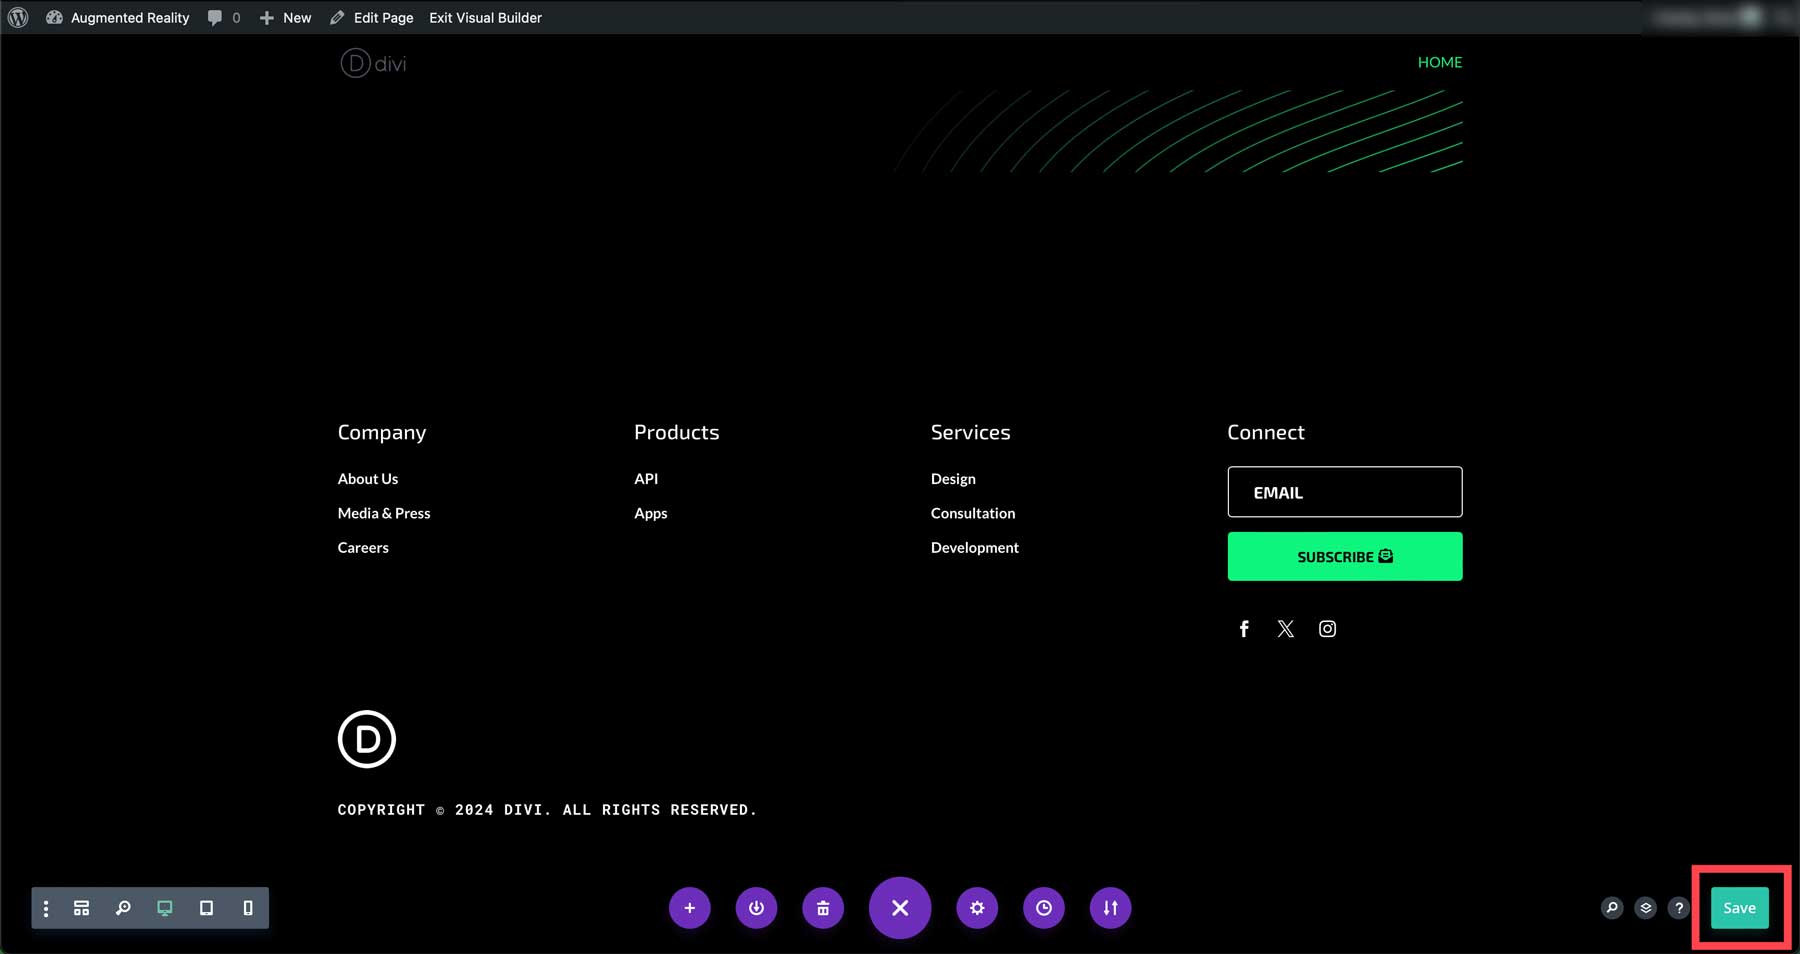
From there, click the green save button to save your page.
If you’d like to learn everything there is to know about Divi, check out our extensive documentation. It contains more than 70 helpful Divi tutorials to aid in building your website.
Step Five: Enhance Your Website with Divi Marketplace Products
Now that your content is in place, you must decide which plugins to use. Generally speaking, there are plenty of free options out there. However, there are times when you need more specific plugins, depending on the type of site you plan to create. The Divi Marketplace is the perfect solution For enhancing Divi beyond its already amazing capabilities. Here are a few examples of the products available that all work seamlessly with Divi.
- Portfolio Websites: If you’re looking for a way to showcase images on your site, the Divi Carousel Module is a great place to start. You can feature team photos, logos, client testimonials, and more, all for $29.
- Events Websites: Looking to add events to your Divi website? In that case, the Divi Events Calendar plugin is the perfect addition. It works seamlessly with The Events Calendar plugin by adding Divi modules to the Visual Builder. You can display images in a feed, calendar view, carousel, and more for $54.
- Ecommerce Websites: Divi and WooCommerce integrate quite well with over 20 Woo-specific modules built in. If you’re looking to build a stunning ecommerce website, Divi Plus is a great solution. It incorporates over 60 modules, 4 extensions, 80 pre-built websites, 50 templates, and 250+ section blocks to build your ecommerce website in style for a mere $79.
- Informational Websites: For those with info-heavy websites, Table Maker for Divi offers a beautiful way to break up all of that information. It allows you to create custom responsive data tables that can be styled in unlimited ways, all for an affordable $39.
- Websites With Elaborate Menus: In some cases, you might want to have a more complex menu than what Divi offers. DiviMenus is a menu builder that allows for popups, content toggles, mega menus, and more, allowing you to create beautiful, functional menus for any type of Divi website. It’s a great option for giving your site a unique look for just $49.
Additional Plugins To Consider
In addition to enhancing Divi’s functionality, there are several essential WordPress plugins that you should include on your site to help with various aspects, including SEO, security, and caching. Other optional plugins, such as social media, affiliate marketing, or live chat, are worth consideration. Since WordPress is so popular, there are thousands of plugin choices. This can be overwhelming for newcomers, so here is a breakdown of some essential plugins you will need for your WordPress website.
- SEO: Choose a good SEO plugin like Rank Math or Yoast SEO, so you can easily configure your SEO, both on and off-page, to give yourself a fighting chance at ranking high in search pages.
- Security: Protecting your site from nefarious actors and malware should be one of your top priorities. Incorporate a security plugin, such as Solid Security or WP Activity Log to help you stay on top of things.
- Optimization: Keeping your site speedy involves adding a speed optimization plugin like WP Rocket to your site. You should also consider a database optimization plugin like WP-Optimize keep the bloat out of your site’s database. Cleaning your database keeps your site running smoothly for the long haul.
- Caching: If you’re using a shared, VPS, or dedicated hosting provider, you may need to install your own caching solution. Cache plugins, such as W3 Total Cache, are considered the best of the best, ensuring your site’s files are served fast, and keeping your bounce rate down and customer engagement up.
- Backup: Before pushing your site live, make a backup of your website either with your host or a plugin such as Updraft. If disaster strikes, you want to be sure you have the most recent iteration of your site to fall back on.
Step Six: Launch Your Website
The last and most exciting step in creating your WordPress website is taking it live. You’ve made your navigation, configured your SEO, and added content. This last step involves tying up a few more loose ends. With that in mind, we’ve created a handy checklist for you to follow to ensure you don’t miss anything.
- Conduct a content review: Make sure all content is accurate and free of misspellings, and check all links.
- Optimize: Use an image optimization plugin like EWWW to ensure all images are under 200kb. Enable caching and modification to ensure your site loads fast. Run a GTMetrix report to see how well your site is performing.
- SEO and Analytics: Set up Google Analytics, integrate it into your site and check all posts and pages to ensure a keyword, title, URL, and meta description are configured properly. Using an SEO plugin like Rath Math or All in One SEO can help with this process. Generate an HTML sitemap.
- Security: Update all plugins, themes, and WordPress core. Install a security plugin, such as Solid Security.
- Check all forms: Test all forms to ensure email deliverability. If you encounter any issues, install and configure an SMTP plugin like WPForms.
- Connect your domain: Point your domain to your new website, then install an SSL.
- Search engine visibility: Head back to Settings > Reading and uncheck the discourage search engines from indexing this site checkbox
Divi Makes It Easy to Build A Website
Creating a WordPress website doesn’t have to be scary, especially when using Divi. You can easily bring your vision to life, thanks to Divi’s drag-and-drop Visual Builder, Theme Builder‘s full-site-editing capabilities, various design modules, or by implementing Divi’s flagship new artificial intelligence design assistant, Divi AI. Divi is also an excellent option for freelancers looking to get more out of WordPress. With Divi Pro, freelancers and agencies can create a collaborative workspace. With Divi Teams, you can share Divi and its suite of products in the cloud, providing each with specific permissions for their role. Additional benefits of Divi Pro are Divi Cloud and Divi VIP, which allow you to save and share layouts in the cloud for re-use and get answers to your questions within a lightning-fast 30 minutes ⚡. For a mere $277 a year 😮, Divi Pro gives you the design prowess of Divi and all the products in its ecosystem for an unbelievable price.
Before we wrap up, we included a table of the recommended plugins we mentioned in this post. Each product listed will enhance your Divi website by making beautiful design additions and ensuring your site is safe and secure.
| Product | Price | Desc. | ||
|---|---|---|---|---|
| 1 | Namecheap | $5.98/year | Domain Registrar | Visit |
| 2 | SiteGround | $2.99/month | Hosting | Visit |
| 3 | Divi | $89/year | Premium WordPress Theme | Visit |
| 4 | Divi Cloud | $8/month | Create and store layouts in the cloud | Visit |
| 5 | Divi Teams | $1.50/month (per seat) | Collaborate with team members, assign user roles | Visit |
| 6 | Divi VIP | $6/month | Professional-level support in 30 minutes | Visit |
| 7 | Divi AI | $21.36/month | Generate layouts, images, text, and code for your Divi website | Visit |
| 8 | Divi Pro | $277/year | Divi, Divi Teams, Divi VIP, Divi AI, and Divi Cloud | Visit |
| 9 | Divi Carousel Module | $29/year | Create image carousels | Visit |
| 10 | Divi Events Calendar | $54/year | Display events and calendars on Divi pages | Visit |
| 11 | Divi Plus | $79/year | Adds ecommerce modules, plugins, themes, templates, and sections to Divi | Visit |
| 12 | Table Maker | $39/year | Custimize tables for displaying info on your website | Visit |
| 13 | DiviMenus | $49/year | Create elaborate mega menus with images, popups, content toggles, and more | Visit |
| 14 | Rank Math | $6.99/month | Premium SEO plugin | Visit |
| 15 | Solid Security | $99/year | Security plugin | Visit |
| 16 | WP Activity Log | $139/year | Security plugin: Manage user events for added security | Visit |
| 17 | WP Rocket | $59/year | Optimize your site for speed | Visit |
| 18 | WP-Optimize | $49/year | Database optimization plugin | Visit |
| 19 | W3 Total Cache | $8.25/month (billed annually) | Cache plugin | Visit |
| 20 | Updraft Plus | $70/year (2 websites) | Backup plugin | Visit |
| 21 | EWWW Image Optimizer | $7/month | Image optimization plugin | Visit |
| 22 | WP Forms | $49.50/year | Form plugin | Visit |
Frequently Asked Questions (FAQs)
Let’s answer some of your most common questions regarding WordPress website creation. Did we miss one? Leave a question below, and we will respond!
How do I make a WordPress website?
Can I create a WordPress website for free?
What is WordPress?
Why should I use WordPress to make my website?
Can a beginner build a website with WordPress?
Does WordPress require coding experience?
What kind of websites can be created using WordPress?
Where can I learn more about WordPress?
Where should I host my WordPress website?
Which WordPress Theme should I use for my website?
What are the top plugins I should install?
Which is better, Wix or WordPress?
Featured Image via Darko 1981 / Shutterstock.com



I am looking for something better than a regular website, etsy store, and shopify store, which is what is going on now. I read some things about woocommerce and wordpress. I am wondering…if I have to build all the pages myself, does that include each and every product page or is that something that will generate automatically the way it does when I publish a printify product to my shopify store? It’s a lot to take on, as I have a lot of items, and the answer could make a difference in my ability to take something like this on.
Thanks so much for your time, and I understand if you are unable to answer my question.
Tina Pare
Thank you very much for your information; it is just what I was looking for. May I ask what software you use for your fantastic and quick website? I too intend to build a straightforward website for my company, however I require advice on a name and hosting. Asphostportal is said to have an excellent reputation for it. Are there any other options available, or can you recommend them?