
Off-canvas popups are one of the most effective ways to capture attention, grow email lists, announce offers, or guide visitors without cluttering your main page layout. In the past, creating them in Divi required using third-party plugins or custom code. With Divi 5, that all changes. Using the powerful combination of Divi 5 Canvases and Interactions, you can now build fully custom, native off-canvas popups directly in the Visual Builder.
In this post, you’ll learn exactly how to use these two features to create beautiful off-canvas popups.
Let’s get started.
What Are Divi 5 Canvases?
Divi 5 introduces Canvases — a new system of detached workspaces that live separately from your main page or post content. Think of them as design boards inside the Visual Builder, allowing you to create, organize, and manage elements without ever cluttering your primary layout.
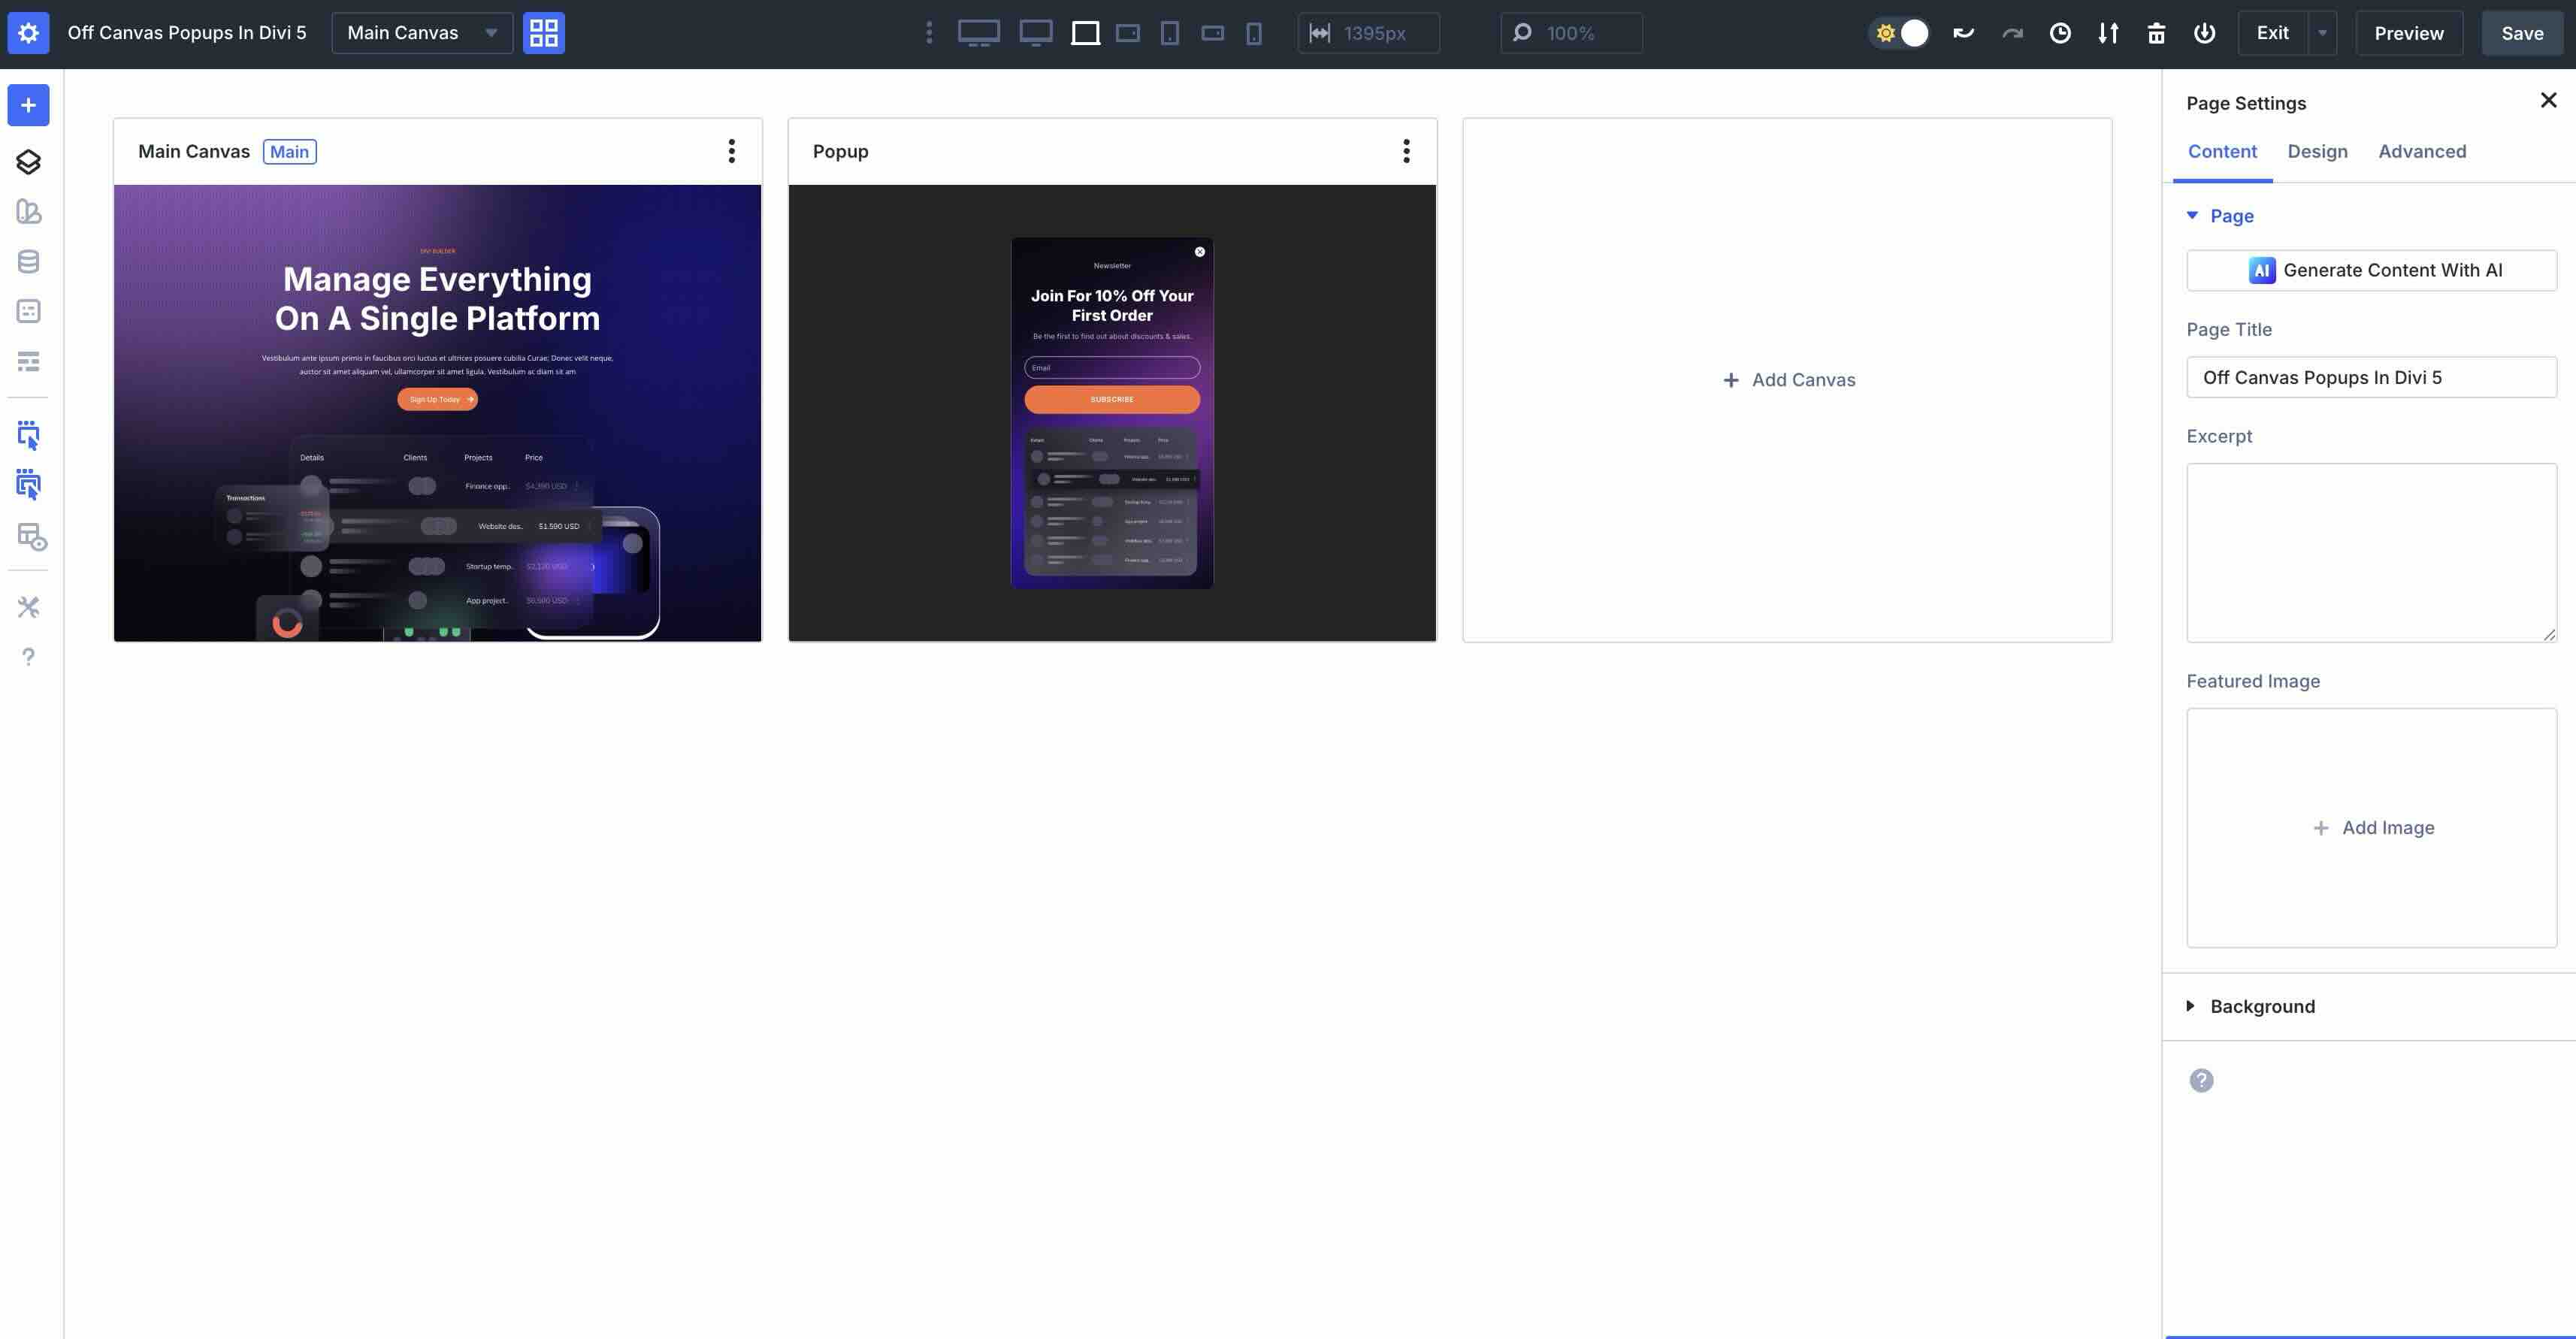
Every Divi page starts with a Main Canvas, where you build the core visible content of your page, including the hero, body content, and more.
Subscribe To Our Youtube Channel
Where things get interesting is with detached Canvases. These are completely separate workspaces that do not appear in the main page area while you’re editing in the Visual Builder. They’re perfect for building off-canvas elements like slide-in menus, sidebars, cookie banners, and popups that stay hidden until you want them to appear.
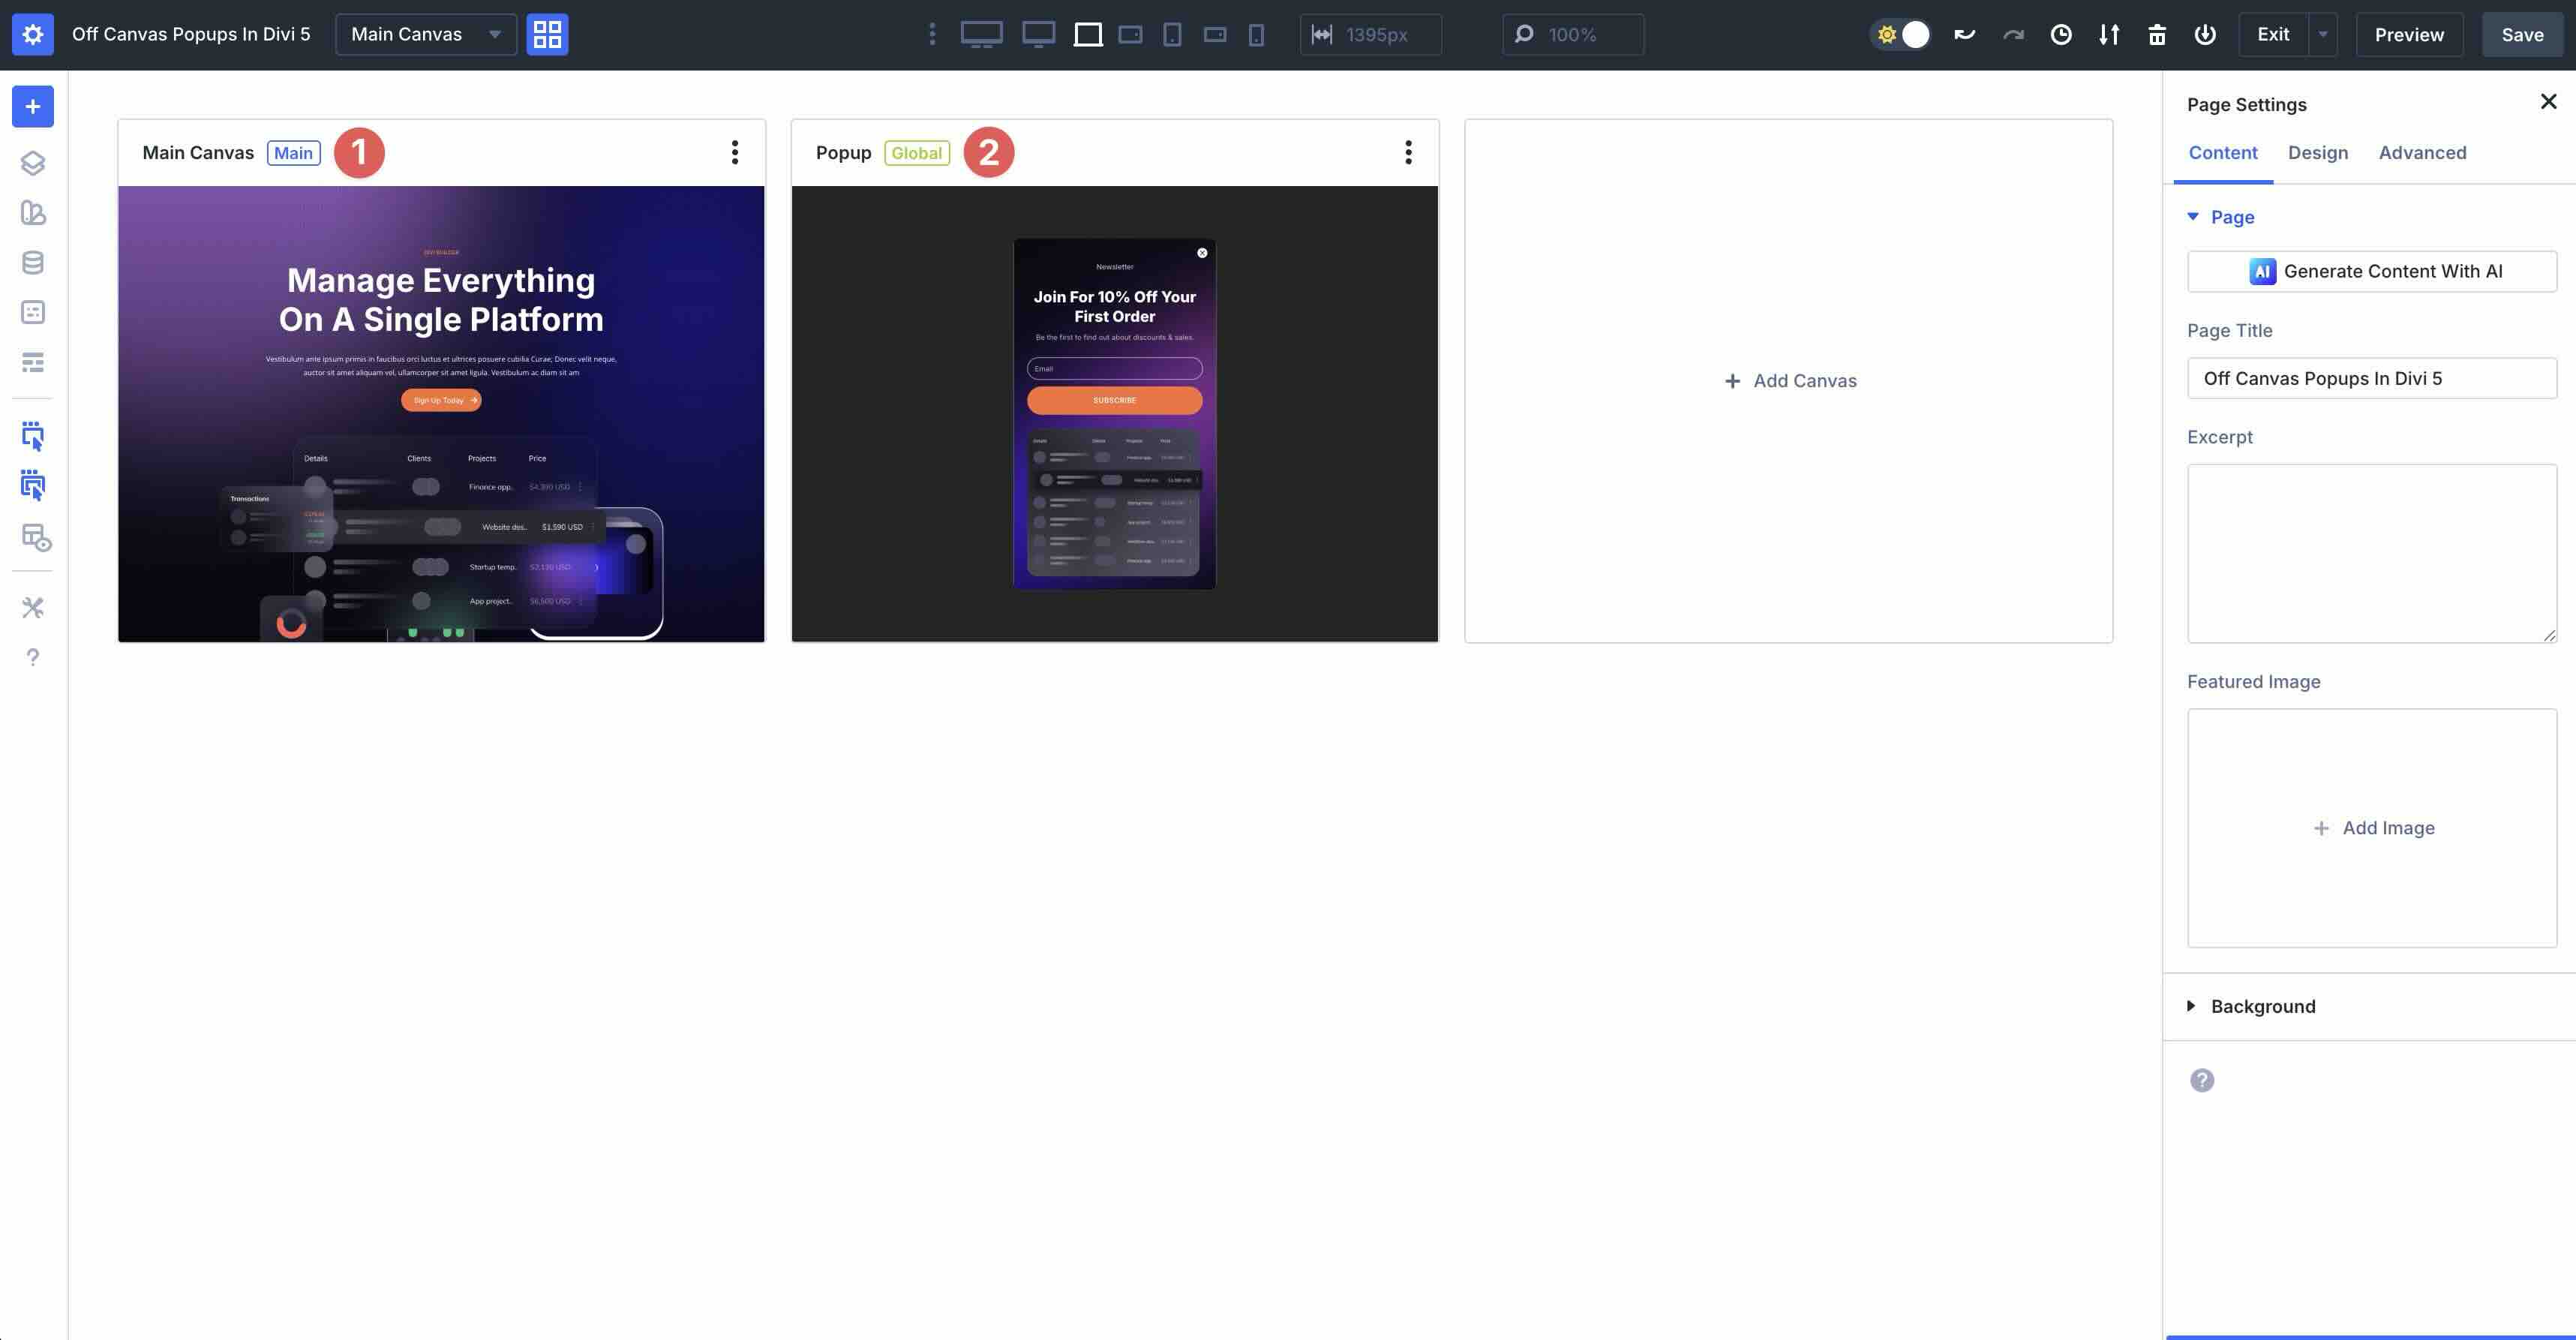
Main Canvas vs Detached Canvases
Detached canvases come in two types in Divi 5. Local Canvases are tied to a specific page, post, or template. They are great for one-off, page-specific popups or unique elements that shouldn’t appear site-wide.
Global Canvases are available across your entire website. Regarding popups, using a global Canvas allows you to create a newsletter signup, promotional slide-in, or exit-intent overlay once, then reuse it across every page of your website. Simply change it in one place, and it updates site-wide.
How Front-End Appending Works
In the Visual Builder, your detached canvases remain hidden and isolated, keeping your workspace clean. But when you target them with Interactions, Divi automatically inserts their content on the front end. This means popups stay completely out of sight in the Builder, only loading and appearing on the live site when triggered. The result is seamless off-canvas behavior without custom code or third-party plugins.
Why Canvases Are Perfect For Popups
Canvases remove the pain points of building popups in Divi:
- You Can Build In Isolation: Easily design complex layouts without interfering with the main page.
- They Harness Divi 5’s Full Power: You can use animations, transform effects, responsive settings, Nested Rows, Presets, Design Variables, or any other Divi feature inside the Canvas.
- Multiple Trigger Options: Pair with Interactions to show or hide elements, launch them with clicks, viewport enter or exit, toggle presets, or create mouseover effects.
- They Are Reusable And Maintainable: Use Global Canvases for site-wide popups or keep them local for targeted campaigns.
- They Provide A Clean Workflow: There’s no need to hide sections with visibility settings or duplicate sections. Everything lives in a neat, purpose-built space.
Essentially, Divi 5 Canvases turn popups from a headache into a native feature. You design once in a detached workspace, then let Interactions bring it to life dynamically on the front end.
What Are Divi 5 Interactions?
Divi 5 Interactions is a powerful system that allows you to add dynamic, user-driven behaviors to any element on your page. Located directly in the Advanced tab of any module, column, row, or section, this feature lets you define what triggers an action and what happens as a result.
At its core, every Interaction follows a simple three-part structure:
- Trigger Events: The user events or page conditions that start the Interaction.
- Effect Actions: The action that occurs when the trigger fires.
- Target Modules: The element that receives the effect.
This makes Interactions versatile for everything from hover effects and scroll animations to controlling off-canvas popups and modals.
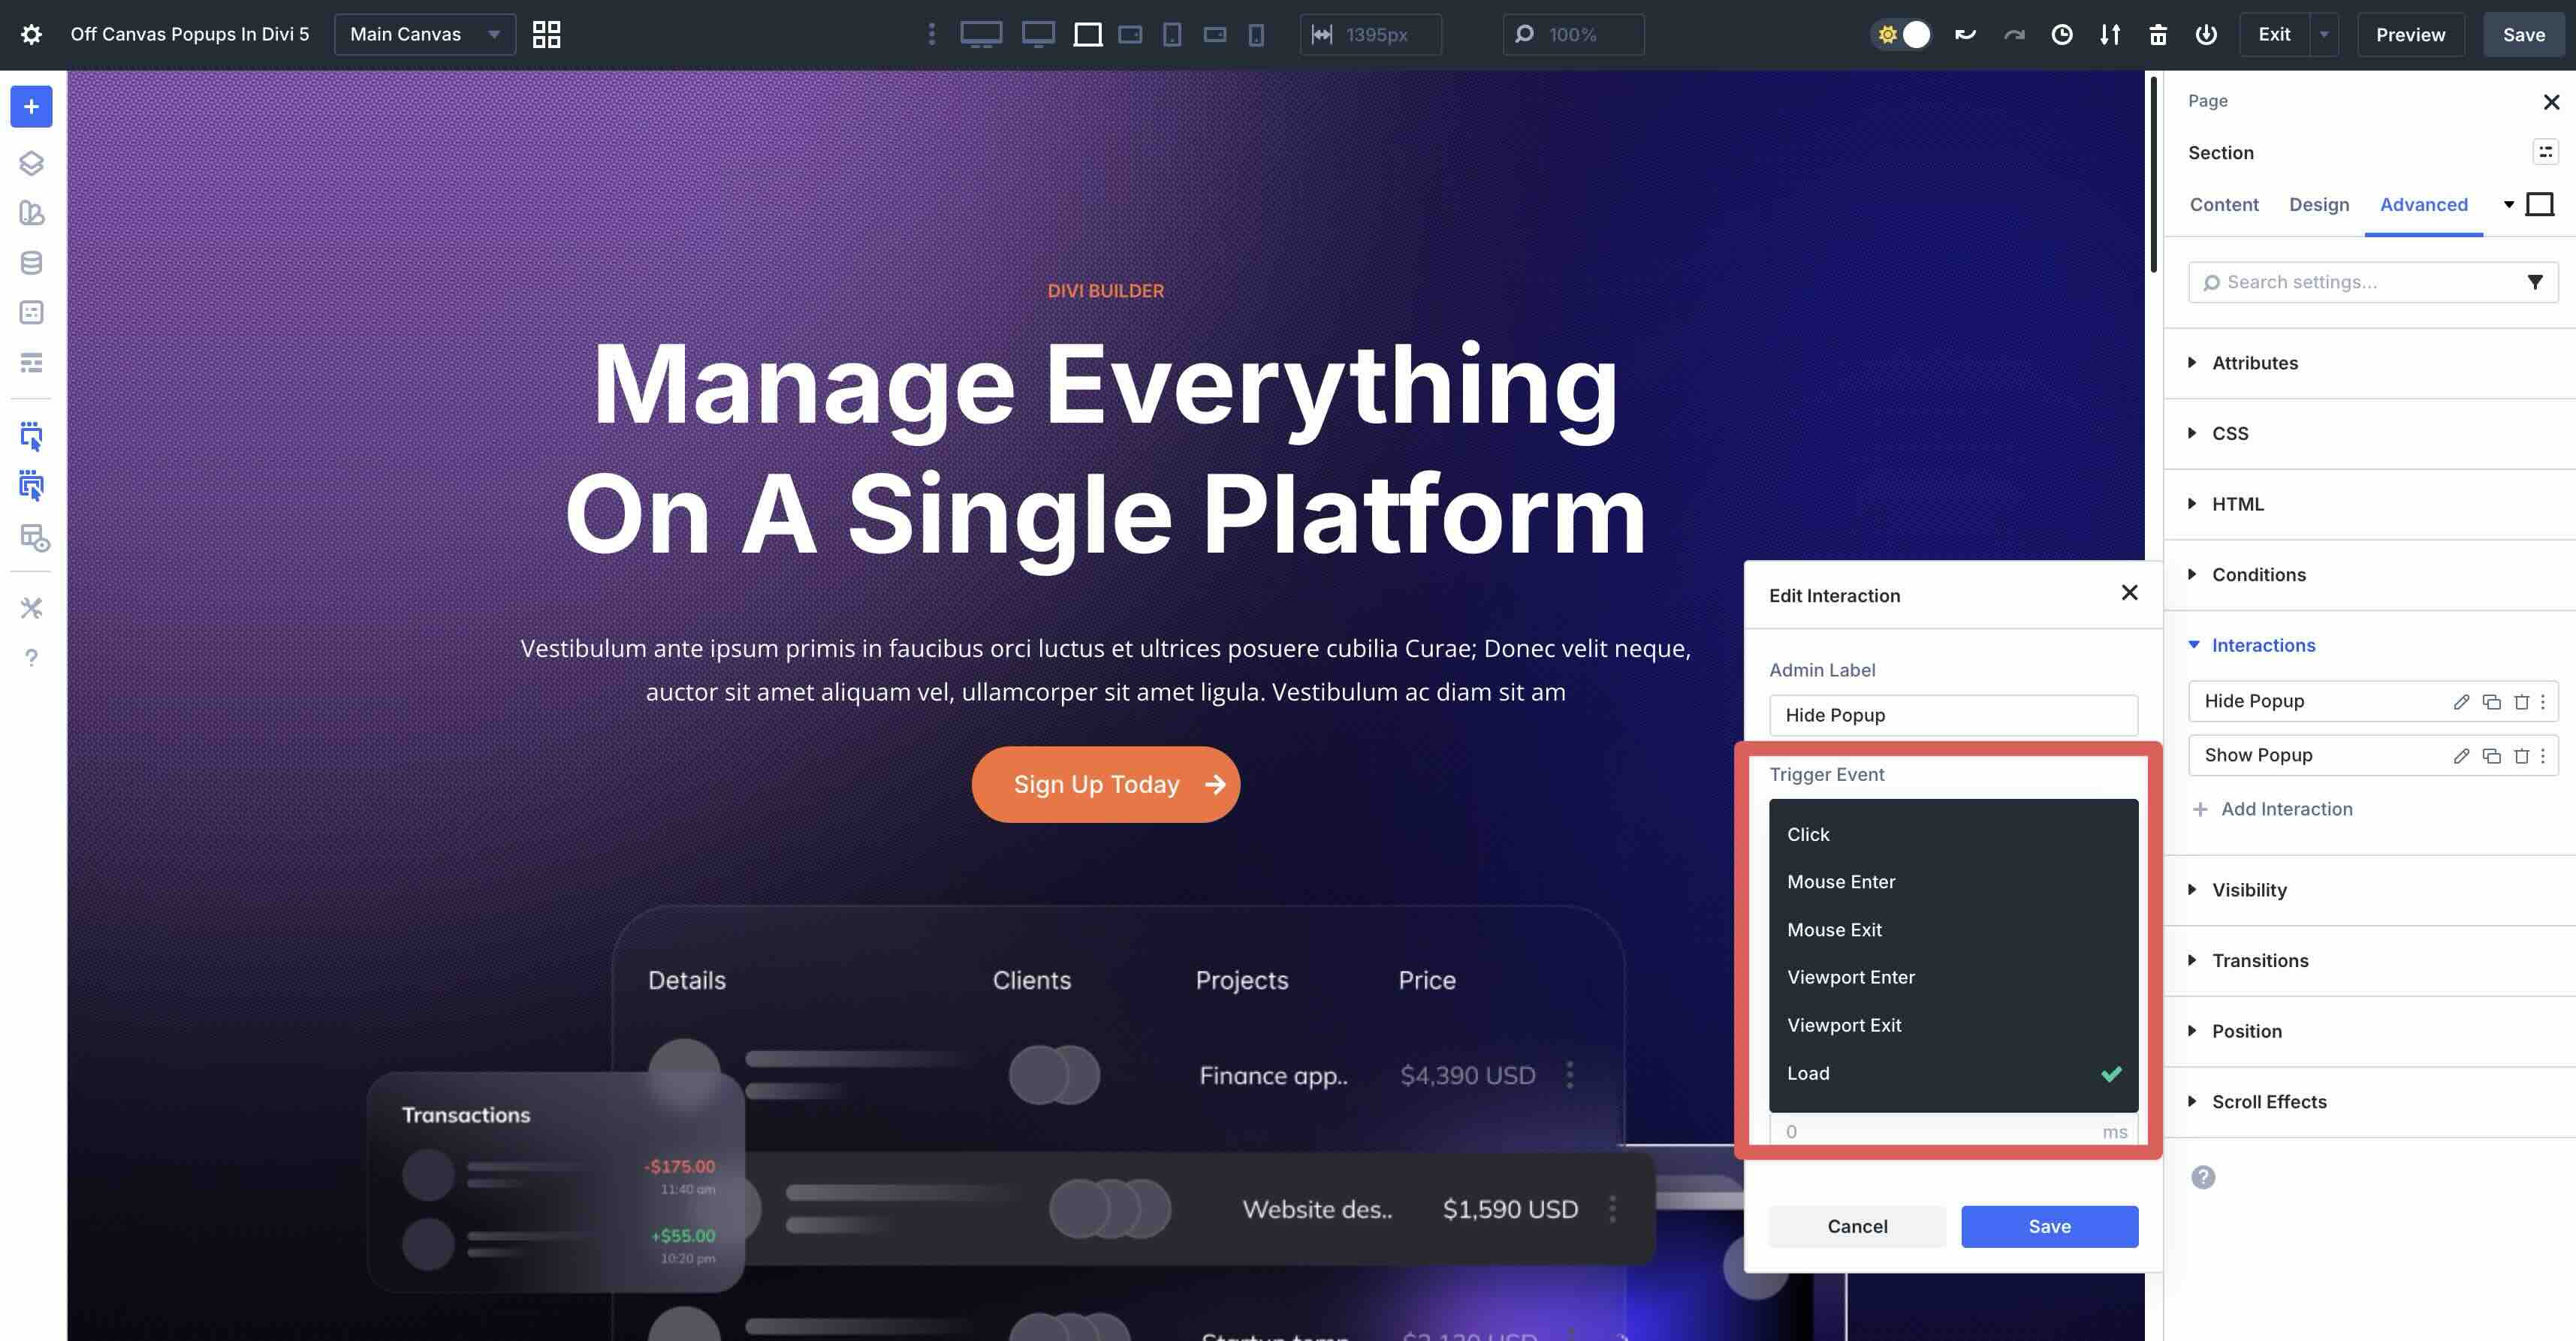
Available Trigger Events
Divi 5 offers a set of intuitive triggers to match real user behavior. Here are a few you’ll use when creating popups:
- Click: Perfect for buttons or icons that open/close a pop-up or content reveal.
- Mouse Enter And Mouse Exit: Great for hover previews or subtle interactions.
- Viewport Enter And Viewport Exit: Triggers when an element scrolls into or out of view, making these triggers perfect for scroll-activated popups.
- Load: Runs automatically when the page loads, with an optional time delay. For example, you could use Load to display a welcome pop-up after 5 seconds.
You can combine multiple Interactions on the same or different elements for layered, sophisticated behavior.
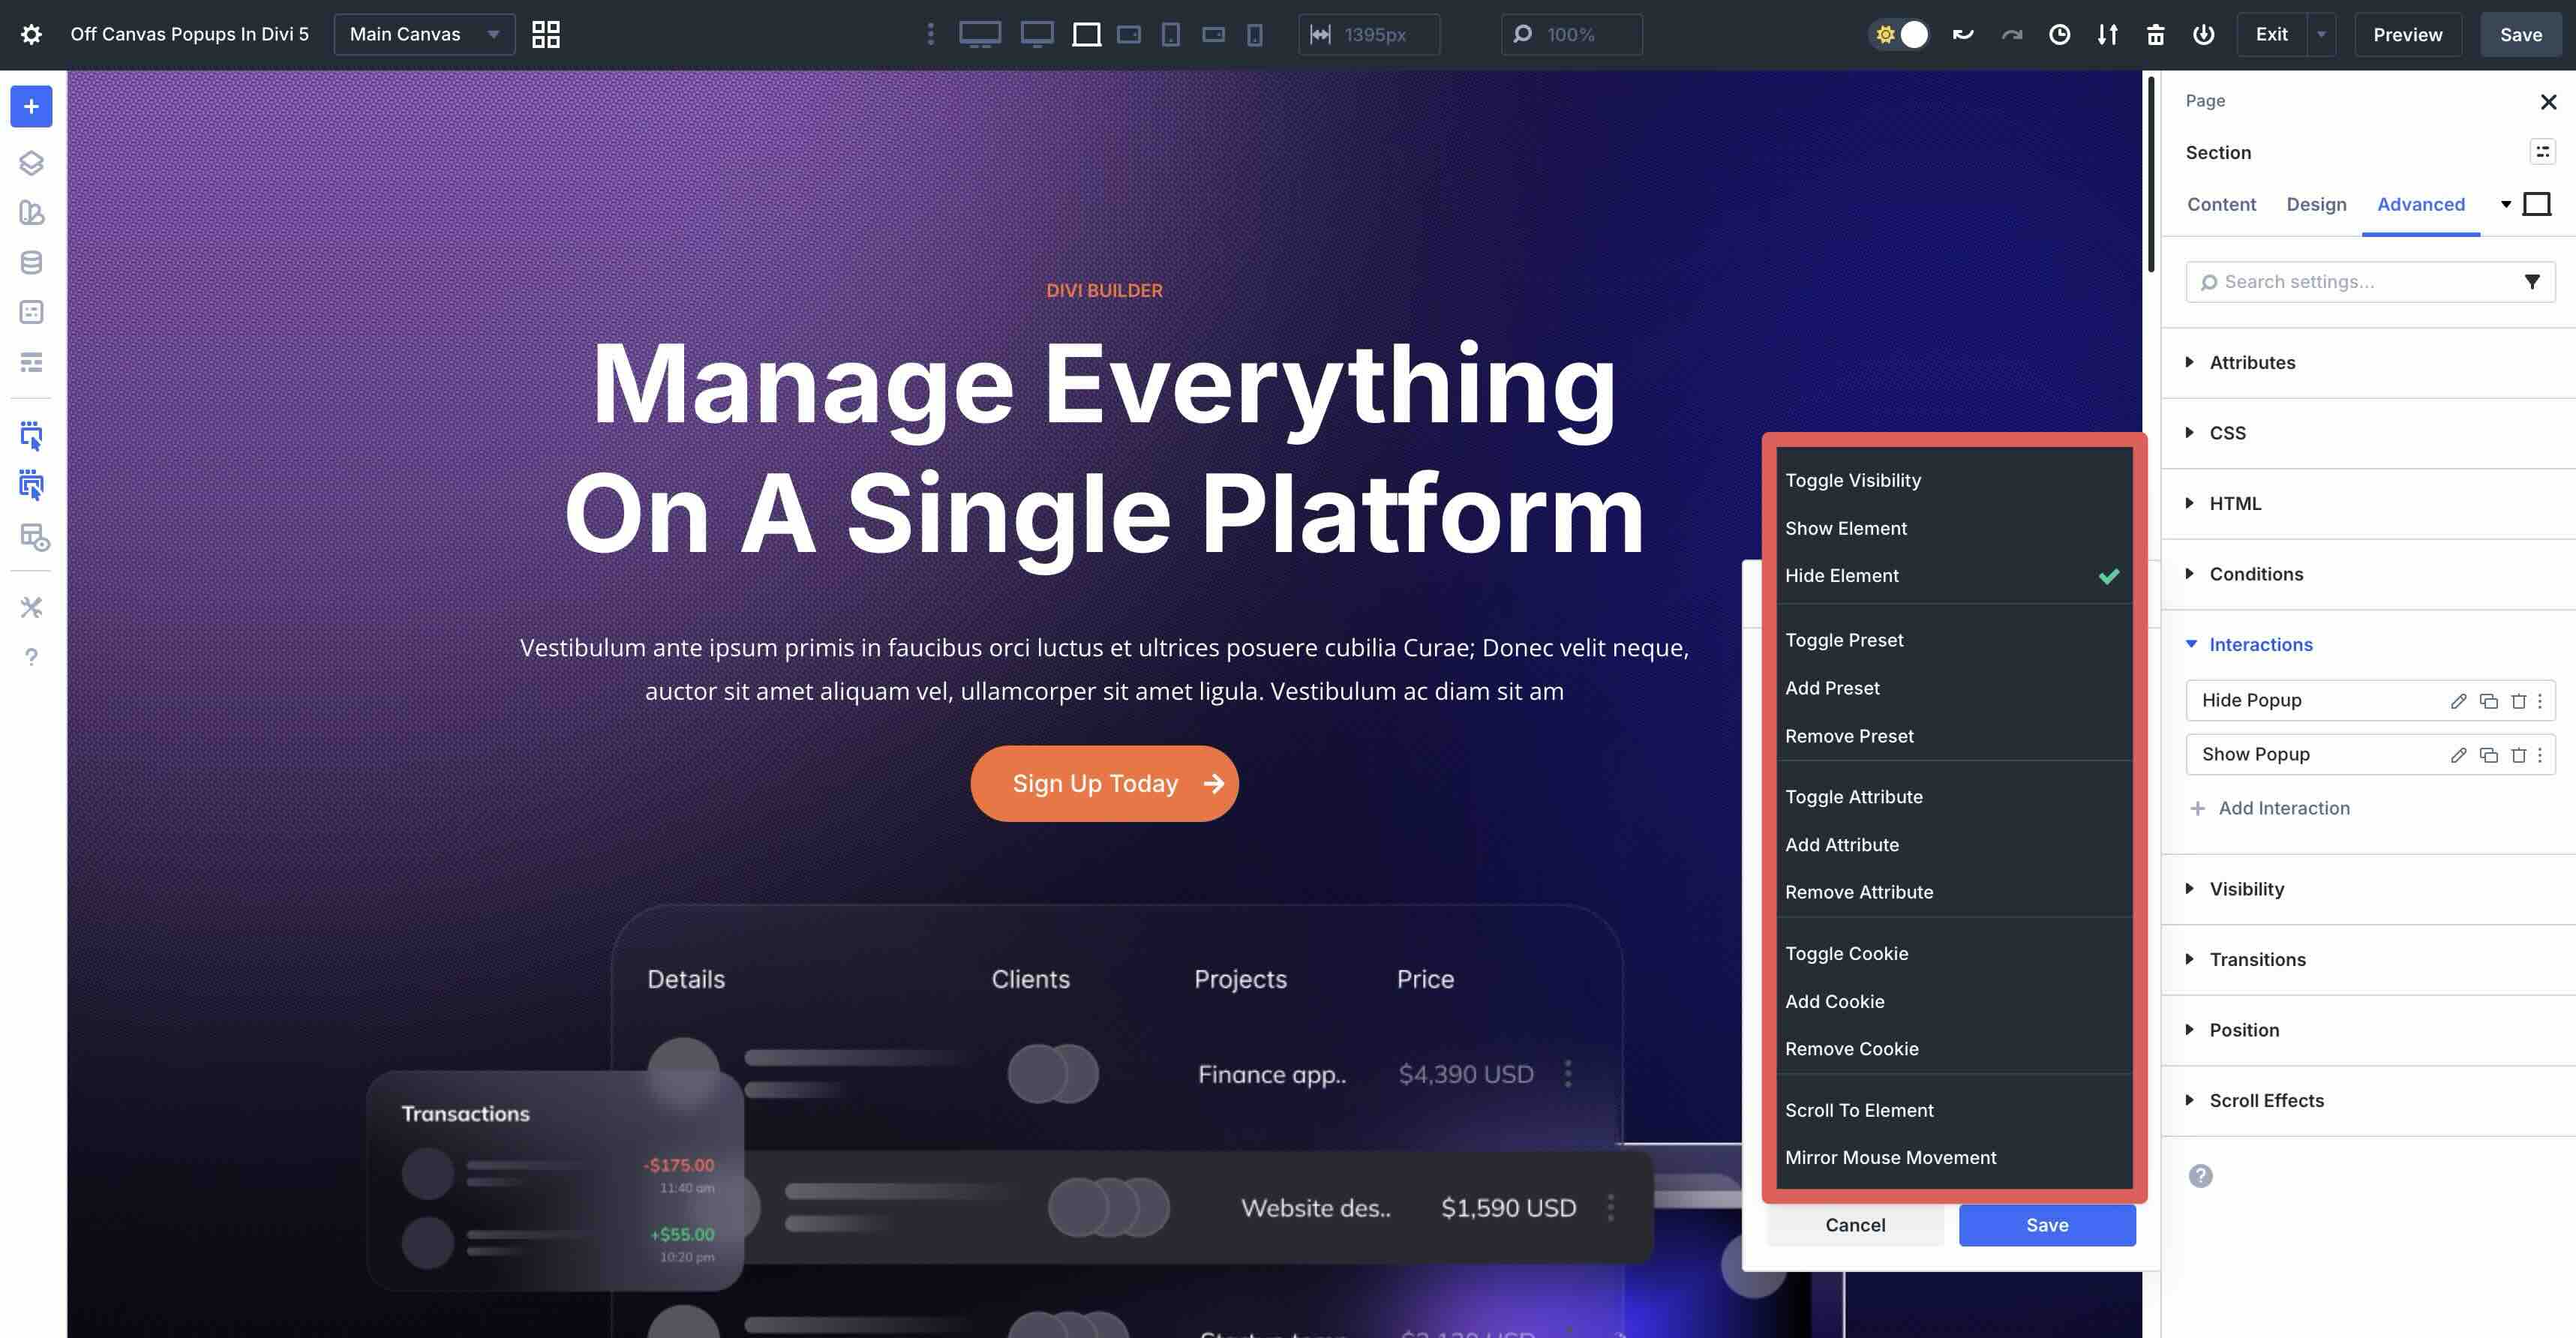
Key Effect Actions For Popups
For popups in particular, there are several core effects you can use:
- Show Element: Reveals a hidden target, like a pop-up section.
- Hide Element: Conceals an element.
- Toggle Visibility: Switches between shown and hidden states with a single Interaction.
Targeting Detached Canvas Elements
Interactions are the perfect partner for Canvases because you can target elements located on any detached Canvas directly from the Main Canvas. Divi automatically appends the Canvas content to the front-end when the Interaction fires, keeping your workspace clean while delivering seamless off-canvas functionality.
How To Create An Off-Canvas Pop-up In Divi 5
Now that you understand how Canvases and Interactions work, we’ll put that knowledge to use and build an off-canvas pop-up. To keep things simple, we’ll use a premade pop-up created by our design team. We won’t go through the steps to build the pop-up. Instead, we’ll walk you through creating a Canvas, importing a layout, and setting up Interactions to trigger it.
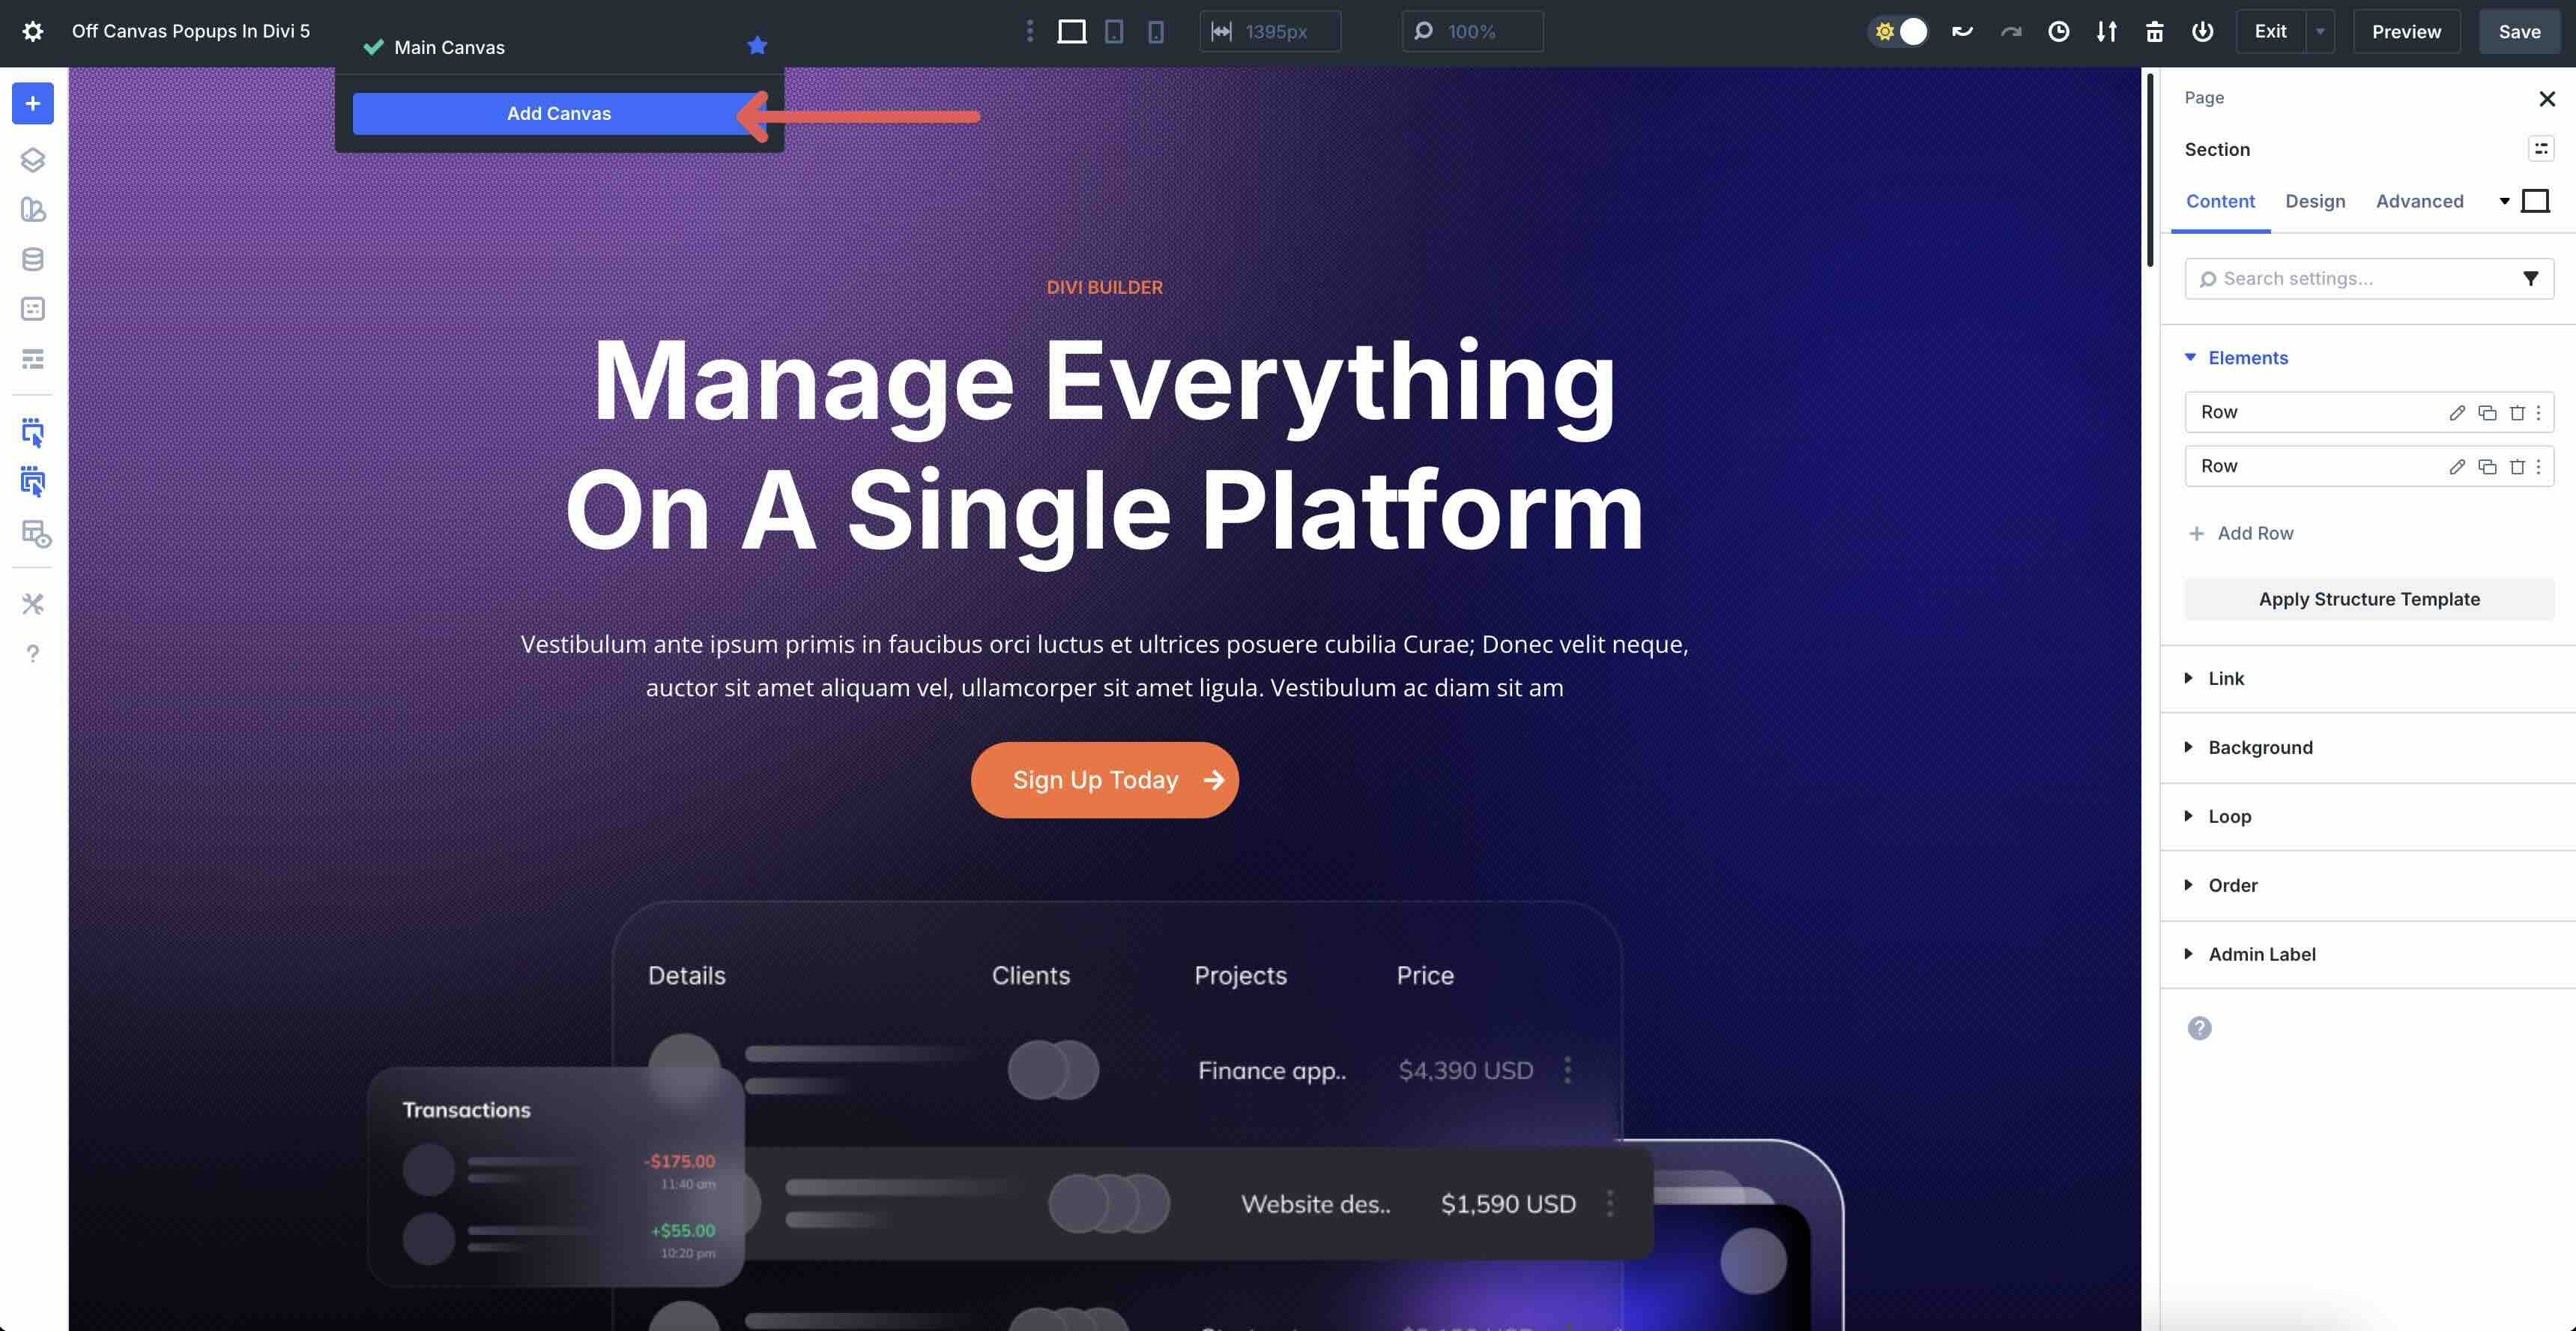
Step 1: Create A New Canvas
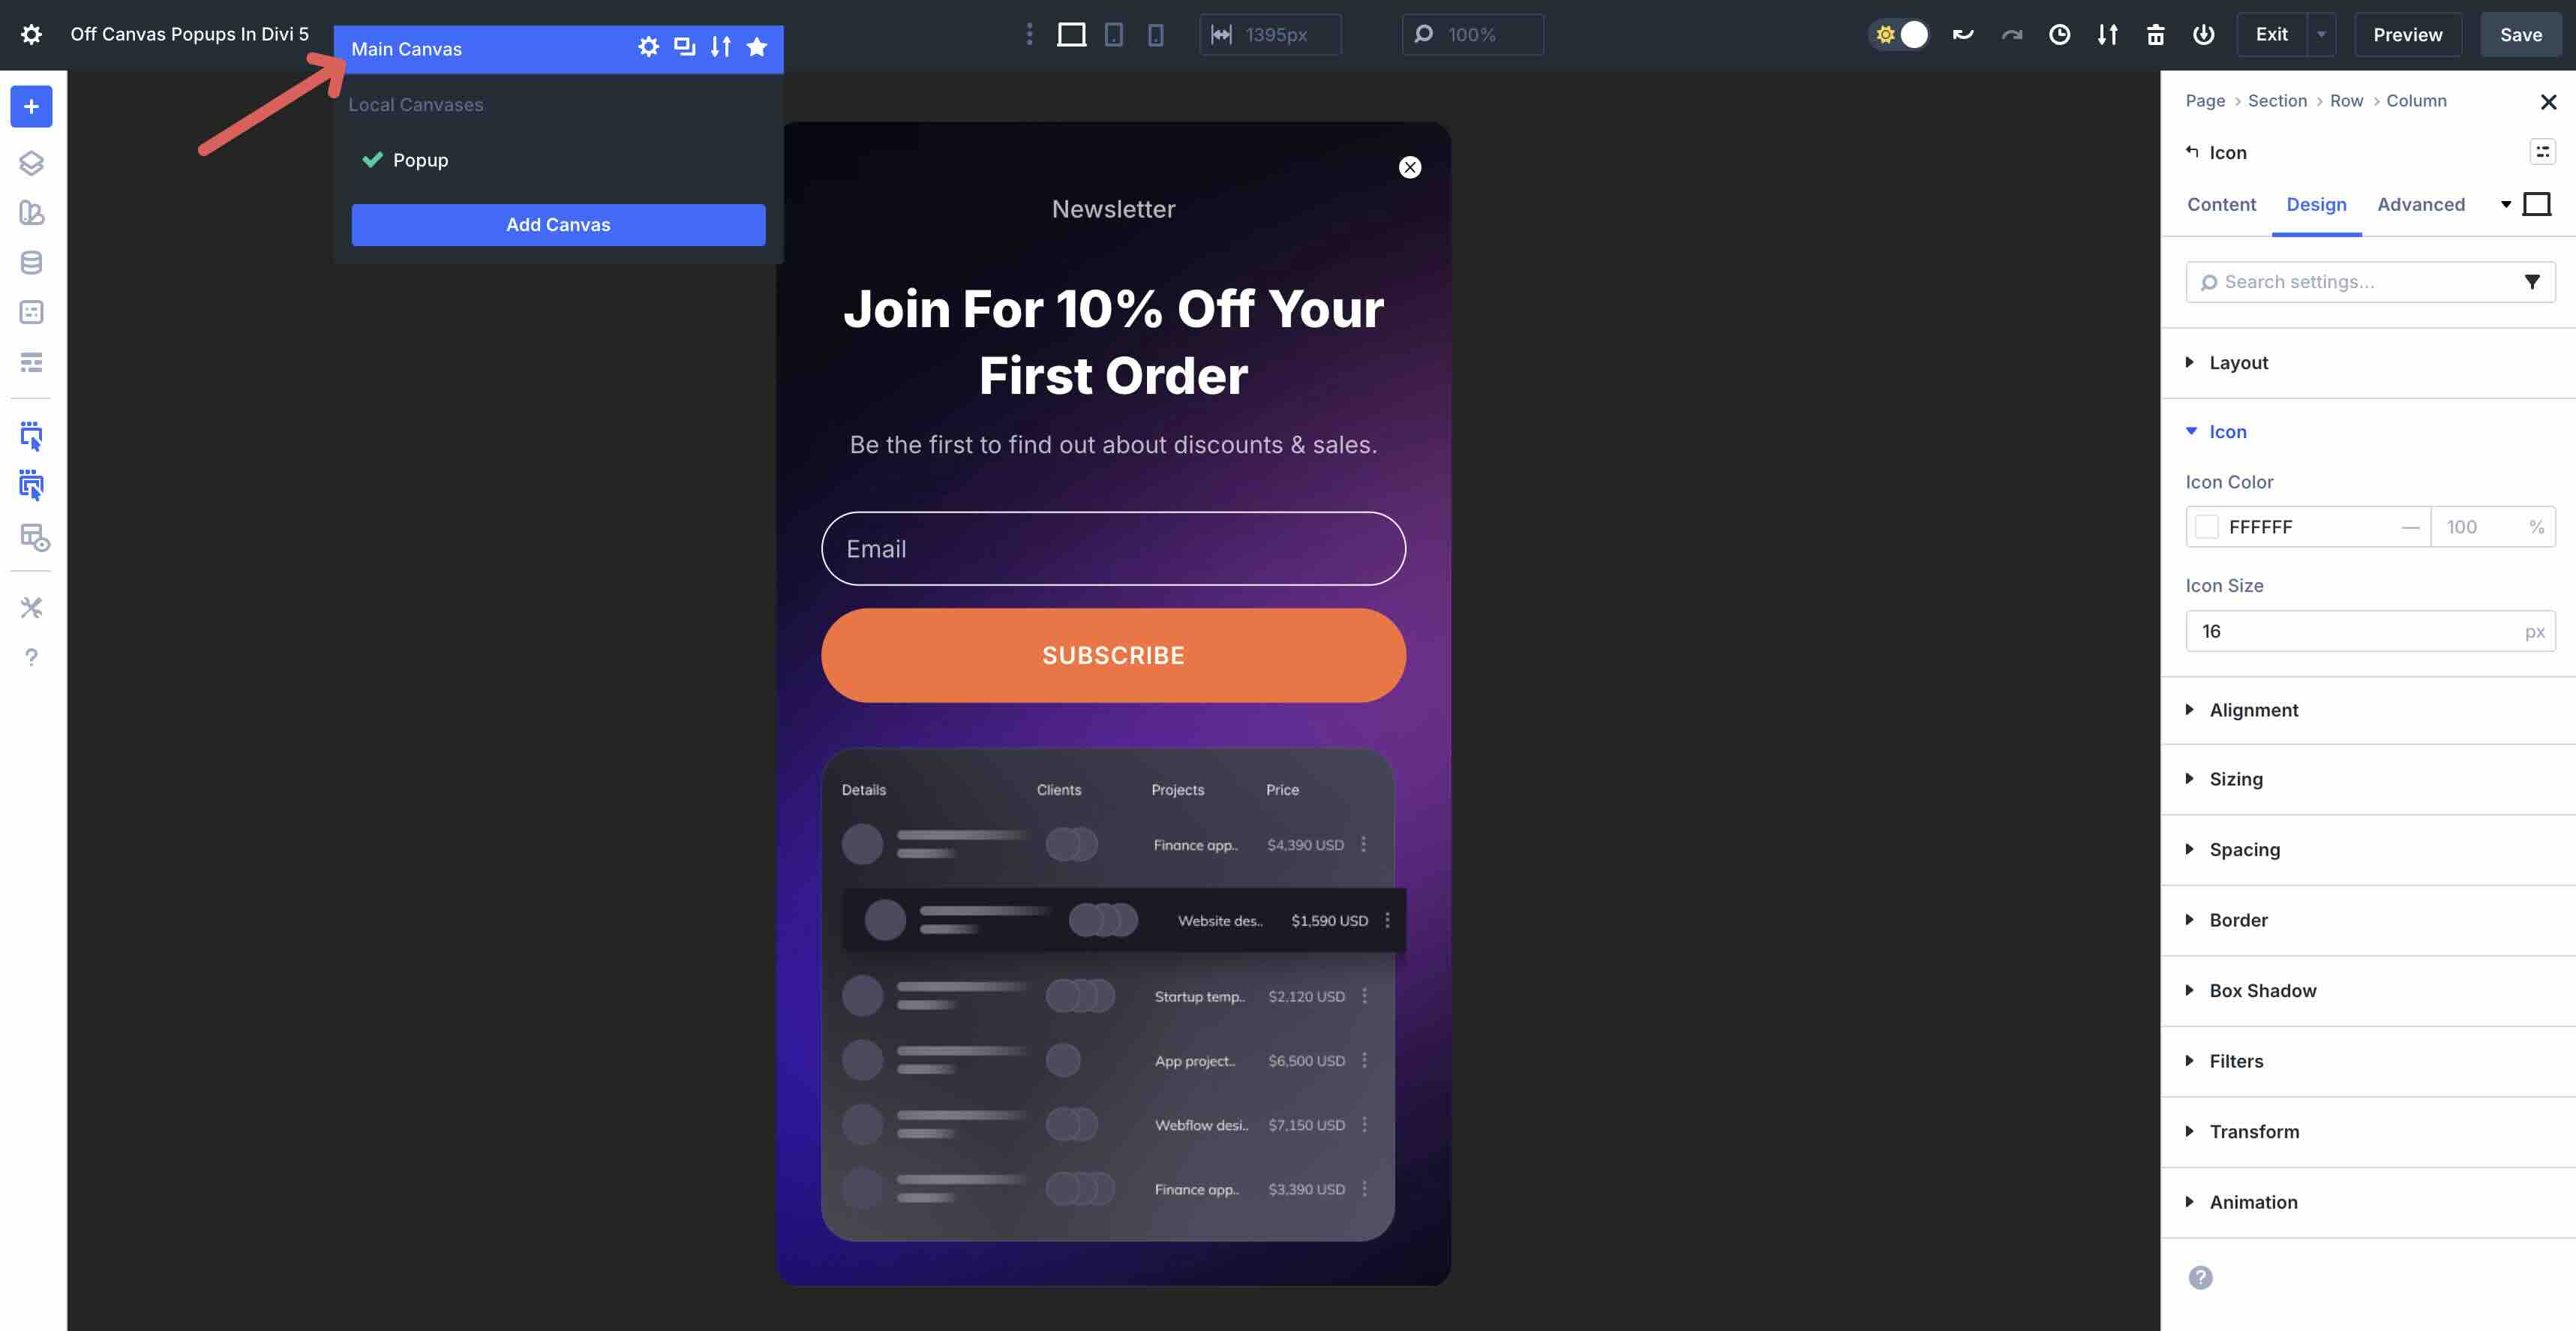
Create or open an existing page in the Visual Builder. Click the Main Canvas dropdown menu to the right of the page title.

Next, select Add Canvas.
Add a Canvas Name and then click Add Canvas once more.
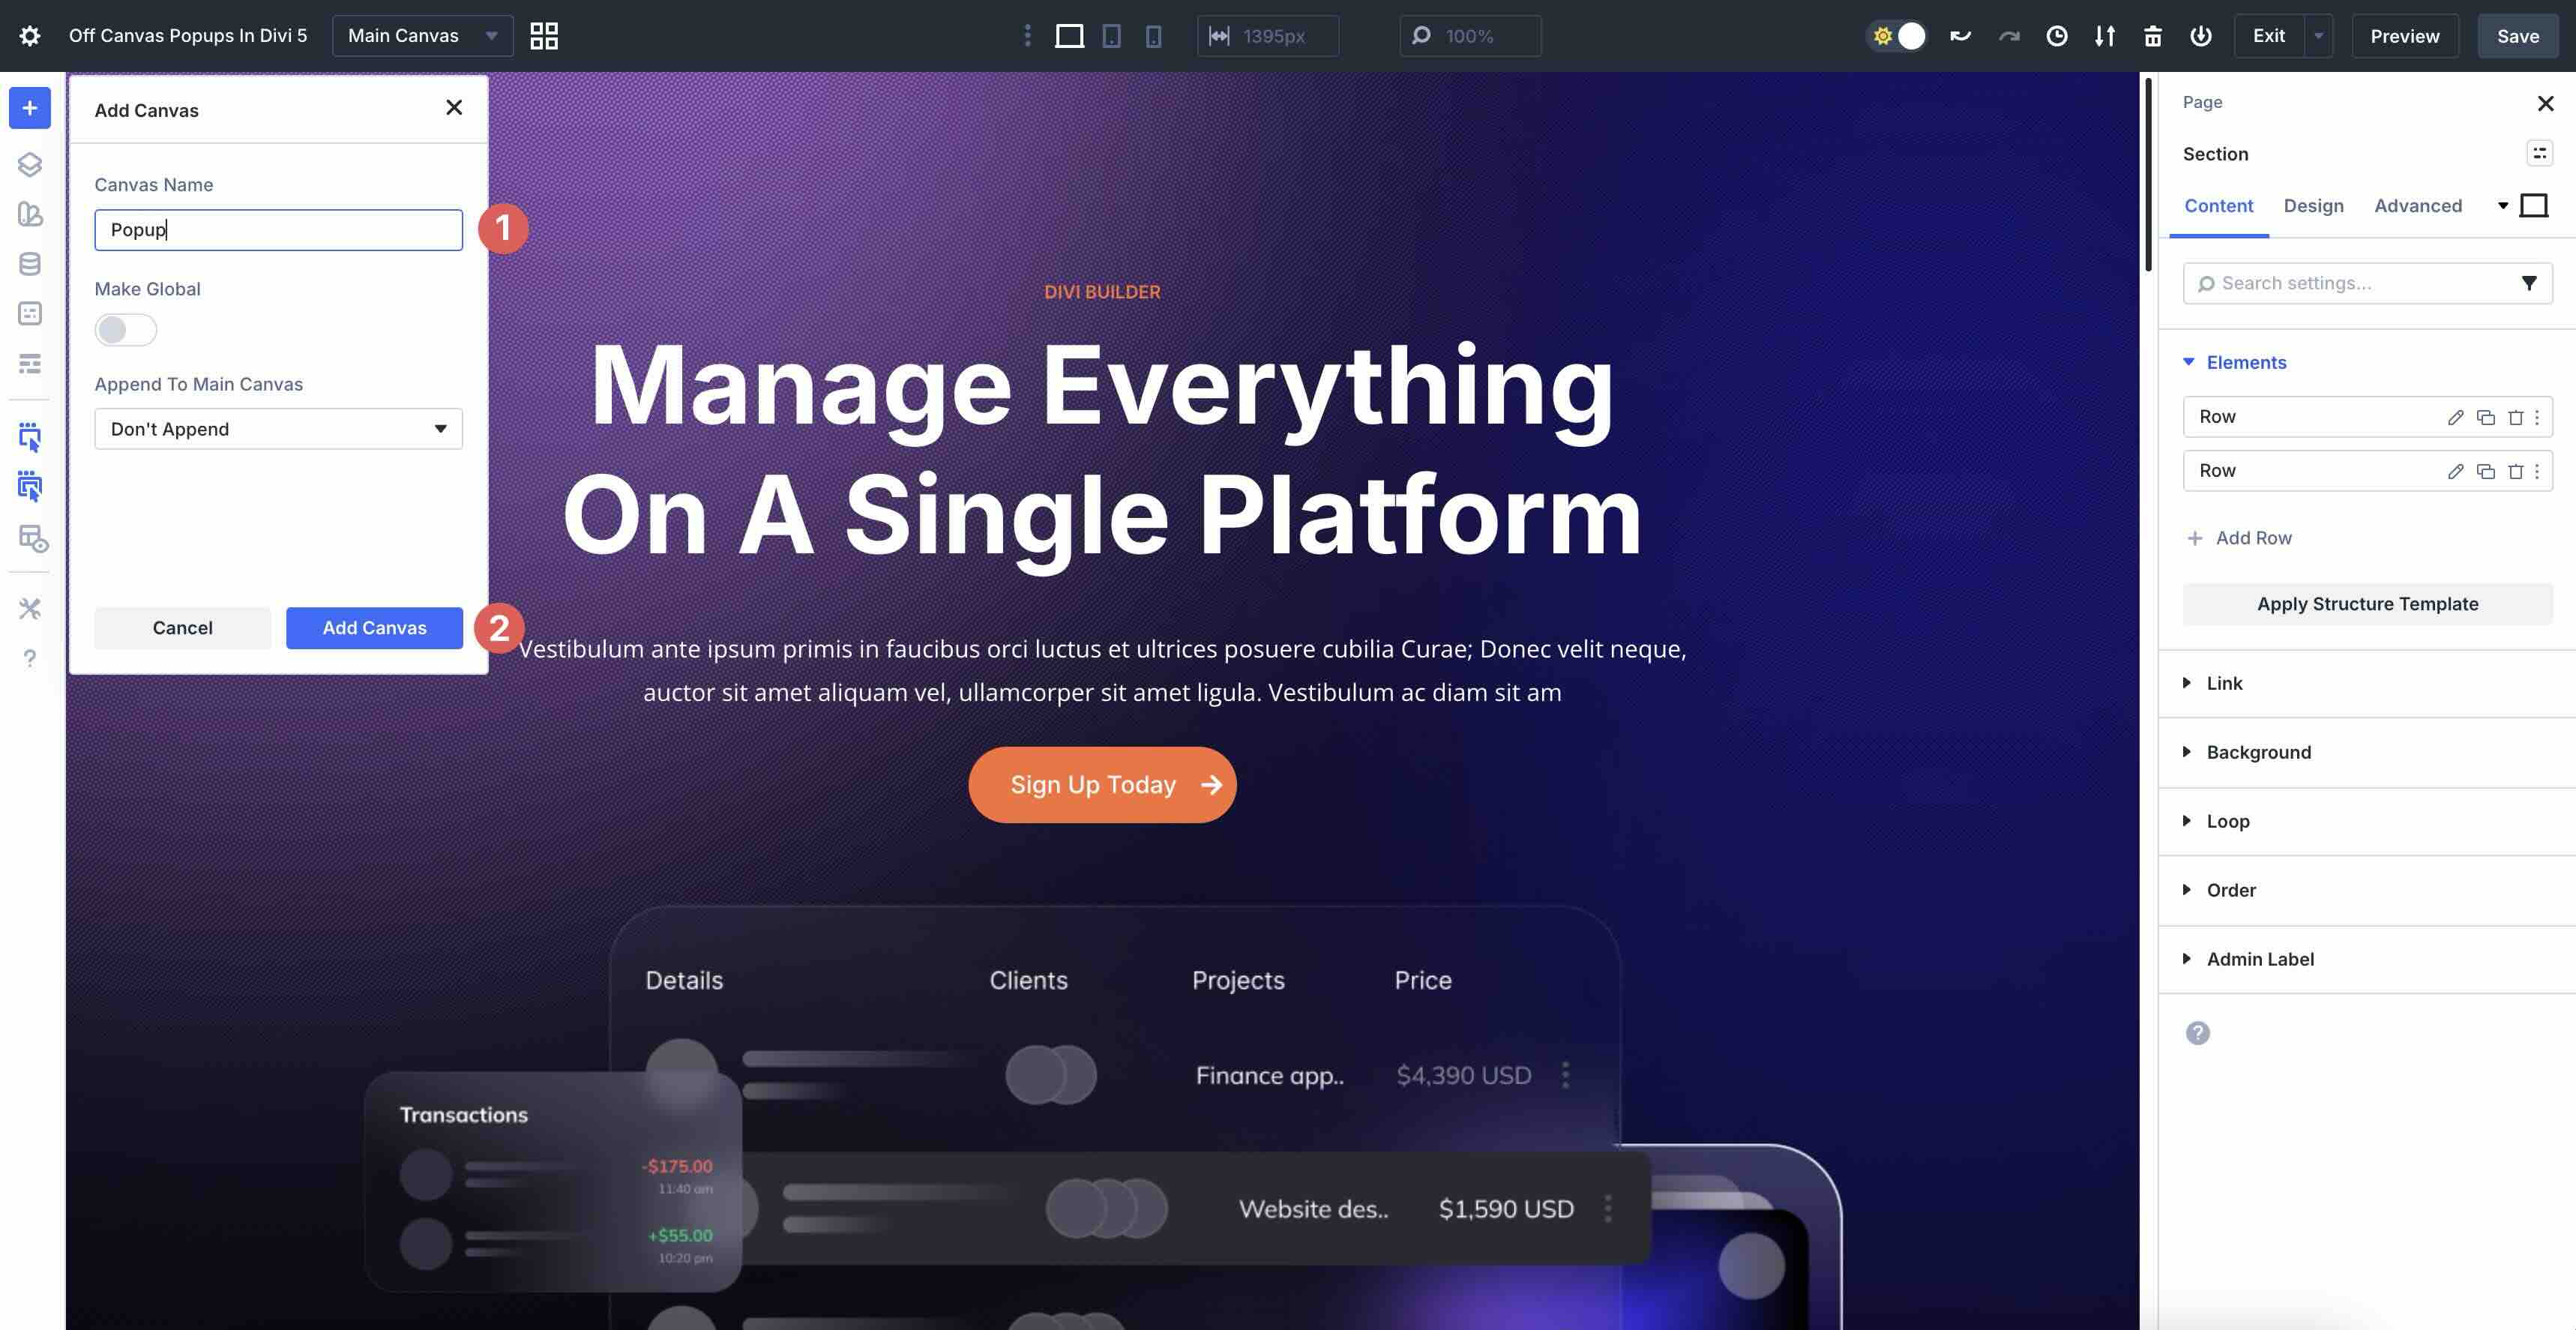
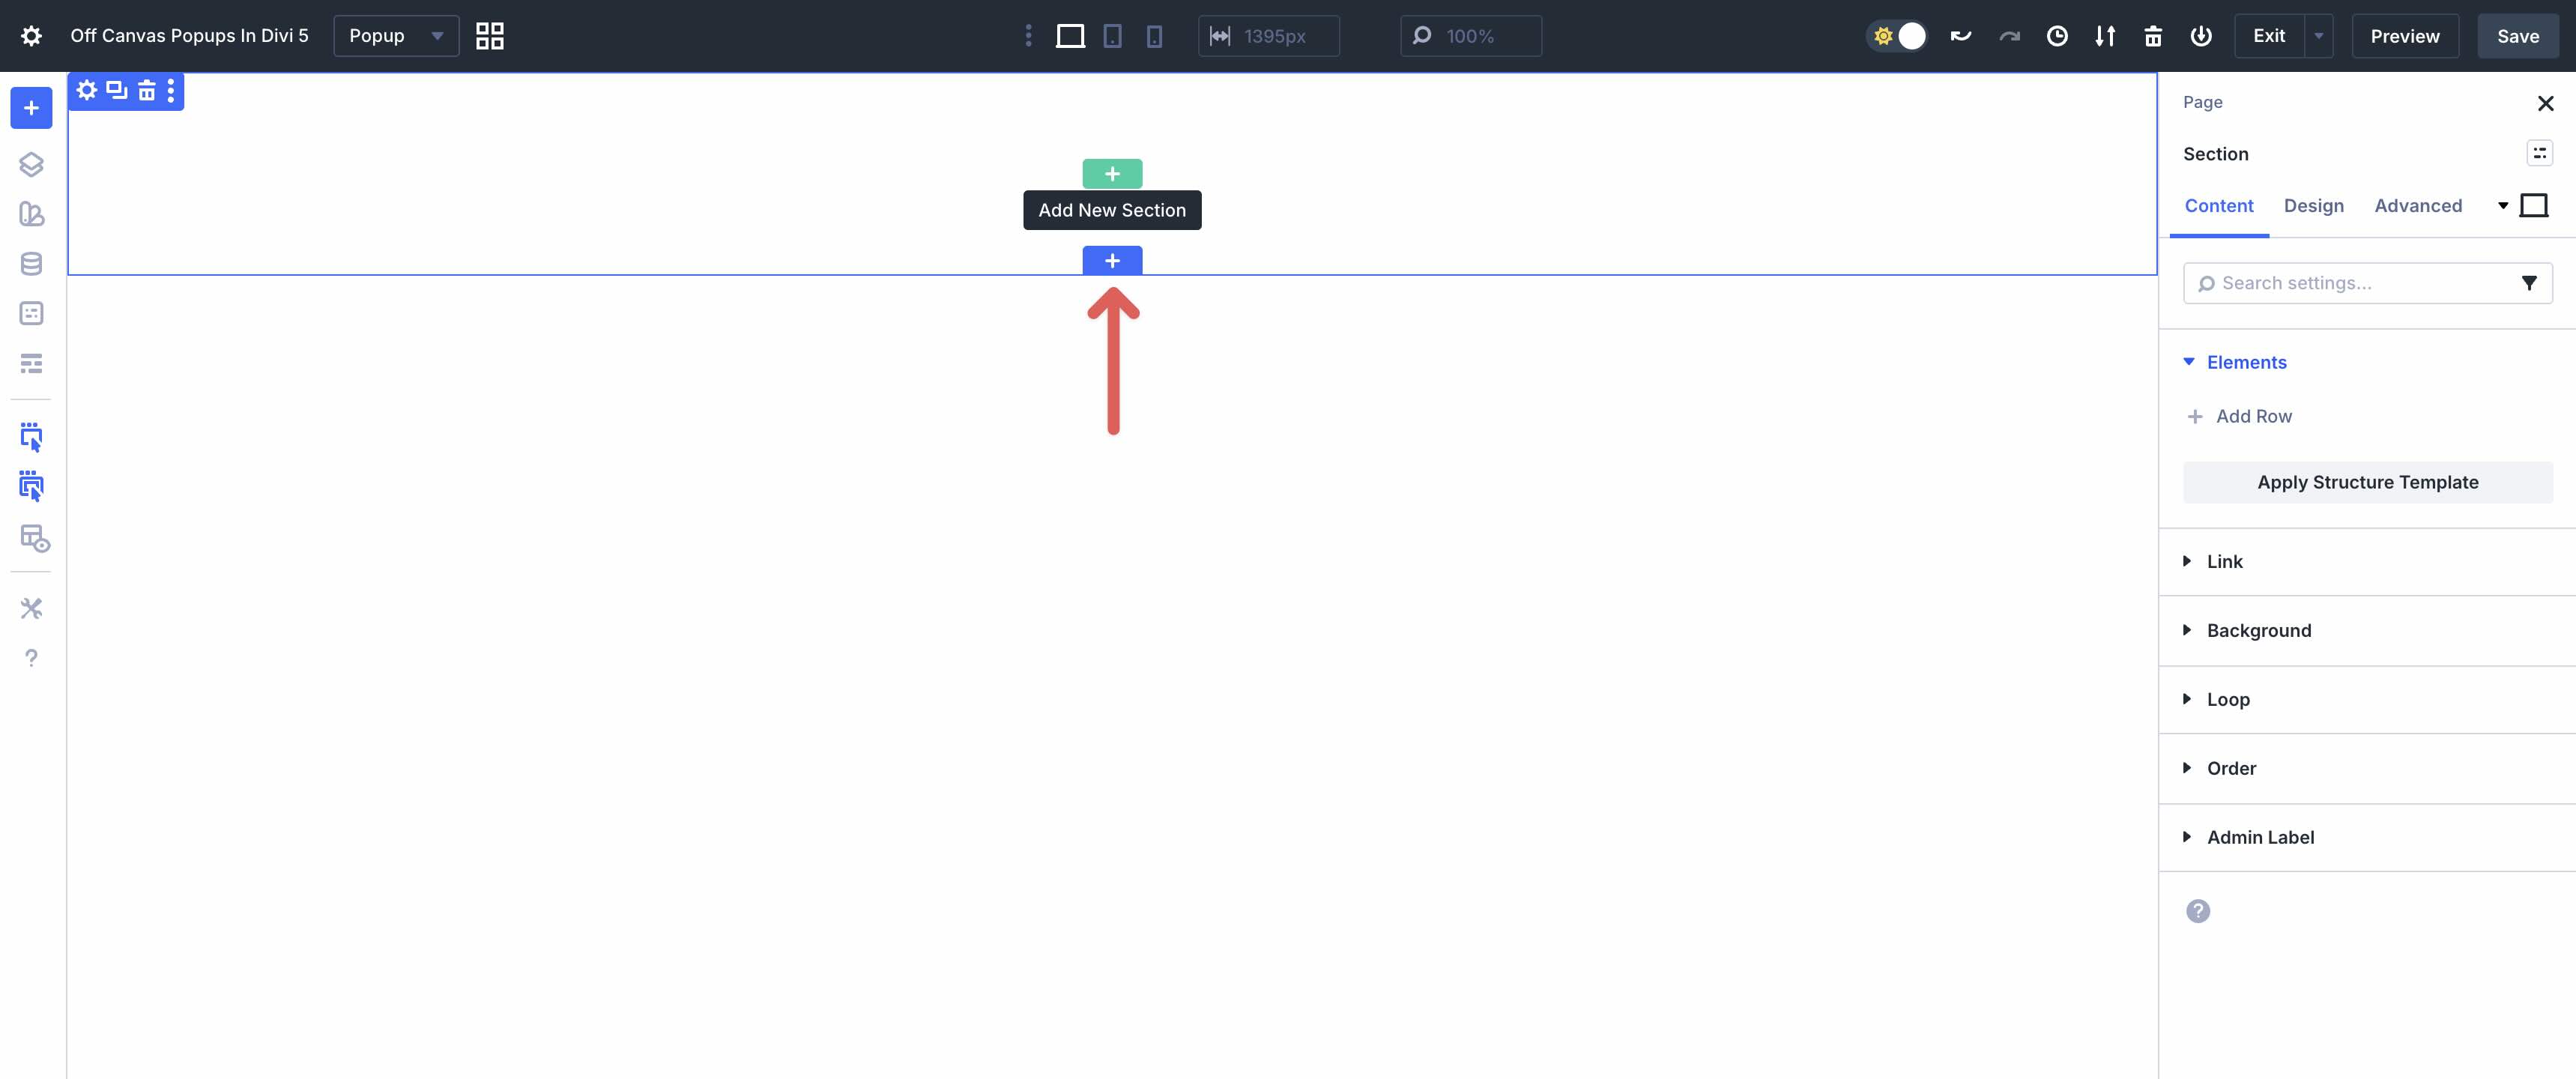
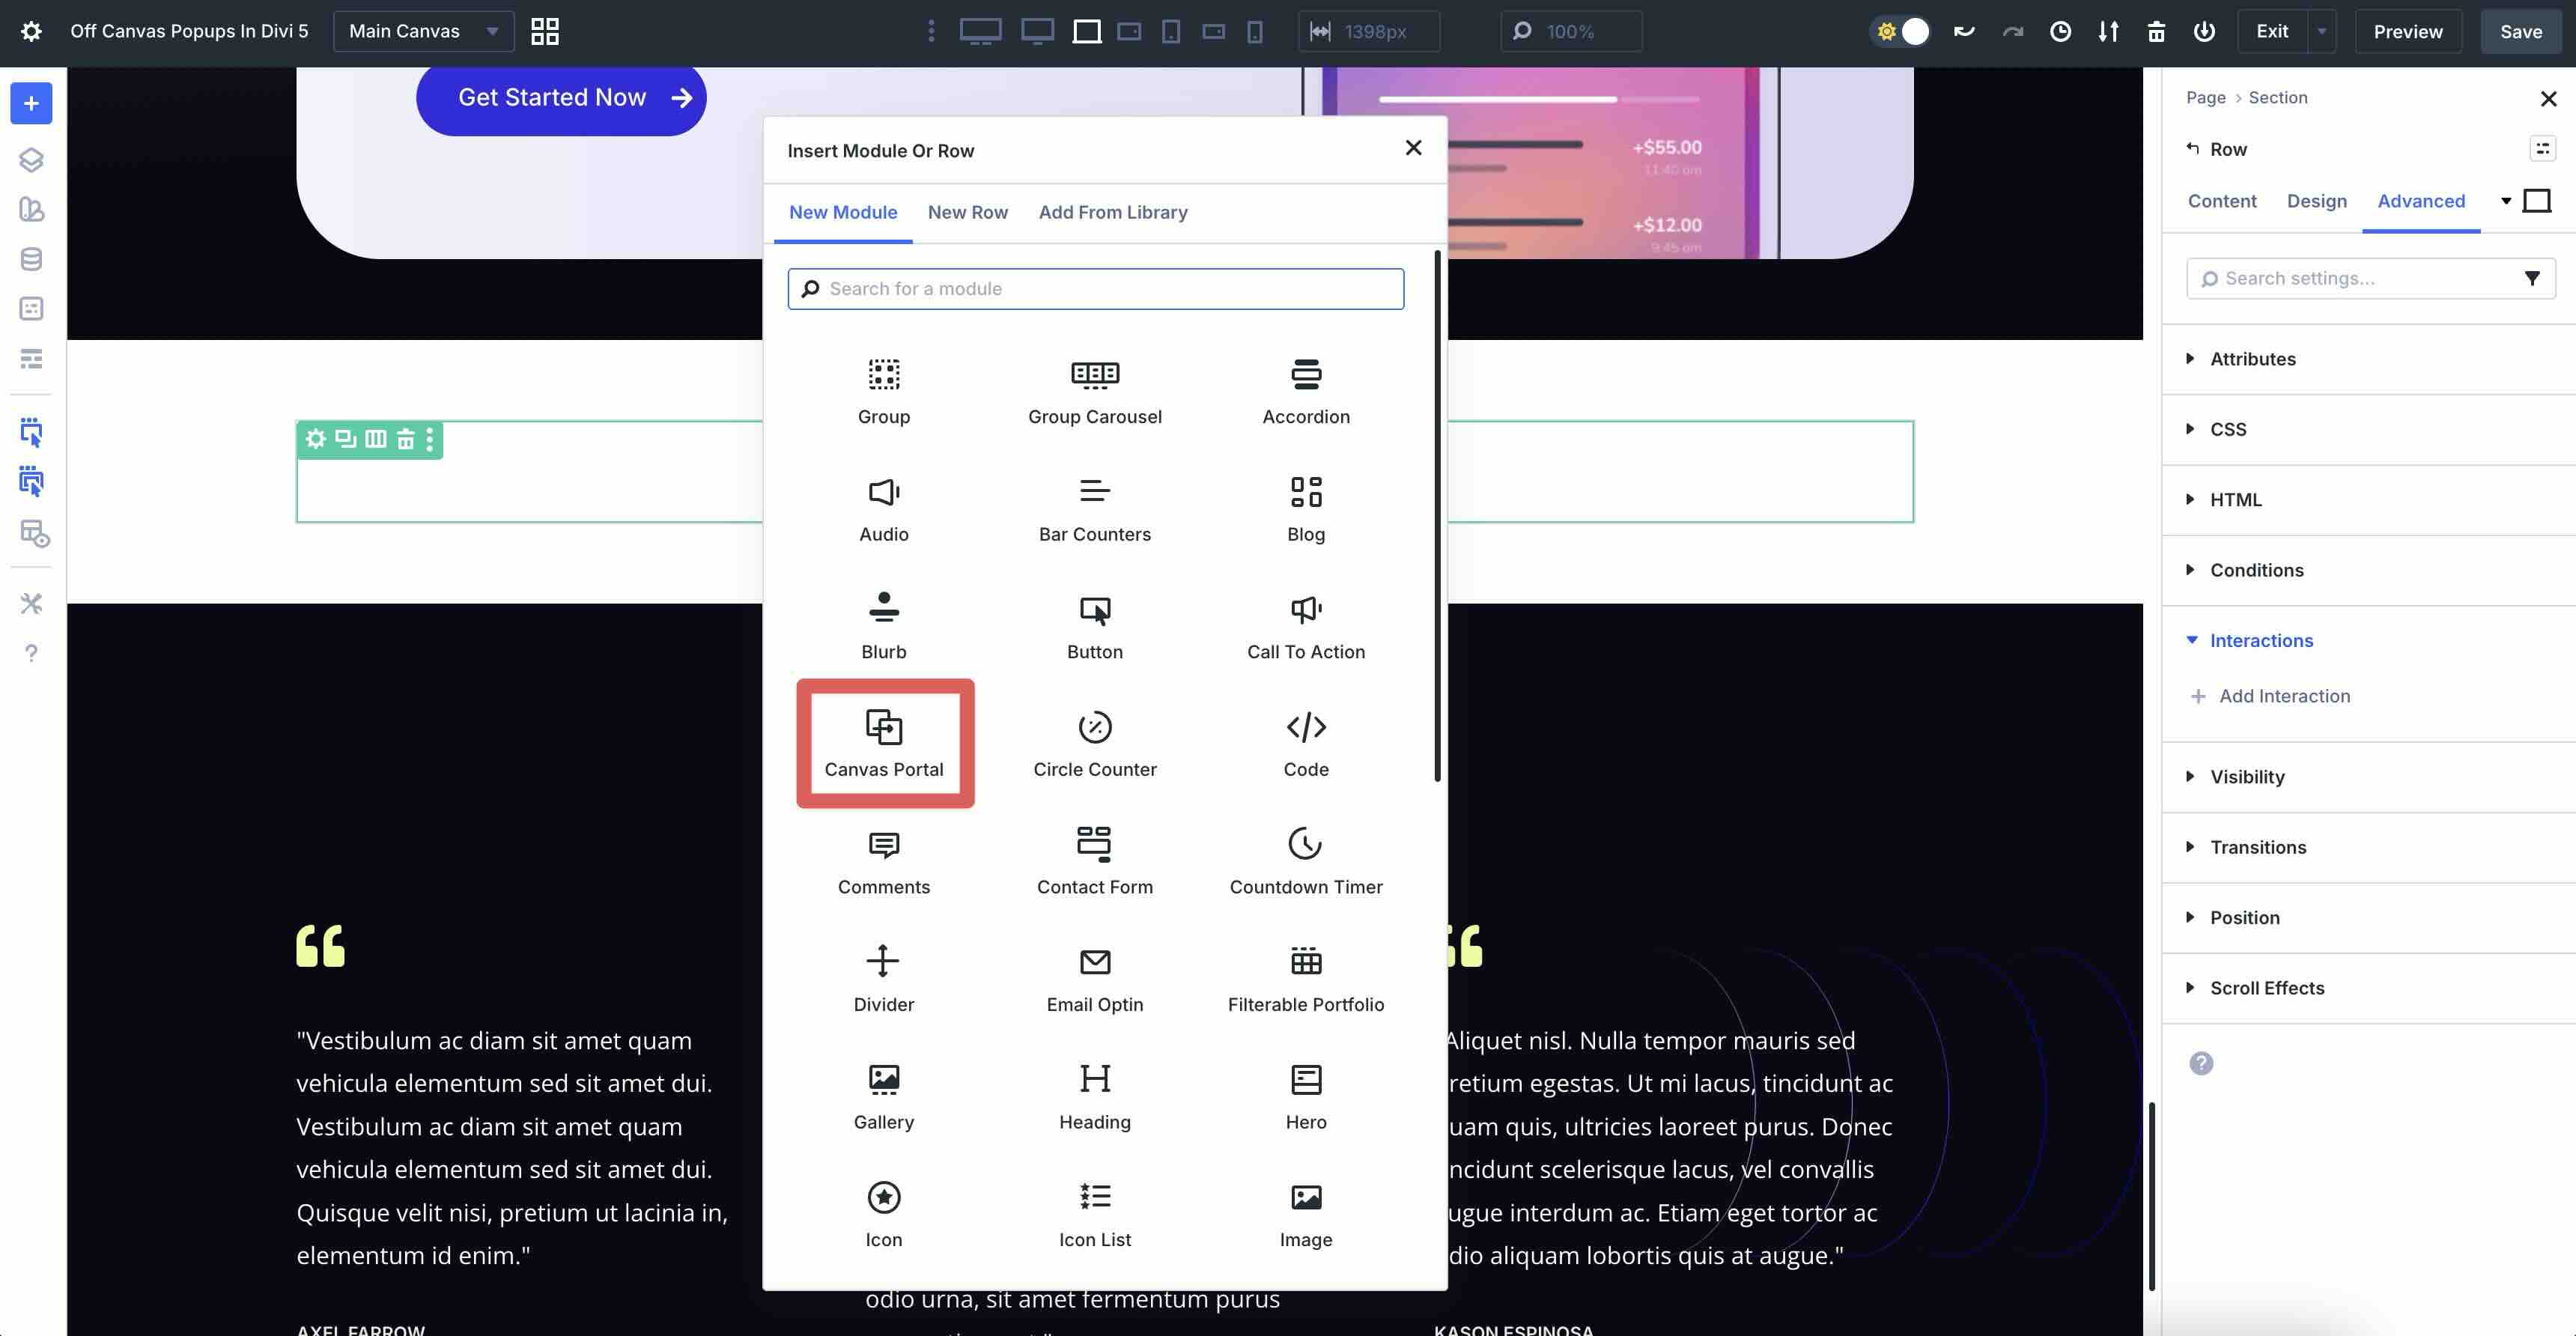
A new Builder canvas will open. Click the blue + icon to add a new section to the Canvas.
Select the Add From Library tab and choose a premade layout. We’ll use an email pop-up created by the Elegant Themes design team.
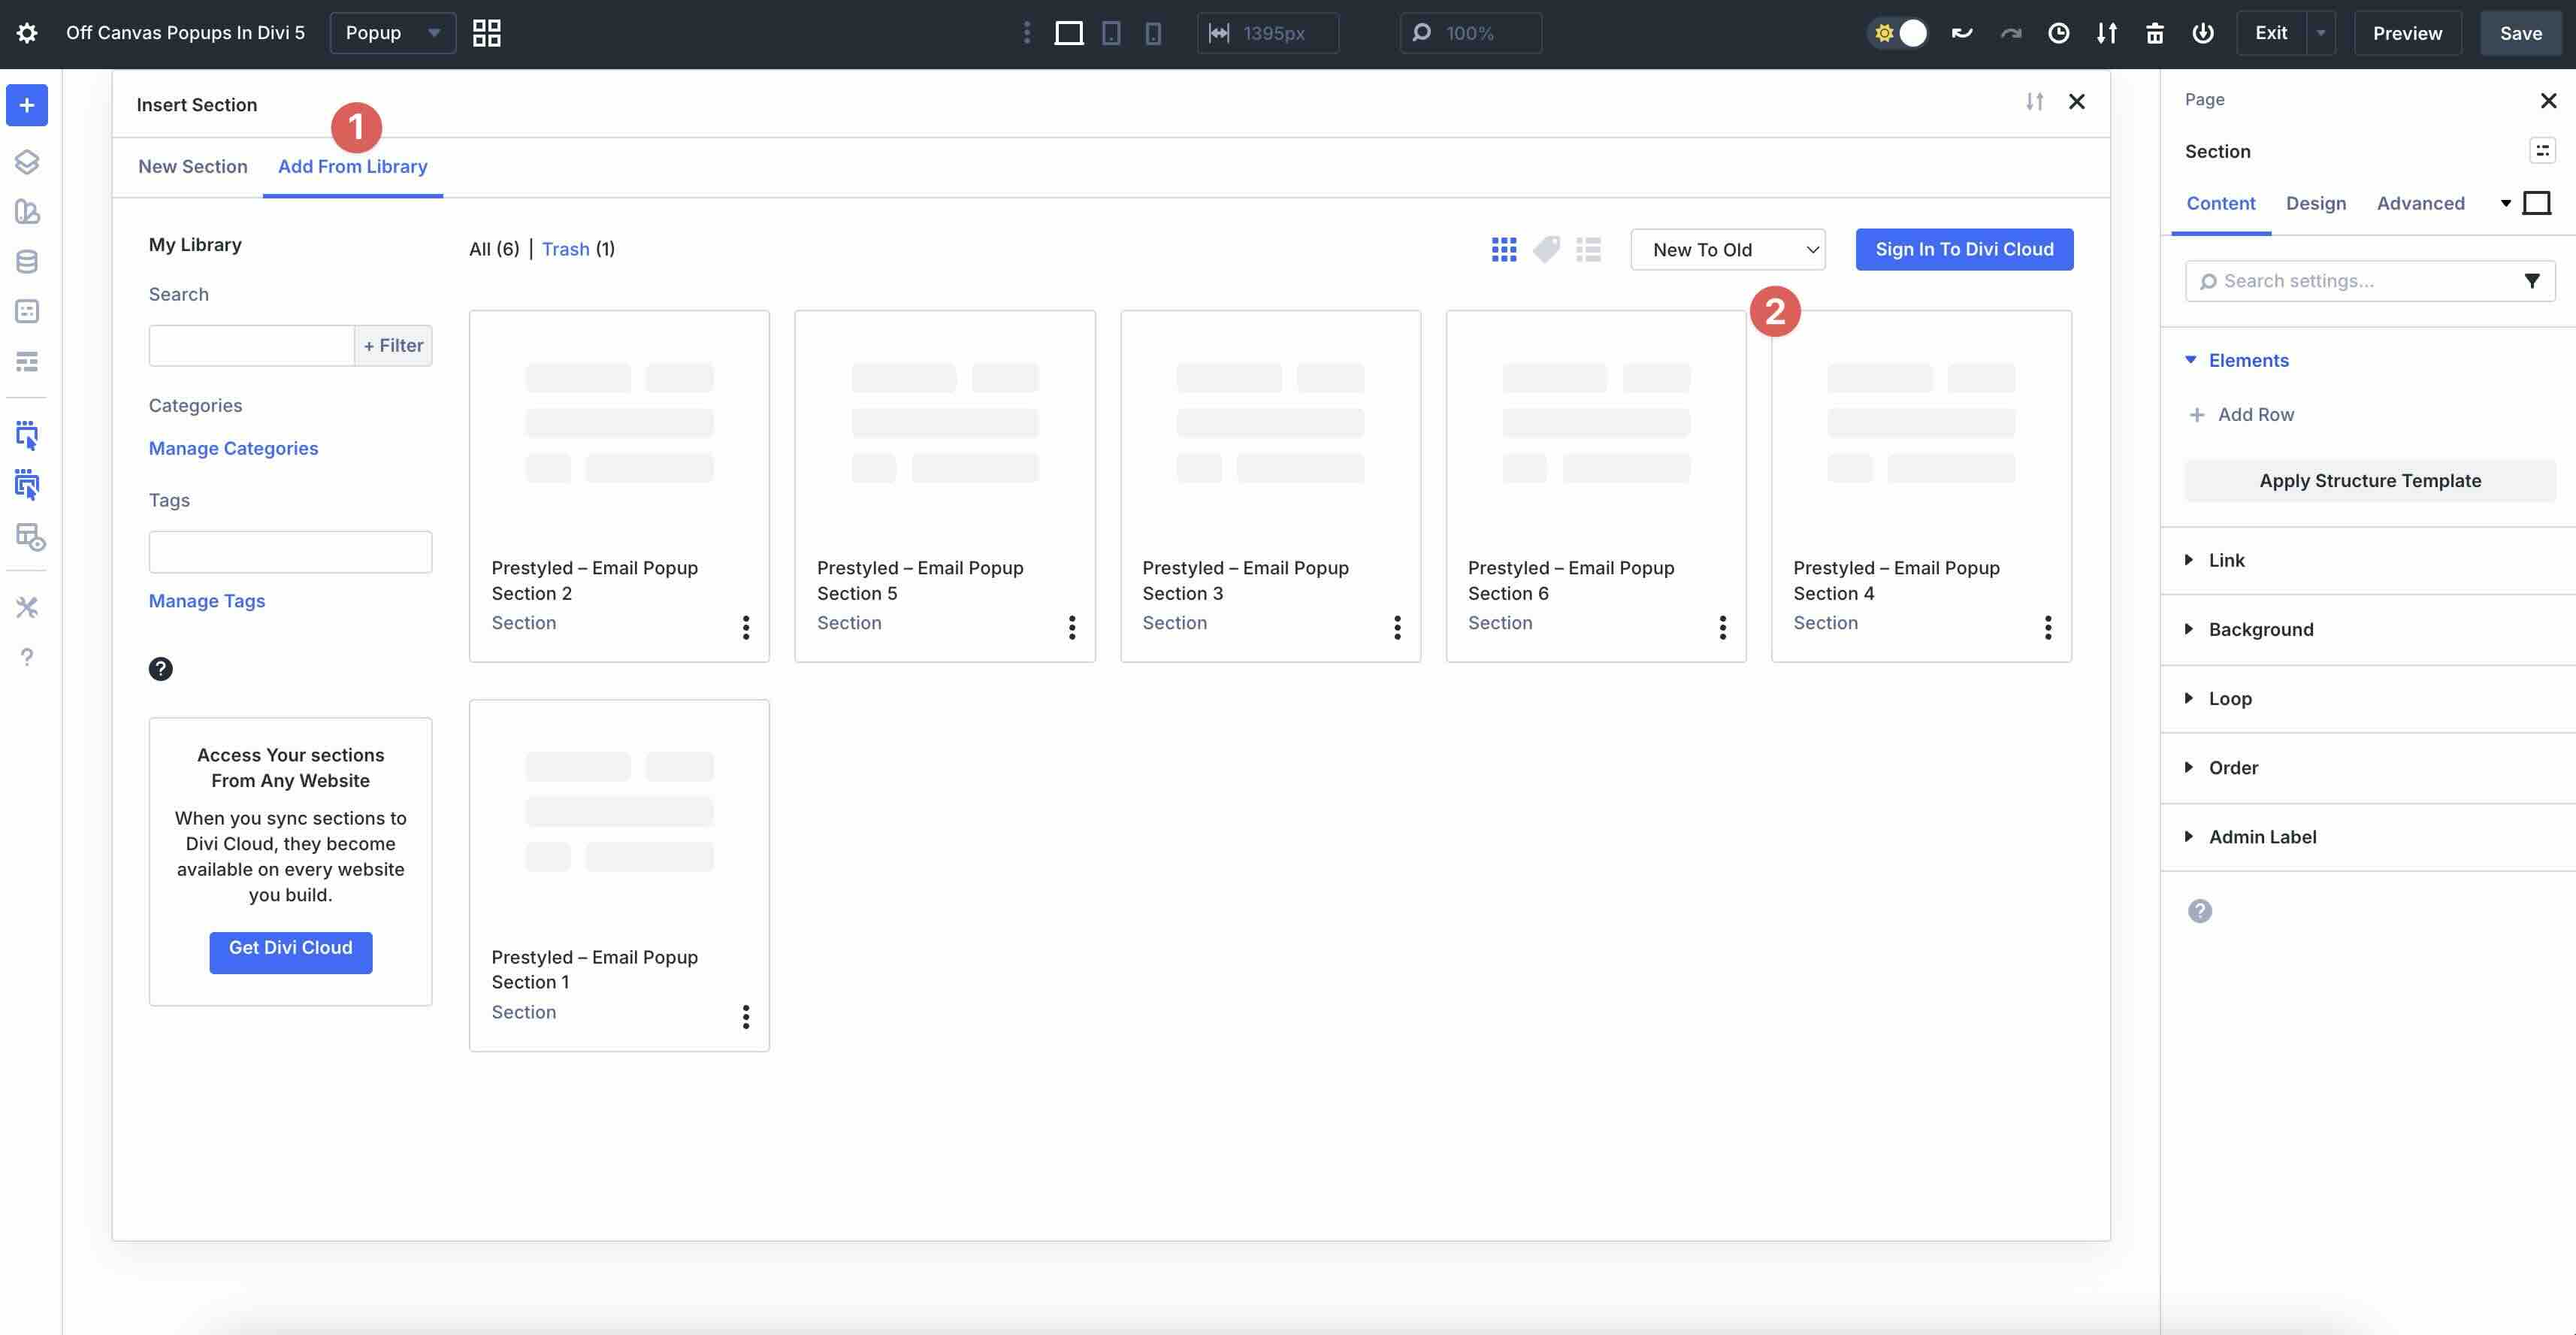
Finally, click Use This Section to load the pop-up onto the Canvas.

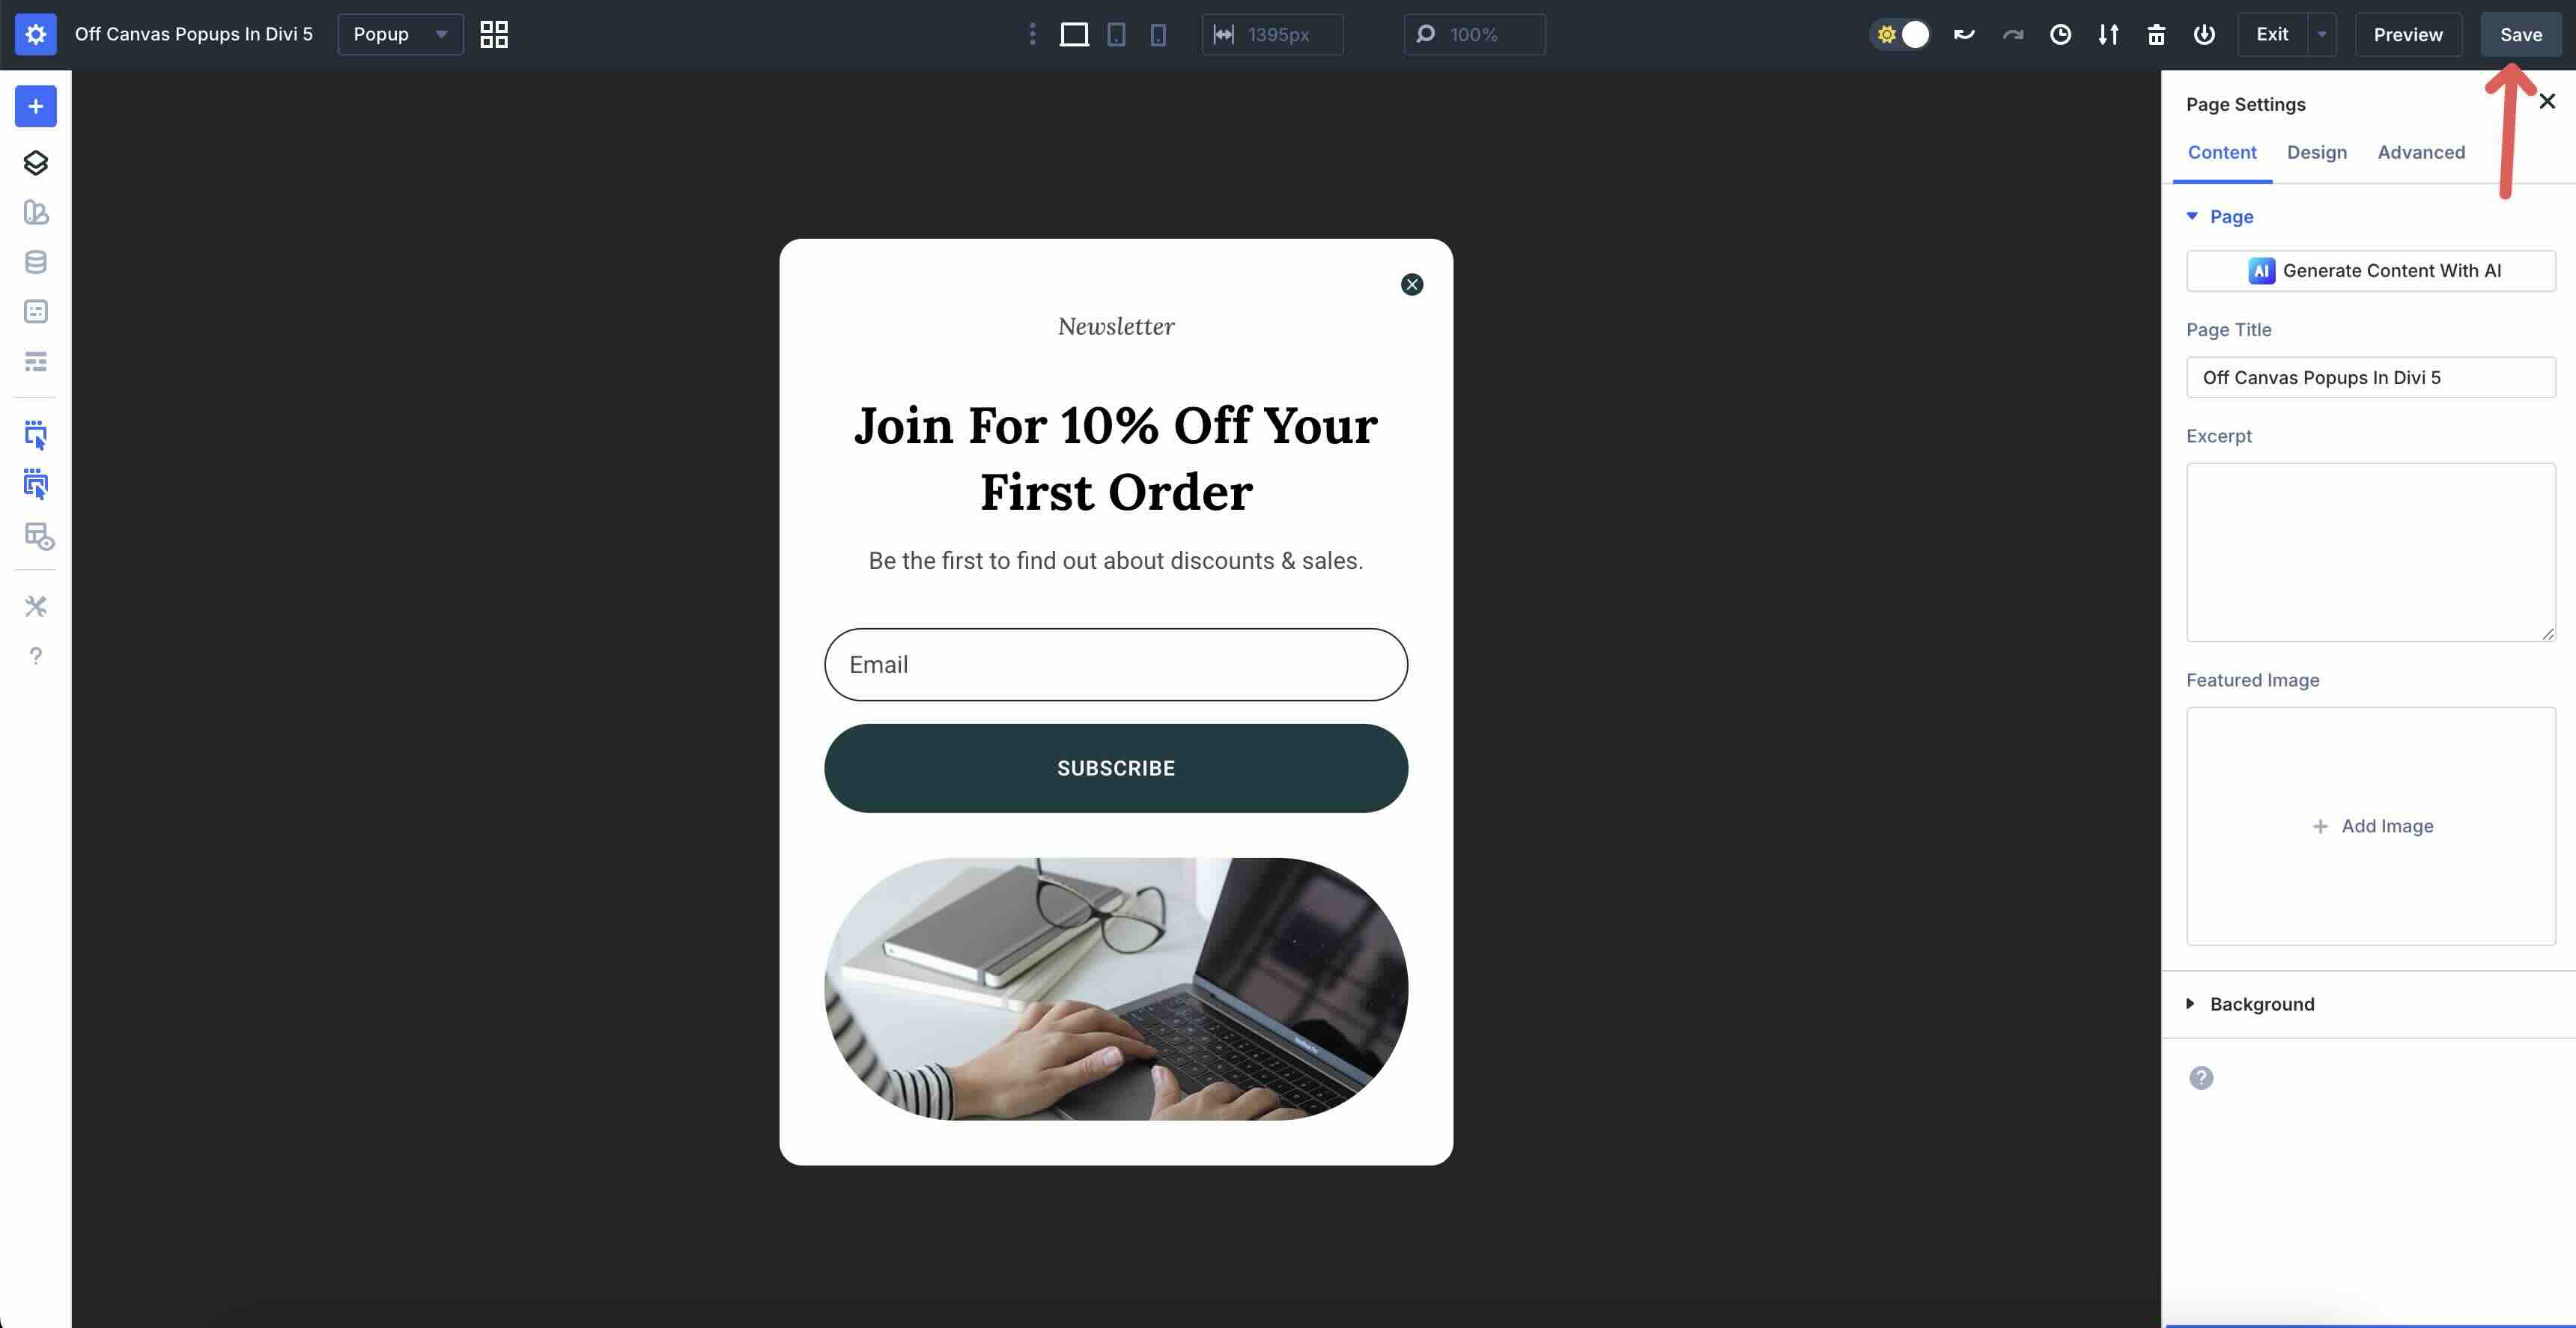
Once the layout loads, be sure to save the Canvas.
Step 2: Make Design Changes
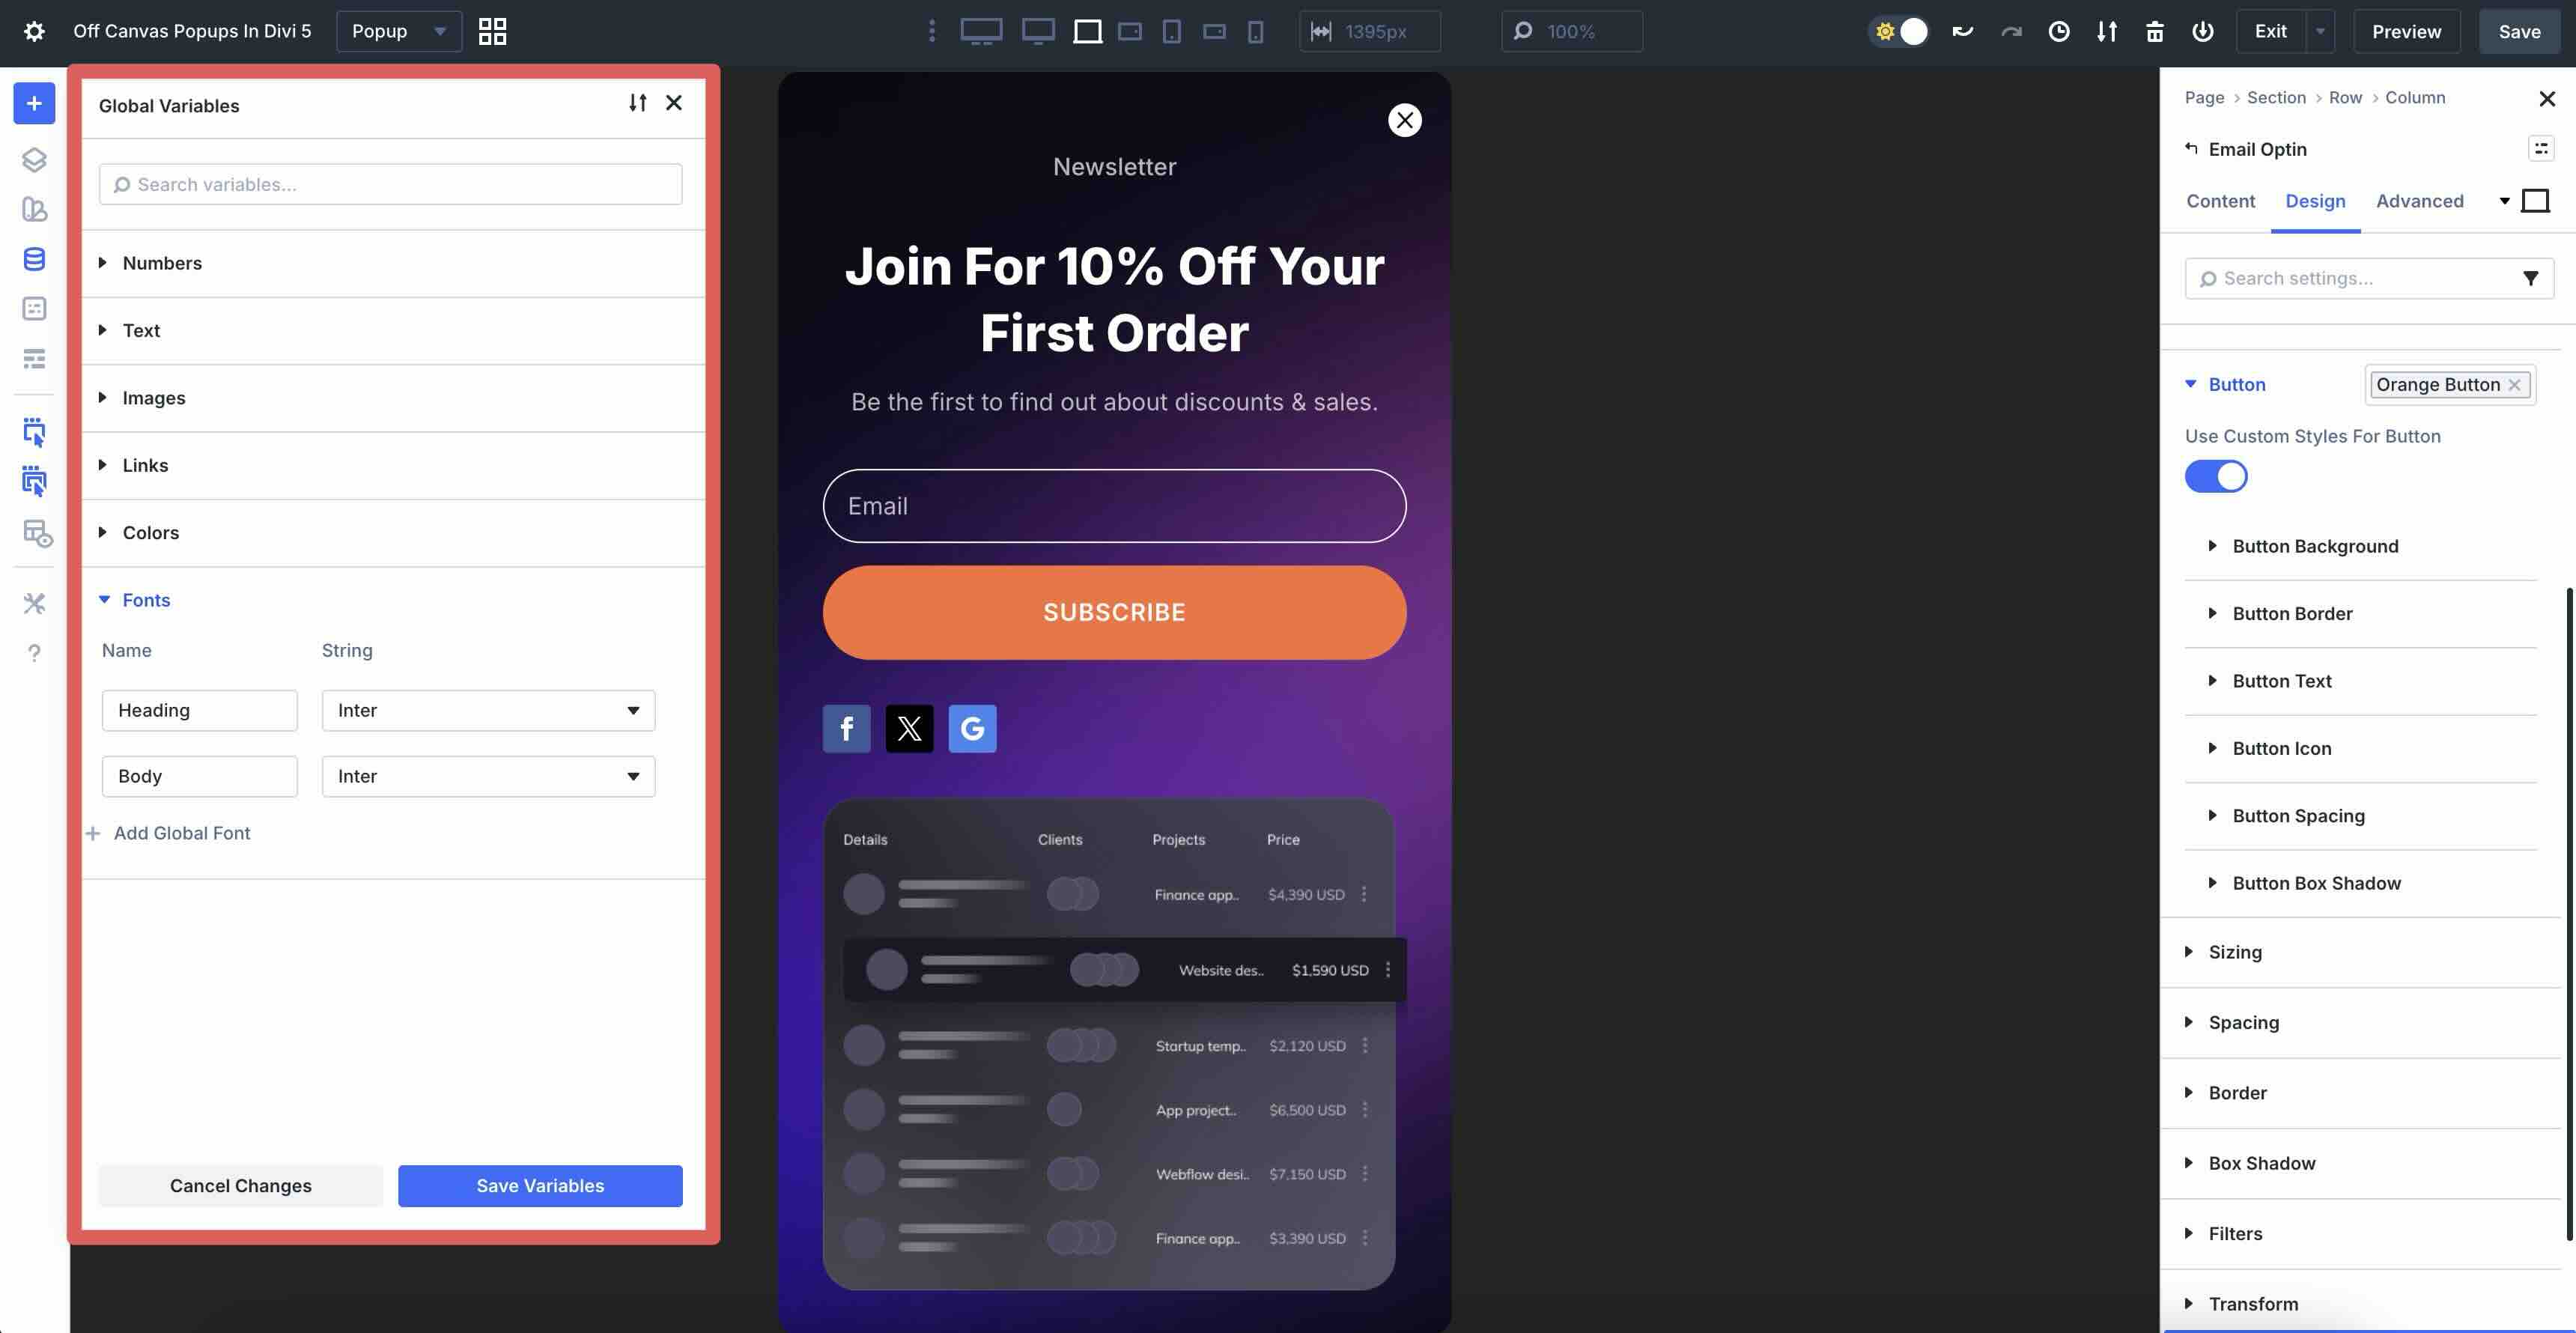
Divi 5 makes styling your pop-up a breeze. Since we are starting with a premade layout, we can easily change the pop-up’s look in a few clicks. Use Divi’s Design tab in each module to make quick changes like changing the Heading Font and Color.
Changing a Button module’s design settings is easy, too. Simply select a new Background Color, swap the Font, adjust the Border Radius, and more.
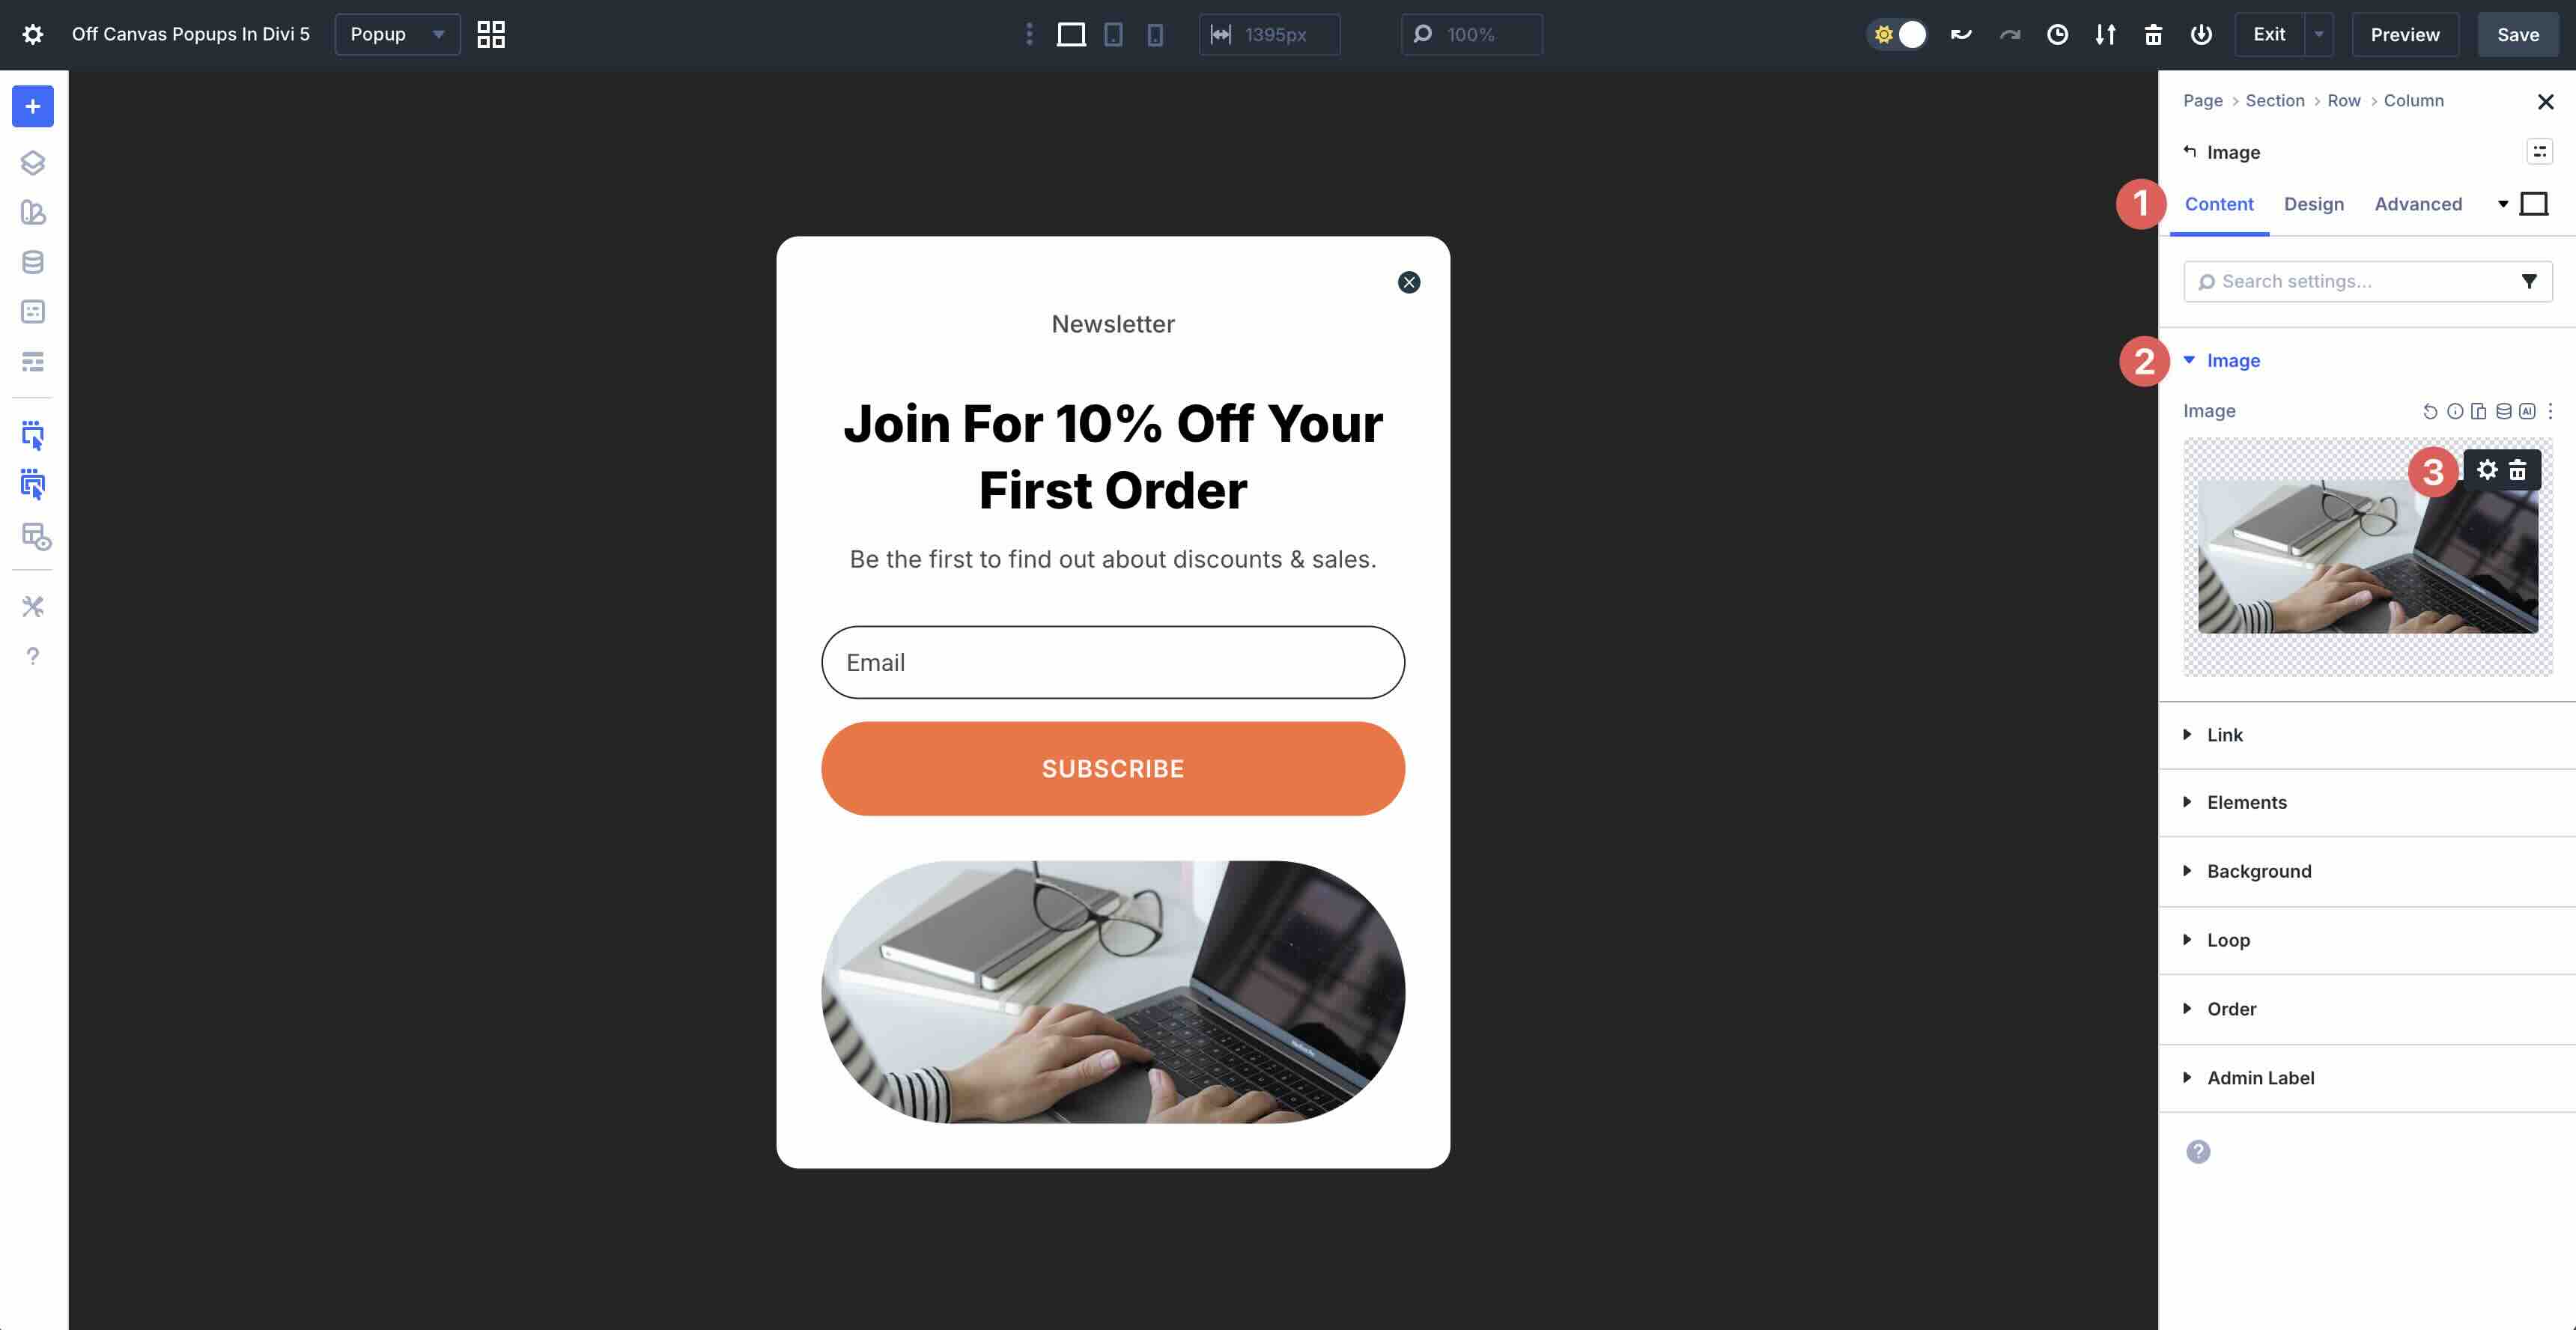
Images are easy to swap out, too. Simply open the Image settings, navigate to the Content tab, expand the Image dropdown menu, and click the Settings icon to choose a new image.
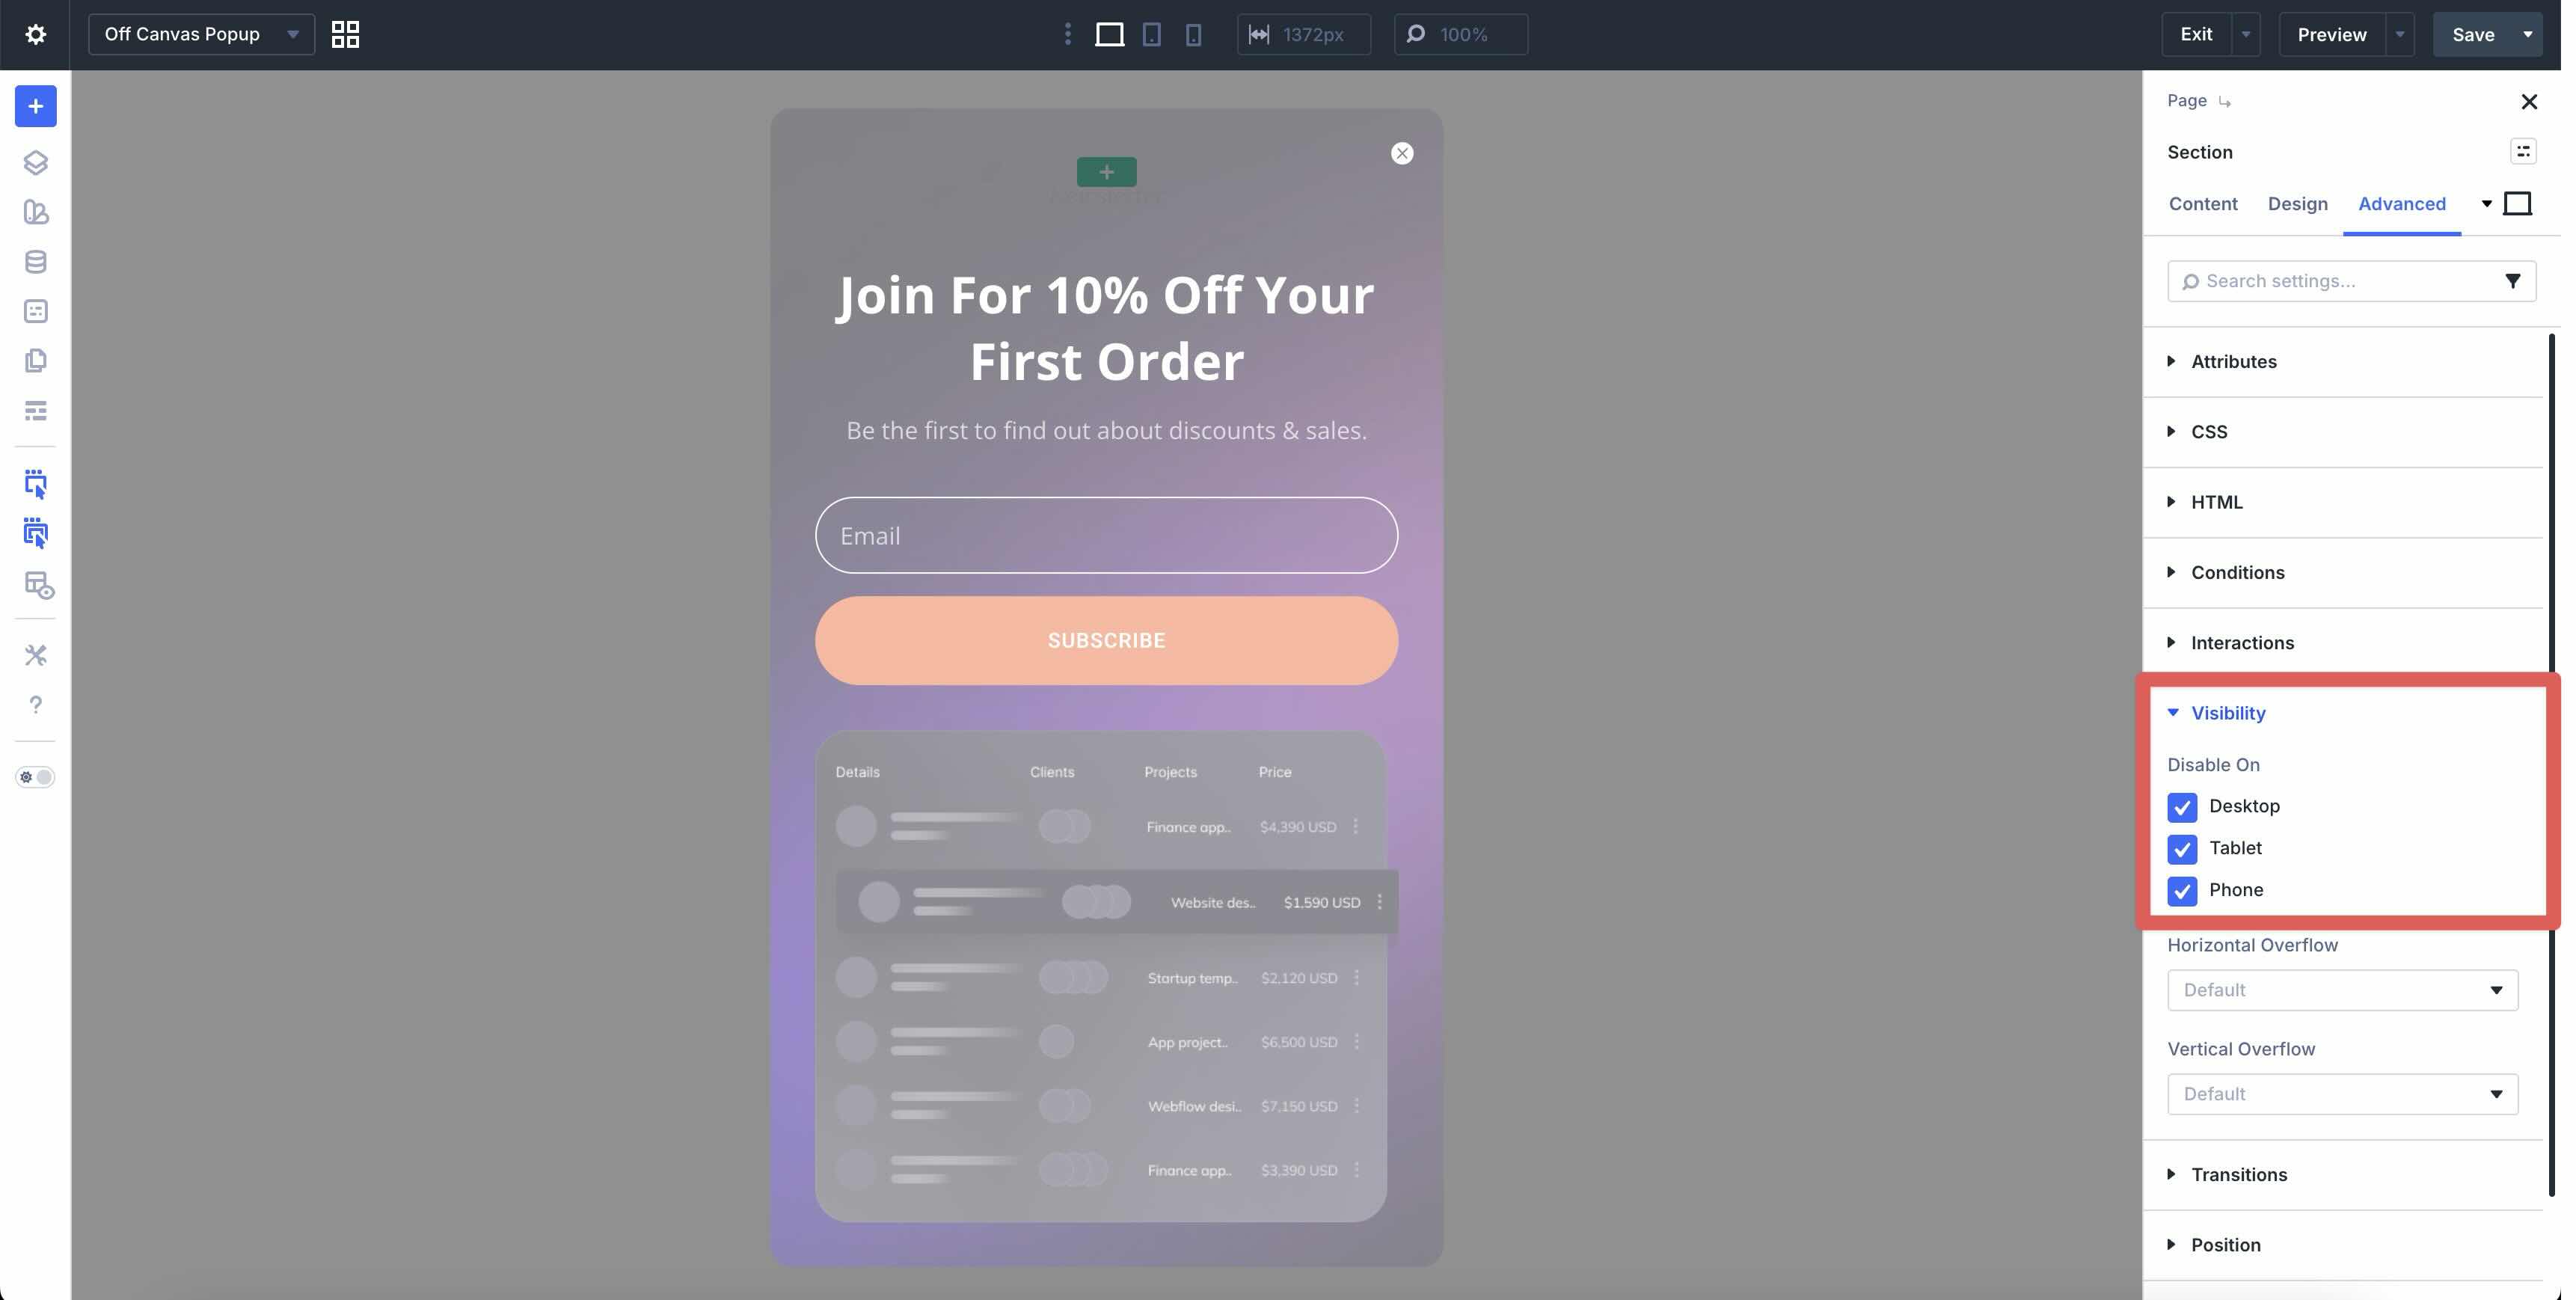
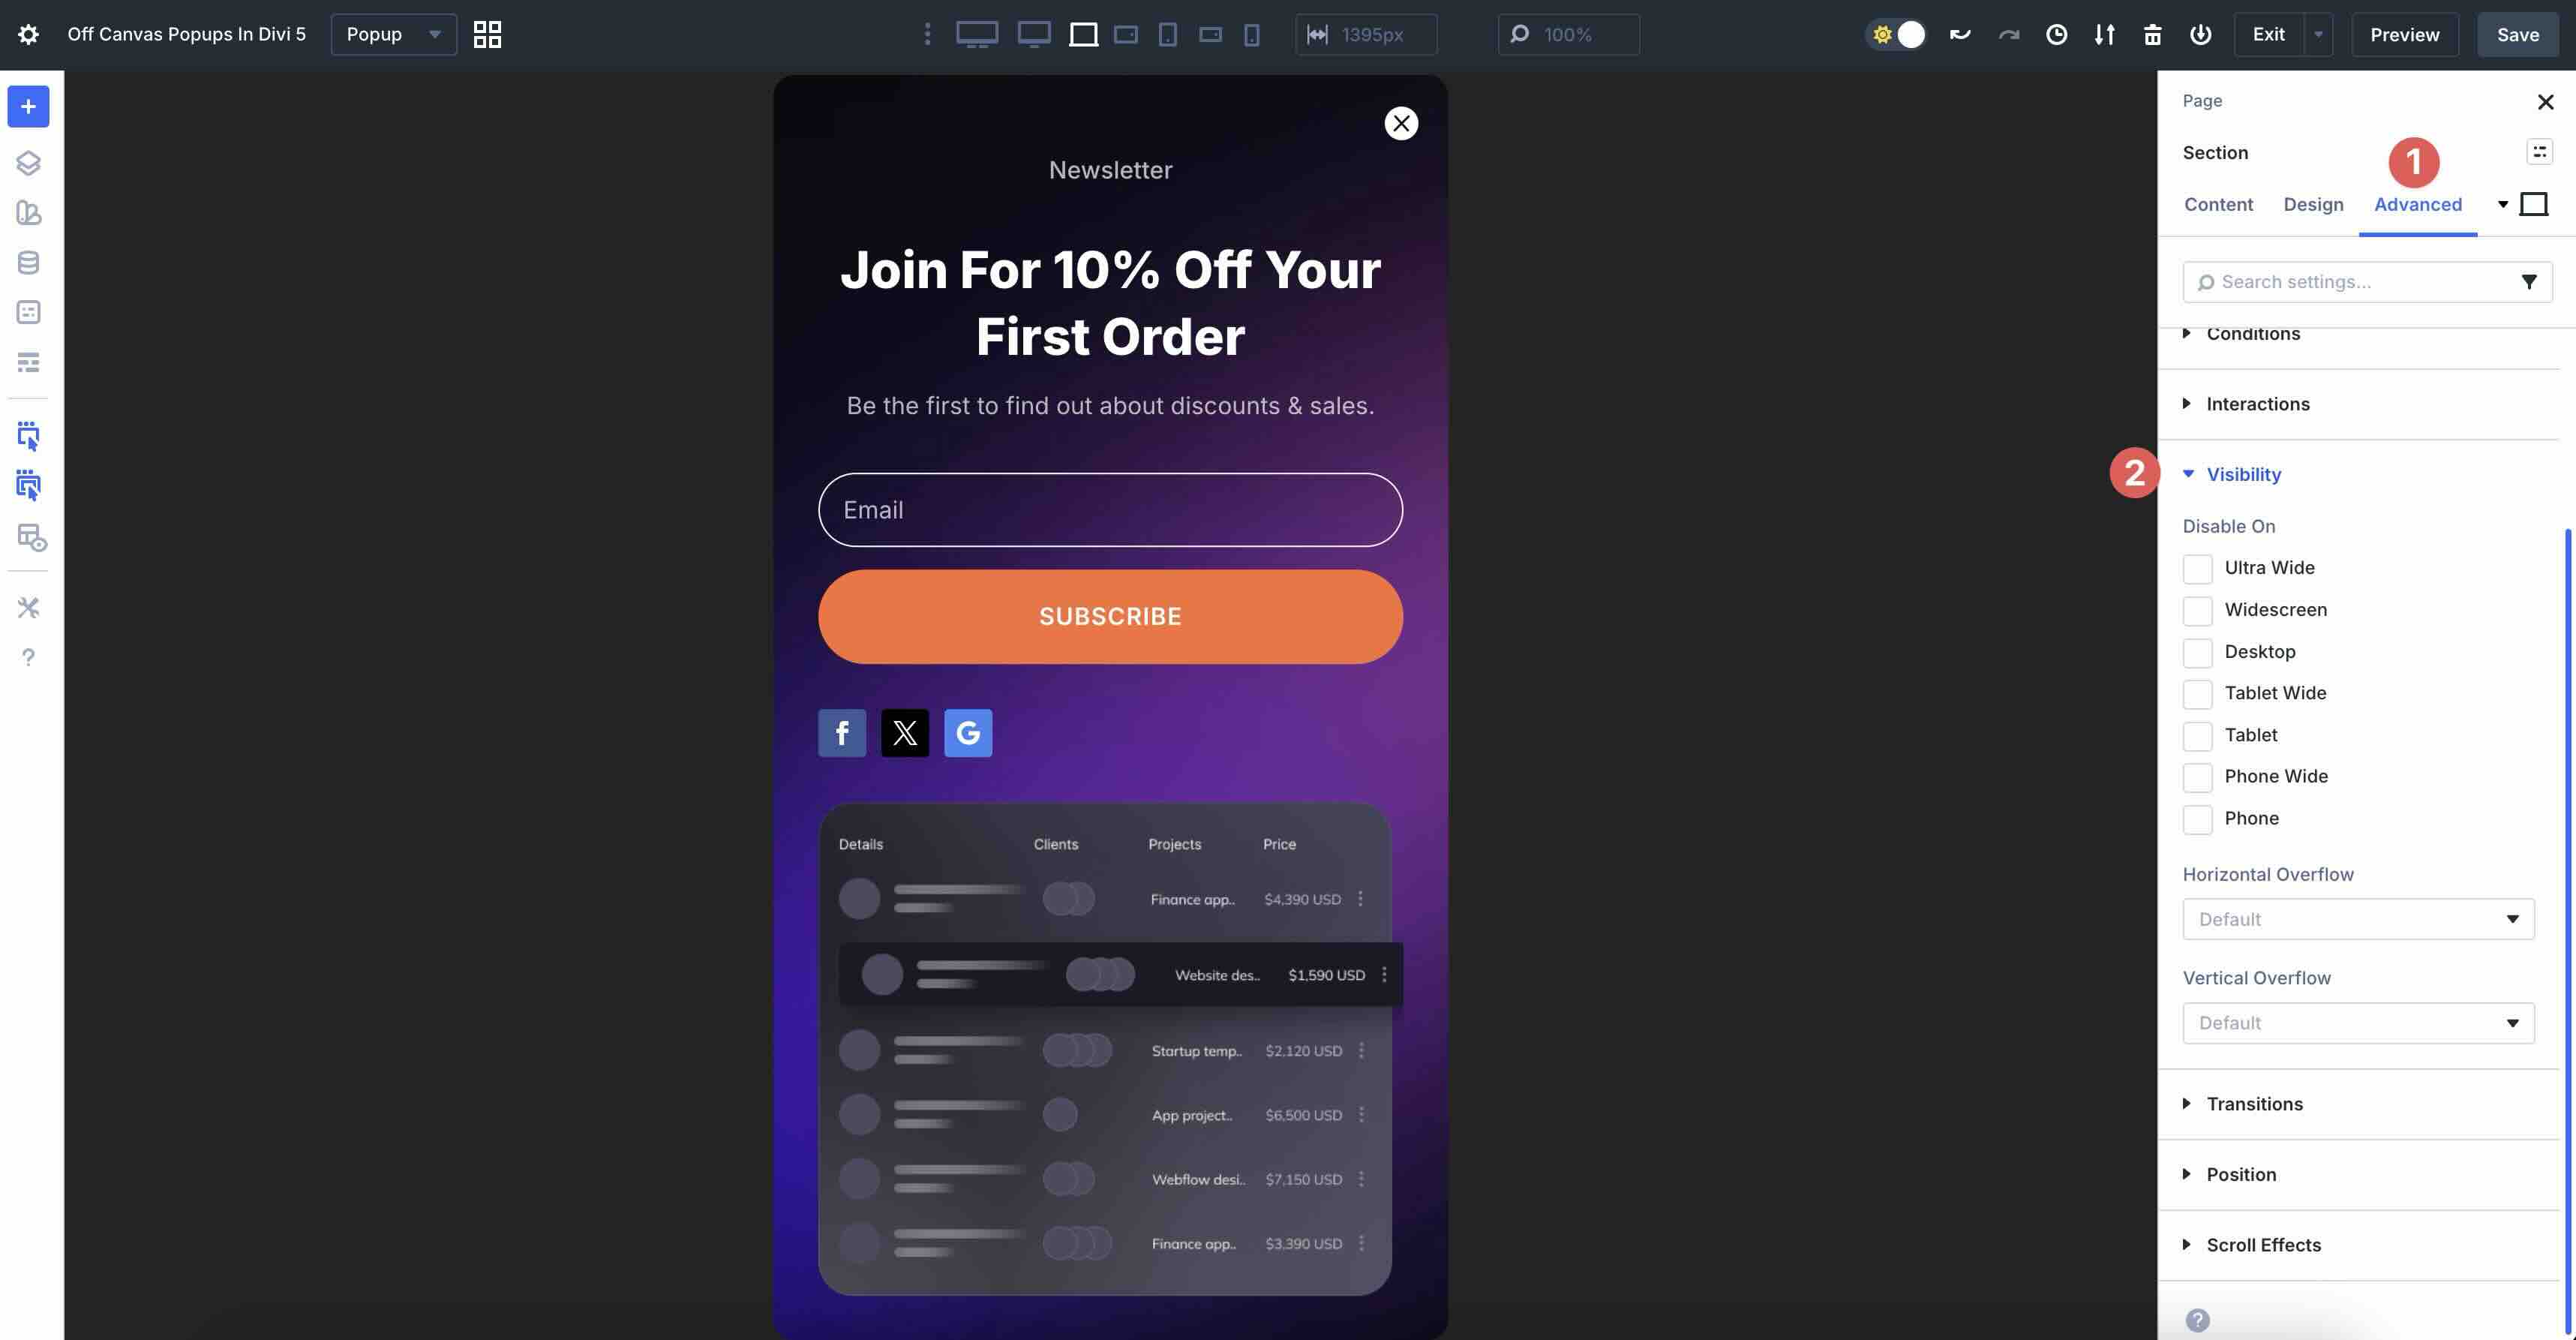
Before heading back to the Main Canvas, we need to hide the popup from view using Divi 5’s Visibility settings. This will keep the popup hidden on the Main Canvas until it is triggered by Interactions.
In the Advanced tab, expand the Visibility dropdown menu. Click to disable the section on Desktop, Tablet, and Mobile.
Step 3: Set The Interactions
Set An Interaction On The Main Canvas
Once design changes are in place, we can switch back to the Main Canvas to set the Interaction for our pop-up. Click the Canvas dropdown menu to select the Main Canvas.
We will set an Interaction to launch it after a time delay. Because we are using a pop-up with positioning already in place, it won’t matter which section we use to trigger it.
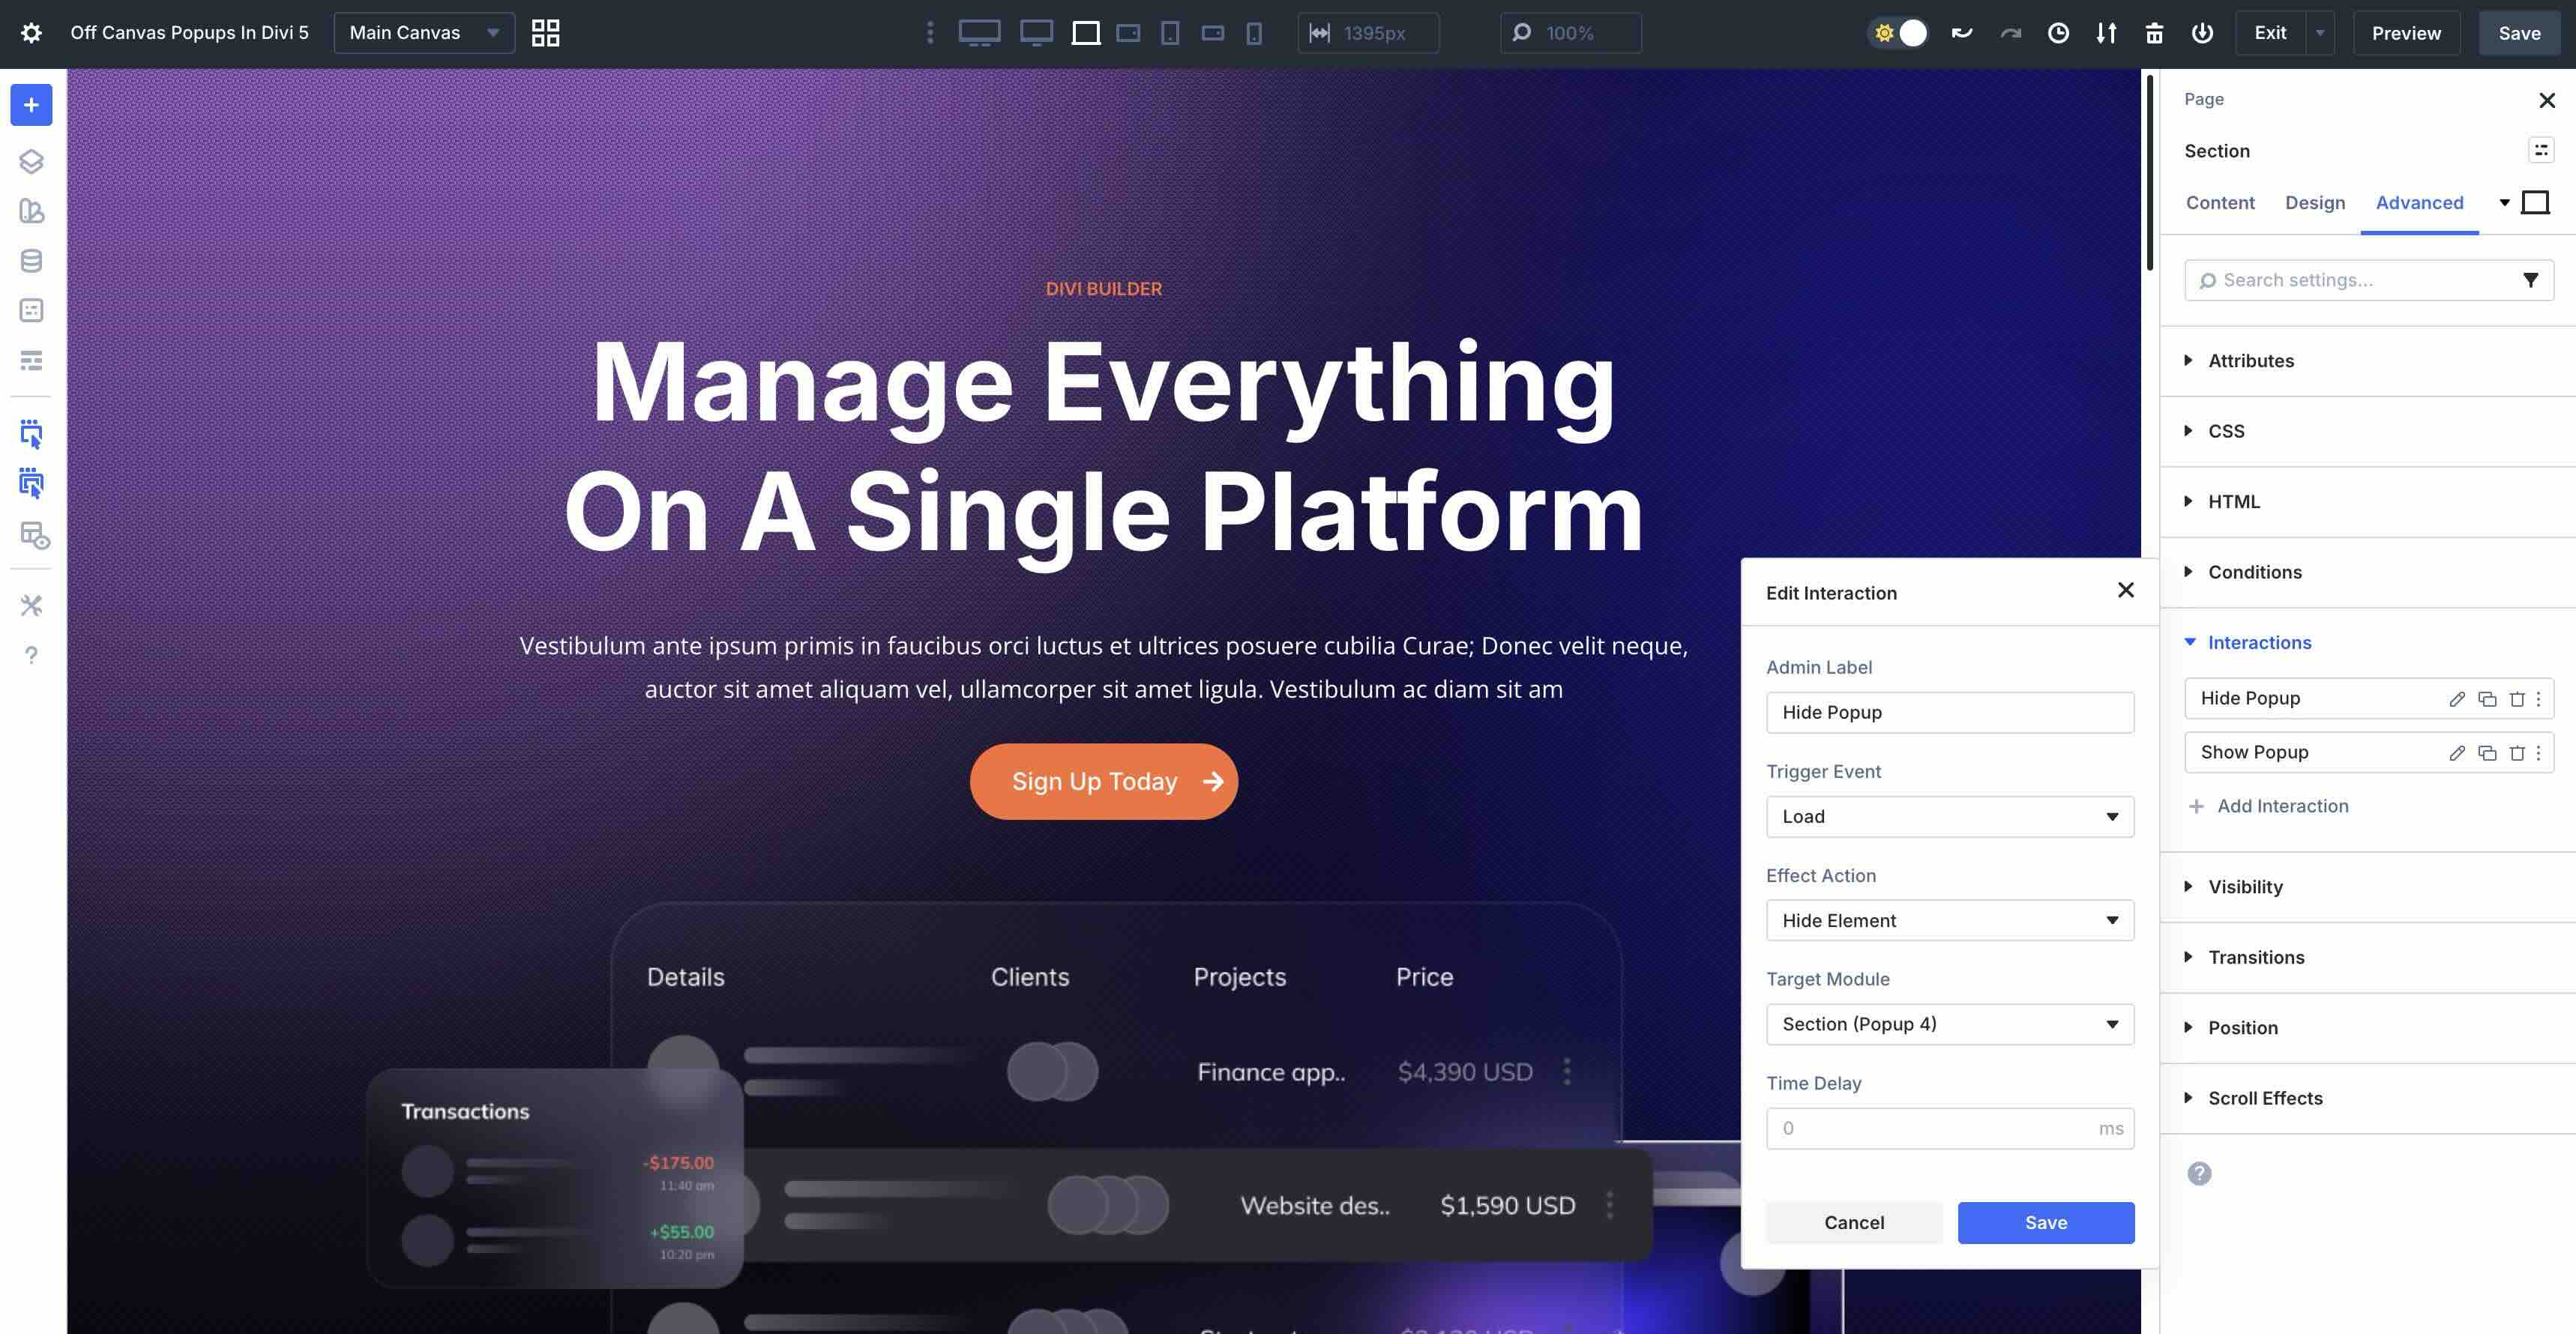
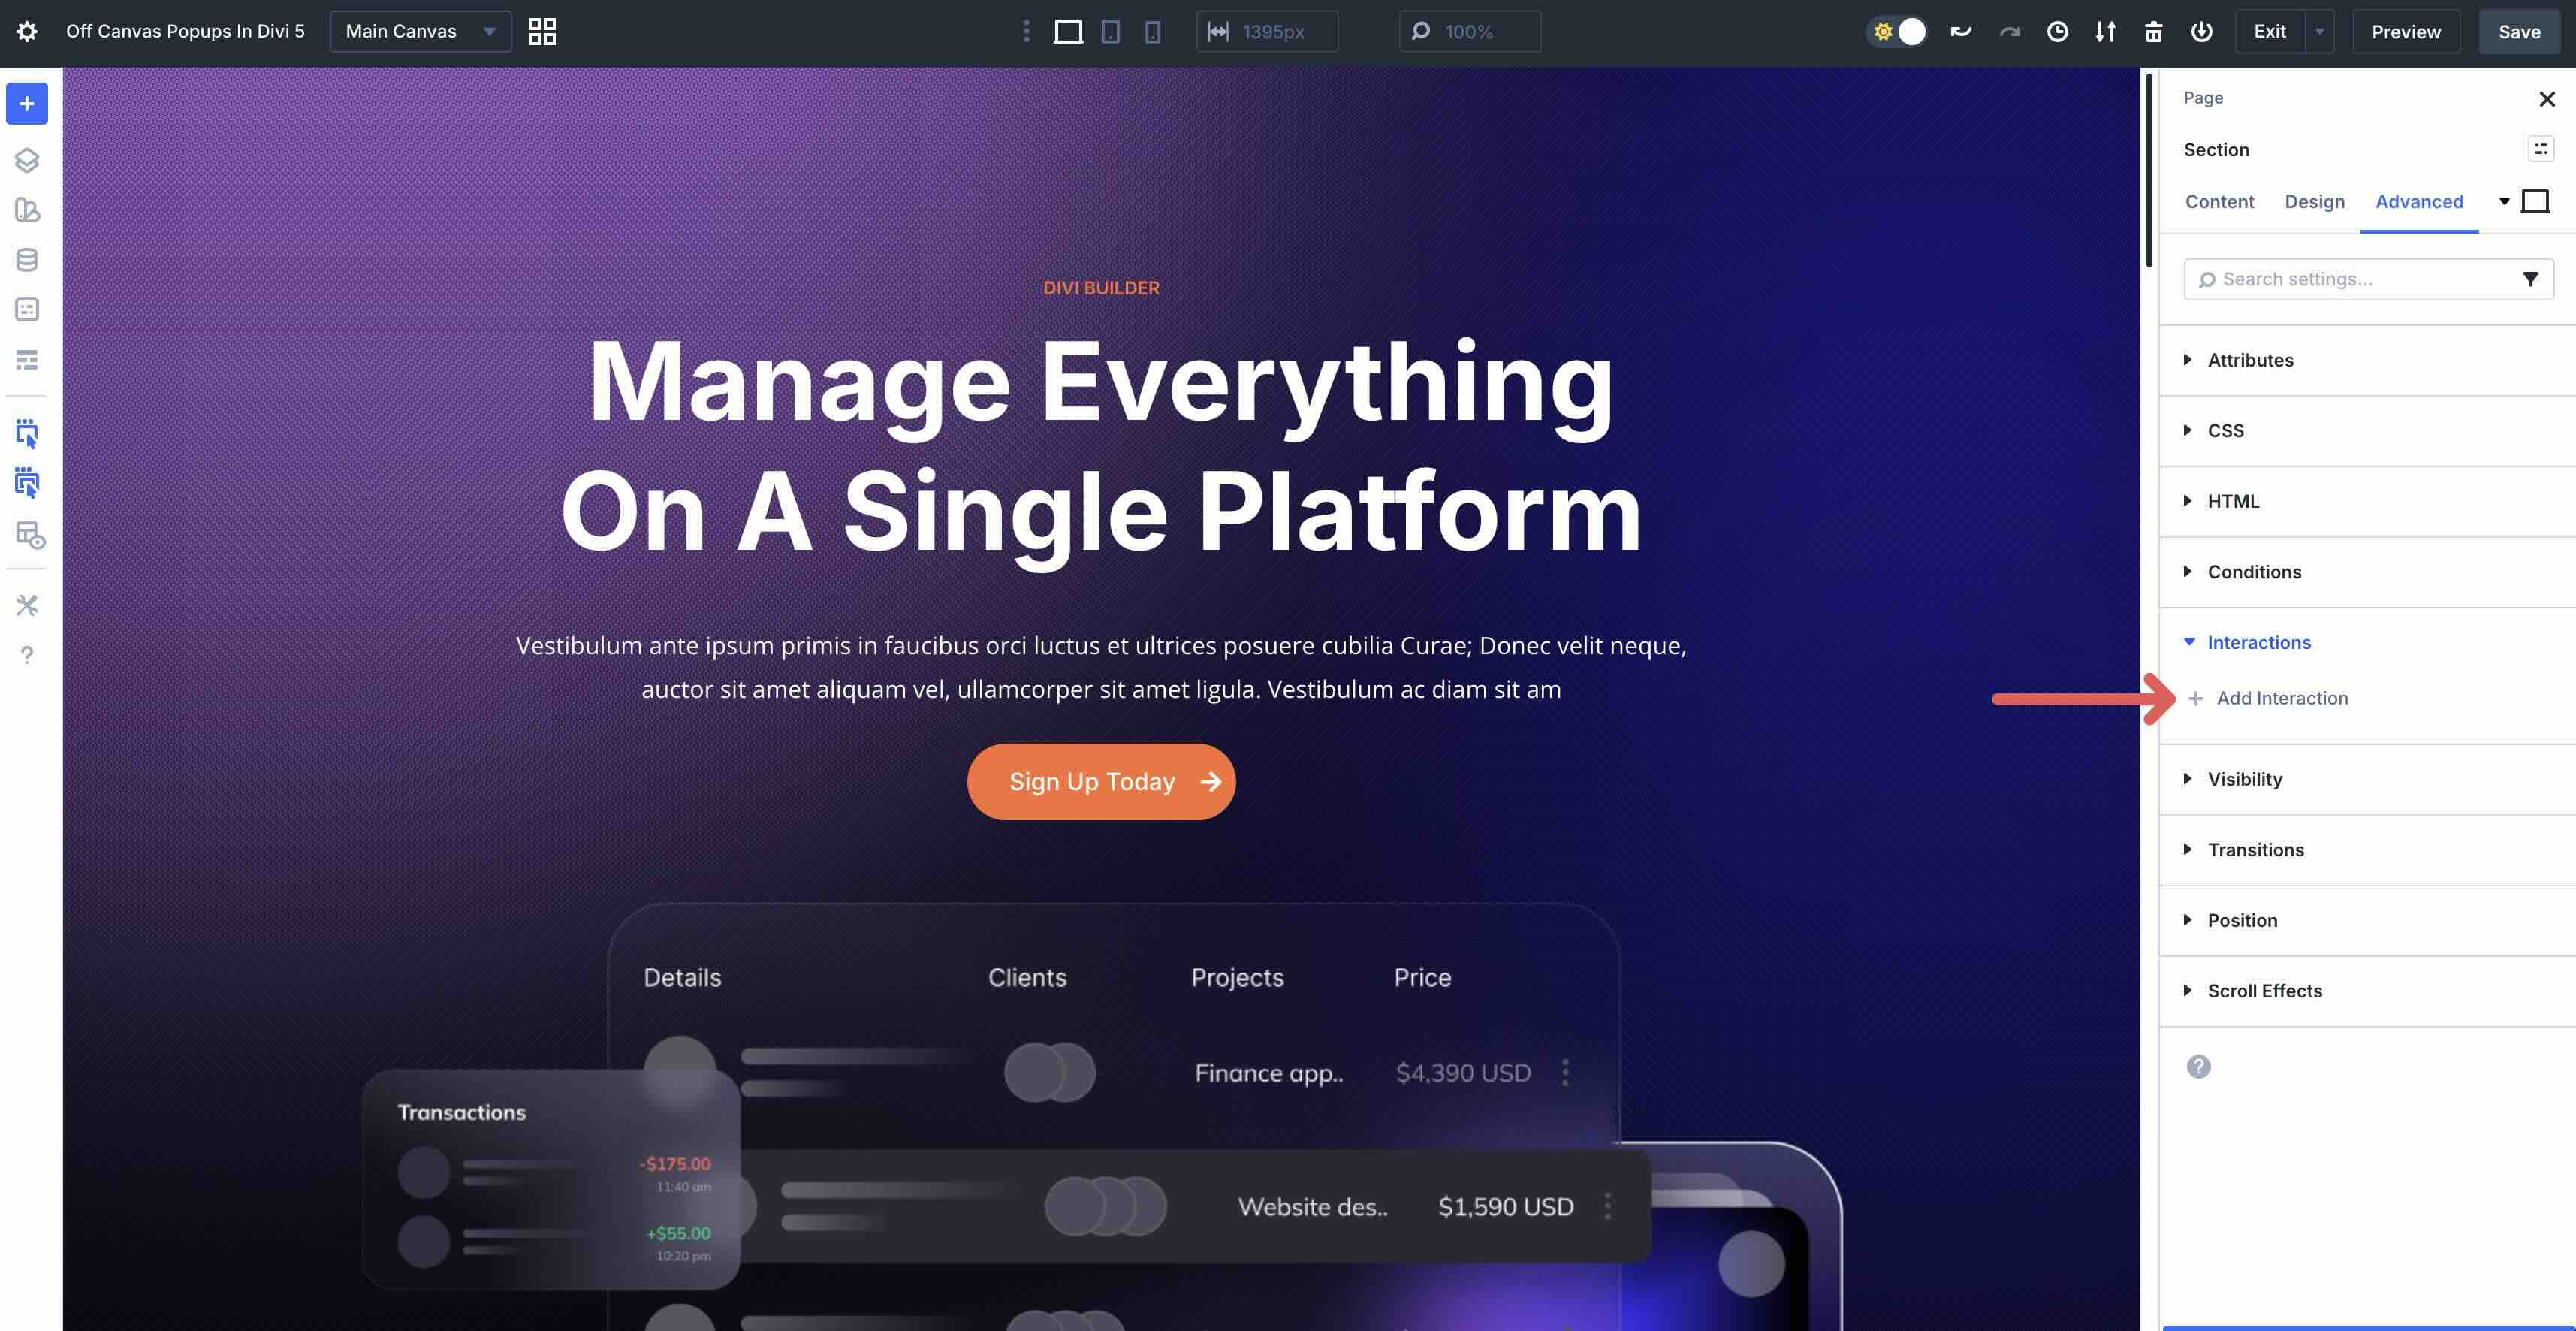
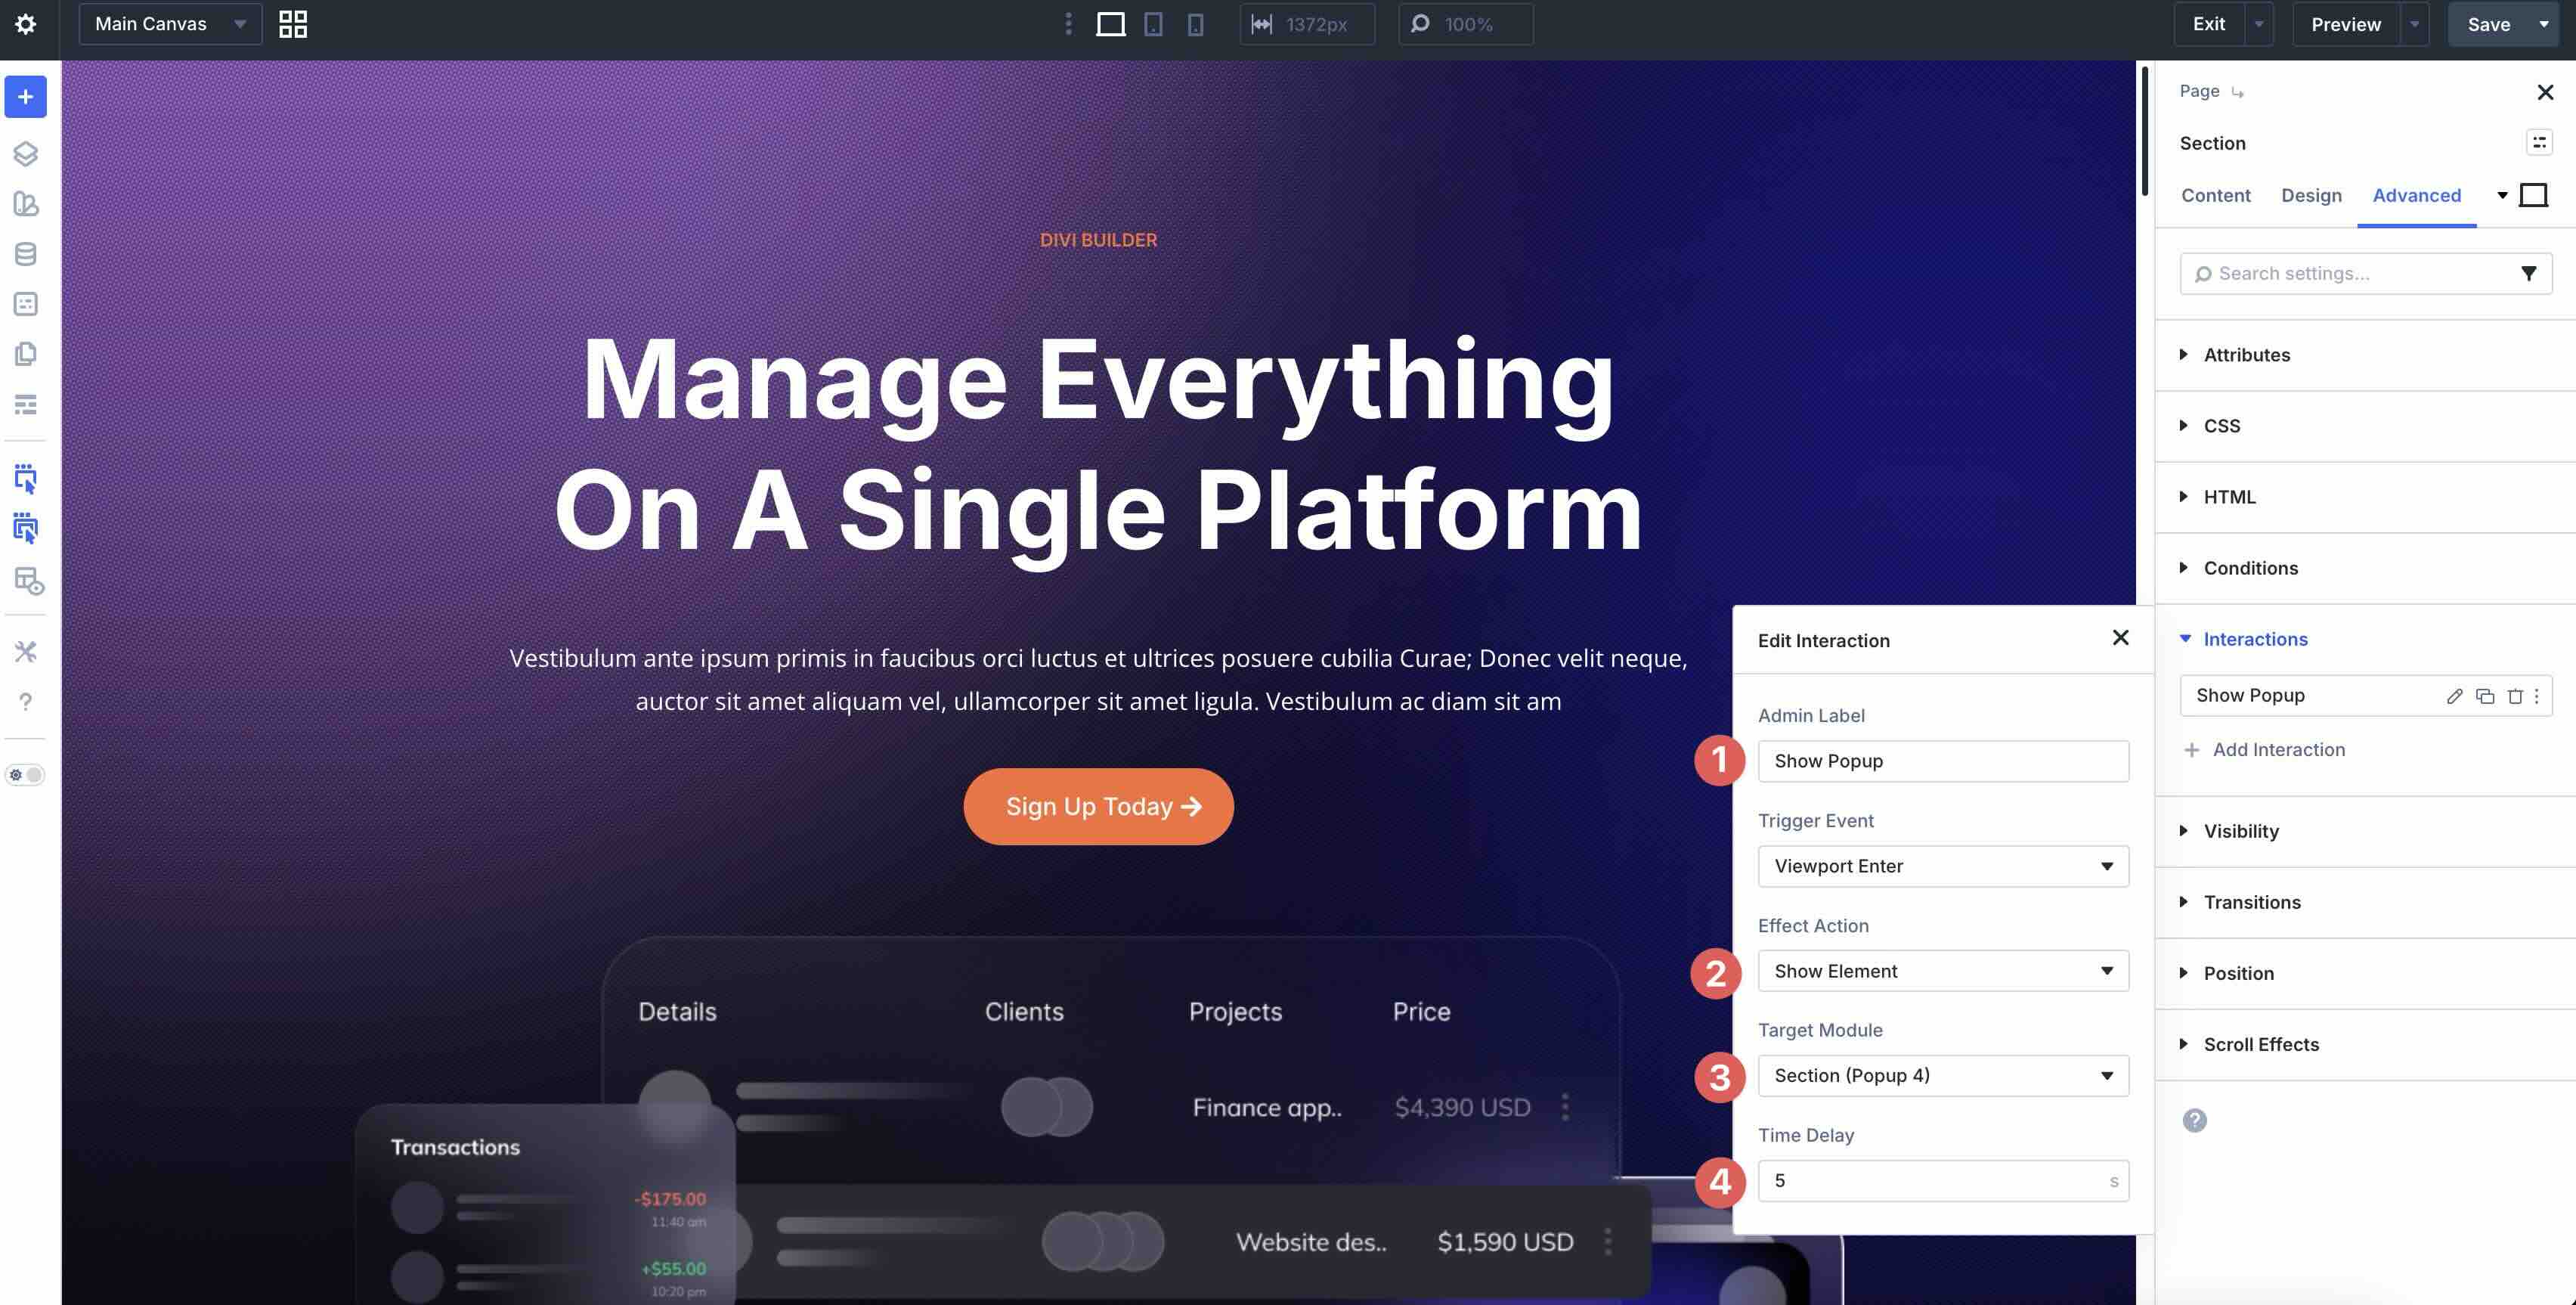
Click to open the settings of the hero section on the Main Canvas. Navigate to the Advanced tab and expand the Interactions menu. To add a new Interaction, click the + Add Interaction button.
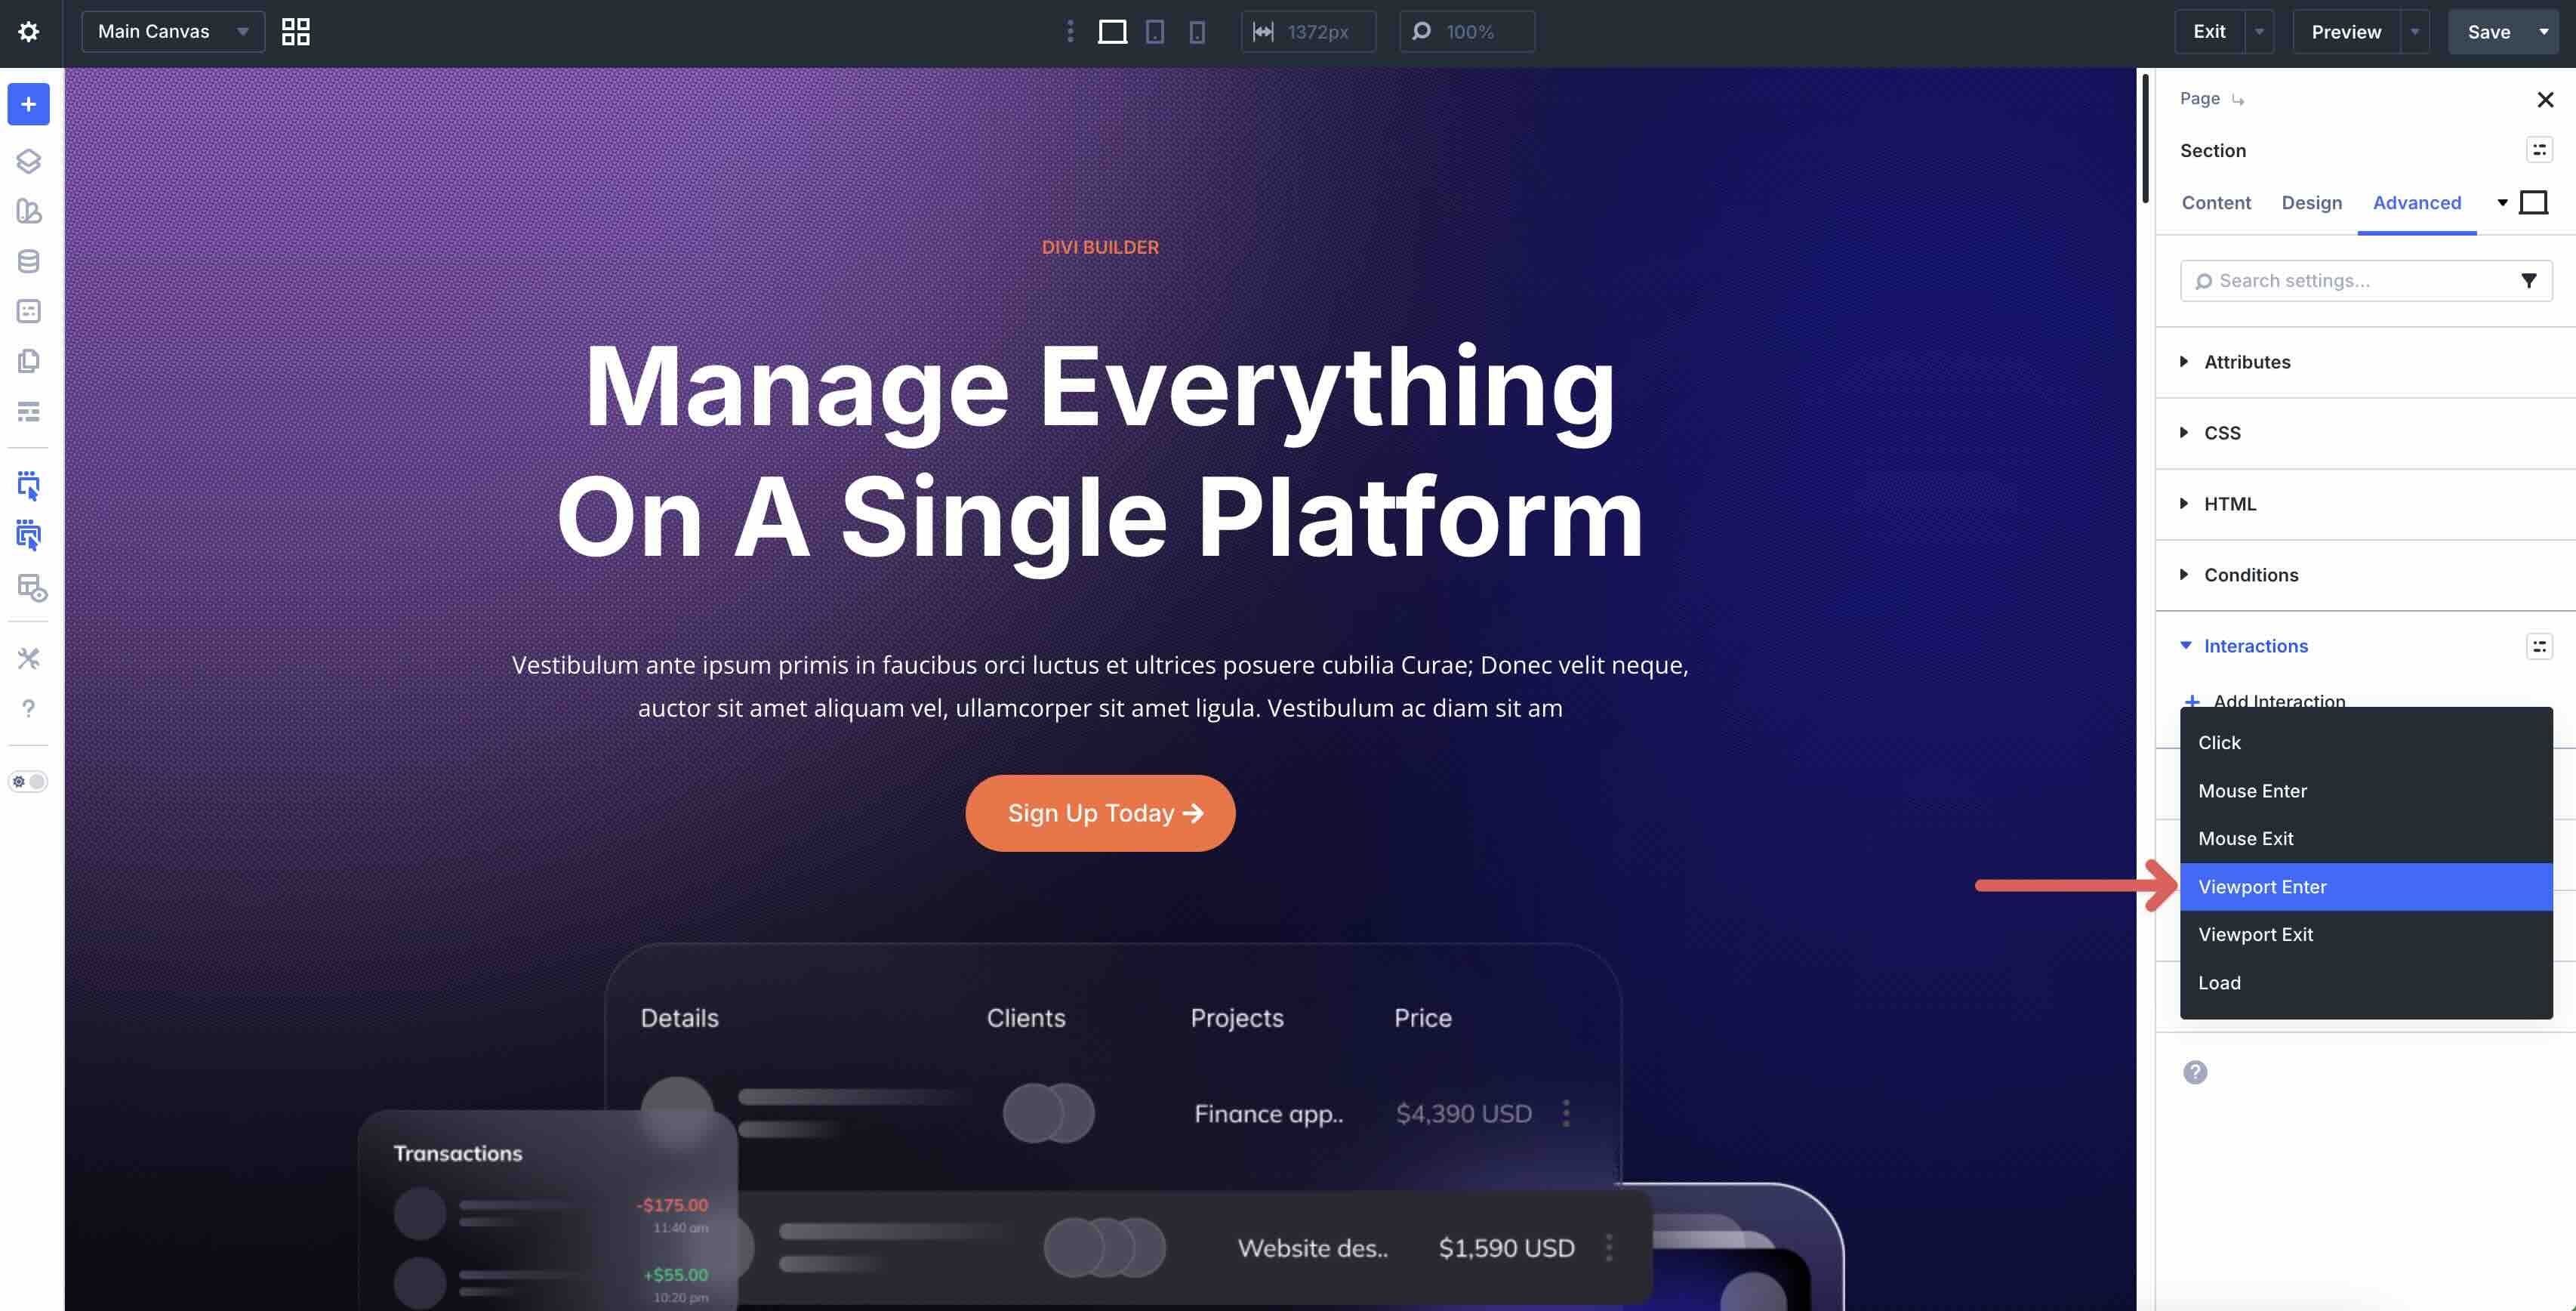
We’ll add an Interaction that delays the pop-up by 5 seconds. Select Viewport Enter.
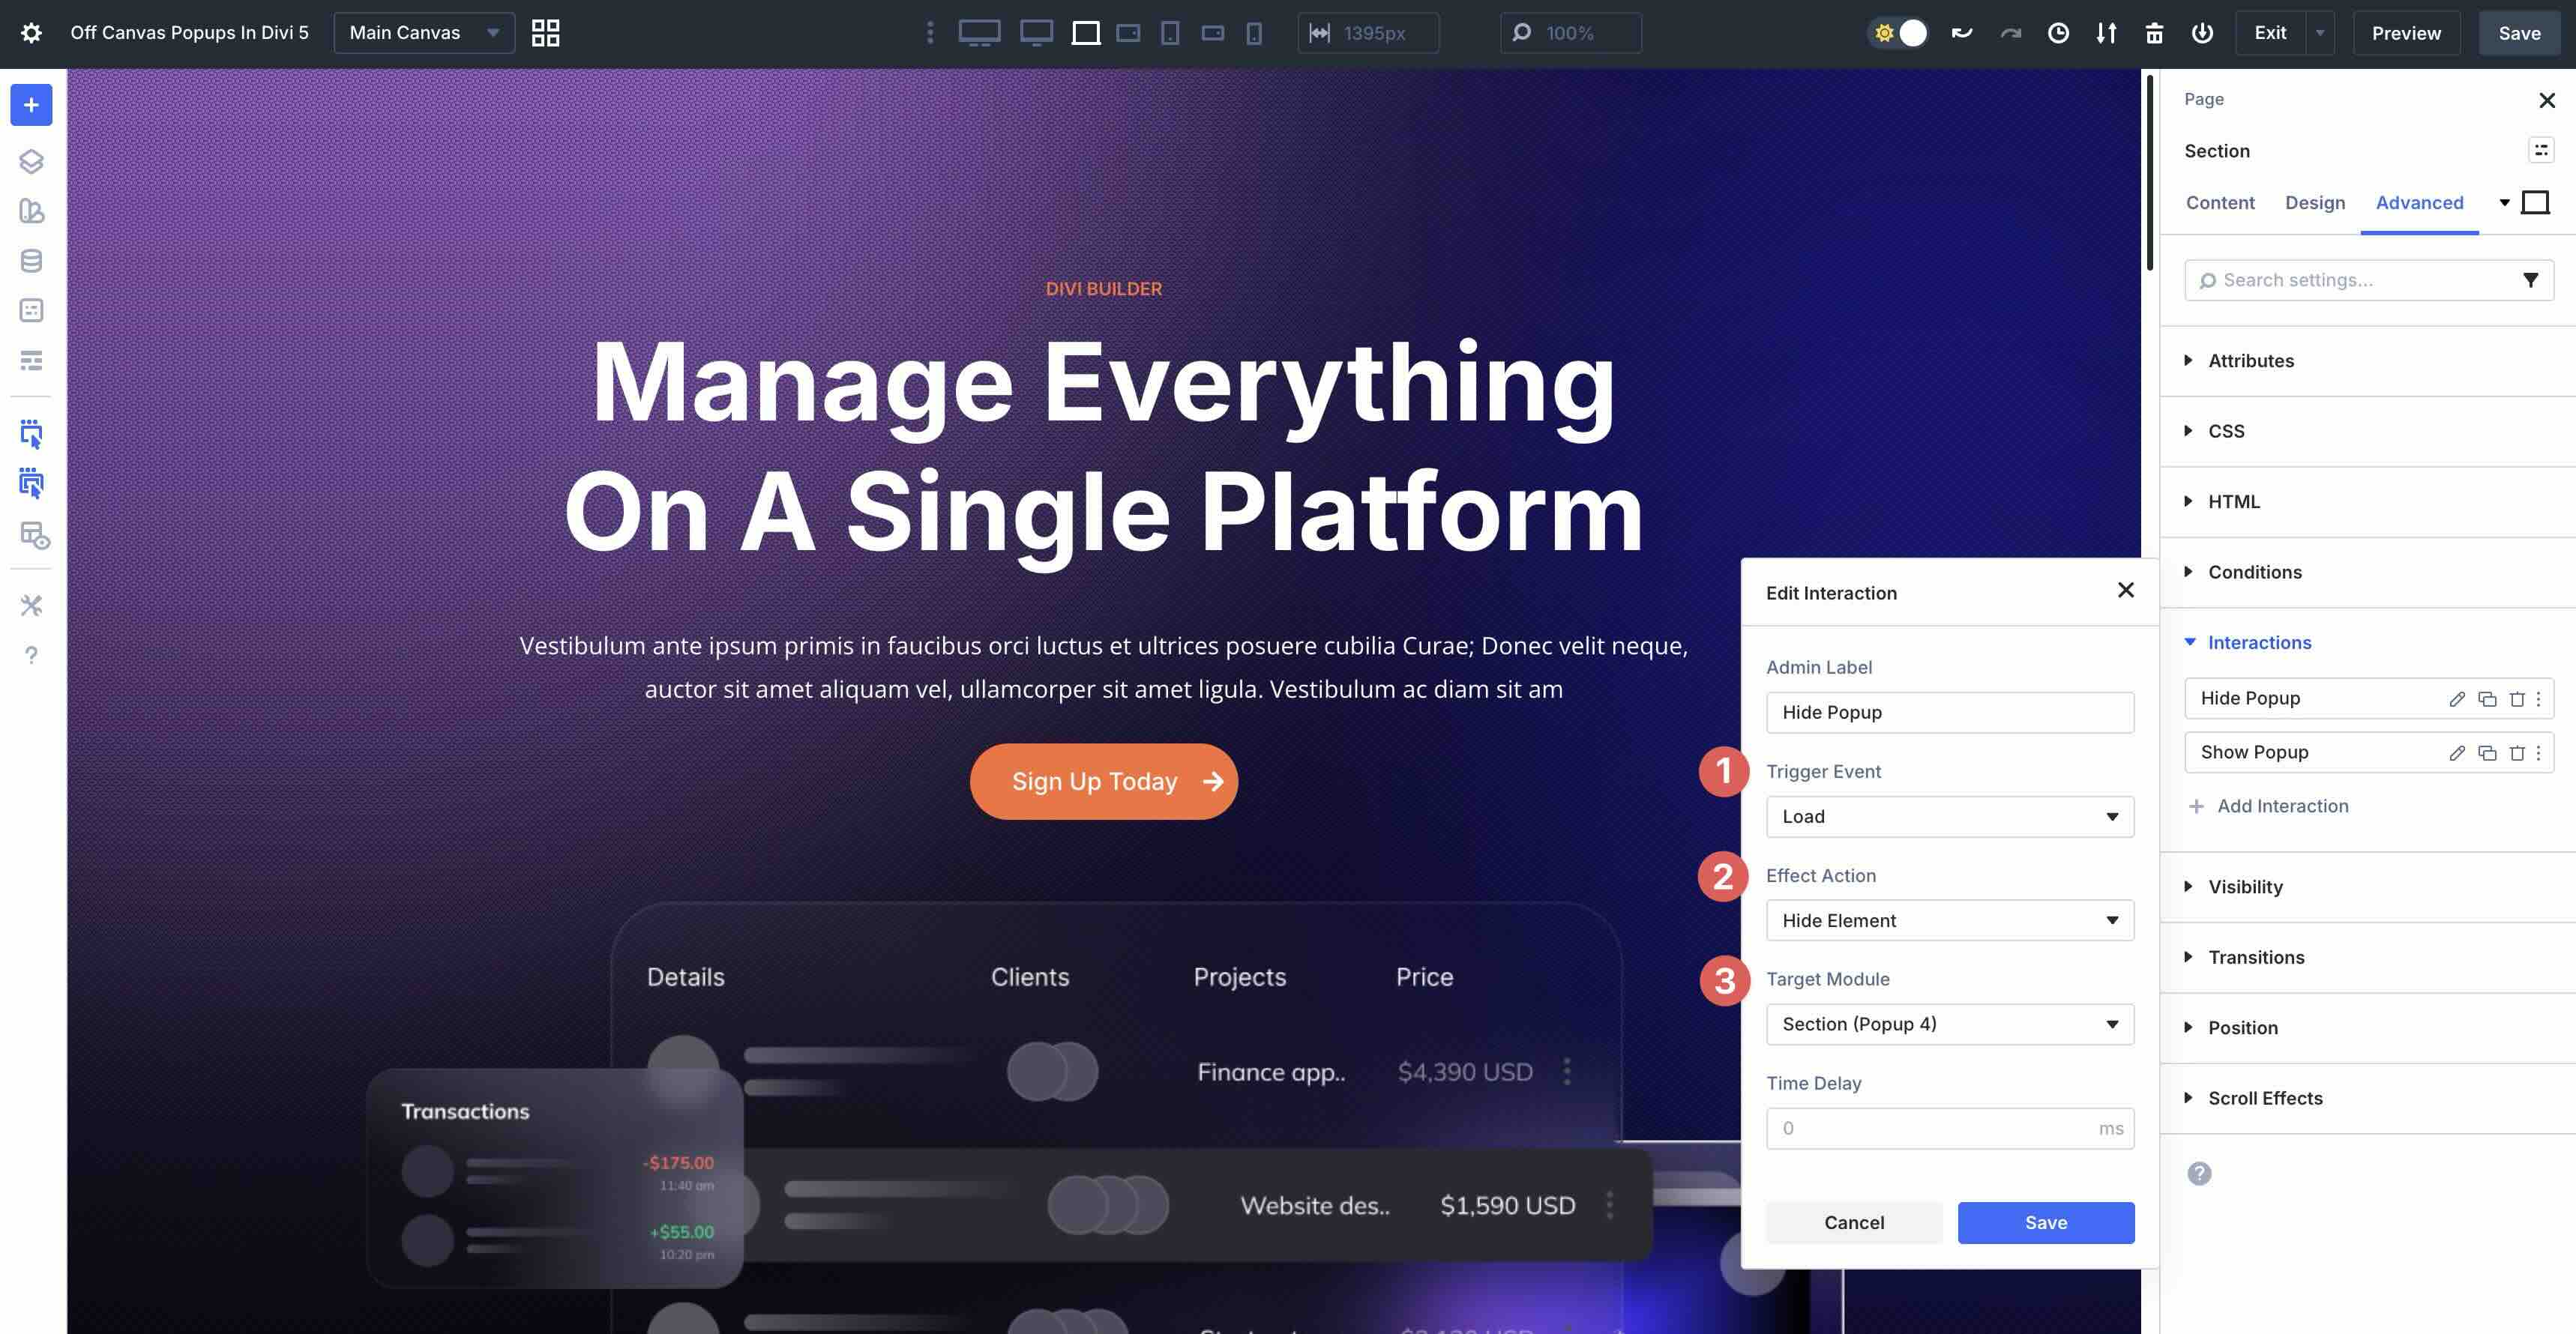
When the modal appears, set an Admin Label, choose Show Element as the Effect Action, the pop-up section as the Target Module, and set the Time Delay to 5 seconds.
Create An Interaction To Close The Popup
When using a premade popup, the close Icon module typically has an Interaction in place. However, if you create a popup from scratch, you’ll need to add one. Let’s walk through adding a third Interaction to the popup.
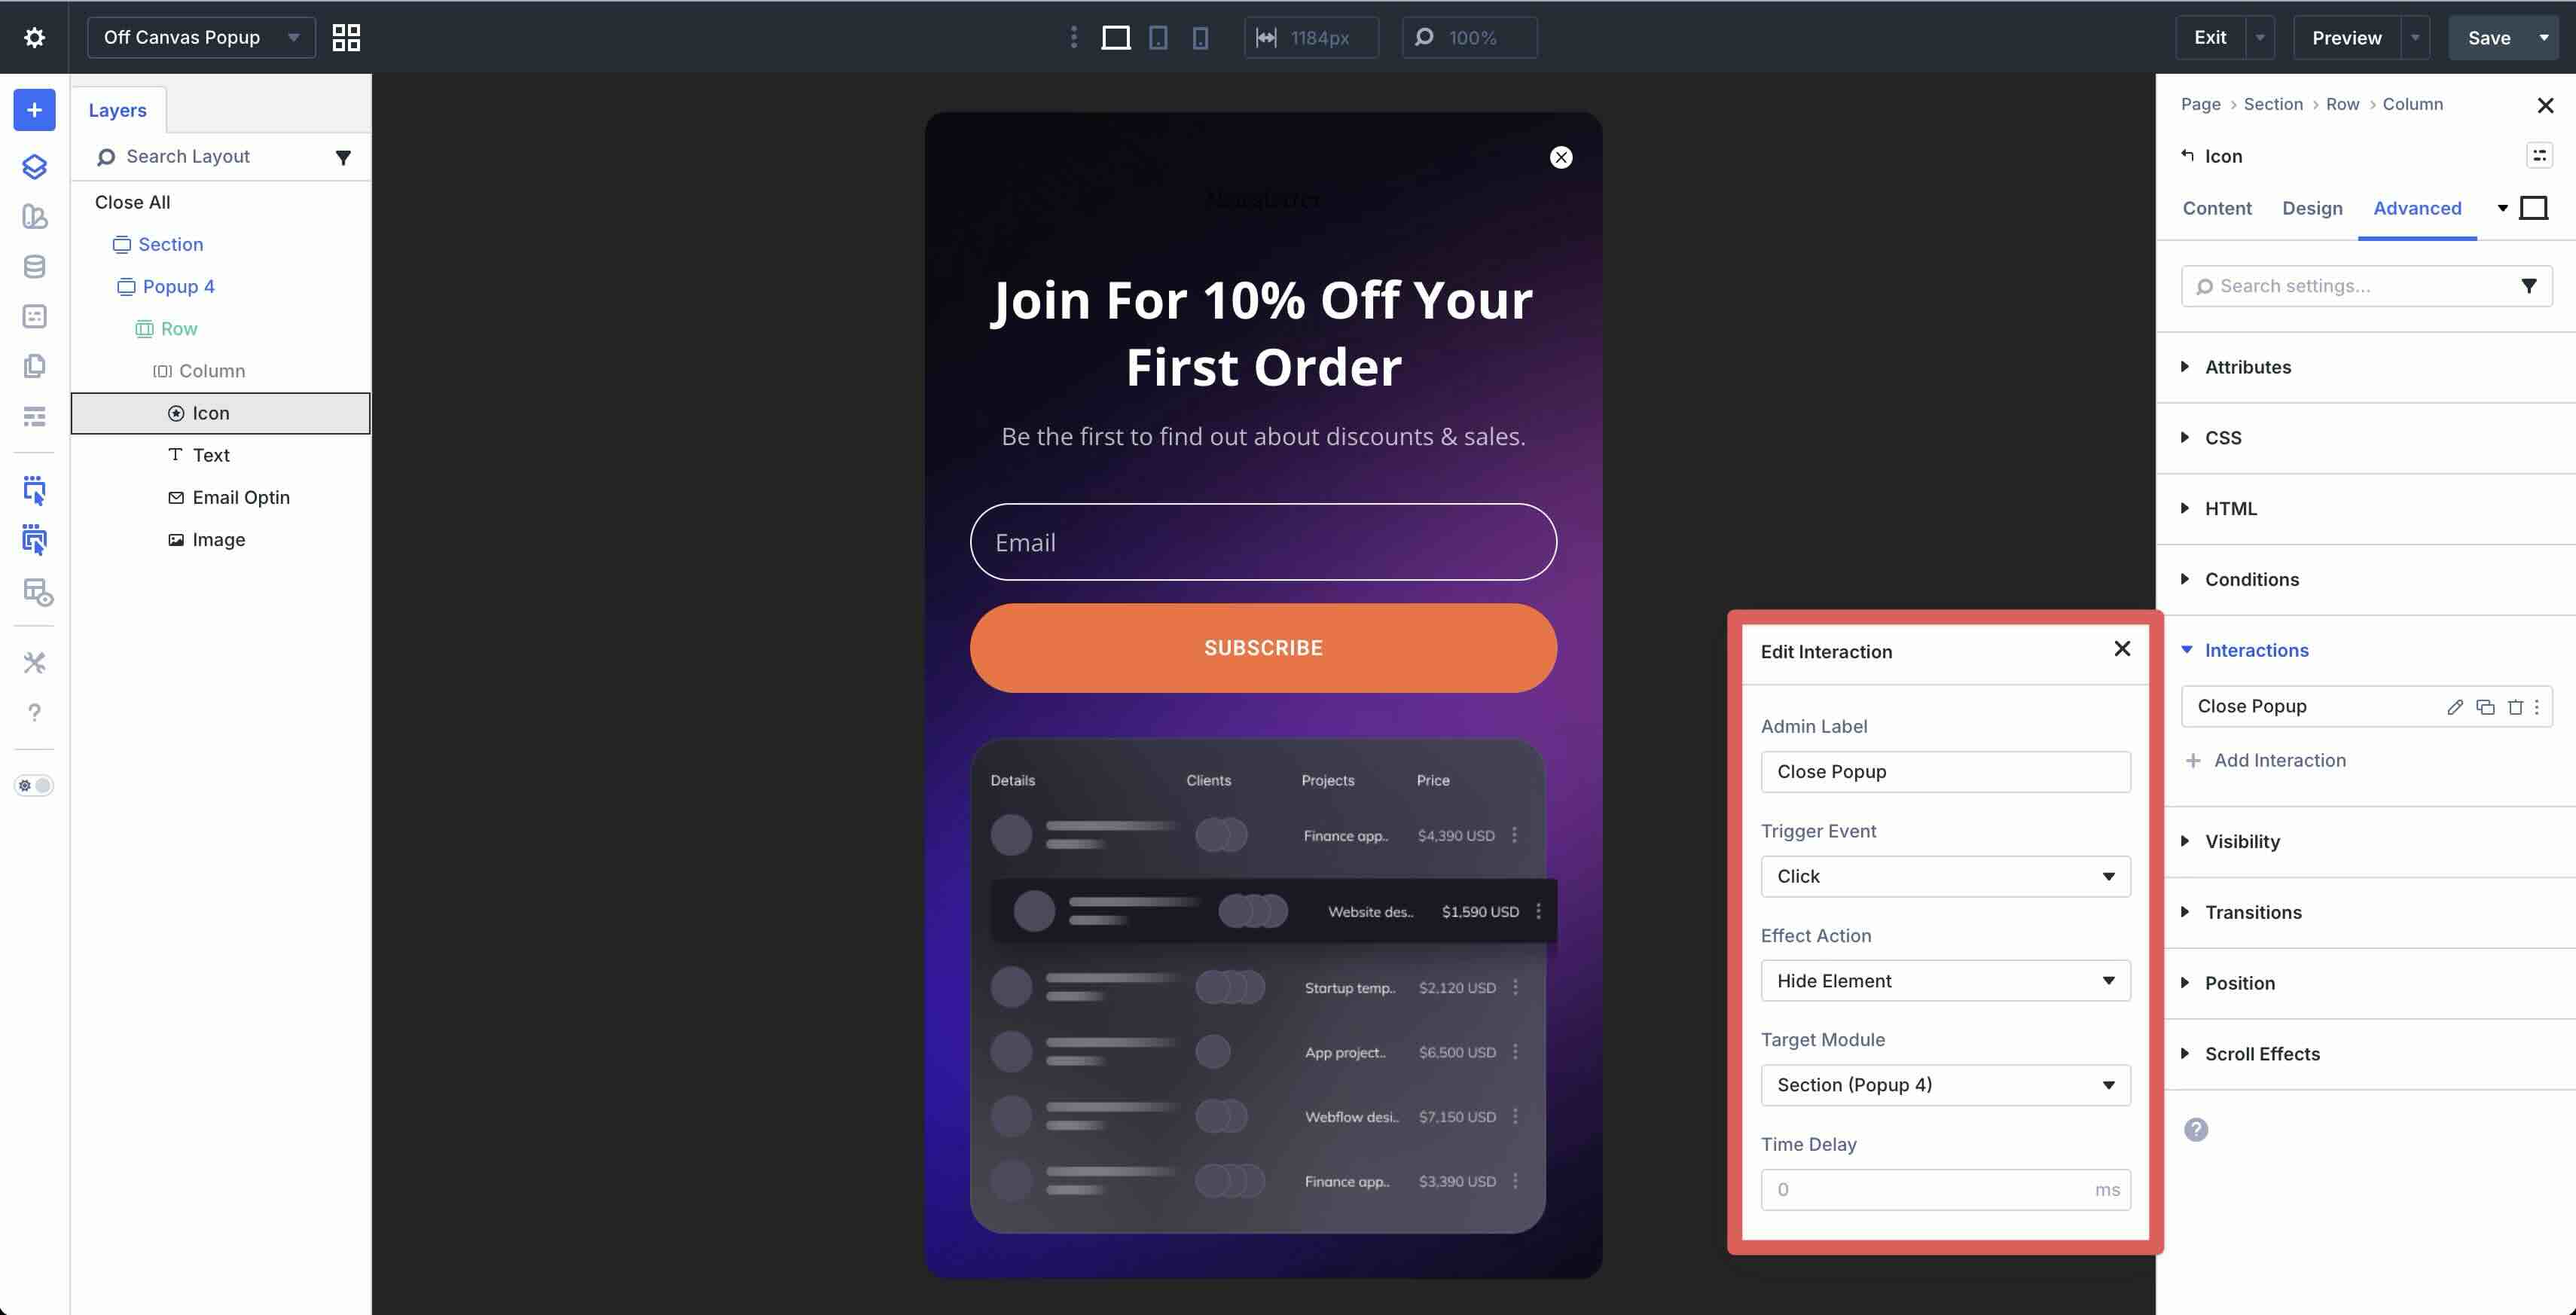
In the popup canvas, select the close Icon on the popup.
![]()
Navigate to the Advanced tab to add a new Interaction. Assign Close Popup as the Admin Label, Click as the Trigger Event, and the Hide Element as the Effect Action. Be sure to select the popup section as the Target Module.
Save the popup canvas and test on the front end.
Step 4: Test For Responsiveness
When all Interactions are set, be sure to use Divi’s Customizable Responsive Breakpoints to check for any inconsistencies on smaller device screens. Divi offers seven breakpoints, from Ultra Wide desktop to Phone views, allowing you to create pixel-perfect popups at every breakpoint.
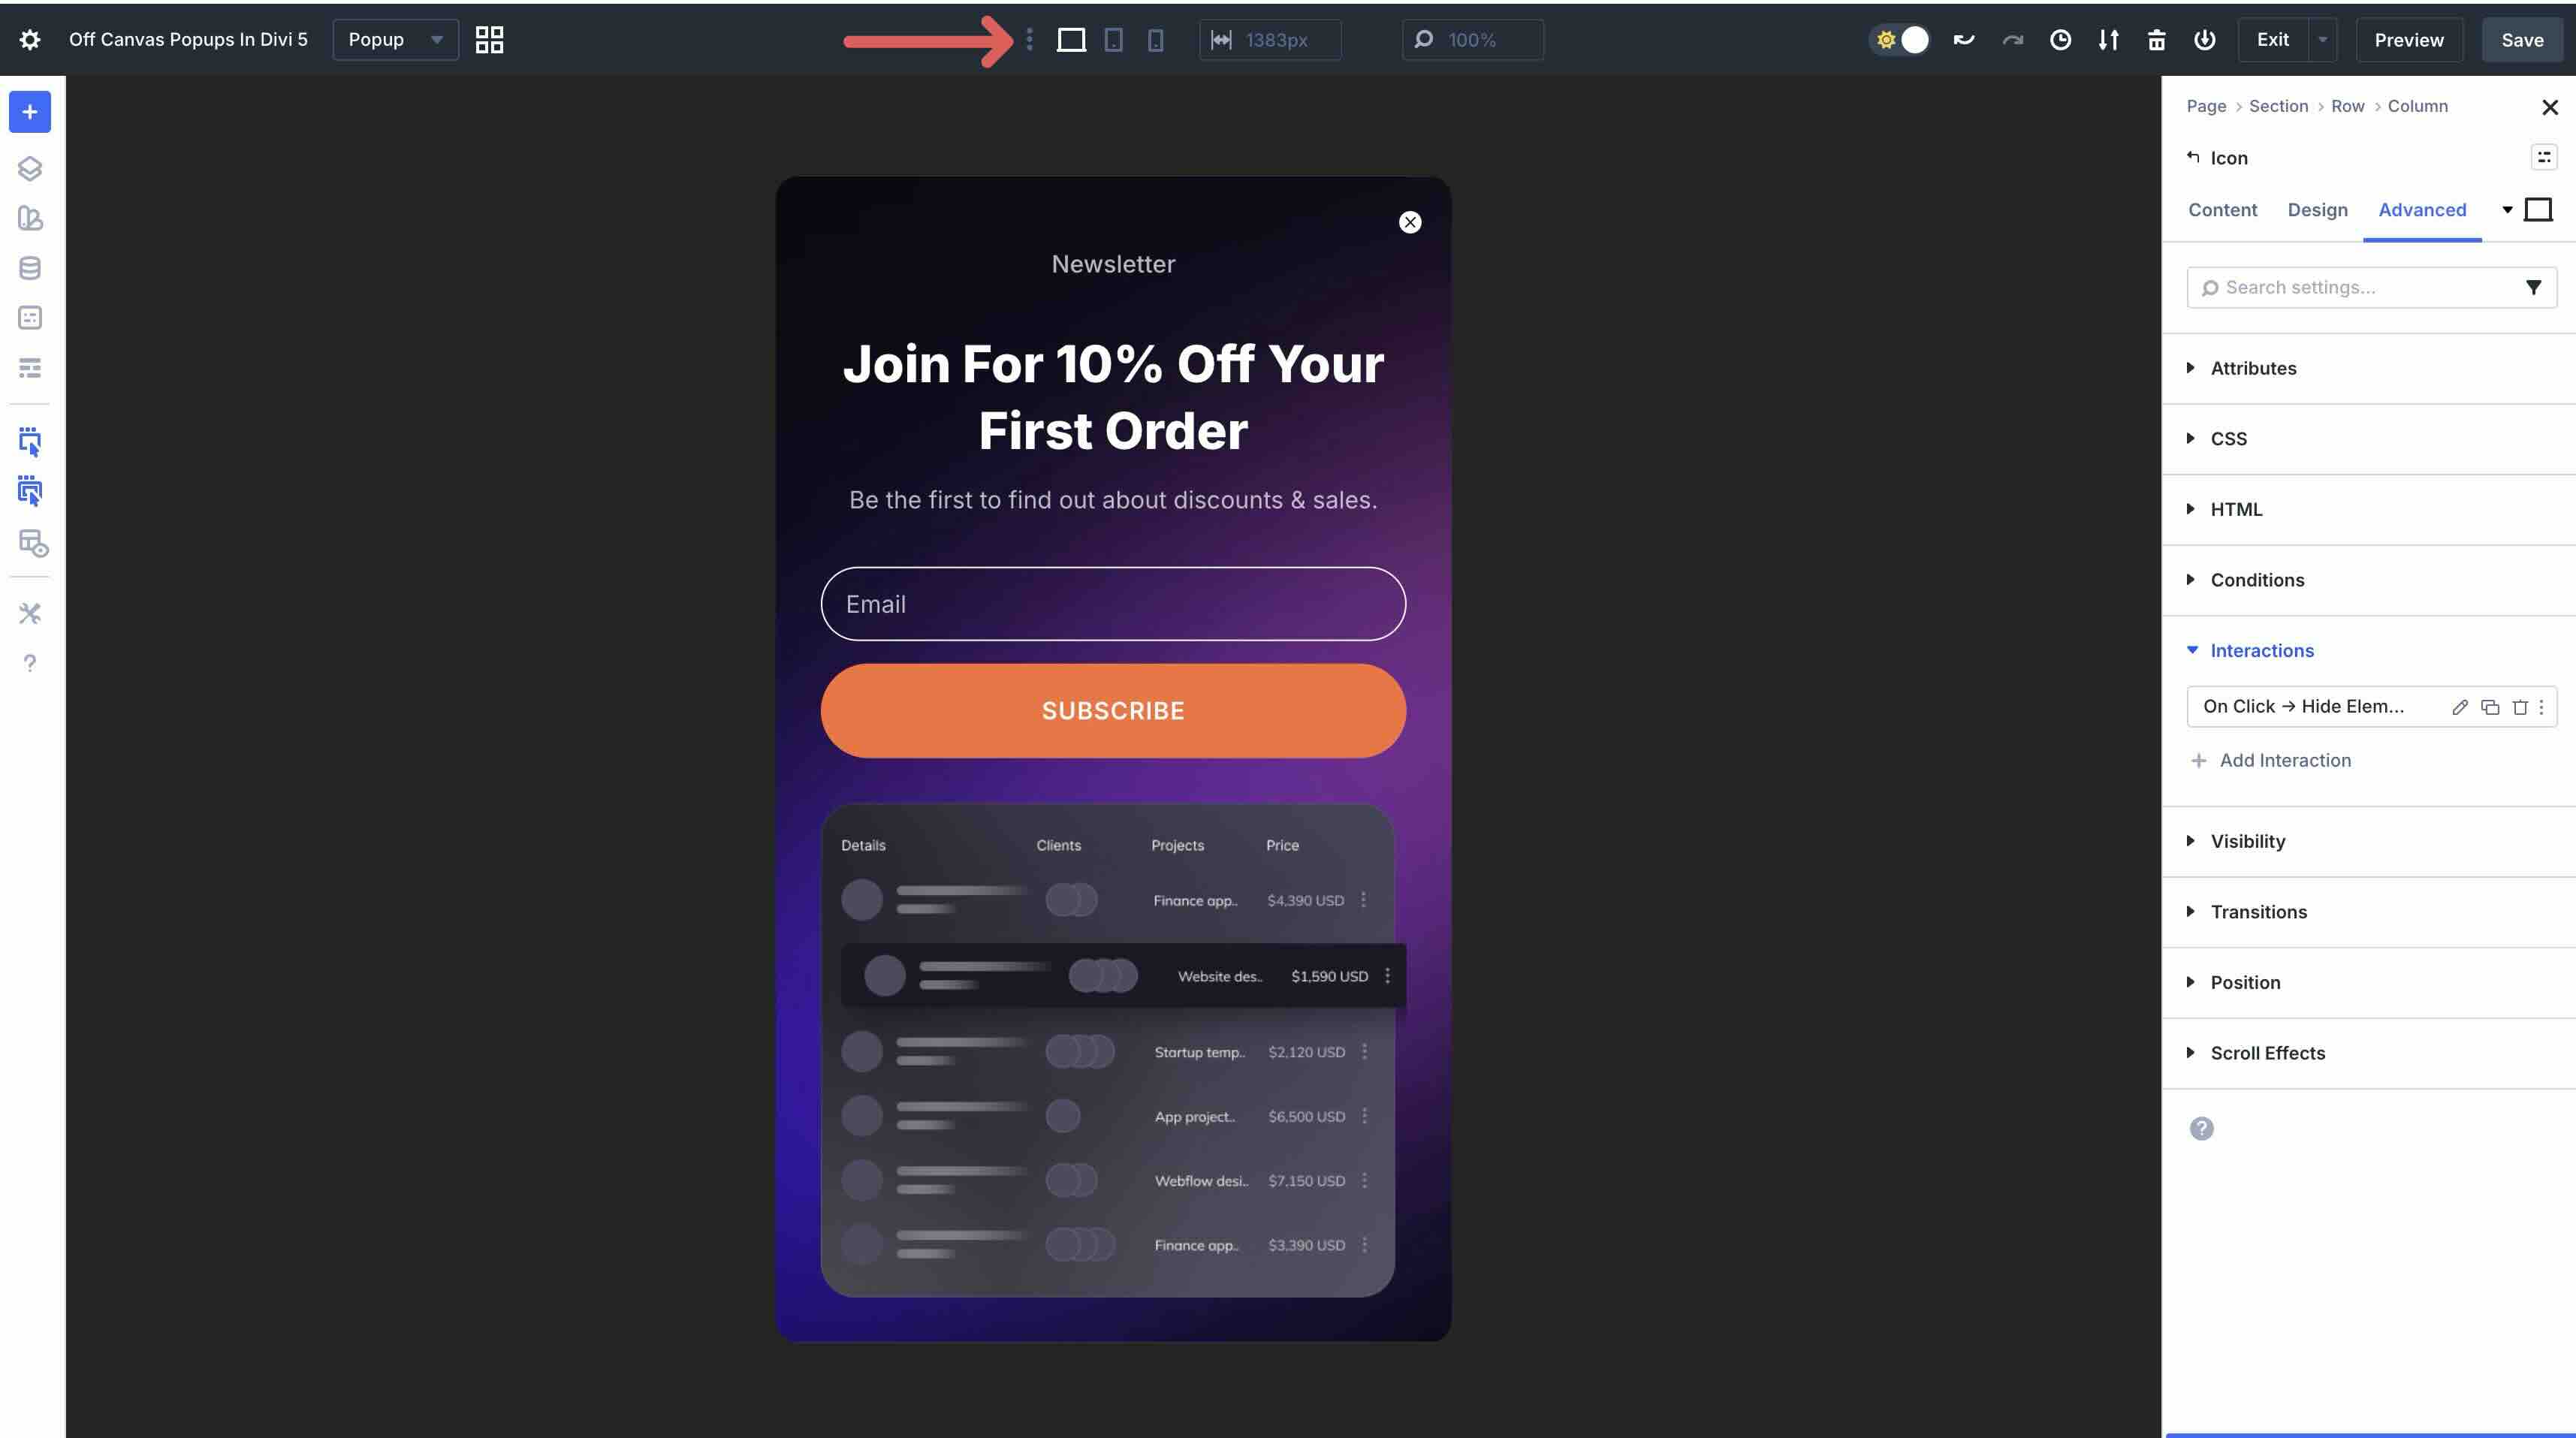
To enable all seven, click the ellipsis menu in the toolbar at the top center of the screen.
When the Sitewide Responsive Breakpoints modal appears, toggle each breakpoint on and then click the Save button to enable them.
From there, navigate through each breakpoint to make any necessary adjustments.
Alternatively, you can use Divi’s Responsive Editor to make changes at the module level. You can easily change font sizes, adjust spacing, or change the close icon size with a few easy clicks.
Tips And Best Practices
Now that I’ve built a pop-up using Divi 5 Canvases and Interactions, here are some tips to take popups to the next level, making them more efficient, maintainable, and user-friendly.
Leverage Global Canvases For Site-Wide Popups
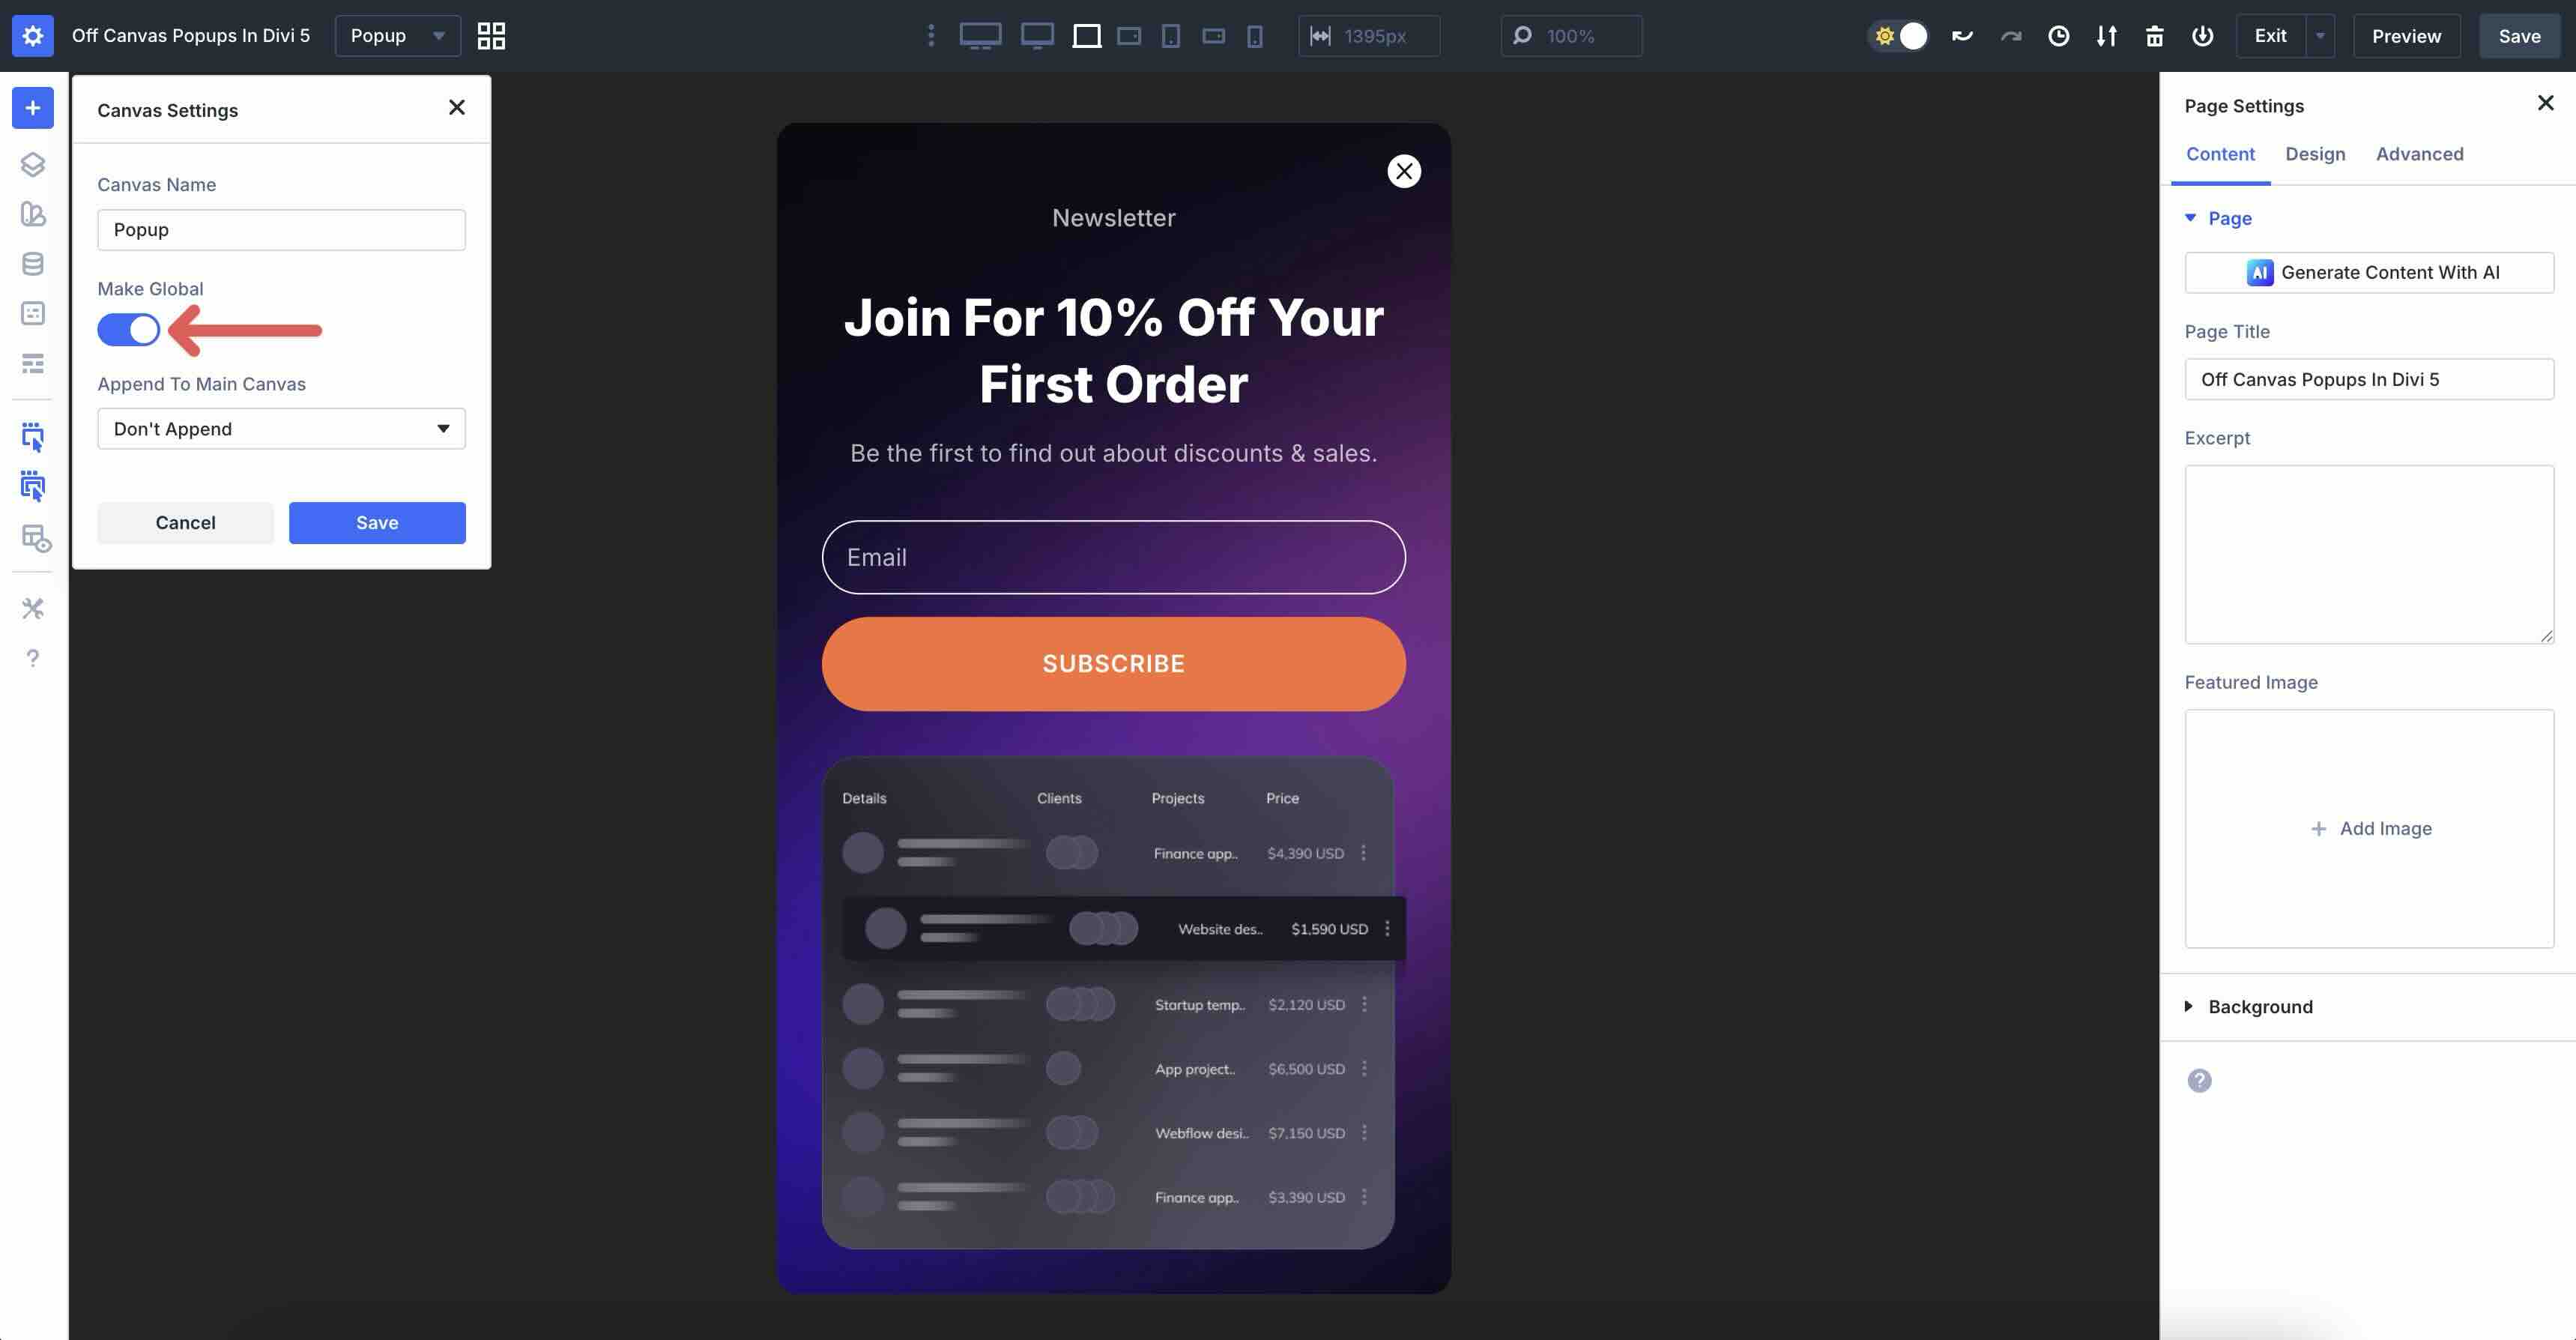
If you want a pop-up to display across your website, create it in a Global Canvas instead of a local one. Global Canvases are accessible from every page, post, or Theme Builder template on your site. Design once, then trigger the same pop-up anywhere using Interactions. Any update you make propagates site-wide. This saves time compared to duplicating popups across multiple pages.
Use Position Settings And The Canvas Portal Module For Precise Placement
While automatic front-end appending via Interactions works great for off-canvas popups, Position settings give you extra control when you need a pop-up to display in a specific spot on the page.

Similarly, you can use the Canvas Portal Module to place the pop-up exactly where you want it. It allows you to place a detached Canvas directly inside any section or row for relative positioning.
Combine With Other Divi 5 Features
Divi’s ecosystem shines when you layer features together inside your Canvas. You can use Nested Modules or Nested Rows to build complex pop-up layouts with ultimate flexibility. Build multi-column forms, image and text grids, or accordions with ease.
Another Divi 5 feature, Presets, lets you create reusable styles and apply them site-wide. Interactions can even dynamically toggle, add, or remove Presets. For example, you can change colors, fonts, or borders on hover to create subtle effects.
Global Design Variables allow you to keep consistent branding across all popups. With Design Variables, you can set global colors, spacing, typography, and more in one place.
Visibility settings can initially hide the pop-up section on specific devices, then reveal it only when needed. Although this isn’t necessary when using Canvases, it’s useful when building an on-page pop-up to keep it hidden until triggered.
Download 6 Email Popups For Divi 5
Get all 6 prestyled popup sections for free. Import them into your Divi Library, drop one into any page, and attach a trigger using Interactions.

Build Popups In Divi 5 Today!
Divi 5 Canvases and Interactions unlock a whole new world of powerful, completely code-free popups right inside the Visual Builder. With these tools, you have a clean, native workflow for designing beautiful, complex popups in isolated, detached Canvases, then bringing them to life dynamically with intuitive triggers. The result is faster sites, easier maintenance, and popups that feel integrated into your Divi design system.
I encourage you to download the latest Divi 5 Public Beta, experiment with Canvases and Interactions, and let us know what you think in the comments.


I absolutely Love this feature. The fact I can set animations on load of the canvas is perfect. But, would this be possible to add an “out” animation ? Seems brutal to close a popup that came smoothly with a fine tuned built in animation … 🙂
That would be a great enhancement, something our developers are already considering! Right now, Divi 5 Interactions include actions like Show Element, Hide Element, and Toggle Visibility, and the article focuses on using built-in animations for the popup’s entrance, but there is no separate native exit animation for closing.
This seems to work only for a newsletter popup. I have a team page that I want to make popups when users click on each profile. I couldn’t figure out how to make that. Do you have any recommendations on how we can make it happen? If I need to hide a popup section and make it fixed, it’ll be extremely difficult to work with the editor, let alone for 20 popup. If I want to use the canvas, I can’t get it work by “CLICK” action. It seems that you need to make the popup similar to Elementor or Bricks, where you get more control and features all-in-one (like conditions, places to display, scroll based popup, exit intent popup, counters, sessions, local storage, etc.).
That is excellent feedback! You can definitely trigger the off-canvas sections via “Click” using Divi 5’s new Interaction settings (by targeting the specific element ID), but we agree, managing 20 unique popup sections inside one page layout would be crowded to work with! 😊
We hear you loud and clear on the desire for a dedicated, all-in-one Popup Builder engine with advanced conditions and storage logic. We will pass this suggestion straight to our development team.
This post needs to demonstrate how to set a cookie so the on load popup doesn’t show for a set period of time – so it is not annoying.
Great point, Chris! Keeping pop-ups user-friendly is so important for a good experience. While cookie support isn’t available in the Divi 5 Beta just yet, I’ve shared this with our developers as a feature request. Thanks for the feedback!
Is there any way to set trigger for a pop-up if you get 1/2 way down the page?
Also, another vote from me to have a timer for the popup to not load again for a set duration. In testing, it is pretty useless without it, as it keeps coming back.
Yes, you can approximate a halfway-down-the-page trigger using Divi 5 Interactions with the Viewport Enter trigger. Place a small hidden/empty element around the halfway point of the page, then add an Interaction to that element that shows the popup when it enters the viewport.
An exact “trigger at 50% scroll depth” setting would still be a great addition, though and so would a native “don’t show again for X hours/days” option. I’ll make sure to relay these suggestions so our dev team. Thanks for your input! 👍