
Animations can make your sites feel alive, but most designers avoid them because they slow down loading speeds. The choice seems simple: either you get a website that crawls or a fast-loading one that feels flat and lifeless.
Well, that used to be the case until Lottie arrived. This post covers what Lottie brings to the table, how it differs from old methods, and how Divi 5 lets you add these animations to your sites without touching code. Let’s dive in!
What Are Lottie Animations?
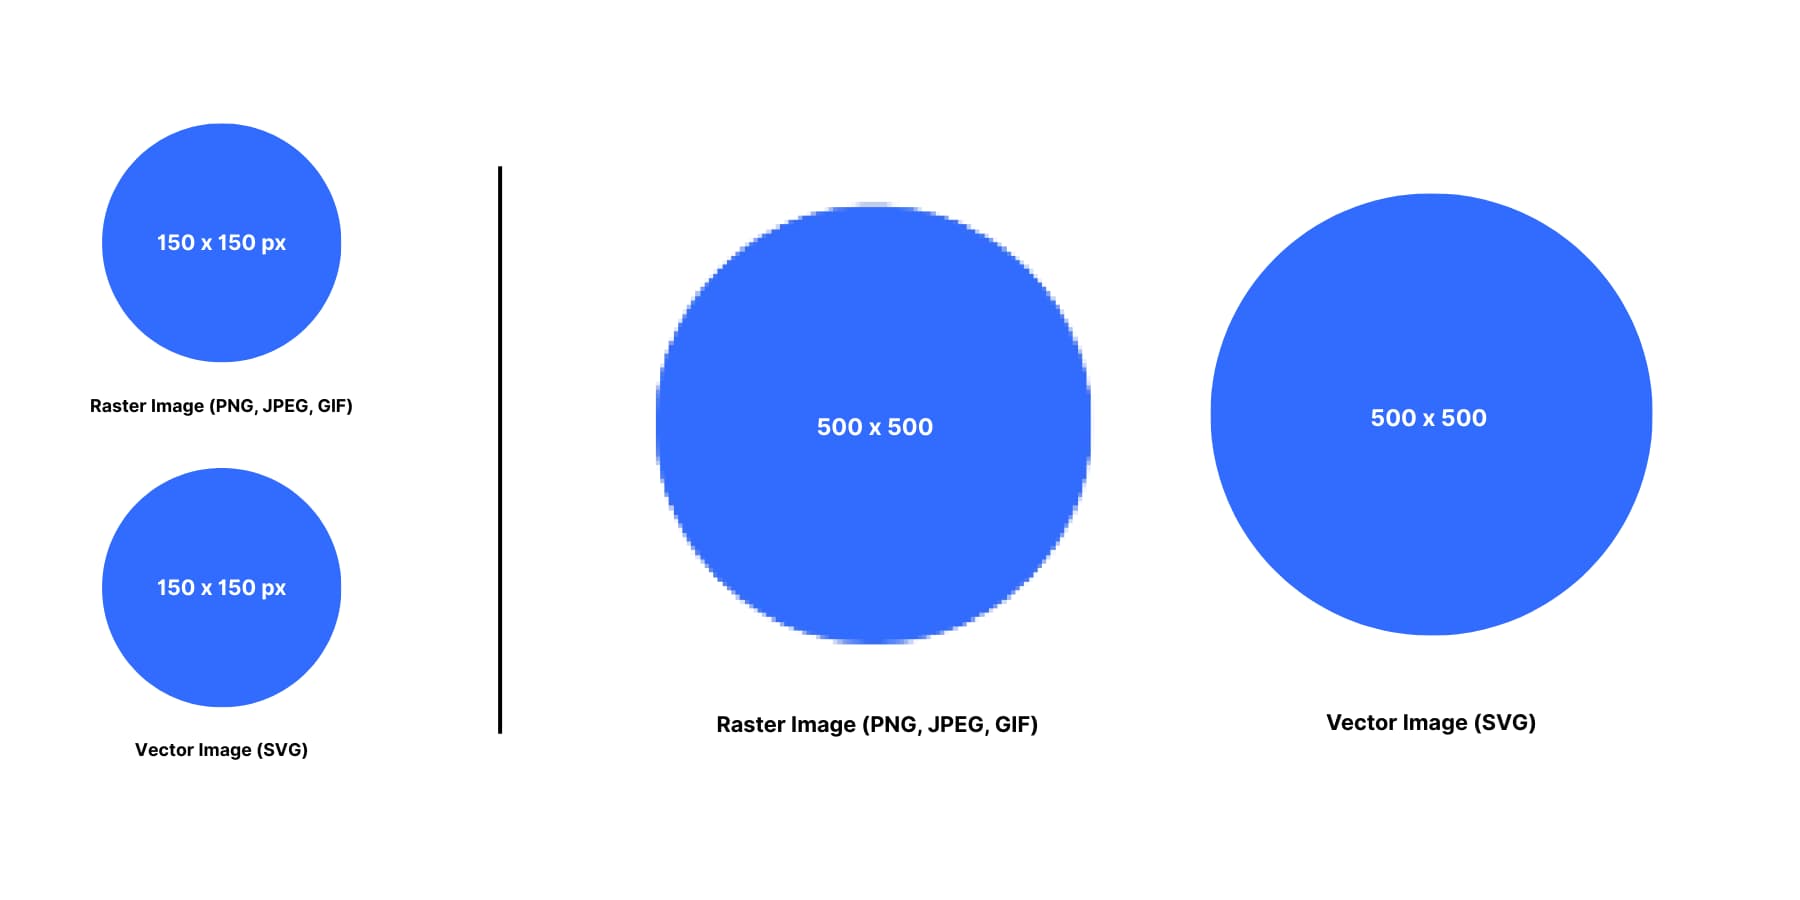
Lottie animations are lightweight, JSON-based vector animations. They’re often much smaller than GIFs but keep the same or better quality (5-10x smaller).
Lottie originated from Bodymovin, an After Effects plugin that exports animations as JSON. Engineers at Airbnb later built libraries to run these animations on different platforms.
Lottie files are vector-based, instead of pixels. You can stretch them big or small without getting blurry pixels. You can also edit colors, speed, and timing by changing the code directly. They work on phones, computers, and any device with a web browser.
Lottie caught on because they load fast. Really fast. JSON makes data exchange super efficient, which is why these animations load so much faster than older formats.
What Makes Lottie Different From GIFs
GIFs and Lottie basically appear the same. Both are non-video files that have movements and animations. But when you compare these two formats side by side, the differences become clear really fast:
| Feature | Lottie | GIF |
|---|---|---|
| File Size | 1KB-3MB | 1-15MB for short clips |
| Quality | Vector-based, stays crisp | Pixel-based, gets blurry when scaled |
| Colors | Full device color range | Limited to 256 colors |
| Customization | Edit after export via JSON | Must recreate from scratch |
| Loading Speed | Fast due to tiny file sizes | Slow, impacts page performance |
| Scalability | Infinite without quality loss | Pixelates when enlarged |
| Frame Rate | Up to 123 FPS | Typically 15-24 FPS |
The main difference is how they store animation. GIFs save separate image frames like a flipbook. Lottie files use math to rebuild the animation in real time. That makes Lotties smaller, crisper, and more flexible.
Where To Find Lottie Files
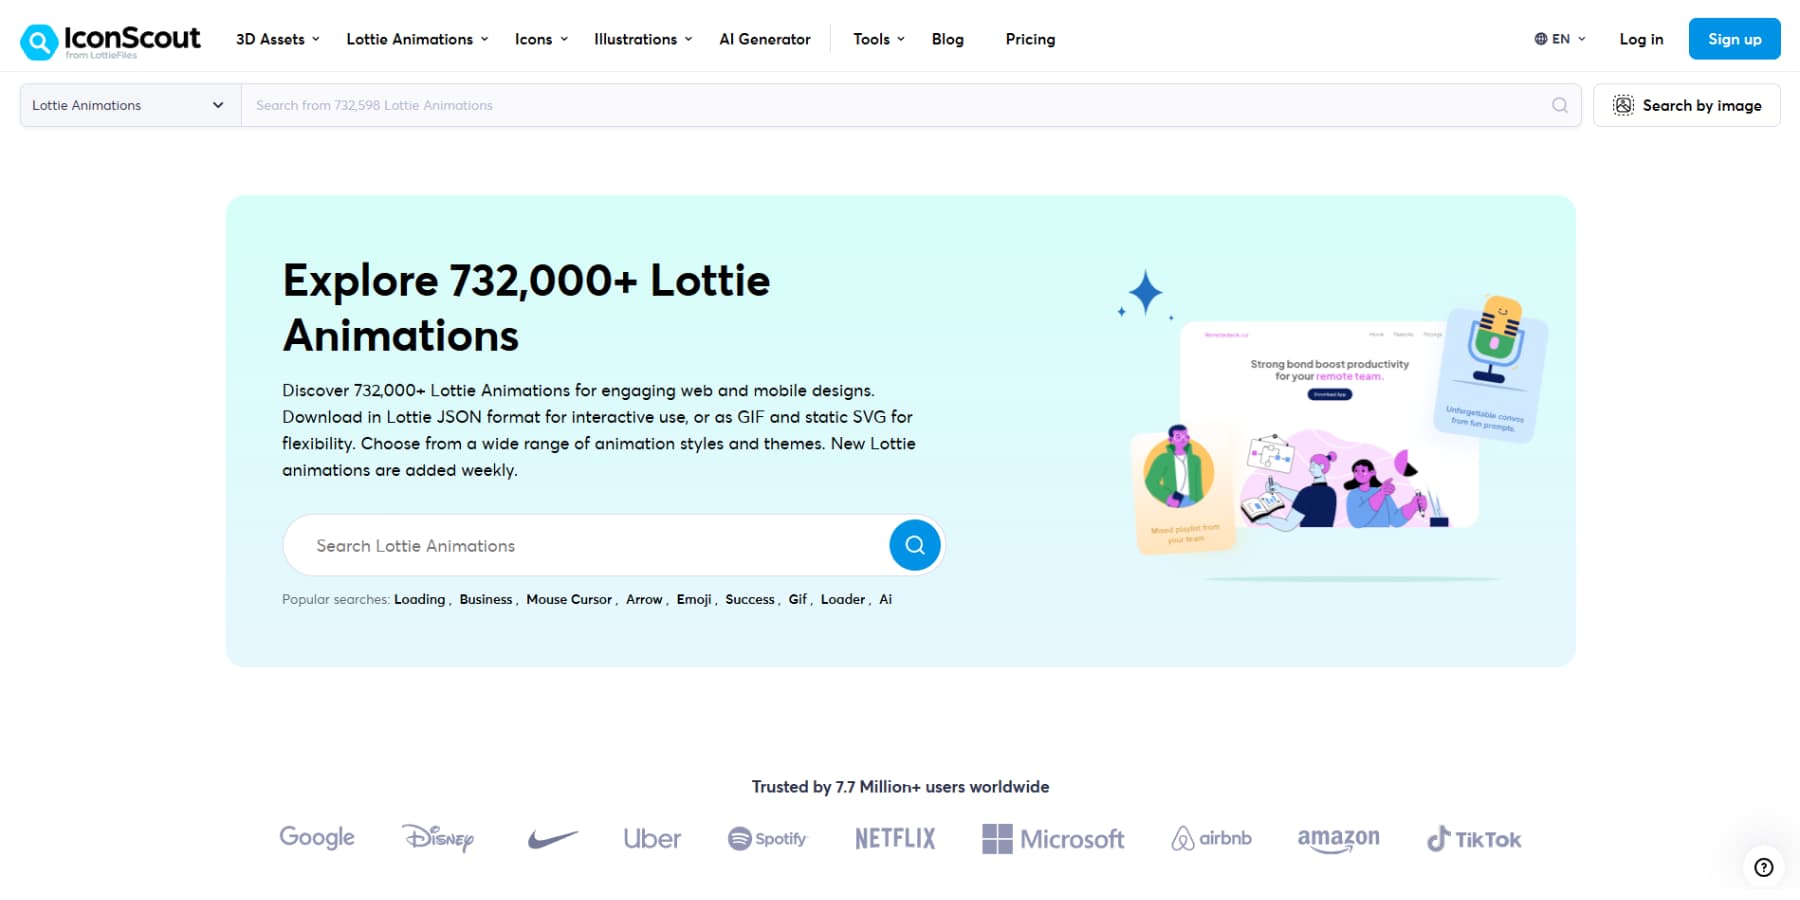
LottieFiles is your best starting point. You can download free files, customize colors and timing, and export them for your projects. Their community uploads new stuff daily.

IconScout combines Lottie animations with its icon library, which is good for maintaining visual consistency across your site. It offers editing tools and format conversion so that you can download as JSON, GIF, or MP4.
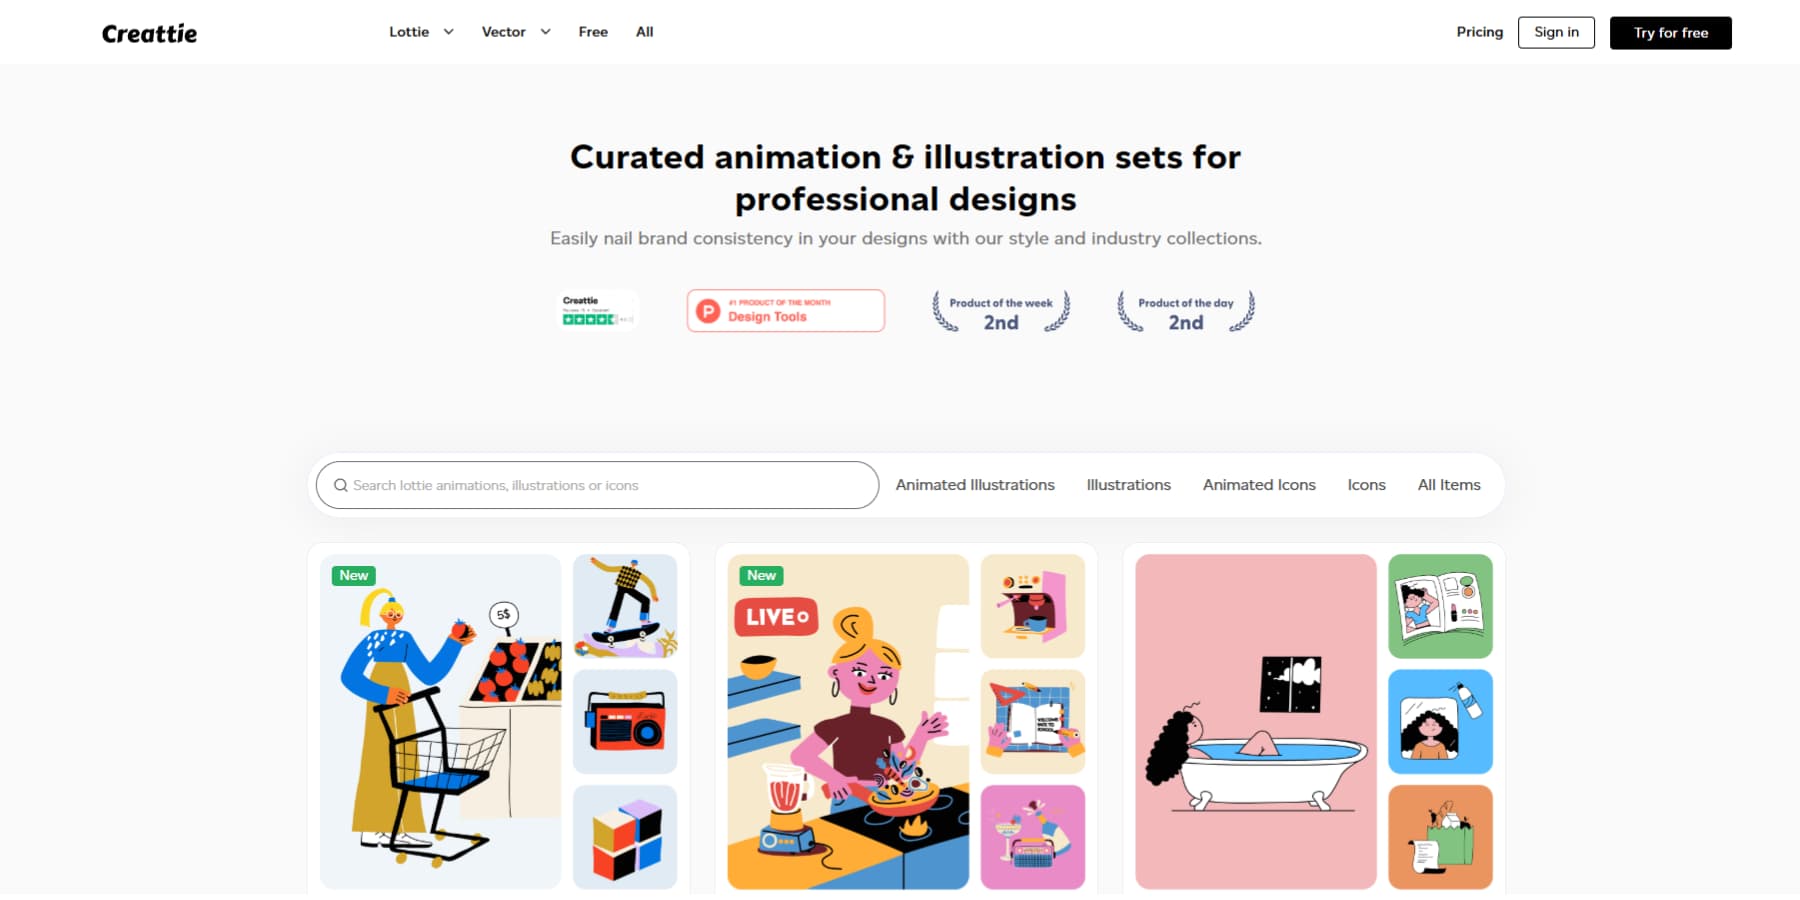
For simpler needs, Creattie keeps things straightforward. You can access their free animations, and their collection focuses on practical business animations that work on real sites. Premium subscribers get editor access to adjust colors and speed settings.
Most platforms export standard JSON files that work everywhere. Some add backup formats for platforms that don’t support Lottie yet. Free tiers usually give you basic downloads, while paid plans unlock editing features and higher quality exports.
How To Use Lottie Animations On Your Website
Adding Lottie animations depends on how you build your site. If you code from scratch, include the Lottie script in your HTML and link it to your JSON file. You can control size, speed, loop, and triggers with JavaScript.
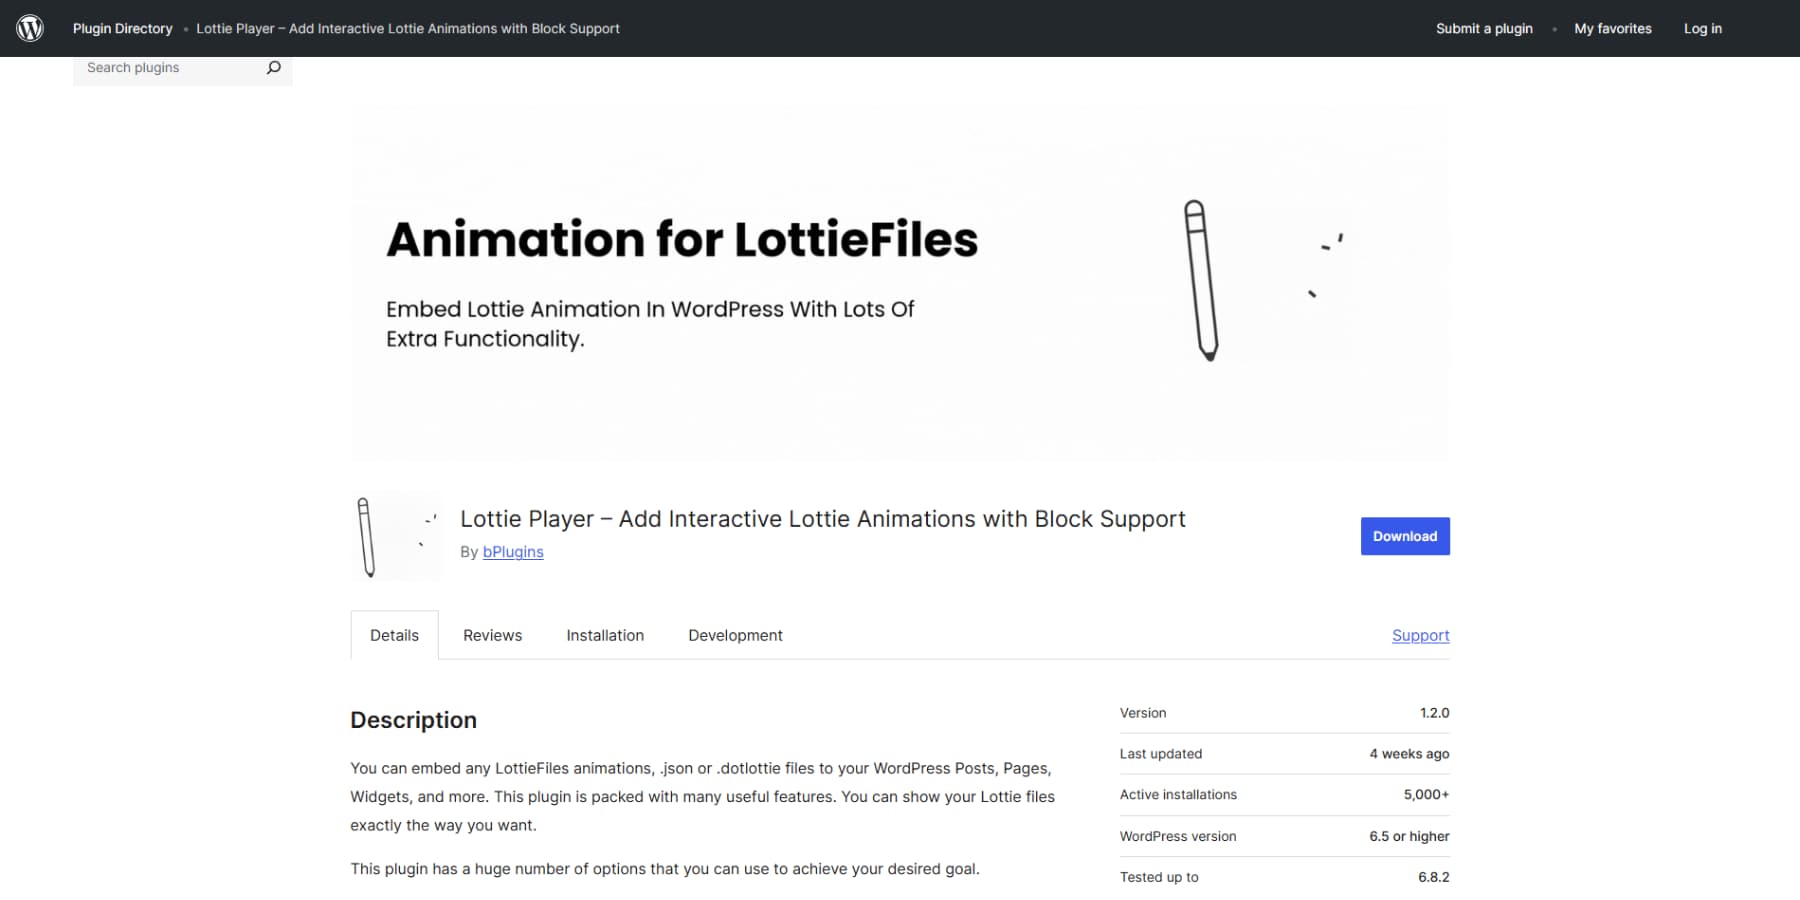
In WordPress, the simplest method is to add an HTML code block. Within the same code block, you can control the size, speed, and looping. However, this method isn’t very intuitive because you can’t preview the animation in the editor.
Plugins like Lottie Player and some Gutenberg addons give you more options, but advanced interactions and detailed controls are usually paid features. Gutenberg can feel awkward for animation work, and copying animated sections across pages often becomes manual and repetitive.
However, modern WordPress page builders such as Divi 5 include Lottie support, removing the need for extra plugins and giving you full control without writing code.
Divi 5 Makes It Easy To Add Lotties To Your Website
For years, WordPress designers have been frustrated by the difficulty of getting animations to work. The choice usually involves wrestling with complicated plugins or diving into custom code. Divi 5 changes this with its built-in approach to Lottie animations.
Divi 5 Is A Rebuilt + More Powerful Version Of Divi
Divi 5 rebuilds everything from the ground up rather than just updating what existed before. We spent over two and a half years rewriting every feature, setting, and interaction to create a more powerful foundation.

The new framework works even better with current WordPress standards and opens up possibilities that weren’t available before. This shift affects how you build layouts, design elements, and responsive sites.
What’s Changed?
- Complete codebase rebuild eliminates shortcodes and adopts a block-based storage format that aligns with WordPress’s block editor. Sites load faster because Divi only loads the modules you use on each page.
- The Flexbox Layout System replaces the old fixed block layouts with Flexbox, which give you precise control over alignment, spacing, and how elements stack and flow.
- Design Variables store colors, fonts, numbers, images, text, and URLs as reusable values. If you change your primary brand color once, it will update across your entire site.
- Relative Colors & HSL make color management mathematical. Create color relationships that automatically adjust based on your base colors, plus full HSL controls.
- Option Group Presets build reusable style blocks for typography, borders, shadows, and backgrounds. Create them once, then apply them to any element type.
- WooCommerce Modules includes product-focused modules for custom product pages and category pages. Cart and checkout modules are coming soon.
- New Modules add the Group Carousel for any slider, the Lottie Module for JSON animations, and the Icon List for custom lists.
- Loop Builder dynamically pulls content from any post type. It works with WooCommerce products, ACF fields, custom post types, and repeater fields.
- Support for Advanced CSS units like REM, VW, VH, clamp(), calc(), min(), and max() without writing code. Visual sliders and inputs handle the technical stuff.
- Nested Rows lets you drop rows inside other rows with unlimited nesting for complex layouts.
- Interactions lets you build popups, toggles, mouse effects, and scroll animations without extra plugins.
- Responsive Editor lets you view and modify responsive, hover, and sticky states for any setting across all screen sizes.
- The Visual Builder Interface includes dockable panels, a tabbed interface, light and dark modes, keyboard shortcuts, and better layer navigation with breadcrumbs.
A Quick Overview Of Using Divi 5’s Lottie Module
Divi 5’s Lottie Module streamlines the entire workflow into six straightforward steps. These steps get you from zero to a striking website and show you how animations integrate with your site’s design system. Everything stays consistent and becomes part of your website’s visual language without creating isolated elements that stick out.
1. Determine Your Lottie Source
There are two ways to get Lottie animations on your website. Choose based on how much control you want versus speed.
The fastest route uses files directly from platforms like LottieFiles or IconScout. You select the Lottie file you like, customize it, and download its JSON file. It’s quick and easy. However, these sites often restrict how many you can download or customize, etc.
You can create animations from scratch in After Effects for total control. Your brand gets precisely what it needs without any download restrictions. You avoid the sameness of popular Lottie libraries. But this is the hardest way since it requires you to know how to use After Effects and need computing power to render.
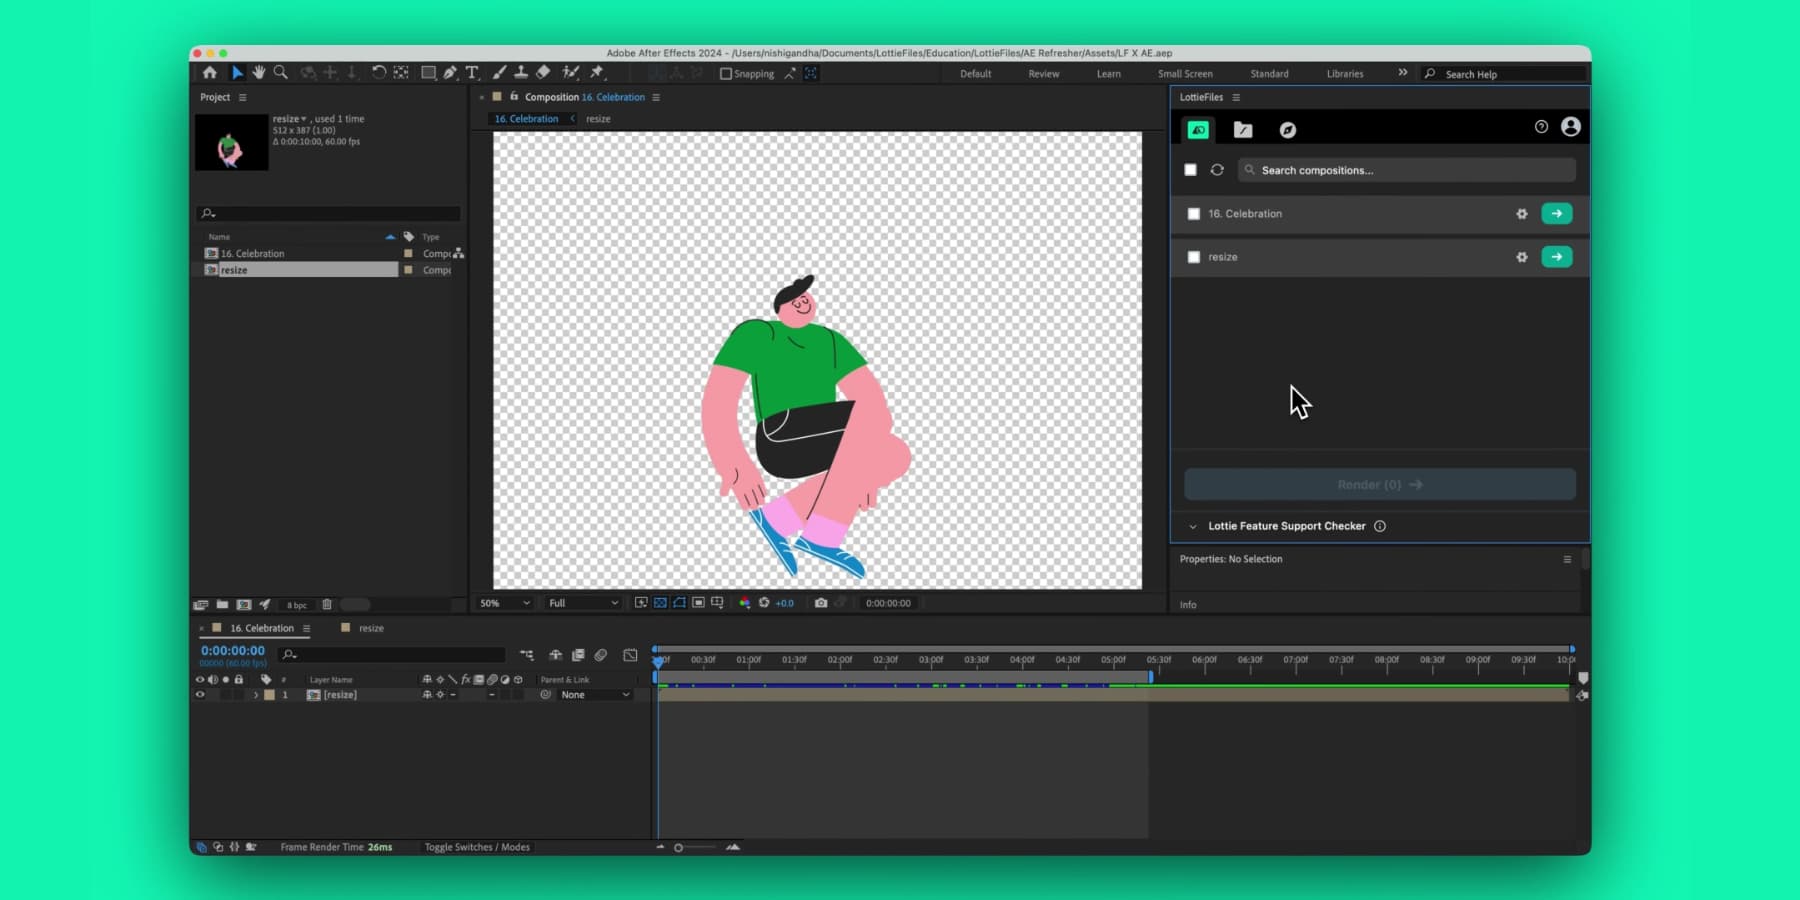
Image by LottieFiles
Pick whichever makes sense for your business. One thing to know: you cannot change the colors of your Lottie files inside Divi 5. The colors stay the same as the original file. But most Lottie websites let you pick specific colors and stroke widths before downloading them.
2. Enabling JSON Uploads
As explained, Lottie files are JSON files. However, JSON files can carry payloads that exploit vulnerabilities in how websites process data. Someone could disguise malware as an innocent animation file. They can also include scripts that run on your server or trick other systems into running dangerous commands.
Though legitimate JSON files, like Lottie animations from trusted sources, pose minimal risk when appropriately handled. So, be mindful of where you are getting your files from.
Due to this security risk, WordPress errs on the side of caution by blocking these uploads entirely.
So, to upload your JSON file, you need to tell WordPress to start accepting them. One option is the File Upload Types plugin, which lets you check boxes for different file formats.
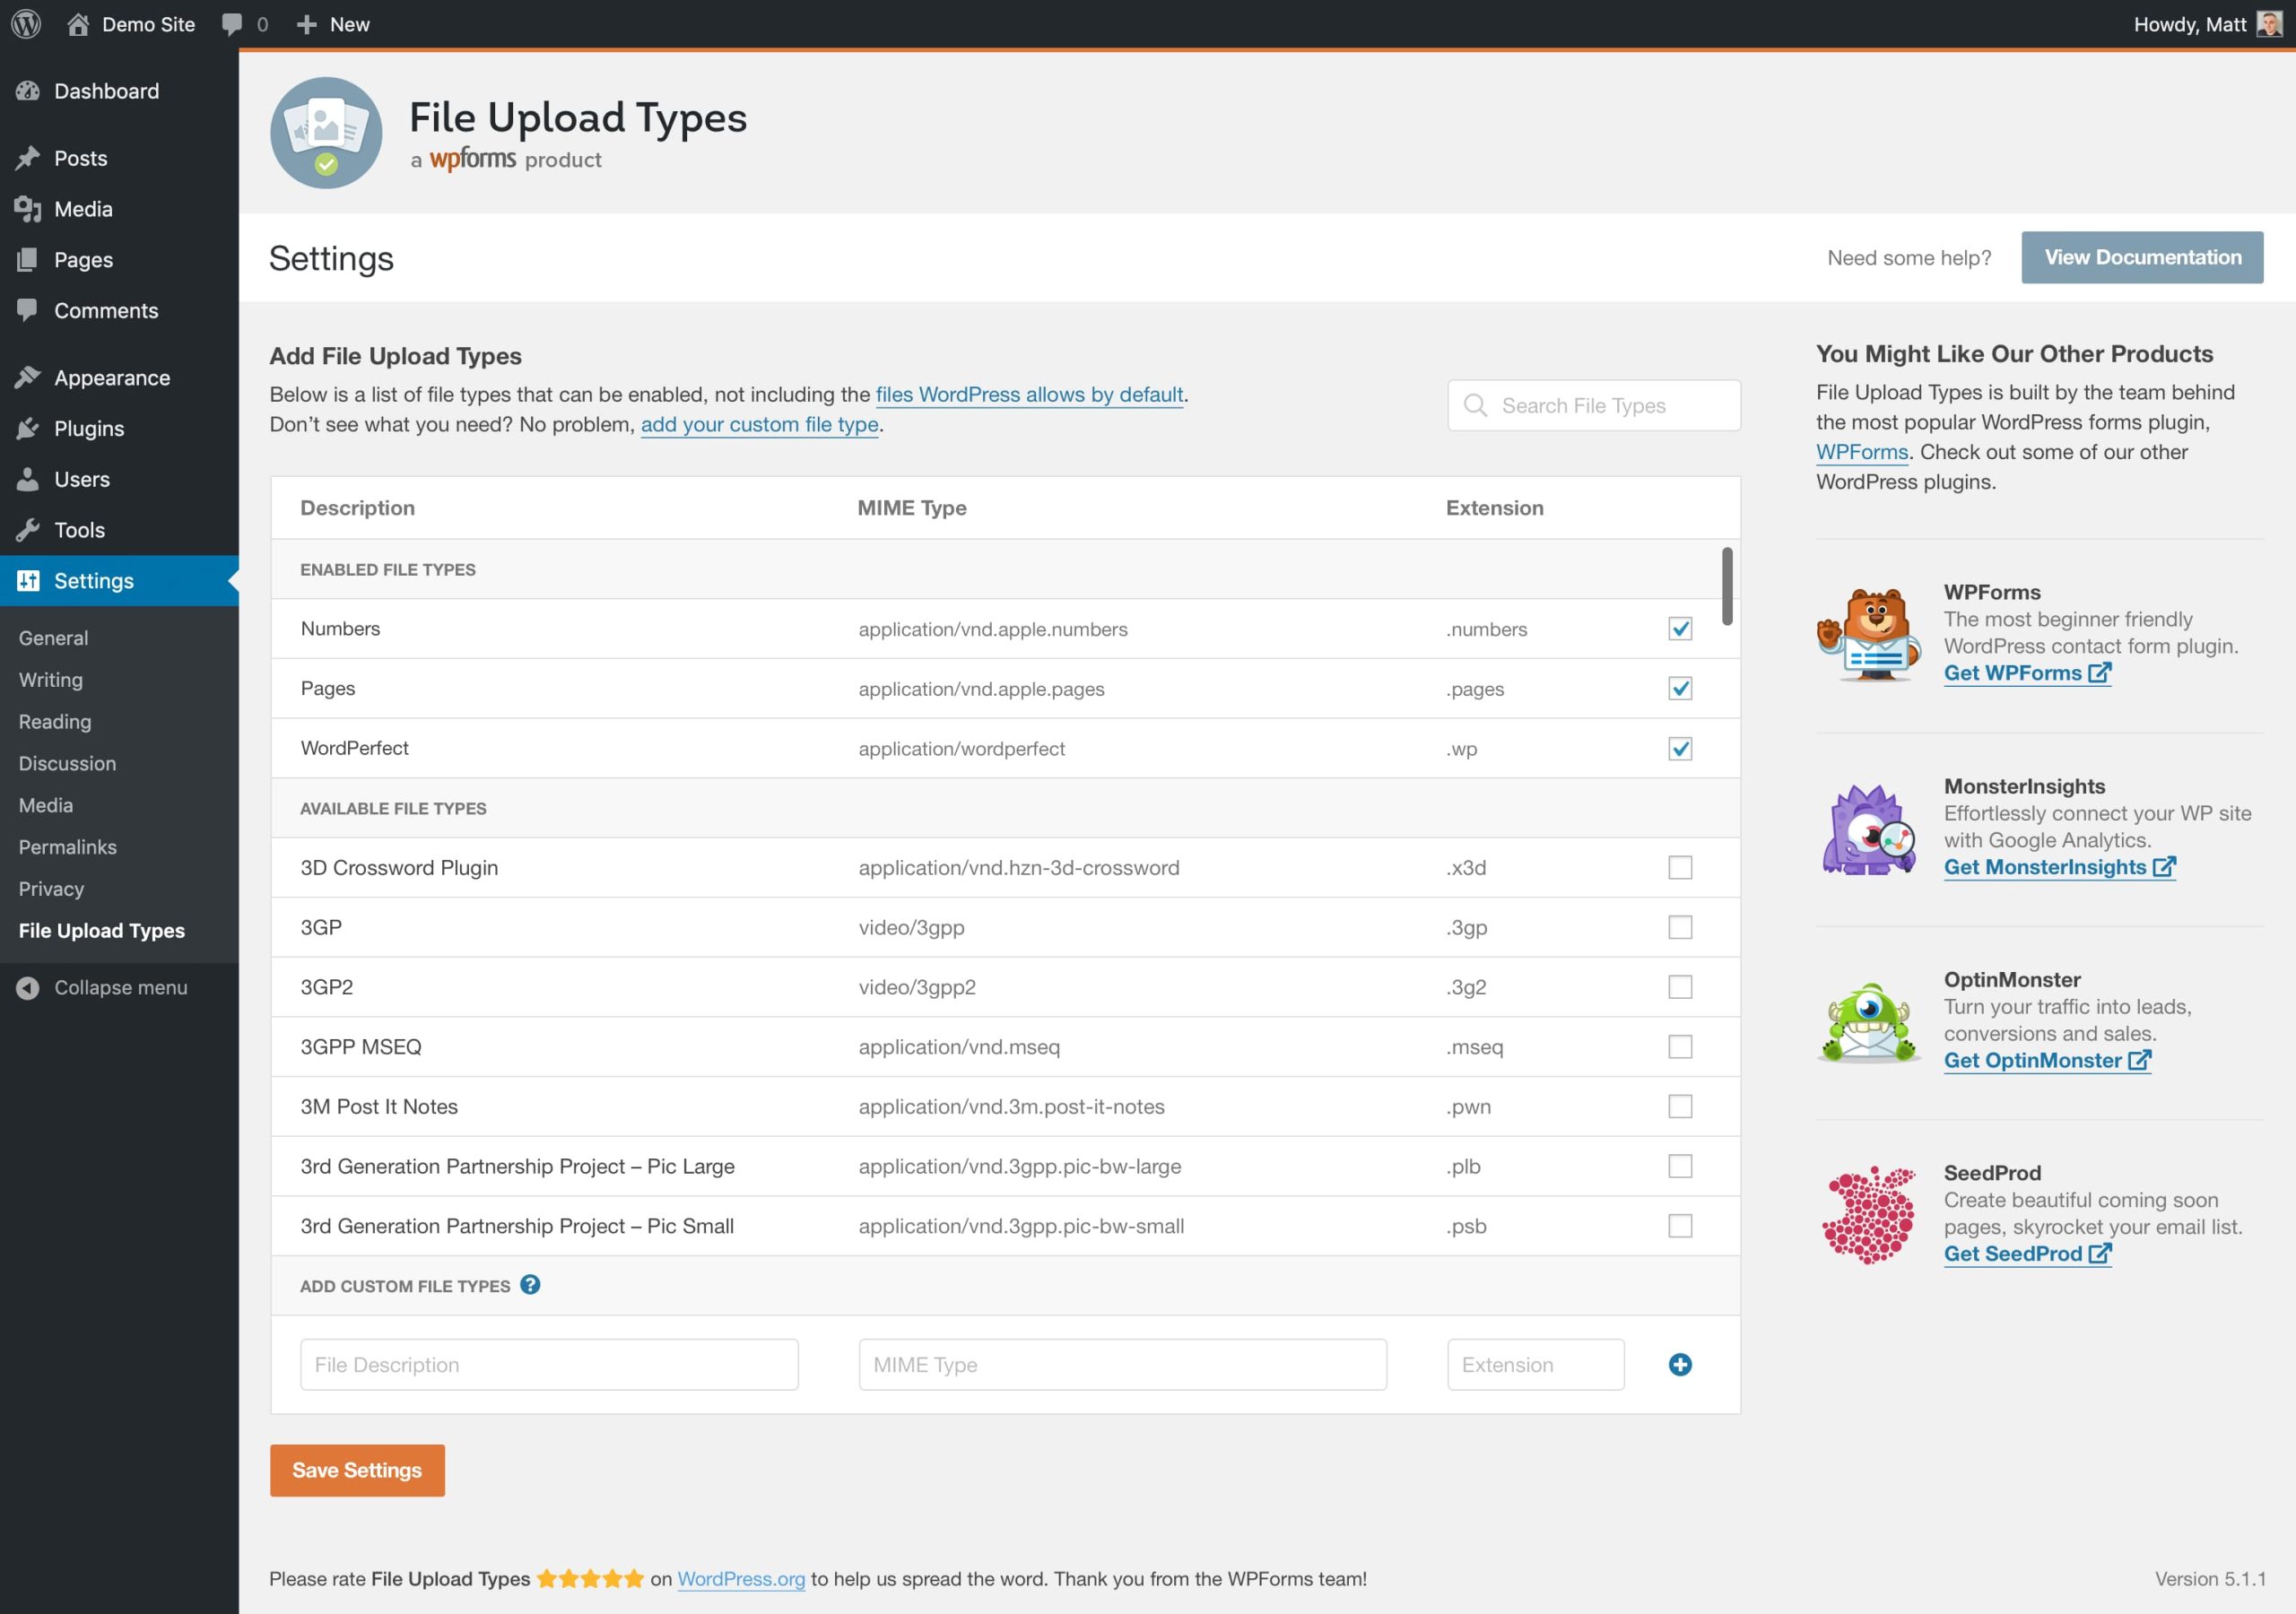
Image by File Upload Types
Always back up your site first and only upload JSON files from sources you know and trust.
3. Adding the Lottie Module To Your Page
Adding the Lottie Module works like adding any other Divi module. Open the Visual Builder on your page and click the plus icon to add elements. The Lottie Module will appear in the module list alongside the others.

Once you add the Lottie Module, you can start configuring your animation source. As mentioned, you need to enable the JSON uploads first.
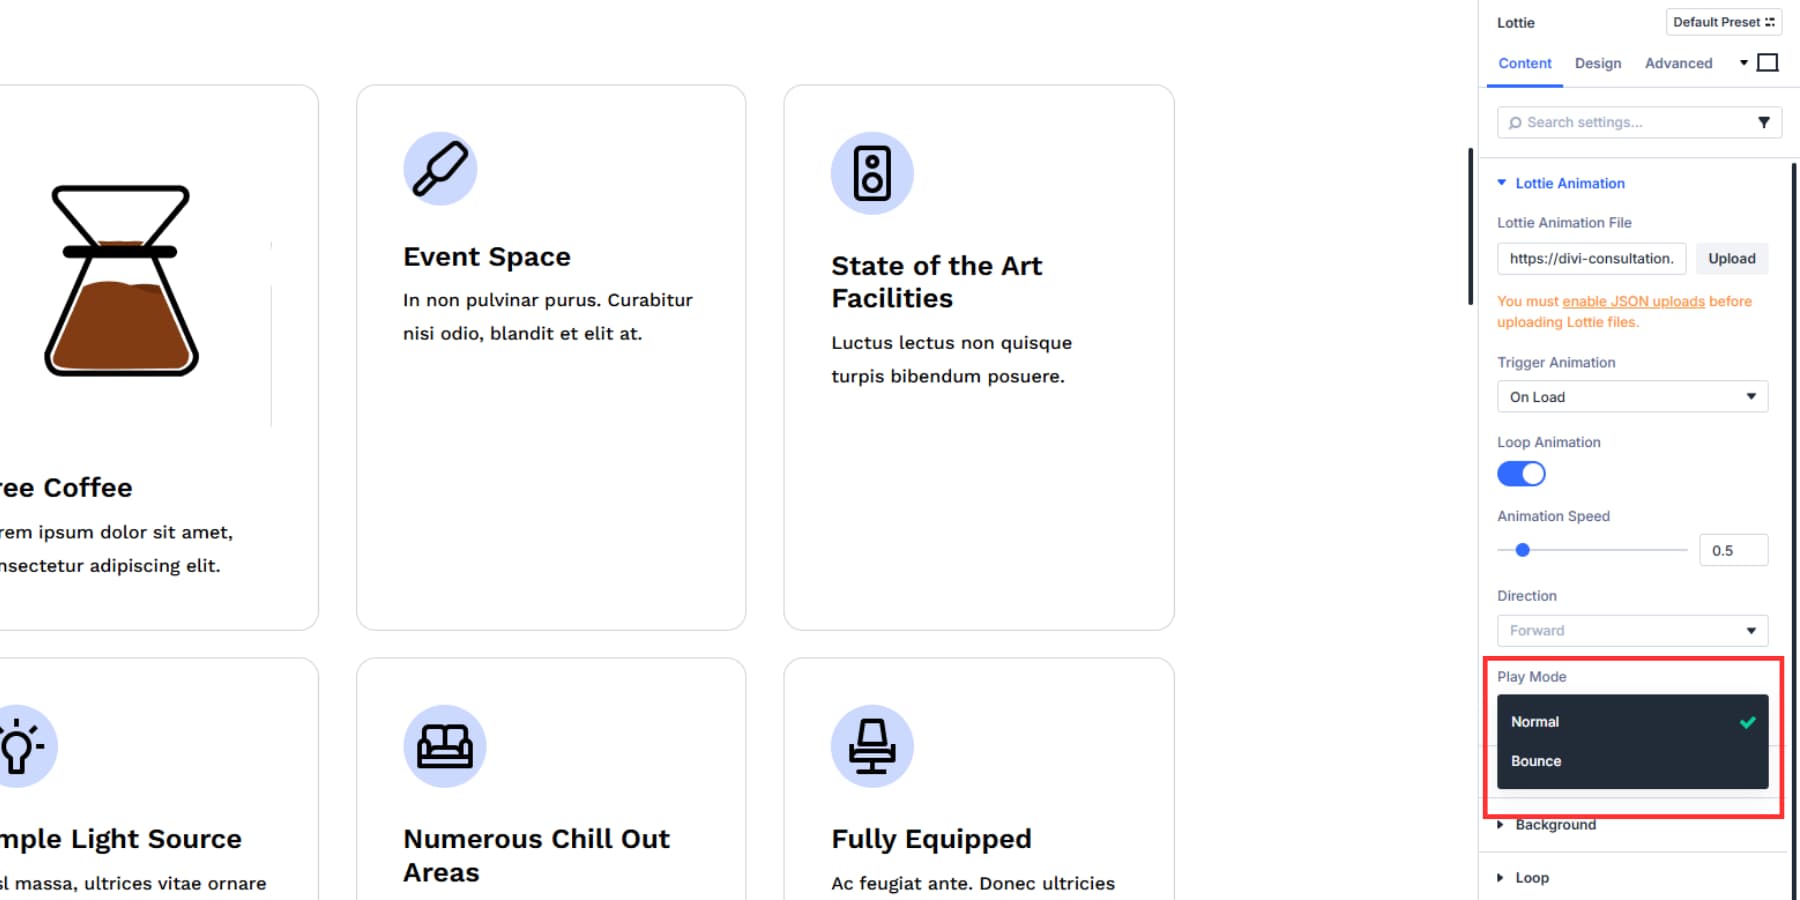
4. Configuring Animation Playback Settings
Once your Lottie Module loads, you access several playback controls that determine how your animation behaves. The Trigger Animation setting lets you choose when the animation starts: on load, view, hover, click, or scroll to animate.
Scroll to Animate is interesting: it creates interactive effects by tying animation progress directly to user scrolling behavior. As users scroll down the page, the animation progresses frame by frame. This makes the animation an interactive element that responds to scrolling instead of playing automatically when the page loads.
The Loop Animation toggle keeps your animation running continuously.
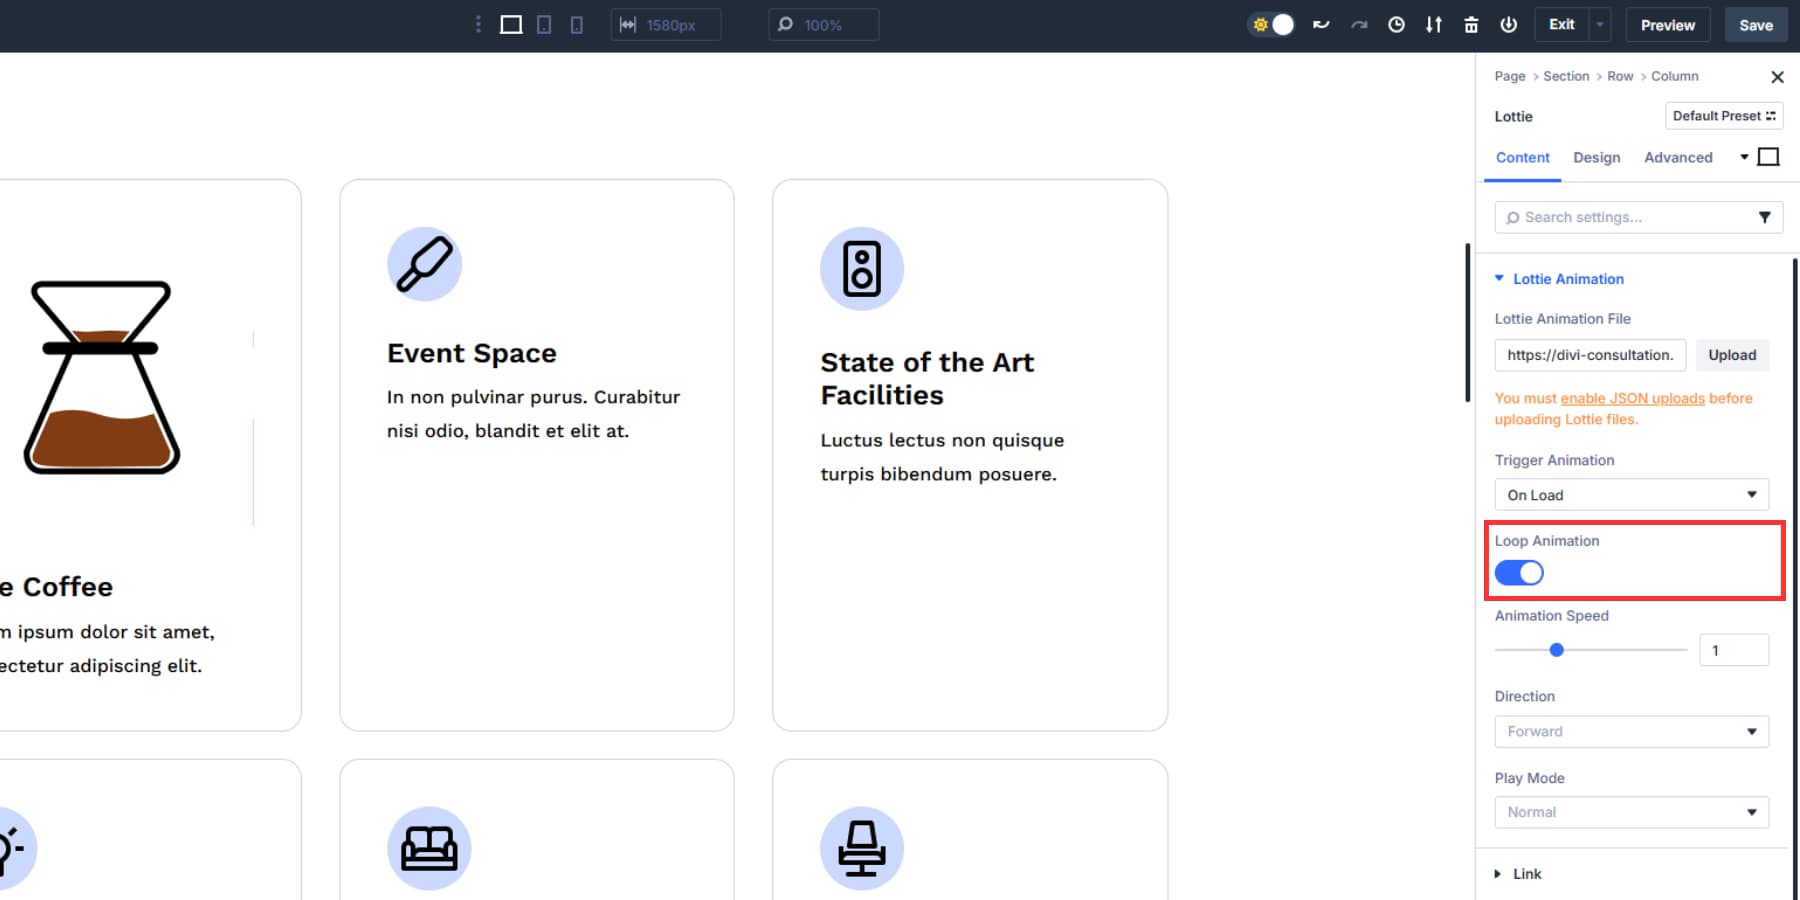
You can adjust Animation Speed to control how fast the animation plays.
Direction control lets you run animations forward or backward.
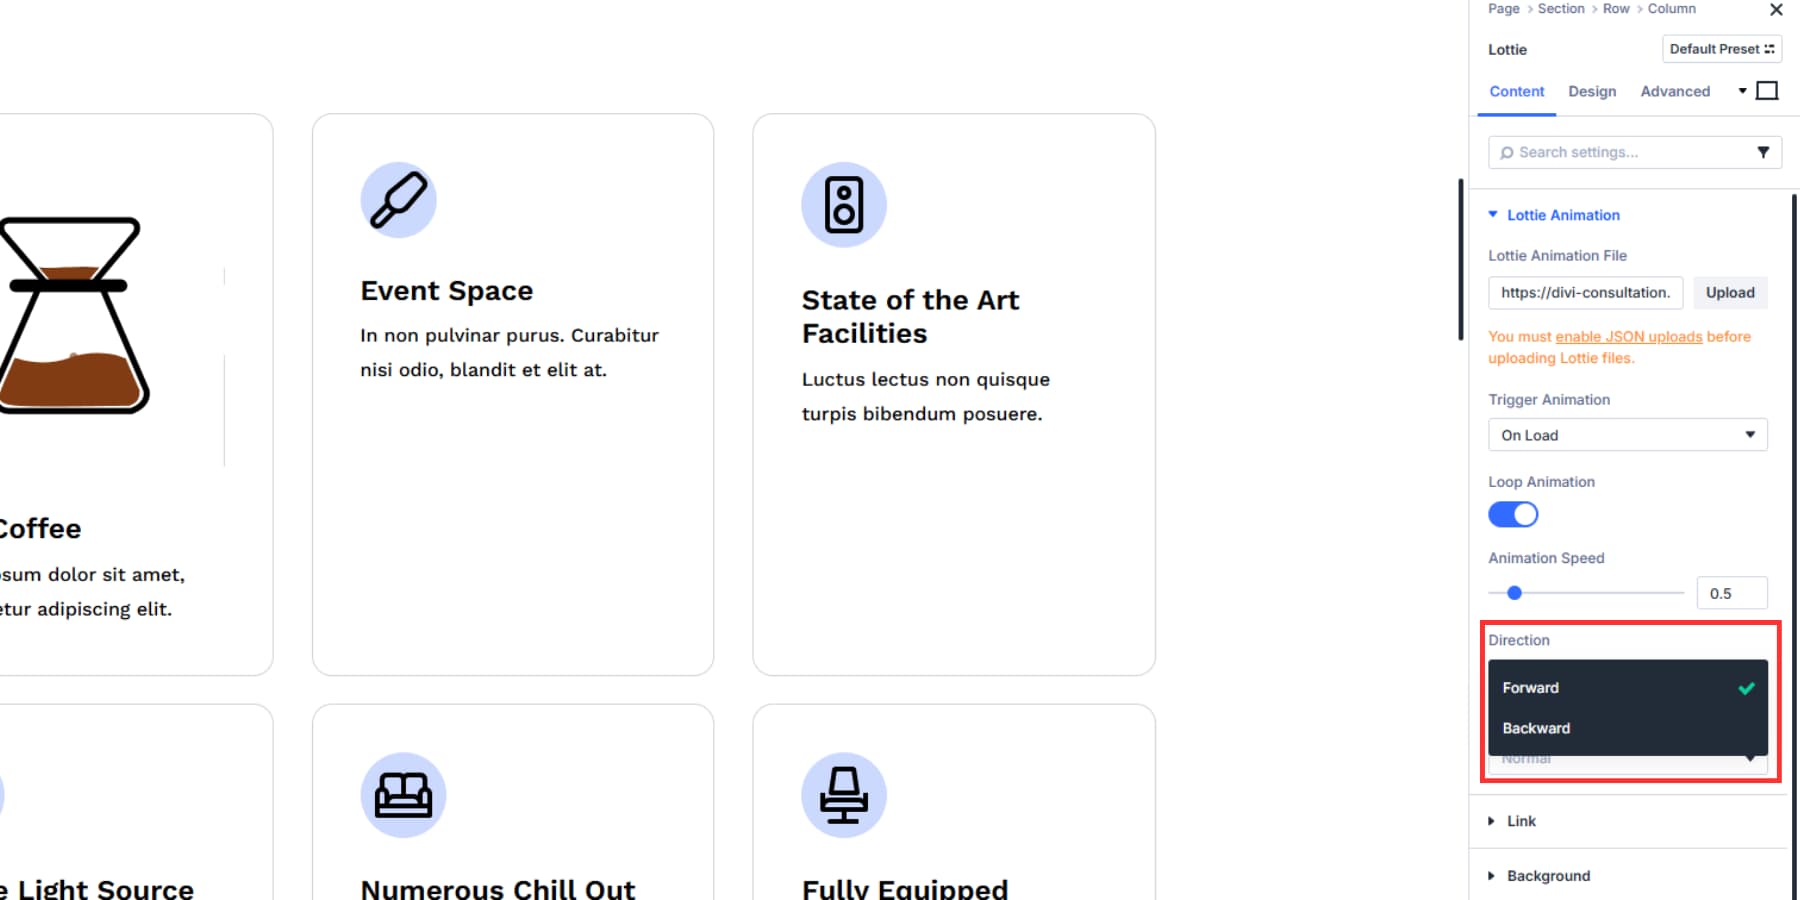
The Play Mode offers Normal playback or Bounce, which reverses direction at the end.
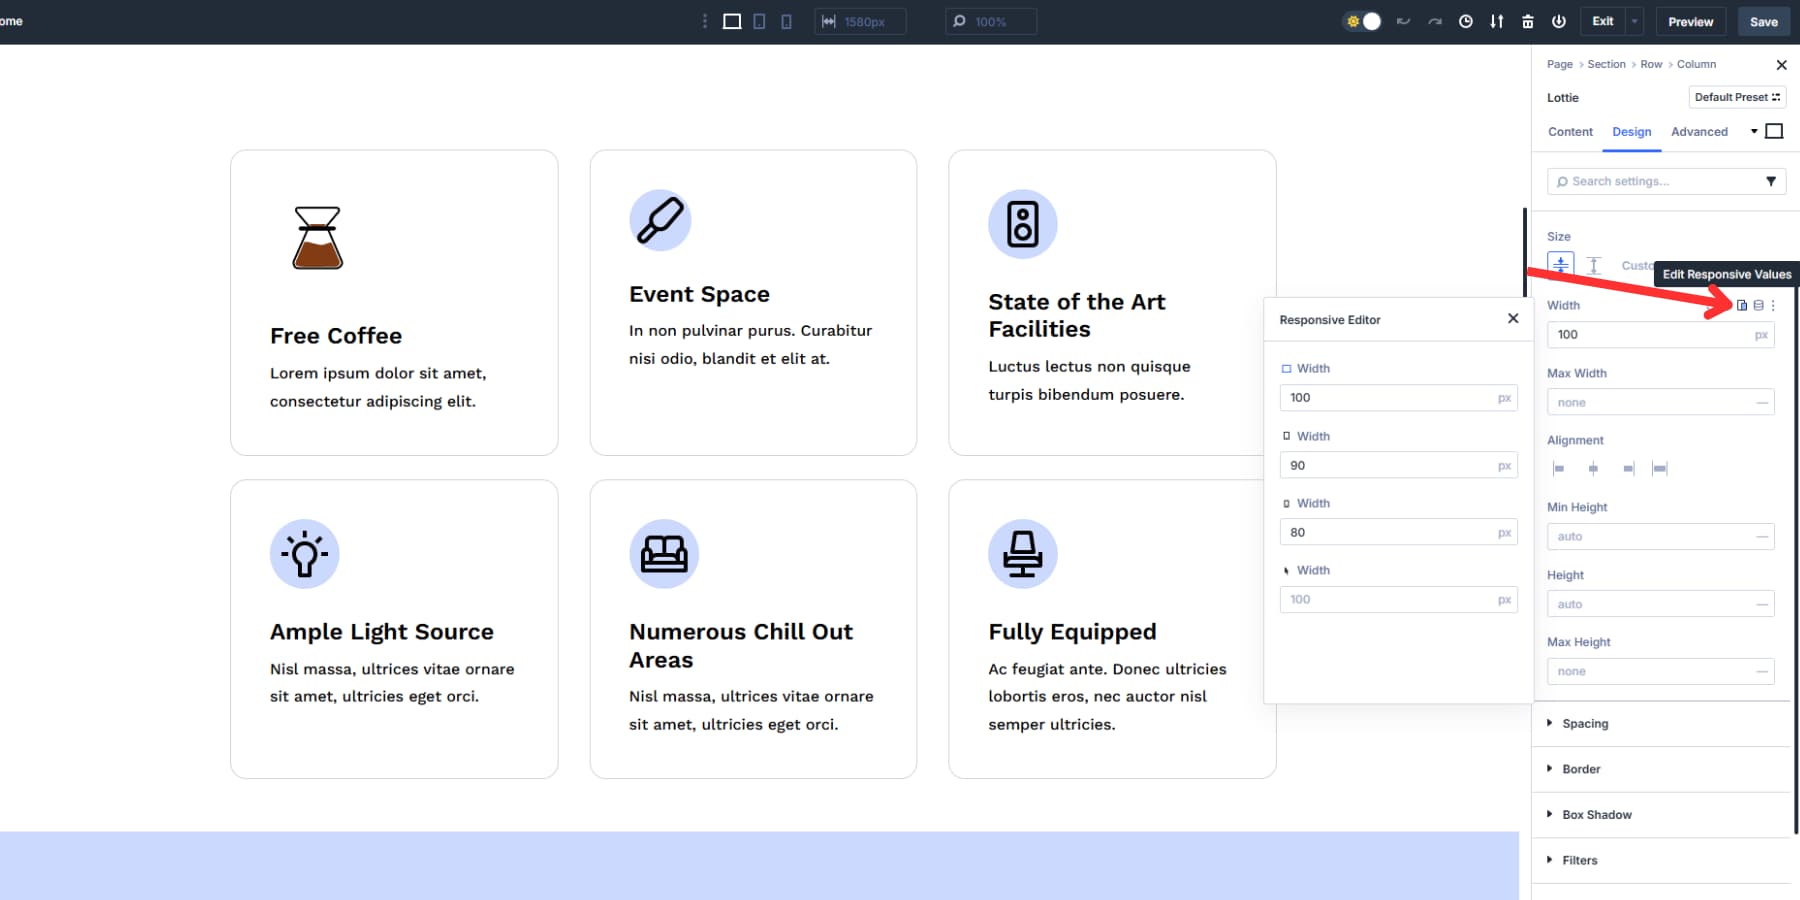
5. Fine-tuning With Divi’s Design Controls
The Design tab gives you control over the look of your Lottie animation. You can change its size, alignment, height, spacing, and position it exactly where you want it on the page.
Divi 5 lets you use all its design settings on Lottie Modules. You can add transforms, filters, and box shadows. These create transition effects that work with your animation. The settings help you make more complex visual experiences.
Pro tip: Instead of using hardcoded pixels to size your Lottie files, use advanced units saved as Design Variables. There are several Design Variable options. We won’t go into too much in this post, but here’s an excellent guide.
![]()
Swapping out regular hardcoded values with your Design Variables keeps your website connected to its overall design system. When you change the values in the Design Variables, they automatically update everywhere they are used. This makes it quick to make changes whenever needed, especially when you are working with clients.
A large animation might work great on a desktop, but overwhelm mobile users. You can slow down animations on touch devices where users interact differently, or shrink complex animations that become hard to see on small screens.
Some animations might need different positioning on mobiles and tablets, where content flows differently.
The Responsive Editor works with Divi 5’s customizable breakpoints.
Instead of the old three-device limit, you can set up to seven breakpoints.
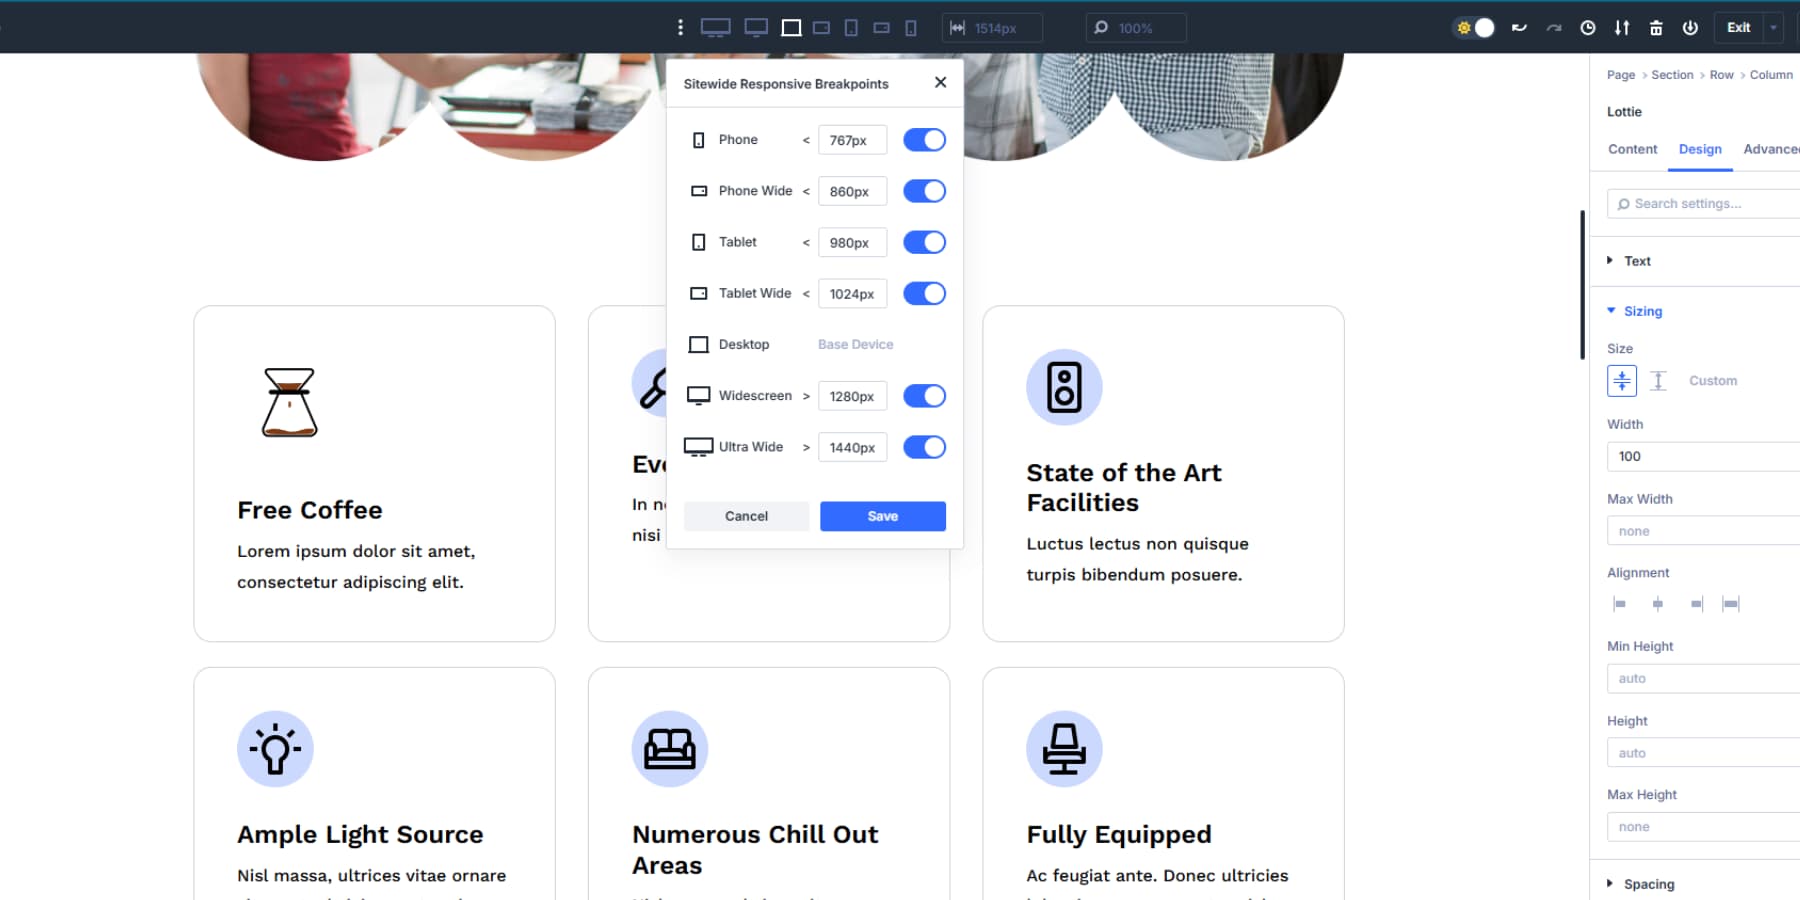
Switch between these breakpoints to test how your animations look on each screen size and make quick adjustments. Advanced units like clamp() also allow you to skip the hassle of adjusting for each breakpoint.
6. Create Reusable Presets From Lottie Setups
Once your Lottie animation is working perfectly, save those settings for future use. Divi 5 offers two ways to do this with presets.
Option Group Presets save specific style groups from your Lottie Module. You might save the spacing settings, border styles, or transform effects as separate Option Group Presets. These work across any module type, not just Lottie. Your animation spacing preset could also style image modules or text blocks.
Click the preset icon on the specific setting tab, label it appropriately, and save.
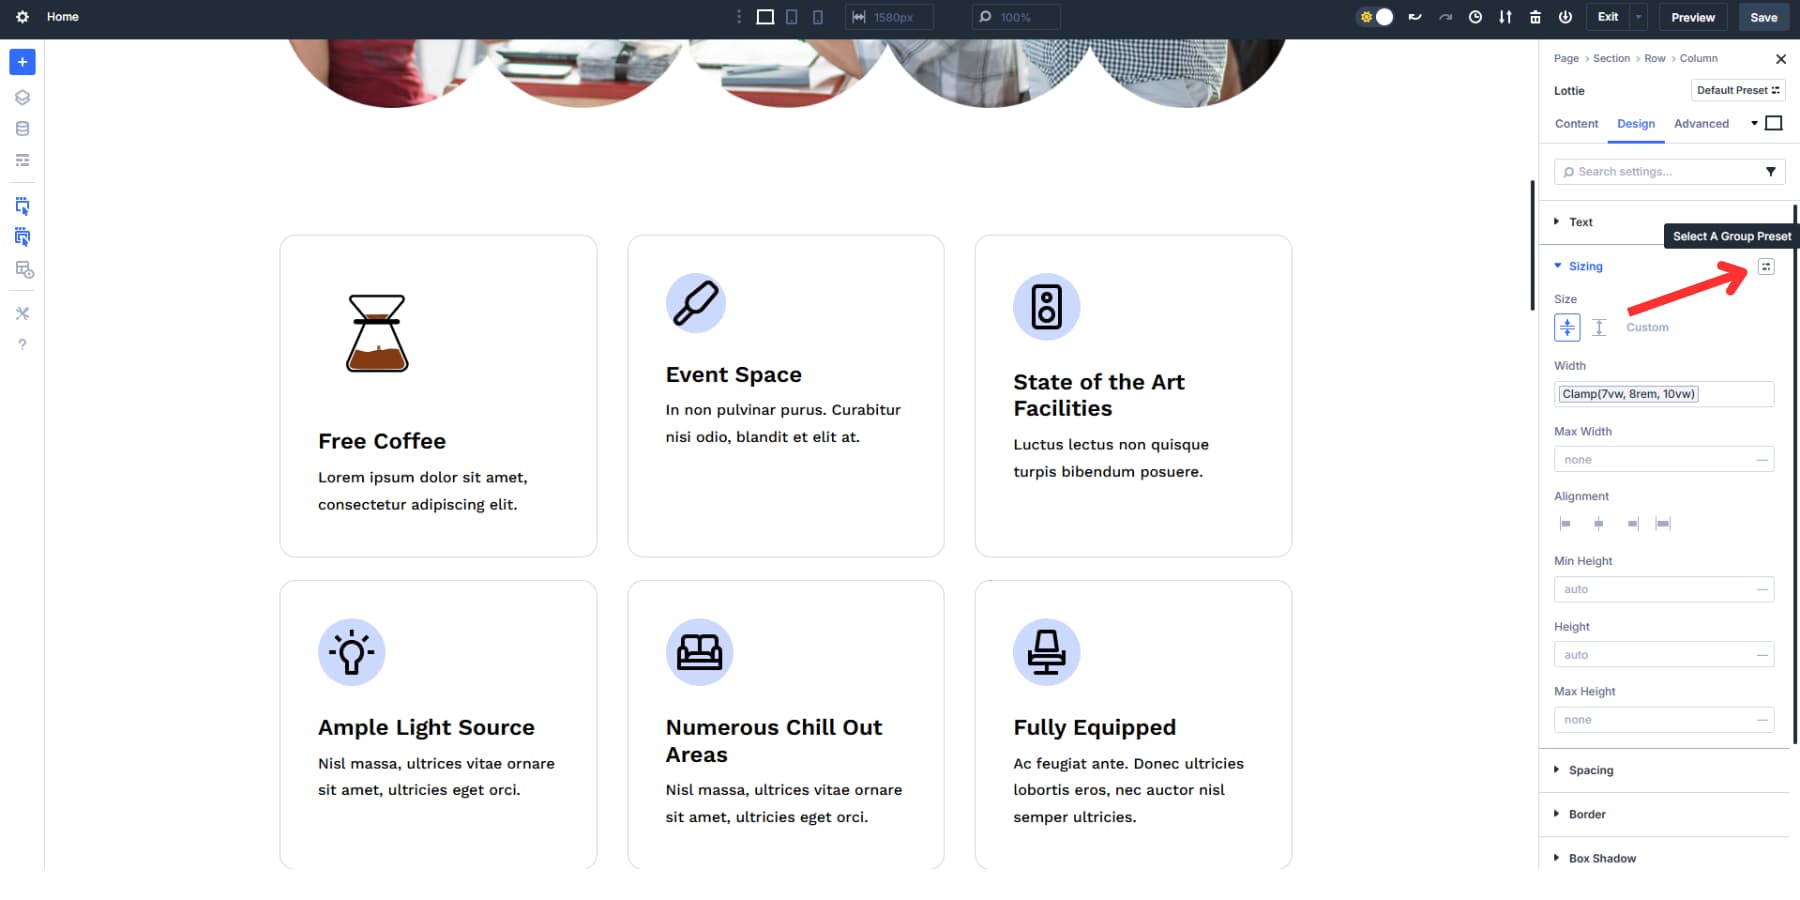
When you must apply the same options, click on the same icon in the other module and select the preset you saved.
These presets work across any module type. Your animation spacing preset could also style image modules or text blocks, or vice versa. Update the preset once to change every linked element across your site.
Element Presets, on the other hand, capture your entire Lottie Module setup except the actual animation file. This includes the trigger settings, speed, direction, and all design properties.
You can save a perfectly configured Lottie animation as an Element Preset by clicking on the preset icon at the top left of the panel. Then, you can apply it to other pages with one click. If you update the preset later, every instance across your site changes automatically.
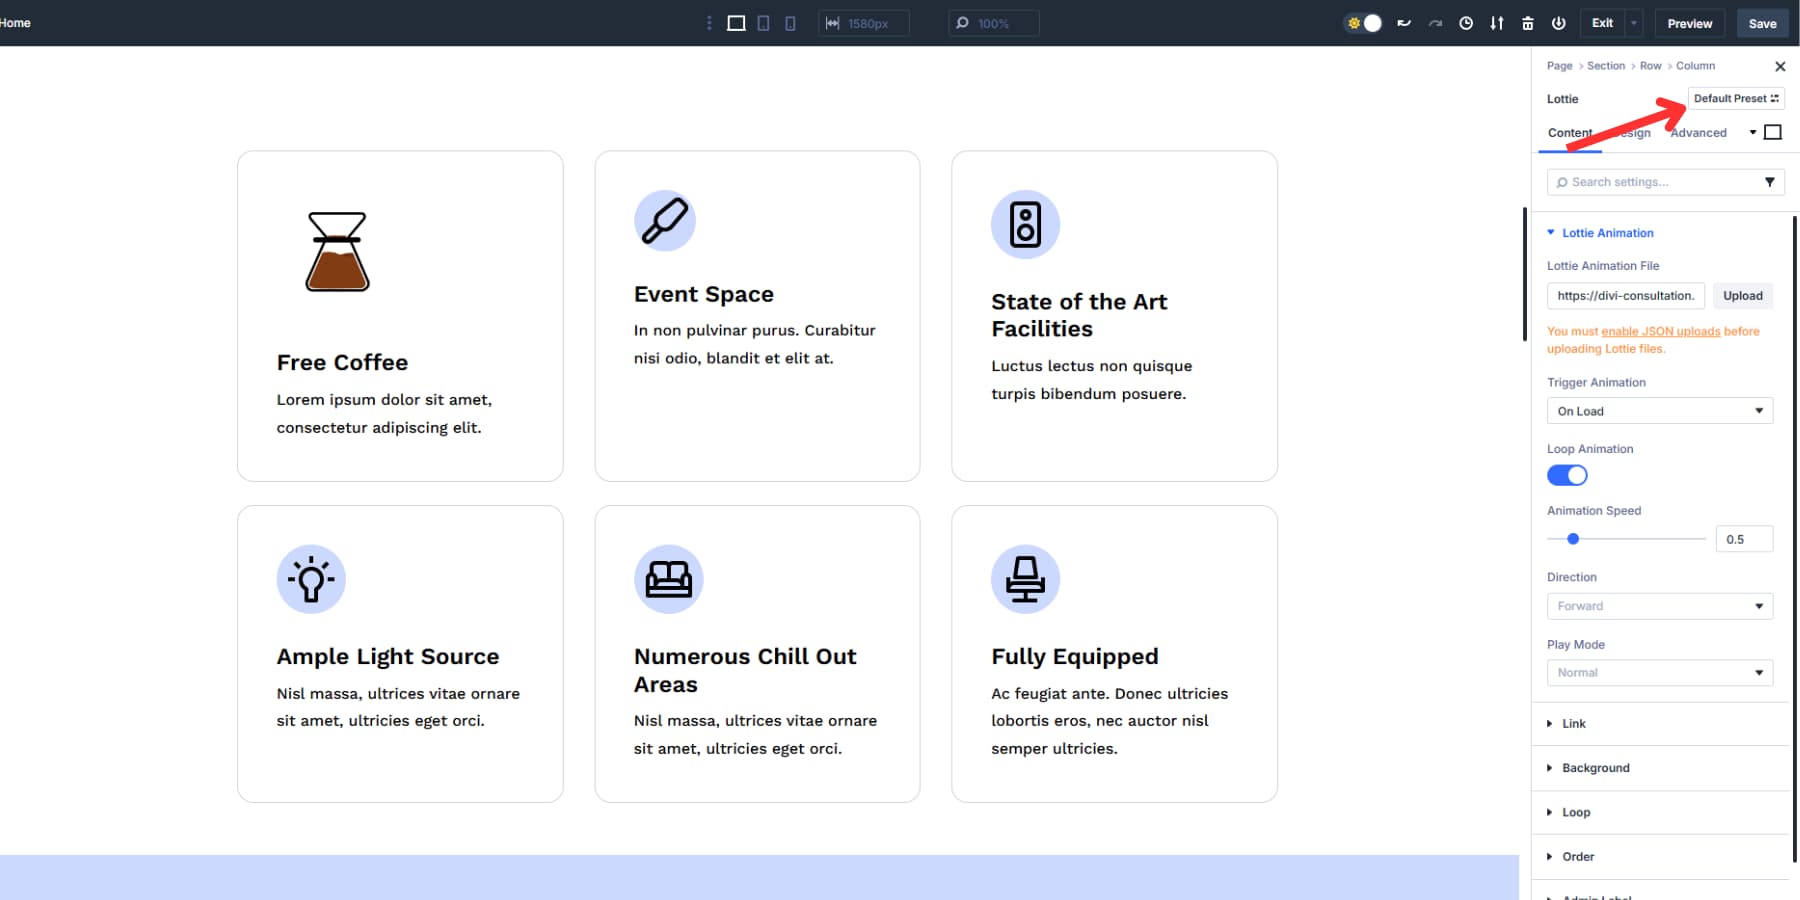
This two-layer approach gives you flexibility. Build your design foundation with Option Group Presets, then combine them into complete packages with Element Presets.
Use Lottie Animations In Divi 5 Today
Lottie files give you rich motion graphics at a fraction of a GIF file size. While there are several ways to add Lottie files to your site, including WordPress plugins, Divi 5 puts them at your fingertips through simple drag-and-drop controls.
Also, style once as Option Group Presets and apply those same design rules to any module on your site. Build your spacing, transforms, and effects into reusable blocks that keep everything consistent. Your animations become part of a larger design language instead of random moving pieces scattered around your pages.
Download Divi 5 and build sites with systems, not chaos.


Leave A Reply