
Maintaining a blog on your WordPress site is essential for providing valuable content to your readers. Also, blog posts can help your site appear on search engine ranking pages (SERPs) when written well. In the past, those without good writing skills would have to hire someone to write their posts or, worse, not have a blog. Thanks to artificial intelligence (AI) tools such as ChatGPT and Divi AI, you can harness this new technology to help craft your posts for you. In this article, we’ll walk you through the steps to write a WordPress blog post with AI.
Let’s get started.
What is WordPress?
WordPress is a popular content management system (CMS) that is utilized on more than 43% of all websites on the internet. It started as a blog platform in the late 90s and has evolved into a website-building powerhouse used by freelancers, web agencies, and large corporations. There are two types of WordPress. .org and .com. While they are built by the same people, there are some differences. So everything is clear, we will be working in WordPress.org, which is self-hosted and comes with nearly unlimited customization options.
What is AI?
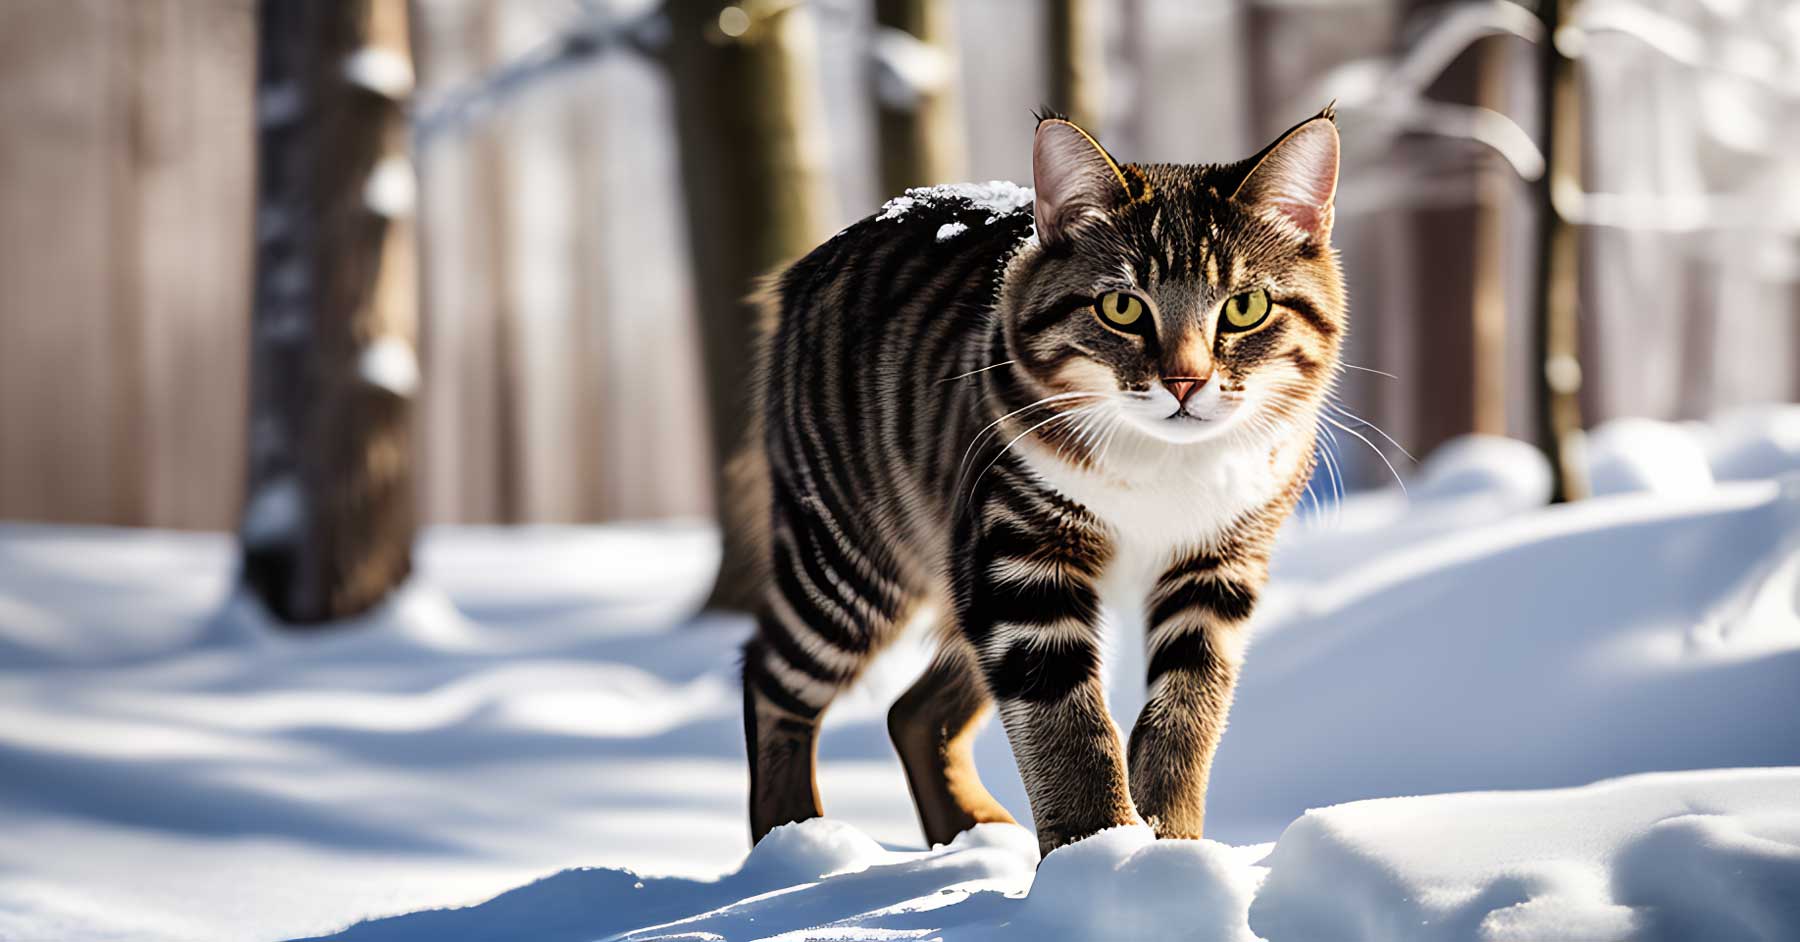
image created with Divi AI | Prompt: photo of a Maine Coon cat, set a snowy forest, dramatic lighting, ultra quality, 8K UHD, National Geographic Wildlife photo of the year
AI is the development of computers that use machine learning to achieve tasks that would normally require humans to do. AI can train these systems to generate images, text, video, music, and more. This type of AI is called generative AI, which involves intensive training between two systems, or generative adversarial networks (GANs), containing a discriminator and a generator. They work together to compare the generator’s output to the data the system was trained on. For example, during image generation, the generator presents output to the discriminator, which tries to determine if it’s real or fake. As training continues, the generator will be better at output, so the discriminator can’t tell the difference between the two.
Some of the more popular AI text and image generators like Divi AI, Jasper, Writesonic, and ChatGPT have many uses, including writing blog posts, creating realistic images, and more. Learn how to use AI tools in your writing.
What is Divi AI?

Divi AI is the newest, most exciting product launch in recent memory. Based on Stable Diffusion and Open AI models, Divi AI can write content and generate images right inside the Visual Builder. That said, Divi AI is built a bit differently than other generative AI. Made specifically for Divi, it understands all of Divi’s design elements and can make suggestions for text and images based on the associated content on the page. For example, if your page is about a Maine Coon cattery, Divi AI will suggest text related to Maine Coon cats. This incredible new tech will make creating Divi websites easier than ever!
How to Write a WordPress Blog Post With AI
Subscribe To Our Youtube Channel
With all of the AI technology available to WordPress users today, there are several ways to create a blog post using AI. However, for this post, we will concentrate on two routes. The first uses Divi AI, and the other uses ChatGPT and Midjourney.
Regardless of the method used, using the Gutenberg editor to create blog posts is recommended. The primary reason for this is that full site editing themes like Divi or Twenty Twenty-Three allow you to create templates to showcase your site’s content. We won’t go into detail about Gutenberg here, but this post outlines how to get around in the block editor. If you’re a Divi user already, you’ll be happy to know that we released improved compatibility with the block editor back in 2022 by introducing the Divi layout block. It allows you to use the Gutenberg editor and Divi Builder simultaneously, which will be needed to use Divi AI.
Creating a Template
Before creating your first post, you’ll need to learn how to create a template using Gutenberg or Divi. When your template is created, you can get down to business.
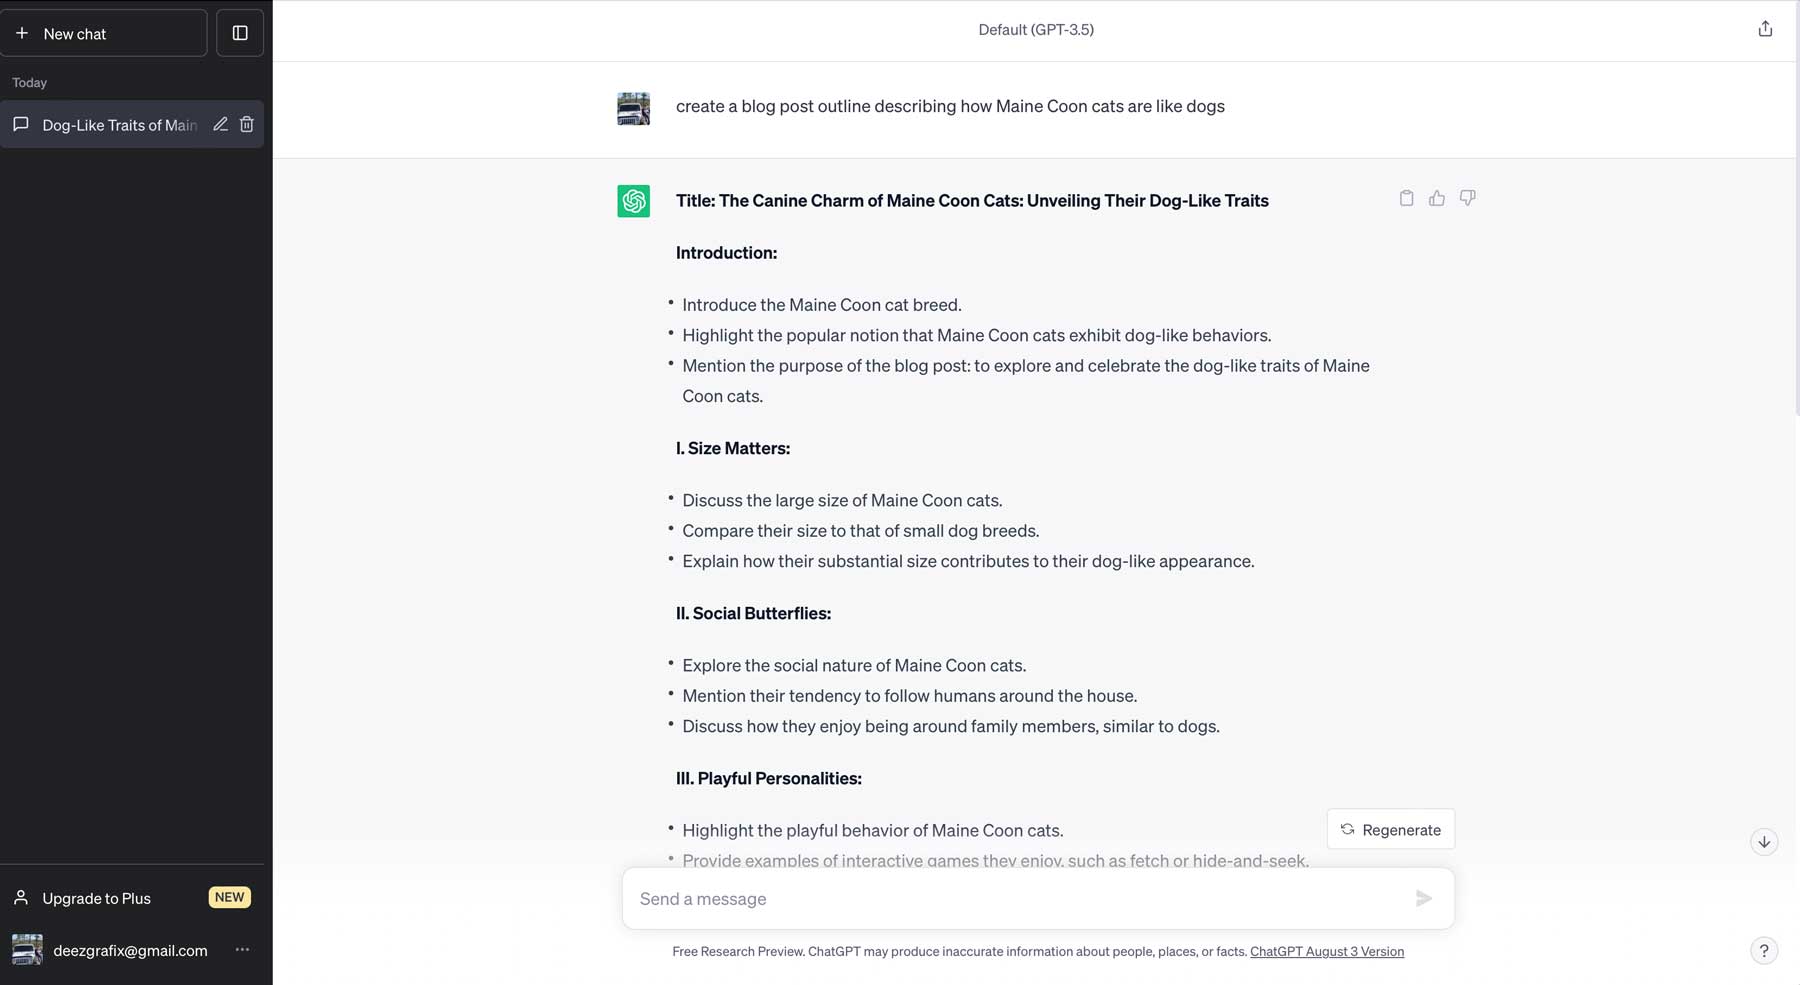
Step 1: Crafting the Blog Post Outline
We’ll outline the steps to create a blog outline using ChatGPT. While this step isn’t necessary, it will help you form your thoughts and give you a structure for AI to follow. If you haven’t already, sign up for an account with ChatGPT. Version 3.5 is free, but you must sign up for a paid plan for the more advanced version. For our post, we want to feature the dog-like qualities of Maine Coon cats, so we’ll use the following prompt: Create a blog post outline describing how Maine Coon cats are like dogs.
ChatGPT will get to work on creating an outline for our post:
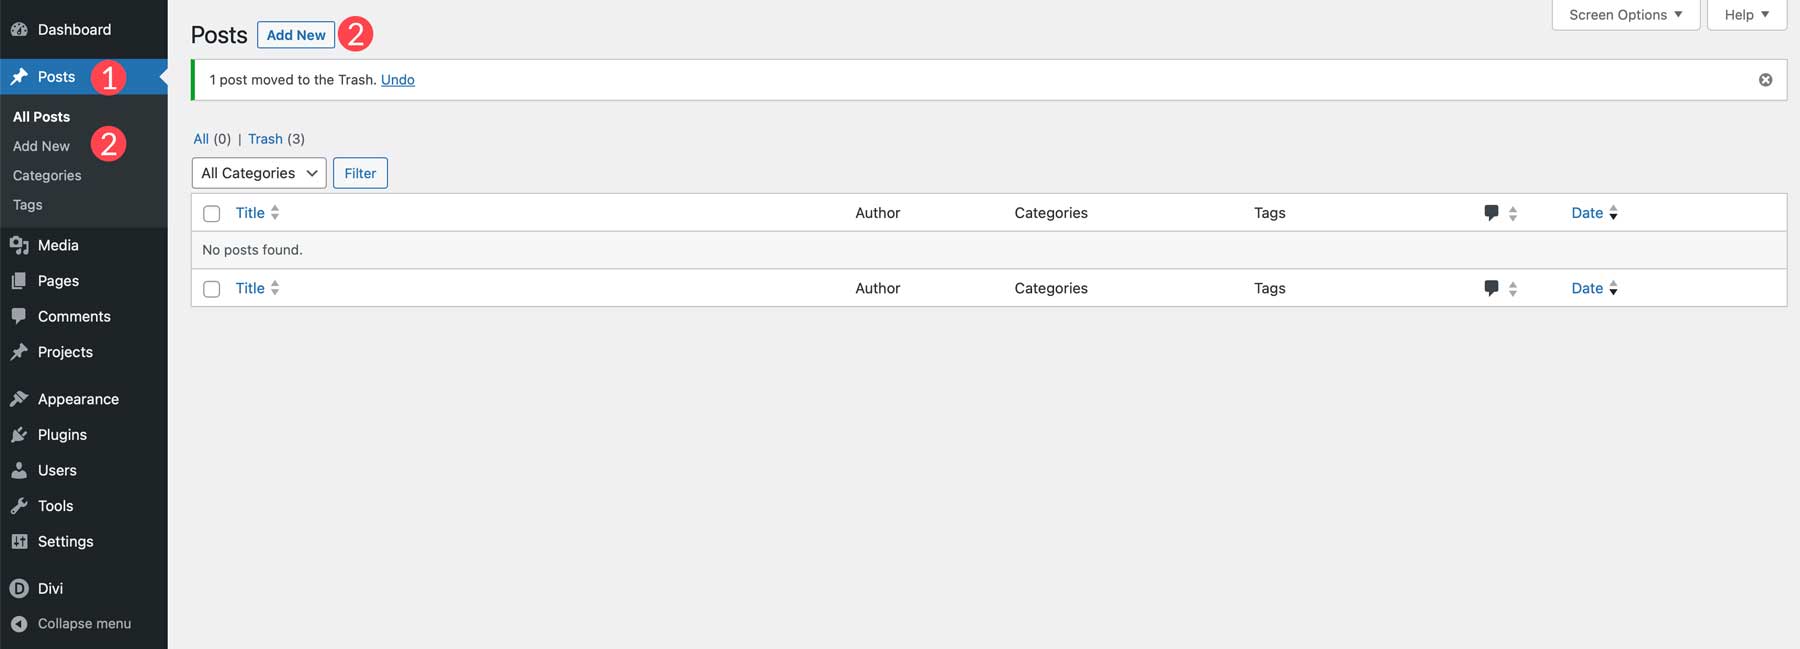
Step 2: Create a New Post
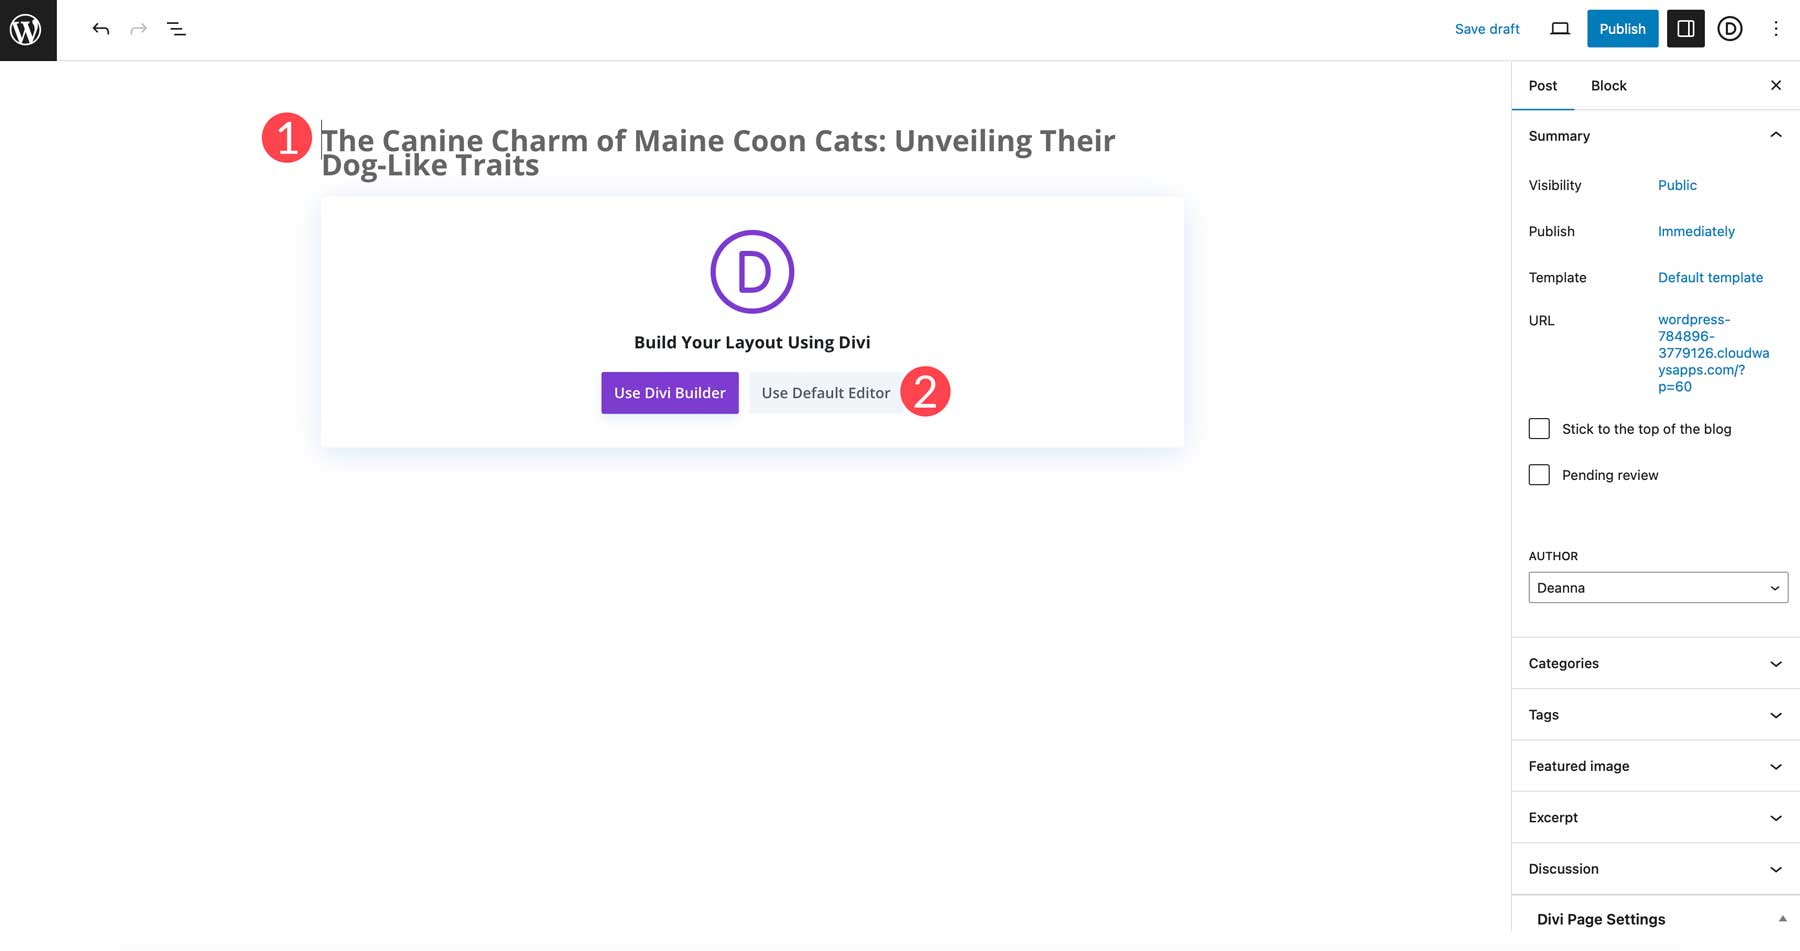
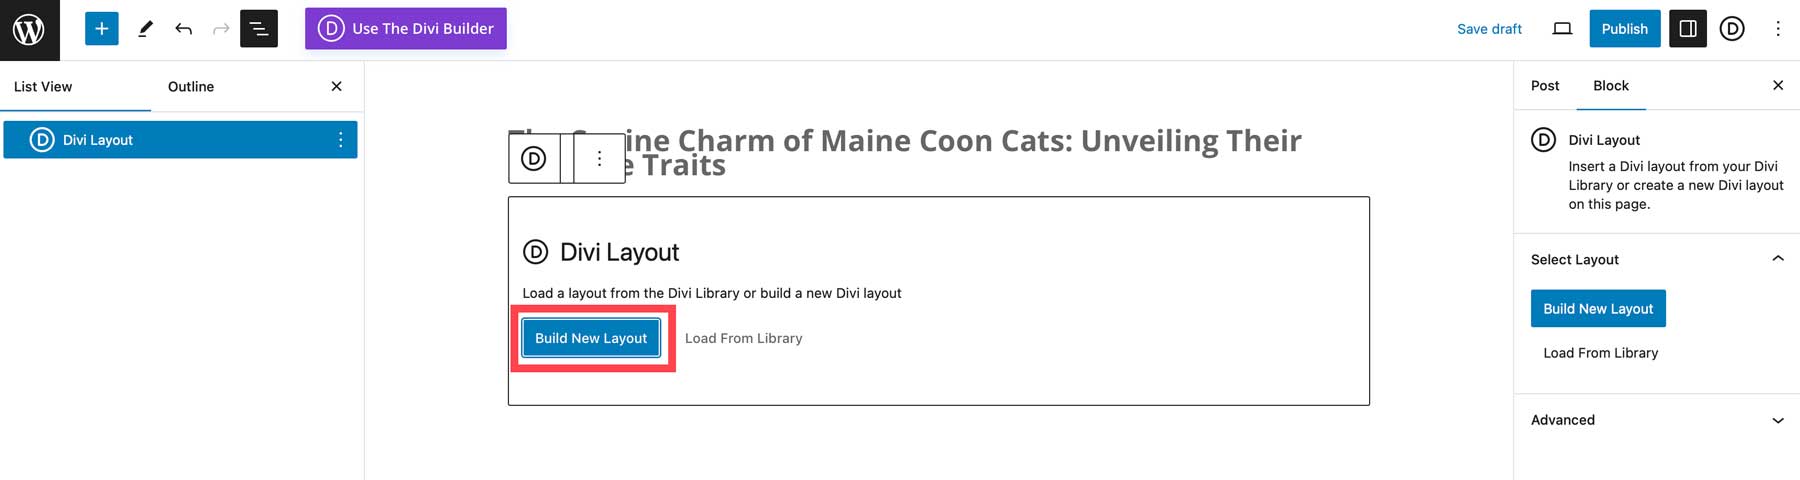
To create a new post, log into your WordPress dashboard, then navigate to posts (1). Next, click the Add New button (2) to create your first post.
Next, we’ll need to add a title to our post (1). Let’s use the one generated with ChatGPT: The Canine Charm of Maine Coon Cats: Unveiling Their Dog-Like Traits.
If using Divi, click the default editor button (2) to load Gutenberg.
Step 3: Writing the Intro
With the post created, the first step is to add an intro paragraph.
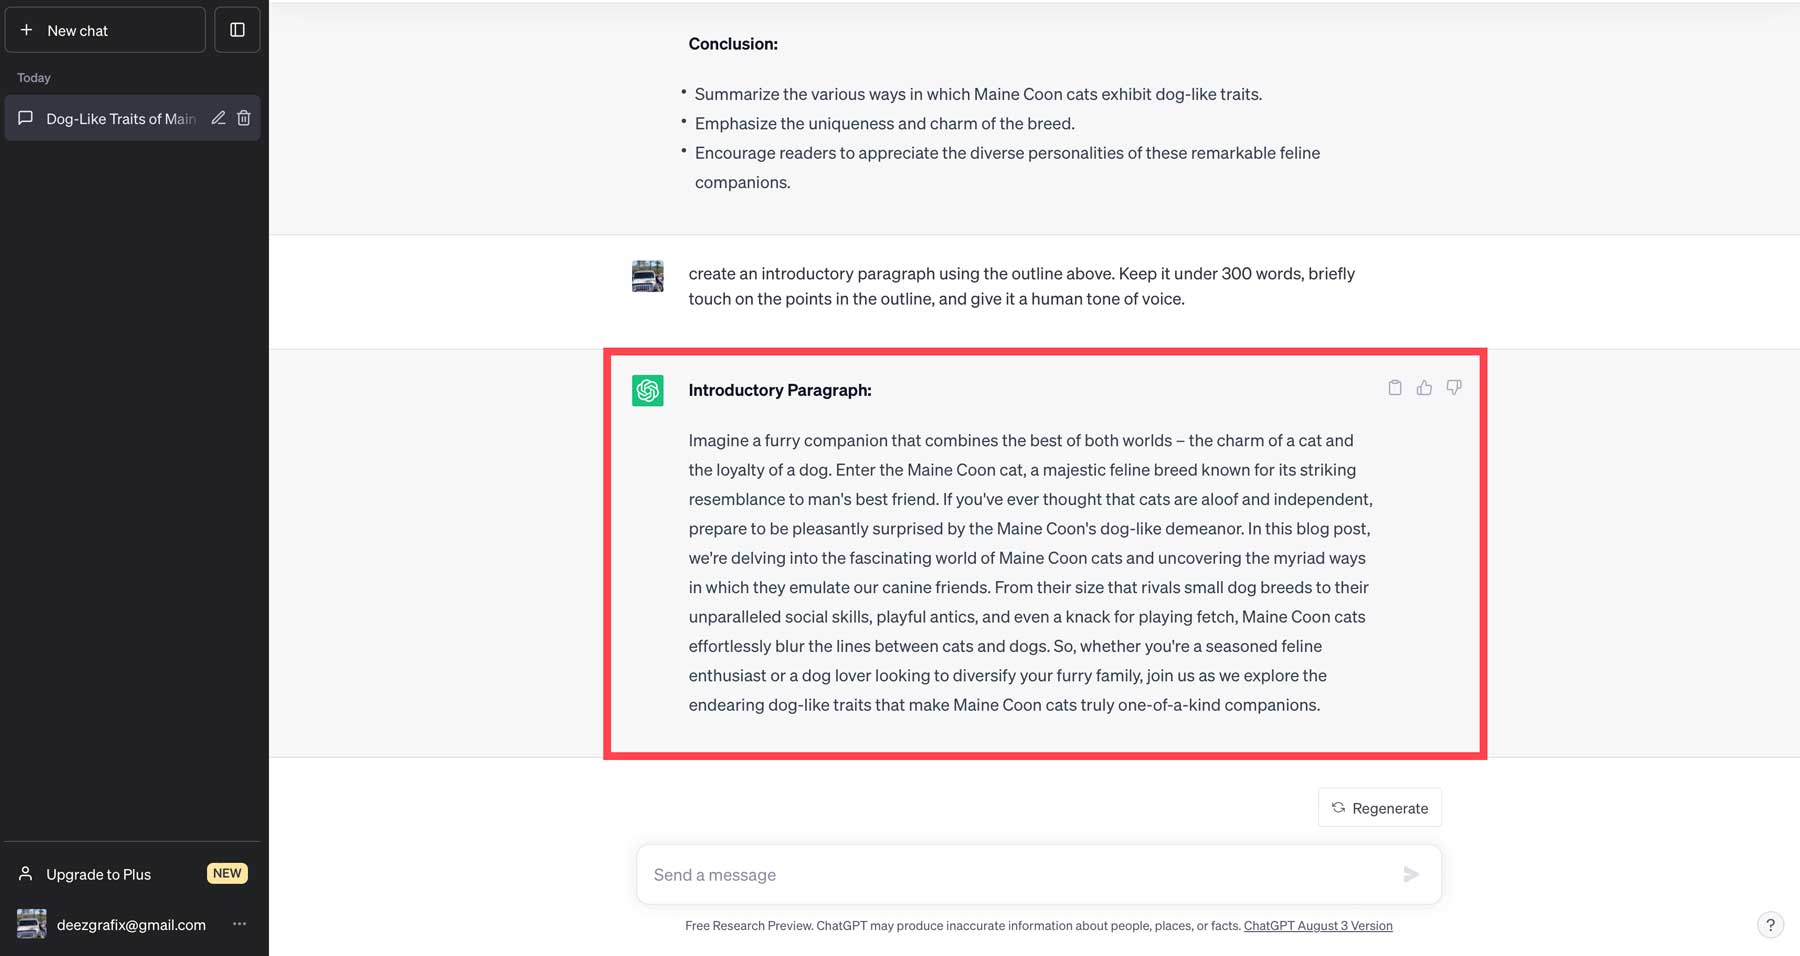
Using ChatGPT
Creating an introductory paragraph is simple using ChatGPT. Head back to the interface and write the prompt: Create an introductory paragraph using the outline above. Keep it under 300 words, briefly touch on the points in the outline, and give it a human tone of voice.
Now, you can do one of two things here. You can copy and paste the generated paragraph or use it to aid you in creating original content. Because we want to keep things ethical, we’ll change the introductory paragraph by using the generated output merely as a guide.
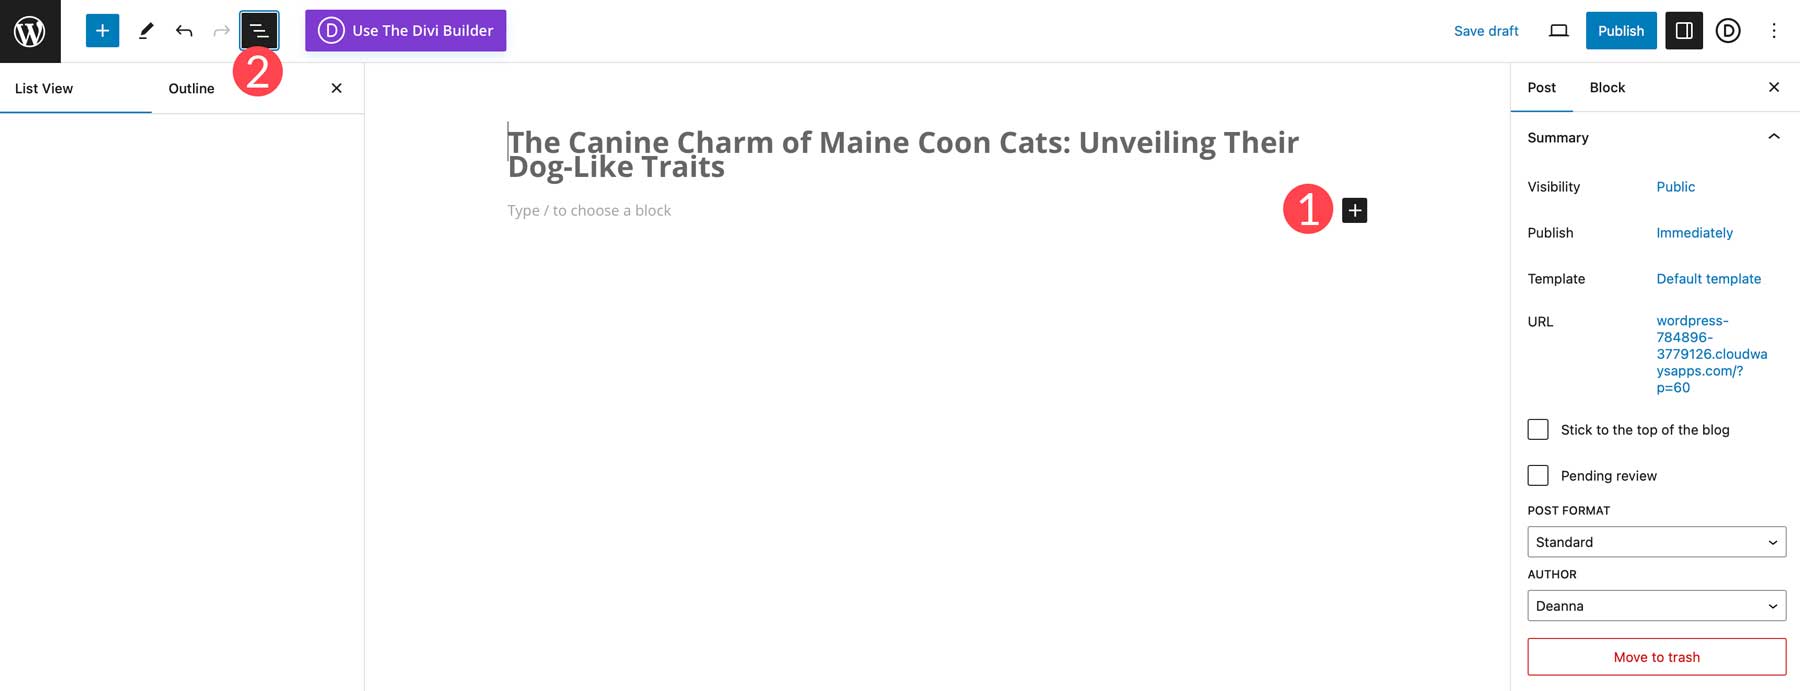
Paste the output into the default editor by adding a paragraph block. To do this, click the + icon (1) in the page builder or navigate to the list view (2) to add a paragraph block there.
Using Divi Within Gutenberg
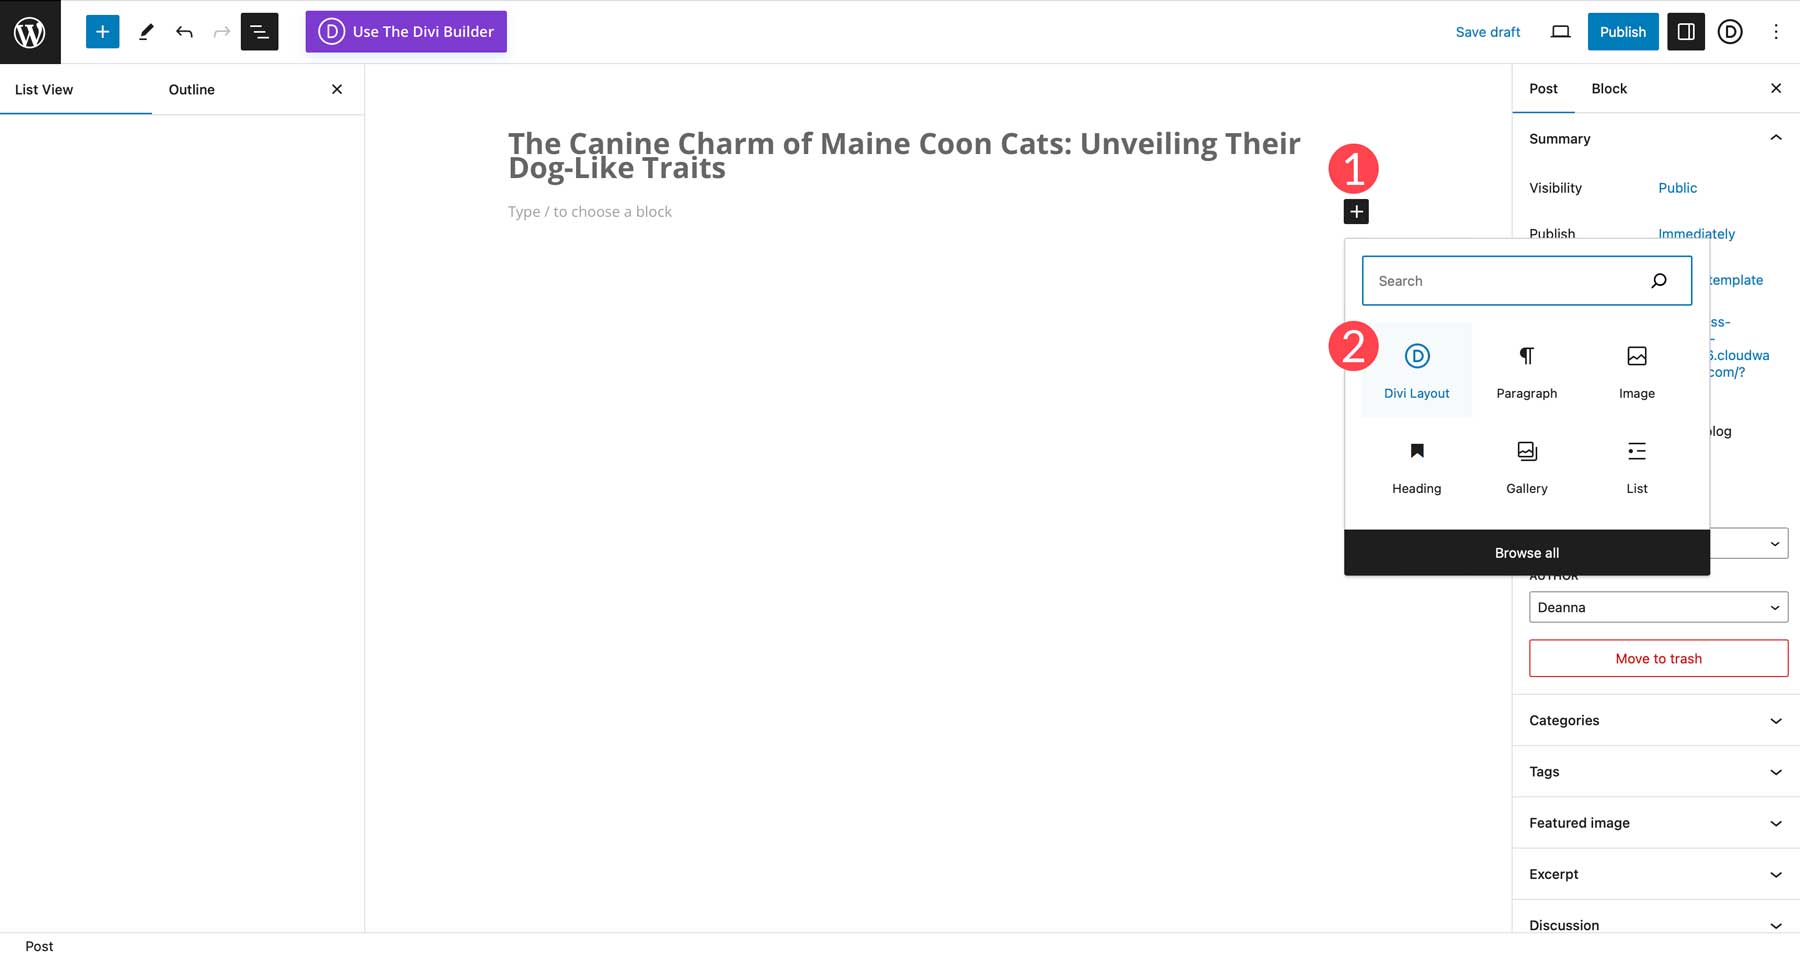
We’ll need to set things up differently if using Divi. We’ll use Divi to create our post rather than adding a paragraph block to add content. The initial process is the same, except for the block. Click the + icon (1), then search for and add the Divi Layout block (2).
Next, click the Build New Layout button.
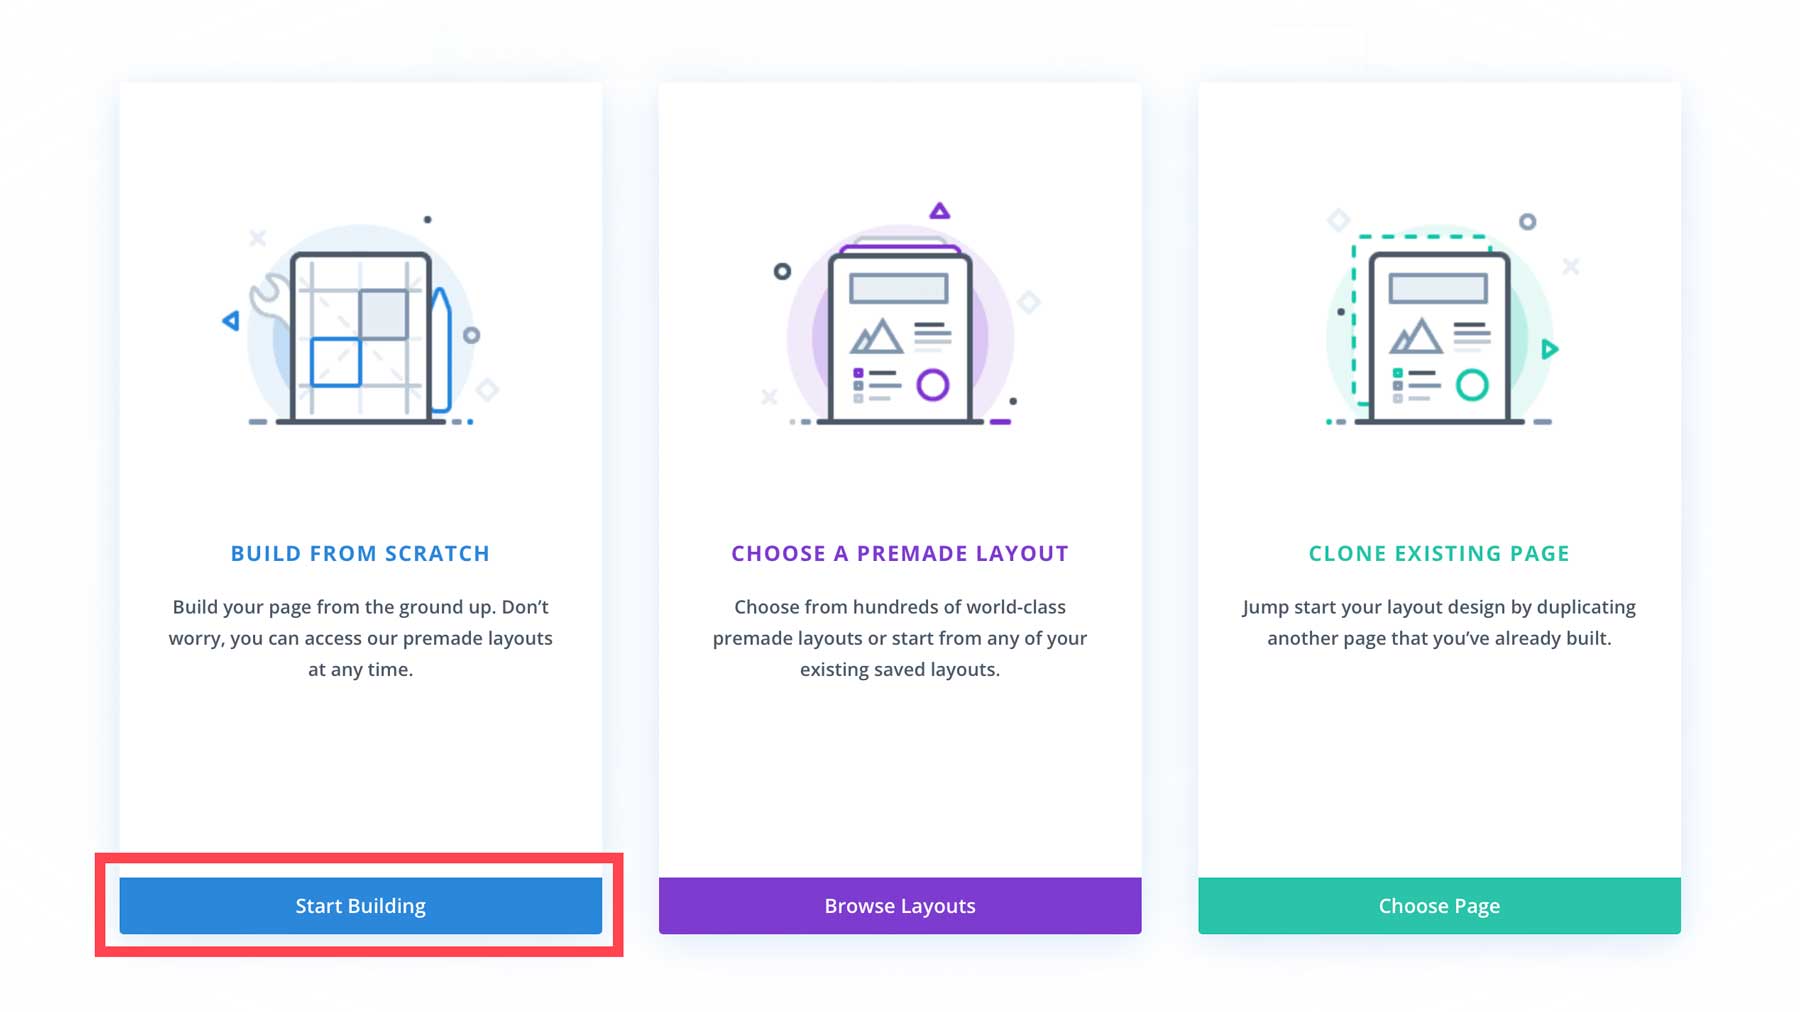
To create our new layout, we’ll build it from scratch. Click the Start Building button to continue.
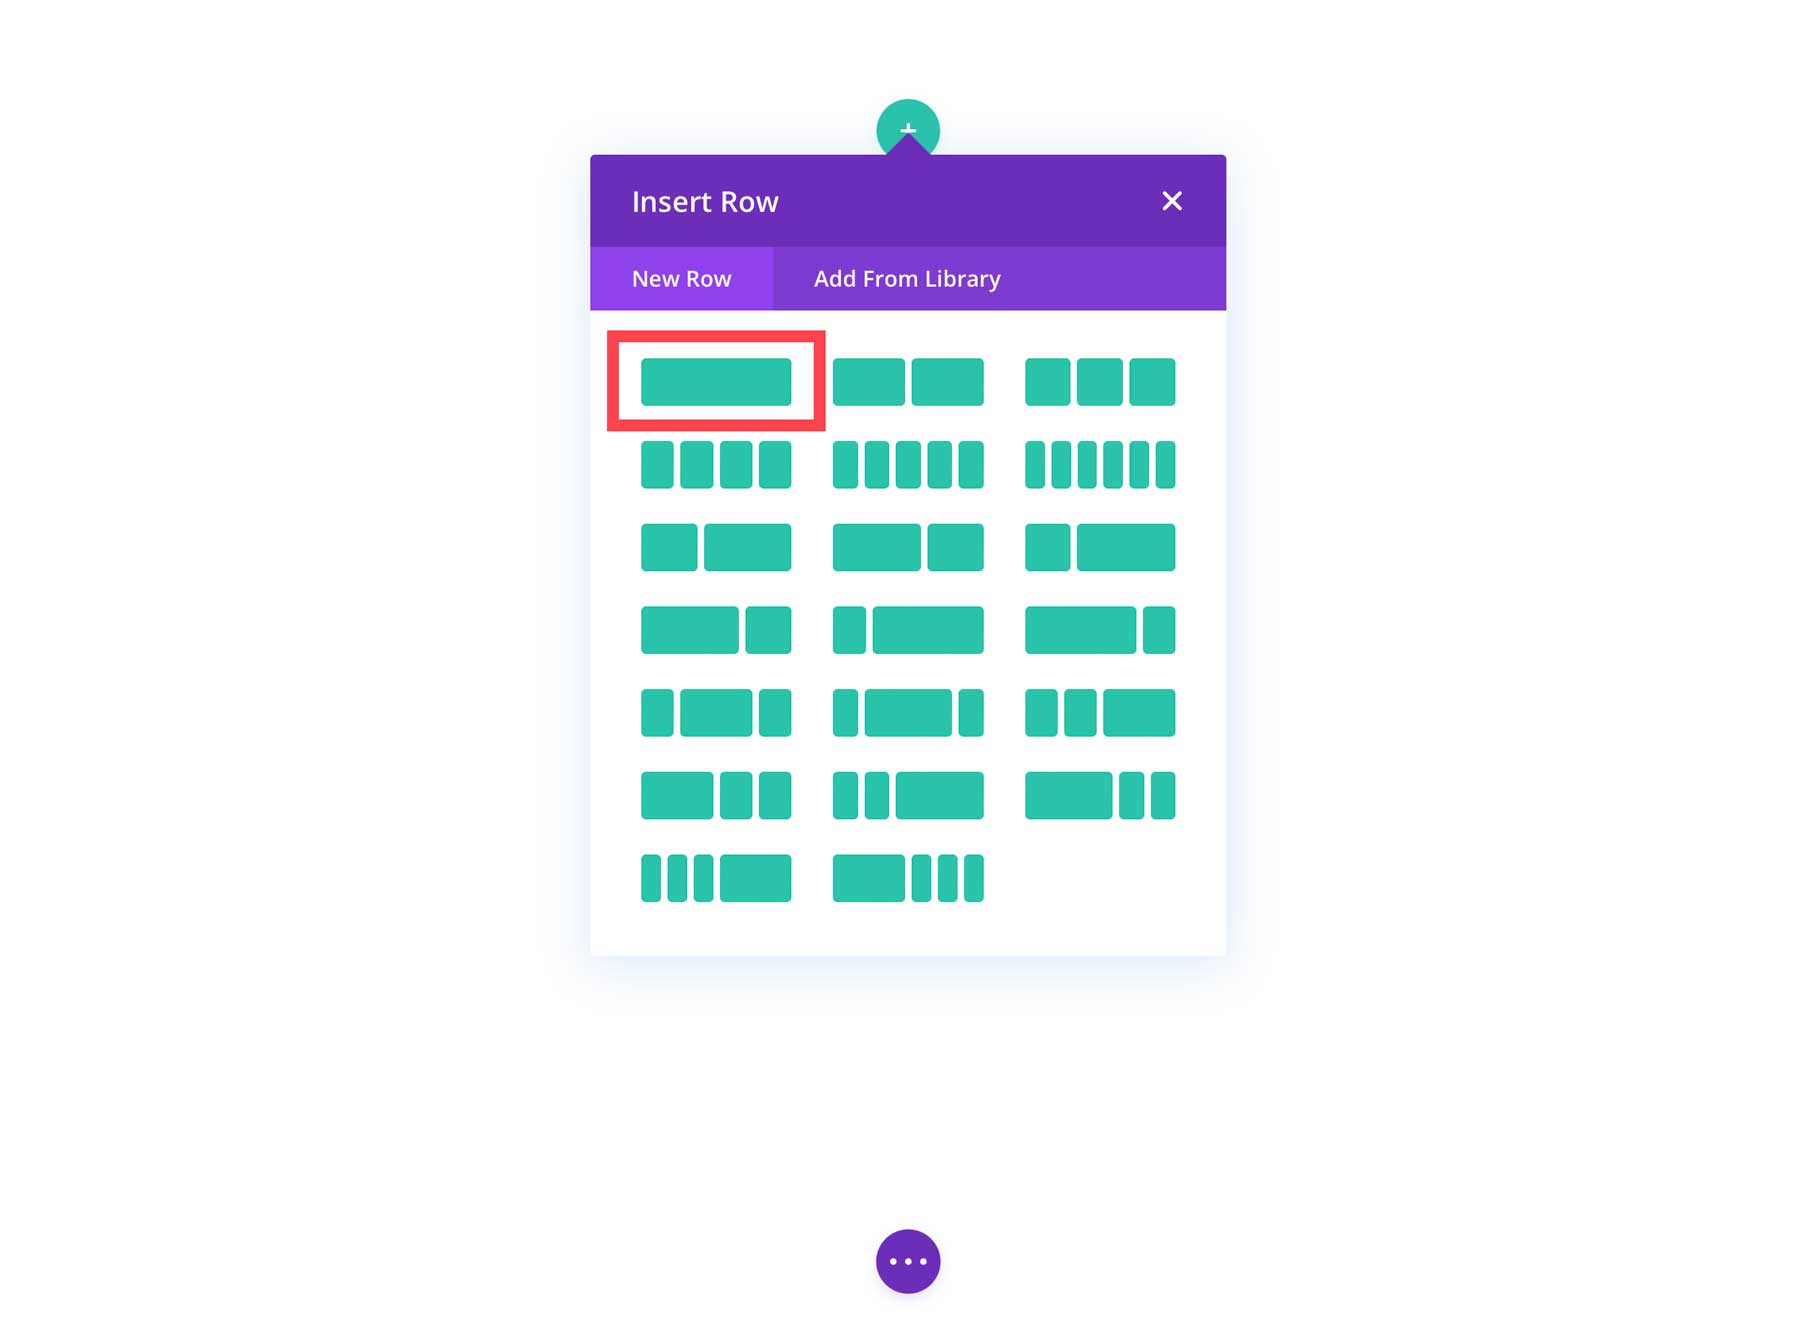
Choose the single column row.
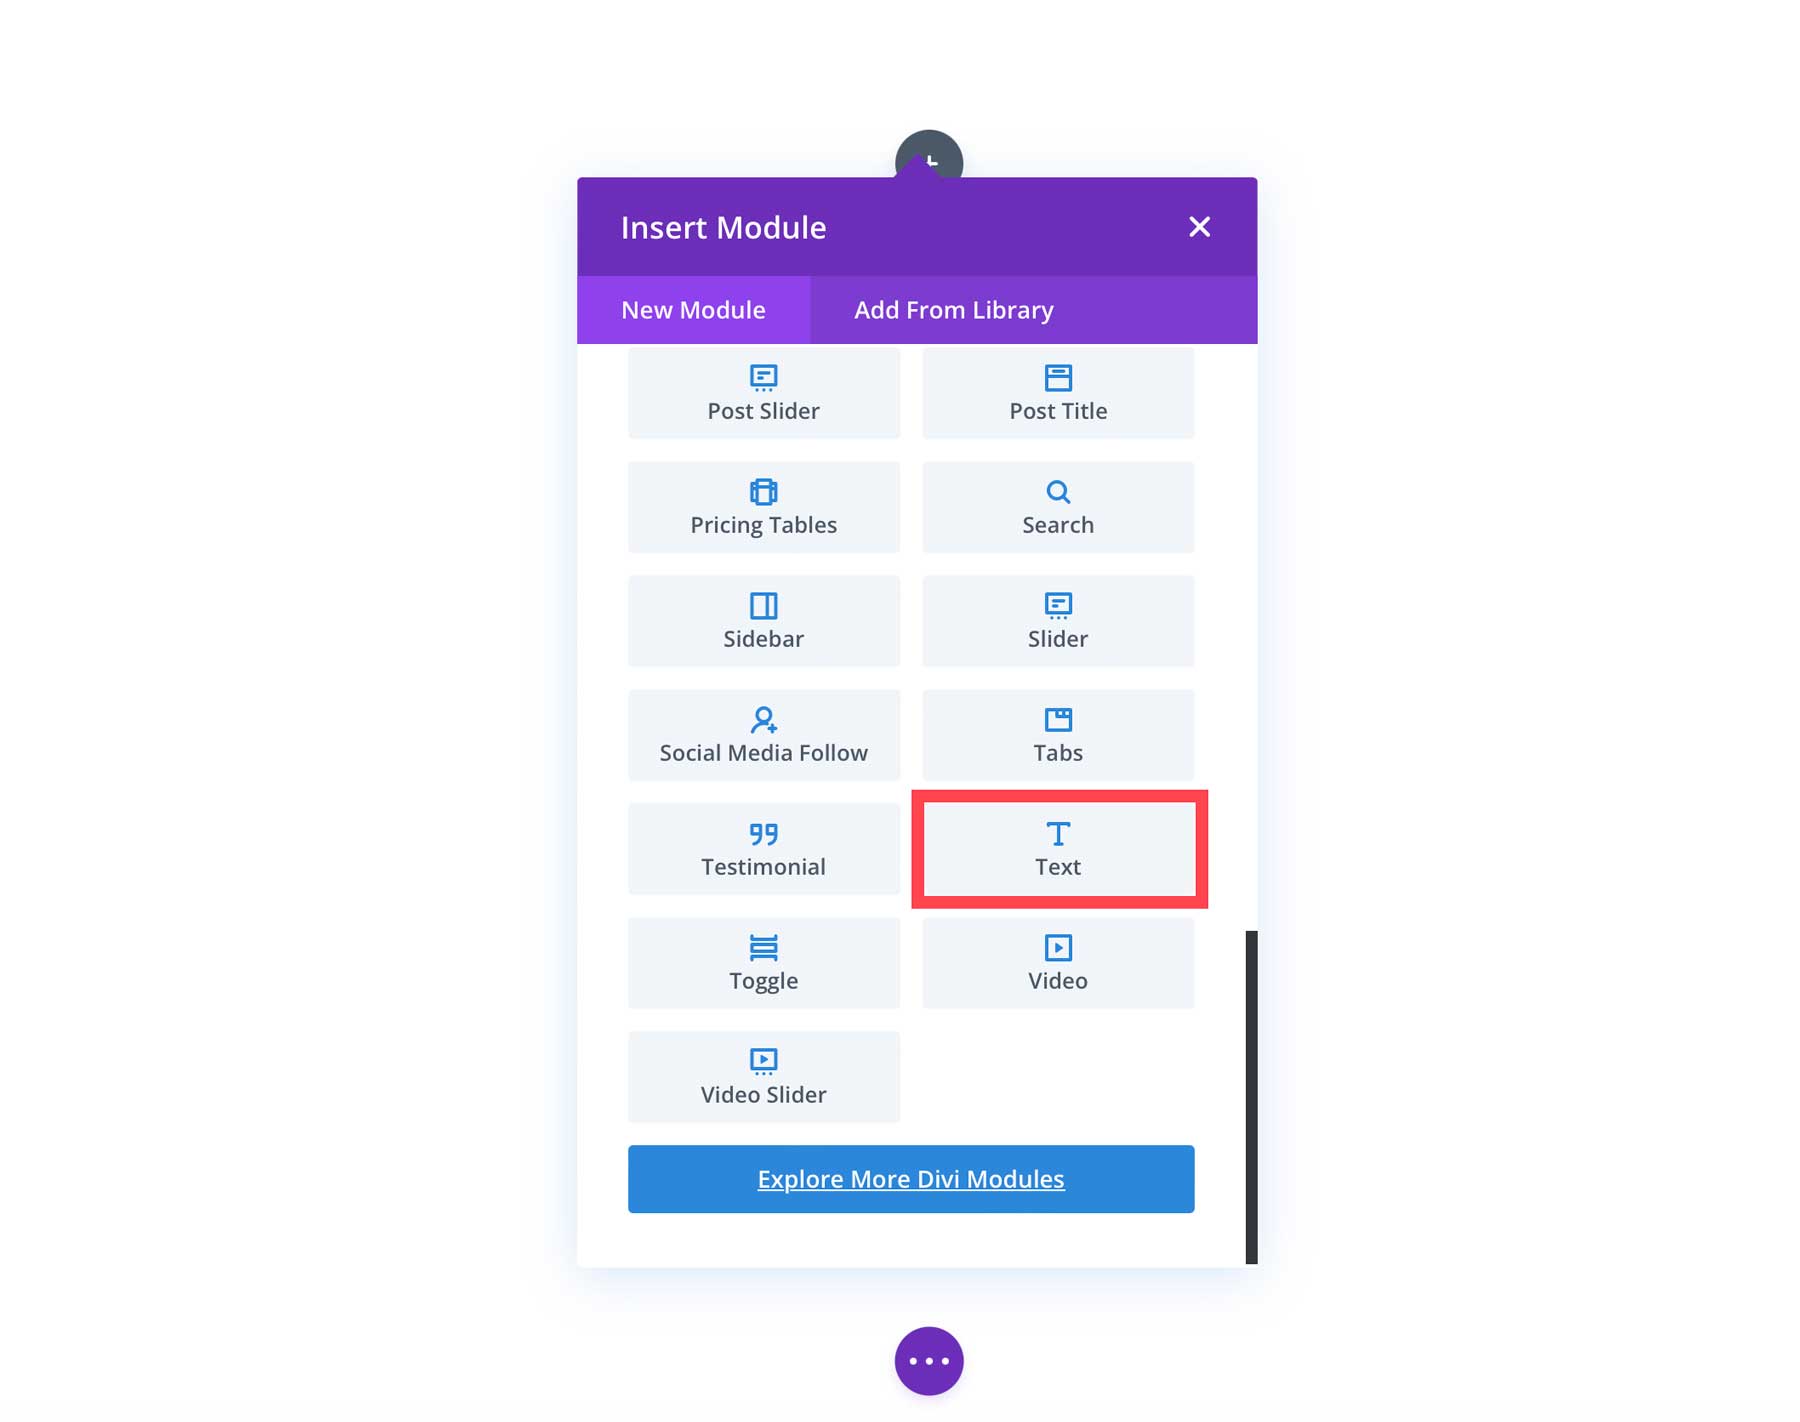
Select a text module to create AI-generated text.
Getting Familiar With the Divi AI Interface
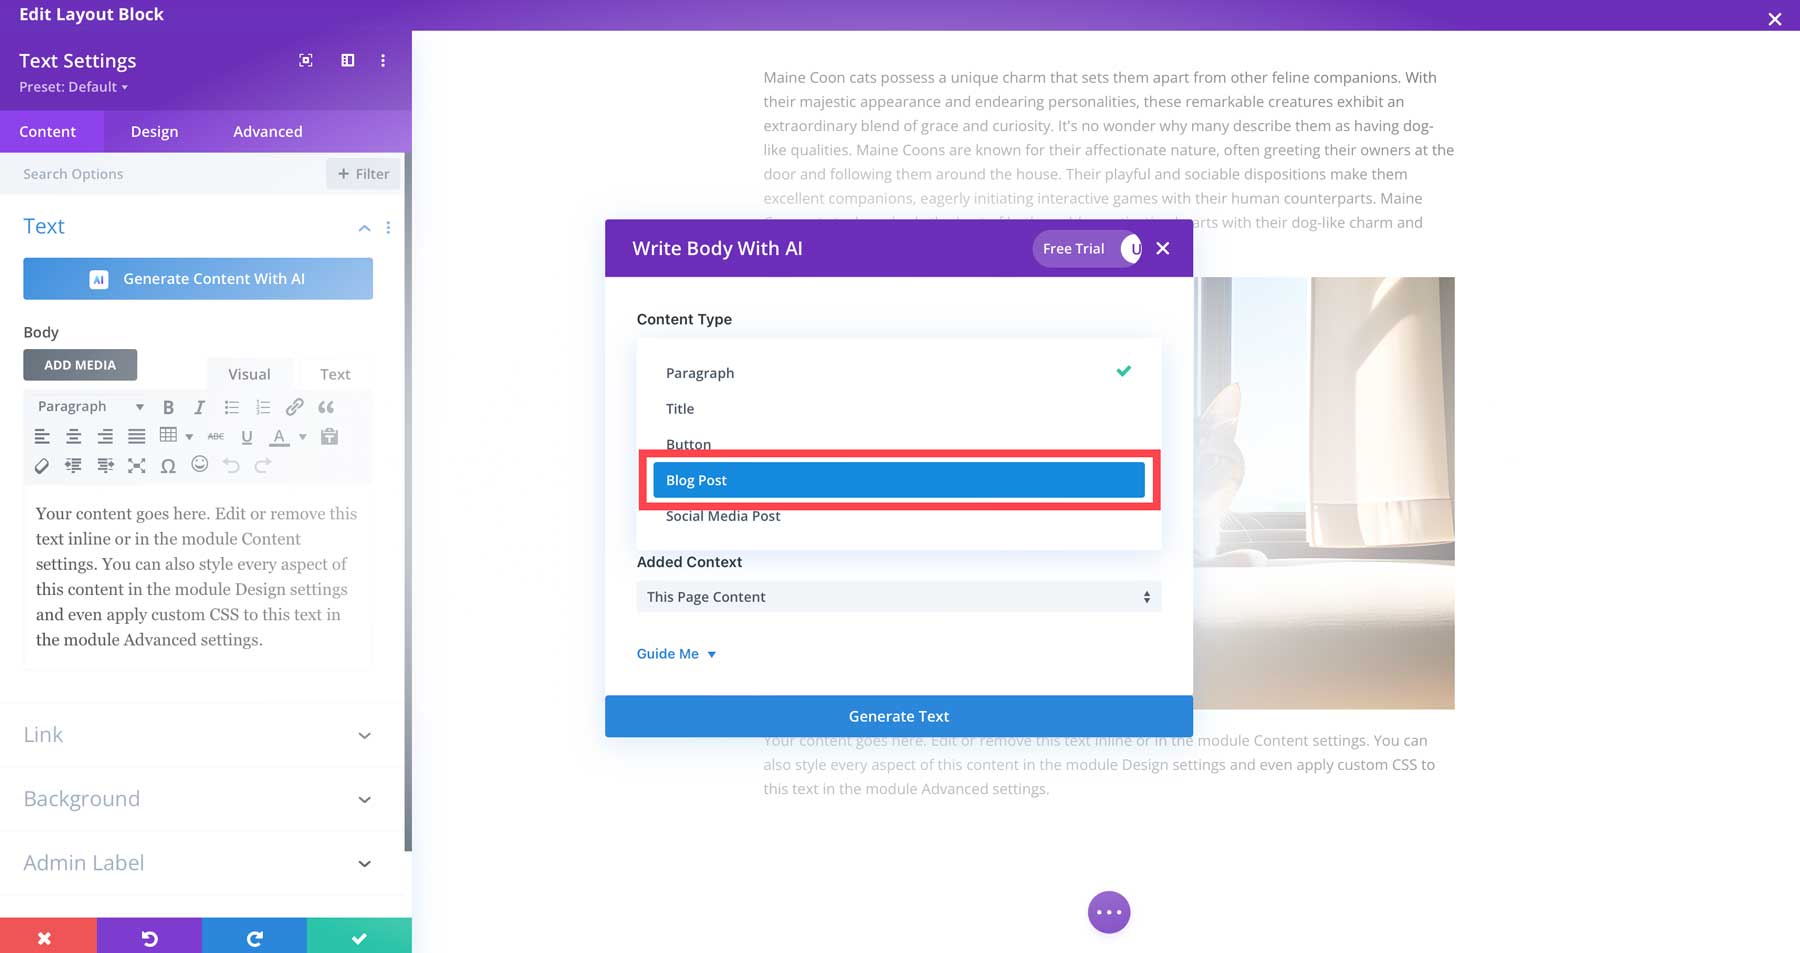
Generating text with Divi AI is a snap. To start, click the Generate Content with AI button (1) or hover over the placeholder text to reveal the AI icon (2). You’ll have two options: Write with AI (3) or Write Automatically (4). Choosing the automatic option will generate text automatically. This is an excellent feature for posts and pages with content you want to expand on. For this case, however, we’ll choose to write with AI. This will allow us to give Divi some context.
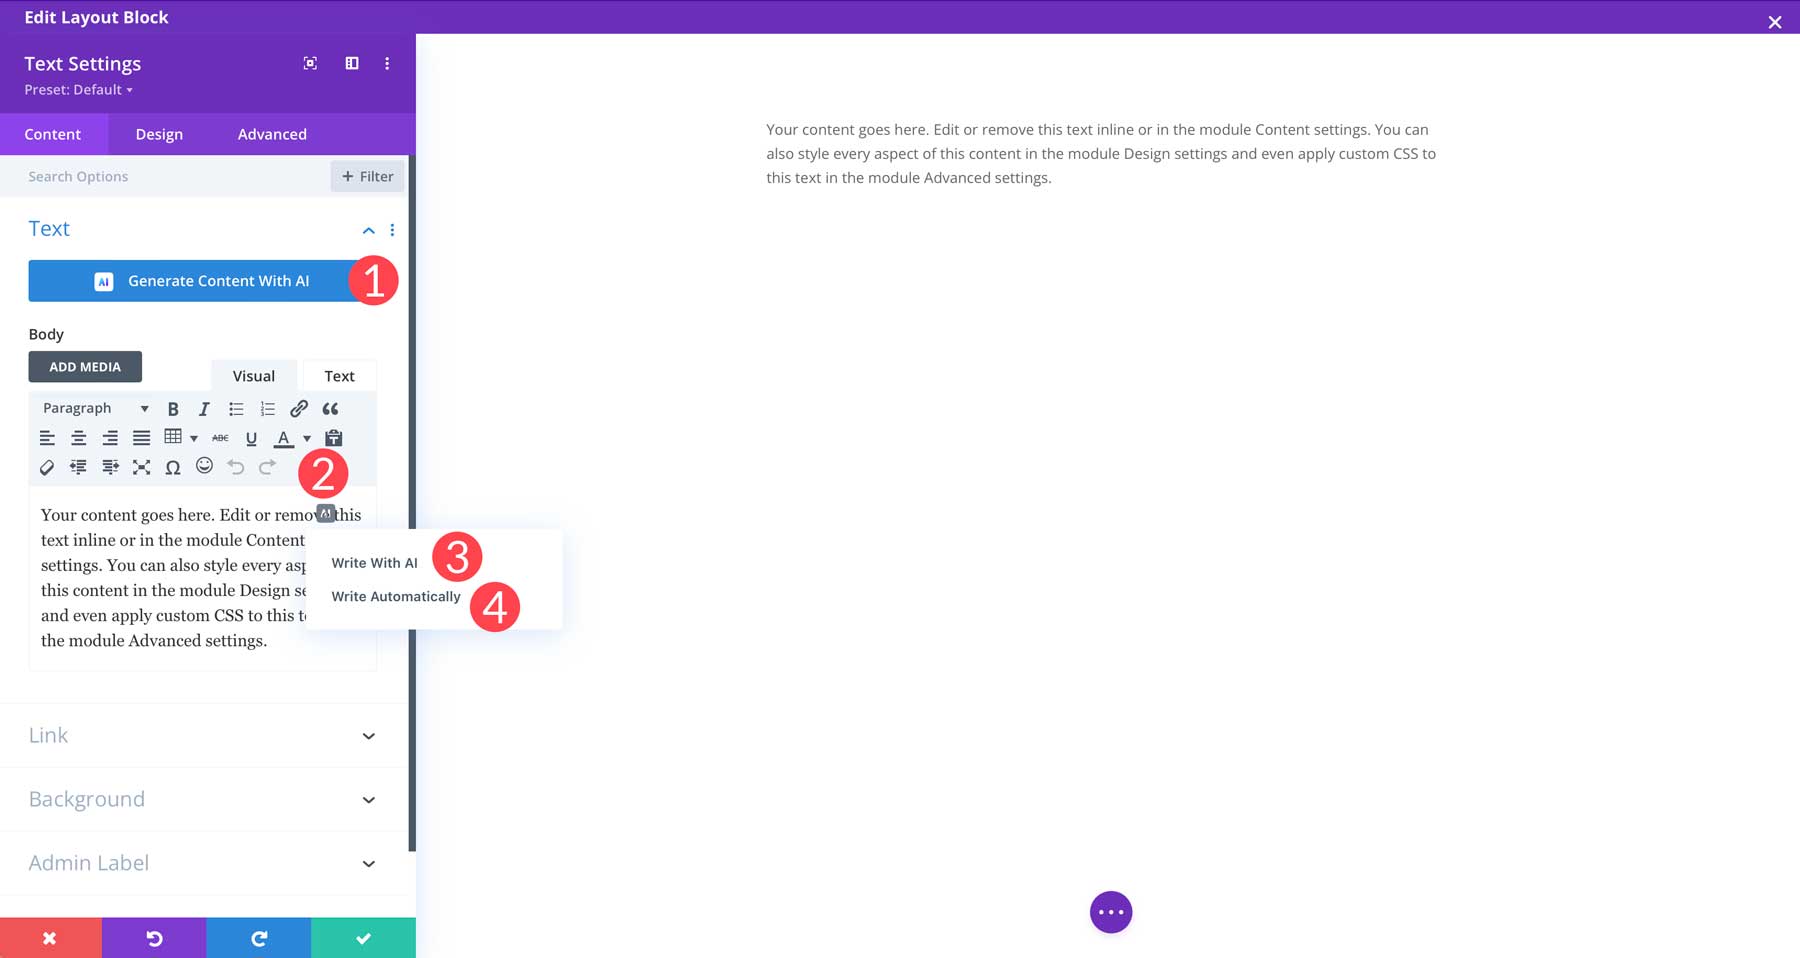
You’ll notice a new dialog box with a few features when your screen refreshes. Let’s briefly explain what each setting does:
- Content Type: This allows you to generate a paragraph, title, button, blog post, or social media post.
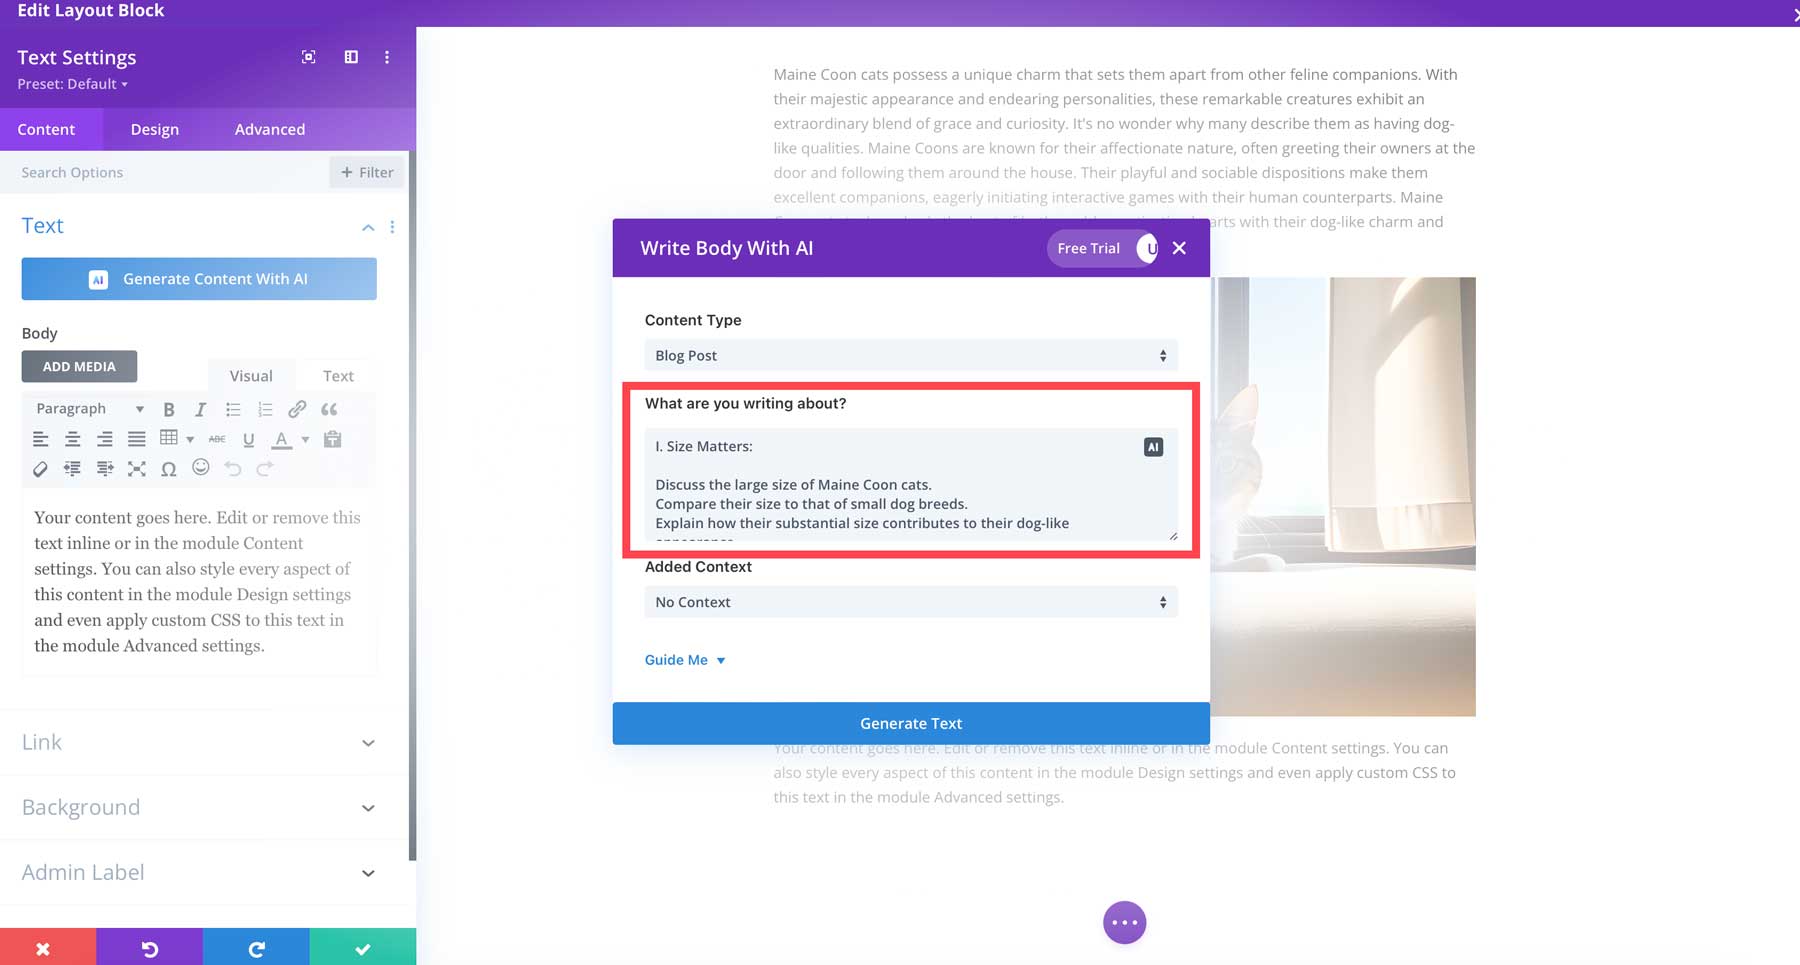
- What are you writing about: Use this to give Divi a starting point for your text.
- Added Context: If you’ve started creating your post already, you can use this to give Divi context. Options include this page content, this section content, this module content, or no context.
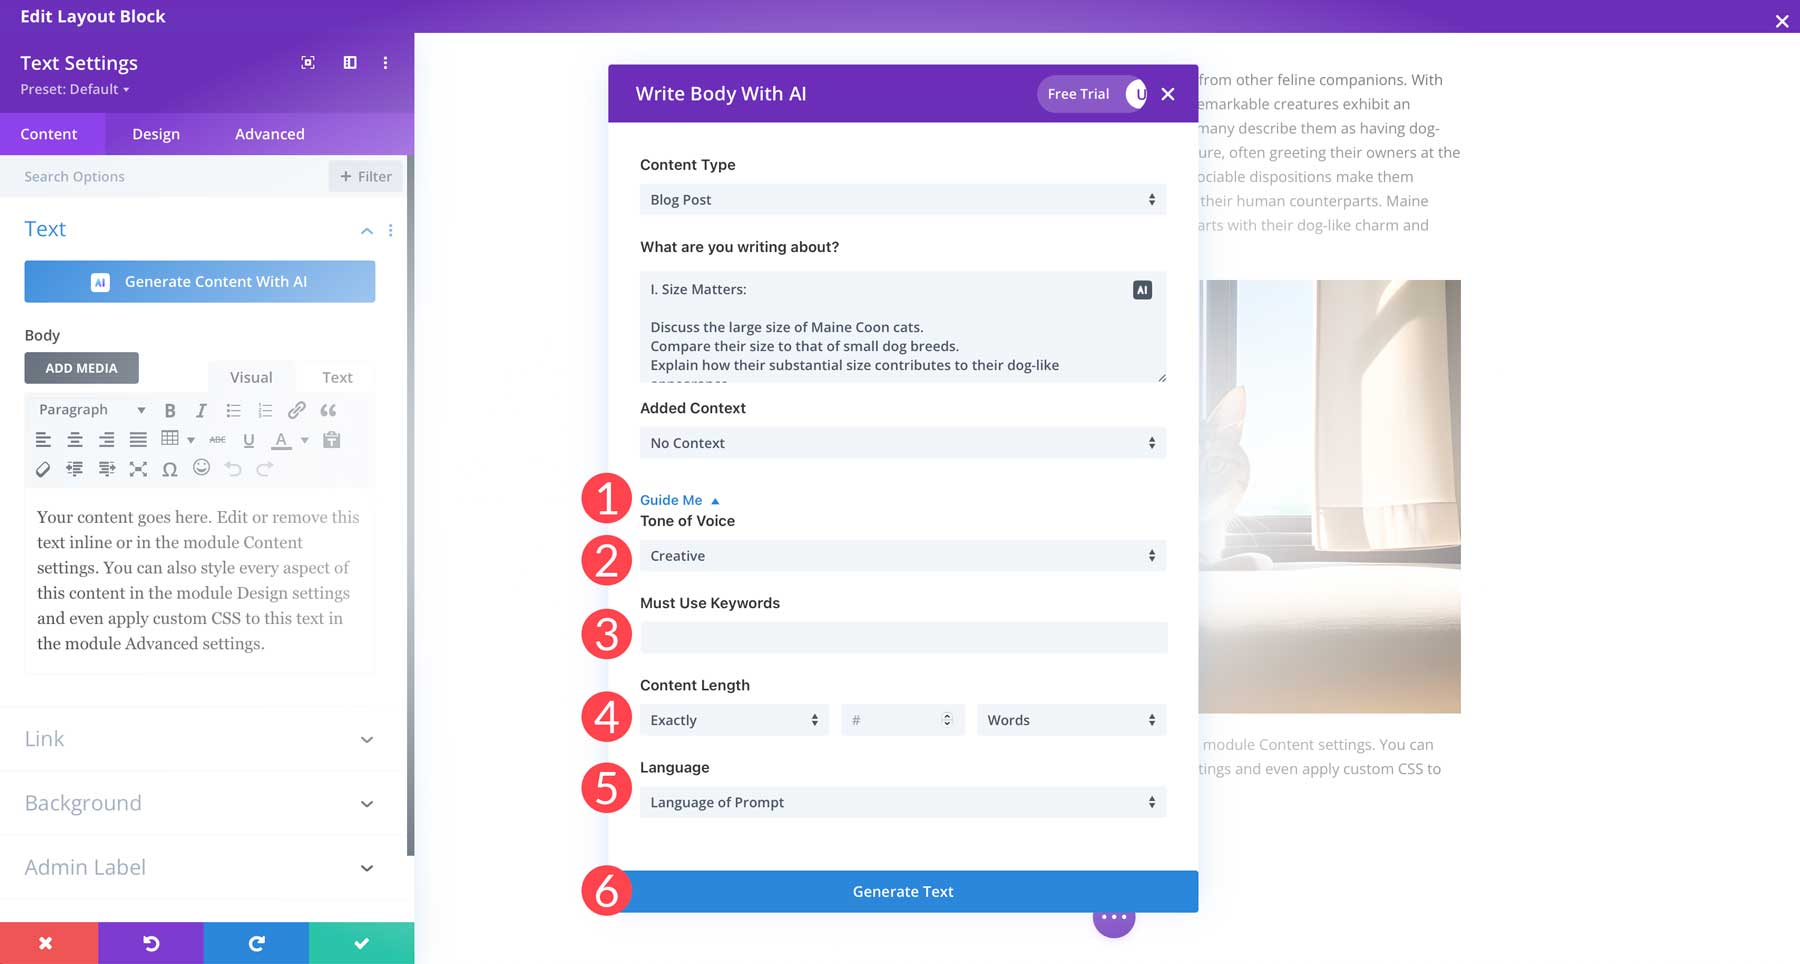
- Tone of Voice: Choose the writing style you prefer from the available options: creative, informative, and funny.
- Must use keywords: Add important keywords to your text.
- Content length: Specify how many words, sentences, characters, paragraphs, or list items you require.
- Language: Here, you can specify the language. You can either use the language of your prompt or choose from over 130 supported languages.
- Generate Text: Generate text with Divi AI.
Generating Text with Divi AI
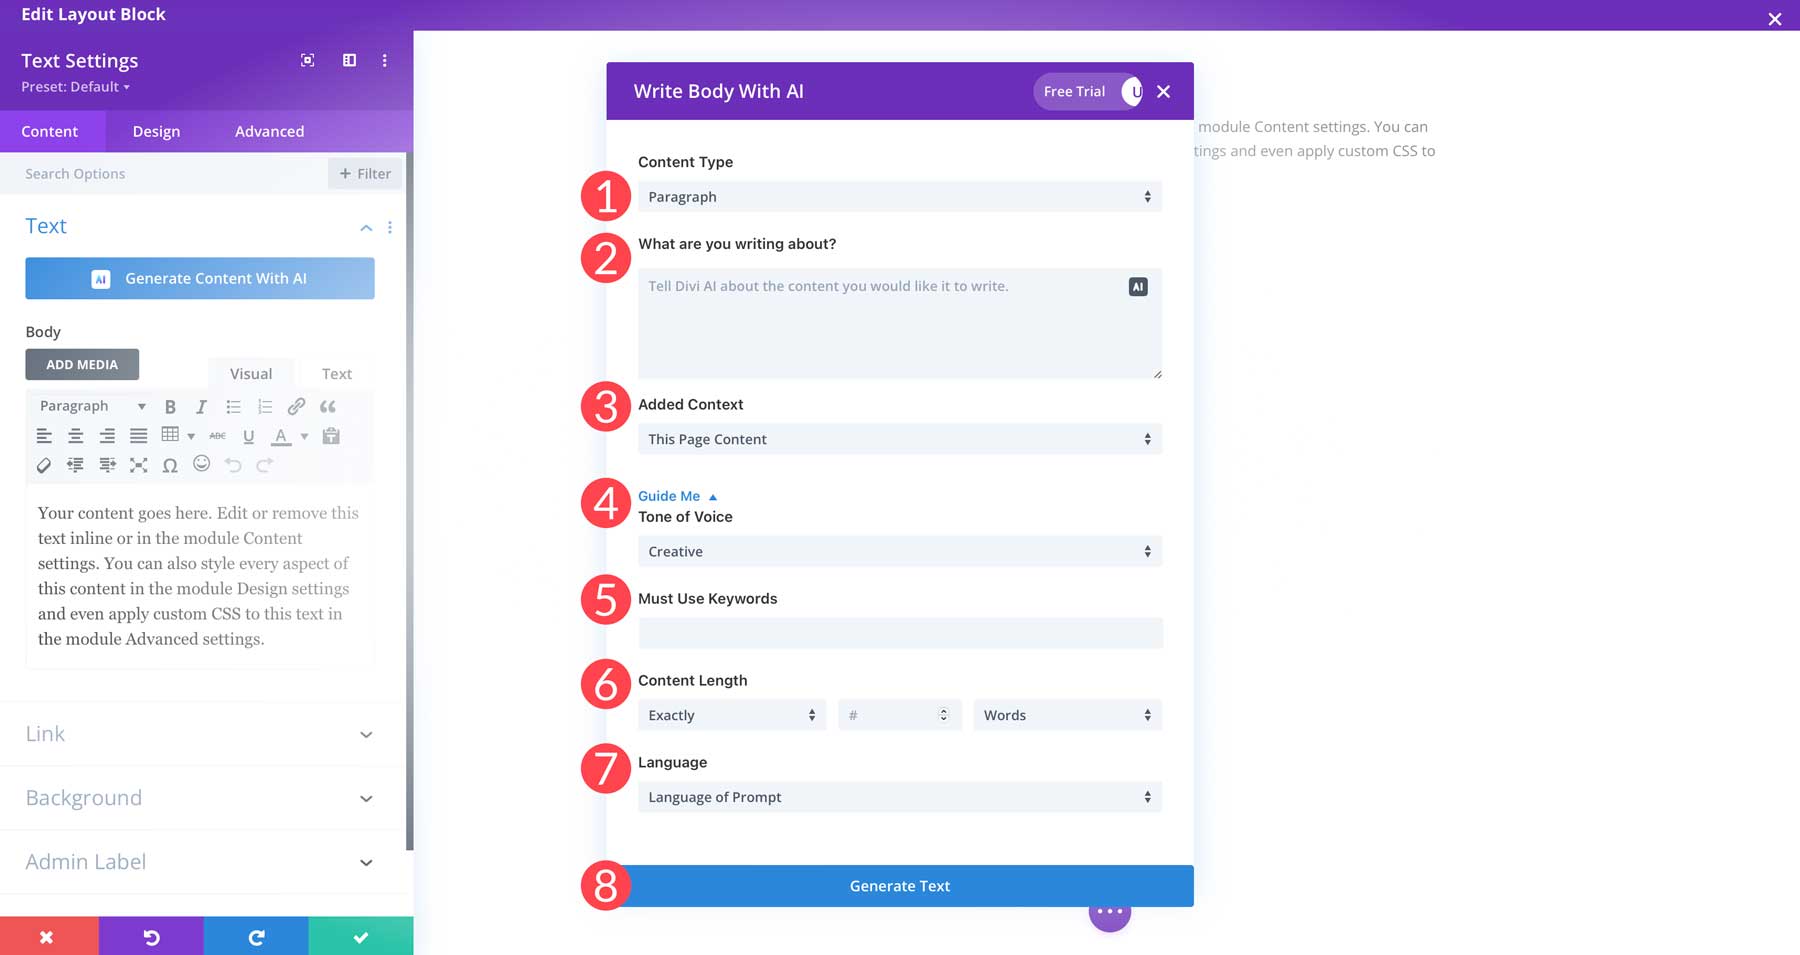
To generate our first paragraph, we’ll choose the following options:
- Content type: Paragraph
- What are you writing about: Write an introductory paragraph about how Maine Coon cats have dog-like qualities
- Added Context: No context
- Tone of Voice: Creative
- Must use keywords: Maine Coon, dog-like
- Content length: Exactly 200 words
- Language: Language of prompt
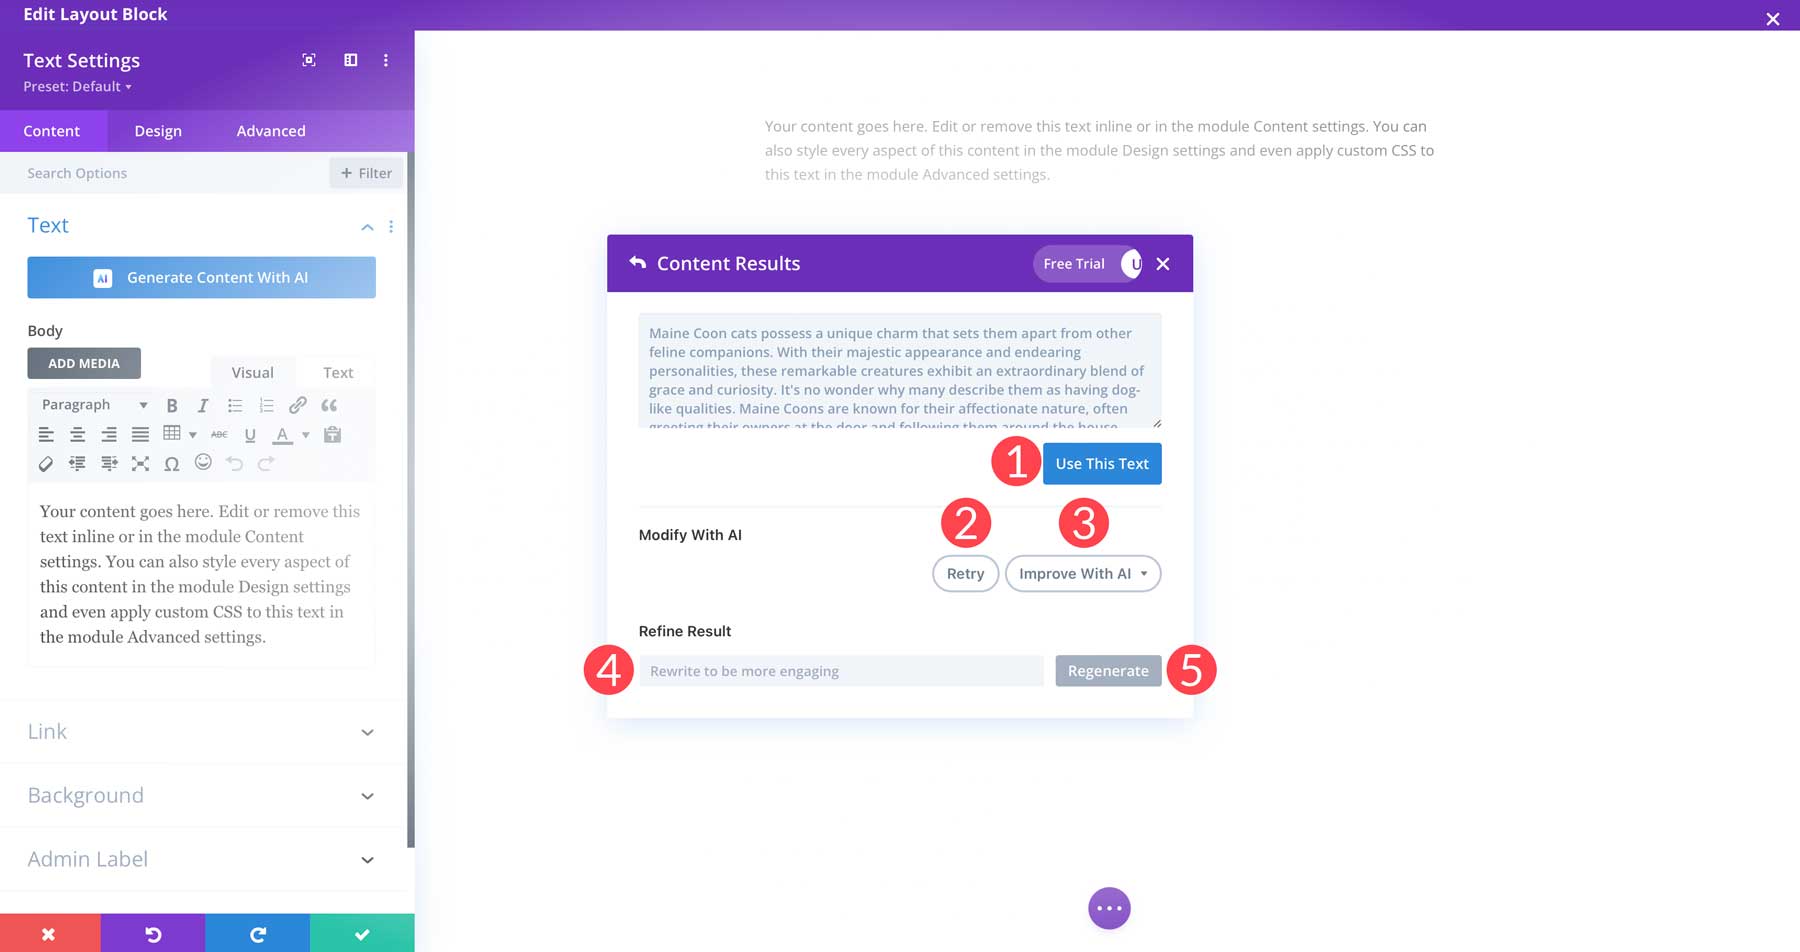
With the settings in place, click the generate button to produce the text. Divi will create the text based on your prompt. If you are satisfied with the results, click the Use this text button (1). Alternatively, if you want to make changes, you can modify the output by clicking retry (2) or by selecting the improve with AI dropdown menu (3). You can make it better, rephrase, lengthen, shorten, simplify, paraphrase, or modify it by changing the tone of voice, amongst other options. If you’d like to refine it, you can add more details in refine result (4) text field, then click regenerate (5).
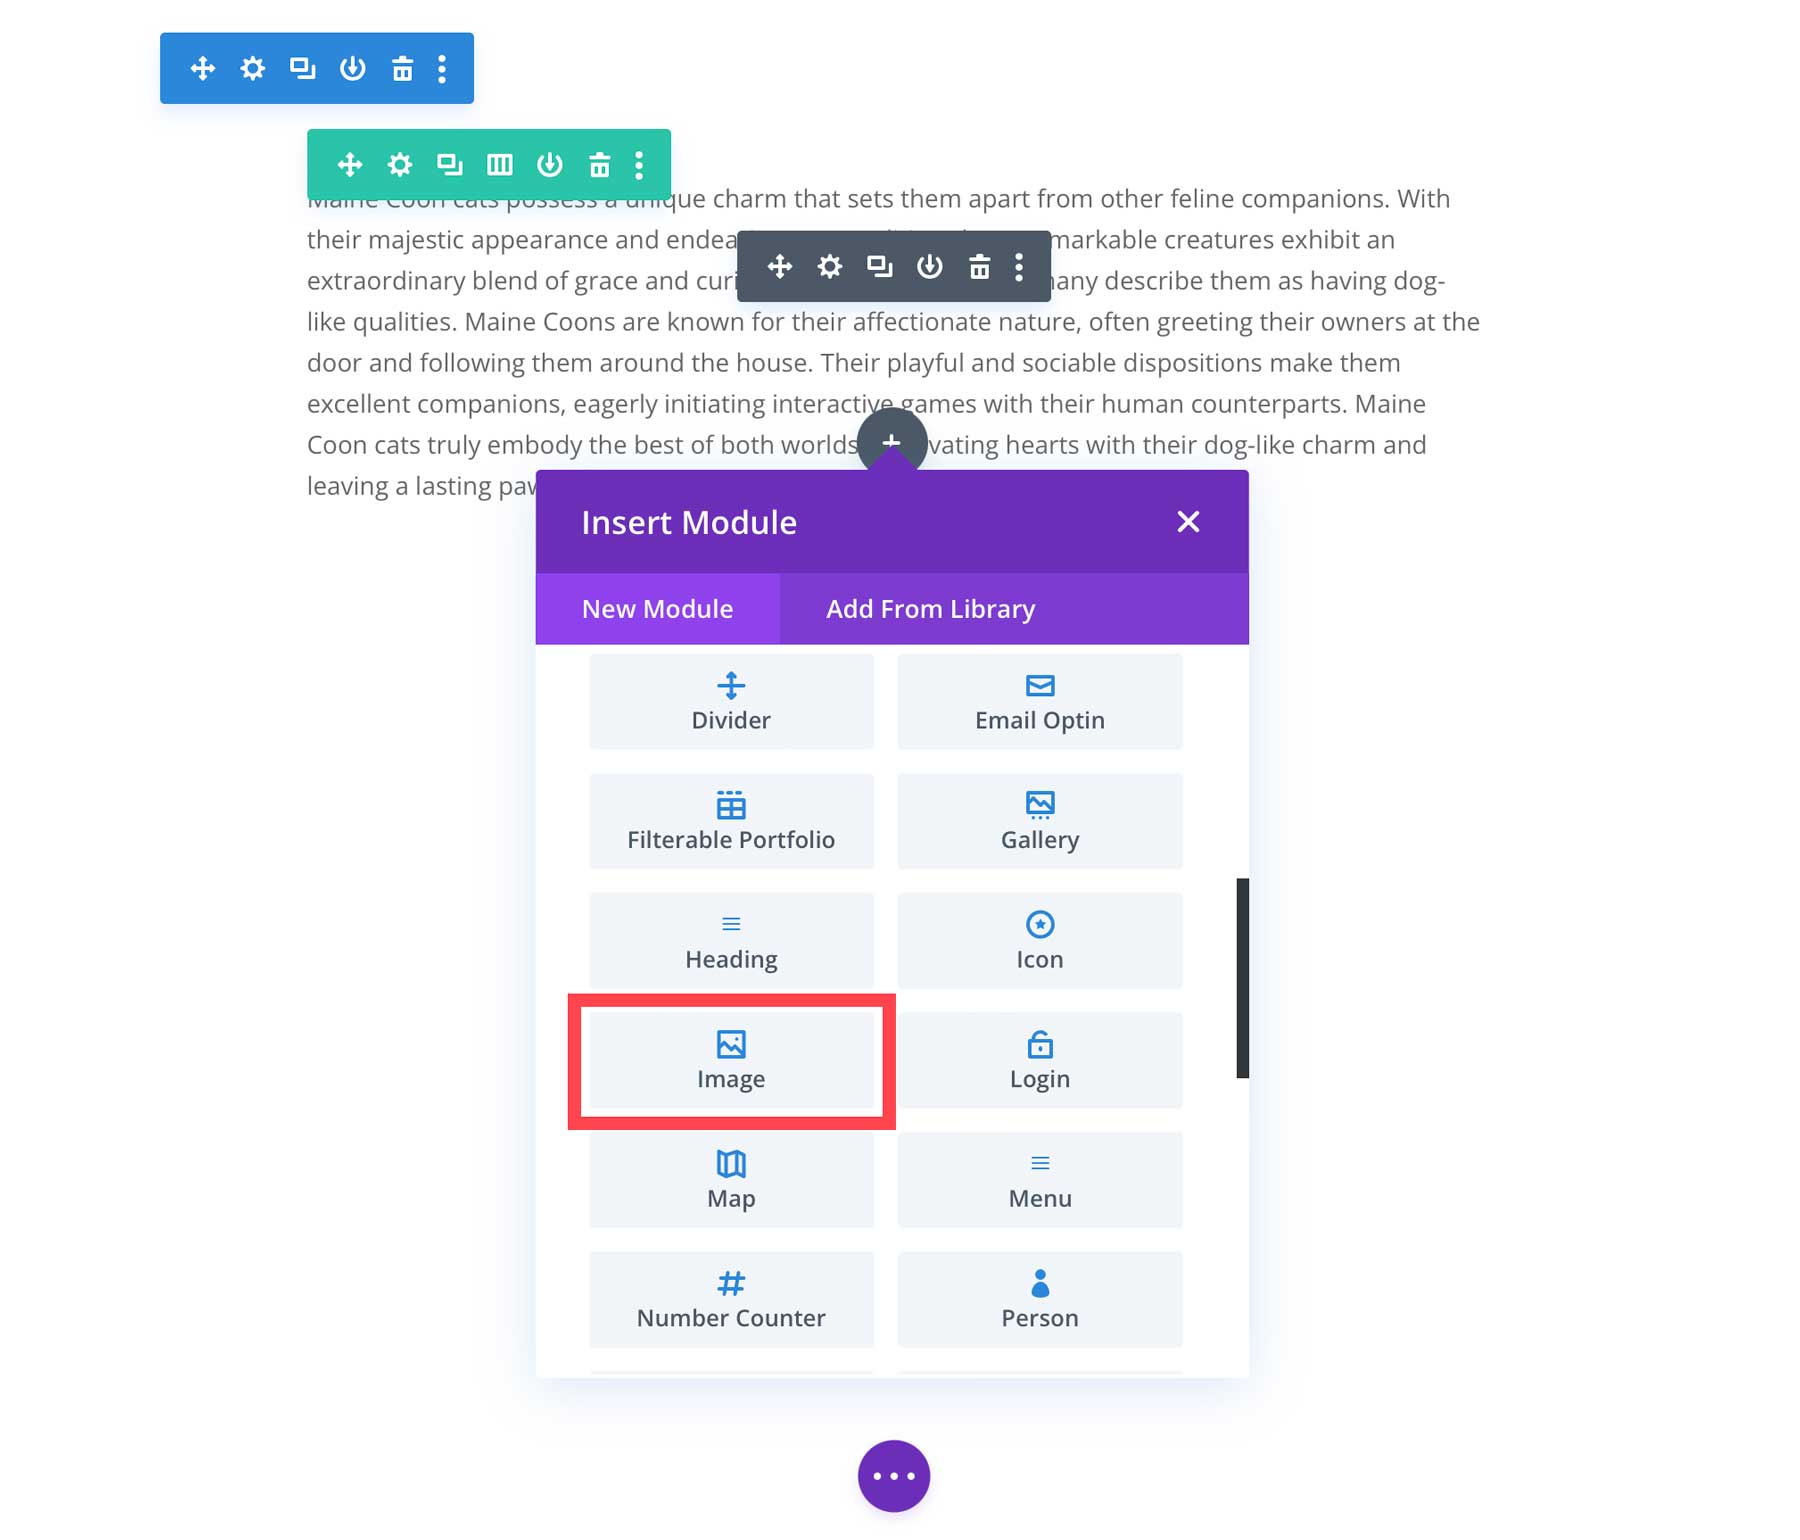
Step 4: Creating Blog Post Images
The next step is to create an image for our post. After all, blog posts are better with supporting photos. They provide visual aids, keep your readers engaged, and serve as a way to boost your site’s search engine optimization (SEO) using alt tags.
We’ll showcase two ways to generate images for your WordPress blog post: Midjourney and Divi AI.
Using Midjourney
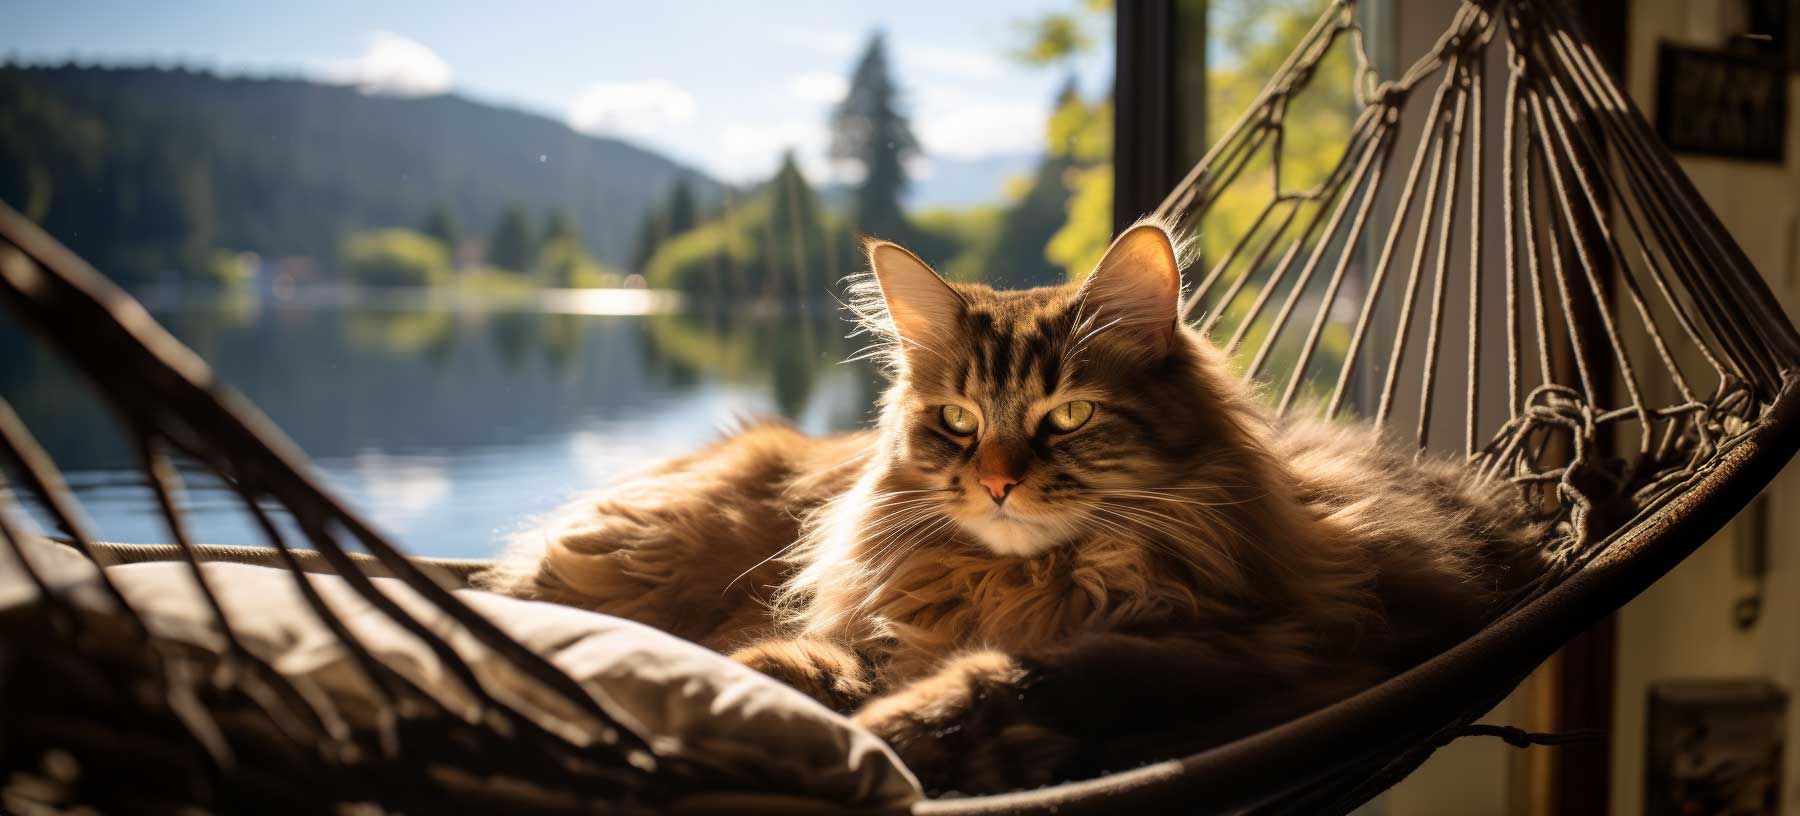
image created with Midjourney
Midjourney hit the scene earlier this year and has become one of the most popular platforms for creating images. We won’t go into the steps to use it here, as we have an in-depth tutorial already created for you. Midjourney generates some of the most incredible AI art you’ll find. However, we should caution you on using it commercially. Due to ongoing litigation, its future is unclear. That said, generating images with it is likely ok if you are a paid subscriber. This post concentrates on the second method, Divi AI.
Using Divi AI
Another (and better) way to create images for your blog posts is by using Divi AI’s built-in image generation tool. It functions like the AI text generator, where you can create, refine, and use pictures within your posts or pages. Unlike other AI image generators, there’s no need to use a separate platform. With Divi AI, you get the power of Stable Diffusion right in the Visual Builder. To create an image using Divi AI, add an image module to your post.
To activate AI, hover over the placeholder image in the module to reveal the AI icon.
![]()
Upon clicking the icon, you’ll have two options: Generate with AI or Generate Automatically. Select the first option.
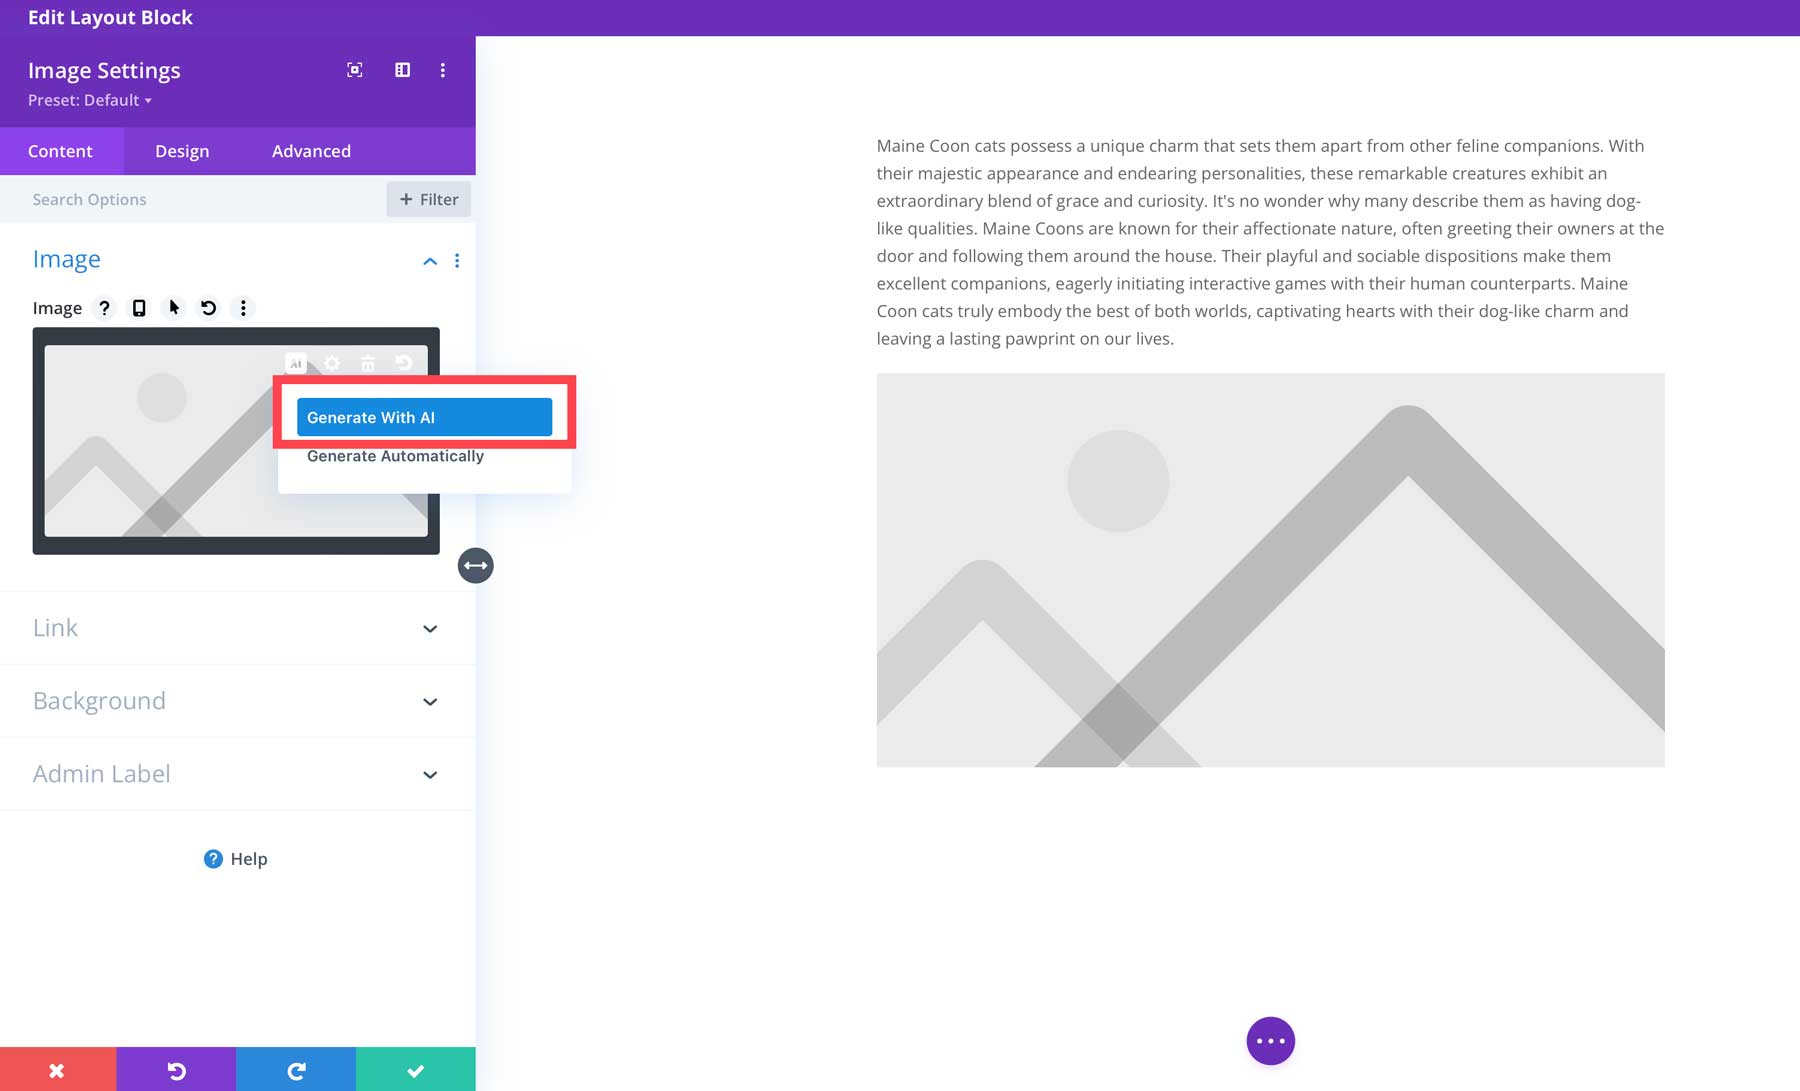
Divi AI Image Settings
Before generating an image, let’s go over the settings so you’ll understand how things work. We won’t go over everything related to generating images, like prompting tips, but we will show you the basics.
- Image style: Choose from 13 style presets, including photo, digital painting, vector art, and more.
- Image description: The text prompt field you’ll use to describe your desired image.
- Reference image: If you have an image in mind that isn’t quite what you need, you can use it as a reference image to assist Divi AI in creating the perfect one.
- Aspect ratio: You can choose from square (1:1), Landscape (8:5), portrait (3:4), or a custom size.
- Size: The pixels (width x height) for your image.
- Generate: Generates an image based on the settings above.
Generate an Image Using Divi AI
Now that you know the interface, we can generate our first image. Since our blog post is about Maine Coon cats, we’ll generate an image that can be used in our post that we can also apply as our featured image. With the AI image dialog box opens, input the following settings:
- Image style: Photo
- Image description: photograph of a brown sortie Maine Coon cat, lying on a sofa, looking out the window, award winning photography, soft shadows, midday lighting, cinematic photography
- Reference image: none
- Aspect ratio: Landscape (8:5)
- Size: 1280 x 800
With the settings in place, click the generate button to generate your photo.
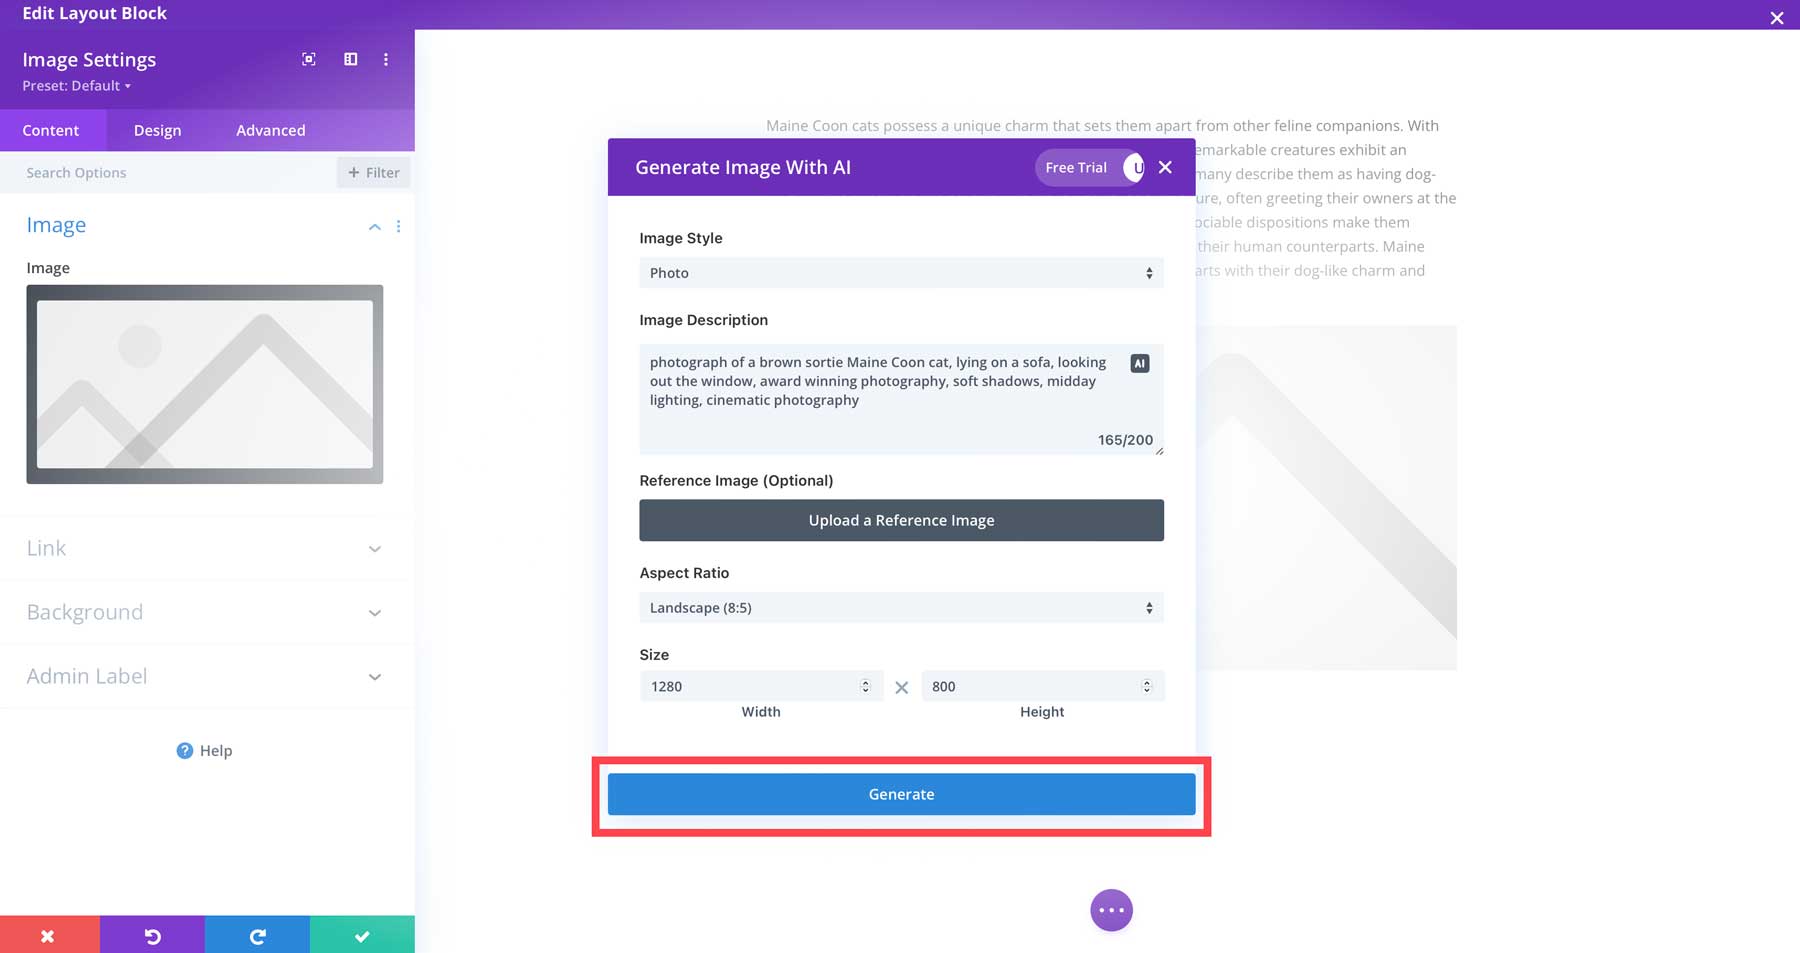
When the process completes, Divi will provide four images for you. To choose one, click on your favorite (1), then click Use this image (2). Alternatively, you can generate more like it (3), generate four more (4), change the style (5), or add a completely new description (6) to regenerate it (7).

Once you select a photo to use, Divi will automatically place it into your image module. From there, you can upscale it to make it a higher quality image by clicking the AI icon again and selecting upscale in the settings.
Step 5: Writing the Post Content
Now that we’ve generated our title, introductory paragraph, and featured image, let’s walk through the steps needed to create the body copy.
Using ChatGPT
To create the body of your blog post using ChatGPT, you’ll repeat the steps outlined above. Head back over to ChatGPT, then instruct it to complete the body of the post. You can do this by entering the following prompt: Based on the outline above, create the post content minus the conclusion. Make it no longer than 1500 words, and use the same tone of voice in the introductory paragraph.
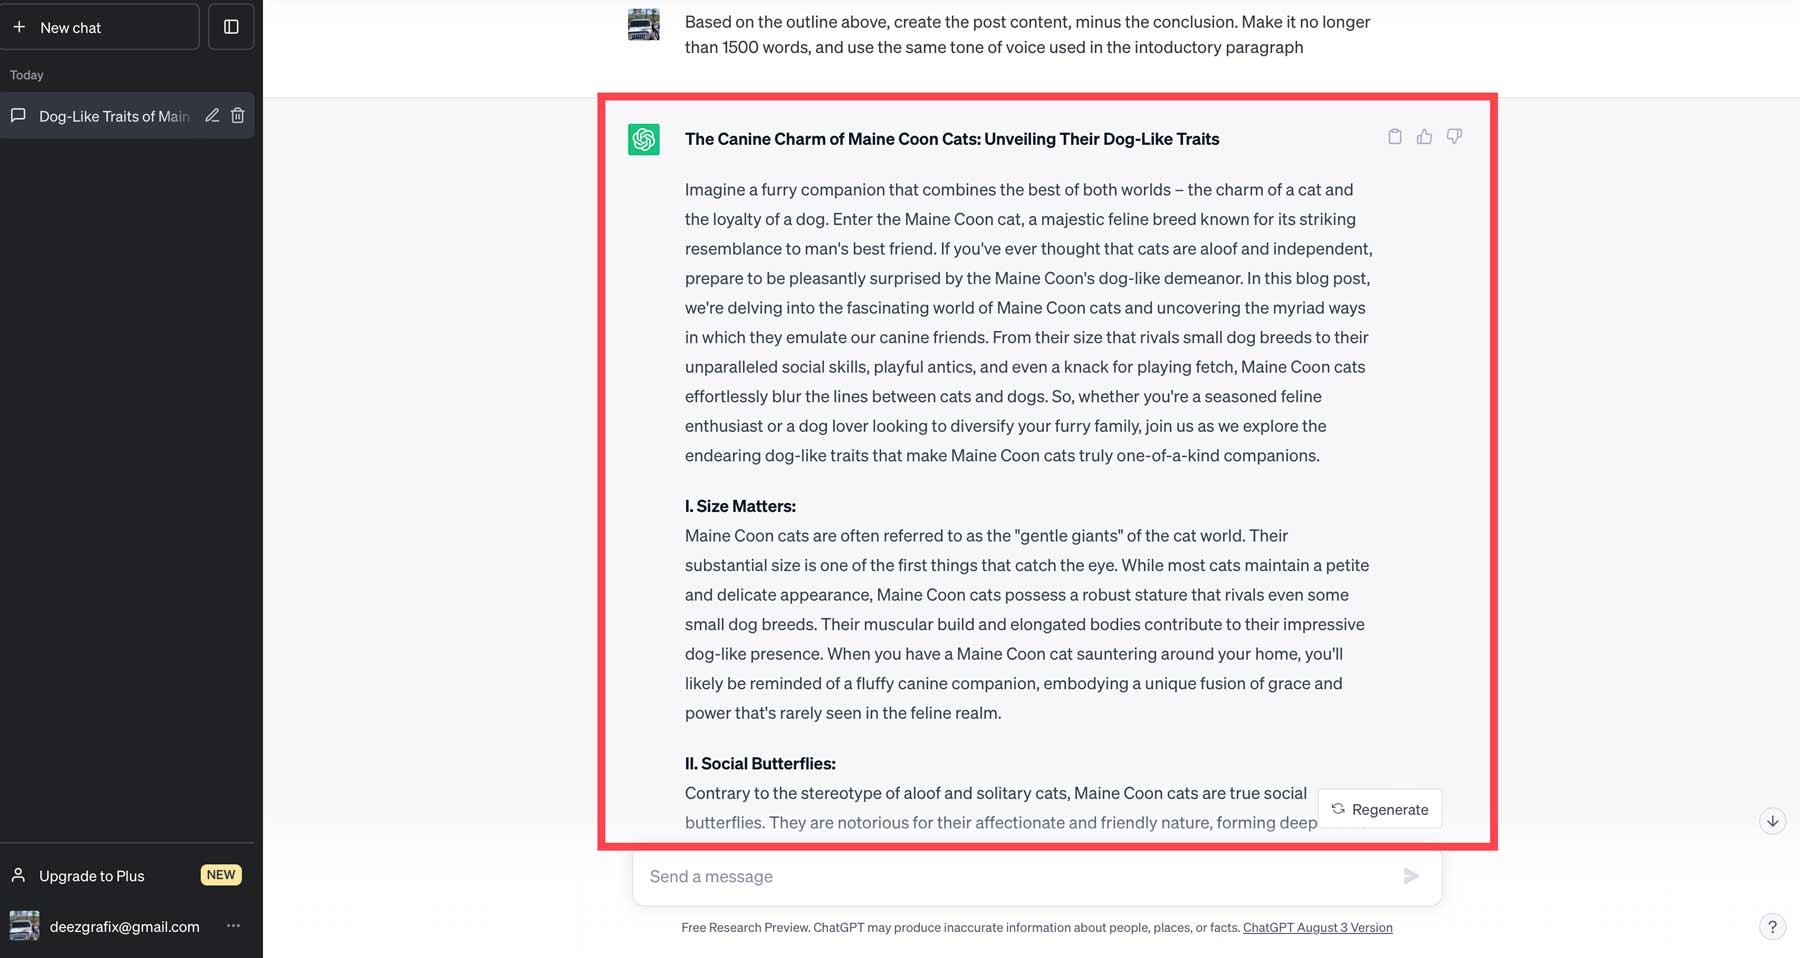
ChatGPT will proceed in creating the body copy for your post. As previously stated, you should use this text as a guide rather than simply copying and pasting it into your post. There are several reasons for this. First, ChatGPT has been known to suffer from hallucinations or falsehoods. Therefore, you should always fact-check everything it gives you. Secondly, Google is getting better at recognizing AI-generated content. This is a grey area since the technology is so new, but some indications using generated content without a human touch could hurt you in the SERPs.
Additionally, there will obviously be plagiarism concerns, especially since ChatGPT was training on information pulled directly from the internet. Lastly, generated content generally needs more creativity and personality. Therefore, we recommend taking what it gives you as a guide to overcoming writer’s block or for inspiration in more creative writing.
Using Divi AI
Now that Divi AI has a bit of context, we can proceed one of two ways: use Divi AI to create the entire post or generate a few paragraphs at a time. The method you choose depends on whether you plan on making more images. If you only plan to have one image in your post, Divi can create your entire post for you. However, if you want to create additional supporting photos, you’ll need to create a few paragraphs at a time. To generate your entire post, activate Divi AI by adding a new text module and clicking the AI icon again. Choose blog post from the dropdown menu when the dialog box appears.
In the What are you writing about text field, head back to ChatGPT to copy the blog outline we created in step 1, then paste it into the field. Be sure to omit the intro section.
Click guide me (1) to reveal the additional settings. Be sure to add your tone of voice (2), must use keywords (3), specify the number of words to generate (4), select the language (5), then generate your post (6).
Tip: When generating content with Divi AI, add headlines for your important paragraphs. Also, use Divi AI’s word settings to keep paragraphs under 300 words. By doing this, you’ll achieve a higher SEO score with your chosen SEO plugin.
Step 6: Writing the Conclusion
Writing the conclusion paragraph is the last step in creating your first post. If using ChatGPT, all you have to do is provide it a prompt to complete the post. For example, give it the following: Based on the outline above, write a conclusion paragraph in the same writing style.
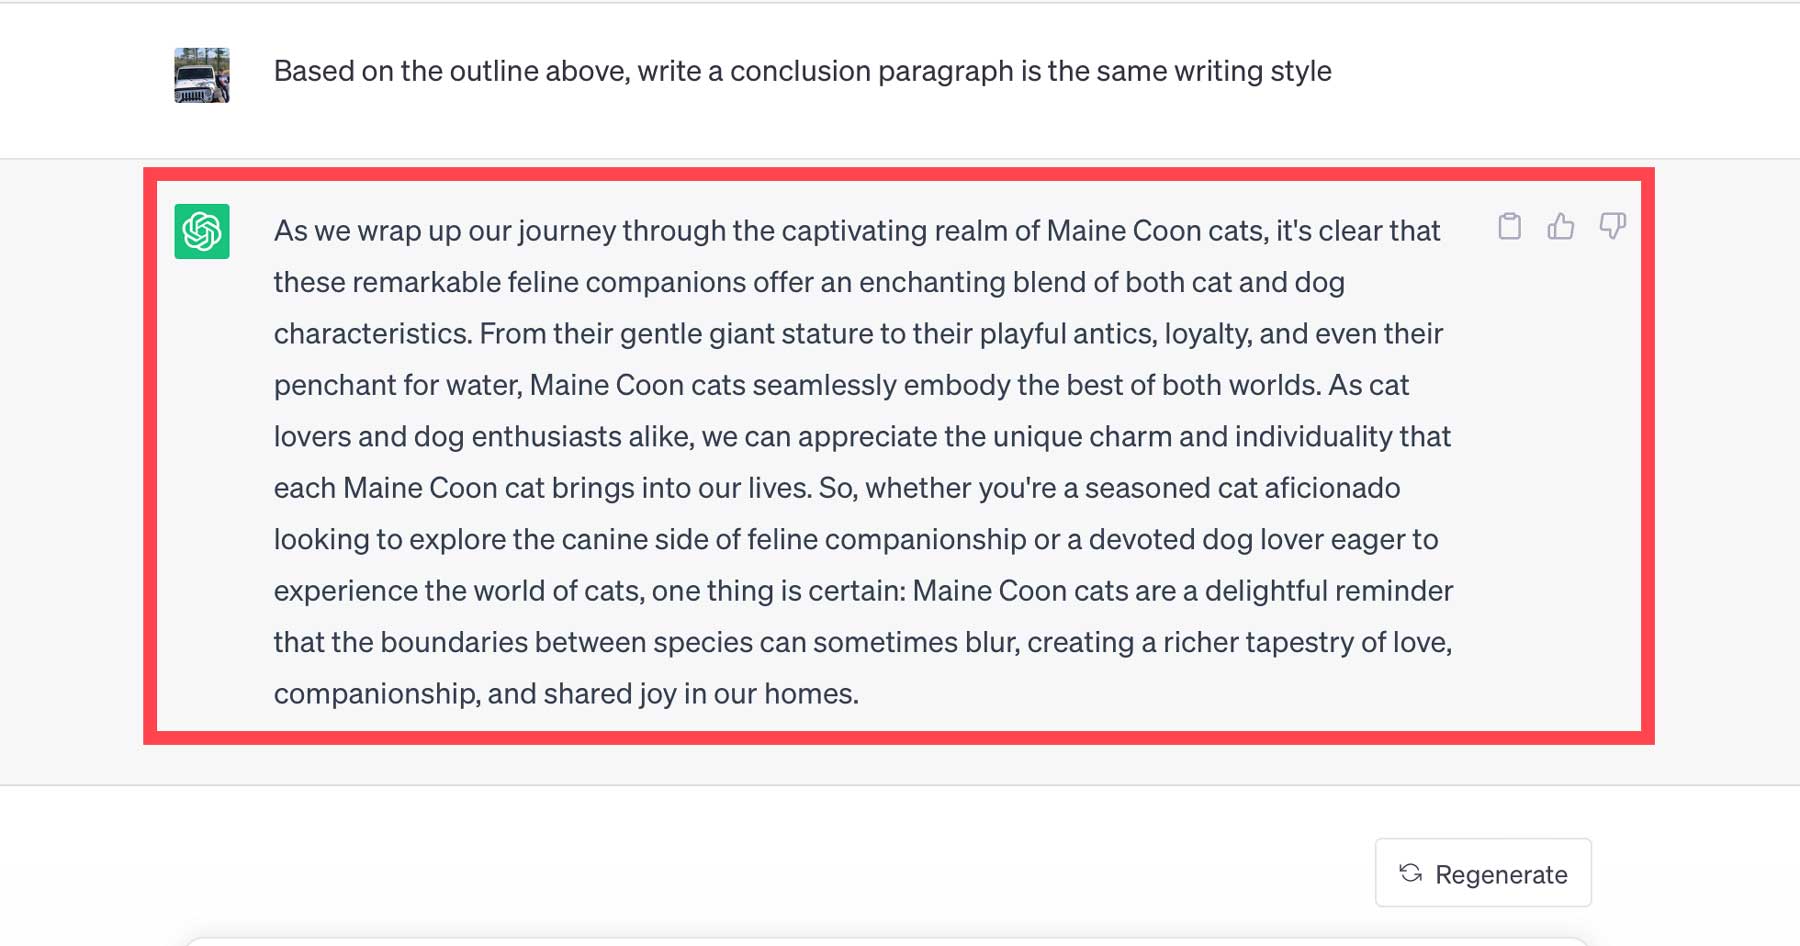
Write Conclusion with Divi AI
To create our conclusion paragraph, we’ll take a slightly different approach. Instead of leaving the context blank, for this last paragraph, we’ll have Divi write a conclusion based on the content of our post. To do this, add a new text module, then fill in the following settings:
- Content type: Paragraph
- What are you writing about: Summarize the various ways in which Maine Coon cats exhibit dog-like traits.
- Added context: this page content
- Tone of voice: Creative
- Must use keywords: Maine Coon cats
- Content length: About 250 words
- Language: Language of prompt
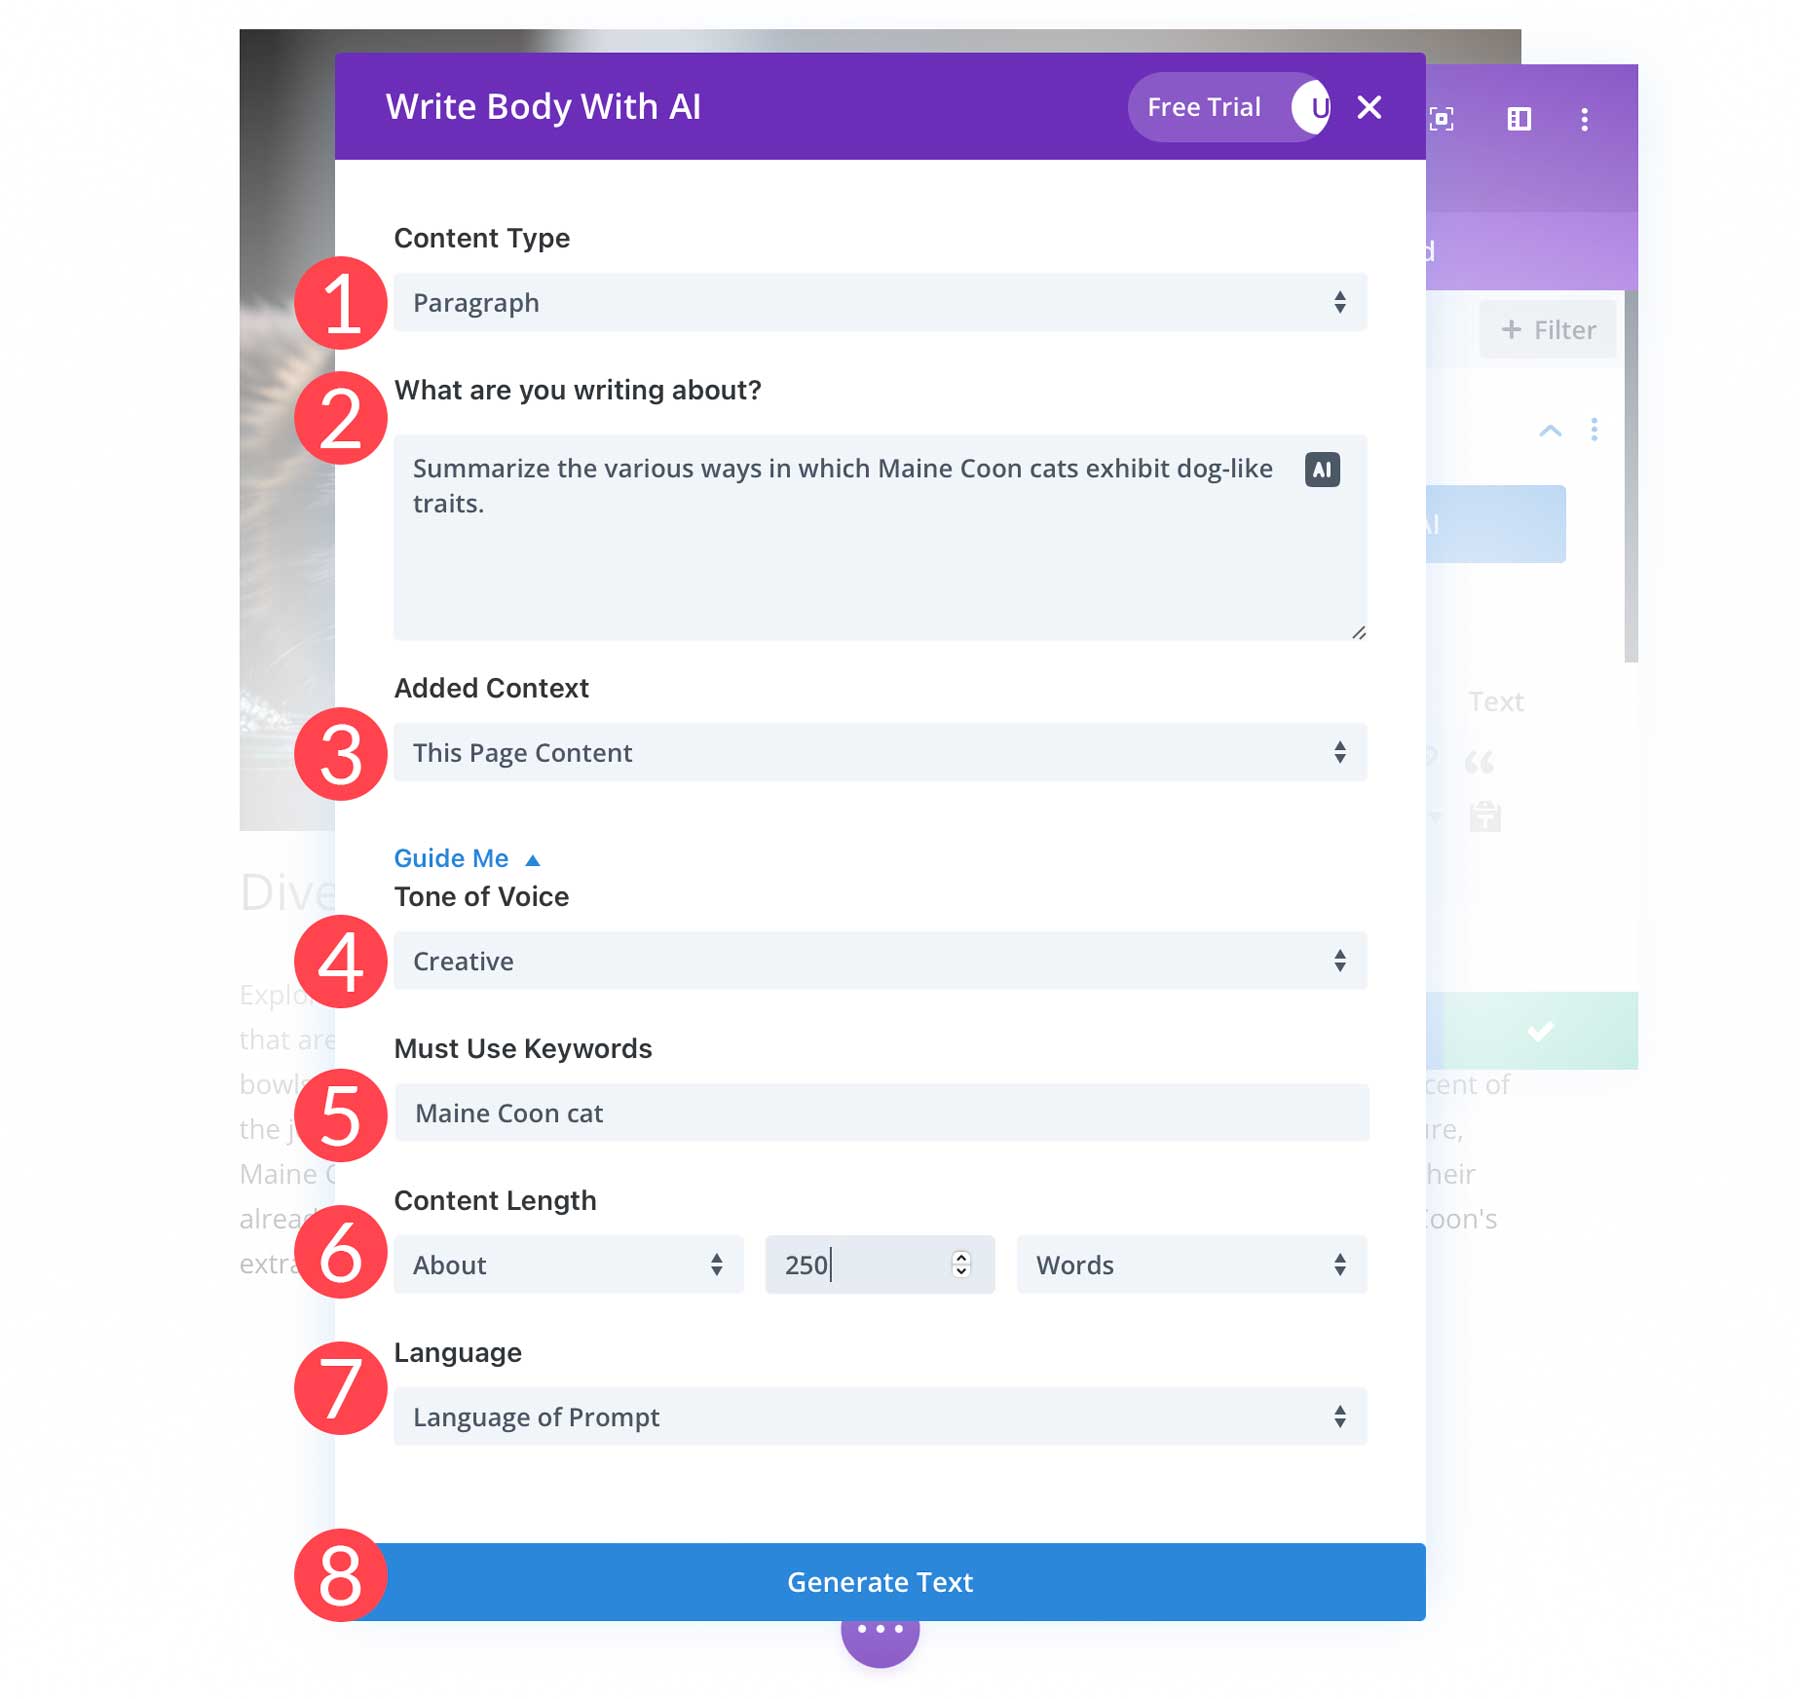
That’s it! You’ve successfully created a well-written blog post with Divi AI.
Blog Post Images
So you can get a better idea of how amazing Divi AI image creation is, we thought you might like to take a look at the images we generated for our Maine Coon cat post:
Prompt:Photo of a Maine Coon cat sitting in a window, majestic, award winning photography
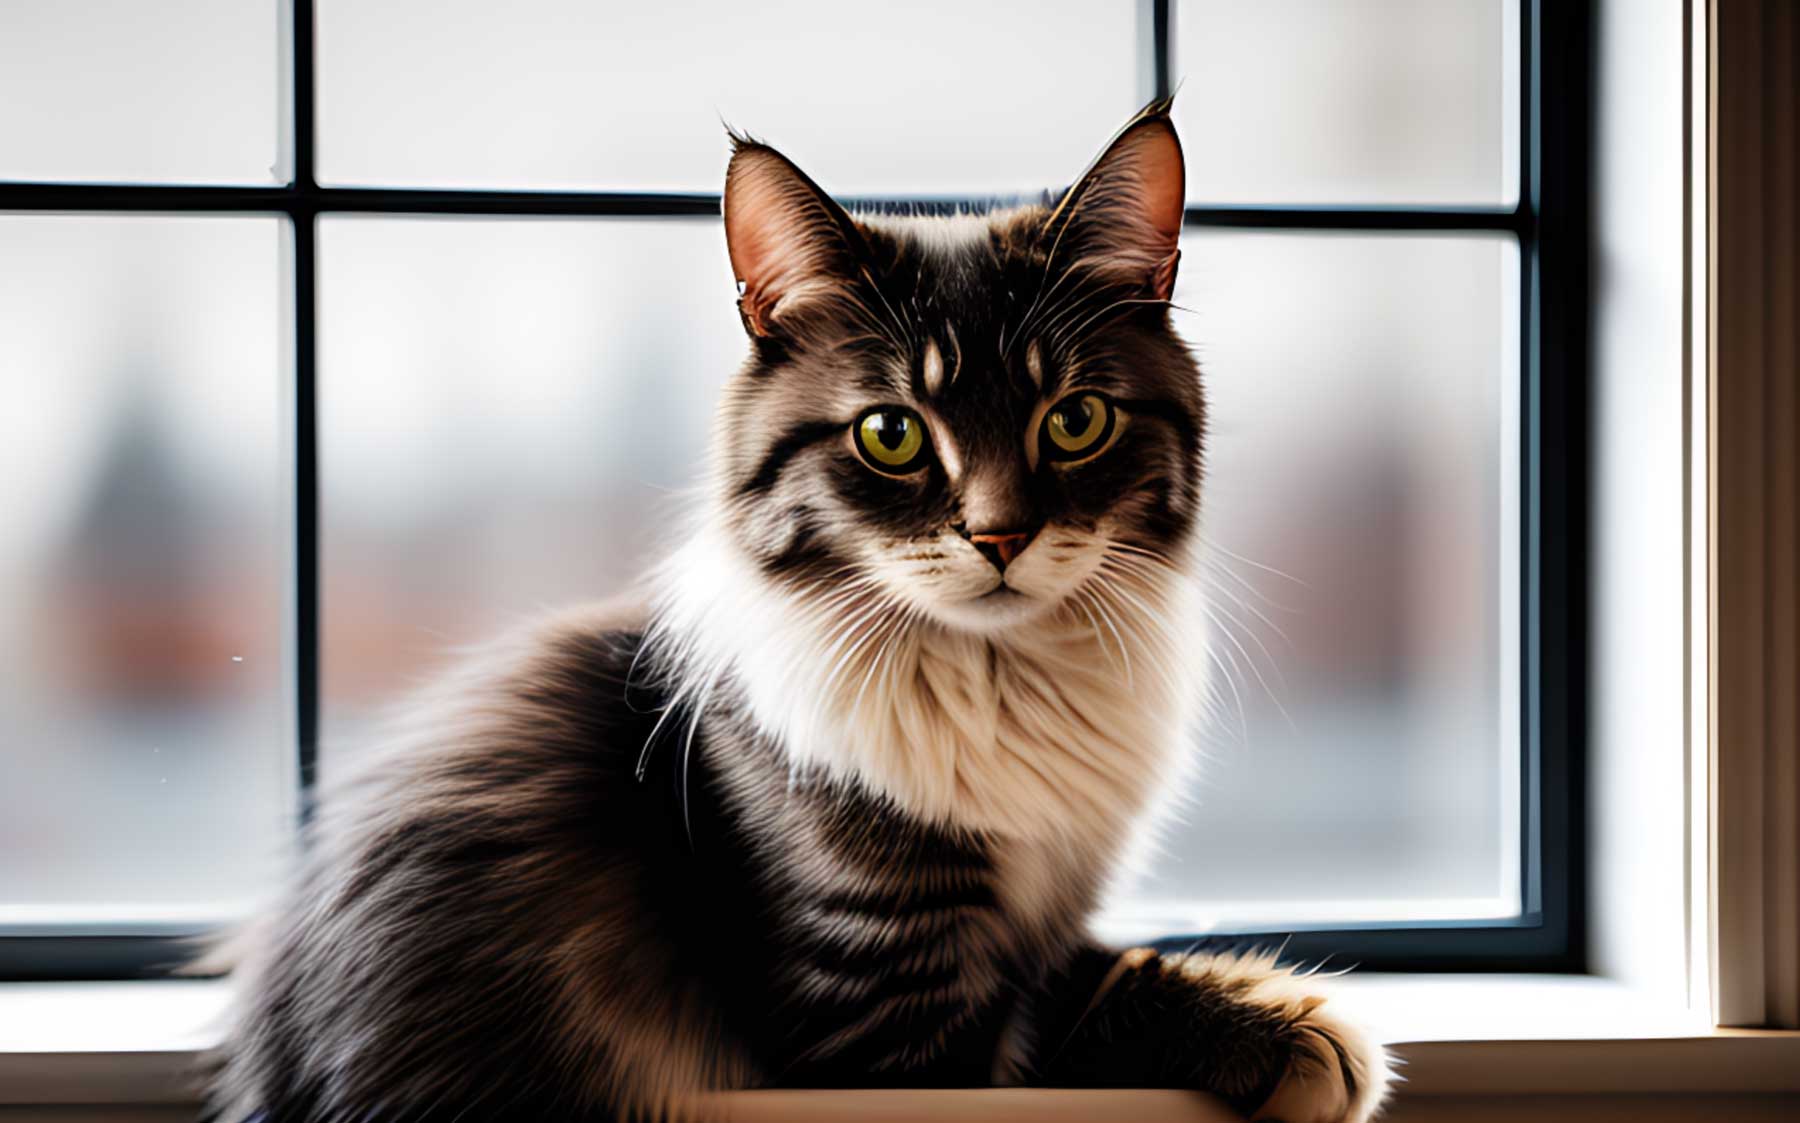
image created with Divi AI
Prompt:Photo of a Maine Coon cat wearing a harness, highly detailed fur, walking on pavement, afternoon lighting
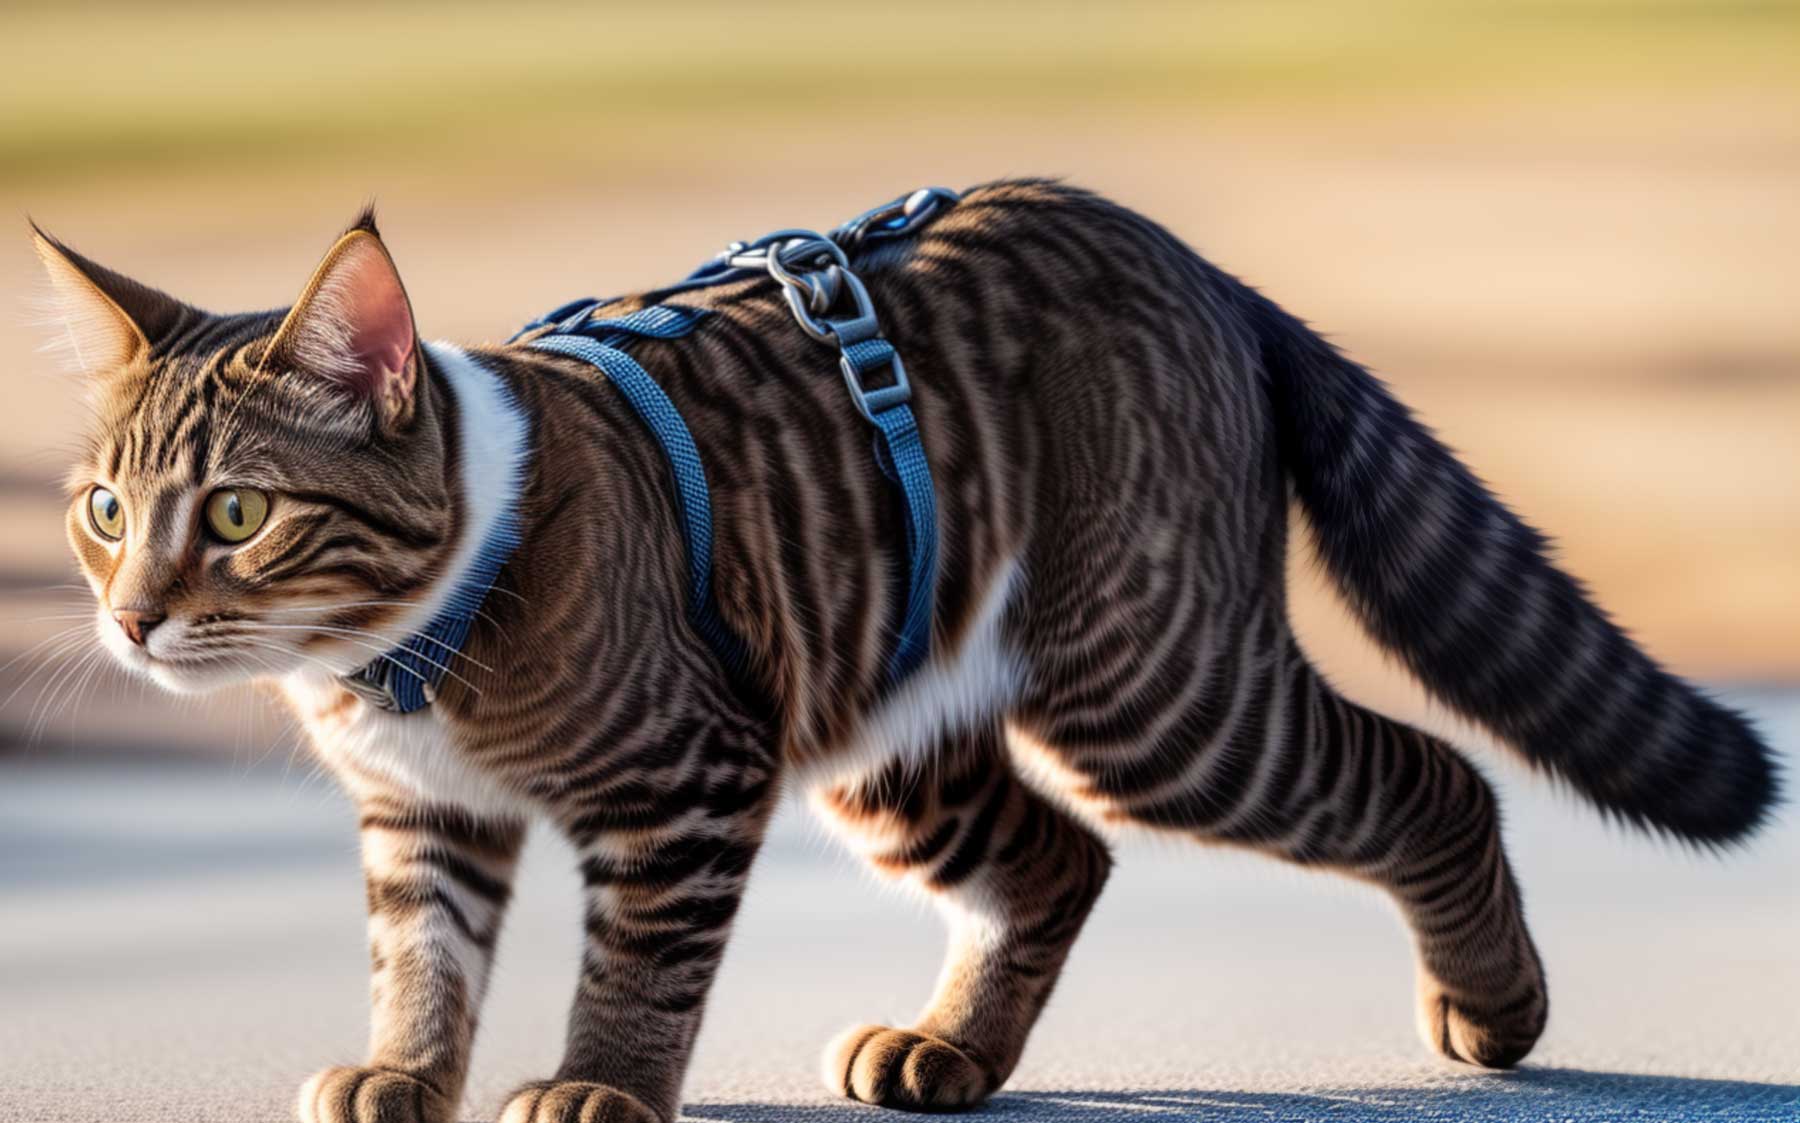
image created with Divi AI
Prompt: Photograph of a Maine Coon cat, clean sharp focus, highly detailed fur, green eyes, cinematic lighting
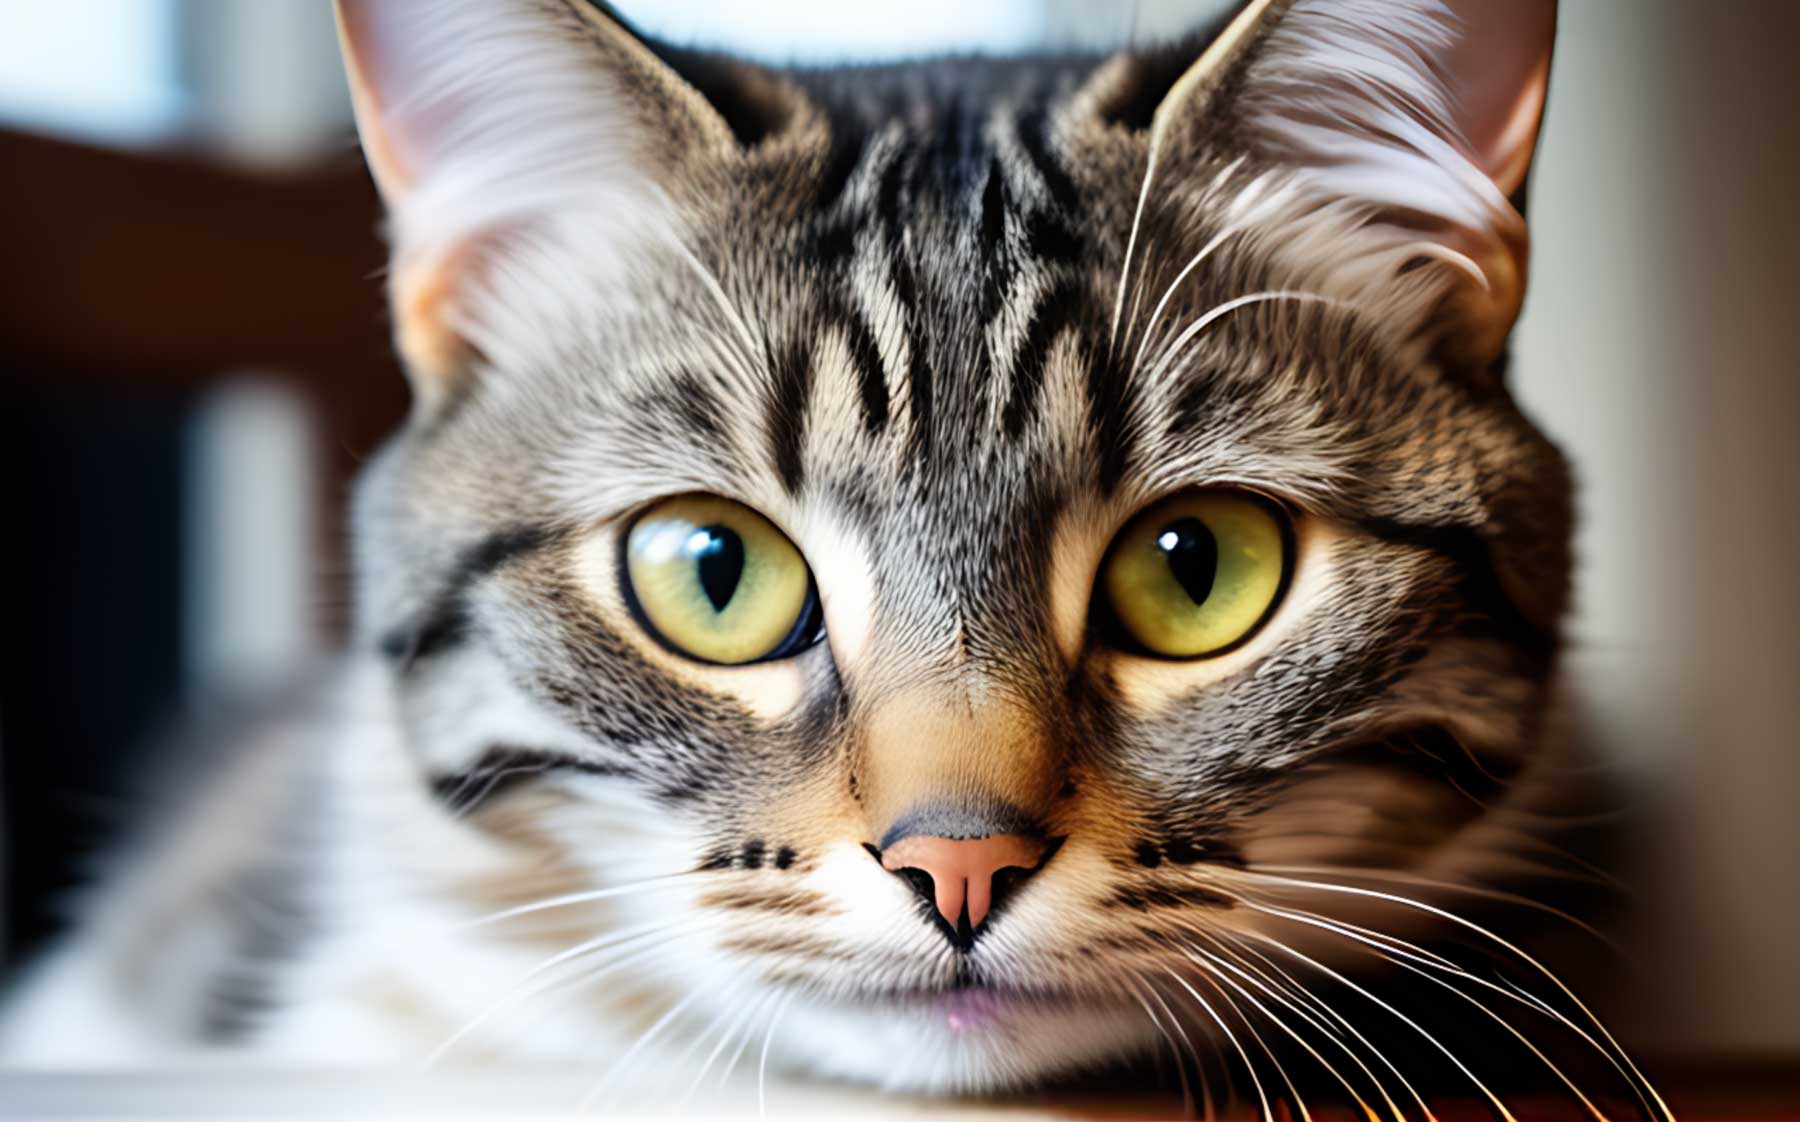
image created with Divi AI
Prompt: Highly detailed photograph of a Maine Coon cat, wading through water, ripples, clean sharp focus, 8k resolution
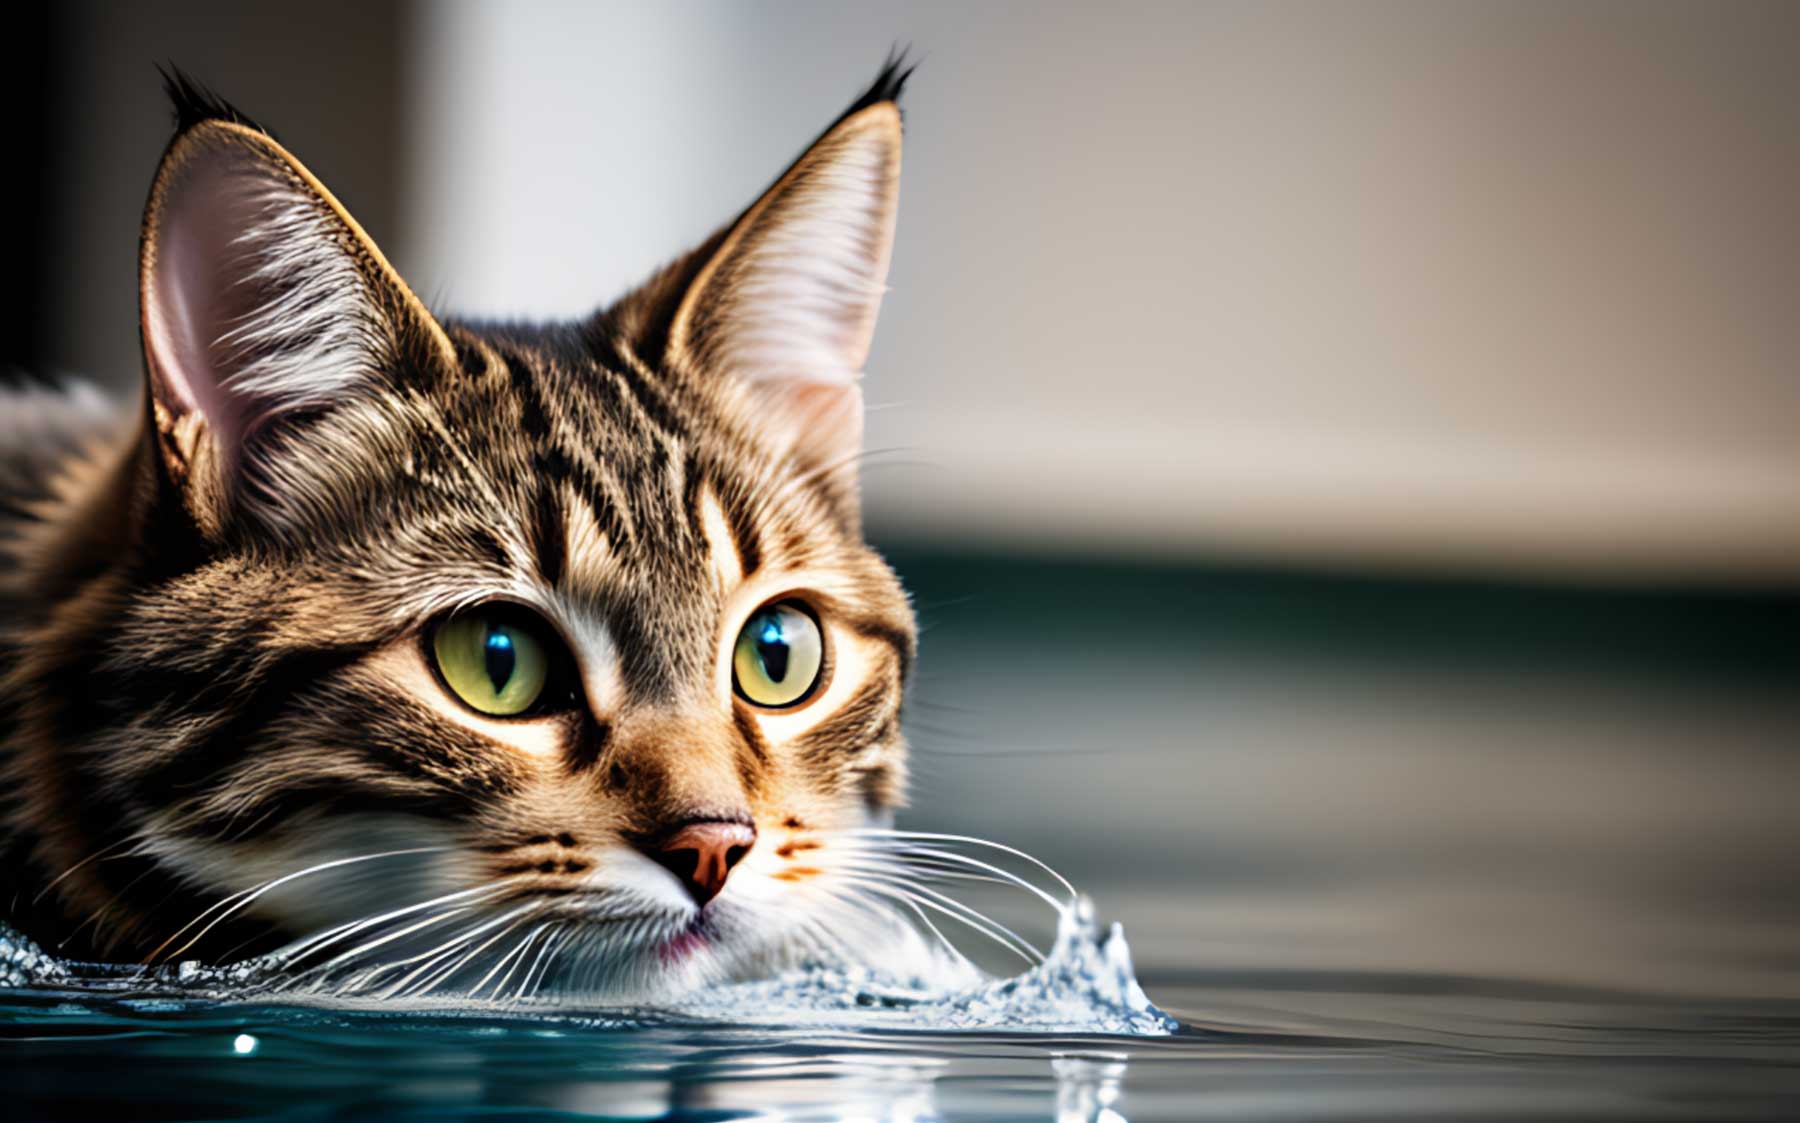
image created with Divi AI
Final Thoughts on Writing A WordPress Blog Post With AI
With the introduction of generative AI, freelancers, and website owners can easily write blog posts with AI. With tools such as Divi AI and ChatGPT, what would normally take a day or two (or sometimes longer) now takes a fraction of the time. By using artificial intelligence wisely and responsibly, we can use it to harness creativity, increase productivity, and make writing fun!
What are you most excited about with our new artificial intelligence feature? Let us know by sounding off in the comment section below.
Featured Image via Lightspring / shutterstock.com


Great tutorial on using AI for WordPress blogging! I’ve been experimenting with various AI tools for content creation and found a helpful tool called imageprompt.net for generating image prompts. It’s a free image to prompt converter that helps me analyze existing images and learn how to write better prompts for Midjourney and Stable Diffusion. When I see an image style I like, I can upload it to imageprompt.net to get a detailed prompt description. This has really improved my AI image generation workflow alongside the content writing tips you shared here. Thanks for the comprehensive guide!
what about articla.ai?
I find it easy to use with pay as you go which make it great choice for casual users.