
With the exciting new release of Divi AI, many users are already testing out the powerful features and exploring the possibilities. More accurately, they are probably having a blast generating stunning works of art and giving their website a fresh makeover with new images and professional copy. But as you get started with Divi AI, you will no doubt have tons of questions about what it is and how to use it. In this post, we’ll cover what you need to know about Divi AI and how to start using Divi AI on your own website.
By the way, to celebrate the launch of Divi AI we are offering a 40% off introductory discount for one week. Now’s the time to lock in those savings forever!
- 1 What Divi AI Can Do: A Brief Overview
- 2 Getting Started With Divi AI
- 3 What Divi AI Learns About Your Website to Generate Contextual Content
- 4 How to Build Entire Page Layouts with Divi AI
- 5 How to Use Divi AI for Images
- 6 How to Use Divi AI for Text
- 7 Wrapping Up
- 8 Get 40% Off Divi AI During Our Introductory Sale!
What Divi AI Can Do: A Brief Overview

If you haven’t already heard about Divi AI, here is a quick sneak peek at just a few of the things you can do with Divi AI:
- Auto-Generate Page Layouts in seconds, with custom design, text, and images — all with a simple prompt.
- Generate Content On-Brand and In-Context with Your Current Website. Divi learns about your website content so that it can continually improve. This allows it to produce content relevant to your brand and voice.
- Generate Images Automatically in Seconds based on what it already knows about your website and page content.
- Refine Your Images with Prompts and Quick Actions. Tweak and modify images with Divi AI as needed using additional prompts and quick action buttons.
- Generate Text Content Automatically and Edit it Like a Pro. Divi AI can help you write website copy and entire blog posts like a professional
- And so much more…
What Makes Divi AI Unique?
Using external third-party AI tools like Jasper, Chat-GPT, or Midjourney to generate content for your site can be difficult. It requires complex prompts and guesswork to ensure your content is specific to your website brand. Divi AI bridges the gap by giving you access to a powerful AI assistant that understands your existing content already. With Divi AI as your assistant, you can get the results you need quickly and easily. Some of its most unique features allow users to do the following:
- Generate content for your website in the appropriate context. Divi AI analyzes and understands your existing website data so you can auto-generate content specific to your website brand. If your website is an interior design company, Divi will be able to generate images and text specific to your interior design company.
- Make Suggestions for New Content. If you’re not sure what to write next or what image to add to a section of your page, Divi AI can help. Because Divi understands the content of your page, it can prompt itself and give you suggestions!
- Accessible within the Visual Builder and Divi Modules. With Divi AI, you can generate AI content right inside Divi’s Visual Builder in real time. This allows you to generate AI text and images on the fly when designing your page, making it a more convenient solution than having to jump back and forth using other third-party AI tools.
- Easy-to-use prompts and Quick Actions. Divi takes the grunt work out of prompting AI to generate content that actually fits your website. You can write detailed prompts or have Divi AI generate suggested prompts for you.
- One-Click AI Content Generation for Divi websites. You don’t even need to prompt Divi AI to generate content for your website. You can choose to generate text or images automatically. You can even generate entire modules filled with content in one click.
For more, check out all the amazing features of Divi AI
Getting Started With Divi AI
How to Get a Divi AI Subscription
If you are new to Divi, you will first need to purchase a Divi membership before you can get access to Divi AI. Once a member, you can sign up for unlimited access to Divi AI. To sign up, go to the Divi AI landing page and click the green sign up button inside the Get Divi AI box.
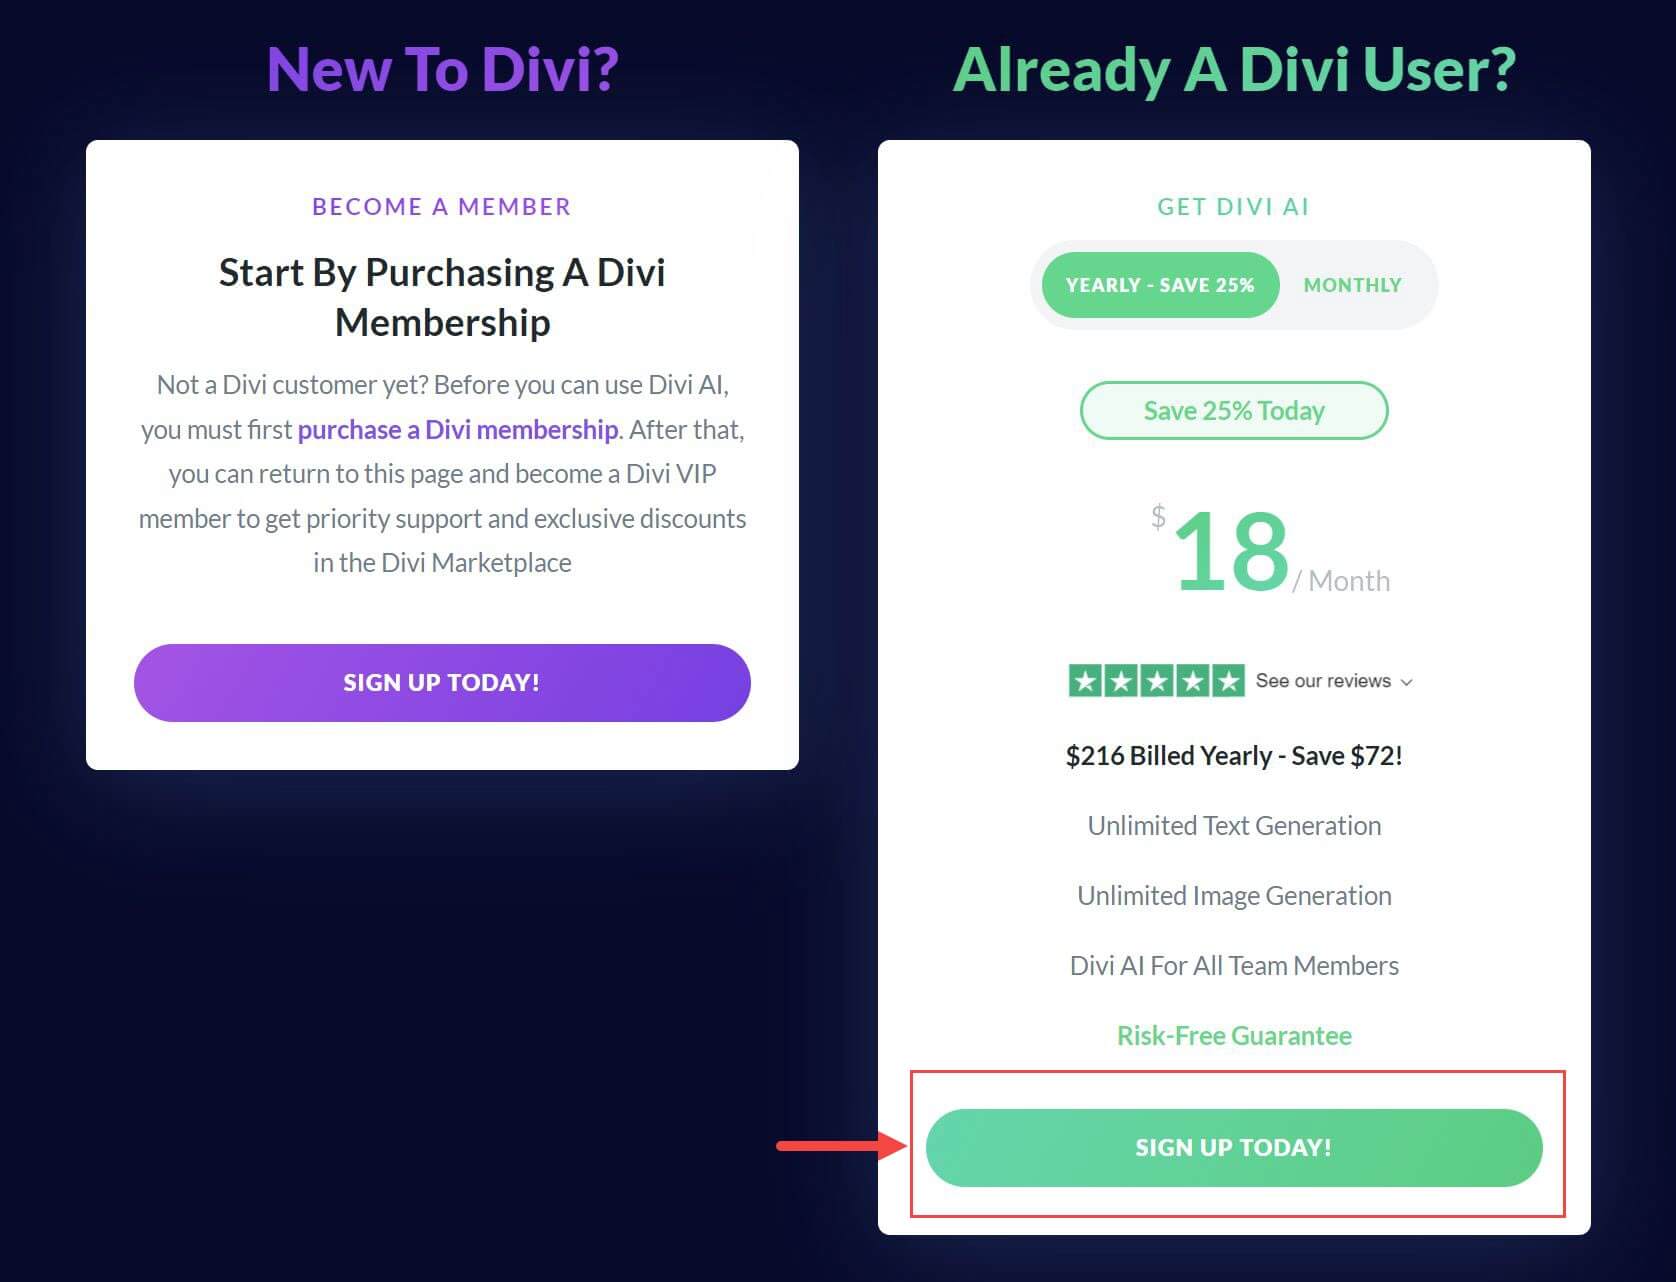
If you are already a Divi user, simply visit the Divi AI landing page to sign up for unlimited access to Divi AI.
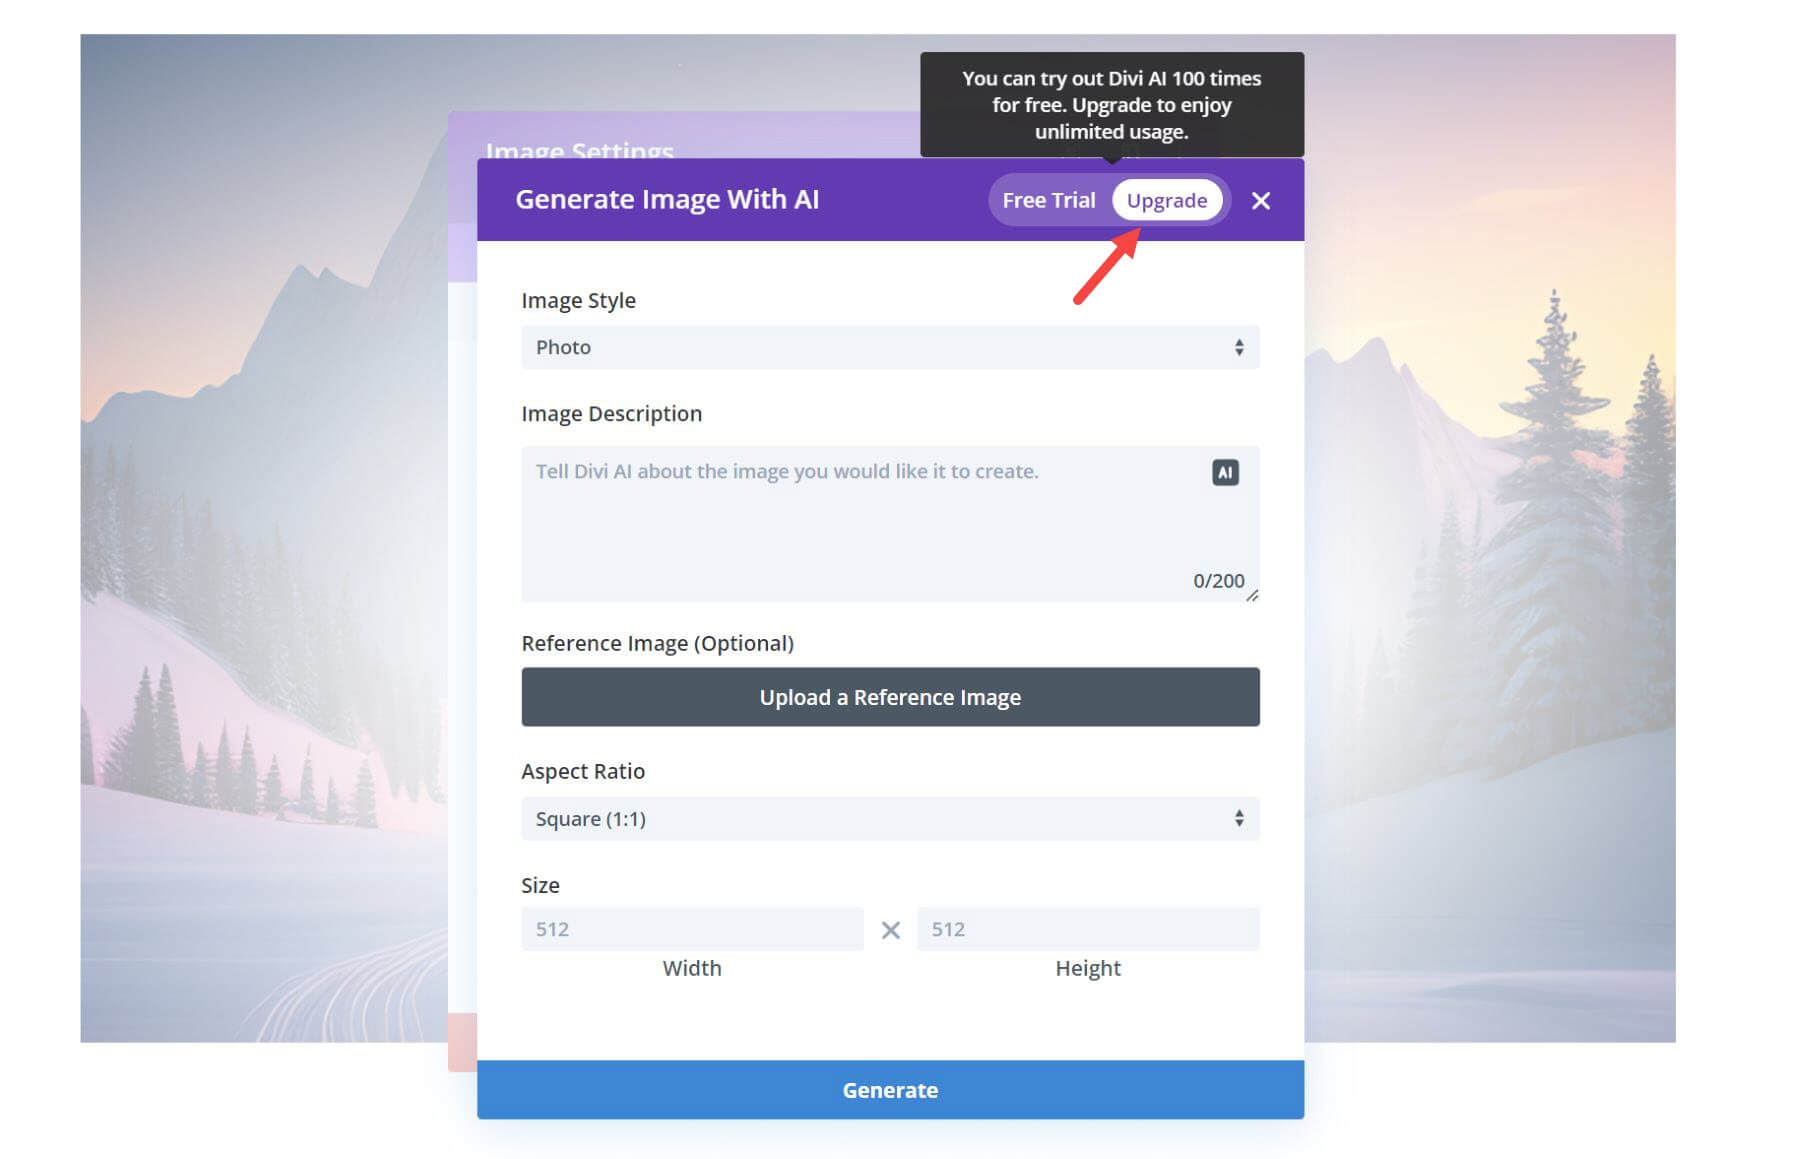
Every Divi user has access to Divi AI with a limited free trial. All you need to do is make sure you are using the most recent version of Divi. The free trial allows you to use Divi AI 100~ times. After that, you will need to upgrade to a paid version to have unlimited usage of Divi AI. You can upgrade at anytime using the button at the top the Divi AI Generator modal.
For more, check out Divi AI pricing.
Subscribe To Our Youtube Channel
How to Access Divi AI in the Divi Builder
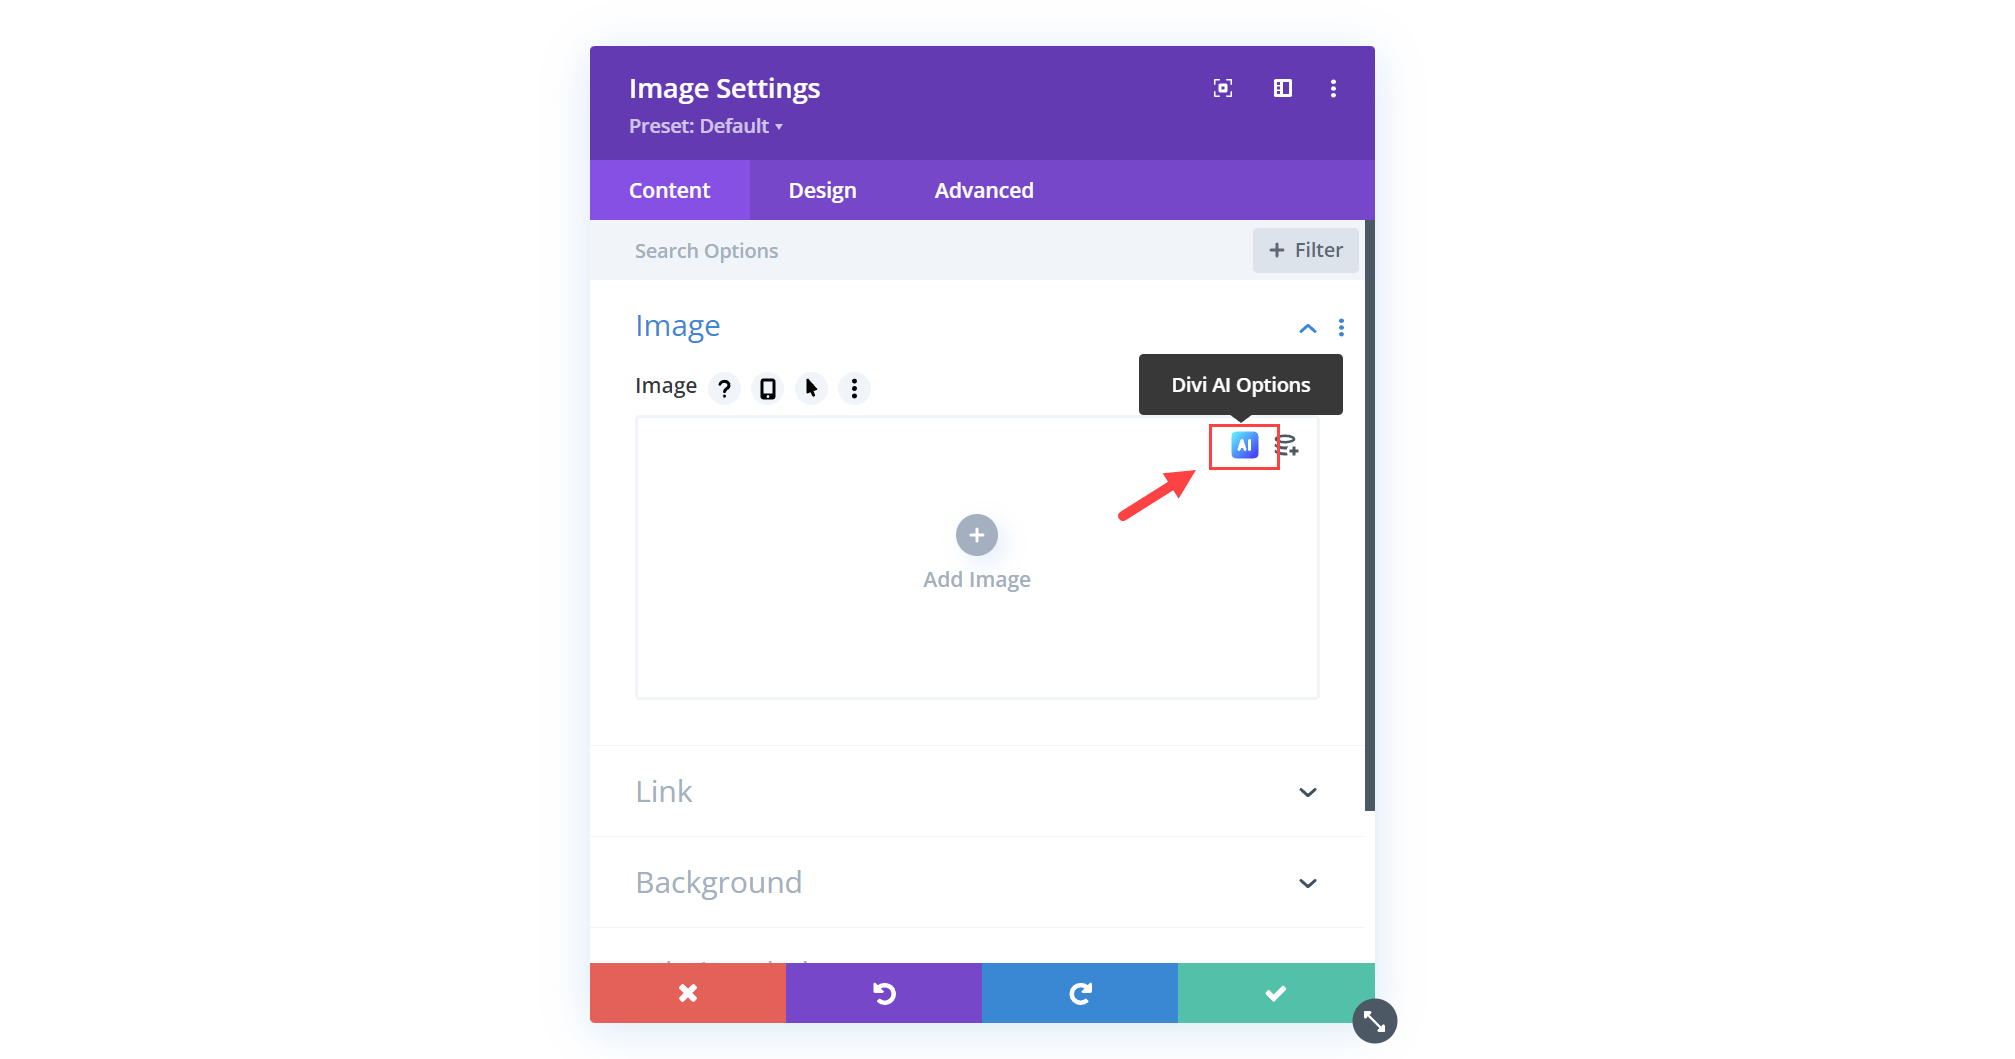
Divi AI is already built-in to the Divi Builder. Once you are signed up for Divi AI, there is nothing for you to install or activate in order to enjoy the benefits of Divi AI. Currently, Divi AI can be accessed everywhere you can add text or images in the Divi Builder. That means Divi AI can be used on any Divi element (section, row, column, etc.) or Divi Module (text, image, blurb, etc.) that supports text input or image uploads. You can deploy the Divi AI generator by hovering over an input box and clicking on the Divi AI button that pops up in the top right of the input box.
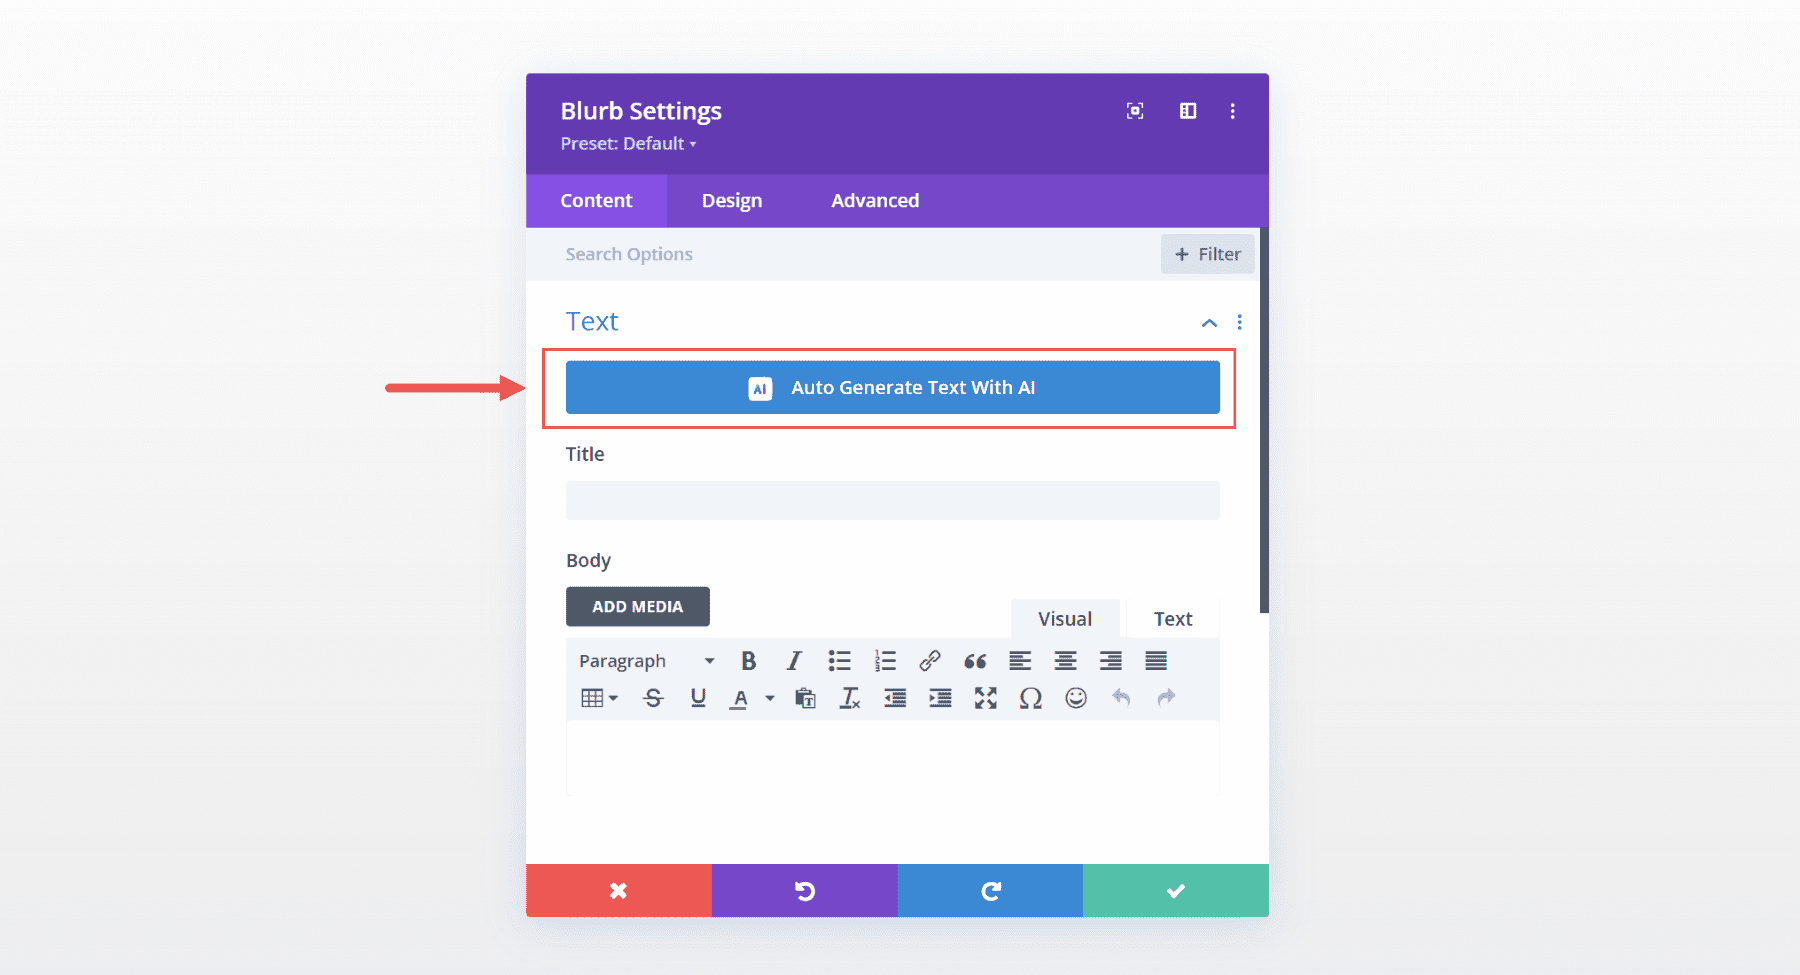
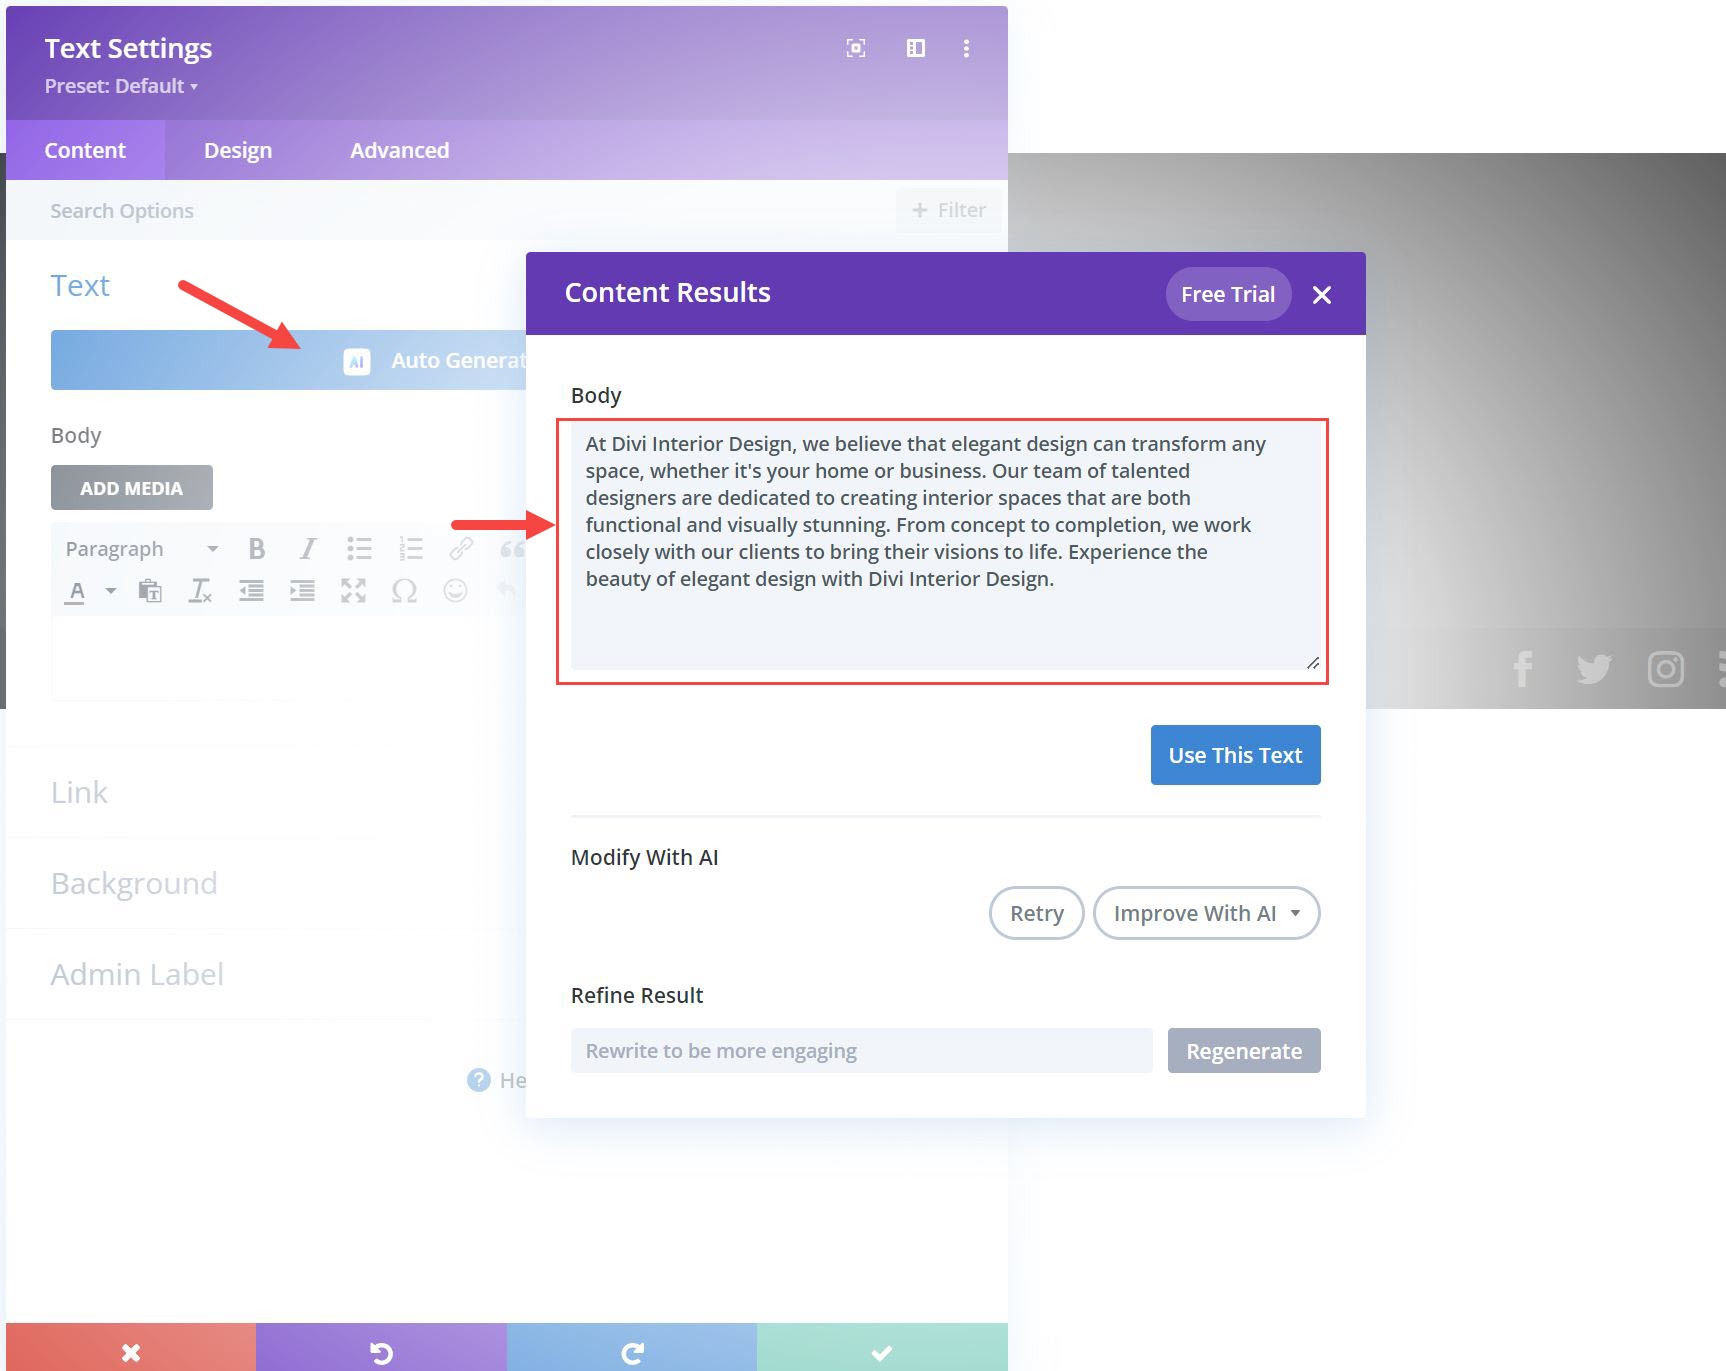
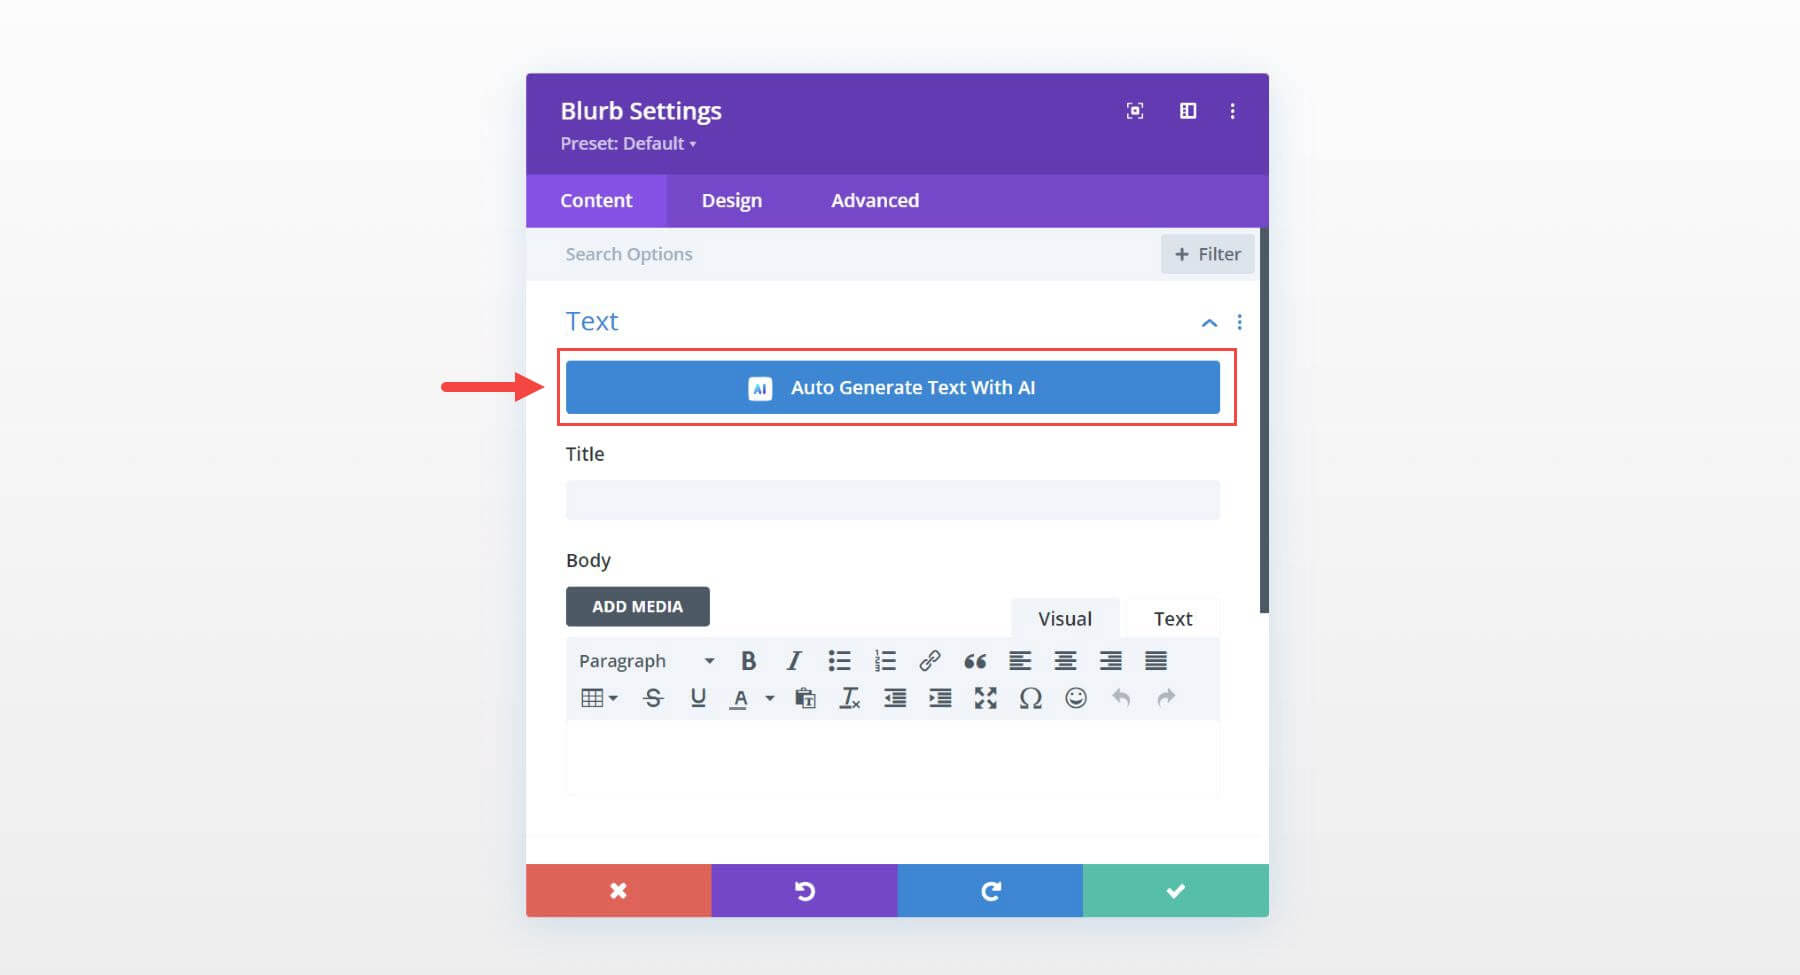
Some modules will include an “Auto Generate Text with AI” button at the top of the module’s content options. This allows you to auto-generate all the text input areas available for a certain module (text, body, button, etc.).
For example, if you are using a blurb module, you can click “Auto Generate Text with AI” to generate content for the Title and Body area of the module with a single click.
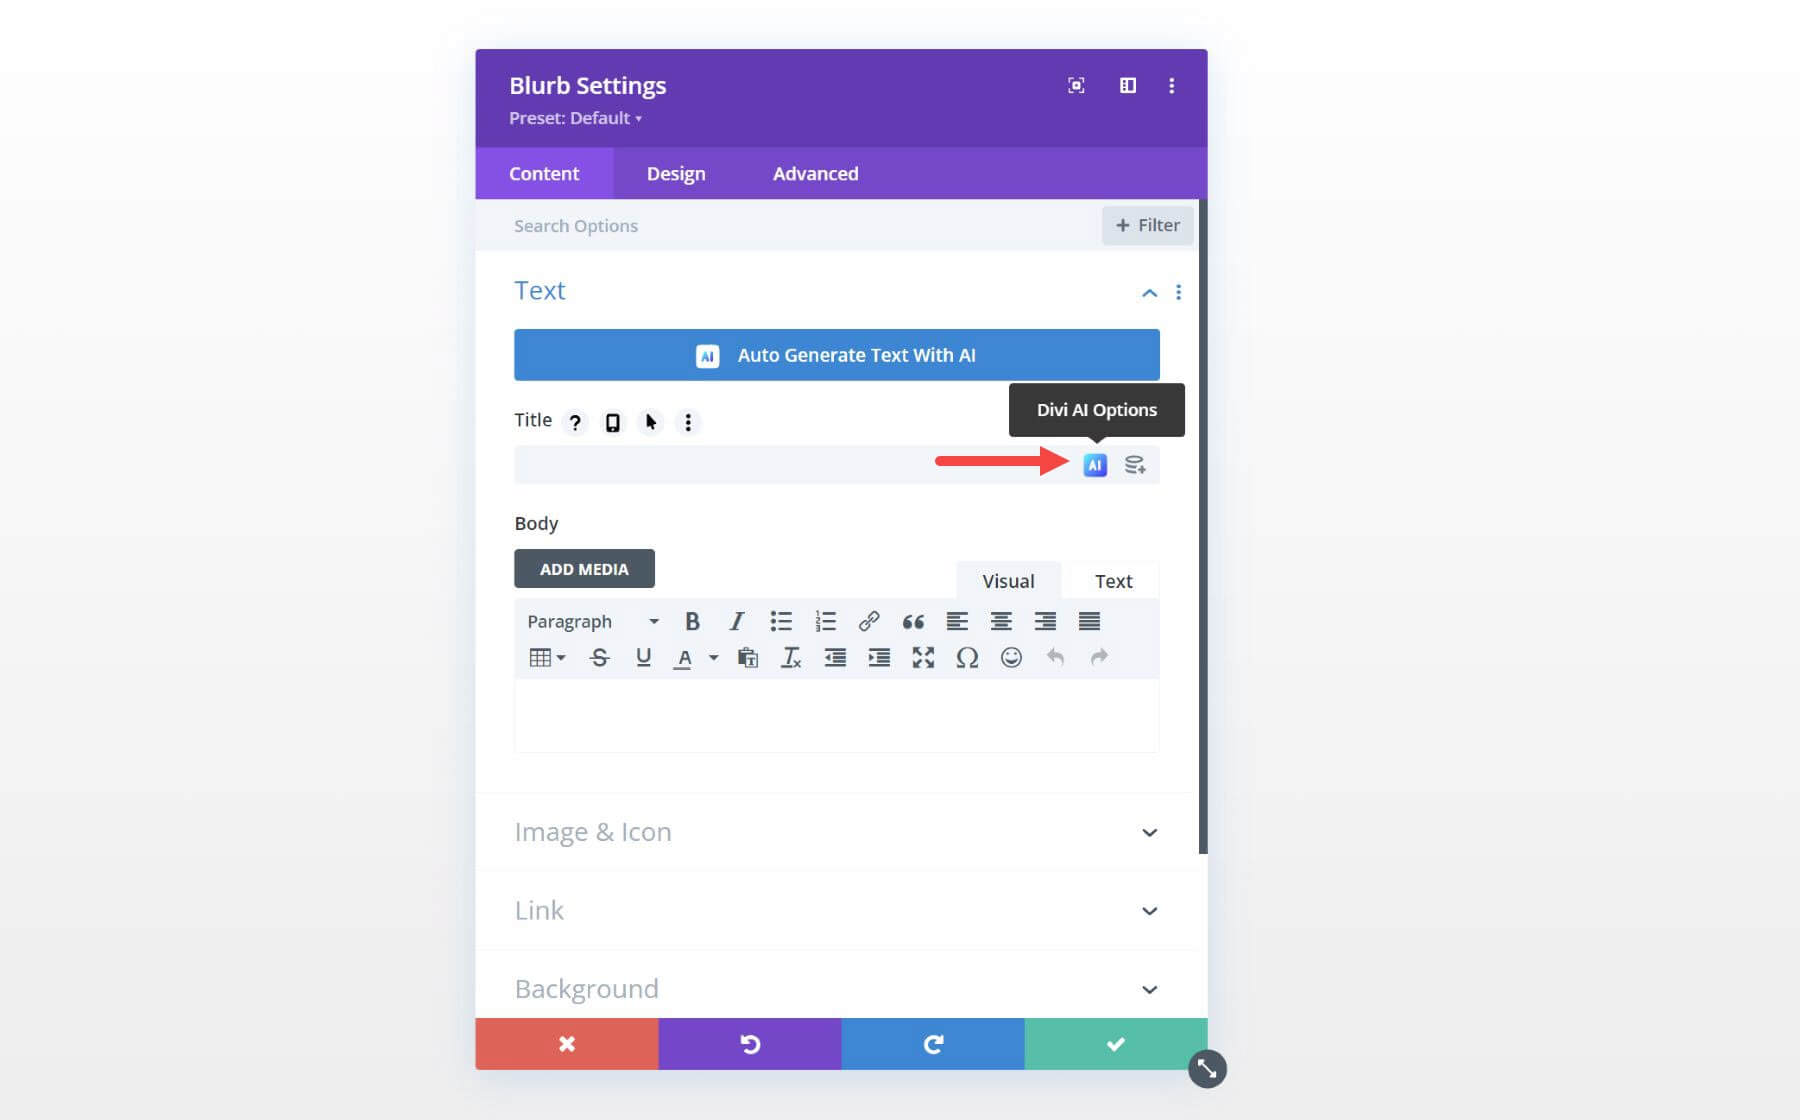
Or you can choose to deploy the Divi AI text generator for each one by clicking the Divi AI button within each of the input areas individually.

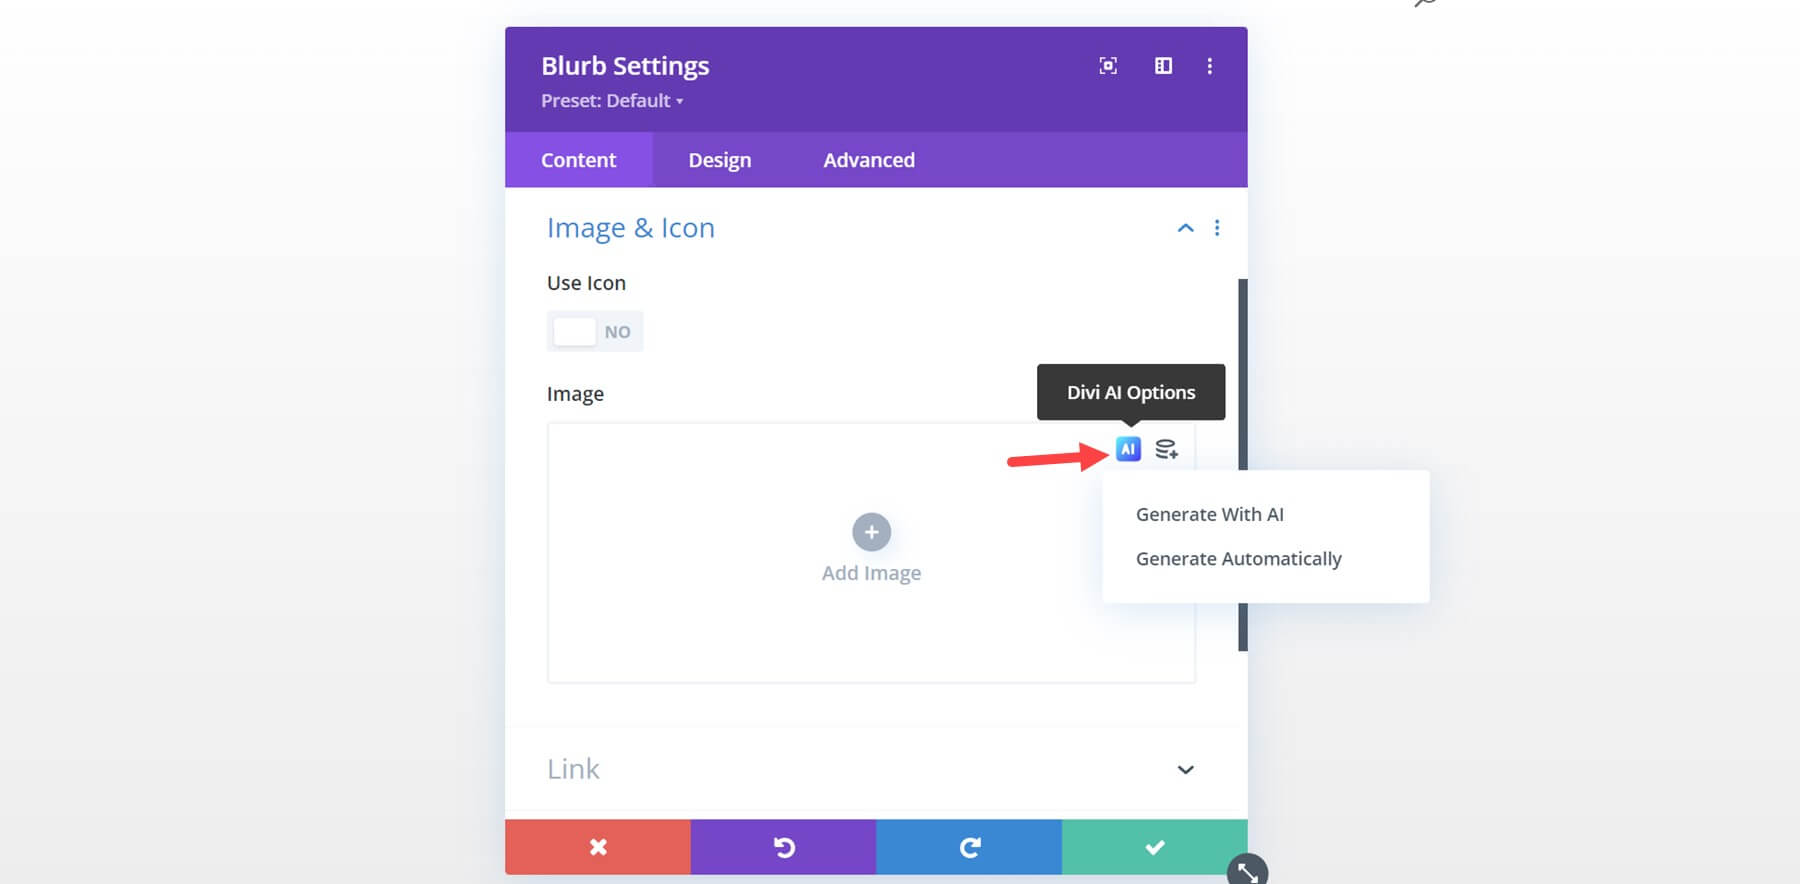
Since this is a blurb module, you also have the ability to generate an image with Divi AI. Under the Image & Icon option group, hover over the image input box, and click the Divi AI options button. You will have the option to generate the image automatically or by using the Divi Image Generator Options modal.
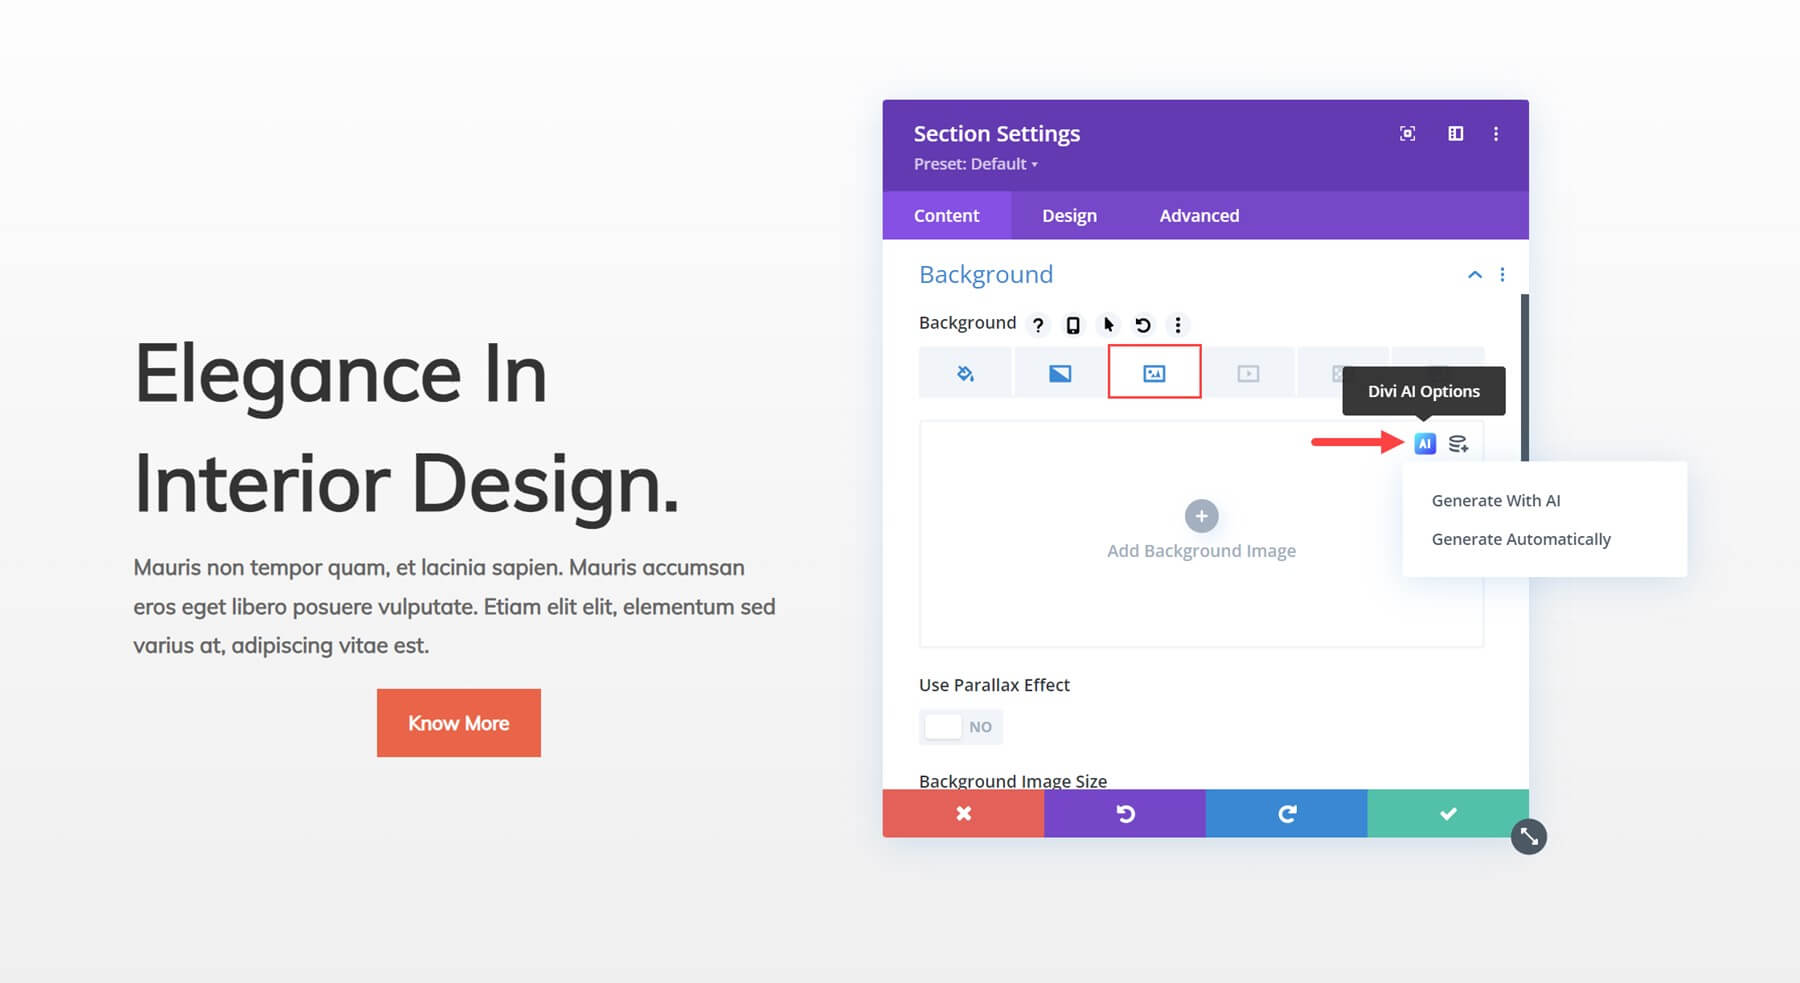
Because Divi Builder structural elements (sections, rows, and columns) allow you to add background images, you can access the Divi AI image generator under the background image option tab.
What Divi AI Learns About Your Website to Generate Contextual Content
As mentioned already, Divi AI understands your website automatically. This allows it to generate on-brand results in context based on the existing data and content of your website. So, it is important to understand what information is needed to allow Divi AI to work its magic. In general, you can expect Divi AI to account for your website or company information (Website Title, Tagline) as well as page content and the content within modules.
Divi AI Evaluates Your Website Information from the Start
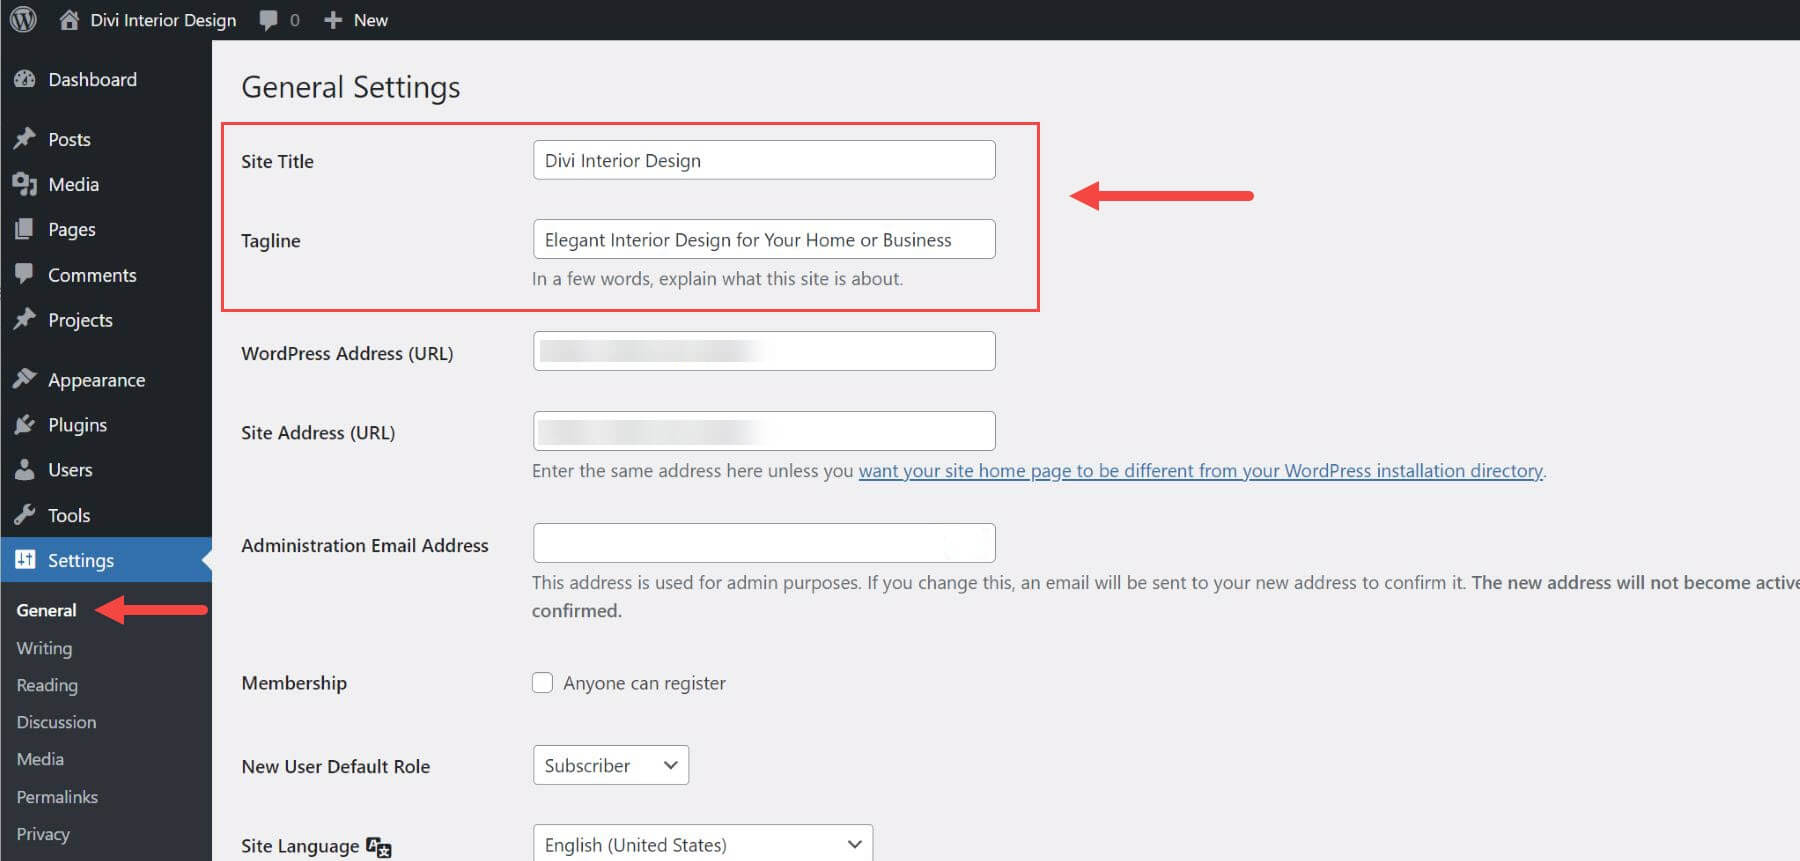
So let’s say you have a website with the title “Divi Interior Design,” and the tagline reads “Elegant Interior Design for Your Home or Business.” This information can be found by going to the WordPress Dashboard under Settings > General.
Then you can create a new page and deploy the Divi Builder.
To get an idea of what Divi AI already knows, all I have to do is create a text module and click the “Auto Generate Text with AI” button. This will create content specific to the context of your website information on the page. The content will likely include the title of your website and additional content based on the tagline (what your company does). This is perfect for kickstarting the copy of a home page.
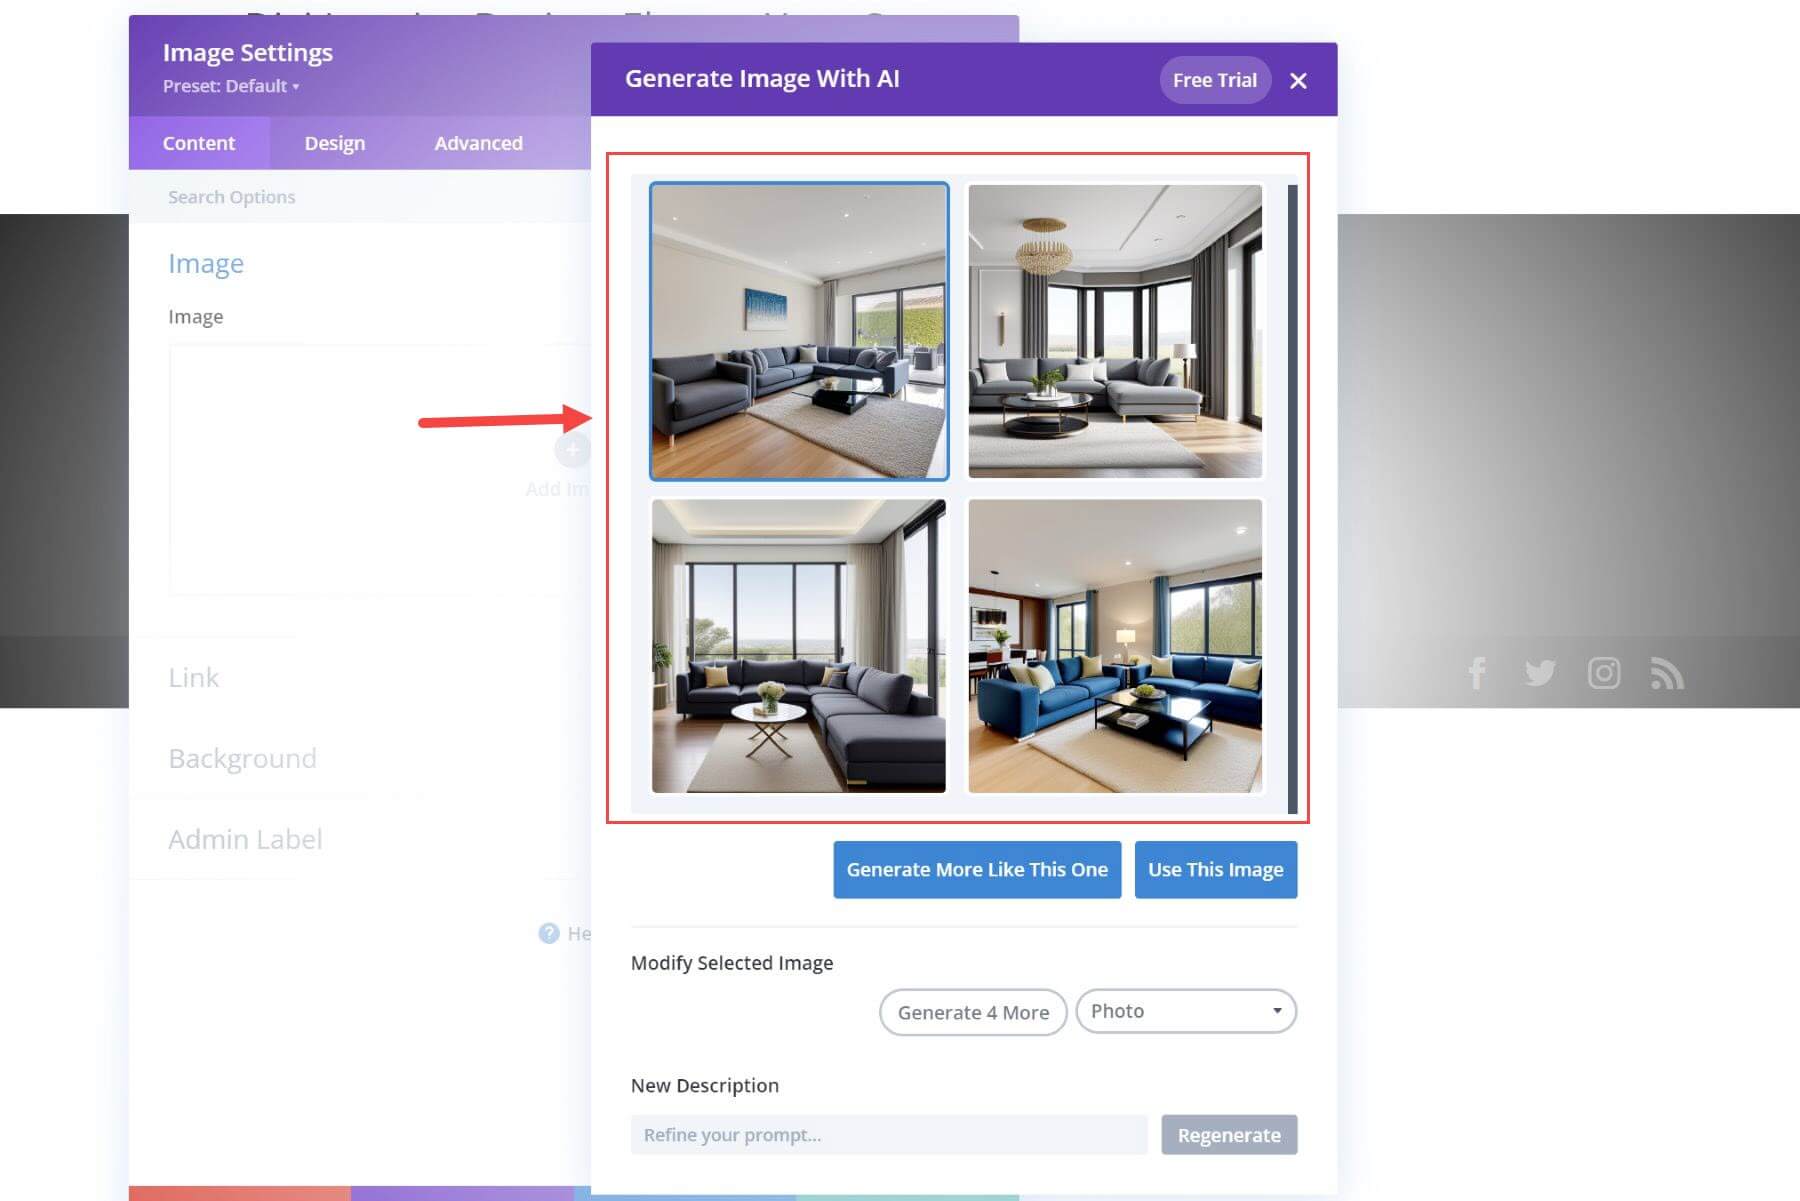
And, if we use an image module to generate an image with Divi AI automatically, we get results of interior design photos that are consistent with my website info.
Of course, that is just the tip of the iceberg. As you build your website, Divi AI will have more information available to generate more contextual content in more specific instances.
Divi Evaluates Page Content to Generate Content for Entire Modules
Not only will Divi AI evaluate your basic website information, it will also analyze the content (and context) of your page, allowing you to generate even more on-brand results as you as you build. The more content you have and the more you use Divi AI on your pages, the better Divi AI will be able to generate accurate results.
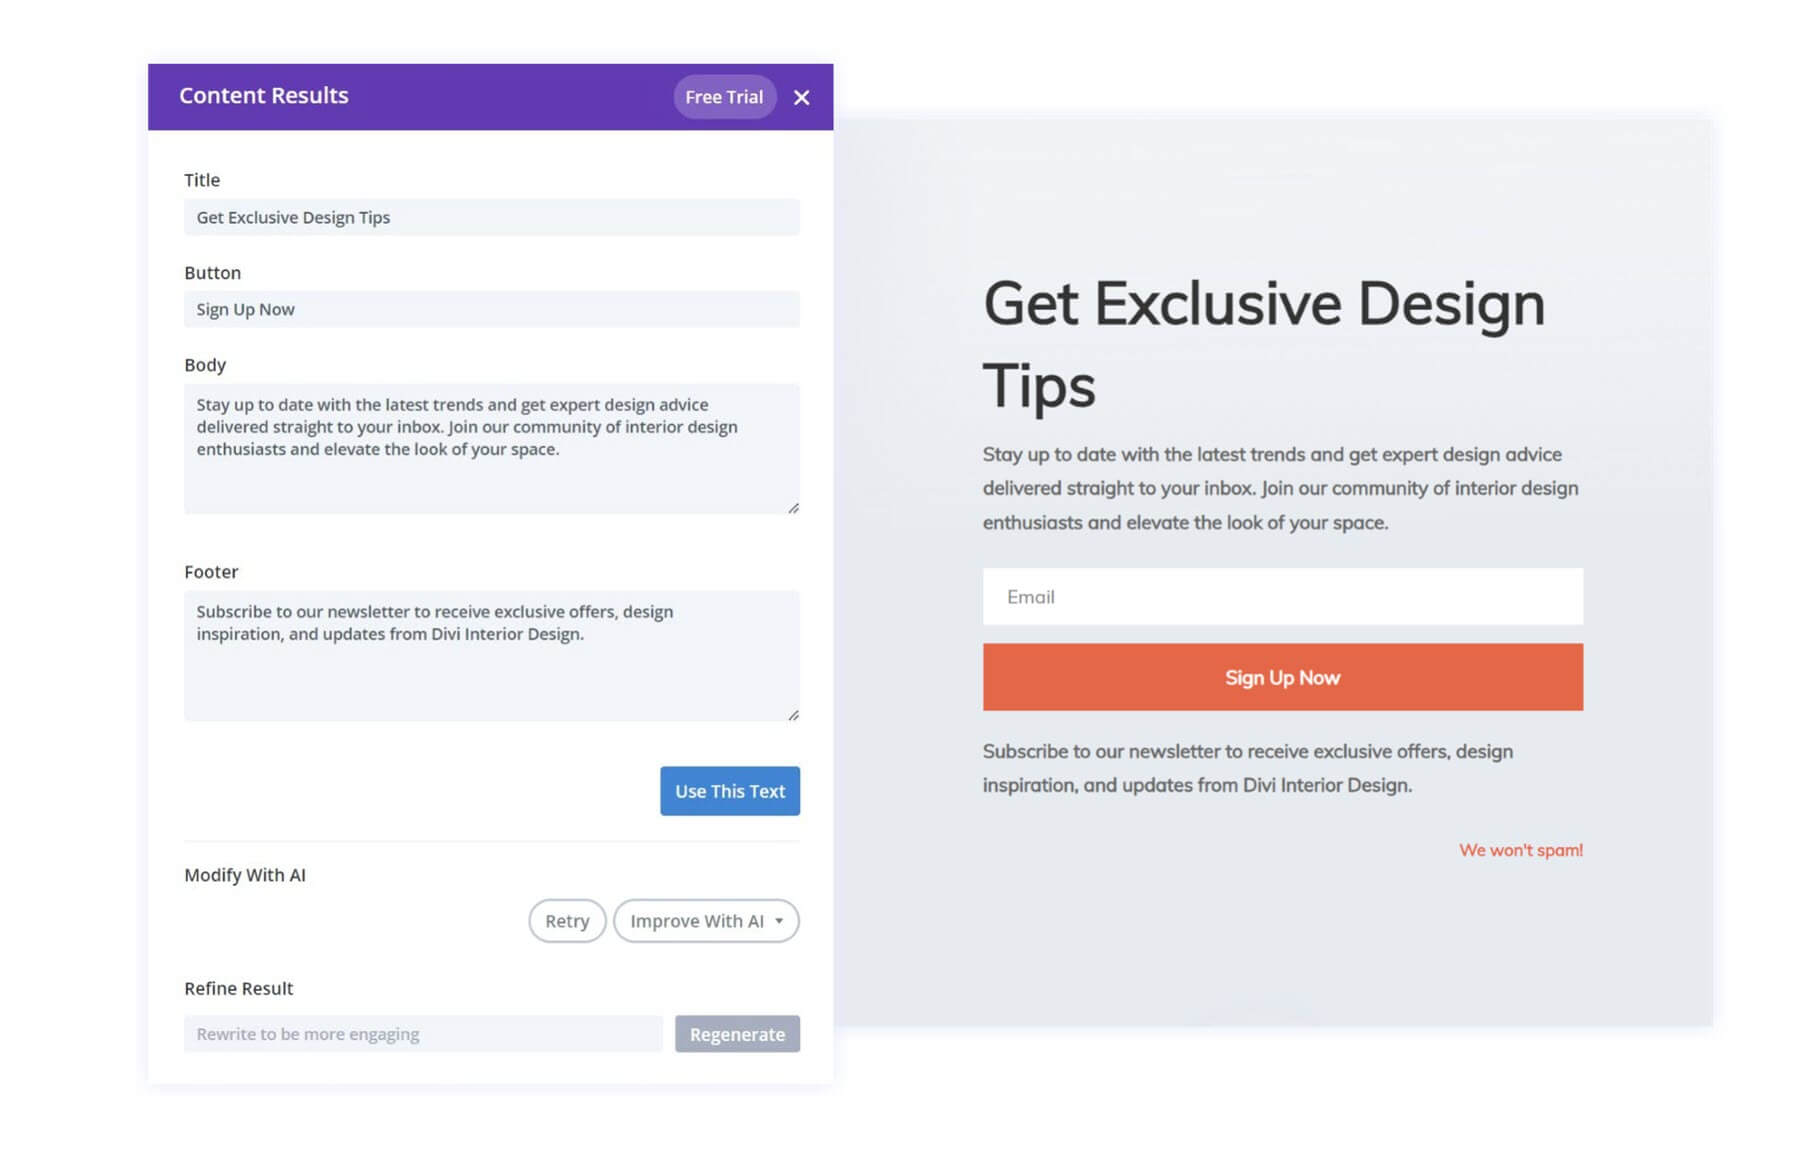
For example, by the time you reach the end of your building your page, you will be able to generate the content for an entire Email Opt-in Module in a single click!
Now that we have a good idea of what Divi AI knows and what it can do, let’s go into a more detail on how you can use it on your website.
How to Build Entire Page Layouts with Divi AI
With Divi Layouts AI, you can create your first page (or any page) by letting Divi AI generate an entire page layout for you. This is a perfect jumpstart for creating your website. Here’s how to do it.
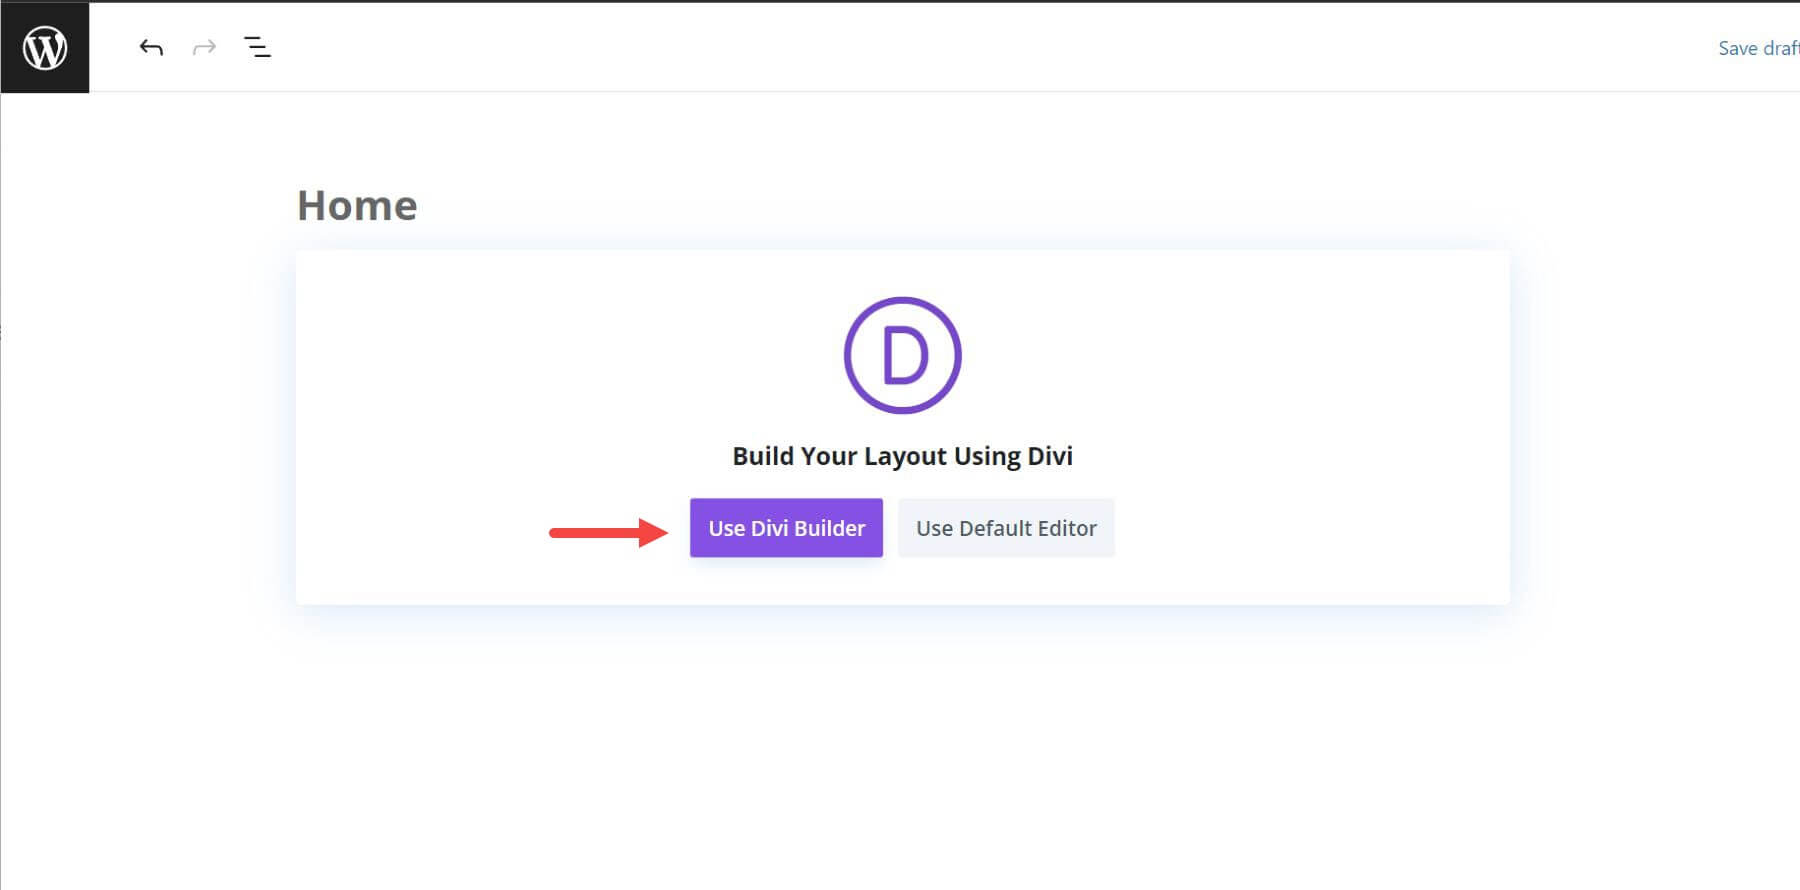
First, create a new page like you normally would in WordPress, and select “Use Divi Builder”.
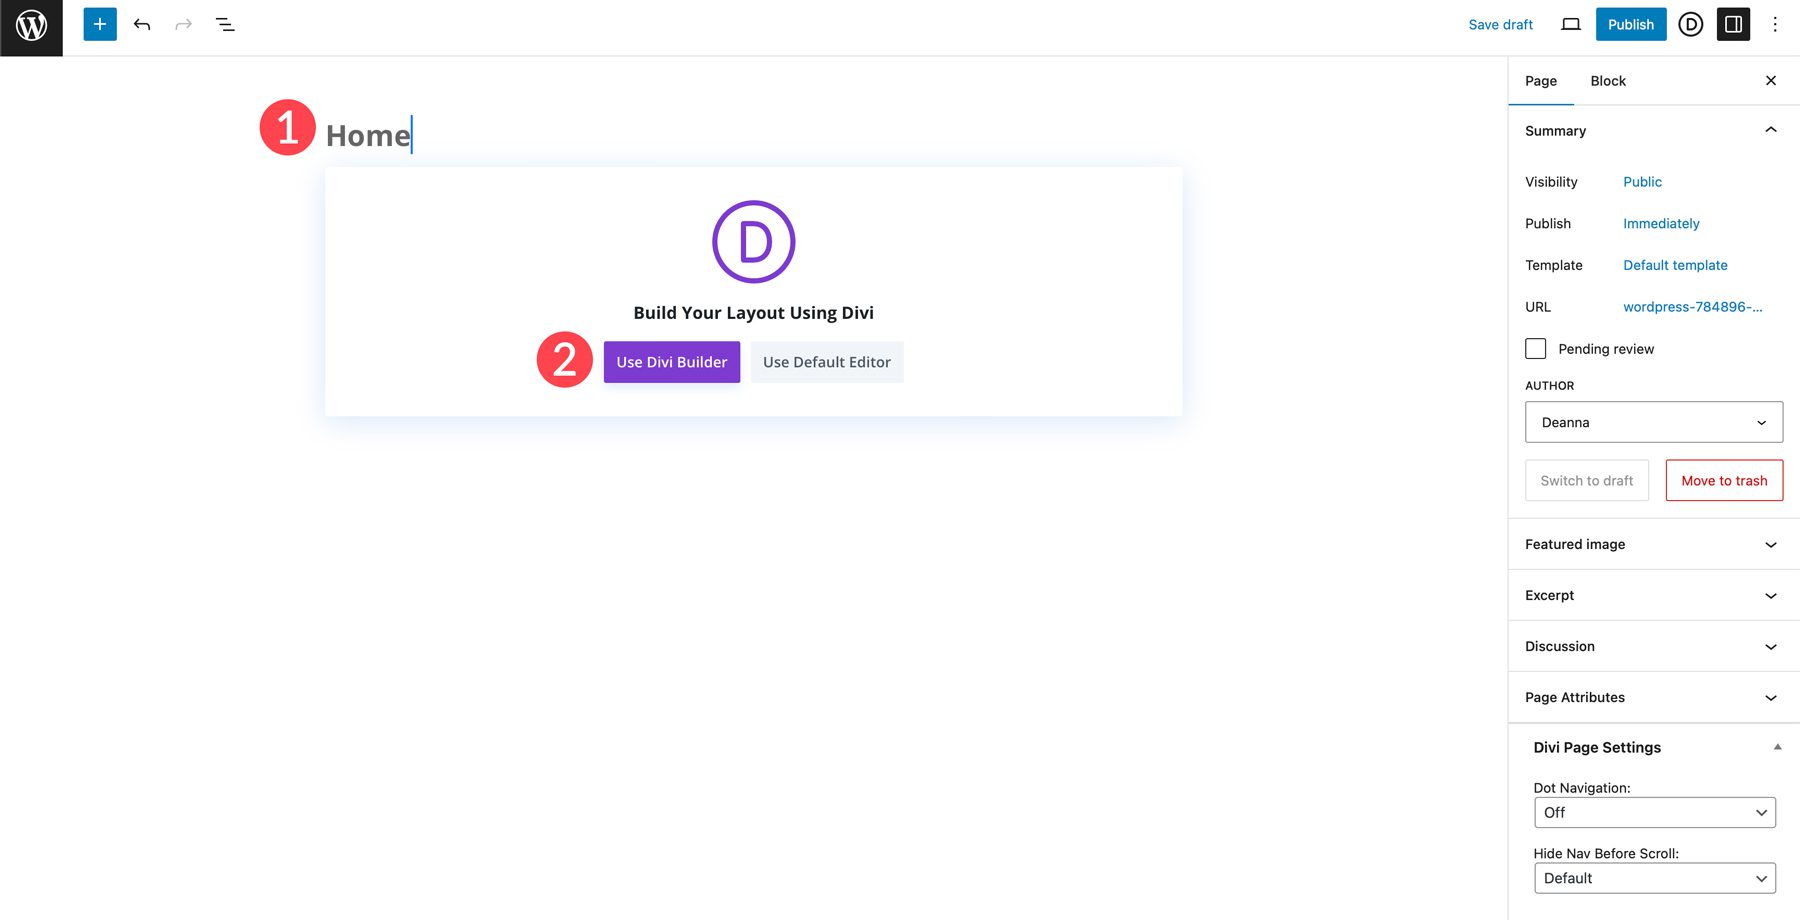
Then select “Build With AI”.

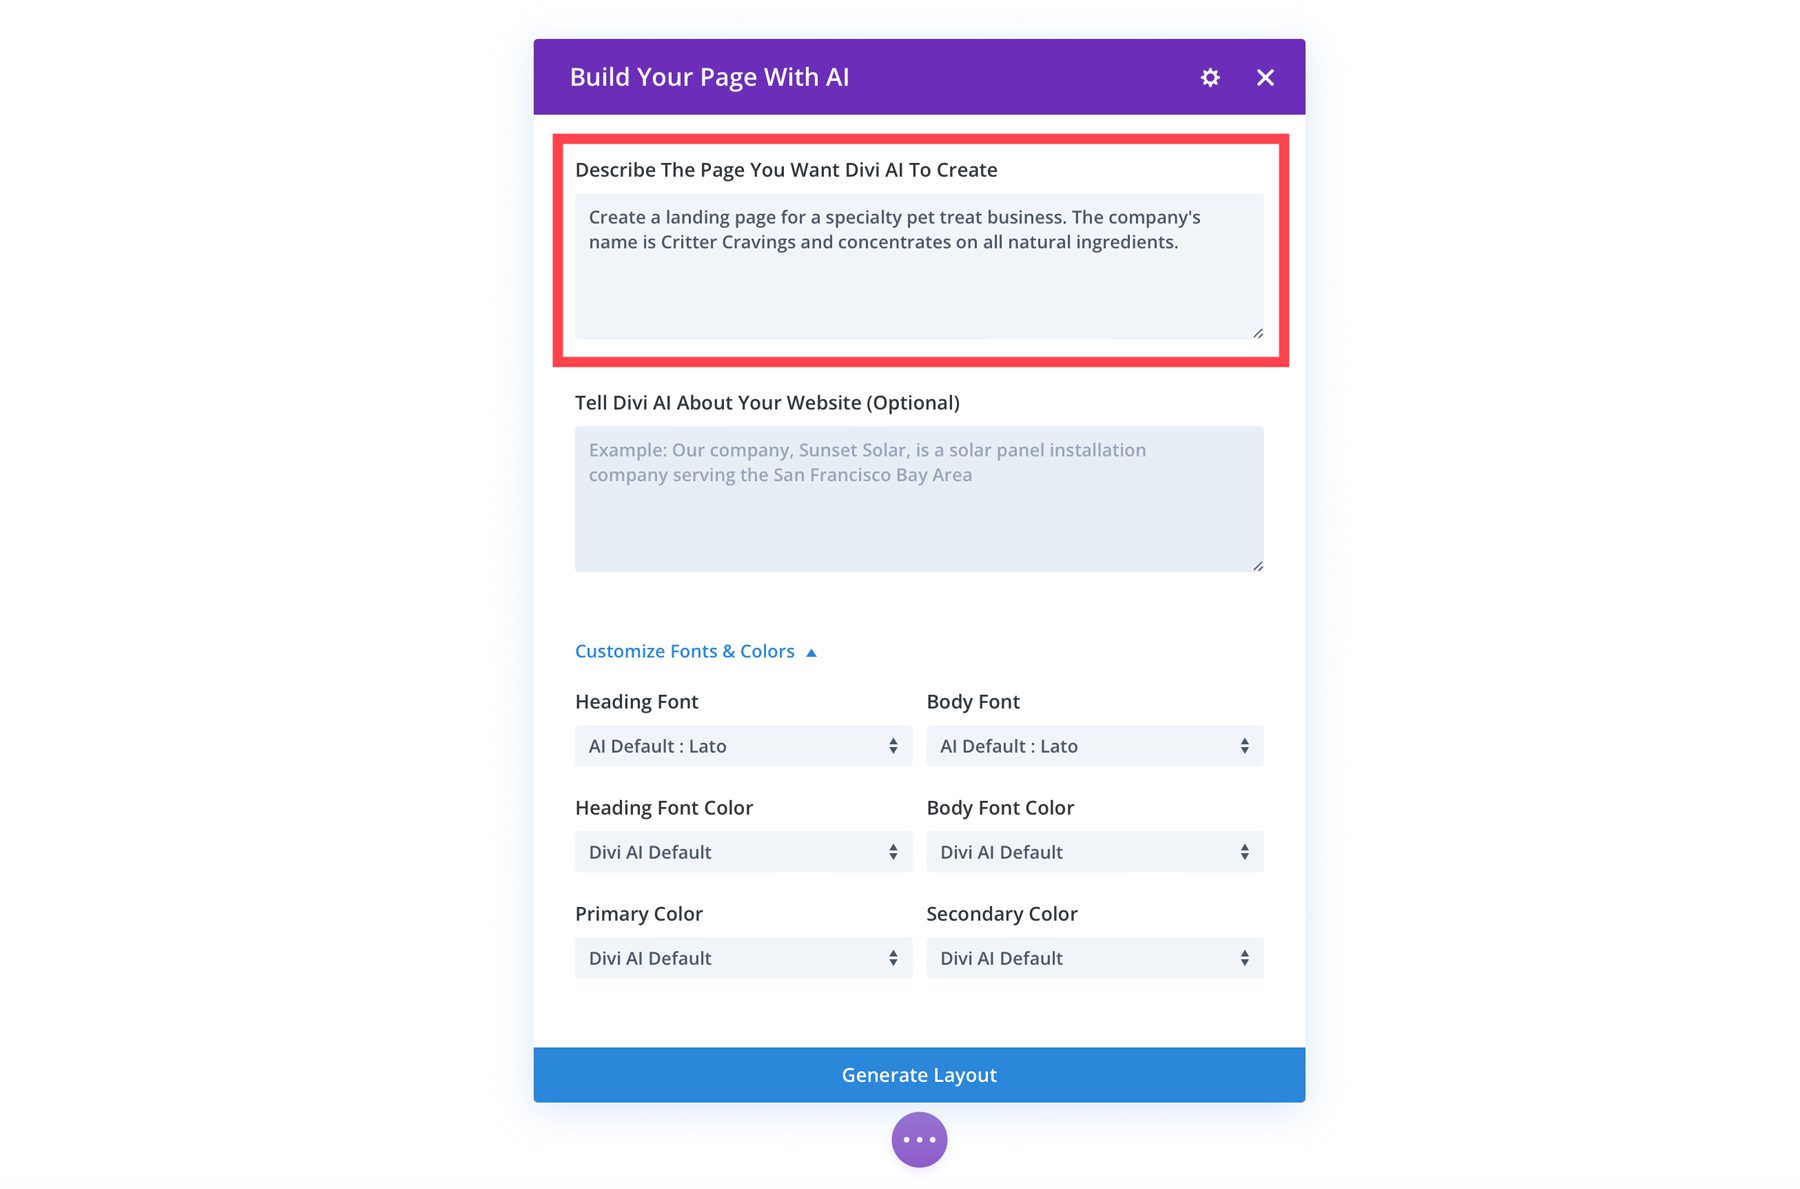
In the first prompt field, enter a brief description of the page you want to create.
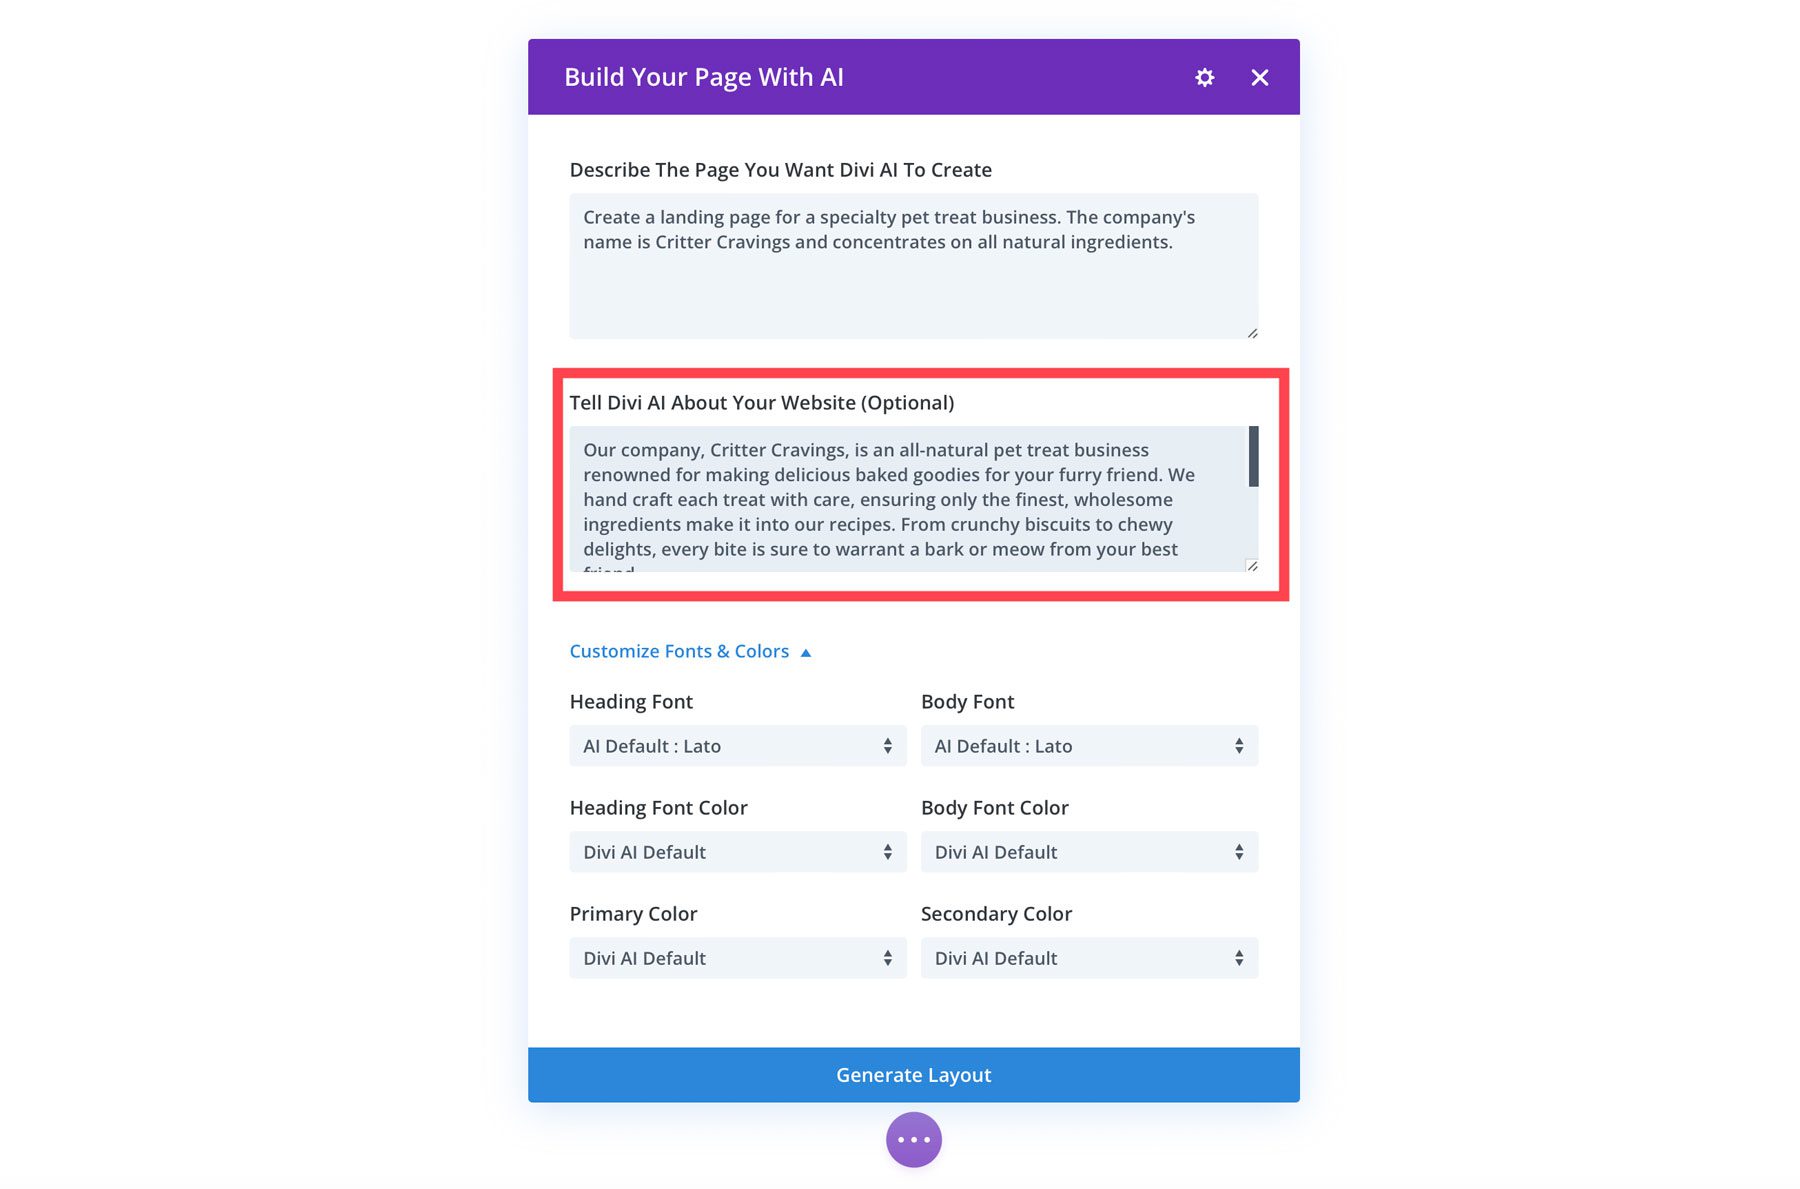
Next, provide some information about your website to give Divi AI more context. This can include details like your company’s mission, target audience, and key products or services.
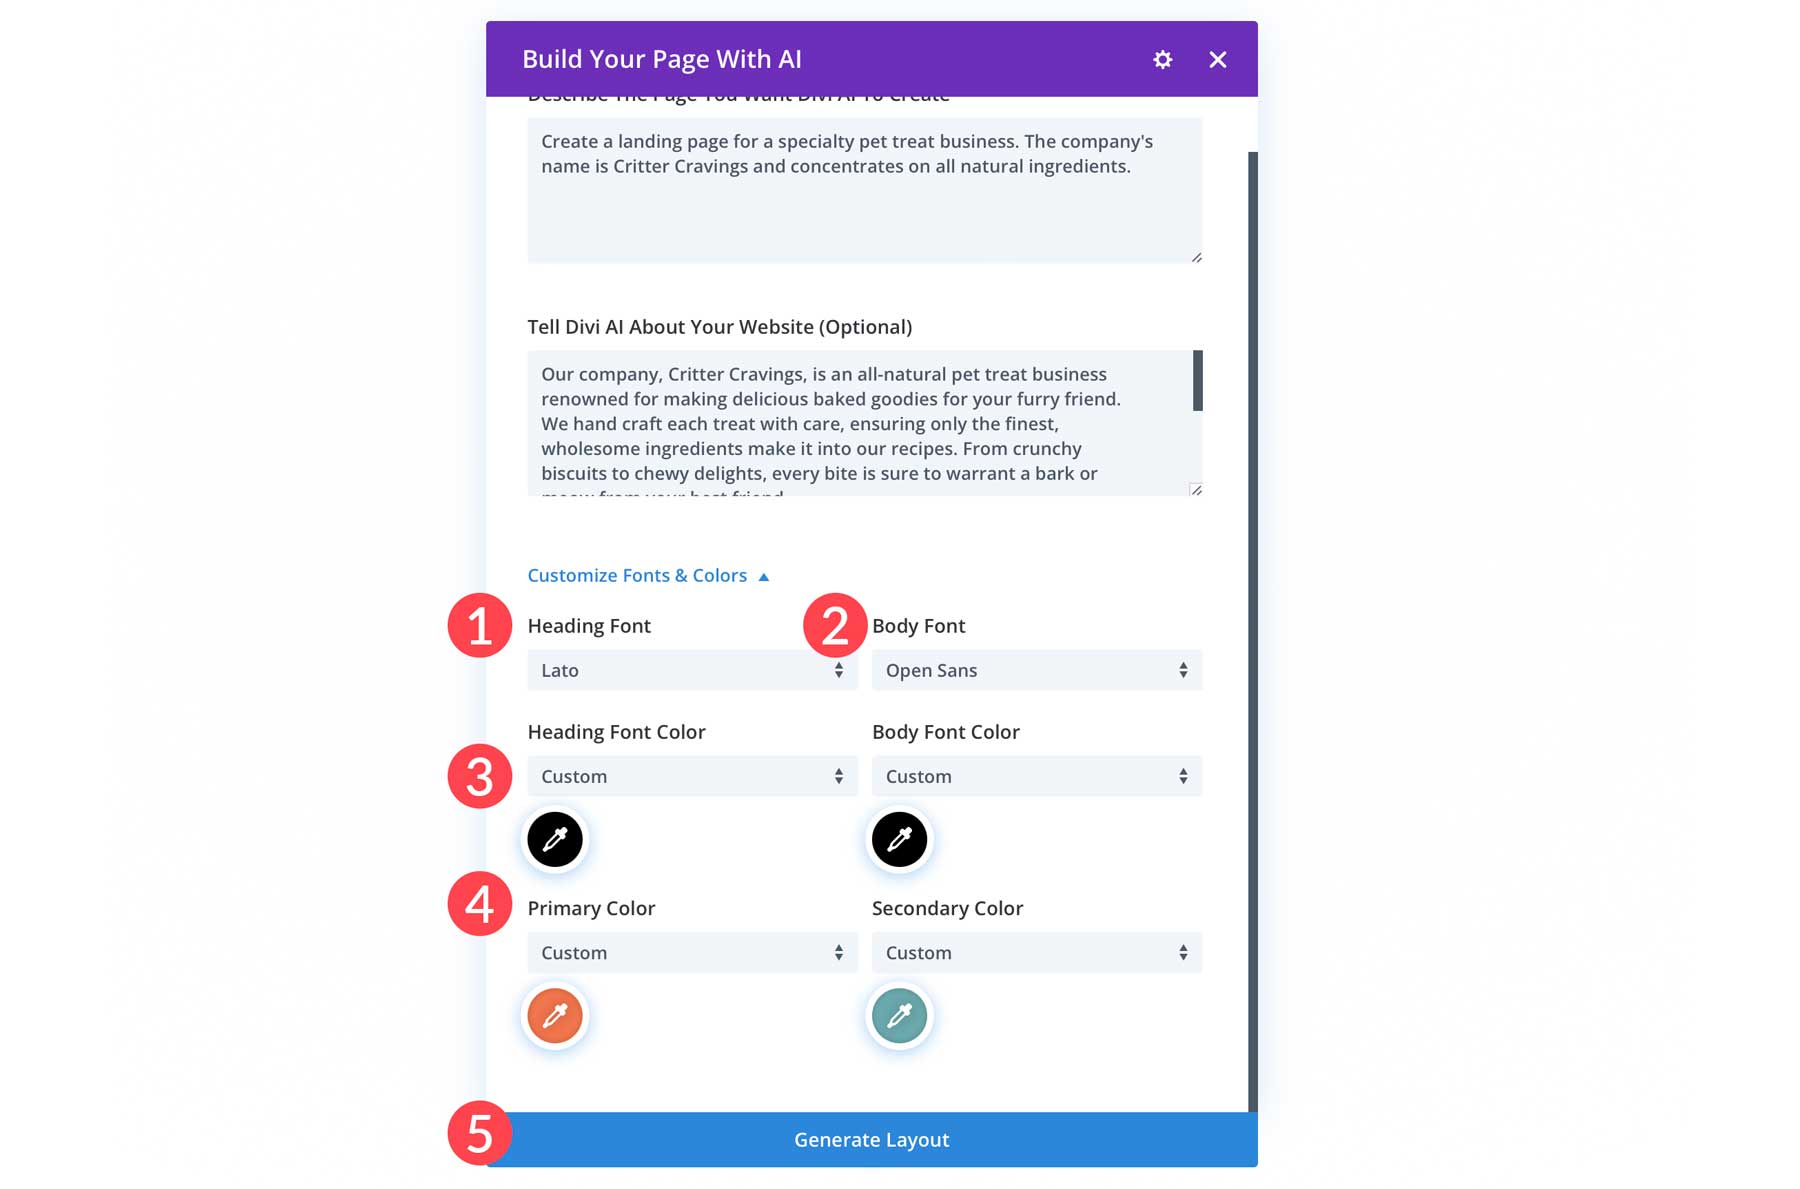
You can also customize fonts and colors to match your brand. Select the fonts you prefer for headings and body text, and choose your primary and secondary colors. Once you’ve made your selections, click Generate Layout.
Divi AI will then generate a wireframe, apply your chosen fonts and colors, and create the text and images for your page layout.

You’ll have created your website’s first page in seconds! Of course, you will want to check it over and make any necessary adjustments. This is only the start of what Divi AI can do.
How to Use Divi AI for Images
Divi Image AI is based on the Stable Diffusion model for generating AI images based on prompts. But what makes Divi AI special is that it is specifically built for Divi, giving you access to a powerful Divi AI assistant for generating images specifically for your website. The options for generating AI images are seamlessly integrated into the Divi builder, making it easier than ever to get the results you need.
How to Generate a New Image with Divi AI
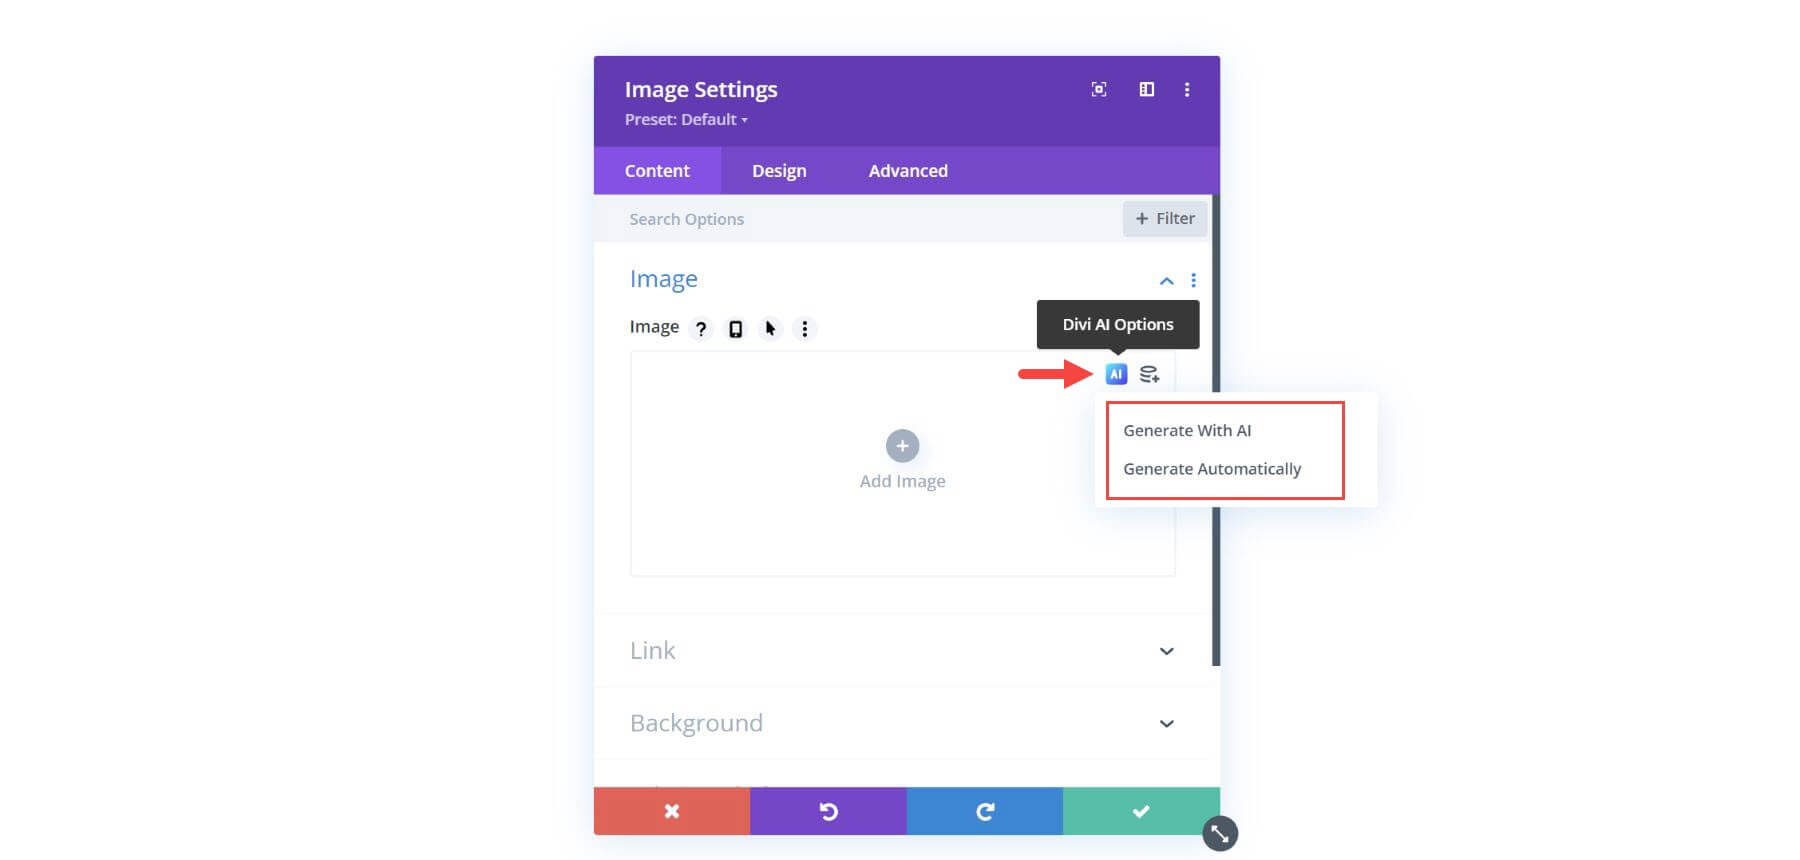
You can generate new images with Divi AI using any Divi element or module that supports image content. For this example, we are going to use an image module. Once you add the image module to the page, hover over the image upload input box and click the Divi AI Options button. Once clicked, you can choose “Generate with AI” or “Generate Automatically.”
If you choose “Generate Automatically,” Divi AI will generate an image based on the context of your website information. For example, if your website is titled “Divi Family Dentistry,” Divi AI will generate images related to dentistry, like a picture of a dentist’s office.

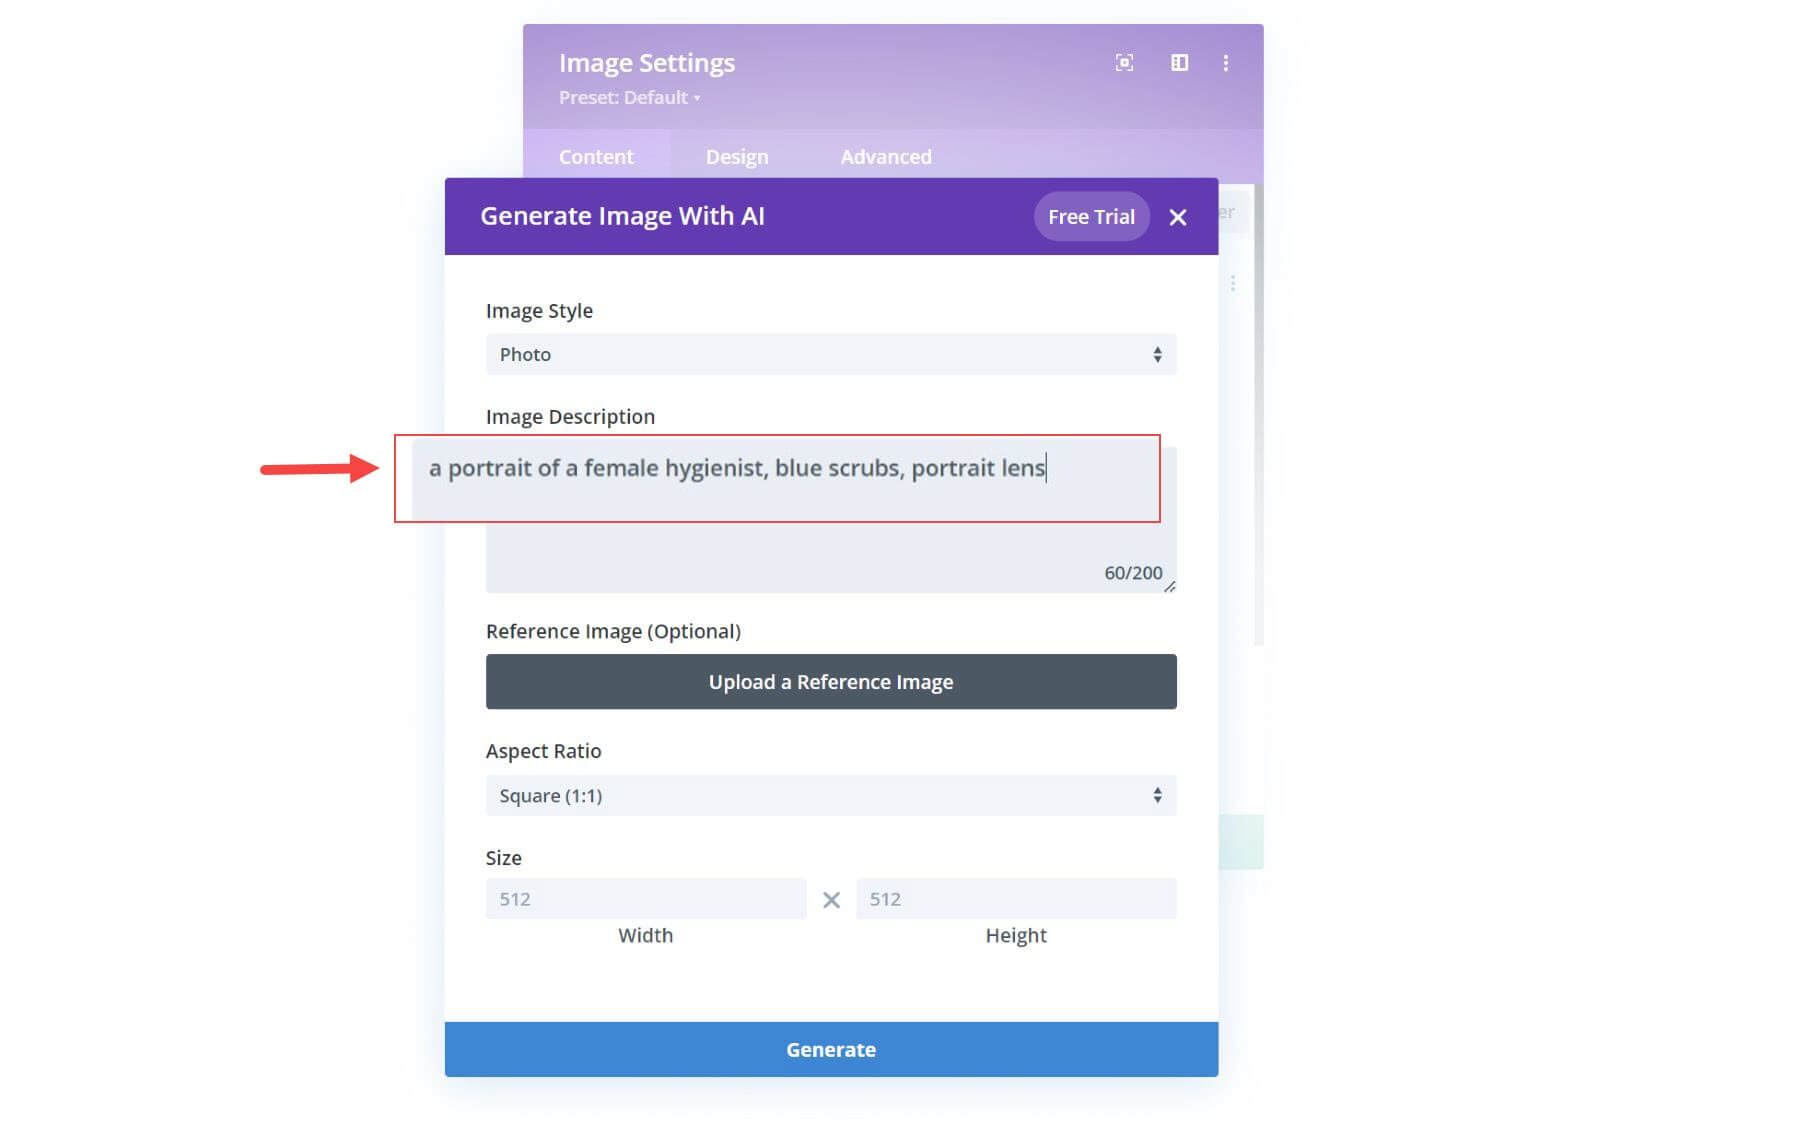
For more targeted results, you’ll want to choose “Generate with AI.” This brings up the Divi AI image generator modal, where you can tell Divi AI exactly the kind of image you want. For starters, you can provide a simple text prompt in the Image Description like “a portrait of a female hygienist, blue scrubs, portrait lens.”
This should give you some great options to choose from. You can then select and use and image that you like. Plus, you can generate more images to find the one you want. Or, you can modify the image with built-in options to generate new results.

Understanding The Divi AI Image Generator Options
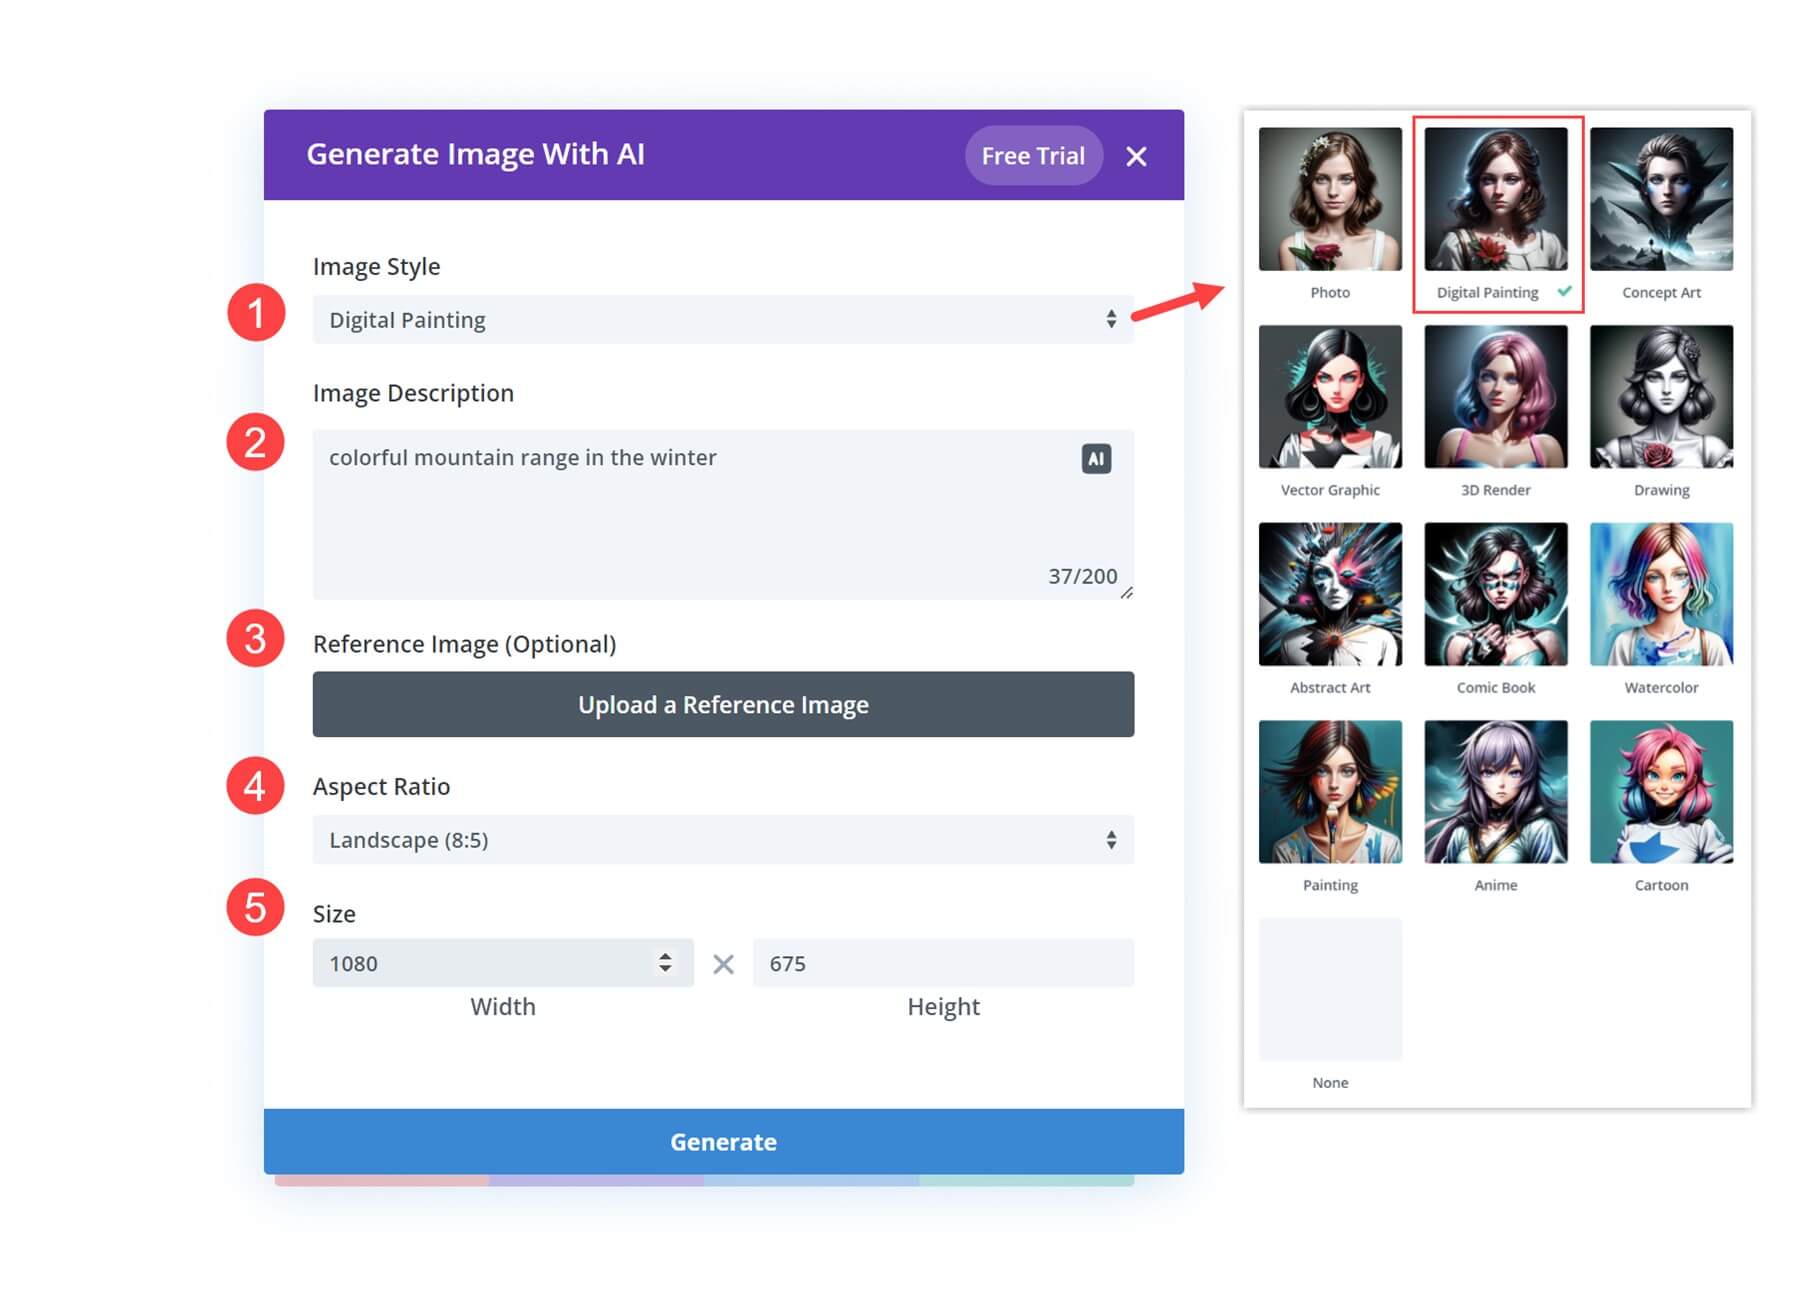
The Divi AI Image Generator Options include the following:
- Image Style
- Image Description
- Reference Image (optional)
- Aspect Ratio
- Size
Using these options, you can create pretty much any image you can imagine with the power of Divi AI.
Here is a brief overview of each of the options at your disposal.
Image Style
You can choose from 12 different image styles when generating your AI image. These include:
- Photo (default)
- Digital Painting
- Concept Art
- Vector Graphic
- 3D Render
- Drawing
- Abstract Art
- Comic Book
- Water Color
- Painting
- Anime
- Cartoon
This gives you a wide range of creative style options to create images for any type of design or website.
Image Description
The image description is where you can add a text prompt that describes the image you want to create. The trick here is to be both concise and descriptive. Finding the right prompts may take a few tries to get the results you are looking for, but it can be fun to experiment with different prompts to achieve magical results.
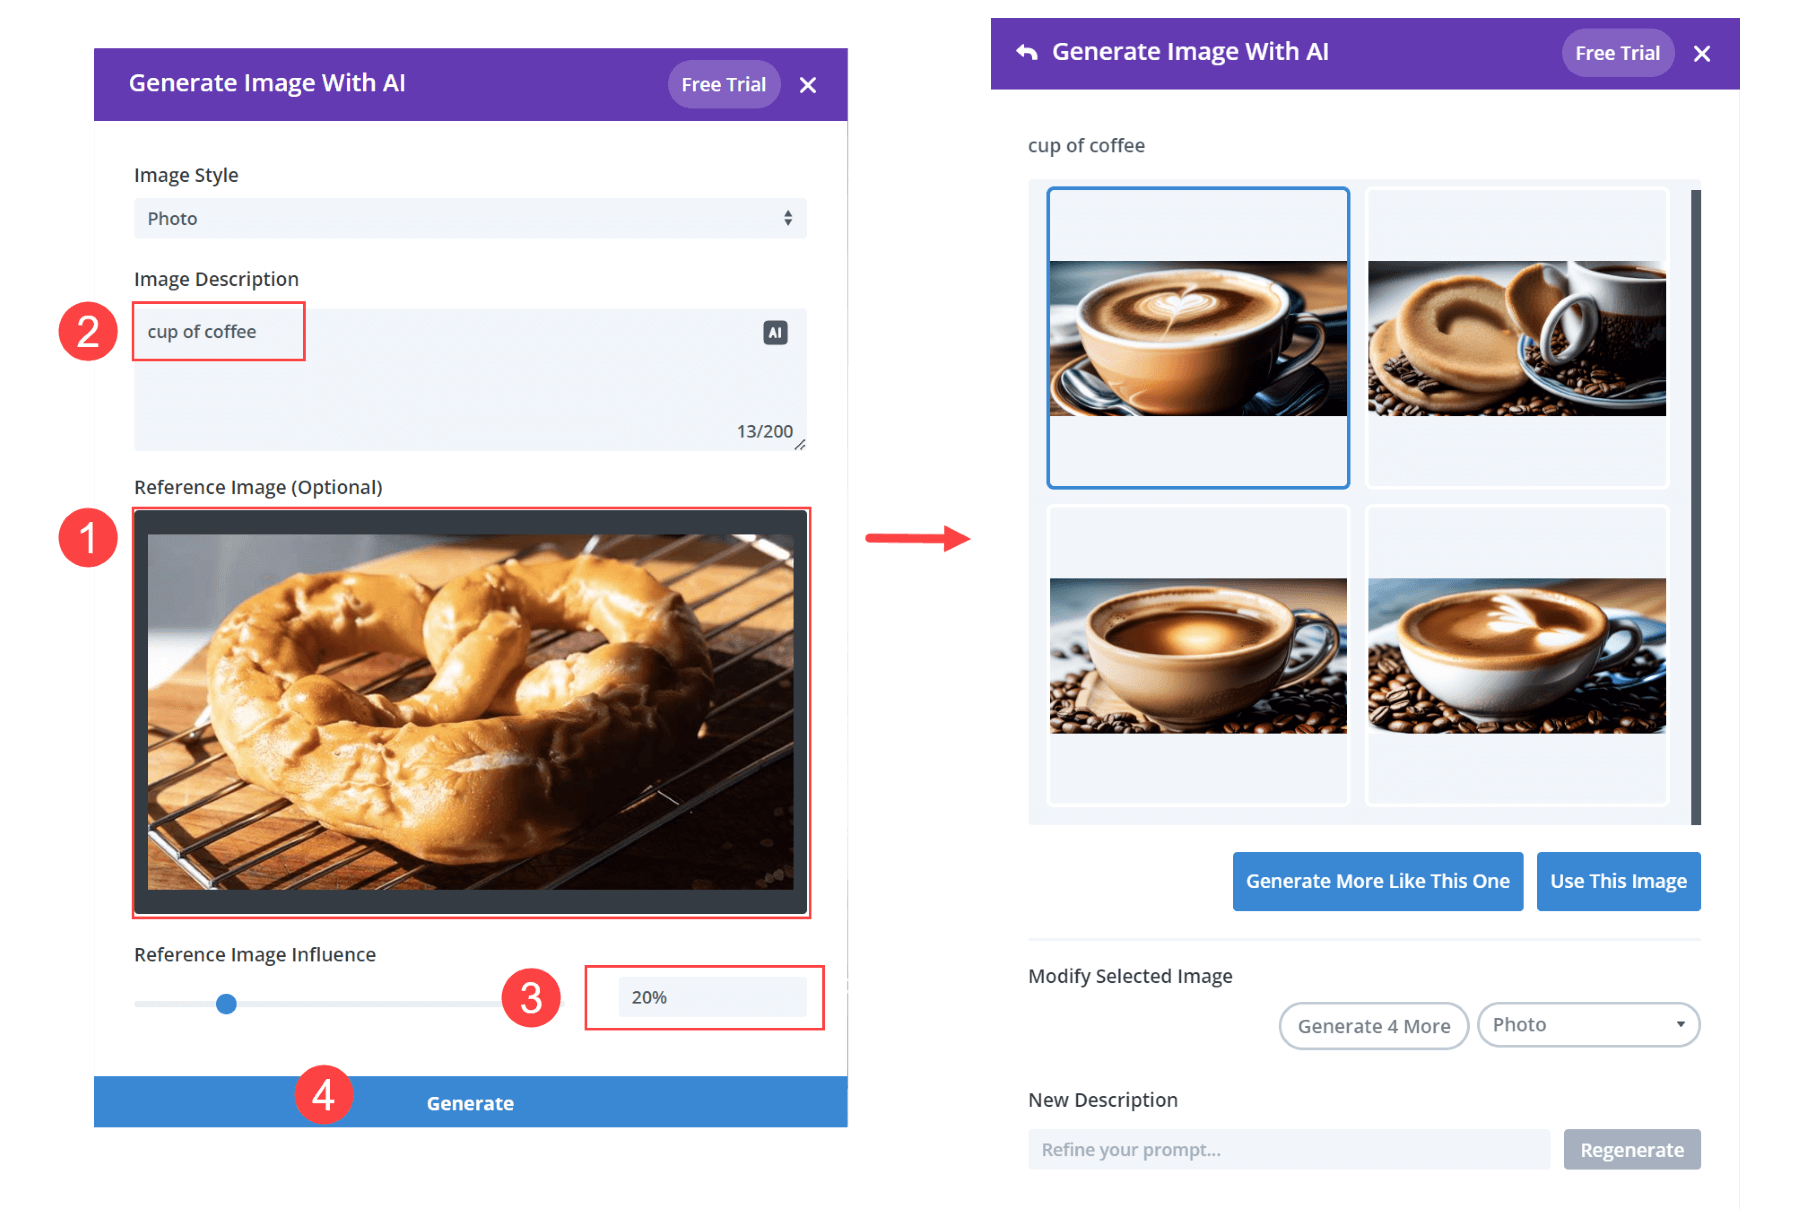
Reference Image
The reference image option allows you to upload an image that Divi AI can use as a style reference. So, if you like the overall feel and style of a certain image, you can upload the image as a reference and then use the image description to make a completely new image based on that reference image.
Furthermore, you can adjust how much you want the reference image to impact your description (and vice versa) by adjusting the Reference Image Influence dial.
The new results can be quite magical.
Aspect Ratio
You can adjust the aspect ratio of your image by selecting one of the following options:
- Square (1:1)
- Landscape (8:5)
- Portrait (3:4)
- Custom Size
This is a convenient way to make sure your image will align with common dimensions used for web design and other custom layouts on your page. For example, if you are looking for a fullwidth image to use for a background, you may want to use “Landscape”, but if you are looking for an image for blurb module, you may want to use “square.” Choosing to use a custom size will allow you to designate the exact dimensions you want for an image. This is a powerful tool for web designers who want to find unique images with the exact dimensions and resolution they need.
Size
Once you select an aspect ratio for your Divi AI image, you can use the size option to adjust or scale the image size while keeping the aspect ratio in place. Of course, if you choose Custom Size, you can adjust both the width and height options independently.
NOTE: If you are using a reference image, the dimensions of that image will be used when generating a new image with Divi AI.
Improving AI Images and Using Quick Actions
You can improve any existing image in Divi using Divi AI. In fact, some of the best results can come from improving images that you already generated by Divi AI. To improve an existing image with Divi AI, click the Divi AI options button when hovering over an image already loaded inside the Image Upload input box. This will bring up a drop down menu with additional options and quick actions including:
- Generate with AI
- Improve with AI
- Generate and Replace (quick action)
- Reimagine (quick action)
- Change Style (quick action)
Choosing the Generate with AI option will allow you to start the AI image generation from scratch. But choosing the “Improve with AI” option will load the AI image generator module with the current image used as the reference image. This will allow you to make adjustments using the current image as a reference (as discussed previously). The “Generate and Replace” quick action option is basically another way to generate a new image automatically without using the current image as a reference.
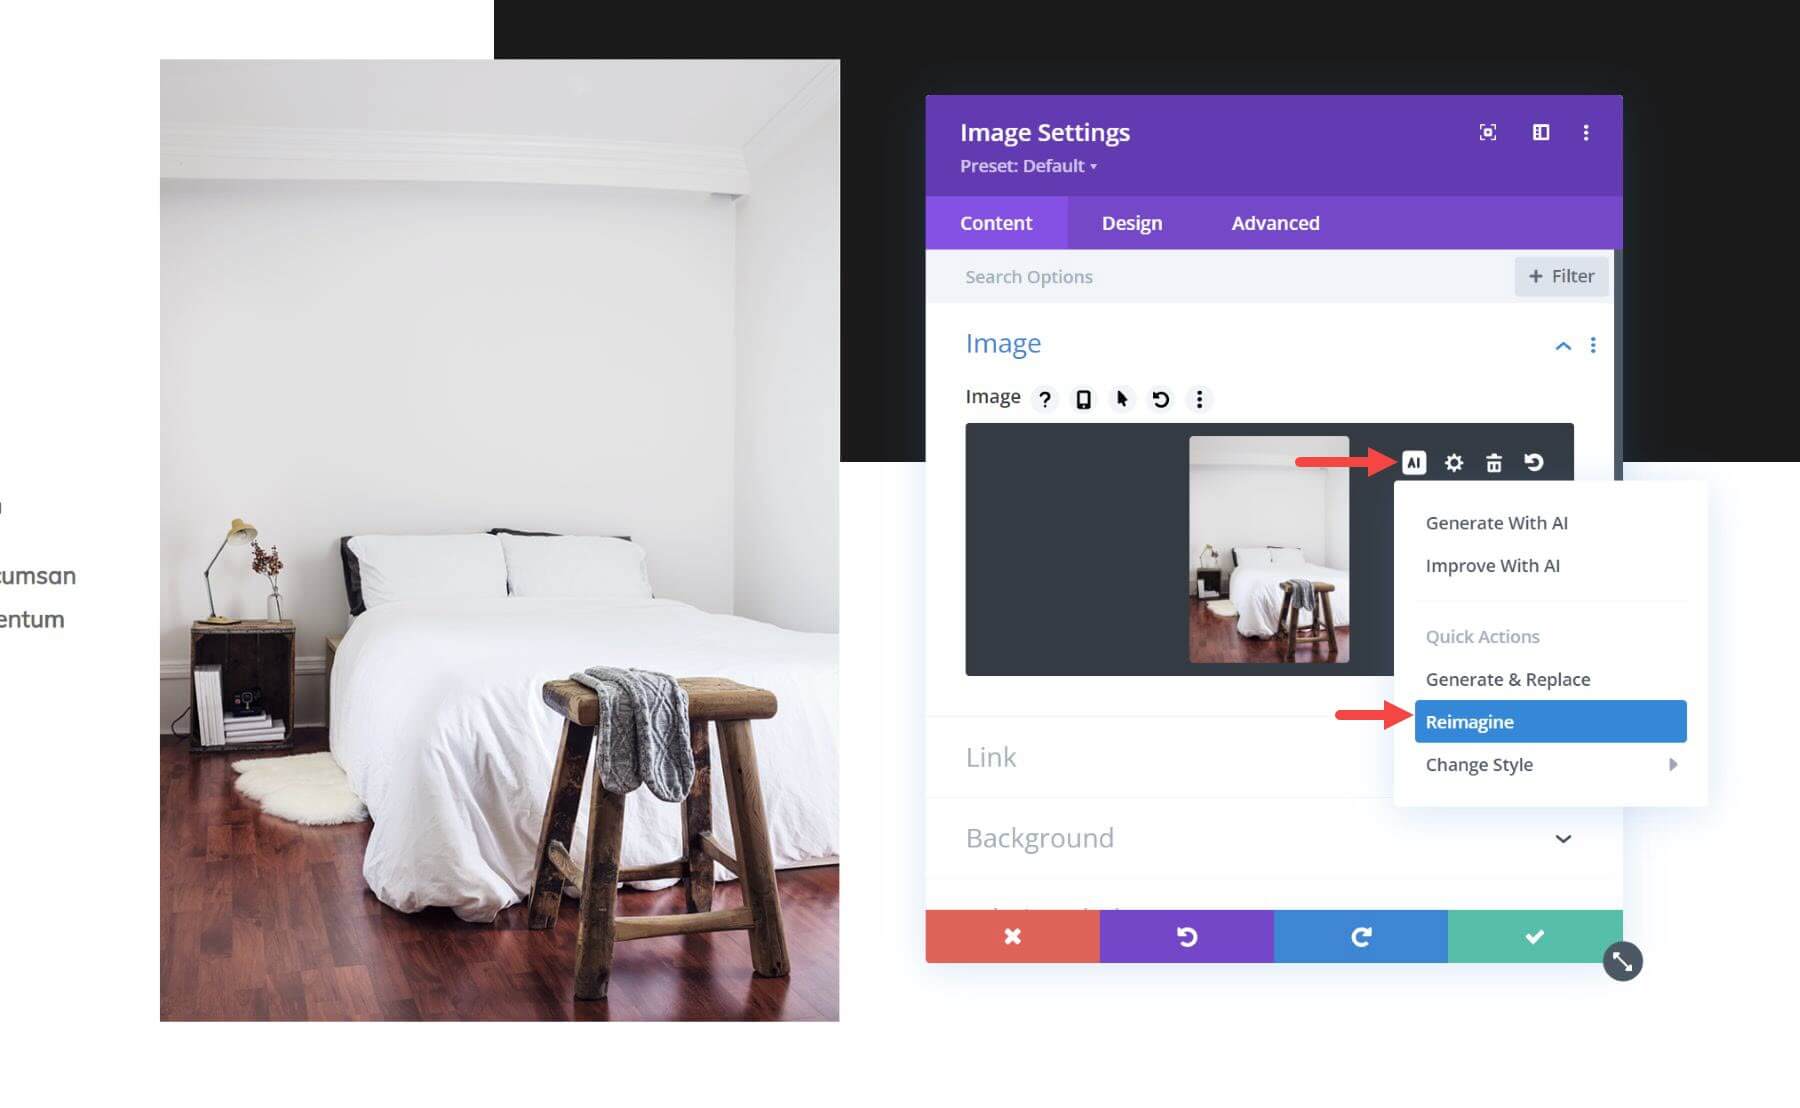
Example Use Case: Using the Reimagine Quick Action to Improve an Image
One of the most useful quick action options for an existing image is the “Reimagine” option. This can transform regular images into magical works of art in a single click.
Here is an example use case of of combining the “Reimagine” quick option on an existing image and then improving it with a simple prompt with Divi AI.
First, choose the “Reimagine” option for the existing image Divi AI Options.
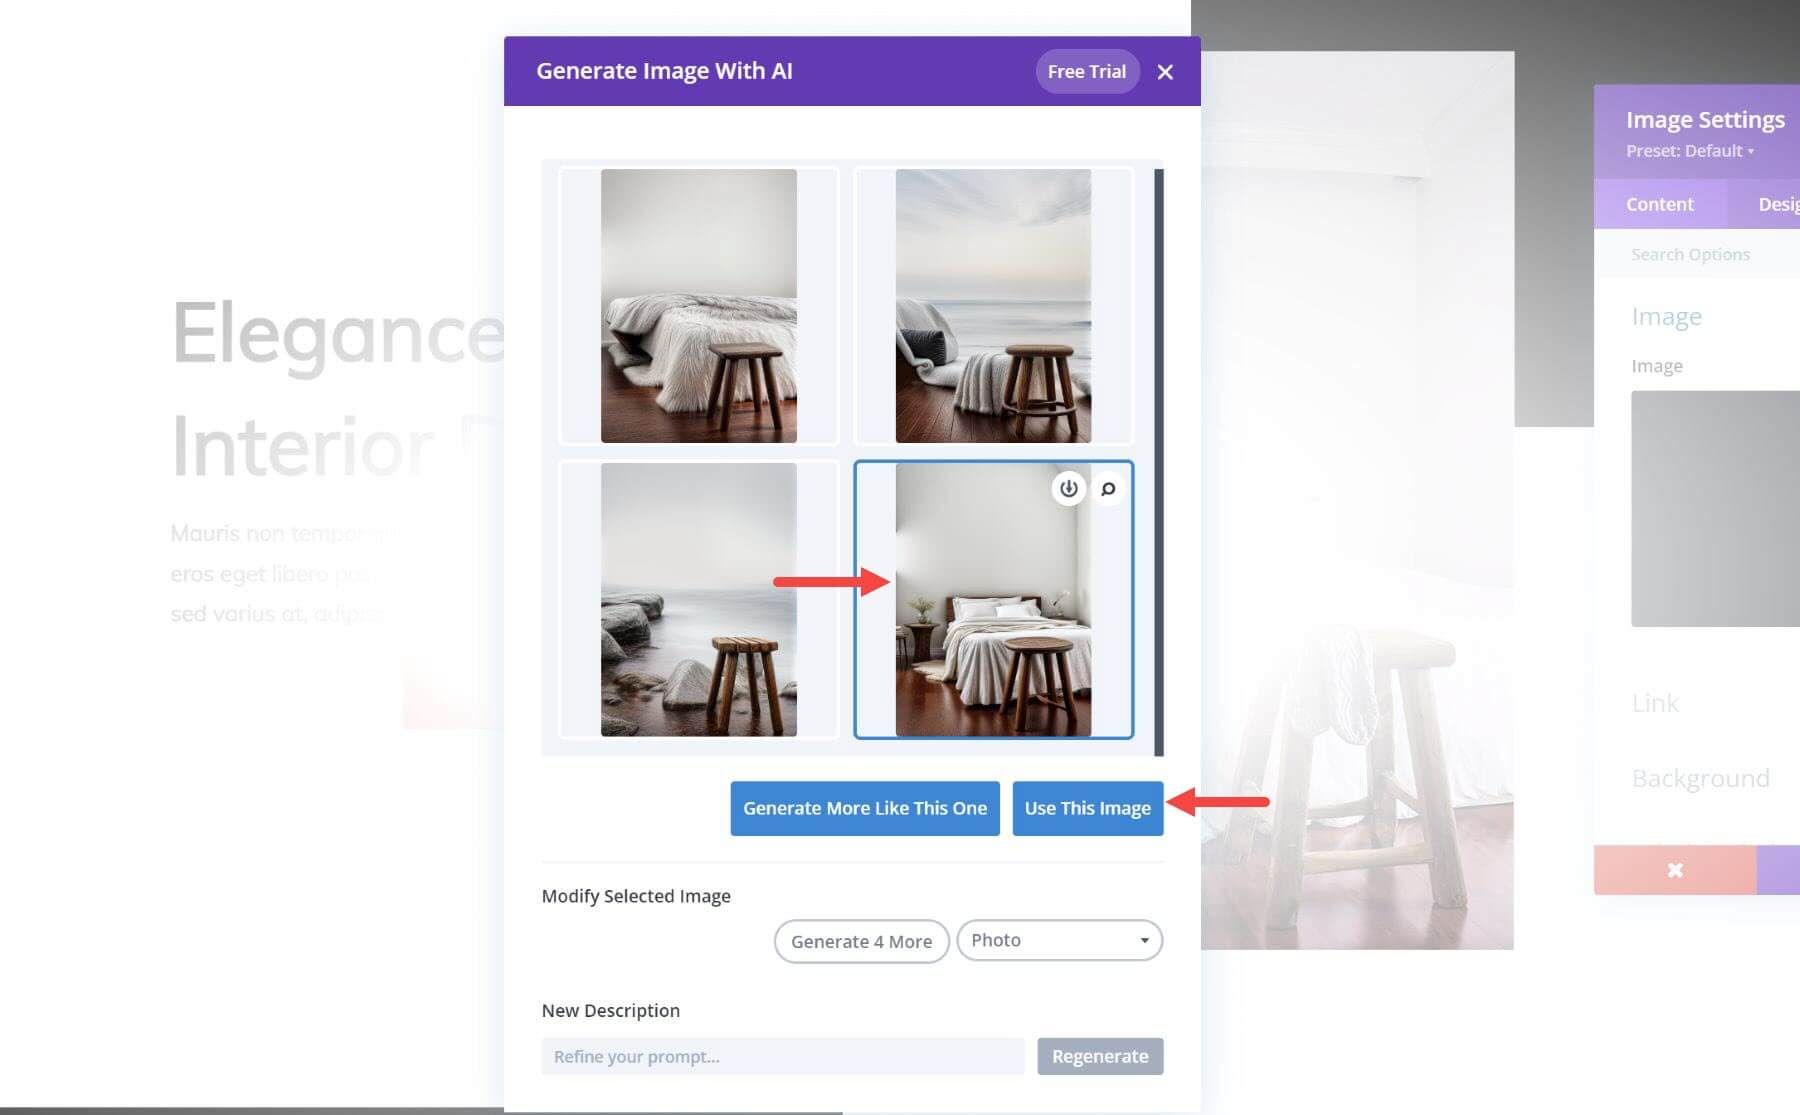
Then choose the best image from the suggestions given by Divi AI.
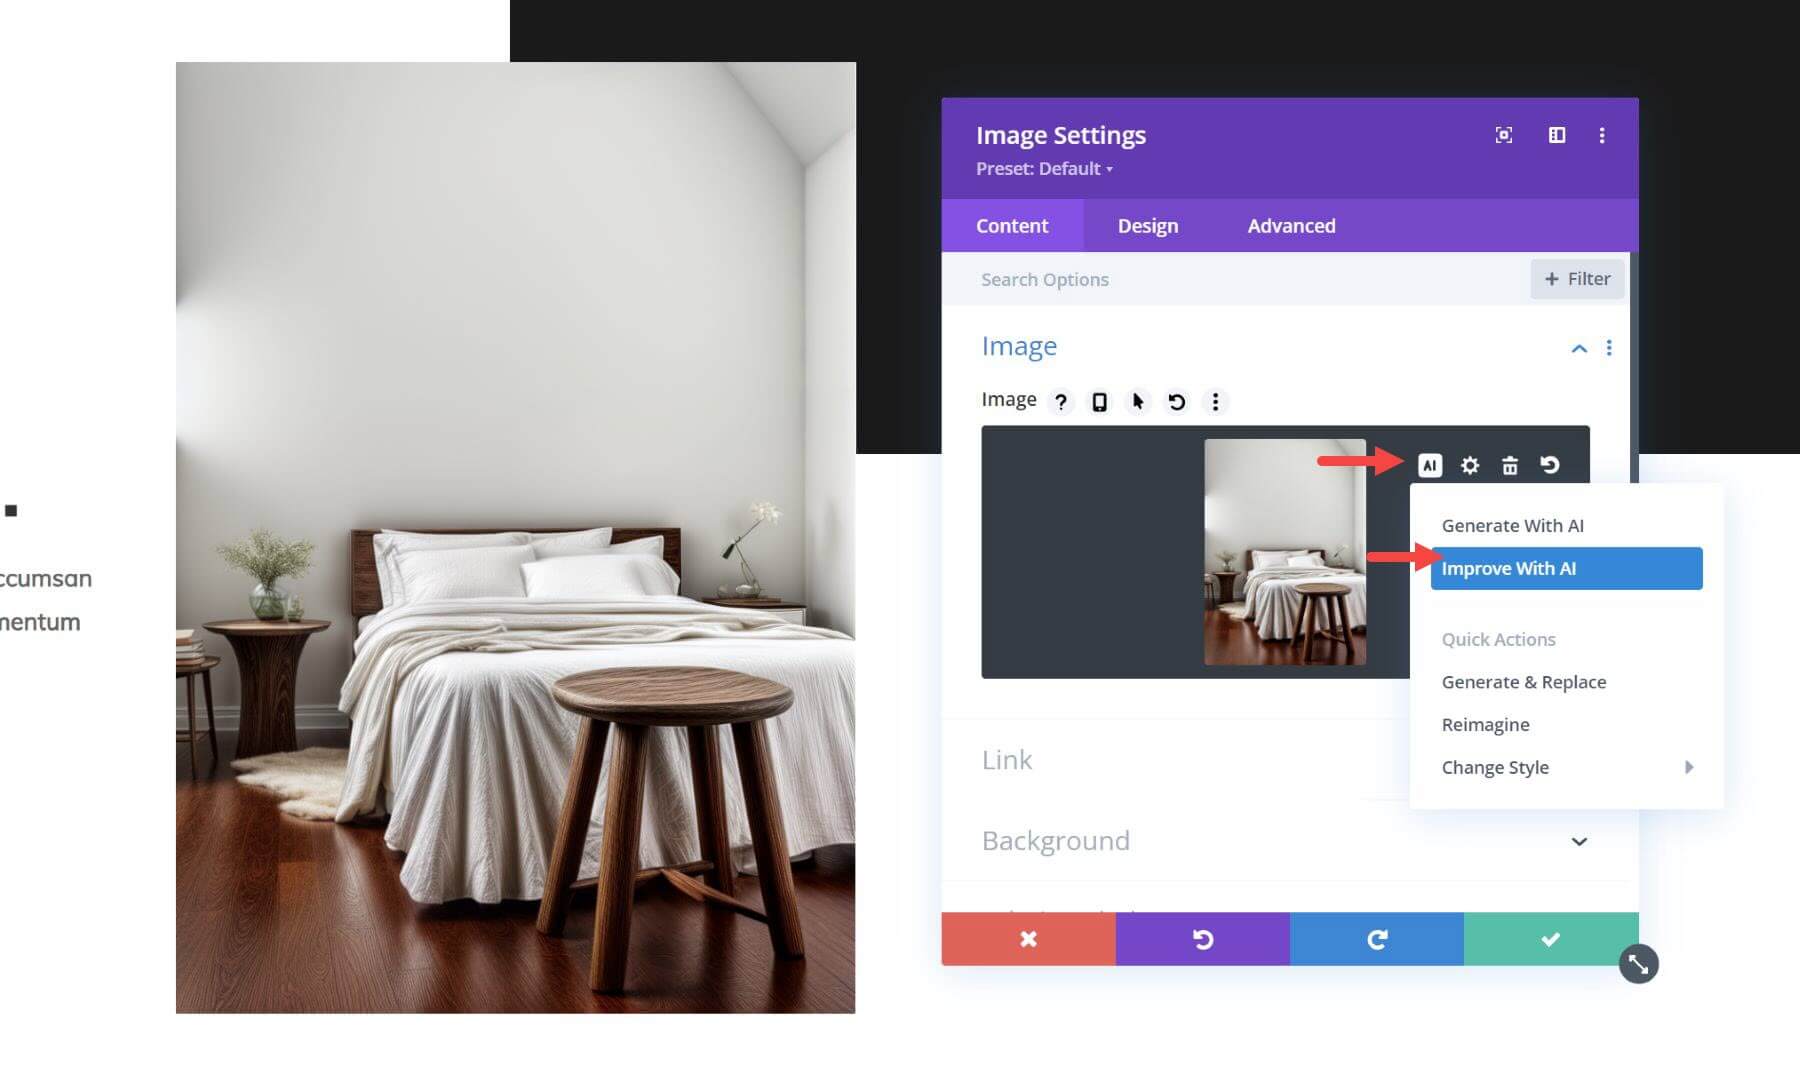
After that, choose “Improve With AI” for the new image.
And add a short description to add a minor change to the image. In this case, I’m using the description “with dark orange pillows”. Then click the generate button and choose your favorite result from the suggested images.
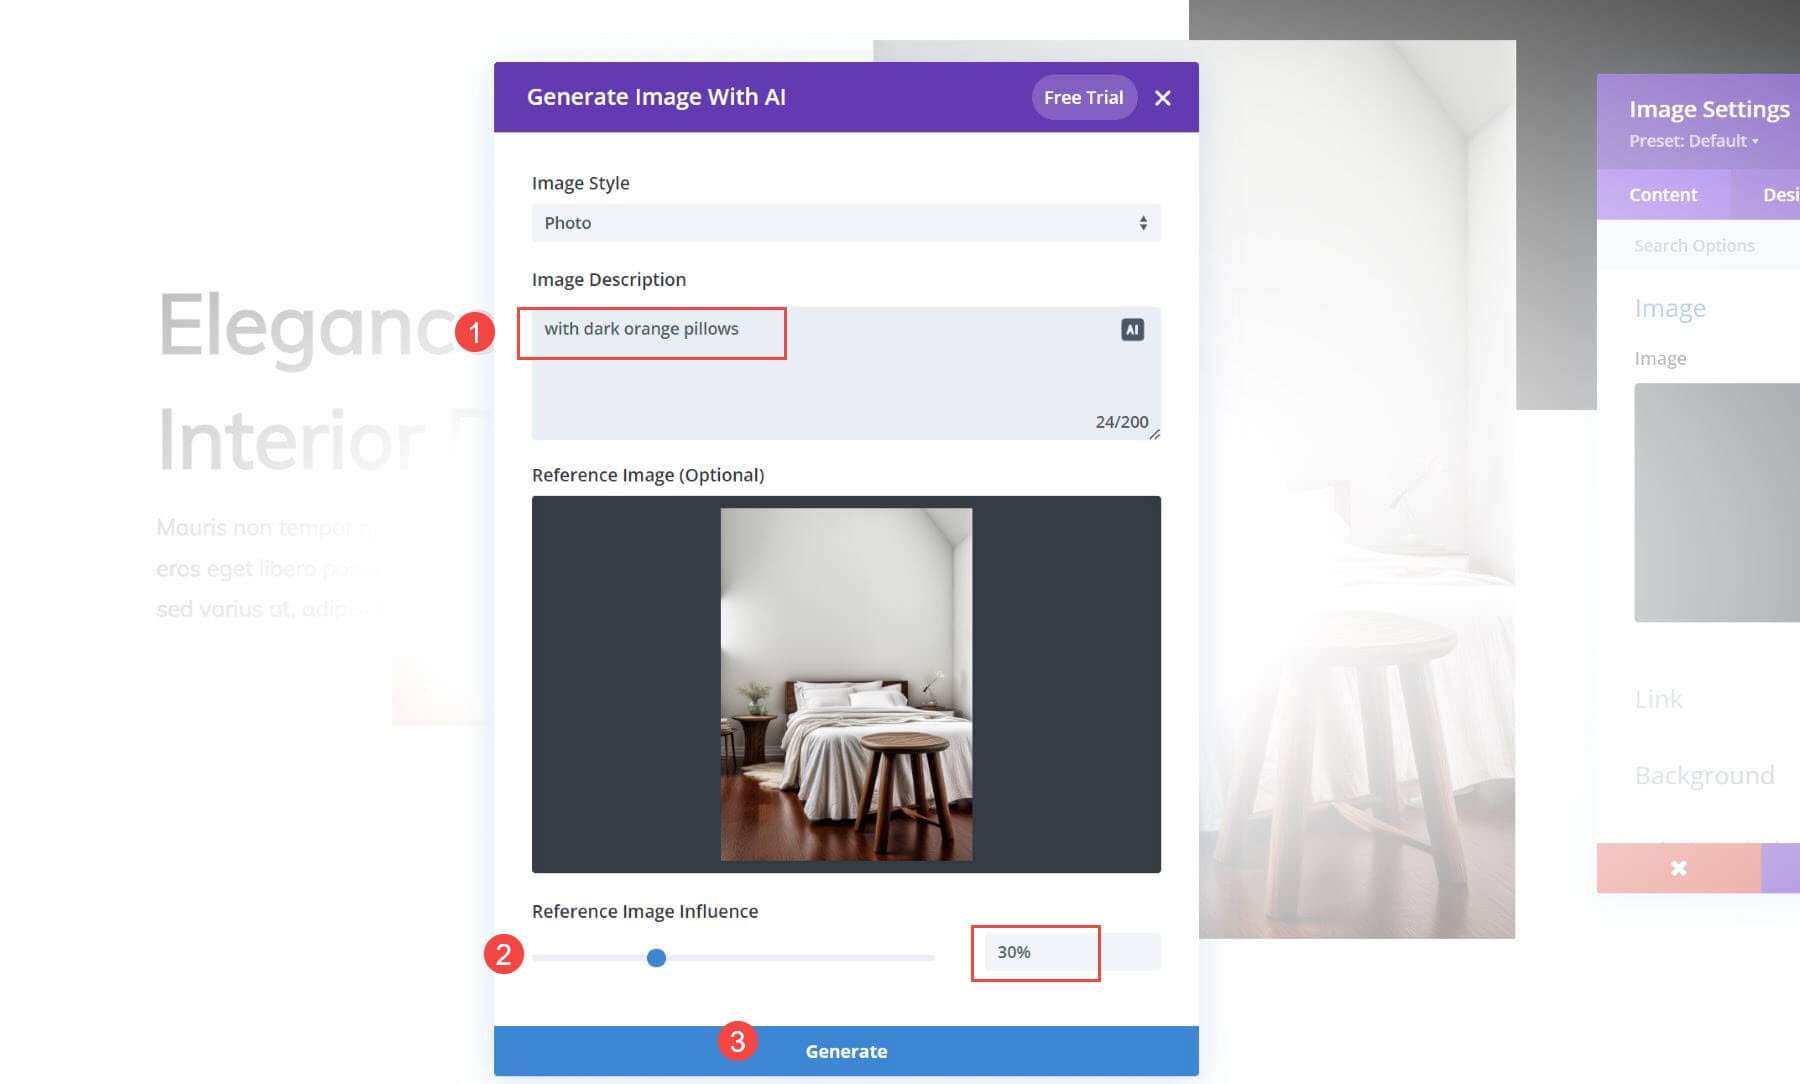
Now look at the new image that matches the color theme of current layout.
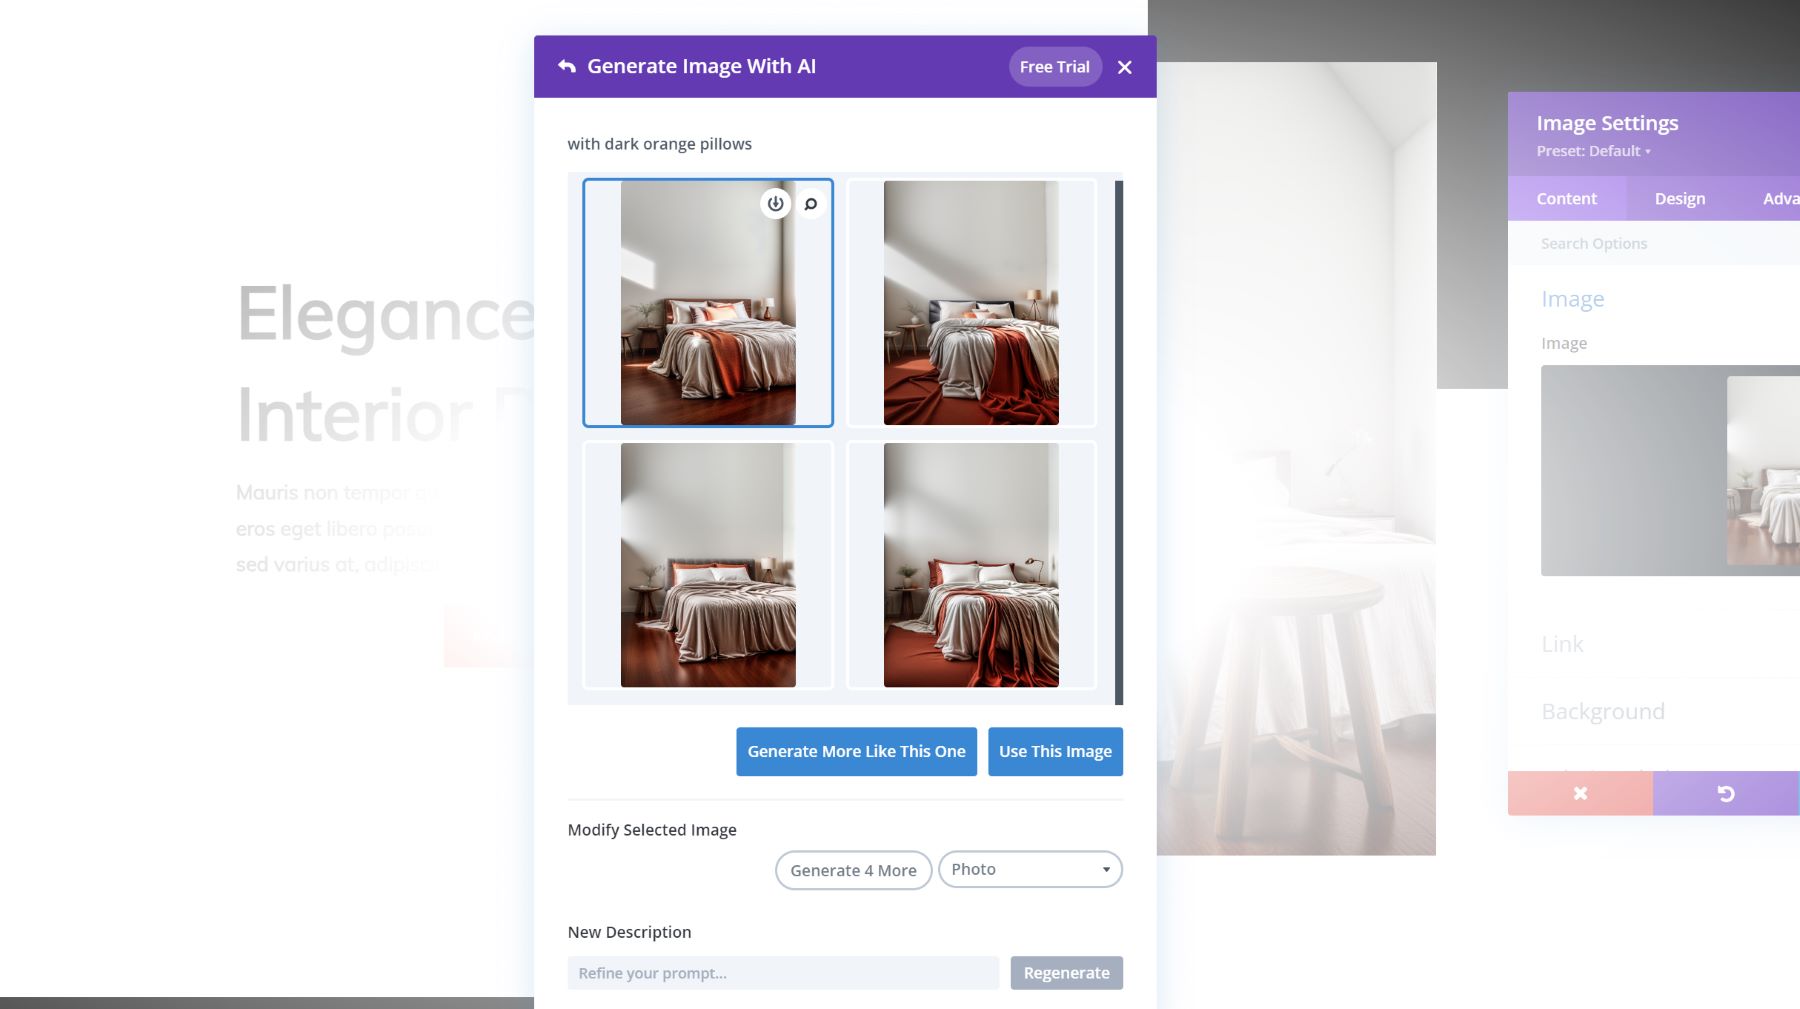
The result is quite magical!

How to Use Divi AI for Text
With Divi Text AI, you can generate any type of text content you need for your website. It truly is a powerful AI writer for your Divi website. Because Divi AI understands your existing content, you can generate content in the context of your website or page. This allows you to keep your copy on brand and write like a professional so you don’t have to hire one.
Let’s jump into the basics of how to get started with Divi Text AI.
How to Generate Text for Your Website Automatically
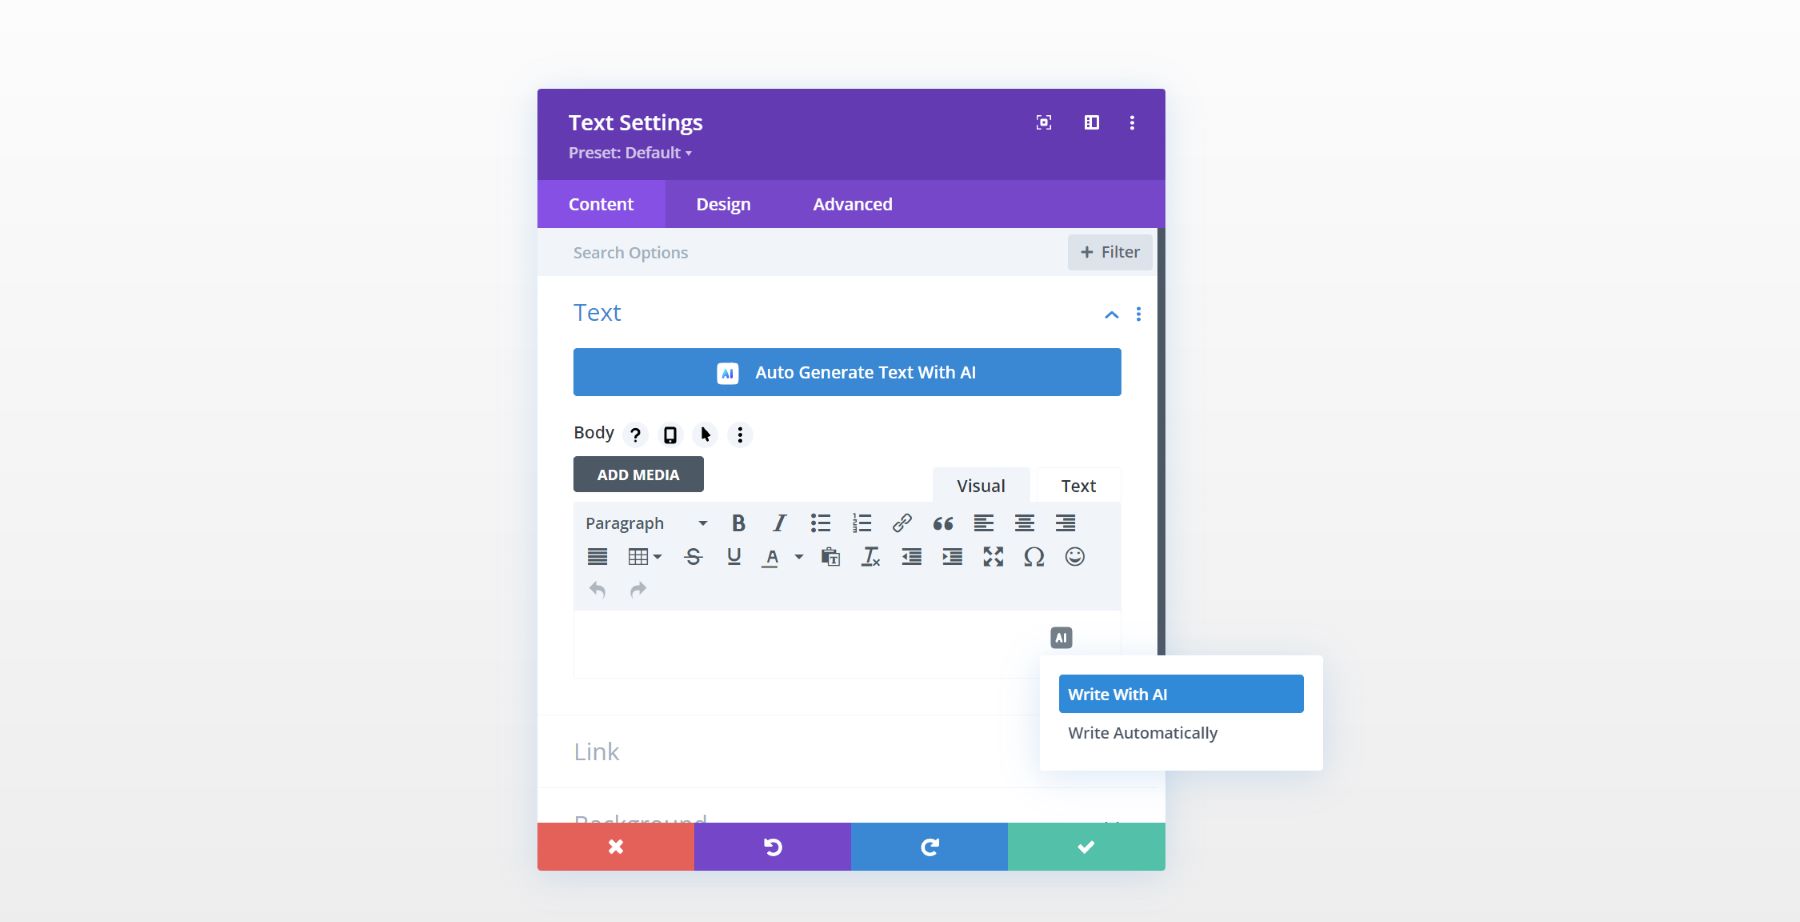
To generate text for you site with Divi AI, you can use any module that supports text input. For this example, we are going to use a blurb module. This module allows you to add text for a Title and a Body paragraph. You’ll notice a large button at the top of the content options that allows you to “Auto-Generate Text With AI.”
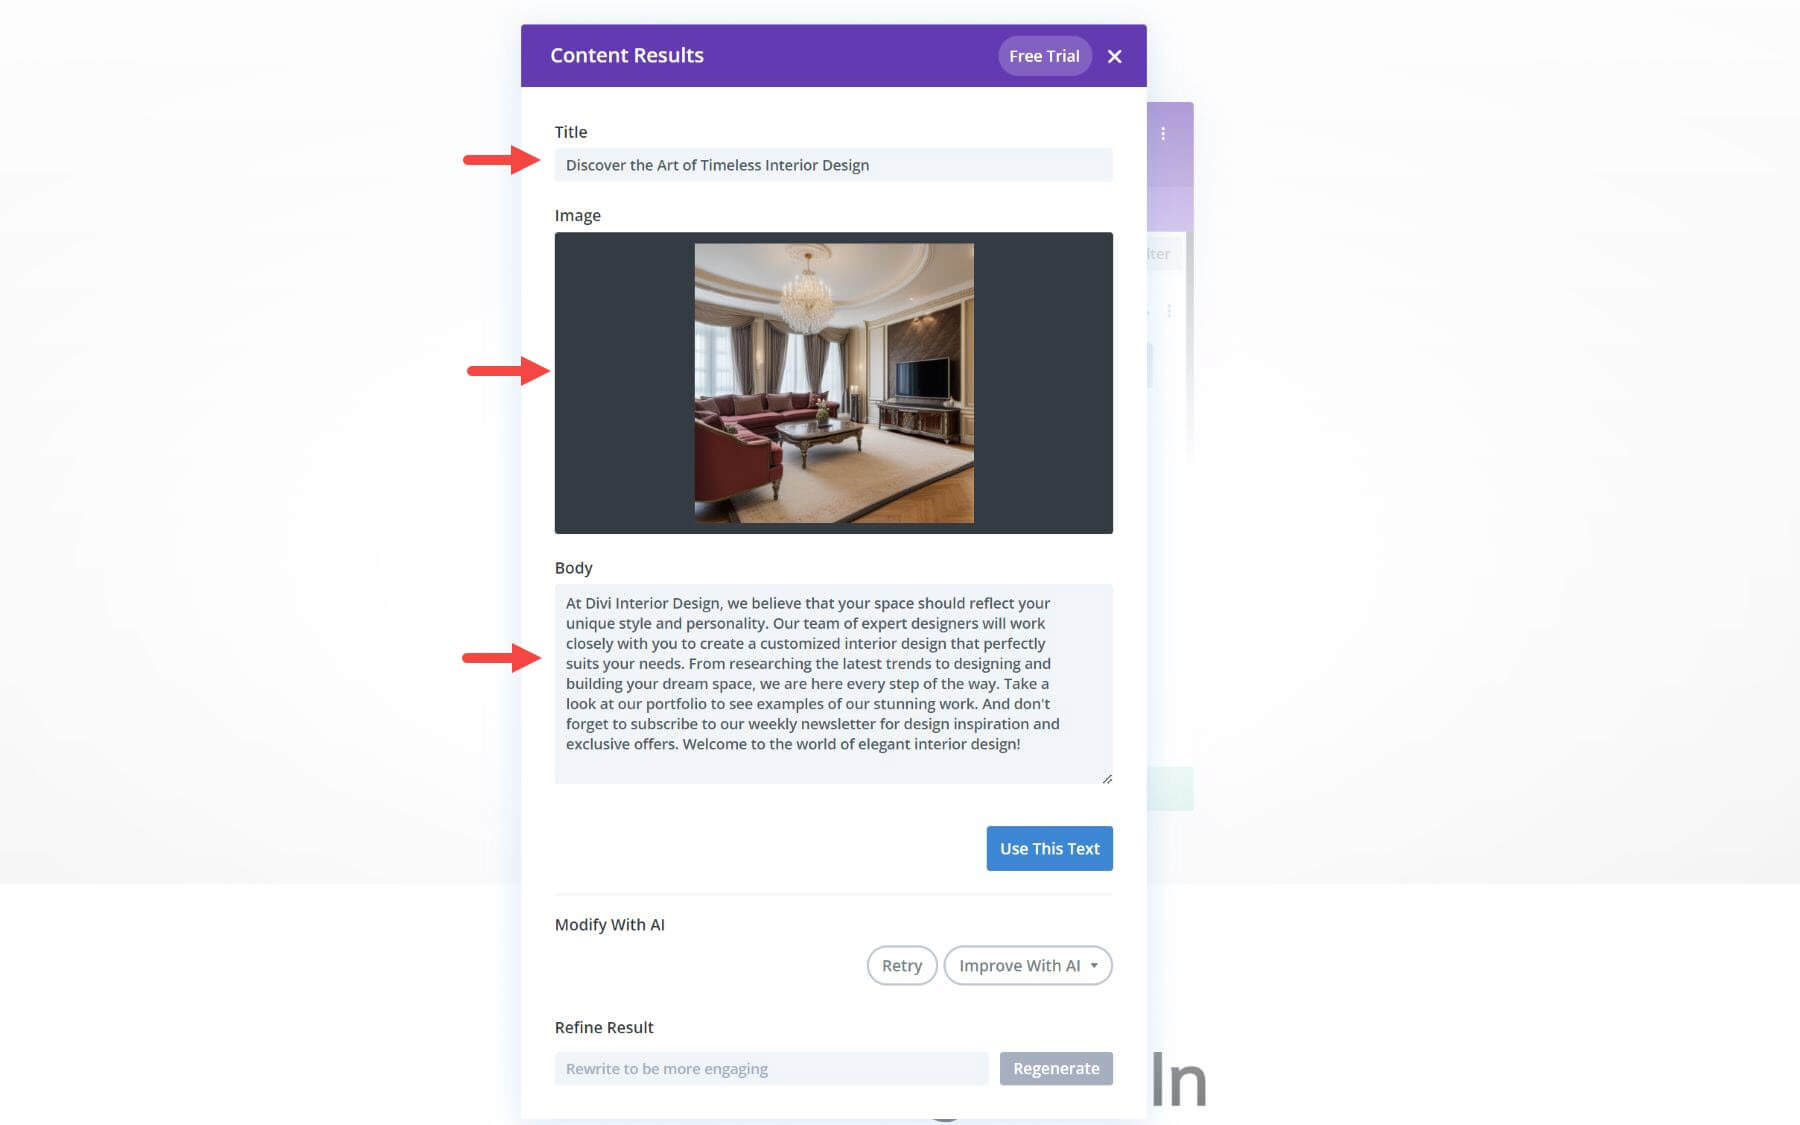
Clicking this will allow Divi AI to automatically fill the Title and Body text input boxes. Since my current website is an interior design company, Divi AI will suggest content related to my website information. And since the blurb module also includes an image, it will generate an image automatically as well!
You can always hover over any individual text input field and click on the Divi AI Option button. Once clicked, you can choose “Write with AI ” or “Write Automatically.”
If you choose “Write Automatically,” Divi AI will generate an text based on the context of your website information the current field type. For example, if it is a Title input field, Divi AI will automatically generate a suggest title.
The results will be similar to using the one-click Auto-generate button for the entire module, only this option auto-generates content for text fields individually.
Using The Divi AI Text Generator to Write Content
If you want more control over the content that is generated, you’ll want to choose “Write with AI.” This brings up the Divi AI Text generator modal, where you can tell Divi AI exactly the kind of content you want.
Divi AI Text Generator Options
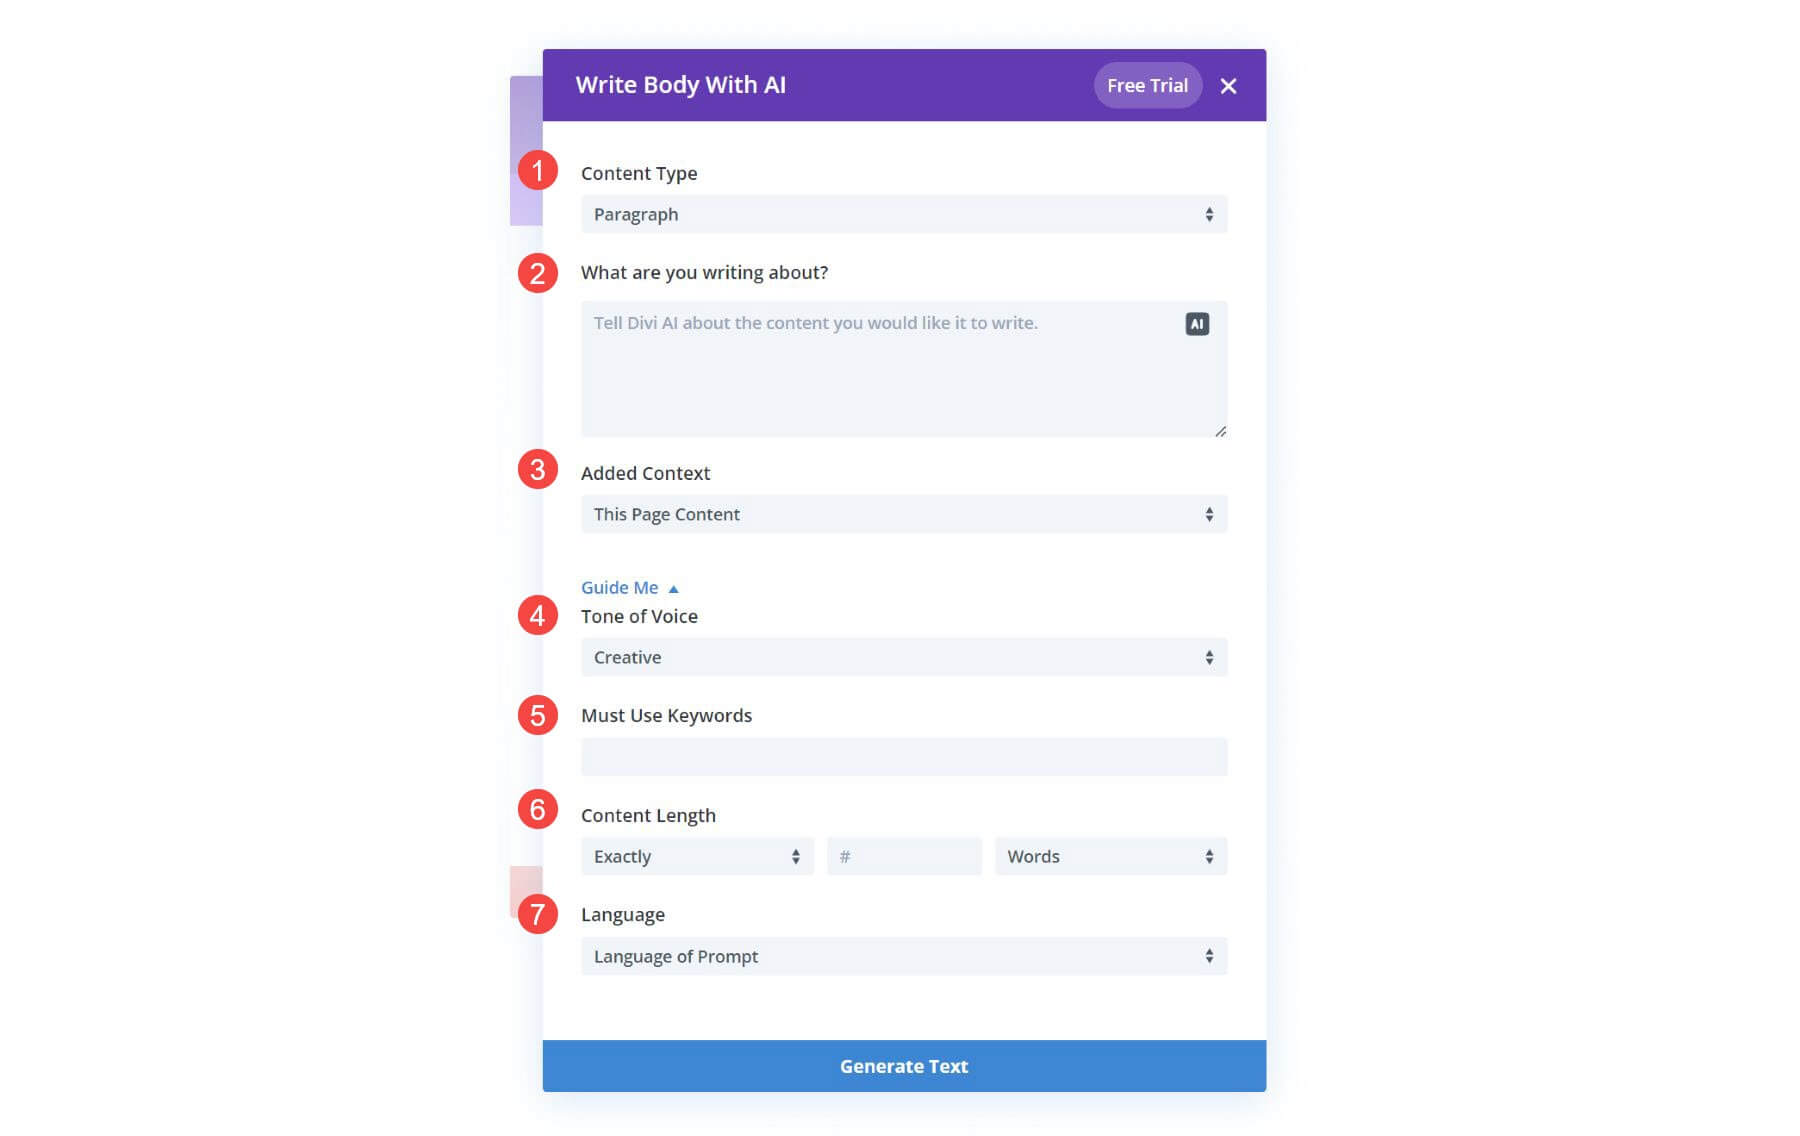
Inside the Divi AI Text generator modal, you’ll find helpful options that allow you to prompt Divi AI for more specific results. The main top 3 options include the following:
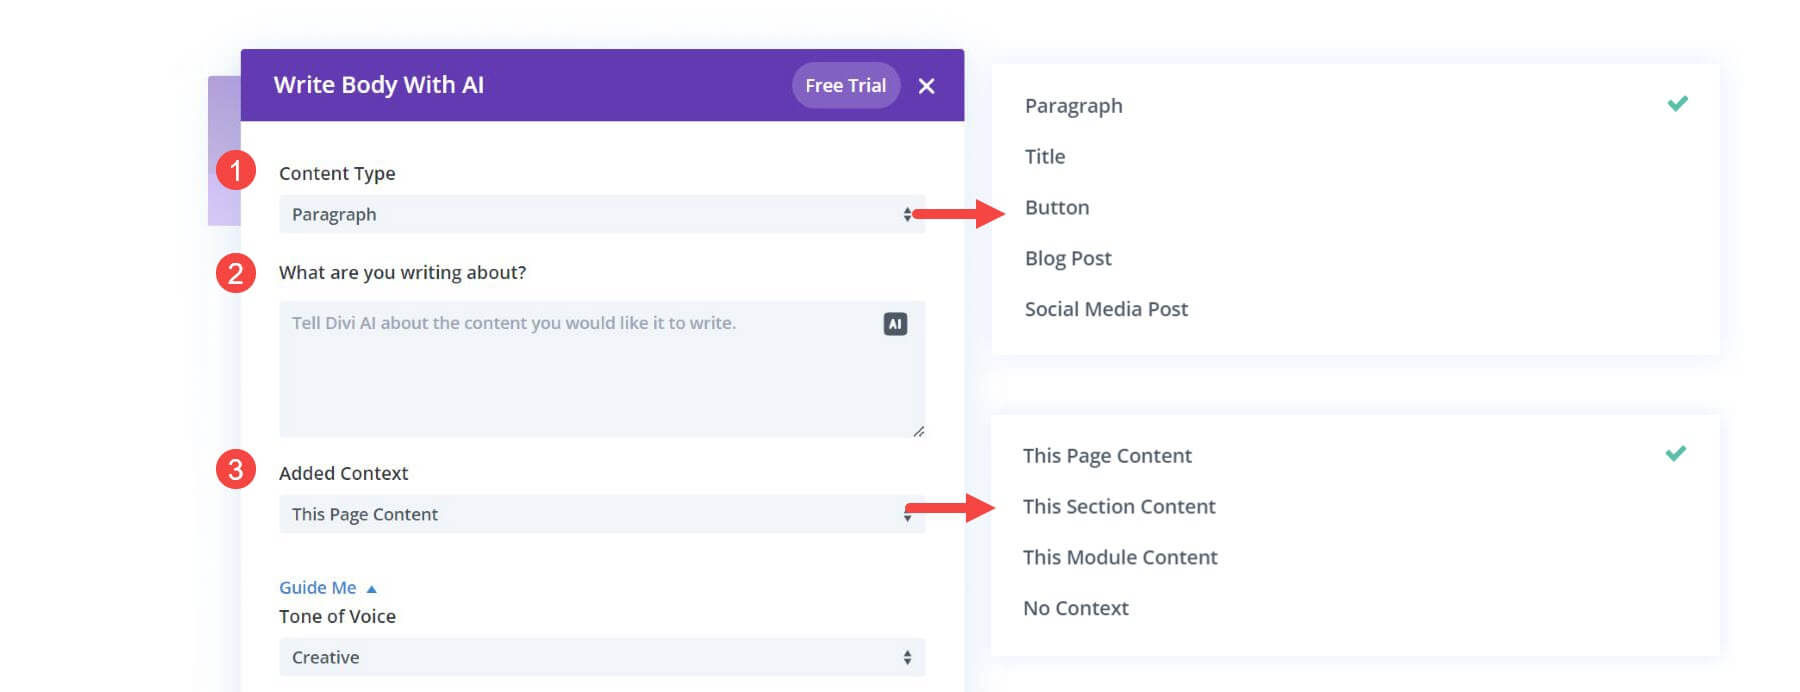
- Content Type: You can select the type of content you are writing to give Divi AI a better idea of what to generate. The content types supported include Paragraph, Title, Button, Blog Post, Social Media Post, and more.
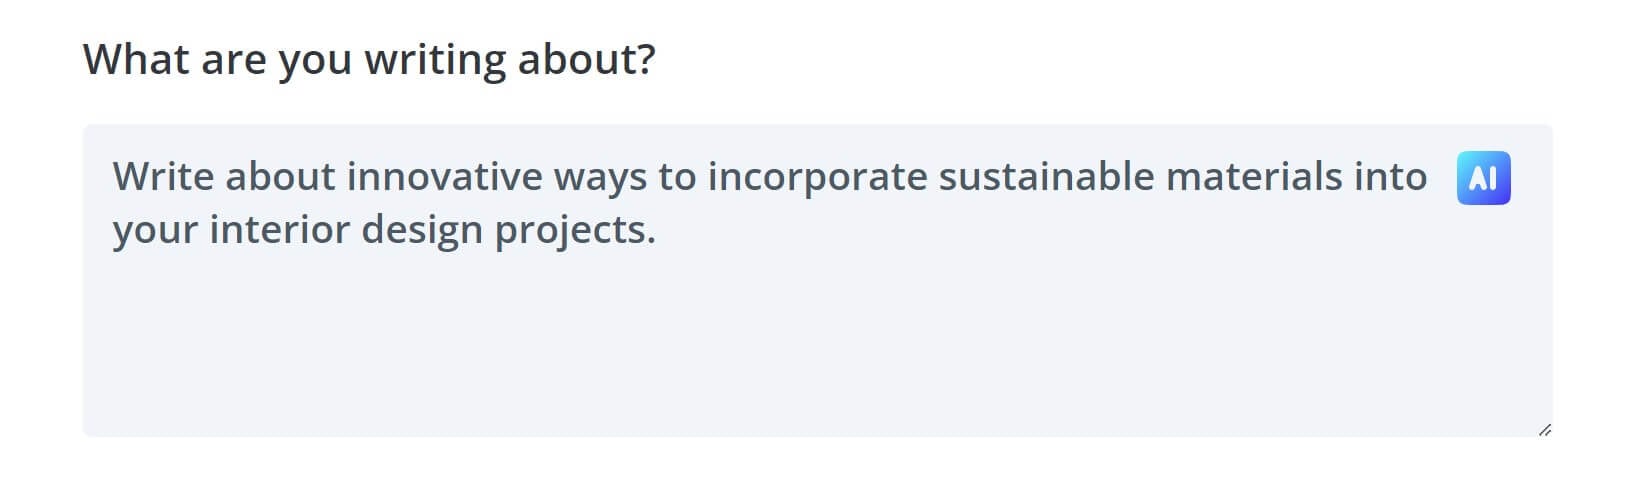
- What are you Writing About?: This is the main text prompt area where you can describe the content you want Divi AI to generate. Also, if you are not sure what prompt to use. Let Divi AI make a suggestion! Simply click the Divi AI button inside the field to see a suggested prompt to use.
- Added Context: Because Divi AI can evaluate your existing page content when generating new text, you can choose the level of additional context you want Divi AI use to create relevant content. If you want to supply Divi AI with the entire page content as context when generating text, you can select “This Page Content” for the Added Context option. You can also choose to supply Divi AI with context limited to the section content, the module content, or you can choose to supply Divi AI with no context.
Additional “Guide Me” Options
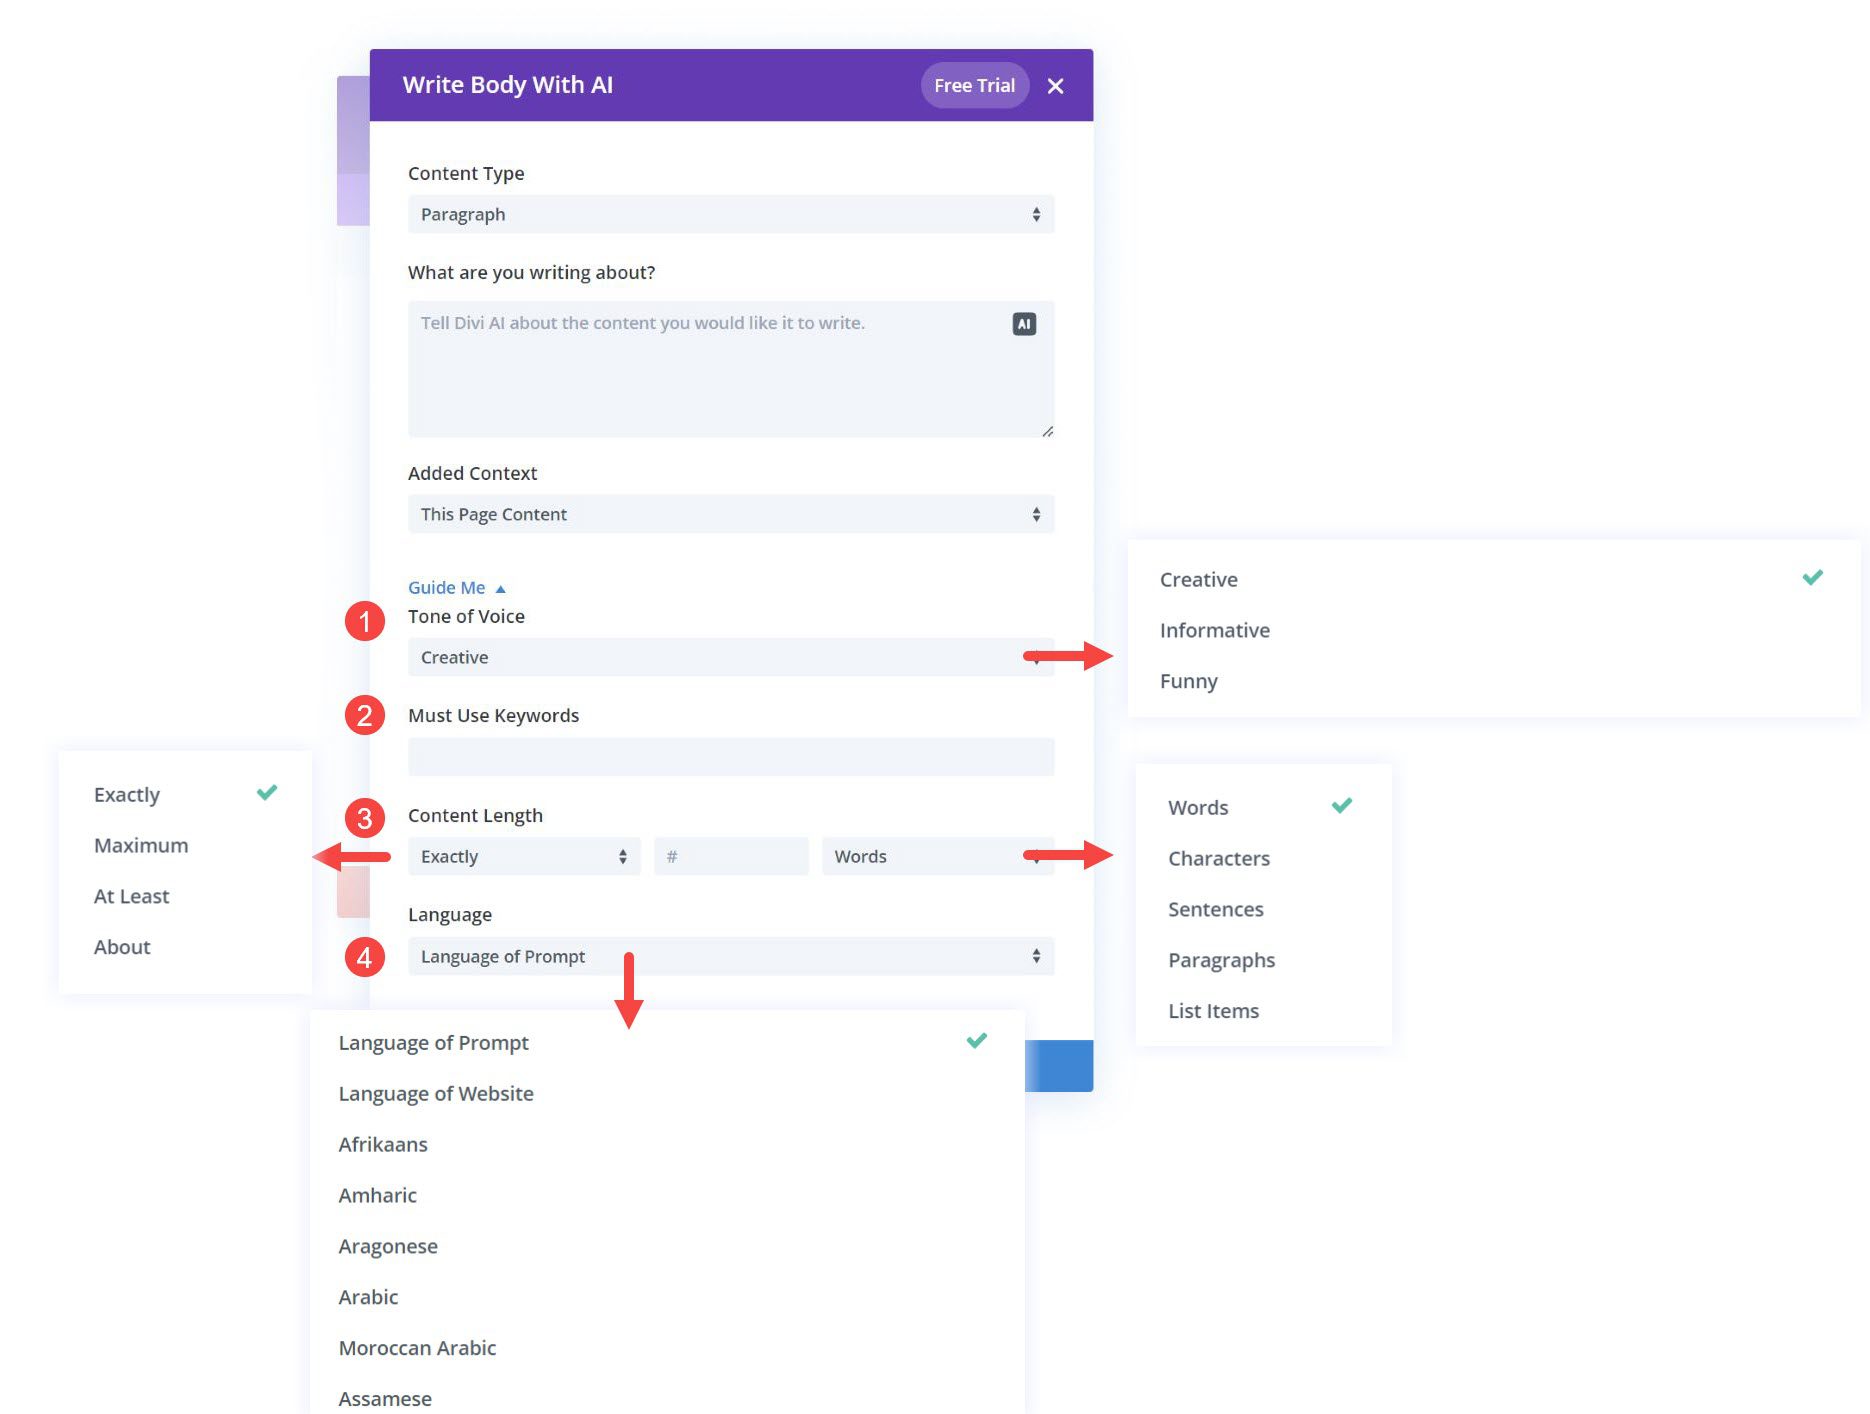
Under the Guide Me toggle options, you’ll find even more granular options for generating text with AI. This options allow you to select the following prompts:
- Tone of Voice – This is great for branding. Tell Divi AI what tone of voice to use when writing the content.
- Must Use Keywords – This allows you to add all the keywords you want to be included in the content that is generated. This is great for SEO, giving you a jumpstart on optimizing content with keywords that help you rank higher in search results.
- Content Length – This specifies how long or short you want the content to be.
- Language – Here you can the language you want Divi AI to write in. Divi can write in over 26 languages.
Example Use Case: Writing a Blog Post
For a example, let’s say we want to write content for a blog post. Using the Divi AI text generator, I could add the following options:
- Content Type: Blog Post
- What are you Writing About?: “Write a blog post on the most popular interior design styles”
- Added Context: no context
- Tone of Voice: Informative
- Must Use Keywords: “interior design, minimalist design, interior design styles, contemporary”
- Content Length: about 1000 words
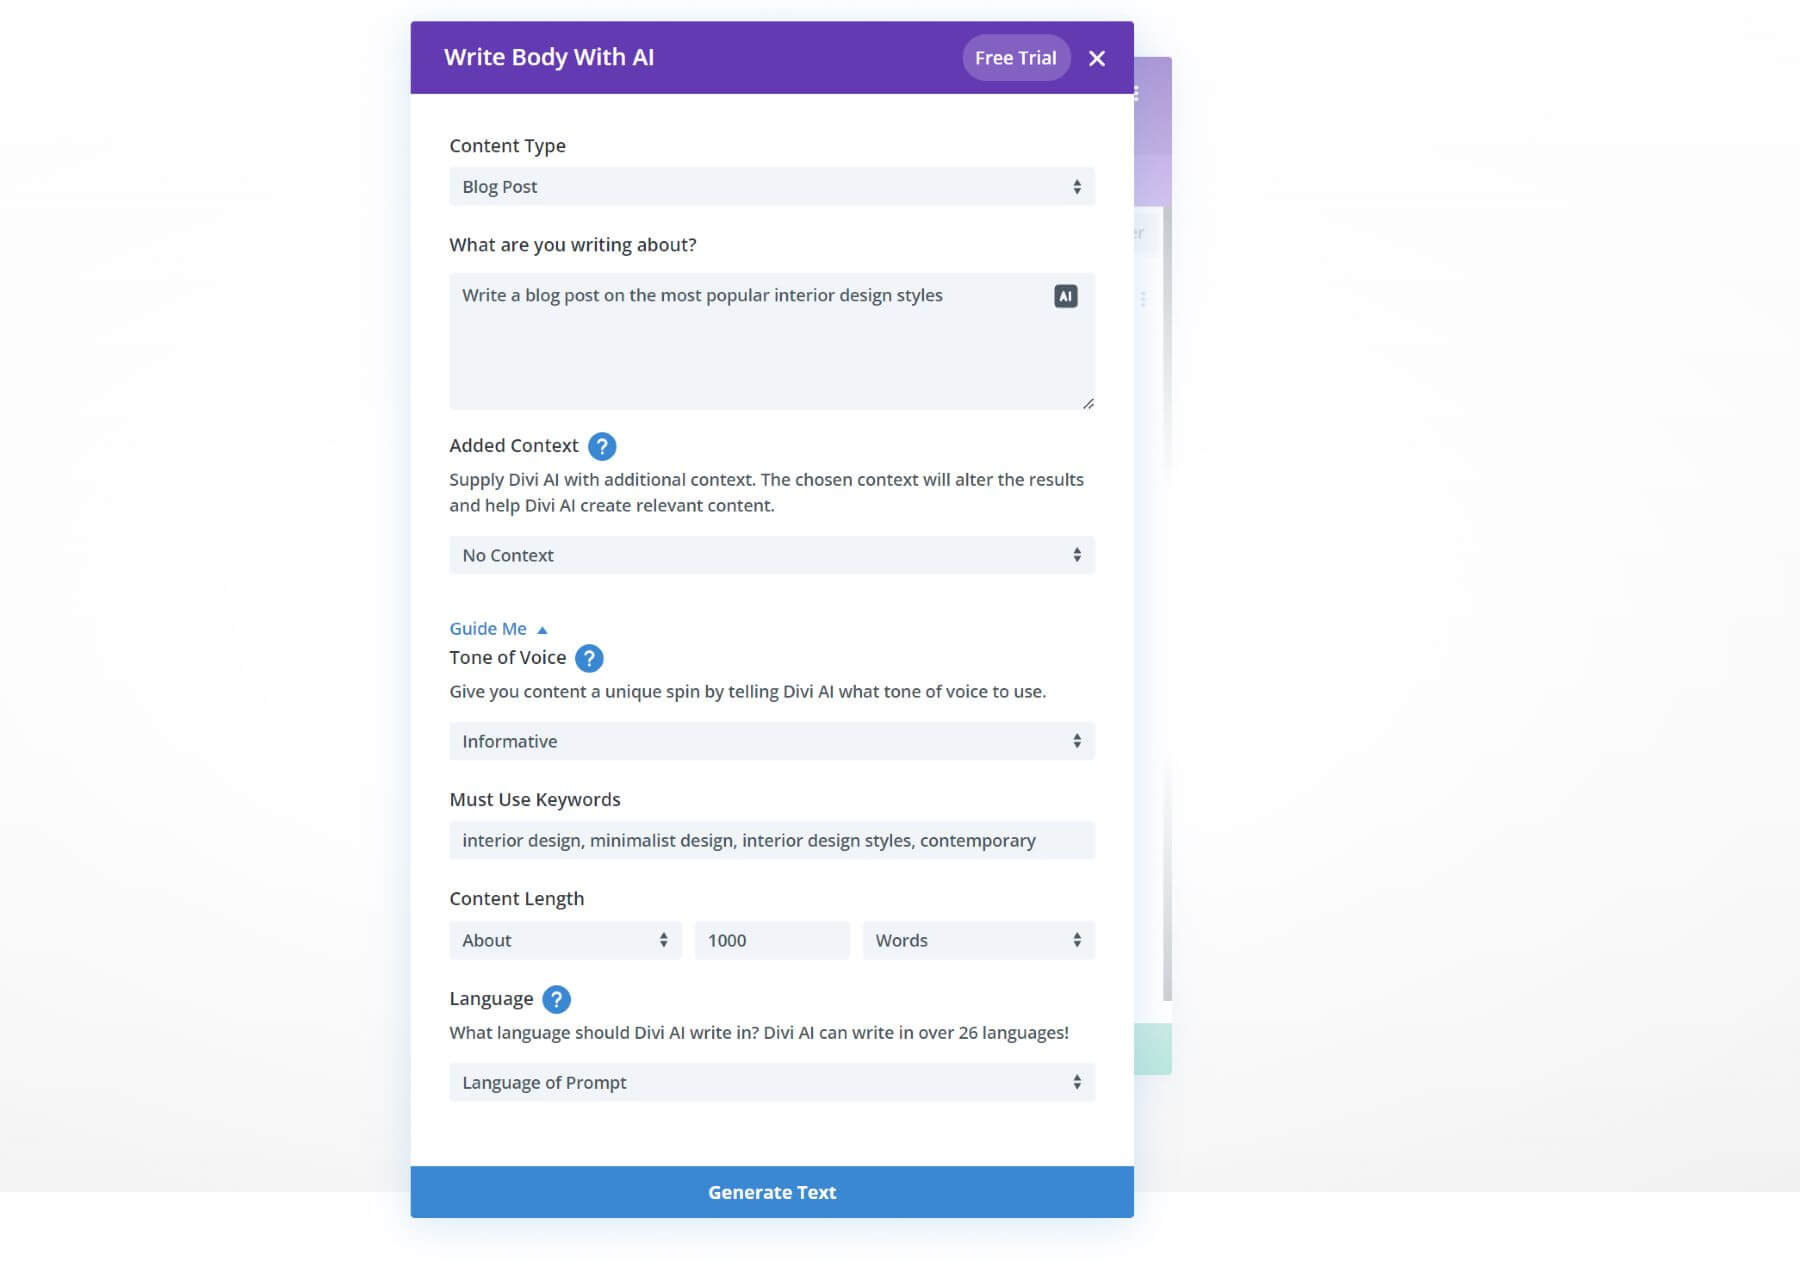
Then simply click “Generate Text” to have a huge jumpstart on a brand new blog post in seconds.
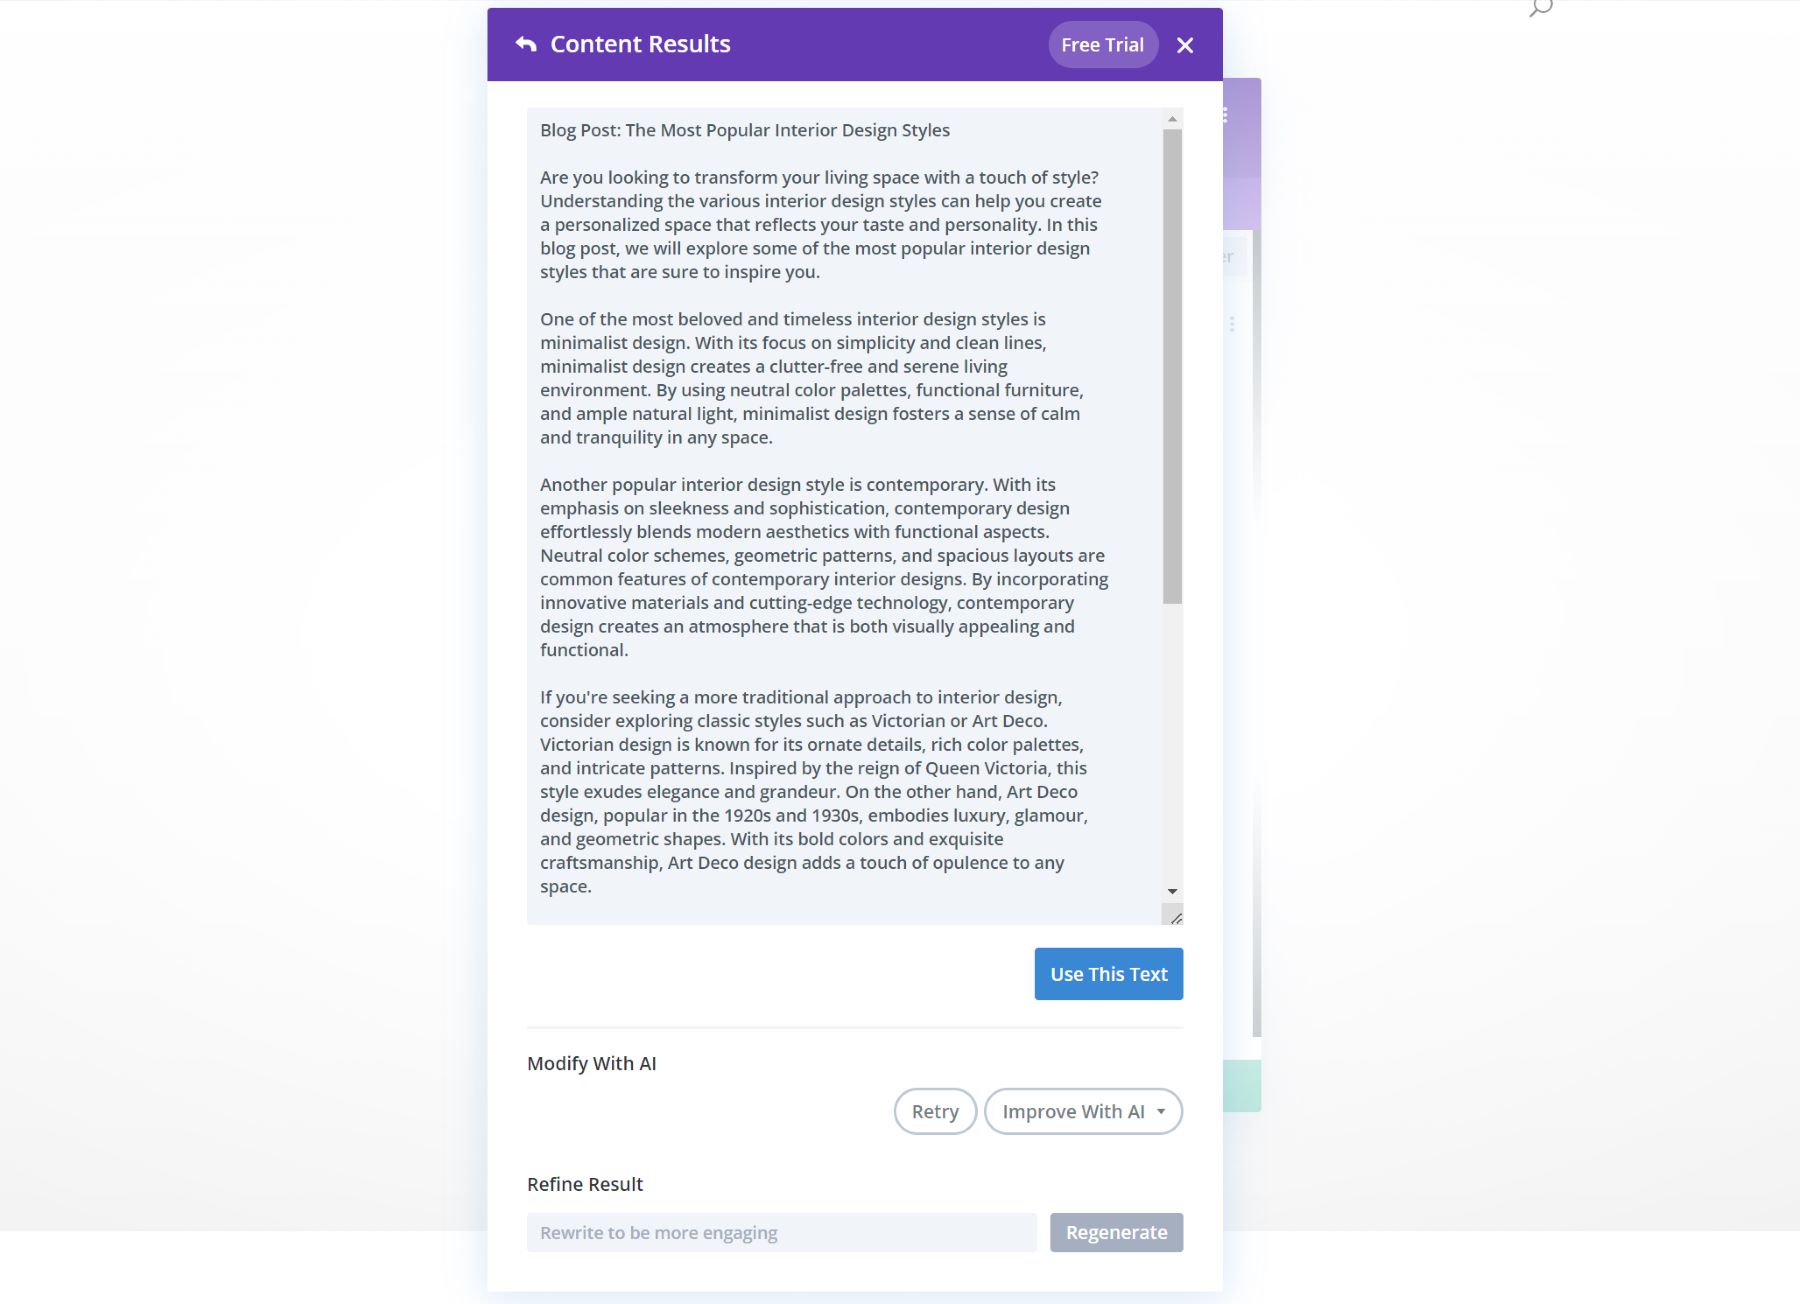
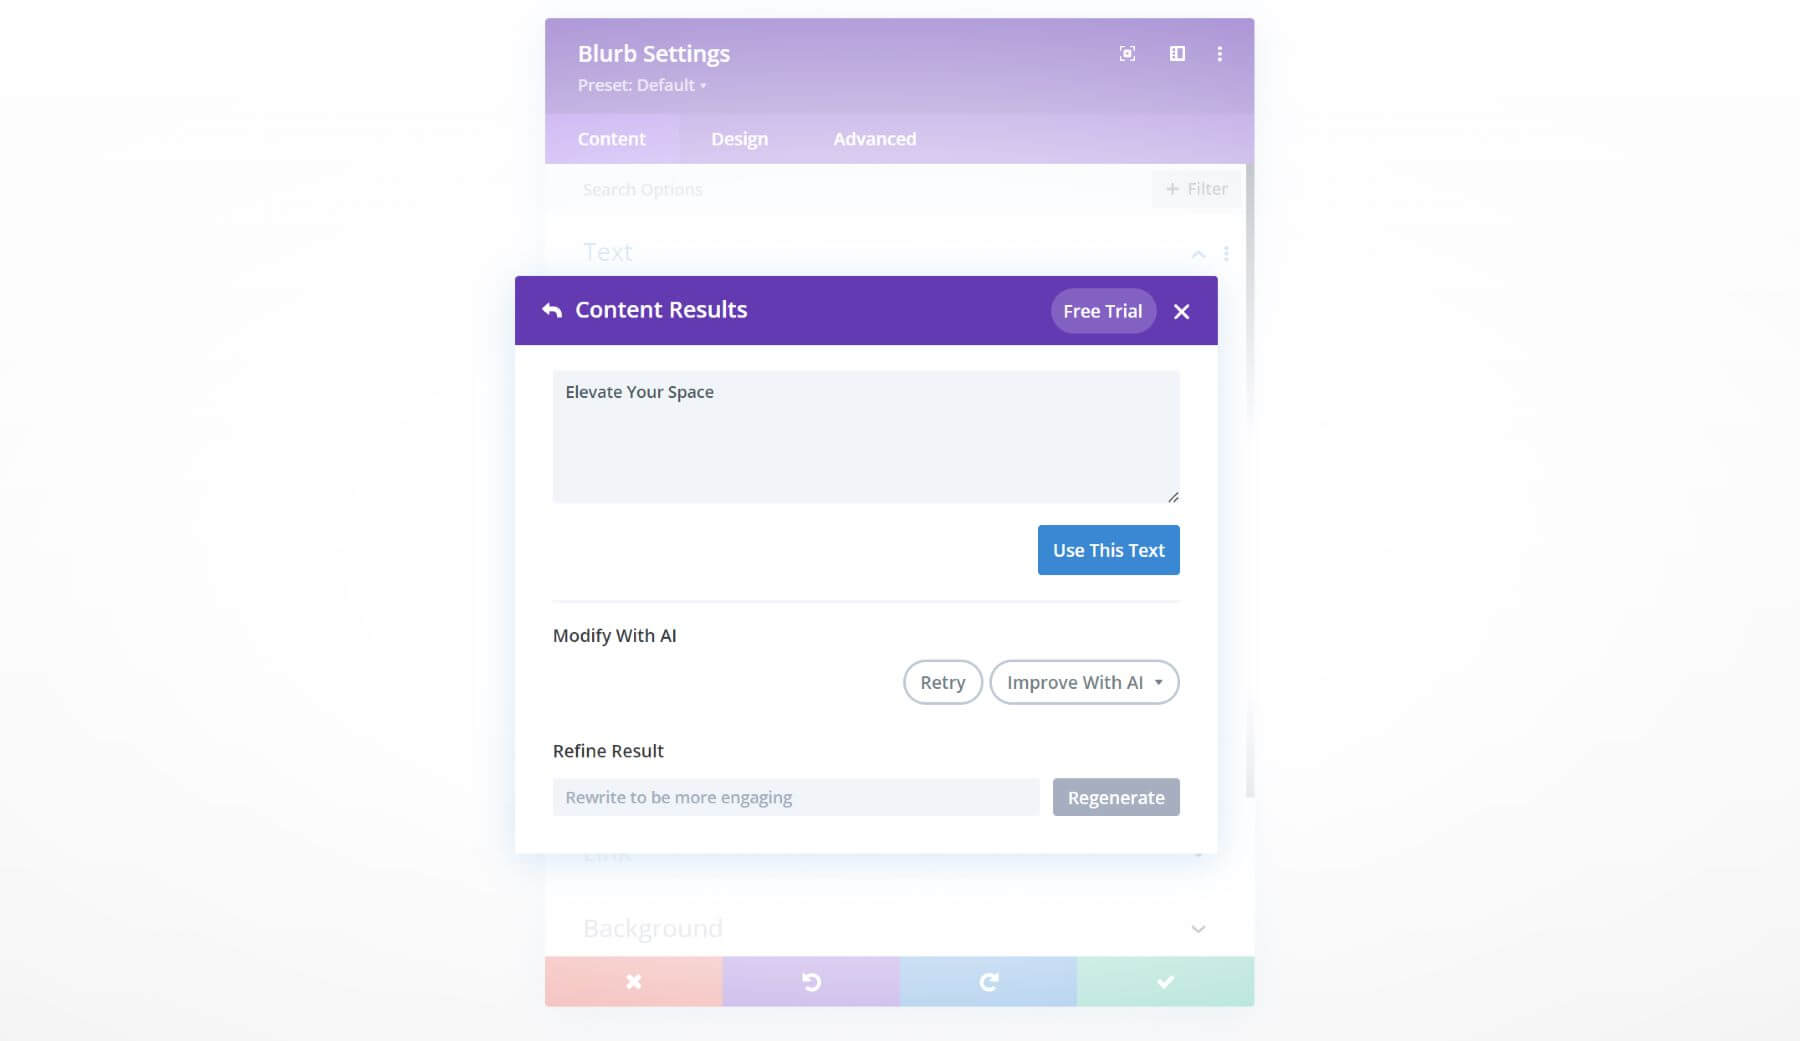
Once the content is generated, you can generate another version by clicking “Retry” or you can select the “Improve With AI” toggle to make adjustments with ease.
Revising and Editing Your Text with AI Quick Actions
Divi AI has a ton of handy built-in options for improving your content. To do this, hover over the text input field with the text you want to revise, and click the Divi AI button.

This will bring up a list of options and quick actions to choose from.
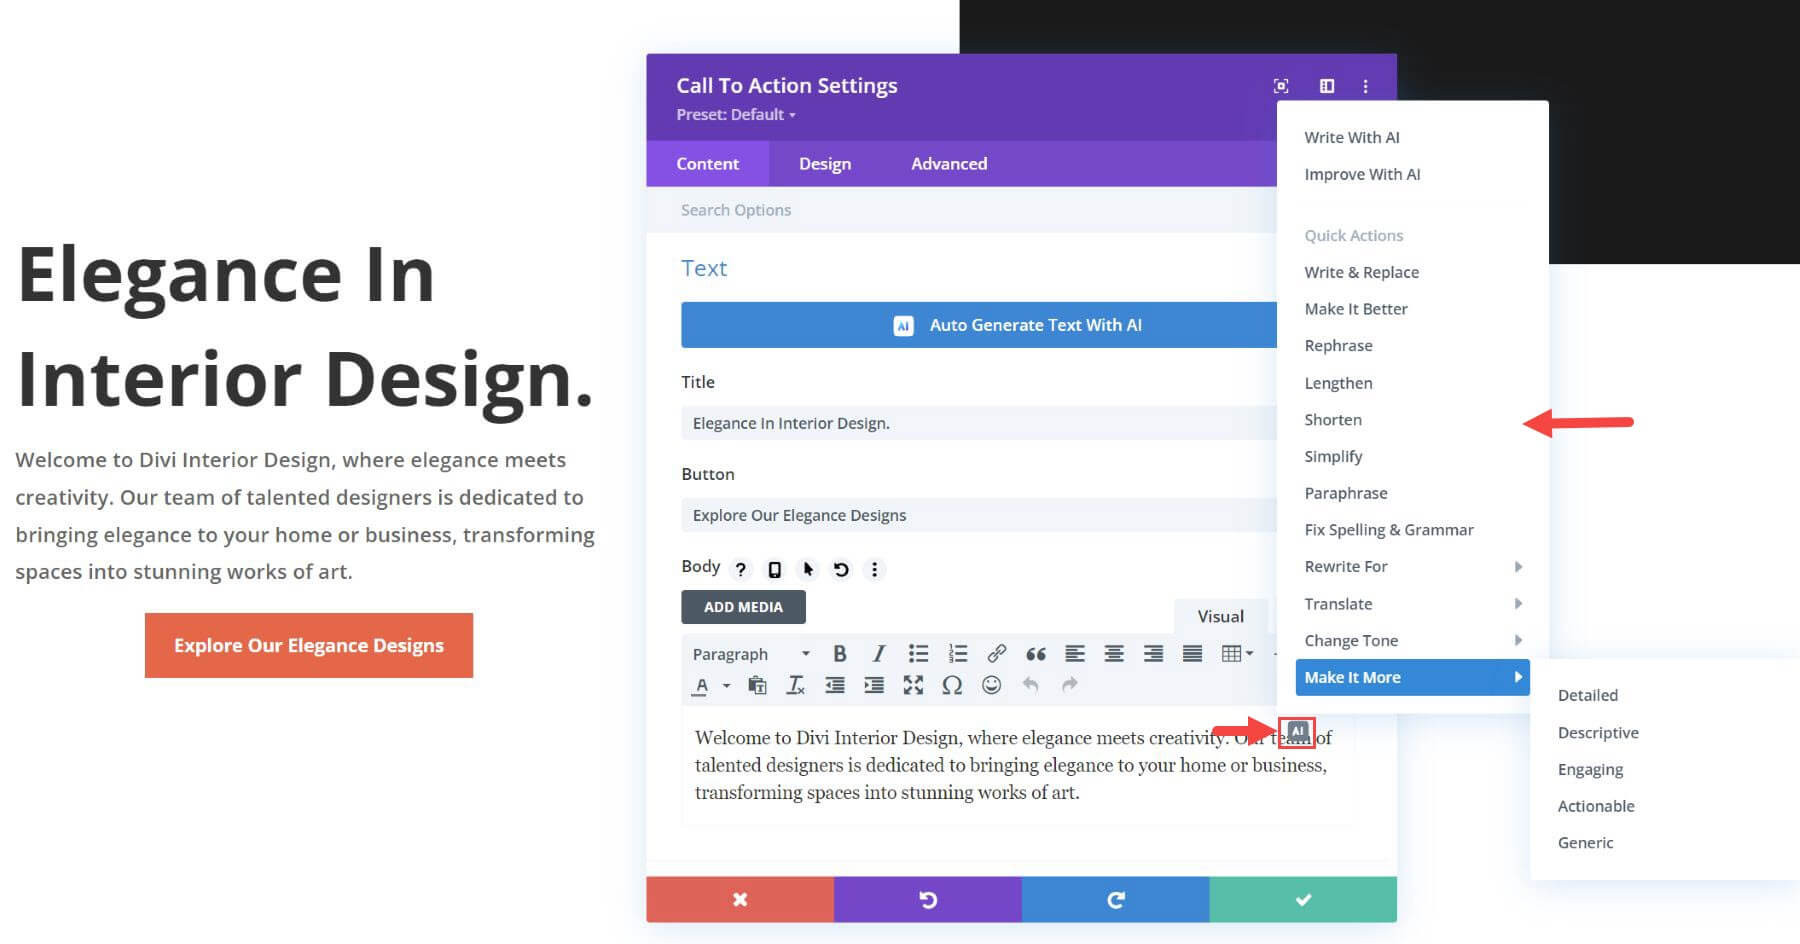
With a click of a button, you can fix grammatical mistakes and make content shorter, more engaging, targeted to experts, and more. This will allow you to edit and improve your copy like a pro!
Wrapping Up
Divi AI is a beast of an AI assistant for designing Divi websites. And the more you use Divi AI for your website, the better it gets. We hope this guide has helped you understand the true potential of Divi AI. And we hope it will help you creating amazing content for your own website.
We know you probably still have tons of questions about Divi AI that wasn’t able to make it in this post. But don’t worry. We have plenty more tutorials on Divi AI coming your way. So stay tuned for more!
Get 40% Off Divi AI During Our Introductory Sale!
For the next week, we are offering 40% off Divi AI. Anyone who purchases Divi AI before the sale sends will save $115 per year and lock in those savings for life! Plus, all of your team members can use Divi AI at no additional cost. Get the discount here 👇


Leave A Reply