")
There is much to learn about new tools, such as Stable Diffusion, OpenAI, Midjourney, and other AI art generators. As creative professionals, we owe it to ourselves to embrace this new technology, learn what we can, and use it as a tool to make our lives easier. In this post, we’ll look closer at Stable Diffusion and how to use it to create gorgeous AI images.
Let’s get started.
What is Generative AI?
Generative AI is the process of generating new content based on existing data through machine learning. With Generative AI, users can create various content, including text, images, videos, and other synthetic data. Unlike supervised learning, where a machine uses labeled data to train models, machine learning uses unlabeled data to find patterns and structures without supervision or feedback. It provides a high quality of work in a fraction of the time it would take a human to create so it can be an incredibly useful tool for creators.
What is Stable Diffusion?
Stable Diffusion is a powerful AI image generator that can create images from a text prompt. You can produce output using various descriptive text inputs like style, frame, or presets. In addition to creating images, SD can add or replace parts of images thanks to inpainting and extending the size of an image, called outpainting. You can edit a generative or uploaded image, whether the image was created with AI or not. Like OpenAI, SD is completely open source, so it’s free for anyone to use.
Using Stable Diffusion for Image Generation
Subscribe To Our Youtube Channel
There are primarily two ways that you can use Stable Diffusion to create AI images, either through an API on your local machine or through an online software program like DreamStudio, WriteSonic, or others.
If you plan to install Stable Diffusion locally, you need a computer with beefy specs to generate images quickly. However, with recent advancements, you can get by with the following:
- Windows, MacOS, or Linux operating system
- Graphics card with at least 4GB of VRAM
- 12GB or more installation space, preferably through a solid state drive (SSD)
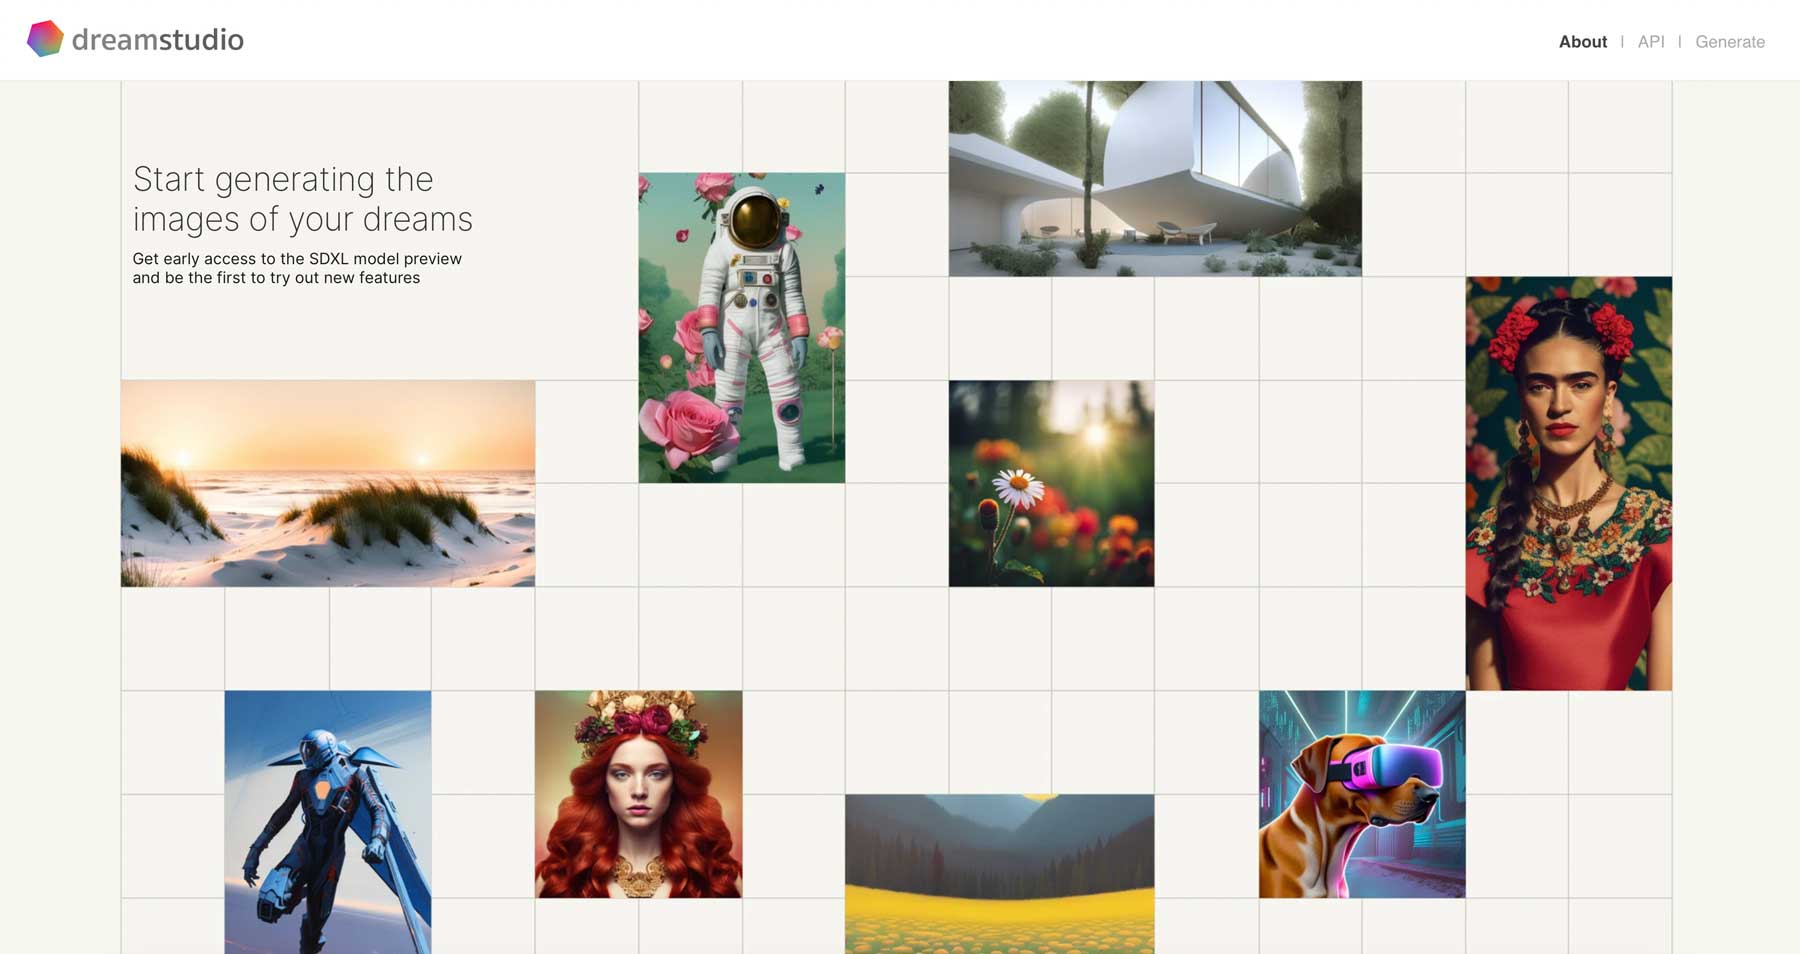
That said, most users will run SD in an online software setting to avoid the hassle of setting everything up locally. For this tutorial, we’ll use SD’s flagship software, DreamStudio.ai. It comes with a simple and intuitive interface with various settings and editing tools to get the most out of Stable Diffusion.
Understanding Prompts for AI Image Generation
Before creating images with DreamStudio, we’d be remiss if we didn’t explain how to make the best prompts for Stable Diffusion image creation. After all, prompts are a crucial component of the image generation process. First, it’s important to know that a prompt consists of three main parts: frame, subject, and style. The frame defines the size and composition of the image. In contrast, the subject describes the object or objects of the picture. Finally, the style specifies the visual characteristics of the image. Examples of style could be famous artists such as Pablo Picasso or Ansel Adams, an art style or medium like acrylic or oil painting, line art, etc., or descriptive text such as the angle and composition.
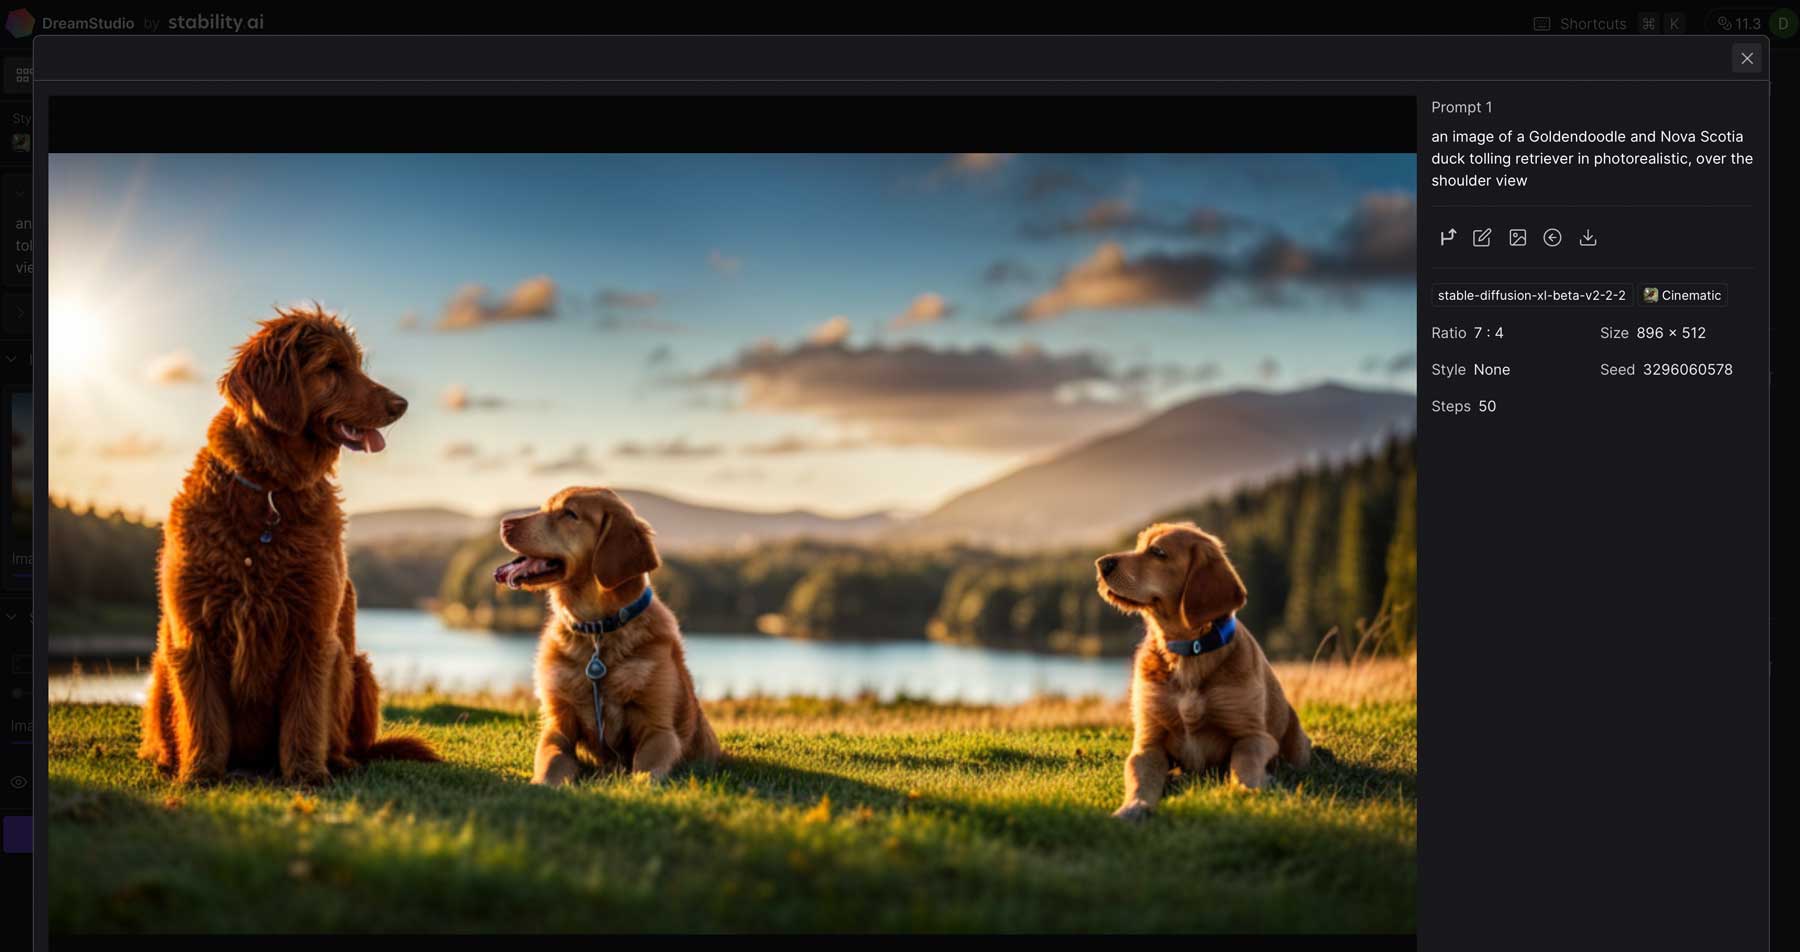
For example, we asked DreamStudio to generate an image of a Goldendoodle and Nova Scotia duck tolling retriever in a photorealistic, over-the-shoulder view. Here are the results:
Tips For Creating Effective Prompts
To create effective prompts in Stable Diffusion, it’s important to be specific about what you want. Be sure to provide clear instructions for each prompt component (frame, subject, and style), and above all else, be descriptive.
Use Keywords
As a good rule of thumb, try to incorporate as many of these keywords as possible:
- Subject: What you want to see in an image (example: mountain, cat, car, etc.)
- Medium: the material used, such as digital painting, illustration, photography, etc.
- Style: This refers to the artistic style desired, such as impressionist, realism, hyperrealistic, etc.
- Artist: Name a specific famous artist, such as Rembrandt, Picasso, etc.
- Resolution: infers how sharp and detailed an image is. Use words such as highly detailed, ultrarealistic, etc.
- Additional details: Add in additional descriptors (modifiers) to enhance an image
- Color: Add colors to guide SD to create images of a certain color or tone, such as light blue, deep red, etc.
- Lighting: Add lighting effects through keywords like cinematic lighting, dark, etc.
Add Negative Prompts
In addition to keywords, you can use negative prompts to steer SD in the right direction. Negative prompts are aspects you don’t want to see in your generative output. This is a great way to omit unwanted elements in your images. For example, we used this prompt in DreamStudio, along with this negative prompt to leave out things we didn’t want to see:
Prompt:
an image of a Goldendoodle in a photorealistic, over-the-shoulder view. Add detailed grass, a lake, and mountains in the foreground. Add cinematic lighting, high detail, and sharp focus.
Negative Prompt:
extra limbs, disfigured, deformed, body out of frame, bad anatomy, watermark, signature, cut off, low contrast, underexposed, overexposed, bad art, beginner, amateur, distorted face, blurry, draft, grainy.
Result:

Don’t Forget the Style
Remember to use the style selector when familiarizing yourself with DreamStudio (or any other generative AI that uses Stable Diffusion). This helps SD identify the style you’re looking for and will apply the appropriate styling model chosen. Right now, there are 16 style presets available, which will give you different looks. We suggest familiarizing yourself with the style presets to create different types of art.
DreamStudio’s 16 style presets:
- Enhance
- Anime
- Photographic
- Digital Art
- Comic Book
- Fantasy Art
- Analog Film
- Neon Punk
- Isometric
- Low Poly
- Origami
- Line Art
- Craft Clay
- Cinematic
- 3D Model
- Pixel Art
Using DreamStudio to Generate Images
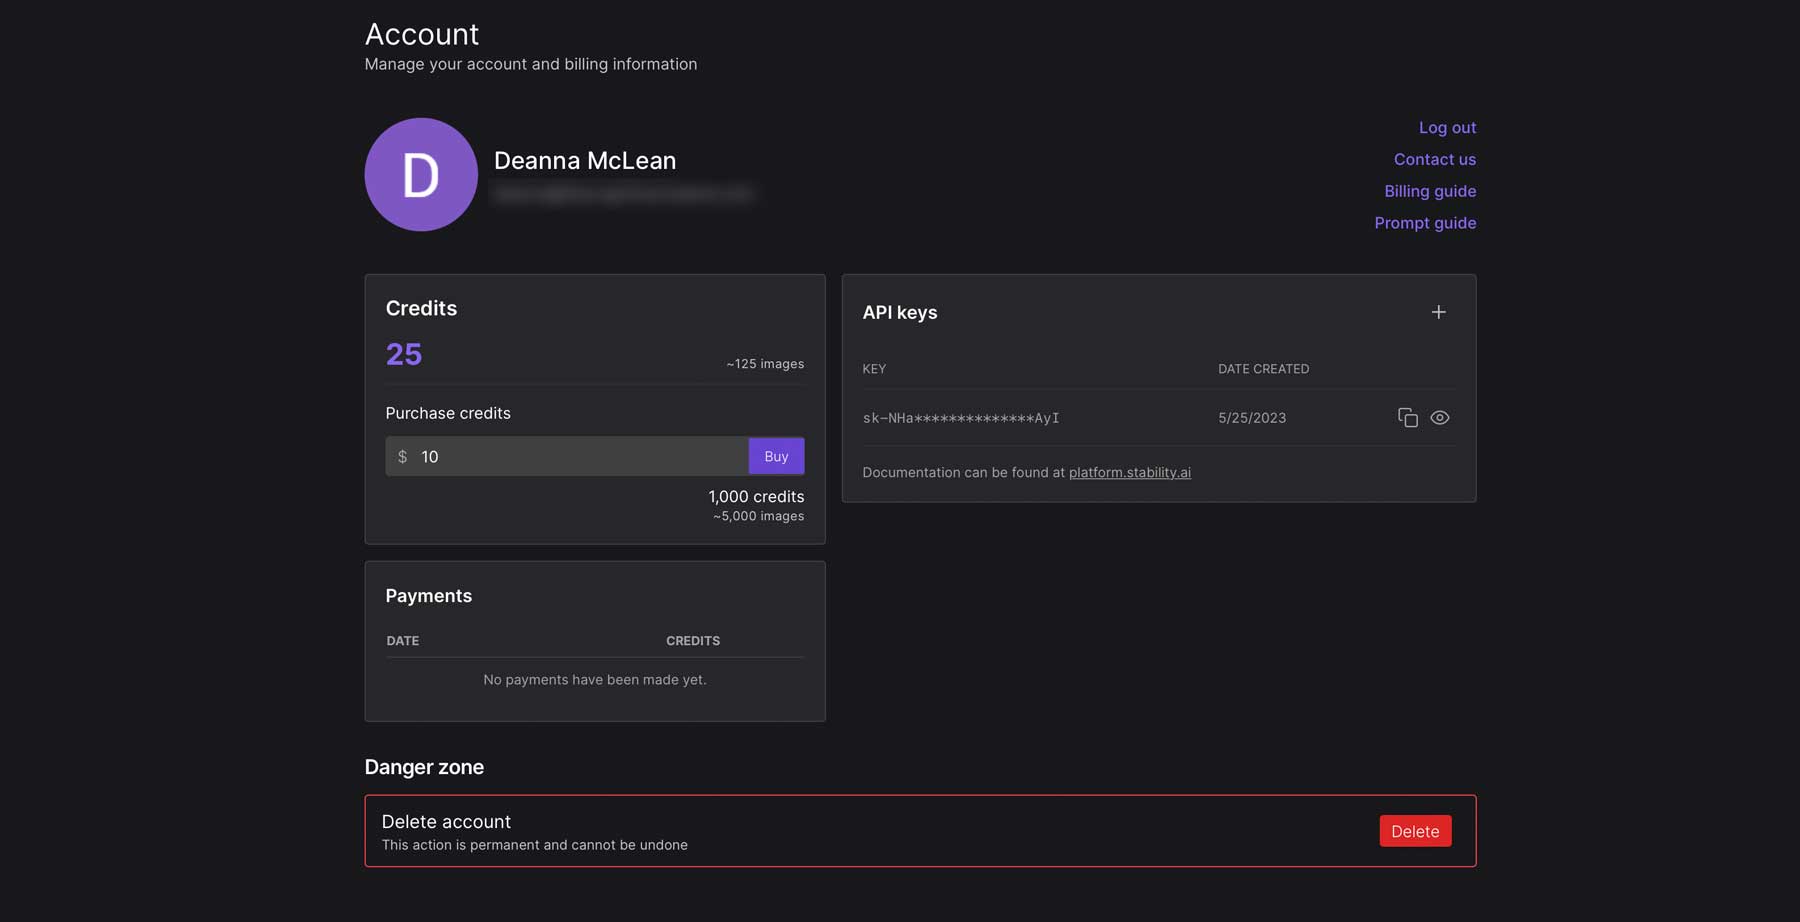
Now that we’ve gotten you up to speed on Stable Diffusion and tips for creating beautiful AI images, let’s focus on DreamStudio. When you sign up, you’ll receive 25 credits, which is generally enough to create 125 images. If you need more, you can purchase 1000 credits for roughly 5000 images for $10.
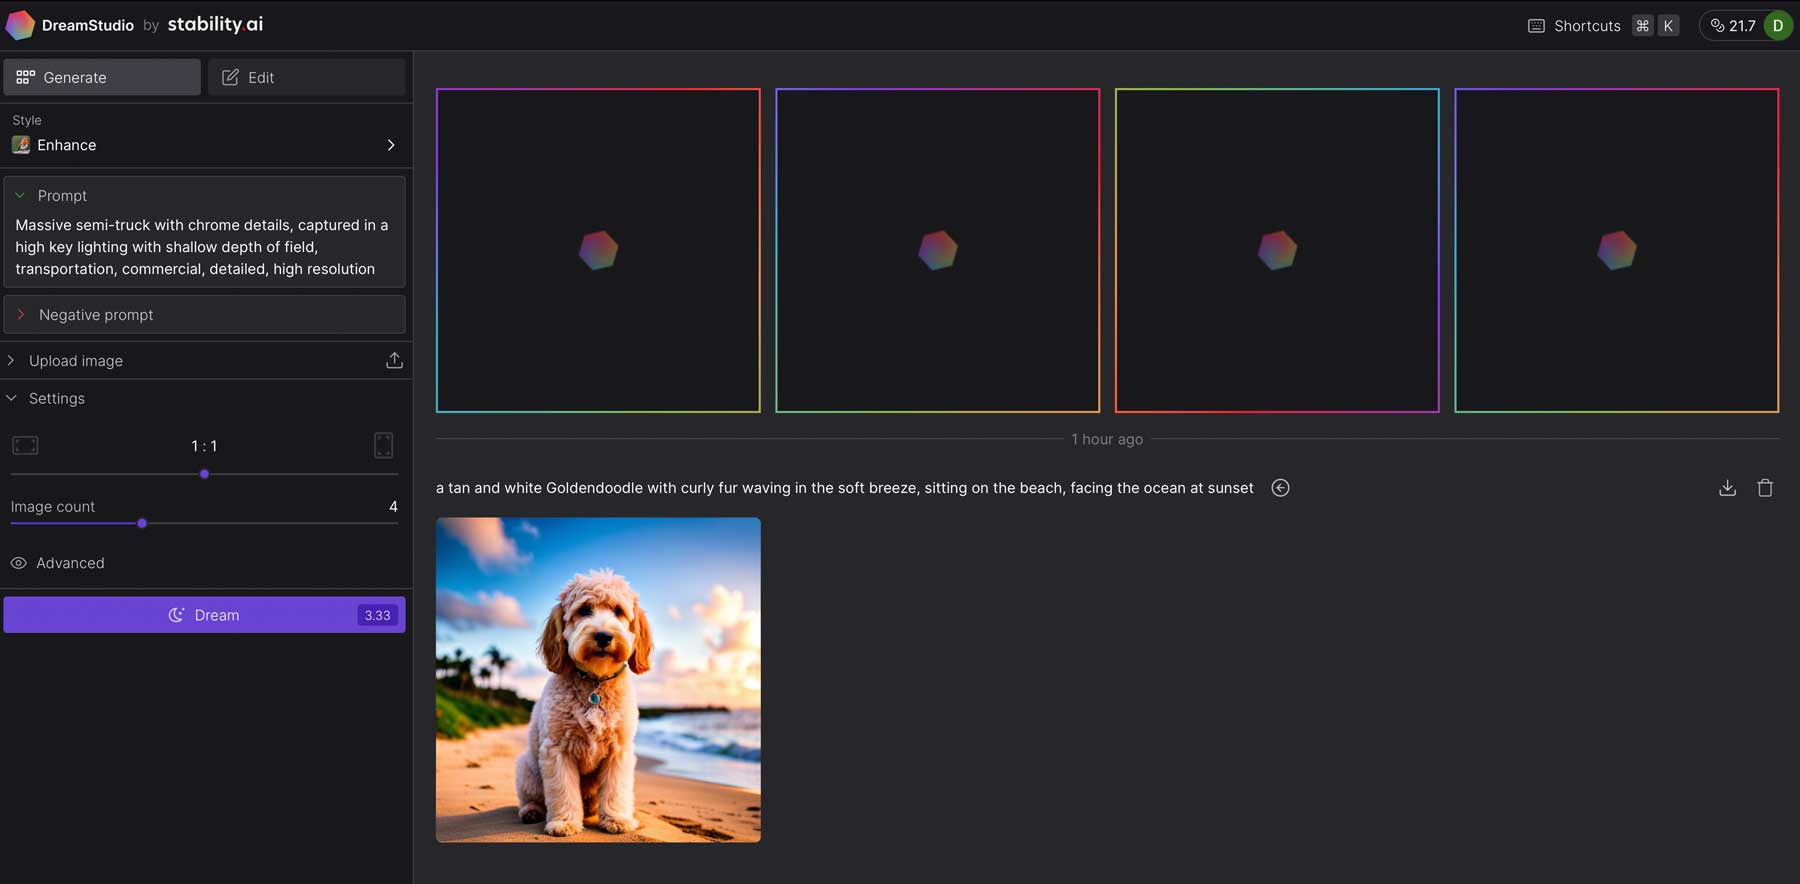
Upon your initial login, you’ll be directed to the DreamStudio interface. Let’s explore the different tools and settings, so you can familiarize yourself with the platform to generate AI images.
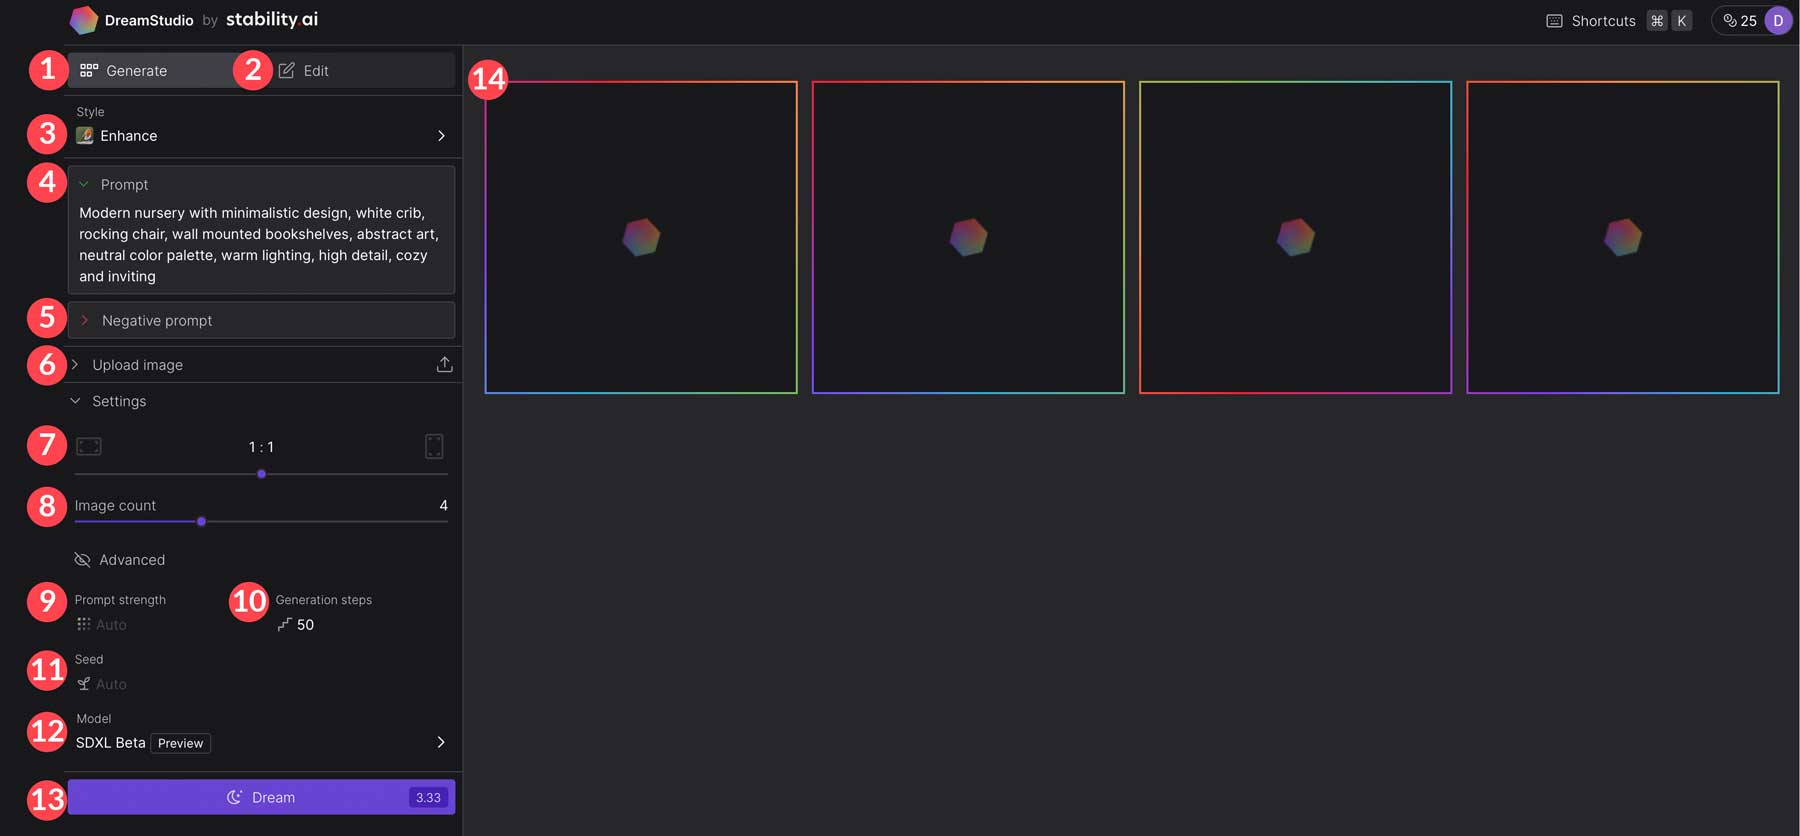
- Generate tab: Where you’ll generate AI images.
- Edit tab: for altering your images.
- Style: Select one of 16 image styles.
- Prompt: Where you’ll describe the image you want to create.
- Negative prompt: Image characteristics you want to avoid.
- Upload image: Generate AI based on an uploaded image.
- Image aspect ratio: 10 available size presets including 7:4 (896×512), 3:2 (768×512), 4:3 (683×512), 5:4 (640×512), 1:1 (512×512), 4:5 (512×640), 3:4 (512×683), 2:3 (512×768), and 4:7 (512×896).
- Image count: Choose between 1-4 images to output. The more images you create, the more credits are required.
- Prompt strength: Controls how strongly SD weighs your prompt. By default, Stable Diffusion uses a value of 15, which can be adjusted from 1-30.
- Generation steps: Be default, this parameter is set to 50. You can choose between 1-100, with higher values generally producing higher-quality results.
- Seed: Controls the random seed as the base of the image. Values range from 1 and roughly 4.3 million. Using the same seed with the same settings will provide similar results.
- Model: There are three models, each providing varying results: Stable Diffusion v2.1, Stable Diffusion v2.1-768m, and SDXL Beta (default).
- Dream: Generates the image based on your prompt. DreamStudio advises how many credits your image will require, allowing you to adjust your settings for a less or more costly image generation.
- Output: This is where your generated images will appear.
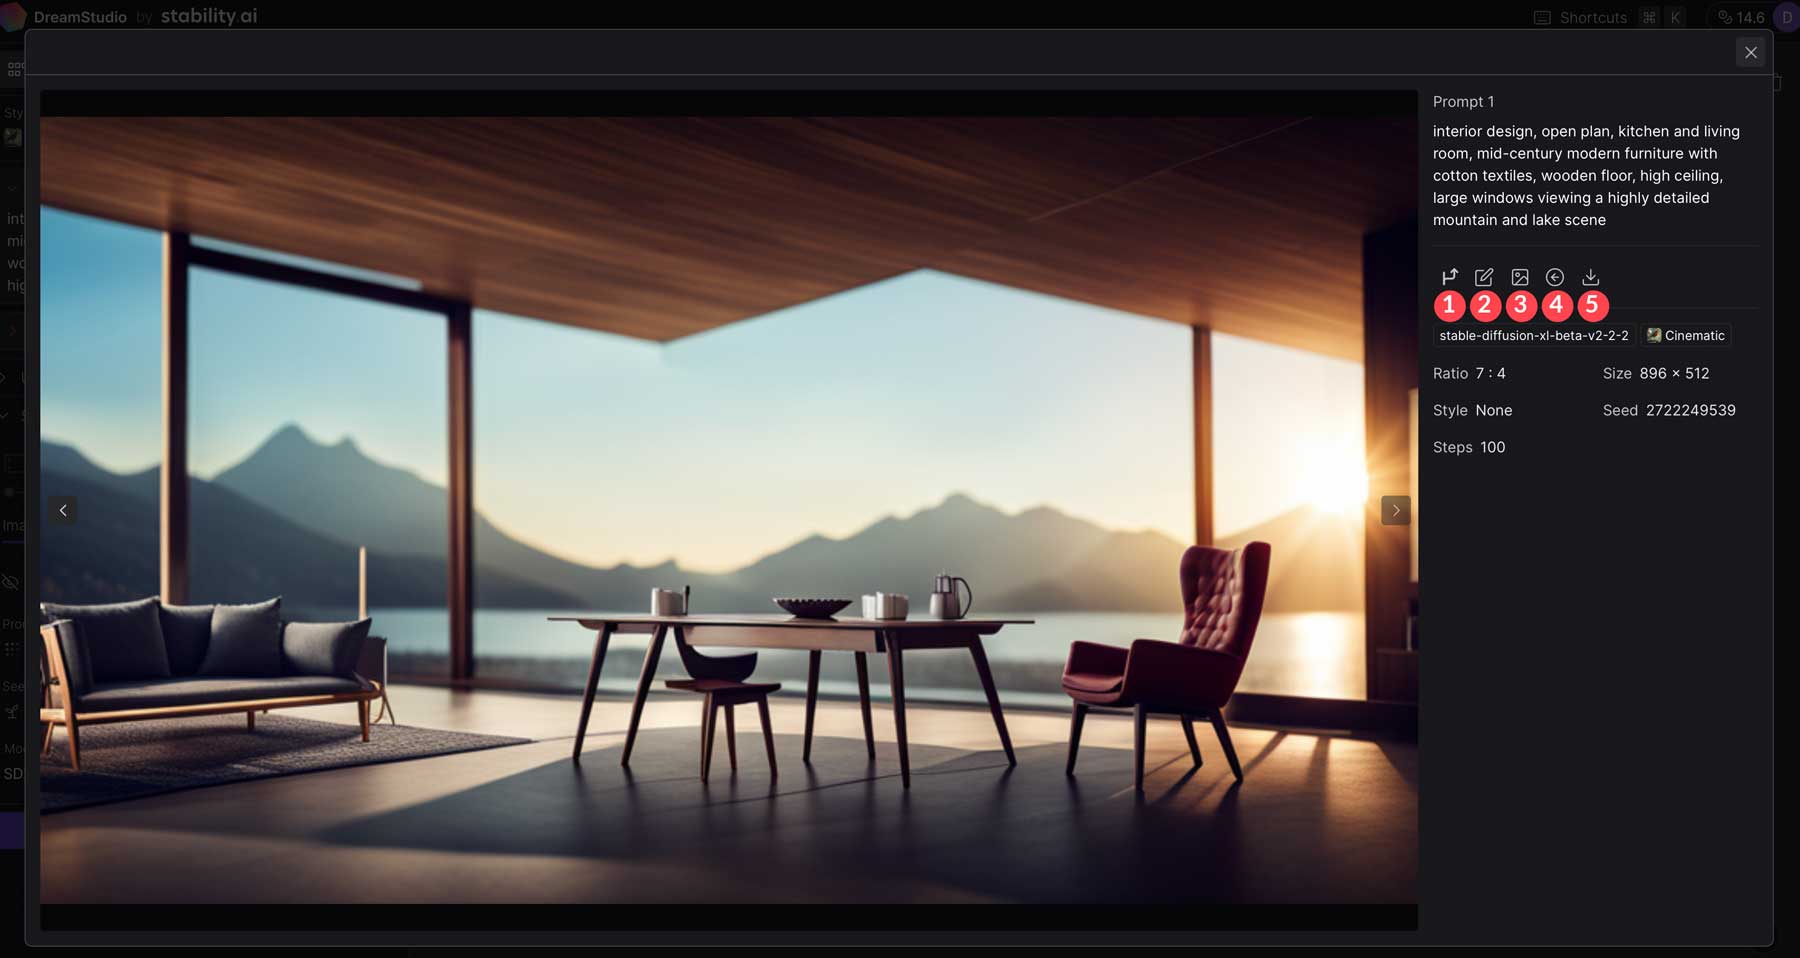
After generating an image, click on it to make changes such as generating variations, editing, using the image as a basis for similar generated images, reusing the same prompt, or downloading it.
Fine-Tuning Generated Images
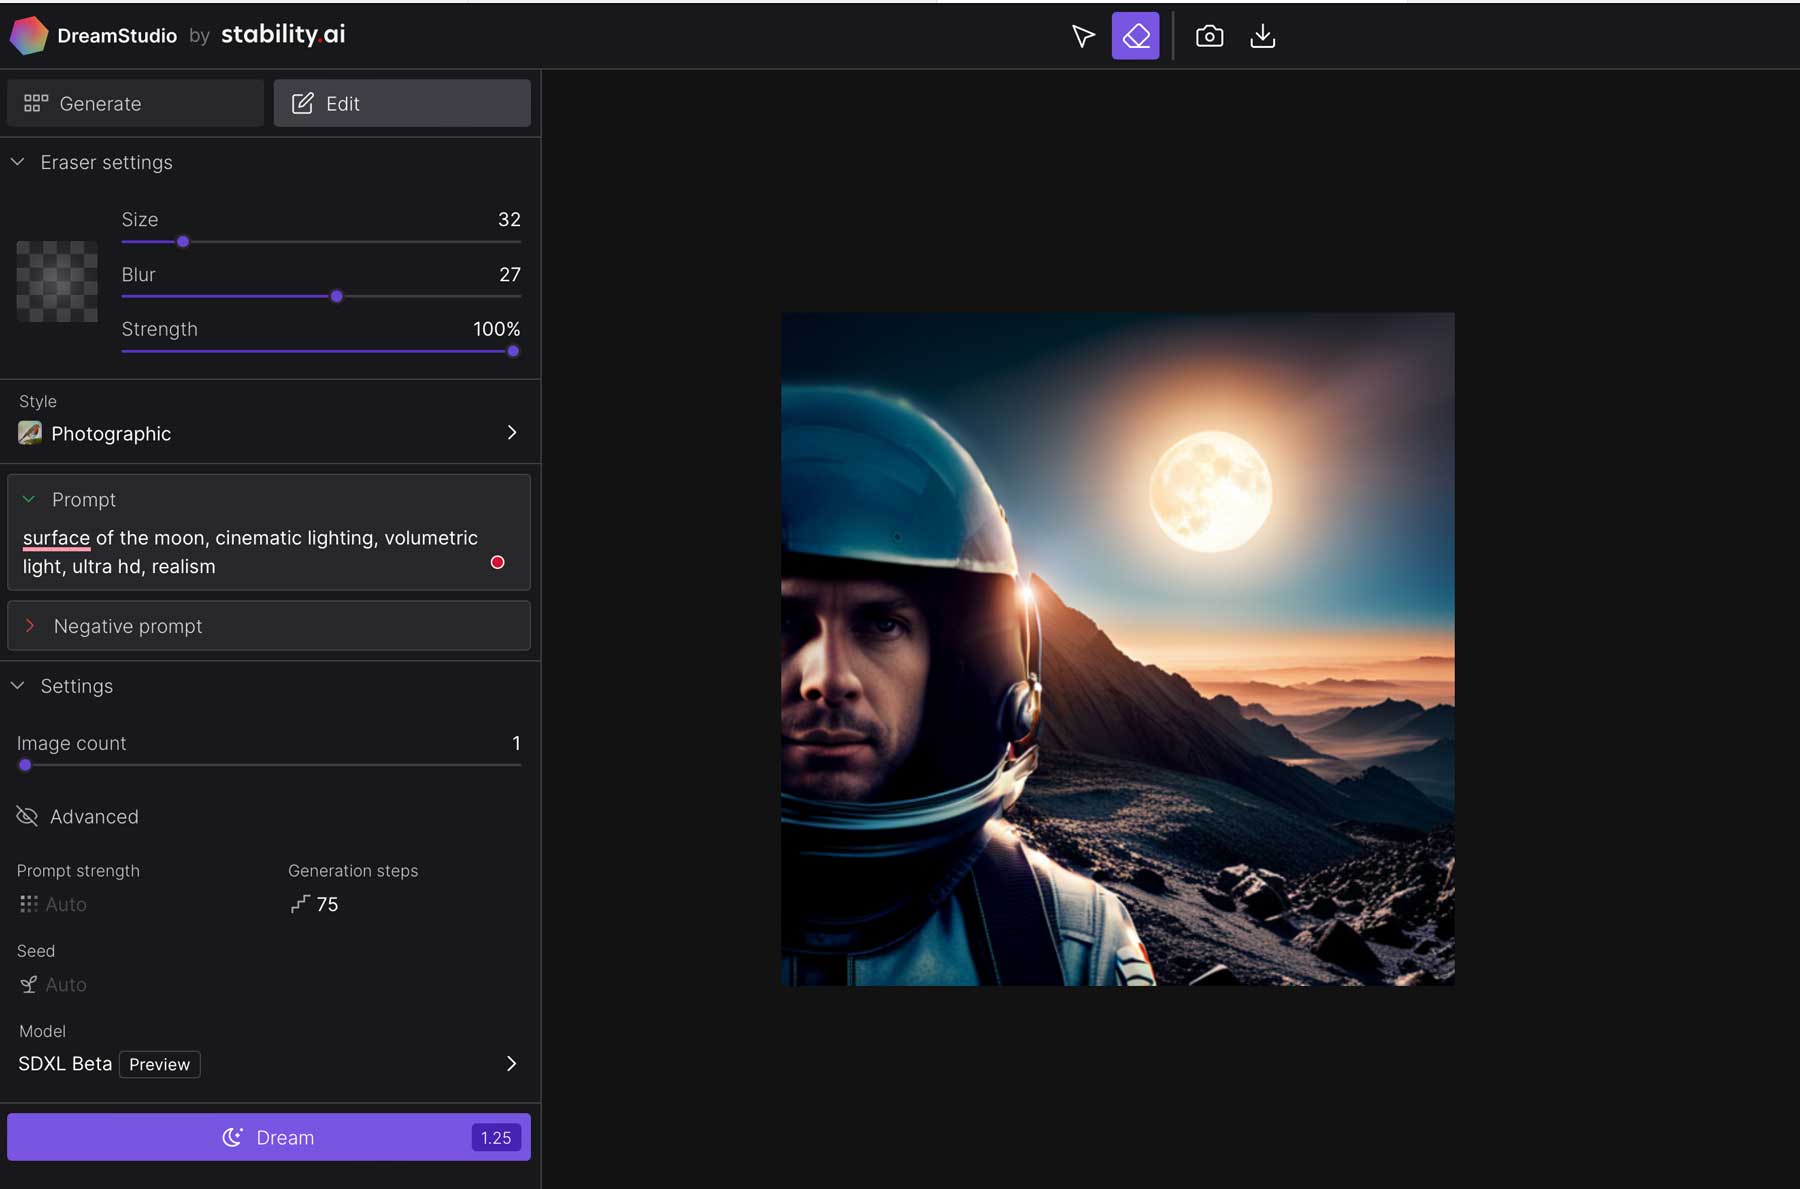
After generating AI art, you can use the edit tab to fine-tune your images. You can erase aspects of your image, such as the background, faces, and more. From there, you can add an additional prompt to combine your original photo with another one. This technique, called inpainting, is perfect for combining styles or themes in your images. For example, we generated an image of an astronaut, then erased the original background of the photo.
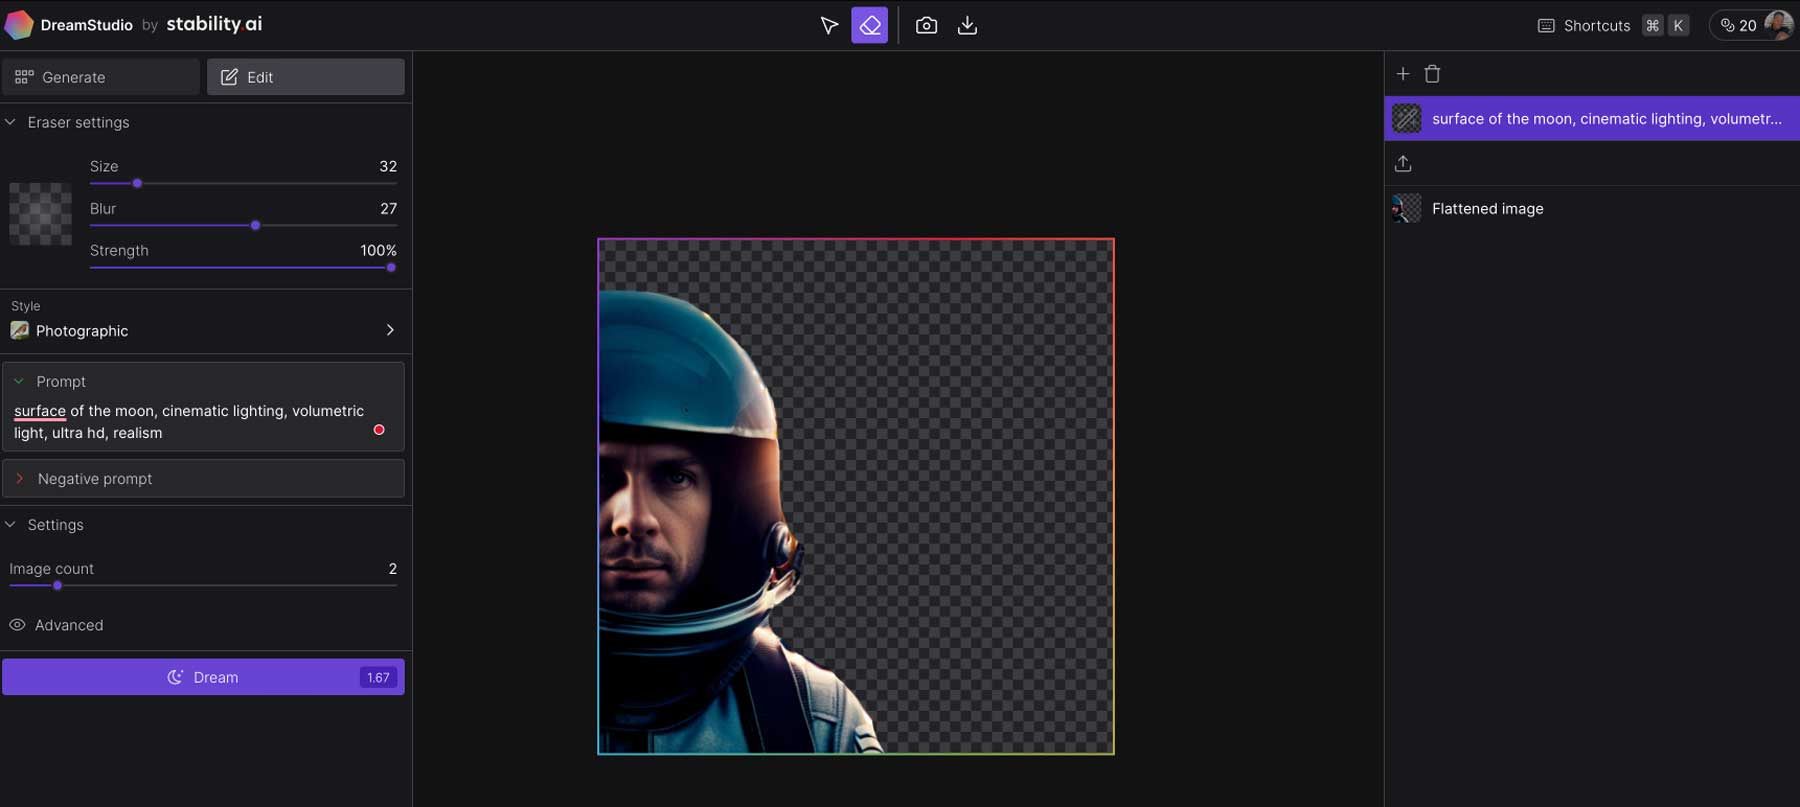
Next, we created an additional prompt to ask SD to add an image of the moon’s surface with cinematic, volumetric lighting in ultra-high definition and realism. The results worked quite well.
Over time, we expect DreamStudio to expand upon these editing tools to make it easier to create cool mashups, stunning effects, and more.
Saving Generated Images
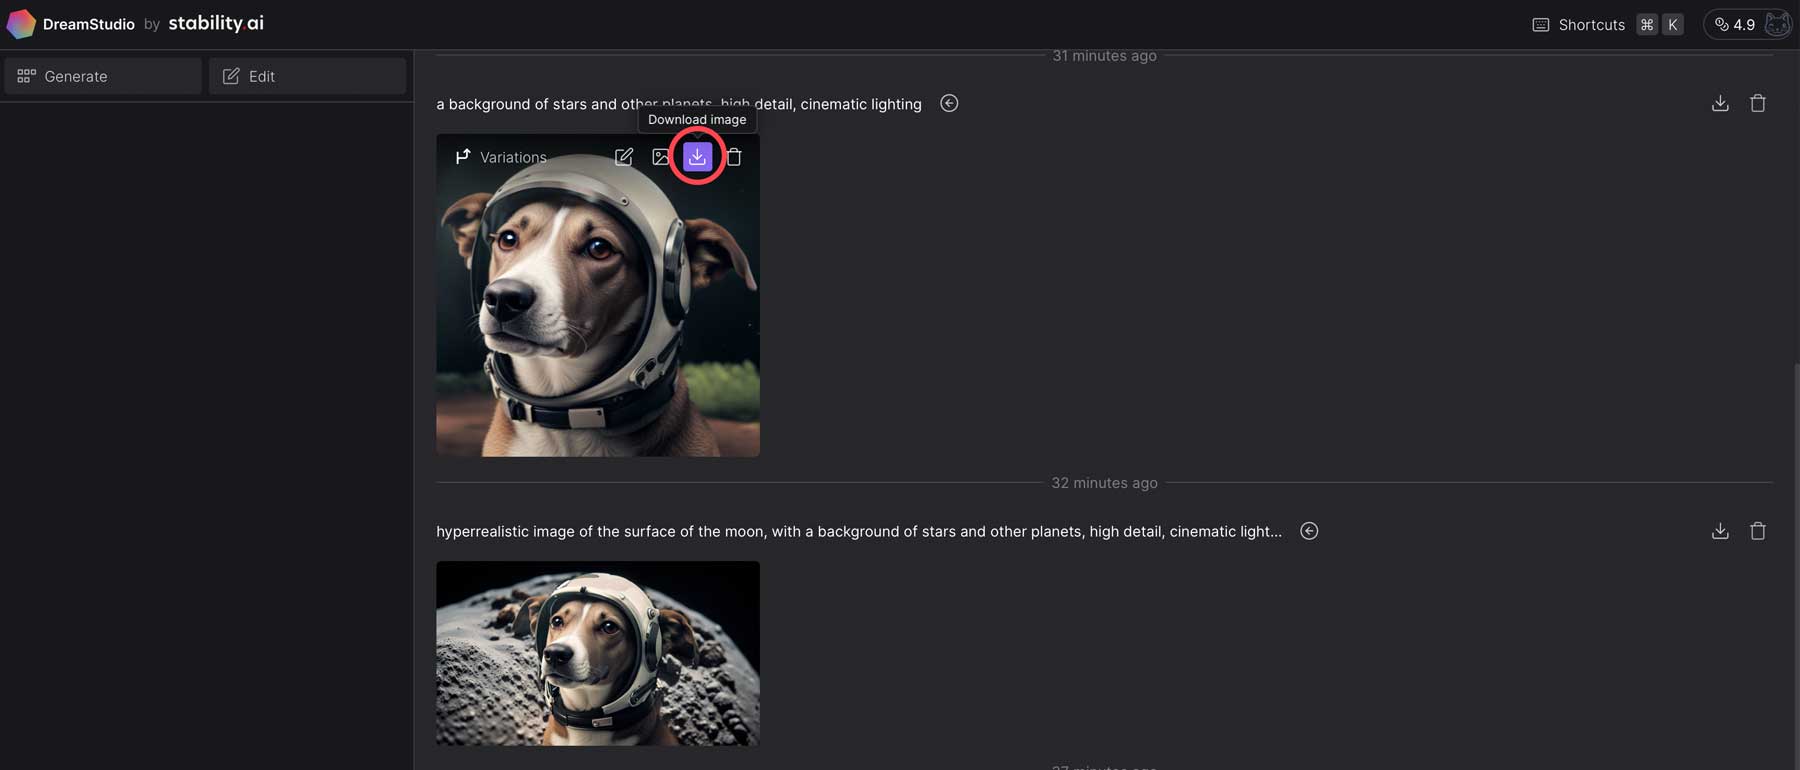
When you’re ready to share your creation with the world, DreamStudio makes it easy. Click the download button in the main image preview window by hovering over the image.
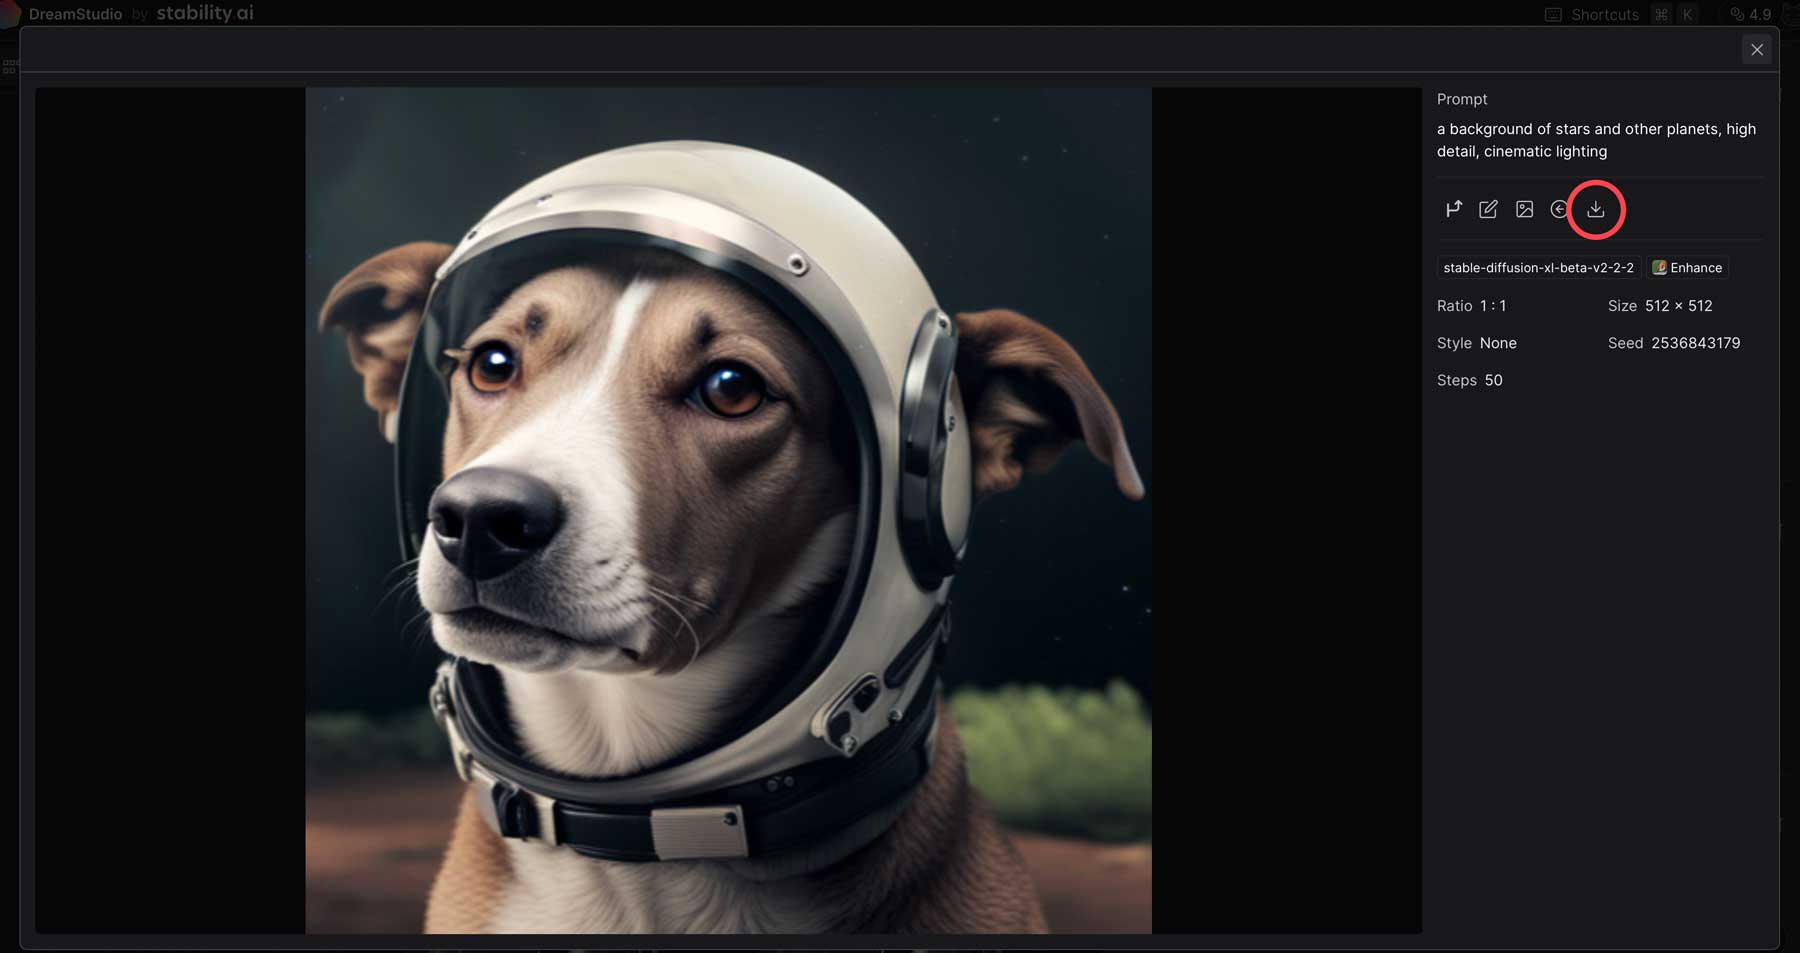
Alternatively, you can click on the image to bring up a larger preview, then click the download button from within the image preview.
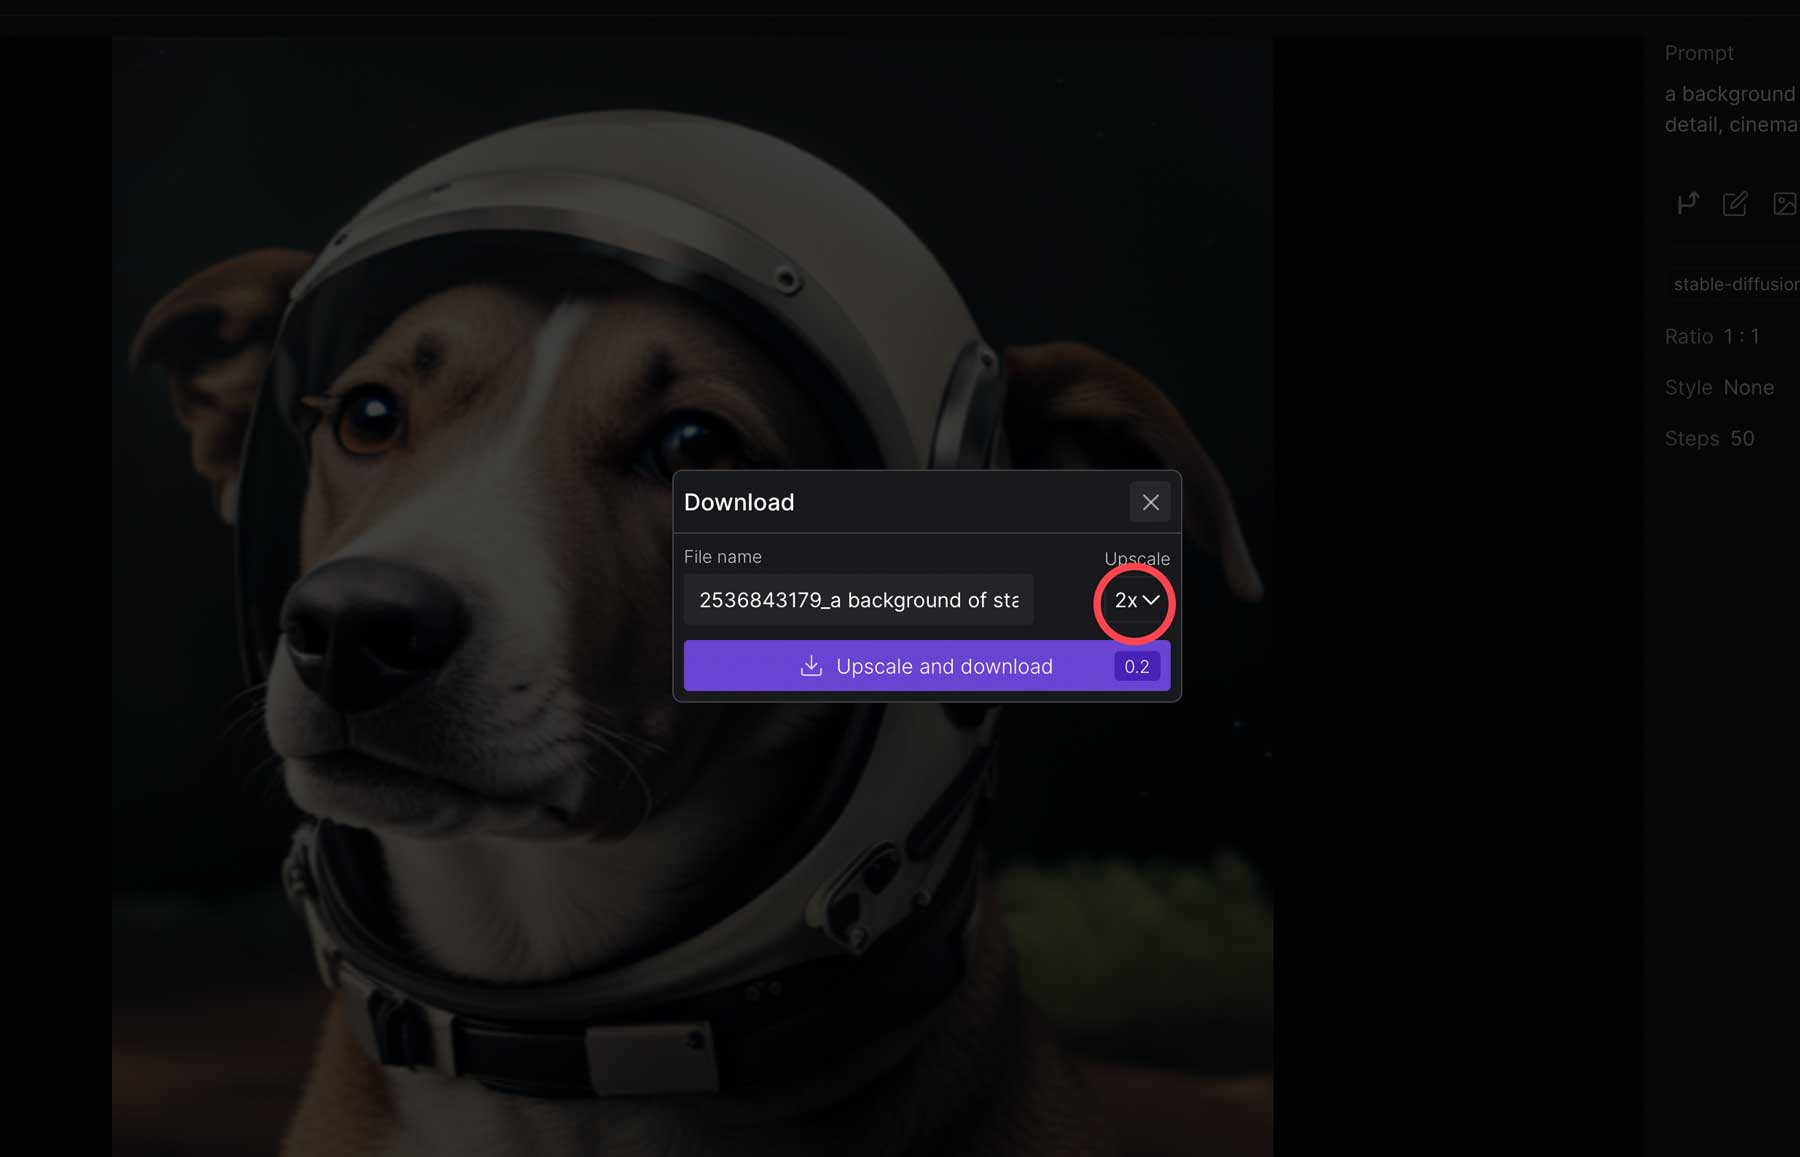
Finally, upon clicking the download button, you can download your image at the original size or pay a small fee (credit) to upscale it.
Final Thoughts on Stable Diffusion
Stable Diffusion is an innovative technology that is revolutionizing the way artists create. Using effective, descriptive text prompts, you can create high-quality images and edit them to suit your needs. The use of Stable Diffusion, along with other generative AI, such as Midjourney, Photosonic, and others, has become an increasingly popular way to create digital art. As generative AI evolves, using it responsibly and ethically is important. After all, AI is designed as an assistive tool, not a job replacement.
If you’d like to learn more about generative AI and the tools used to create it, check out some of our other posts related to all things AI:
- 5 Best AI Website Builders (For Fast Web Design)
- 9 Best AI Development Software
- 8 Best AI Video Generators (Compared)
- 9 Best AI Design Tools (Reviewed & Compared)
- How to Use AI to Create Amazing Web Design with Divi (Using ChatGPT & MidJourney)
Frequently Asked Questions (FAQs)
Before we wrap up, let’s answer some of your most common questions Stable Diffusion. Did we miss one? Leave a question below, and we will respond!


I am using genmo and Lenoardoai to generate my ai images. I am in so happy 😁 to know about stable duffsion. I will make good use of it now.