")
Keeping your WordPress website safe and secure should be at the top of your mind. After you’ve added your favorite WordPress plugins and chosen your beautiful theme, your next step should be protecting the investment of time, resources, and money you’ve put into your site. This is where maintenance of your WordPress website comes in. There are a few things you should do to keep up with your WordPress website, and one of them is keeping a free online and offline back. In this post, we’ll learn how to back up your WordPress website in three ways, discuss backup storage solutions, best practices, and what to do if you need to use your backup after a website crash.
- 1 How to Backup Your WordPress Website Using a Plugin
- 2 How to Backup Your WordPress Website Using Your Hosting Provider
- 3 How to Backup Your WordPress Website Manually
- 4 Where to Store Your WordPress Backups
- 5 How Often Should You Backup Your WordPress Website
- 6 What to Do If Your Site Crashes
- 7 Tips and Best Practices for Backing Up Your WordPress Website
- 8 Conclusion
- 9 Frequently Asked Questions (FAQs)
How to Backup Your WordPress Website Using a Plugin
There are many backup plugins that you can use to take a backup of your website. A WordPress backup plugin is a quick and straightforward way to create a website backup. For our guide, we’ll walk through using UpdraftPlus, a popular WordPress backup plugin, to create your website backup. We’ve also come to like using Blogvault to back up a WordPress site, also.
Subscribe To Our Youtube Channel
Install and Set Up Plugin
From your WordPress dashboard, from the left-hand menu, hover over Plugins. Next, click Add New.
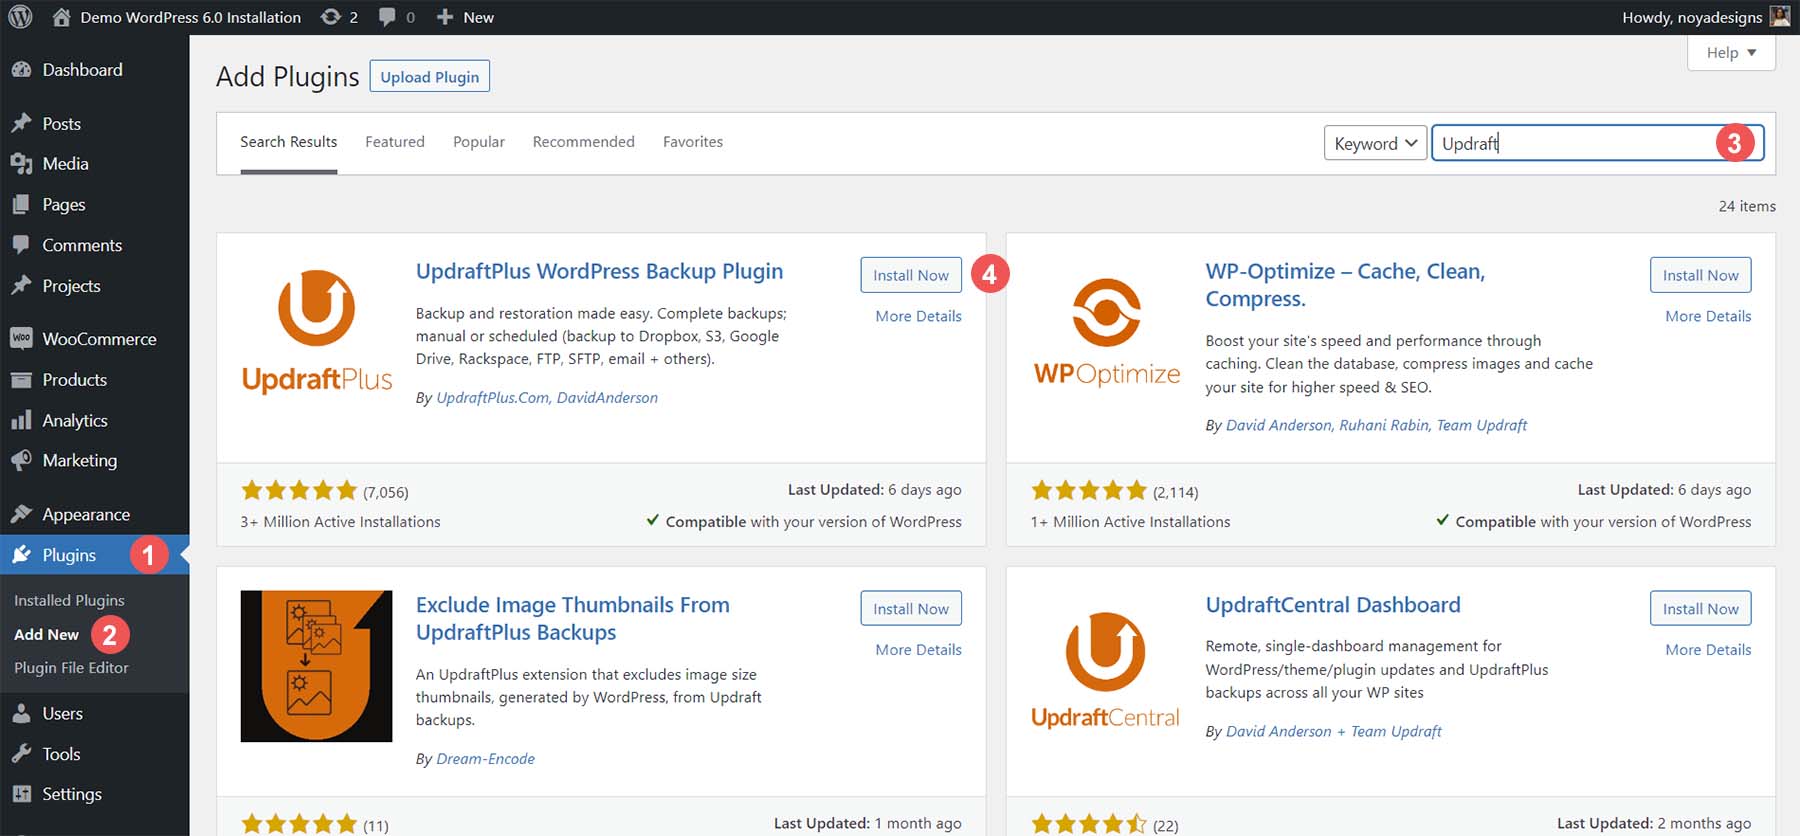
In the search bar at the top right, type Updraft. Click Install Now; the button will turn blue after you install the plugin. Click the blue button that now says Activate next to the first option.
Configure Settings
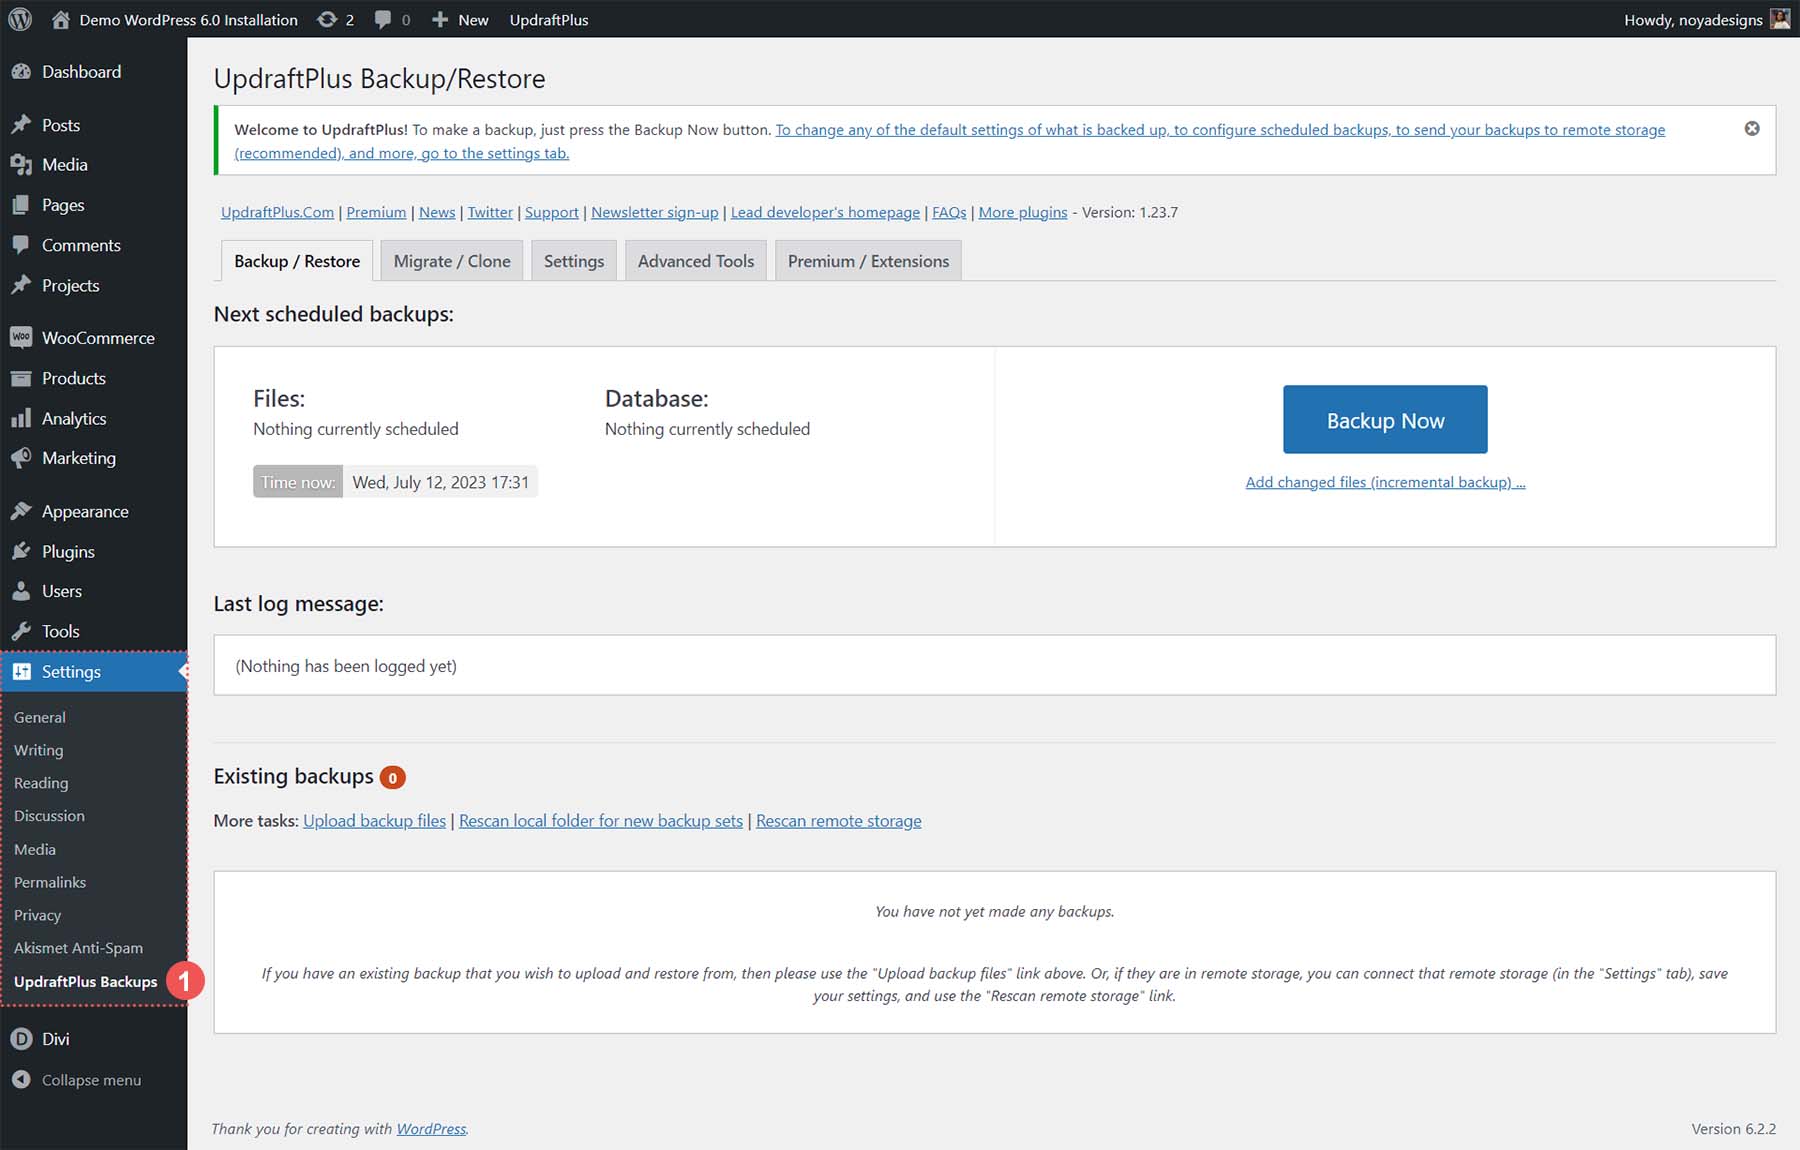
Once UpdraftPlus is installed, you can access the plugin by hovering over Settings from the left-hand menu. Then, click on the UpdraftPlus Settings menu option. This will show you the plugin’s dashboard, notifications regarding your backups, and your existing and scheduled backups.
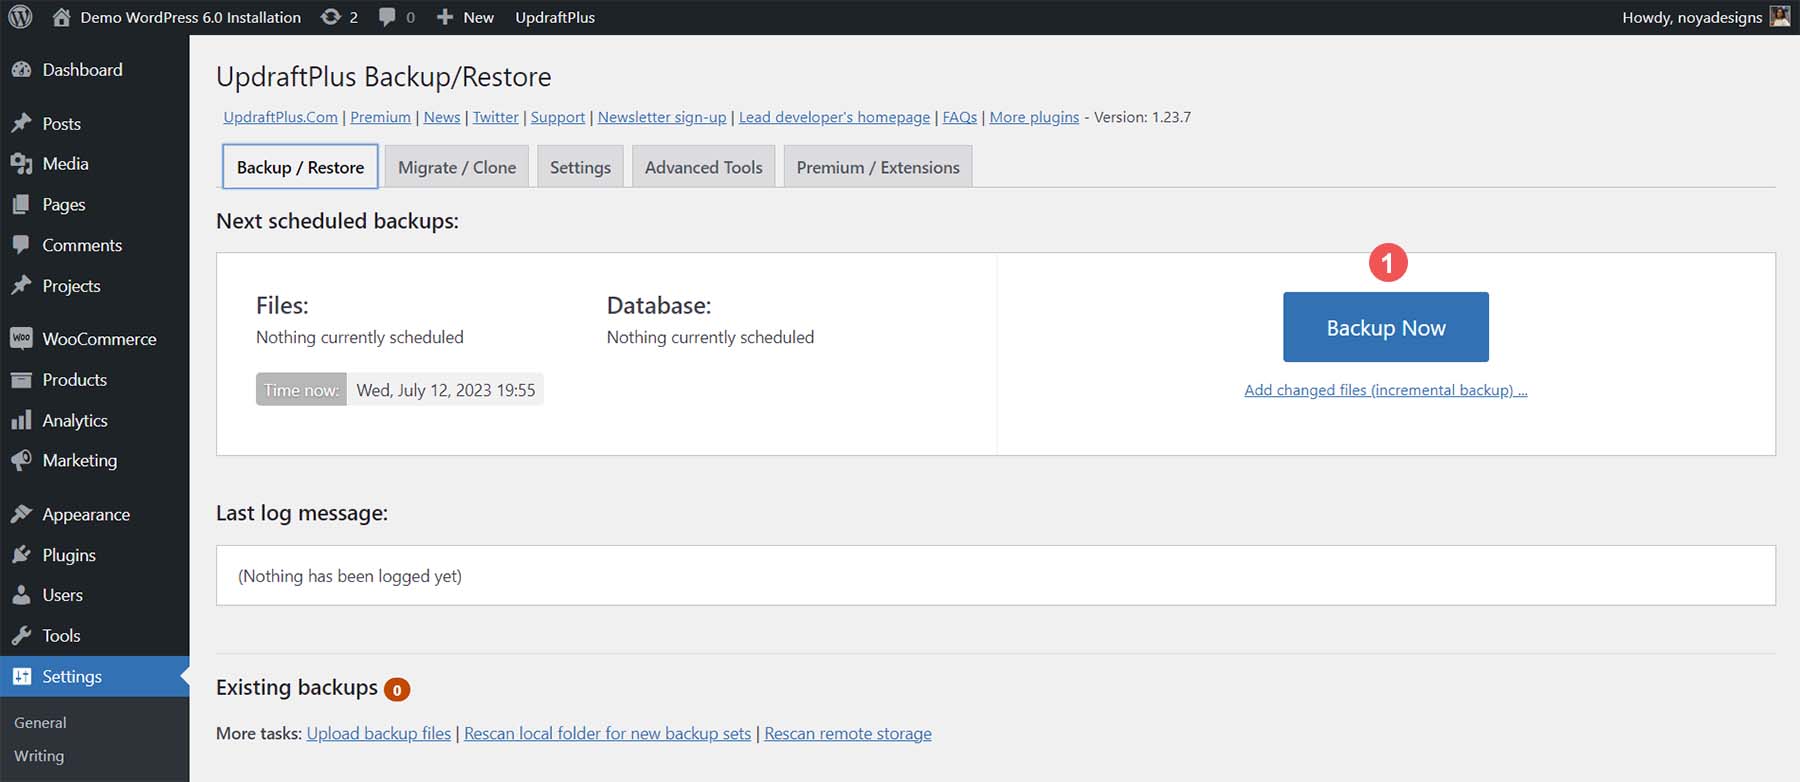
Create a New Backup
Click the large, blue backup Now button to create your first backup.
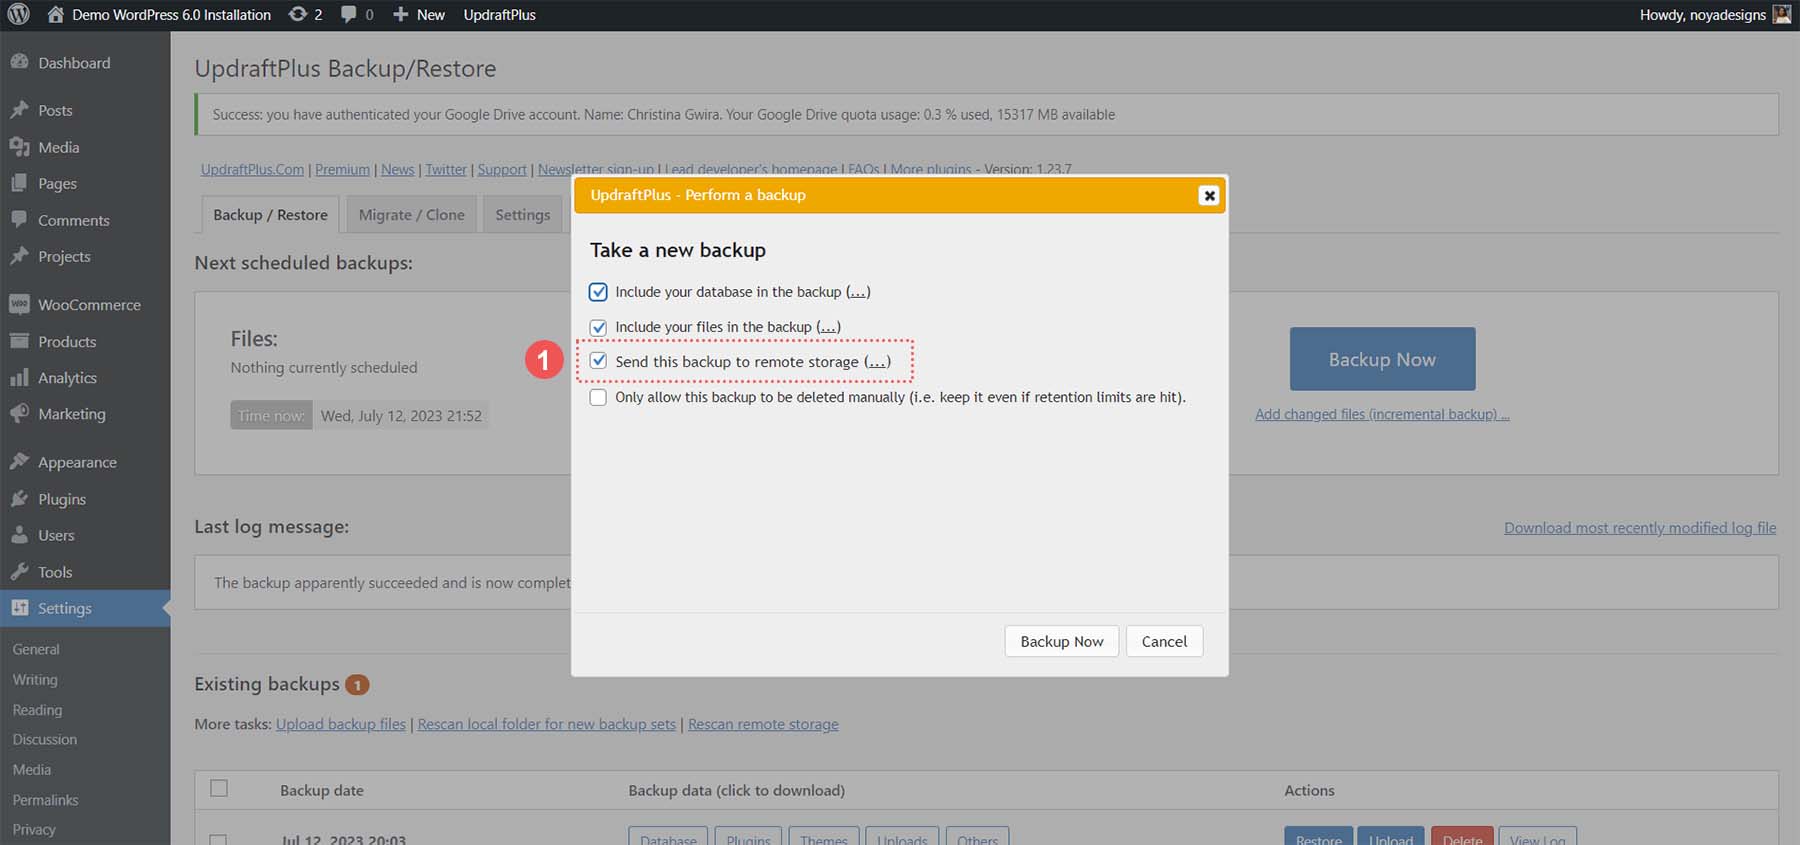
Once you’ve done this, a popup will appear. You’ll be presented with four options:
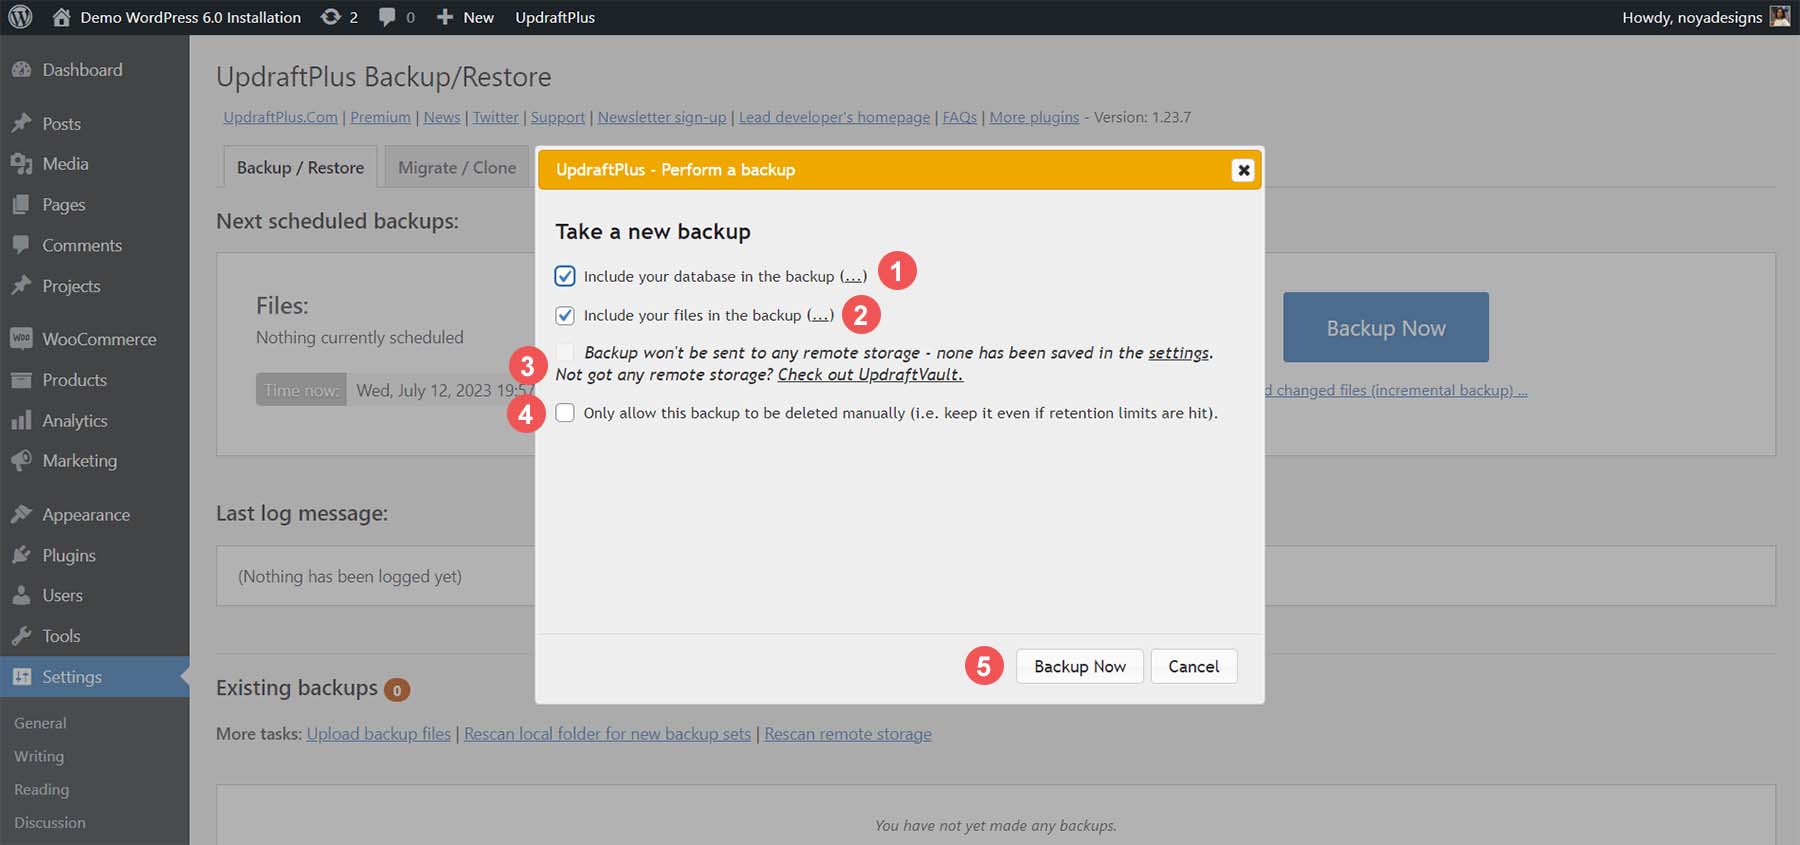
You can include your database or your files in your backup. Both options have an (…) following them, allowing you to get specific about the database tables and folders you’d like to include or exclude from your backup. Once you have set up cloud storage for your plugin, you’ll have the option to. We’ll come back to this later. Lastly, you have the choice of deciding whether this download will be deleted automatically or not. Once you have made your selections, click the Backup Now button.
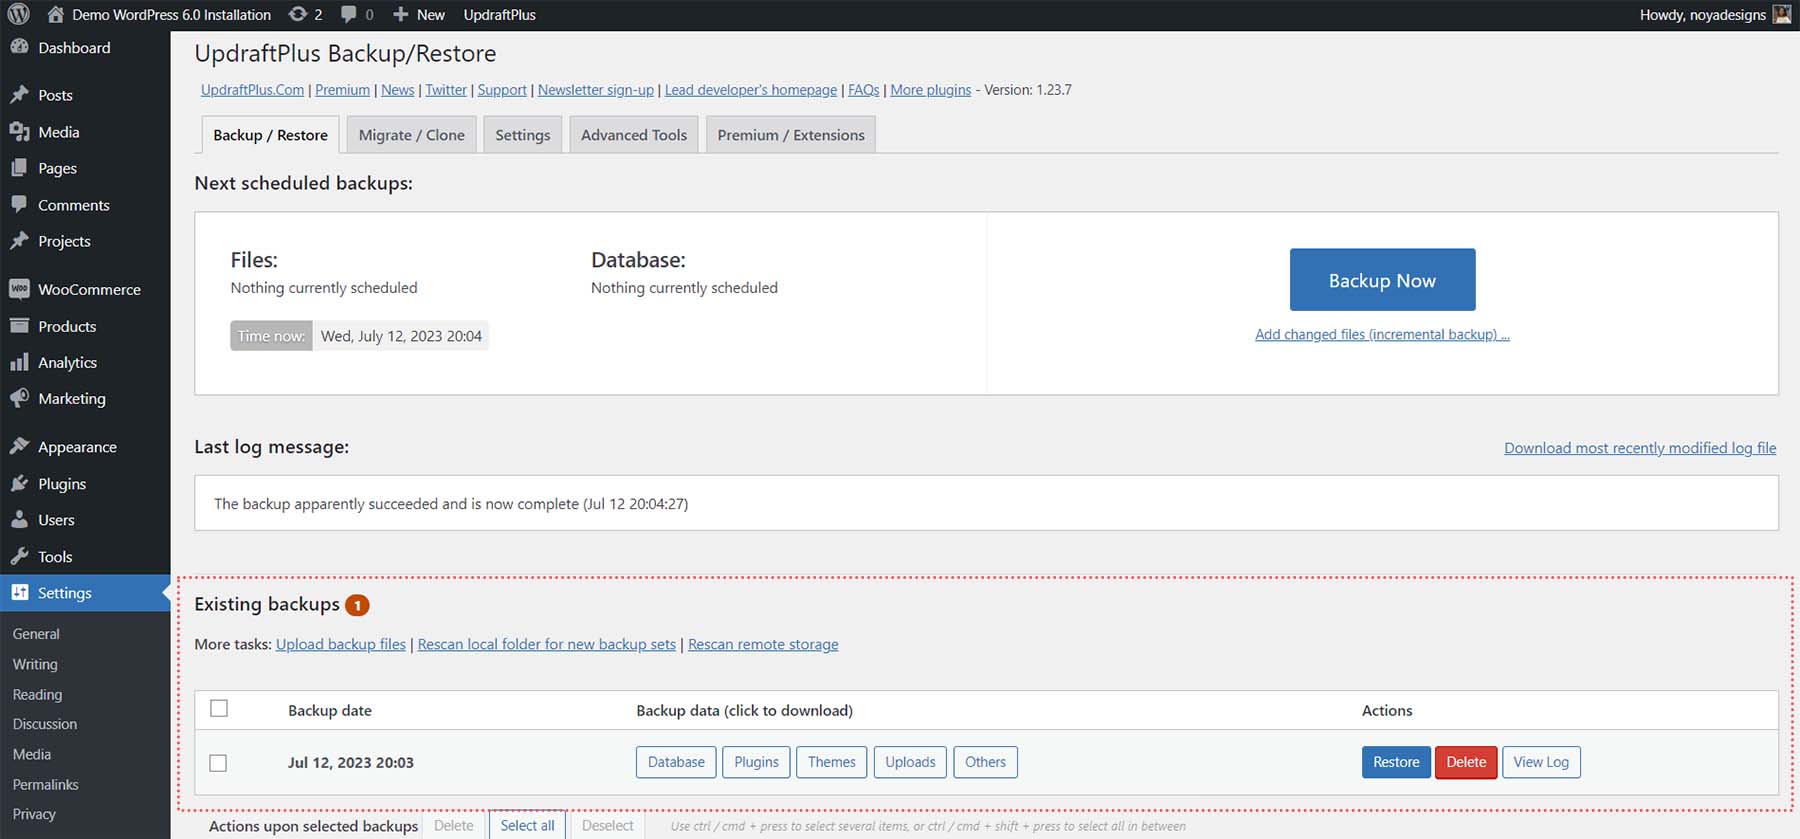
Once your backup has been completed successfully, you’ll notice it is added under the Existing backups table. You can select specific aspects of your backup to download, restore said download, delete it, or view the log processed as it backed up your website.
Schedule Automatic Backups
Now, let’s look at setting up scheduled, automatic backups. Click on the Settings tab from the UpdraftPlus dashboard.
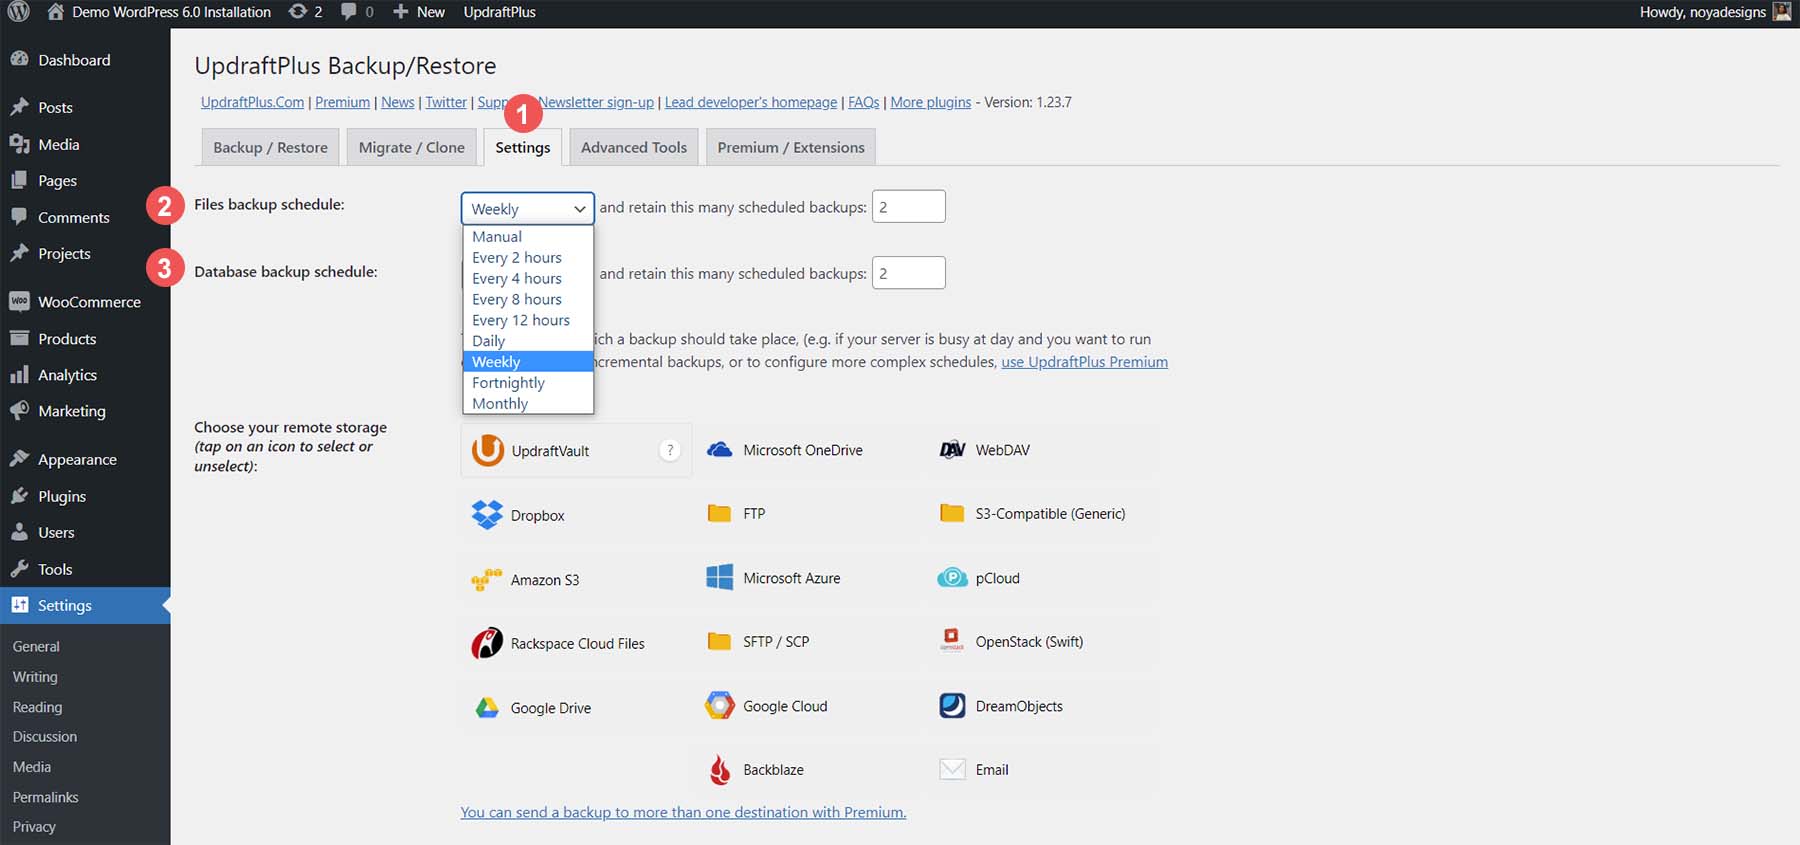
The first two options on your screen allow you to set up automatic schedules for your backup process. You can set up a schedule for the files and database of your website in a frequency from a few hours to monthly. Additionally, you can decide how many backups you’d like to keep on your server.
From the same settings screen, we can set up the storage solution we’ll be using for our website. UpdraftPlus has many options for storing your backups on the cloud. Some of the options available include:
- Dropbox
- Google Drive
- Email and
- SFTP
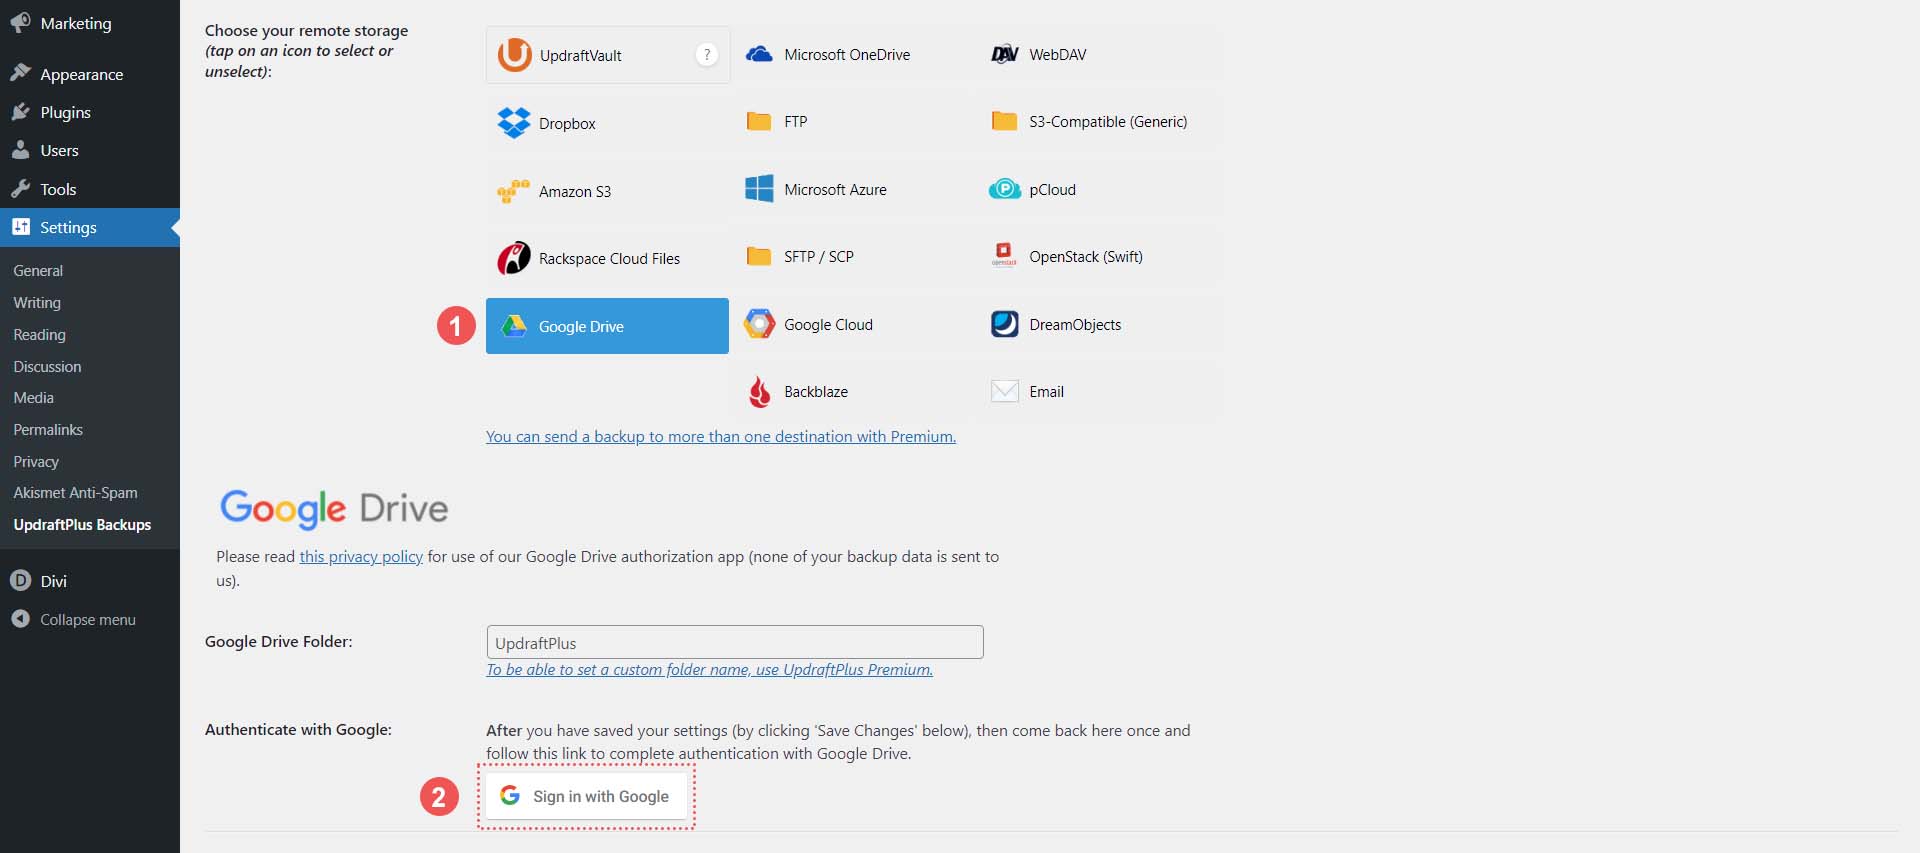
With the free version of the UpdraftPlus, you can back up to one cloud or online service. However, the plugin’s premium version can back up to multiple places. For our guide, let’s back up to Google Drive. From the list of cloud services, select the Google Drive icon—next, login to your Google Drive account by clicking the Sign in with Google button.
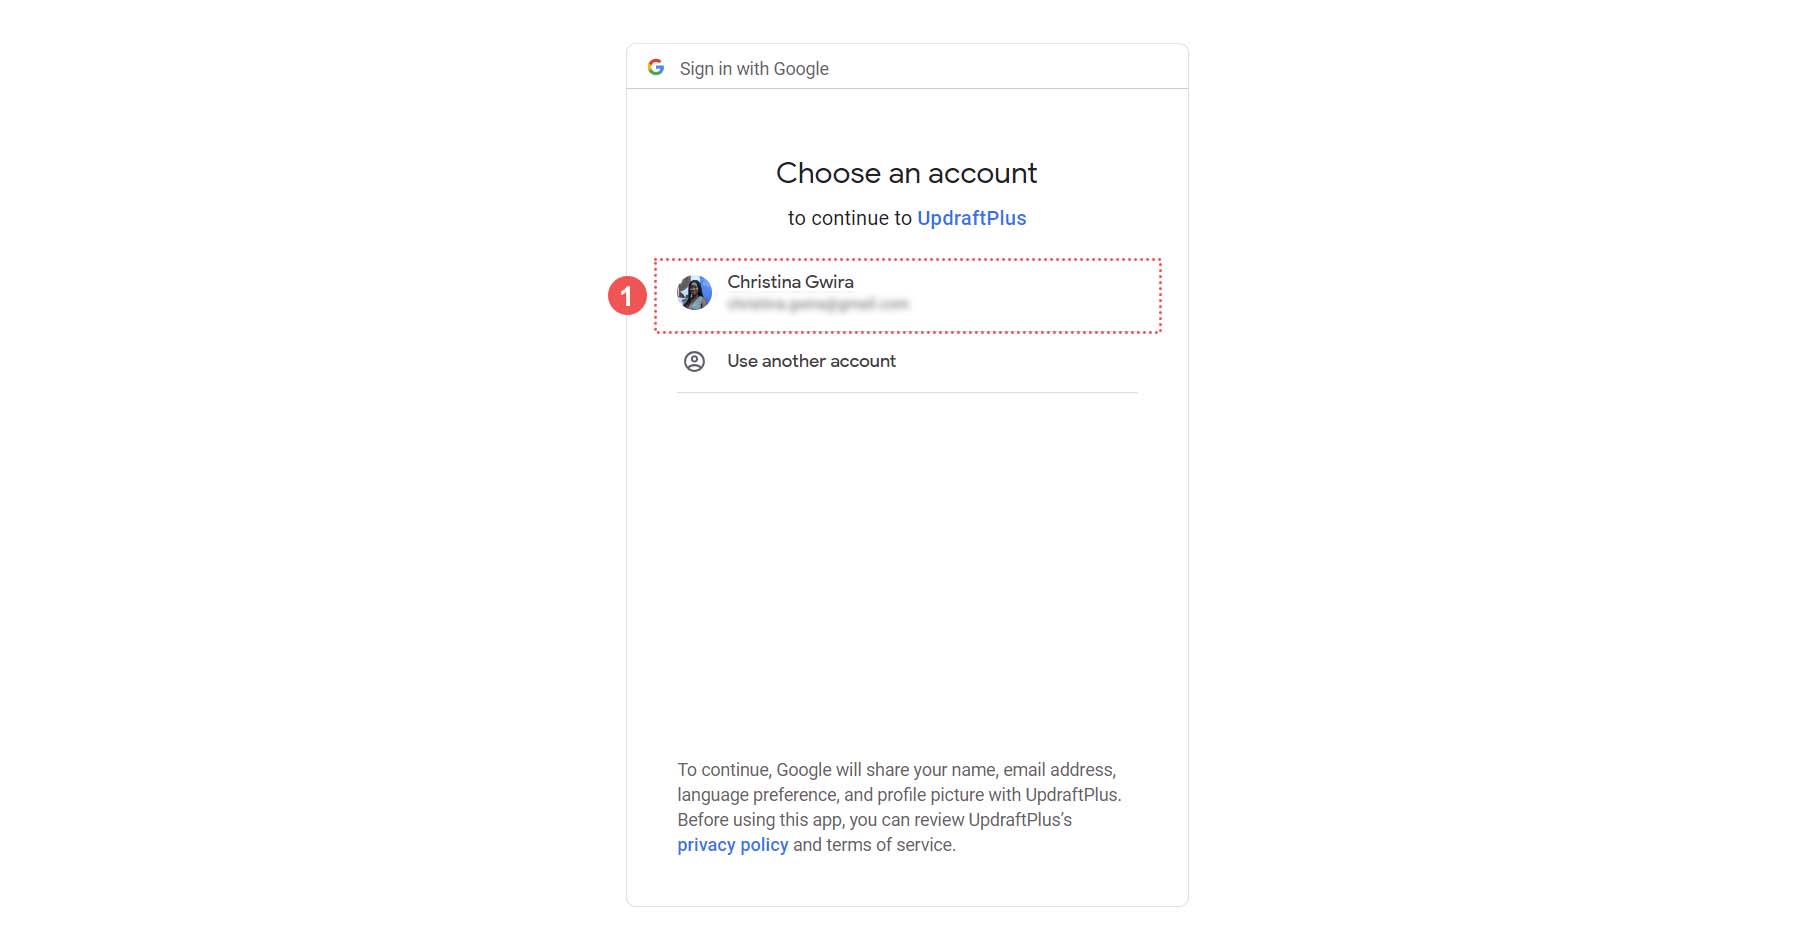
Next, sign into your Google account.
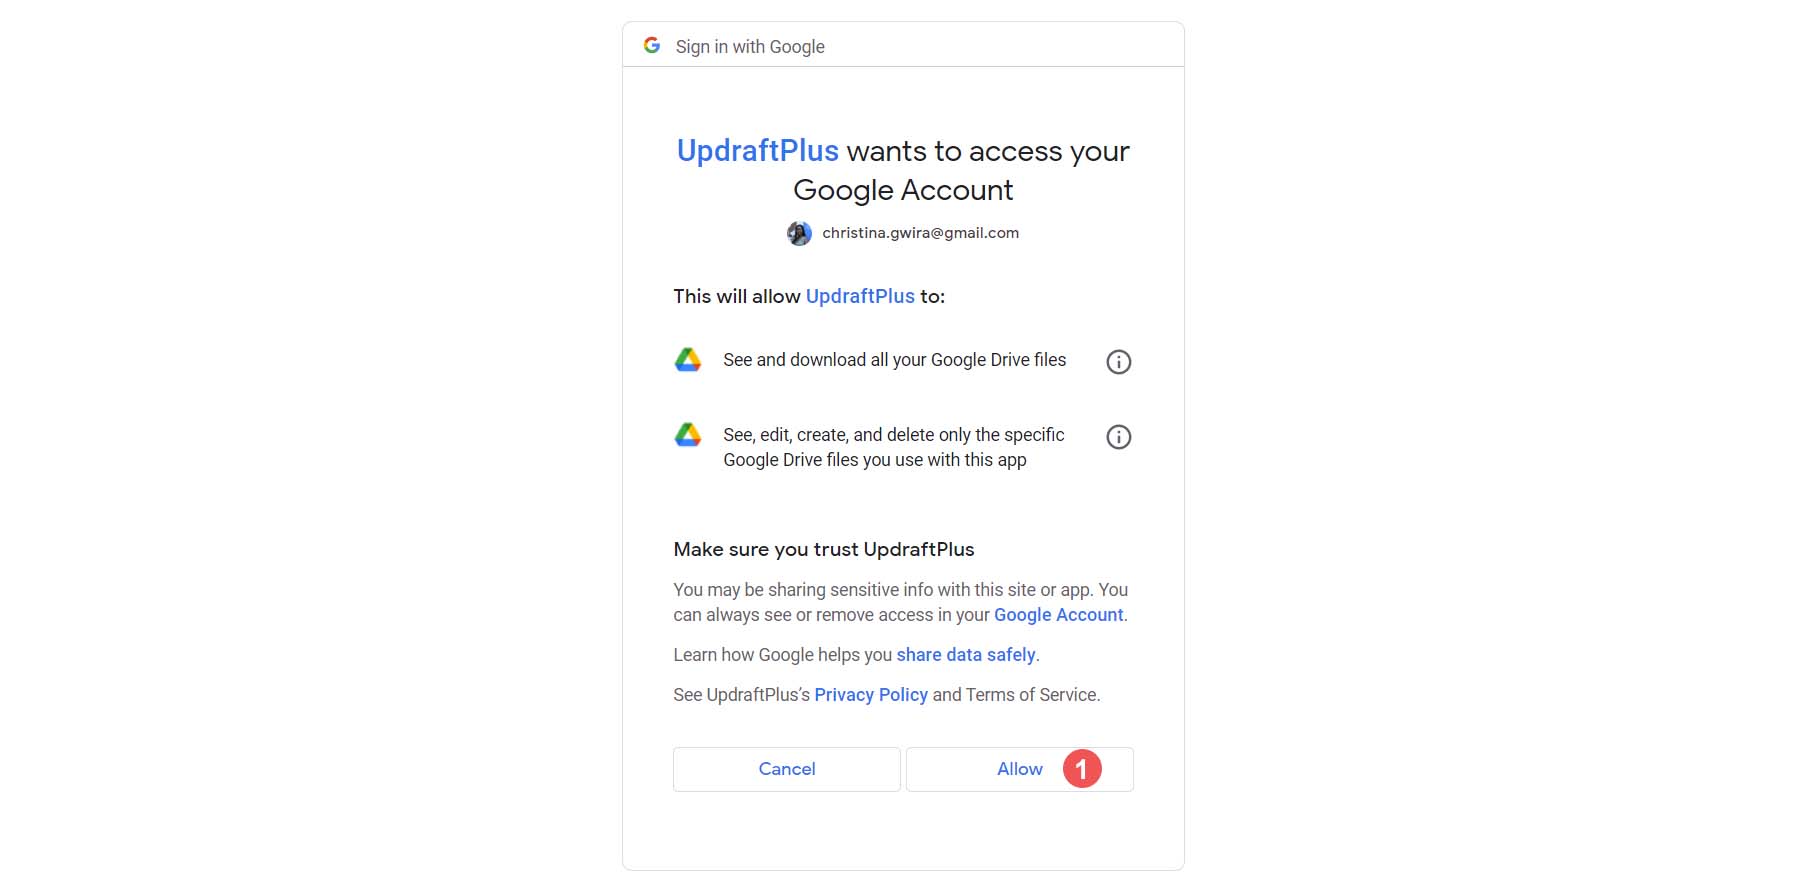
After, grant UpdraftPlus access to your Google Drive account, then click Allow.
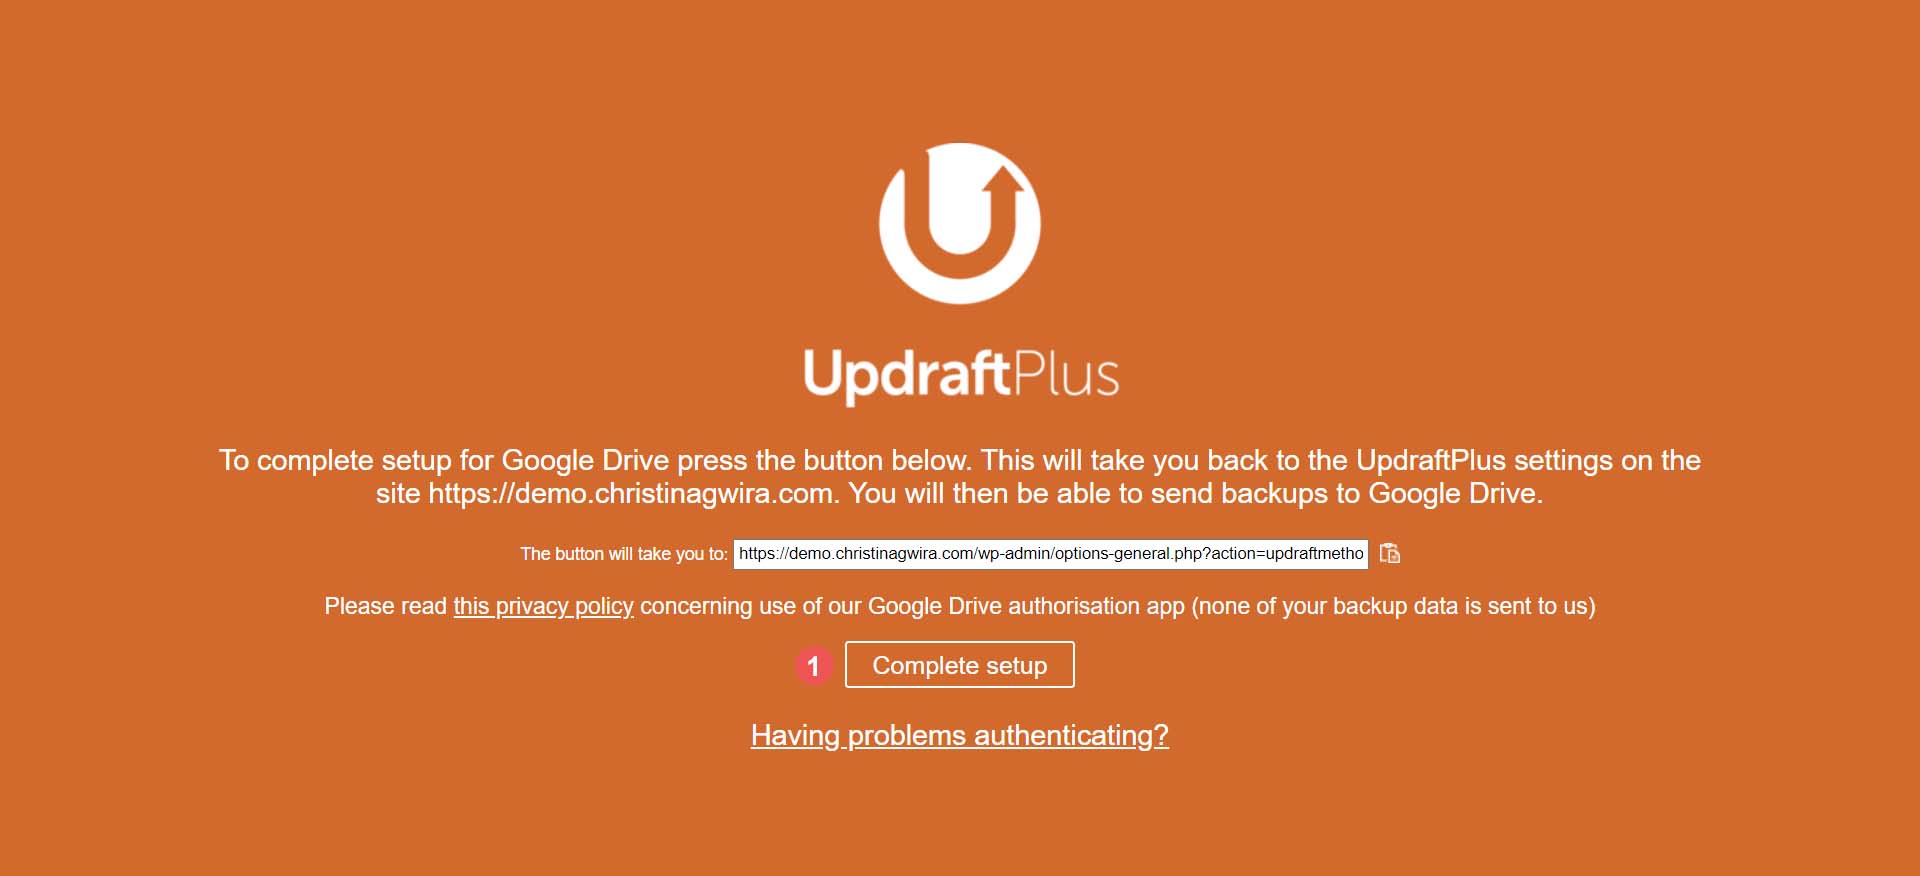
Once this is done, you’ll be presented with this final screen. Click on the Complete Setup button. This will take you back to your WordPress installation.
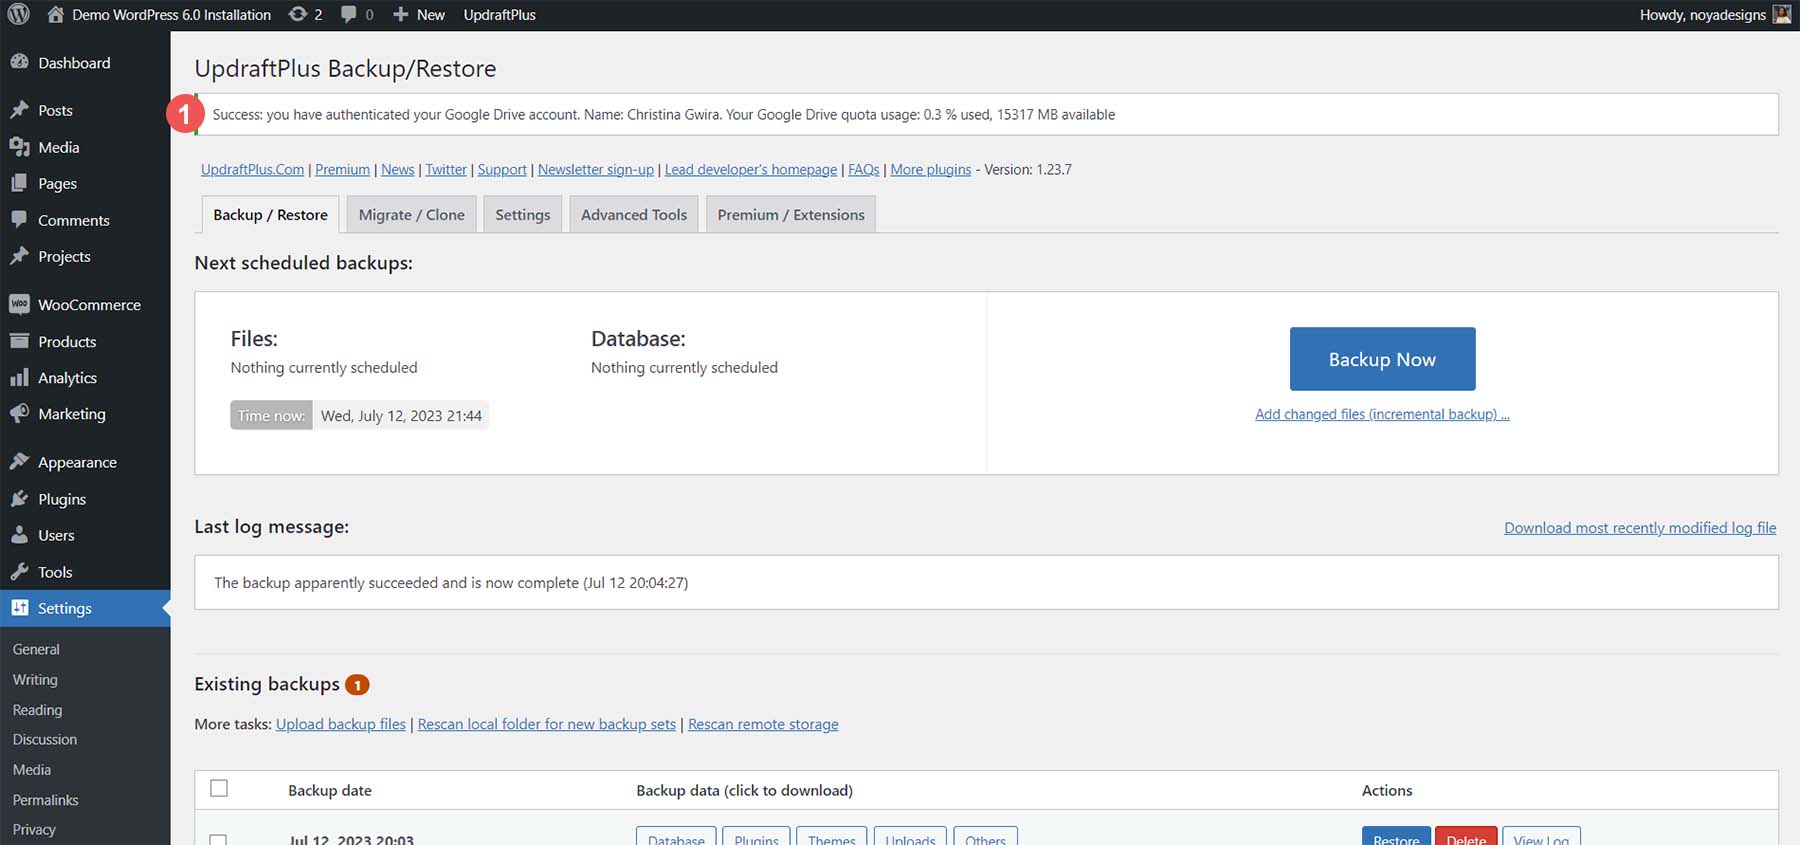
Once you have returned to your WordPress install, you’ll see a notification that your Google Drive has been successfully connected.
Once your account is connected, click on the Settings tab again. Then, scroll down to the cloud account you set up and click the Save Changes button.

When you make a backup, you can send the backup to your Google Drive account.
Storing Your Backup Offline
It’s always a good idea to download backups onto your computer, a USB, or any cloud storage platform that will allow you to store your website offline. To do this, click any of the folders you’d like to download to the media of your choice from the backup you’ve just made.
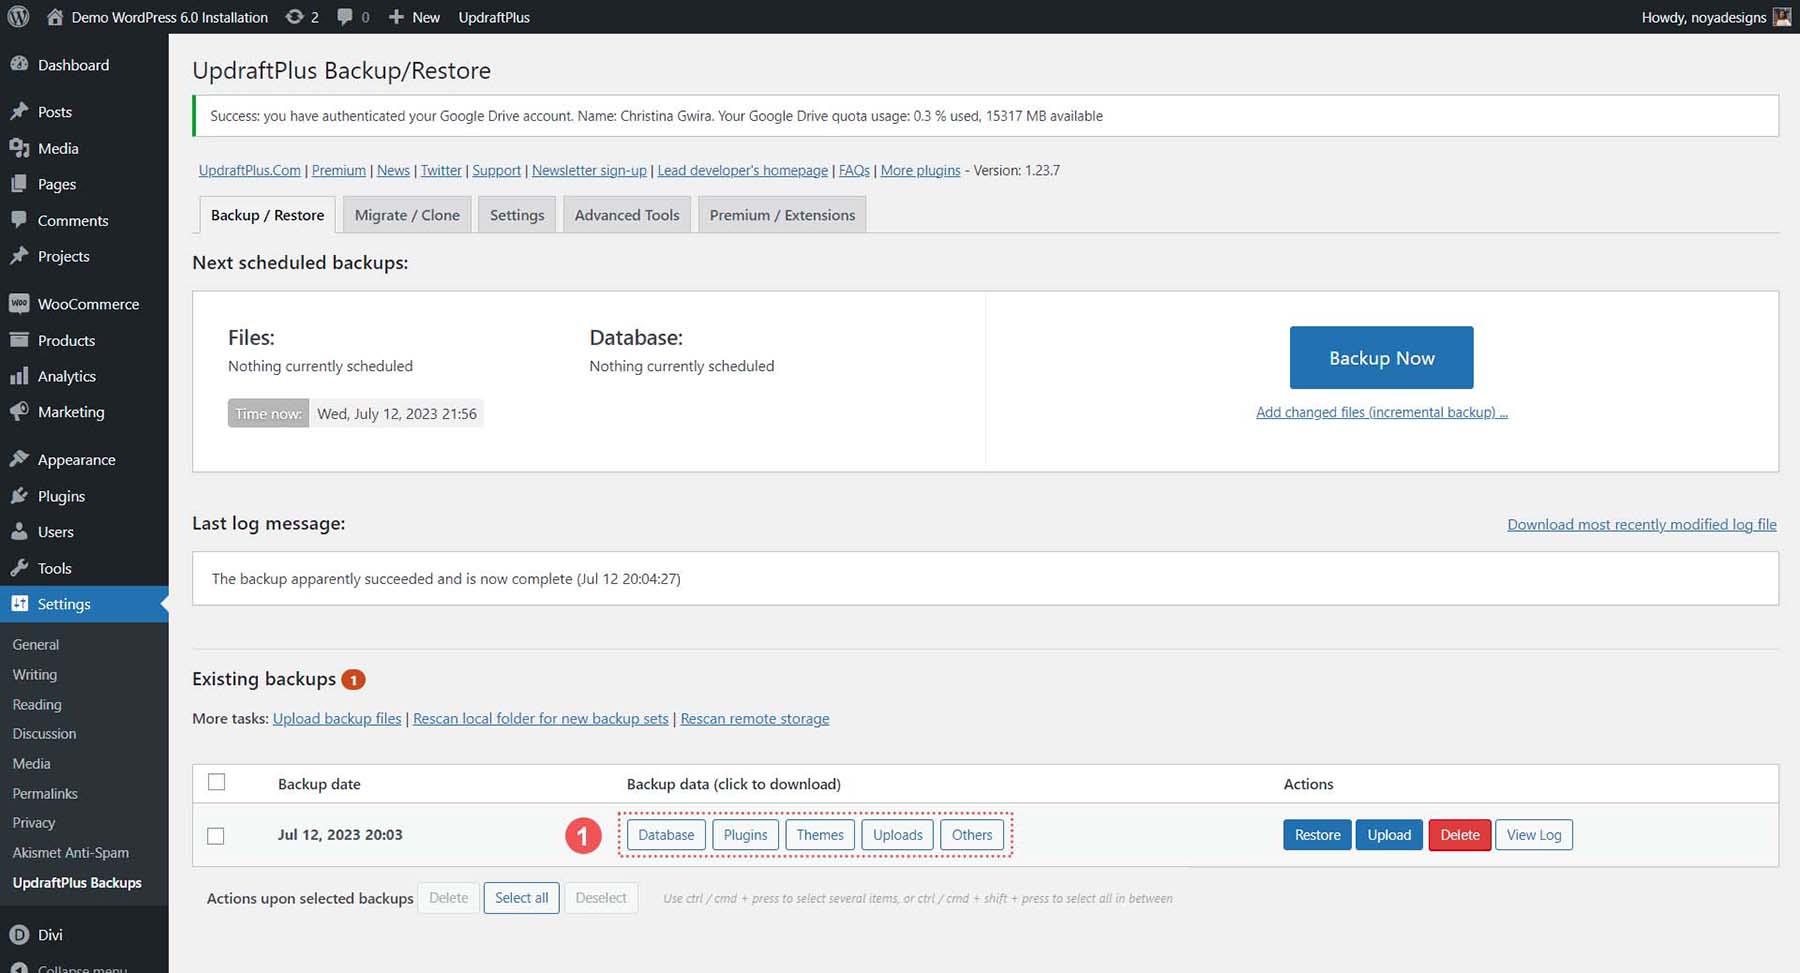
For a full offline website backup, download the database, plugins, themes, uploads, and other folders. Now that we know how to make a backup with a plugin online, offline, and to the cloud, let’s see how we can do this with our hosting provider.
How to Backup Your WordPress Website Using Your Hosting Provider
Backing up your website with a plugin is a simple and easy way to back up your WordPress website if you can access WordPress’ user interface. However, things can get a bit sticky for you if you don’t have access to the dashboard. This is why knowing how to back up your WordPress using your hosting provider is essential.
For our use case, we’ll show you how to manually back up your WordPress website using Siteground, one of the best hosting providers for WordPress.
Login and Access Site Management Tools
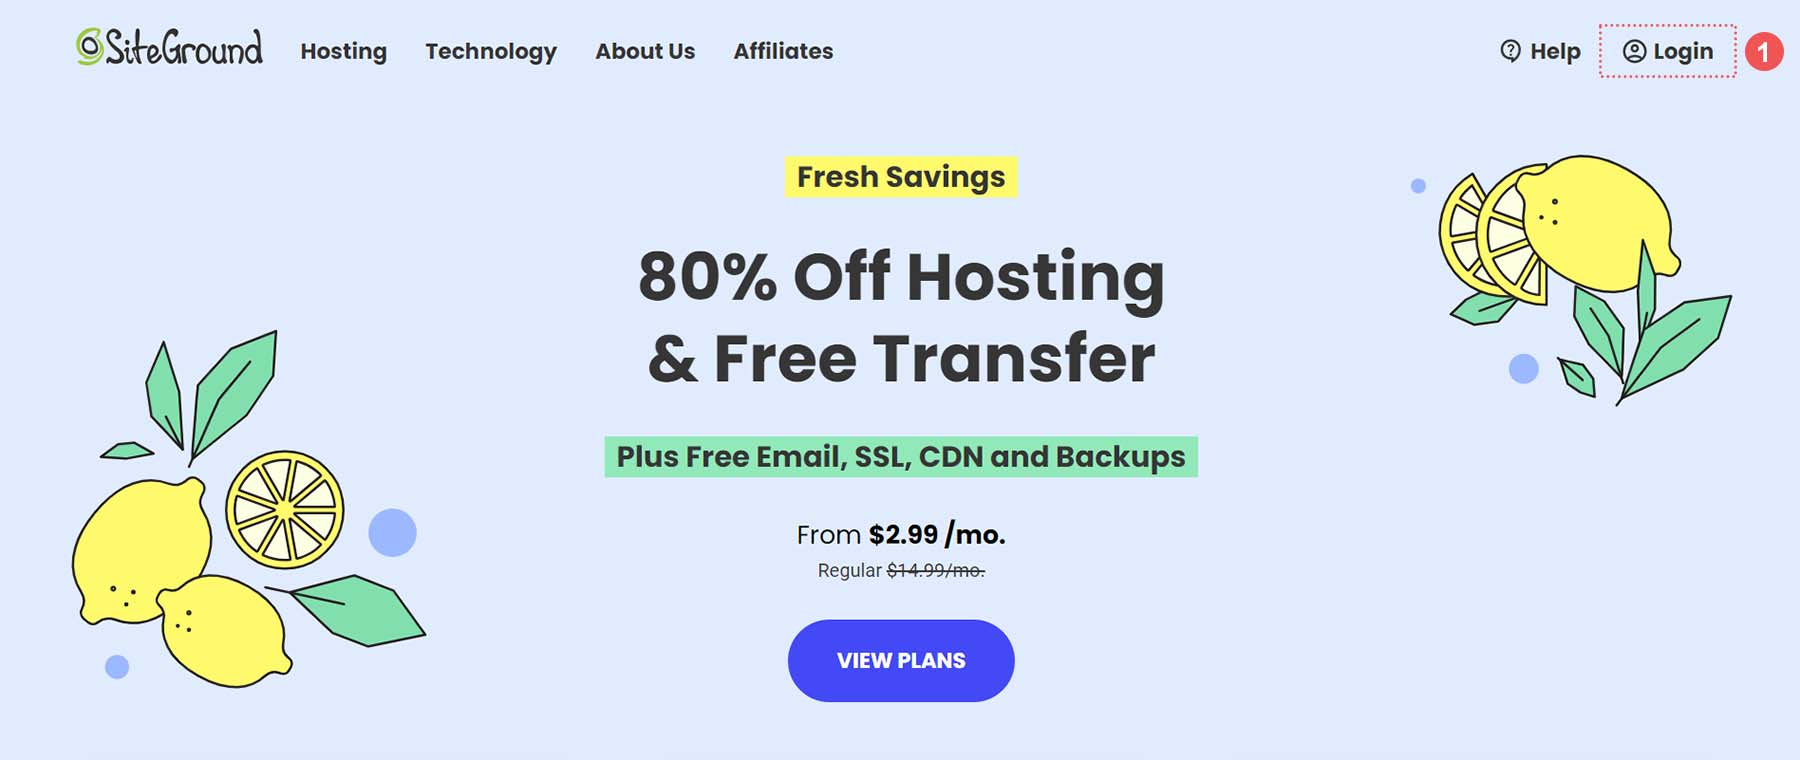
Visit Siteground and click the Login link in the top right-hand corner.
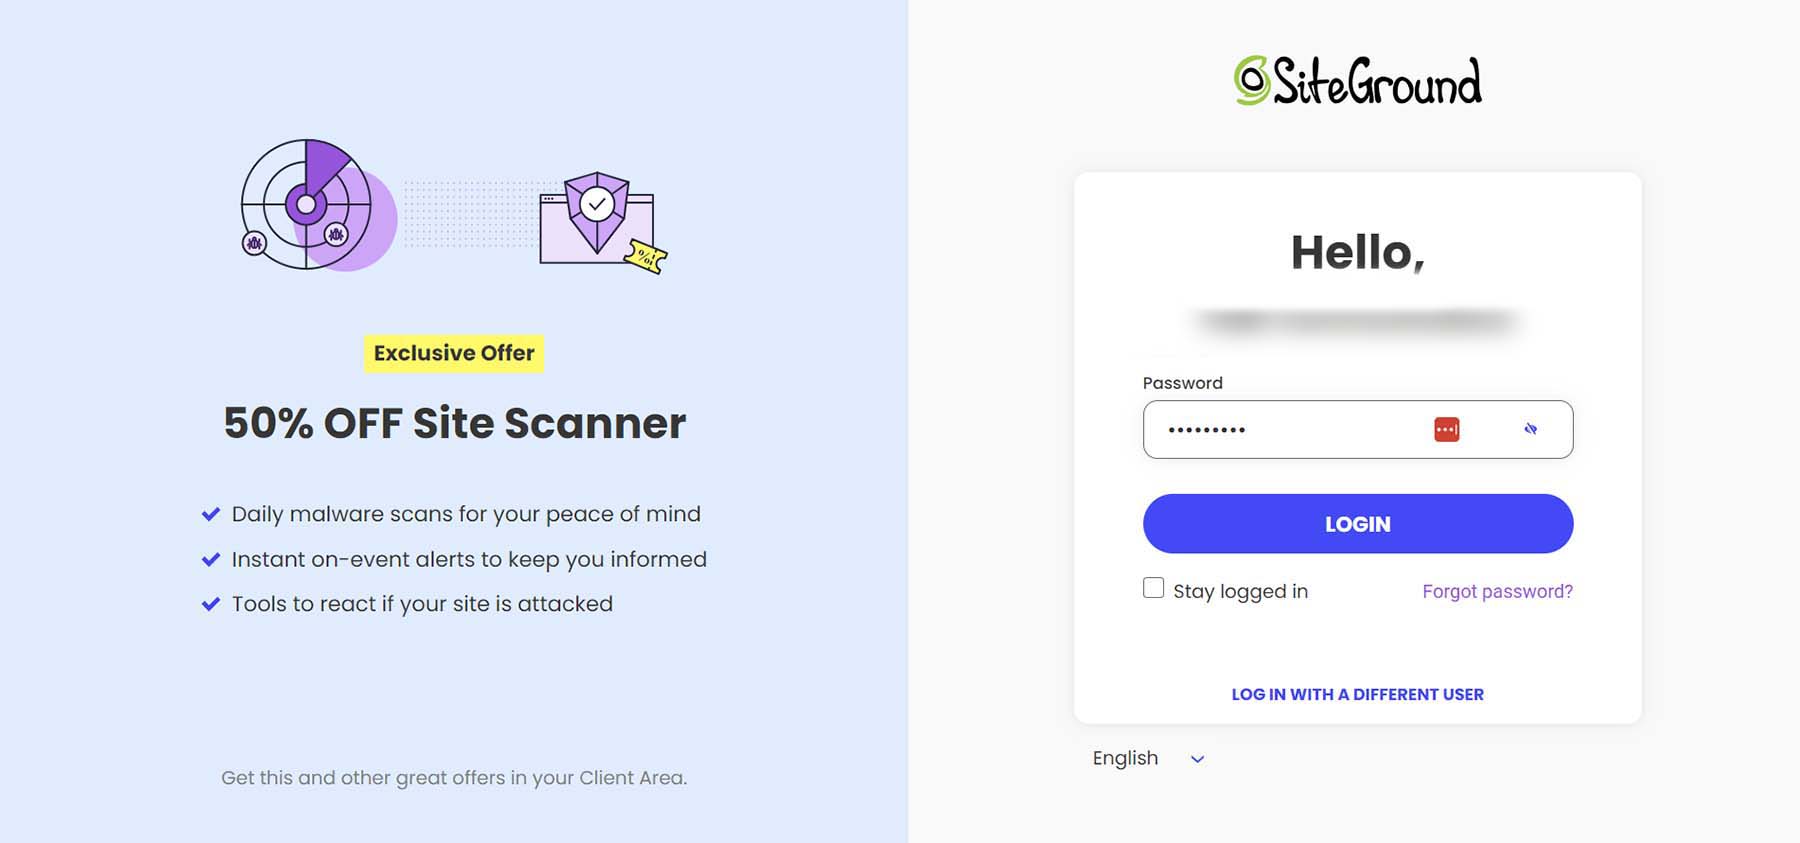
You’ll then need to enter your username and password.
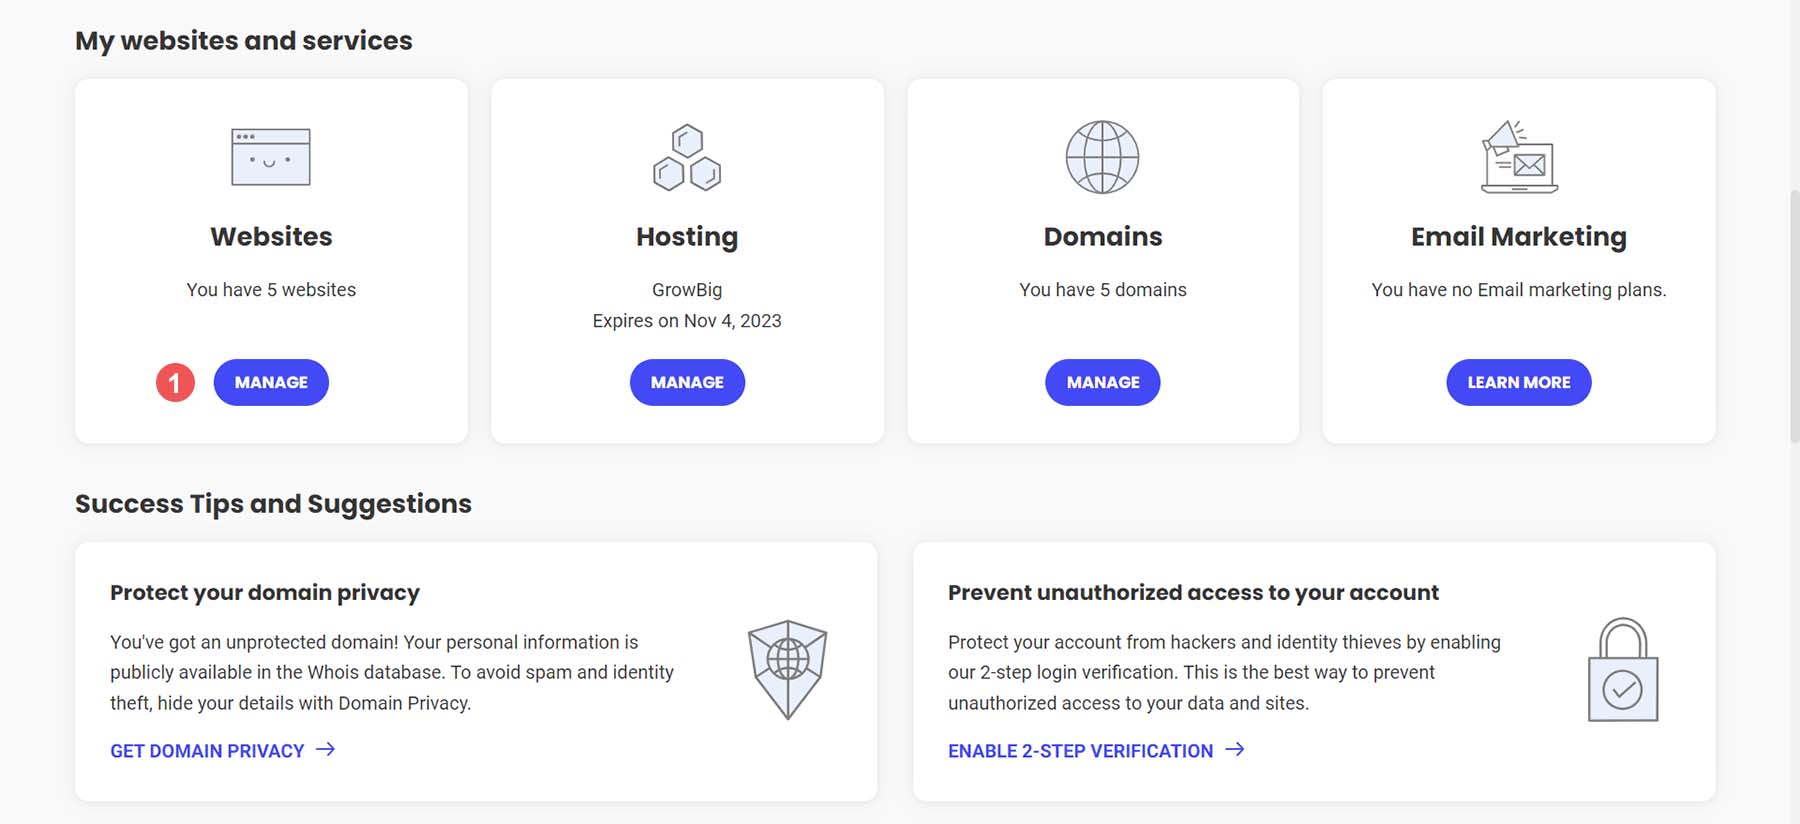
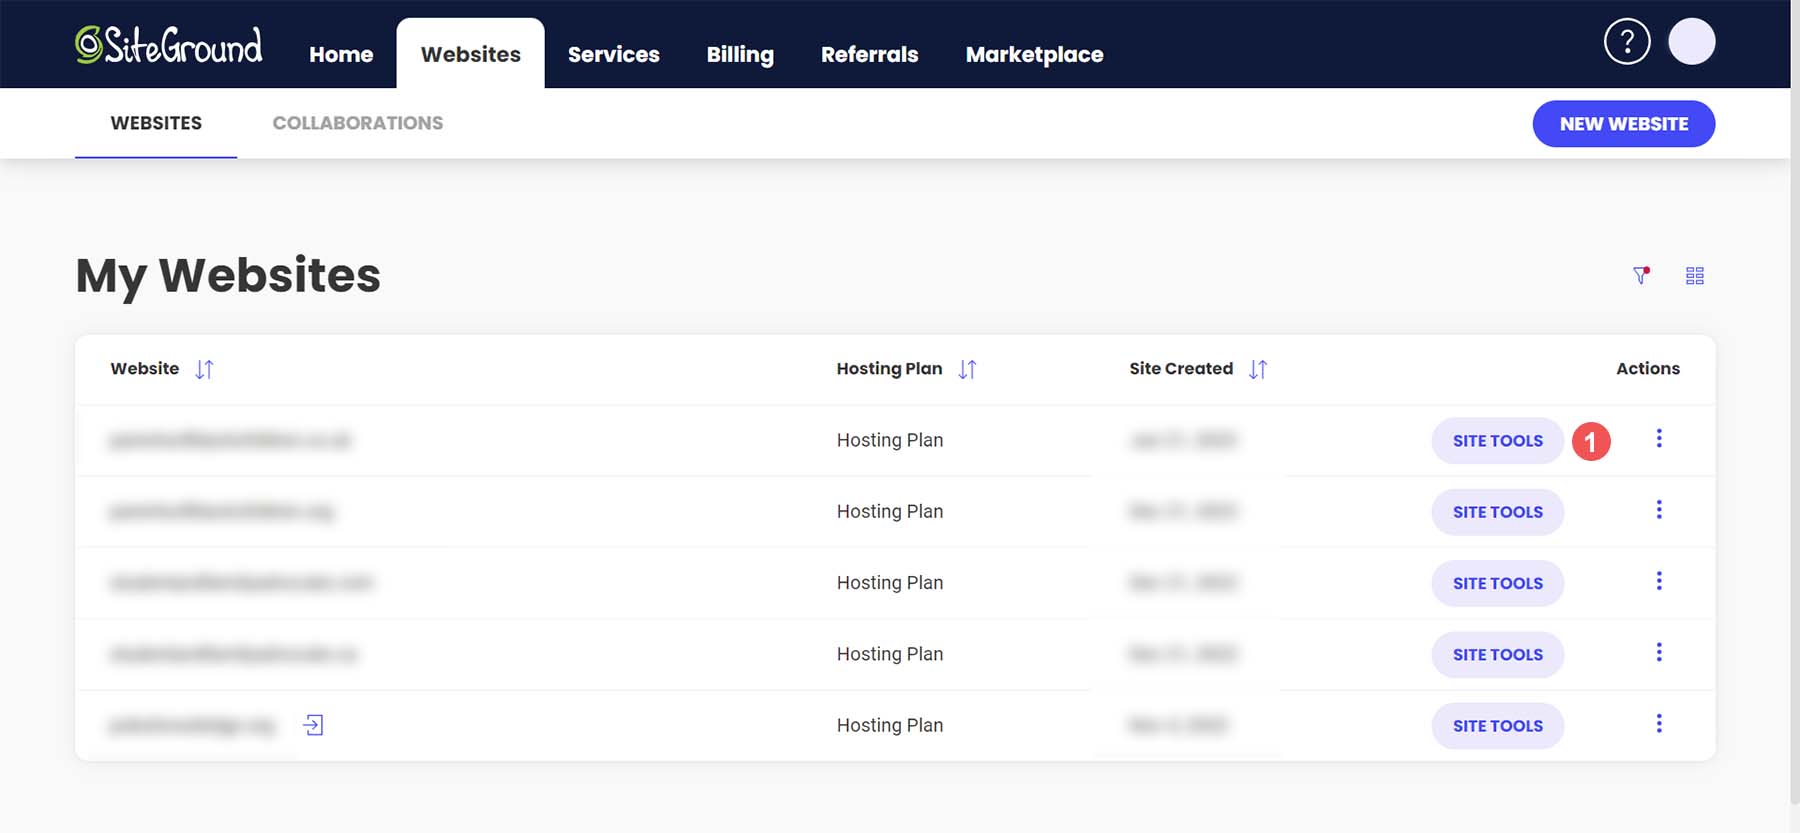
Once in your account, you’ll be presented with your Siteground home screen, which lists all your products. Click on the Manage button under the Websites title.
Once here, you’ll see a table listing all your websites within your Siteground account. Click on the Site Tools button next to the website that you’d like to back up.
Create a New Backup
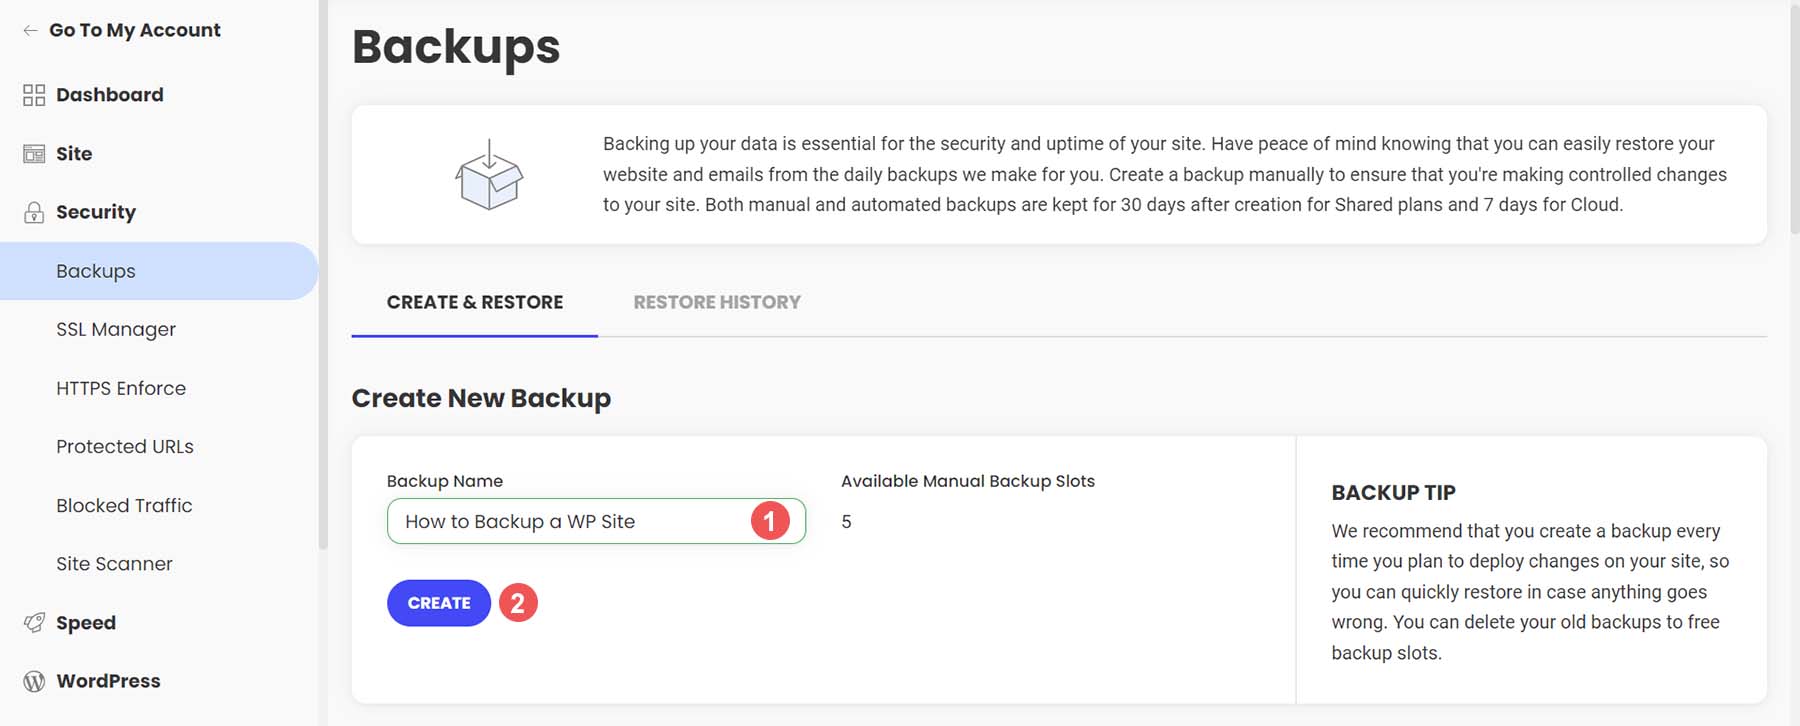
On your website, you’ll see a variety of tools and options that you can use to manage your site. To start the backup process, click on the Tool Finder, or press CTRL + K. Then, search backup in the search box that appears. Finally, click Backups from the dropdown.
Once on the Backups page, give your backup a name you’ll remember. Then, click on the blue Create button.
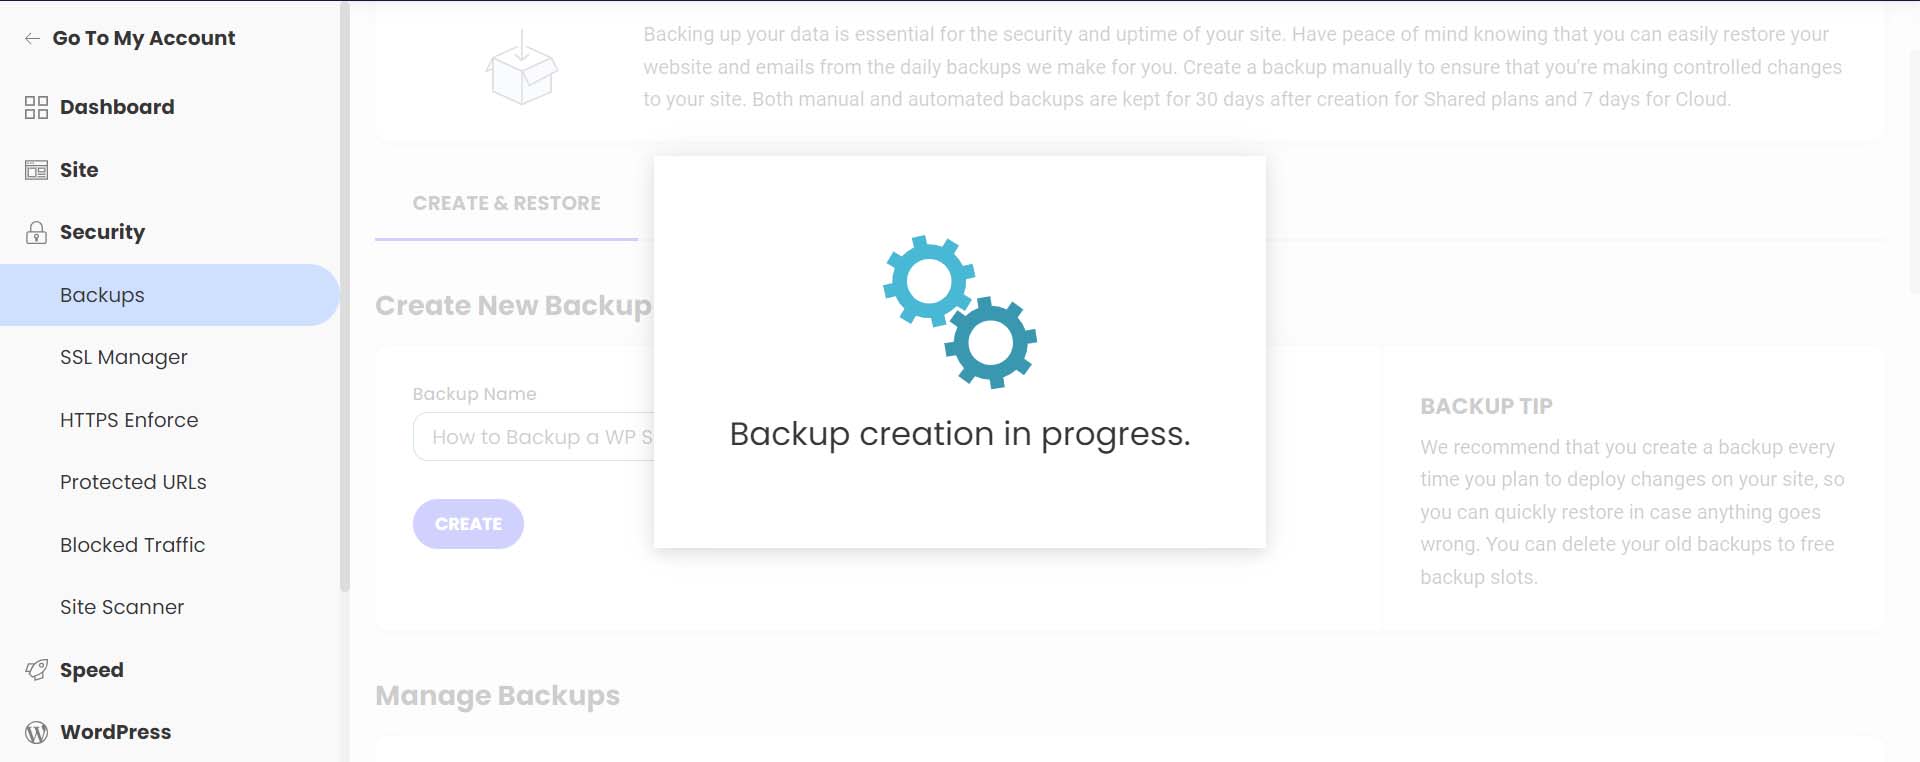
You’ll be presented with this screen as your backup is being created.
You’ll get a confirmation message once your backup has finished being created.
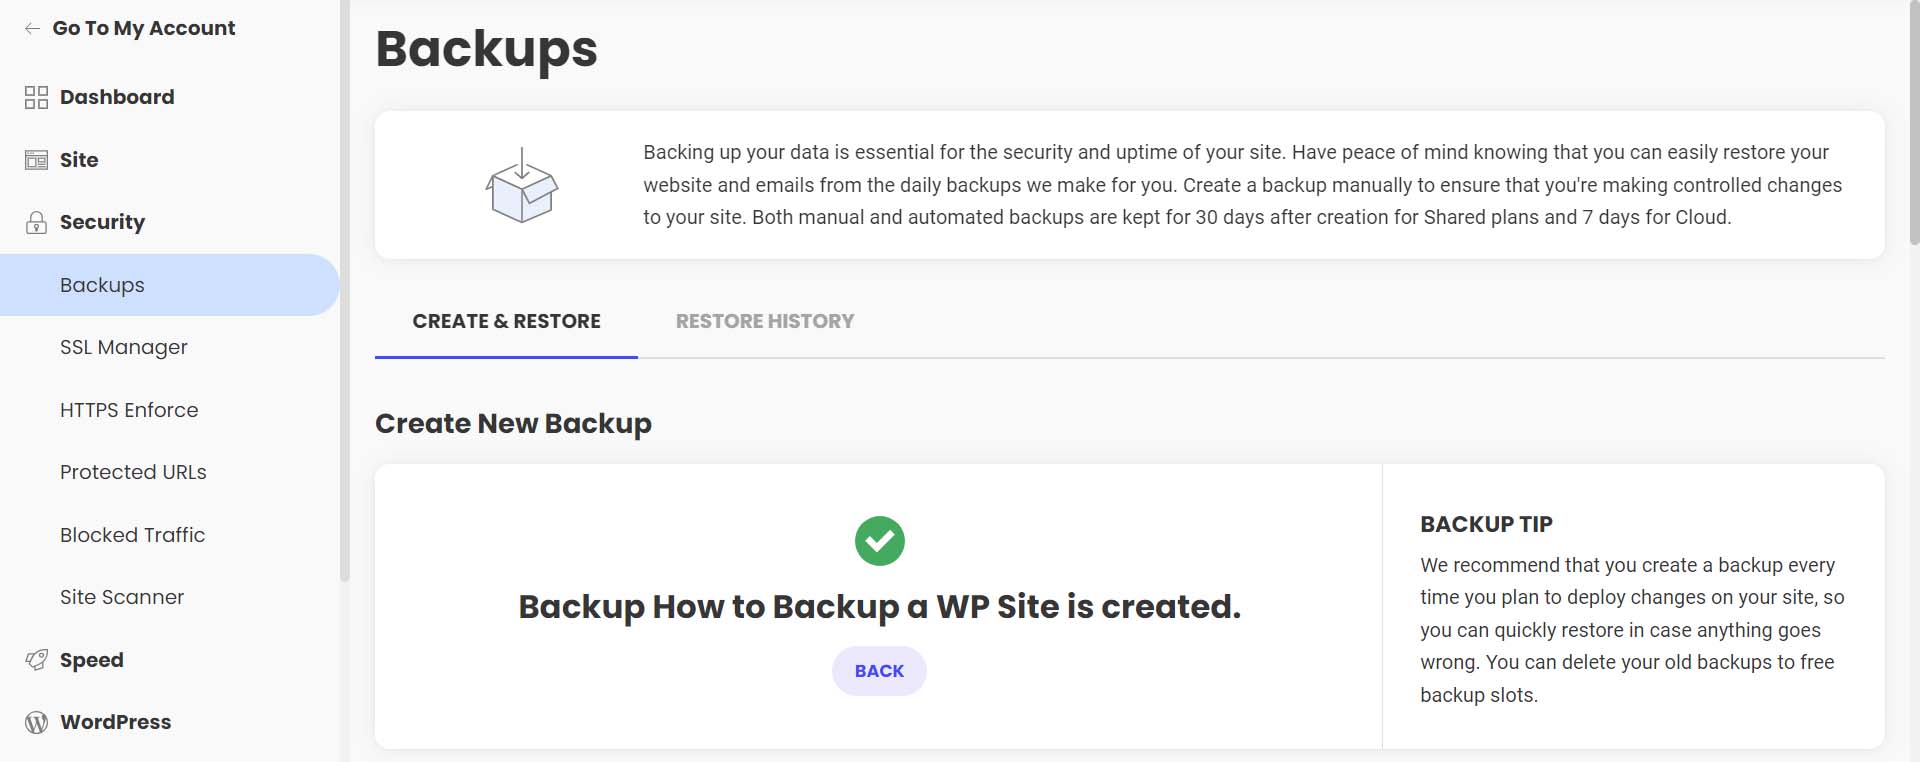
Notice your backup now shows up in your list of backups, alongside your regular, automated backups, with your note attached.

Siteground makes it easy to restore your website in the case of file corruption, hacking, and more. To do this, select the meatball menu next to the backup you’d like to restore. Then, select which type of restoration you’d like to process.
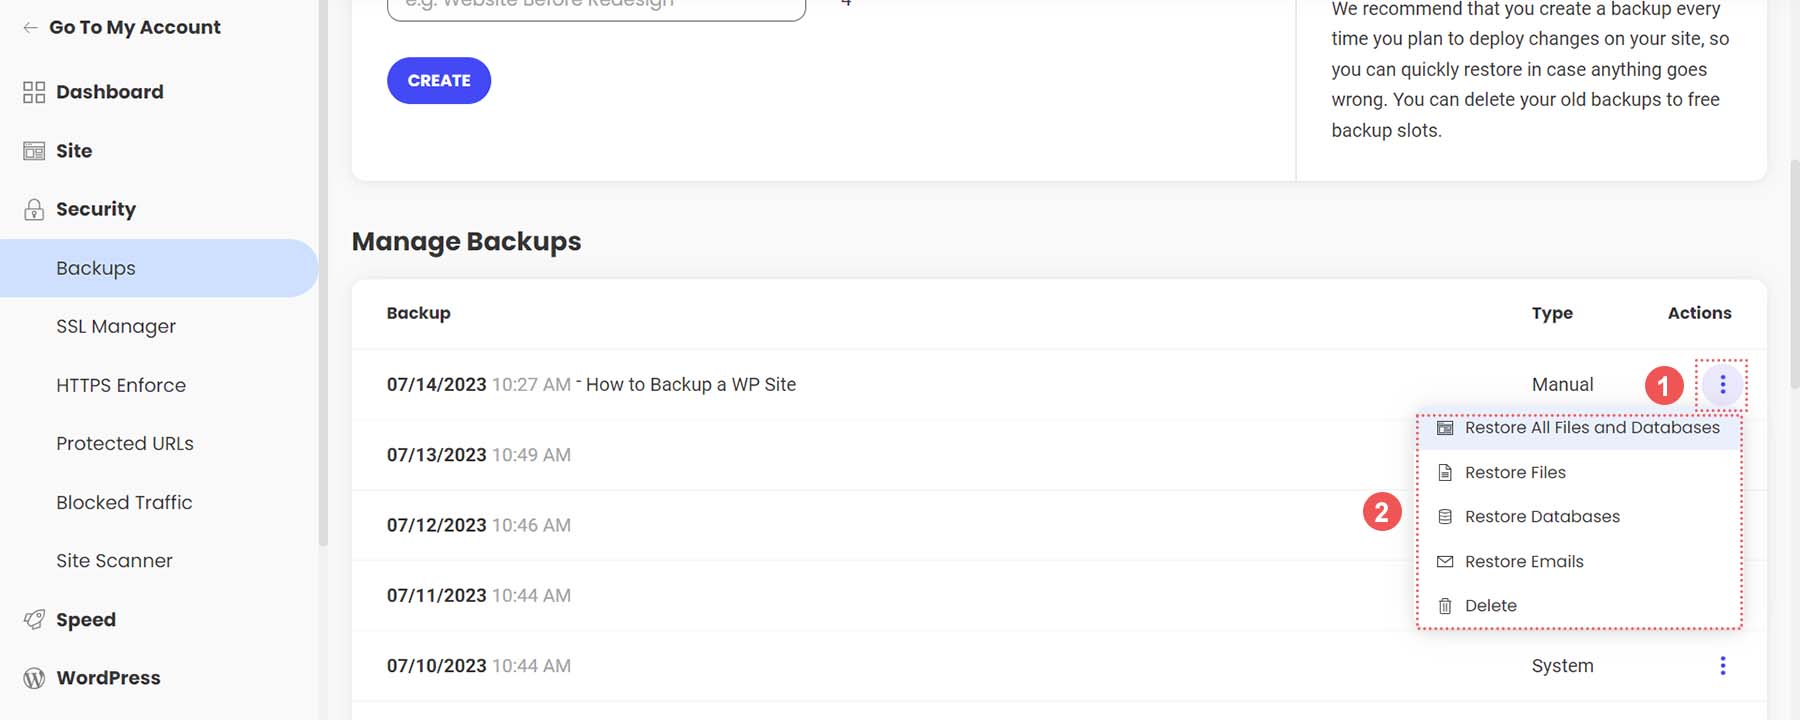
This easy one-click method of backing up and restoring your WordPress website is an excellent benefit of using Siteground and other managed WordPress web hosts.
Next, let’s look at how to do a manual backup of your database and WordPress files.
How to Backup Your WordPress Website Manually
To manually back up your WordPress website, the easiest method is to download a backup of your site files using your hosting provider. An overwhelming majority of modern web hosts provide you with an online file manager and portal that you can use to manage your website’s files directly. The software that many hosts use is cPanel. With cPanel, you can access your databases, email accounts, and a visual file manager. For more information about cPanel, check out our cPanel guide. However, more commonly, your hosting provider may have its own propitiatory interface they provide to their clients for file management and backups.
If you don’t have access to your files on your host or through cPanel, you can back up your site via FTP. Filezilla is a popular FTP client to manage your WordPress site via FTP. You can use terminal clients like Putty and WinSCP to connect to your server and back up your site as a last resort.
This time, however, we’ll be using a file manager within our web host to back up our files and phpMyAdmin to back up our database. We’ll still be using our Siteground account for this tutorial section. However, you can still follow similar steps irrespective of your web host.
Backing Up Your Site Files
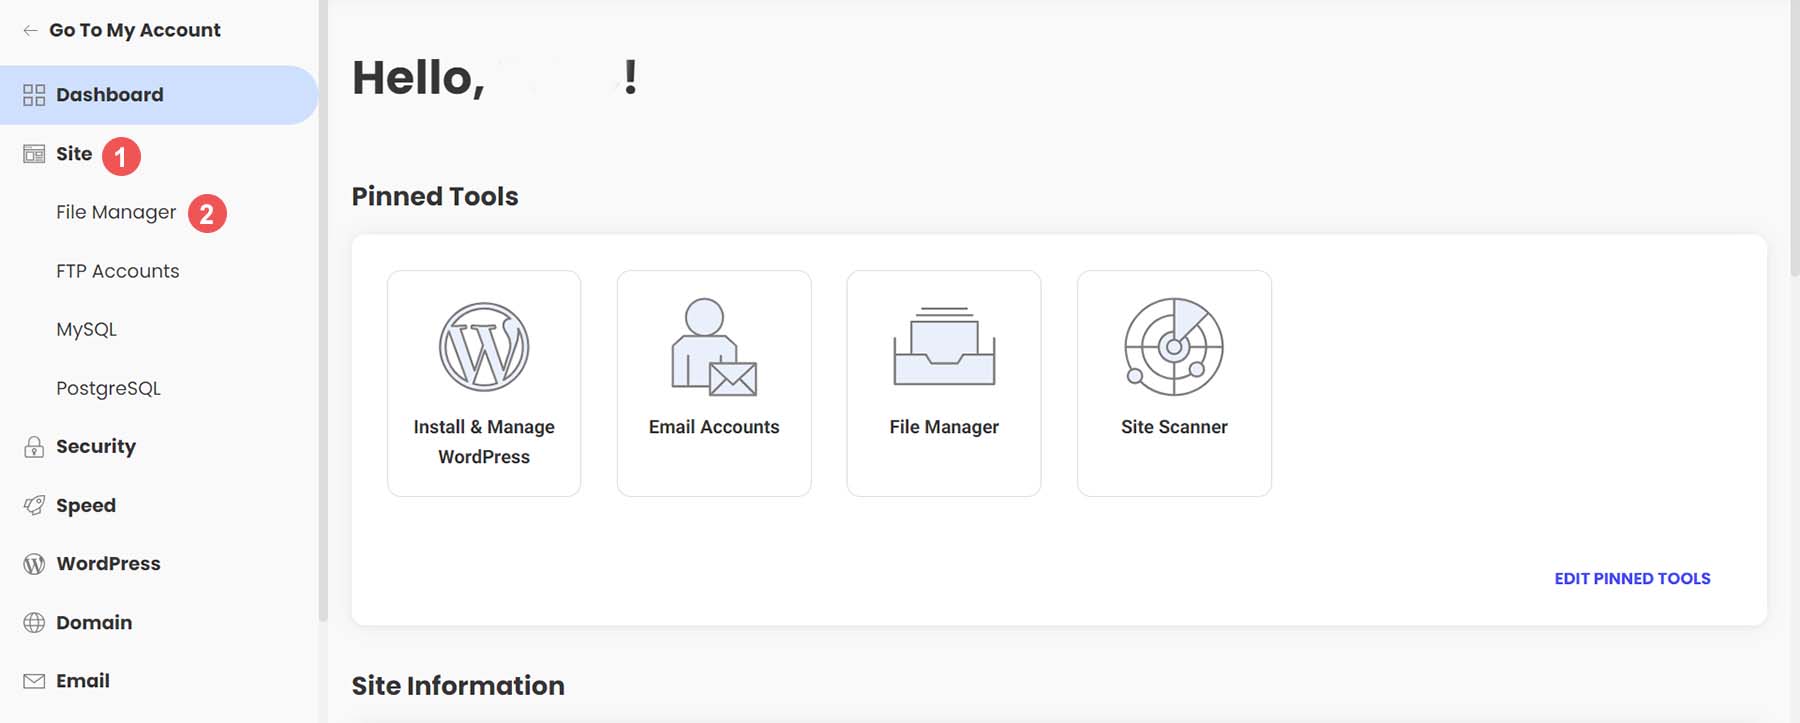
While still in your Siteground account, from the left-hand menu, click site. Then, click File Manager.
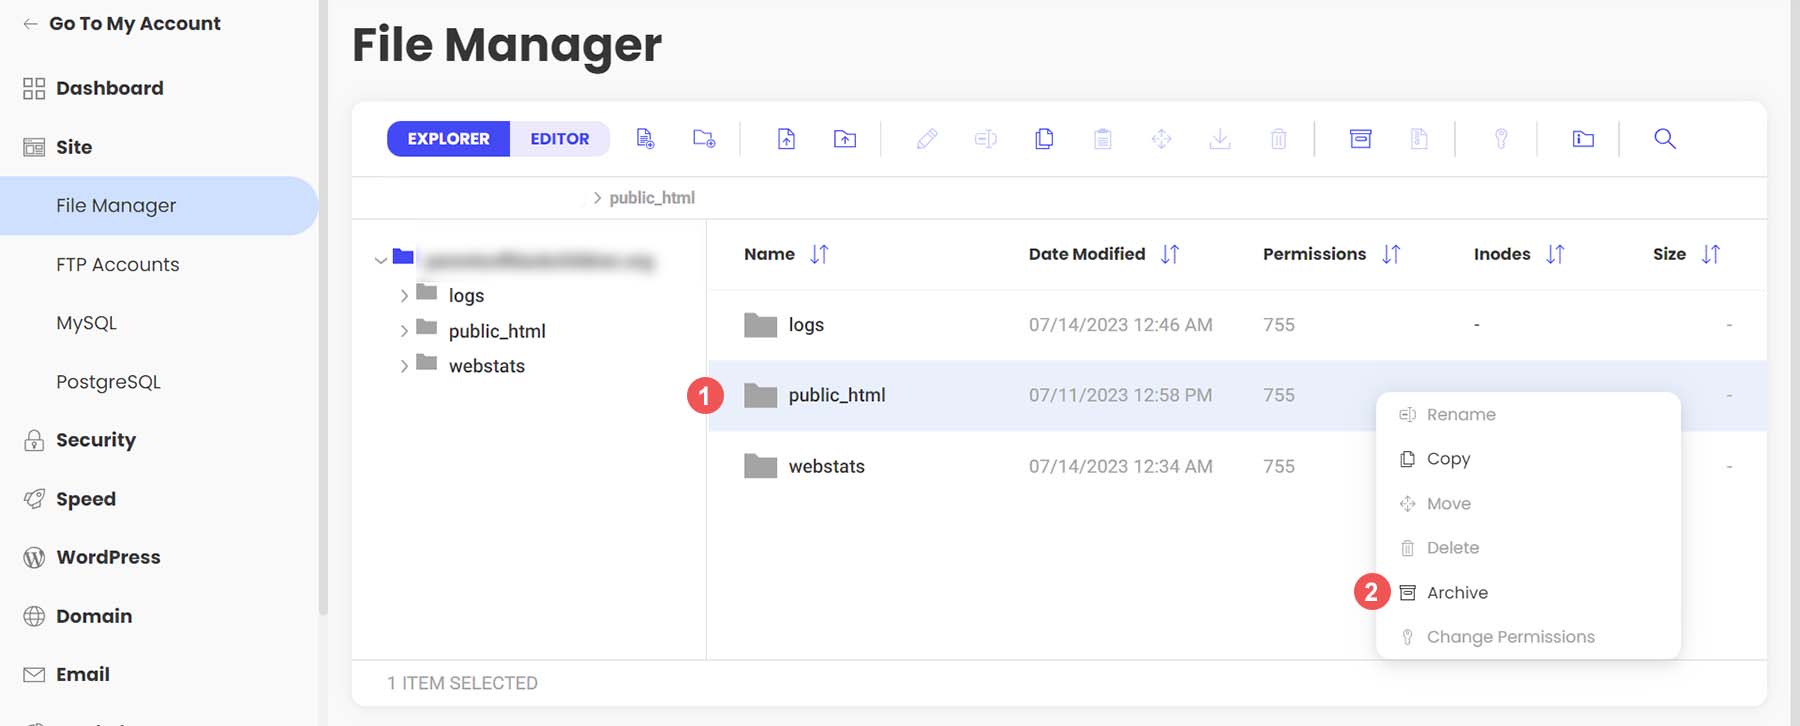
Once in the file manager, you’ll notice a folder called public_html. This is where all your WordPress files live. Right-click on this folder. Then, click on the Archive link.
Next, name your archive. Then, click Confirm to start archiving (or zipping) your WordPress files.
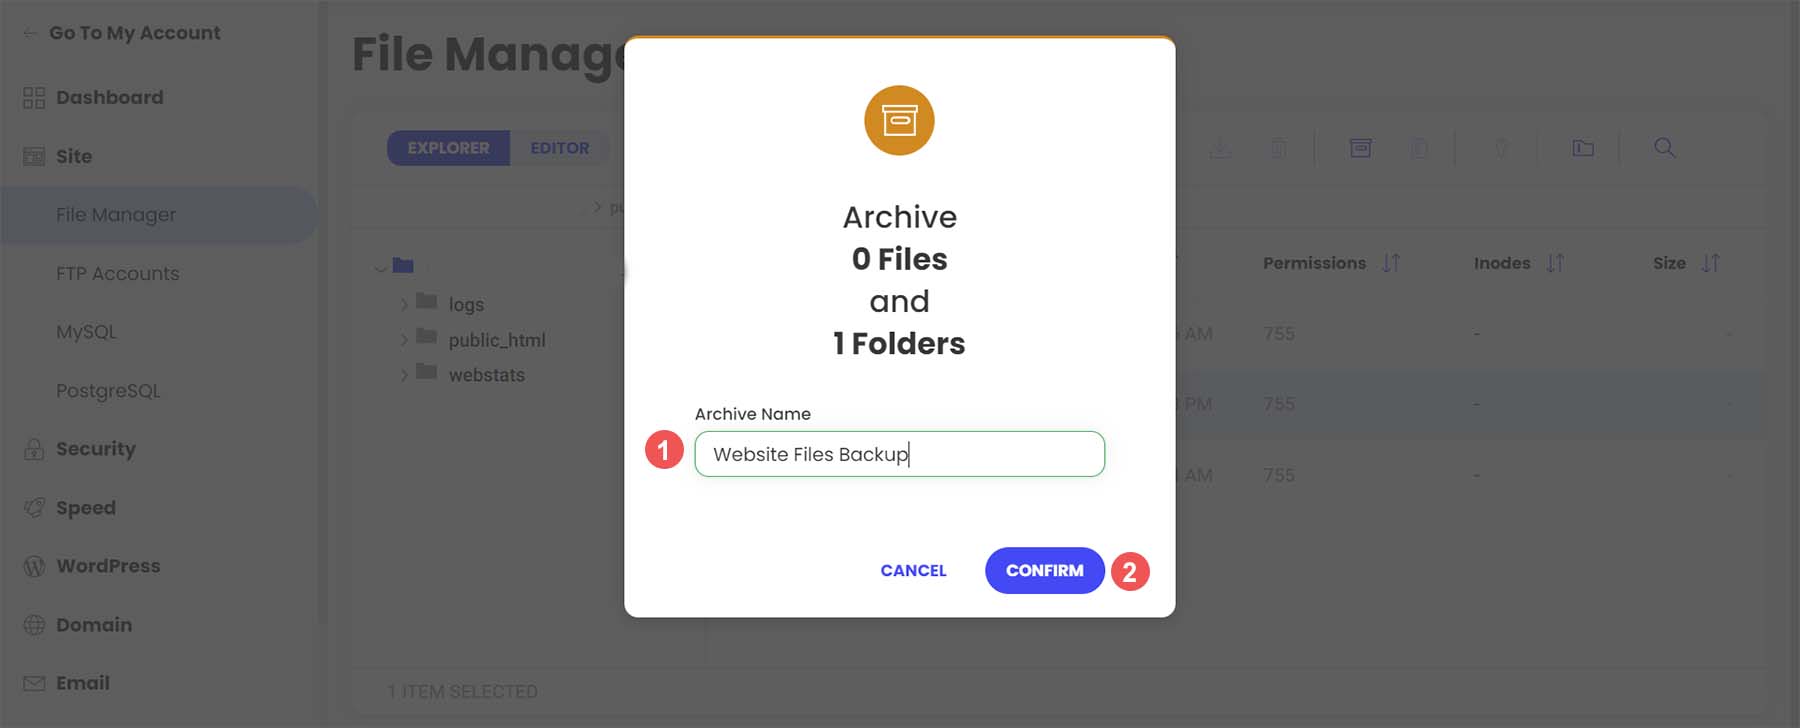
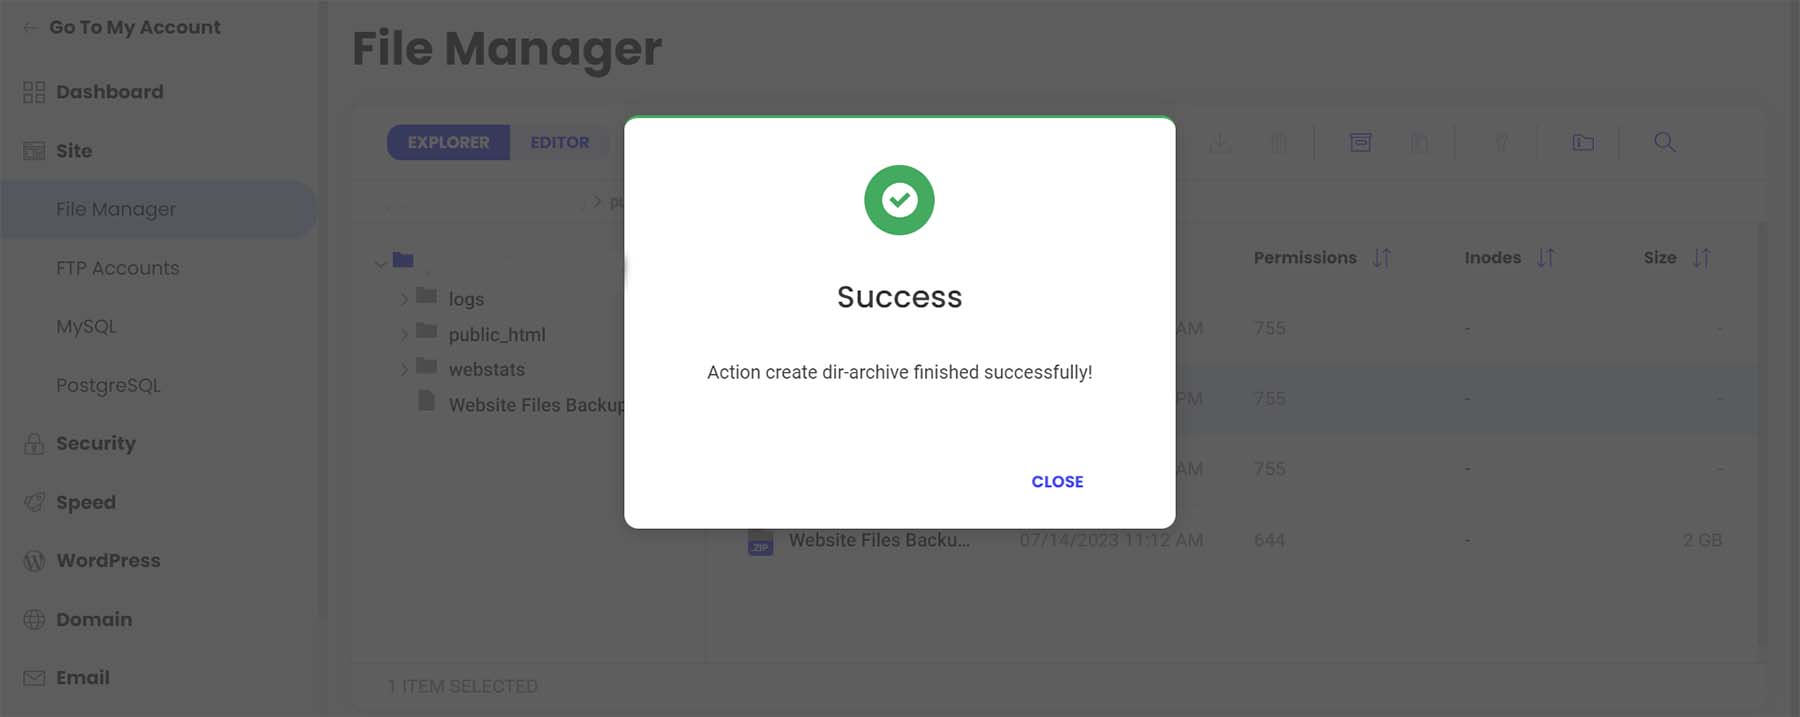
Once your archive has been created, you’ll be presented with this success message.
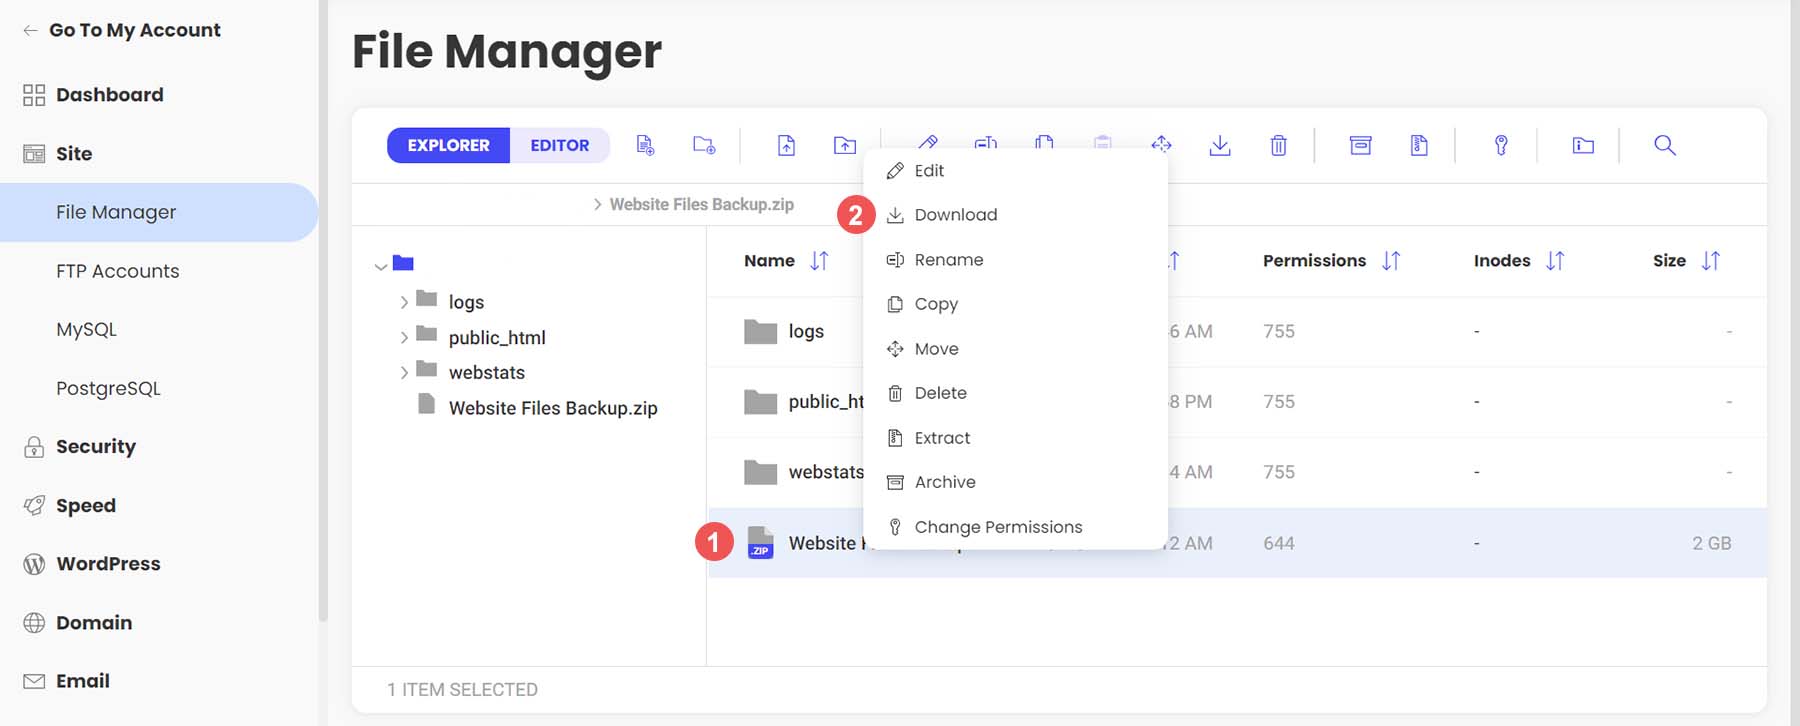
You’ll now notice that your archive is a new file within your file manager. Now, right-click on your archive. Then, click Download to safely save your file backup offline and on your hard drive or media.
Backing Up Your WordPress Database with phpMyAdmin
Now that we’ve manually backed up our WordPress files, we can move on to backing up our database. Again, your web host should offer a simple way to back up your database within its site tools or using cPanel. However, for direct access and more control, you can use phpMyAdmin for pretty much any WordPress website.
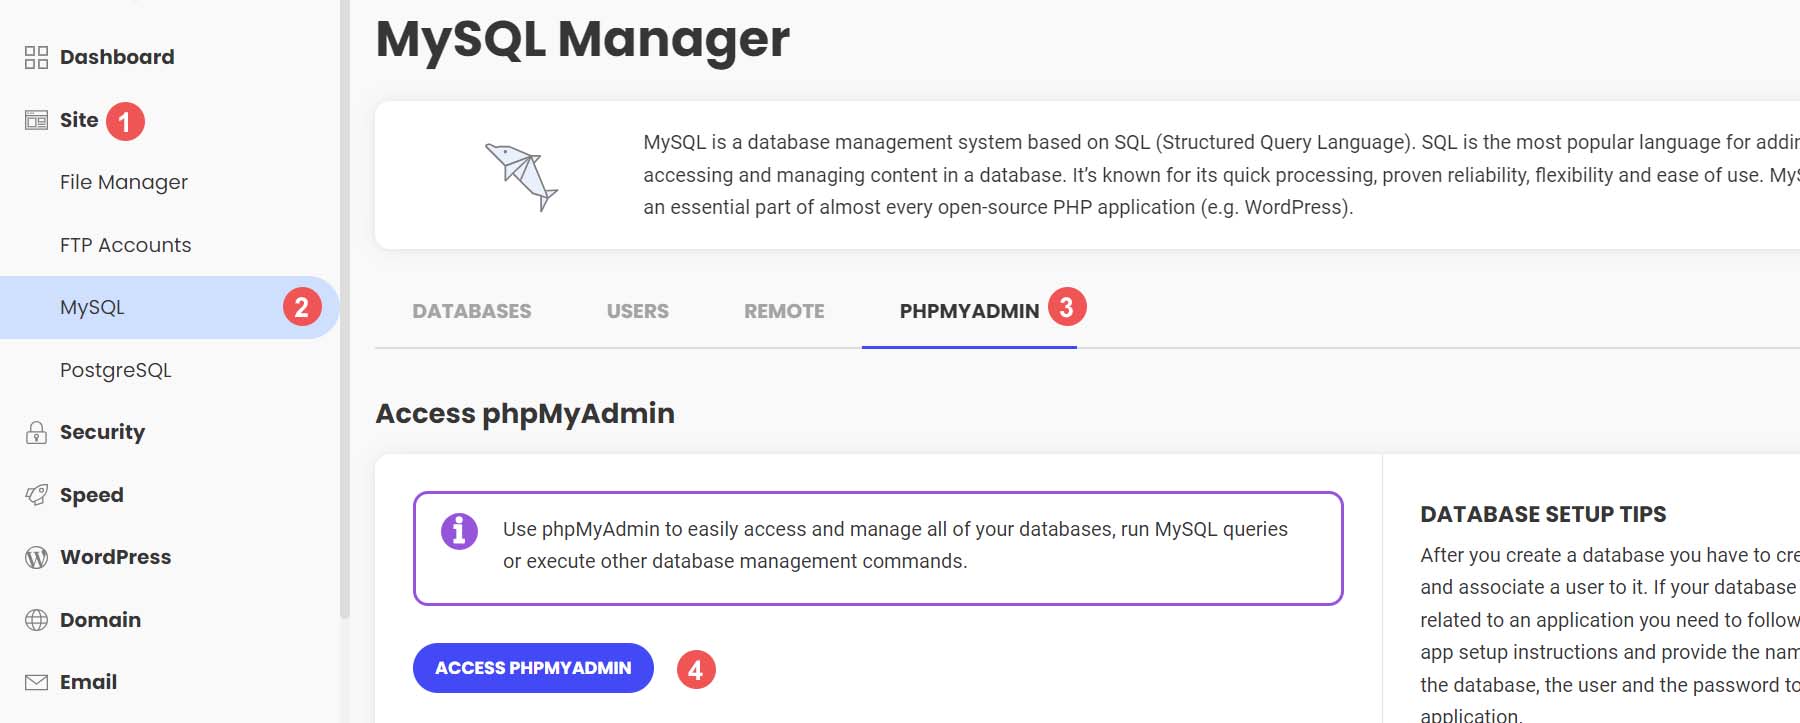
To access phpMyAdmin in Siteground, go to the Site section within the left menu. Next, we click on the MySQL link. Then, we click on the phpMyAdmin link from the right side of the screen. Finally, we scroll down slightly and click the blue Access phpMyAdmin button. This will open up the free PHP tool in a separate window.
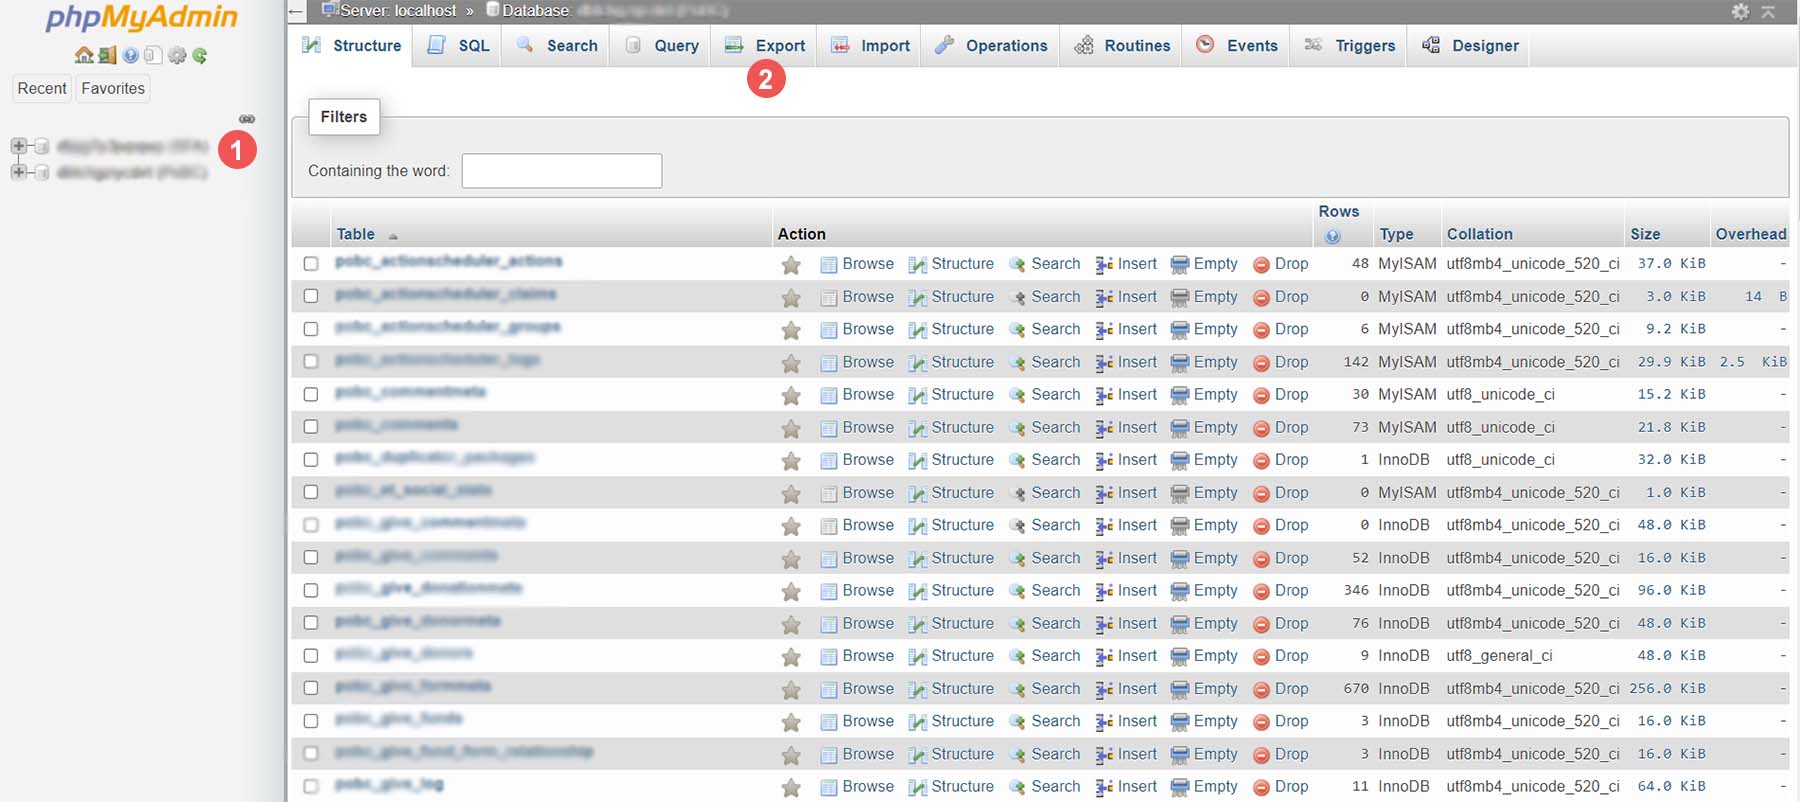
Once you’re in phpMyAdmin, you’ll see a list of your website’s databases on the left-hand side.
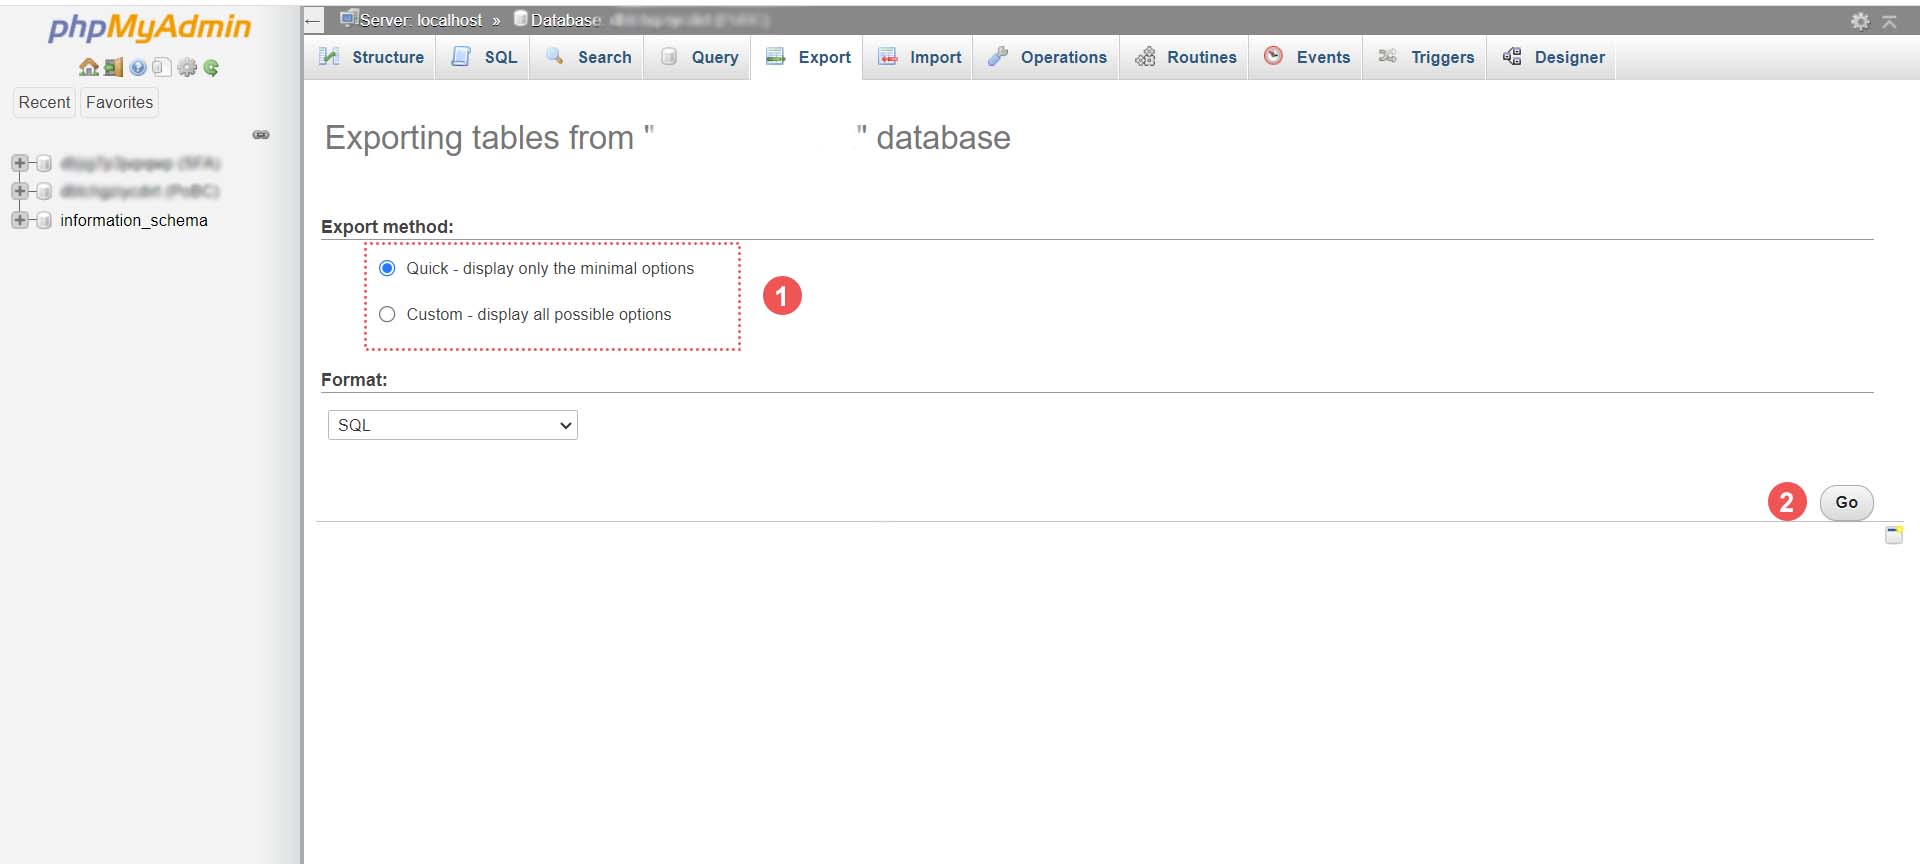
Click on the database that you’d like to download. It should coincide with the database for the website files that we backed up earlier. If you’re unsure of the database you should select, you can find your database name within the wp-config.php file of your WordPress file structure within the file manager. Then, click the Export button from the top menu.
You have two options when it comes to exporting your database. To keep it simple, select the Quick Export method. Then, select Go. If you’d like to add additional outputs, select specific tables to backup and more, click the Custom button, and make your choice before selecting Go.
Save Your Database File
Finally, your. SQL file will be generated. Depending on your database size, this could take a few seconds to a few minutes. An alert box will pop up, asking you to save your database file. It is recommended to save it in the same place you saved your WordPress files zipped folder.

That’s it! Now you have an external backup of all of your site files and your database.
Where to Store Your WordPress Backups
As mentioned throughout this tutorial, there are many places where you can store your WordPress backups. The first and easiest place is directly within WordPress. This is typically the place where backup plugins save your backups. However, this can cause performance issues in the future as you make more backups and your website grows larger. We suggest storing backups outside of your WordPress site in multiple places for safekeeping. You can store them on your computer, on an external hard drive, or in the cloud using a third-party host or platform like Google Drive or Dropbox.
It should be mentioned that having an offline backup of your website is imperative. While your web host and cloud storage are great places to store your backup files, any online platform can go down or corrupt your backup files. Having an external copy of your site is the only way to make sure you have a safe copy.
How Often Should You Backup Your WordPress Website
Most web hosts today offer complimentary, daily backups of your website. However, depending on the complexity of your website and the processes occurring on your site, you may need to change this schedule. On average, having some form of automated, daily backup is good practice. This can be done either through your web host or a plugin like UpdraftPlus or BackupBuddy, to name a few.
However, if you’re in the eCommerce space, you would surely want to consider backing up your website more frequently, depending on your server load, storage limits, and the number of orders on your website. It is not uncommon for an eCommerce website to do hourly or even backups by the minute! In addition to daily backups, consider making monthly offline backups for your website for peace of mind.
What to Do If Your Site Crashes
Having your website crash is a devastating feeling. Your first port of call should be your web host. More often than not, they have daily backups of your website from which you can quickly restore it. Secondly, check your online cloud and your backup storage folder on your website to see if there is a backup there that you can restore. You’ll need to copy over your database and file structure if you manually restore your website. In the rare event that you can gain access to your WordPress dashboard during a site crash, you can try restoring one of your backups from your backup plugin if it has that feature.
Tips and Best Practices for Backing Up Your WordPress Website
Here are a few things to remember when backing up your WordPress website.
- Consider Using a Backup Plugin: A backup plugin is the easiest way to manage and create backups in WordPress. Check out these best backup plugins for WordPress.
- Test Your Backup: It’s important to test your back to ensure that in a time of crisis, you’ll have a backup that actually works. You can do this by restoring a backup on a local install or staging site. Additionally, this tests to see any bugs in your files or steps you may need to include or optimize as you create your backups.
- Backup Both Your WordPress Files and Database: Some backup plugins allow you to backup only the database instead of the entire site. However, it’s always a good idea to create a full backup of your website regularly, especially after making changes to your site. Sometimes changes in your file system could cause issues with your database backup if your file structure has changed.
- Keep an External Backup: Cloud backups rely on platforms that can go down or fail. If the worst-case scenario occurs, an offline backup will save you. Taking an external backup of your complete site once a month can be a good practice to adopt.
- Use Automatic Backups When Possible: Automatic backups free headspace for you to maintain your website. Choose a backup plugin with this, or ensure this feature is included in your hosting plan.
- Don’t Store Your Online Backups Within WordPress: As a backup is a complete snapshot of your website, storing them within your WordPress website can not only eat up your storage space but cause issues when it comes to performance. Aim to store your online backups outside your WordPress installation and, even better, on the cloud through services like Google Drive or Dropbox.
- Backup Before and After Major Site Changes: Make a full site backup before adding a new design or functionality to your website. You never know if a new plugin that you add or a tweak to a theme could take your website offline.
- Keep Your Backups Secure:.Whether storing them online or locally, make sure your backups are secure and safe from hackers. You can store them in password-protected folders and media devices like USBs, encrypt them, and more.
- Label Your Backups Something You’ll Remember: Most backups have an auto-generated name which can be hard to remember when you check back on it several weeks later. Give your backup a name that’s easy to identify. For example, “Before Menu Edit” lets you know this backup was before you changed your menu.
Conclusion
Learning how to make a backup of your WordPress site is an essential step in the website building process. A backup will save your website when it’s been hacked, and it’s good practice to be able to restore your site if anything goes wrong. It’s also good insurance overall. Additionally, backups are an essential website maintenance task that should be carried out on your website frequently. With WordPress, there are a few ways to back up your website. If you’d prefer to use a plugin for your backups, our list of the best WordPress backup plugins is an excellent place to start.
Alternatively, the restoration process of a website is the other side of maintaining a website. A good migration plugin can make it easy to move your website to a new location. In closing, learning how to make a backup of your WordPress website is a necessary skill to gain as you build your next website project.
Frequently Asked Questions (FAQs)
Before we wrap up, let’s answer some of your most common questions WordPress backups. Did we miss one? Leave a question below and we will respond!
What are WordPress backups?
How can I make backups of my WordPress website?
What is the best way to backup a WordPress site?
Can I backup a website without plugins?
How often should I backup my WordPress website?
Why should I store my WordPress backup files externally?
What are the advantages of backing up my WordPress website?
What is the difference between WordPress database backup and file backup?
Can I backup my WordPress website for free?
Can I store my WordPress backups for free?
Image by jossnat / shutterstock.com


Thank you very much for your information; it is just what I was looking for. May I ask what software you use for your fantastic and quick website? I too intend to build a straightforward website for my company, however I require advice on a name and hosting. Asphostportal is said to have an excellent reputation for it. Are there any other options available, or can you recommend them?
Website should be defined clearly in terms of backup. Is it files and database? I thought I was backing up both when backing up my so-called website but backup didn’t include databases. Used my web hosts backup utility.
Updraft has saved my arse a number of times. I strongly recommend the premium version.