")
Creating a website is crucial for establishing an online touchstone, whether for personal use, business, or as a hobby. With the right tools and guidance, anyone can build a top-notch site. This guide will walk you through the essential steps to create your own website, from choosing a platform to launching and maintaining your site.
By the end of this post, you’ll have a clear action plan to build a website from scratch. We’ll cover everything you need in 7 streamlined steps. Whether you’re a complete beginner or looking to upgrade your current website, this guide will help you get started without needing any coding knowledge.
Subscribe To Our Youtube Channel
What to Know Before Creating a Website
Before building your website, it’s important to know what you’re getting into. Especially in the first couple of steps, there will be some setup and configuration of a domain, web host, and a site builder (like Divi). No matter what, you’ll need a domain name—your website’s online address. You may also need a hosting service (where your site files live) and a website builder to design and build. These last two items can be done differently depending on whether you use an all-in-one website builder or a self-hosted solution for WordPress (both with their benefits).
You should also understand the custom commitments involved. The cost of building a website can vary greatly depending on your chosen tools and services. While it’s possible to create a basic website for free using some platforms, a more professional site costs between $100 to $500 per year (excluding labor that you or others put into it). The time it takes to build a website depends on its complexity and your familiarity with the tools, but most people can create a simple site in a few days to a week.
Let’s now cover the steps to creating a website. These are the exact steps that I use to create my websites from start to finish.
How to Create a Website from Start to Finish
Creating a website involves several steps, but this guide is intended to give them to you as streamlined as possible. If you’re confident about a particular step, go ahead and do it. If you need more details, watch our corresponding video guides (embedded throughout) or read our extended guides for each step.
Here’s what’s ahead of us:

Below, I’ll cover six (6) insanely easy steps for building your website
Your first decision is choosing which website builder to use.
Step 1. Choose Your Website Builder

The first step in creating your website is choosing the right platform. We start with the builder because that will determine later steps (answering questions like ‘do I need to get a web host, or is it included with my site builder?’). Popular website builders like WordPress, Wix, and Squarespace offer different features and levels of customization to help you create a website.
Wix is known for its drag-and-drop interface, though many find it cumbersome. Squarespace offers sleek, modern templates ideal for visual portfolios and better pricing than Wix, but the pricing can still get out of hand in a hurry. WordPress, especially with Divi, stands out as the most flexible and customizable option. It’s ideal for any type of website, and it’s typically more cost-effective in the long run.
Why Use Divi to Create Your Website
Choosing Divi as your website builder unlocks a world of possibilities, offering flexibility and control unmatched by other builders:
- Built on WordPress: Divi combines WordPress’s open-source power with the ease of a drag-and-drop builder, giving you much more flexibility and customization options compared to Wix and Squarespace. WordPress is highly customizable and scalable, perfect for almost any website you need. An added bonus to choosing WordPress is that it tends to be significantly cheaper in the long run.
- Visual Drag-and-Drop Builder: Design your website directly on the front end by dragging and dropping elements, adjusting style settings, and seeing changes instantly.
- Quick Sites and AI-Generated Sites: Divi lets you build a website in minutes using Divi Quick Sites or AI-generated sites, with or without a Divi Pro license.
- No-Code Customization: Divi brings CSS-level control to a simple interface, offering advanced design options without needing to touch any code.
- Complete Control Over Every Element: Unlike website builders that limit customization, Divi allows you to customize every aspect of your site—from headers and footers to page layouts and global styles—ensuring your site is unique and fits your exact needs.
For a quick start, check out Divi Quick Sites to see how easy it is to get your website up and running with ready-to-use layouts and designs.
For now, you really should see how Divi Quick Sites makes your life easier as you start building your website.
Other than that, your needs will change based on the type of website you are looking to create. Here are specific guides for these types of sites, though the one you’re currently reading is good enough to get started.
Step 2. Set up Your Website Domain and Hosting
Your domain name is your website’s address and a key part of your online identity. Choose a domain that’s easy to remember, relevant to your brand or purpose, and available.
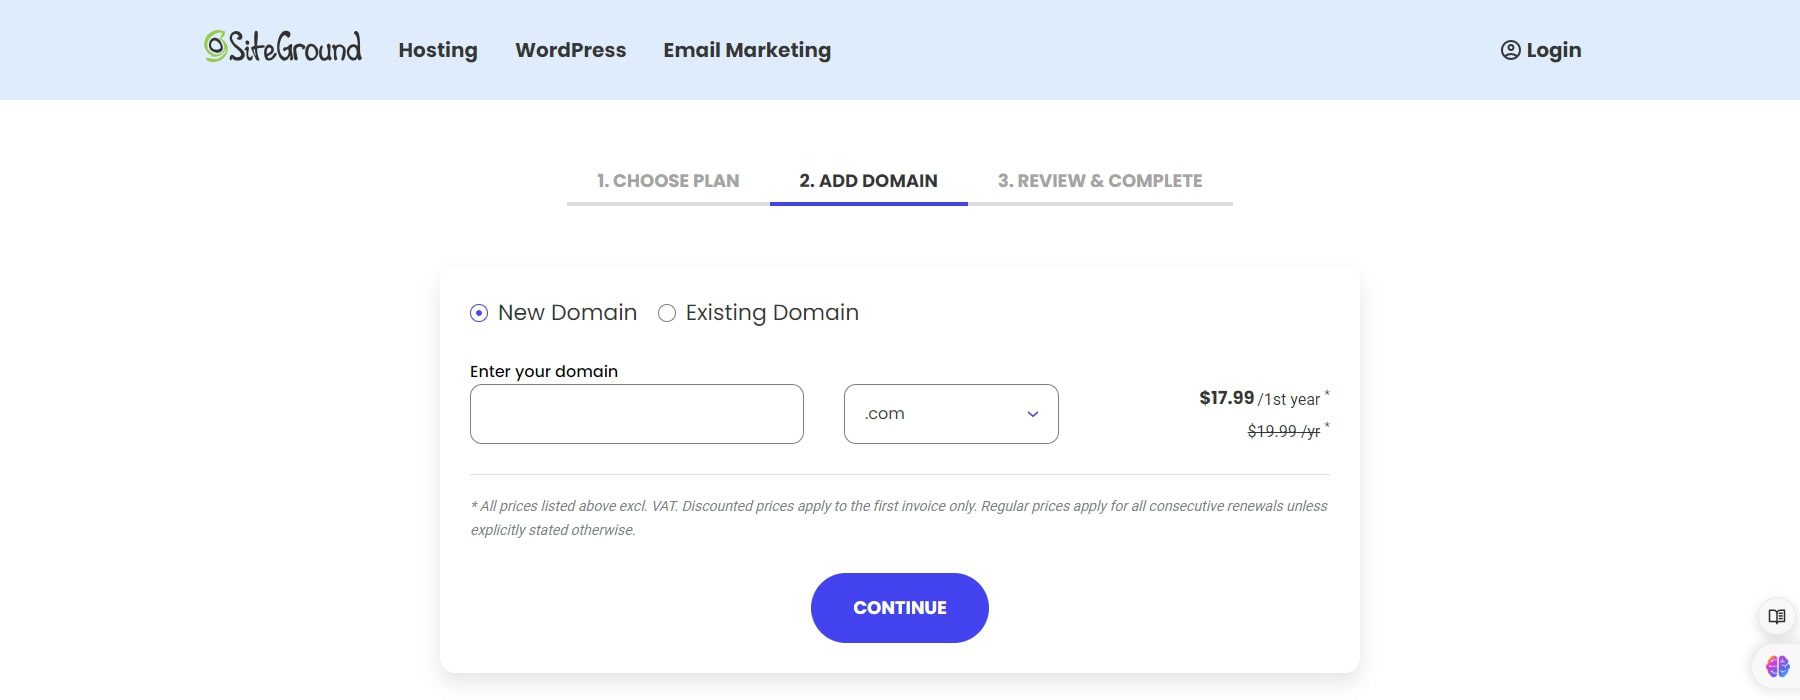
Many hosting providers offer domain registration services, often bundling them with hosting packages. We recommend SiteGround if you use their hosting or Namecheap if you use another host.
Web hosting is where your website’s files are stored. When choosing a hosting service, consider storage space, bandwidth, customer support, and pricing factors. Shared hosting is often sufficient for small websites, while larger sites may require VPS or dedicated hosting for better performance and control.
Follow this video tutorial to get hosting and a domain up and running in minutes.
Once you’ve secured your domain and hosting, you’re ready to move on to the next step: installing WordPress and Divi on your new site.
Step 3. Download and Install Divi
Now that your domain and hosting are set up, it’s time to install WordPress and Divi on your new website.
First, you’ll need to purchase and download Divi from your Elegant Themes account. To get Divi, choose between two membership options: a yearly subscription for $89 or a lifetime access plan for $249. Both options give you full access to Divi, the Divi Builder, and a variety of other premium tools from Elegant Themes. You can sign up and purchase Divi here.
Once you’ve signed up and logged in, navigate to your Member’s Area and download the Divi theme file.
To install Divi on your WordPress website, follow these steps:
- Log in to your WordPress dashboard.
- Navigate to Appearance in the left-hand sidebar and click Themes.
- Click Add New at the top of the page, then click Upload Theme.
- Select the Divi ZIP file you downloaded, click Install Now, and then activate the theme once the installation is complete.
Installing Divi is just as easy as installing any theme. You can follow along with this process in the video tutorial below:
Once Divi is installed, you’re ready to start building your website with its powerful drag-and-drop Visual Builder and the wealth of features it offers.
Step 4. Build Your Website
Now that you’ve set up your domain and hosting and installed Divi, it’s time to dive into building your website with Divi’s powerful tools. If you haven’t watched the Divi Quick Sites video yet, now’s the perfect time. It will give you a great overview of what’s possible with Divi, especially if you’re looking to get your site up quickly.
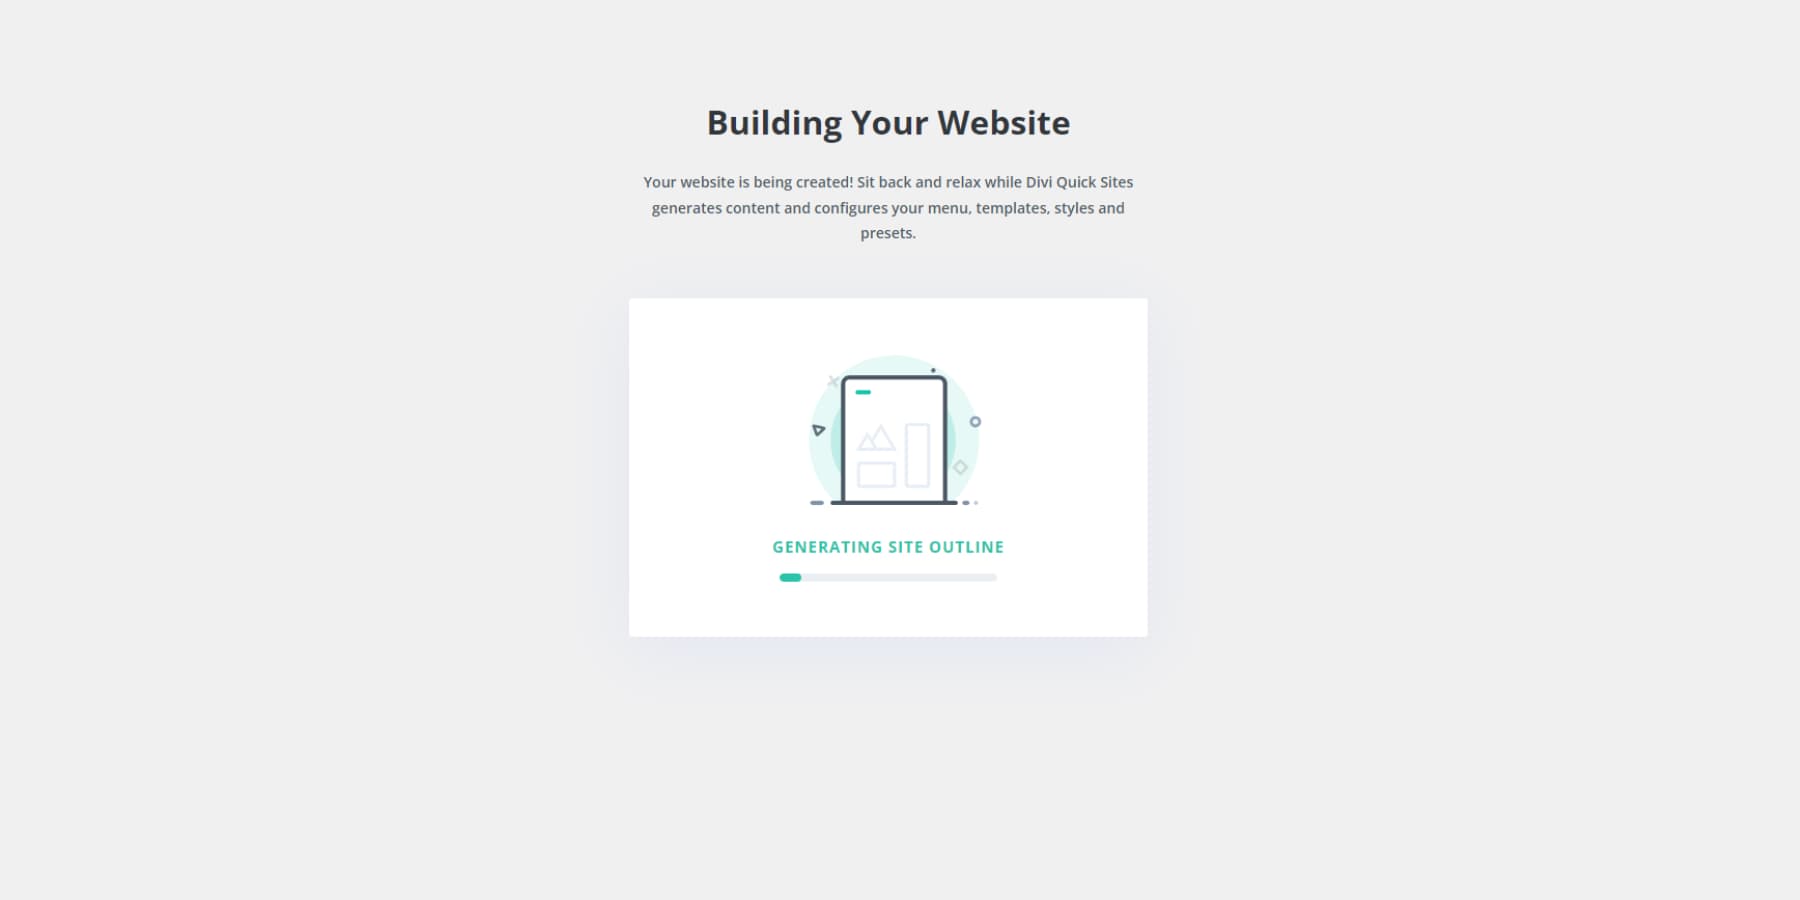
Here’s how it works. You share details about your business and what you’re looking for in a website, and Divi AI takes it from there. In just a few minutes, you’ll have a complete, unique website tailored to your needs—not just a template with placeholder content.
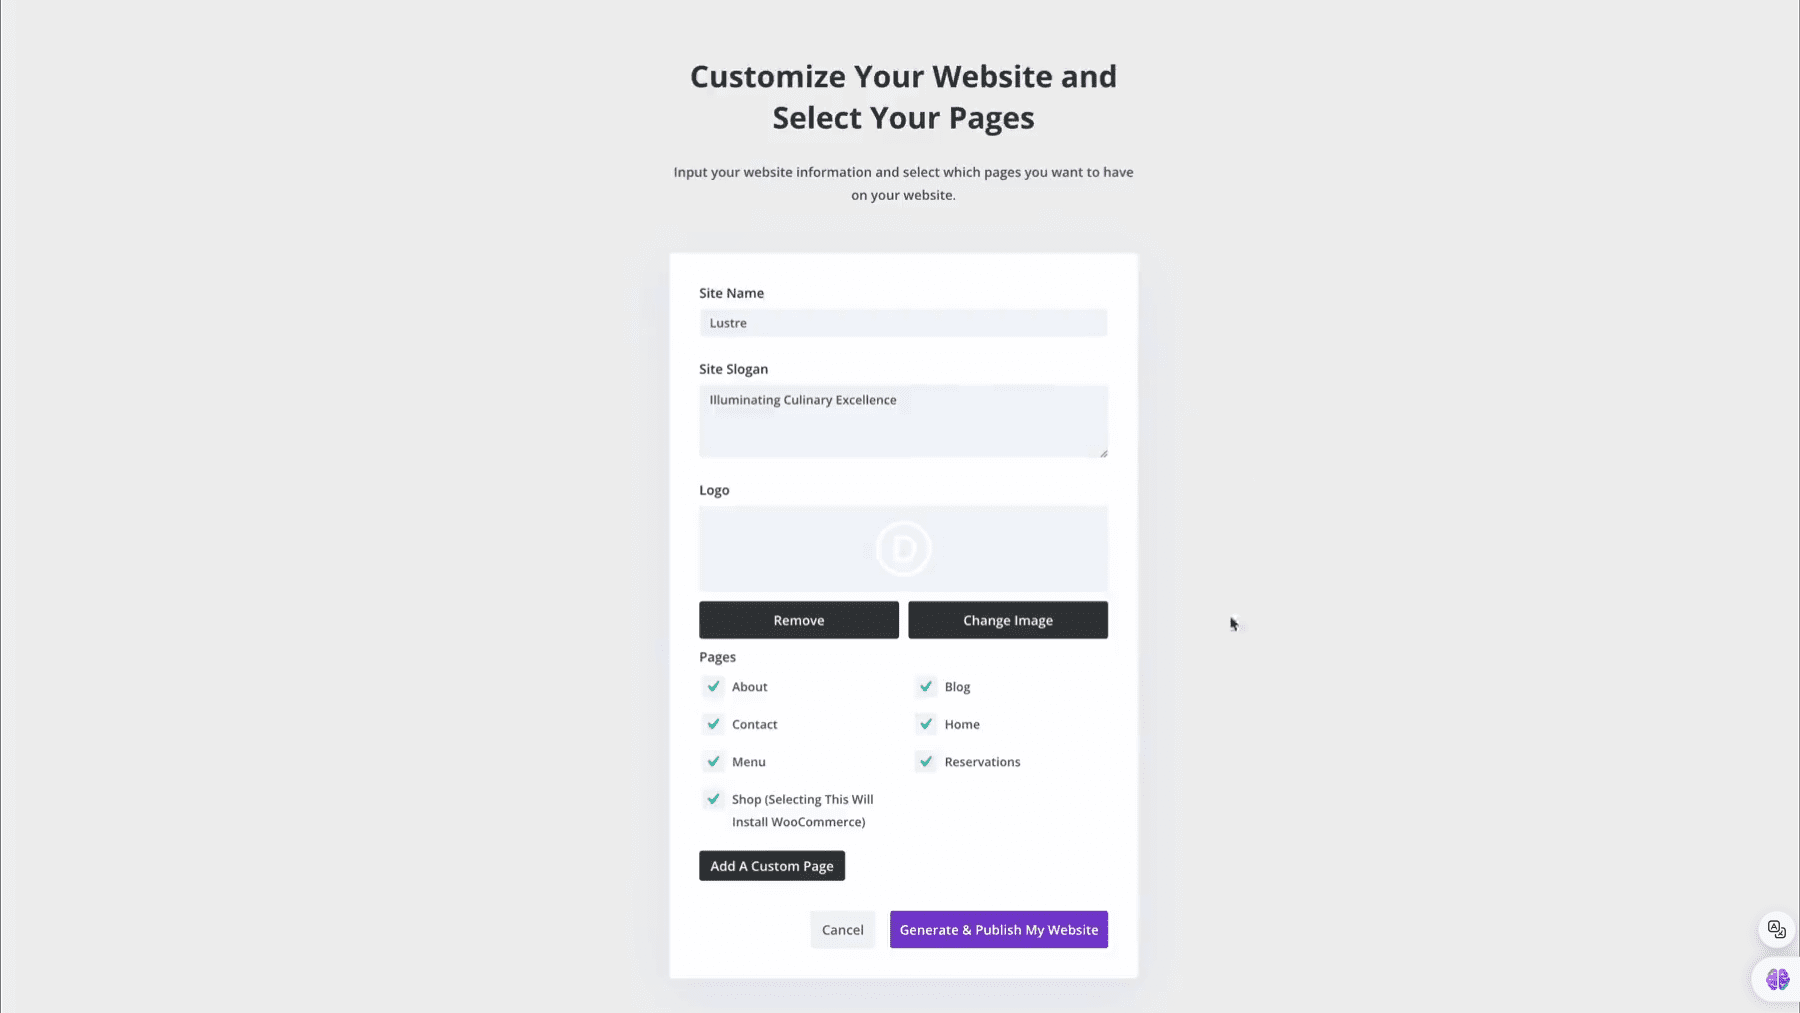
The AI doesn’t just slap together a few pages and call it a day. It crafts relevant pages with custom layouts, fills them with well-written content, and even generates (or curates from Unsplash) images that fit your needs. It goes the extra mile by selecting matching fonts and colors, setting up your homepage and menu, configuring the Theme Builder, adding global colors, and more. If you’re planning an online store, it’s got you covered there, too—it’ll install WooCommerce and customize your shop, cart, and checkout pages.
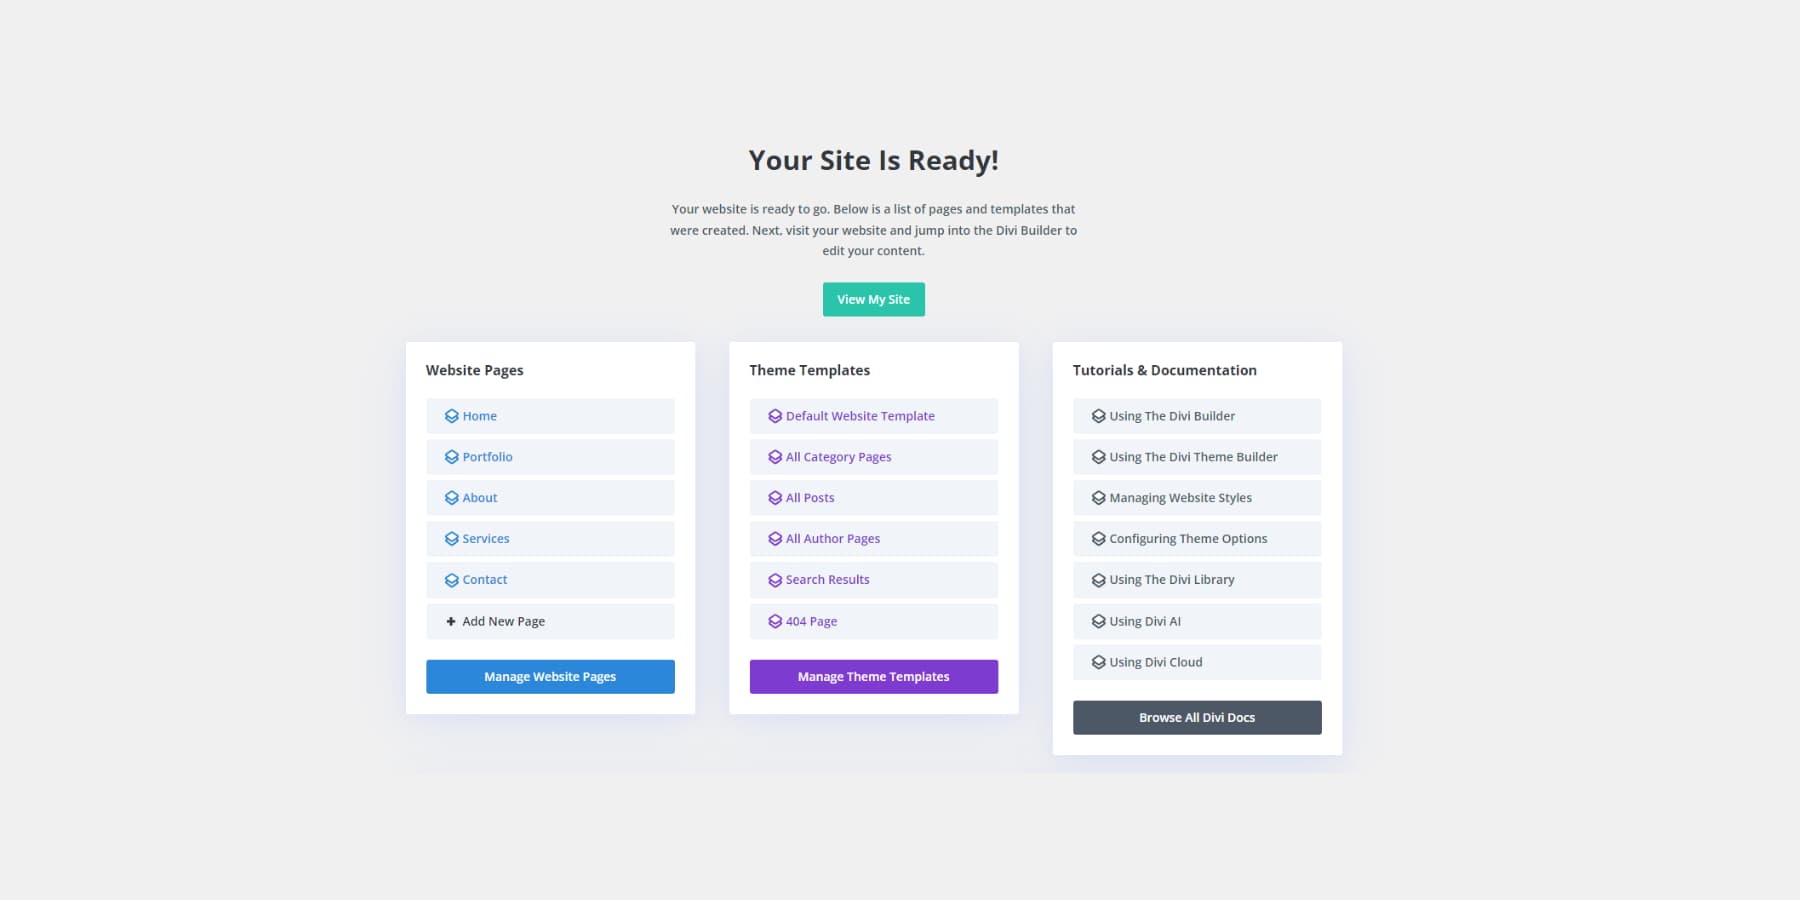
Once you hit that Generate & Publish My Website button, all you have to do is wait and watch. Divi’s AI will work its wonders, and you’ll see a real-time display of which aspects of your site are being created.
But what if AI isn’t your thing? No worries! Divi Quick Sites has another ace up its sleeve—Divi Starter Sites. These are premade website starter packs, professionally designed by the Divi team. They come complete with predesigned pages, theme templates, menus, module presets, and global styles.
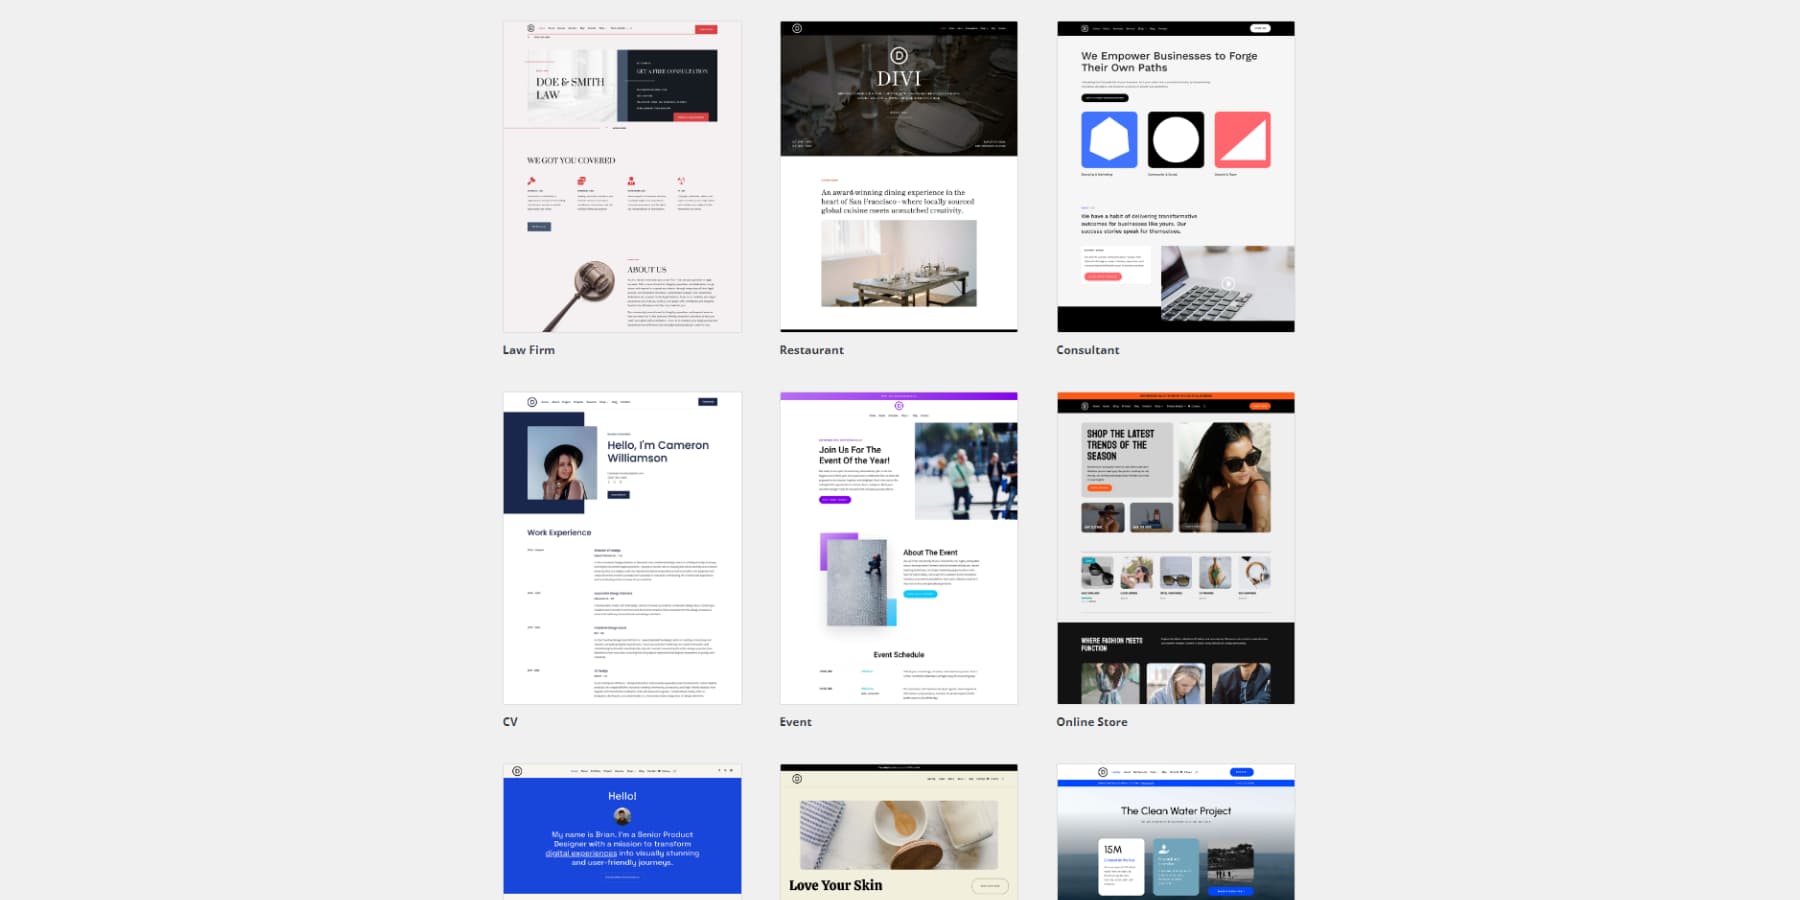
New Starter Sites are added weekly
The benefit of Starter Sites is that you know exactly what design you are getting, and you don’t have to have Divi AI to use it (Starter Sites are free with every Divi Membership). Either way, Divi Quick Sites dramatically speeds up website creation.
Step 5. Customize Your Website
Now that Divi Quick Sites has set up your initial website, it’s time to make it truly yours. Divi’s powerful customization tools allow you to tweak every aspect of your site without code (or with if you like). Let’s break down the key areas you’ll want to focus on and resources for you to master them:
- Visual Builder: Divi’s drag-and-drop Visual Builder is your go-to tool for page-level customization. You can edit text, adjust layouts, add modules, and more—all while seeing your changes in real-time.
- Modules: Divi comes packed with various modules for displaying different types of information on a page or template. These modules, from image galleries to contact forms, can be customized to match your site’s style.
- Global Presets: Global Presets let you start with the big picture. You can create font, background color, animation effects, and more that are reusable as an easy-to-apply preset. If you used Divi Quick Sites (AI or Starter Site), you’ll already have global presets set up, which you can edit to your liking.
- Theme Builder: Use the Theme Builder to customize headers, footers, and other global templates. You can create templates for various parts of your site, like blog posts or product pages.
- Responsive Design: Don’t forget to check your site’s appearance on different devices. Divi makes adjusting your design for mobile, tablet, and desktop views easy.
- Custom CSS: For those who want to dive deeper, Divi allows you to add custom CSS to fine-tune your design. Using Divi AI makes this even easier.
Remember, customization is an ongoing process. As you use your site, you’ll discover new ways to improve and refine it. Divi’s extensive documentation, blog, and Facebook Community are great resources if you need help.
Step 6. Add Essential Plugins and Functionality
Let’s explore some essential plugins and features you should consider using on your website. These recommendations are for WordPress, but many other site builders have their own Add-On ecosystem that would be worth looking into.
Essential Plugins
With every WordPress website, there are some essential plugins you’ll need in order to be successful. You’ll want to install plugins for SEO, security, and other excellent WordPress plugins to help you keep your site in tip-top shape.
SEO
WordPress is SEO-friendly out of the box but needs a little help if you want to score higher placement in the search engine ranking pages (SERPs). Thankfully, there are some excellent SEO plugins out there, like Rank Math, to ensure your site is easily discovered by potential customers.
Site Security
Another vital aspect to consider is a reliable security plugin, like iThemes Security. Ensuring protection against malware, bots, and DDoS attacks is crucial. With over 44% of the internet built on WordPress, it becomes a prime target for malicious actors.
Optional Plugins
Aside from SEO and security plugins, some optional plugins can enhance your website. Consider chat, newsletter, social media, or other optional plugins to make your website a lead-generating powerhouse.
Website Chat
Customer engagement is crucial for the success of your website. You should consider installing a good chat plugin, like Tidio, to make yourself more accessible to customers. Whether you need to automate the customer experience or provide a live agent for your website, a chat plugin is an excellent way to give visitors the answers they crave.
Newsletter Optin Forms
If you’re looking to increase leads and grow your customer base, a newsletter plugin, like Bloom, fits the bill. It’s an excellent way to grow your customer base, provide useful information to them, and track your site’s engagement.
Ecommerce
If you sell products or services, WooCommerce is the go-to eCommerce plugin. It integrates seamlessly with Divi, allowing you to create a stylish online store. Install Google Analytics to understand your audience and track your site’s performance. The MonsterInsights plugin makes integrating and viewing your analytics data in your WordPress dashboard easy. There are other plugins well worth looking at that extend WooCommerce for online stores.
Backups and Migrations
Don’t risk losing your hard work—a backup plugin like UpdraftPlus can automatically save your site’s data, giving you peace of mind.
Remember, while plugins can add valuable functionality, too many can slow down your site. Only install what you truly need, and always update your plugins for security and performance.
Always keep in mind that plugins are powerful tools, but using too many can slow down your website. Be selective and only install plugins you truly need. Regularly update your plugins to maintain performance and security using Divi Dash, a powerful WordPress site manager that comes with your Divi membership.
Step 7. Publishing and Growing
Before you hit the publish button, take a moment to review your entire site. Click through every page, test all your forms and interactive elements, and give your content one last proofread. It’s always a good idea to have a fresh pair of eyes look over your work, so consider asking a friend or colleague to give your site a once-over.
Once you’re satisfied with everything, it’s time to go live! If you are using a site builder, you can set your site to go live, and if you are using WordPress, you can push your staging site. And there you have it! You’ve journeyed from a blank canvas to a fully-fledged, functional, and beautifully customized website.
Take a moment to step back and admire your creation. You’ve poured your creativity, vision, and effort into building a site that reflects your brand and resonates with your target audience.
Monitoring and Improving Your Website
Once your website is live, your work isn’t over. The next step is to track how well your site is performing and continuously make improvements. Here are a few tools to help you monitor and grow your website:
- Divi Dash: Manage and monitor all your Divi websites from one central dashboard with Divi Dash. This tool simplifies site management, making it easy to handle multiple sites, view important stats, and ensure that everything runs smoothly. It’s perfect for users who manage multiple sites and need a quick overview of updates and performance metrics.
- Google Search Console: Setting up Google Search Console is crucial for monitoring how your site is performing in search results. It helps you understand how people find your website and provides valuable data on search queries, click-through rates, and more.
- Ahrefs Site Audit: Ahrefs offers a free site audit tool that crawls your website for any SEO or performance issues. It’s a great way to catch problems early and ensure your site is optimized for search engines.
- Cloudflare: Improve your website’s speed and security with a free Cloudflare account. Setting up Cloudflare and changing your nameservers can drastically increase your website’s speed while protecting it from potential security threats.
Continuous Growth
As your site begins to attract visitors, you’ll want to stay proactive about improving it. Use the insights from your monitoring tools to make data-driven decisions. Over time, you can add new content, enhance your SEO, and even expand your website’s functionality with plugins or features.
And don’t forget—Divi makes it easy to iterate on your design. Whether you want to tweak your homepage layout, add a new blog post, or introduce a new feature, Divi’s Visual Builder and Theme Builder make the process simple and intuitive.
Publishing your website is just the beginning. With the right tools and mindset, you can continue to grow, improve, and refine your site as your audience and business evolve.
Wrapping Up
We’ve covered a lot here, and now you have everything you need to build, customize, and grow your website using Divi. From setting up your domain and hosting to building and refining your site, you’ve walked through each step of the process. Divi’s powerful tools, like the Visual Builder and Quick Sites, make it easier than ever to create a professional website tailored to your unique vision.
But remember, your website is a living, breathing project. As your brand evolves and your audience grows, you’ll continue to find new ways to improve and enhance your site. Don’t be afraid to experiment with new layouts, add more features, or refine your SEO strategy to attract more visitors.
Whether you’re managing a single website or multiple sites with Divi Dash, Divi gives you the flexibility to keep up with your changing needs. And with the help of our extensive resources and community, you’ll always have the support you need to take your website to the next level.
Ready to get started? Build your perfect website today!
You probably couldn’t follow all our tool suggestions while building your site, so here are all the tools, plugins, and products we mentioned throughout and what each does for you.
| Tools to Create Websites Better | Description | ||
|---|---|---|---|
| 1 | Divi Theme | Best WordPress Theme & Page Builder | Get |
| 2 | Divi Module | Building Blocks of Pages and Templates with Divi | Get |
| 3 | Quick Sites | Important Prebuilt Websites | Get |
| 4 | Theme Builder | Building Theme Templates | Get |
| 5 | Divi No-Code Visual Builder | No-Code Visual Design Tool | Get |
| 6 | Divi AI | AI Website Builder | Get |
| 7 | Siteground Domains | Domain Registrar | Get |
| 8 | Namecheap | Alternative Domain Registrar | Get |
| 9 | Siteground Hosting | WordPress Hosting | Get |
| 10 | Rank Math | SEO Plugin | Get |
| 11 | iThemes Security | Security Plugin | Get |
| 12 | Tidio | Customer Support Chat Plugin | Get |
| 13 | WooCommerce | Ecommerce Plugin | Get |
| 14 | MonsterInsights | Analytics Plugin | Get |
| 15 | UpdraftPlus | Backup Plugin | Get |
| 16 | Ahrefs Free | Free SEO Site Audits/Crawling Tool | Get |
| 17 | Cloudflare | Free Edge Caching | Get |
| 18 | Google Search Console | Track Search Performance | Get |


Leave A Reply