
By now, you’ve surely heard that your website prefix should be HTTPS, not HTTP. Changing your website URL’s prefix from HTTP to HTTPS is an important step in securing your website overall, improving your page rank and SEO trustworthiness, and giving your users (and yourself) peace of mind. But how do you actually do it? We’ll tell you everything you need to know.
What is HTTPS and What Does It Do?
HTTPS stands for hypertext transfer protocol secure. It’s the secure evolution of HTTP (hypertext transfer protocol), and it’s a signal to users that your website is safe and their data is secure. HTTPS is now the standard across all major, up-to-date browsers. Google used to consider it for ranking your site in the SERPs; however, the search engine giant has now flipped that practices on its head. Now, Google penalizes sites and lowers their rankings if they have not made the move from HTTP to HTTPS.
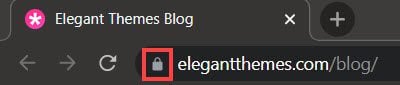
Browsers will display a small padlock icon in your browser bar, which shows users that they’re browsing a secure website. The HTTPS protocol secures a website through end-to-end encryption. It accomplishes this through something called a security certificate.
You’ll see these certificates referred to as SSL or TLS certificates. (We have a great breakdown of TLS vs SSL certificates you should check out for more details.) Essentially, an encrypted website protects both your site and your end-users from malicious hacking, data breaches, and other nefarious activities.
Is Going From HTTP to HTTPS Required?
Yes, 100%. It’s essential to the success of your website on nearly every level. Aside from the obvious need to secure your website in general, running an unsecured website could set you up for potential liabilities. You don’t want to get hacked — or for your users to have their information stolen from your site.
These days, browsers and search engines such as Google have built-in tools that discourage users from surfing unsecured websites. They also set up ways to deter website owners from keeping an unsecured URL indefinitely. The main tactic, as we’ve mentioned, is to penalize sites with an HTTP prefix so that your SEO ranking takes a hit. If getting more eyes on your site is part of your strategy (which we can assume it is), you’ll need to redirect from HTTP to HTTPS as quickly as you can.
Users Can See If a Website is Secure
Chrome and many other browsers warn users before they enter an unsecured website. This acts as a deterrent for users who don’t want to put their data at risk. Formerly, Chrome would color this padlock green, but when Google moved to HTTPS being the standard, that practice ended. Now, it will only show as a color (red) if the website is not secure. It is now considered a warning, rather than an all-clear signal.
When your users know you’re protecting them and their data, then they’ll be more likely to use your services. Malware and a plethora of security threats abound online, and it’s so easy to become the victim of nefarious action. All businesses need a foundation of trust between user and brand, and this is an essential pillar in that foundation. Protecting user data is key to building trust and encouraging user engagement. A reliable security plugin can provide an added layer of protection against these online security threats, giving users peace of mind and strengthening the foundation of trust between your brand and your users.
How to Redirect Your HTTP WordPress Site to HTTPS
Want to know how to redirect your WordPress site to a secure URL? There are a few ways to accomplish this. Before you begin, remember to back up your website and have a few recovery options in place. You know, just in case something goes wrong during the process. You’ll want to be able to get your site back if something breaks. It may not happen often, but it is possible to lock yourself out of your site.
Choose and Install an SSL/TLS Certificate
Many web hosts offer free SSL certificates along with their hosting plans. You can often enable that with the click of a button in the site tools. If your host does not offer an SSL or TLS certificate for free, it might be time to look for a new host. You can also find a slew of them to handle manually, such as Free SSL and Let’s Encrypt.
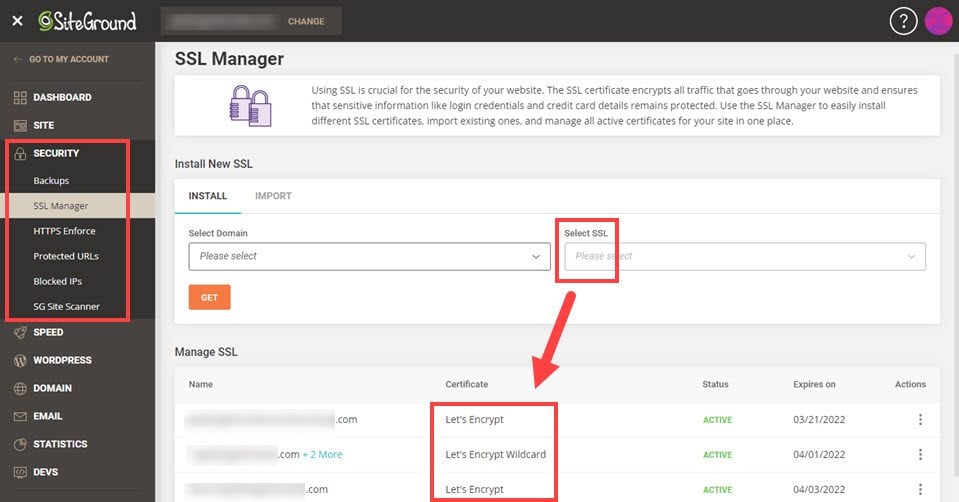
As an example, SiteGround has an entire suite of tools in their backend under the Security tab that lets you handle the initial steps of getting your certificate set up with just a few dropdowns. With most hosts, it’s as simple as entering the URL you want to move, selecting which SSL certificate you want to add, and clicking the Save, Get, Submit, etc. button. Other hosts like Pressable and Flywheel offer similar setups.
Switch to HTTPS in WordPress
With the certificate in hand, you’ll need to go into your WordPress site settings to change your URL over to HTTPS. Go into Settings – General and find the fields marked WordPress Address (URL) and Site Address (URL). Change the URLs to read HTTPS.
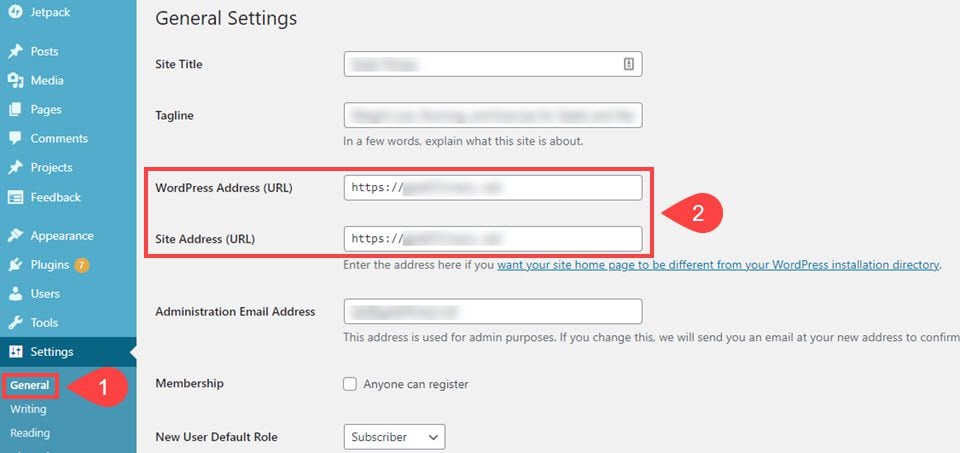
If, however, these fields are greyed out and you can’t edit them, you will have to go into your site’s cPanel or site tools and adjust the URL manually. It might be within the core PHP files, database, or .htaccess file, depending on your particular situation. The official WordPress documentation shows how to do all of that if necessary.
WordPress Plugins to Handle the Heavy Lifting
Not everyone is comfortable editing those files and digging into the deep recesses of their sites. This is why there are so many WordPress redirection plugins that handle most, if not all of the process for you. The most common plugin is Really Simple SSL. With it, you just click Activate, and most kinks are worked out.
If there are issues after that, most of the time it is with two things: redirecting URLs to the new HTTPS standard or fixing the mixed content error.
The mixed content error is an easy fix. Follow our guide, and you’ll be on your way in no time. For redirecting to HTTPS, you have a lot of options. Most of the top WordPress SEO plugins will handle this automatically, so you may just need to check the settings in your dashboard to be sure.
You can also install plugins such as Easy HTTPS Redirection or WP Force SSL & HTTPS SSL Redirect to cover those bases for you. They’re both simple, easy, and quick.
What to Do Next
After you’ve moved your WordPress site from HTTP to HTTPS, it’s time to do a little housekeeping. You’ll want to make sure that all your URLs from your entire website are redirected–not just your homepage.
Here are the next steps you’ll need to follow to make sure you’ve covered all your bases:
- Be sure to check that everything has changed by using plugins such as Better Search Replace to replace HTTP with HTTPS.
- Change your URL in Google Analytics, Adsense, and Search Console. Google has a great guide on doing that here.
- Adjust scripts, CDNs, and other external settings that still use the old URL. These will differ from site to site, but if you use integrations that tie into your old HTTP site, you definitely need to make sure they now point to your HTTPS one.
- Replace the old URL anywhere you link your website (such as social media platforms and other marketing materials). While the HTTP URL should redirect to the HTTPS one, changing it in visible places goes a long way toward credibility and trust that we mentioned earlier.)
- Remember to use the new URL when you type your link going forward. This might take a while. But it will eventually become habit.
Wrapping Up
Redirecting your WordPress website to HTTPS requires several steps that you’ll need to follow carefully. The good news is, when you’re done, you’ll have a secure website that reassures your visitors that their data is safe when they browse your site. In an age when it’s absolutely necessary to have your digital data secure, moving your website from HTTP to HTTPS is of the utmost importance.
Featured image via elenabsl / shutterstock.com


I did this and now I can not log in to WordPress. I’m a beginner web builder, learning as I go and self-taught, and now I don’t know what to do to get logged back in without diving deep into web development territory that I know nothing about and all reads like a foreign language.
Contact the support team of your web host. They’re in the best position to get you logged back in via their systems.
Thanks for sharing this. That was really usefull and is more easy thant it apperas to be. Just done on my website and its working correctly. Tanks a lot!