
‘Flat lay’ is a photo composition technique used to bring out the contrasts and cohesion in everyday objects, as well as to offer a unique style for display. This beautiful technique is used commonly on social media – especially Instagram – and can provide you with an almost unlimited source of inspiration for your next web design project.
In this post, we’ll touch on ten tips you can make use of when creating flat lay photographs. These include the careful choice of formats, sound selection of color combinations, and wise use of space. We’ll illustrate each tip with examples of stunning flat lay photos, and give you some ideas for how to implement them. Let’s get started!
What Is Flat Lay Photography (And Why Might You Use It)?
Flat lay photography enables you to display a variety of items in a unique and compelling format.
Simply put, flat lay is a style of photography that takes a birds-eye-view approach to display. It’s a popular technique used across social media platforms – most often Instagram and Pinterest – and it’s a fantastic way to display products or concepts.
Aside from social media, flat lay is also an effective technique to use on your website. This appealing display style provides a focused and ‘cleanly cluttered’ feel, which can give your site a unique look. In addition, experimenting with flat lay photography is a perfect way to release your creativity and hone your artistic skills.
One of the best things about flat lay photos is that they can be created by just about anyone. All you need is a camera (even a smartphone will do), some decent lighting, and an editing application. To increase your odds for success, we also recommend following the tips offered below.
10 Stellar Tips For Creating Stunning Flat Lay Photos For Your Next Web Design Project
There are many general guides to photography available across the web, but it’s more difficult to find resources that focus on flat lay photos in particular. We’re aiming to fix that with the ten tips listed below, each of which can be used to create stunning flat lay images for your website.
1. Choose Your Format
Image by Floral Deco / shutterstock.com
The purpose of your photographs – that is, whether they’ll be featured on Instagram or play a key role in your next web design project – will largely dictate the format you use. However, it’s important to take format into consideration before setting up and shooting, to avoid a headache down the road.
For example, if you need the finished product to be of a certain size or shape, consider setting those requirements up in advance on your phone or camera. This will not only make editing a breeze, it will also preserve the quality of your work since crops and adjustments won’t be as necessary.
2. Pick a Theme

Image by Africa Studio / shutterstock.com
Themes don’t need to be overtly obvious, but it helps to have some level of connection between the items in your image. Above you’ll see a photo focused on coffee, with the various shades of brown really bringing the objects together.
Themes are important for individual images, but also for the photographs on your website as a whole. When picking a theme, consider your website’s brand, as well as what you’re hoping to achieve with this design. For some niche websites, such as fashion, choosing (and sticking with) a theme is simple. It can be a bit more difficult if your site isn’t centered on something inherently visual, but try focusing on color or other abstract elements.
3. Learn Basic Composition

Image by happydancing / shutterstock.com
You don’t need to spend years studying the elements of artistic composition to succeed at flat lay design. Instead, you just need to become familiar with a few basic rules.
Composition is all about balance. That doesn’t necessarily mean your image has to be perfectly lined up, but you do want to follow some simple composition rules to keep your photographs consistent and professional. Take particular note of the rule of thirds, as used in the image above. This composition technique breaks the image into a 9-piece grid, and lines up the most important elements of the image with the grid intersections.
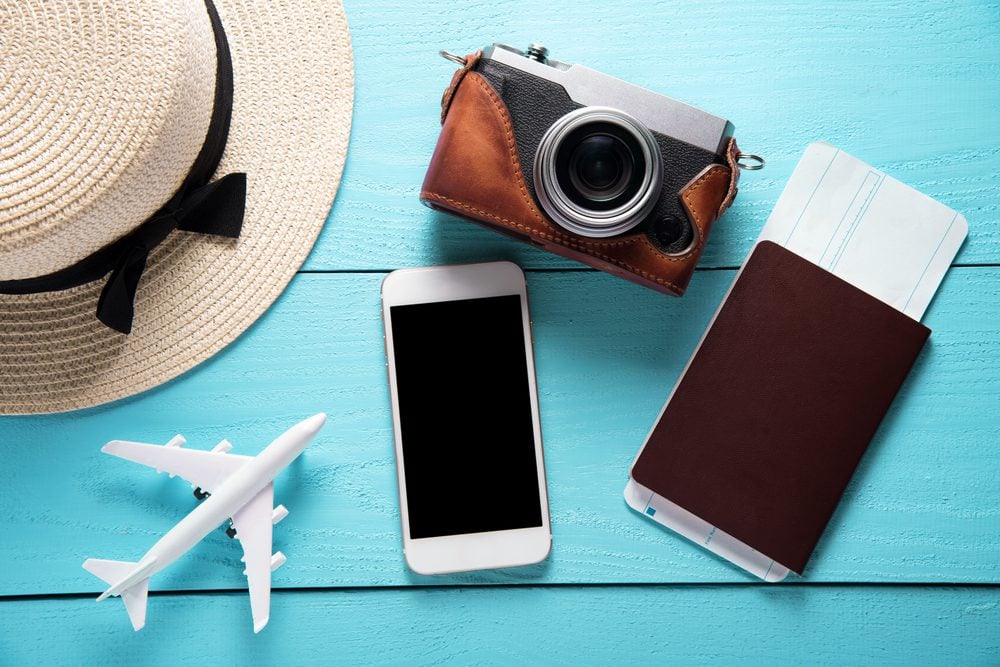
4. Employ a Focal Point
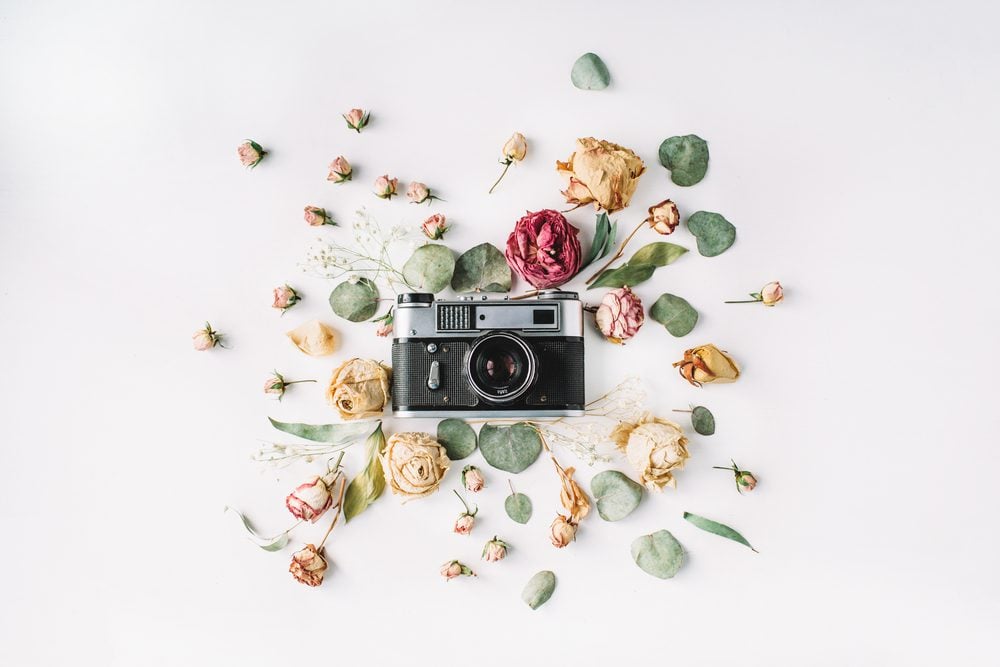
Image by Floral Deco / shutterstock.com
A clear focal point draws the eye, making it an essential component to flat lay photos and one that requires careful consideration. Choose a central object, such as the camera in the above image. Then, place complementary items around the focal point to draw attention to that object.
This technique is useful for tying a piece together. Instead of placing items randomly, a focus gives you a starting point to work with and enables you to experiment with a variety of placements and surroundings.
5. Make Natural Lighting a Priority

Image by marcin jucha / shutterstock.com
Lighting can make or break a photograph, and natural lighting in particular can provide just the touch your image needs to really pop.
While there are a variety of lighting tools that offer a natural feel to your photographs, sunlight often provides the most authentic look. In the above image, the sunlight coming in from the left adds a soft glow to the pastel pink tulips. In addition, the natural shadow adds an extra design element to the piece, giving the image further depth.
6. Use Colors Deliberately

Image by Nelli Syrotynska / shutterstock.com
Careful use of the color wheel can yield stunning results, as demonstrated in the above image. Green and purple complement each other well, and the use of the deep brown background adds even more depth to this already striking combination.
During your next website redesign, take into consideration the color wheel and its variety of stunning combinations. You may feel compelled to use a number of them throughout your website, as well as incorporating them into your flat lay photos.
7. Use Clean Backgrounds
Image by Flaffy / shutterstock.com
While the use of complex backgrounds can be effective, clean, simple backgrounds offer the most options for composition and layout. When you use a clean background, the items in your photograph can really pop. This is essential if you’d like to showcase a particular product, or if you feel that the items on display are important to your site’s narrative.
‘Clean’ isn’t to be taken literally, of course. As in the photo above, a few natural imperfections are quite alright. The important thing is to use a background that doesn’t draw too much attention away from the items being displayed. Avoid clutter, patterns, or background colors that are too bright – all of these can wash out the image and leave it looking chaotic.
8. Shoot from a Bird’s Eye View
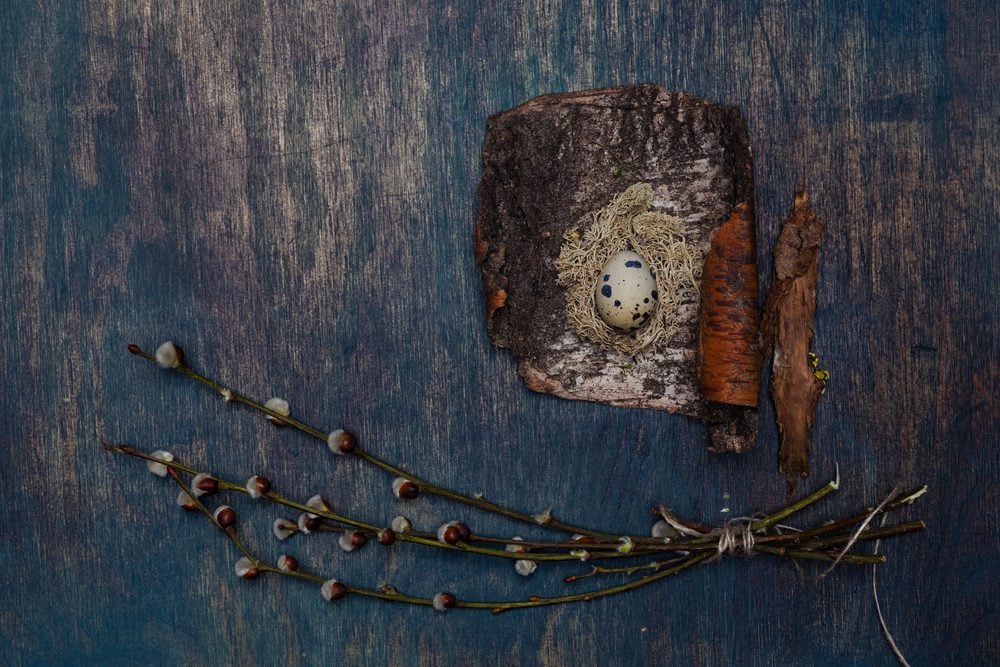
Image by Karniewska / shutterstock.com
While this may seem most obvious tip in the list, it’s one that’s important to make note of. Since flat lay photography depends on a flat vantage point, following the best techniques for birds-eye-view shots is vital.
For best results, flat lay photos should be taken from high above the objects, not directly on top of them. This will help you better frame your images while they’re being taken, and give you a variety of orientation options during the editing stage. Use a stool or chair to achieve the proper height, and experiment with different distances during your photography sessions.
9. Make Smart Use of Space

Image by Zamurovic Photography / shutterstock.com
Some images benefit greatly from an ‘unbalanced’ composition. They make use of ‘negative’ or empty space – a technique that is used for a variety of photography styles. In flat lay imagery, smart use of empty space can put the spotlight on important items.
The goal here is to create an uncluttered image. In the photograph above, the white space is centered around the focal point. However, you can also use white space at the edges of your photographs to create a buffer zone. Just remember: in flat lay photography, less is more.
10. Edit to Perfection

Image by Stock-Asso / shutterstock.com
The truth is that a lot of the magic involved in the creation of flat lay photos takes place after they’ve been shot. Careful editing is key if you want to design images that are compelling and follow the guidelines we’ve discussed so far.
The main elements to focus on during editing are color, saturation, and light. After all, you don’t want to alter the image beyond recognition. Instead, with the use of a photo editor app, you can enhance each image. Use the auto adjuster for a quick fix, or play around with each of the app’s slider tools. You can alter the brightness, sharpness, and contrast, and even add in highlights and other natural touches. It may take a bit of work, but the best flat lay images take time to perfect.
Conclusion
When you’re working on your latest website design, it can be difficult to find a unique way to showcase the site’s visual elements. After all, creativity is important when it comes to web design, and you want your work to stand out.
If you’re looking for a unique and stylistic approach, flat lay photography might be ideal. It’s a simple but powerful technique that can be easily incorporated into your next web design project. This type of photography can greatly contribute to your site’s design, by offering a unique and beautiful addition to any website. The ten tips we’ve explained – as well as the beautiful flat lay photos used to exemplify them – will help you get off to a strong start and create a stunning layout for all your flat lay images.
Which of the above flat lay photography tips are you most excited to incorporate into your next web design project? Let us know in the comments section below!
Article thumbnail image by vsl / shutterstock.com


Your point #8 (achieving a bird’s eye view) is, obviously, critical for this kind of shot but standing on a stool, or desk is precarious and I still end up with my feet in the shot!
And in low light situations — which give those nice, soft shadows — require longer exposures which makes hand-held shots less sharp.
Do you have any suggestions for setting up a safe, steady, foot-free overhead shot?
Try using a tall tripod and sitting up on your shot on the floor. I don’t know of any easier way around this. You can also look into a clamp or spider/bendable/flexable type tripod. They are cheaper and can be hung or mounted high up with little risk to your camera. Some can even hold DSLR type cameras with large lens setups. Good luck!
Sorry, typo there. It should be setting not sitting. I caught it right as I hit Submit. lol! Not enough coffee yet. 😉
Mount the camera on the underside of the tripod, works like a dream.
Hi Greg, thanks for commenting! Looks like David and Jonathan have offered some solid suggestions. 🙂
Your problem is solved with a horizontal camera mount, it will keep those pesky feet out of the picture and give you a nice steady overhead shot.
I find the biggest challenge to be indoor lighting. Holding/setting the camera directly above the subject creates a camera shadow from any lights above that position. Side lighting creates shadows next to the objects. Of course, in a complete studio, this is not an issue, but setting up in remote locations adds to the difficulty. Anyone found an easy and inexpensive solution?
An assistant and a nice reflector.
Hi Neil,
Great post. I was wondering how flat lay photos can be used for virtual products like Digital services, websites etc. What sort of items can be included therein?
Cheers