
When it comes to creating forms, there are a lot of great WordPress form plugins to choose from. But not every great option is the right one for every WordPress user. If you’re looking for something simple, WPForms might just be what you want.
WPForms is a form builder that lets you drag and drop fields to build any kind of forms you need. It includes several templates to get you started. You can place the forms in pages and posts using the shortcodes, and it includes a widget with a dropdown box to select your forms to display.
In this post I’m going to conduct a thorough overview of the WPForms plugin and share my experience and thoughts.
WPForms Pro Edition

While there are several editions to choose from, in this review I’ll walk you through using the Pro edition of the plugin. It’s $199 per year and includes lots of add-ons and features, which include:
- Unlimited Forms
- Unlimited Entries
- Form Templates
- Multi-page Forms
- Spam Protection
- Conditional Logic
- Advanced Fields
- User Registration
- Geolocation
- Post Submissions
- Custom Catpcha
- AWeber
- MailChimp
- PayPal Standard
- Stripe
- GetResponse
- Campaign Monitor
- Zapier
- Unlimited Sites
- 1 Year of Priority Support
- 1 Year of Updates
The Pro edition includes several plugins that you’ll install along with WPForms.
Installation and Setup
First, upload and activate all of your plugins. Next you’ll have to verify your license key. In the WordPress dashboard, select WPForms and then select Settings.
General
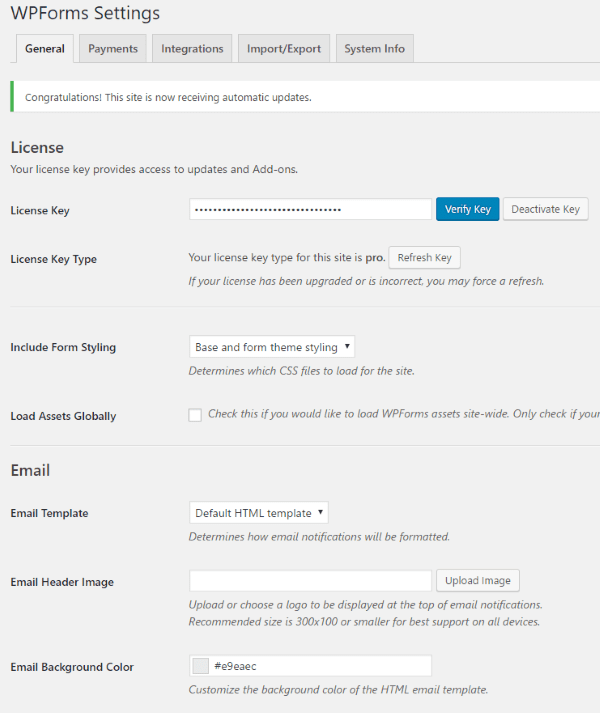
Go to the General tab and activate your account key. You can also adjust your email and reCAPTCHA settings in this tab.
Payments
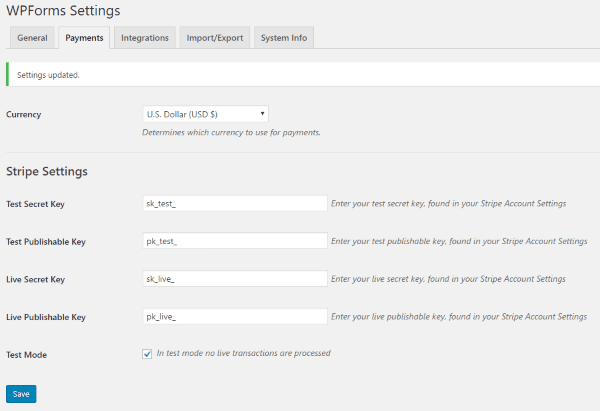
You will choose your currency and set up your Stripe settings in the Payments tab. Use test mode until you are ready to accept payments.
Integrations
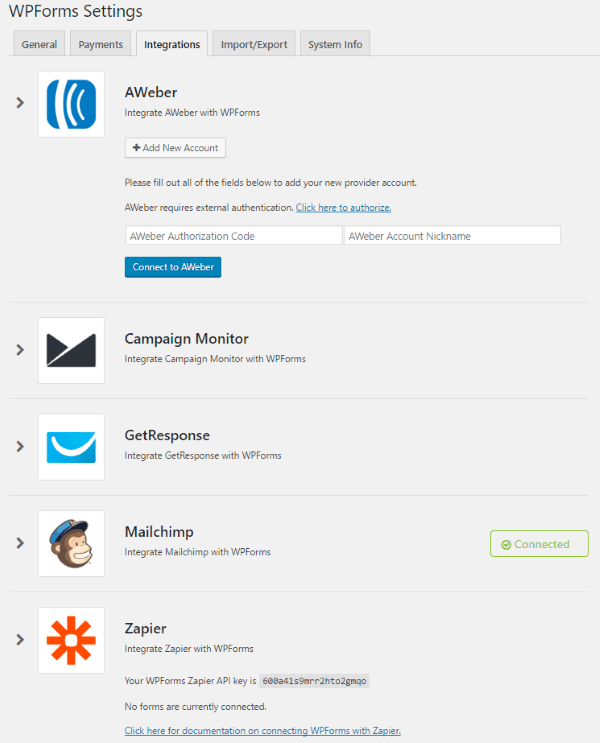
This tab lets you connect to your newsletter marketing apps. Click on the service you want and it leads you through the process. I found the steps intuitive. It makes the process as easy as possible.
Import/Export
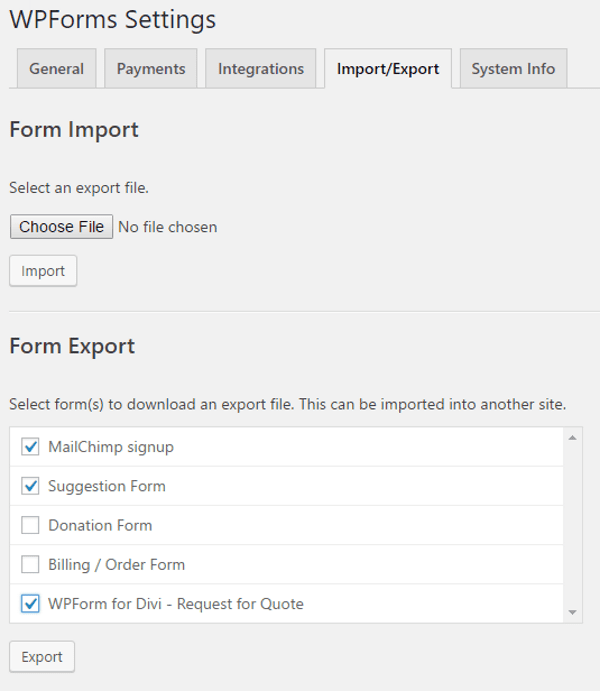
This tab lets you import and export your forms. You can select which file to import and which forms to export.
Creating a Form
To create a form, go to WPForms in the dashboard and select Add New. It will take you to the setup screen. The menu on the left takes you through all of the steps to create or customize the form. You’ll need to add your information in some of the fields. Others, such as email, will use the admin email by default.
Setup
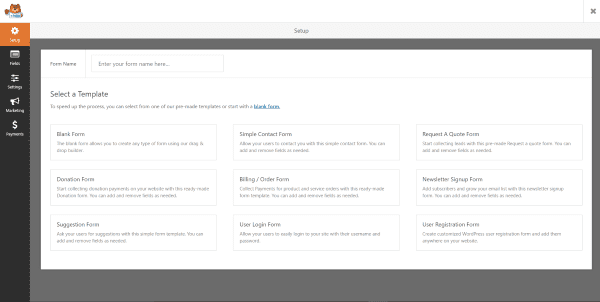
The form creation screen takes over your WordPress dashboard, hiding the dashboard menu. Here you can name the form and select a template to build you form.
Templates include:
- Blank
- Donation
- Suggestion
- Simple contact
- Billing/Order
- User Login
- Request a Quote
- Newsletter Signup
- User Registration
Creating a Request for Quote Form
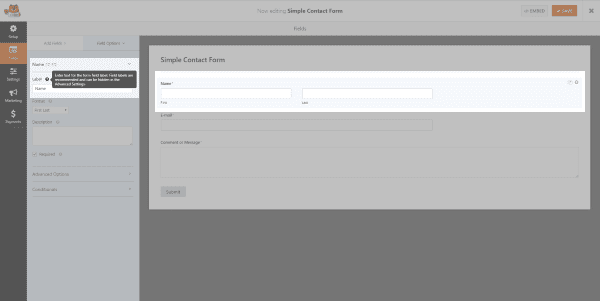
For my first form I wanted to build a Request for Quote form and place in within a Divi module for an agency page. I selected the template and it took me to the form where I could customize it.
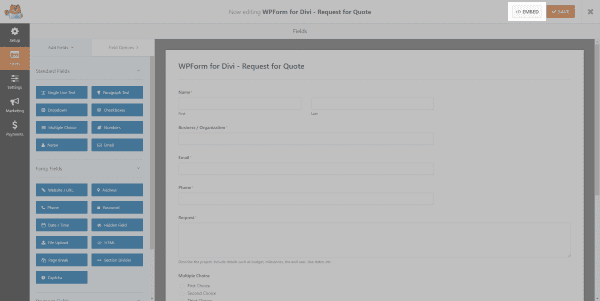
Fields
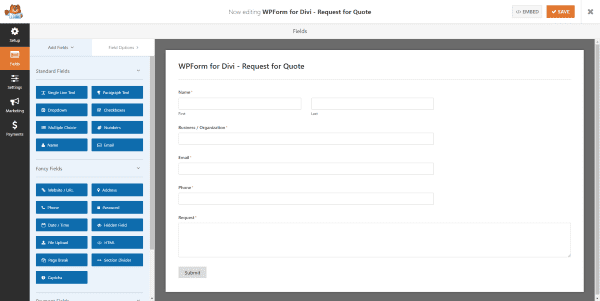
The section to the left of the form has items that you can add to the form. They are separated into three categories. The categories and their items include:
Standard – single line text, paragraph text, dropdown, checkboxes, multiple choice, numbers, names, and email.
Fancy – website, address, phone, password, date/time, hidden, file upload, HTML, page break, section divider, and captcha.
Payment – single item, multiple items, credit card, and total.
Clicking on any of the items will add them to the bottom of the form on the right. Once the fields are on the form you can drag and drop them in any order you wish.
Field Options

Clicking on the fields on the form will open its options. The options are different depending on the type of field it is.
Clicking on the fields lets you change the label and description, and choose if they’re a required field. Some have specialized information for that type of field. Advanced options are also specialized and includes a field for CSS class. Conditionals options enables conditional logic.
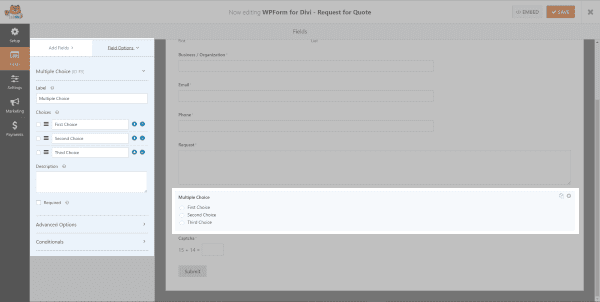
I added a multiple choice field and opened the field options. Here you can change labels, add a description, and make it a required field. Advanced Options allows you to show values, choose the number of columns to display, hide the label, assign a CSS class, and disable dynamic choices.
Settings
The settings tab includes General, Notification, and Confirmation settings.
General

Here you can edit the forms’ title, give it a description, hide the title and description area, assign as CSS class, assign text to the submission button, assign a CSS class to the button, enable anti-spam, and disable storing entry information.
Notifications
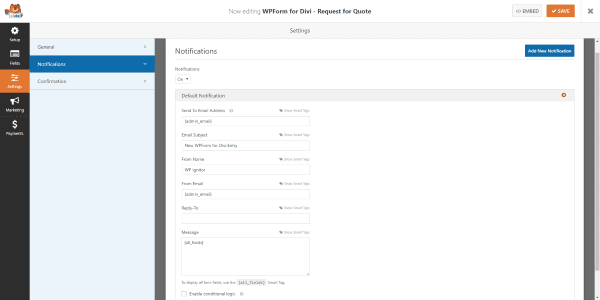
You can disable notifications. The default notifications allow you to choose the email it’s sent to, email subject, from name, reply-to, and message. You can also enable conditional logic which allows you to set conditional rules of when and how the notification is sent.
Confirmation
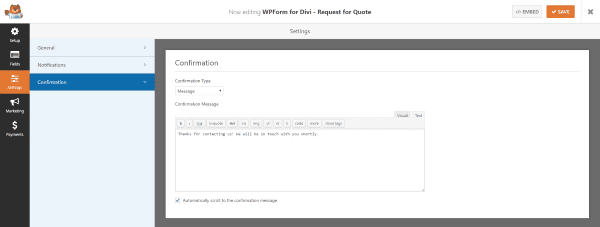
This lets you create the confirmation message that is sent to anyone that sends a message through the form. You can have it to send a message, show a page, or redirect to a URL. The message itself is written using the visual or text editor.
Marketing
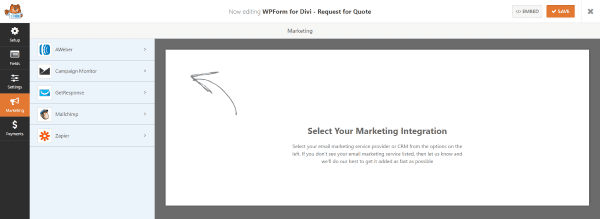
The Marketing tab allows you to connect the form to your marketing campaign platforms. Your choices include:
- AWeber
- Campaign Monitor
- GetResponse
- MailChimp
- Zapier
I connected to MailChimp and Zapier.
MailChimp
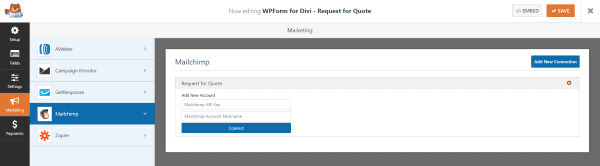
First connect to your account by inputting your API key and account name.
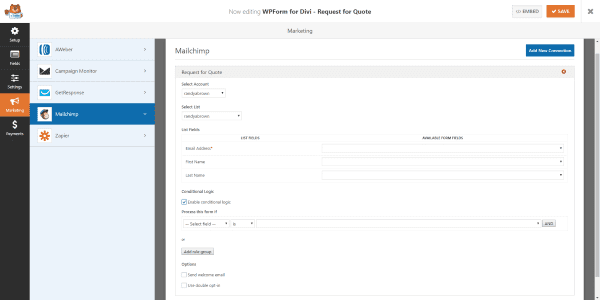
Once the connection is established you can select the account and list you wish to connect to. Choose your fields, conditional logic, you can also enable the welcome email and to use double opt-in. You can add as many connections as you want. This is great if you use more than one newsletter.
Zapier
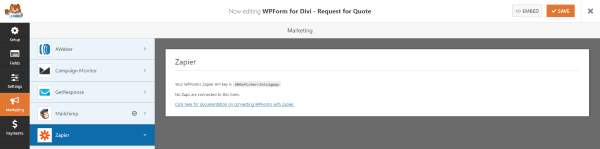
Connecting Zapier is just a matter of clicking on WPForms in the apps at Zapier.com, selecting to connect, and adding the API key that WPForms gives you. Once you’ve connected your account you can start making your own Zaps and connect your forms.
Payments
There are two payment options: PayPal and Stripe.
PayPal
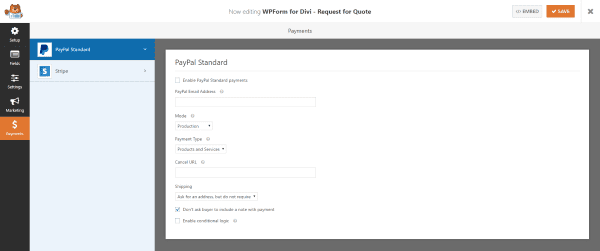
PayPal was easy to set up. I selected to enable standard PayPal payments and typed in my PayPal email address. You can set it to test or production. It’s a good idea to use test until you’re ready to accept payments. You can also choose between selling products or accepting donations.
Stripe
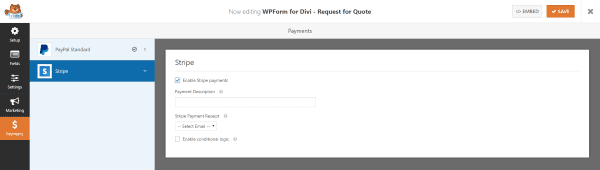
Stripe allows credit card payments. To use Stripe you have to set up your API key in the WPForms general settings and then you can add a credit card field to the form.
Adding the Form to a Page or Post
The form is added to your content using a shortcode. There are two ways to get the shortcode. You can click the </>Embed button in the upper right corner of the form editor.

This will give you a modal popup with the shortcode and a short video showing how to use it.

You can also get the shortcode for every form in All Forms under WPForms in the dashboard. Copy and paste the shortcode into any page or post you want it to appear.
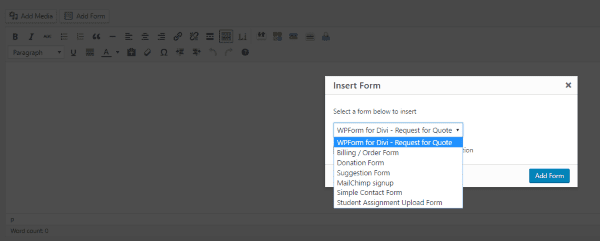
A button labeled Add Form is added to the Visual Editor. You can choose the form you want from the dropdown list. You can select to show the form title and the form description. It will add the shortcode with your selections to your content. You can add multiple forms to you content.
Examples
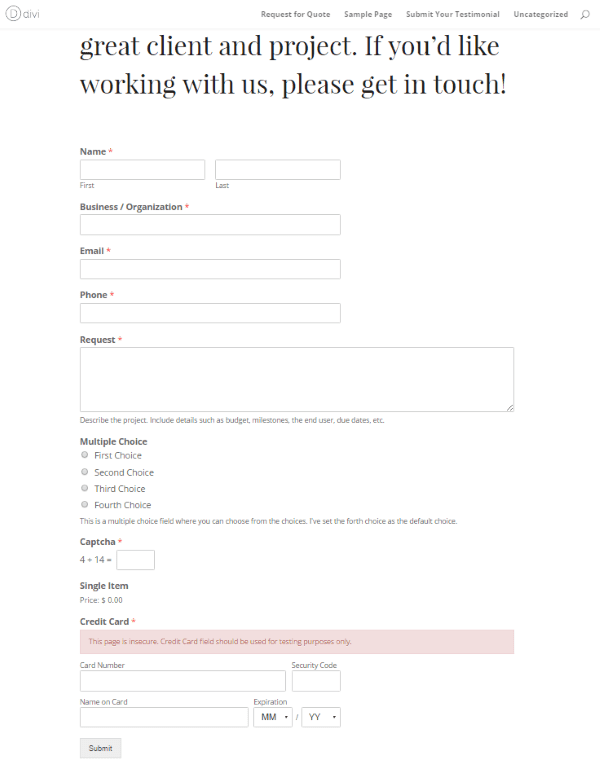
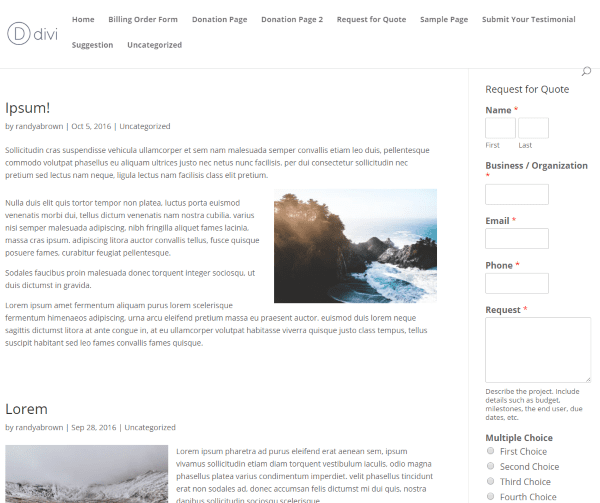
I created a page using the Contact Page Layout Pack from day 42 of the Divi 100. I replaced the contact form module with a code module and pasted in the shortcode. It worked perfectly on the first try and integrates seamlessly.
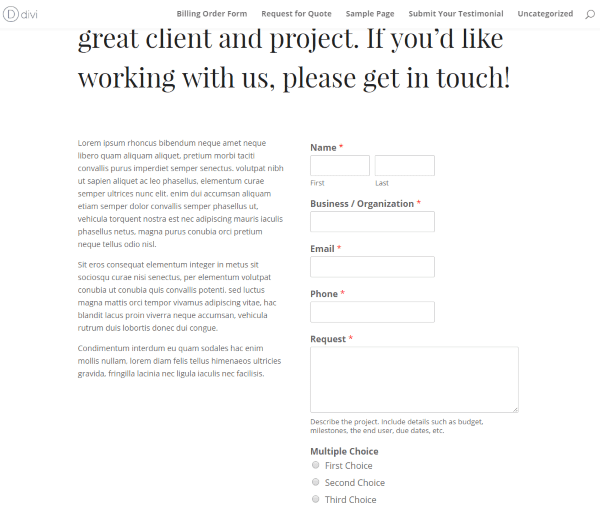
You can also place it within columns. I don’t recommend this for large forms but for smaller forms it works nicely.
Creating More Forms
I went back and created several forms from the templates and added them to other pages.
Creating a Billing / Order Form
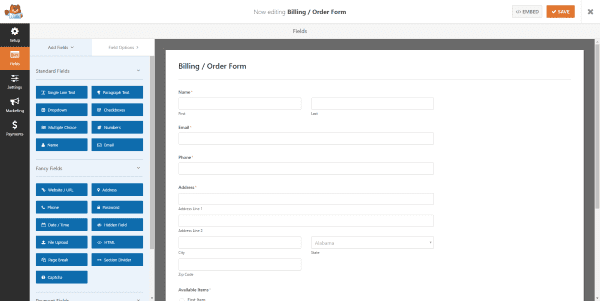
Here’s a look at the Billing / Order form.
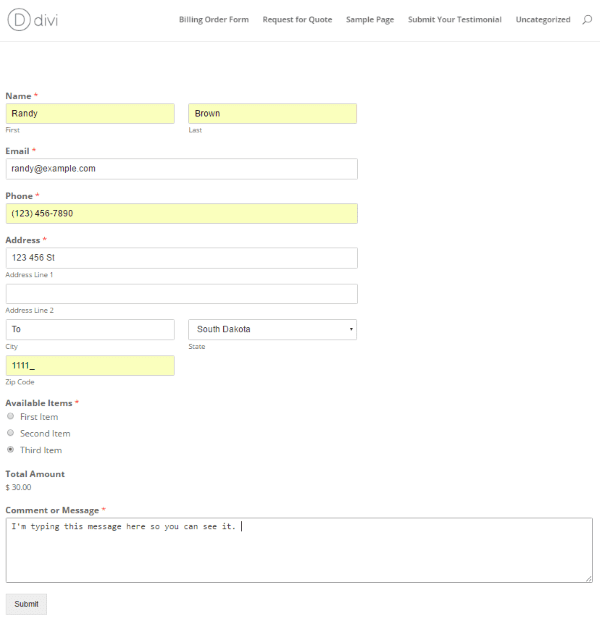
This is the standard form on its own page.
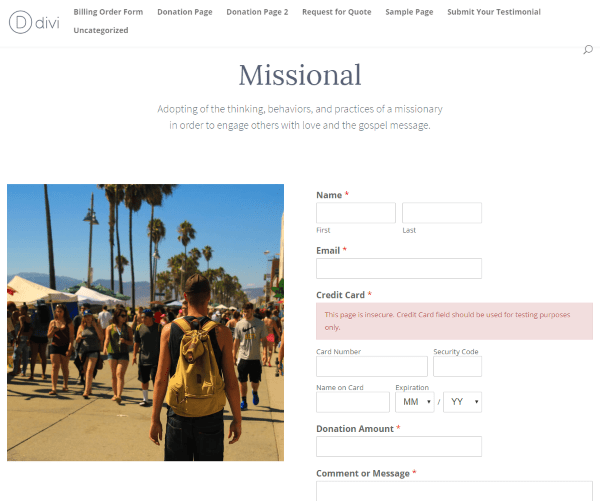
Donation Form
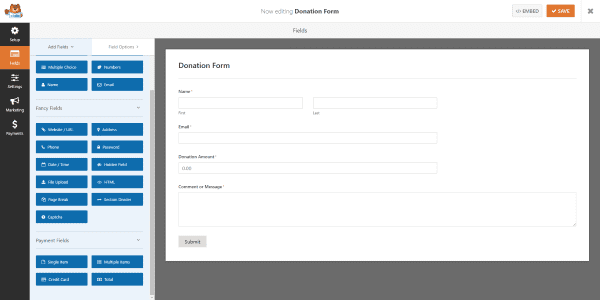
Here’s a look at the donation form.
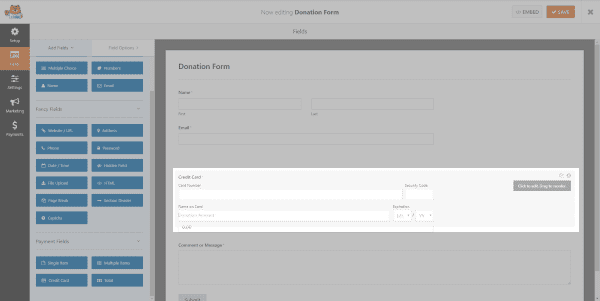
I added a credit card field and used drag and drop to change its placement.
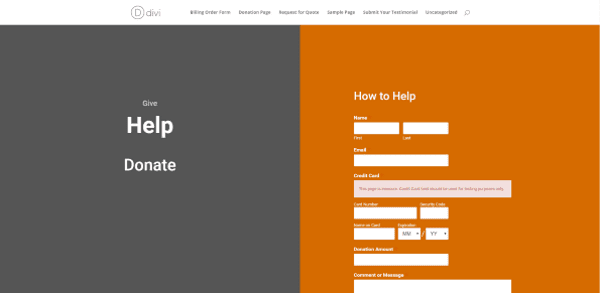
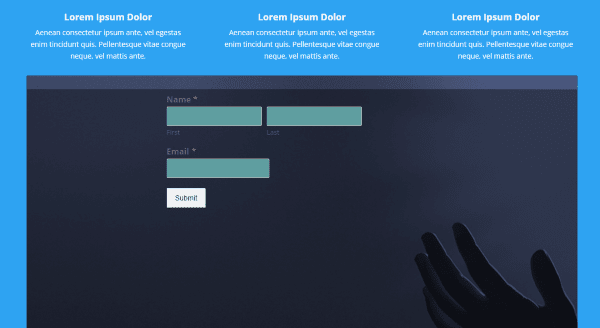
I built a page using the Split Screen Layout Kit from day 37 of Divi 100.
Here’s another example using the Geno’s Church Layout Kit that he mentioned in Day 89 of Divi 100.
Suggestion Form

Here’s a look at the suggestion form.
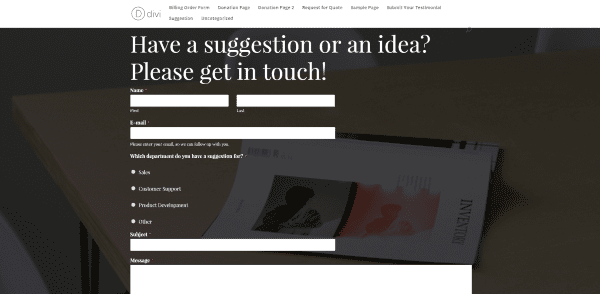
I added it to the Contact Layout Kit. It blended nicely.
Creating a Form From Scratch
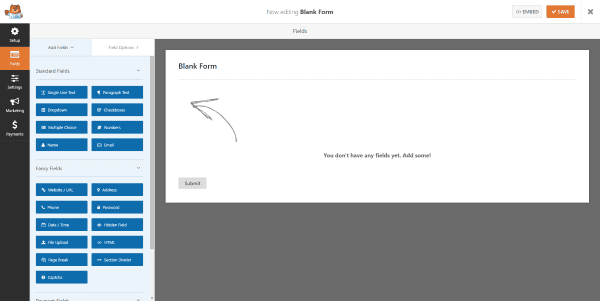
Choosing Blank Form gives you a blank canvas that you can start adding fields to.
To create a form I just started clicking on the items I wanted and then dragged and dropped them in the order I wanted them. The fields have their default labels but you can change them to say anything you want.
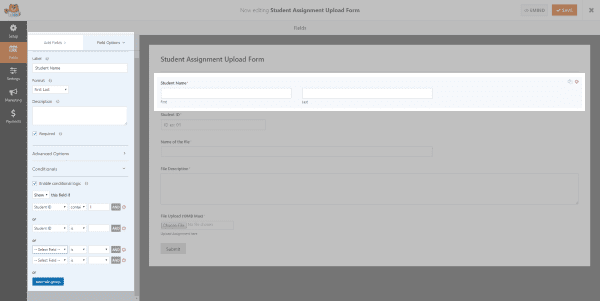
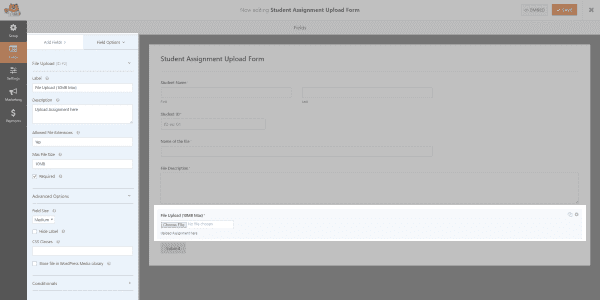
I also added conditional logic so I could exclude certain student ID’s and names.
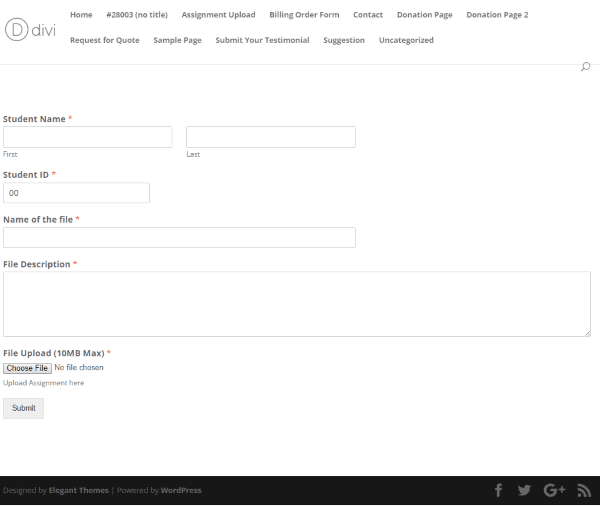
I created a student assignment upload form and placed it on its own page.
Styling with CSS
You can use CSS classes to customize the look of the fields and form elements. It has over a dozen CSS classes for creating multi-column layouts. They show some examples on their website but I found the instructions to be a little too simplified for beginners but they do give you the code to help you get started. You’ll need to add the code to your style sheet. With Divi Leads you can create several styles and text to see which gives you the best results.
Widget
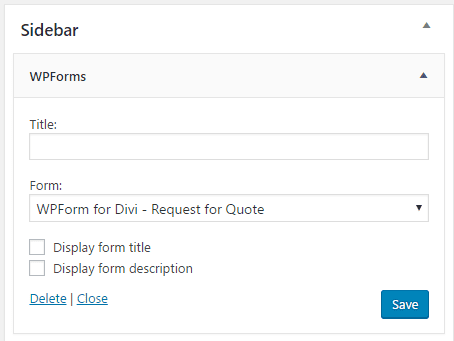
The plugin includes a widget where you can choose your forms from a dropdown list.
The forms resize to fit within the sidebar.
All Forms
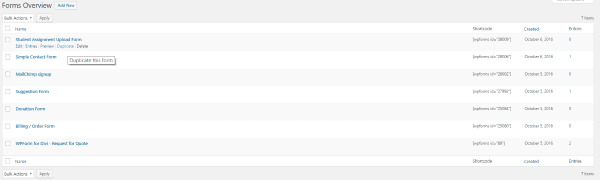
The see all of your forms select All Forms in the WPForms menu in the dashboard. Here you can edit, preview, see entries, duplicate, and delete any of the forms. You can also get the shortcodes for any form from here.
I like that you can preview and duplicate a form from here. This makes it easy to know which form you want to copy and duplicating them is a great way to save time for large and complex forms.
Entries
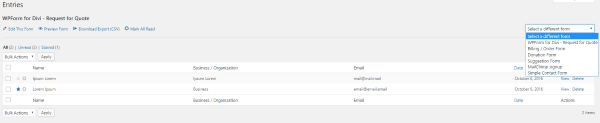
You can see messages that have been submitted for each form individually in the Entries tab from the dashboard. You can change between the forms using the dropdown box on the right. You can view the entries, star them, mark them as read, and download them as CSV files. It has links so you can preview and edit the form.
You’ll also get an email report for every message that your visitors submit. This is especially helpful because there aren’t any alerts in your dashboard except for on this screen.
Click on View to see the details of the message.
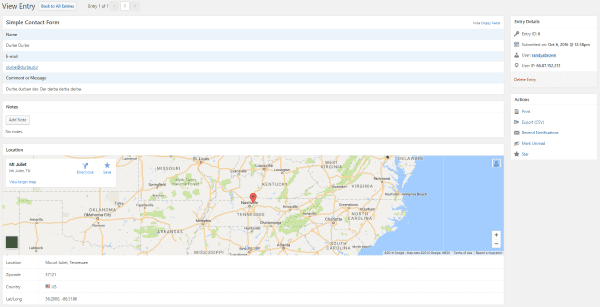
When you view the entry you’ll see details such as the complete message, their contact email, location (using the geolocation addon), etc. You can also add your own notes to the entry and perform other actions such as print, export, resend, mark as unread, and star. You can scroll through the entries from this screen and go back to the All Entries screen.
Support and Documentation
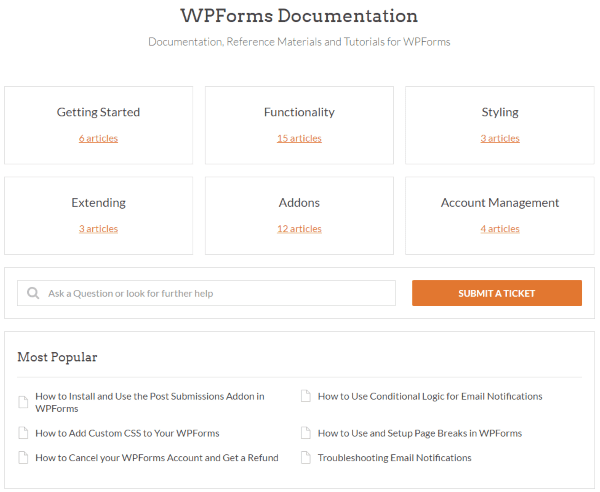
The only documentation within the plugin are the videos the show you how to insert a shortcode and question marks on all of the field options that give you a short explanation of how to use that option.
While no links are provided, there are several documents and videos at their website including an introduction video to help you get started. The material is short and simple but well-written. They also have a blog with lots of short tutorials.
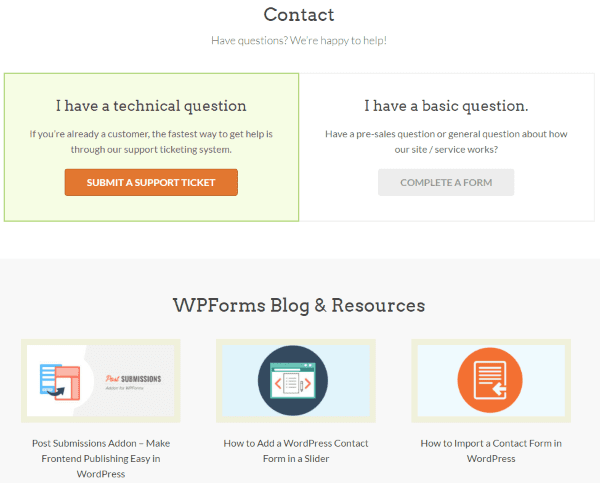
If you do need support you can use the ticketing system. I didn’t need support during my review process but I did consult the documents to learn about the CSS classes. All of the elements of creating and using the forms are covered.
Final Thoughts
WPForms is an easy form system to use. It’s intuitive and simple to use but doesn’t lack features. I was able to create any type of form I wanted using the included fields and drag-and-drop system. It’s evident that great care was taken in the UX design.
The add-ons easily connect to your favorite newsletter and payment systems. Using credit card fields, you can easily use WPForms as a viable solution for accepting online payments without using additional payment plugins or donation plugins. Addons such as conditional logic and advanced fields give you tools to customize your forms even further.
Aside from the CSS classes, it’s very much a beginner’s form creator. I would like to see a few more styling features but if you’re familiar with CSS you shouldn’t have any issues styling it to fit your branding. You can even use it with Divi Leads and run your own a/b tests.
If you’re looking for a form creation system that’s both easy to use and powerful enough to create custom forms, WPForms is worth a look.
Have you tried WPForms?
Featured image via BarsRsind / shutterstock.com


This is a very useful plugin! I use it for my Amazon affiliate sites. Excellent conversion and raises the number of orders
Amazing!! Rally I just feel WOW, Glad to see the pro version,A lot of things are here 🙂
I am almost code illiterate and have found the support at WPF fabulous. I have purchased the basic package and needed css styling help. Support responded very quickly and offered straight away to do it for me – no wading around for hours in forums then wrestling with the answers that still seem like a puzzle for those without any coding knowledge. The plug in was very intuitive to use and if you can use Divi WPF will be a breeze. I highly recommend them – the best support I have ever had.
Nice review Randy. Thanks!
Based on the review of 15 different form plug ins from a few weeks ago:
https://www.elegantthemes.com/blog/resources/best-wordpress-forms-plugins
I opted for WP Forms. And due to the high price I only got the basic version. For my charity site it seems to be all I need and I have created 3-4 forms scattered around my site. It would have been great to have used some of the pro features, but it is not the end of the world.
Despite being a non-programmer who only started with WordPress about 6 weeks ago I could work out how to use it with very little effort.
http://www.shangilia.net
Oh and I forgit, there’s a 30% discount for non-profit so it’s more like 1/5 of the price.
Well, you’ve just got scammed. For 1/4 of the price you’d have all the pro features you wanted on Gravity Forms.
Thanks Randy!
Hi Thomas. I’m glad you liked it. Thanks for sharing! I like your charity site.
GF is very good, although I must say every time I have asked for help it’s either a “customization and we can point you to some developers” or “it’s someone else’ fault”. Even for the most basic stuff like “I am trying to achieve this could you help me with a road map to achieve it?” I get the same kind of answers. I buy GF for what it does and thankfully not the support (because quite frankly i’ve never gotten any). So maybe with some first class support (if WPForms provide that), then for me it could be worth the expense in changing. A discount on annual renewal to match GF would be a good move by WPForms.
There are two Gravity Forms FB groups, which you can get help on.
I’ve had good success with formidable (formidablepro.com), but they’ve recently increased their pricing model, so this seems like a good choice for someone starting out.
FormidablePro also has a way to merge form data into PDF forms, which is very useful for most businesses.
Gravity Forms has Gravity PDF.
I’ve been struggling with deciding on renewing my gravityforms licence(developer) or buying the lifetime WPforms. It seems cleaner for clients to use, and I prefer lifetime memberships. Anyone make the switch and have suggestions?
I prefer lifetime memberships as well, suits my business better in the long run.. but $ 449 is too damn much!!
Ridiculously expensive plugin far less powerfull than Gravity Forms (half the price).
Is that a sponsored article?
Hi Quilamu. This isn’t sponsored. We don’t do sponsored articles. I wasn’t comparing it to other plugins. We do have an article that compares them: https://www.elegantthemes.com/blog/resources/best-wordpress-forms-plugins
Hey Randy thanks for the article. I understand that there are different form options and that it’s nice to see a different option but it would have been nice to see a comparison of the different options out there. This looks a little cost prohibitive for me. I use Gravity Forms (and for geolocation GravityGeo for $30) Gravity Forms costs me $90 per year for what seems to be the same benefits. Is there really a stand out difference (other than the $399 lifetime option) between to two please?
Hi A1 S. I haven’t compared them, but this article compares 15 different forms: https://www.elegantthemes.com/blog/resources/best-wordpress-forms-plugins
This is a nice alternative, but pricing wise I would stick to Gravity Forms. I can’t afford WP Form Prices for the developer addition. $399 per year is insane.
If you read it again it says lifetime for $399
Stefan wrote
> If you read [the article] again it says lifetime for $399
Well, I just checked their pricing page and they’ve obviously raised the amount from $399 to $449 for the lifetime plan within a day after this article!
The pro license is priced the same as the developer license for Gravity Forms. I really do like the UI/UX for WPForms.
the website shows Ultimate $ 449
I’ve recently been using wpforms and have to admit that it works a treat compared to contact form 7 which seems to have a habit of throwing errors out of the blue.
I like it 😉