
Video editing and recording software can be remarkably complex. You typically need a specialized skill set (or a lot of time) to create and edit videos. If you’re going to use those videos for online marketing purposes, the bar is even higher. Fortunately, VEED.IO aims to simplify that process through an online platform with accessible prices.
In this article, we’ll take a look at VEED.IO and check out its main features. We’ll also show you how the tool works, and help you decide whether it’s a good fit for your video editing needs. Let’s get to it!
An Introduction to VEED.IO
If you’ve ever tinkered with video editing software, you know it can be intimidating. Even a short video can have a massive number of frames, which means you may spend a lot of time editing small segments, adding effects, fixing visuals, and more.
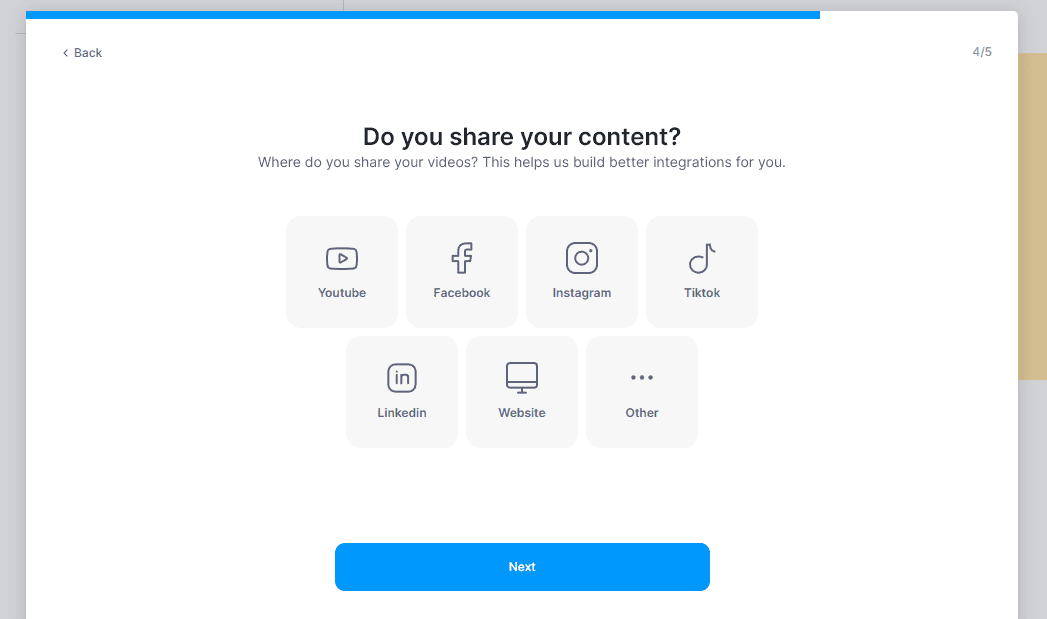
VEED.IO is designed to simplify that process with a user-friendly interface that works like an app. When you sign up for a VEED.IO account, the platform will ask where you intend to share your videos. It will then offer different sets of tools based on your answer:
A free VEED.IO account enables you to export videos of up to ten minutes in length. You can upload files up to 50 MB, and set up unlimited projects. A free account also comes with 20 GB of storage and lets you export videos in 720p, which is good enough for most social media platforms and even online marketing videos.
As far as subtitles go, a free VEED.IO account gives you up to two hours of automatic translations across one or multiple projects. You also get access to a screen and cam recorder tool that includes compression and file conversion functionality.
What’s more, VEED.IO enables you to set up workplaces and give access to other users. You can also comment on videos that other users upload, which makes this platform a powerful collaborative tool.
Key Features (Free Plan):
- Use a screen and webcam recorder to create videos that you can share online or for personal use.
- Upload videos up to 50 MB in size.
- Export videos that are up to ten minutes in length and 720p in quality.
- Get 2 GB of storage.
- Add up to two hours of automatic subtitles to one video or across multiple projects.
- Set up a workspace that you can provide other users with access to.
Price: VEED.IO offers a free plan and premium tiers; the latter start at $12 per month per user.
VEED.IO in Action: Recording and Editing Videos
In this section, we’re going to show you how VEED.IO works by recording a simple video and uploading it to the platform. Then we’ll take a look at its free editing tools, and see how they change when you upgrade to a premium account. Let’s get started!
Setting Up an Account and Recording Your First Video
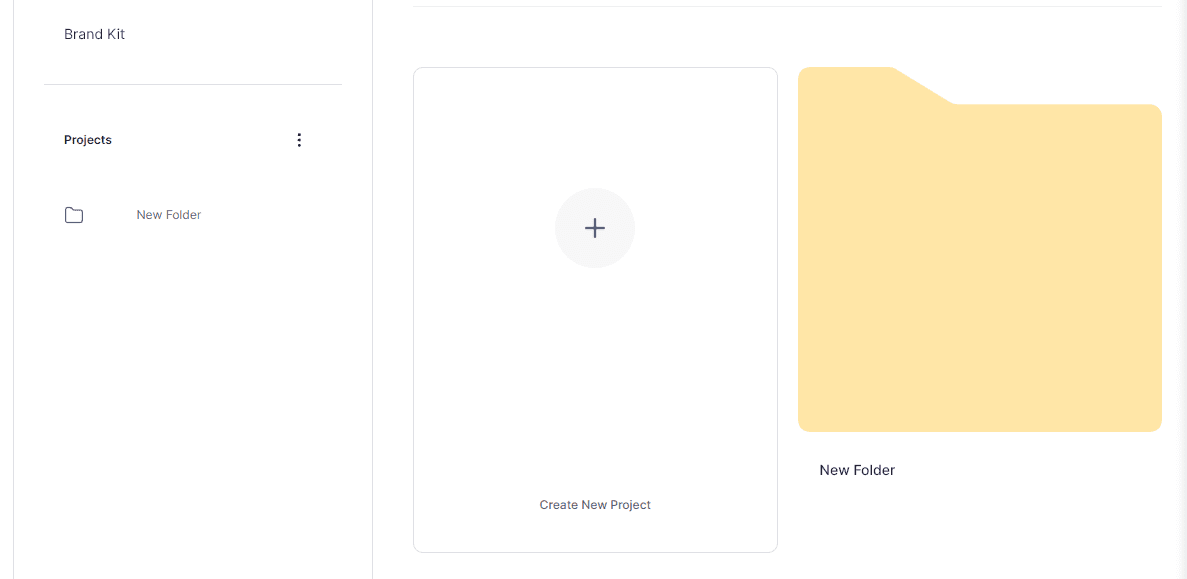
Setting up a VEED.IO account is remarkably simple. During the process, VEED.IO will ask you what platforms you want to create videos for and how much editing experience you have (if any). Once you’re in, you’ll see the option to create new folders and start working on your first project:
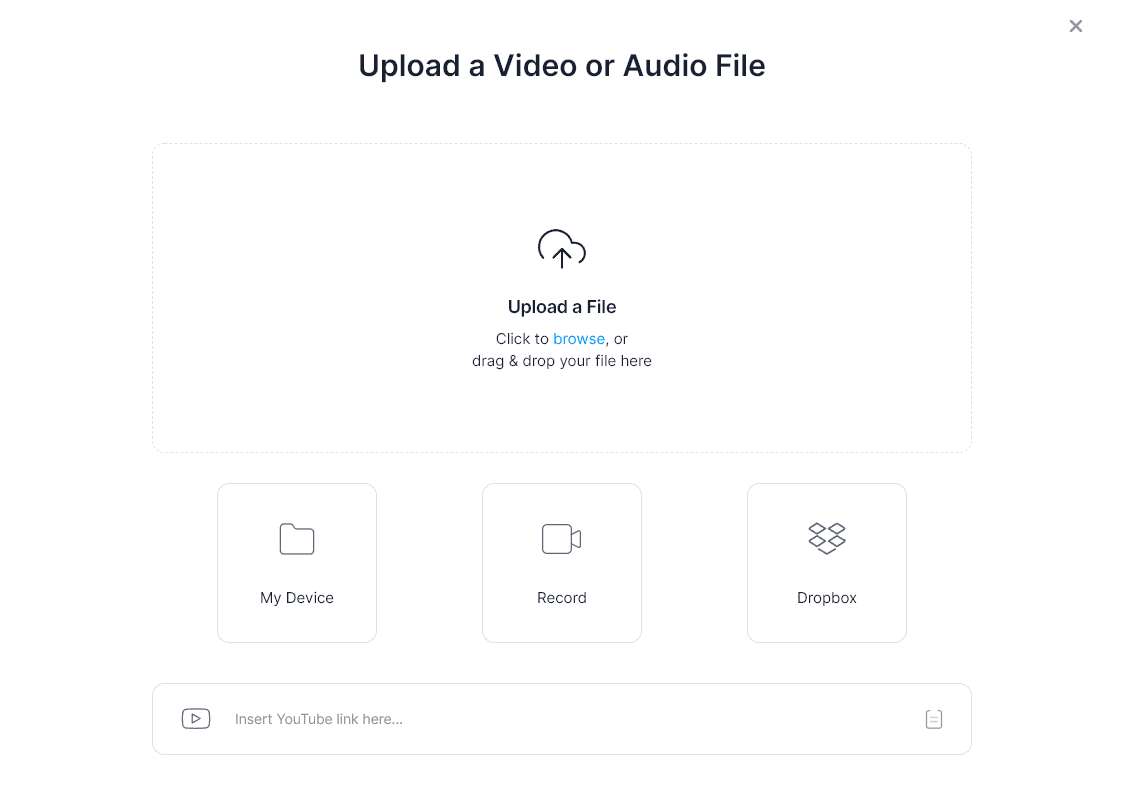
When launching a new project, you have the option to upload a file from your device or from Dropbox, or to import a YouTube video. You can also start a recording:
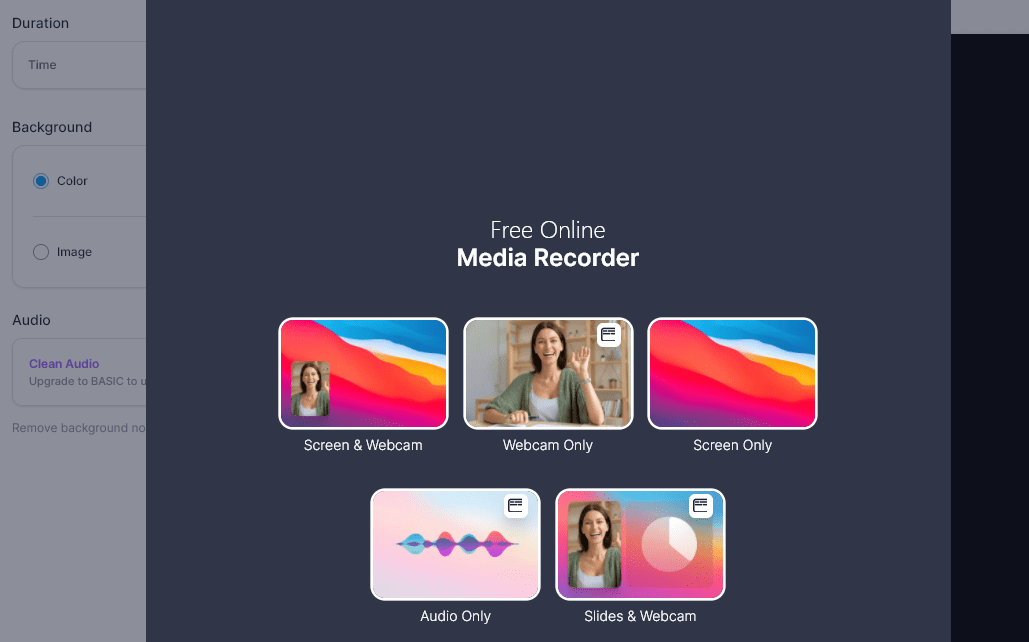
For this review, we decided to check out the recorder option. If you select Record, VEED.IO will ask you what type of recording you want to create, and prompt you to install a browser extension. This will enable you to capture what’s happening on your screen:
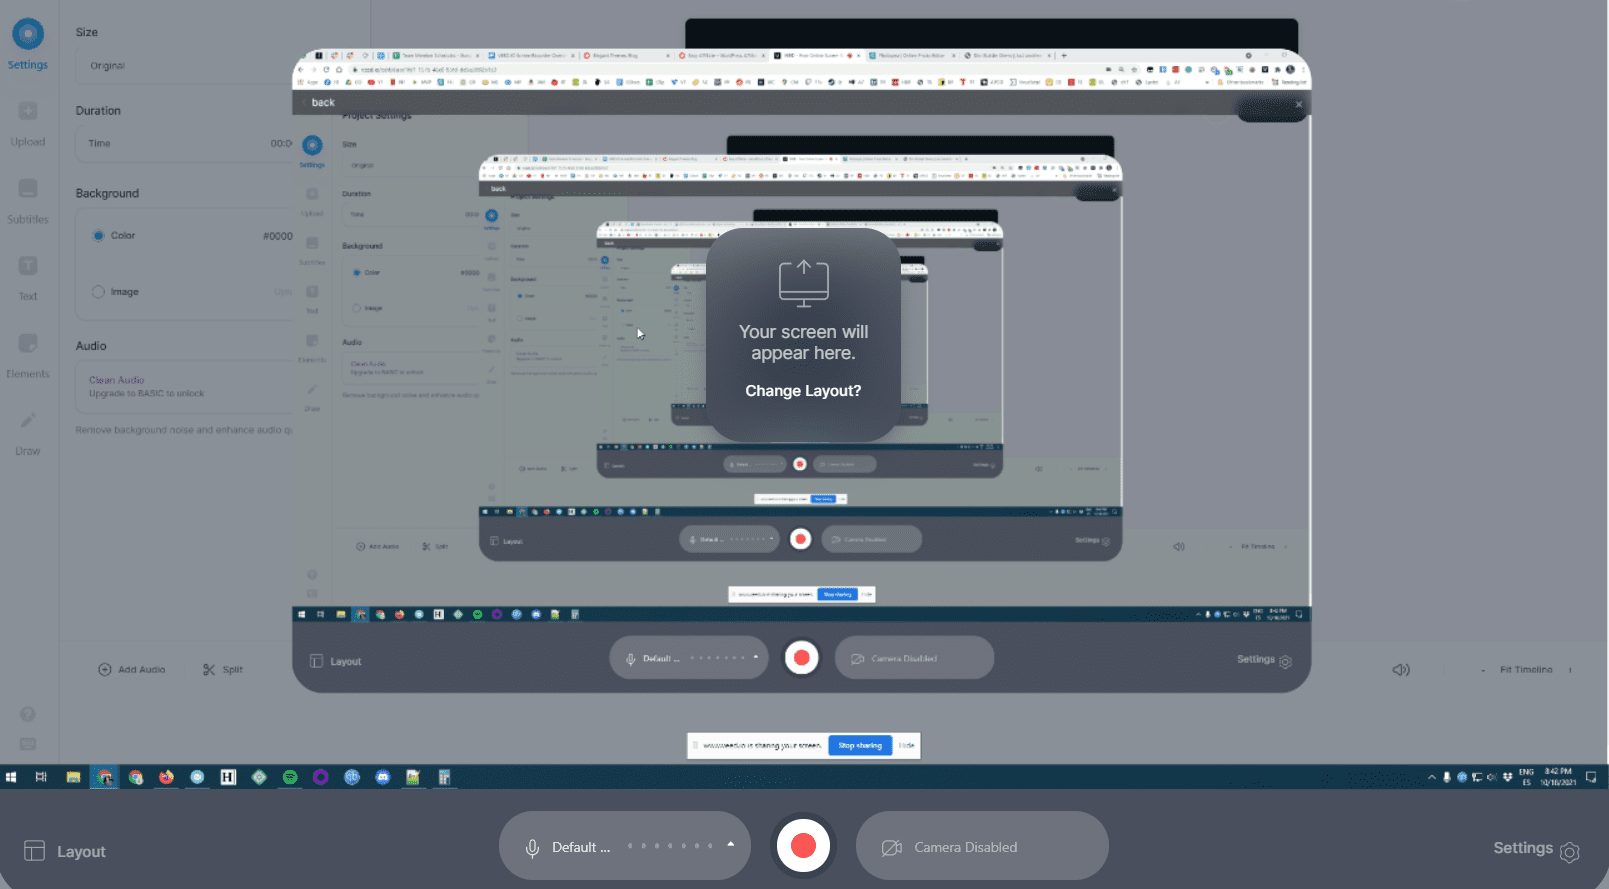
Depending on what option you pick, you might need to grant the software access to your microphone as well. VEED.IO will show you a recording button that will launch the tool. You can then proceed to carry out whichever task you want to showcase:
When you finish recording, the platform will take a few moments to process the video, and then it will launch the editor screen:
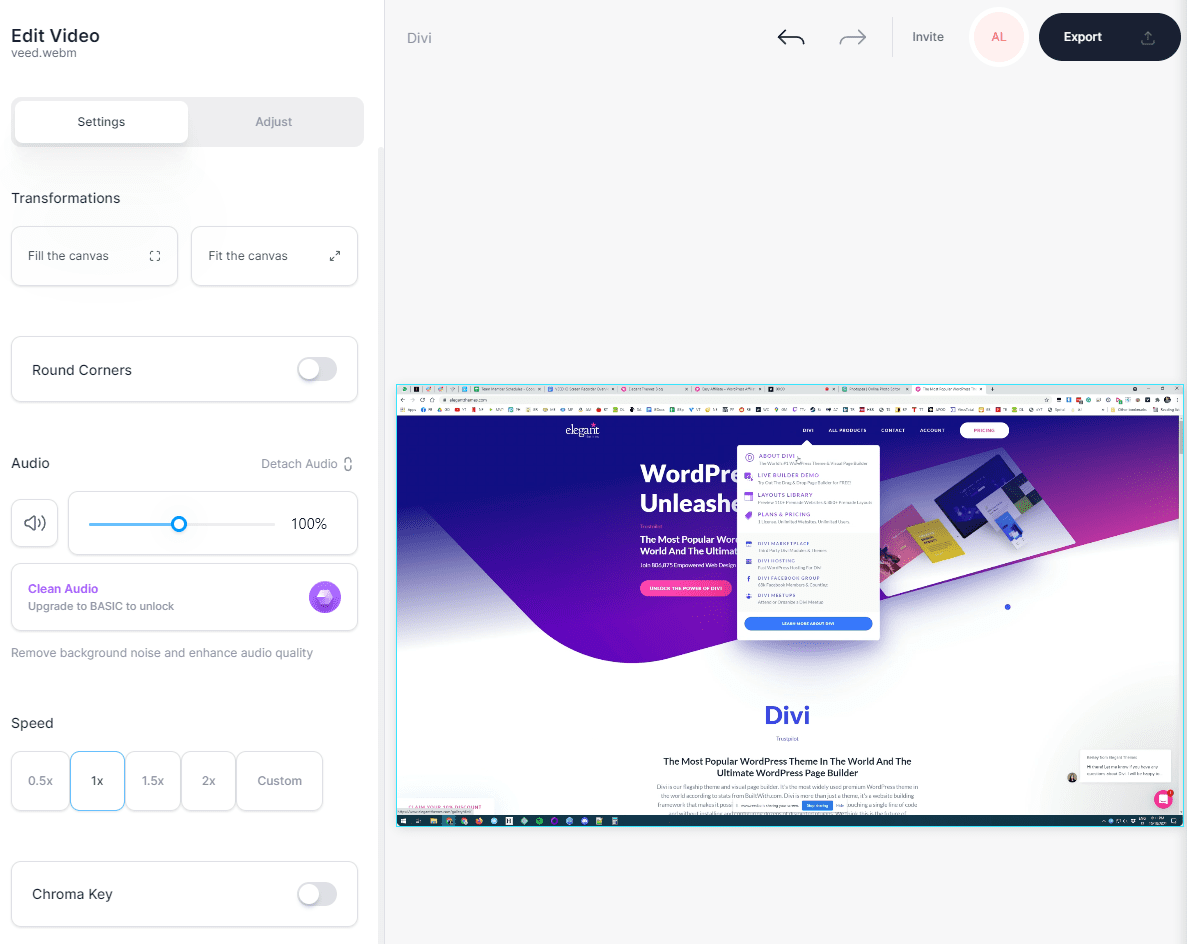
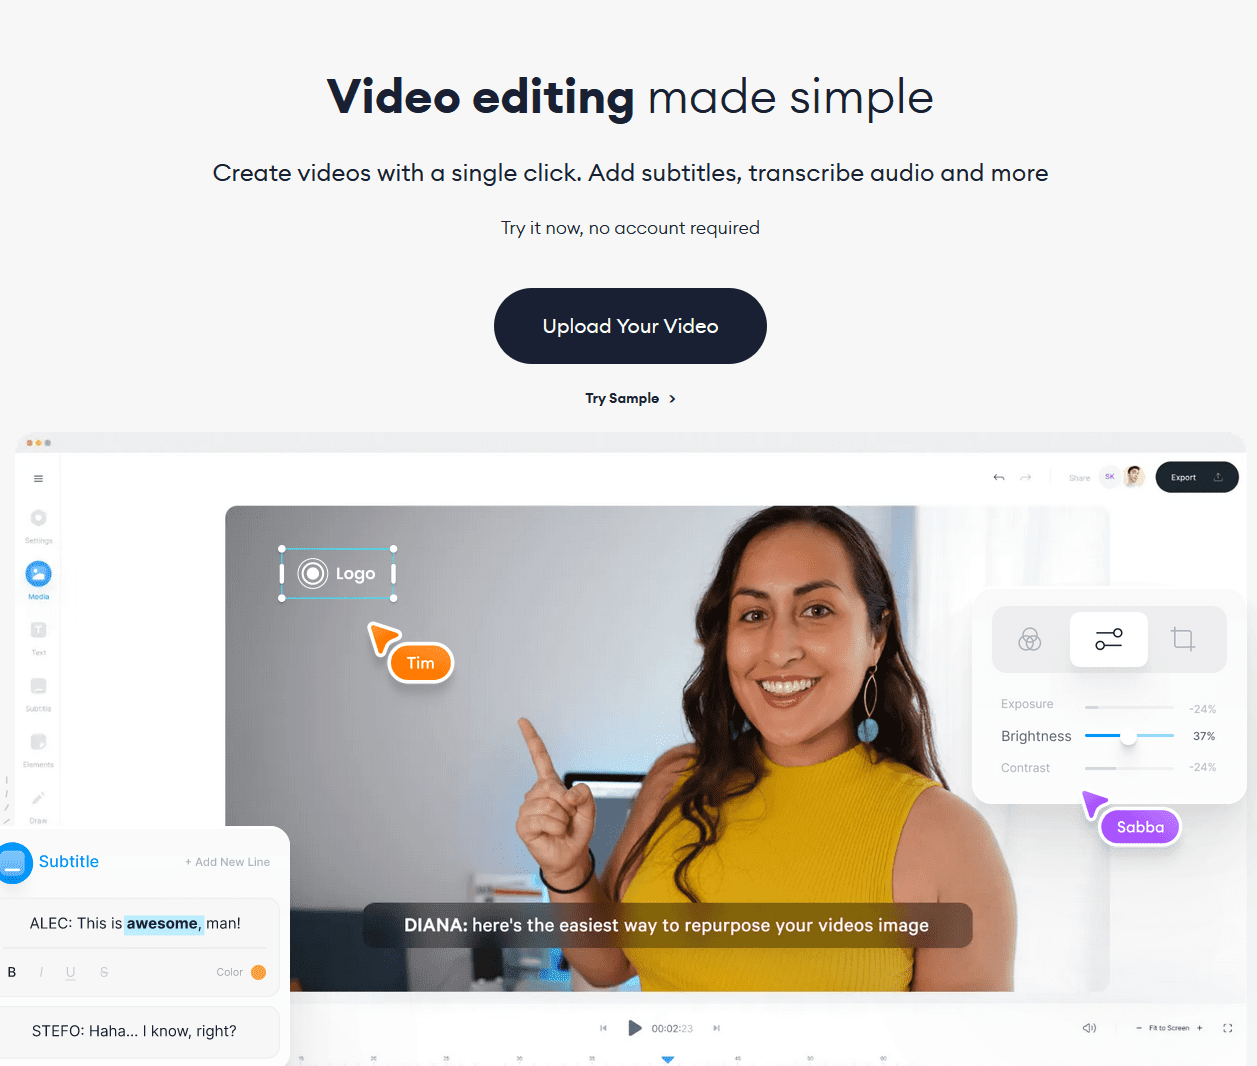
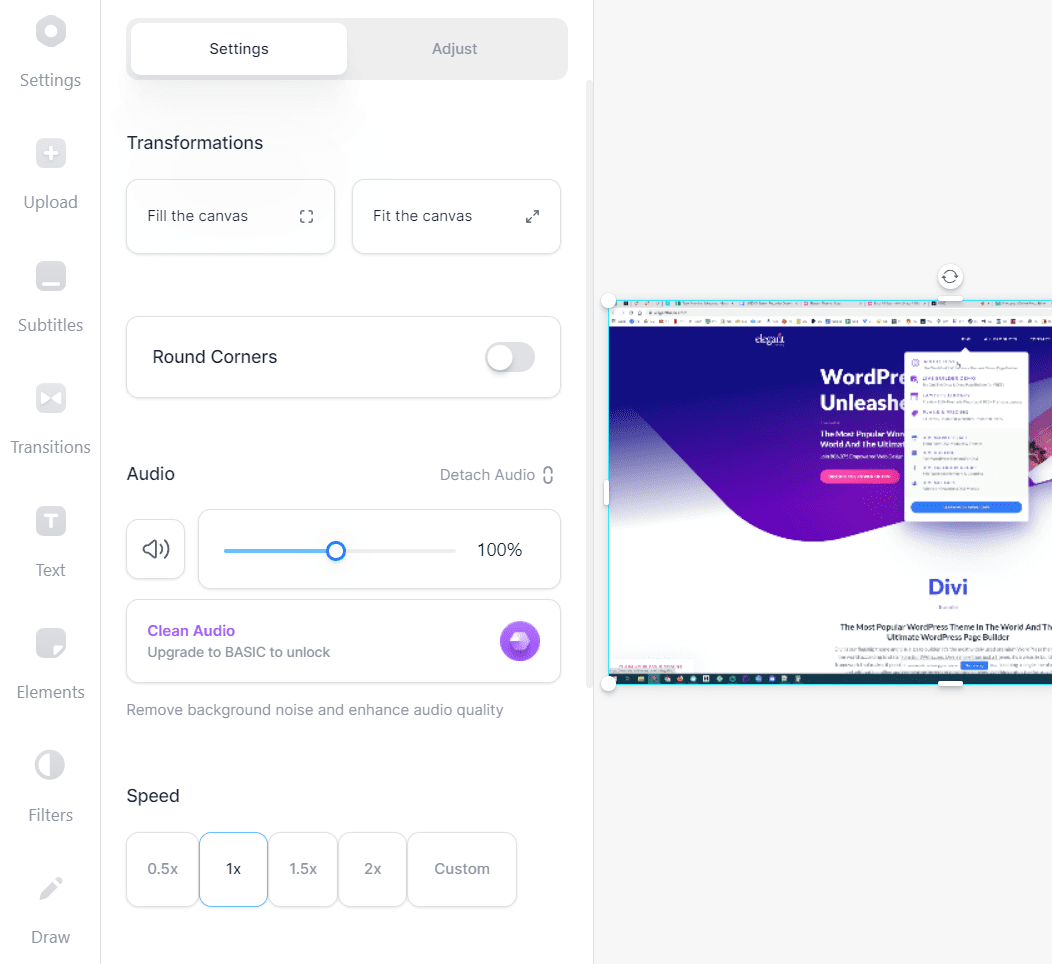
As you can see, the video editor is remarkably user-friendly. By default, the editor will provide some basic options, including speeding up the video and modifying its volume. If you look at the main menu to the left, you can see the rest of the editor’s options, including tools to add subtitles, transitions, elements, filters, and more:
Now that you’ve successfully created a screen recording that you can edit, it’s time to explore the editor itself. Let’s start by checking out the subtitling tool.
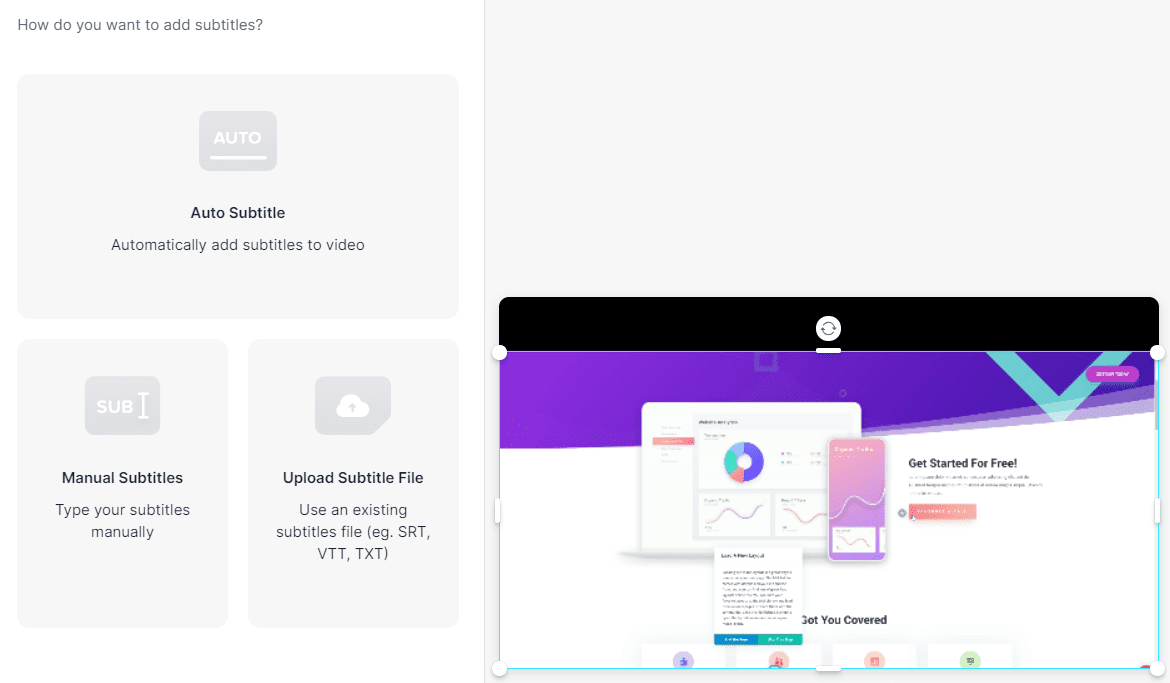
Adding Subtitles
One of VEED.IO’s primary selling points is the platform’s automatic subtitling functionality. When you upload or record a video, you can add subtitles manually or let the platform do it for you:
In our experience, the automatic subtitles that the platform generates are reasonably accurate. If you’ve ever used YouTube’s subtitling functionality, you’ll have a good idea of how accurate VEED.IO can be. However, you may want to review the subtitles and edit them manually to ensure the best results:
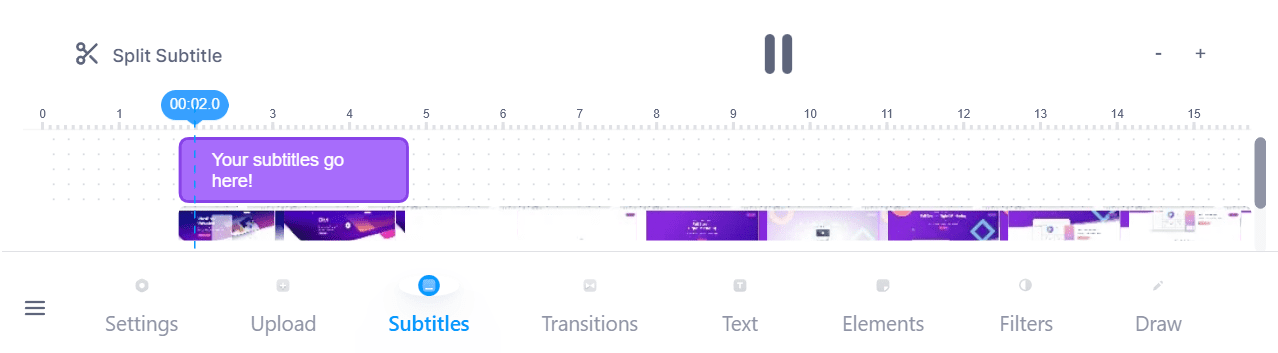
Overall, adding subtitles using VEED.IO is remarkably simple. The editor includes a subtitle layer that enables you to configure how long each line of text should appear for, all while previewing your video.
It is important to note that the free version of VEED.IO doesn’t enable you to clean up a video’s audio. That feature is only available with premium plans. If you’re using VEED.IO’s Pro plan, you’ll see an option called Clean Audio under the Settings tab for each video:
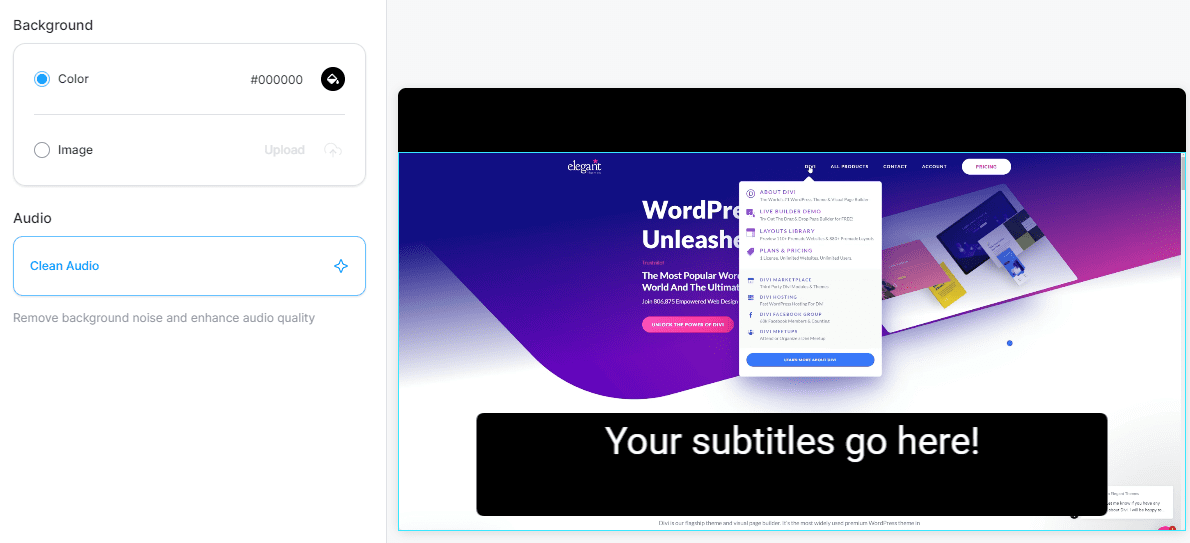
If VEED.IO’s automatic subtitling tool isn’t giving you the most accurate transcriptions, we recommend using the Clean Audio feature and then trying again. Removing background noise can increase subtitle accuracy dramatically, but you’ll still want to review the text manually.
Using Filters
One of VEED.IO’s primary uses is to create videos that you can share on social media platforms and on your website. This means that you also get access to video filters. Out of the box, VEED.IO includes a broad selection of filters that you can apply to videos, ranging from simple color corrections to advanced effects:
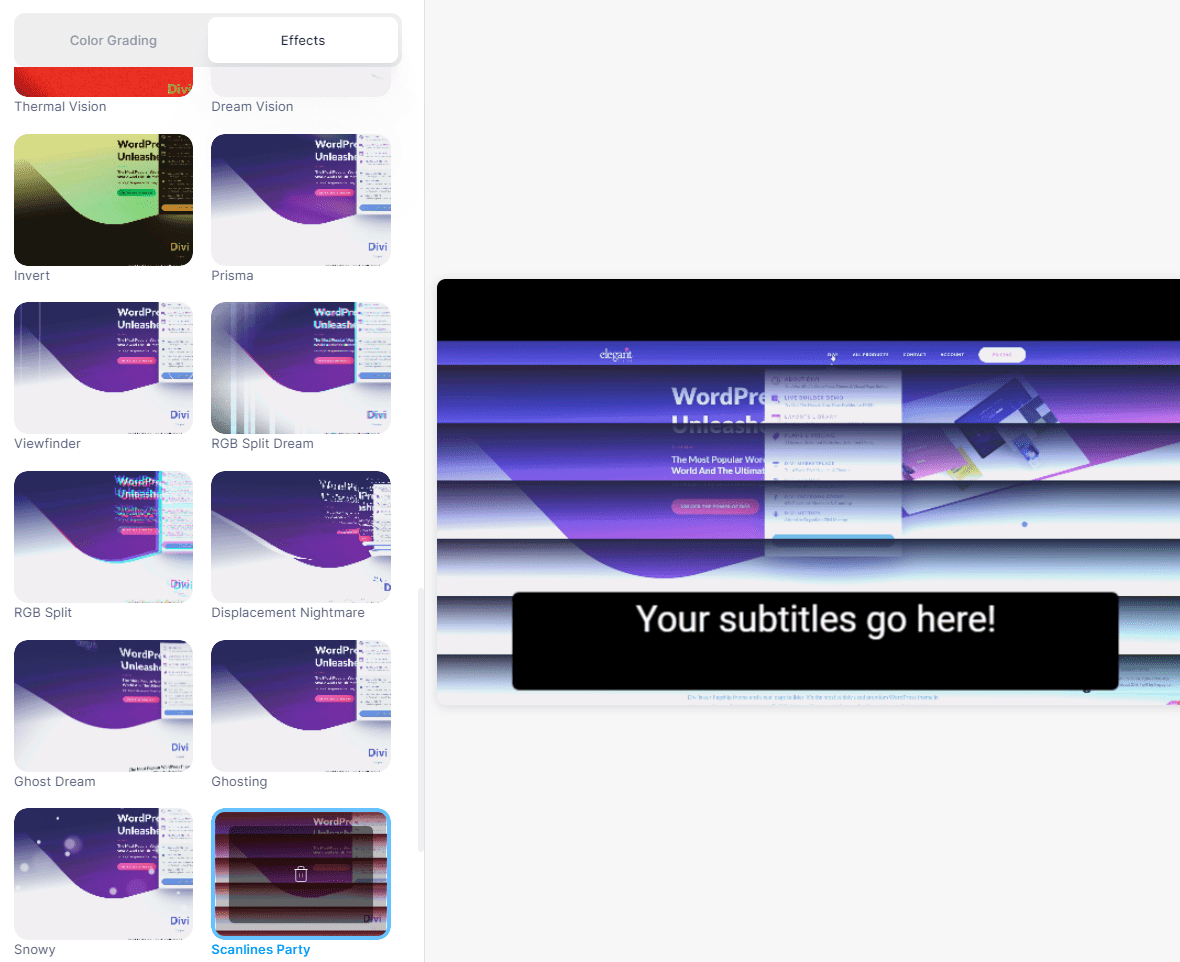
One downside of VEED.IO filters is that a lot of them don’t include any customization options. You simply apply the filter, and in some cases you can customize its intensity. Aside from that, the platform’s filter selection is quite varied and every effect is available on both free and premium plans.
Adding Brand Imaging
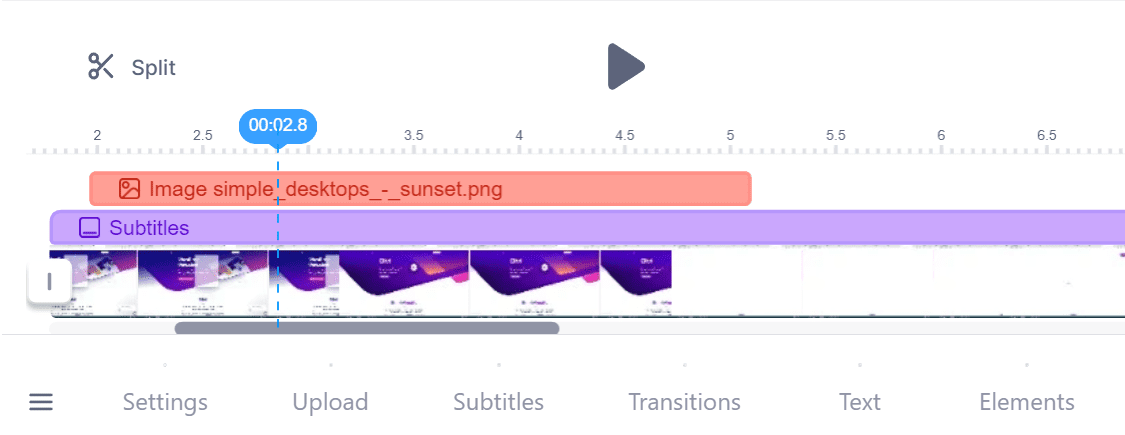
If you’re using a premium VEED.IO account, the platform enables you to upload a full brand kit that you can re-use throughout your projects. That brand kit can include images, video and audio files, color palettes, and font assets:

Once you upload a brand asset, you’ll be able to access it from the editor by opening the Upload > Brand Kit tab:
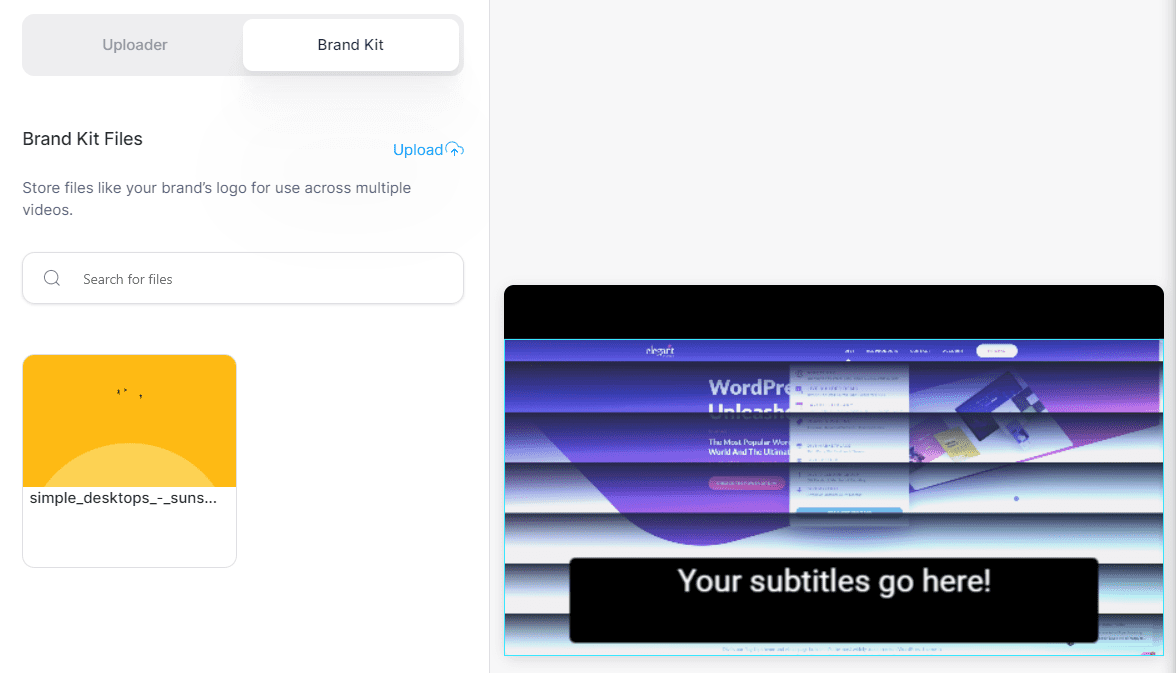
To use assets, simply select them and the editor will enable you to place them within your video. If you scroll down to the video’s timeline, you’ll see a new layer for brand assets, where you can configure when each file becomes visible and for how long:
On top of brand assets, VEED.IO enables you to add emojis, text, and stickers to your videos. If you’ve ever edited a social media story, adding these elements should be second nature to you.
Exporting Videos
Once you’re happy with the results, you can go ahead and export your work. To do so, click on the Export button on the top-right corner of the screen, then select the video’s output quality and subtitles configuration:
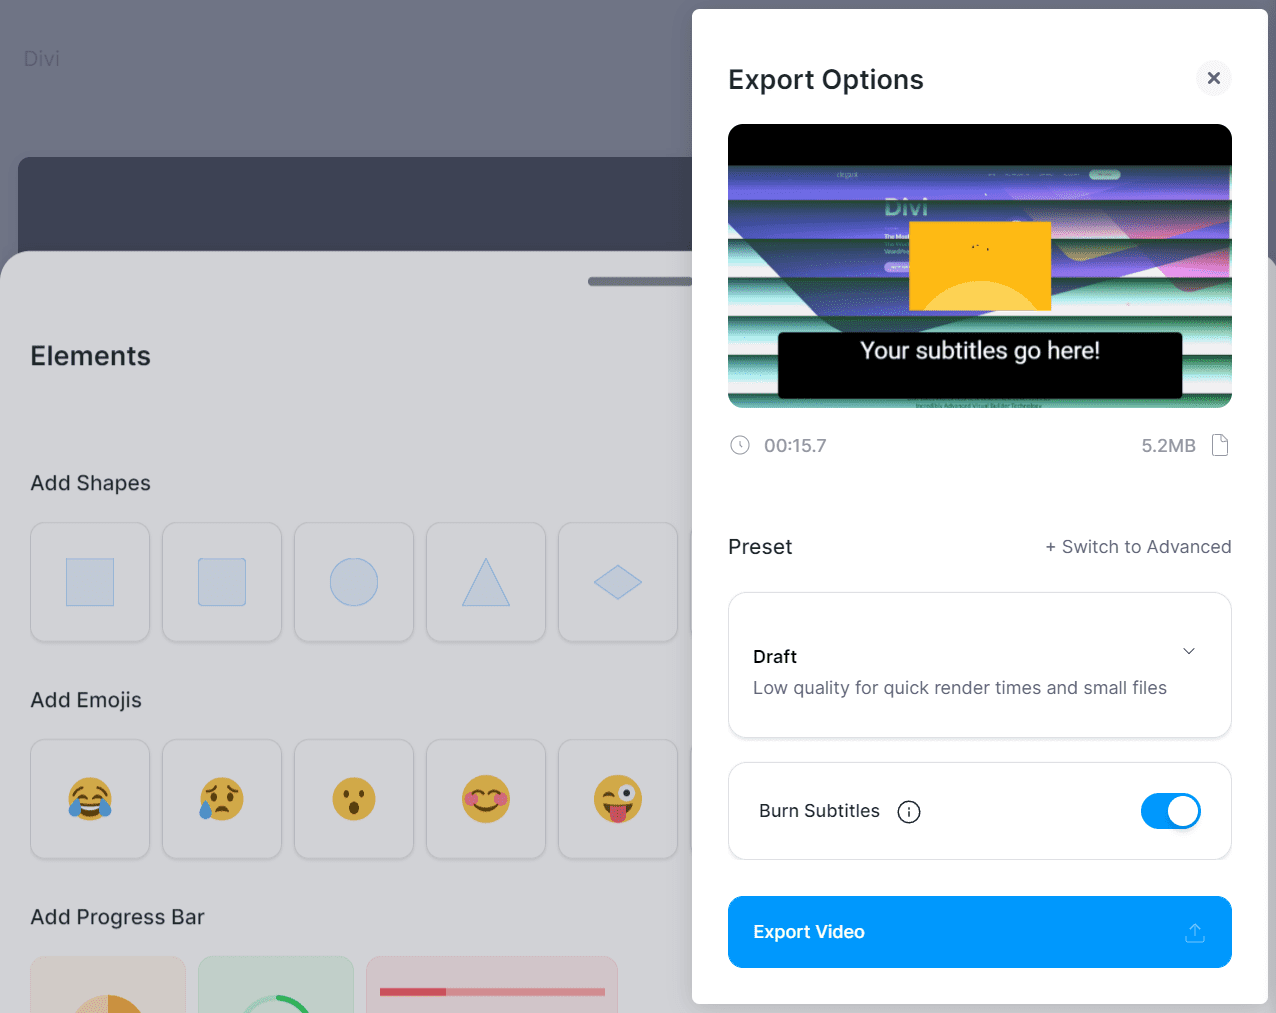
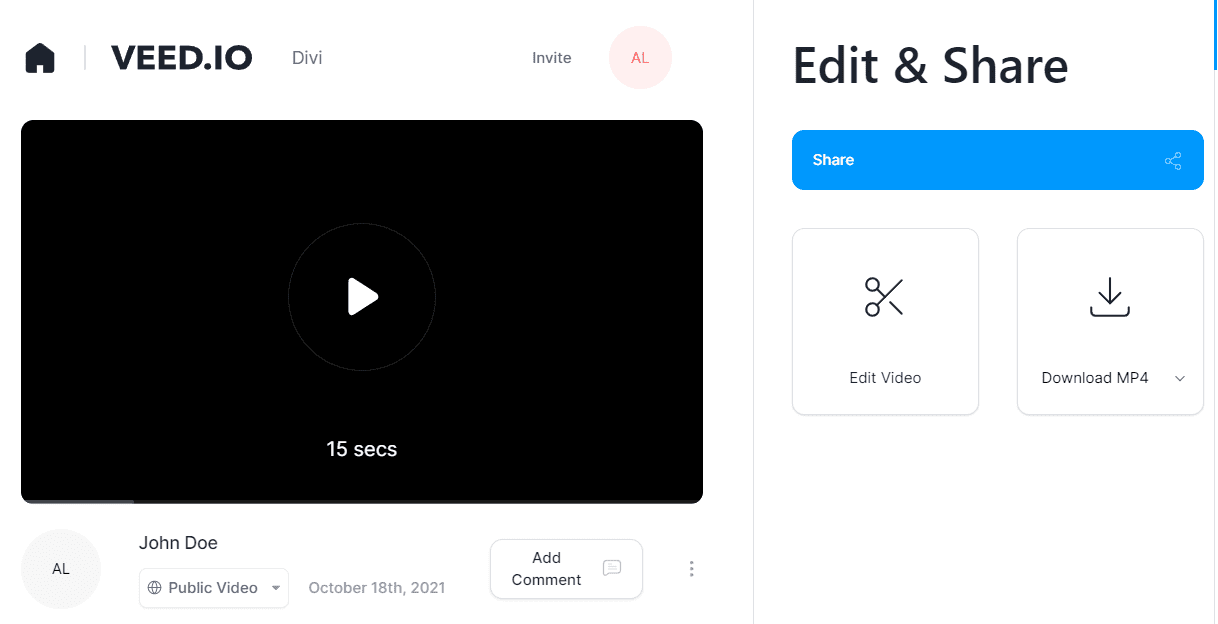
The platform will take a while to render the video – how long can vary depending on its quality and length. Once the video is ready, you’ll get access to a player where you can review it, as well as options to share and download it:
Overall, using VEED.IO is remarkably simple. Unlike other video editing platforms, VEED.IO doesn’t hide all of its best features behind a paywall. If you’re editing simple videos for social media or for your website, the service’s free plan will get you a long way.
Conclusion
Video editing software tends to be complex. In many cases, you also need strong hardware to edit and render videos in a reasonable timeframe. Fortunately, VEED.IO enables you to do all of that online, using a simple, user-friendly interface. The platform offers a robust set of features, and its free plan is more than good enough for basic marketing and social media videos.
VEED.IO premium plans start at $12 per month per user. However, some features such as brand kits are only available with more expensive plans. If you want to create a lot of videos for your brand, we recommend that you consider signing up for the Pro plan instead, which costs $24 per user per month.
Looking for an alternative screen recording option? Take a look at our review of the Nimbus Capture Screenshots and Recordings Browser Extension. Both VEED.IO and Nimbus are great solutions.
Do you have any questions about how to edit videos online using VEED.IO? Let’s talk about them in the comments section below!
Featured Image via Polina Strelchenko / shutterstock.com


This has a lot of great information here. I need to look more in to this myself. I’m so glad that you share this with us.