

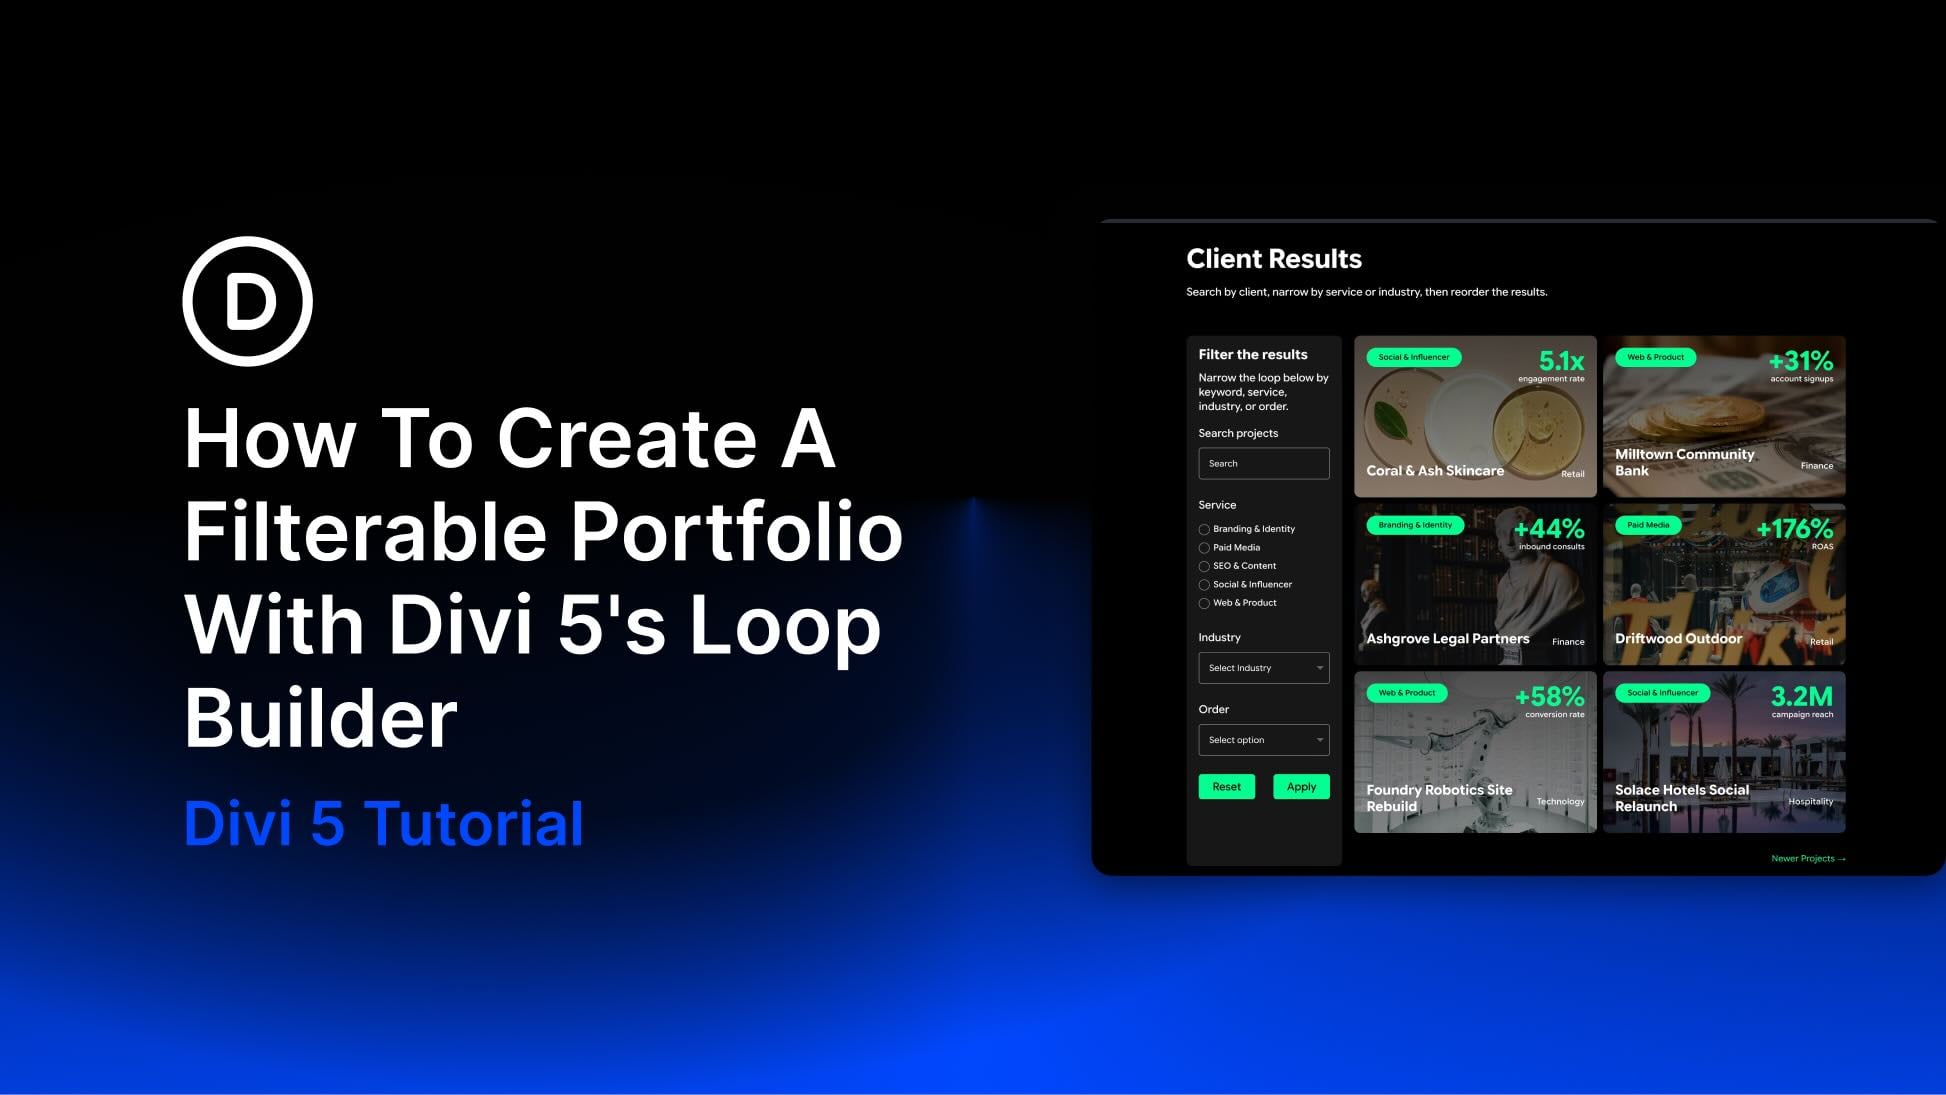
A portfolio that only shows thumbnails is easy to ignore. Clients and prospects want to see proof, including engagement stats. That means your project grid has to do more than look like a gallery. People should be able to search by client, narrow the work by service or industry, and see the stats that make the Project worth showing.
Divi’s legacy Filterable Portfolio module can filter Projects by category. For a custom card layout, a search field, service and industry filters, and stored project metrics, we can use Divi 5‘s Loop Builder. It turns any layout you design into a repeating Projects feed. Loop Filter modules sit next to that feed and let visitors refine it. Flexbox handles the structure, and Advanced Custom Fields (ACF) supplies the numbers and labels that make each card a case study instead of a screenshot.
In this post, we’ll walk you through creating the necessary custom fields for the portfolio, building the Loop, and configuring the Loop filters.
Let’s dive in.
- 1 What Is The Loop Builder?
- 2 What Are The Loop Filter Modules?
-
3
How To Create A Filterable Portfolio
- 3.1 Plan The Content First
- 3.2 Set Up Taxonomies And ACF Fields
- 3.3 Create The Projects And Theme Builder Template
- 3.4 Build The Portfolio Section With Flexbox
- 3.5 Build The Loop Card
- 3.6 Enable The Loop Builder
- 3.7 Assign Dynamic Content
- 3.8 Add The Post Filter Module
- 3.9 Add Pagination
- 3.10 Configure Responsive Behavior
- 3.11 Test The Build
- 4 Download The Files
- 5 Download For Free
- 6 Build Dynamic Portfolios With Divi 5
What Is The Loop Builder?
Loop Builder is Divi 5’s way of turning any layout you design into a repeating feed. You are not stuck with the structure of a Blog or Portfolio module. You build one item with Divi modules, connect it to a query, and Divi outputs that item once for every matching result.
What It Can Loop
A loop is not limited to blog posts. It can pull from posts and custom post types, including Divi’s built-in Projects post type.
You can also loop terms such as categories, tags, and custom taxonomies, as well as users and ACF repeater fields. The Repeater field requires ACF PRO; the fields used in this tutorial are available in the free version. In practice, that means the same feature can power a blog grid, a project archive, a team directory, or a list built from repeater data. You choose the source when you enable the Loop.
How It Works
The workflow stays the same no matter what you’re querying.
Design a single item first. Enable Loop on the element that should repeat, usually a column or a group. Set the query type, post type, terms, order, posts per page, and a meta query if you need one. Then swap static text and images for Dynamic Content, such as Loop Post Title, Loop Featured Image, and any other available tags. Divi renders that template once for every item the query returns.
You do not need a special content module or custom CSS to make that work. A featured image can be a background, and a title can sit on top of it. A custom field can be a heading, a label, or a number. If you can design the item once, you can loop it.
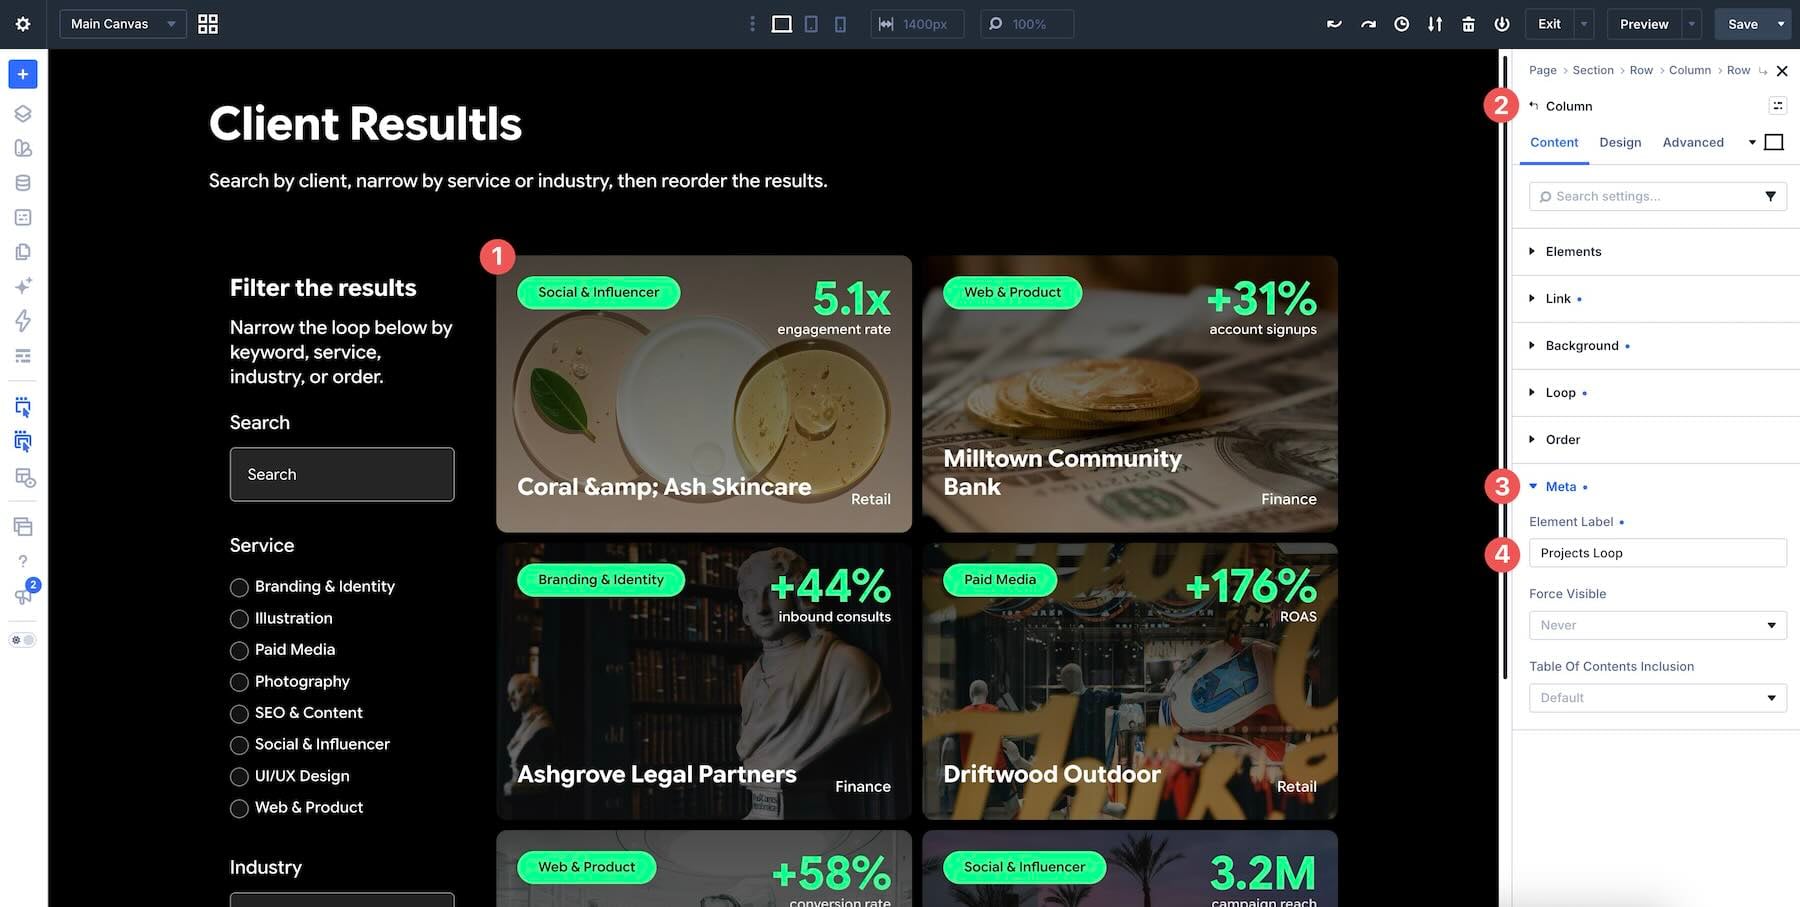
Give the Loop an Element label while you are there. Filters, pagination, and anything else that has to talk to this Loop will target it by that name.
Loop Builder handles the default results and how each result looks. It does not add search, taxonomy controls, or sorting for visitors. That is what the Loop Filter modules are for. They sit outside the Loop, target it by label, and refine the query as people use the form.
What Are The Loop Filter Modules?
Loop Filter modules give visitors a way to search, narrow, and reorder a Loop Builder feed without leaving the page. They do not design the repeating item or decide what the Loop is querying. They refine an existing query.
That split is the entire point. Loop Builder owns the results and the template. Filters own the front-end controls.
How The Two Modules Work
The system is a parent and its items. A Post Filter module is the form. You place it on the page and point it at one Loop by Element Label.
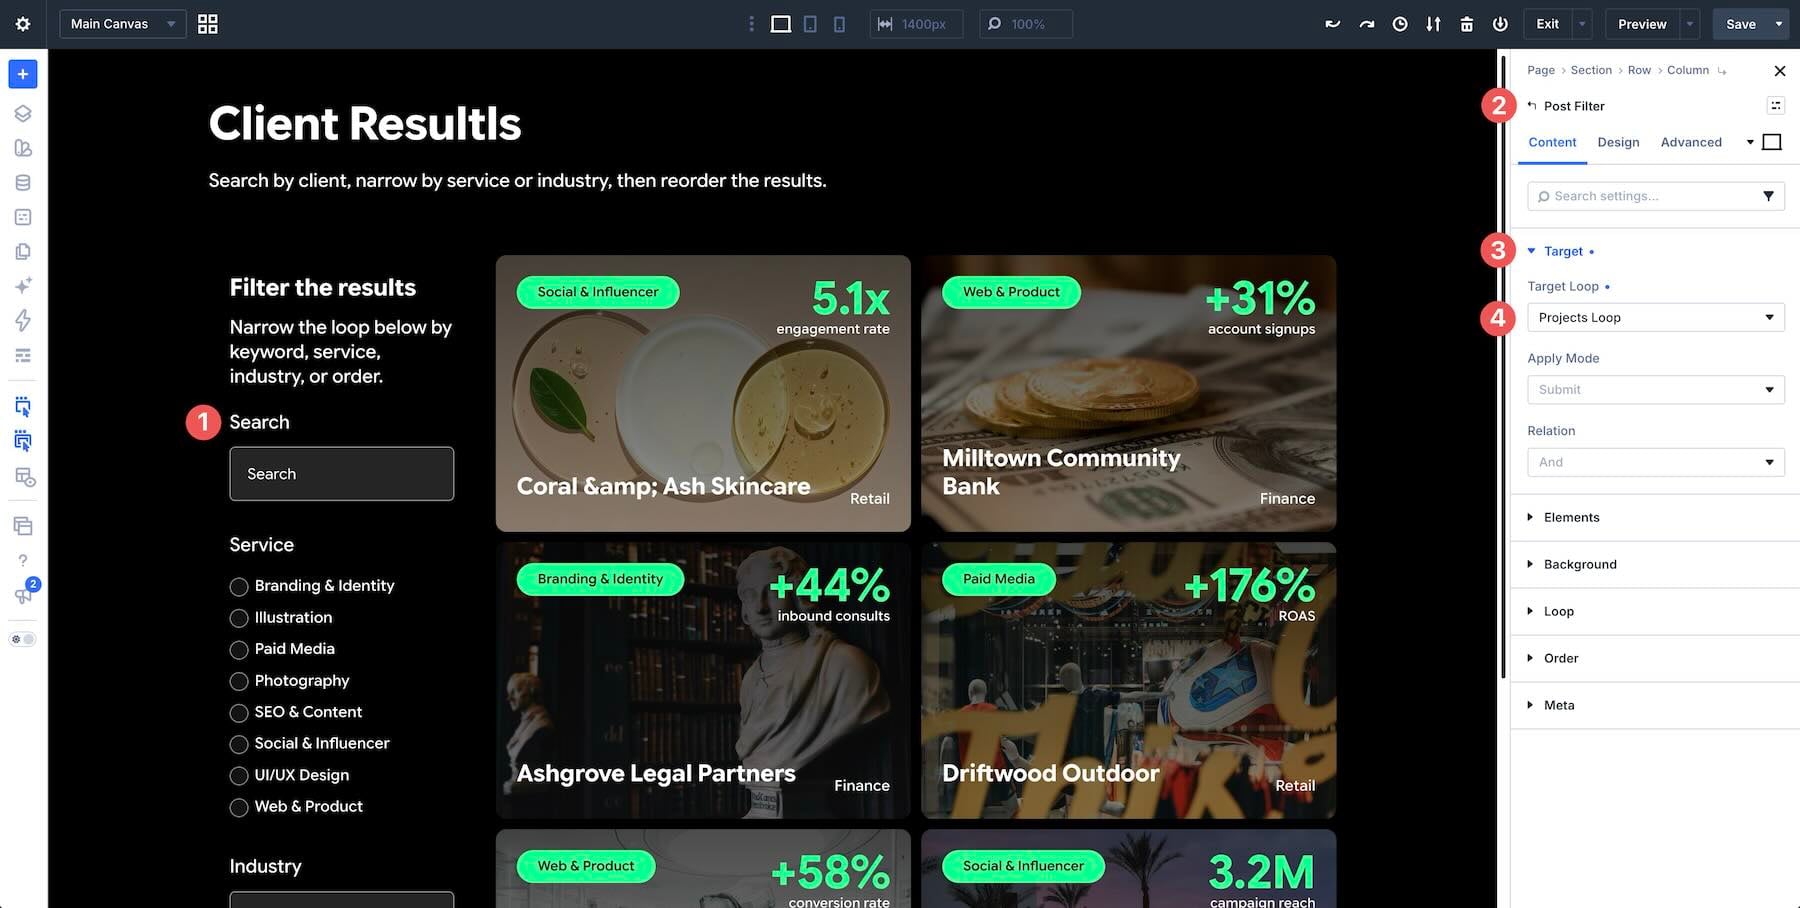
In that form, each Post Filter Item is a single control: a text field, a radio list, a dropdown, a checkbox group, a sort option, an apply button, or a reset button.
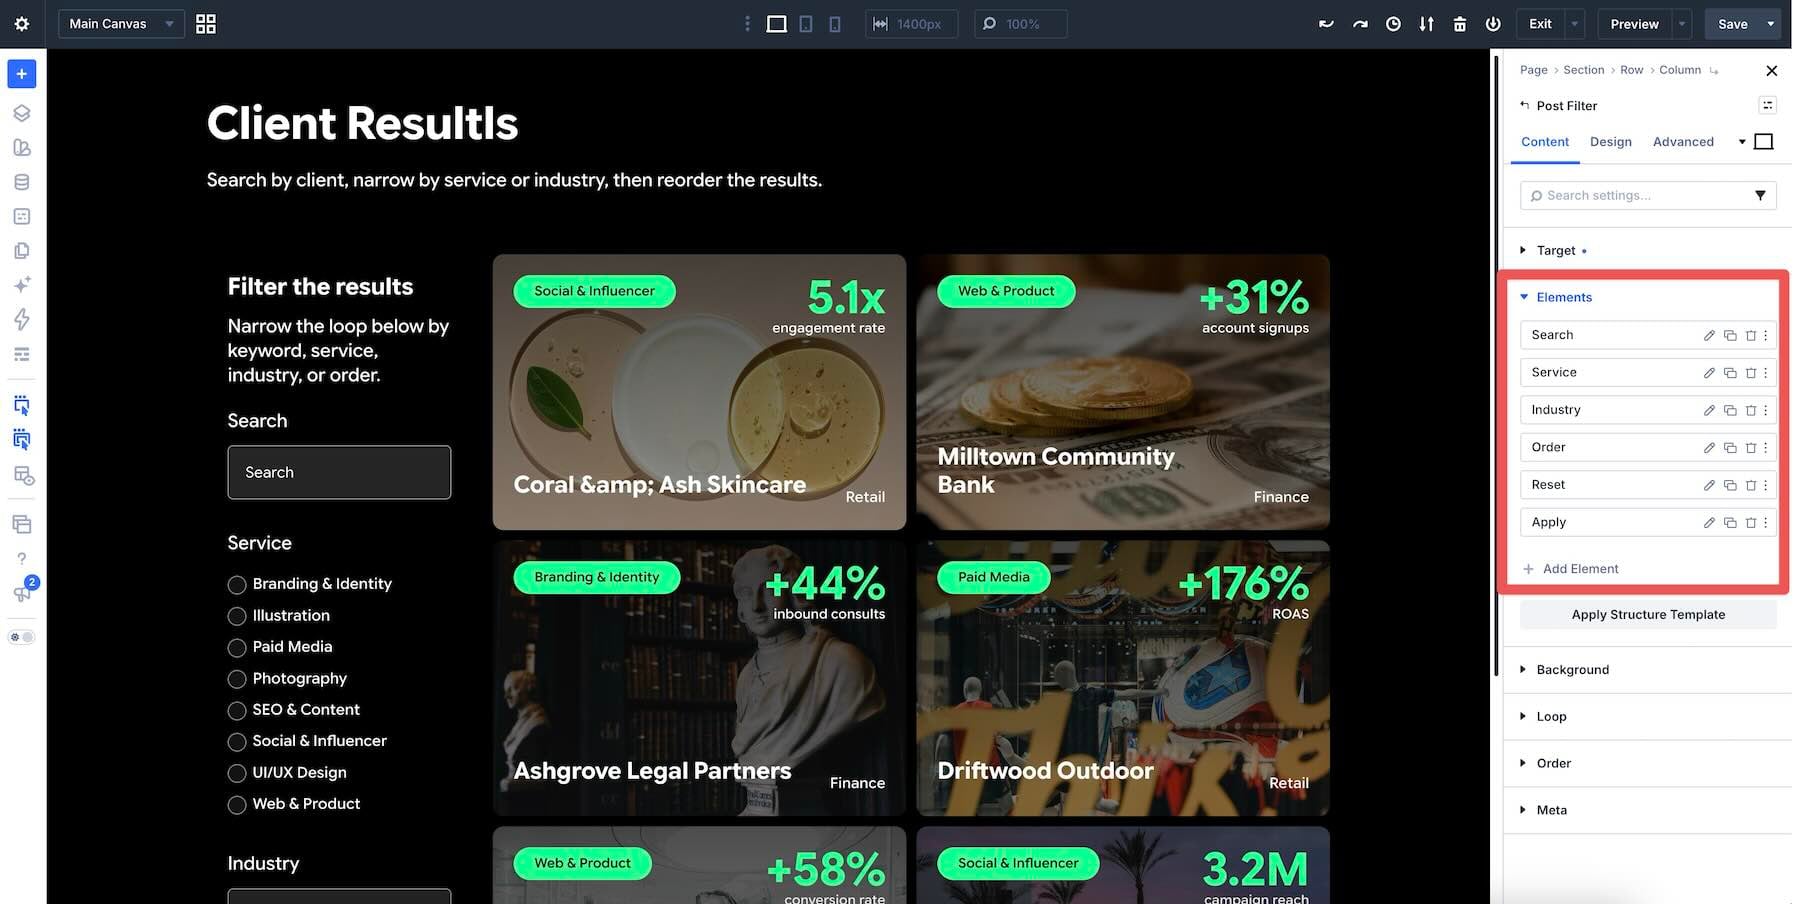
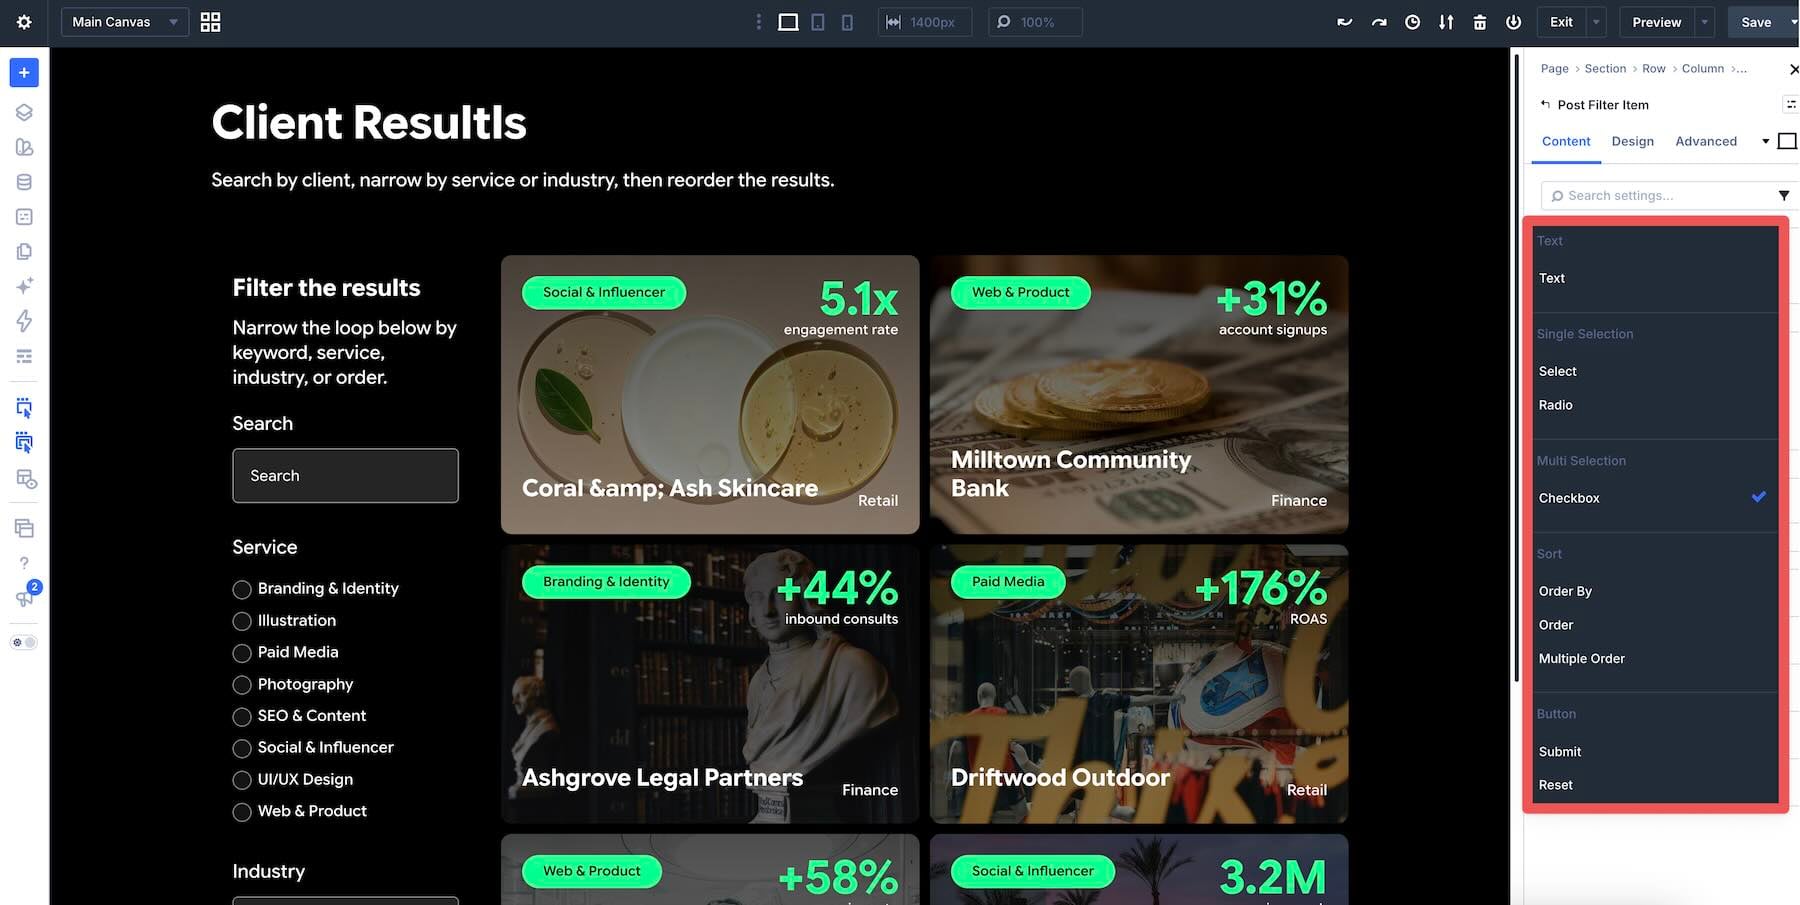
The field type controls the interface. Text becomes a search box. Radio and Select expose a list of values, either as a visible set of choices or as a compact menu. A checkbox allows multiple values at a time. Order By and Order change how the existing results are sorted. Submit and Reset apply or clear the form, depending on whether you want filters to run as soon as they change.
How A Filter Connects To Data
Each Post Filter Item is configured in the Content tab under the field, with four settings that do all the work.
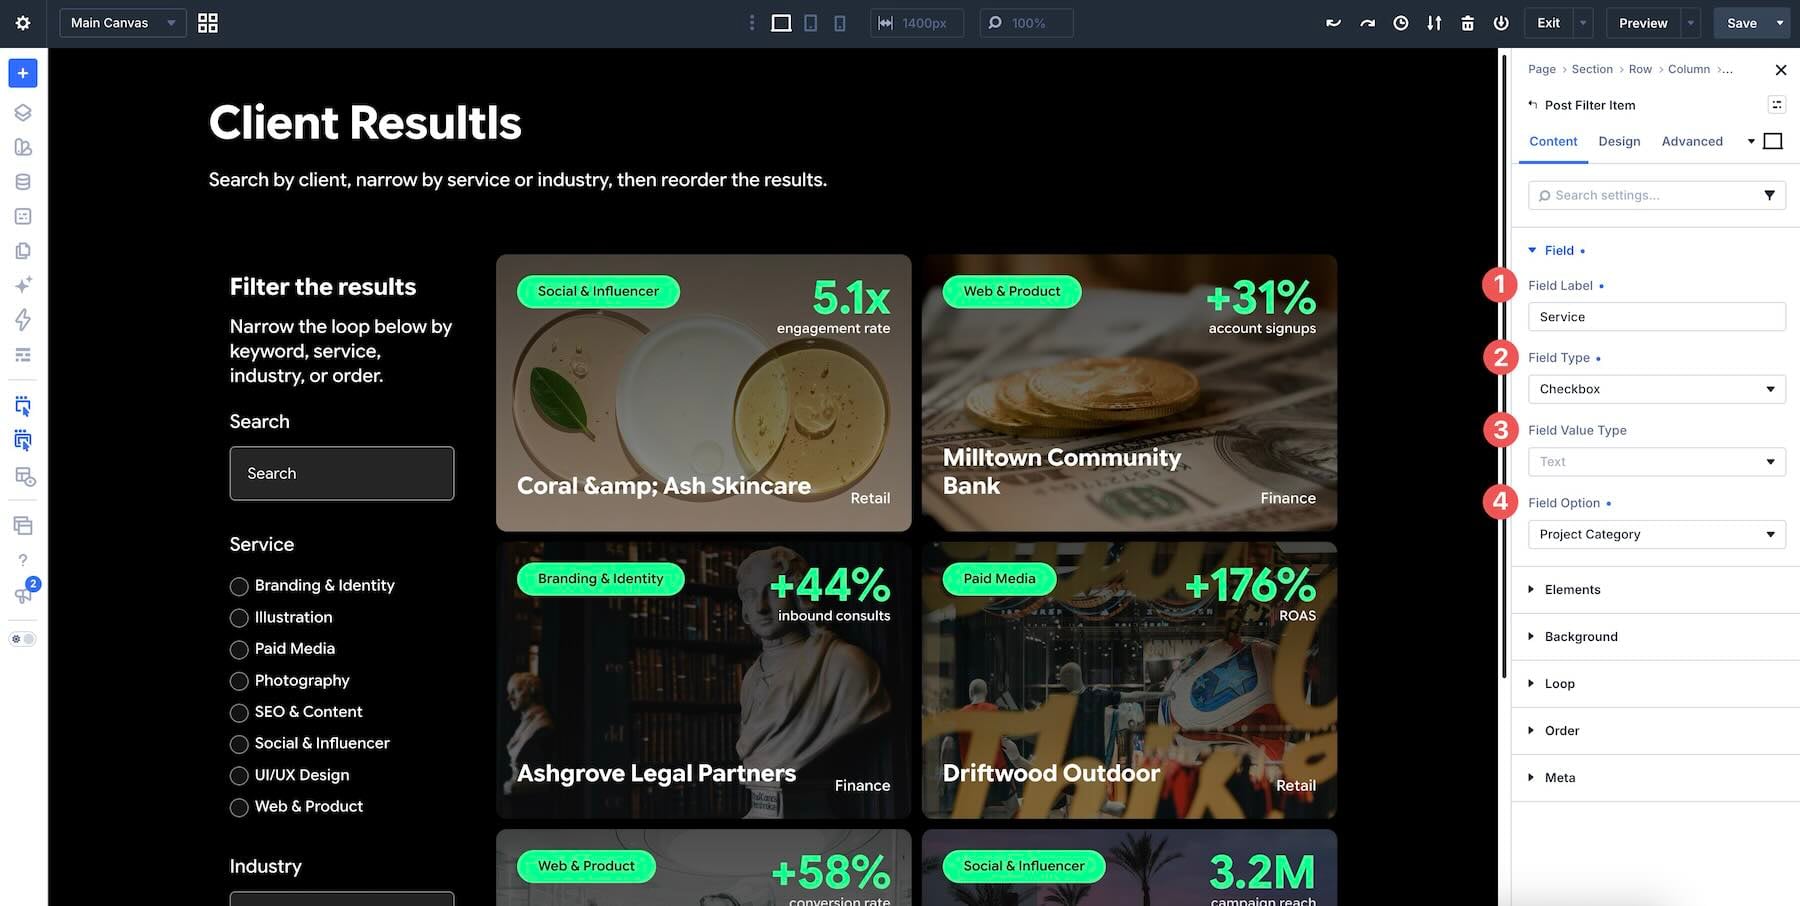
Field Label is what visitors see above the control. It does not query anything and only gives a label to it.
Field Type is the interface, and the menu is grouped by behavior. Text creates a search input. Single Selection includes Select and Radio, both of which pick one value, either from a dropdown or from a visible list. Multi Selection is a checkbox that lets visitors select more than one value. Sort includes Order By, Order, and Multiple Order, which control how the Loop is ordered. Buttons include Apply and Reset, which apply to the form or clear it. The Field Type only decides how the control looks and behaves. It has not yet chosen the data.
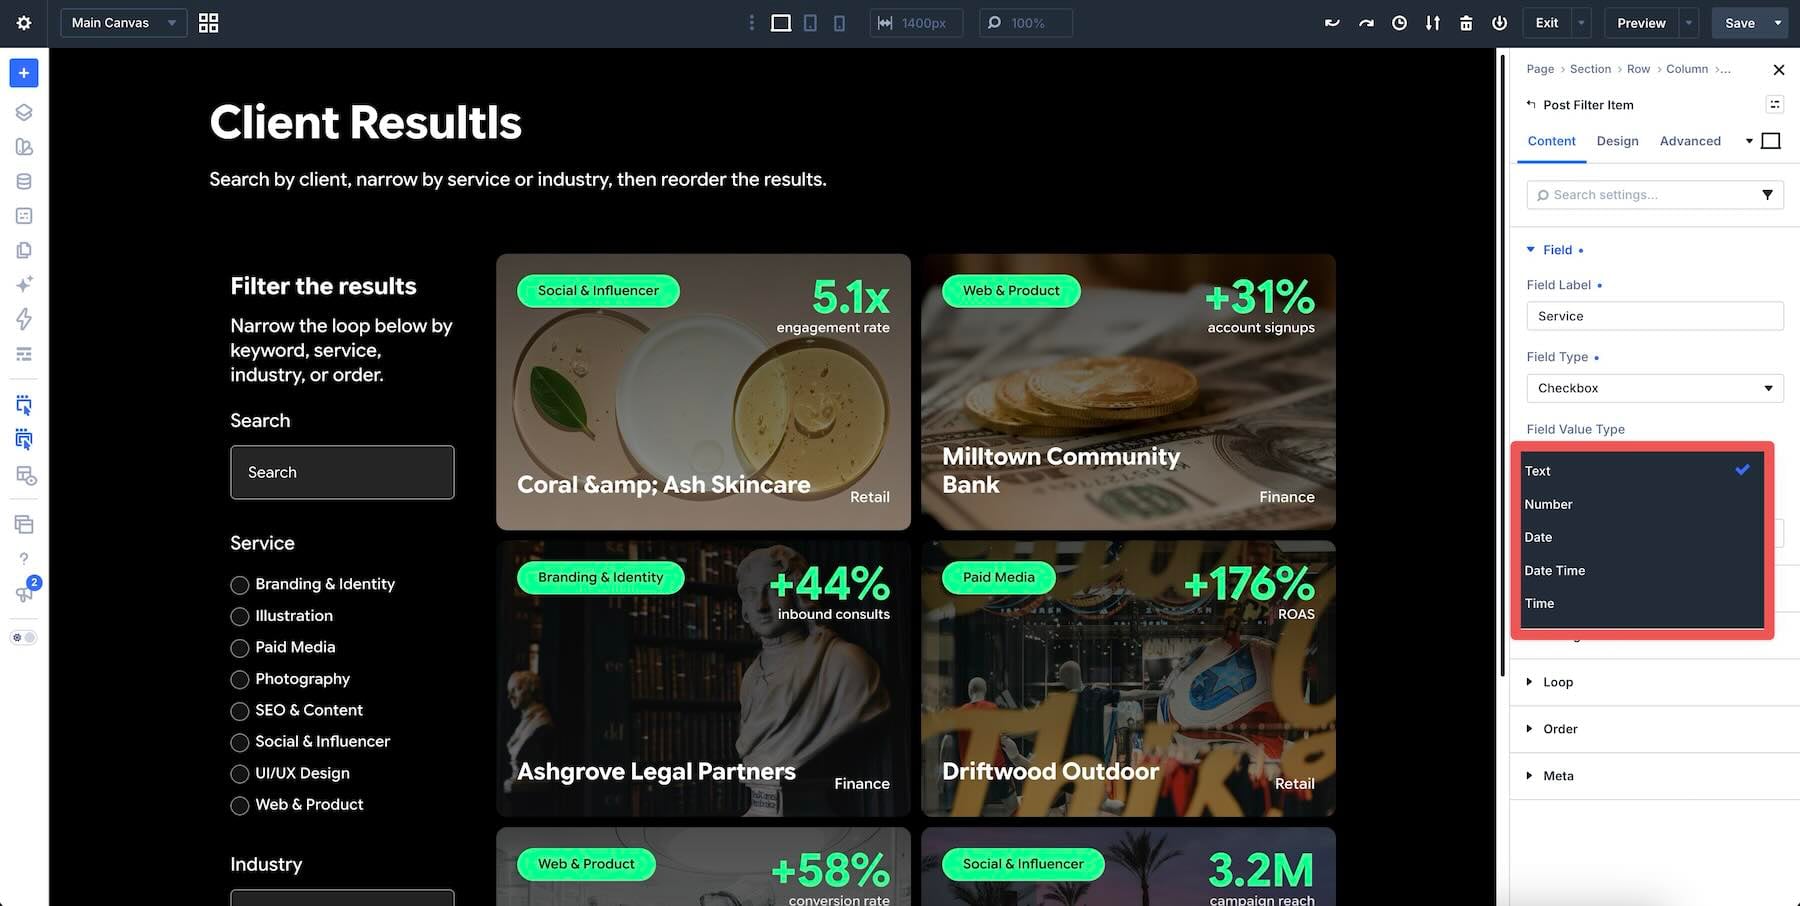
Field Value Type tells Divi how to interpret the stored value when the field is querying data. The options are Text, Number, Date, Date Time, and Time. Leave this on Text for titles, taxonomies, and most labels. Switch it when the value is actually a number or a date, so comparisons work correctly.
Field Option is the connection to WordPress. It tells the item which piece of data to query. What appears in that menu depends on the Field Type, the target loop, and the data attached to those posts. You might connect it to a taxonomy such as Category, Tag, or Project Category, to an author, to standard post data, or to a custom field.
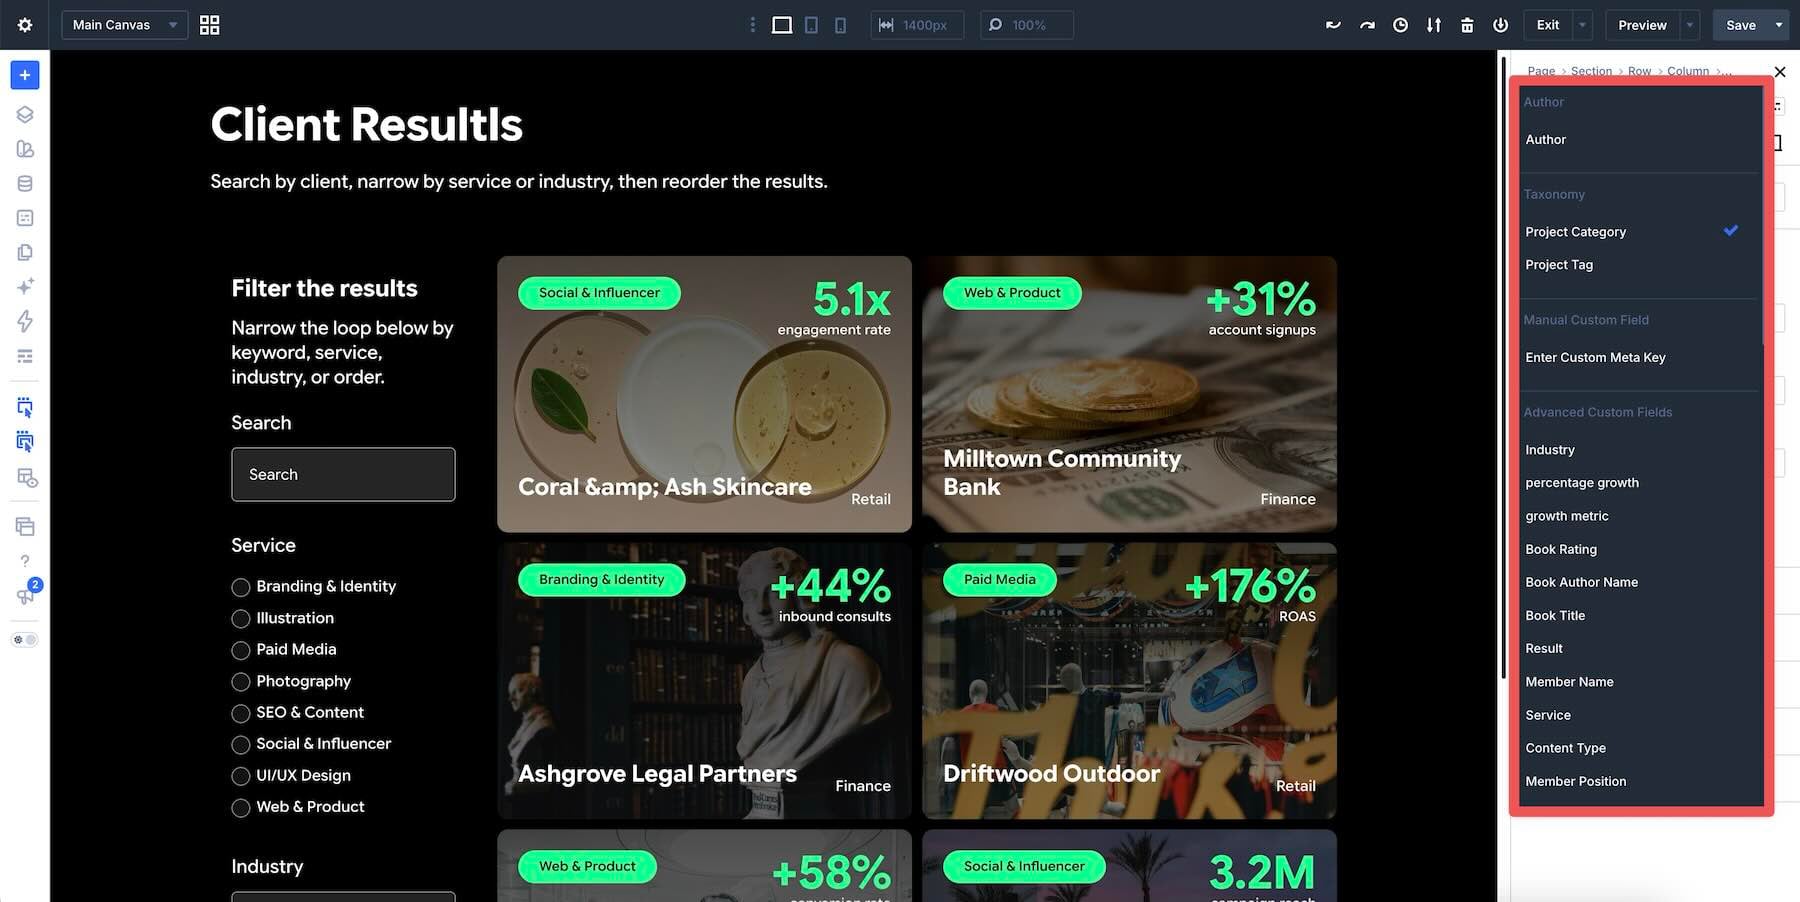
Once those settings are in place, the item knows what to show, how to treat the value, and which data to query.
How To Create A Filterable Portfolio
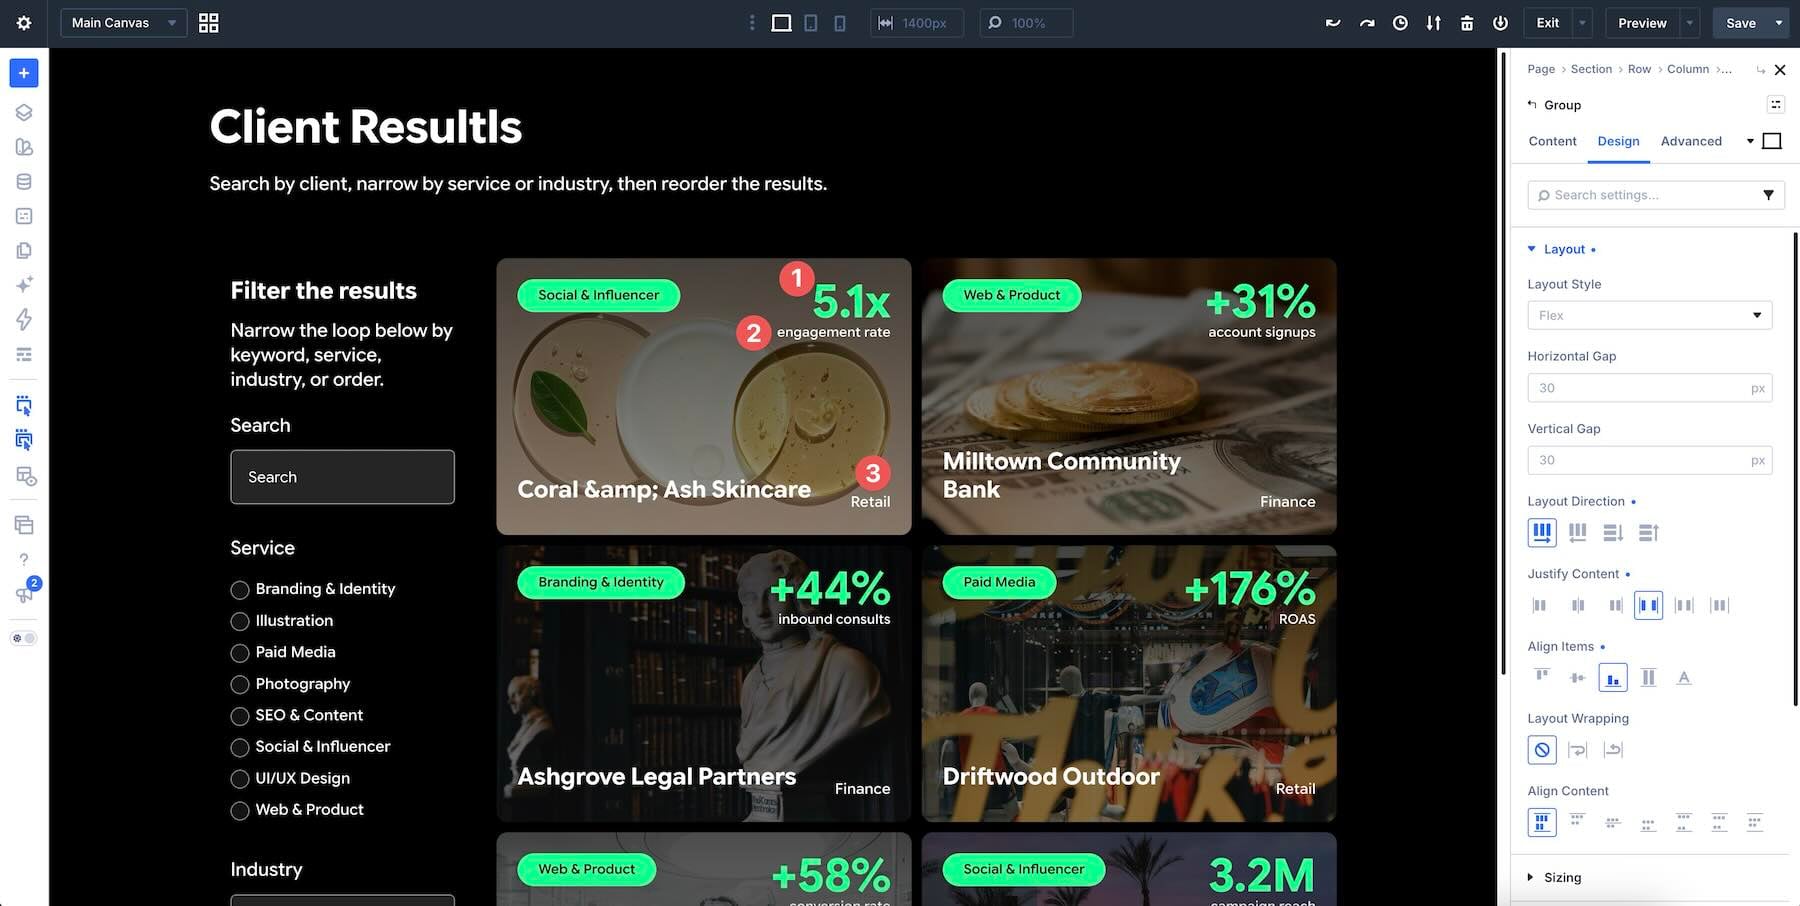
Here’s where we put it all together. We’ll design a Flexbox section, build one card, turn that card into a loop, then connect a Post Filter form to it. The front end will allow visitors to search by client, narrow the grid by service or industry, and reorder the results.
By the end, you’ll have a fully functional Project loop that you can drop into your next Divi 5 project.
Plan The Content First
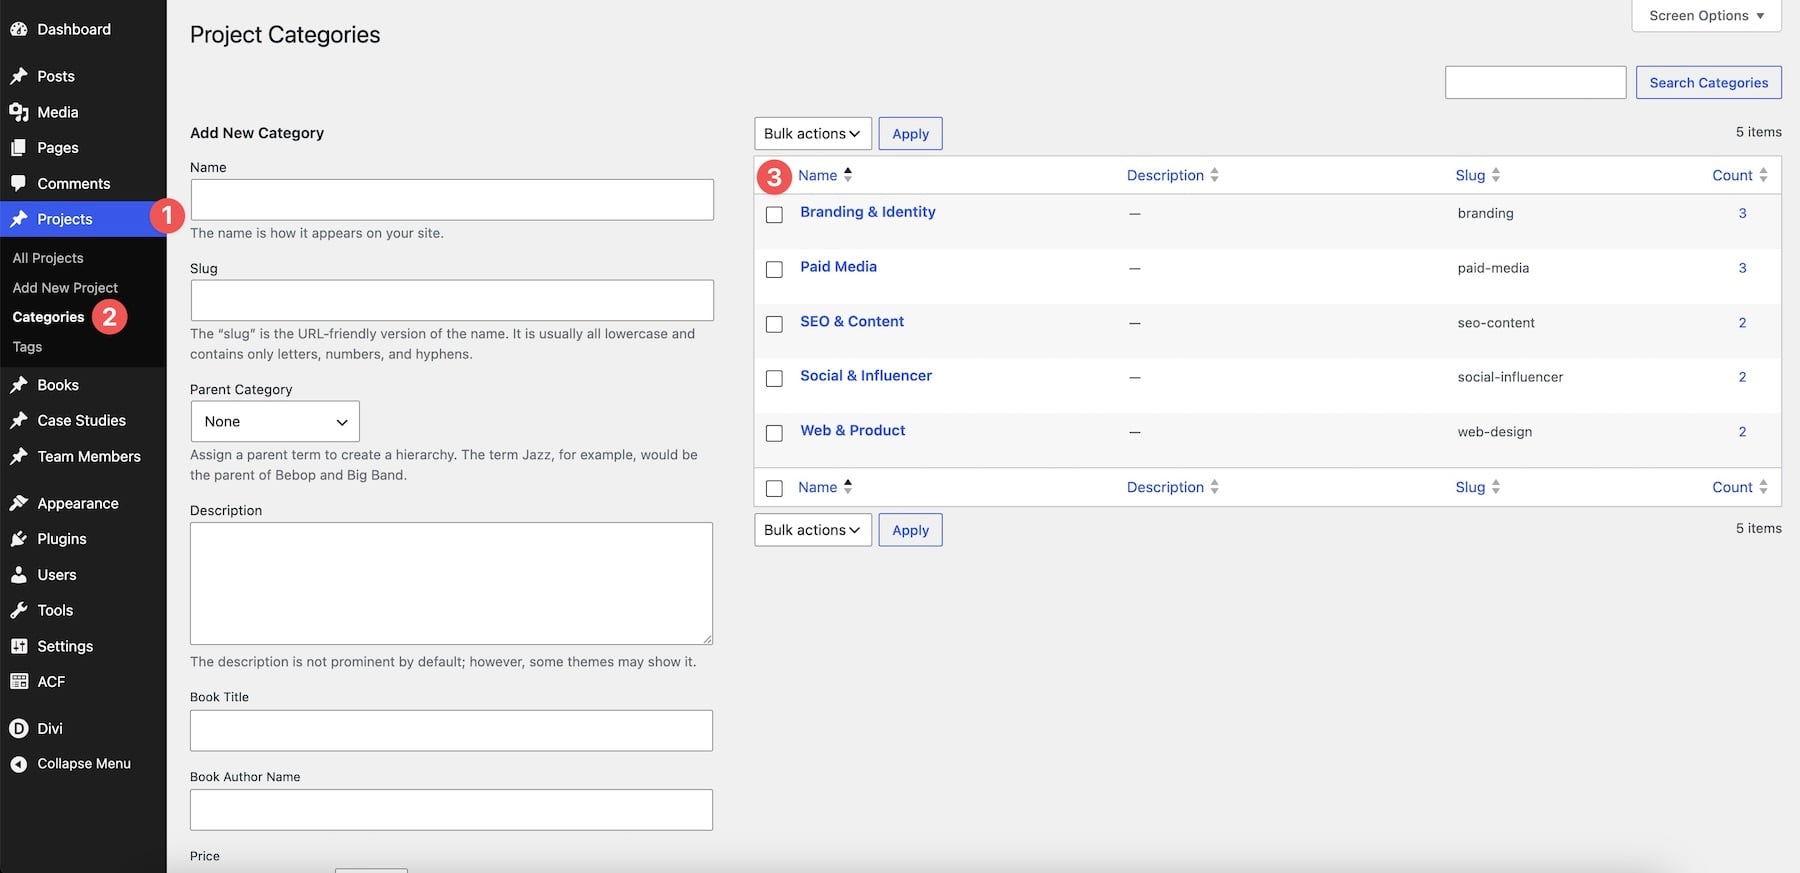
Before opening the Visual Builder, ensure that you have created the necessary Project Categories for the Loop. These will serve as the Loop’s Service field.
We’ll use ACF in the next step to create the Industry select field and the data displayed on the individual cards.
Set Up Taxonomies And ACF Fields
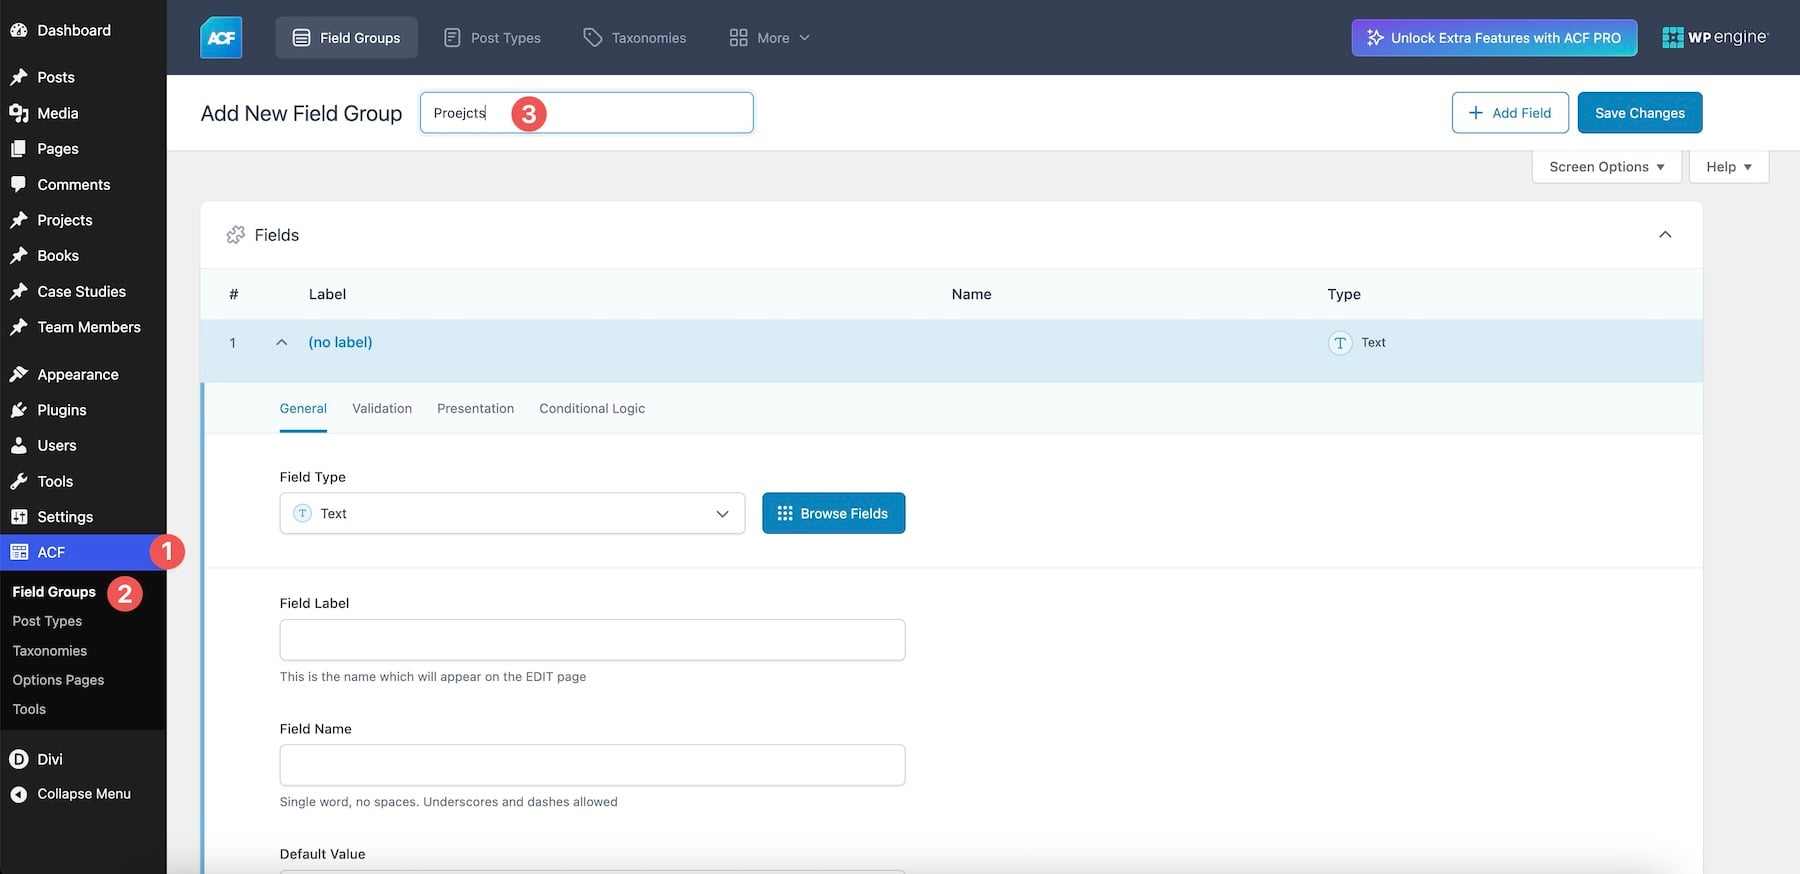
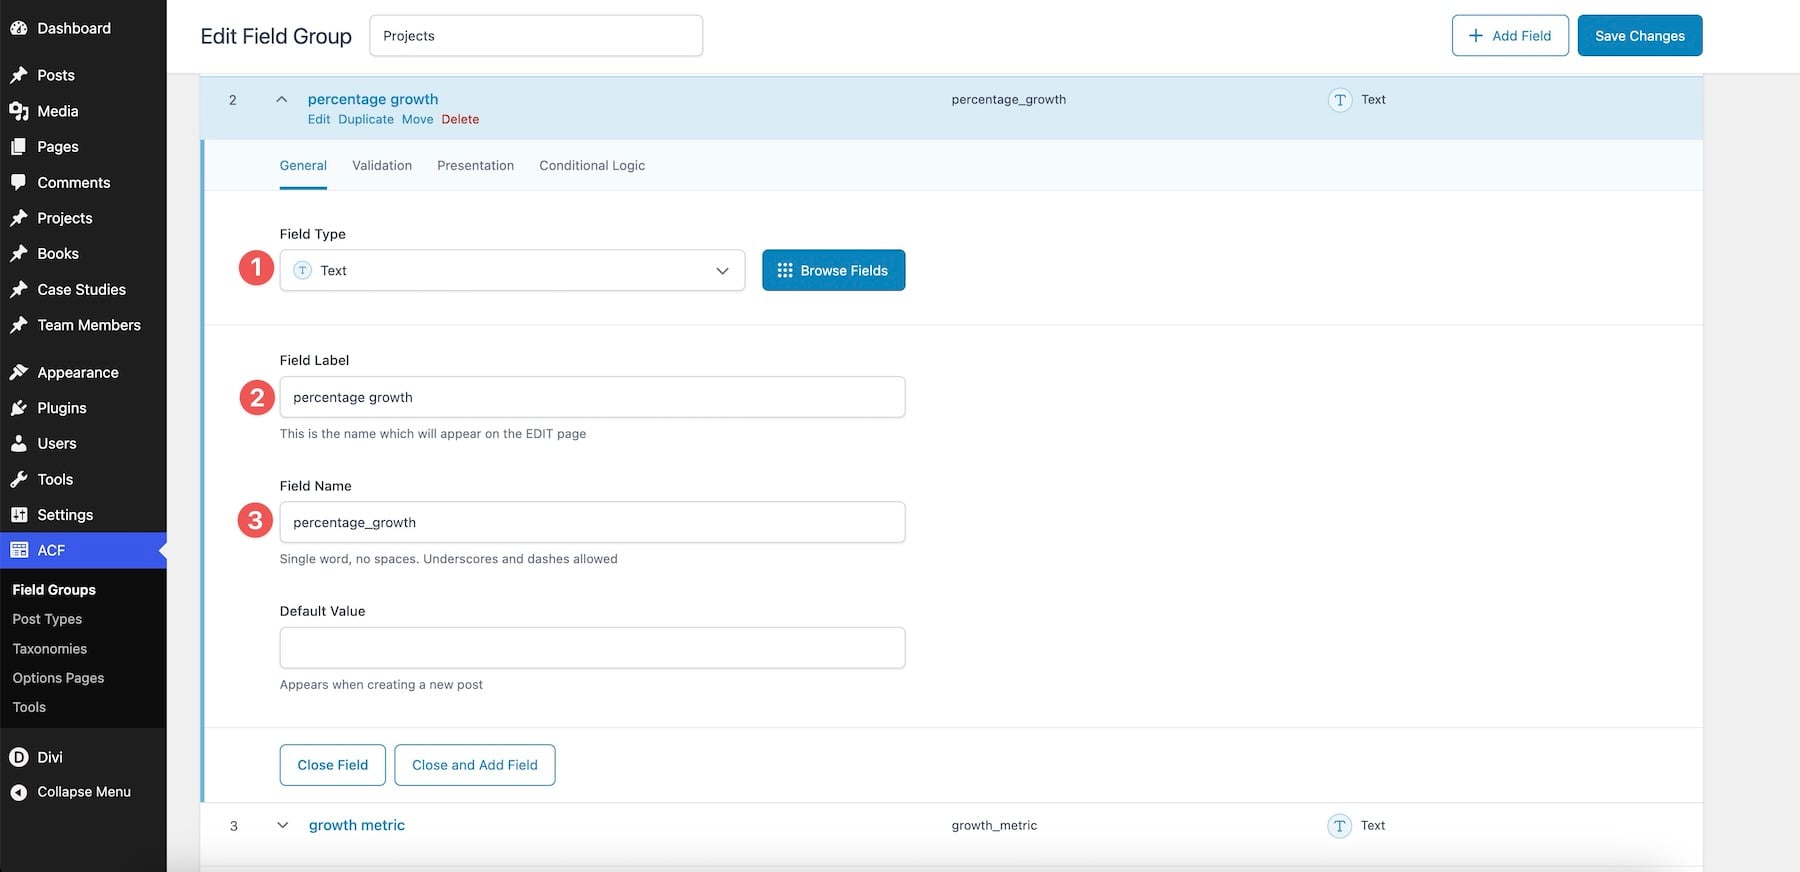
Create the terms before you design anything. Ensure that you have installed the free version of ACF and head to the Field Groups tab. Create a new Field Group and title it Projects.
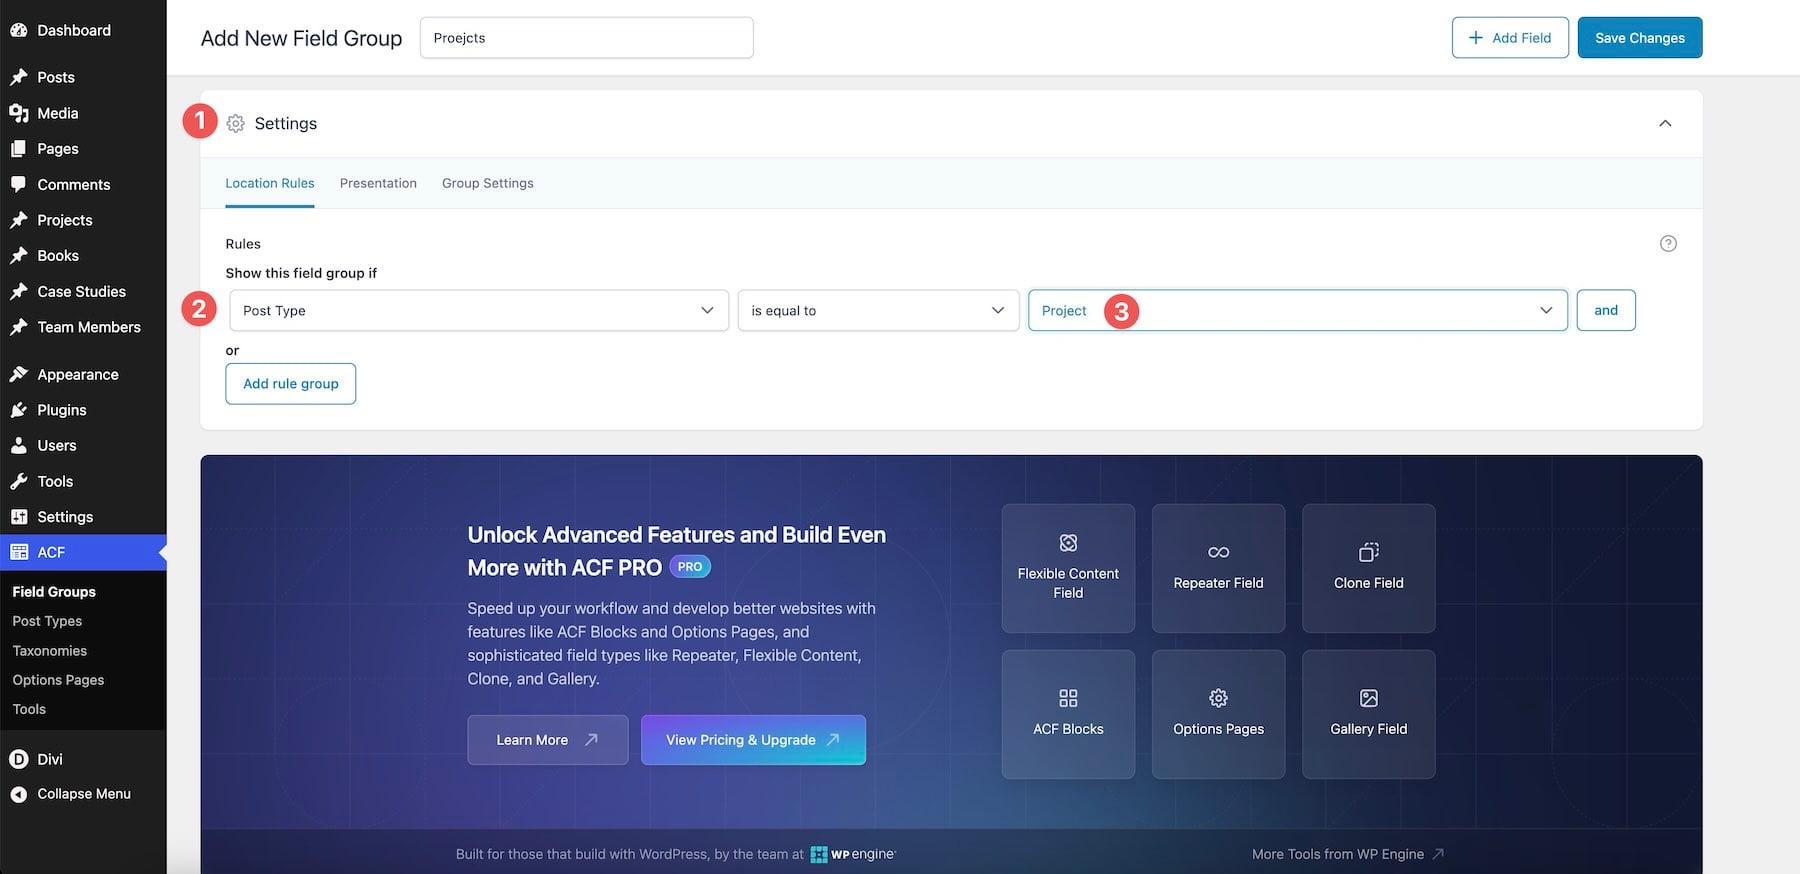
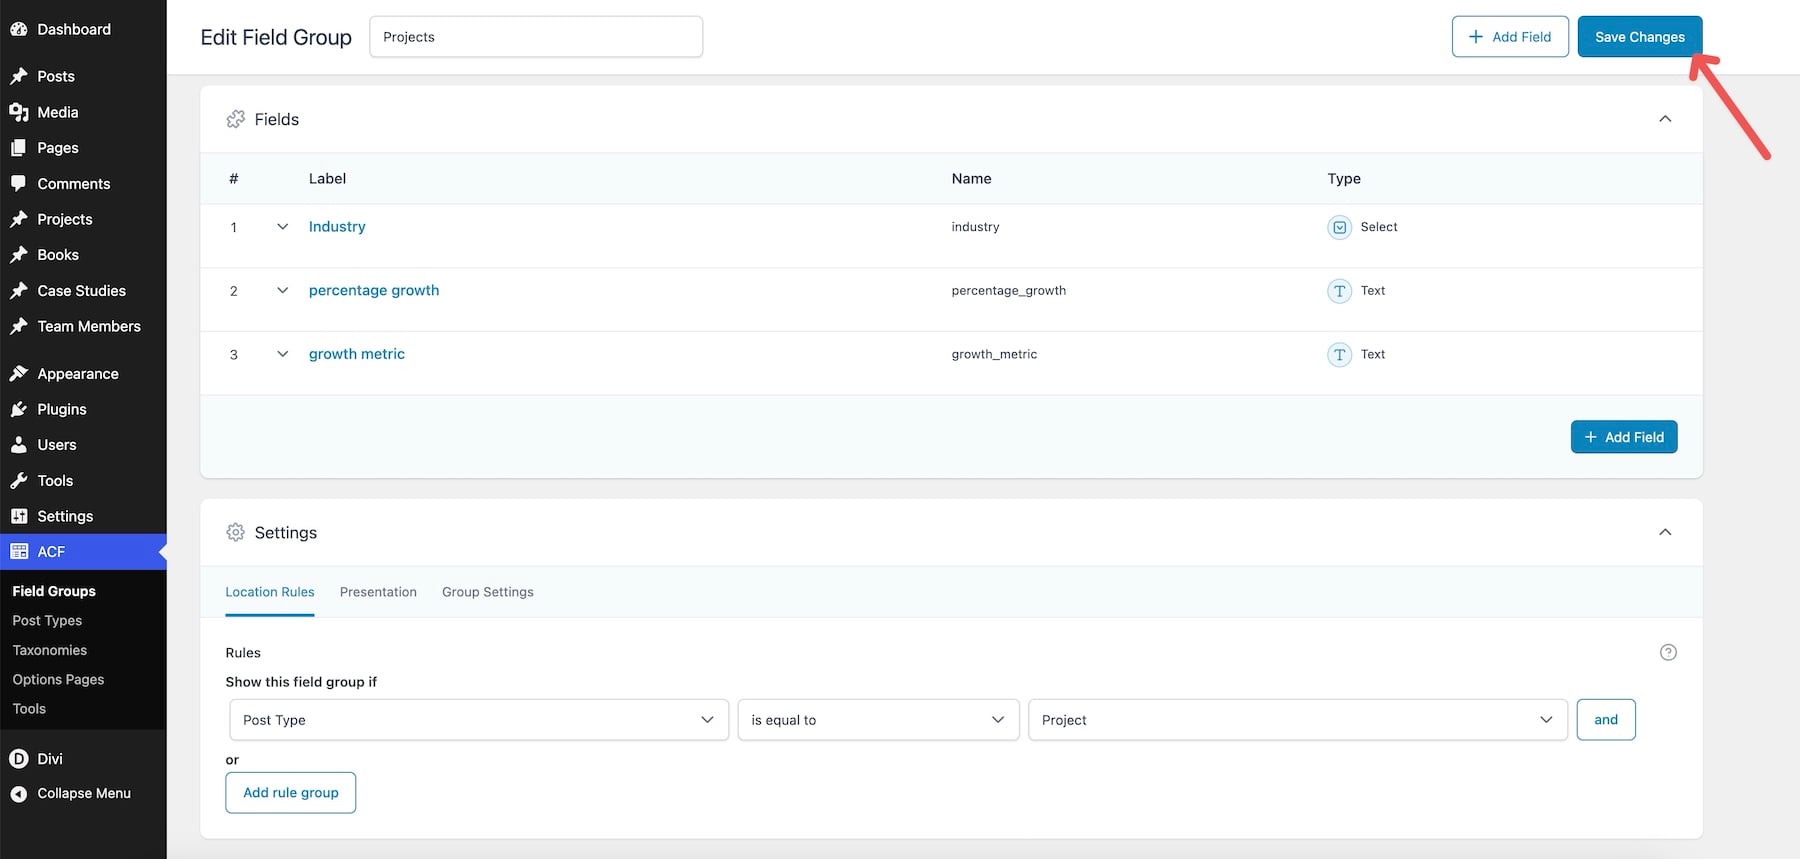
Before creating any fields, ensure that the field group’s location rule is set to Post Type is equal to Project in the Settings.
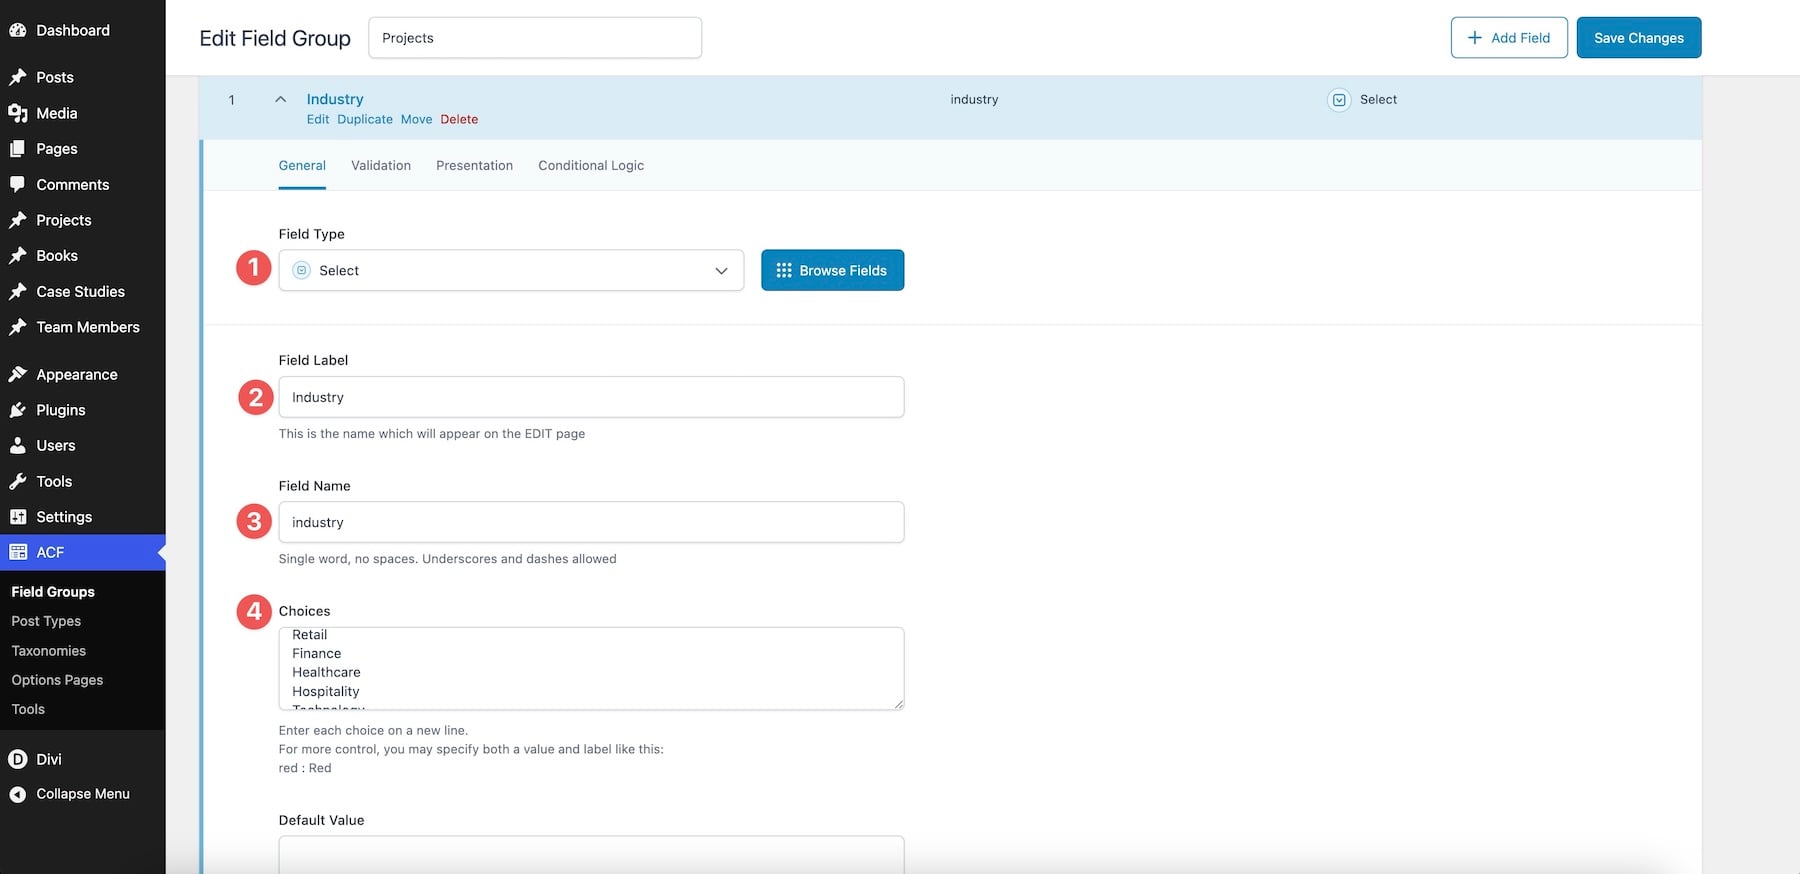
Next, we’ll need to add three new custom fields: industry, percentage growth, and growth metric. For industry, choose Select as the Field Type, use industry as the Field Name, and assign values in the Choices field. Keep it as a single selection.
The final two fields should be set to Text as the Field Type. Use percentage_growth and growth_metric as their Field Names. These store the metric and its label; they do not calculate or update analytics automatically.
Once all custom fields are created, click Save Changes.
Create The Projects And Theme Builder Template
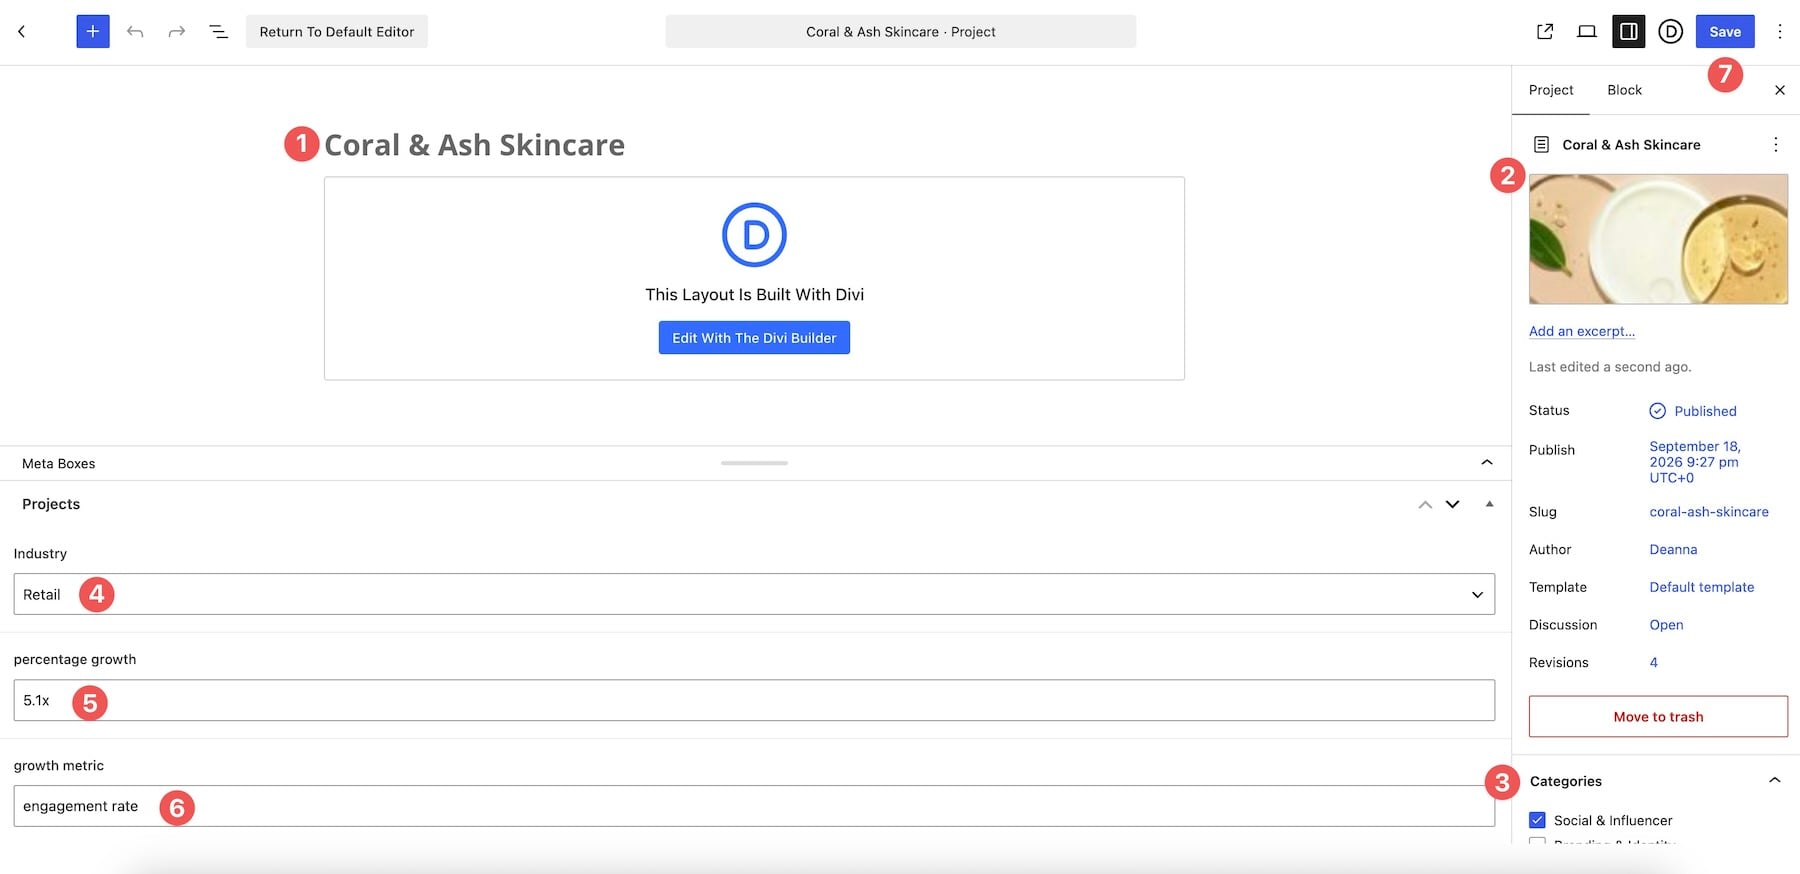
With our custom fields and Field Group created, we can start adding projects. Ensure that each Project has a Title, Featured Image, an assigned Category, and all custom fields filled out with your information. Once complete, click Publish so the Project appears in the public Loop. Create more than six Projects if you want to test pagination.
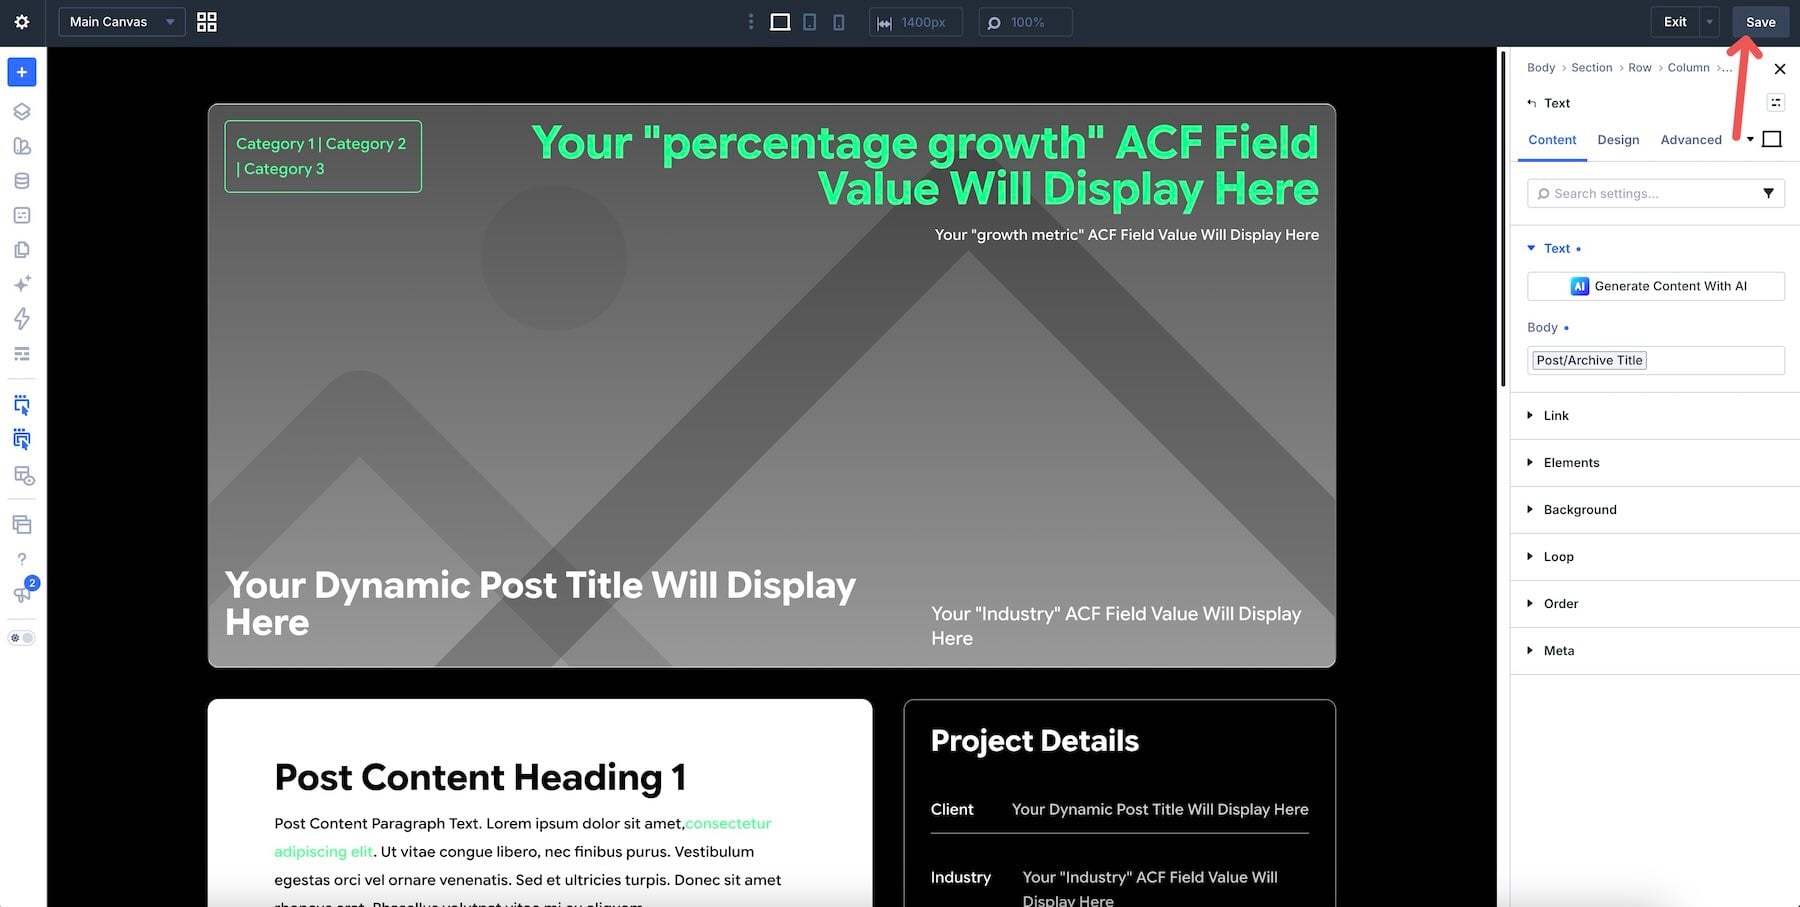
We won’t cover creating a Project template for this tutorial, but to make things easier on yourself, we recommend creating a Project template with the Theme Builder. This is what the visitor will see when they click on a Project in the grid. Go to Divi > Theme Builder, click + Add New Template, and when the modal appears, assign the template to All Projects.
Next, click on Add Custom Body, then Build Custom Body to open the Visual Builder.
You can use Divi 5’s full suite of modules to build the template and assign Dynamic Content where necessary, like Post Title, your custom fields, and the Featured Image.
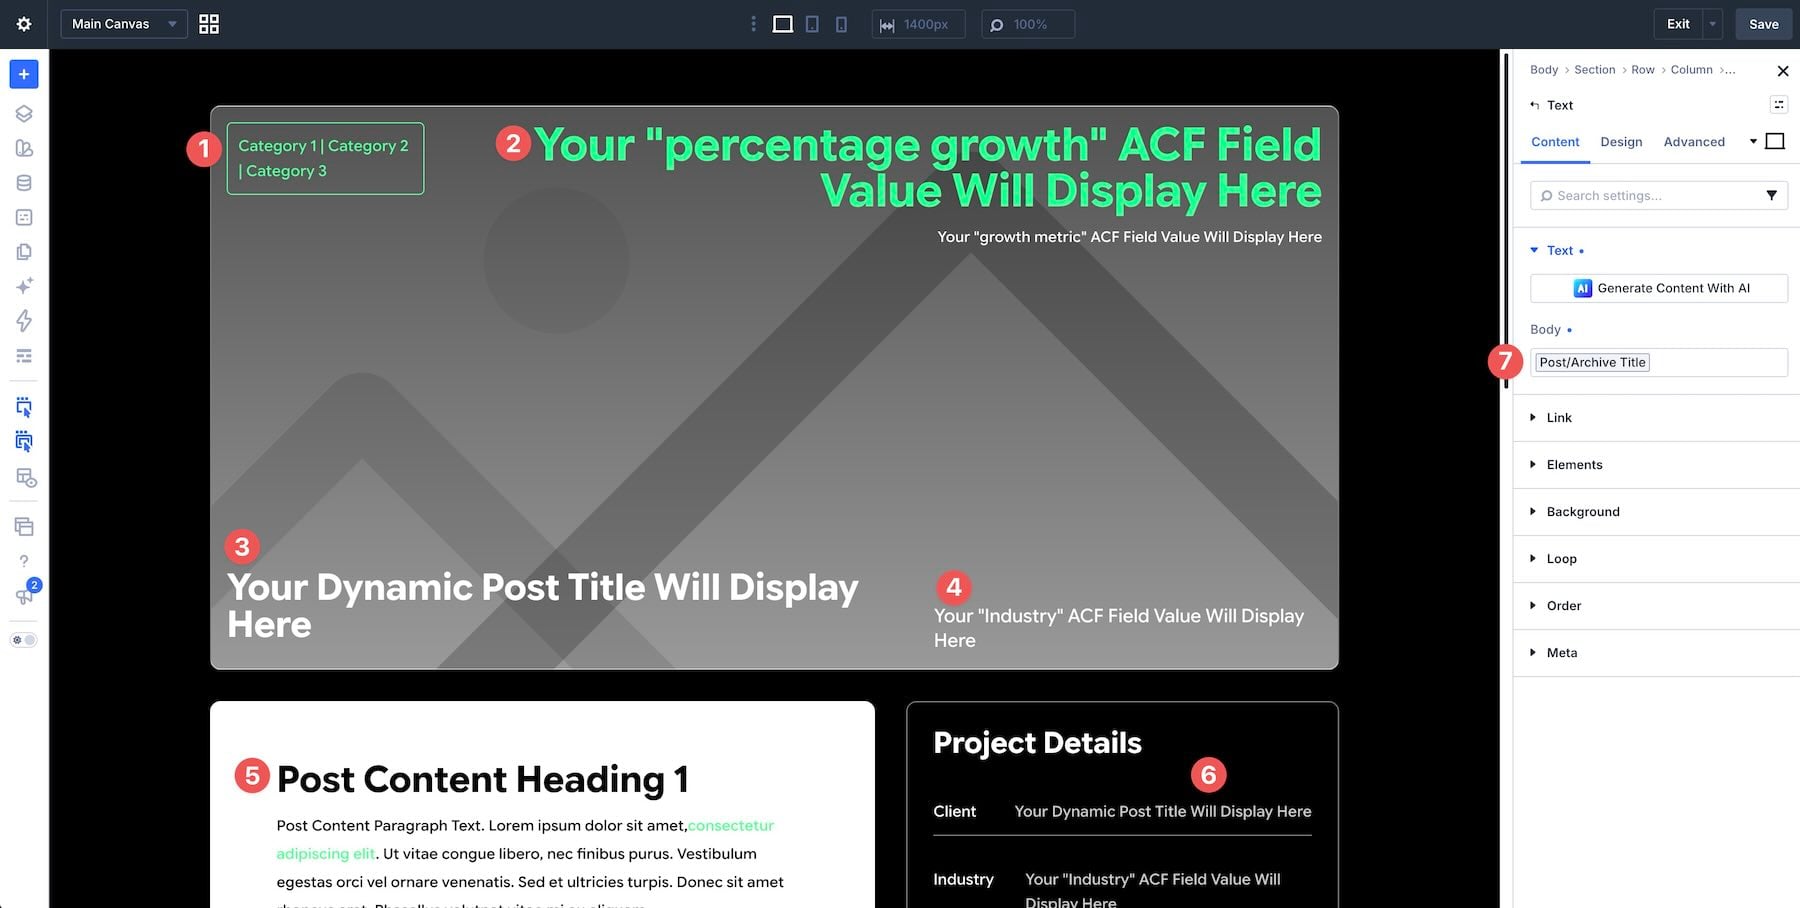
Once finished designing the template, click Save in the top right corner of the Builder.
Build The Portfolio Section With Flexbox
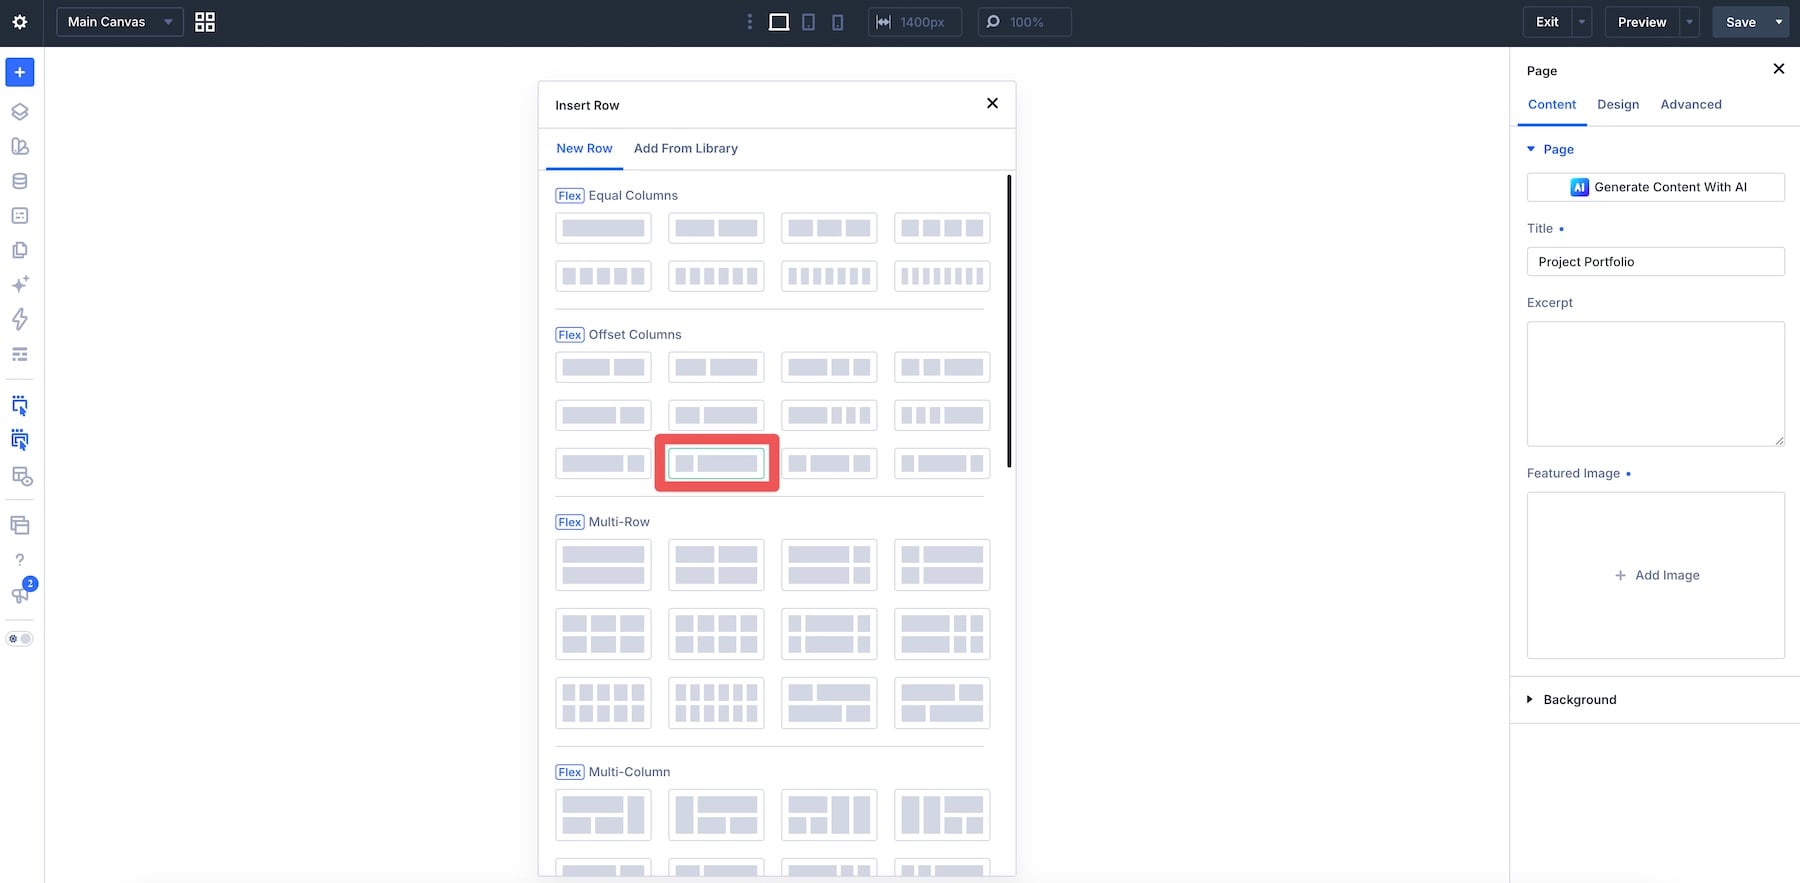
With all data and the Theme Builder template in place, we can start building the structure that will house our loop and post filter form. Create a new page and open the Visual Builder. Add a 1/4 + 3/4 Flex Row to the section.
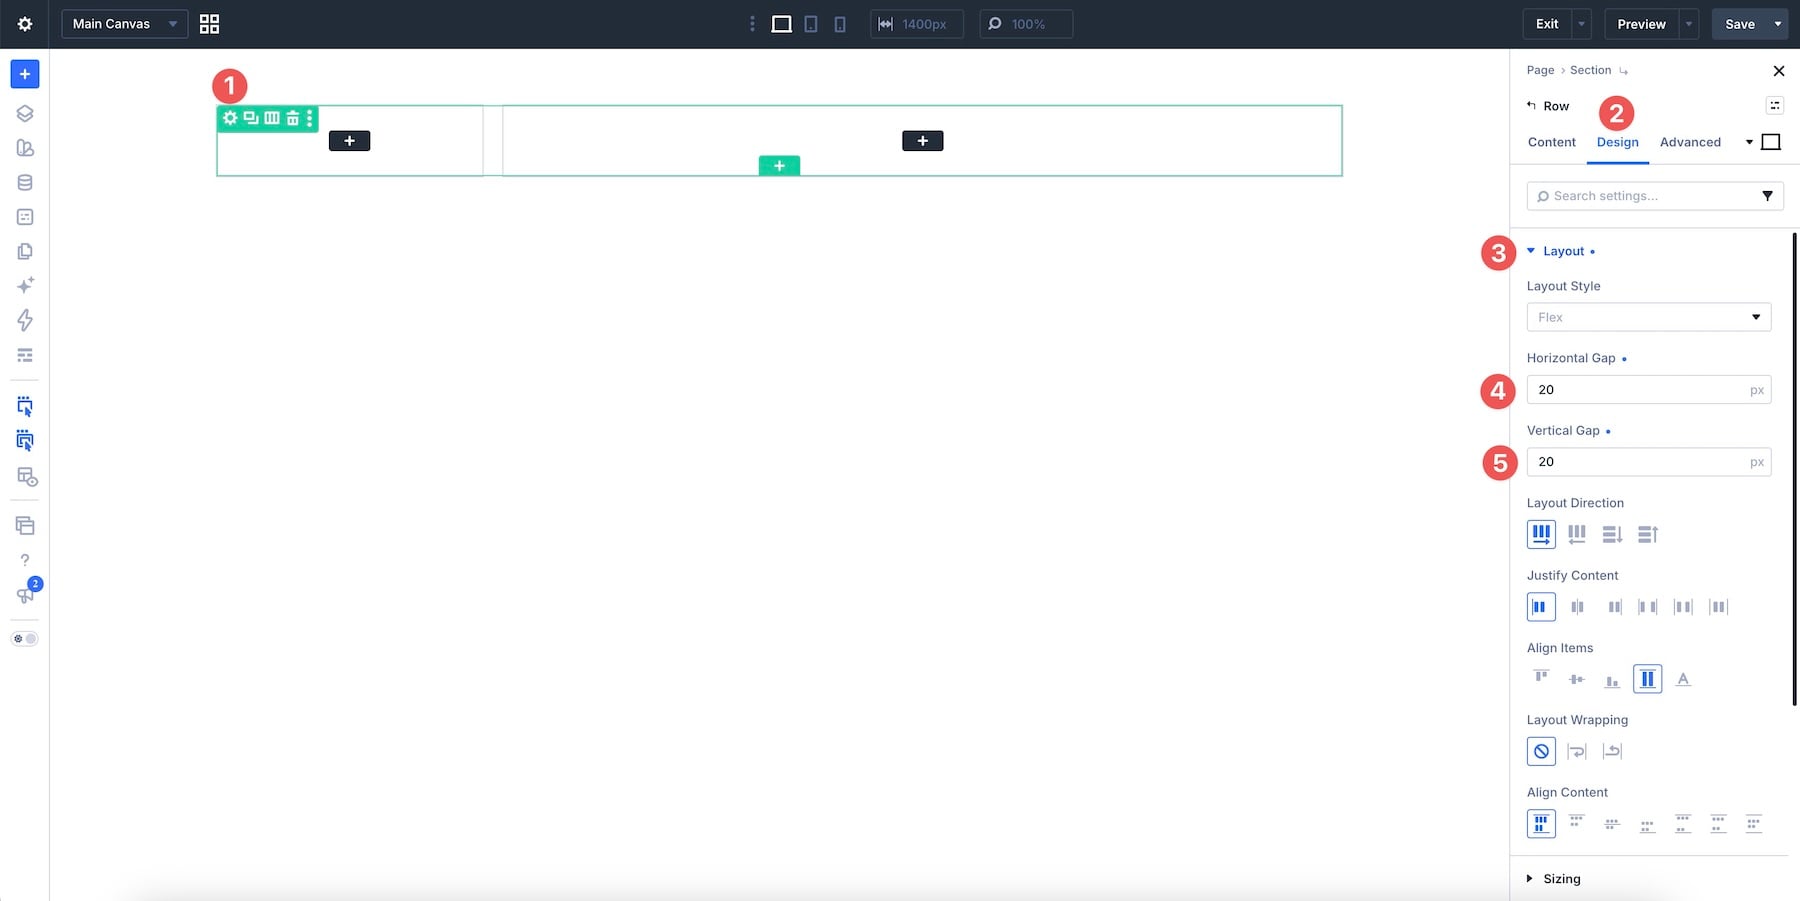
In the Row’s Design tab, expand the Layout option group and assign 20px to the Horizontal and Vertical Gap fields.
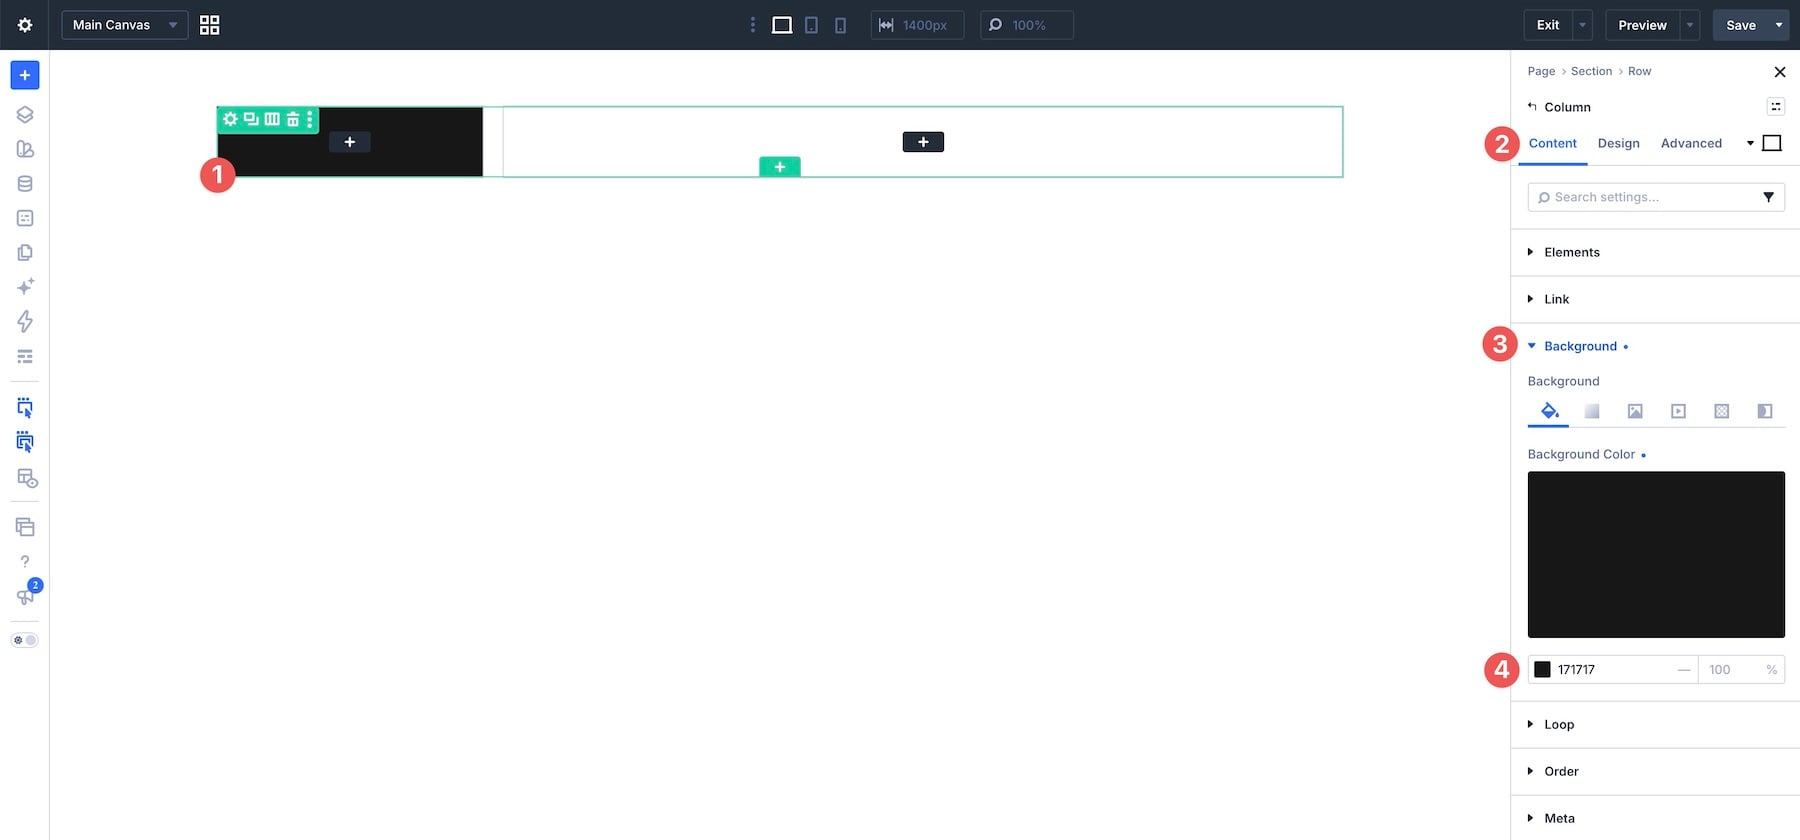
Click into the 1/4 Column, expand the Background option group, and assign a Background Color.
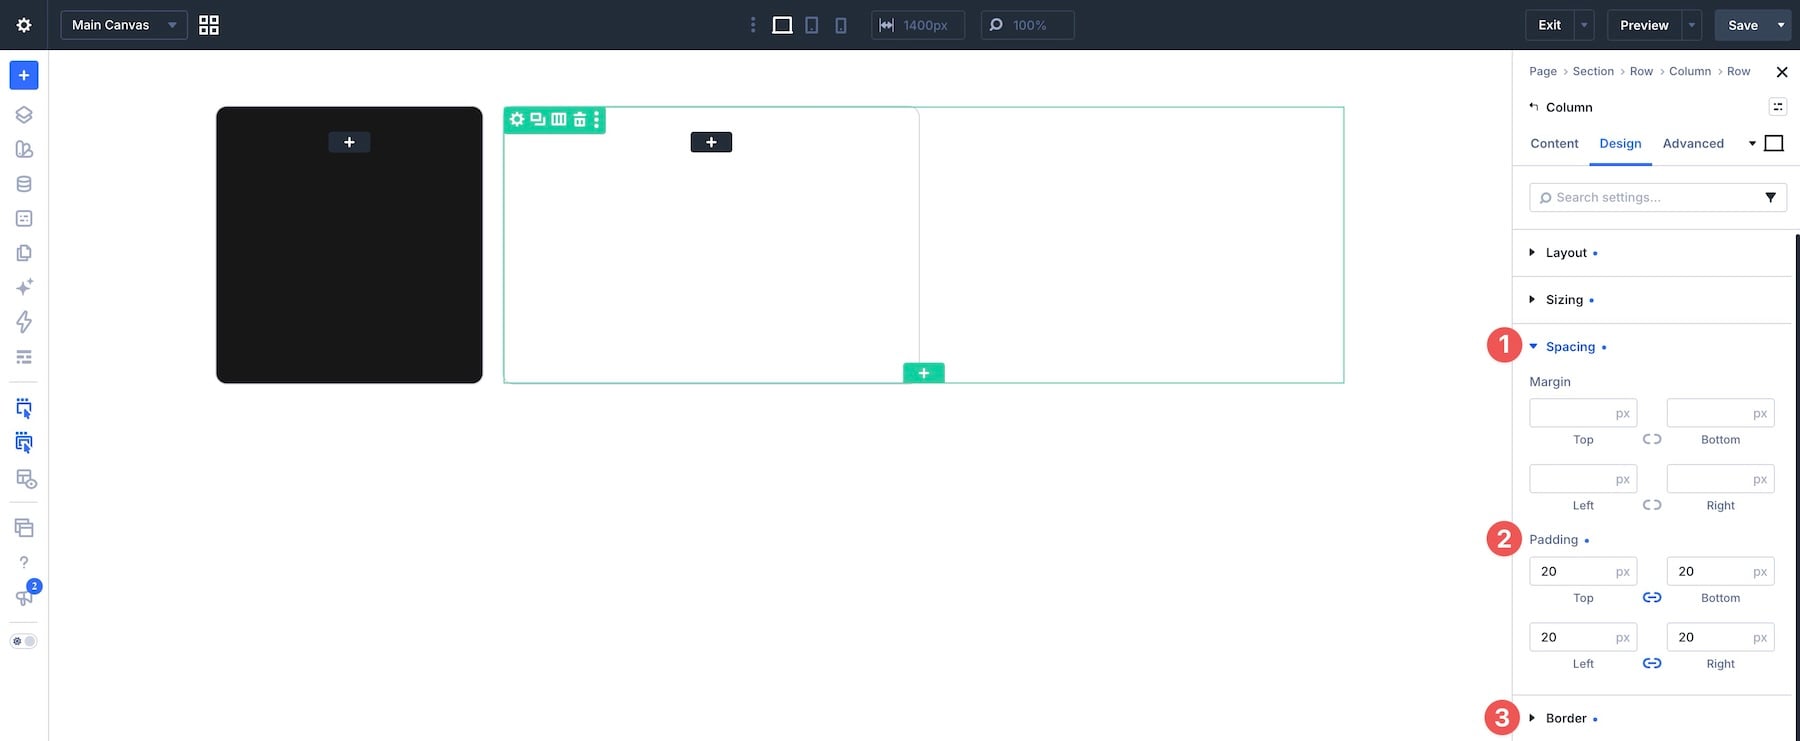
In the Design tab, expand the Spacing group and assign 20px Padding to all four sides. Then, add a 10px Border Radius.
In the 2nd Column (3/4), click the black + icon and add a single-column Nested Row.
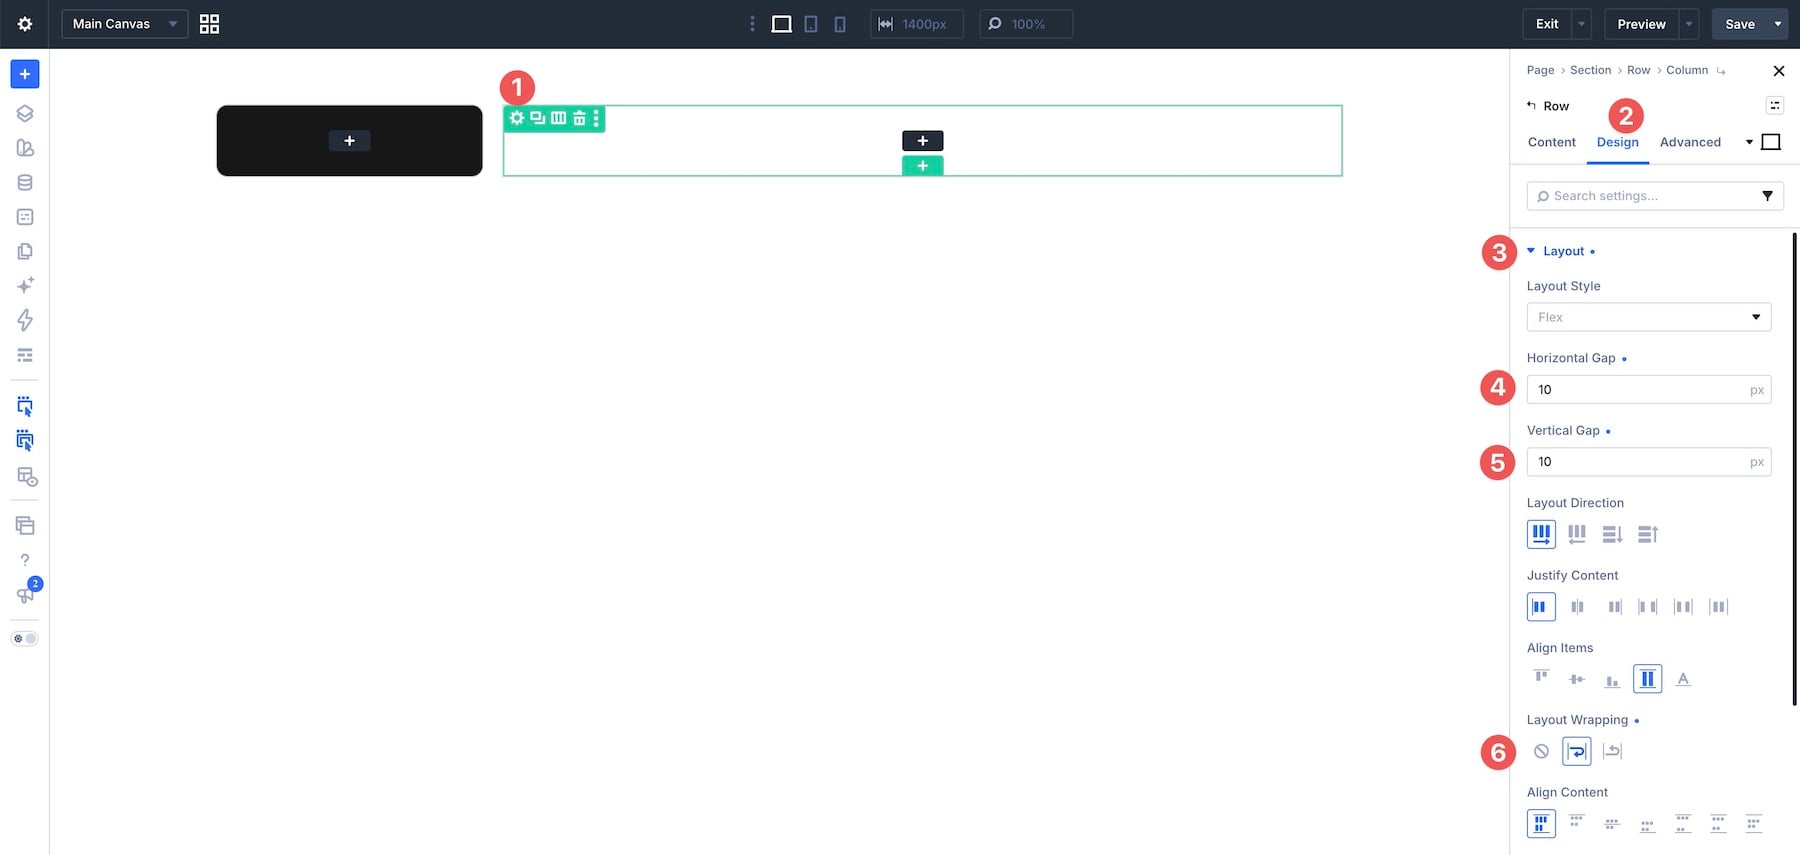
Click the Nested Row to edit it. Navigate to the Design tab, expand the Layout group, and add 10px Horizontal and Vertical Gap. Then, enable Layout Wrapping to Wrap.
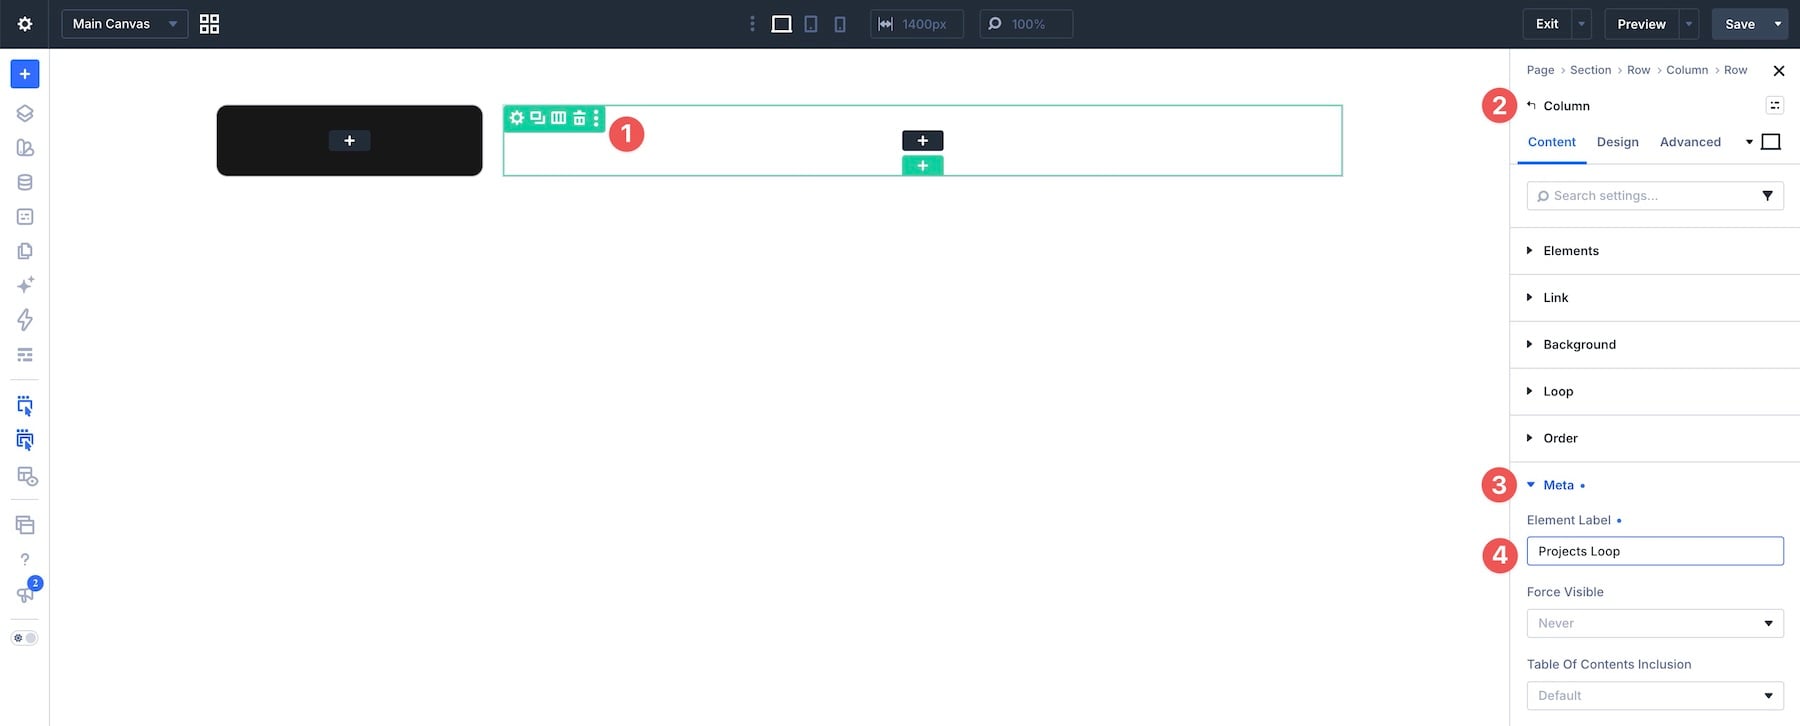
Now, click into the Nested Row’s single Column. Expand the Meta group in the Content tab and assign an Element Label, such as Projects Loop. This will allow you to easily assign the Target Loop to the Post Filter module in the next steps.
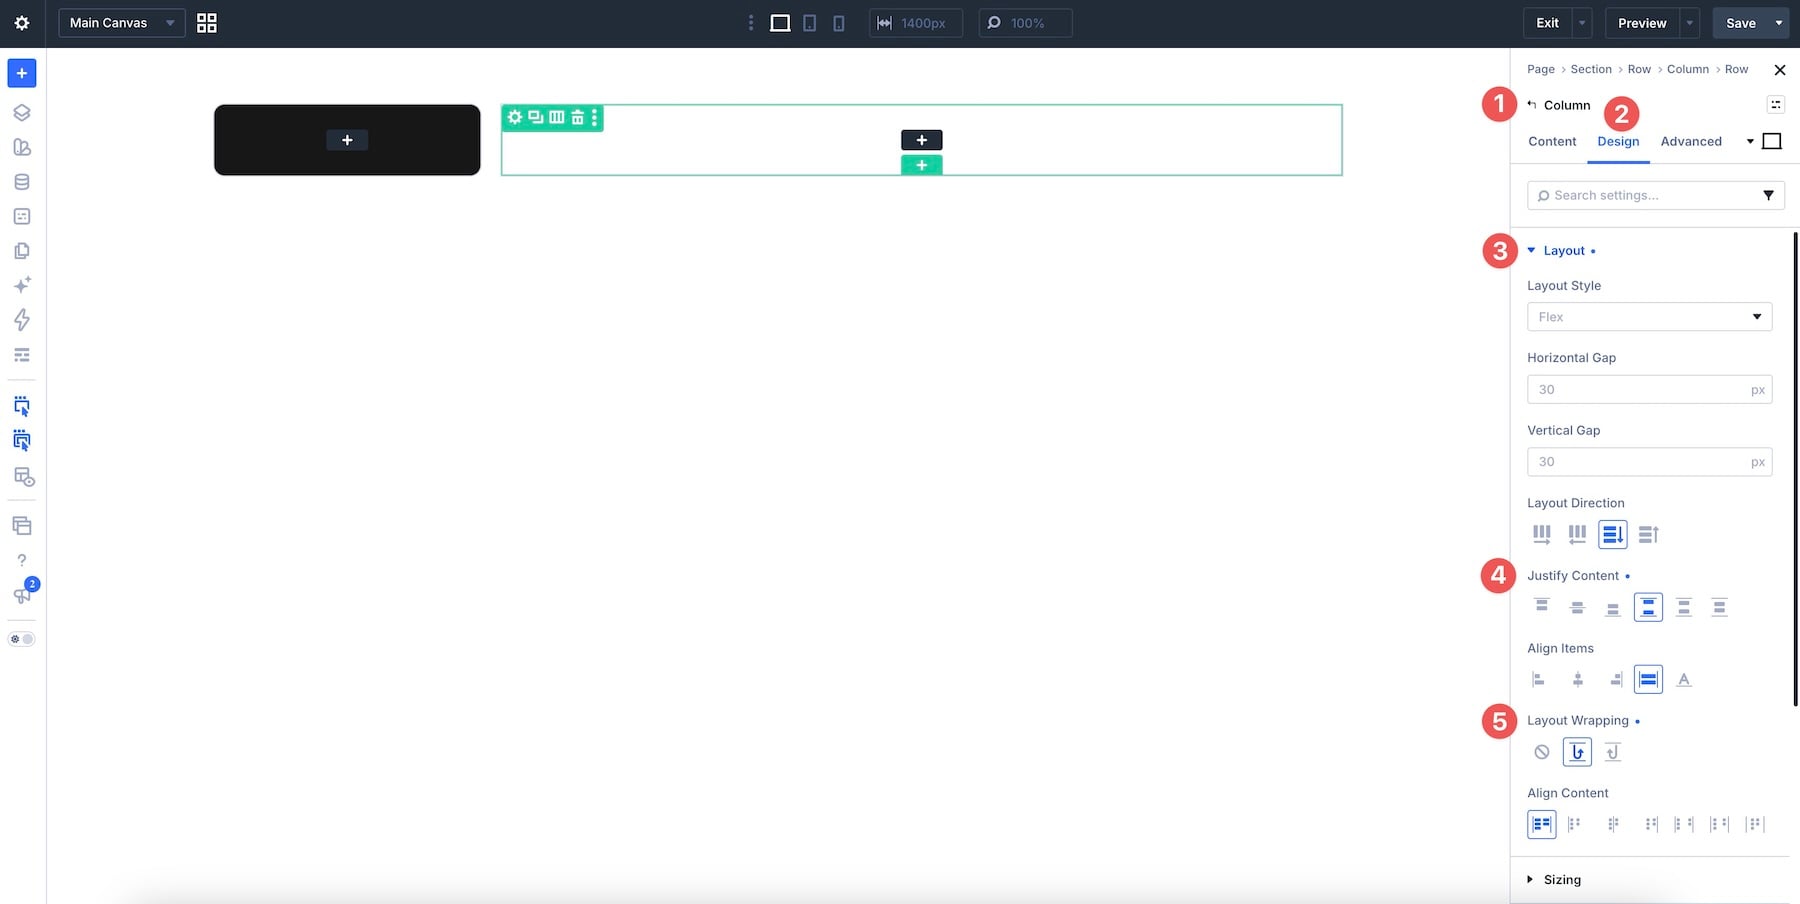
In the Design tab, expand the Layout group and set Justify Content to Space Between. Set the repeated Column’s Layout Wrapping to No Wrap, keeping Wrap on the parent Nested Row only. This prevents the lower card content from flowing outside the card.
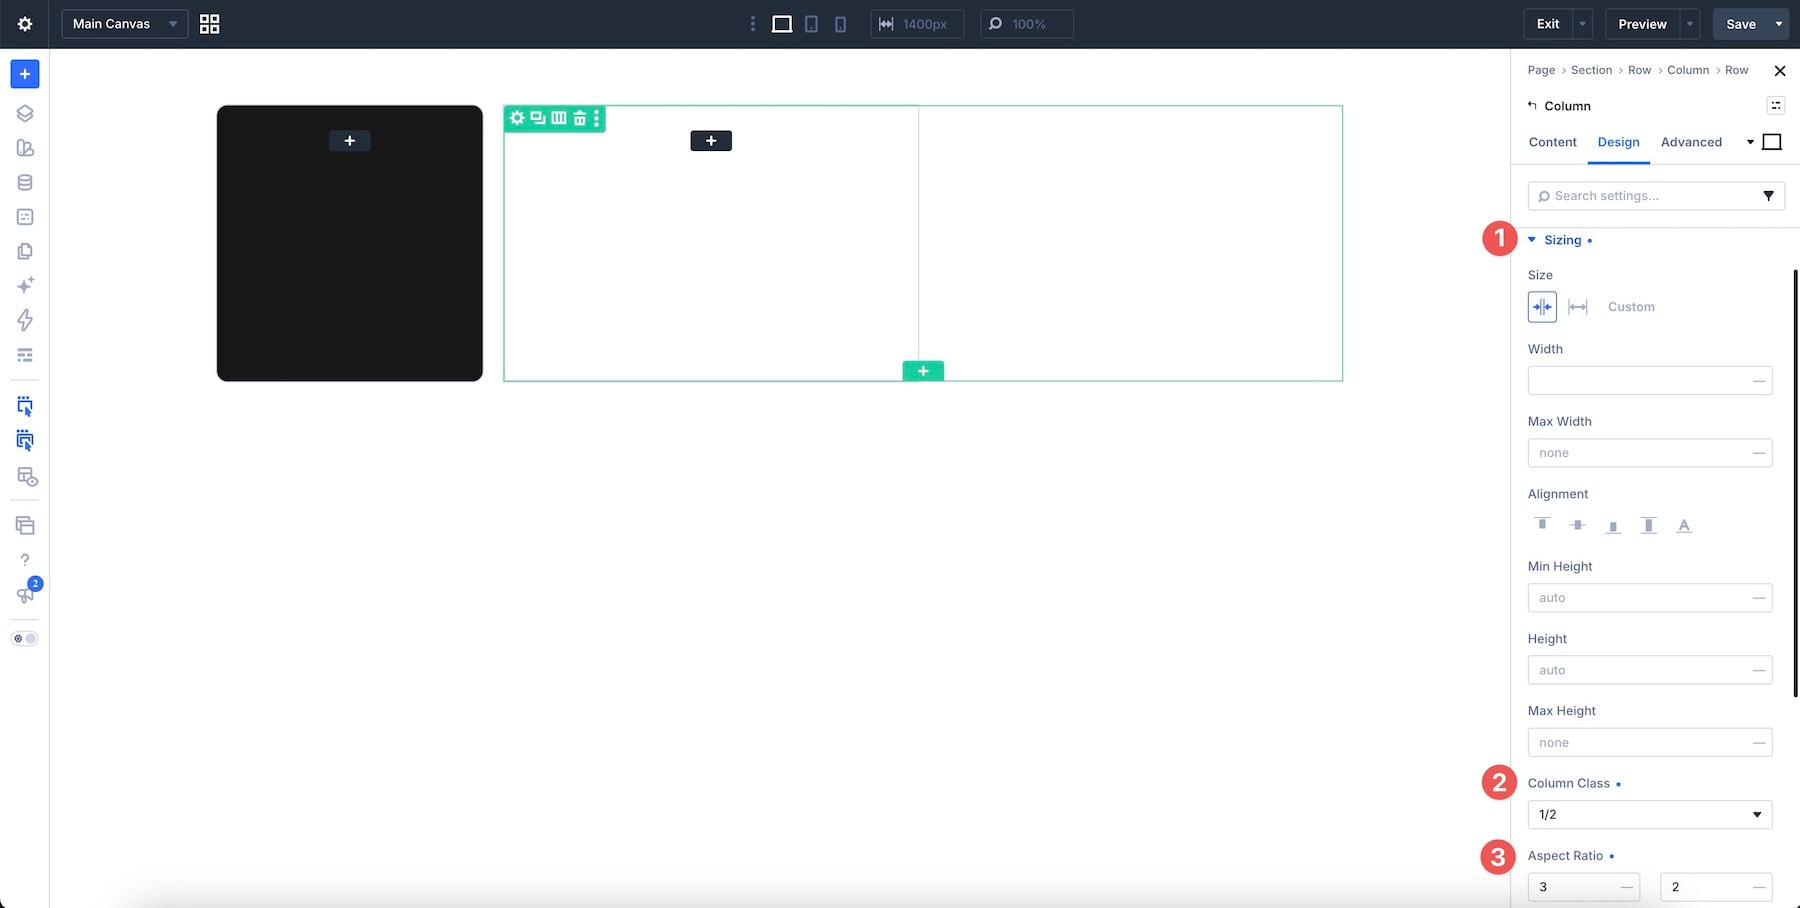
Expand the Sizing group and set the Column Class to 1/2 and the Aspect Ratio to 3:2. Add a 260px Min Height to give the content enough room on narrower screens.
Add 20px Padding to all four sides in the Spacing group, and 10px Border Radius in the Border group.
Build The Loop Card
With the structure in place, we can build the first loop card. We won’t go through a full design here, but there are a few important modules to add to the Nested Row’s Column.
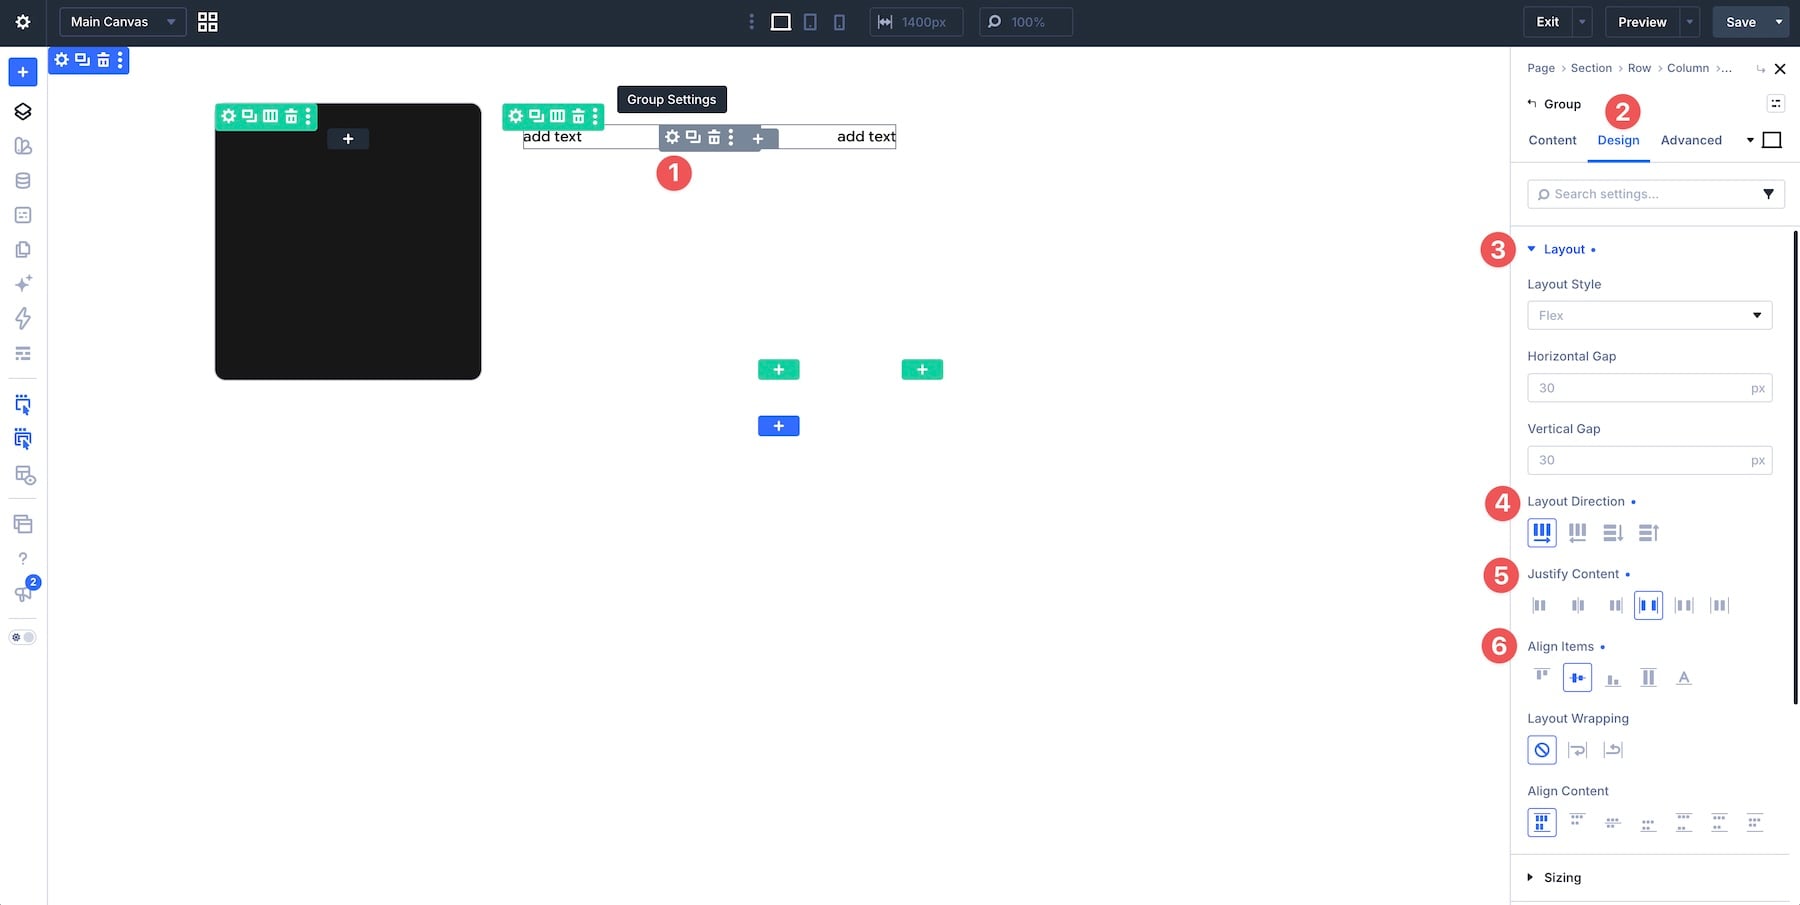
Start by adding a Module Group with a Text module for the service badge and a Heading module for the metric to the repeated Column. In the Module Group’s Design tab, expand the Layout group and set Layout Direction to Row, Justify Content to Space Between, and Align Items to Center.
Use Divi 5’s Design settings to style the first Text module.
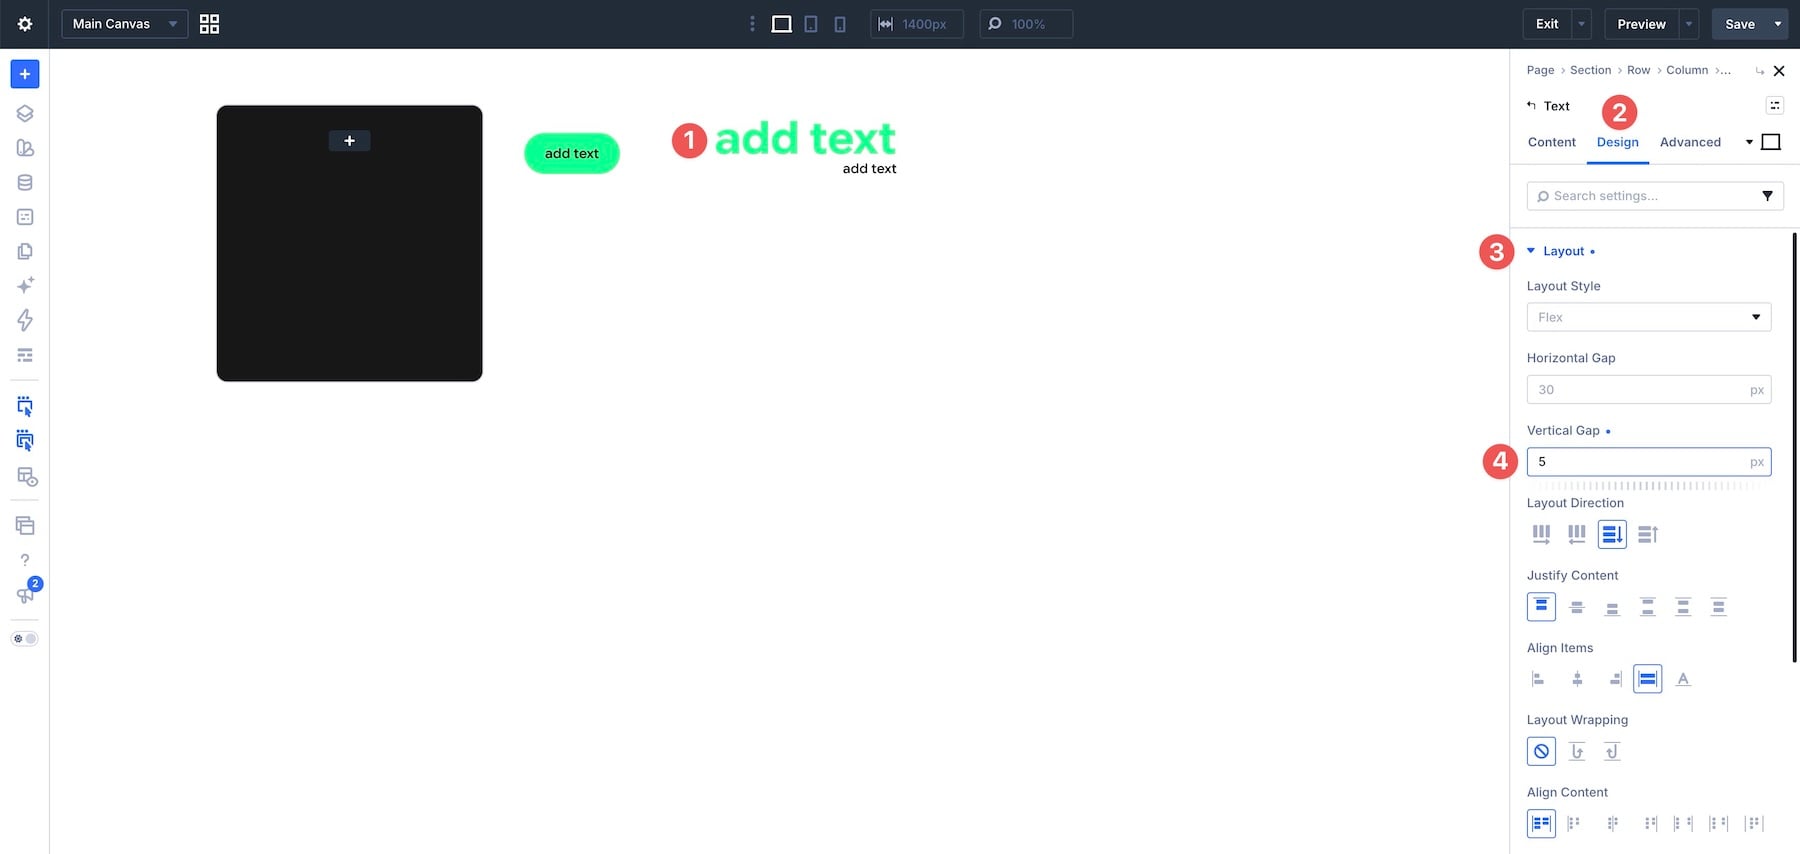
For the Heading module, assign an H4 tag and style it. Then, expand the Elements group in the Content tab. We’ll add a Nested Module (text) to the Heading for the metric’s label.
Once styled, head back to the parent Heading module and go to the Design tab. Adjust the Vertical Gap in the Layout option group to 5px.
We will add another Module Group to the Column similar to the first, with two Text modules for the Project title and industry. Set Layout Direction to Row, Justify Content to Space Between, and Align Items to Center.
Style the last two Text modules as desired and save your progress.
Enable The Loop Builder
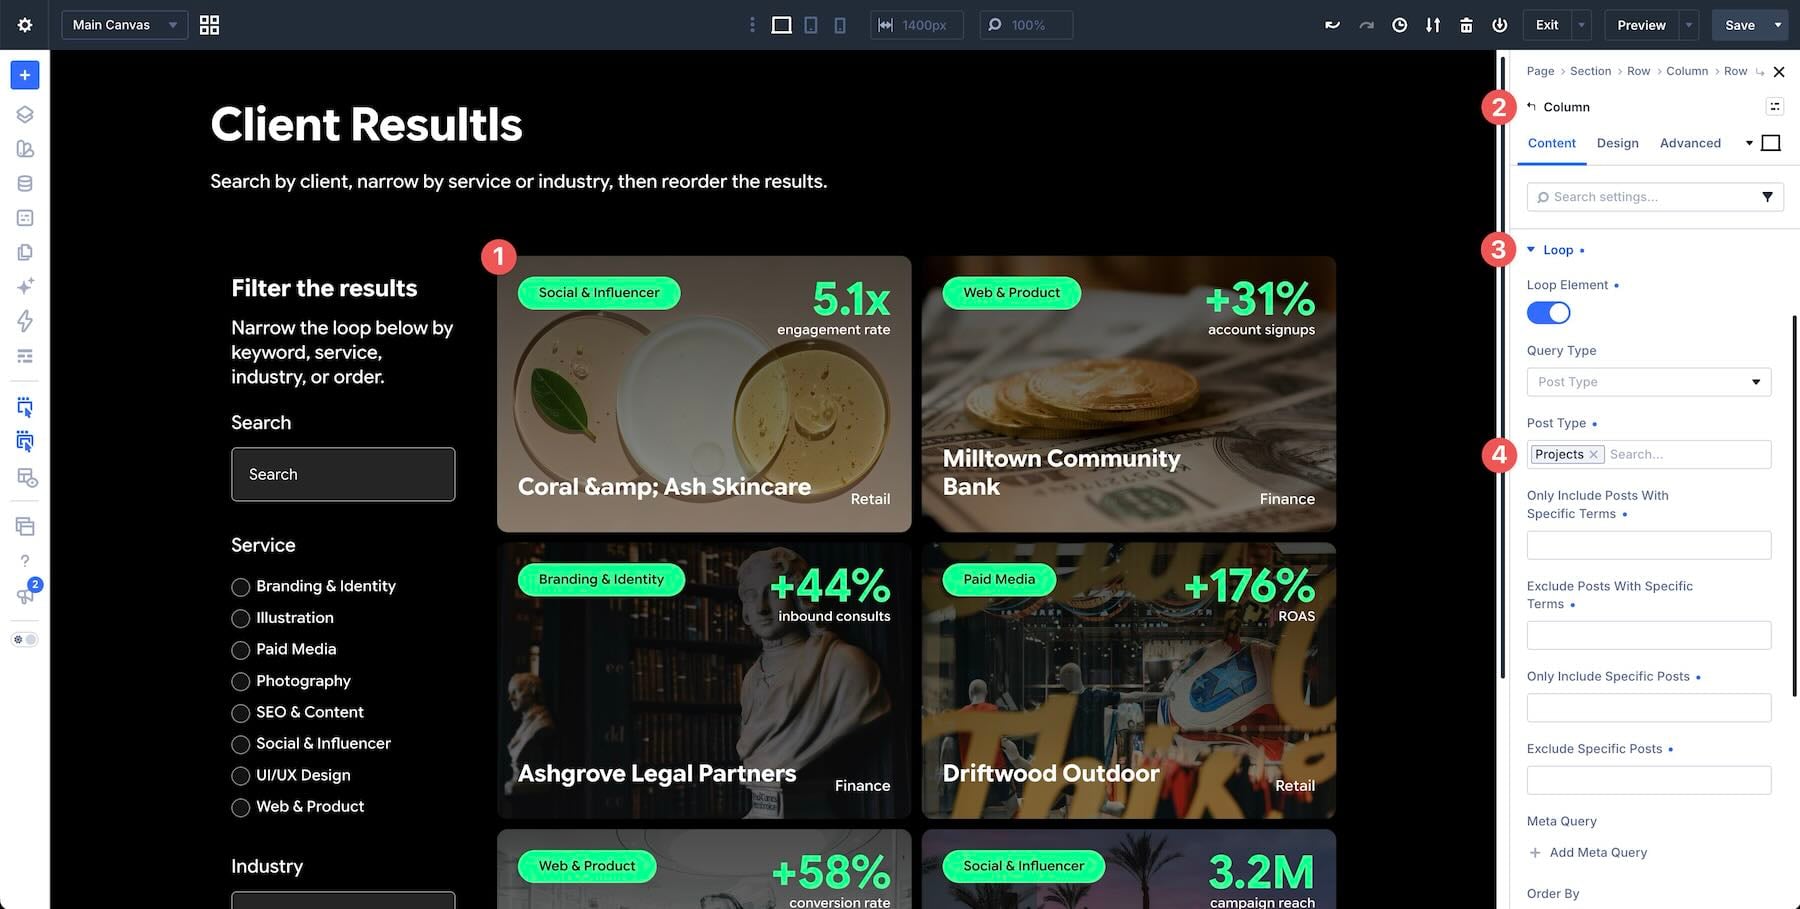
Go back to the Column (Projects Loop) using Divi 5’s Breadcrumbs feature and expand the Loop option group in the Content tab. Toggle Loop Element on.
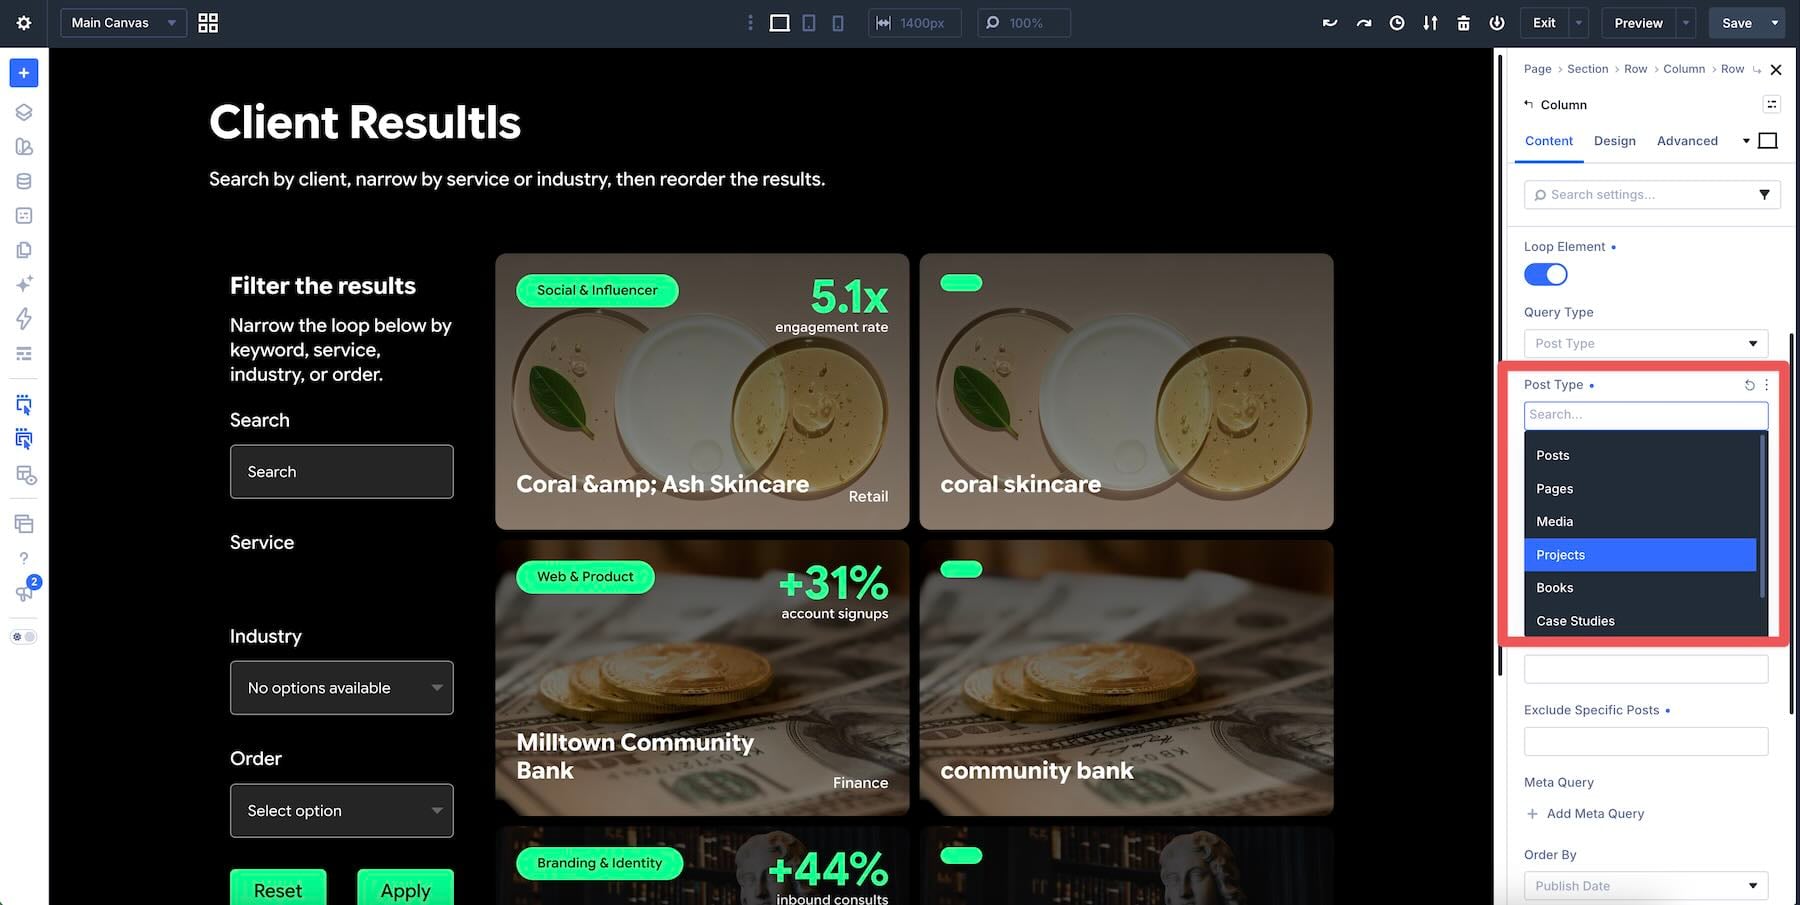
Leave the Query Type set to Post Type, and in the Post Type field, select Projects. Remove Posts if it is also selected.
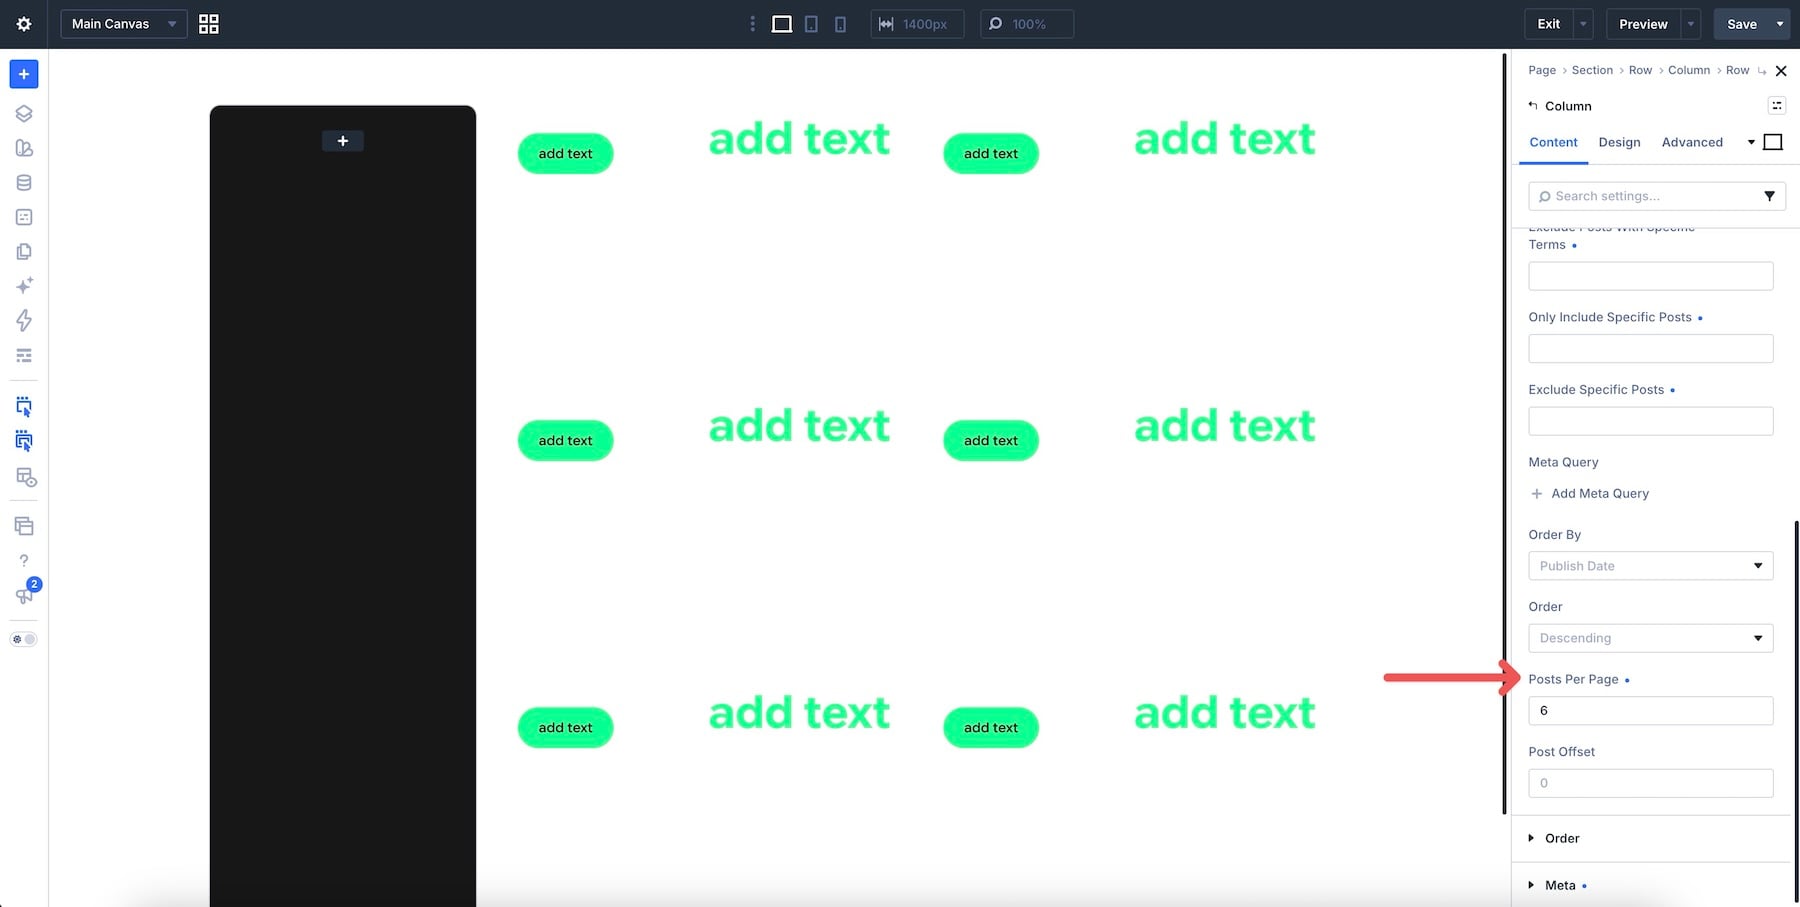
Scroll down to reveal the Posts Per Page field and enter 6. Leave Order By on Publish Date and Order on Descending to show the newest Projects first.
Assign Dynamic Content
With the Loop Builder enabled, we can assign Dynamic Content to each of our fields. Start at the Column level by navigating to the Background option group in the Content tab. Tab over to Background Image, hover over the + Add Background Image field to reveal the Insert Dynamic Content icon.
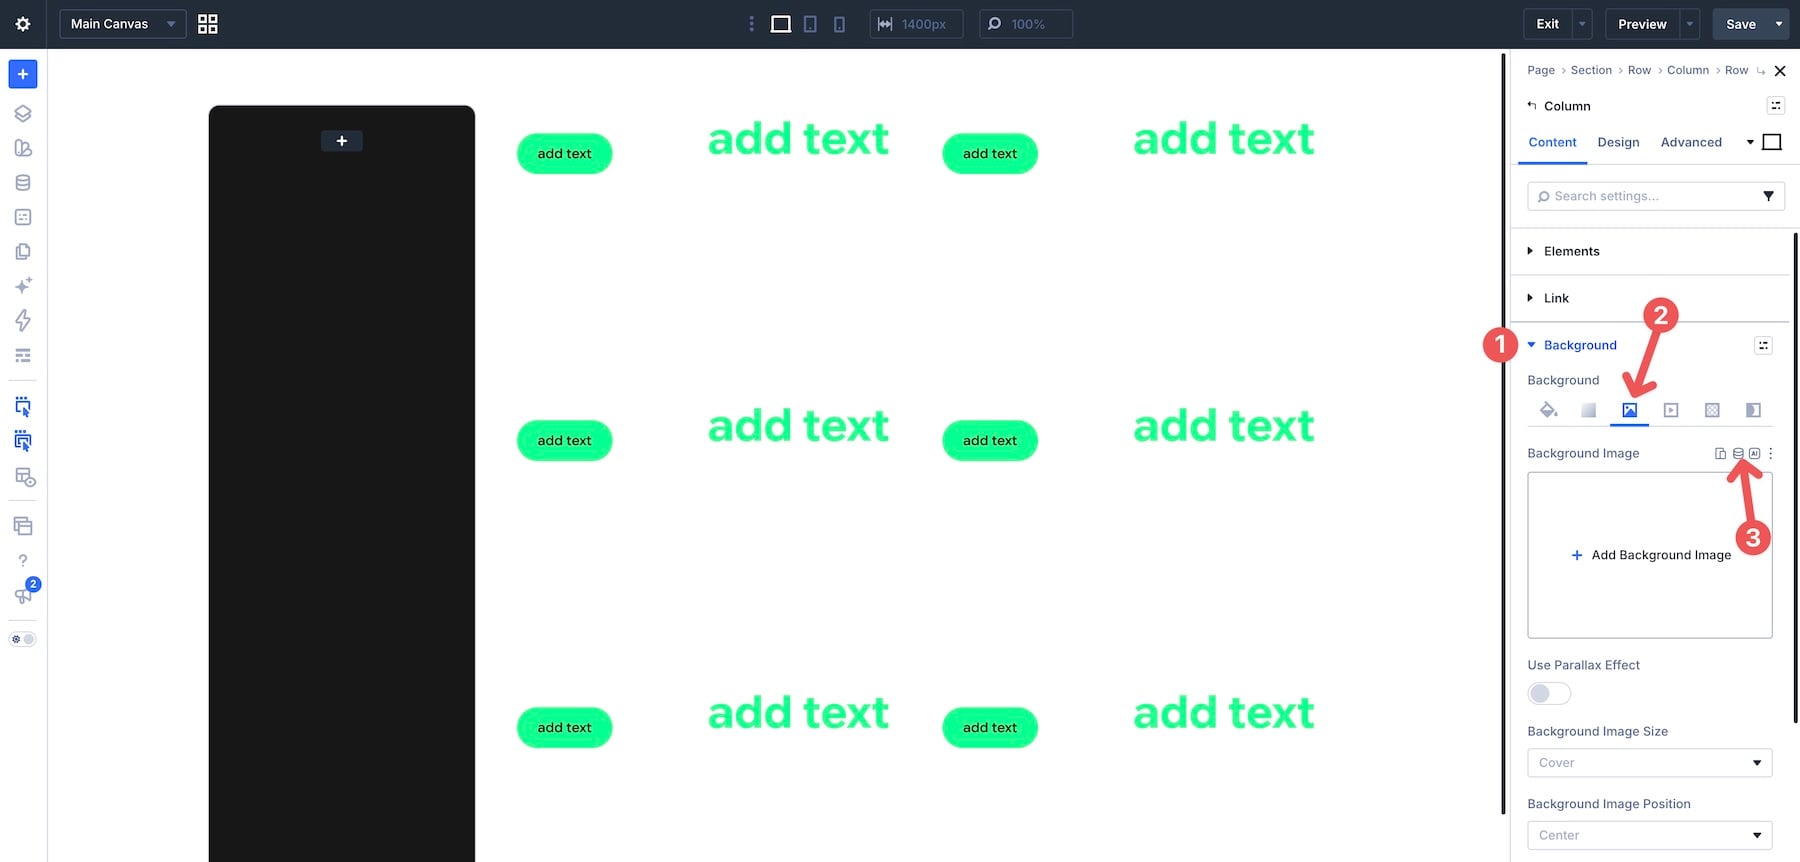
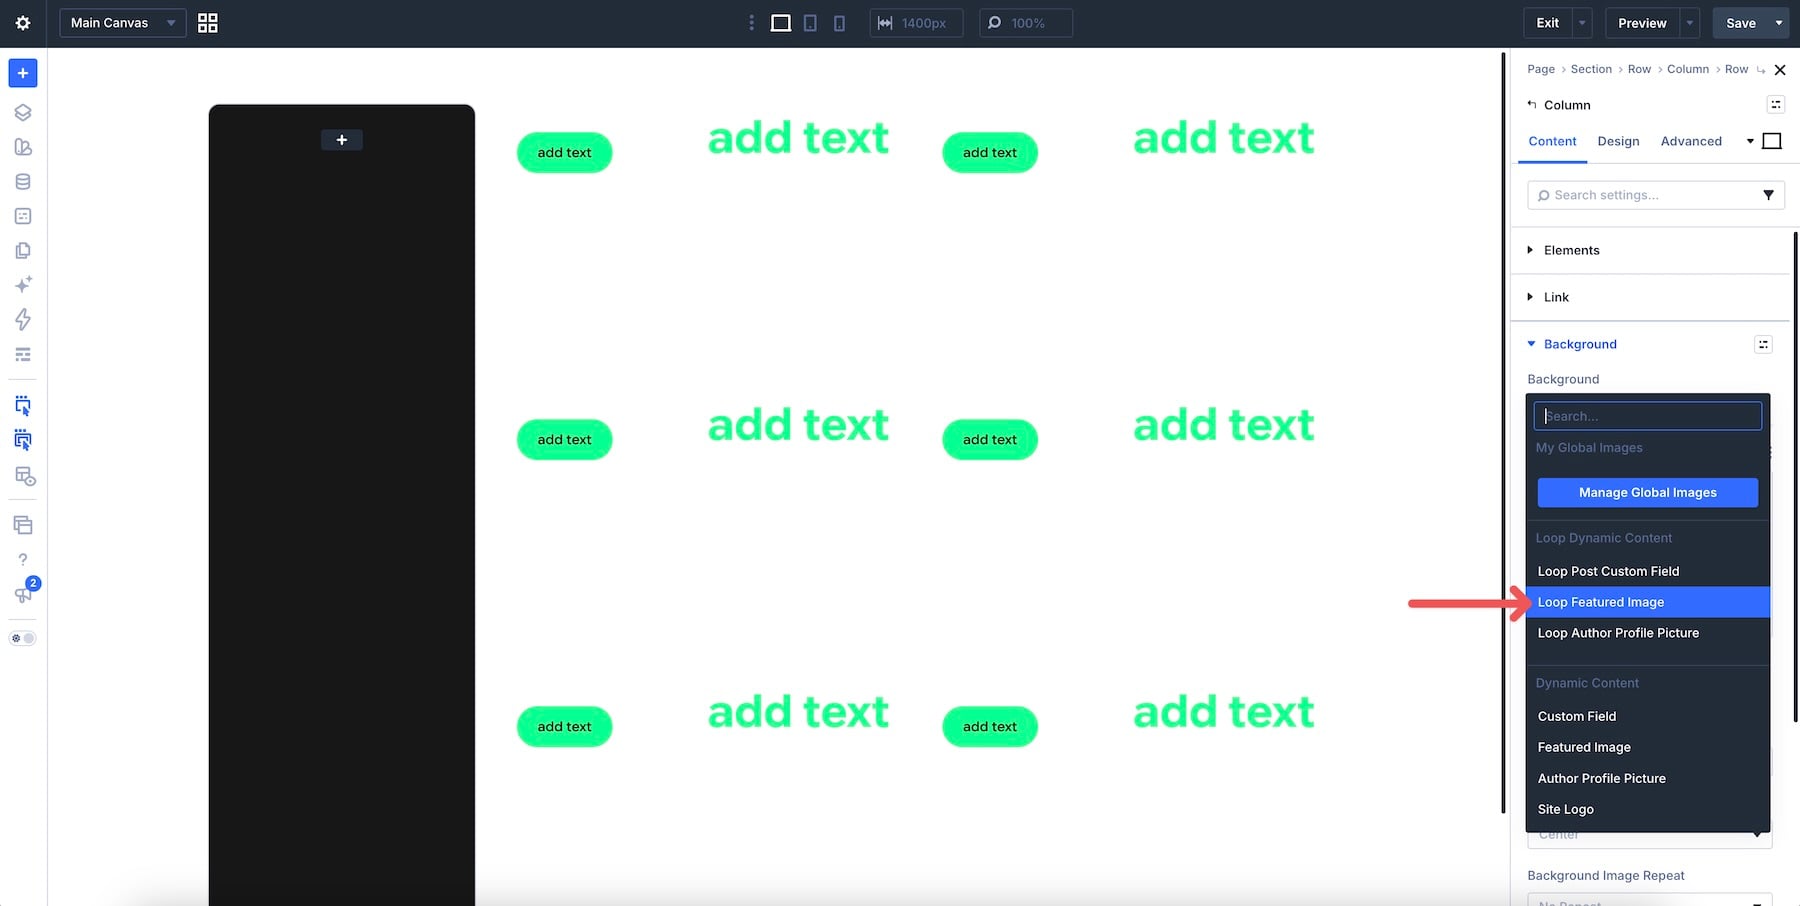
Select Loop Featured Image from the available options.
Then, tab over to the Background Gradient tab and apply a partially transparent gradient to the image so the text pops. Enable Place Gradient Above Background Image so the gradient appears over the featured image.
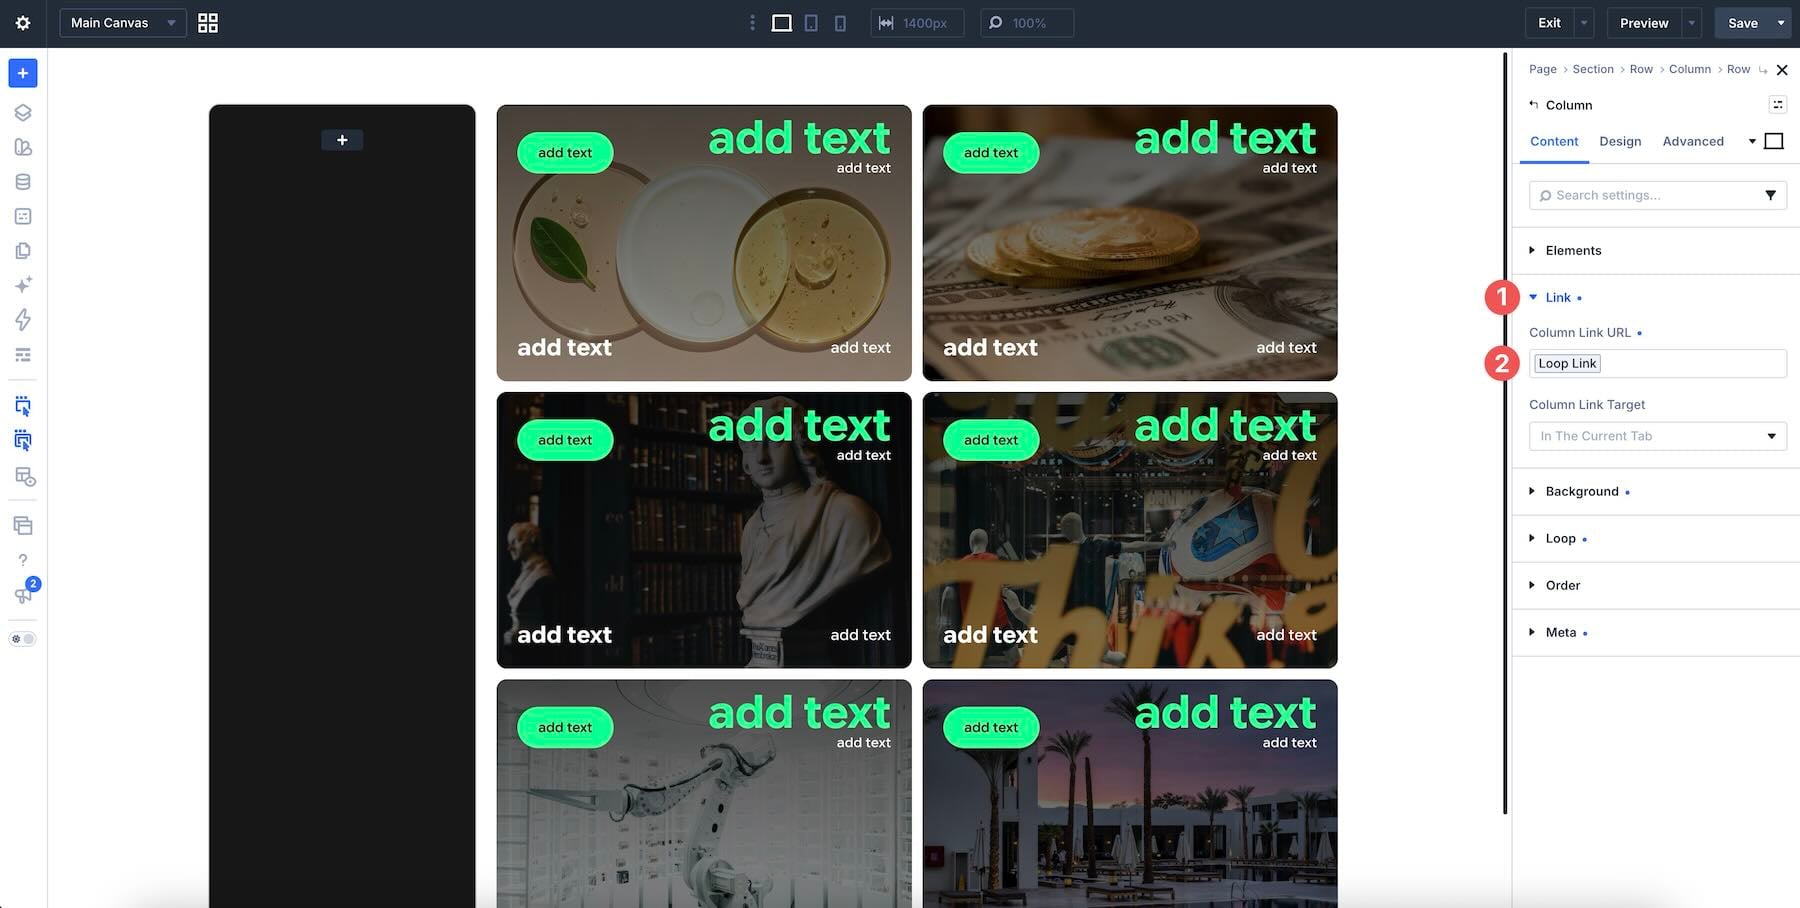
Before leaving the Column settings, expand the Link option group, click the Insert Dynamic Content icon, and insert the Loop Link dynamic field.
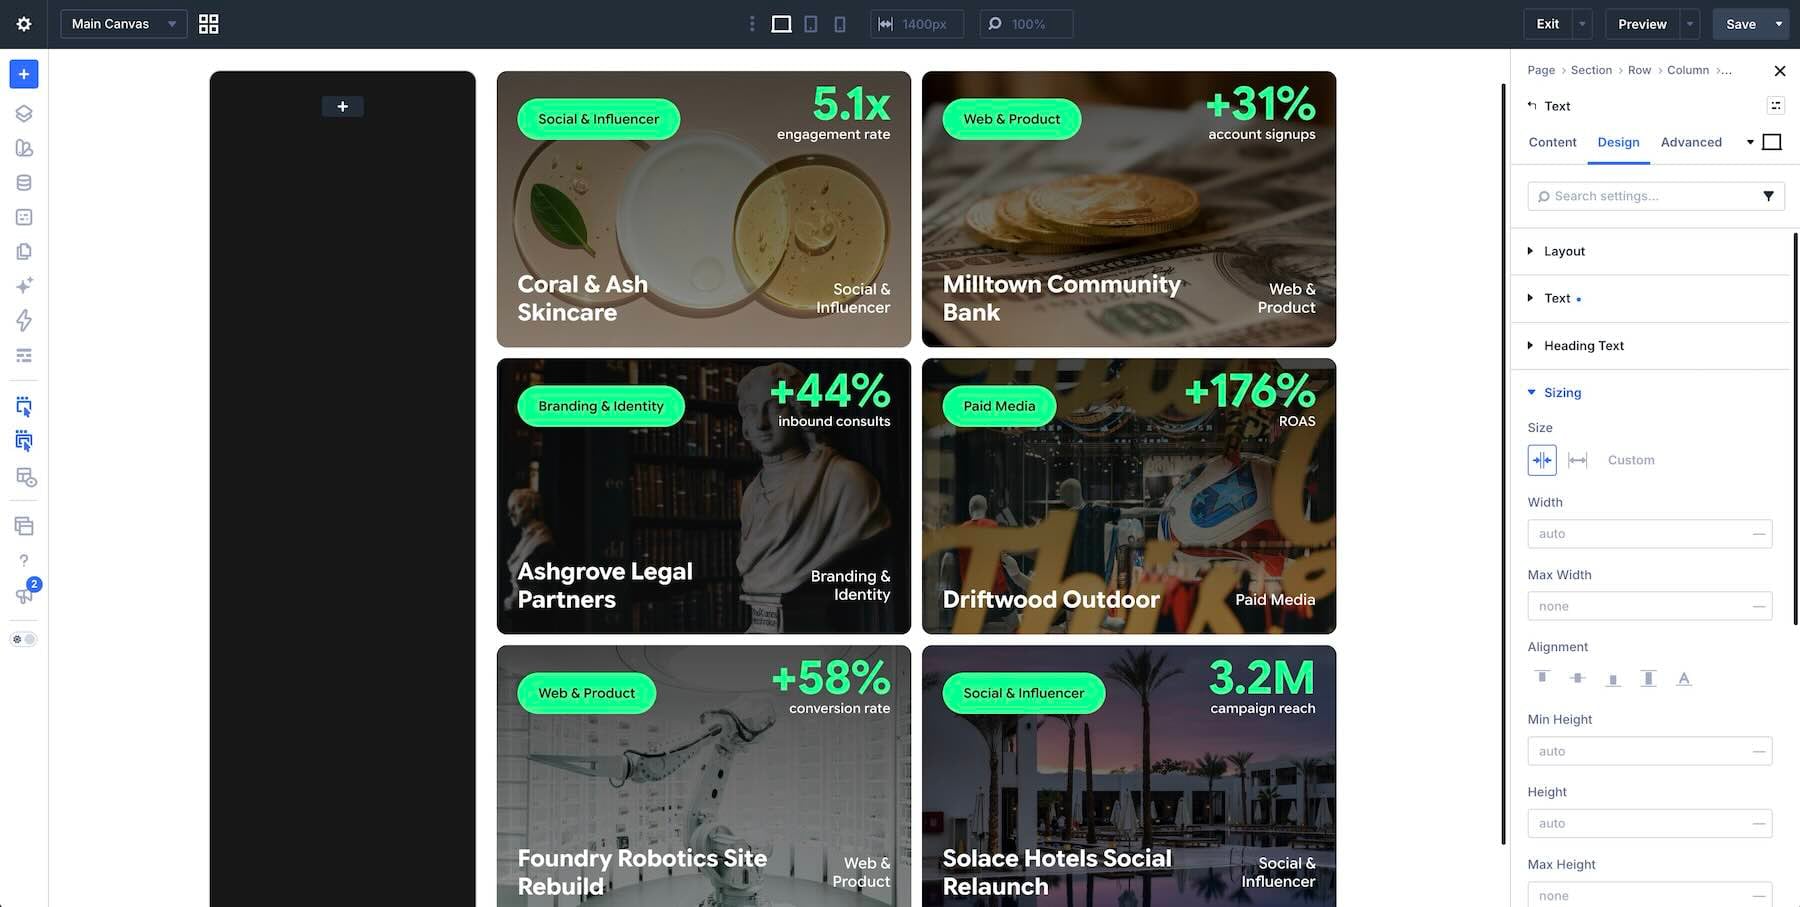
Navigate through each module and assign Dynamic Content to the remaining fields. Clear any placeholder text before inserting the dynamic value. Connect the service badge to Loop Post Terms and set its Taxonomy to Project Categories. Connect the Project title to Loop Post Title.
For the ACF fields, use the Insert Dynamic Content icon in the metric Heading’s Heading field or the Text module’s Body field. Choose Loop Post Custom Field, then select percentage_growth for the metric, growth_metric for its nested label, and industry for the industry text. Apply the variable settings.
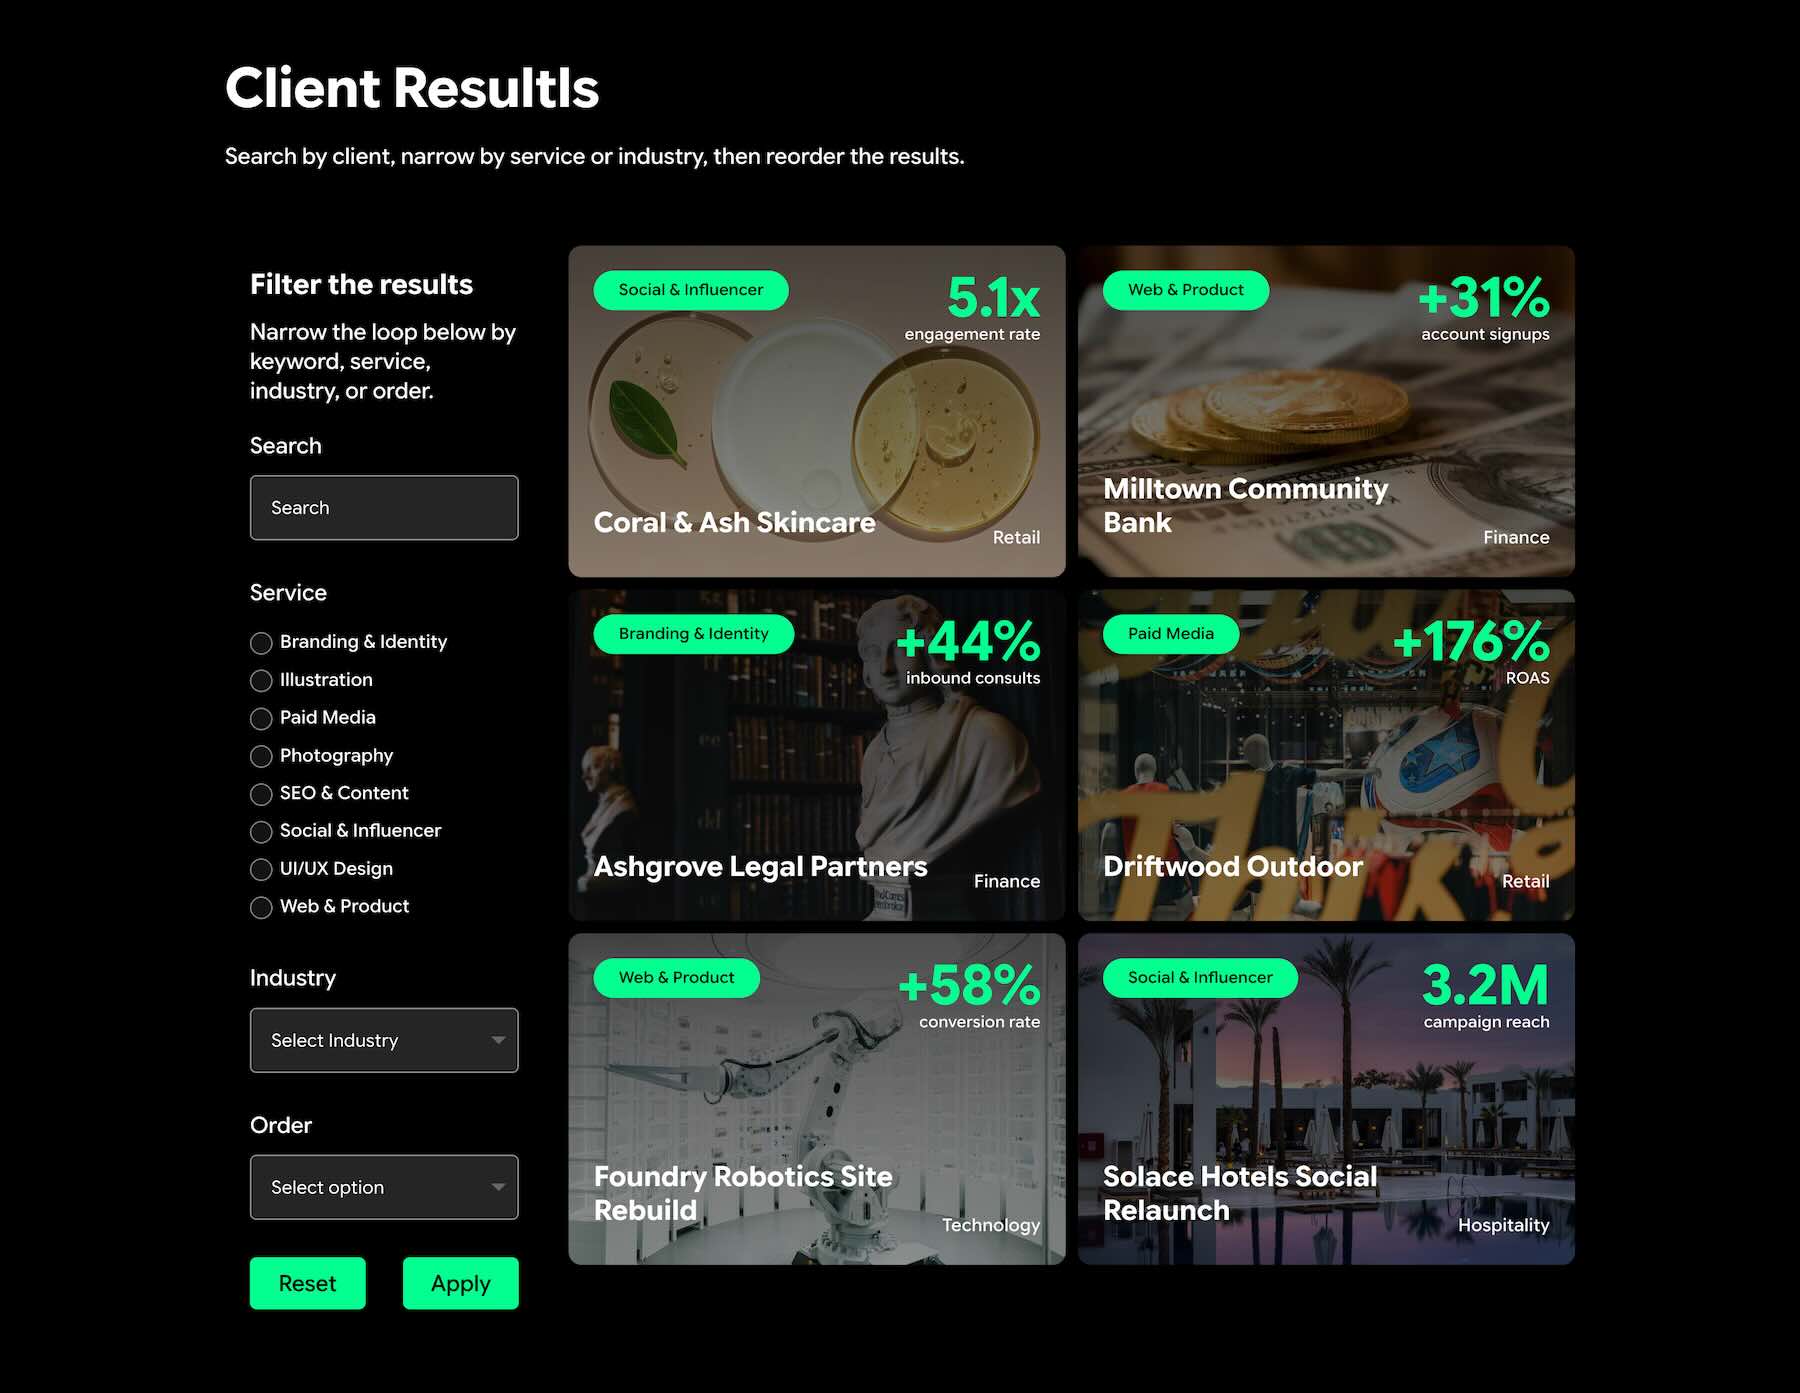
Once all Dynamic Content is connected, your layout should look similar to the image below.
Add The Post Filter Module
Start by adding a Heading and Text module to help the user understand what the form does.
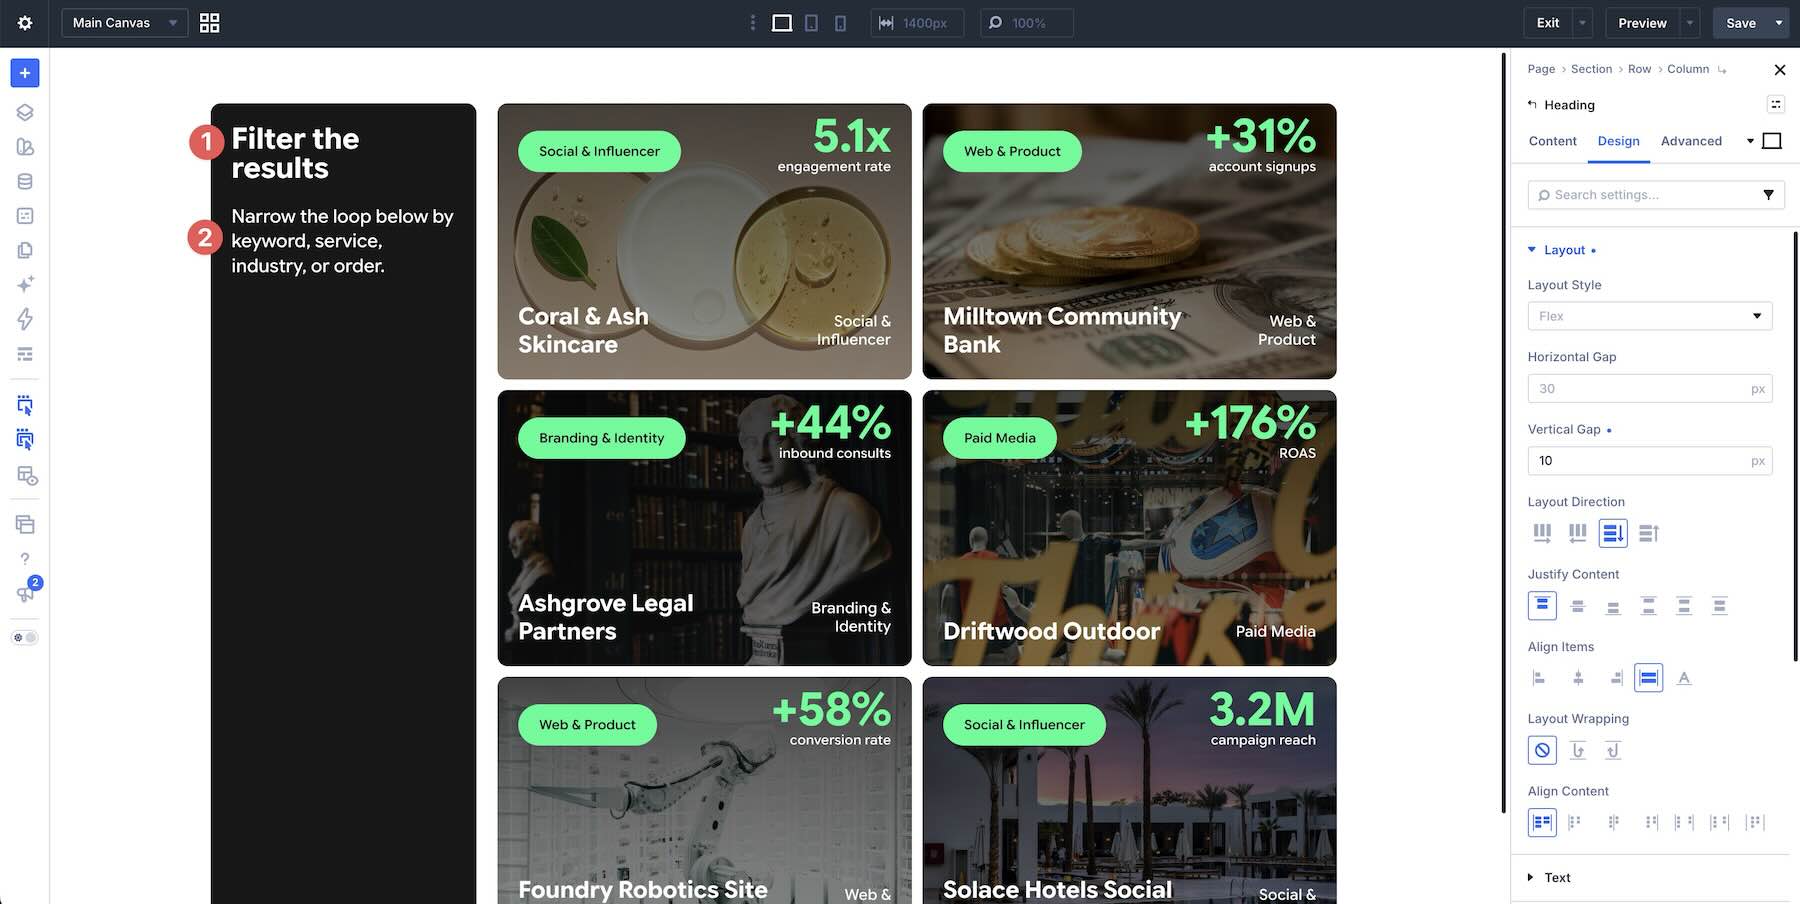
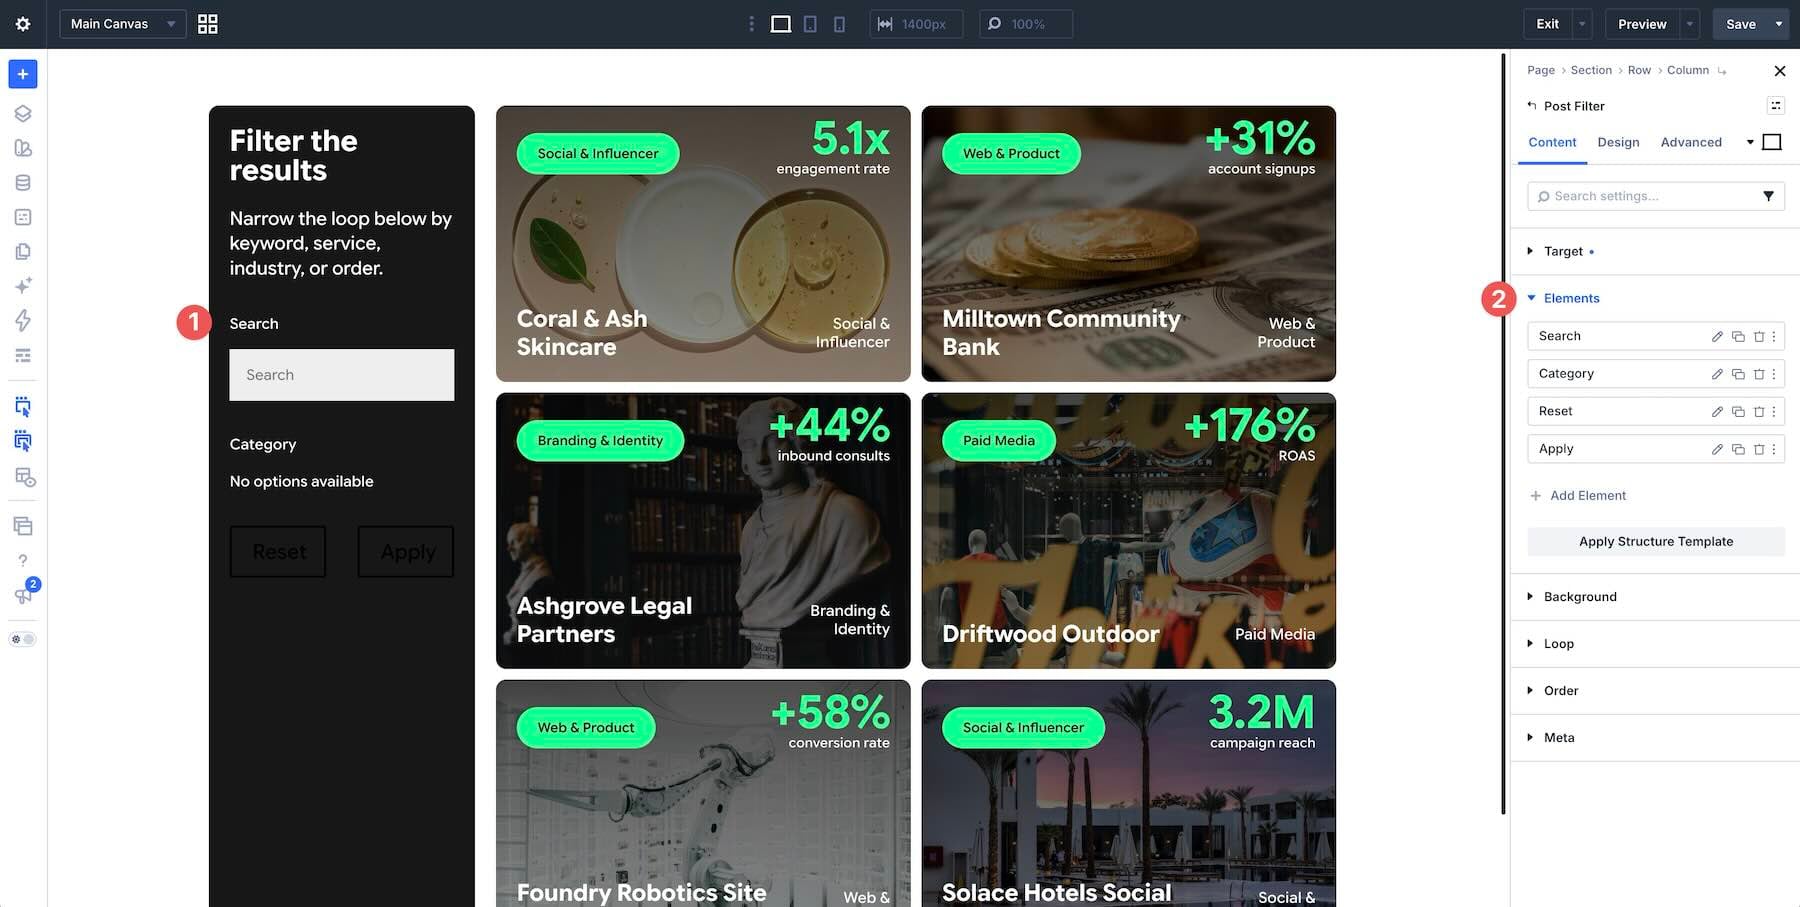
Then, drop a Post Filter module into the left Column and set its Target Loop to the Projects Loop Column. Keep Apply Mode on Submit and Relation on And so the active Service and Industry filters work together.
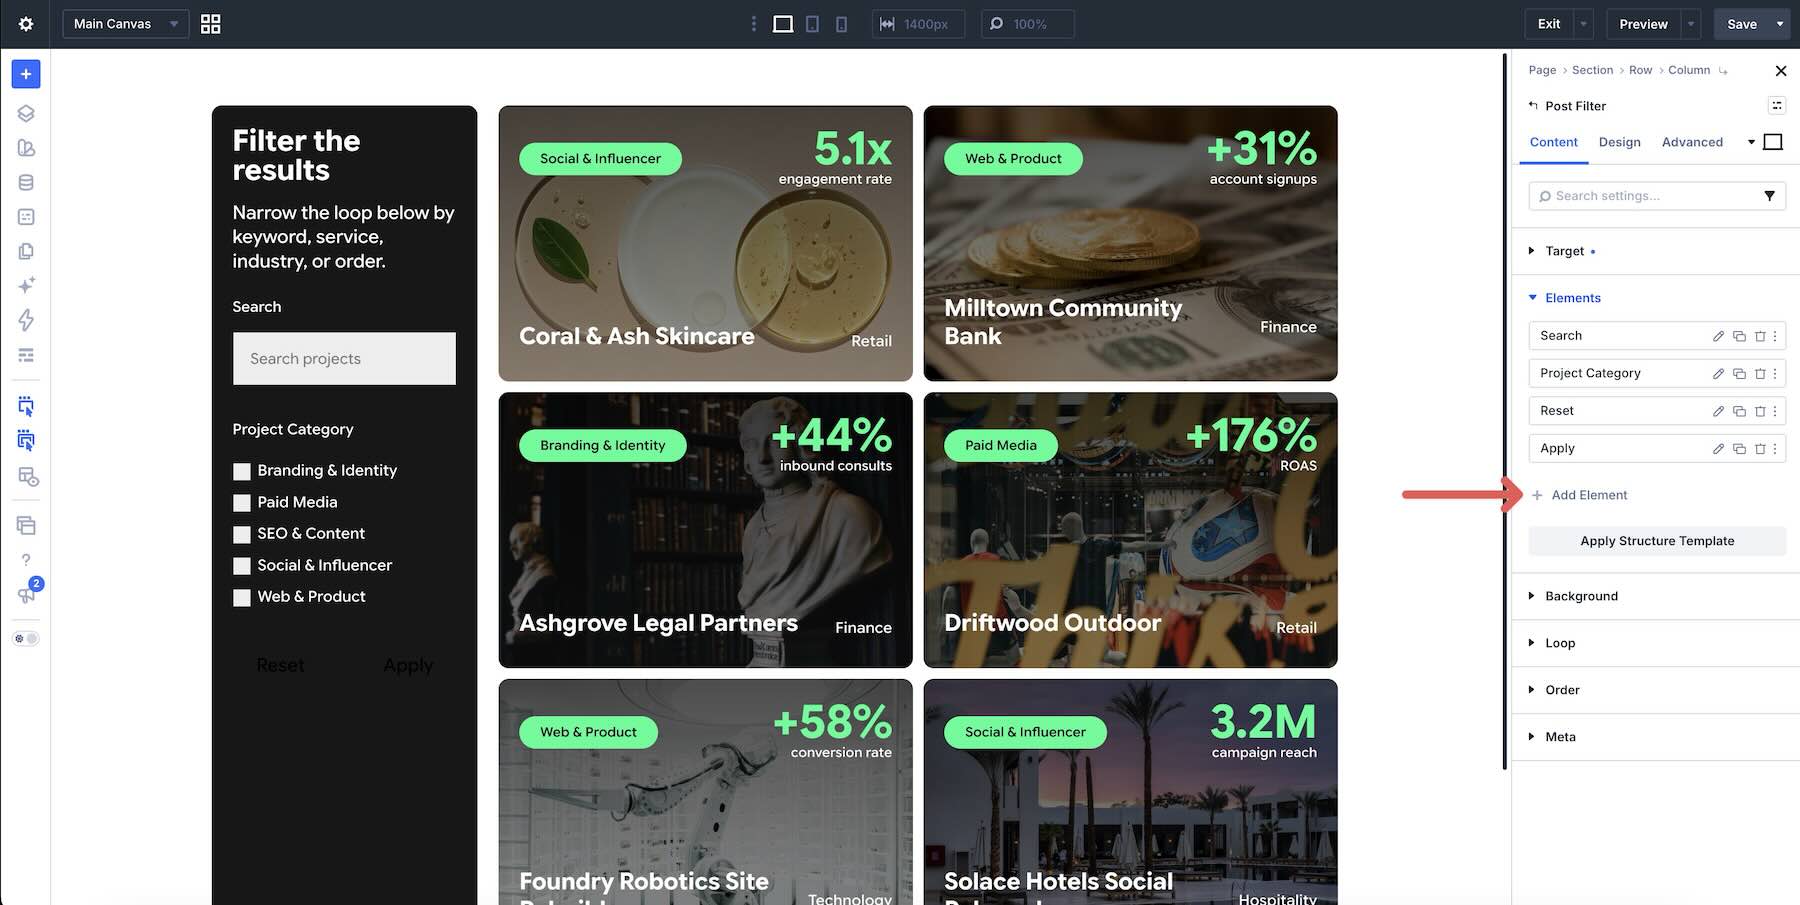
The Post Filter module automatically adds four Post Filter Items when you add the module, including Search, Category, Reset, and Apply. For the form to work correctly, map each query field to the corresponding post data, taxonomy, or custom field.
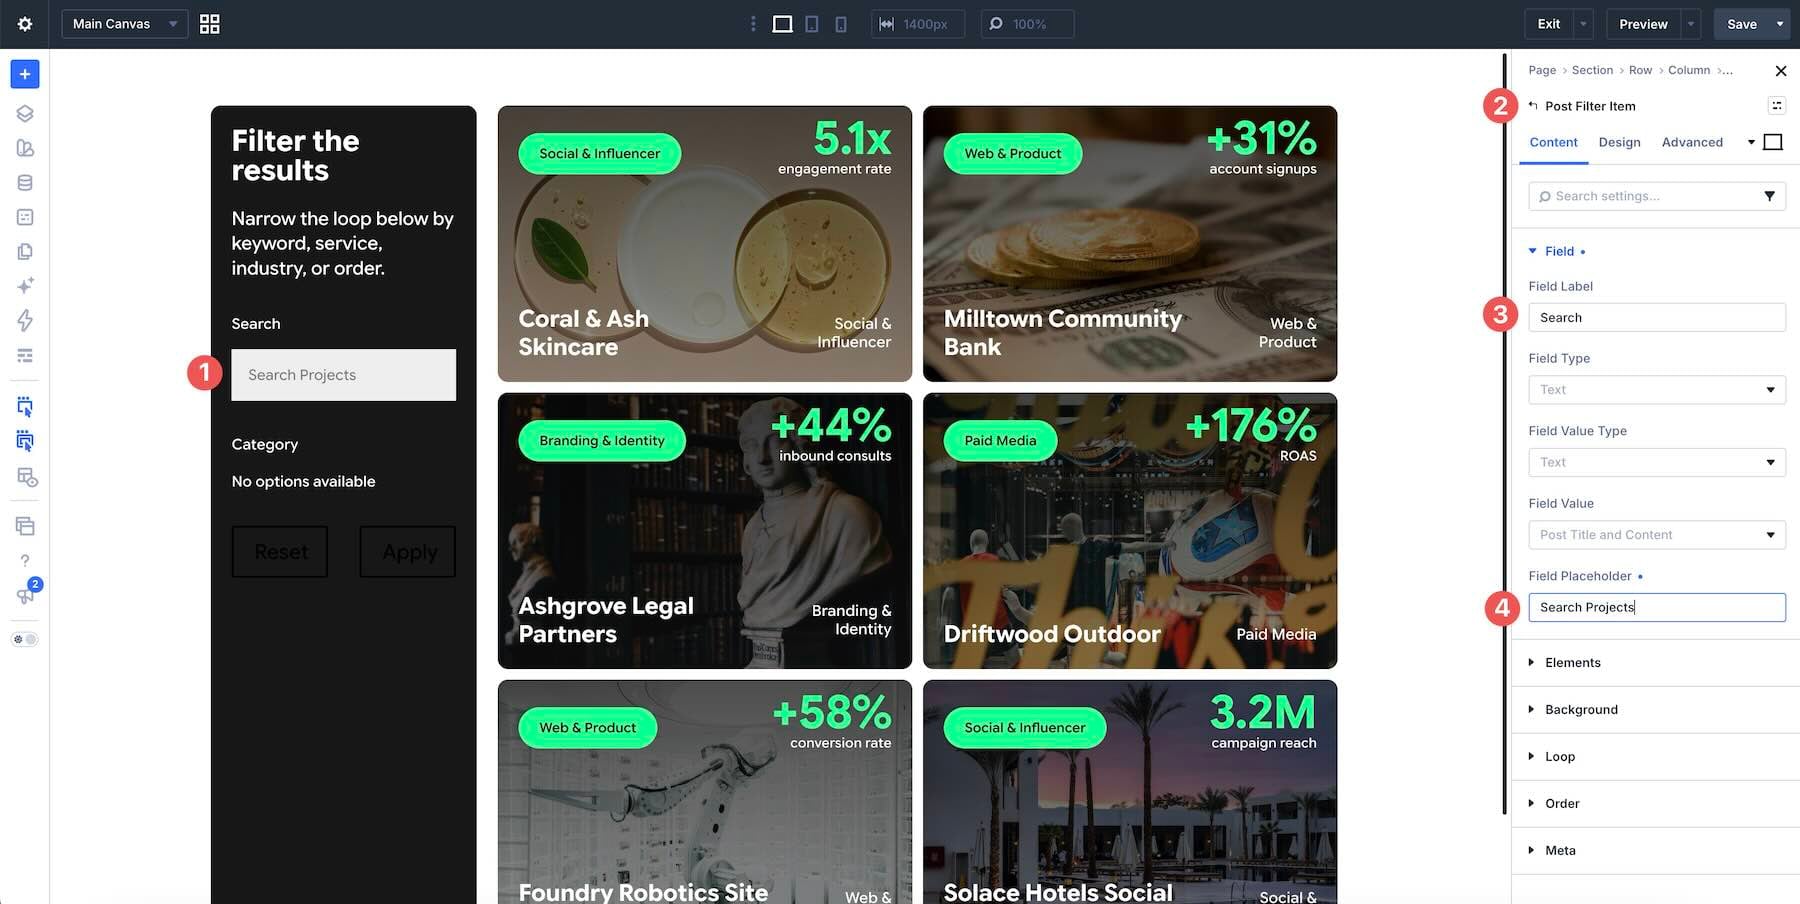
For Search, keep Text as the Field Type and confirm that Field Value is Post Title and Content. Set a Field Label and Field Placeholder.
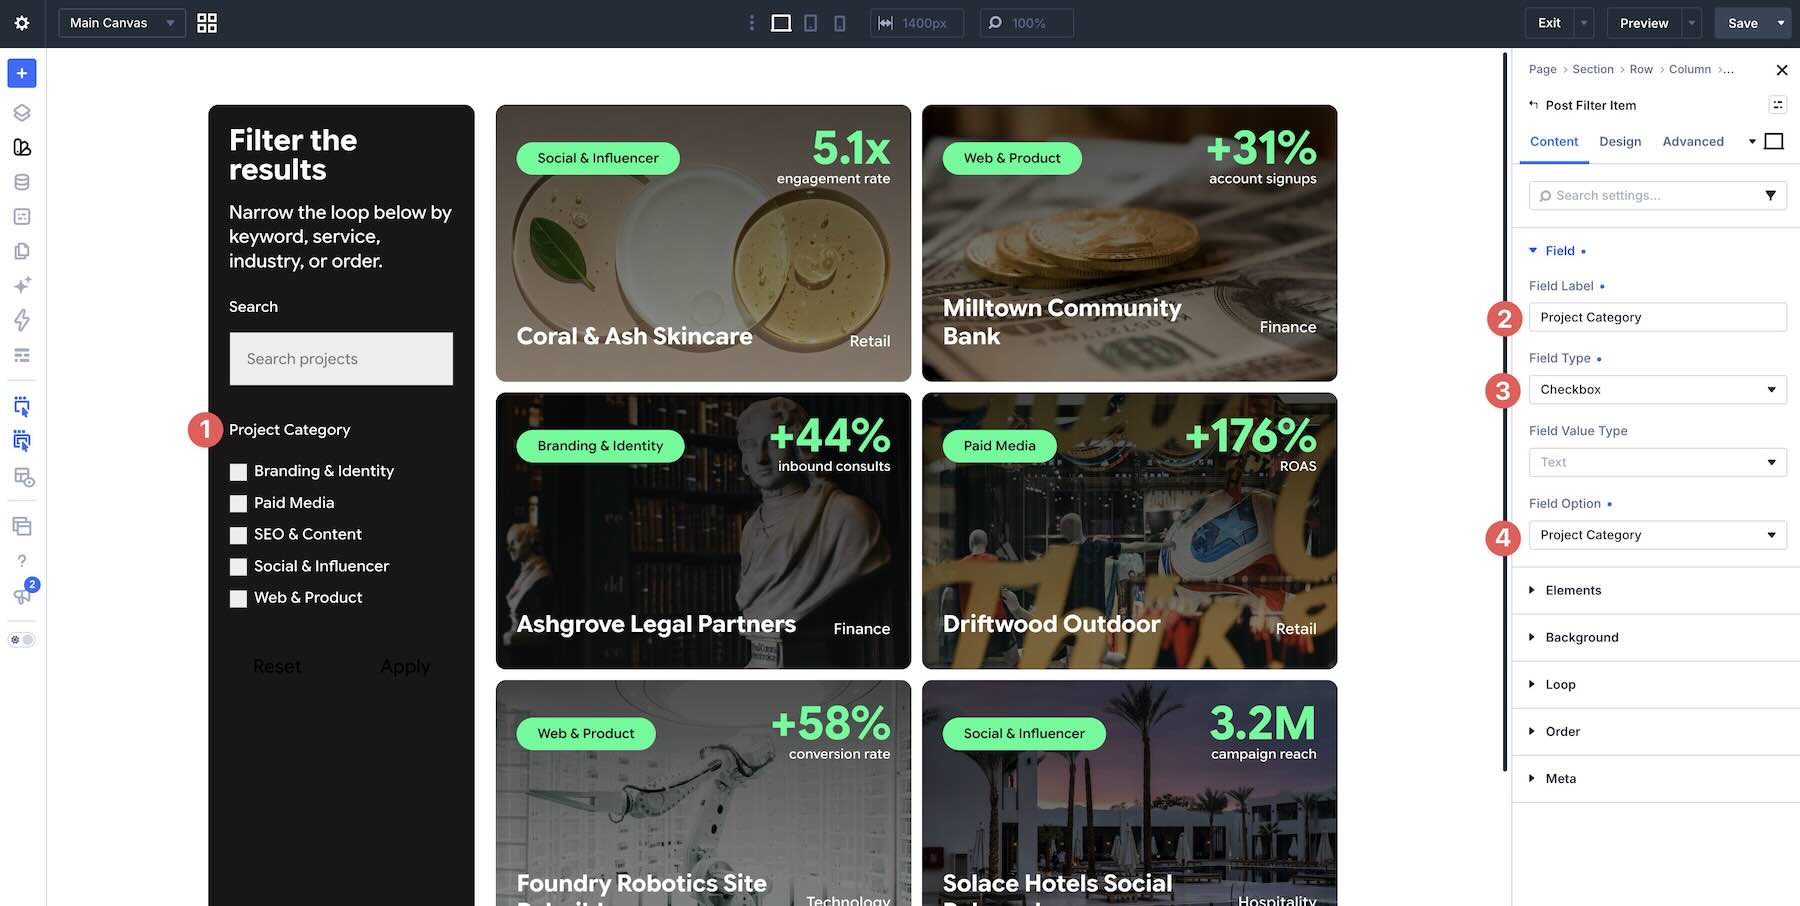
For the Category field, swap the Field Type to Checkbox and select Project Category as the Field Option. Set the Field Label to Service after choosing the Field Option.
We need to add one more Post Filter Item for Industry. Click + Add Element to add a new field.
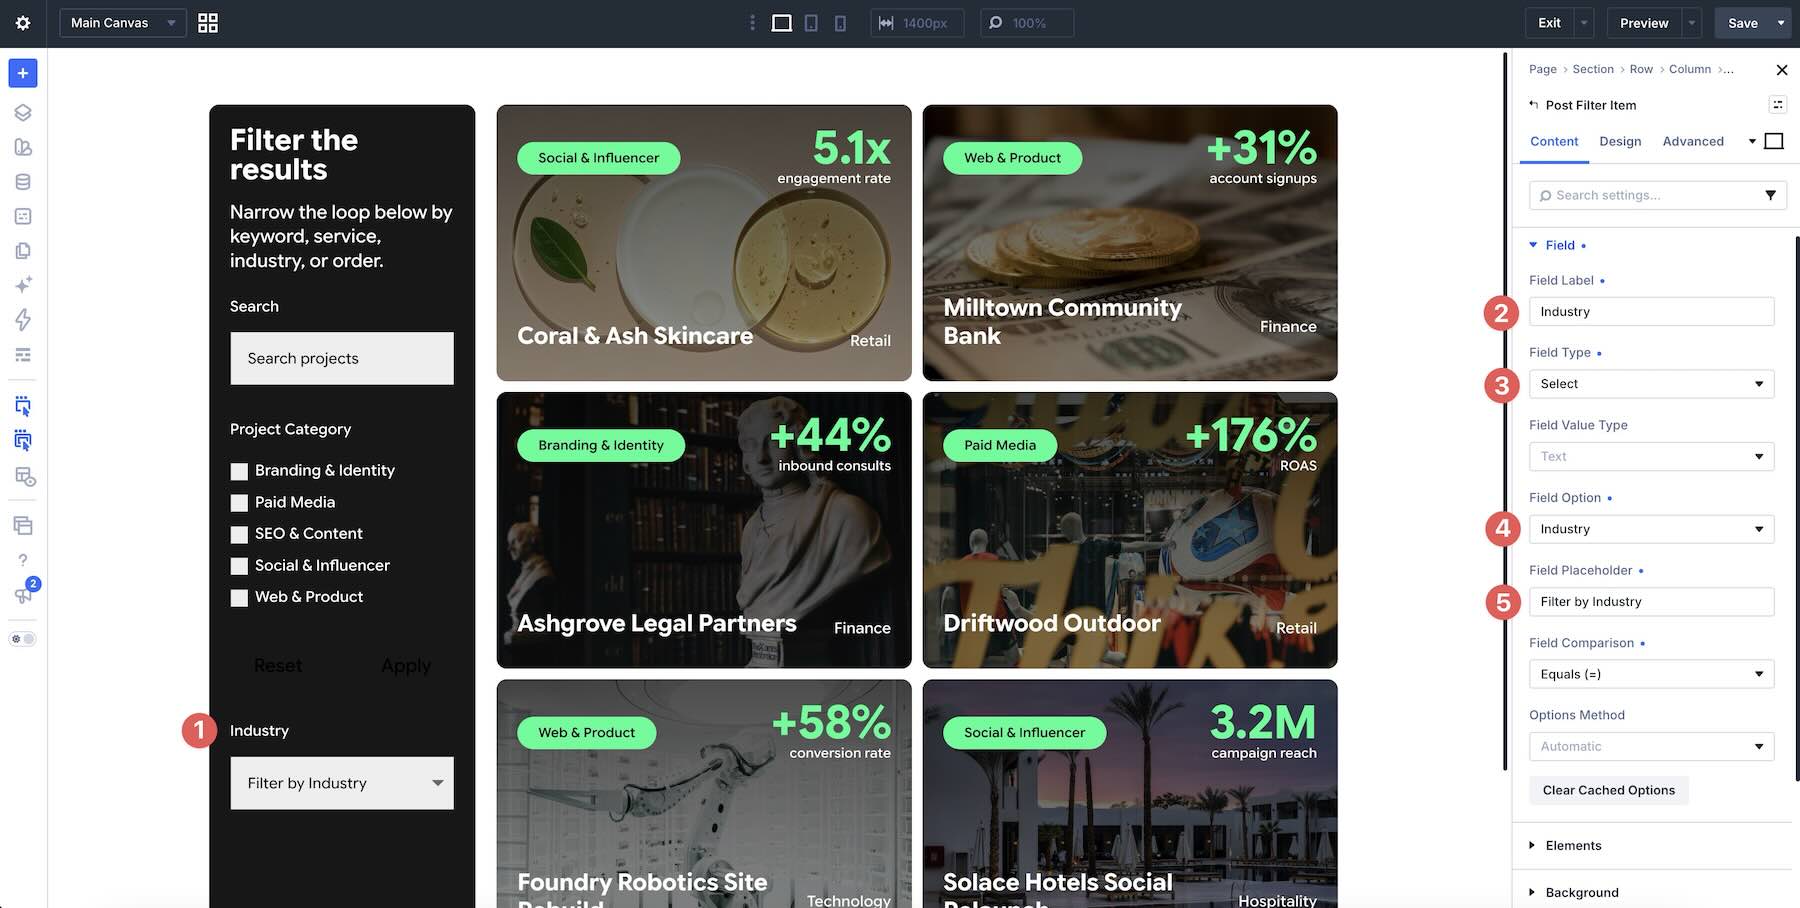
After adding the new field, click to edit it. Choose Select as the Field Type and the industry custom field as the Field Option, then set the Field Label to Industry. Keep Field Value Type on Text, Field Comparison on Equals (=), and Options Method on Automatic. Add a Field Placeholder if desired.
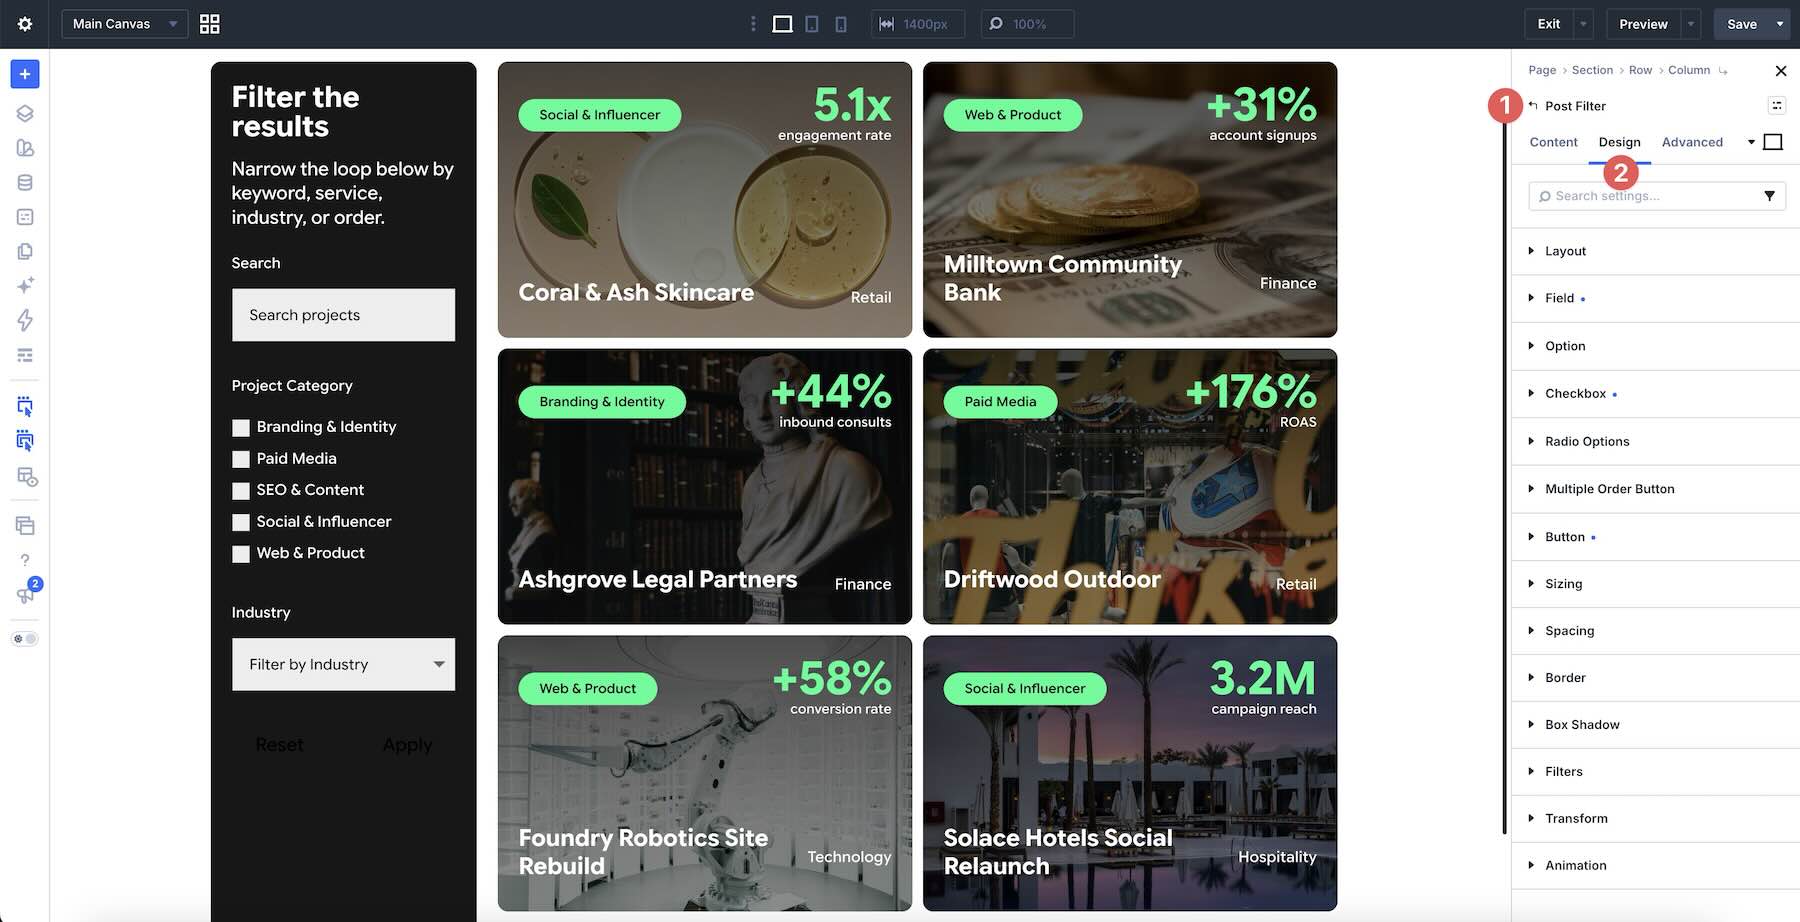
Now we need to reorder the field to be above the buttons, so click and hold the Industry Post Filter Item and drag it just below Project Category.
To let visitors reorder the results, add another Post Filter Item with Order as its Field Type and place it before Reset and Apply. With the Loop ordered by Publish Date, Ascending shows older Projects first and Descending shows newer Projects first. Order By is a separate field type for choosing the sort key.
Style The Form
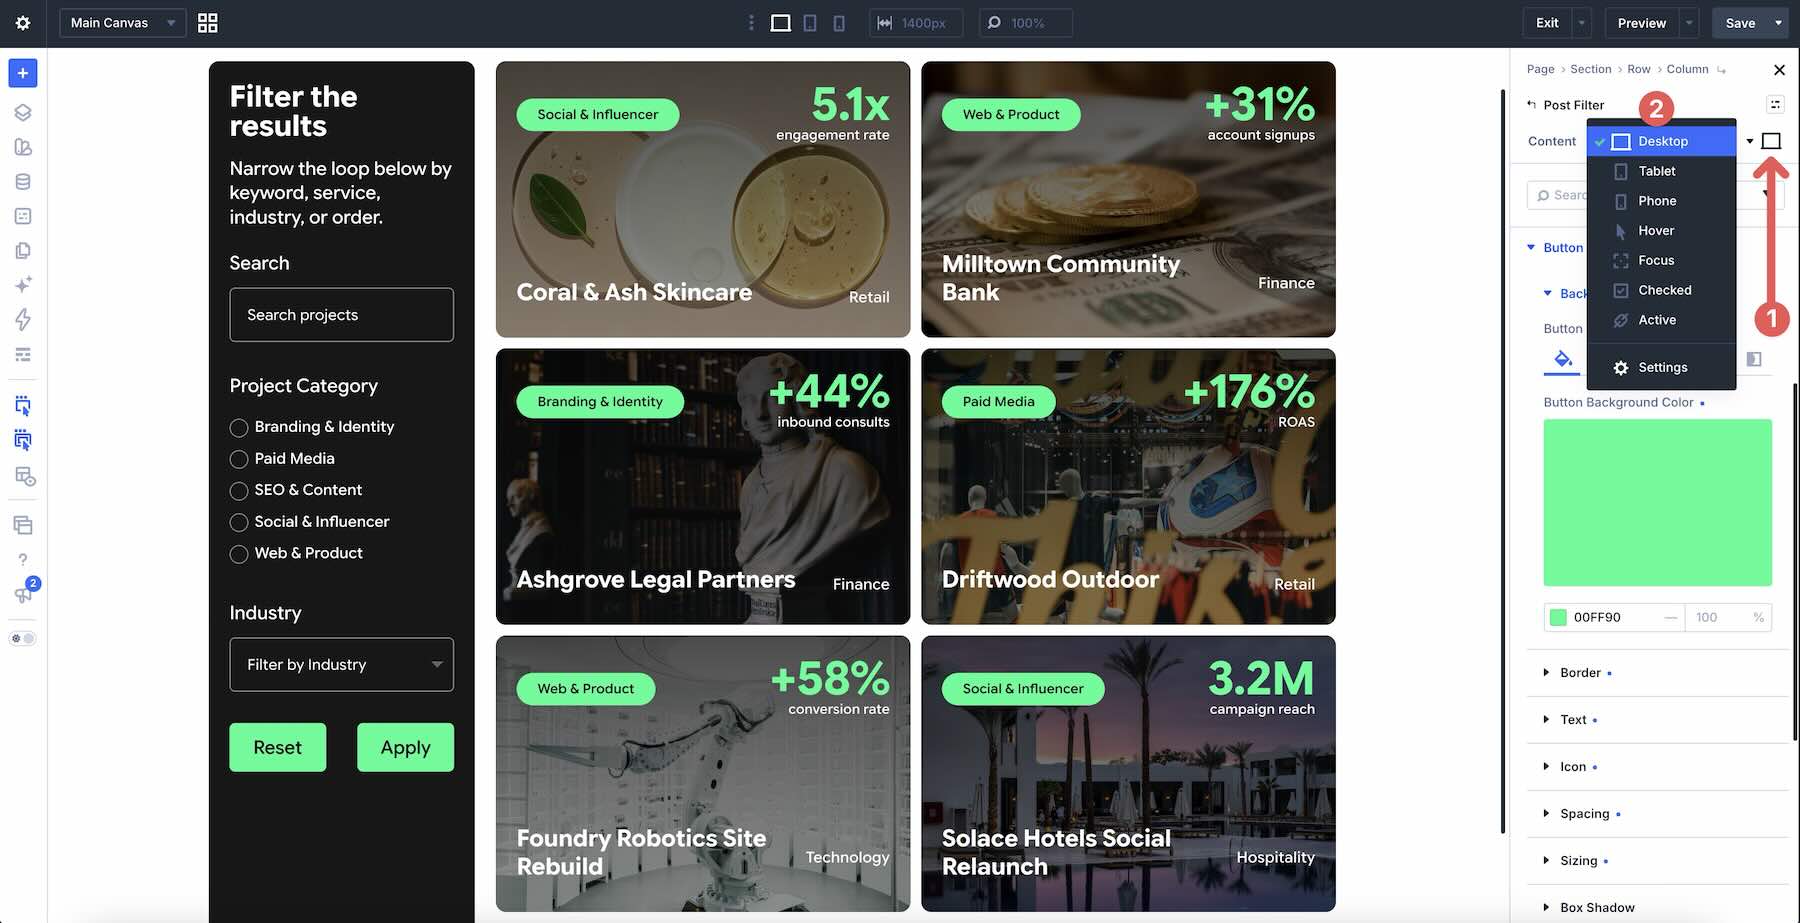
You can style the Post Filter module just like you would any other Divi 5 module. Although you can style individual Post Filter Items, it’s best to make styling changes at the parent element level. Go to the Design tab on the main Post Filter module. Here, you’ll find option groups for Fields, Checkboxes, Radios, Multiple Order Buttons, Buttons, and basic settings for Sizing, Spacing, etc.
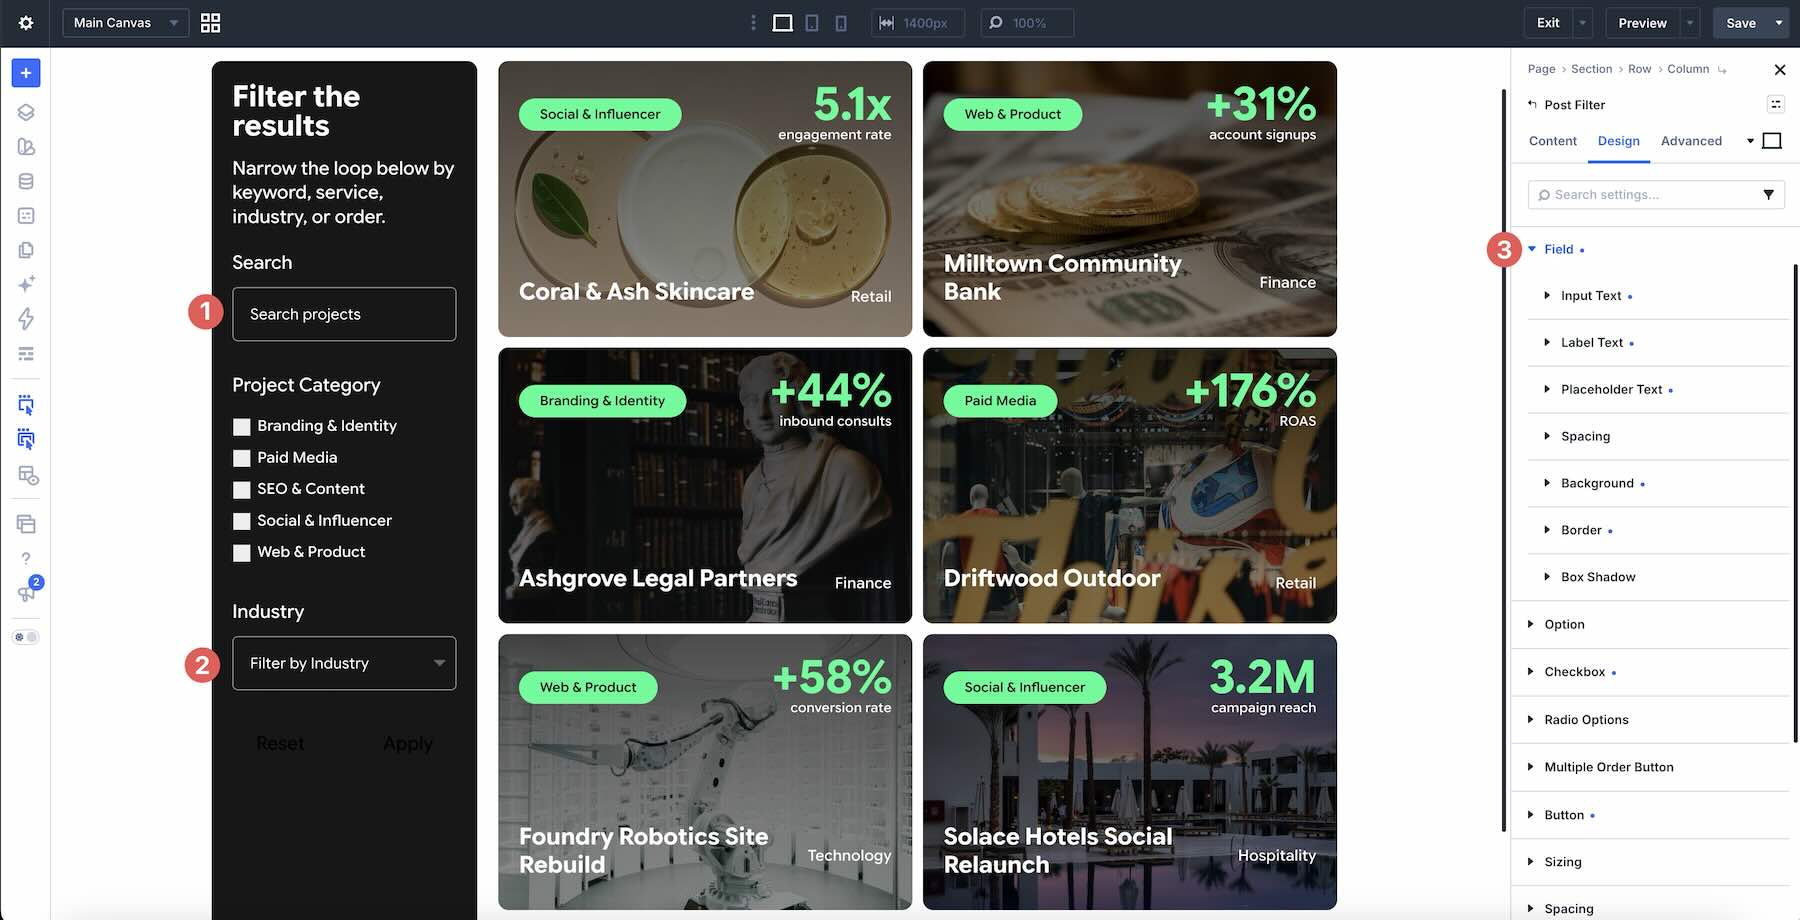
Go through each option group to add styles to the form, starting with the Field option group. For this particular form, these settings control the Search and Industry fields. There are options for Input, Label, and Placeholder Text, along with Background, Border, and Box Shadow.
Make sure to take advantage of Divi 5’s State Picker controls that allow you to change styles based on Hover, Focus, Checked, or Active states.
Add Pagination
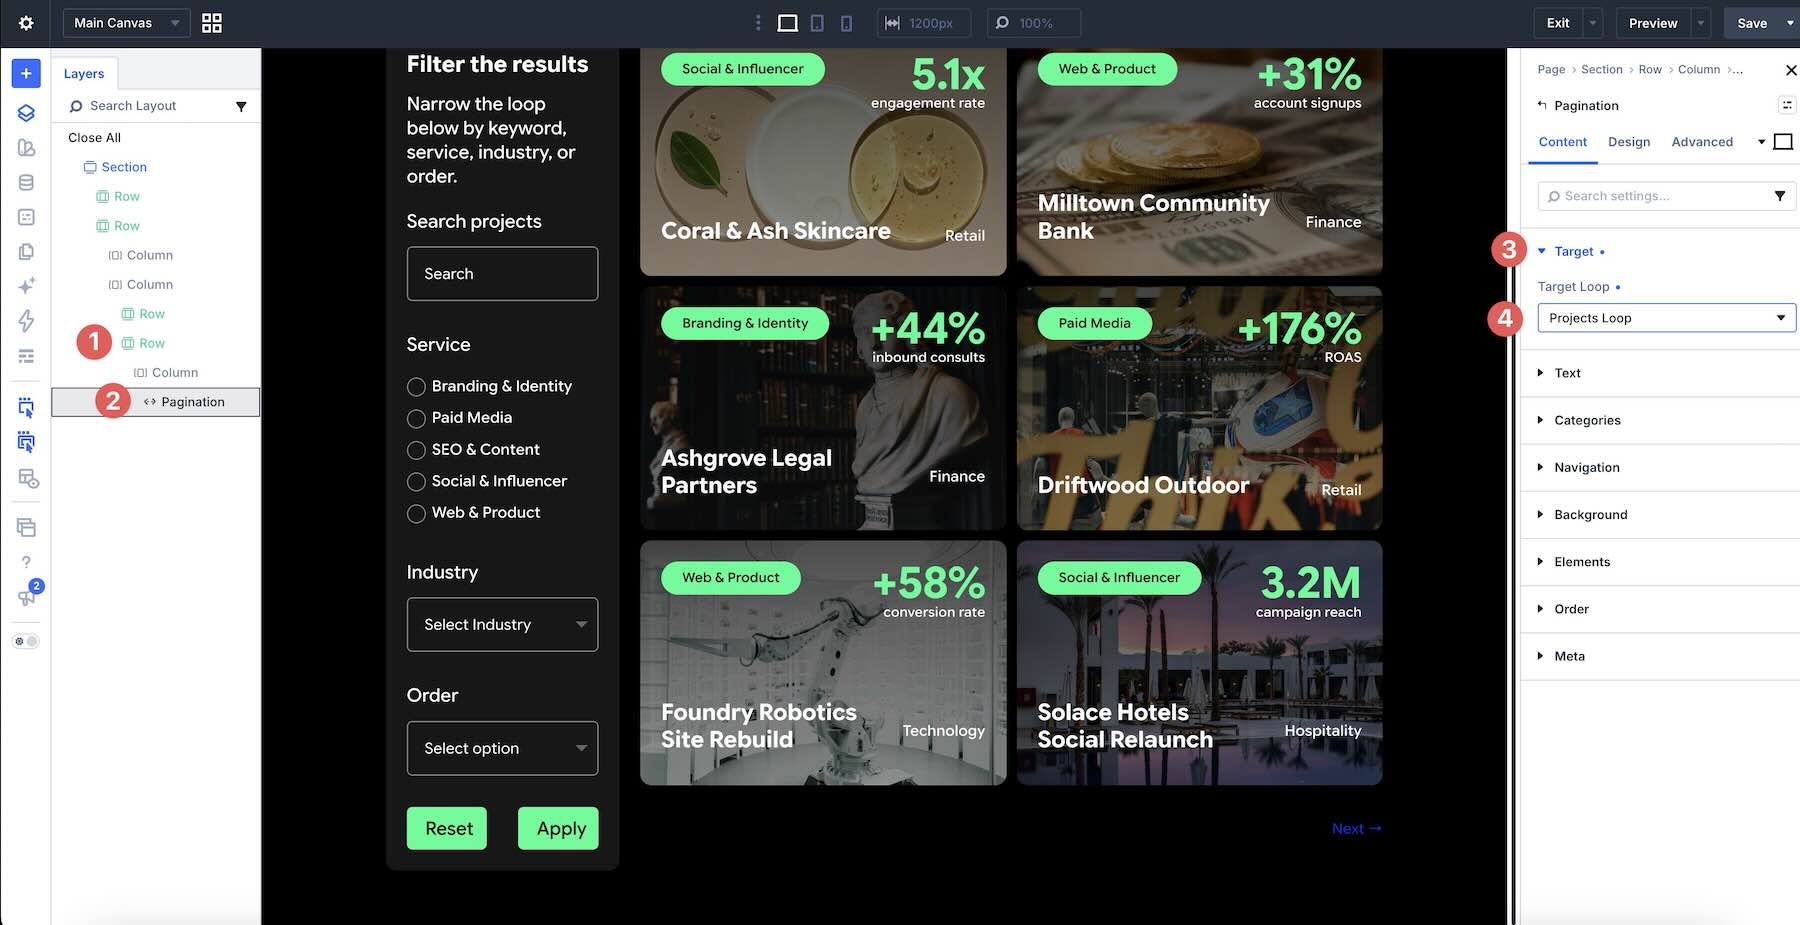
The last module to add to the section is Pagination. This will allow visitors to cycle through the results if there are more than six. In the right outer Column, below the results grid, click to add a new single Column Nested Row. Then, add the Pagination module to the Row. Keep this outside the repeated Projects Loop Column. In the Content tab, expand the Target option group and select the same Projects Loop Column used by the Post Filter in the Target Loop field.
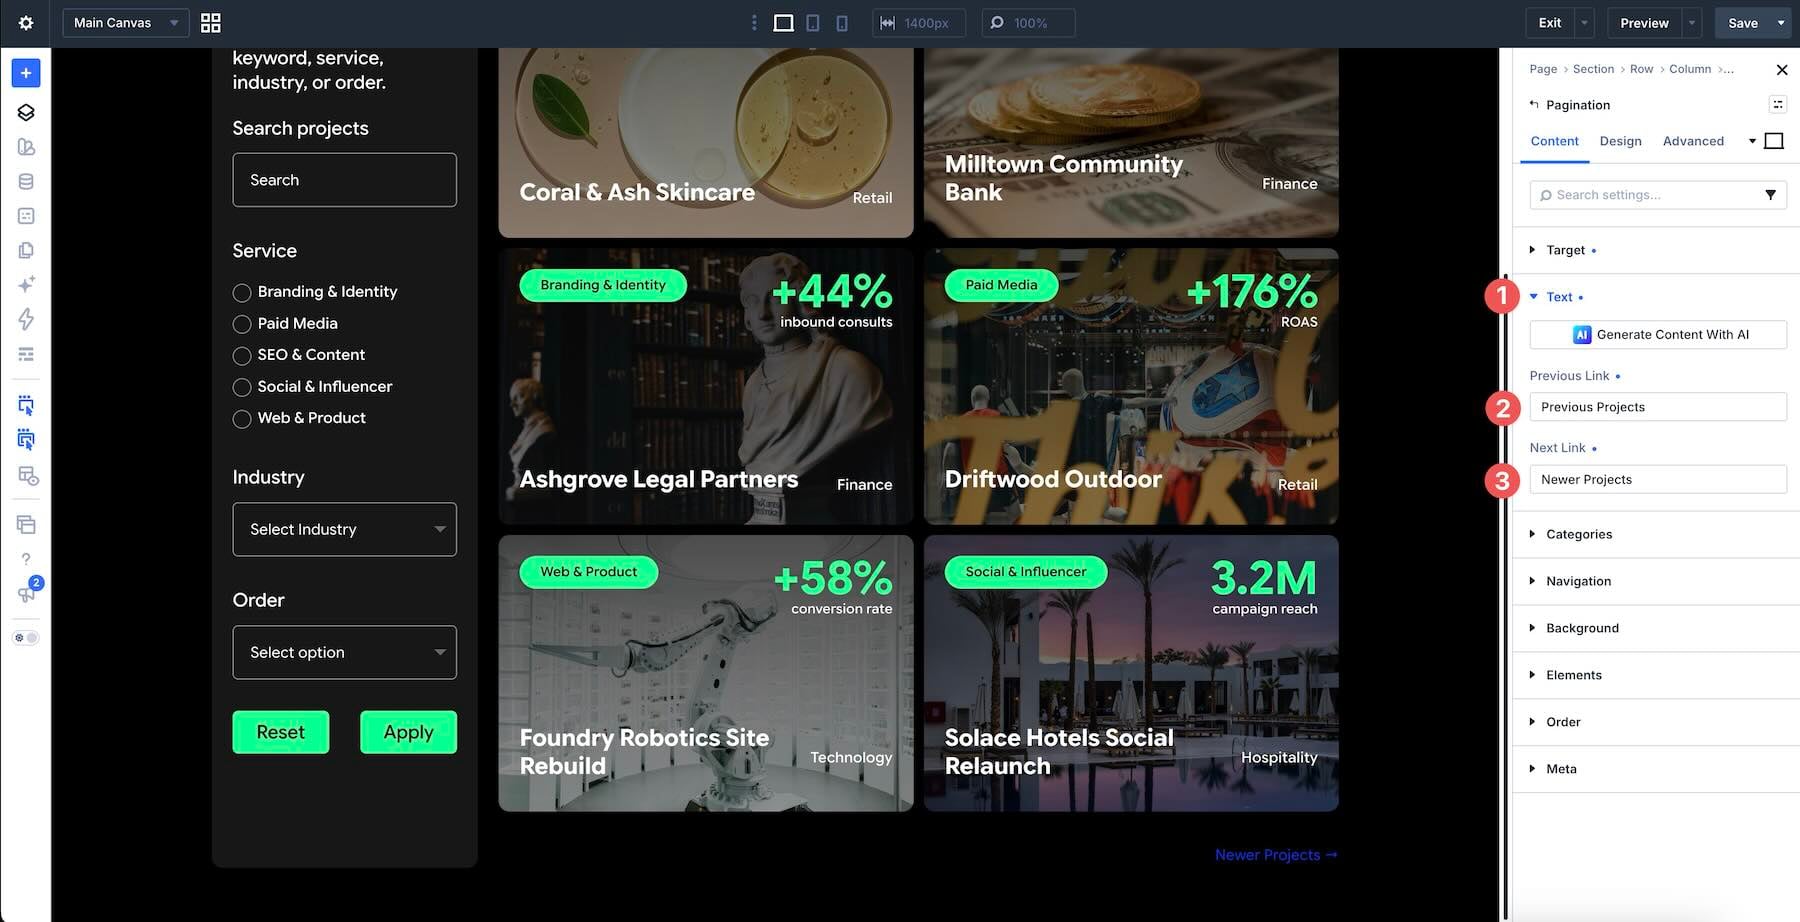
Next, expand the Text option group and place your preferred text into the Previous Link and Next Link fields.
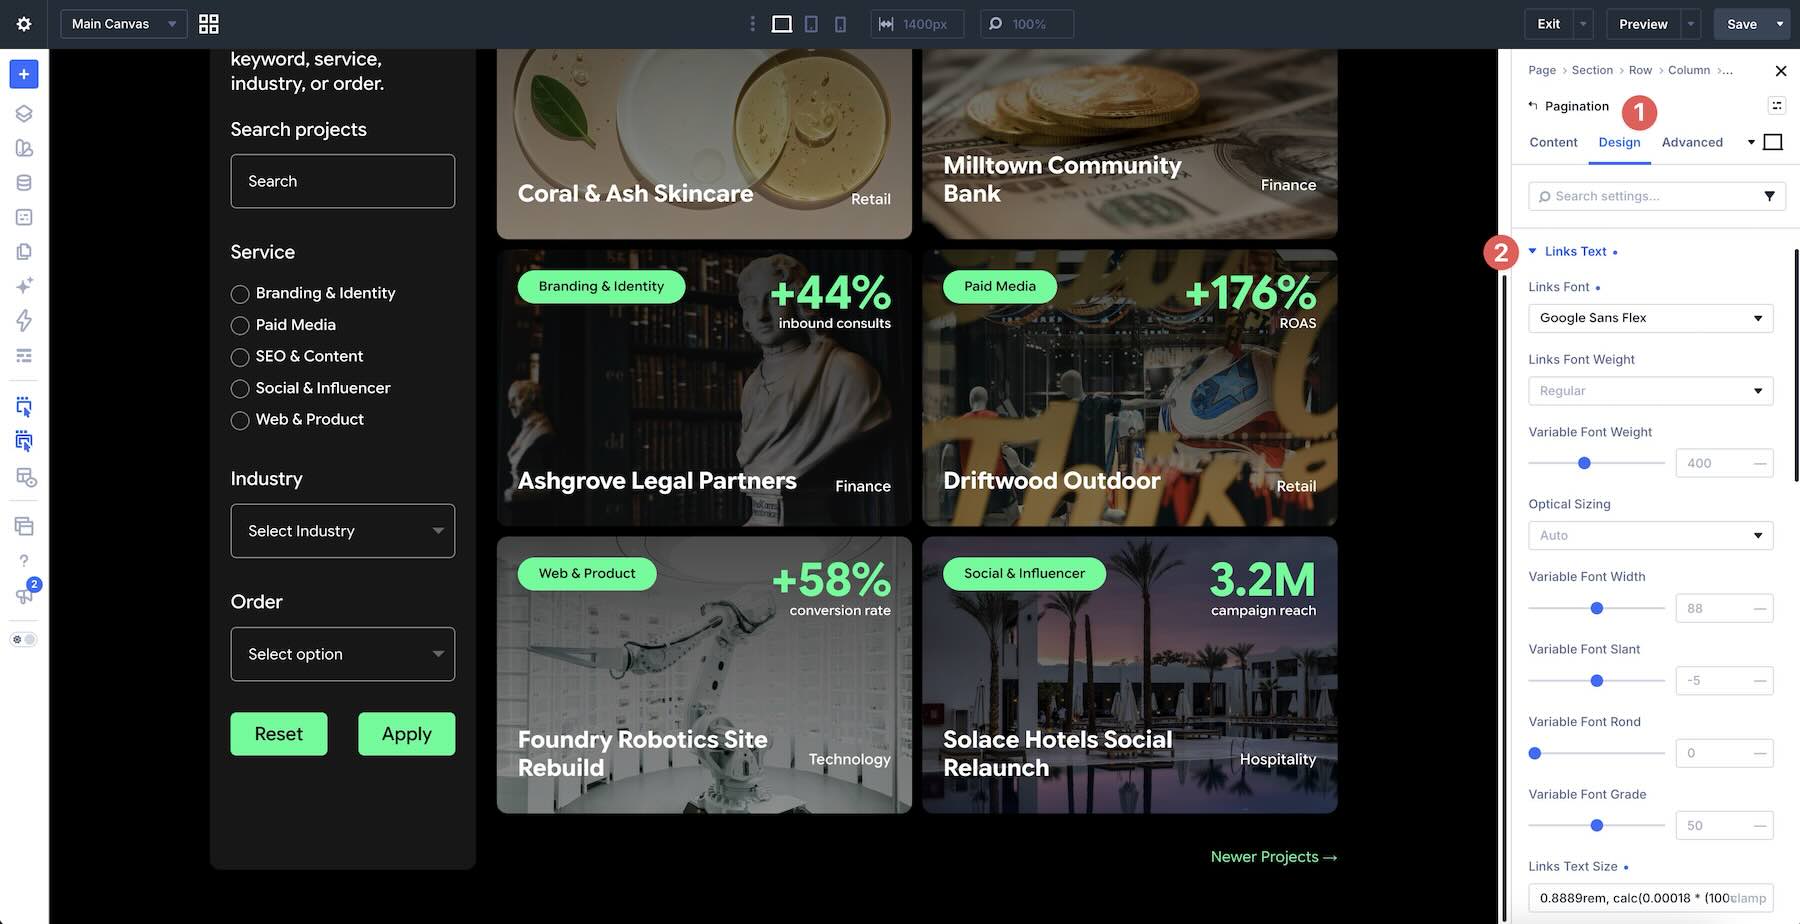
Finally, swap to the Design tab, expand the Link Text option group, and style the links.
Configure Responsive Behavior
With all modules present and styled, we’ll use Divi 5’s Customizable Responsive Breakpoints to make any necessary changes to the layout. Start by enabling the Tablet Breakpoint.
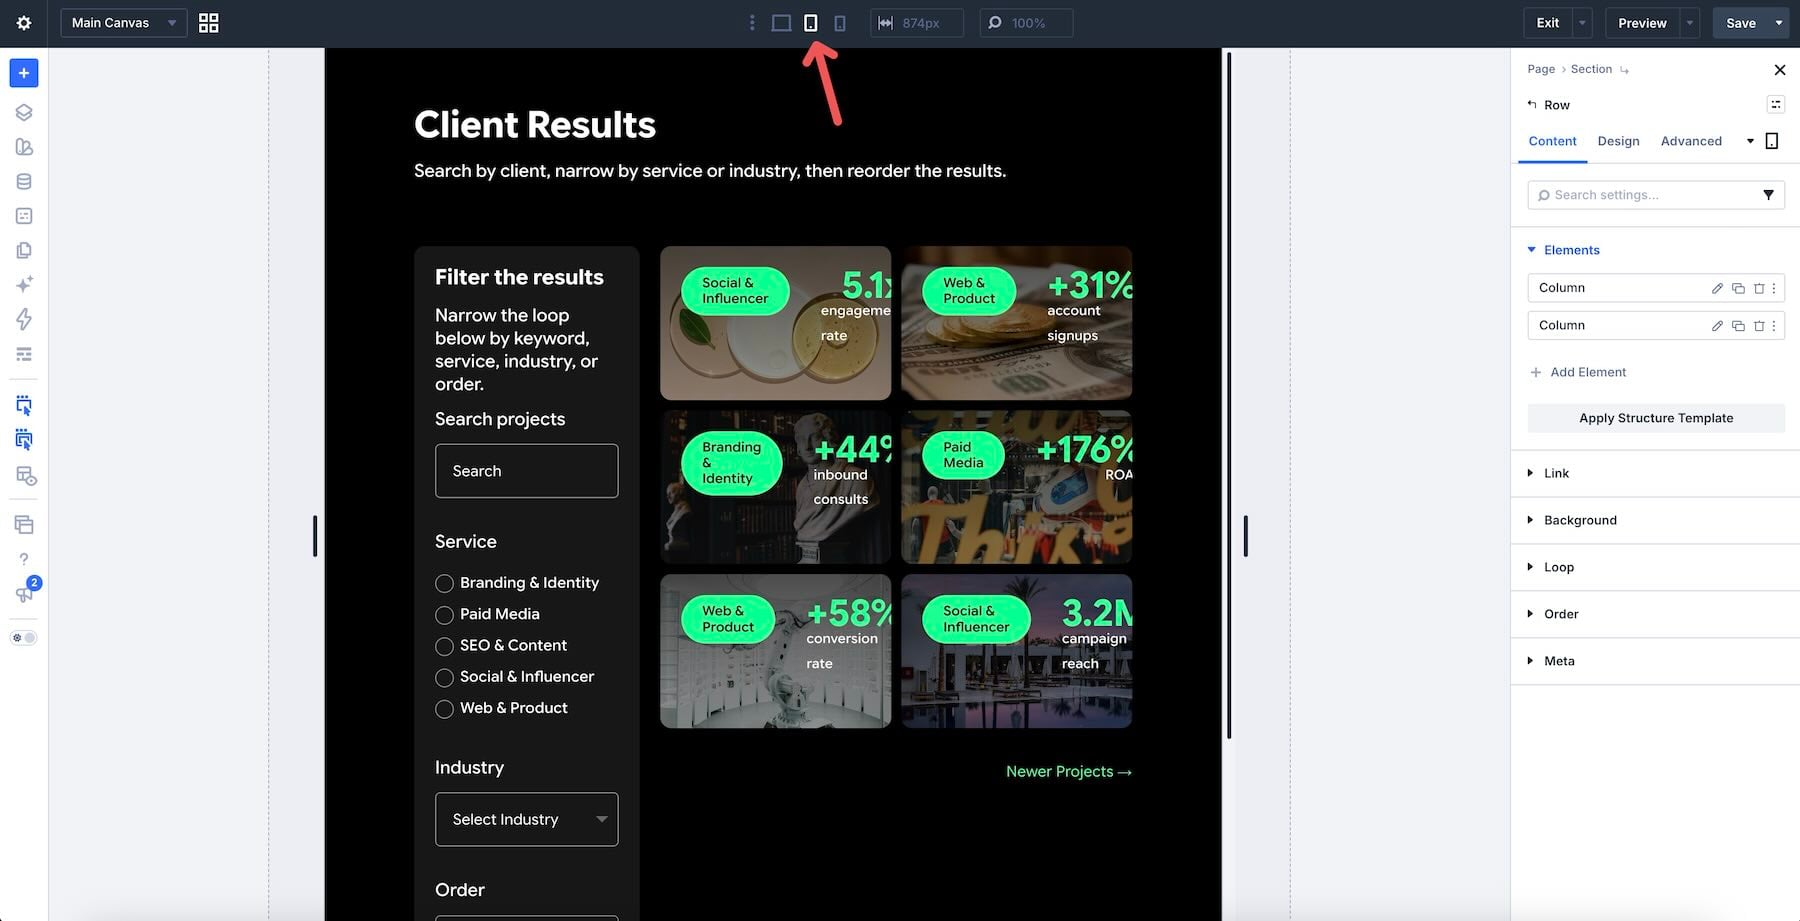
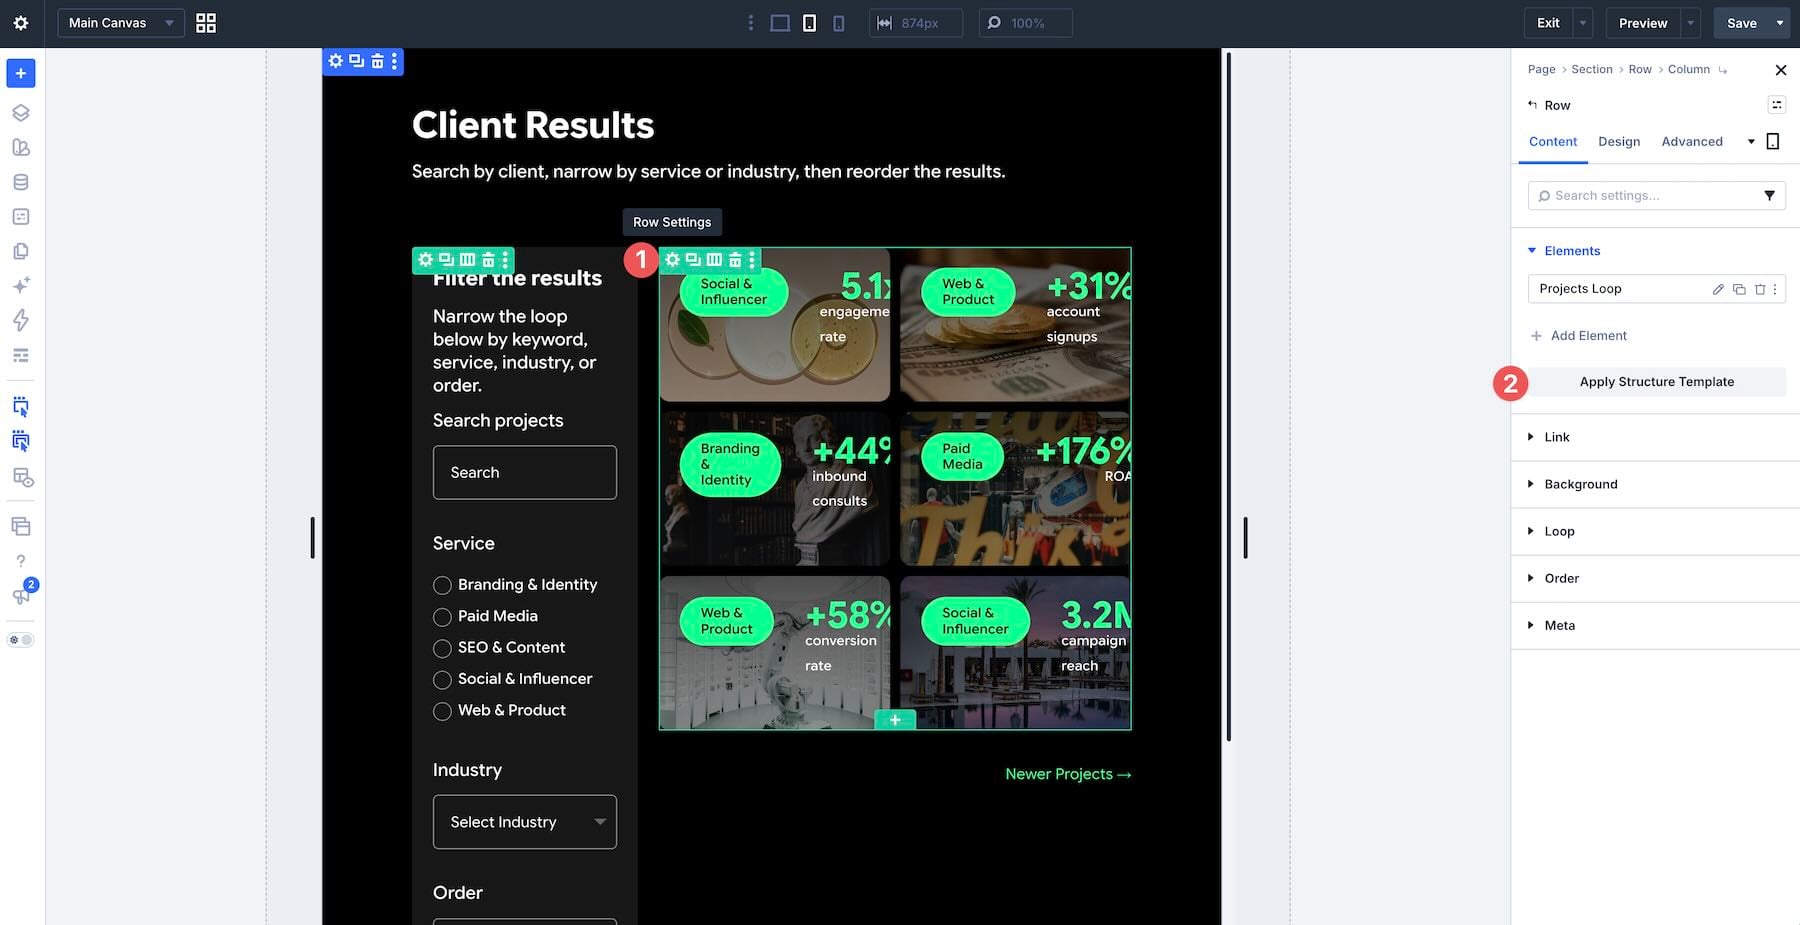
The most glaring problem is how the Project grid is displaying at the Tablet breakpoint. To fix it, select the Nested Row containing the Projects Loop Column and click Apply Structure Template. This is the results Row, not the outer Row containing the sidebar.
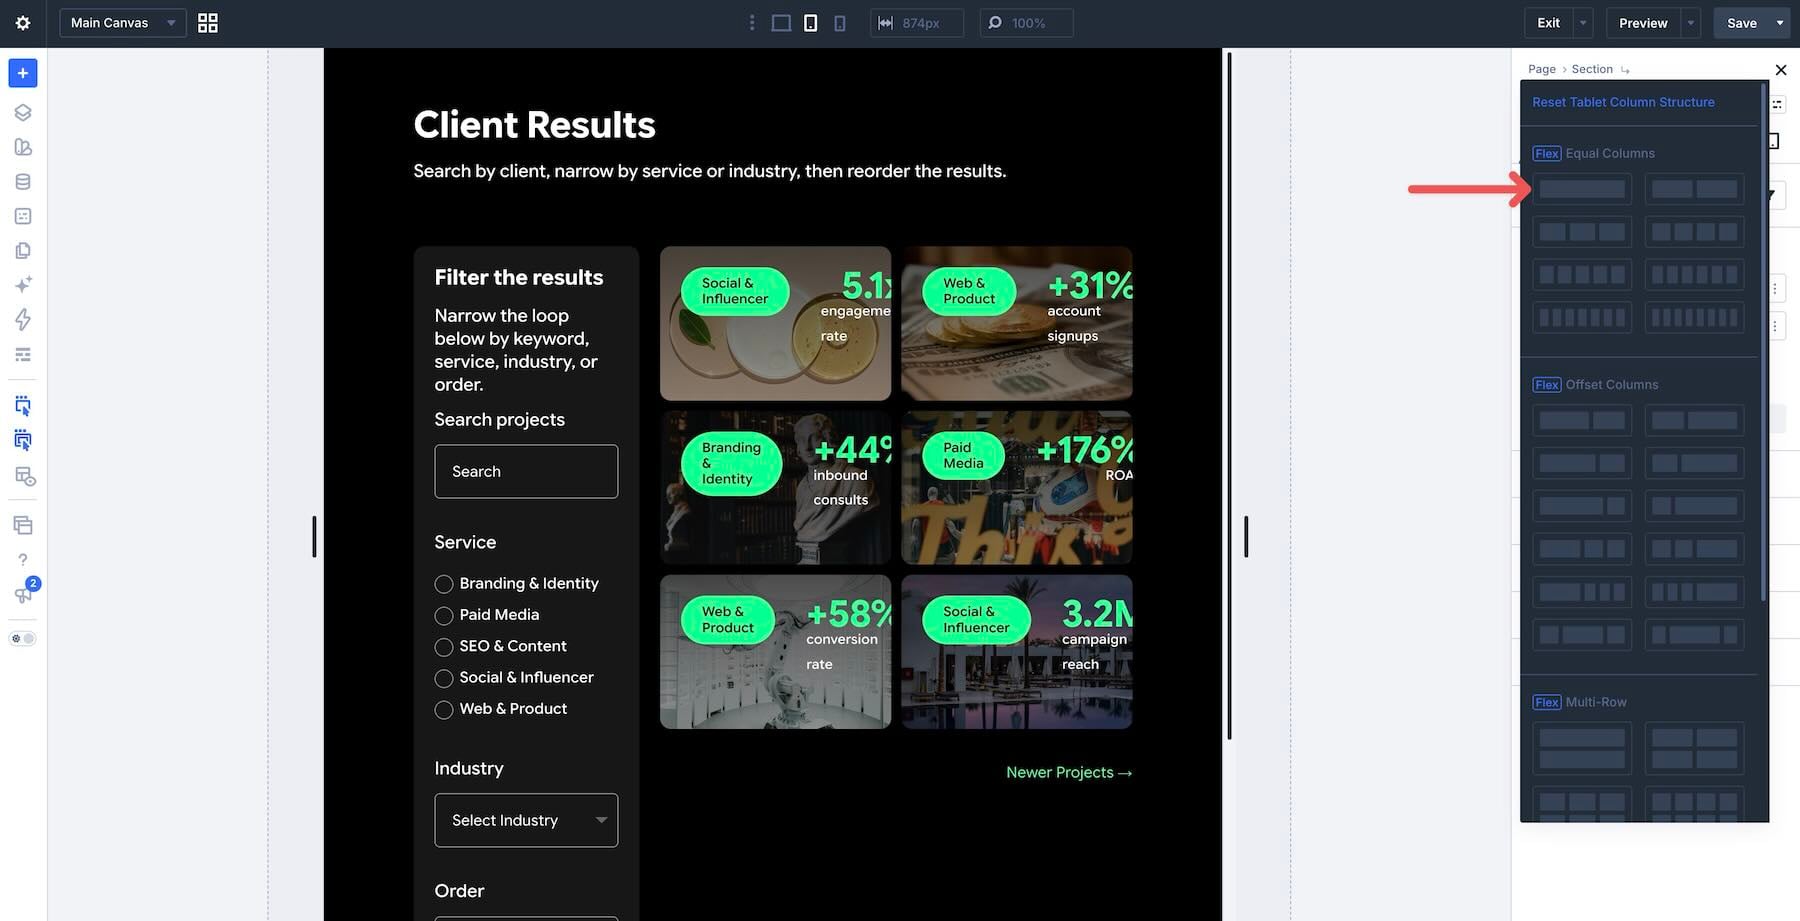
When the Reset Tablet Column Structure modal appears, choose a single Column Flex Row.
Divi 5 will resize the Row to improve the layout’s appearance on Tablet devices. Next, swap to the Phone Breakpoint.
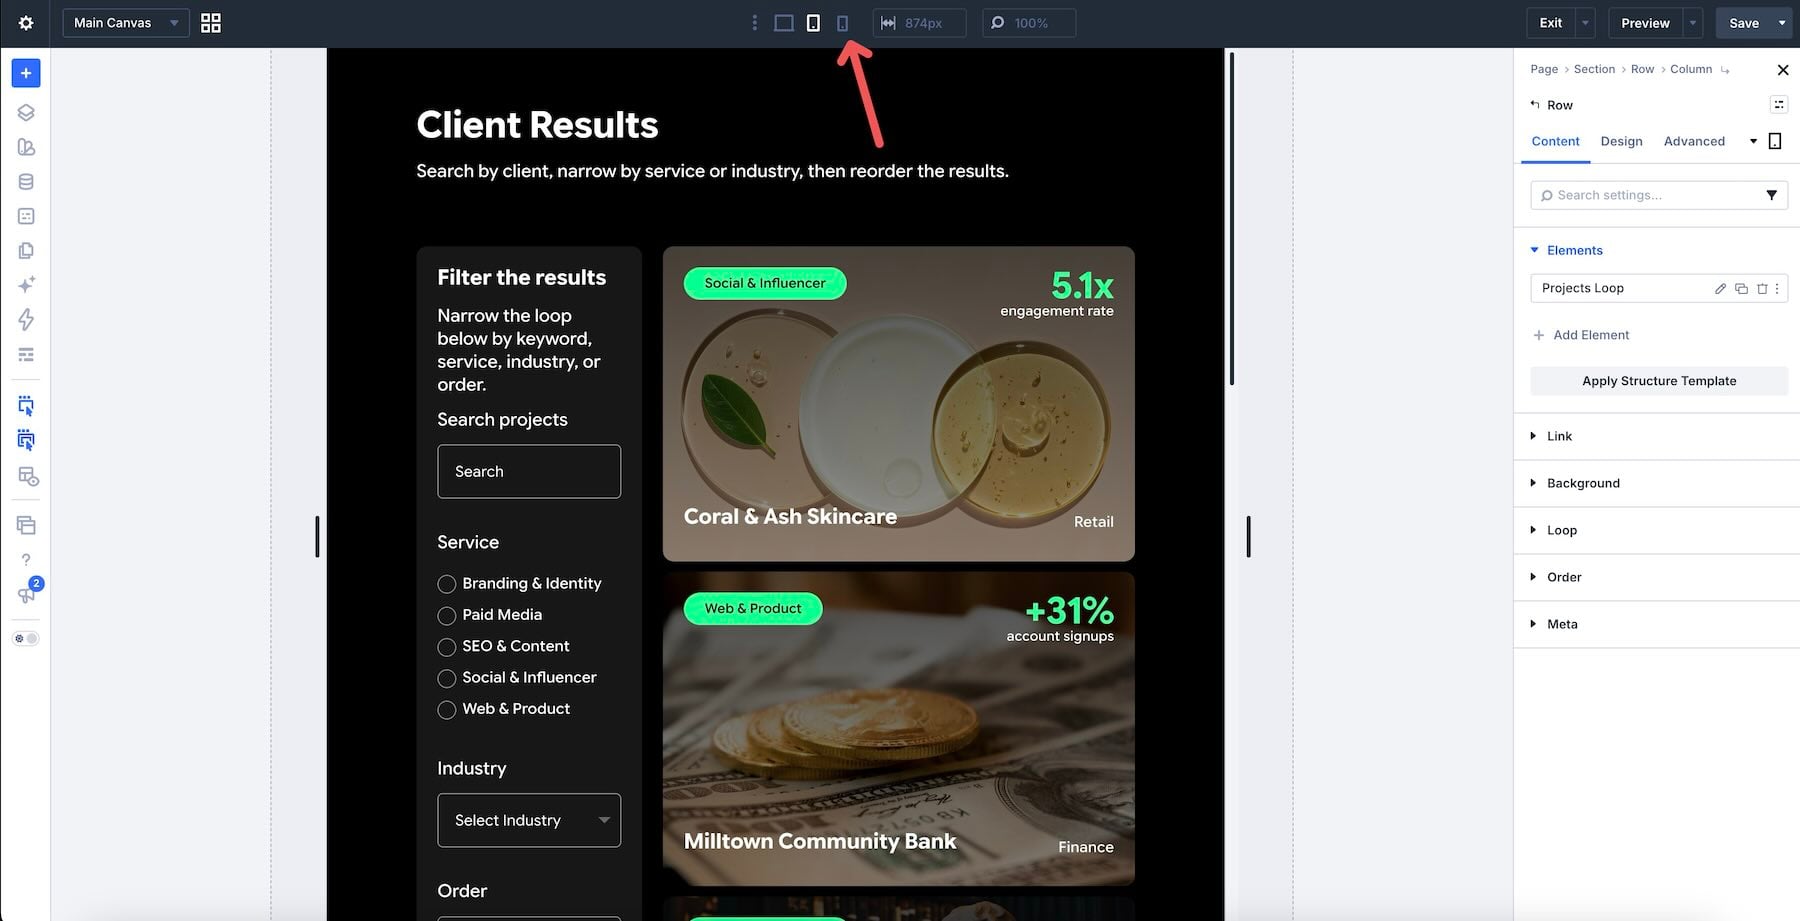
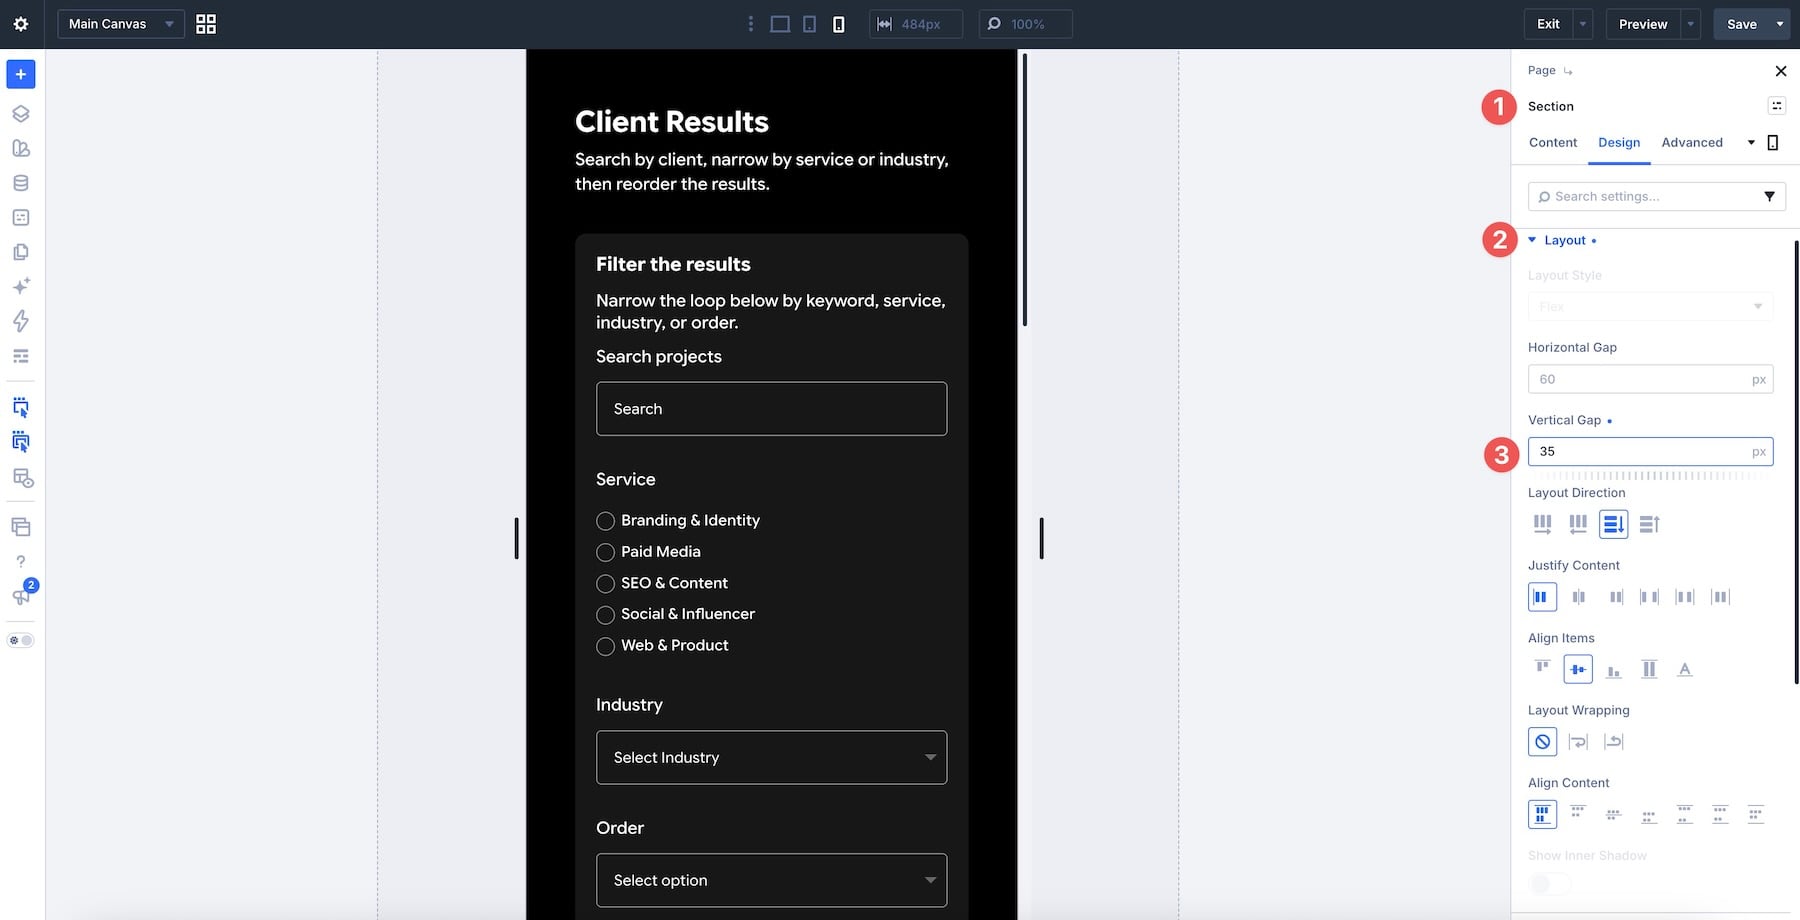
On Phone, ensure both outer Columns are full width so the filter form stacks above the results. Keep the repeated Projects Loop Column full width on Tablet and Phone, with No Wrap and the 260px Min Height. Enable Wrap on the two Module Groups inside each card so long titles and metric labels fit on narrow screens.
Reduce the space between rows as necessary by adjusting the Vertical Gap at the section level.
Test The Build
The last step in the build is to test the functionality on the front end. Save the page, then select the Exit dropdown. Click on View Page and open the page in your browser.
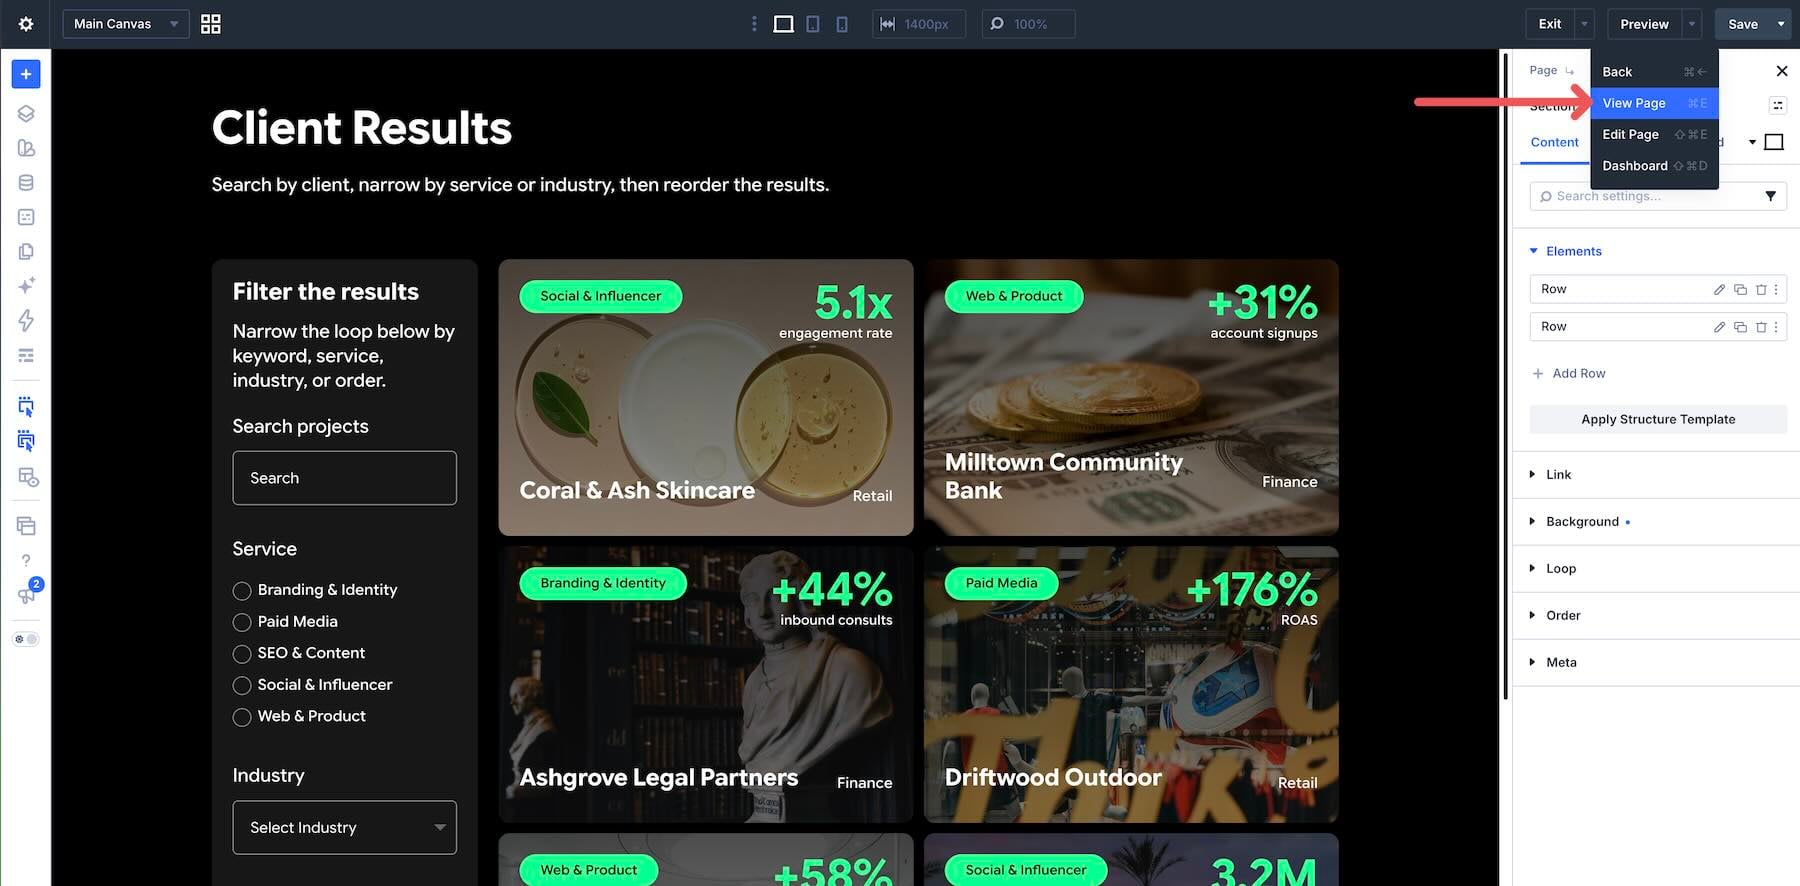
Use the Post Filter form to select a specific service, choose an Industry, or reorder the search results. Tap the Apply button to filter the results and the Reset button to clear all search criteria.
Download The Files
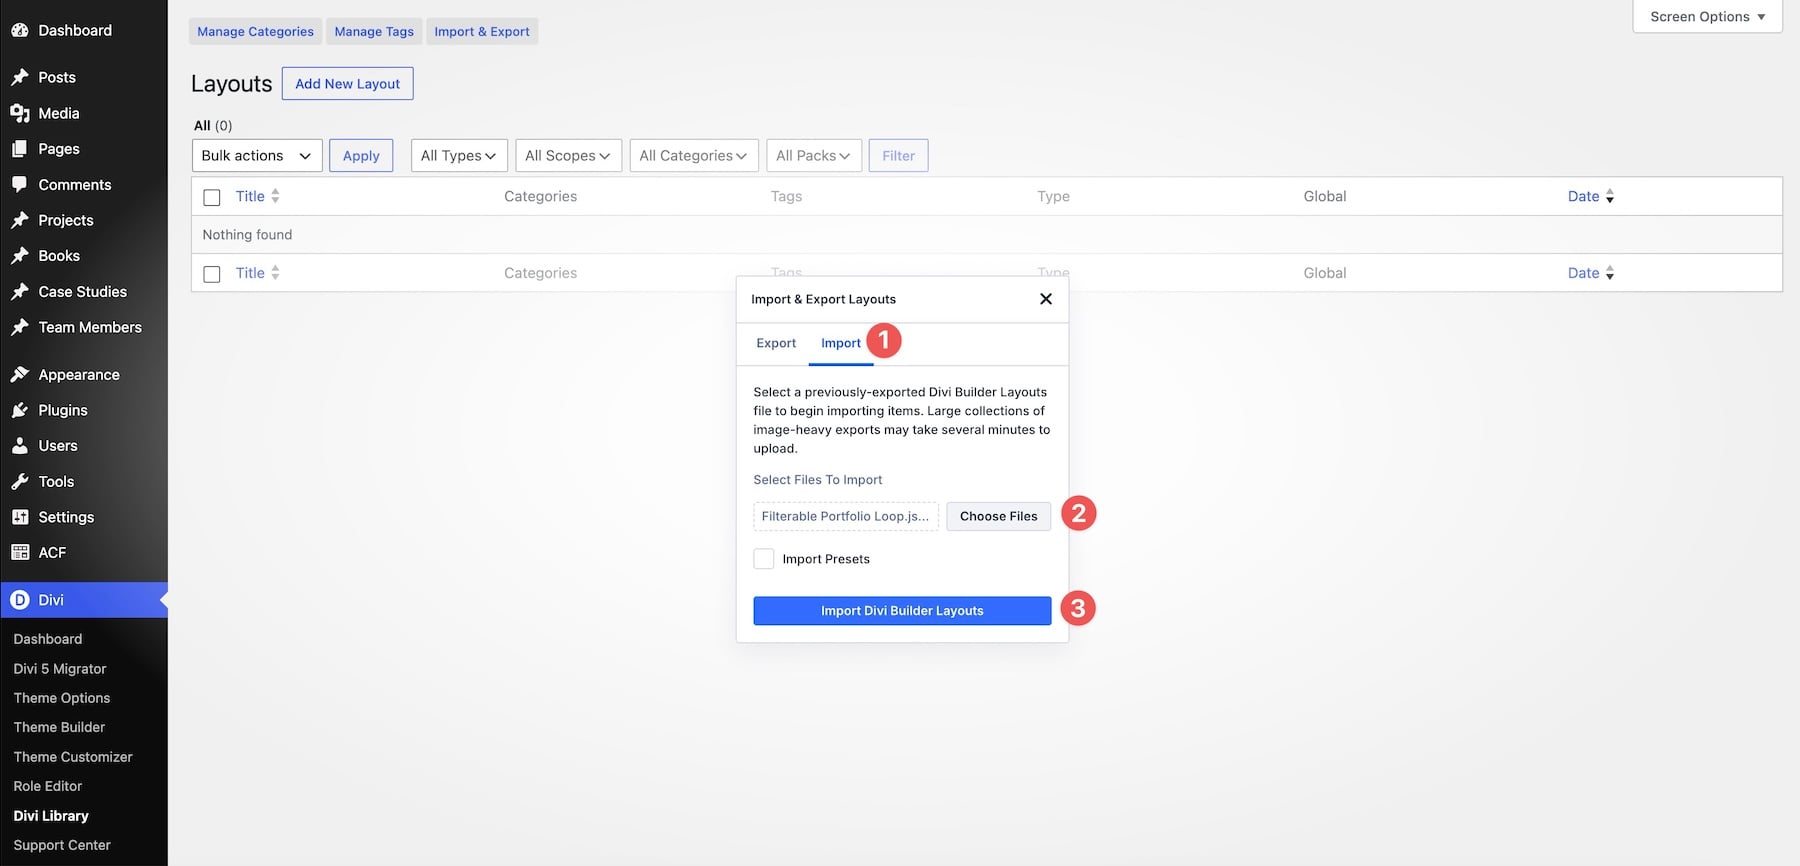
To give you a head start, we’ve created a zip file with the filterable Portfolio loop we built in this post. Fill out the form below to download the file and extract the ZIP on your computer. Then head to Divi > Divi Library and click the Import & Export button.
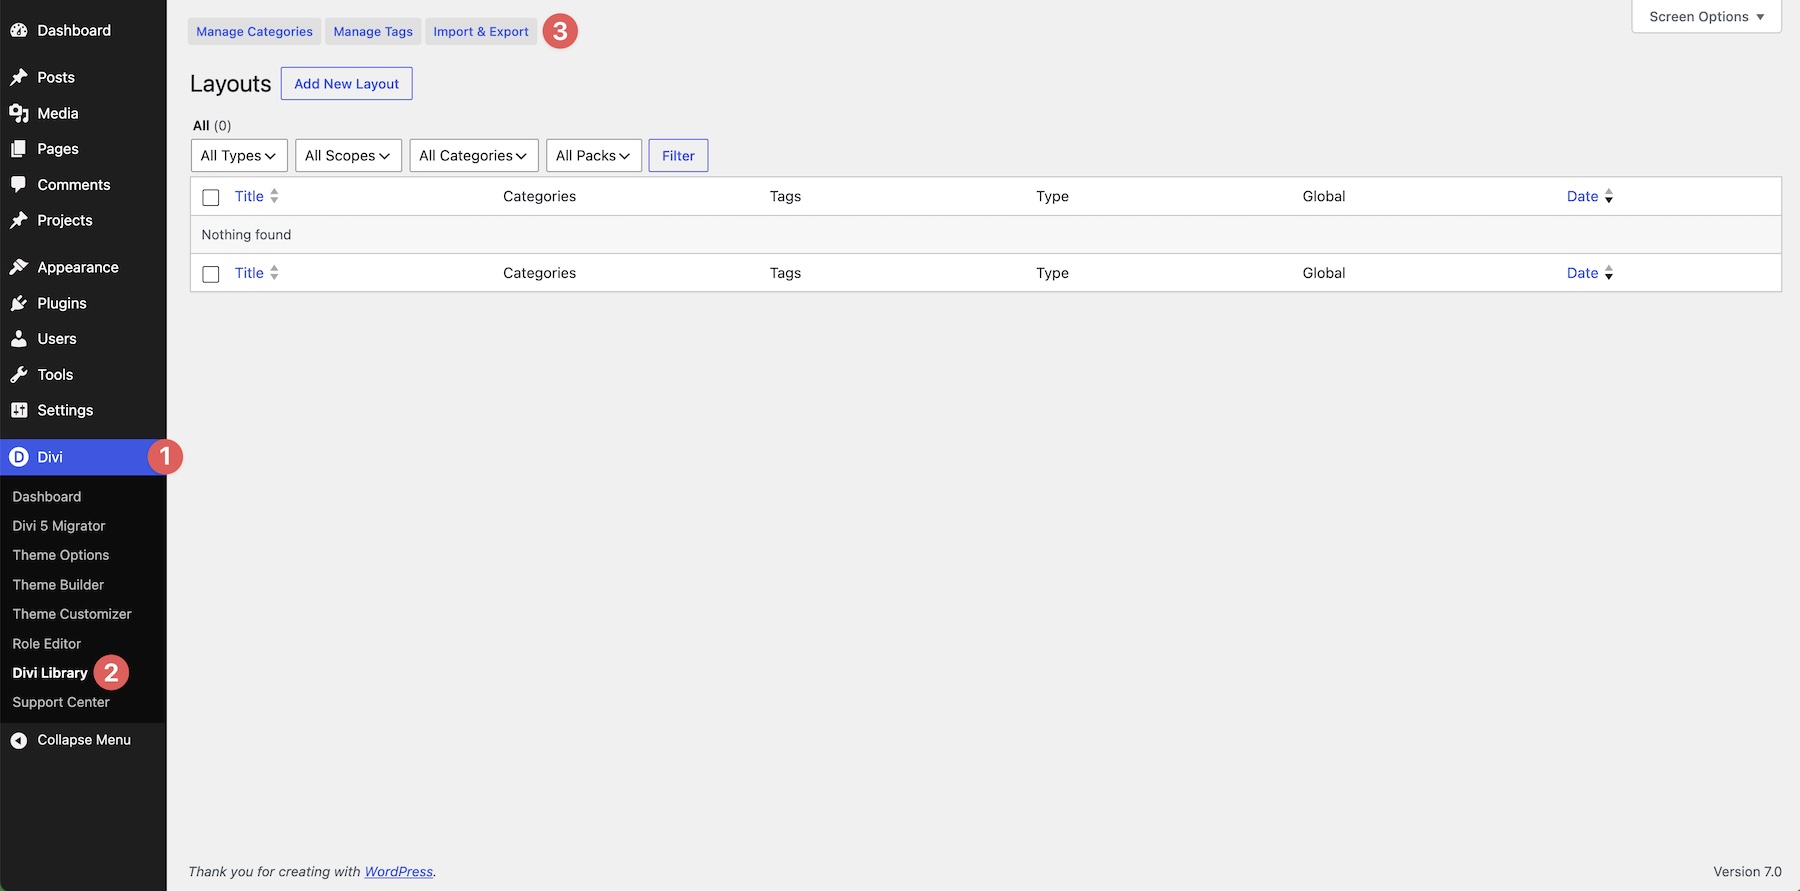
Choose the Import tab, select the layout’s JSON file from the extracted folder, and click Import Divi Builder Layouts.
Ensure that you have created all of the required custom fields and Projects on your WordPress site, then open or create a new page. The layout does not include your Project posts, service terms, ACF field group, or the featured images and custom-field values attached to those Projects. When the Visual Builder loads, click to add a new section to the page.
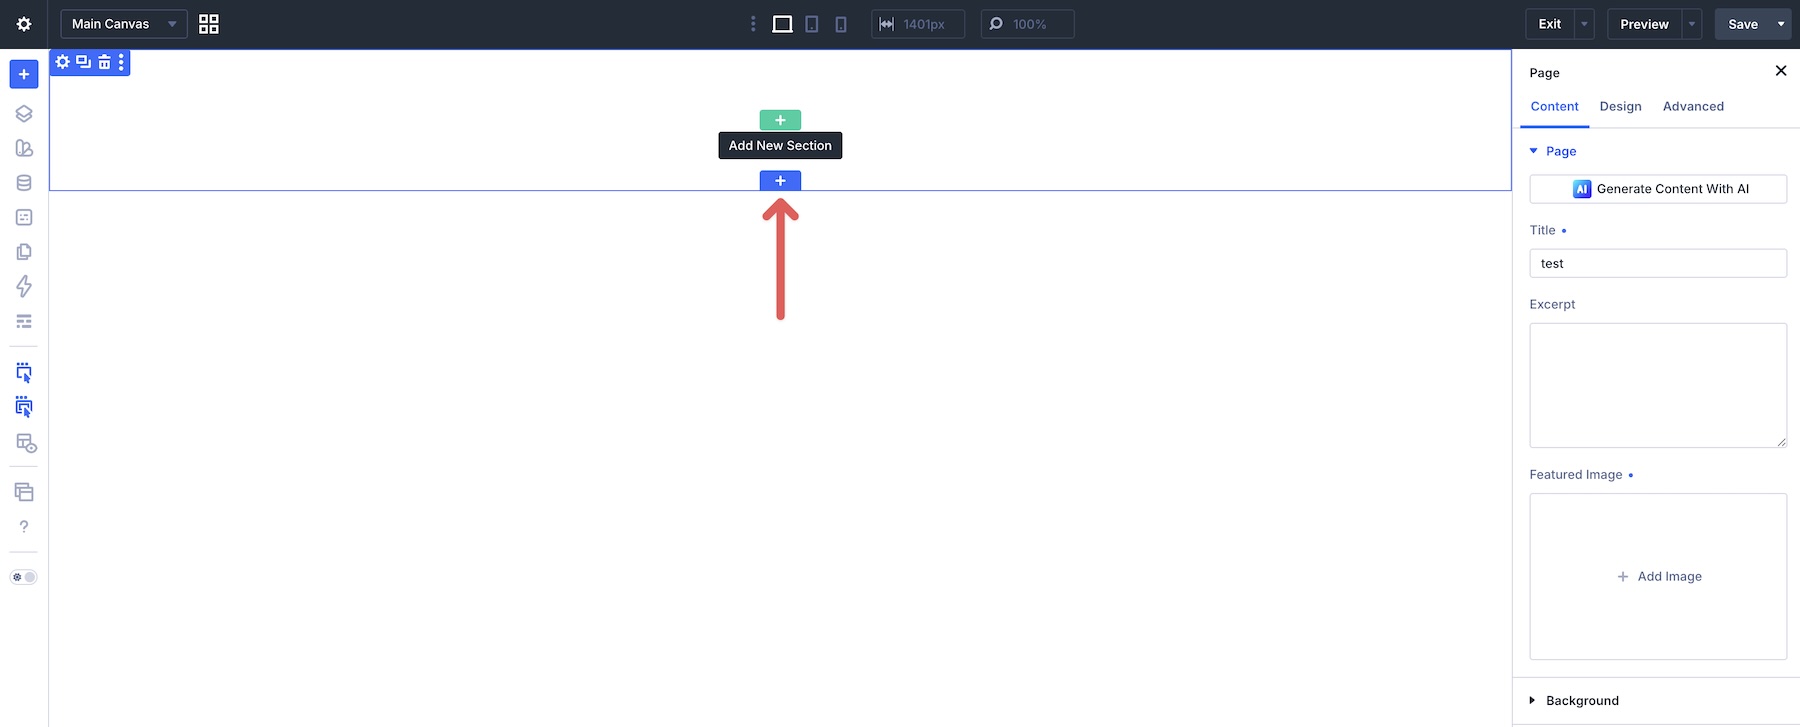
Choose the Add From Library tab and select your saved layout.
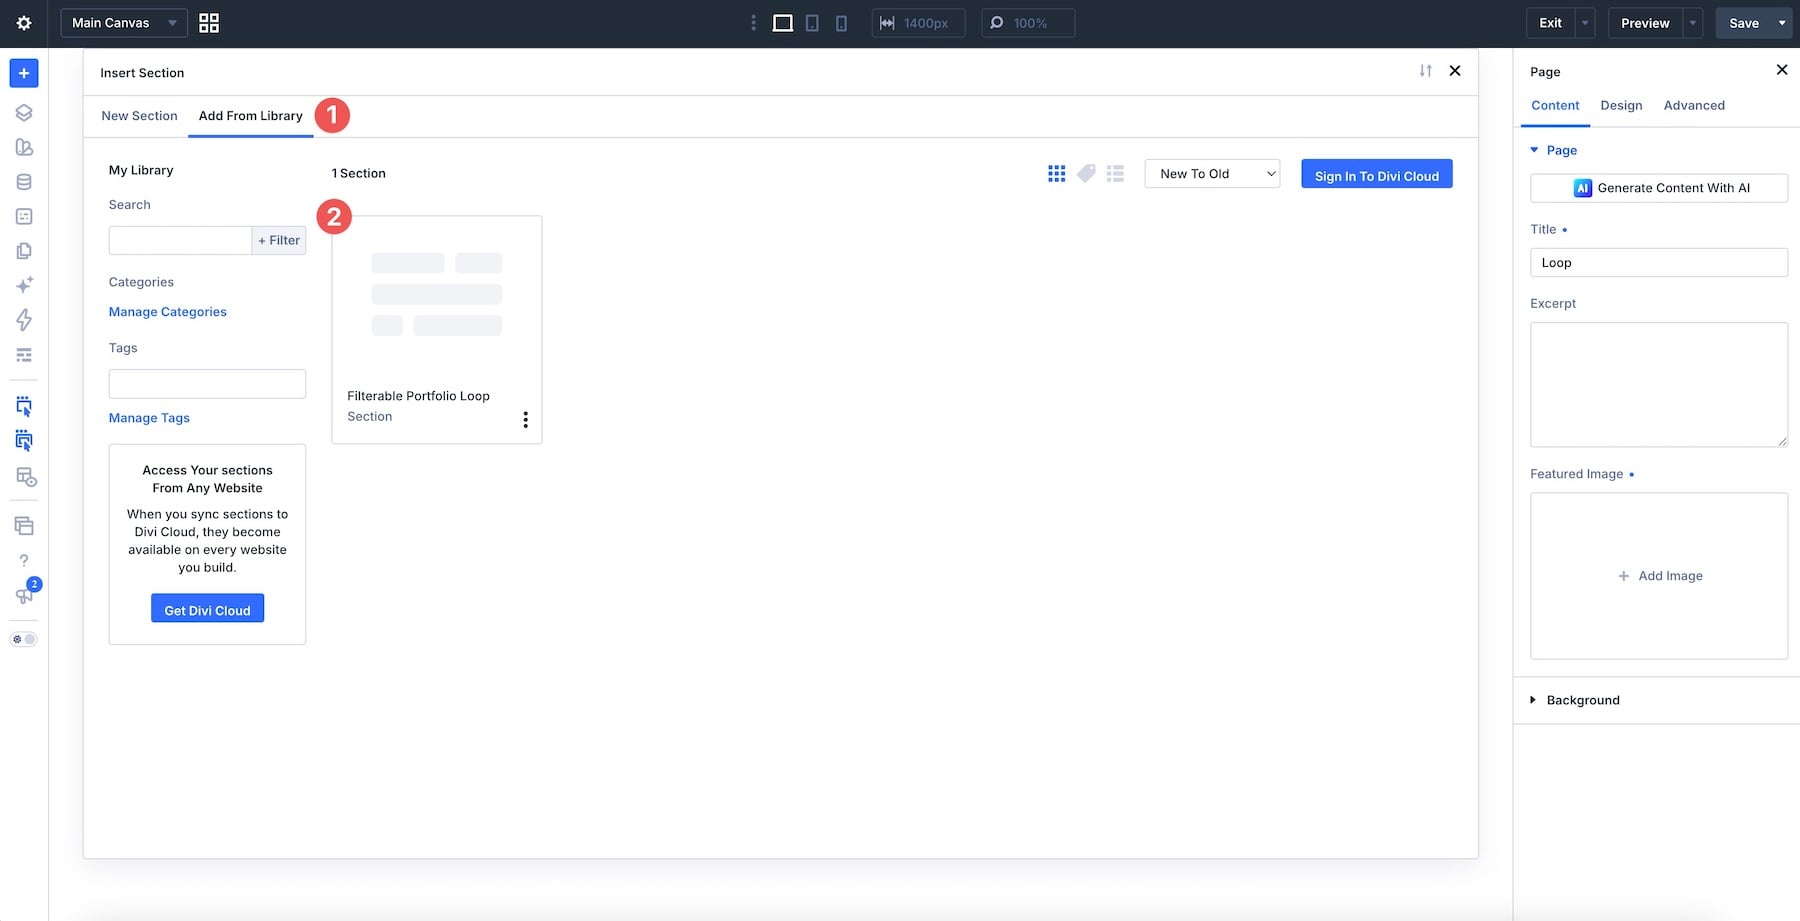
Finally, click Use This Section to load the layout into the Visual Builder. Check each module’s Dynamic Content and confirm that Post Filter and Pagination both target the Projects Loop.

Build Dynamic Portfolios With Divi 5
Moving beyond static thumbnail grids is essential for showcasing work that converts prospects into clients. By combining the power of Divi 5, the Loop Builder, the Loop Filter modules, and Flexbox, you can transform a standard portfolio into dynamic, filterable case studies.
With this setup in place, visitors can search by client, filter projects by service or industry, and examine the performance metrics you enter for each Project directly on the cards. By following the steps in this post, you now have the tools to build a fully functional, highly interactive portfolio that elevates your work and delivers a professional user experience.
Let us know what you think in the comments below or reach out on our social media channels.




Leave A Reply