

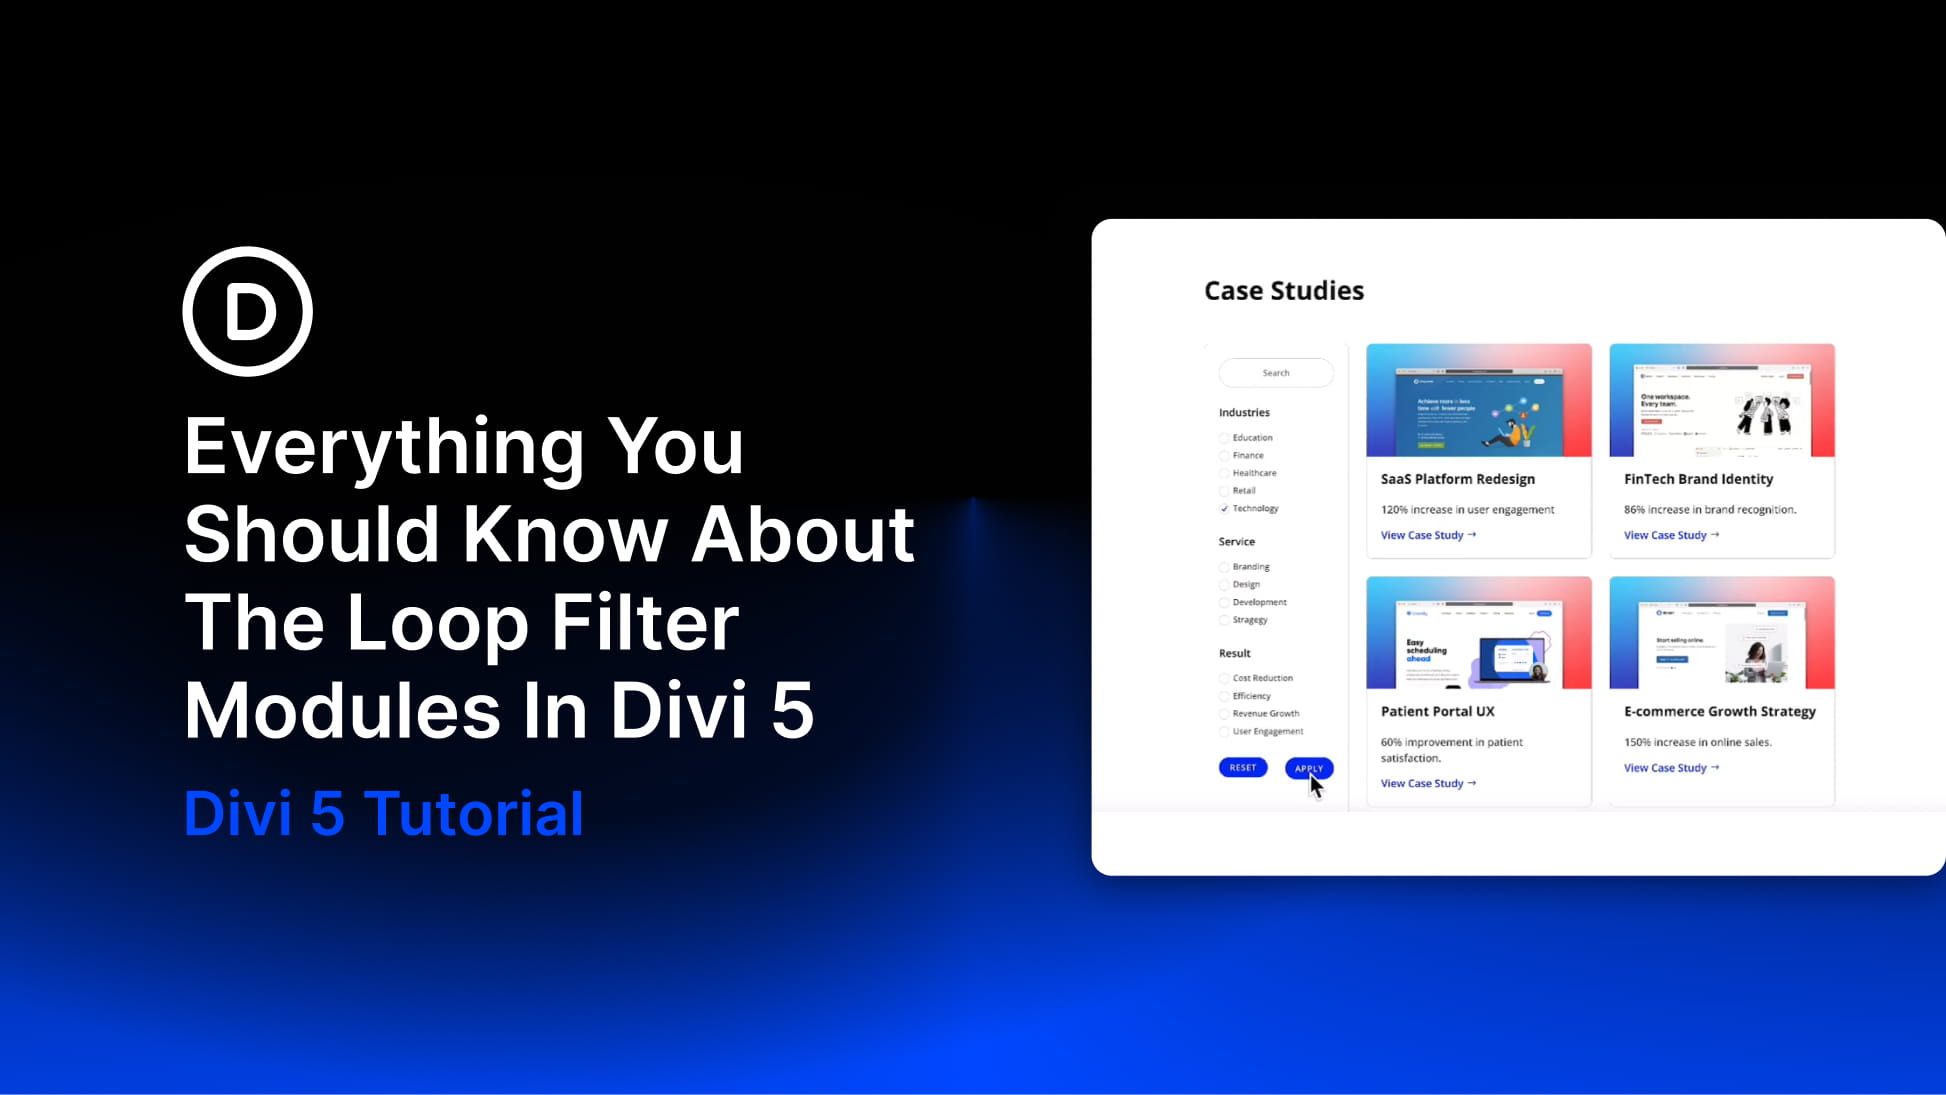
Divi 5‘s Loop Builder lets you turn Divi elements into dynamic feeds for posts, products, projects, custom post types, and other queried content. You design one repeated item, connect it to Dynamic Content, and let Divi populate the layout from WordPress.
The new Loop Filter Modules add the visitor-facing side of that system. Instead of deciding every query condition while building the page, you can create custom filter forms that let visitors search, filter, and reorder the results themselves on the front end.
In this post, we’ll look at how the Loop Filter system fits into Divi 5’s Loop Builder, what each filter type does, how fields connect to taxonomies and custom fields, how to build and style a complete filter form, and several practical ways to use the feature.
What Are The Loop Filter Modules In Divi 5?
Loop Filter Modules let visitors interact with post-based Loop Builder content directly on the front end. A visitor might search a blog by keyword, narrow a portfolio by project category, filter a directory by location, or reorder a product-style catalog without needing a separate page for every combination.
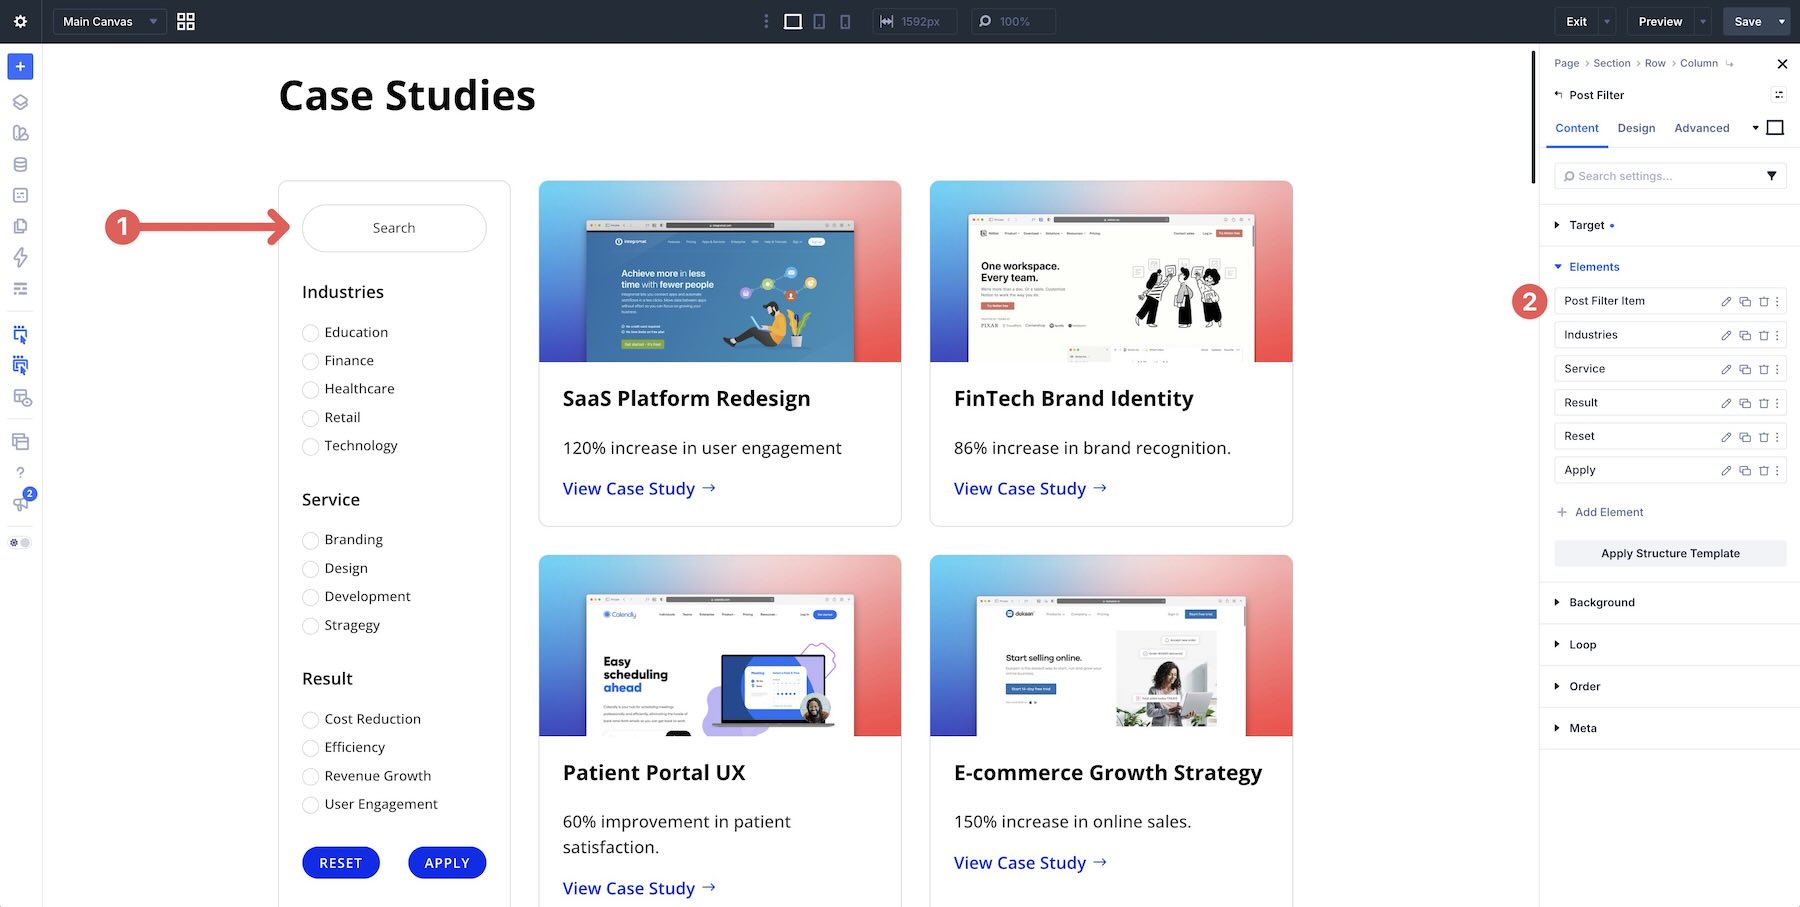
At the center of the system is the Post Filter Module. It acts as the wrapper for the complete filter form and connects that form to a target Loop. Inside it, you add Post Filter Item Modules, with each item providing one control such as a Text field, Select menu, Radio group, Checkbox group, sorting control, Submit button, or Reset button.
The feature builds directly on Divi 5’s Loop Builder. With Loop Builder, you create the repeated content first. You can enable looping on Divi elements, define the query, then connect modules inside the repeated structure to Dynamic Content from the results.
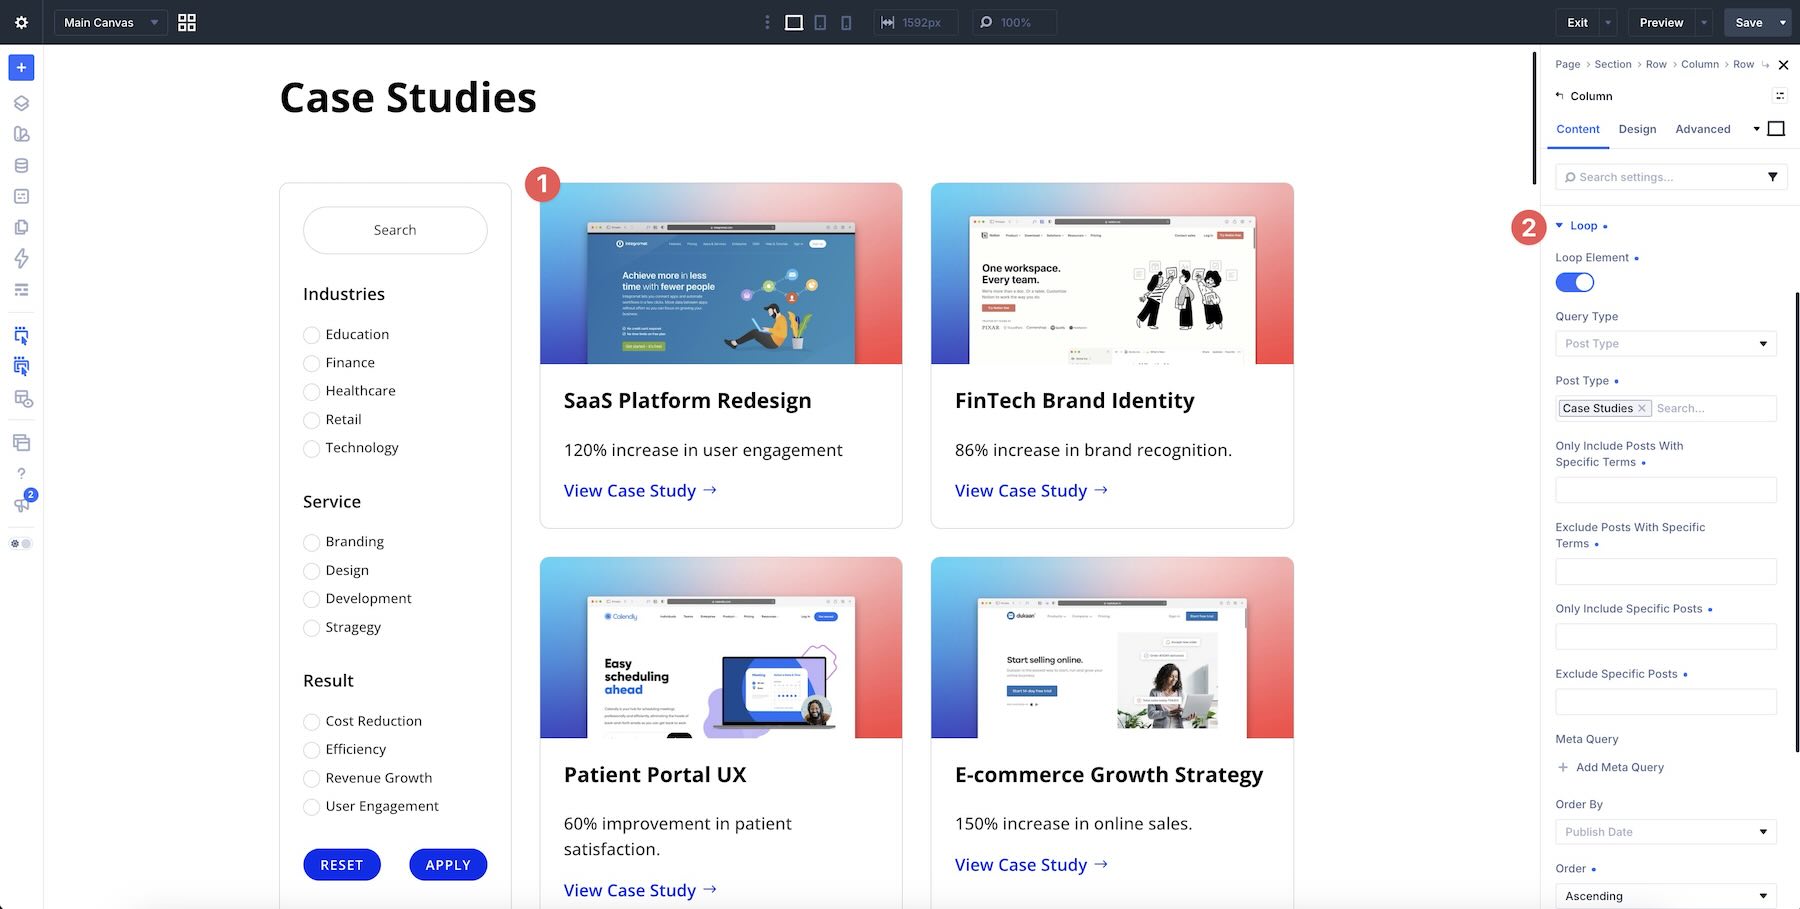
The filter form does not replace that query or card design. It gives visitors a controlled way to refine the results the Loop Builder is already producing. The Loop determines the content source and repeated layout, while the Post Filter Module determines which visitor-facing controls are available.
Key Advantages
The value of Loop Filters comes from combining Divi’s existing dynamic-content tools with controls visitors can actually use. Here are a few of the biggest advantages.
Front-End Search, Filtering, And Sorting
Visitors can search, filter, and reorder compatible Loop Builder results from a form built directly in Divi. The filter controls and the Loop remain part of the same Visual Builder workflow, so you can design the content, filtering experience, and surrounding layout together.
Flexible Querying
Filter fields can query different kinds of post data depending on how you configure them, including post content, taxonomies, and custom fields. That makes the same system useful for a standard blog as well as more structured content such as directories, catalogs, portfolios, and other custom post types.
Design System Friendly
Post Filter and Post Filter Item Modules use the same Divi design system as the rest of the builder. You can style the fields visually, connect values to Design Variables, and save repeated field treatments with Presets.
That means a filter form can follow the typography, colors, spacing, borders, buttons, and other visual rules already established across the site instead of feeling like a separate interface.
Useful Across Post-Based Loop Designs
The same filtering system can support many kinds of post-based loops. Blog posts, Divi Projects, WooCommerce products, and custom post types can all benefit from visitor-facing search and filtering when their content is organized around useful taxonomies, post data, or custom fields.
The important part is the relationship between the form and the Loop. Build a queryable content structure first, then expose only the filters that help visitors find something meaningful inside it.
How The Loop Filter Modules Work
The Loop Filter system is built around two complementary modules: the Post Filter Module and the Post Filter Item Module.
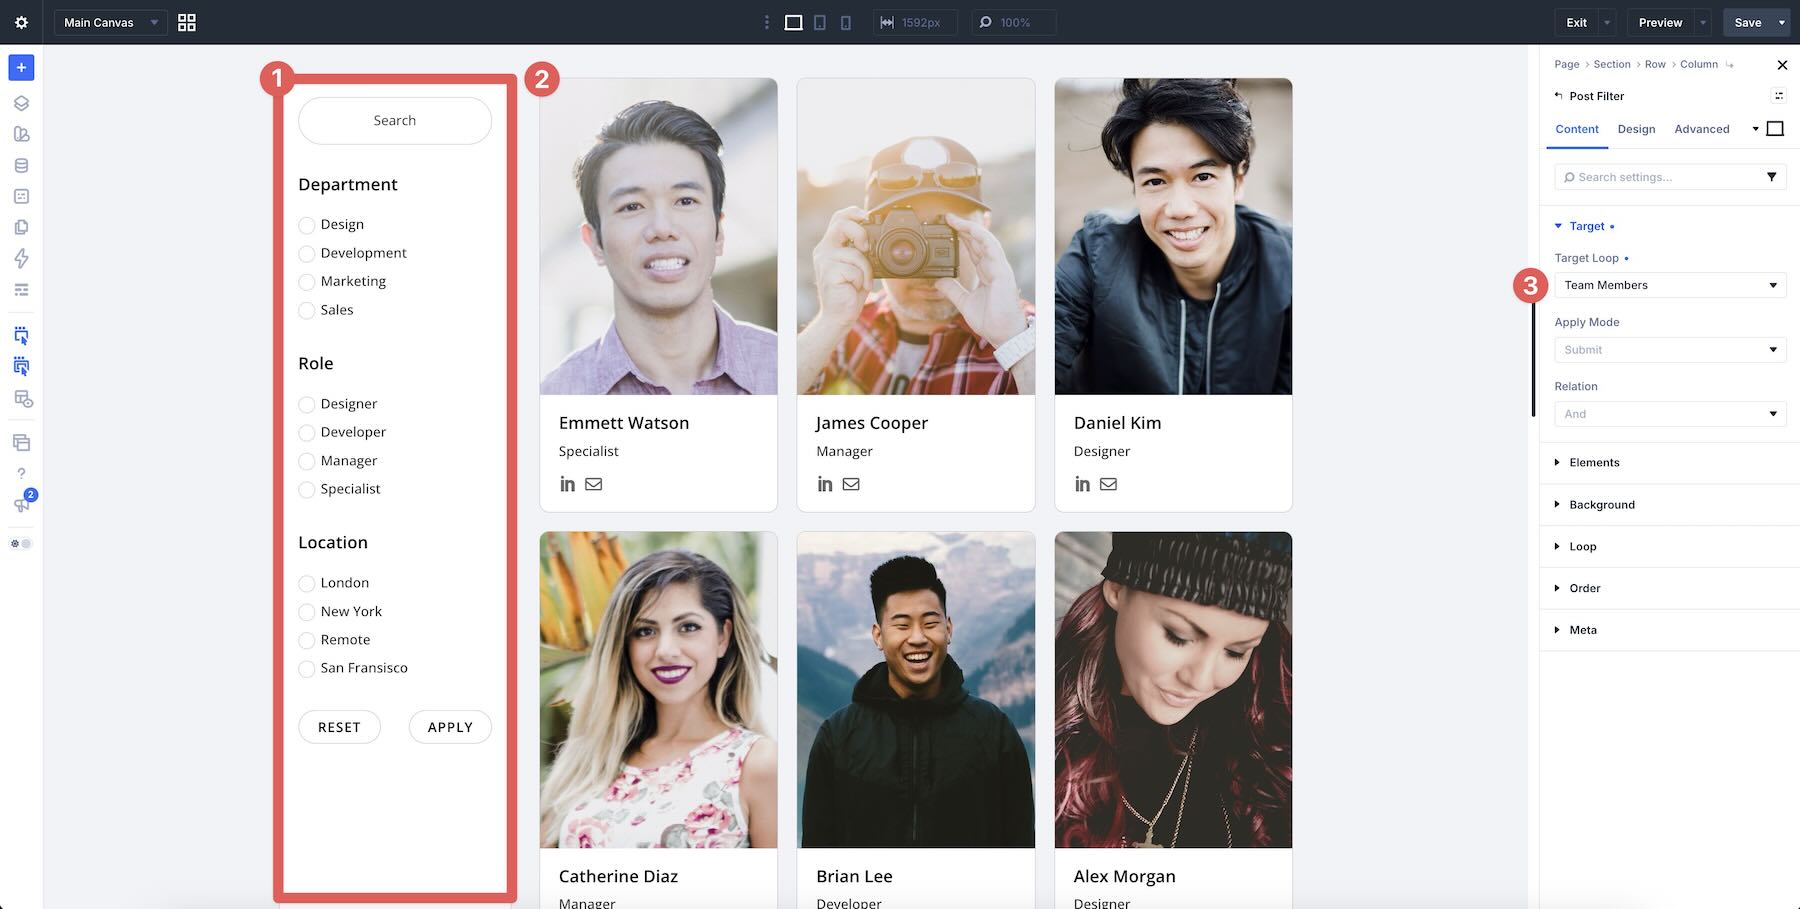
The Post Filter Module is the form container. You add it near the Loop you want visitors to control, then select that Loop as its target. The module does not render the posts itself. Its job is to hold the controls, collect the visitor’s selections, and apply those values to the linked Loop.
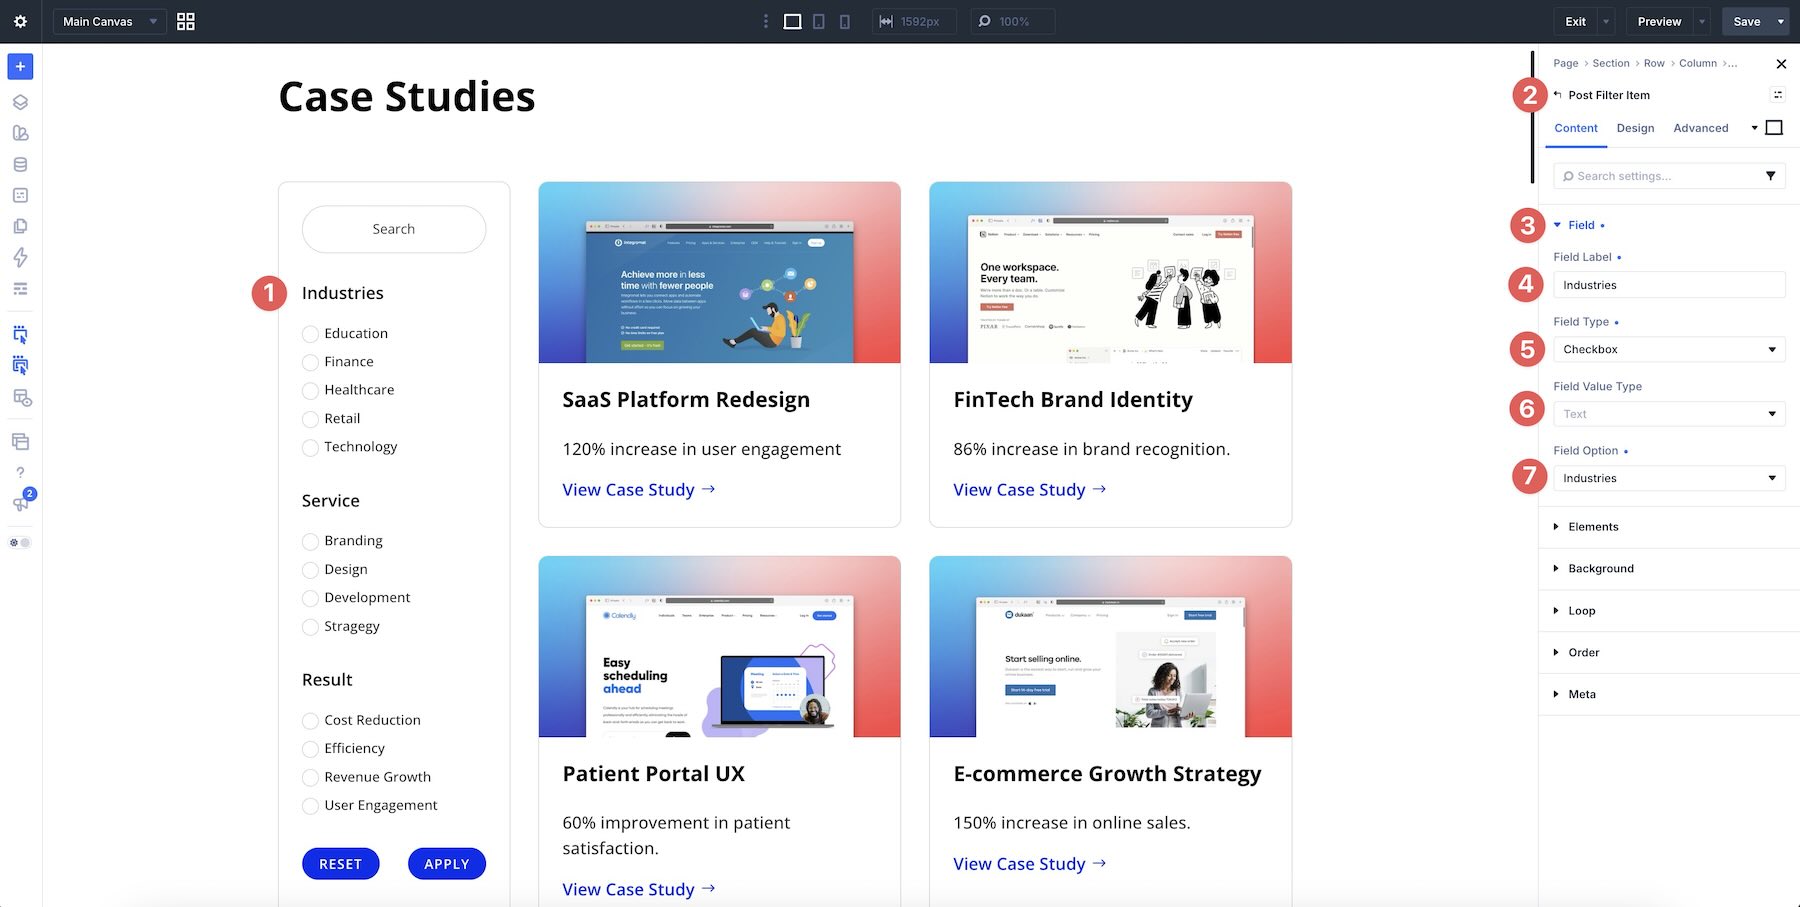
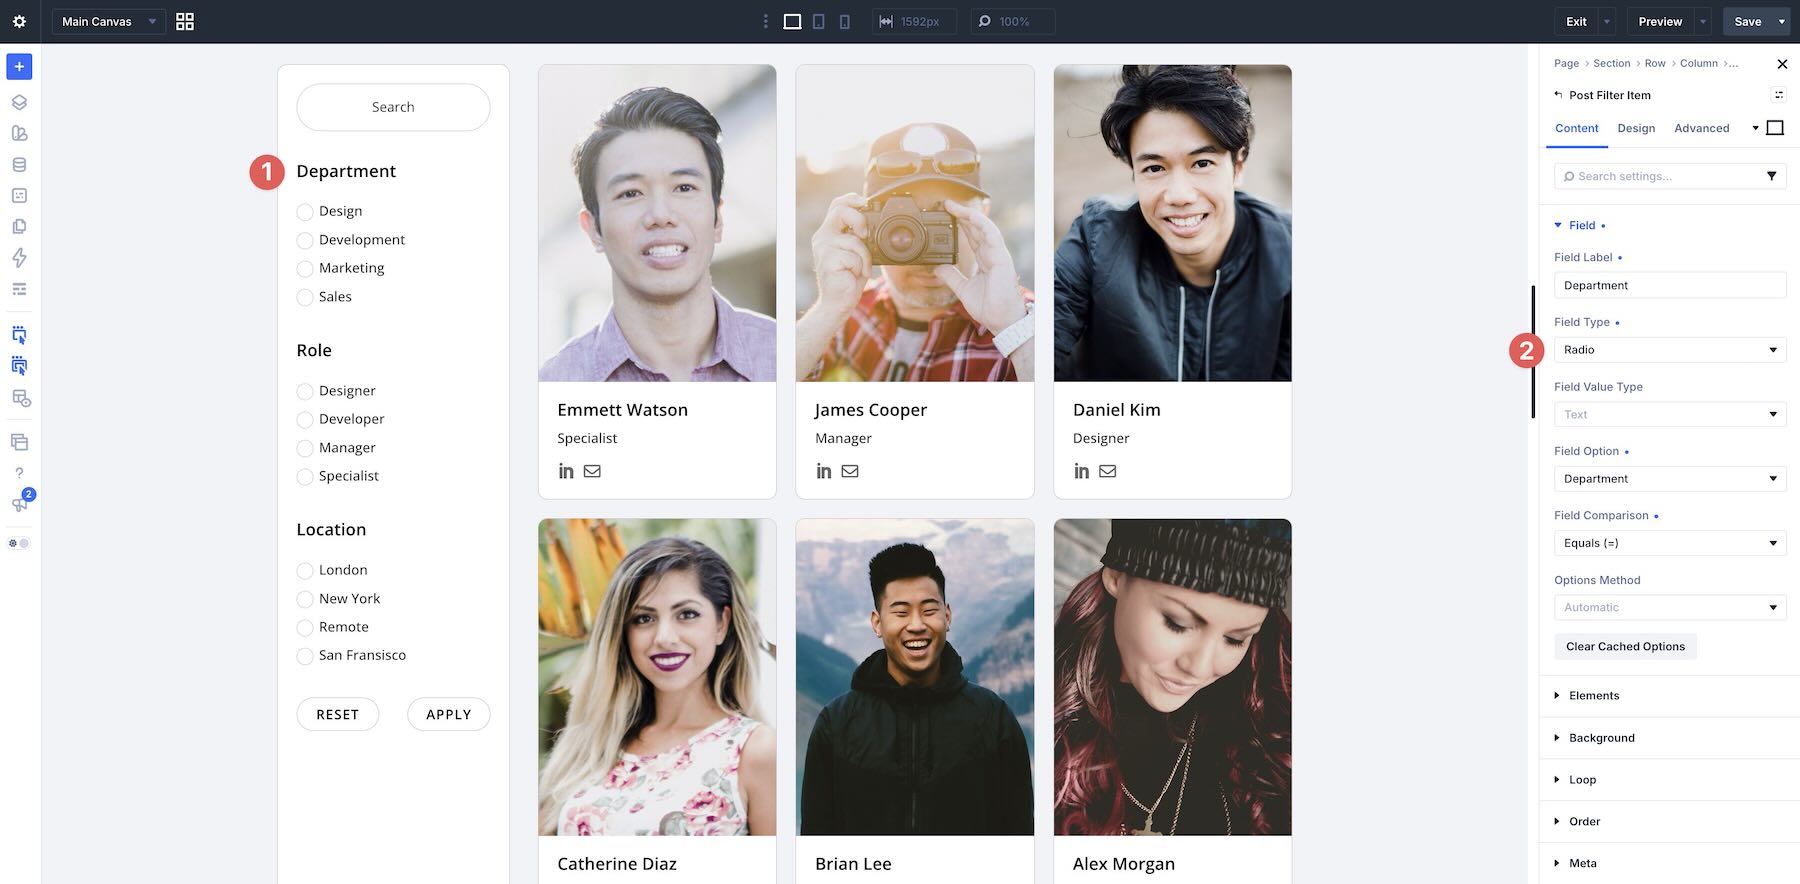
Inside the Post Filter Module, each Post Filter Item represents one part of the query form. You configure the control by choosing its Field Type, telling Divi what kind of value it will work with where applicable, connecting it to the relevant post data, and then styling the result.
Choose The Field Type
The Field Type determines what visitors see and how they interact with that part of the form.
The current Field Type menu includes options such as Text, Select, Radio, Checkbox, Order By, Order, Multiple Order, Submit, and Reset.
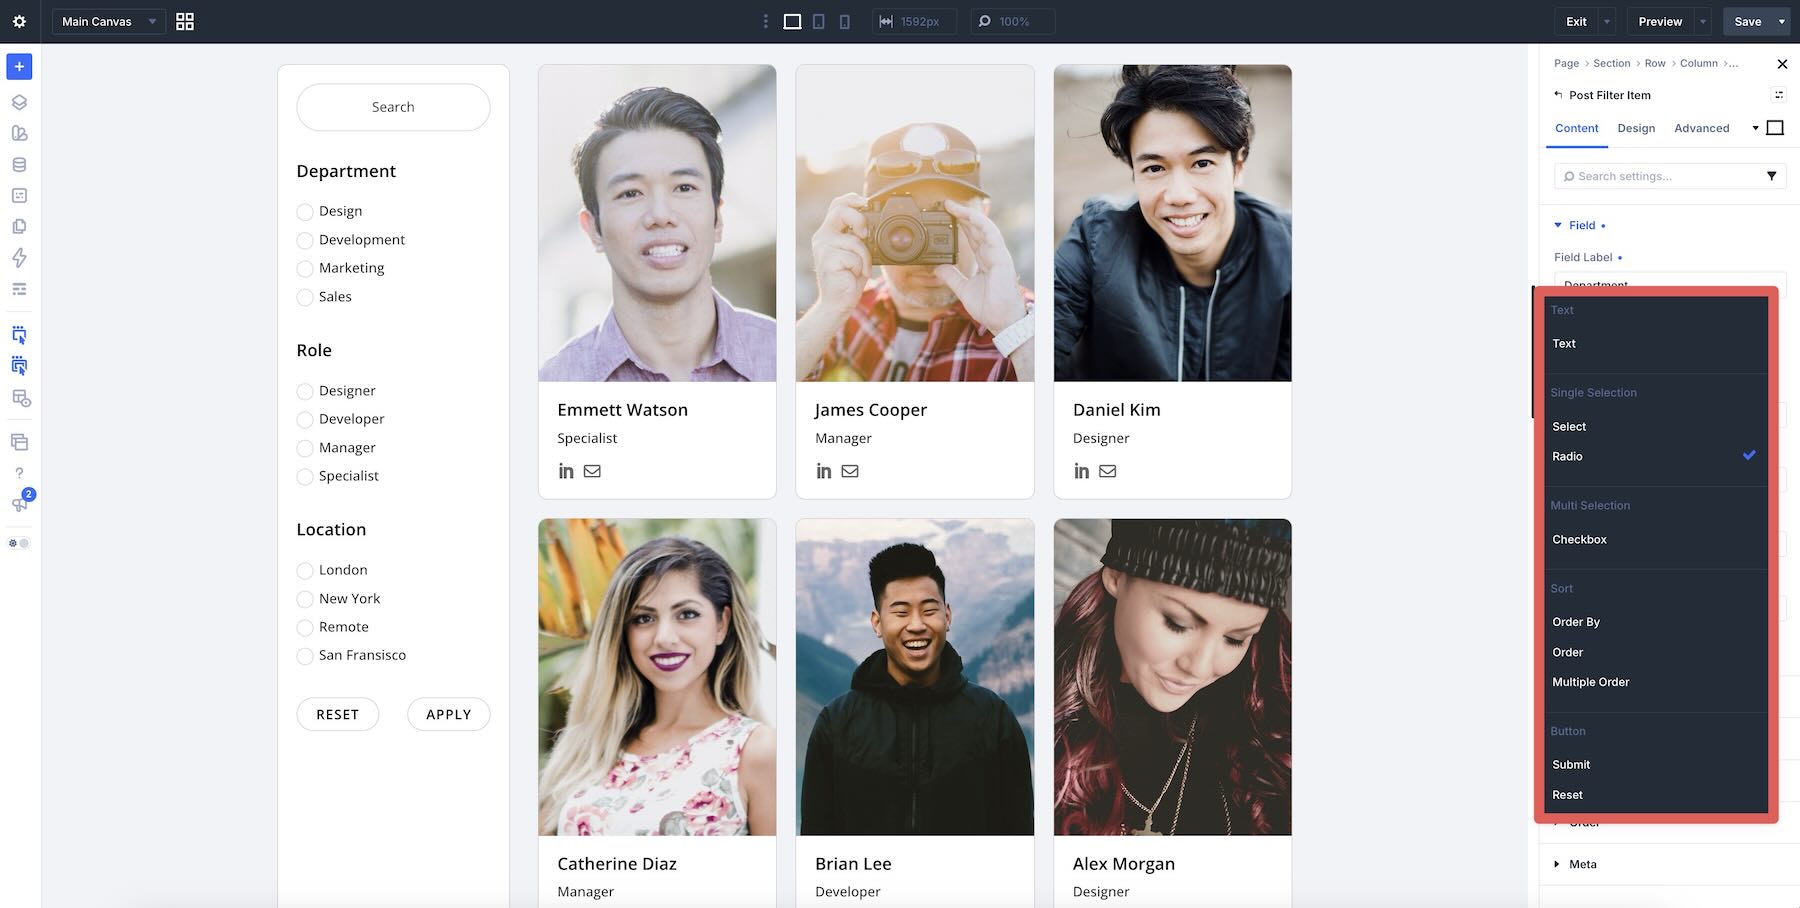
Here’s how the main controls fit into a filter form:
- Text: Creates a text input visitors can use to search. You decide which available post data the search should query, such as the post title, content, or a custom field.
- Select: Displays available values in a dropdown menu. This works well when you have several options but do not want them all visible at once.
- Radio: Displays a visible list of single-choice options. Visitors can select one value at a time.
- Checkbox: Displays multiple selectable choices, allowing visitors to combine available criteria where the configured query supports it.
- Order: Gives visitors control over ascending or descending result order.
- Order By: Determines which value is used to sort the Loop, such as date, title, price, or another compatible field.
- Multiple Order: Provides a more advanced ordering interface when the filter design needs multiple sorting criteria.
- Submit: Applies the current filter selections to the linked Loop.
- Reset: Clears the active selections and returns the filter form and Loop to their configured starting state.
You do not need every Field Type in every form. A simple blog archive might only need Text, Category, and Reset controls, while a structured directory could make good use of several taxonomy fields and sorting options.
Choose The Field Value Type
For fields that query stored data, Field Value Type tells Divi how the value should be interpreted.
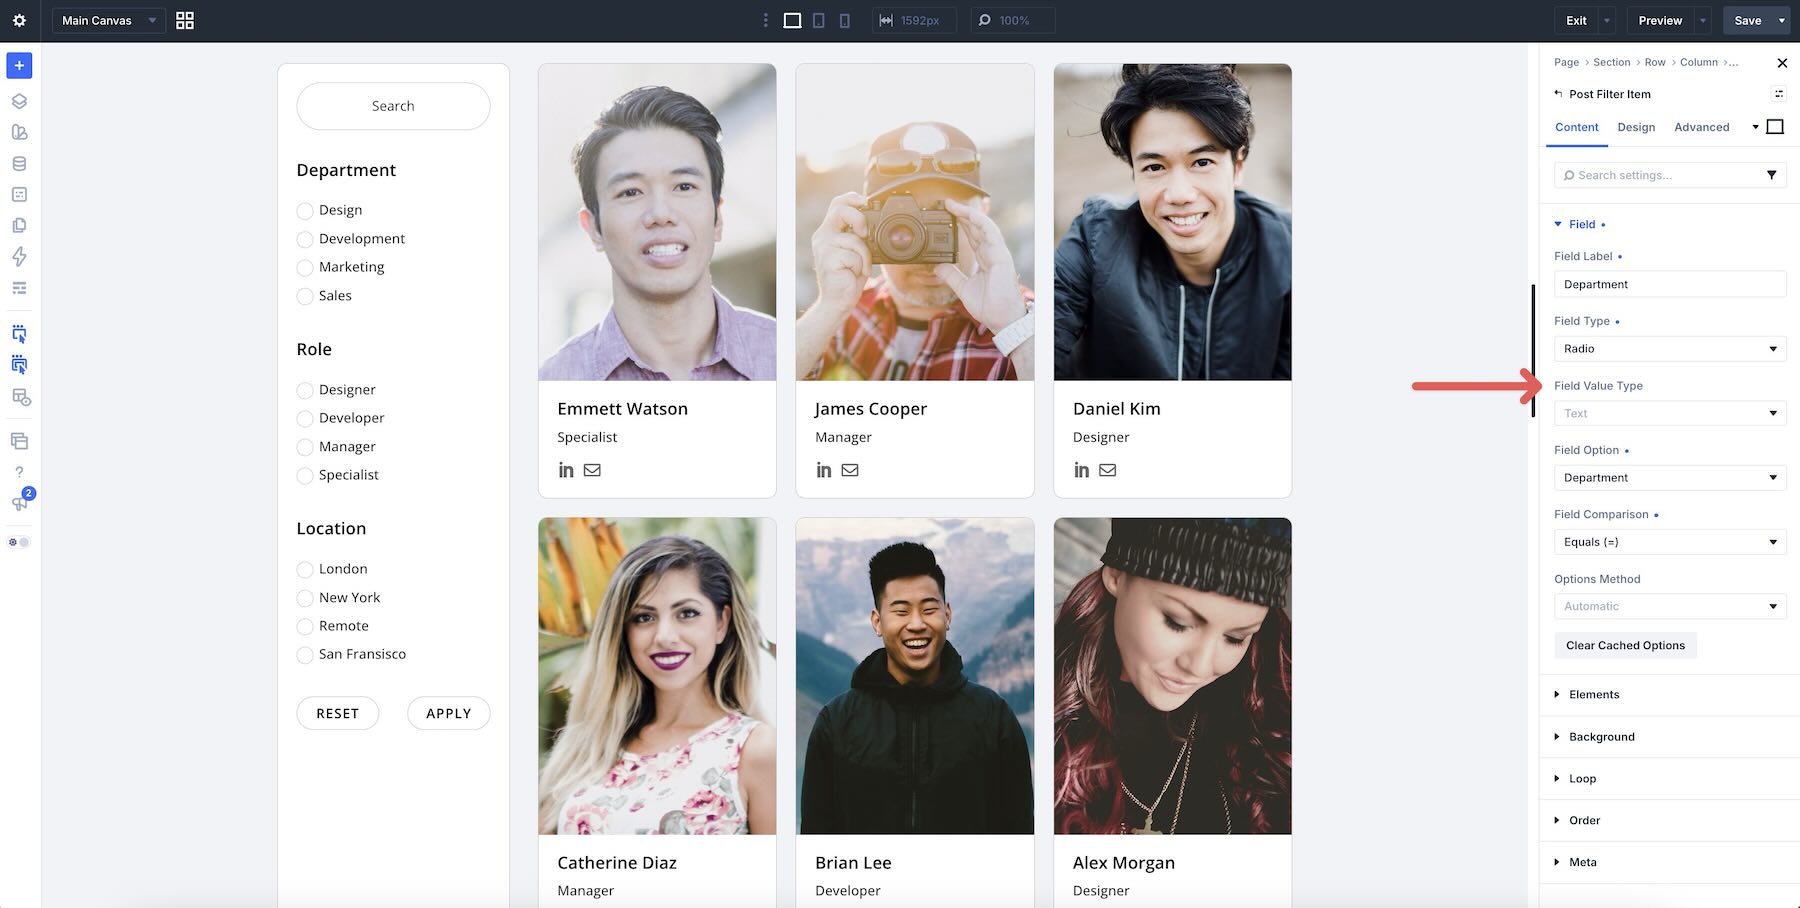
Available types include Text, Number, Date, Date Time, and Time.
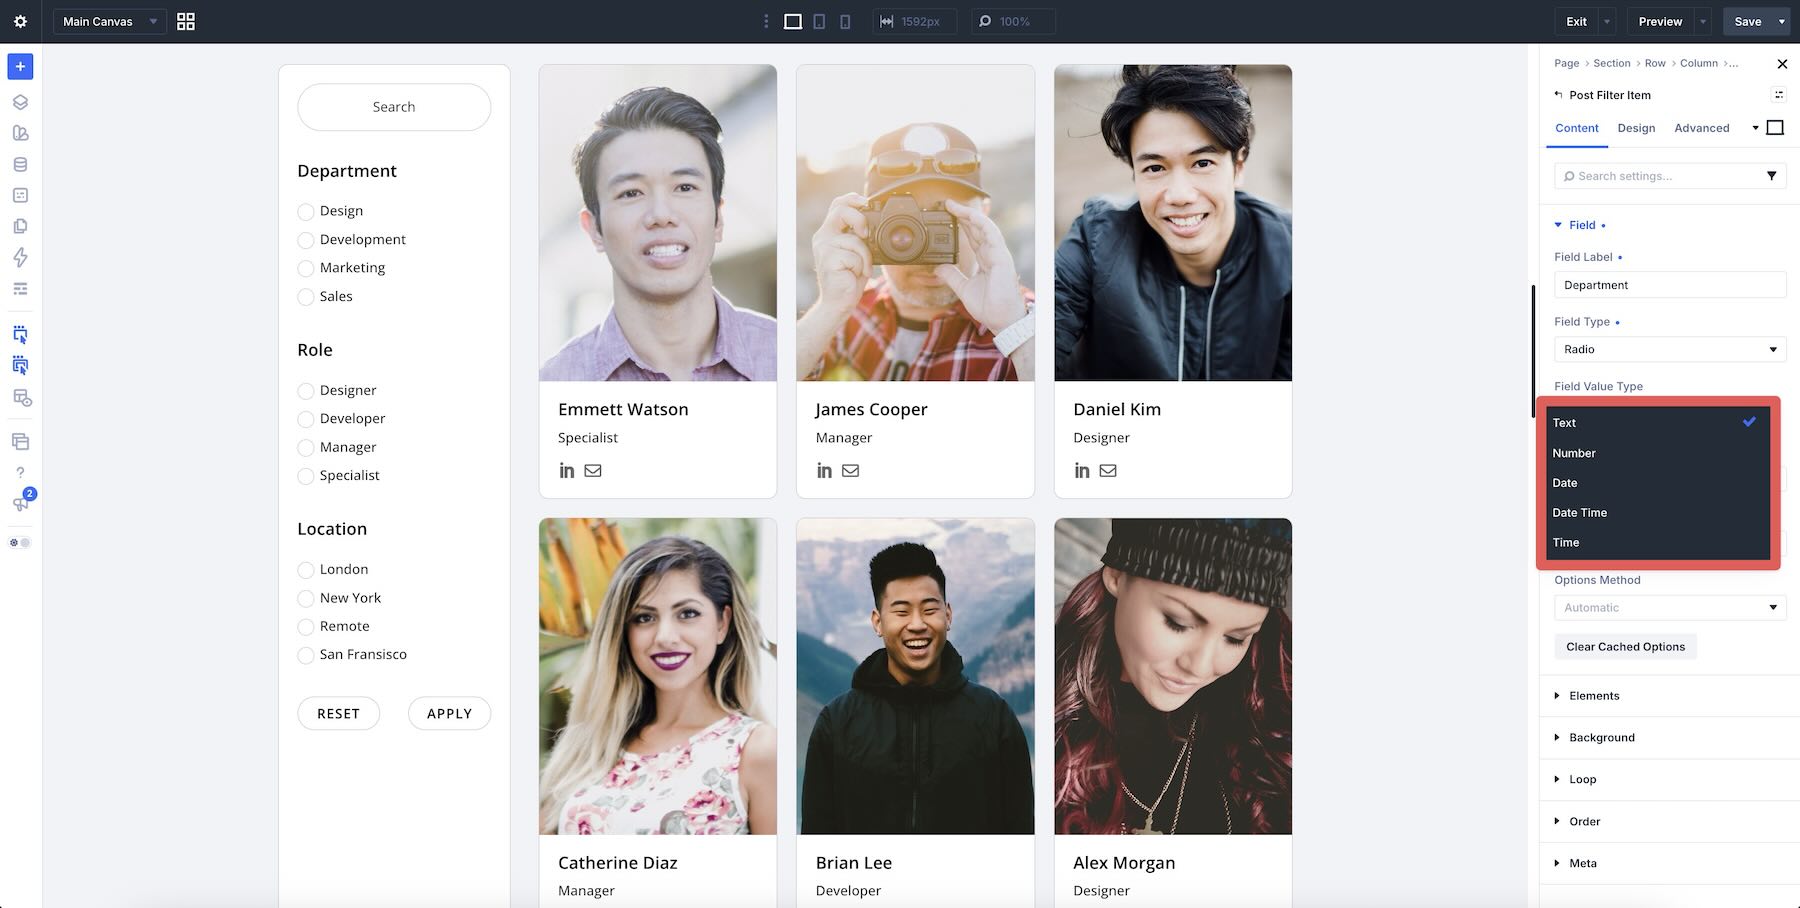
This matters when the underlying value has meaning beyond plain text. A reading-time field stored as a number should be treated as numerical data, while an event date should use an appropriate date value type. Giving Divi the correct type helps the filter interpret and compare the stored values correctly.
Choose The Field Option
Next, tell the Post Filter Item which actual piece of data it should query.
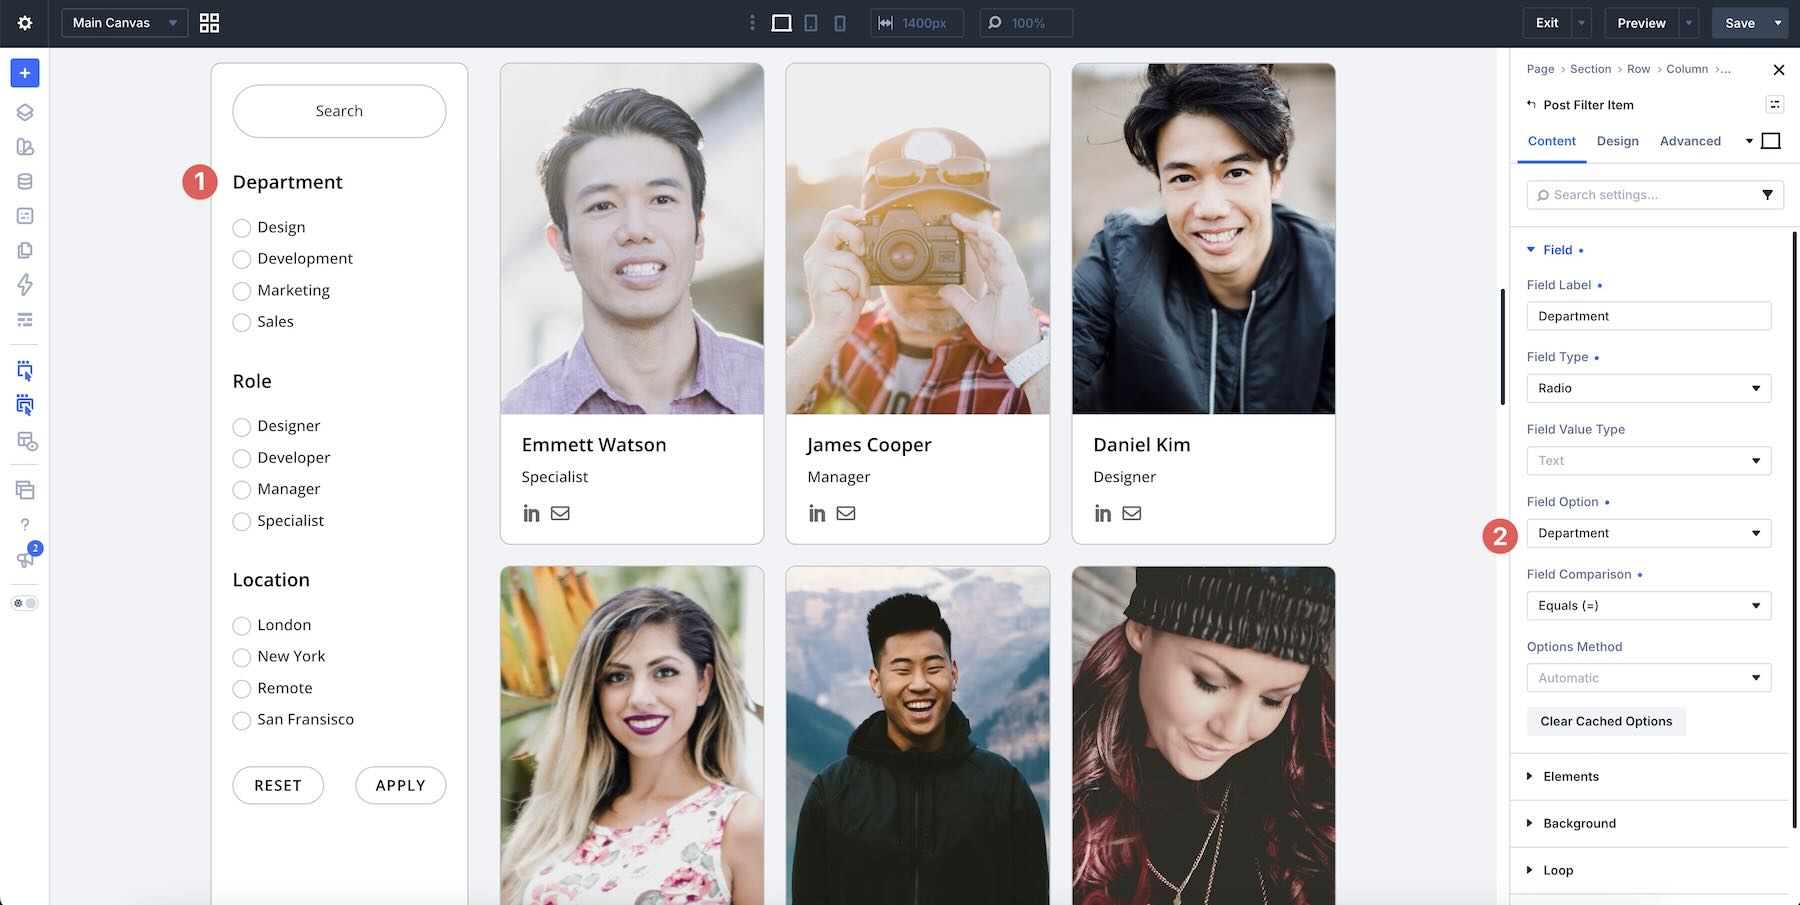
The choices available depend on the Field Type, Target Loop, and data attached to the content. You may be able to connect the field to a taxonomy such as Category or Tag, an author, standard post data, or a custom field.
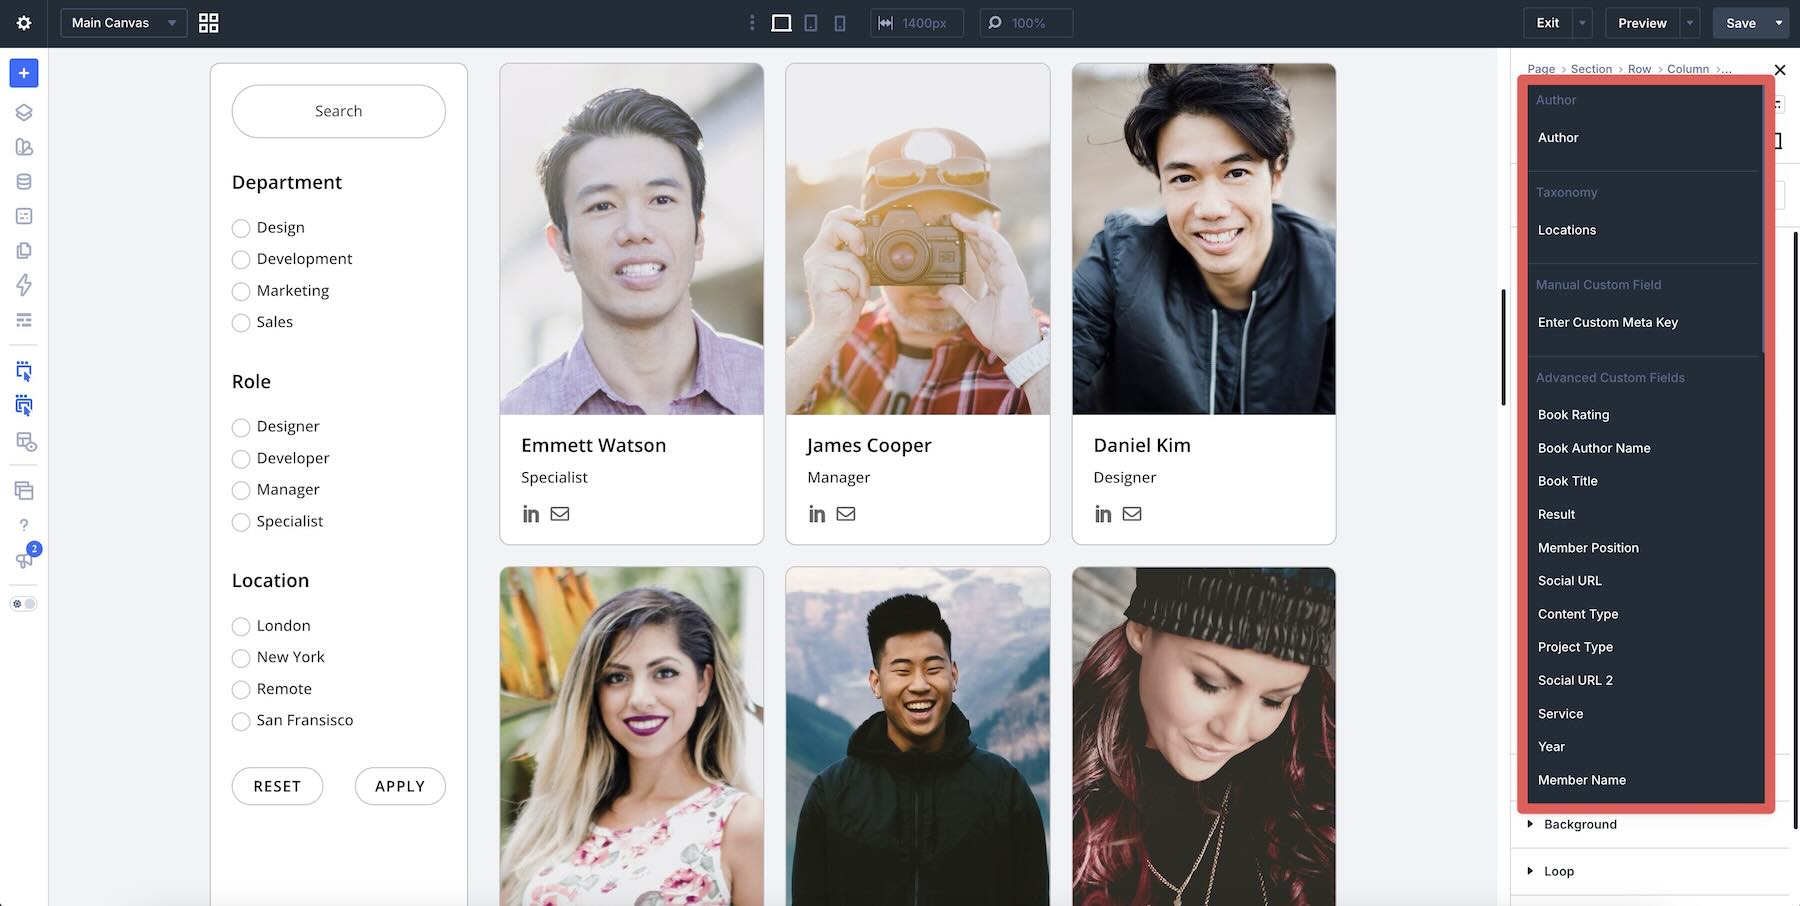
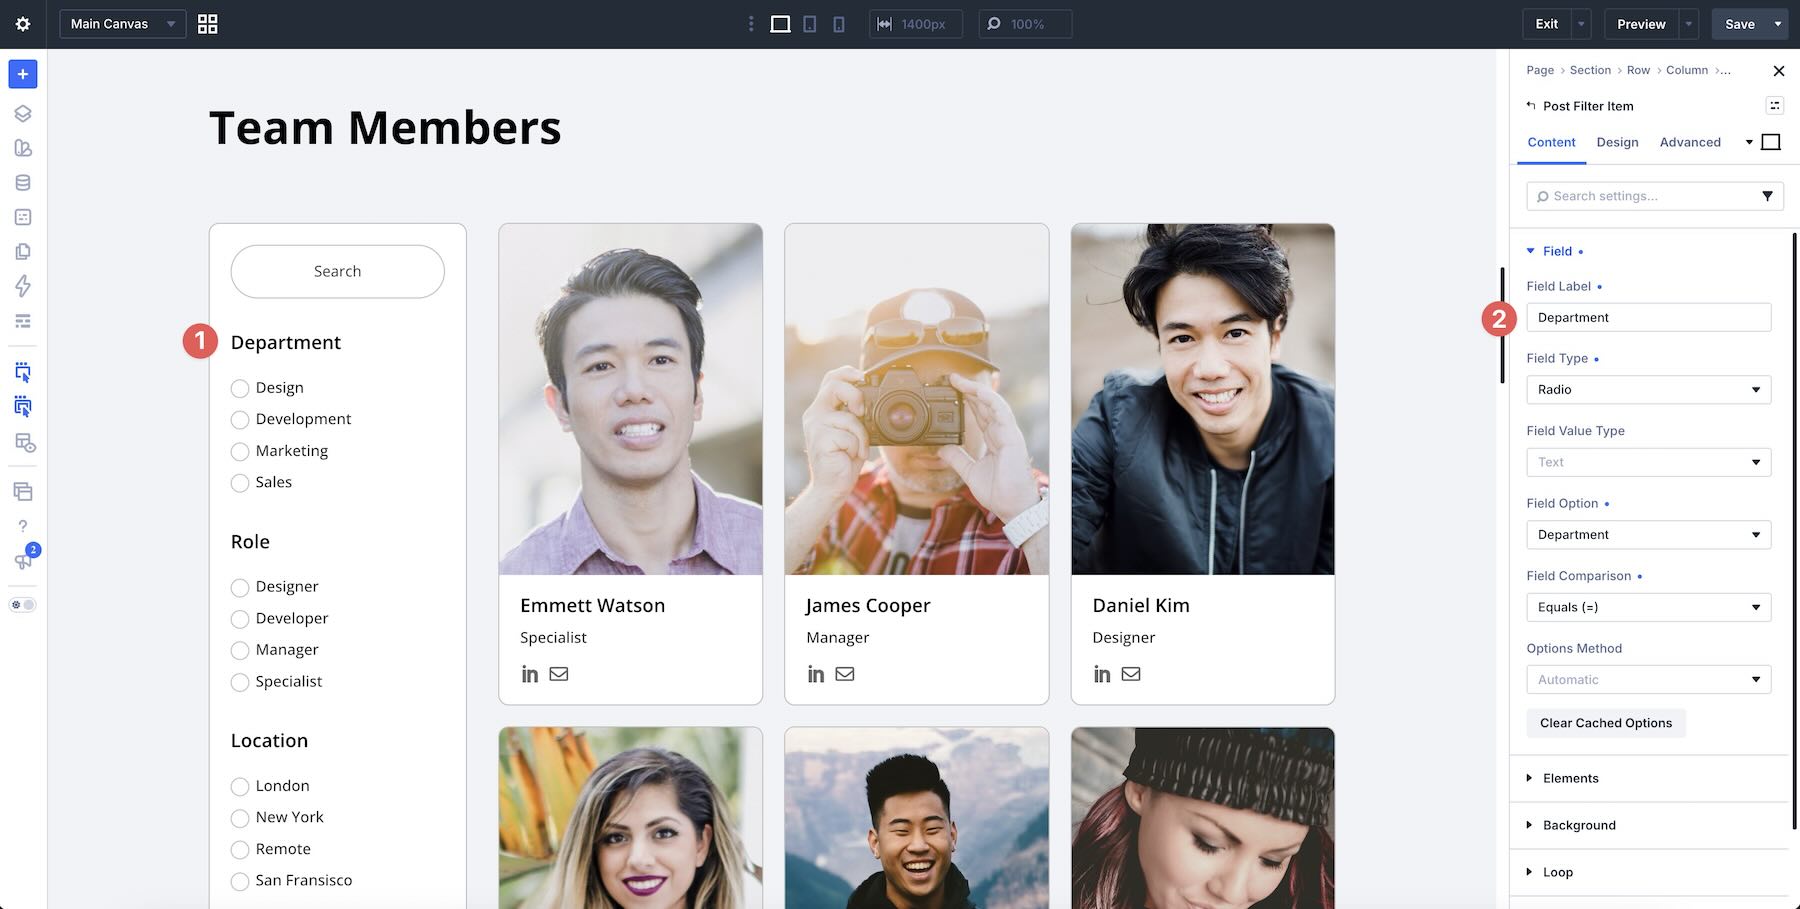
This is where planning the content structure pays off. If a Team Member post type has consistent Department and Location data, those values become useful filter criteria. If that information only exists as unstructured text inside the post body, it is much harder to turn it into a predictable filtering interface.
Style The Field
Once the functional settings are configured, switch to the Design tab to control how the field looks.
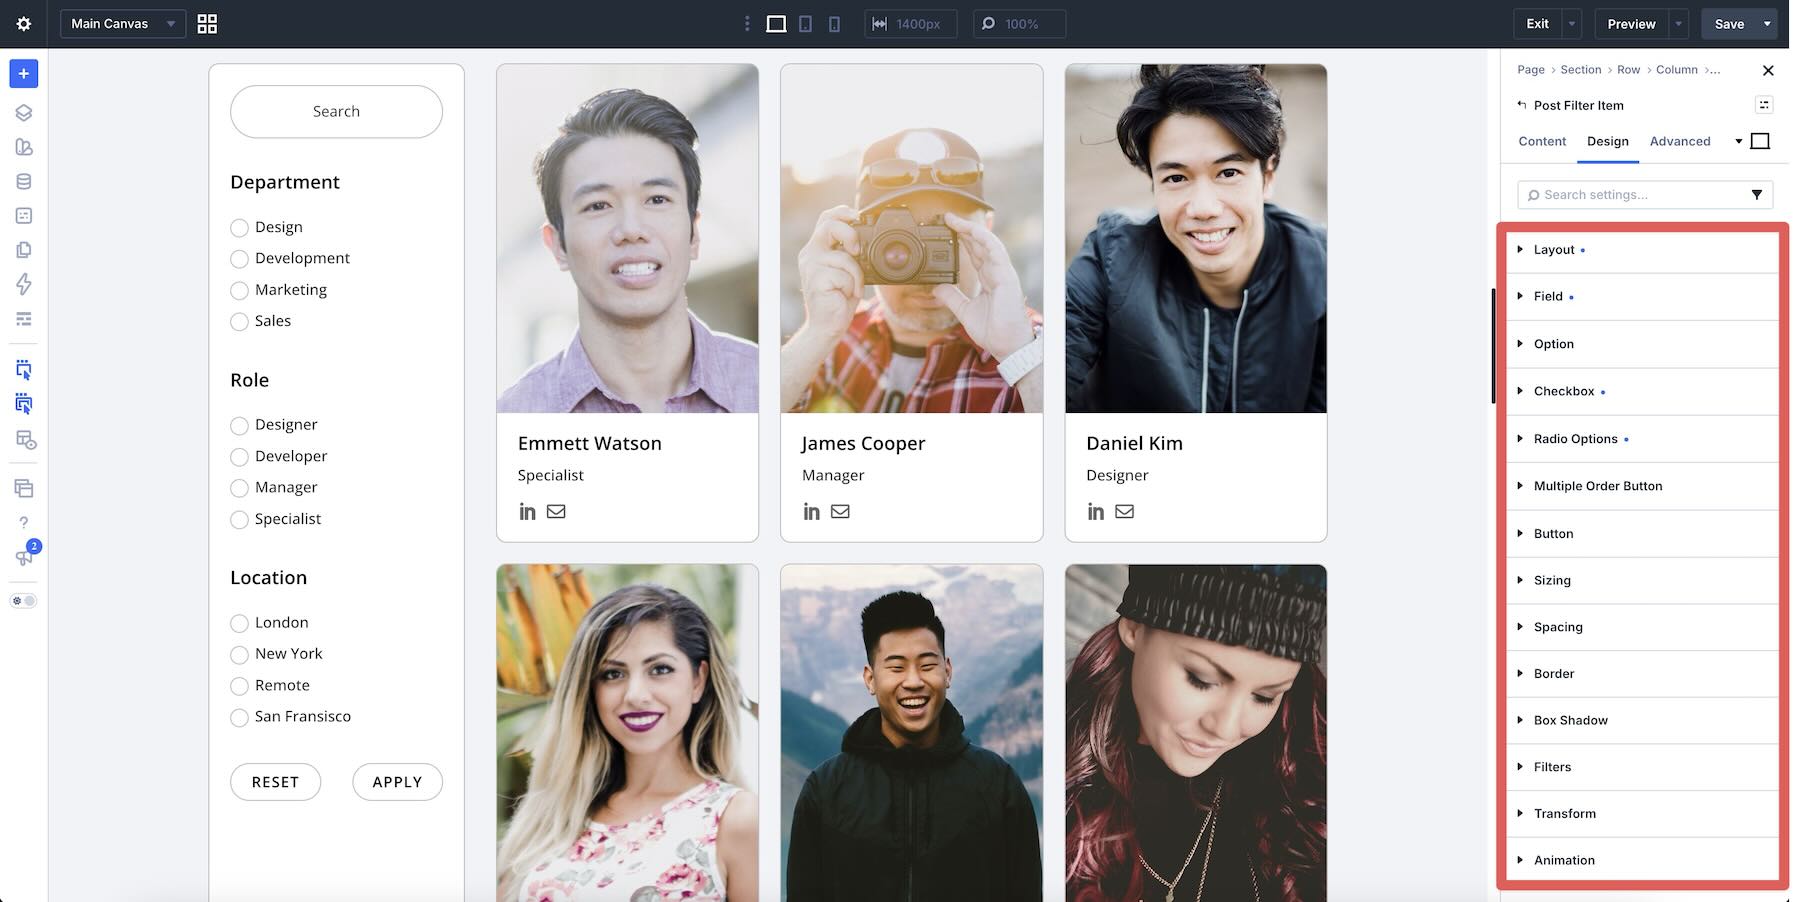
The exact option groups depend on the selected Field Type, but you will commonly see controls such as:
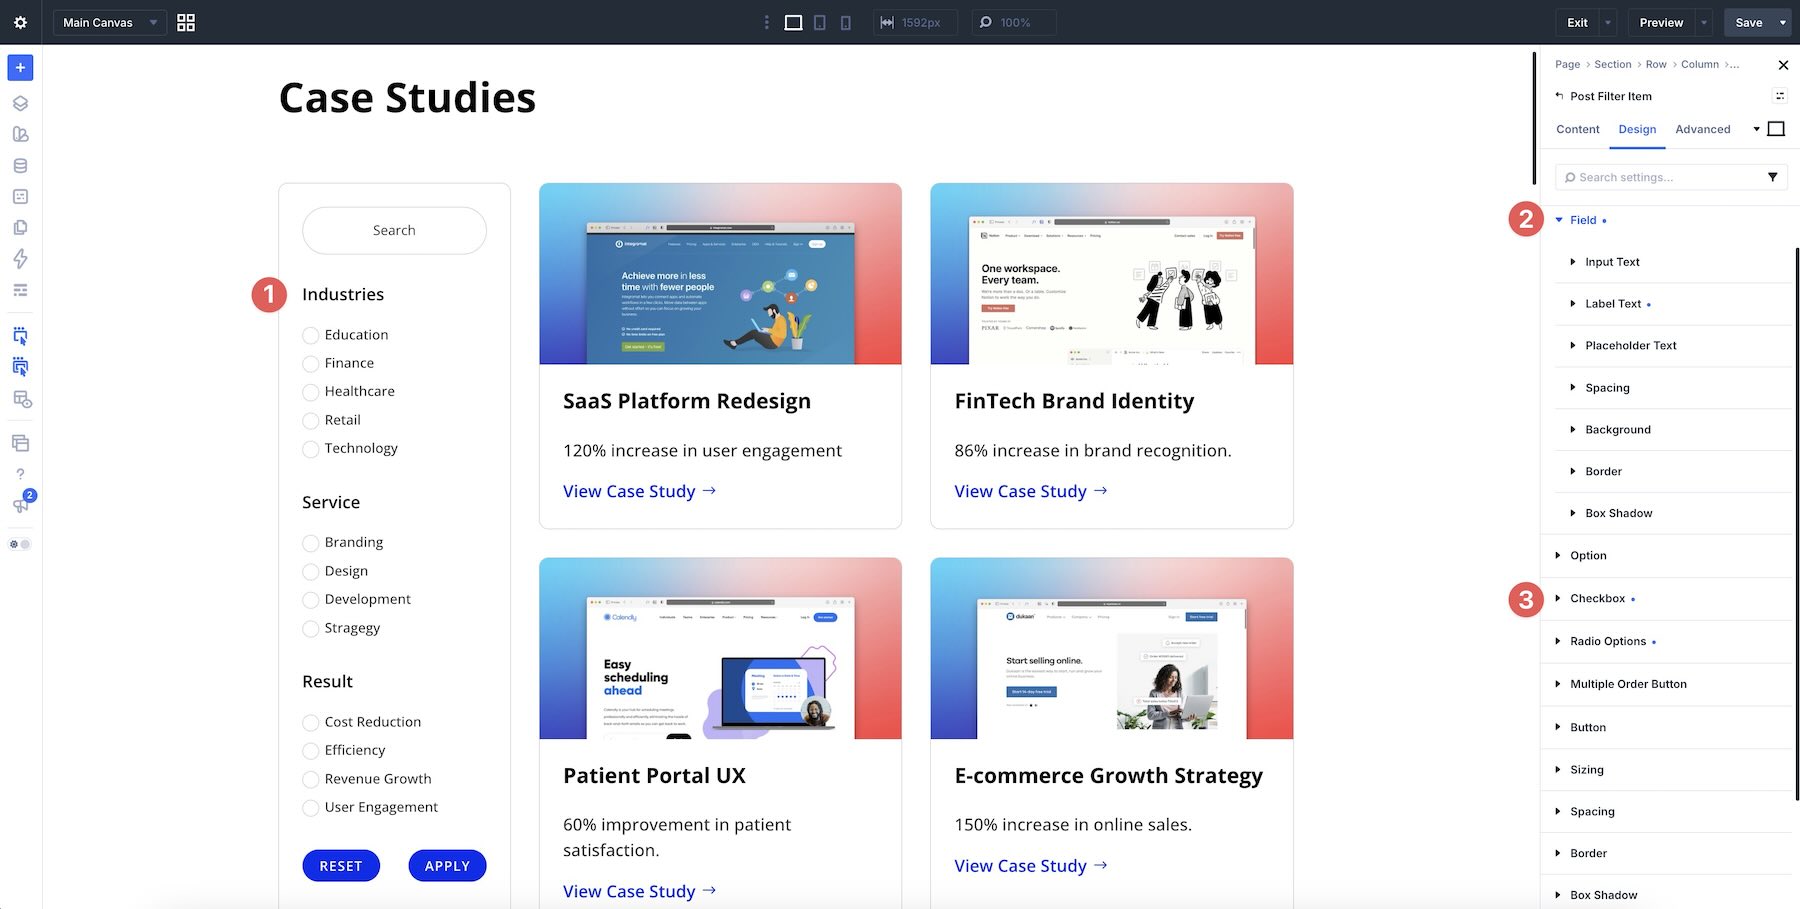
- Field: Styles the input itself, including text, labels, placeholder text, spacing, backgrounds, borders, and shadows.
- Option: Controls the surrounding option container, including its sizing, spacing, background, border, and Box Shadow.
- Checkbox / Radio Options: Provides controls specific to those selectable options, including their labels, inputs, icons, spacing, backgrounds, borders, and shadows.
- Multiple Order Button: Provides styling for controls used by the Multiple Order interface.
- Button: Styles Submit and Reset controls, including typography, backgrounds, borders, icons, spacing, sizing, and Box Shadow.
You also get Divi’s wider design controls where applicable, including Sizing, Spacing, Border, Box Shadow, Filters, Transform, Animation, responsive values, and other standard styling tools.
Practical Ways To Use Loop Filter Modules
Loop Filters become particularly useful when a website contains structured content. Custom post types and custom fields give the Loop meaningful data to query, while the Post Filter Module exposes the most useful parts of that data to visitors.
Here are four examples using Divi’s native Project post type or custom post types and fields created with tools such as Advanced Custom Fields (ACF).
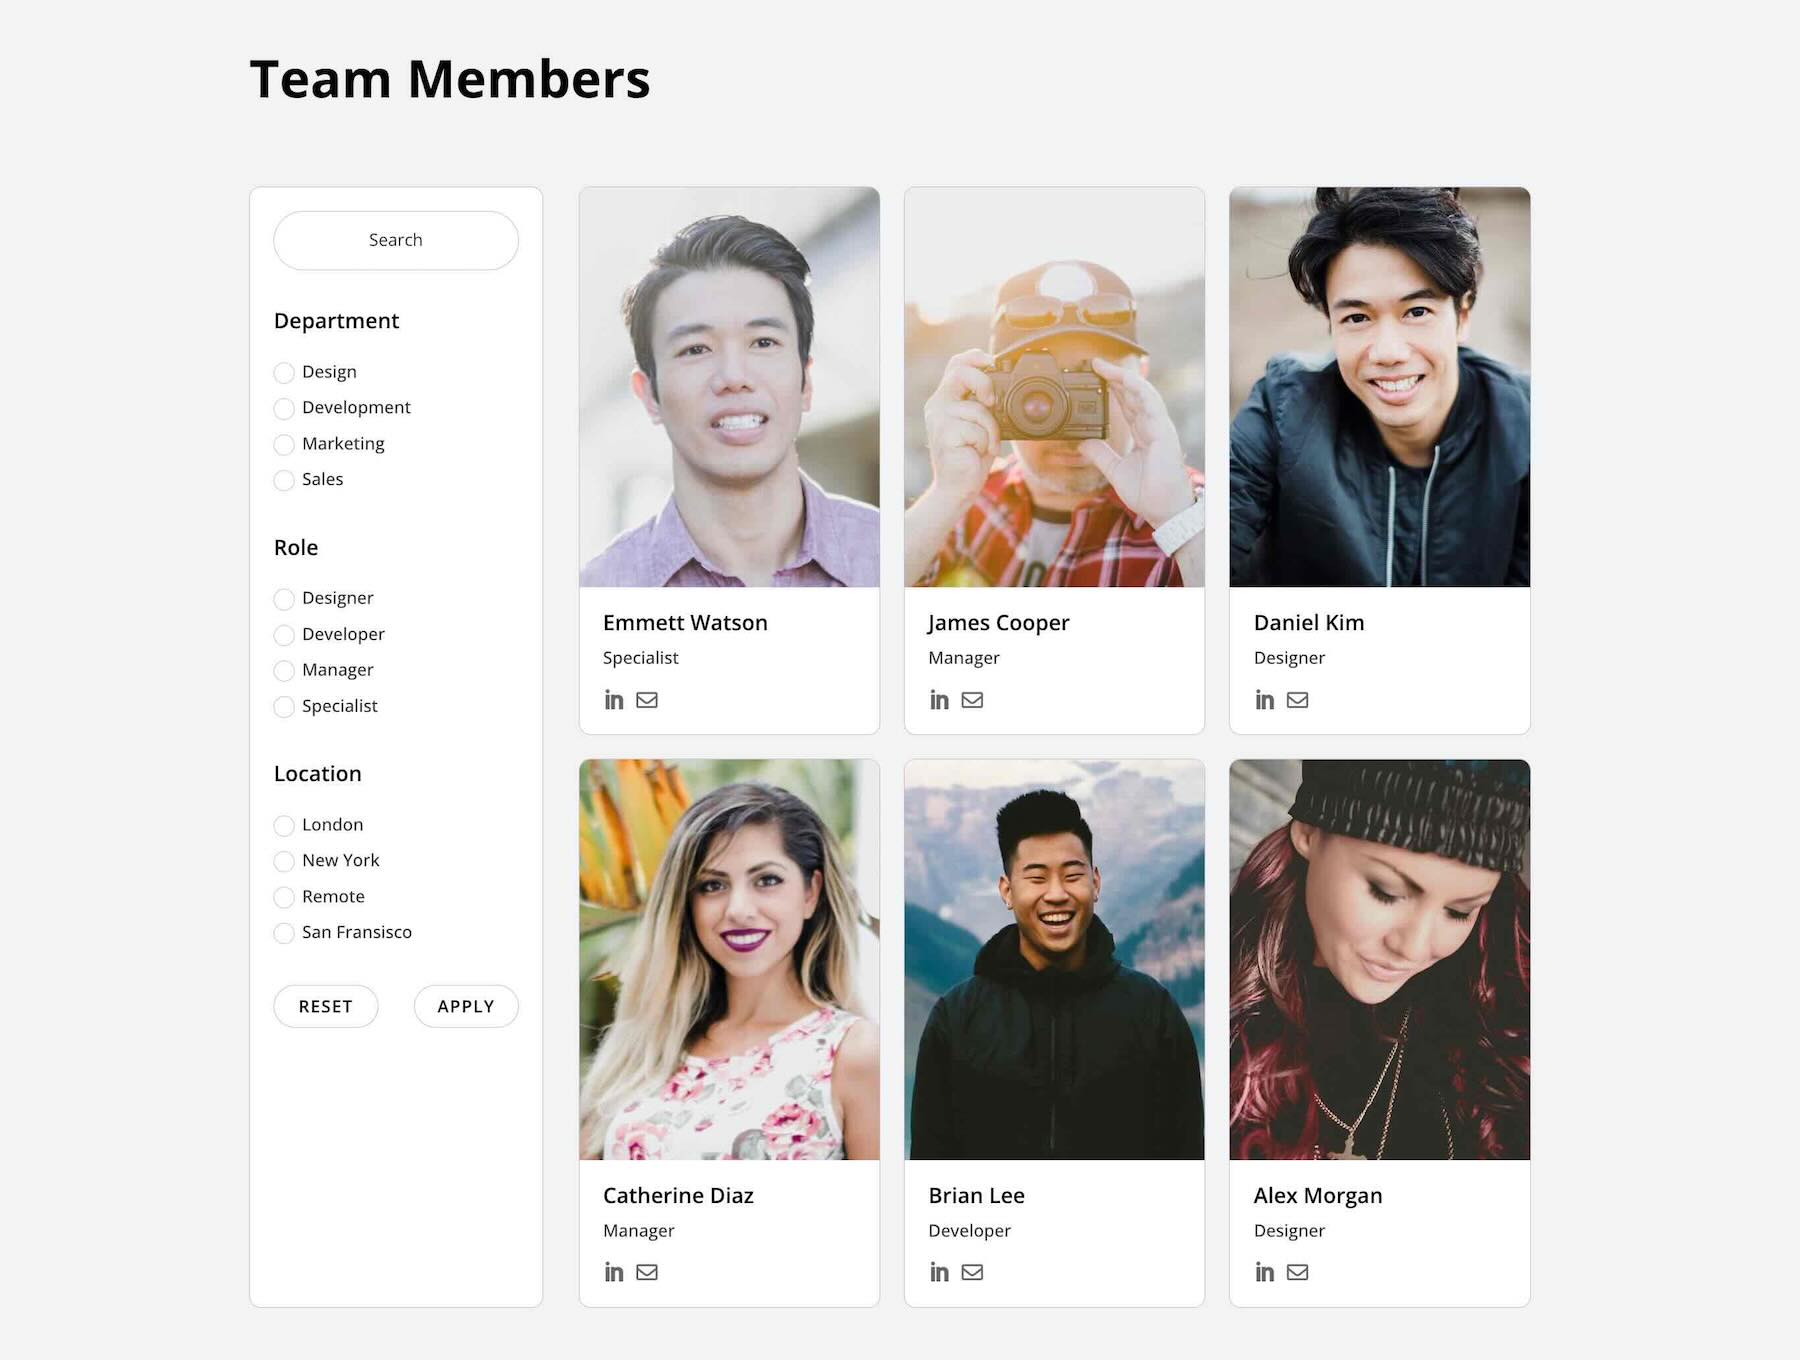
Team Member Directory
For a staff directory, create a Team Members custom post type and organize each person using values such as Department, Role, and Location. Depending on the data structure, those could be taxonomies, custom fields, or a combination of both.
A Text field can let visitors search for a person by name, while Select, Radio, or Checkbox controls can narrow the directory by department, location, or another useful attribute. The same employee-card design stays in place while the Loop changes which people are shown.
Portfolio Project Showcase
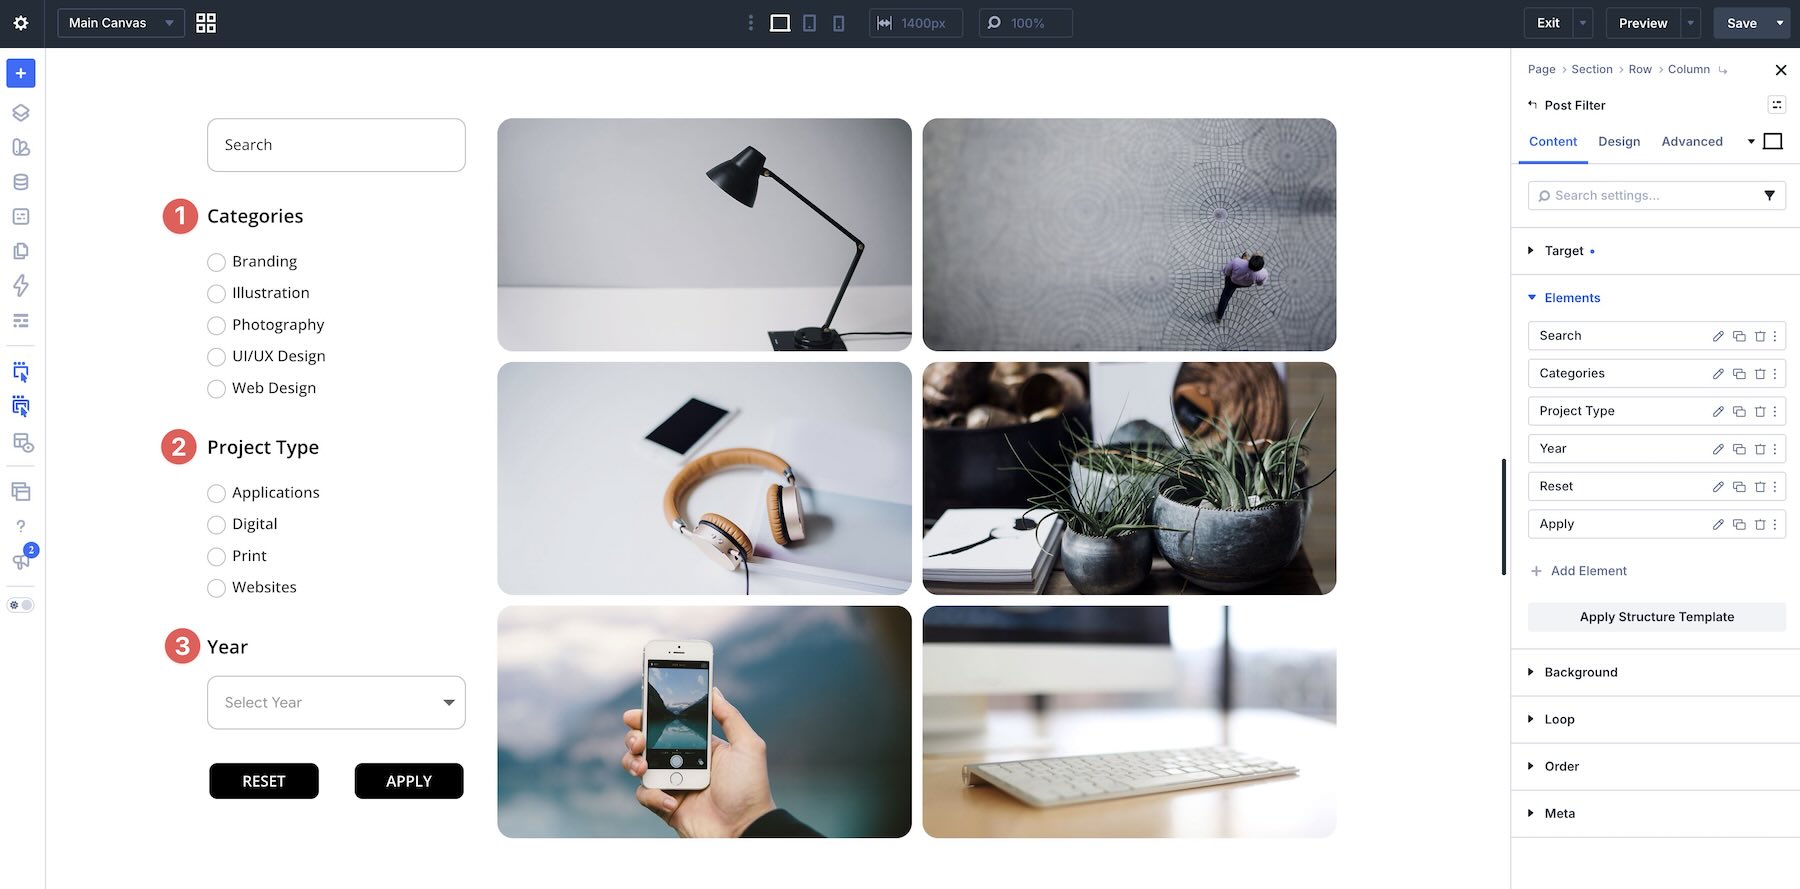
Divi’s native Project post type already gives you a useful starting point for a portfolio. Combine Project Categories with additional custom fields when the portfolio needs more specific information, such as project type, year, service, location, or client industry.
You could let visitors search projects, filter by Project Category, and add another filter for Year or Project Type. Instead of browsing one long portfolio, visitors can narrow the Loop to the work that is most relevant to them.

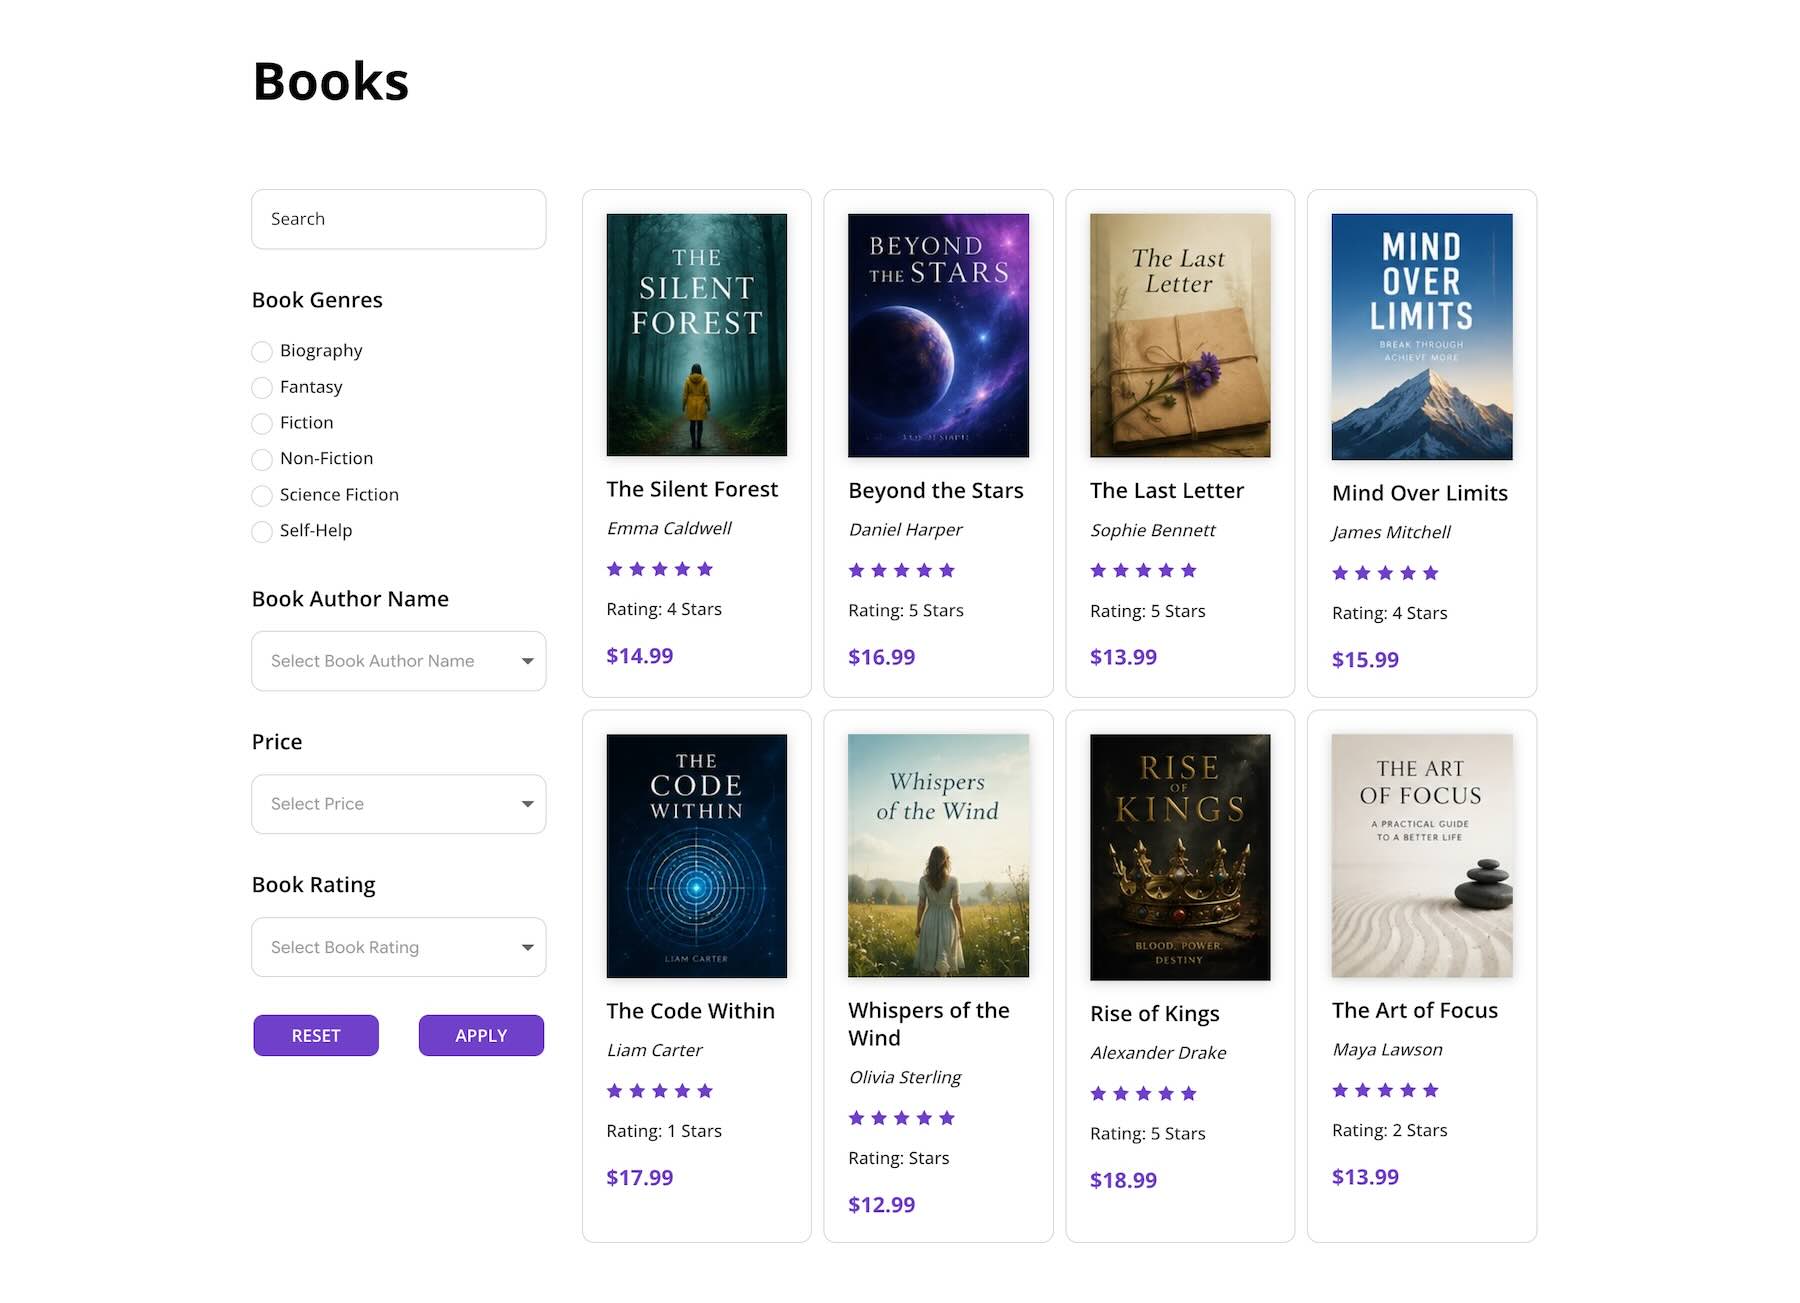
Book Catalog
A bookstore or publisher could create a Books custom post type and structure its content around fields or taxonomies such as Genre, Author, Price, Publication Date, or Rating.
Radio or Checkbox controls can handle Genre, a Select field can keep a longer list of authors compact, and Order By can give visitors another way to browse the catalog. The result is still a Divi Loop Builder layout, but visitors get much more control over which books appear.
Case Studies
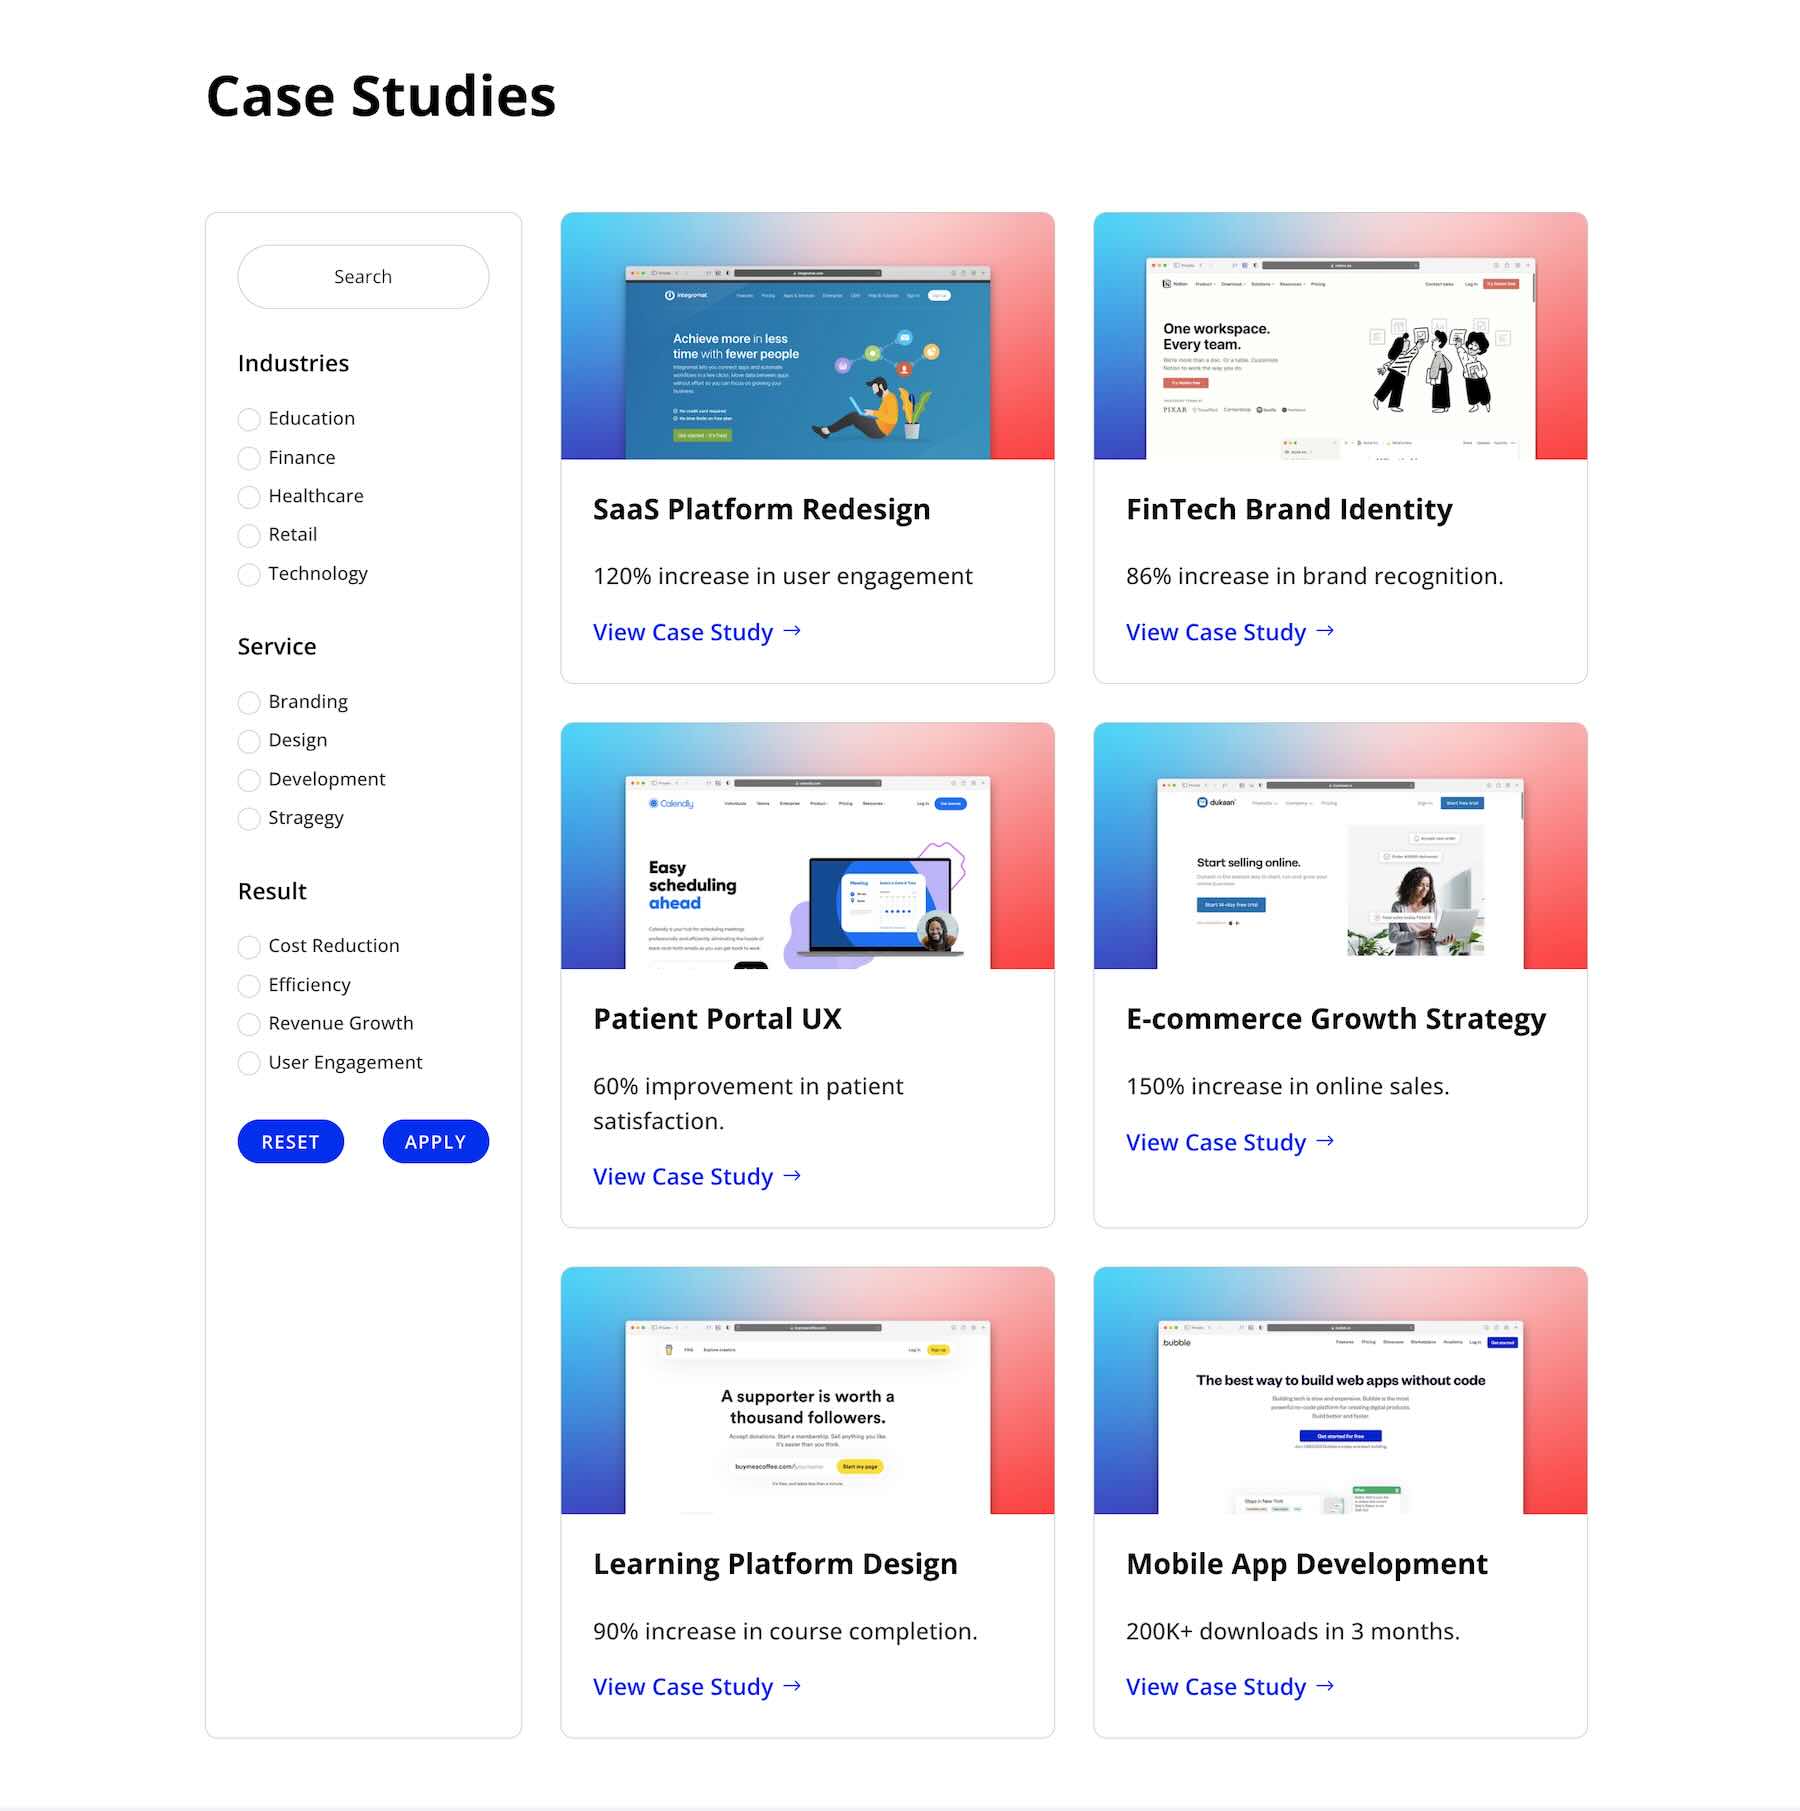
Case studies are another natural fit because they often contain consistent classification data. A custom post type might use fields or taxonomies for Industry, Service, Project Type, or Outcome.
A visitor evaluating your work could search for a specific topic, filter by industry, then narrow the Loop to a particular service. That creates a much more focused path through a larger case-study library.
All four examples use the same underlying idea: structure the content first, create the repeated Loop design second, and then expose the most useful query controls through the Post Filter Module. The design and data model can change completely while the filtering workflow stays familiar.
How To Build A Loop Filter Form In Divi 5
Now let’s put the system together. In this walkthrough, we’ll create a blog Loop using standard WordPress post data along with a couple of custom fields created with ACF, then connect a Post Filter Module so visitors can refine the feed.
Before starting, have several blog posts available for testing and make sure any ACF fields used in the walkthrough are already created and populated. If you need a refresher on the Loop itself, start with our How To Create A Custom Blog Post Loop With Divi 5’s Loop Builder guide.
1. Create Or Open A Page And Enable A Loop
Open a page in the Visual Builder or create a new one. Build the element structure that will contain the repeated content, then enable Loop Element from the appropriate element’s Content > Loop settings. Configure its Query Type, Post Type, number of results, ordering, and any other query options required for the feed.
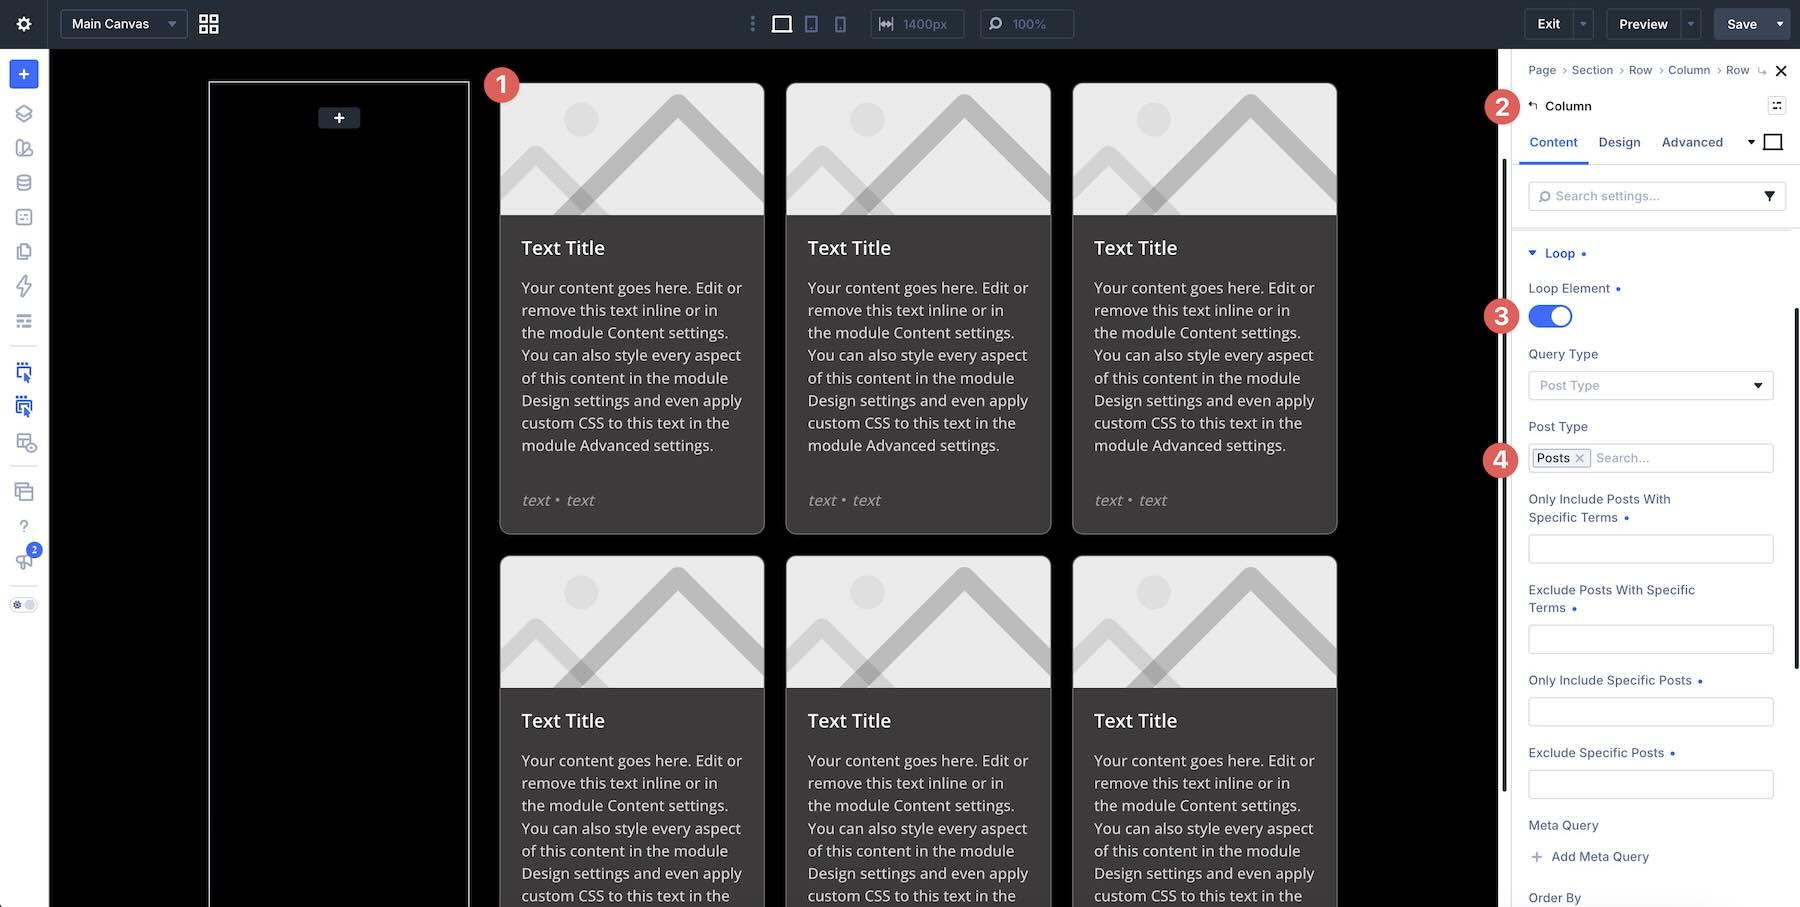
Design the repeated item before adding the filter form. Connect its Heading, Text, Image, Button, or other modules to the appropriate Loop Dynamic Content values so each result displays information from the current item.
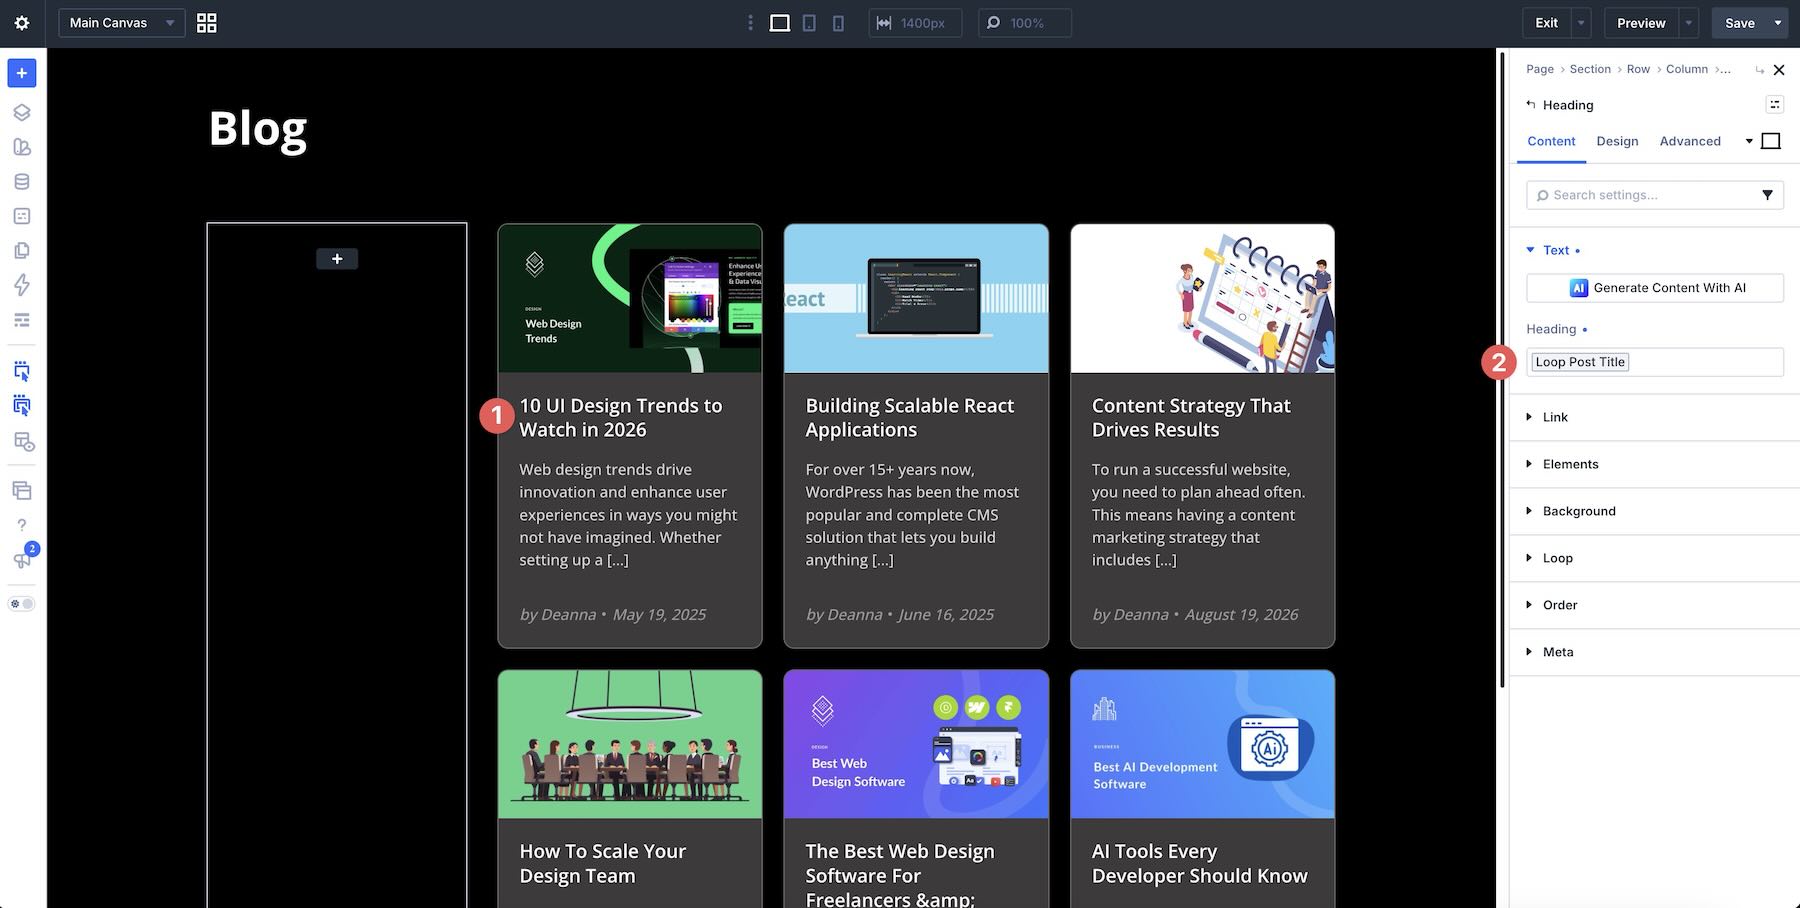
Testing the Loop on its own first makes the next steps easier. If the feed already displays the correct posts and Dynamic Content, any issue introduced later is much easier to trace back to the filter configuration.
2. Add The Post Filter Module
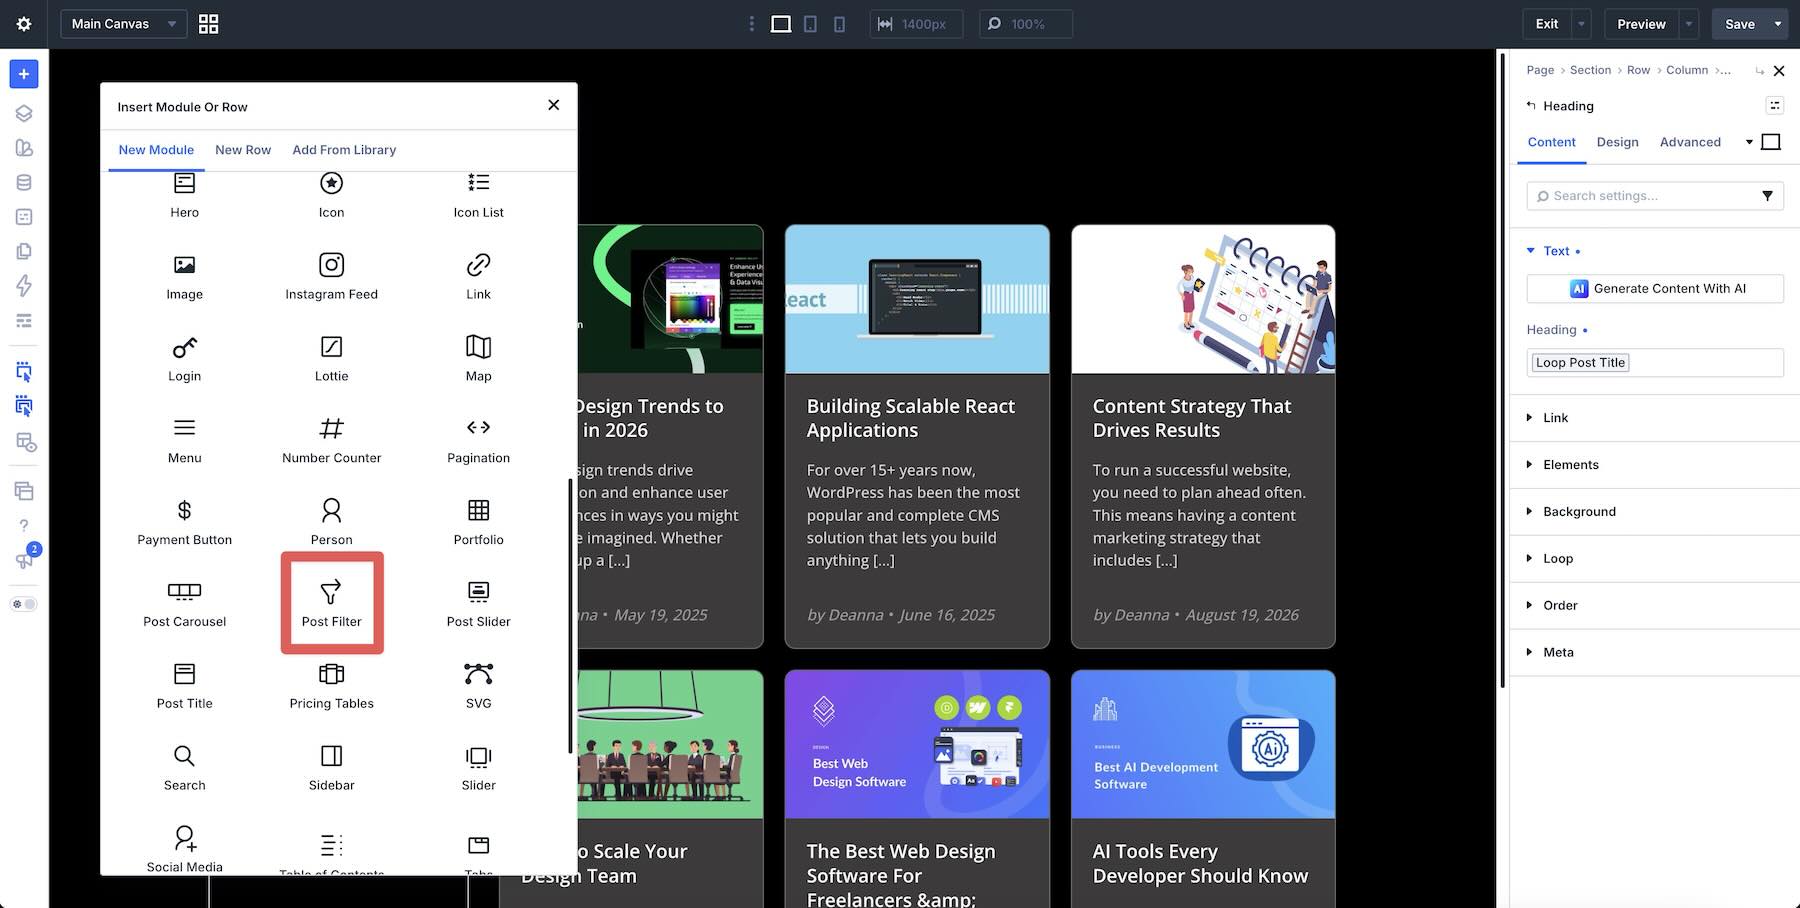
Add a Post Filter Module near the Loop. In this example, it sits in the first Column beside the results, but the form can be positioned wherever the layout makes sense.
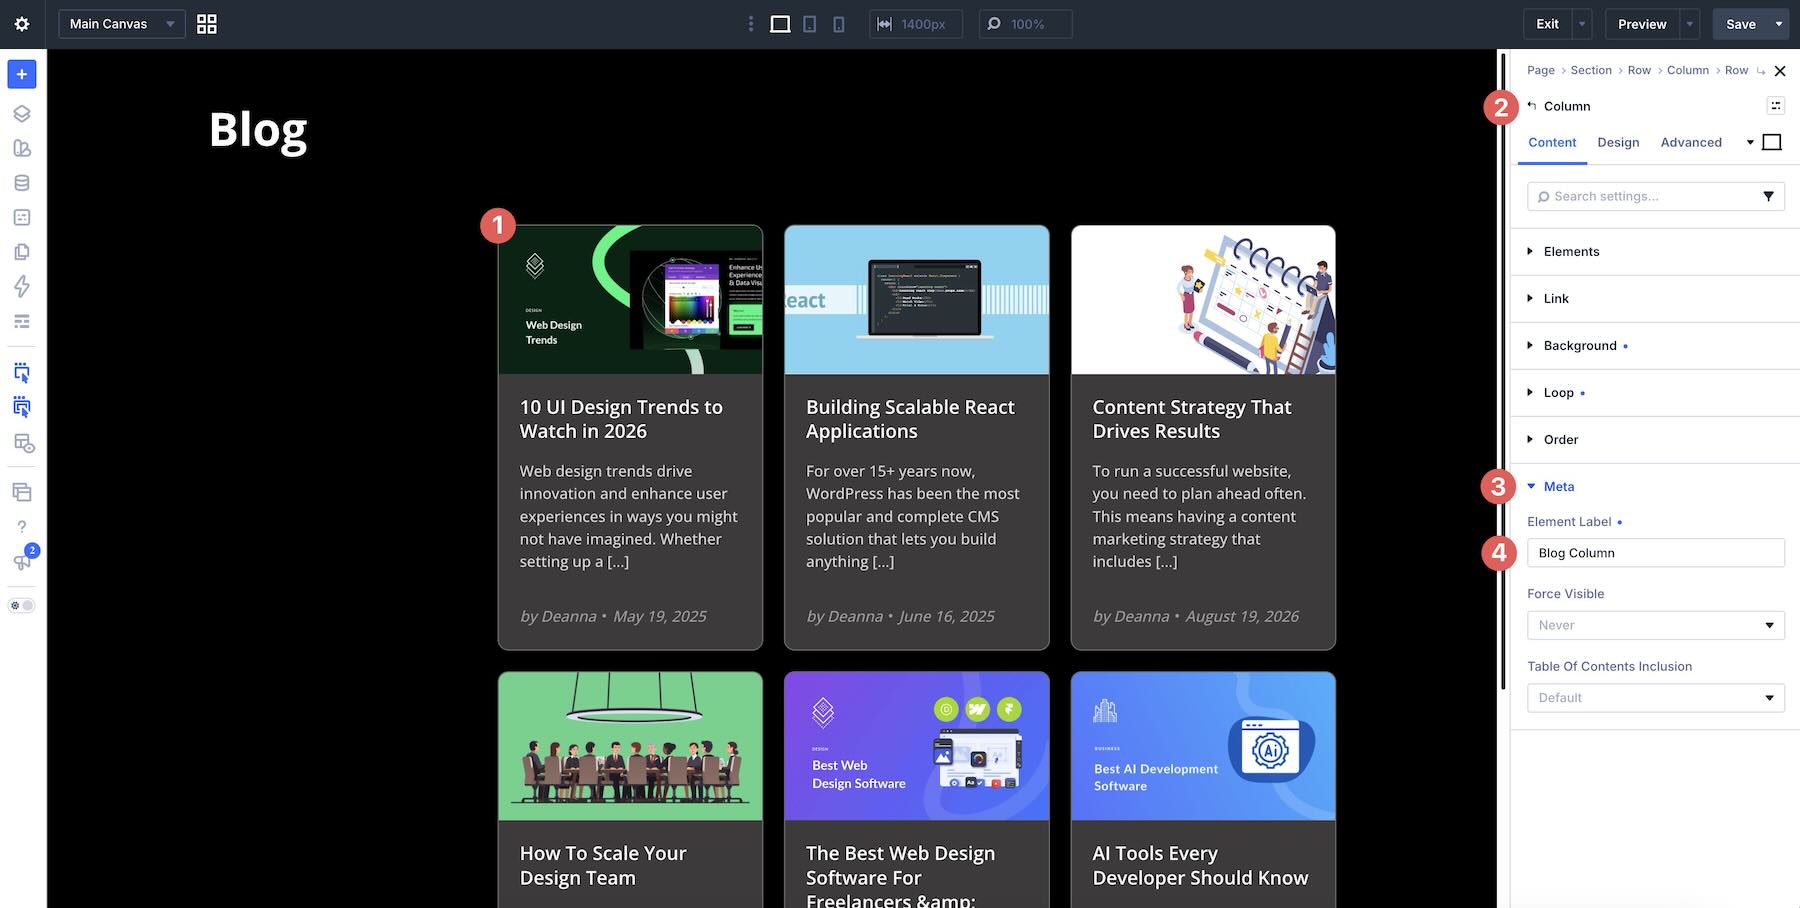
Open the module’s Content tab, expand Target, and select the Loop the form should control. This is especially useful when a page contains multiple Loops because each filter form needs to know which results it should refine.
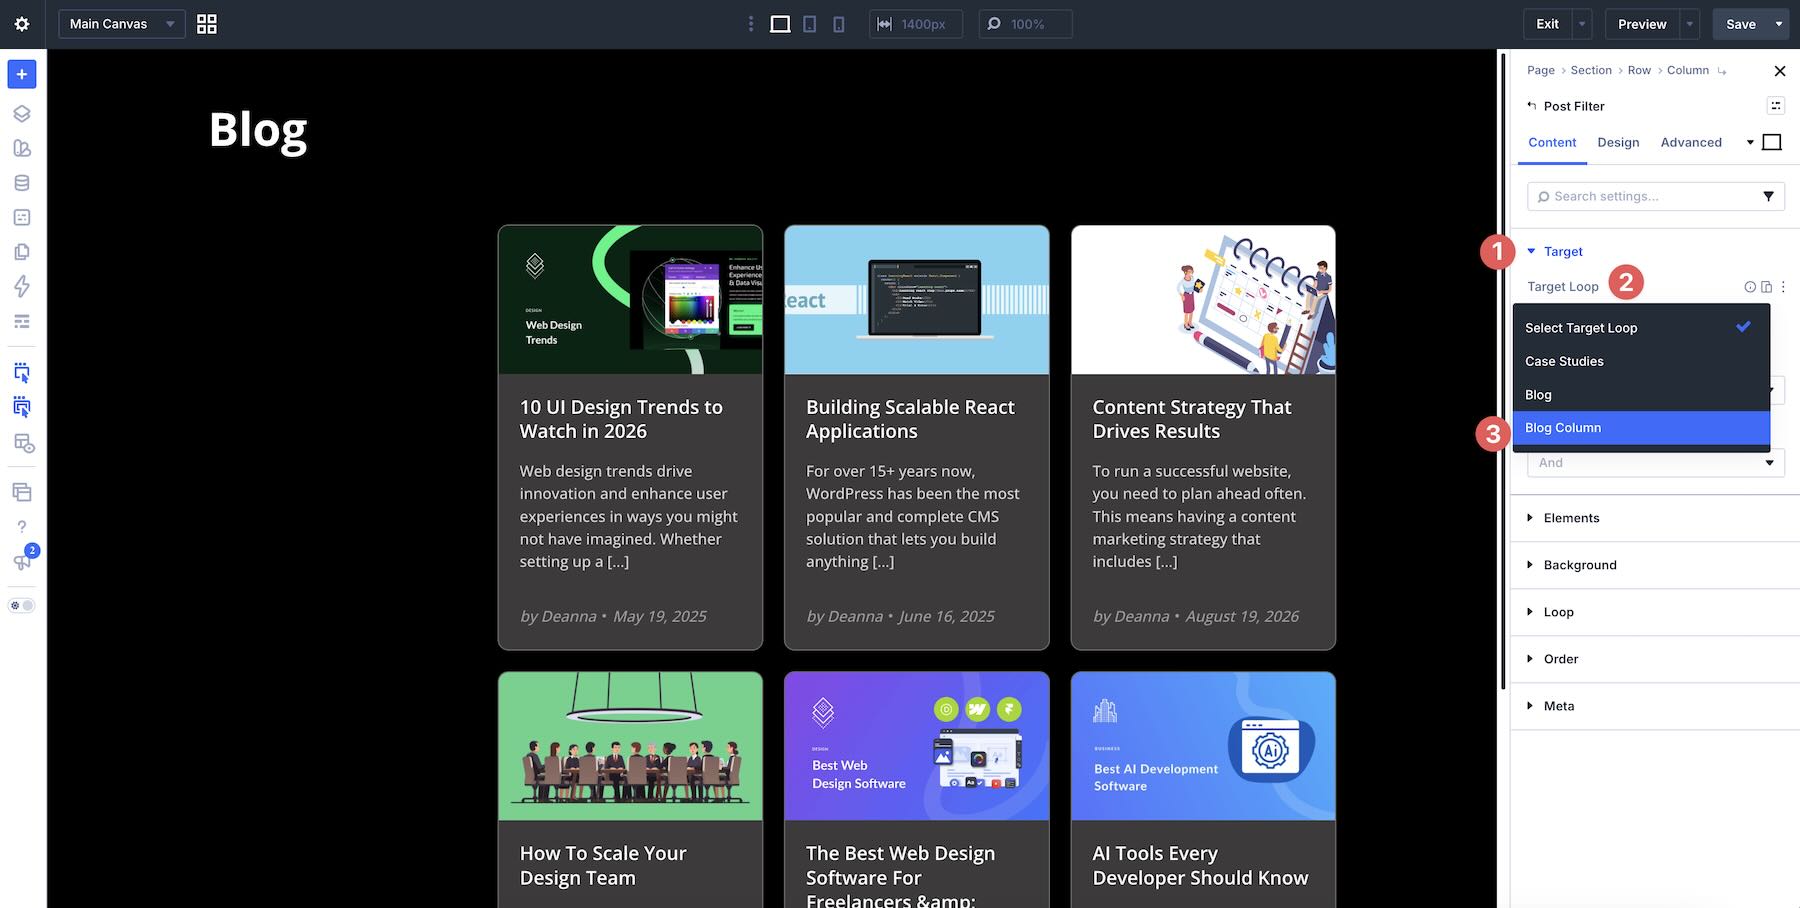
Before selecting the Target Loop, give the Row, Column, Group, or other looped element a useful Element Label. A descriptive name such as Blog Results is much easier to recognize than a generic element label when several possible targets appear in the dropdown.
3. Add Post Filter Item Modules
The Post Filter Module begins with several useful controls, including Search, Category, Reset, and Apply. These give you a working foundation that you can keep, remove, duplicate, or expand depending on the content being filtered.
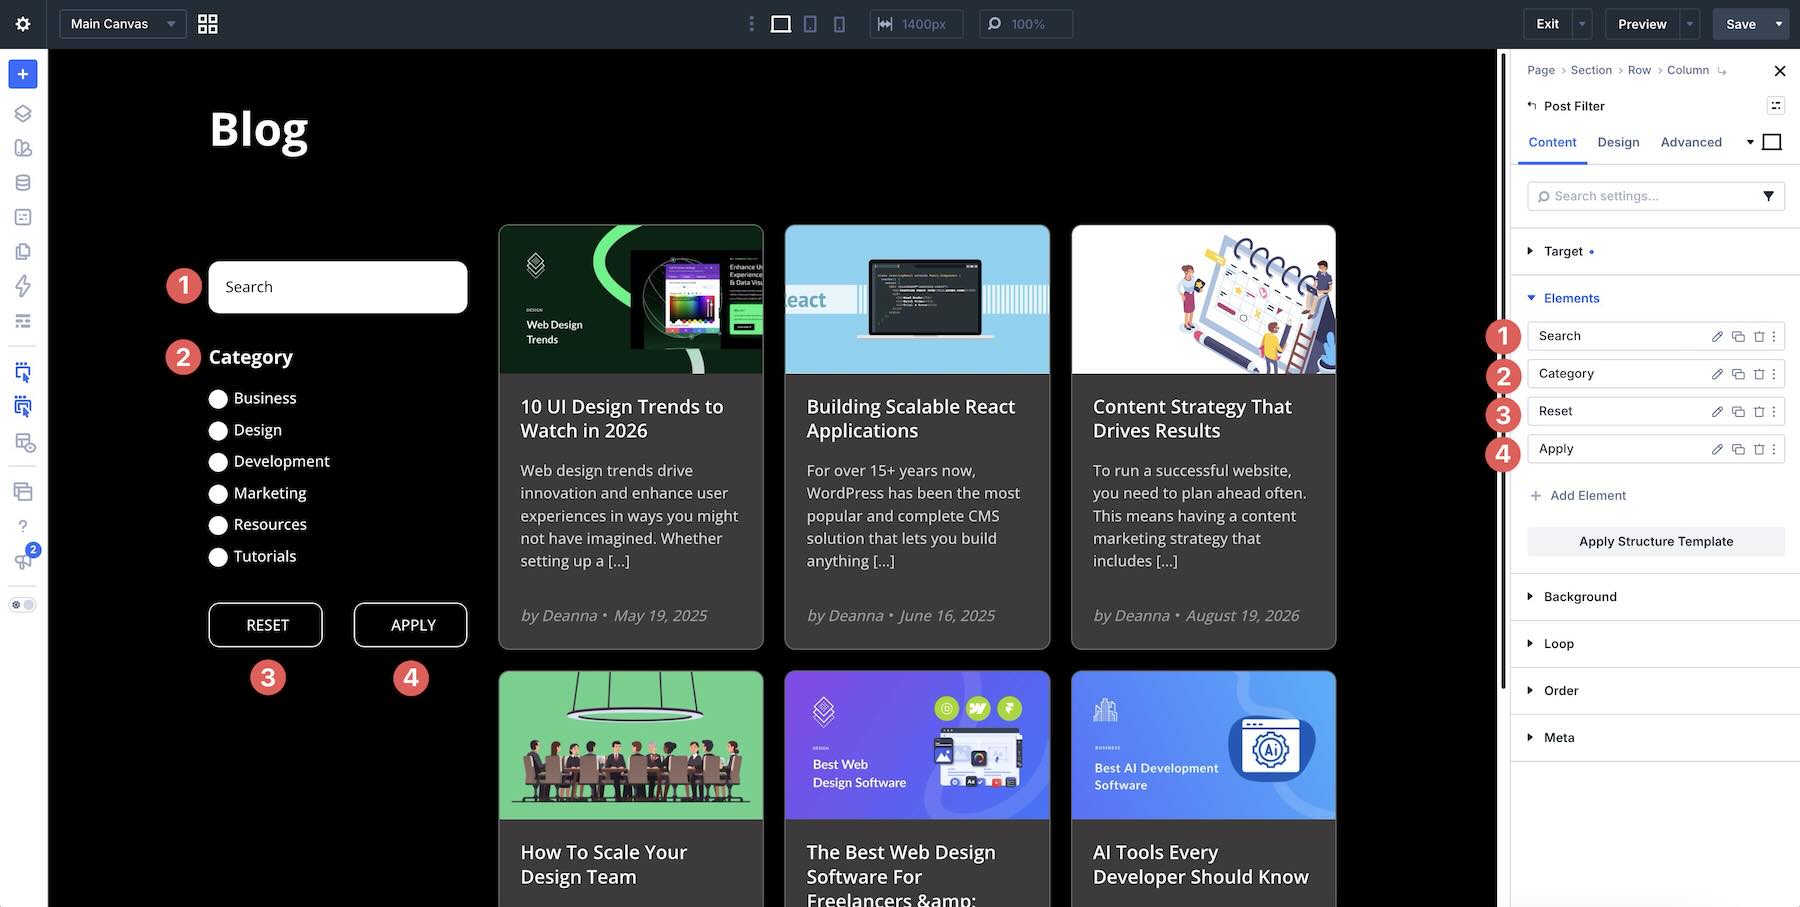
For this example, our posts use two custom fields: Content Type and Read Time. Because the existing Category control is already close to the type of selectable filter we need for Content Type, we’ll duplicate it and then point the copy at the new custom field.
To add another control, click + Add Element in the Post Filter Module’s Elements list.
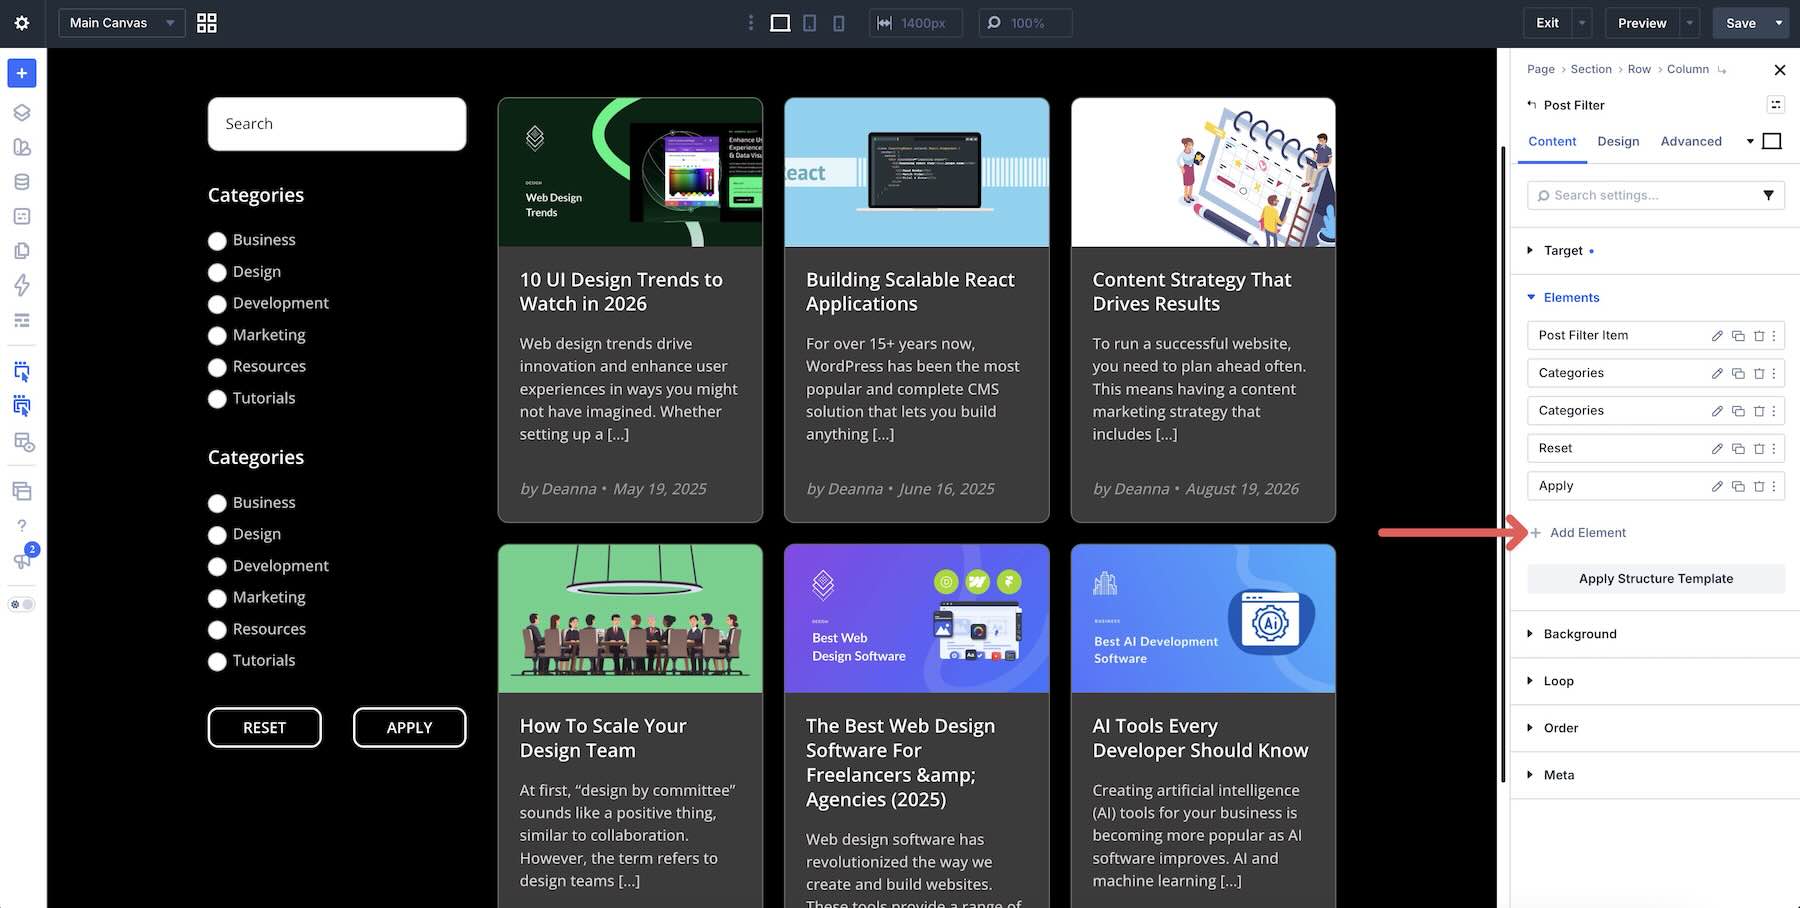
A new Post Filter Item can then be configured for the field you need. Drag the items inside the Elements list to arrange the controls in the order visitors should encounter them.
Think about that sequence from the visitor’s perspective. Broad filters such as Search or Category usually make sense near the top, more specific filters can follow, and Apply/Reset actions are generally easiest to understand at the end of the form.
4. Configure Each Field
With the controls in place, connect each one to the correct data.
Start with the duplicated Category item and change its Field Option so it targets the Content Type custom field rather than the post’s Category taxonomy.
Next, select the new field created for Read Time. In its Content settings, set Field Value Type to Number because the data stored in Read Time is numerical rather than ordinary text.
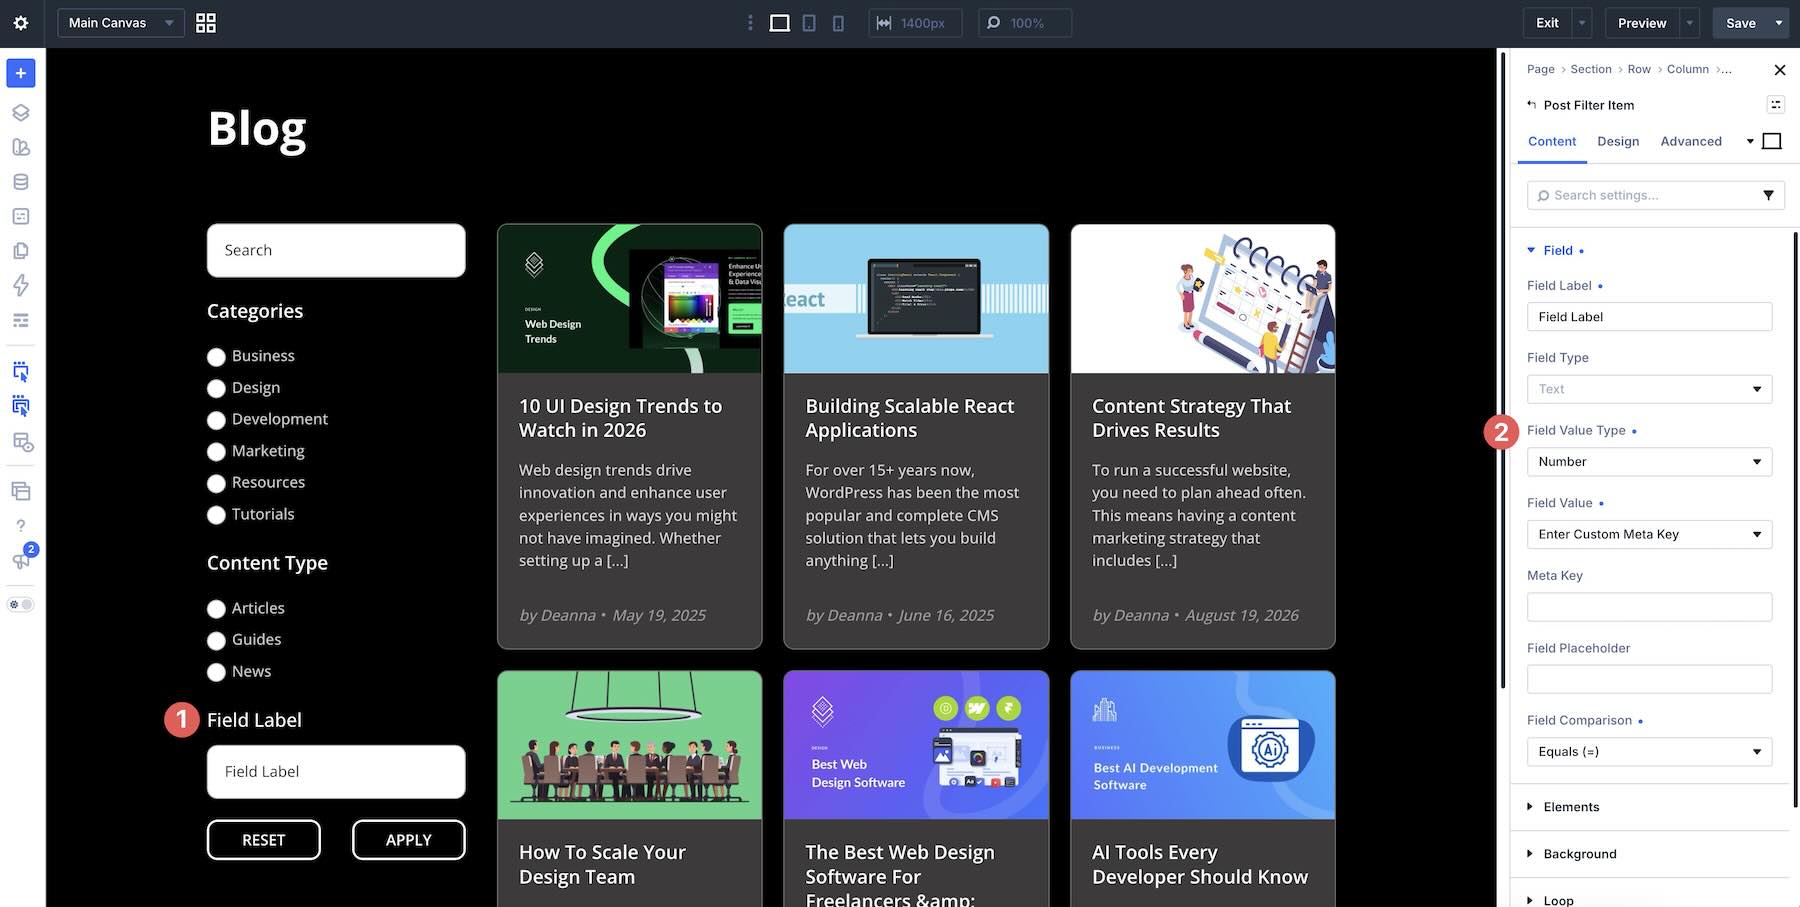
Then connect the field to the Read Time custom field.
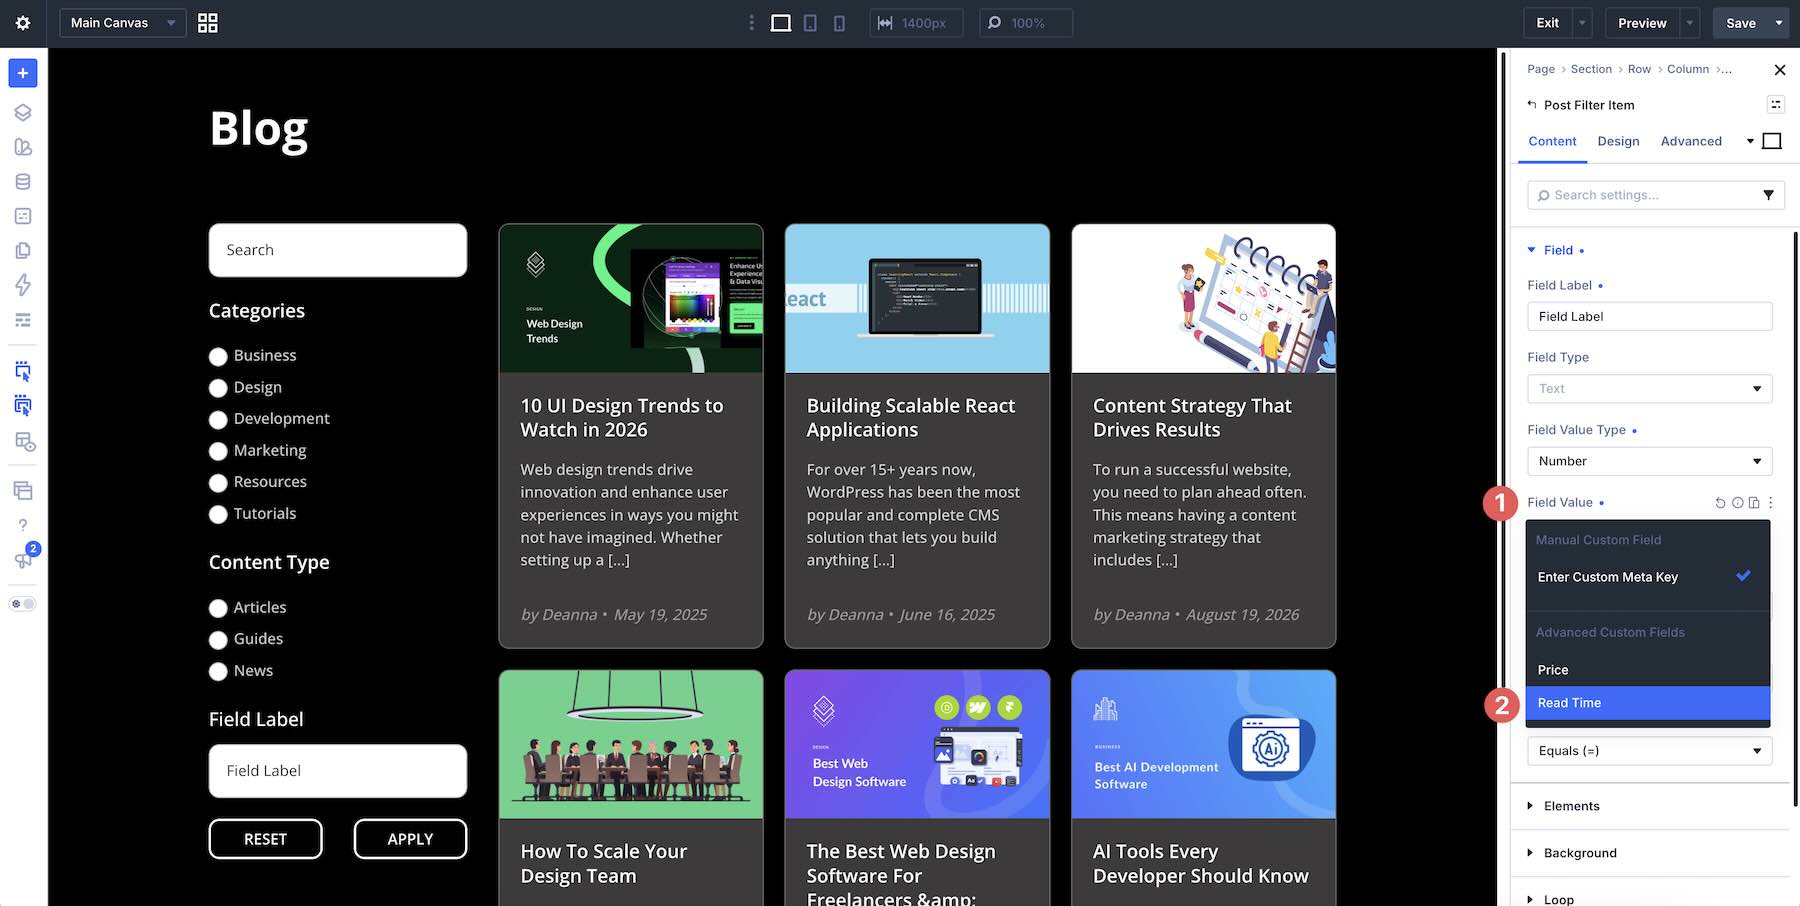
Finally, add a clear Placeholder Label so visitors understand what the field expects.
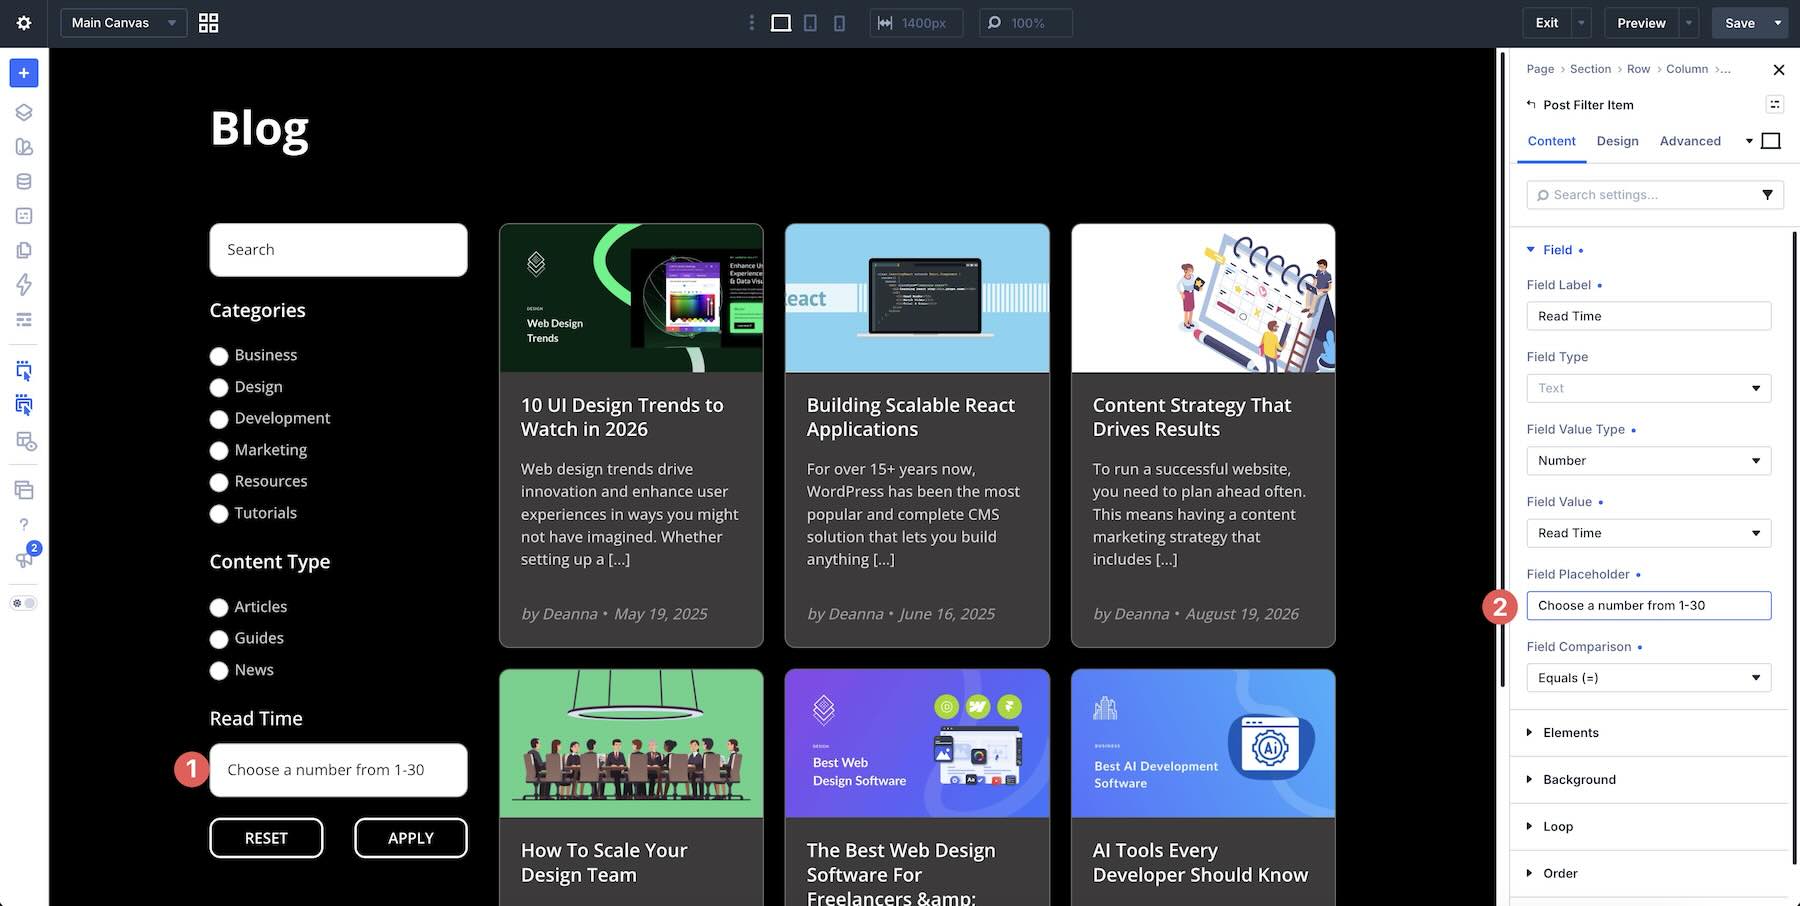
Repeat the same basic process for every additional filter: choose the right interaction type, choose the value type when applicable, connect it to the correct content data, and give the visitor a clear label.
5. Style The Form
Once the filter logic works, switch to the Design tab and style the form as part of the wider page rather than as an isolated utility.
Each Post Filter Item exposes controls suited to its Field Type, including groups such as Field, Option, Checkbox/Radio Options, Multiple Order Button, and Button. Standard Divi options such as Sizing, Spacing, Border, Box Shadow, Filters, Transform, and Animation are also available where applicable.
For a site-wide filtering system, avoid rebuilding the same field style every time. Save repeated treatments with Option Group Presets and connect colors, spacing values, or typography to Design Variables.
This is particularly useful when the website contains several filtered archives. A Project filter, Team filter, Resource filter, and Case Study filter can all feel related without being identical.
6. Preview And Test
Save the page and test the filter on the front end using realistic content. Search for known results, combine different criteria, change the sorting controls, then use Reset and Apply to make sure the form returns the Loop to the expected state.
Also test cases where the filters return very few results or no results at all. The filtering experience should remain understandable even when there is nothing to display.
Finally, switch through Tablet and Phone. Long Select controls, Checkbox groups, Radio options, and button rows may need different widths or stacking behavior on smaller screens, even when the desktop form works perfectly.
Tips And Best Practices
Start Simple, Then Expand
A filter form does not need every available control to be useful. Start with the questions visitors are most likely to ask of the content. On a blog, Search plus Category may already be enough. On a portfolio, Project Category and Service might do most of the work.
Once the basic form is working well, add another field only when it improves content discovery. This keeps the interface easier to understand and makes configuration easier to test.
Keep Labels Clear And User-Friendly
Visitors should not need to understand the underlying WordPress data model to use the filter. Internal names such as meta_key_department might make sense while building the site, but the front end should simply say Department.
The same applies to placeholder text and sorting controls. Use language that describes what will happen when someone interacts with the field.
Structure The Content Before Designing The Filters
A filter can only work with data that has been stored consistently. Before building a complex directory, decide which values belong in taxonomies, which belong in custom fields, and which are ordinary post content.
For example, if Location is important enough that visitors need to filter by it, storing every location as free-form text inside a description is less useful than creating a consistent Location taxonomy or custom field.
Planning the content model first usually leads to a cleaner filter form later.
Use Design Variables And Presets For Consistency
Loop Filter controls participate in Divi’s broader design system, so take advantage of that connection. Save repeated typography, input styles, borders, backgrounds, buttons, and spacing decisions as Presets, then use Design Variables for values that should remain connected across the site.
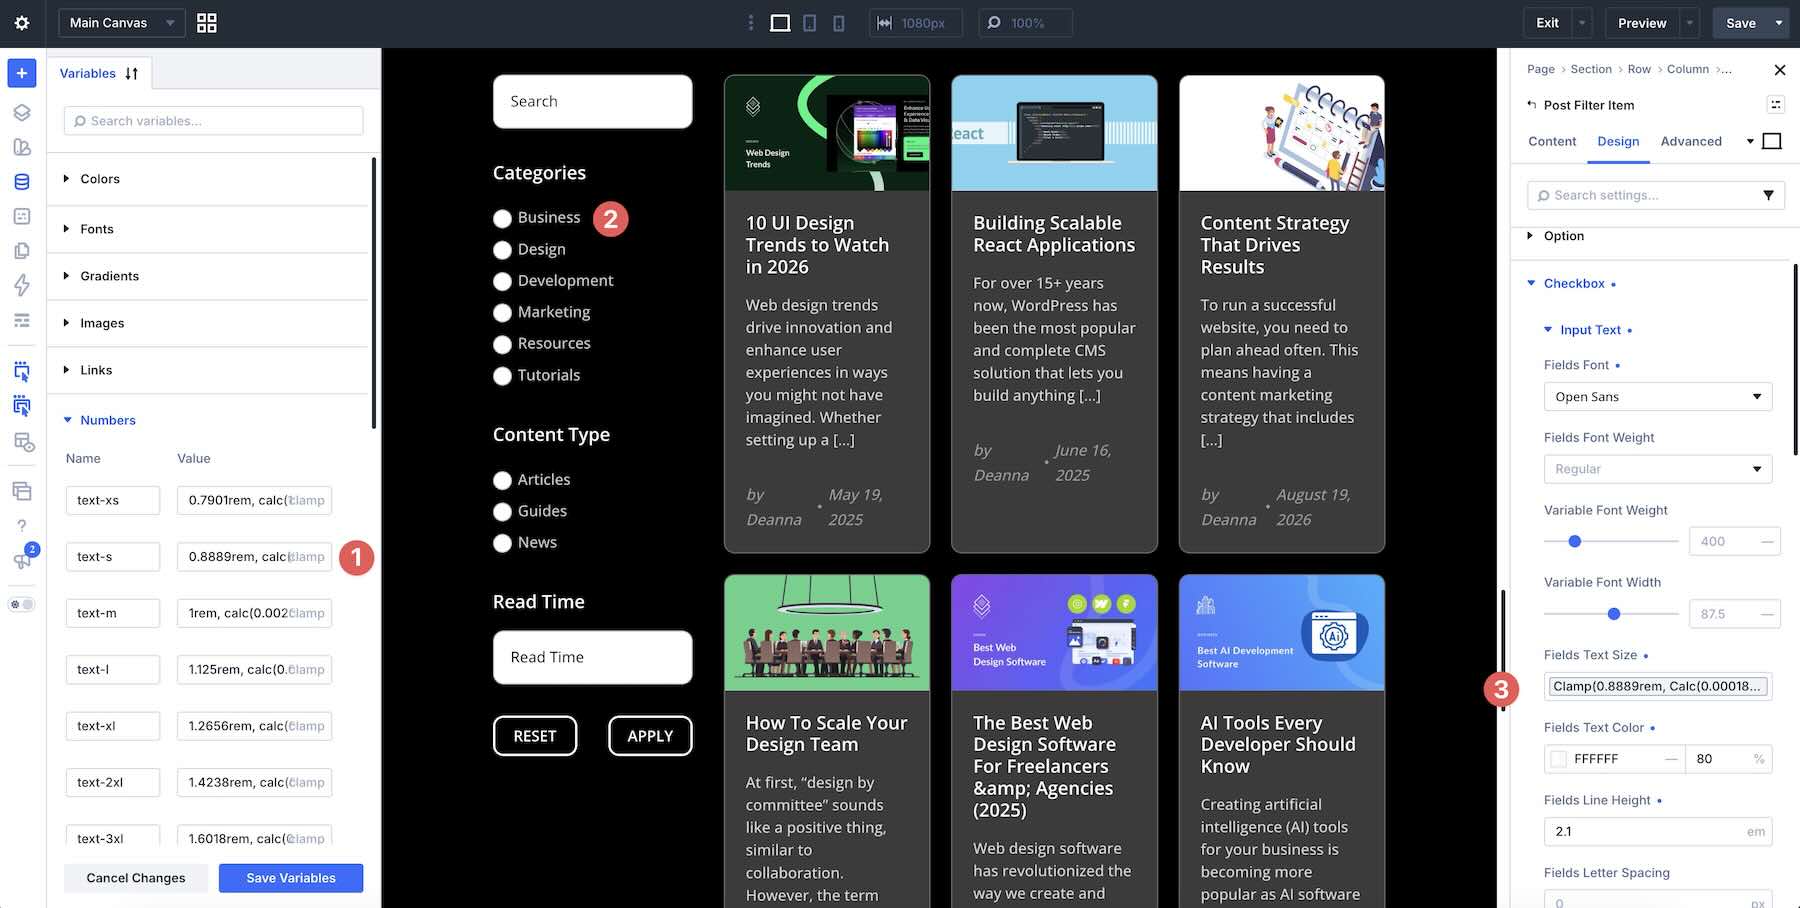
This becomes increasingly useful as filtered content appears in more than one place. Change a shared variable or preset and the related filter forms can follow the same design-system update.
Test With Real Content And Across Breakpoints
A filtering system should be tested against the content volume and variety it will actually handle. Ten sample posts rarely expose the same edge cases as a mature archive with hundreds of items, several categories, irregular custom-field values, and long option lists.
Check Desktop, Tablet, and Phone layouts and test the actual interactions on the front end. Make sure controls remain readable, selectable, and easy to reset.
Keep Larger Filter Forms Focused
More available filters do not automatically create a better discovery experience. A form with several long Checkbox and Radio groups can take over the page before visitors even reach the results.
Prioritize the criteria that make meaningful differences to the content. Use Select menus when a long visible option list would create unnecessary visual weight, group related controls together, and consider whether every available custom field really needs to become a visitor-facing filter.
Download The Files
To give you a head start with the Loop Filter Modules, we’ve created a downloadable pack containing the example sections used throughout this post. Because several examples depend on specific post types, taxonomies, or custom fields, you will still need to connect the imported Loops and Post Filter Items to the corresponding content structure on your own site.
The download contains six JSON files: one Loop Filter Modules – ALL.JSON file and five individual section files labeled Loop Filter Modules 1-5.

To import them, go to Divi > Divi Library and click Import & Export.
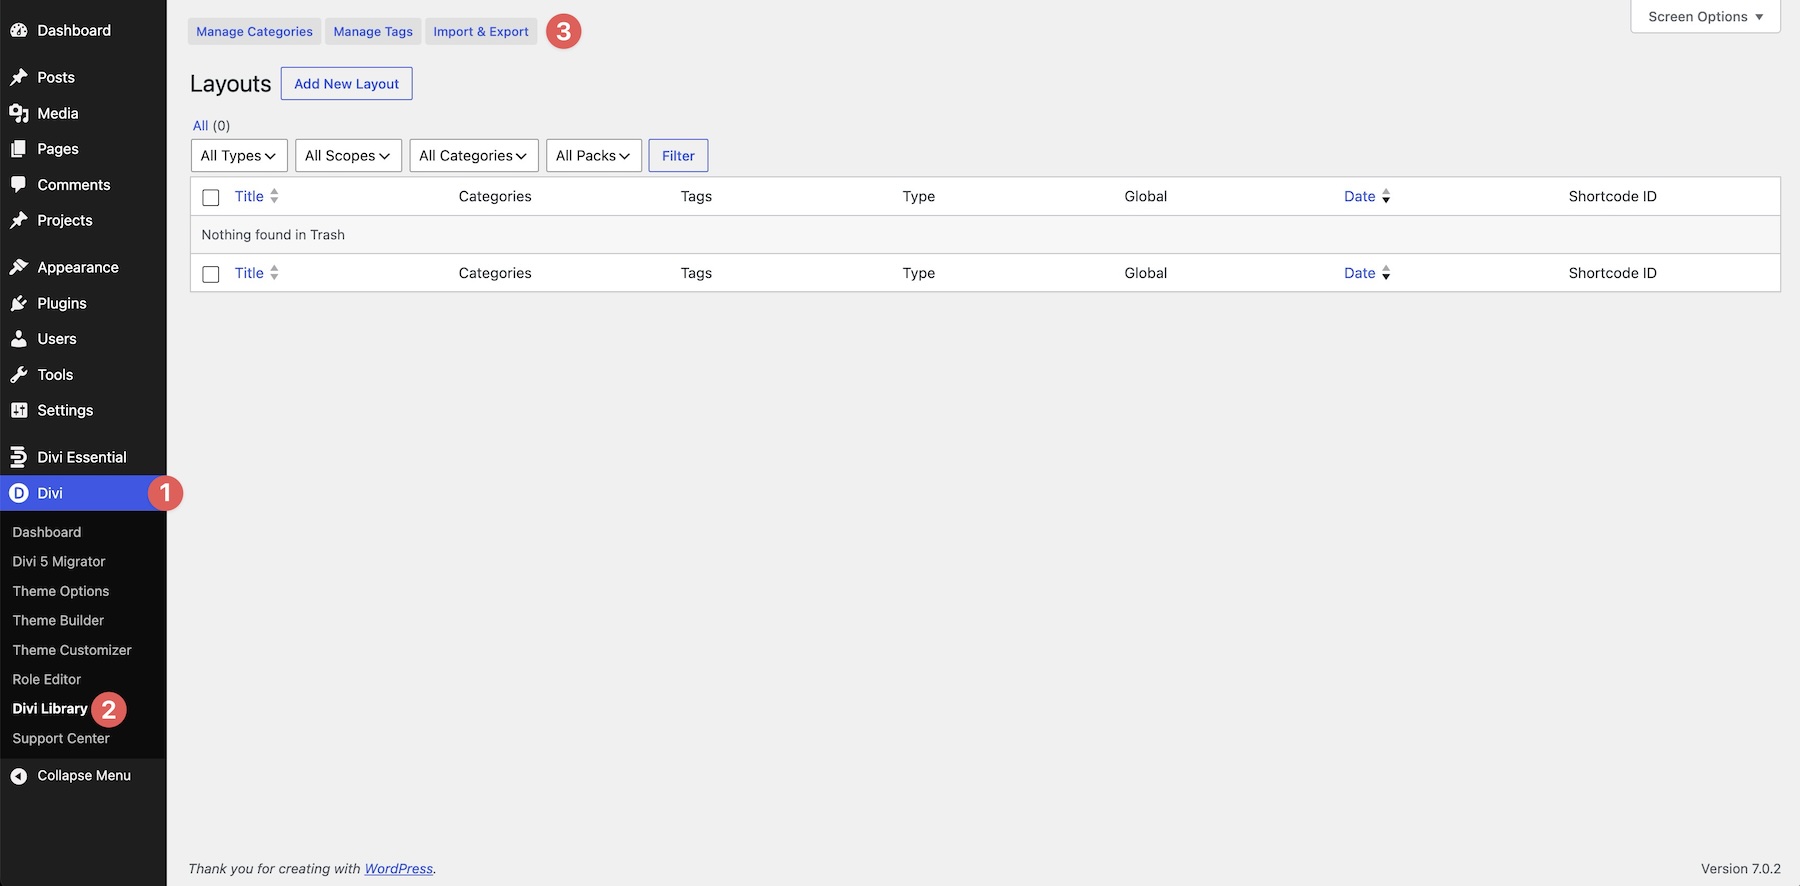
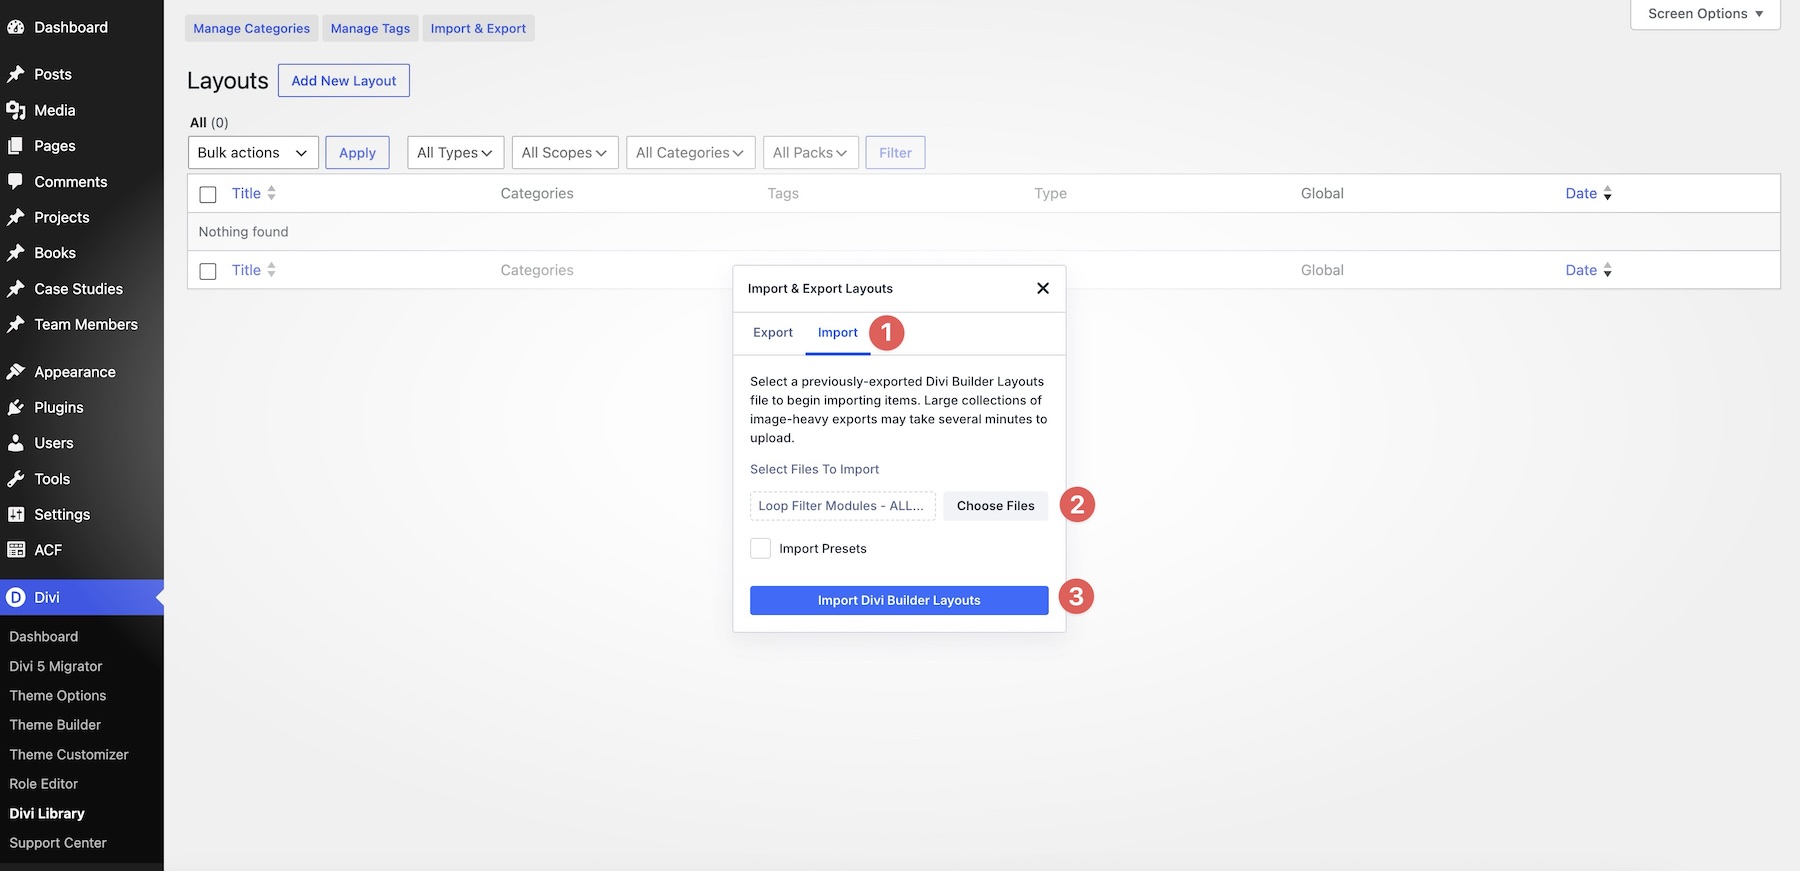
Open the Import tab, choose either one individual section JSON or the ALL file, and click Import Divi Builder Layouts.
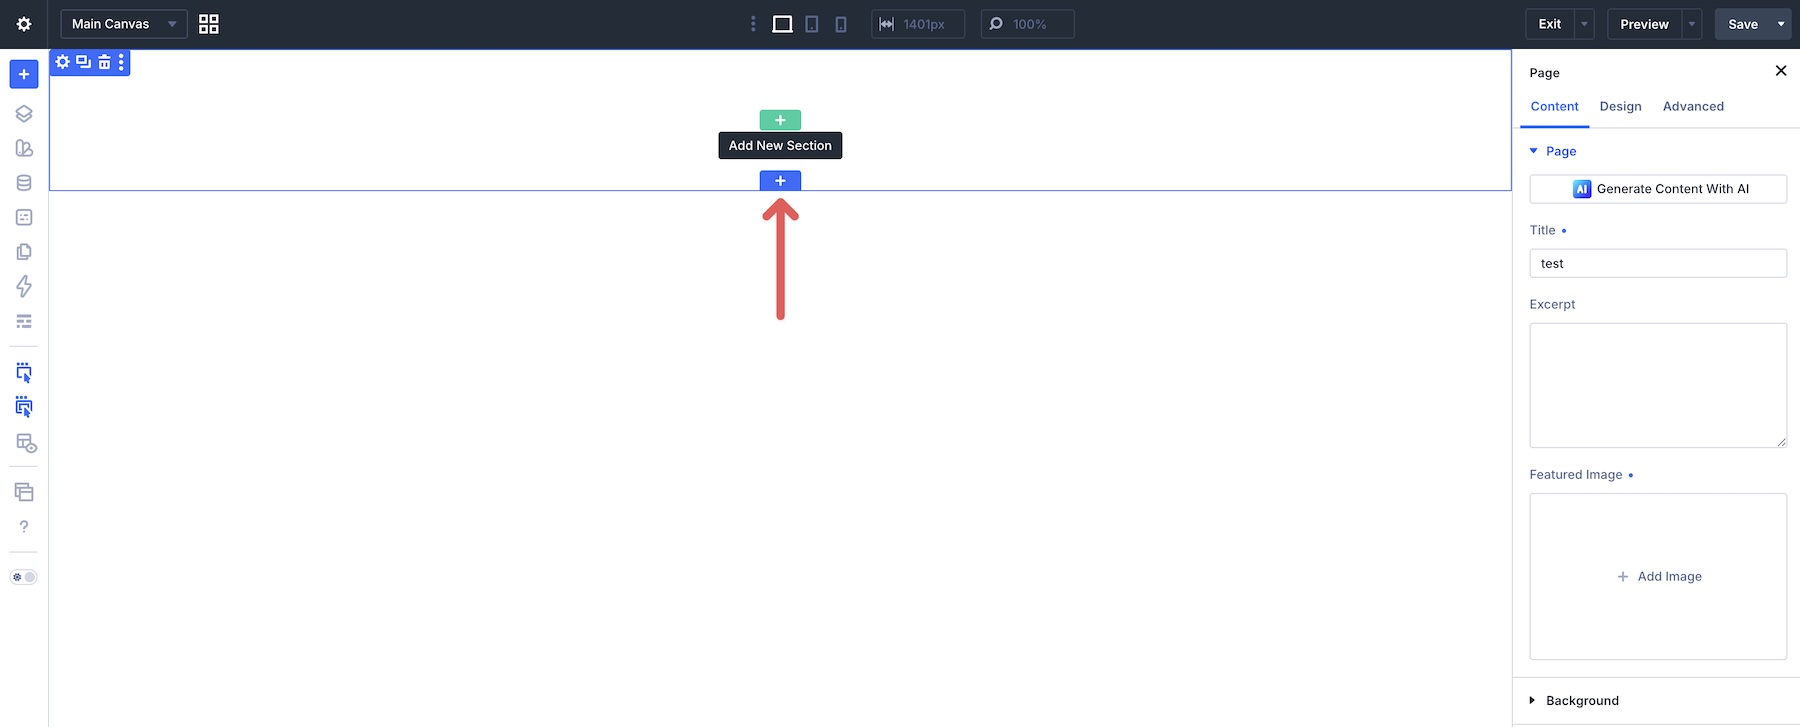
Once the files are imported, create a new page or open an existing page in the Visual Builder. Click the blue + icon to add a new Section.
Choose Add From Library, select the imported section you want to use, and click Use This Section.
After adding the layout, review the Target Loop and every Post Filter Item before testing it. The design can be imported as-is, but the filtering logic still needs to match the post types, taxonomies, and custom fields available on your site.

Turn Divi 5 Loops Into Interactive Content
The Loop Filter Modules build on one of Divi 5‘s most flexible dynamic-content systems. The Loop Builder gives you control over what content is queried and how every repeated item looks. Post Filter and Post Filter Item Modules add the next layer by giving visitors useful ways to refine those results themselves.
That combination works across a wide range of content-driven layouts. You can build a searchable blog archive, a filterable portfolio, a team directory, a product-style catalog, a case-study library, or another structured content experience while keeping the design inside the Visual Builder.
The strongest Loop Filter setups start with good content structure and a focused form. Decide what visitors genuinely need to search or compare, expose those values through the right Field Types, and use Divi’s Presets, Design Variables, responsive controls, and layout tools to make the form feel like a natural part of the page.
Build the Loop first. Connect the Post Filter Module to it. Then give visitors the controls that make that content easier to explore.




Hi,
I have divi 5.7 and I can’t find the Post filter module, it would be so great to implement it with the loop.
Thank you !
Current version is 5.13.1