
The Site Tagline Block is one of many useful blocks that make WordPress so easy to use. With it, you can add your site’s tagline anywhere on your site and customize it using built-in style options. In this article, we’ll discuss everything you need to know about the site tagline block so you can use it effectively on your website.
- 1 What is the Site Tagline Block?
- 2 How to Add the Site Tagline Block to your Post or Page
- 3 Site Tagline Block Settings and Options
- 4 Changing the Global Style of Site Tagline Block in WordPress
- 5 Changing the Global Style of Site Tagline Block in WordPress
- 6 Frequently Asked Questions About the Site Tagline Block
- 7 Adding a Dynamic Site Tagline in Divi
- 8 Conclusion
What is the Site Tagline Block?
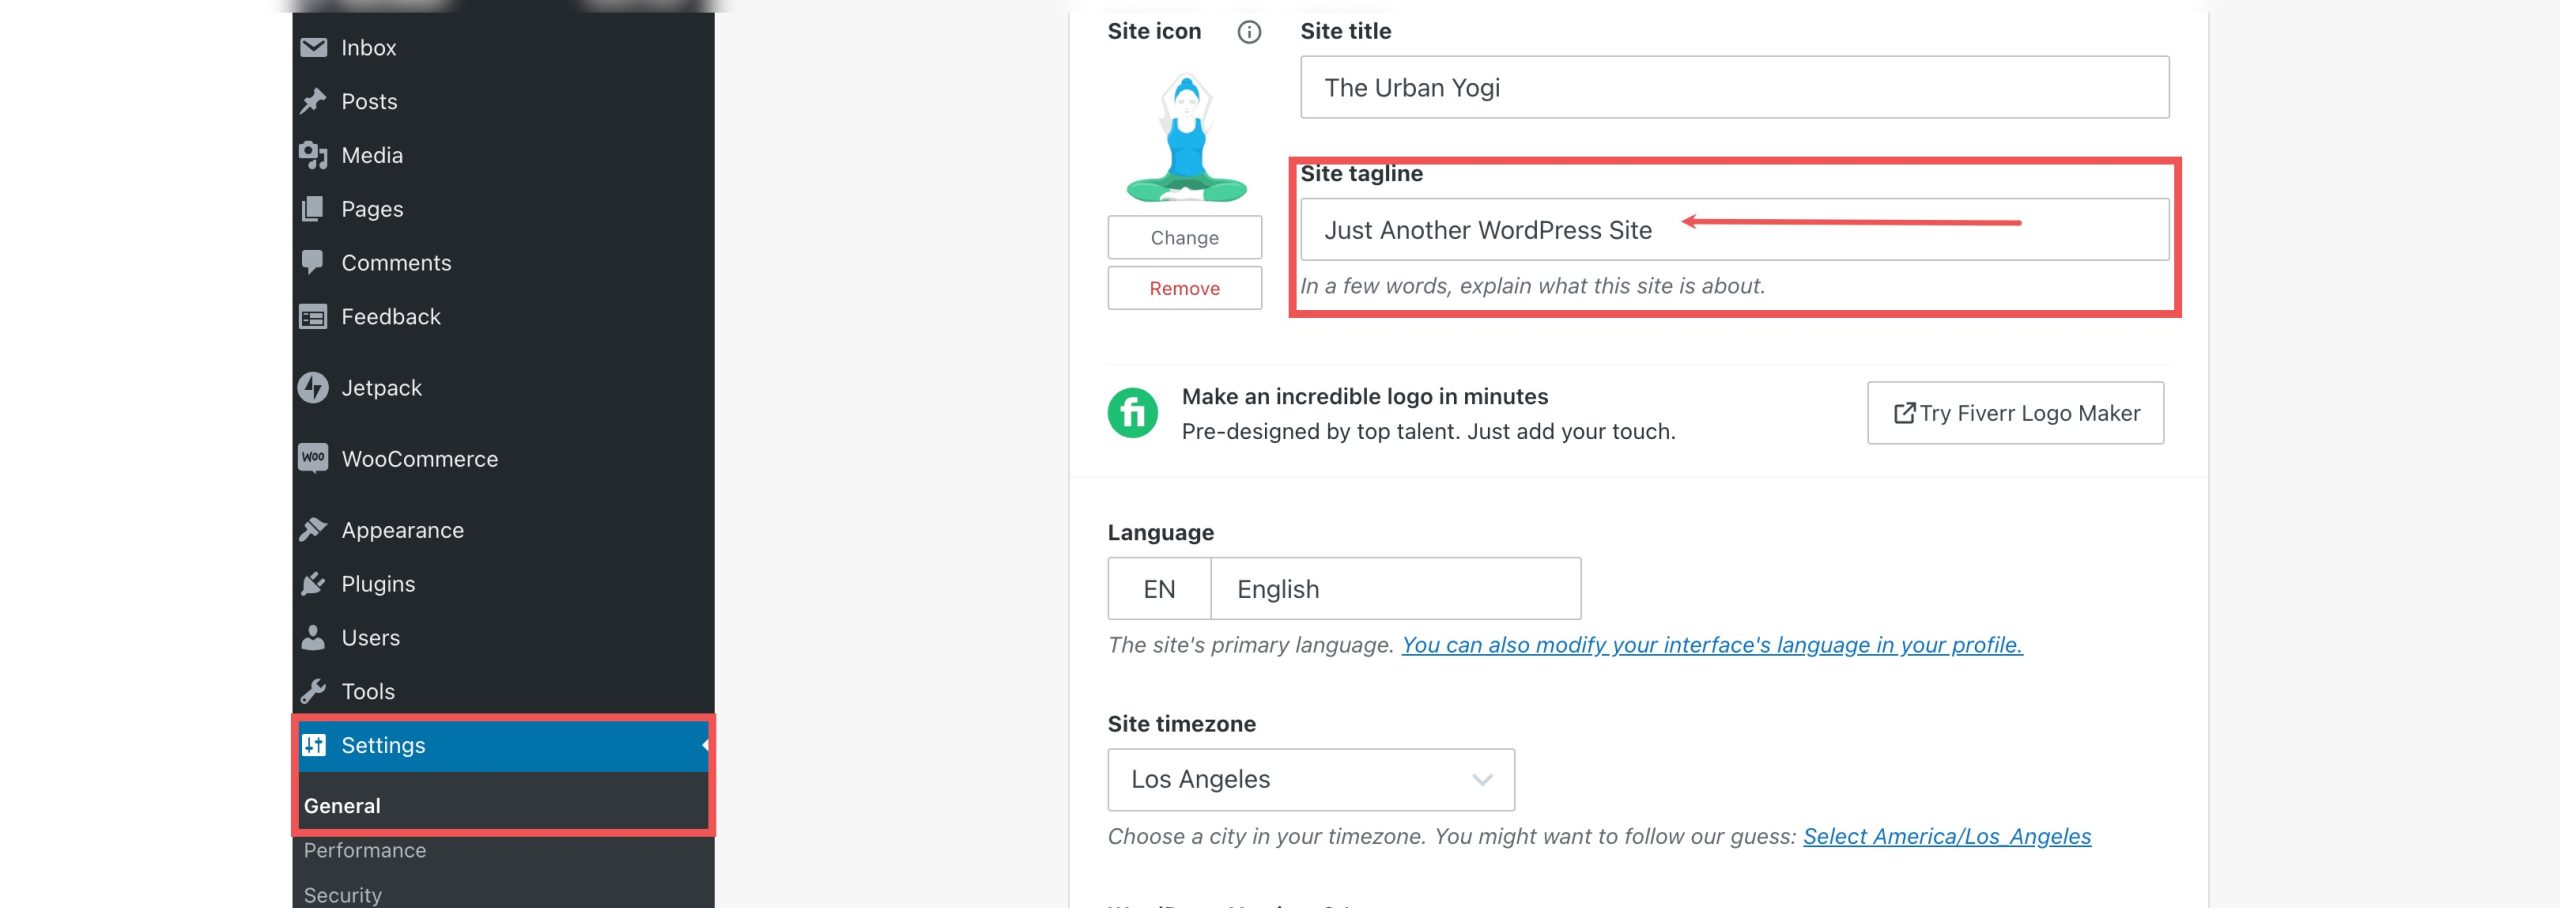
Your site tagline (along with the site title) is usually added when you first install WordPress and can be found in the dashboard’s general settings. The tagline should be updated from the default “Just another WordPress Site” with a more appropriate summary of what your site is all about. To change your website’s tagline in the back end, you can navigate to Settings > General.
The Site Tagline Block is a theme block in WordPress that allows to you easily add your site tagline anywhere on your site as dynamic content. You can drag the block into a page, template, or header and customize it however you like. This is one of many blocks introduced with full site editing in WordPress.
How to Add the Site Tagline Block to your Post or Page
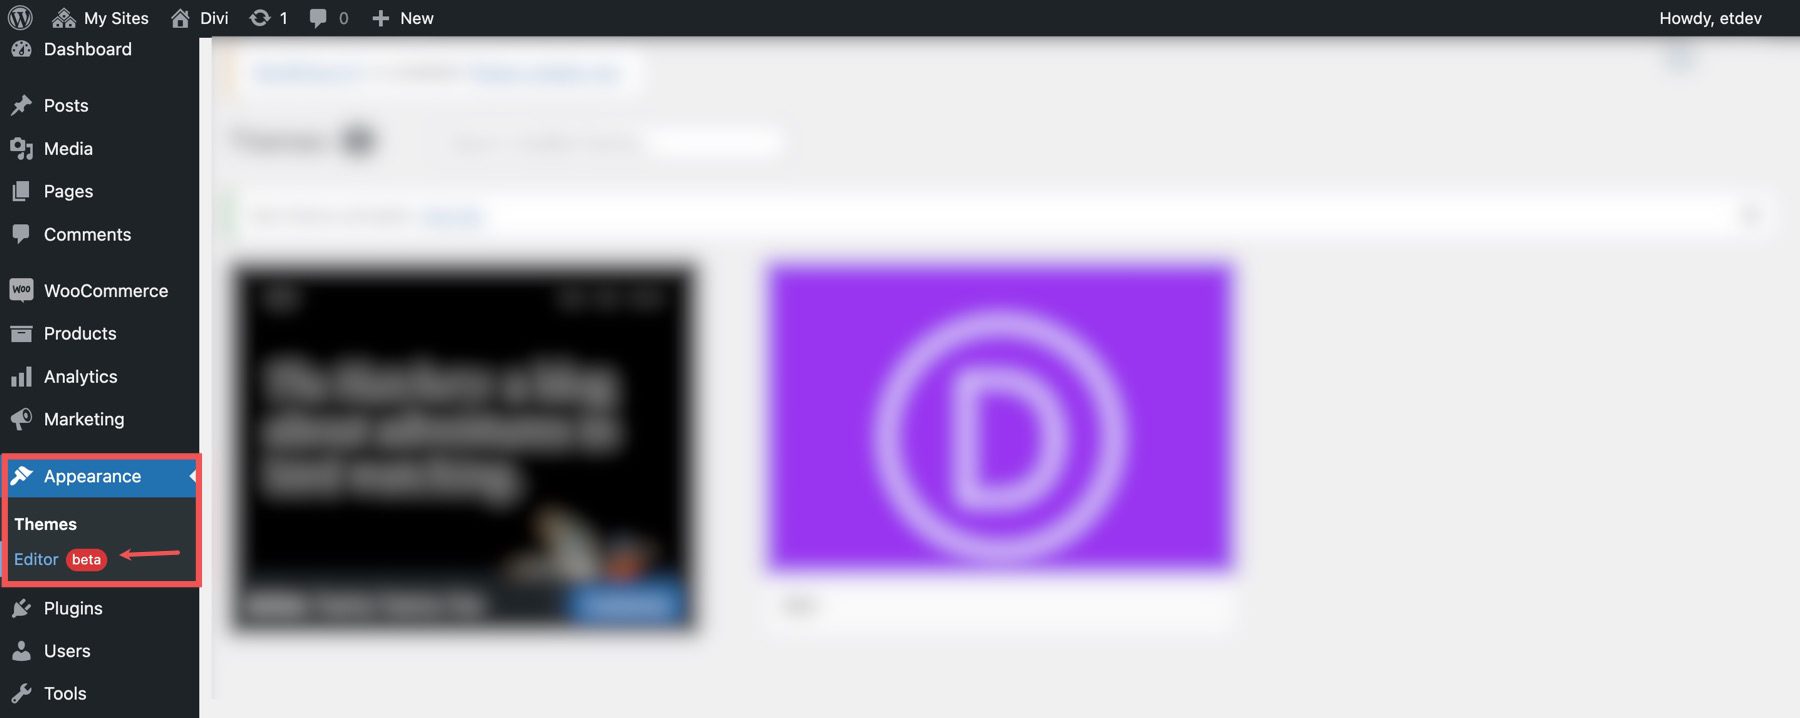
For this example, we are going to use the Twenty Twenty-Two theme to add the site tagline to the header area of the template. From the WordPress dashboard, go to Appearance > Editor.
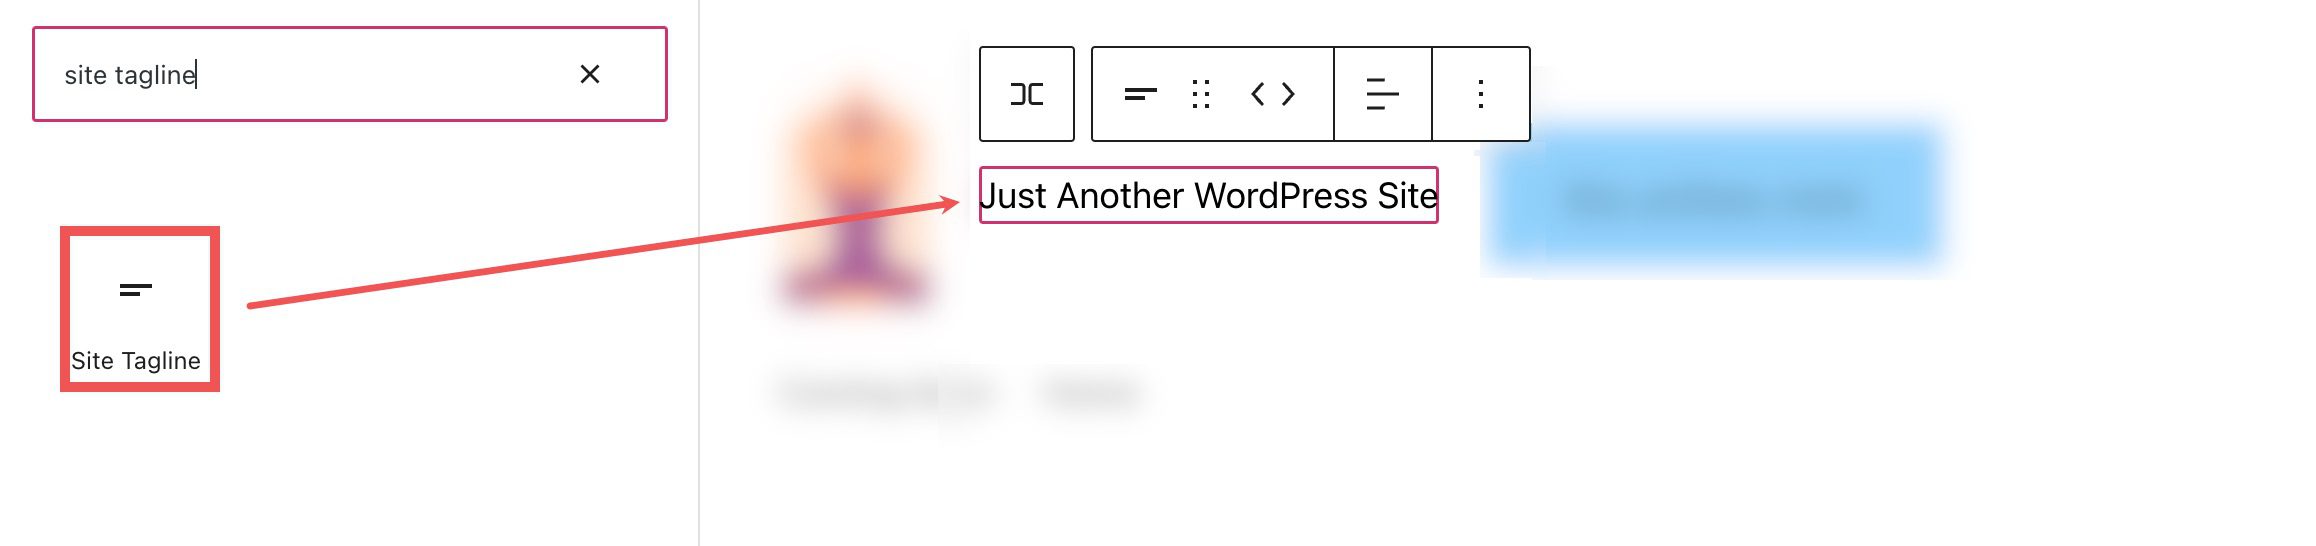
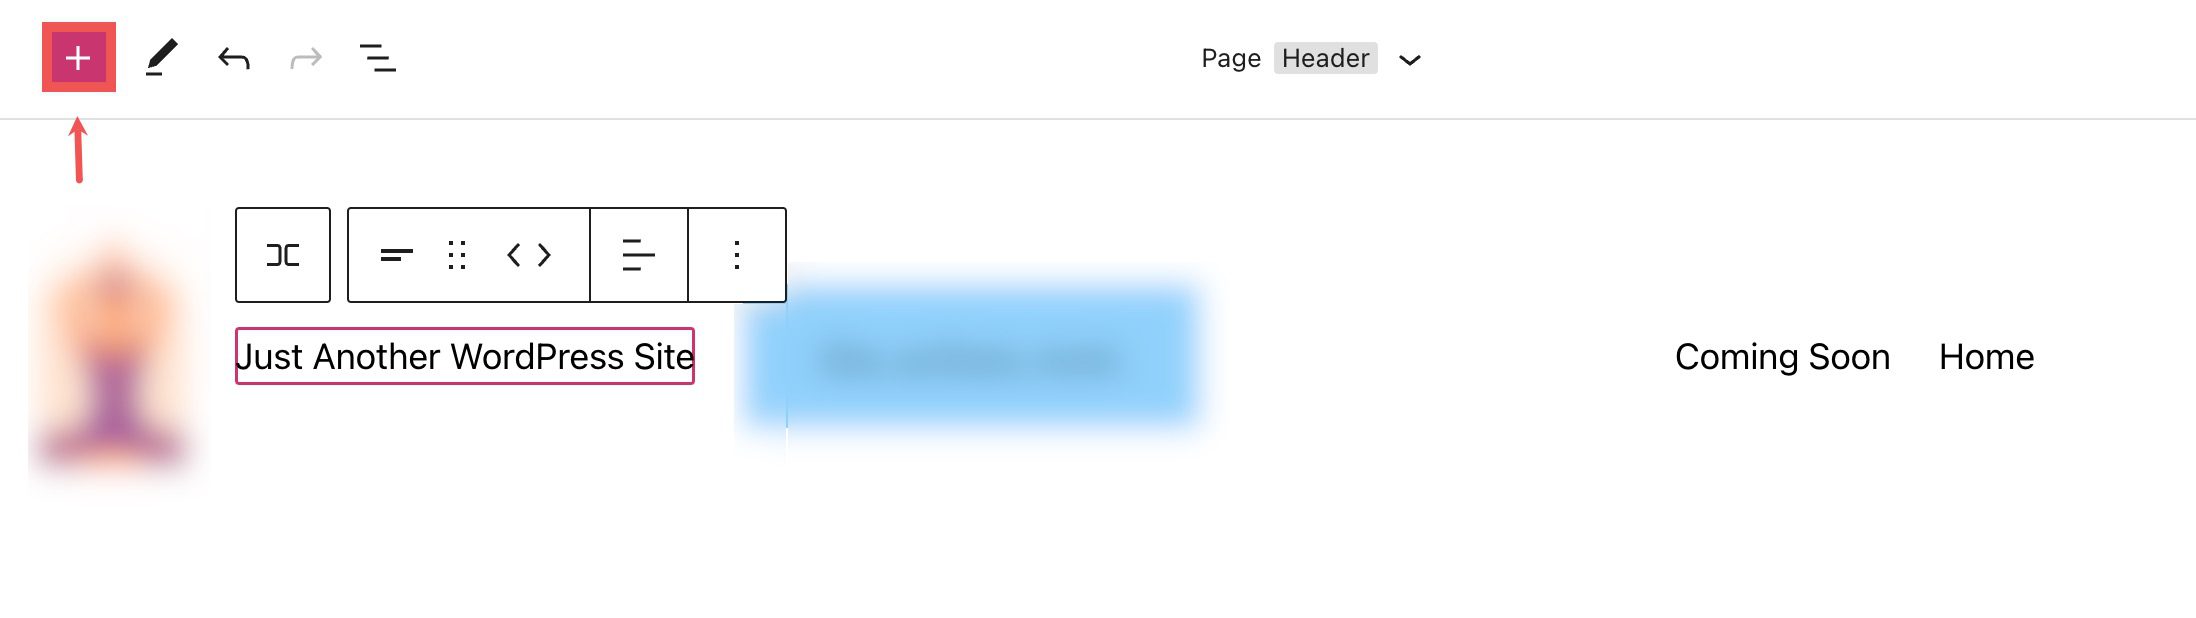
To add a Site Tagline block, start by clicking the Block Inserter icon when editing the page template.
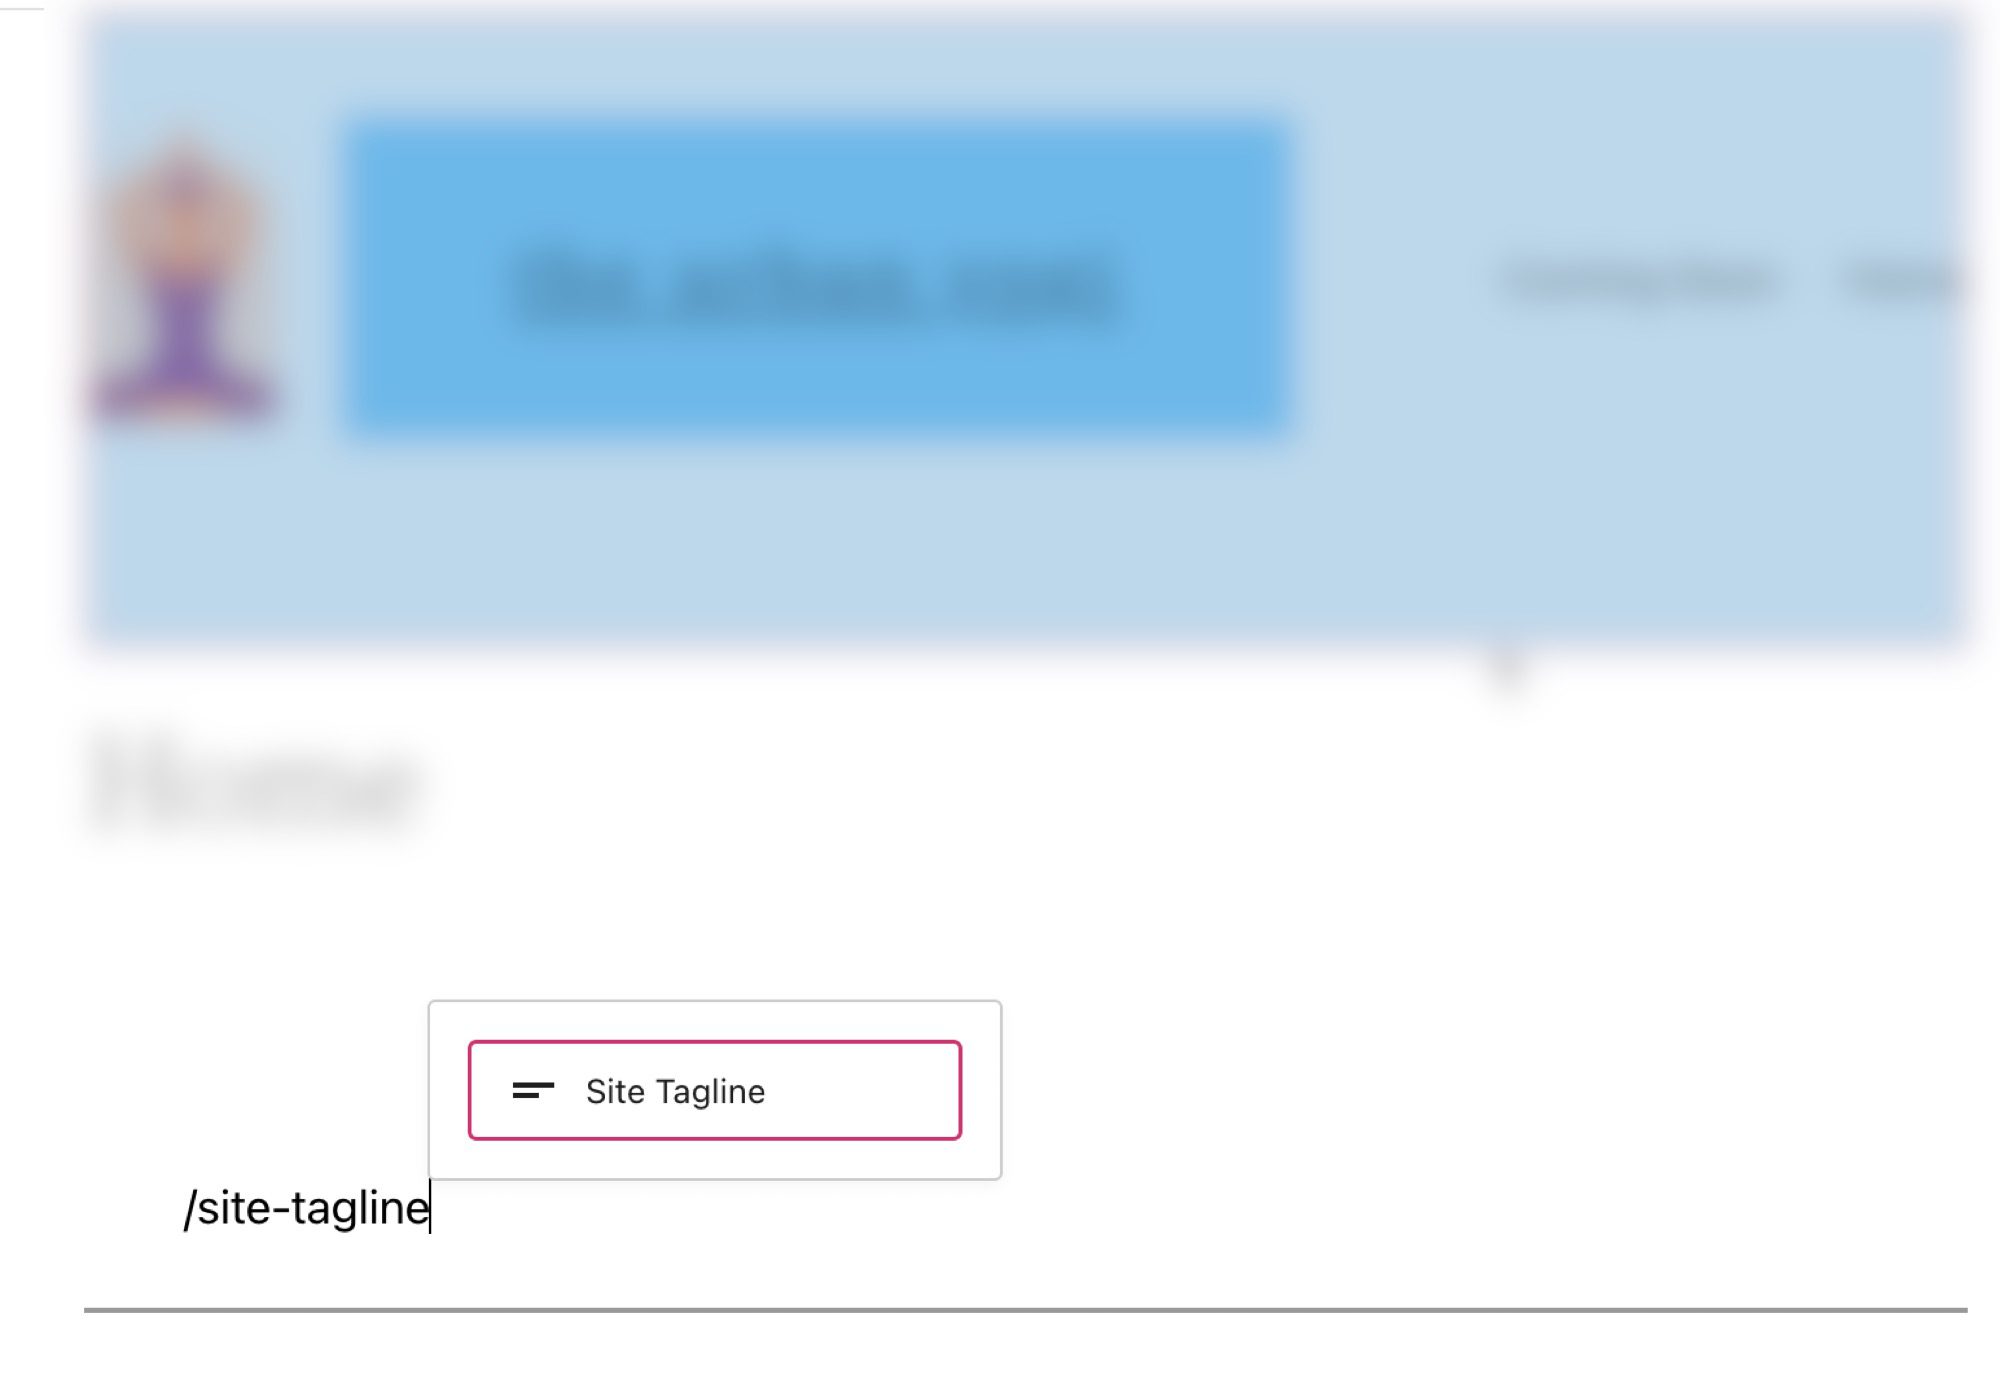
From here you can search Site Tagline from the search bar.

Either click on it or drag it to your desired location to add the block to your page.
You can also type /tagline to quickly add your site’s tagline to your page.
Site Tagline Block Settings and Options
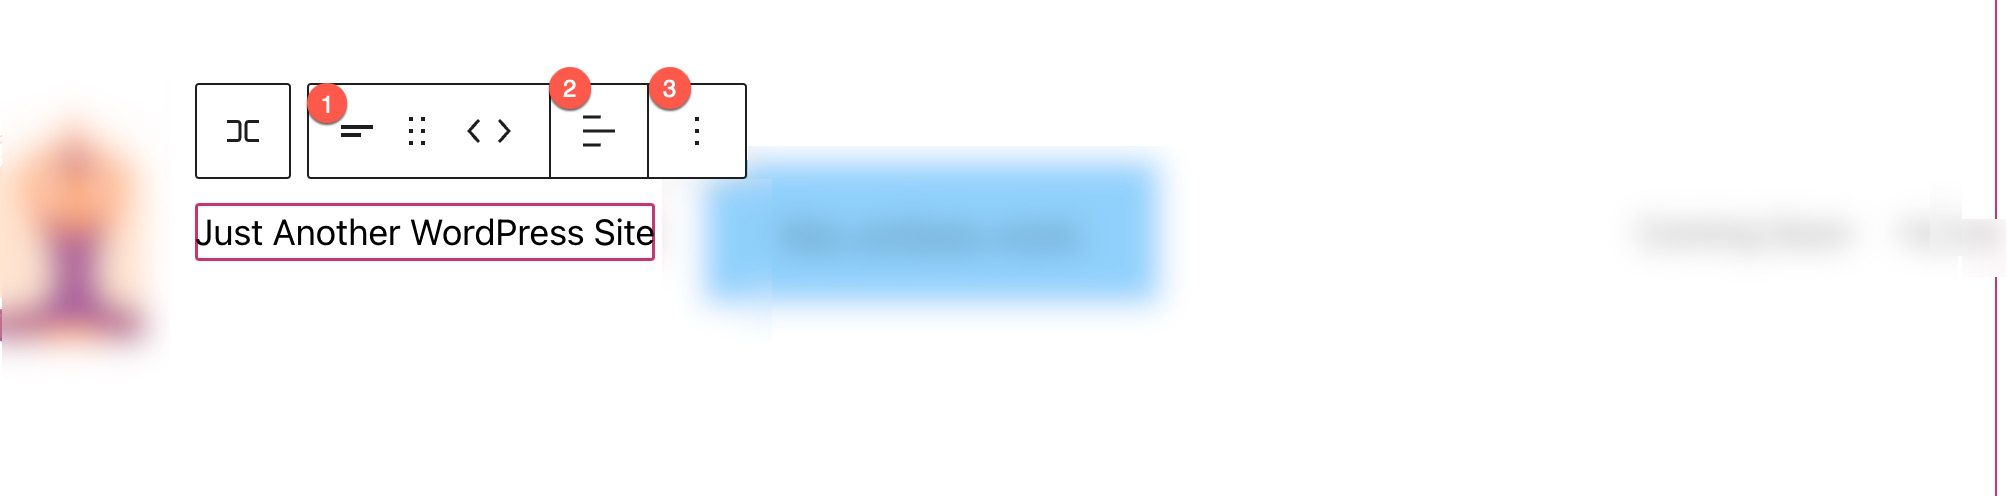
Toolbar Settings
If you hover over the block, you’ll see a formatting menu that includes the following options:
- Transforming the block into another type of element
- Changing the alignment of the text
- Additional settings.
Here’s a quick cheat sheet that shows where each of those options is within the formatting toolbar:
Additional Settings
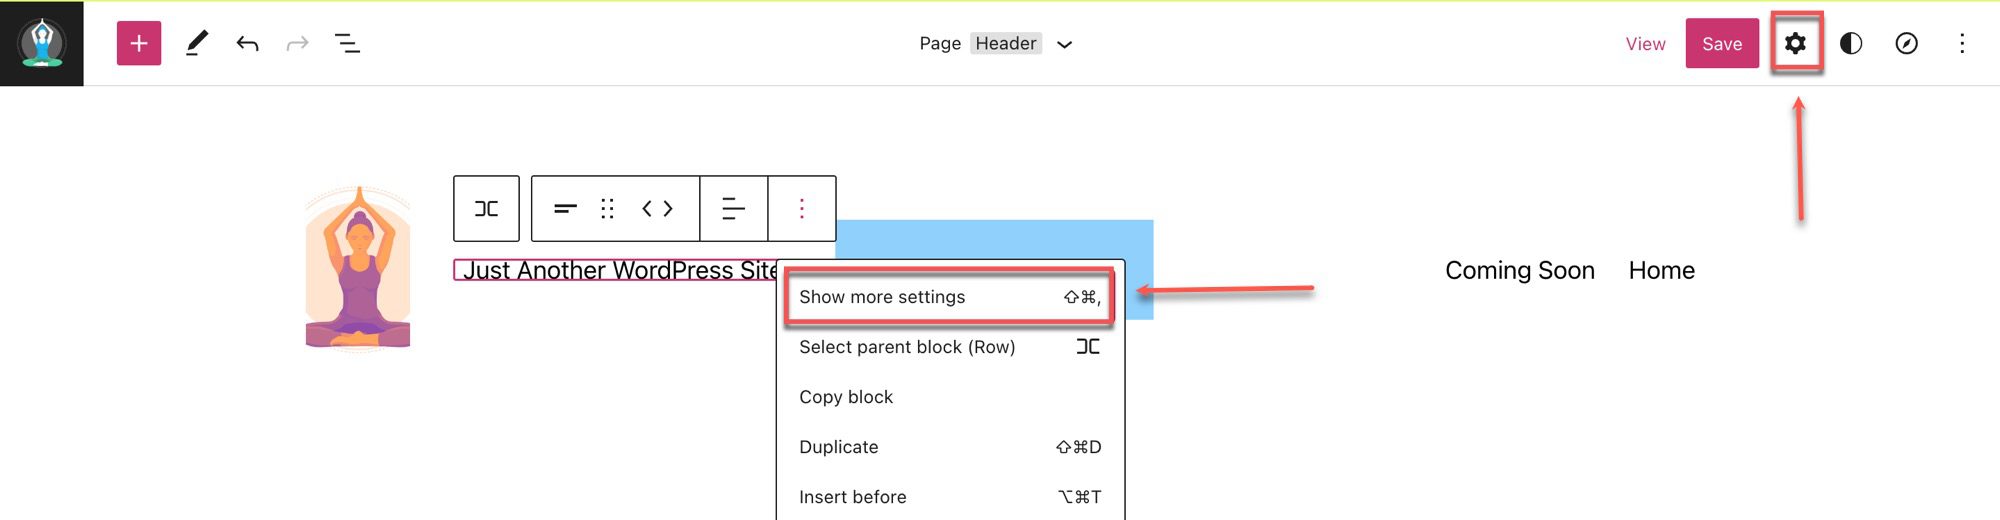
If you click on the three vertical dots on the right side of the toolbar and select show more settings or the cog in the upper right corner you can access the sidebar to view the additional block settings available.
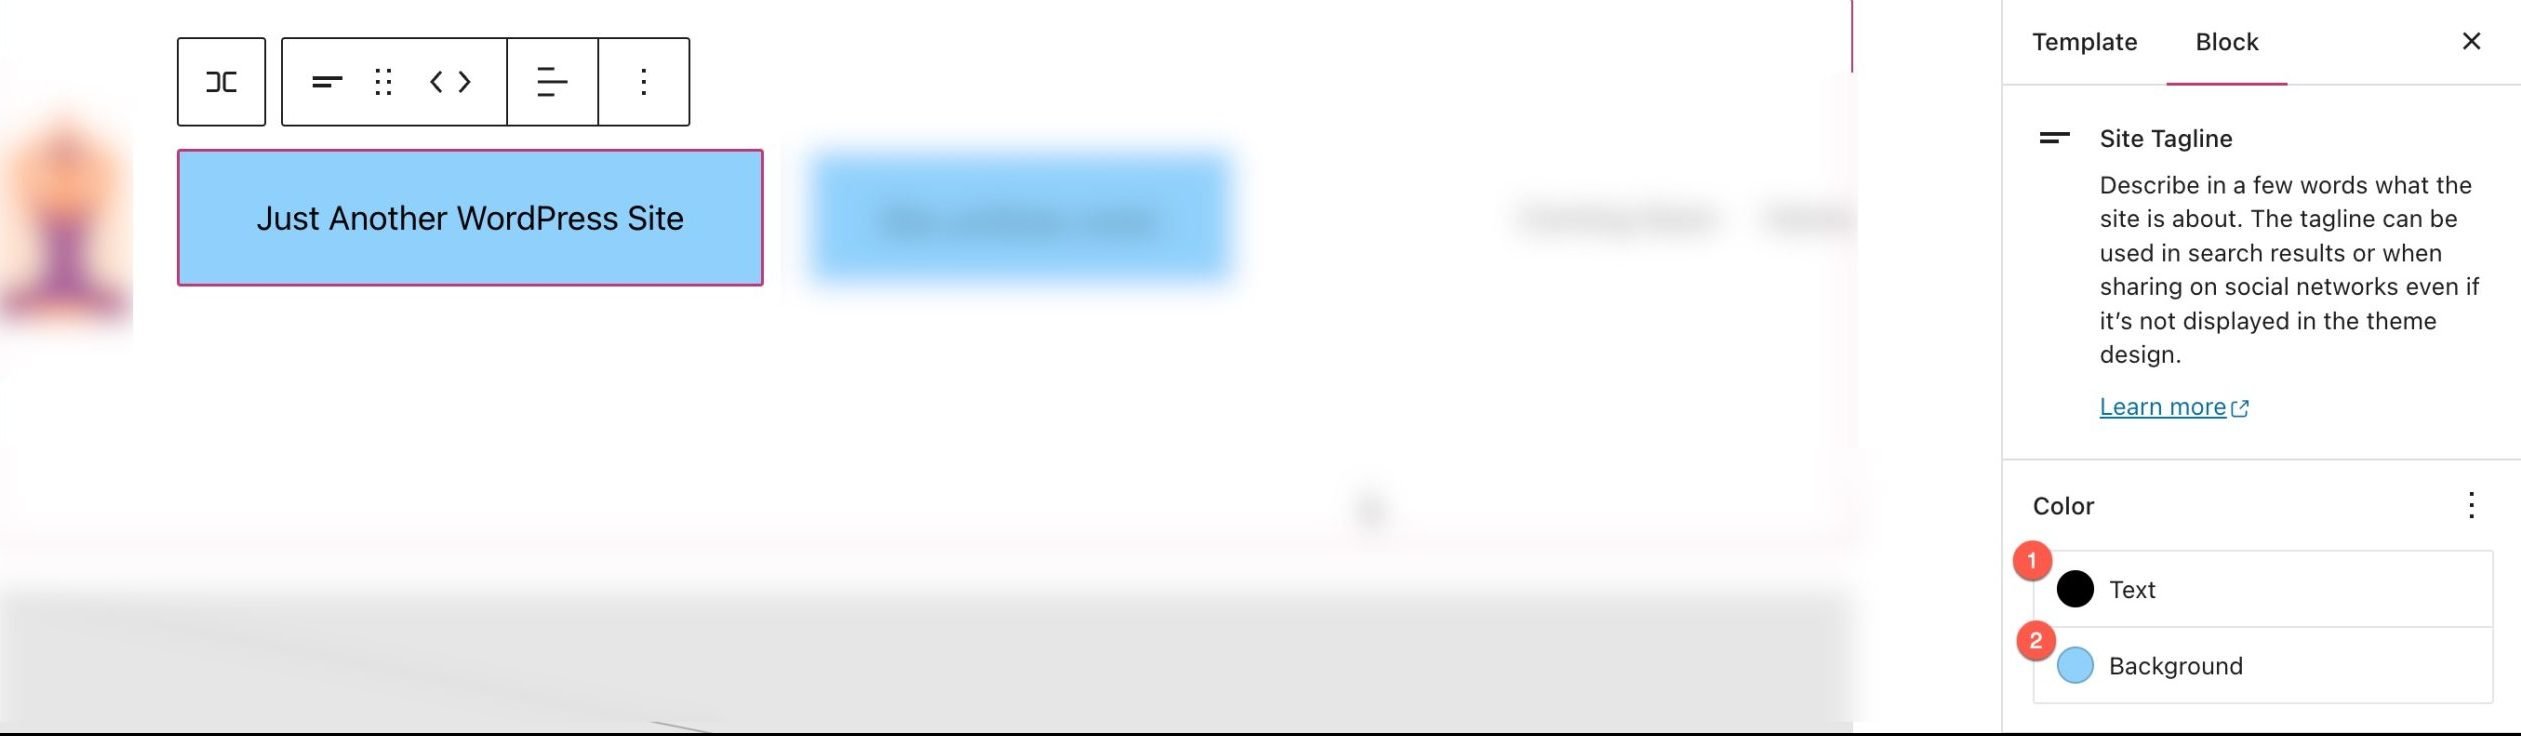
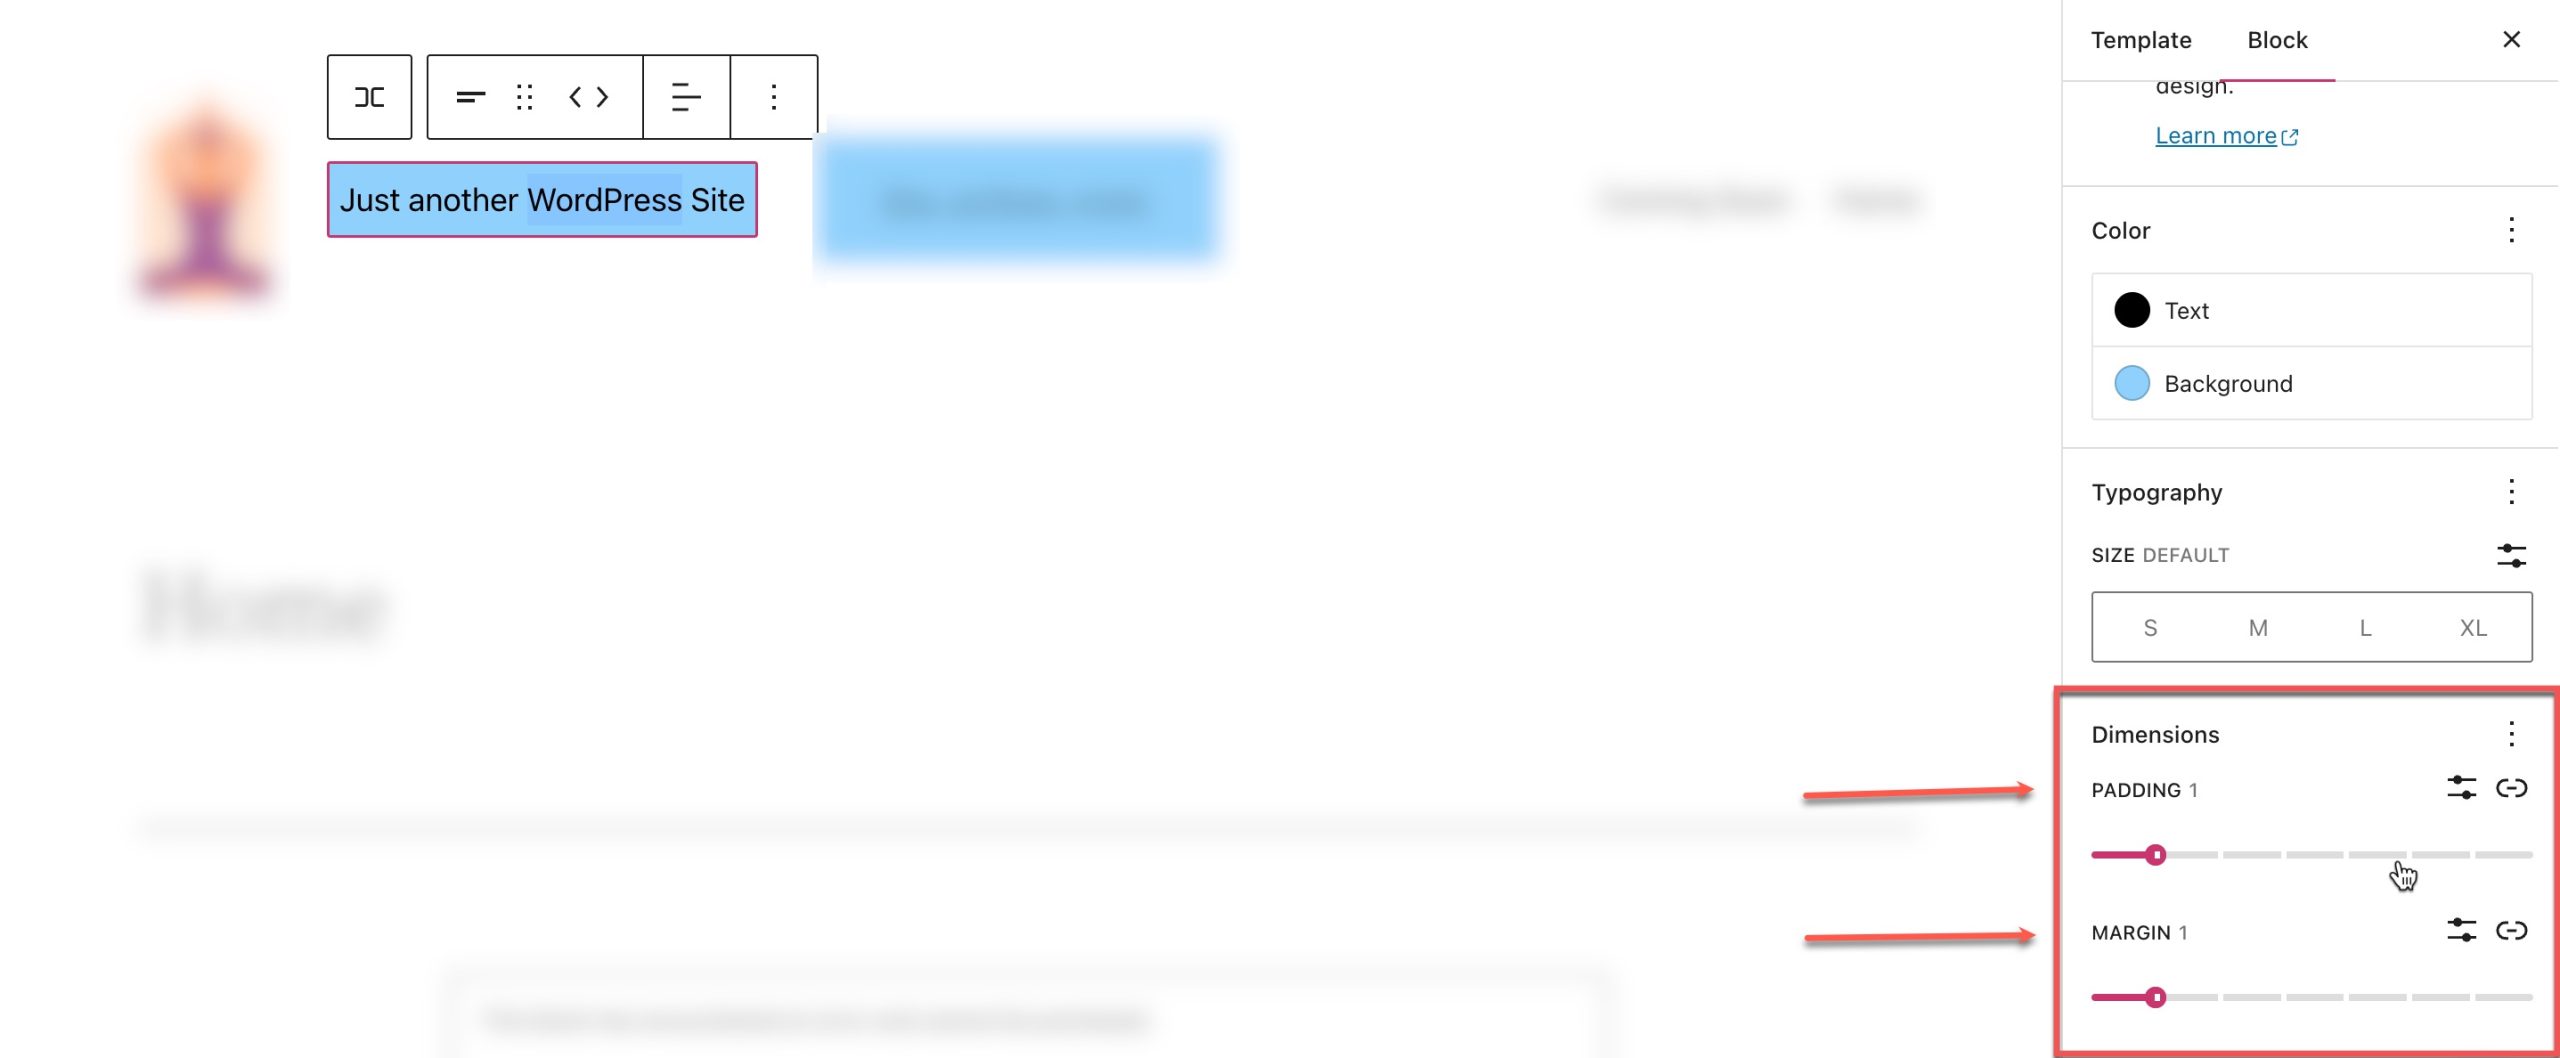
From this side panel you can view the additional settings, first we’ll look at the Color settings available:
- Change the text color.
- Change the background color of the text.
You can also change the font, appearance (Bold, Italic, etc.), line height, letter spacing, decoration (underline, strikethrough), and letter casing by clicking the three vertical dots next to Typography under the Color section.
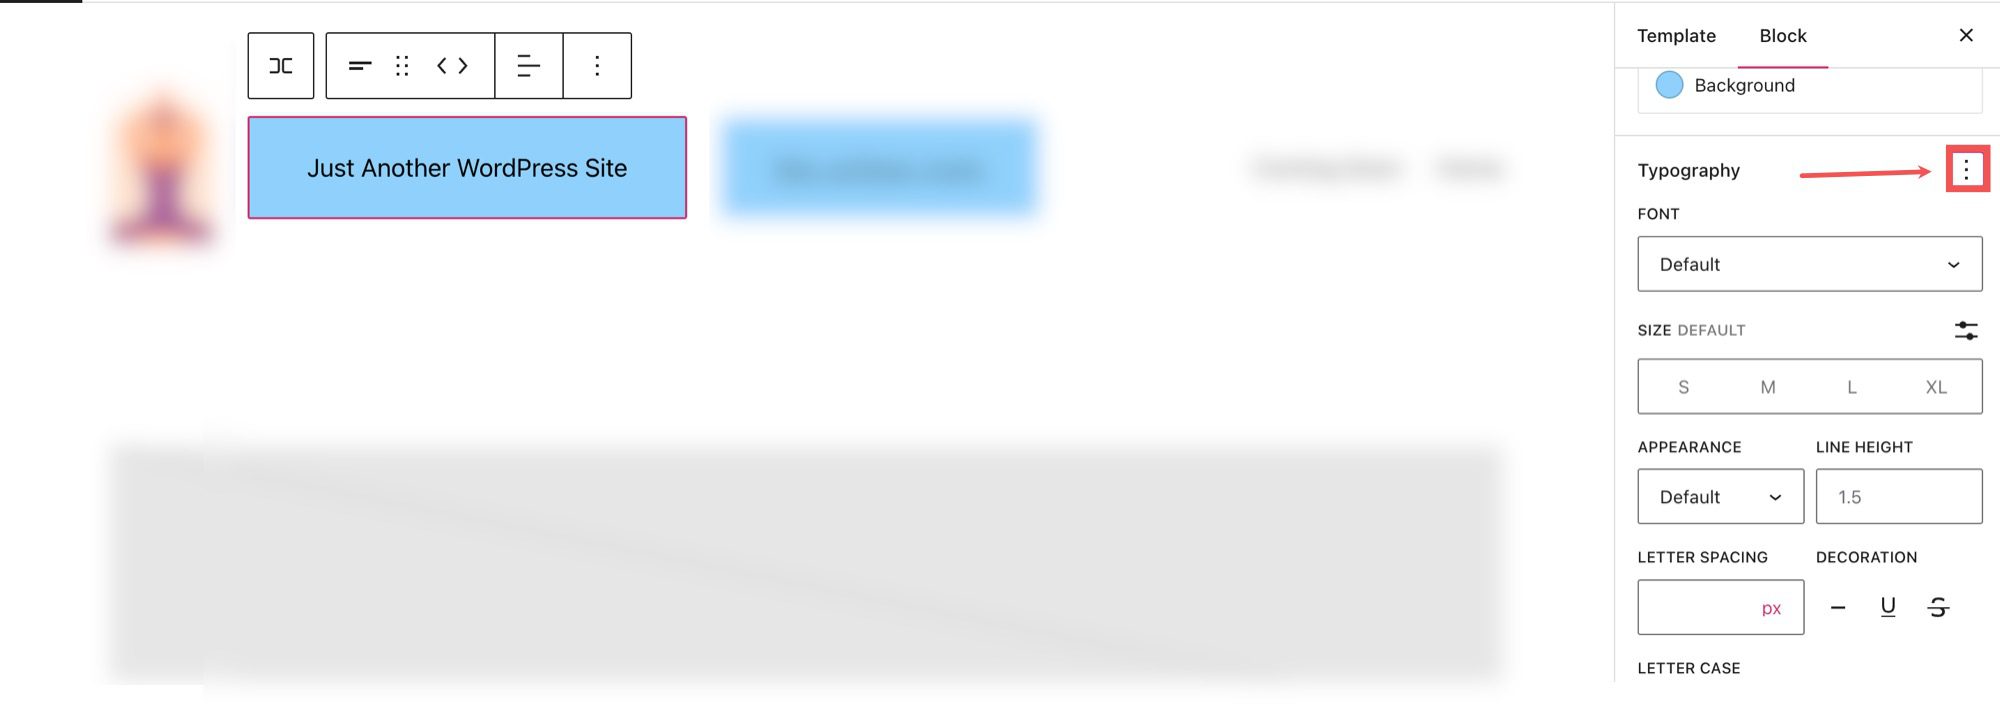
You can change the font from the font setting section.

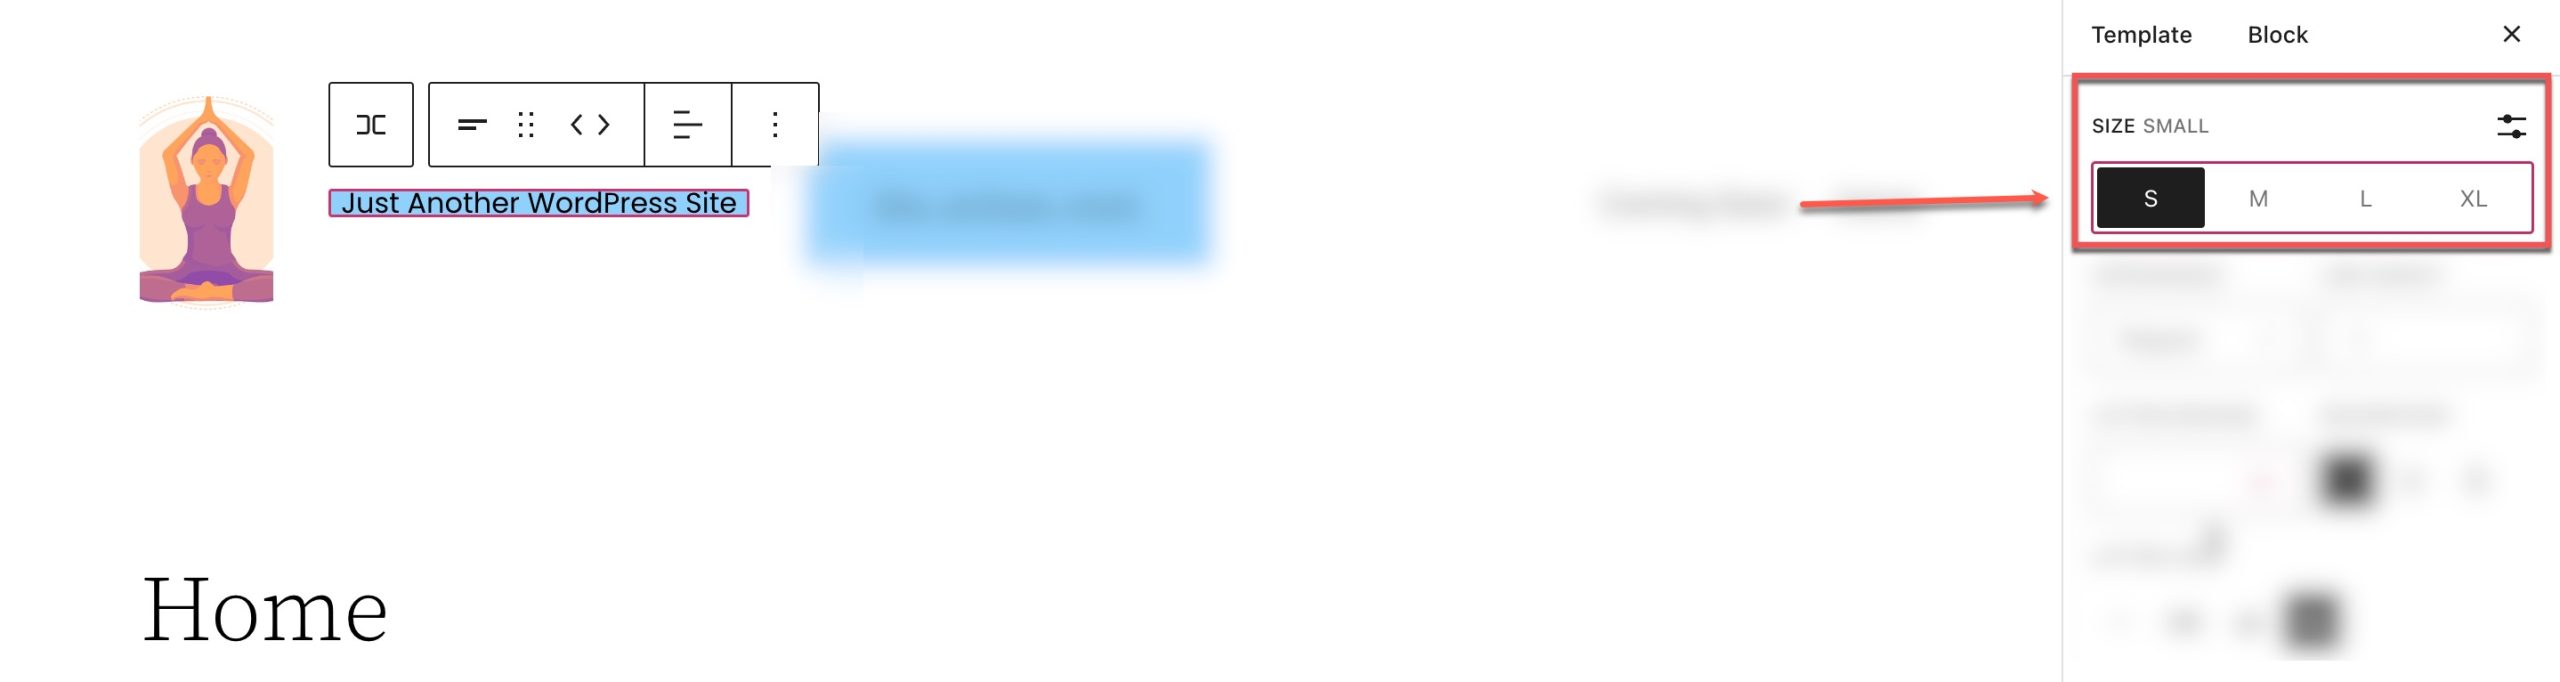
Adjust the font size under the size setting.
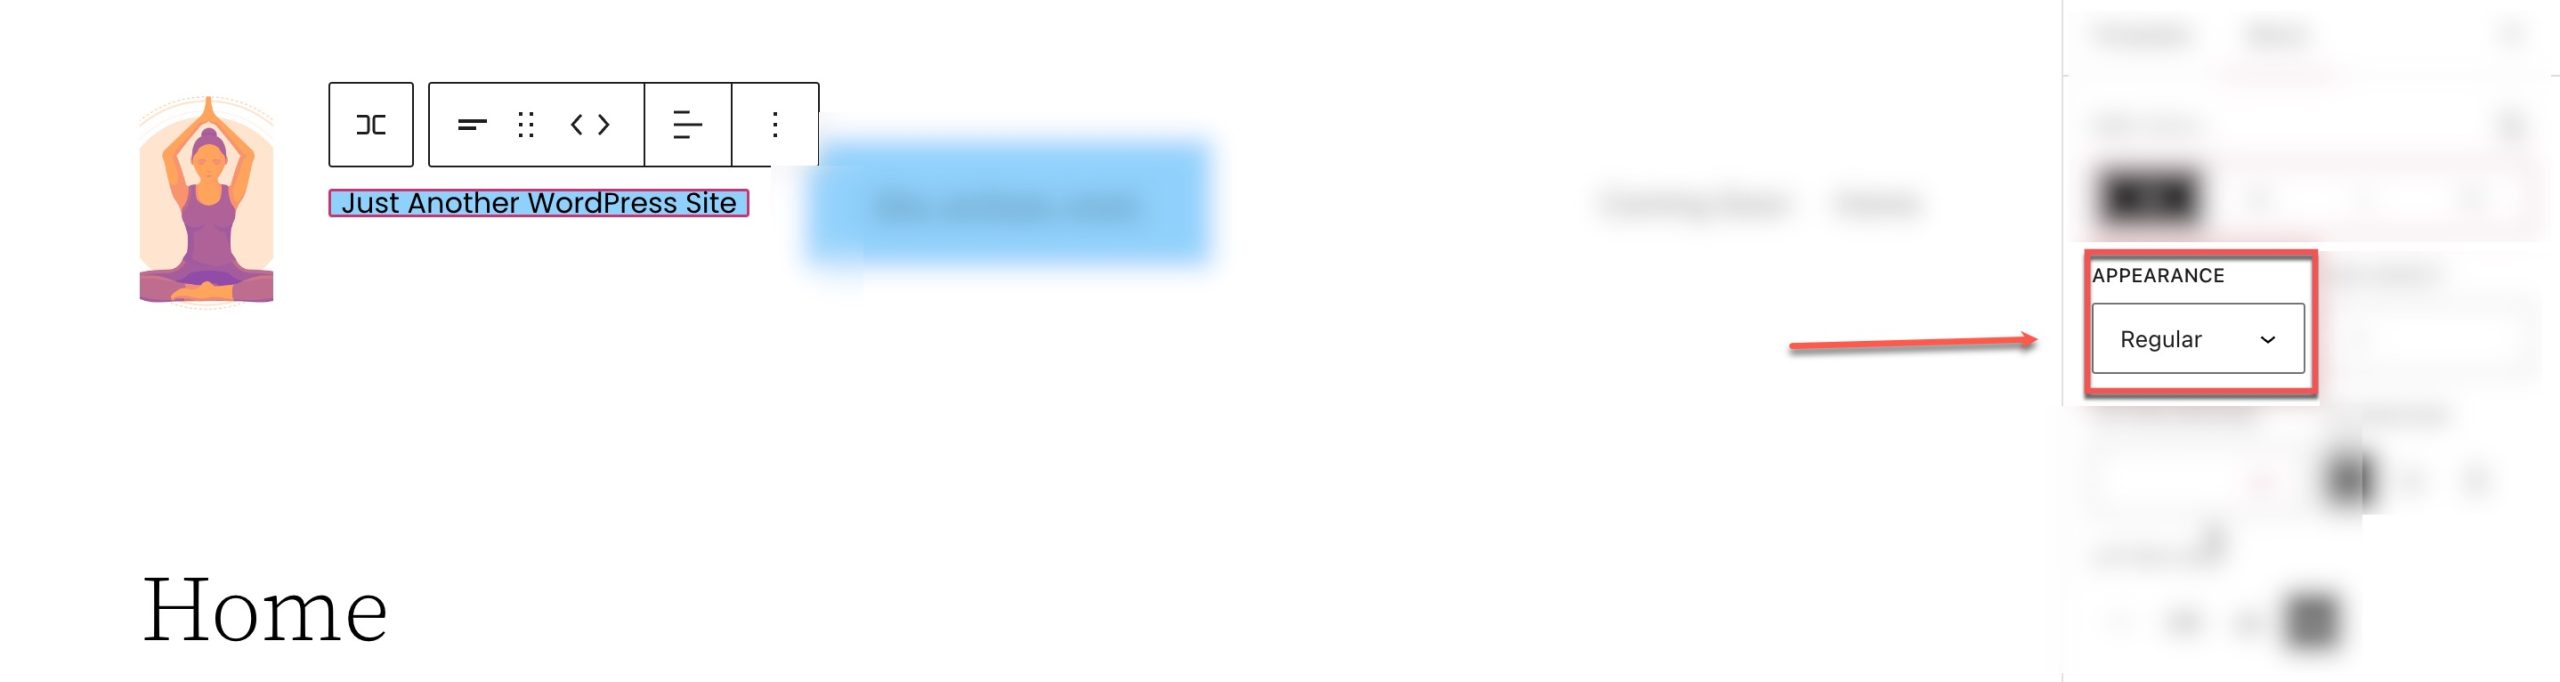
The font-weight (bold, thin, etc.) can be changed in the appearance section.
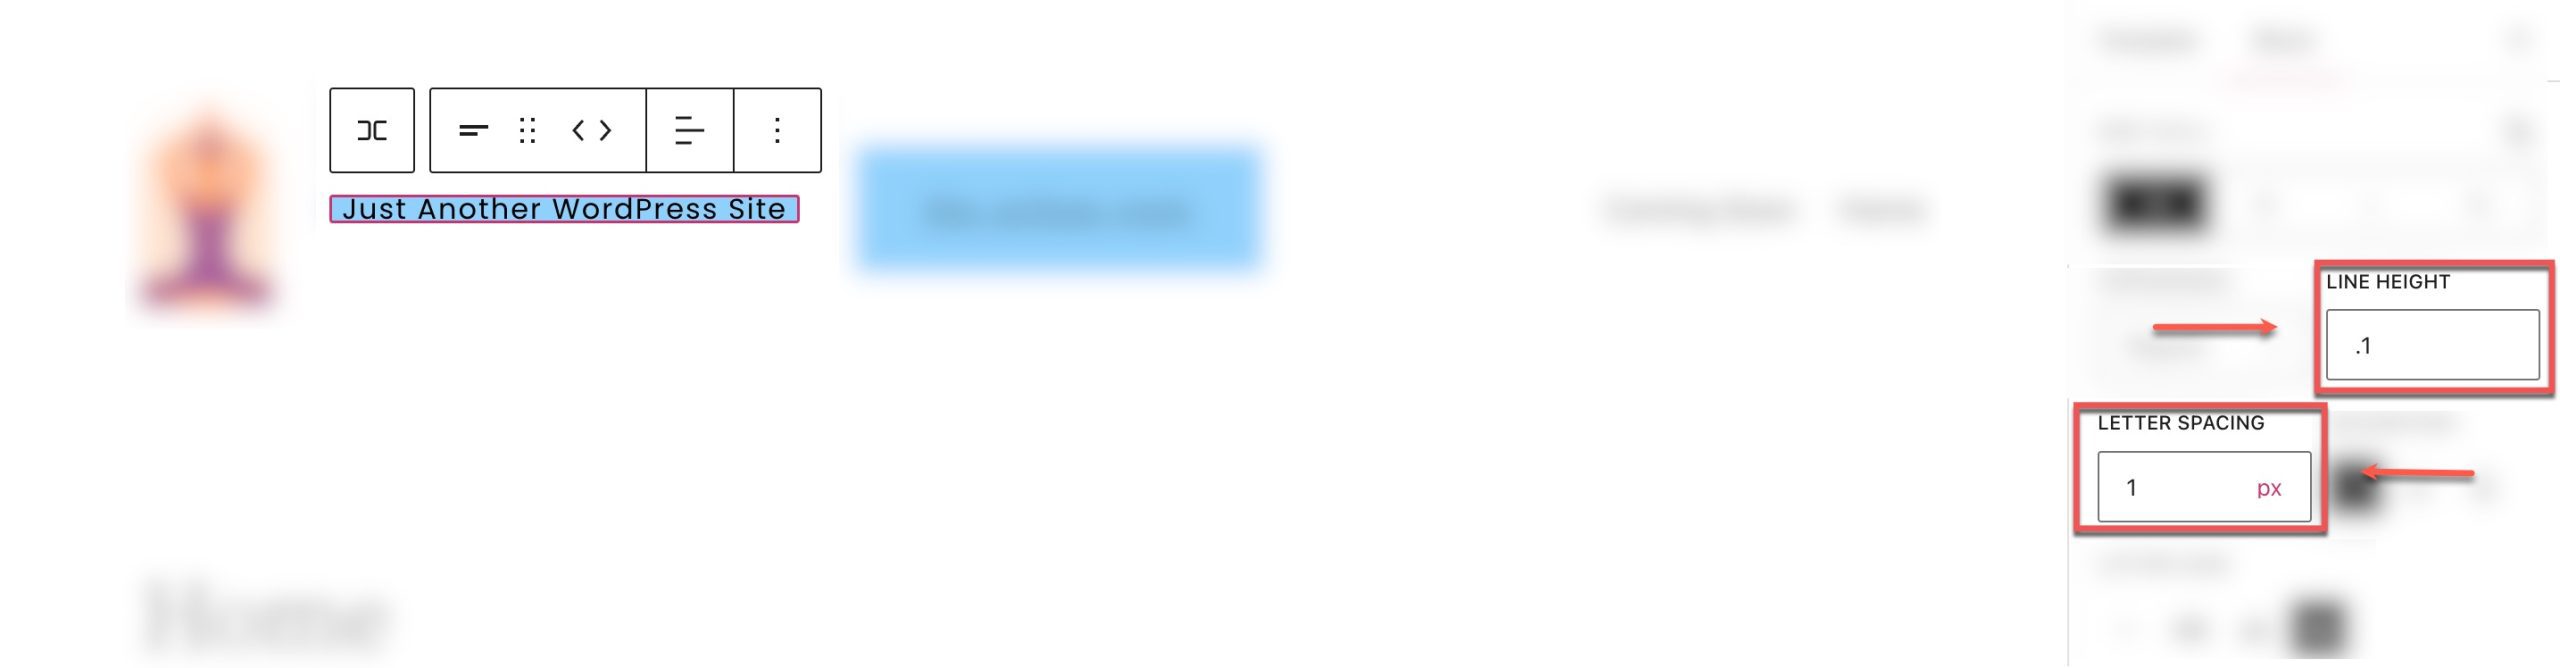
You can also adjust the letter spacing and line height in their respective sections.
In the letter case setting, we can adjust the capitalization of the site tagline block.
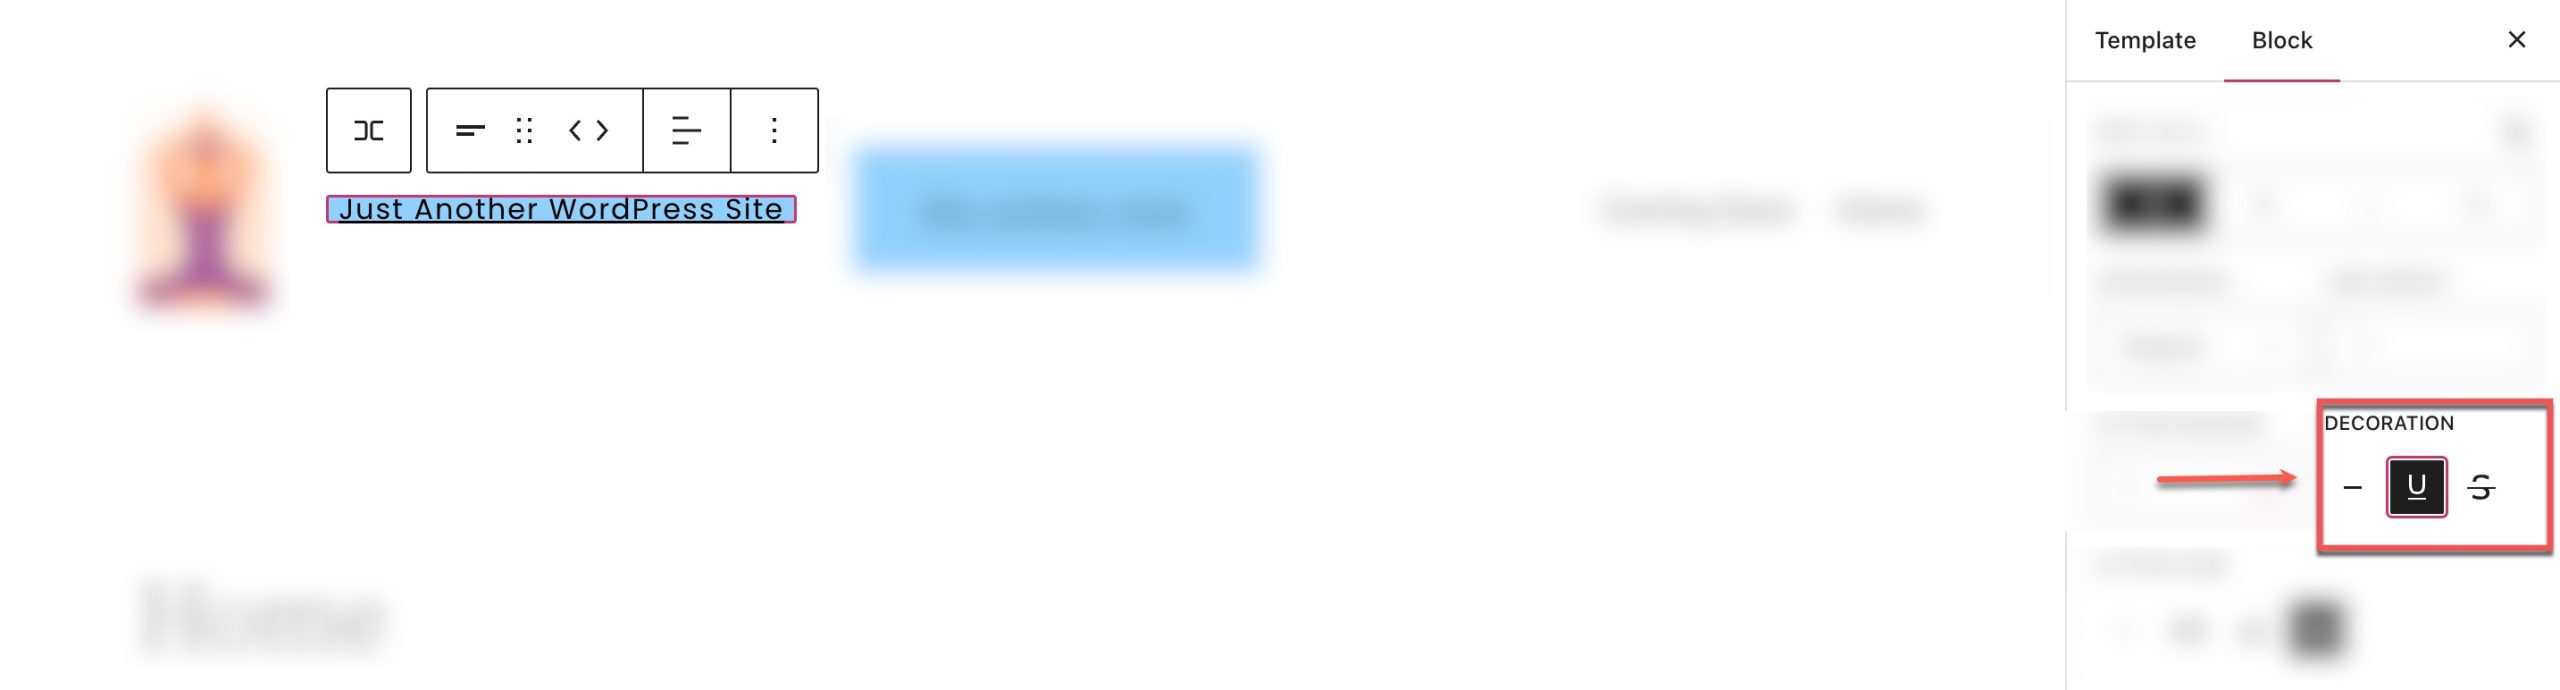
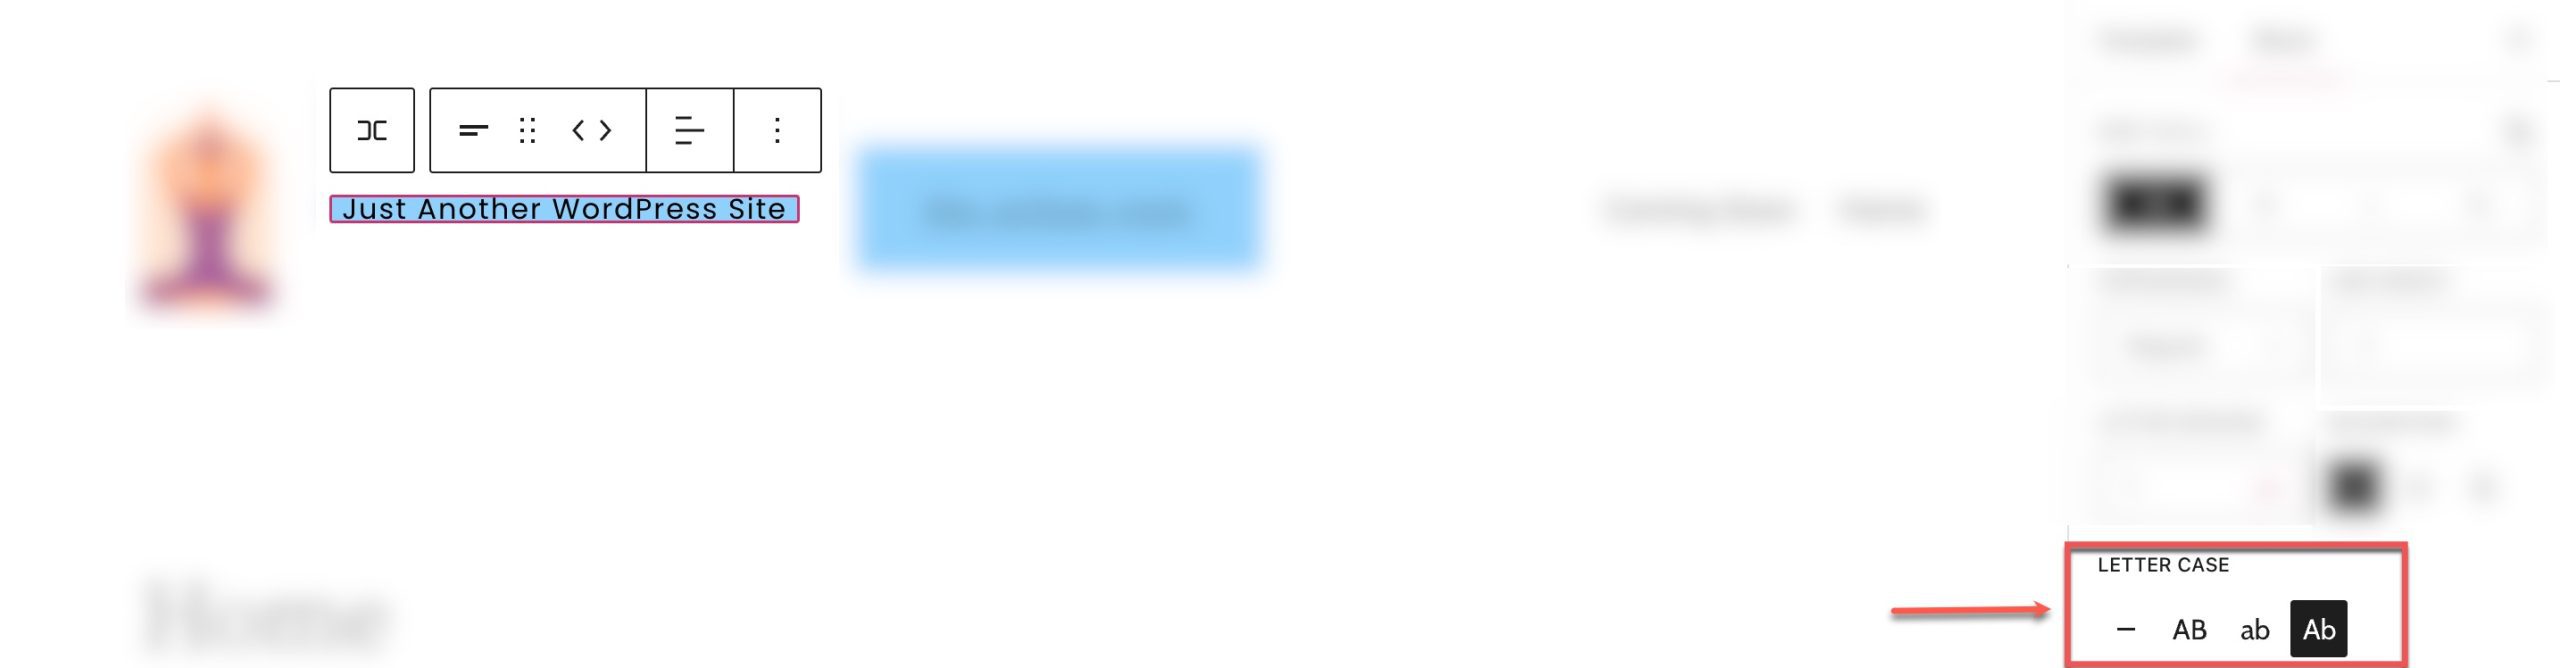 And we can underline or strikethrough our site tagline by selecting those options in the decoration section.
Below the settings section, you can find the dimensions tab where you can adjust the padding and margin of your site tagline block.
Changing the Global Style of Site Tagline Block in WordPress
As mentioned earlier, your actual WordPress Site Tagline (the text content) can be updated using the Site Tagline Block for all interactions of the block dynamically. However, the style (background color, text color, etc.) of the block won’t apply to all interactions unless you change the default global style of the block.
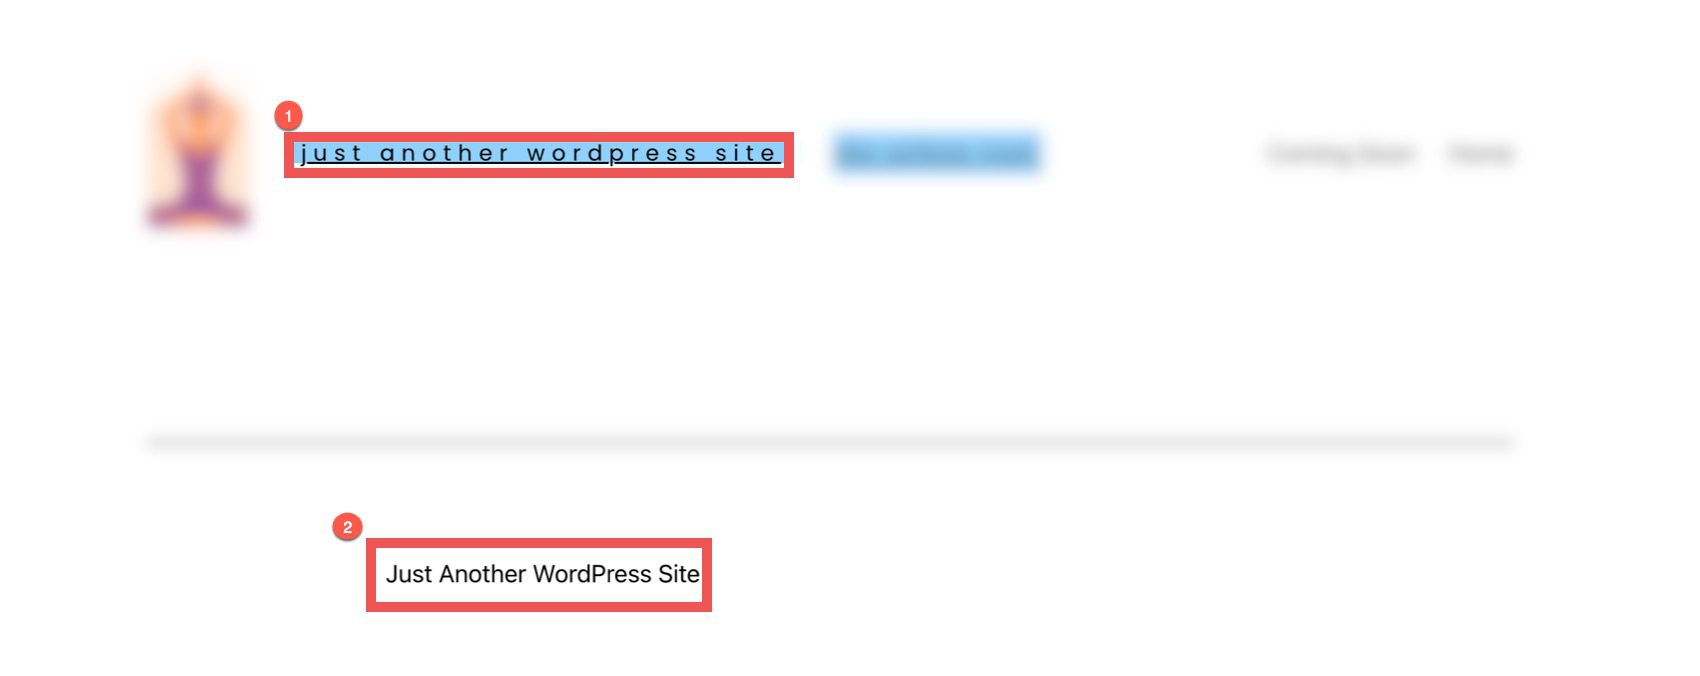
For example, below we have adjusted the background color of our site tagline block in the header to blue.

If we open a blog post, we can see that the header changes with the new style (1), but the style is off if we place the site tagline block somewhere else on the page (2).
To change the styles of all the site tagline blocks on your WordPress website site-wide, we can navigate to the styles tab by clicking the half-white, half-black circle in the top right of our template editor and selecting blocks.
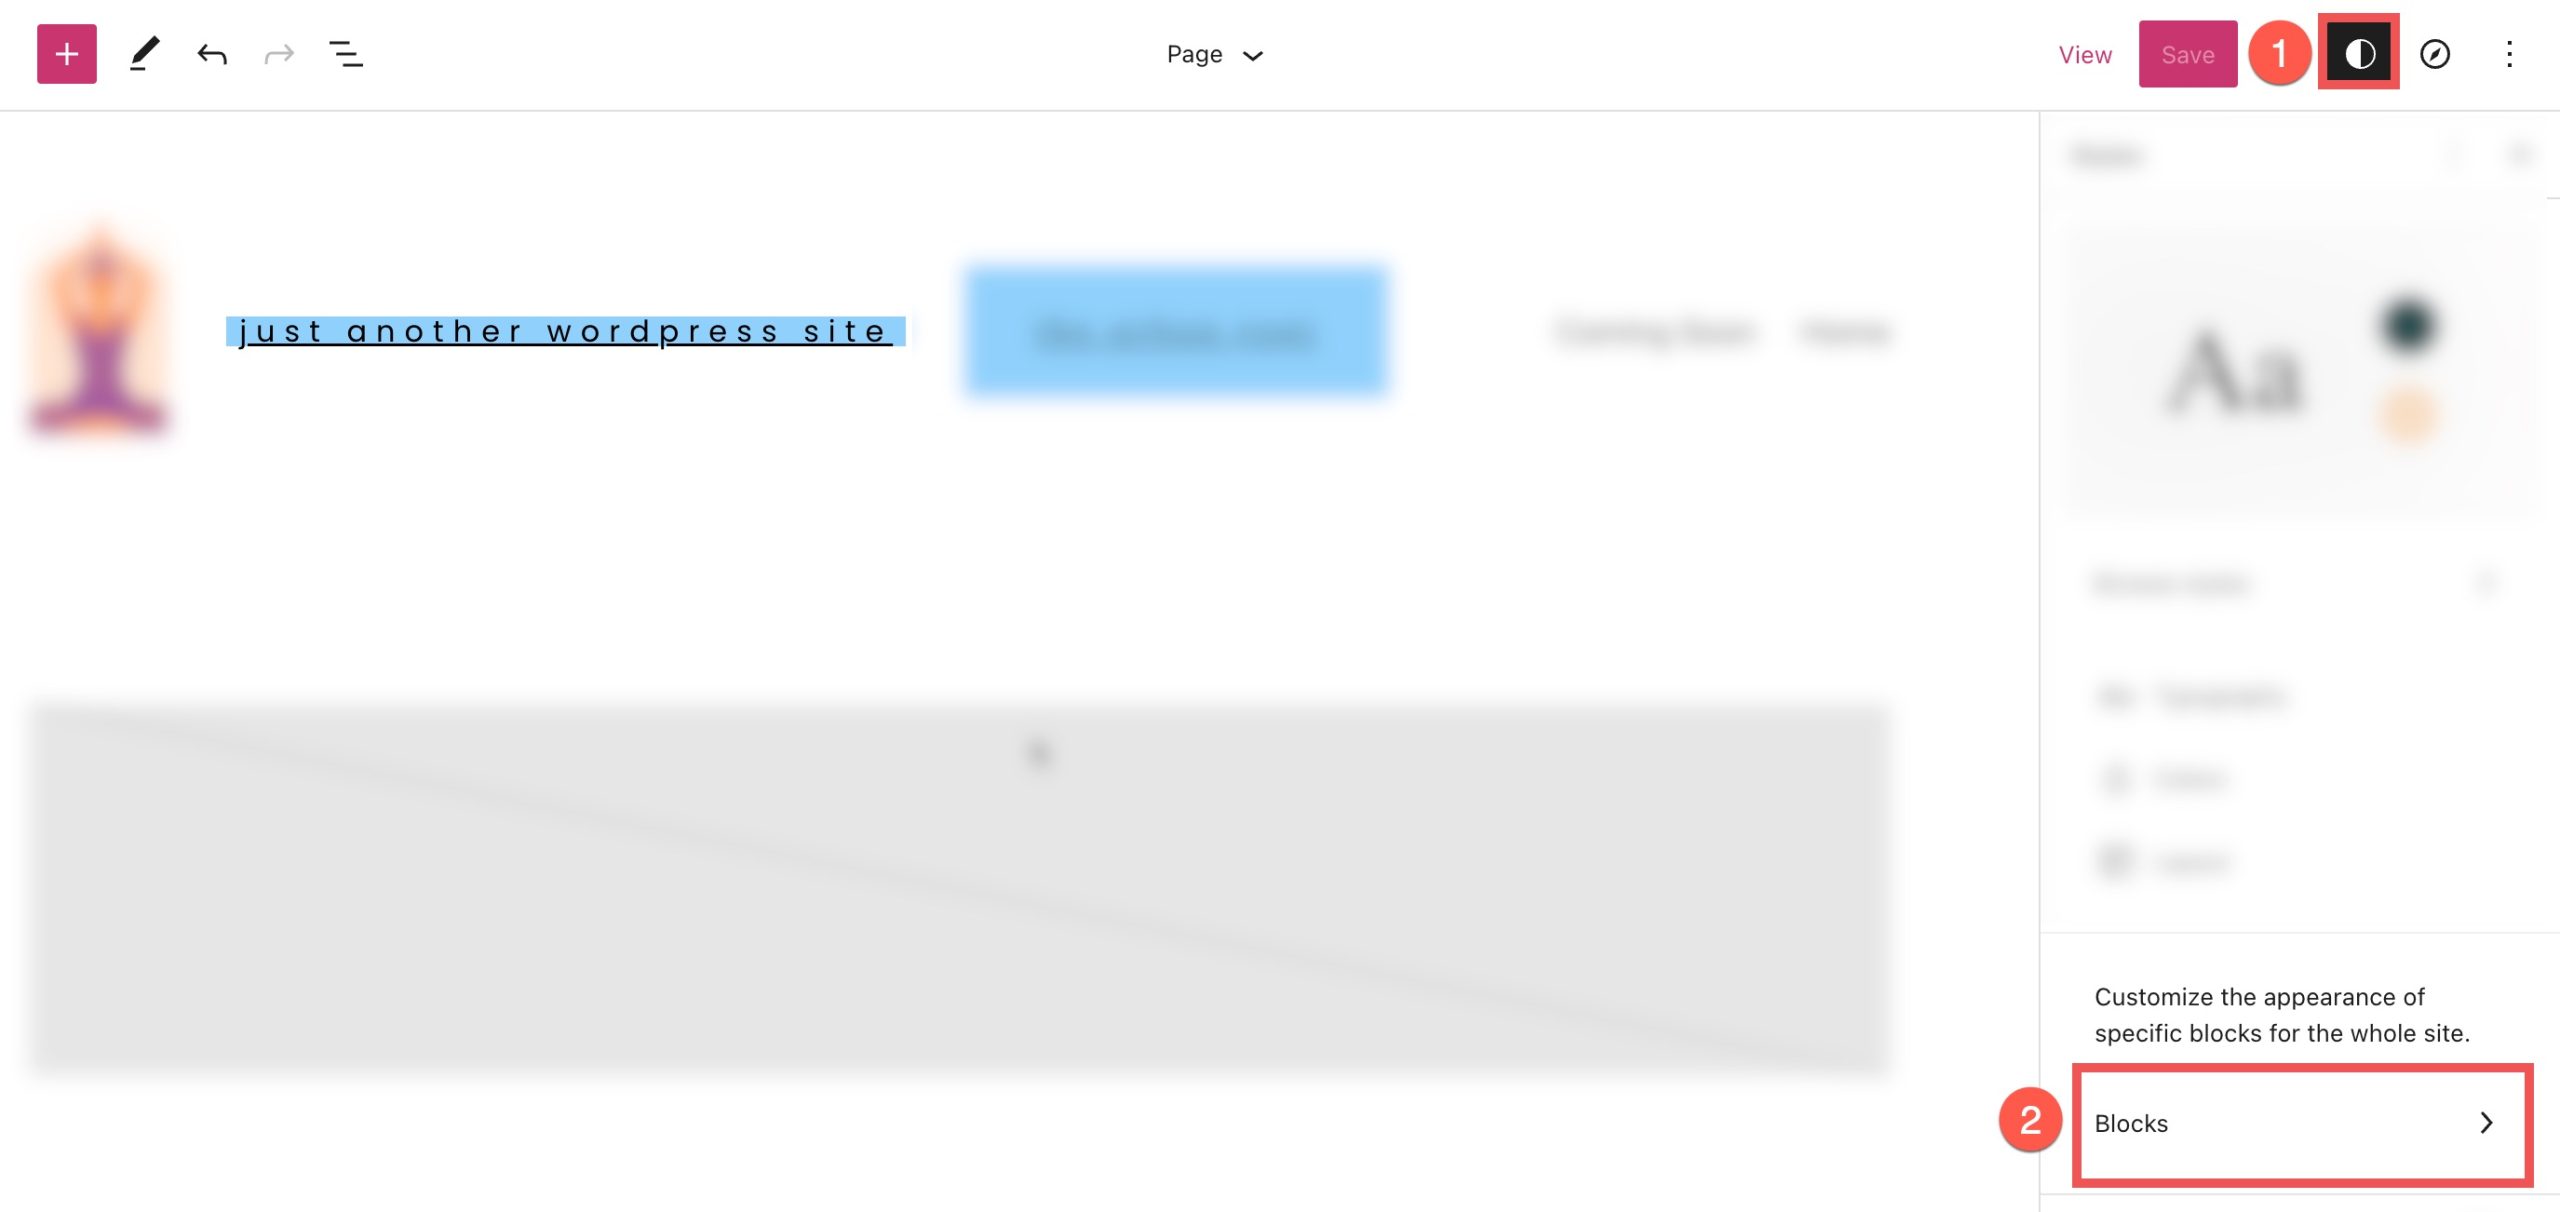
From here, search “site tagline” from the search bar and select it.
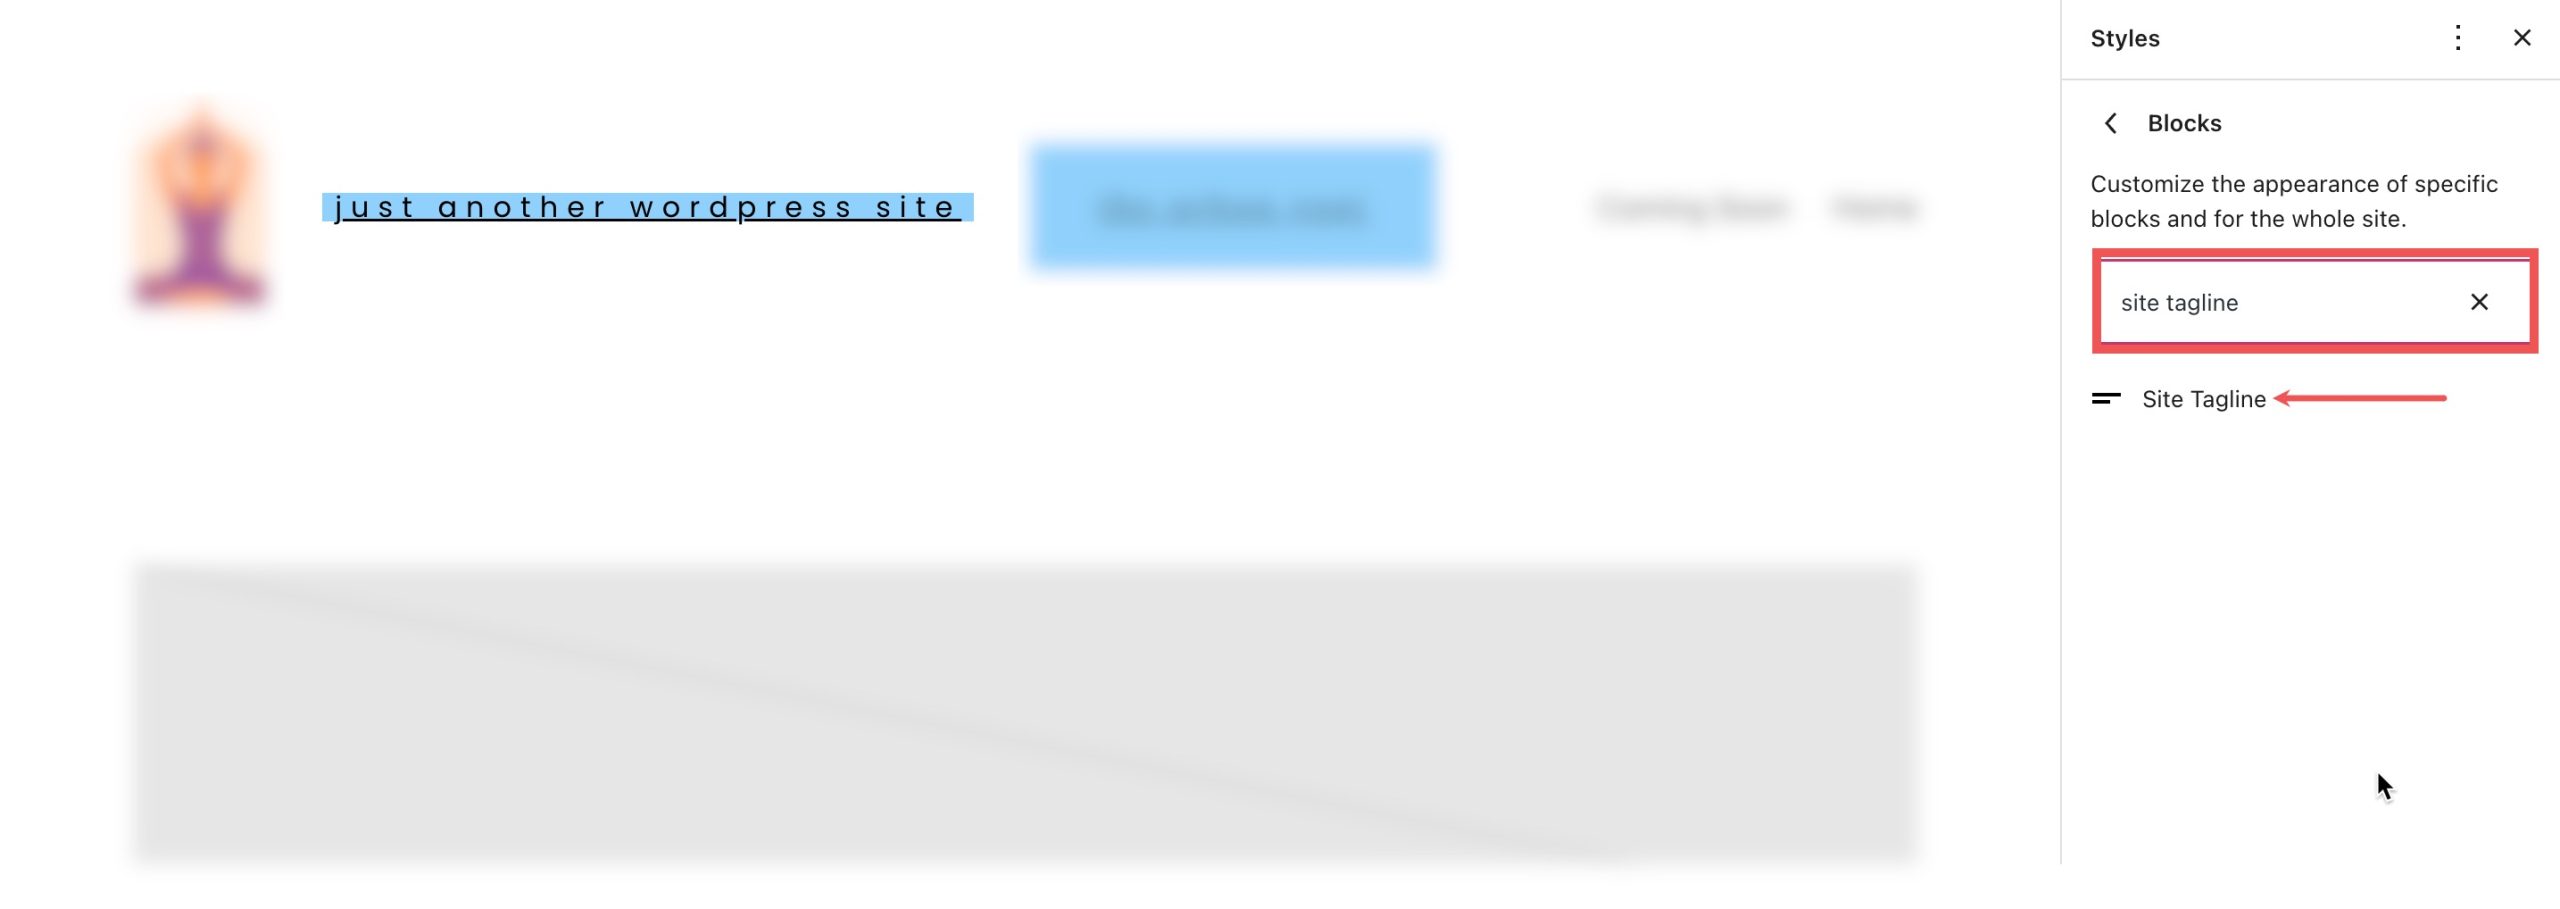
Here you can make changes that will change the default style for all current and future iterations of the site tagline block on your website.
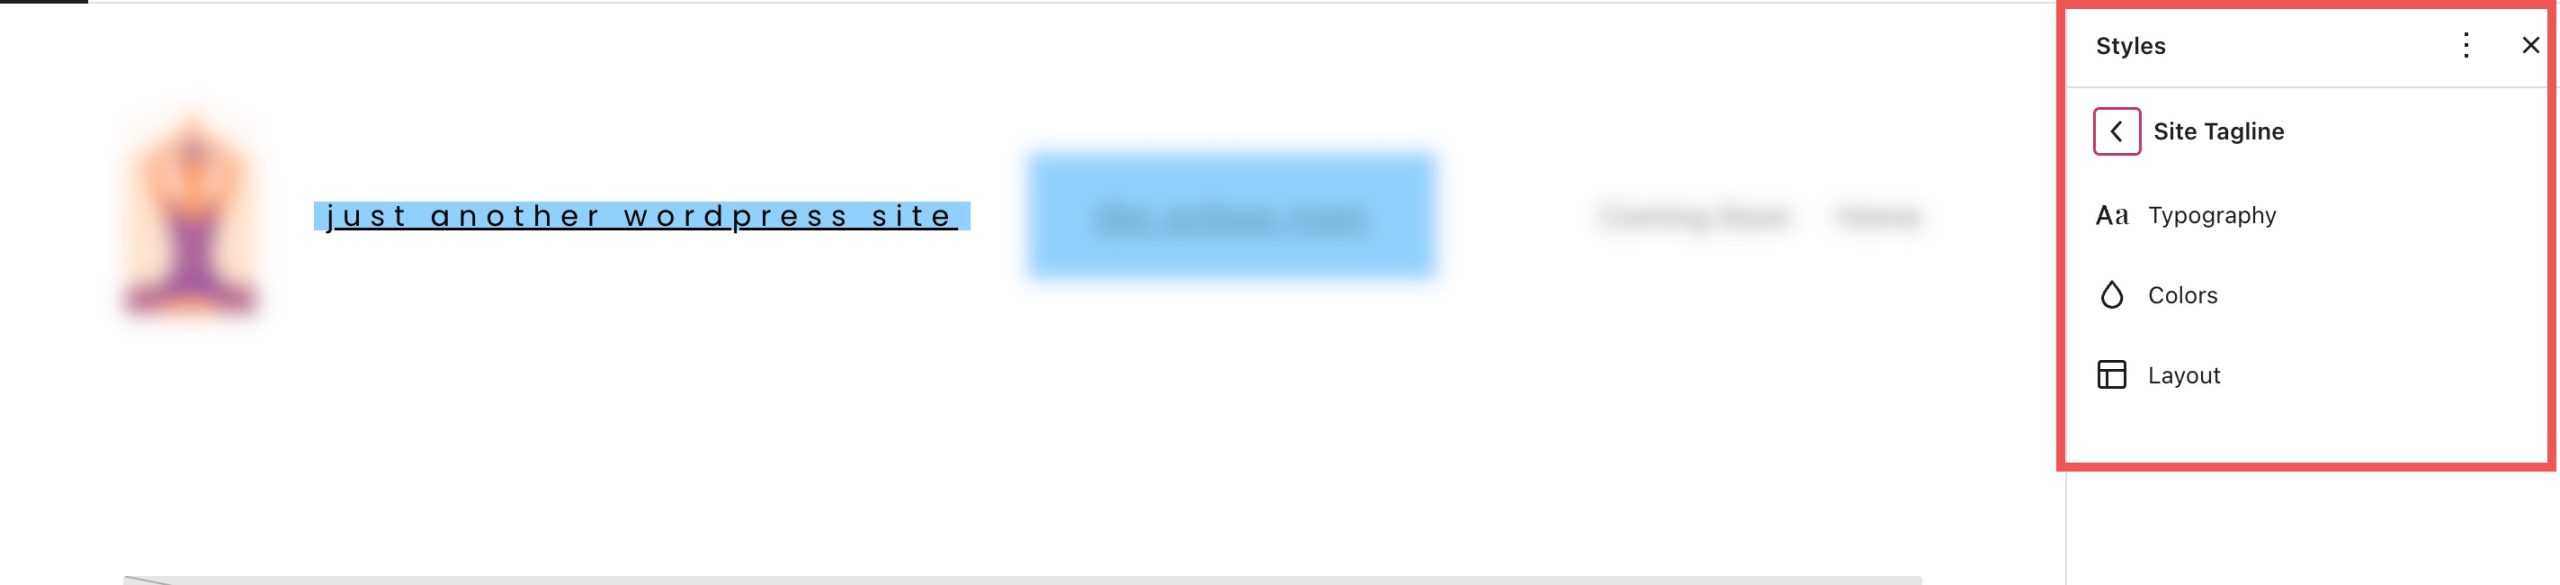
Of course, you can always override these global styles for any individual block as needed.
Frequently Asked Questions About the Site Tagline Block
Here are a few FAQs that may help you better understand the Site Tagline Block.
Do I need a Site Tagline for my website?
Absolutely! Like your Site Title, the Site Tagline helps define your website’s identity and purpose. Most importantly, a tagline helps SEO. It is used by search engines to help rank your site especially if it is displayed on the SERPs. Even if you choose not to display your tagline on your header, creating one in Settings > General, is still good practice for SEO.
Where Should I Use the Site Tagline Block?
Generally, the Site Tagline is used primarily behind the scenes. But it is common practice to add to your header or footer. You can place it next to the site logo block or site tile block to help visitors know what your site is about.
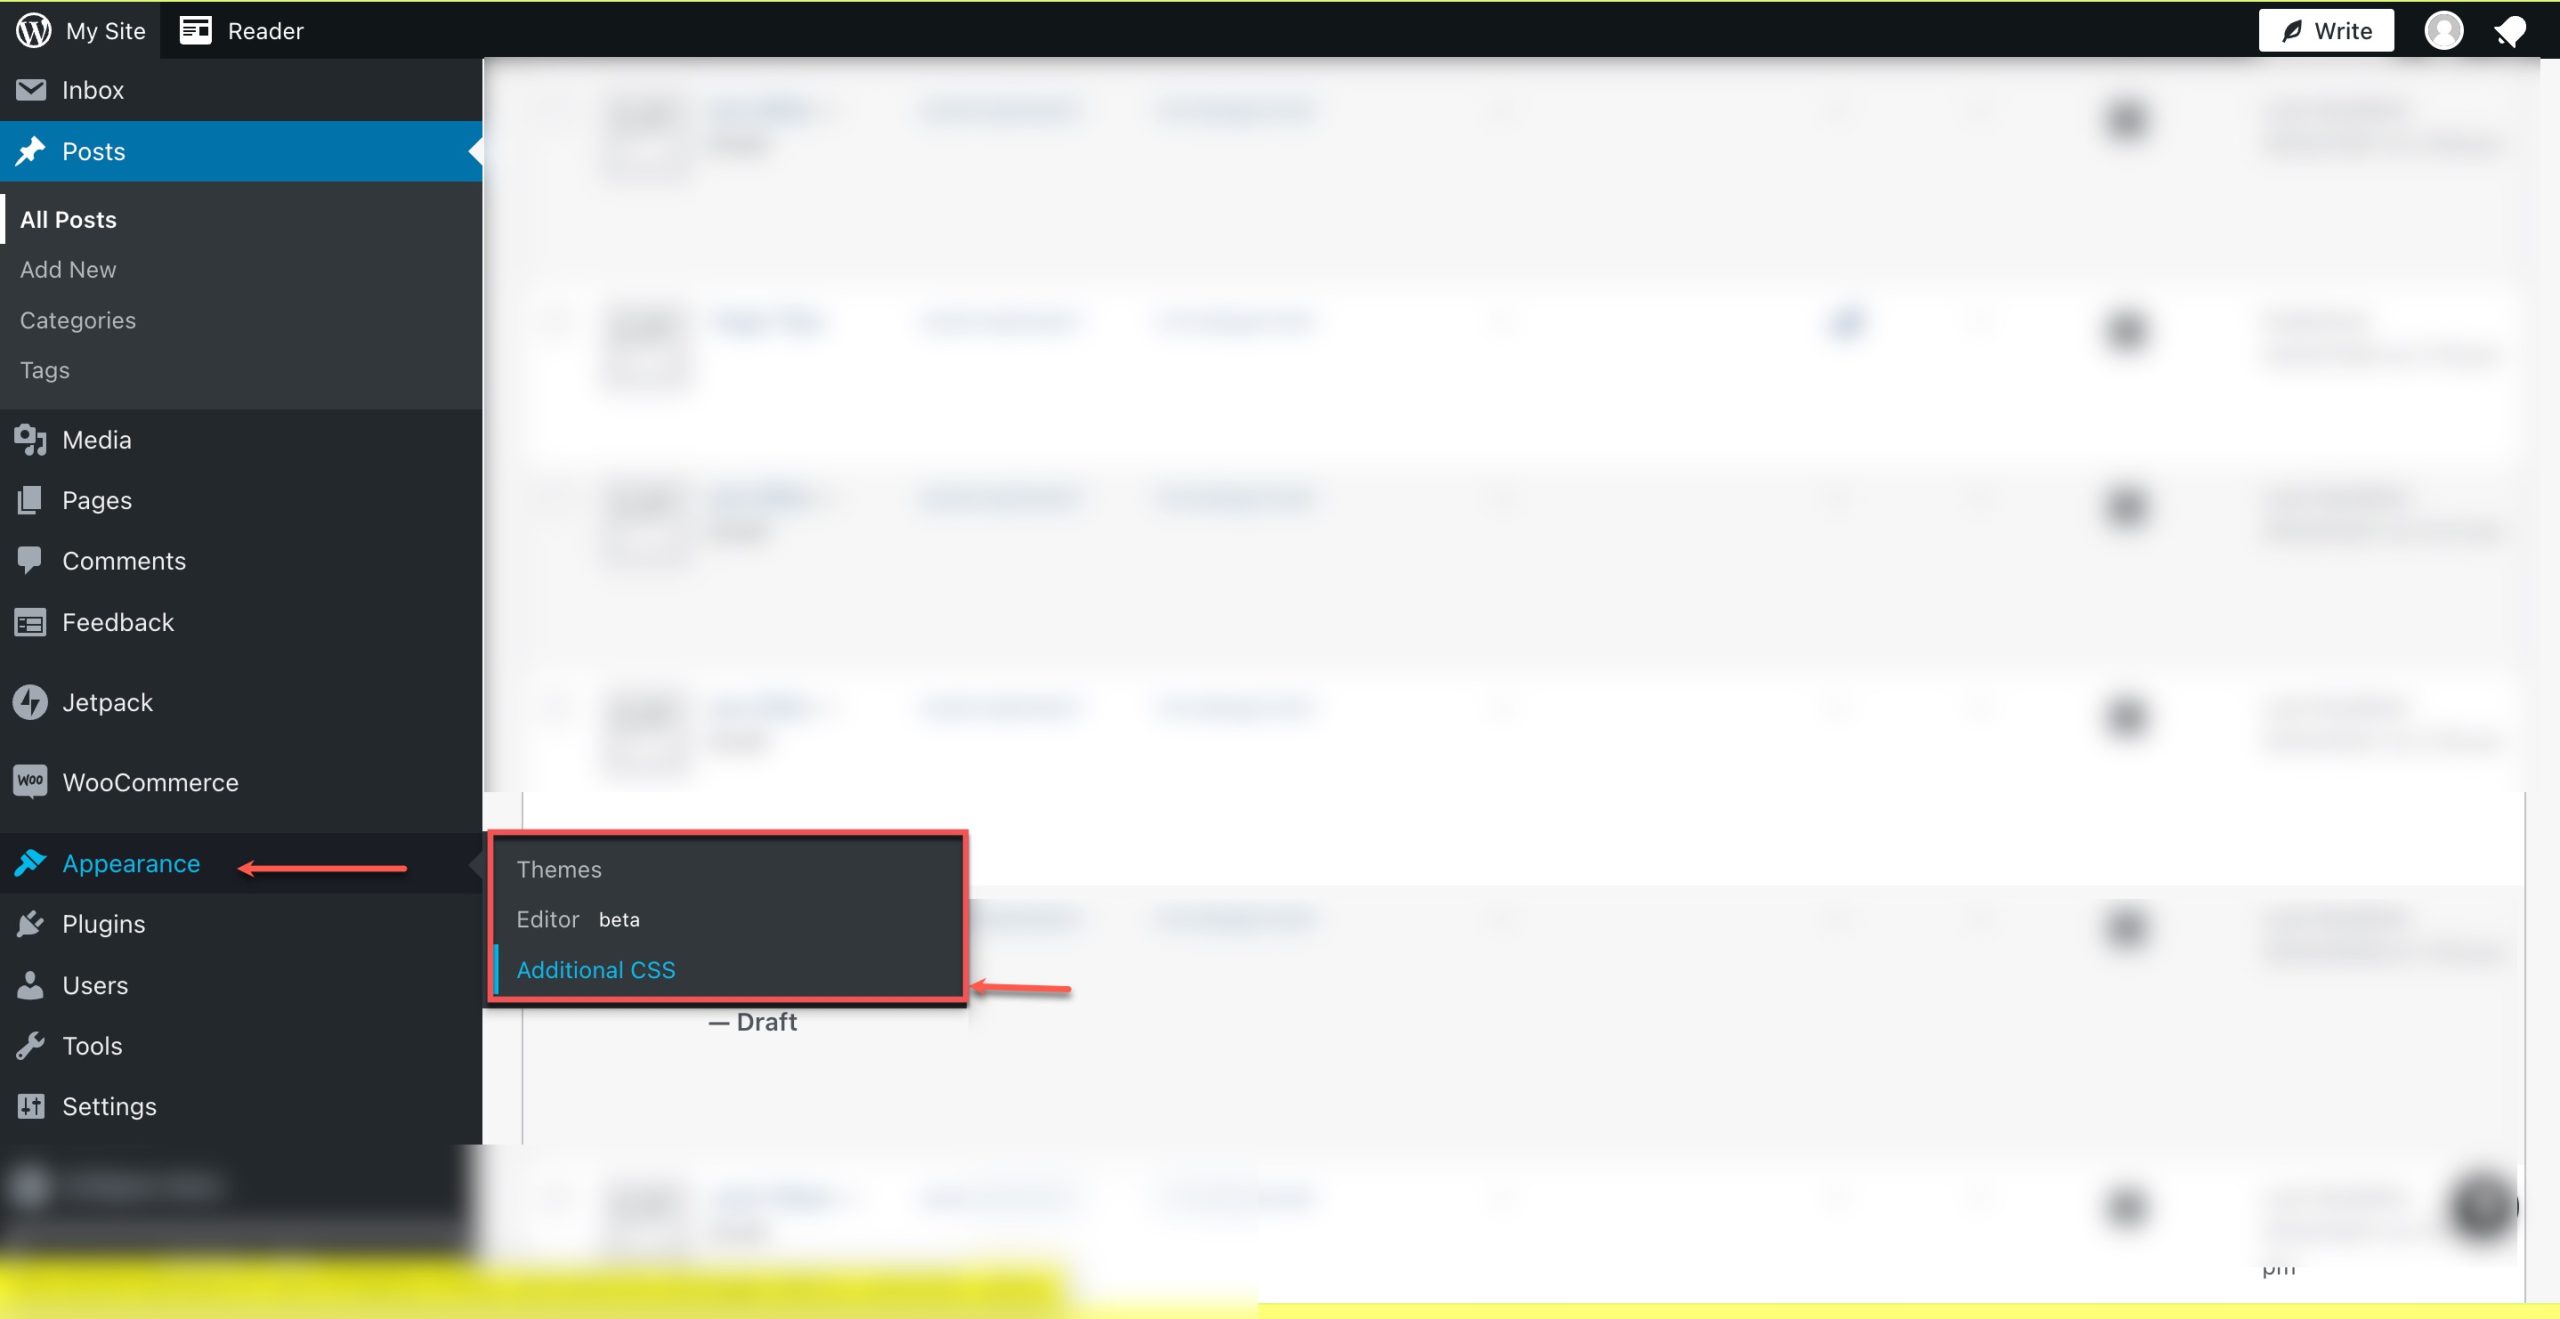
Can I Add Custom CSS to My Site Tagline Block?
Under the dimensions section in the additional settings sidebar, you can see the advanced section. Here you can add CSS classes to your block to target the block in your CSS stylesheet or use your theme’s Additional CSS area as needed.

To access the CSS editor, go to Appearance > Additional CSS:
Adding a Dynamic Site Tagline in Divi
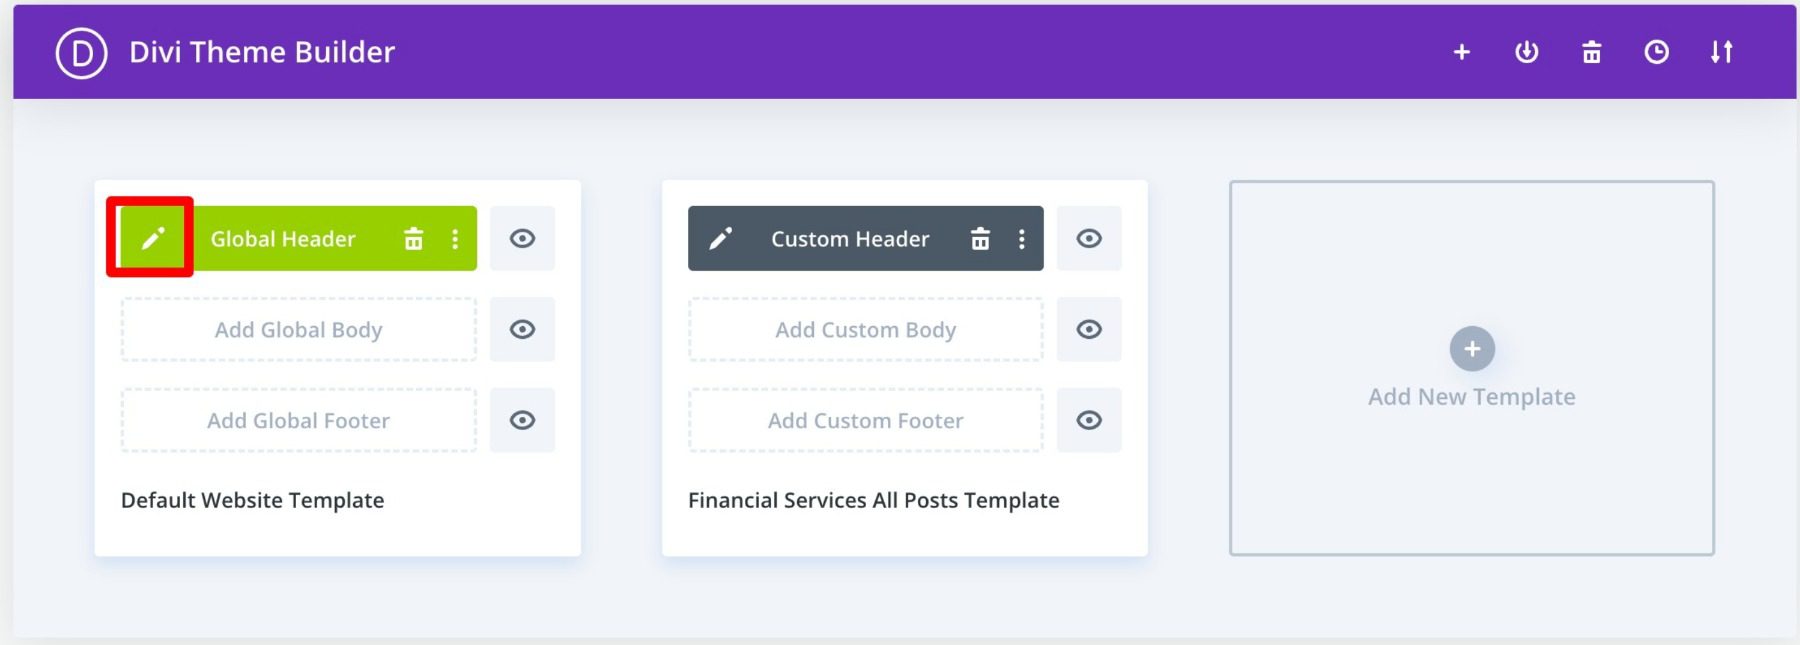
You can use the Divi Theme Builder to add a site tagline to your global header in just a few easy steps. You can start by clicking the edit button next to Global Header in your Divi Theme Builder. We’re using a premade template for this tutorial, but these steps will work with any theme.
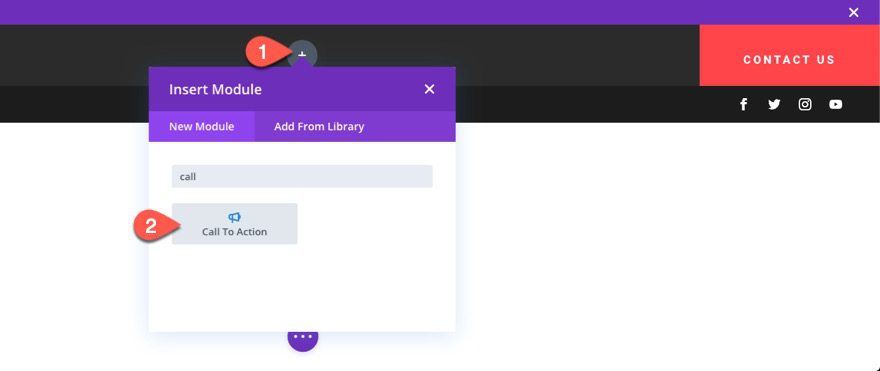
Next, add a new Call to Action module in your header.
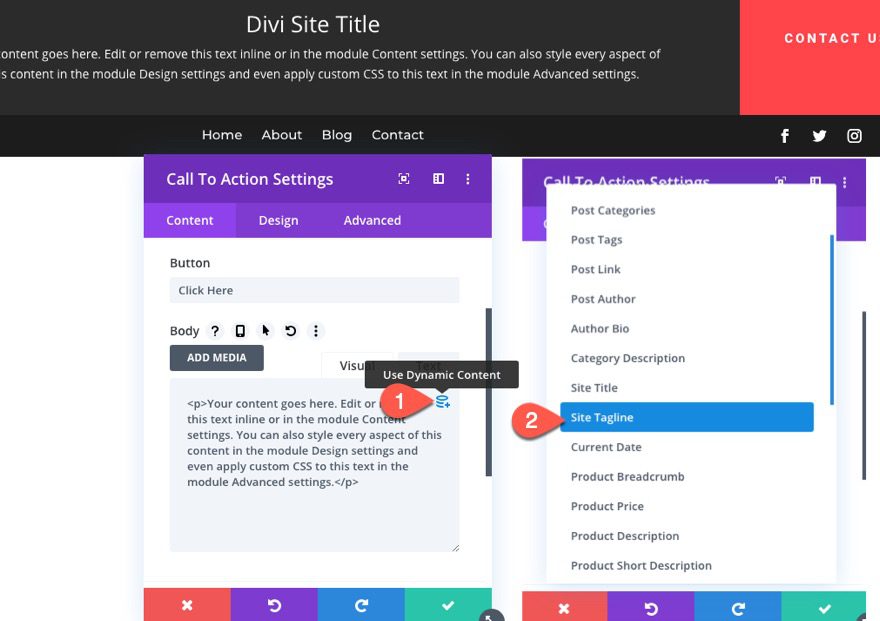
Next, hover over the body area and select the “Use Dynamic Content” icon. Then select “Site Tagline” from the list.
For more, check out our tutorial on how to add a dynamic title and tagline in Divi.
Conclusion
The site tagline block gives you full control over where you want to display it throughout your site. Using the built-in block settings available in the WordPress editor, you can easily add, edit, or style the block to fit your design. Use it to add a beautiful tagline to your site’s header, footer, or anywhere you want.
You may also be interested in our tutorials on WooCommerce Blocks and Block Patterns.
Let us know in the comments if you have any questions regarding the WordPress site tagline block!


Leave A Reply