
Nameservers save your users the mental effort of remembering the numbers that form your IP address. Instead, they can use intuitive domain names to remember and bookmark your site. Although the purpose of a nameserver is relatively easy to grasp, it’s wise to familiarize yourself with the basics of how to modify yours in case the need arises.
In this article, we’ll explain what nameservers are and what they do. We’ll also discuss why it’s important to make sure they’re always updated and current with your hosting.
Let’s get to it!
What Is a Nameserver (And How Does It Work)?
In a nutshell, nameservers are part of a Domain Name System (DNS) and help your browser resolve domain names to IP addresses. A DNS a large database containing information about domain names and their related IP addresses. Nameservers use these DNS records to resolve the names we are familiar with into numbers the browser can use.
For example, when you visit a webpage, you’ll typically enter a URL such as google.com or facebook.com. However, the IP addresses associated with either of those sites look something like 189.60.333.253.
Without nameservers, you’d need to remember numbers such as this for every site you needed to visit. Although we might rely on names rather than numbers to access websites, browsers still need a way to understand the IP addresses that these more intuitive identifiers point to.
So, if you typed elegantthemes.com into your browser, your computer would contact the nameservers for our domain and ask for the IP address of our site. Then, your browser makes a request to the returned address.
If you’d like, you can easily check to see what nameservers you’re using currently. One way to go about this is to use the official Internet Corporation for Assigned Names and Numbers (ICANN) lookup tool:
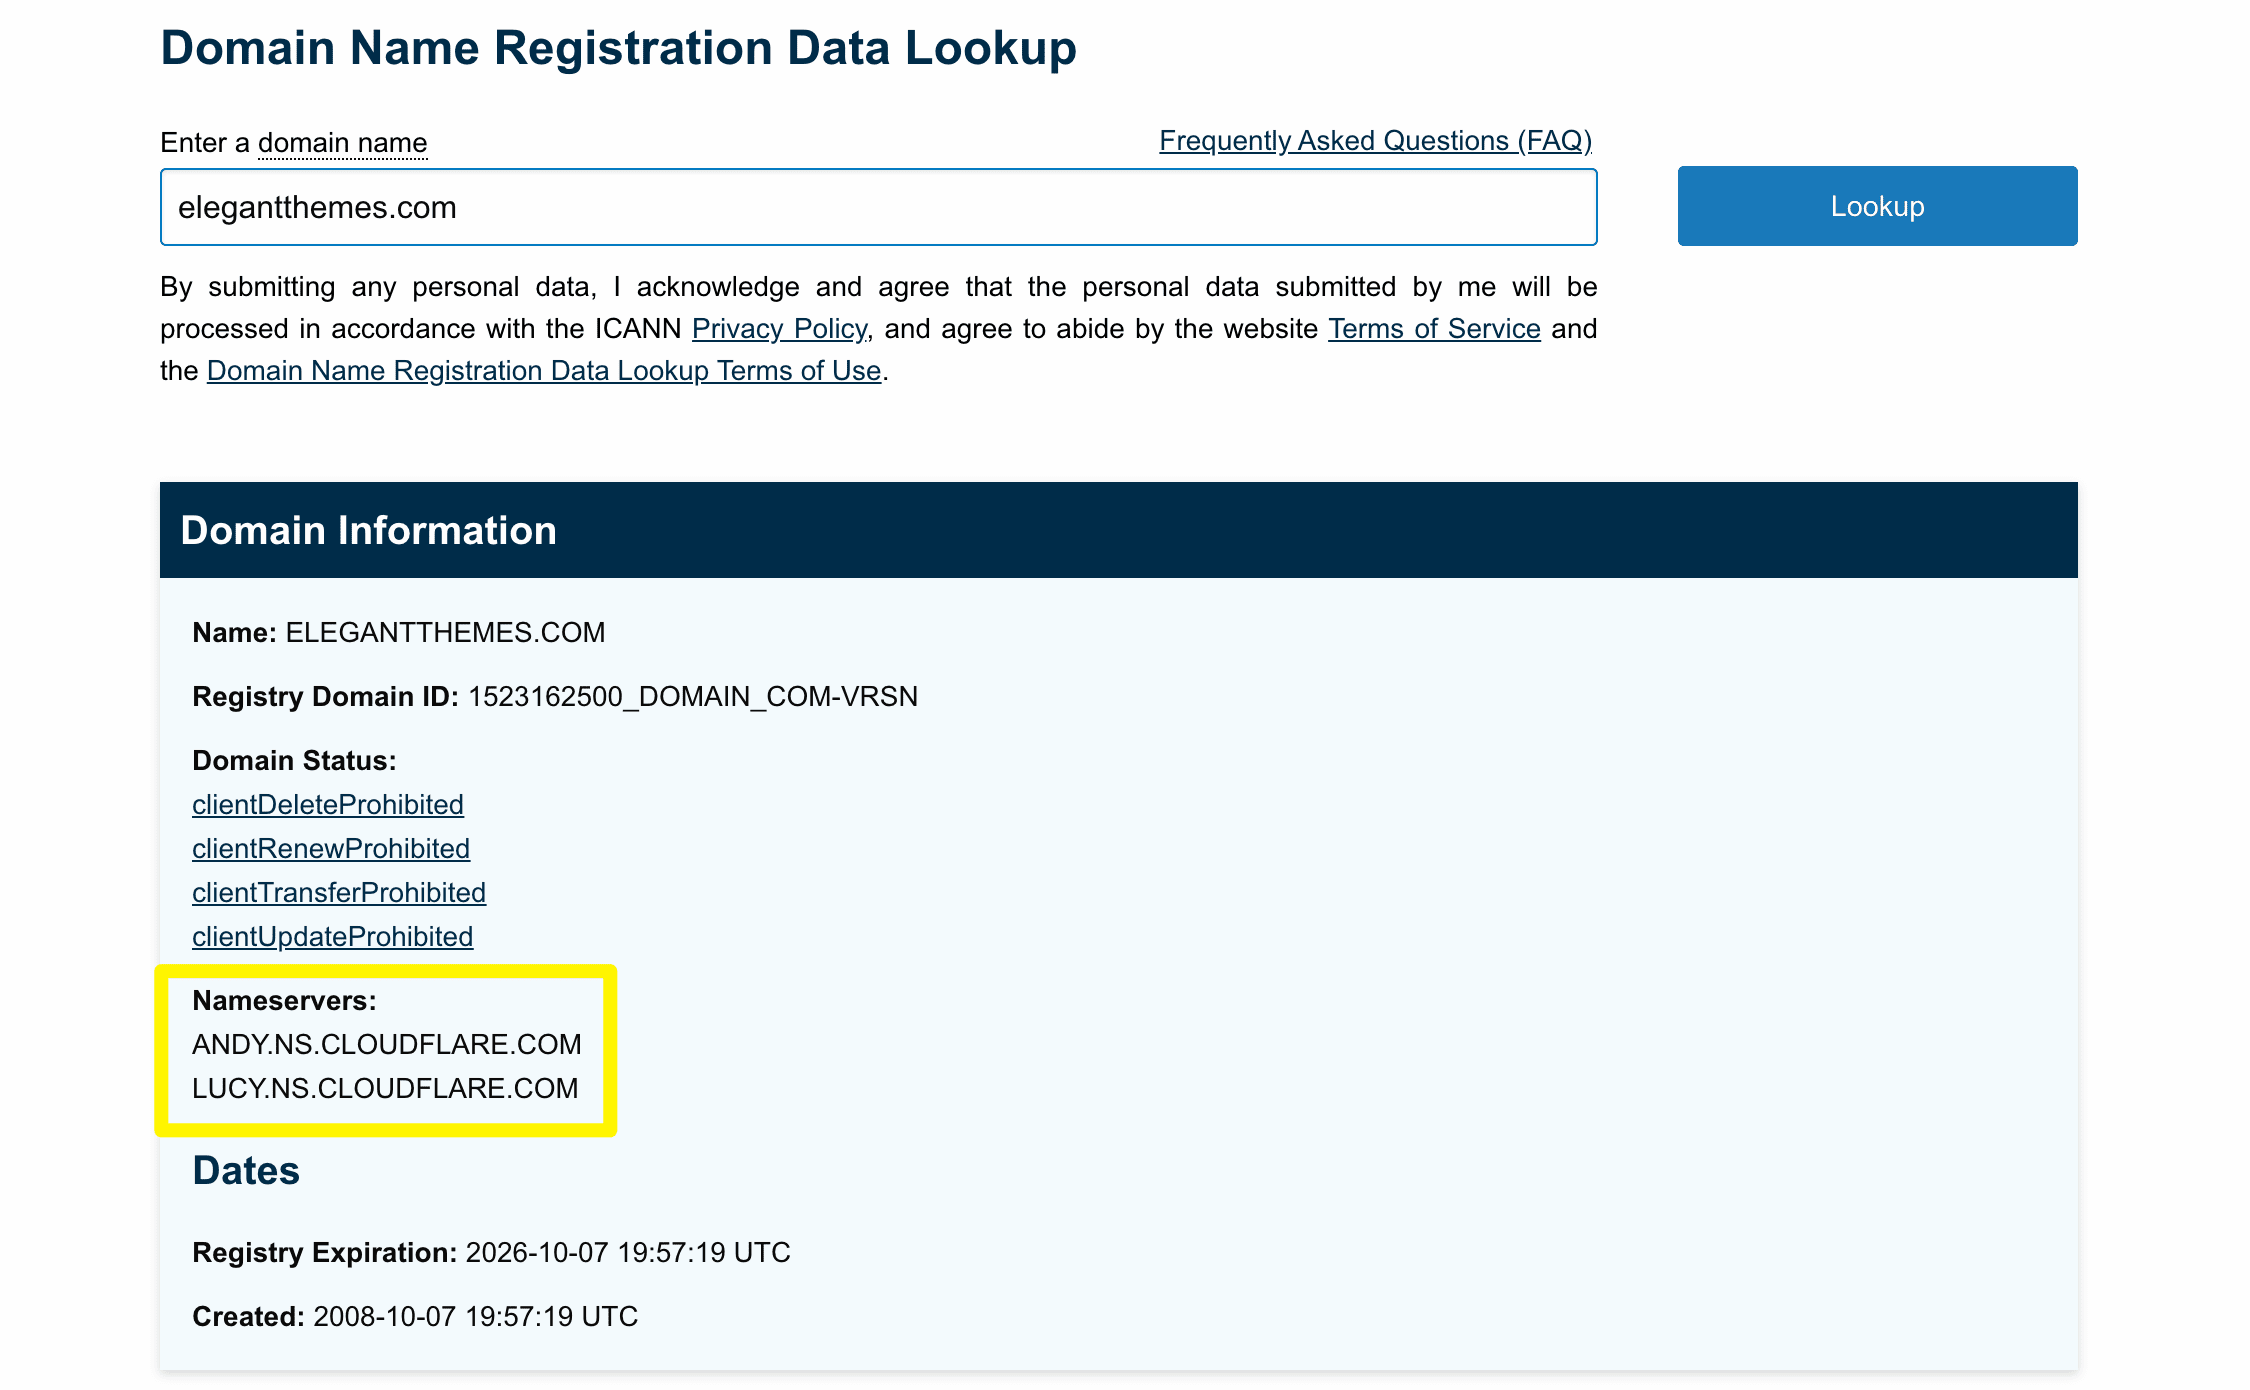
You can also find your nameservers via your hosting account. The process will vary a bit depending on your provider. However, generally speaking, you’ll find nameserver information in the Domains section of your account.
Select the specific address whose nameservers you want to view and look for Manage Nameservers or a similar setting:

If you’re having trouble locating your nameservers, your host’s documentation or support team should be able to help.
Why You Might Want to Change Your Nameservers
Most of the time, you probably won’t give your nameservers a second thought. However, there are several tasks related to managing your website that may require you (or a third-party tool) to interact with them.
For example, Google Search Console uses nameservers to verify your domain. You may also need to set up Google MX records if you’re creating a branded business email address.
However, there are only three scenarios in which you should need to change your nameservers entirely:
- You registered your domain with a company different from the one that hosts the website you want it to point to.
- You’re moving your site to a new hosting provider.
- You want to set up custom nameservers.
In the first two situations, you’ll need to change your nameservers so that they point to the correct site. Otherwise, users who enter your domain in their browsers won’t be directed to your content, since their browsers won’t be able to resolve it to the correct IP address.
Custom nameservers are associated with your domain rather than your web host. Using them simplifies the process of switch hosting providers.
You may be required to create custom nameservers if you’re using a dedicated server or Virtual Private Server (VPS) to host your site. They’re also useful for hosting resellers, as you can avoid giving third-party information to your clients and solidify your brand identity by configuring your nameservers to match your domain.
How to Change Your Nameservers (2 Methods)
You have two options if you’re looking to change your nameservers. You can either switch to the ones provided by your host or configure new custom nameservers. Both methods are relatively straightforward. However, you’ll want to note that it can take up to 24 hours to see changes.
1. Change Your Current Nameservers
If you’re planning to switch hosts or want to register your domain name with a company other than your hosting provider, you’ll need to change your nameservers to point your domain towards your site.
You should be able to accomplish this through your hosting or domain registrar account dashboard. The exact steps will vary a bit based on the company you’re working with, but the general guidelines should be fairly similar.
The first thing you will need to do is access the new nameservers you want to switch to. There are a few possible locations where you may find them, including:
- Your host’s documentation
- A post-purchase email from your hosting provider
- Your hosting account dashboard
There will often be two or more nameservers listed. Make note of all of them.
Next, you’ll need to log into the account to which your domain is registered. Navigate to the domain management screen for the address in question and look for the DNS or nameserver settings.
There should be a page where you can enter the nameservers you sourced from your hosting provider:
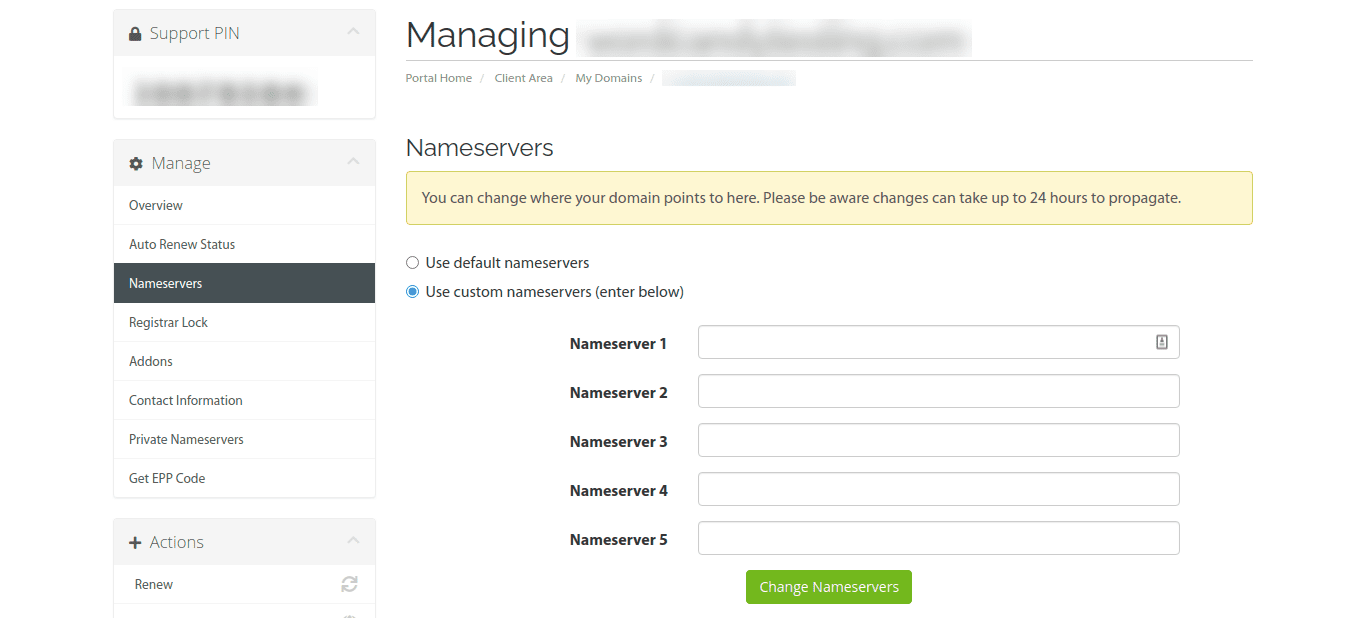
Make sure to save your changes. Within 24 to 48 hours, you should see your site should be accessible by your domain.
2. Configure a Custom Nameserver
If you’re setting up dedicated hosting, VPS hosting, or starting a reseller hosting business, you’ll need to configure custom nameservers instead of changing them to your hosting provider’s default ones.
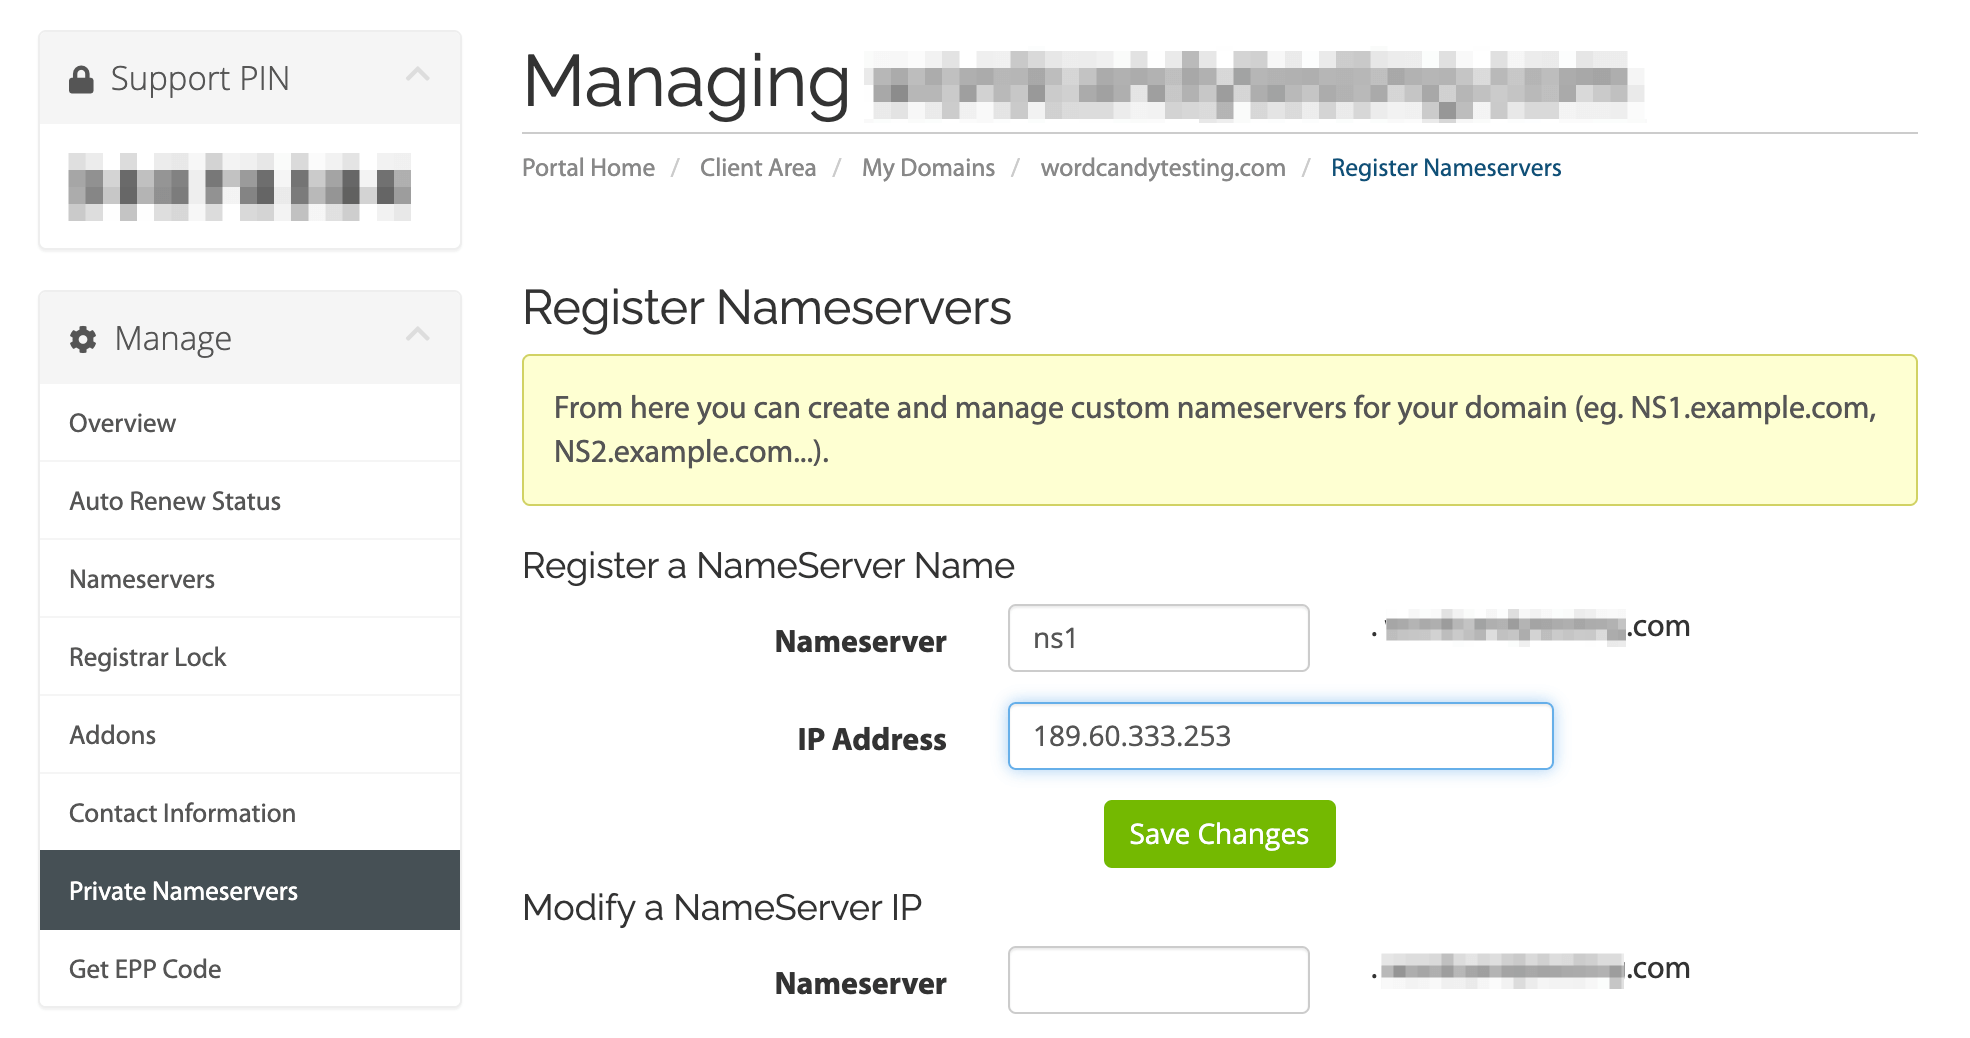
First, log into your hosting account and locate your server’s IP address. Make a note of it for later.
Then access the account to which your domain name is registered. Select the relevant address and open its DNS settings, then look for an option to add or register a nameserver. Some hosts include this under their settings for private nameservers.
Here you’ll need to provide your IP address as well as the custom nameservers you want to use. For a domain such as www.elegantthemes.com, these might include ns1.elegantthemes.com or ns2.elegantthemes.com:
Save your changes. Next, you need to set up the DNS A records that are required for your custom nameserver to work. Again, this process will vary depending on your hosting provider, and we recommend consulting its documentation or support team if you’re not sure how to proceed.
If your host uses cPanel, you’ll find the necessary settings under Domains > DNS Zone Editor:
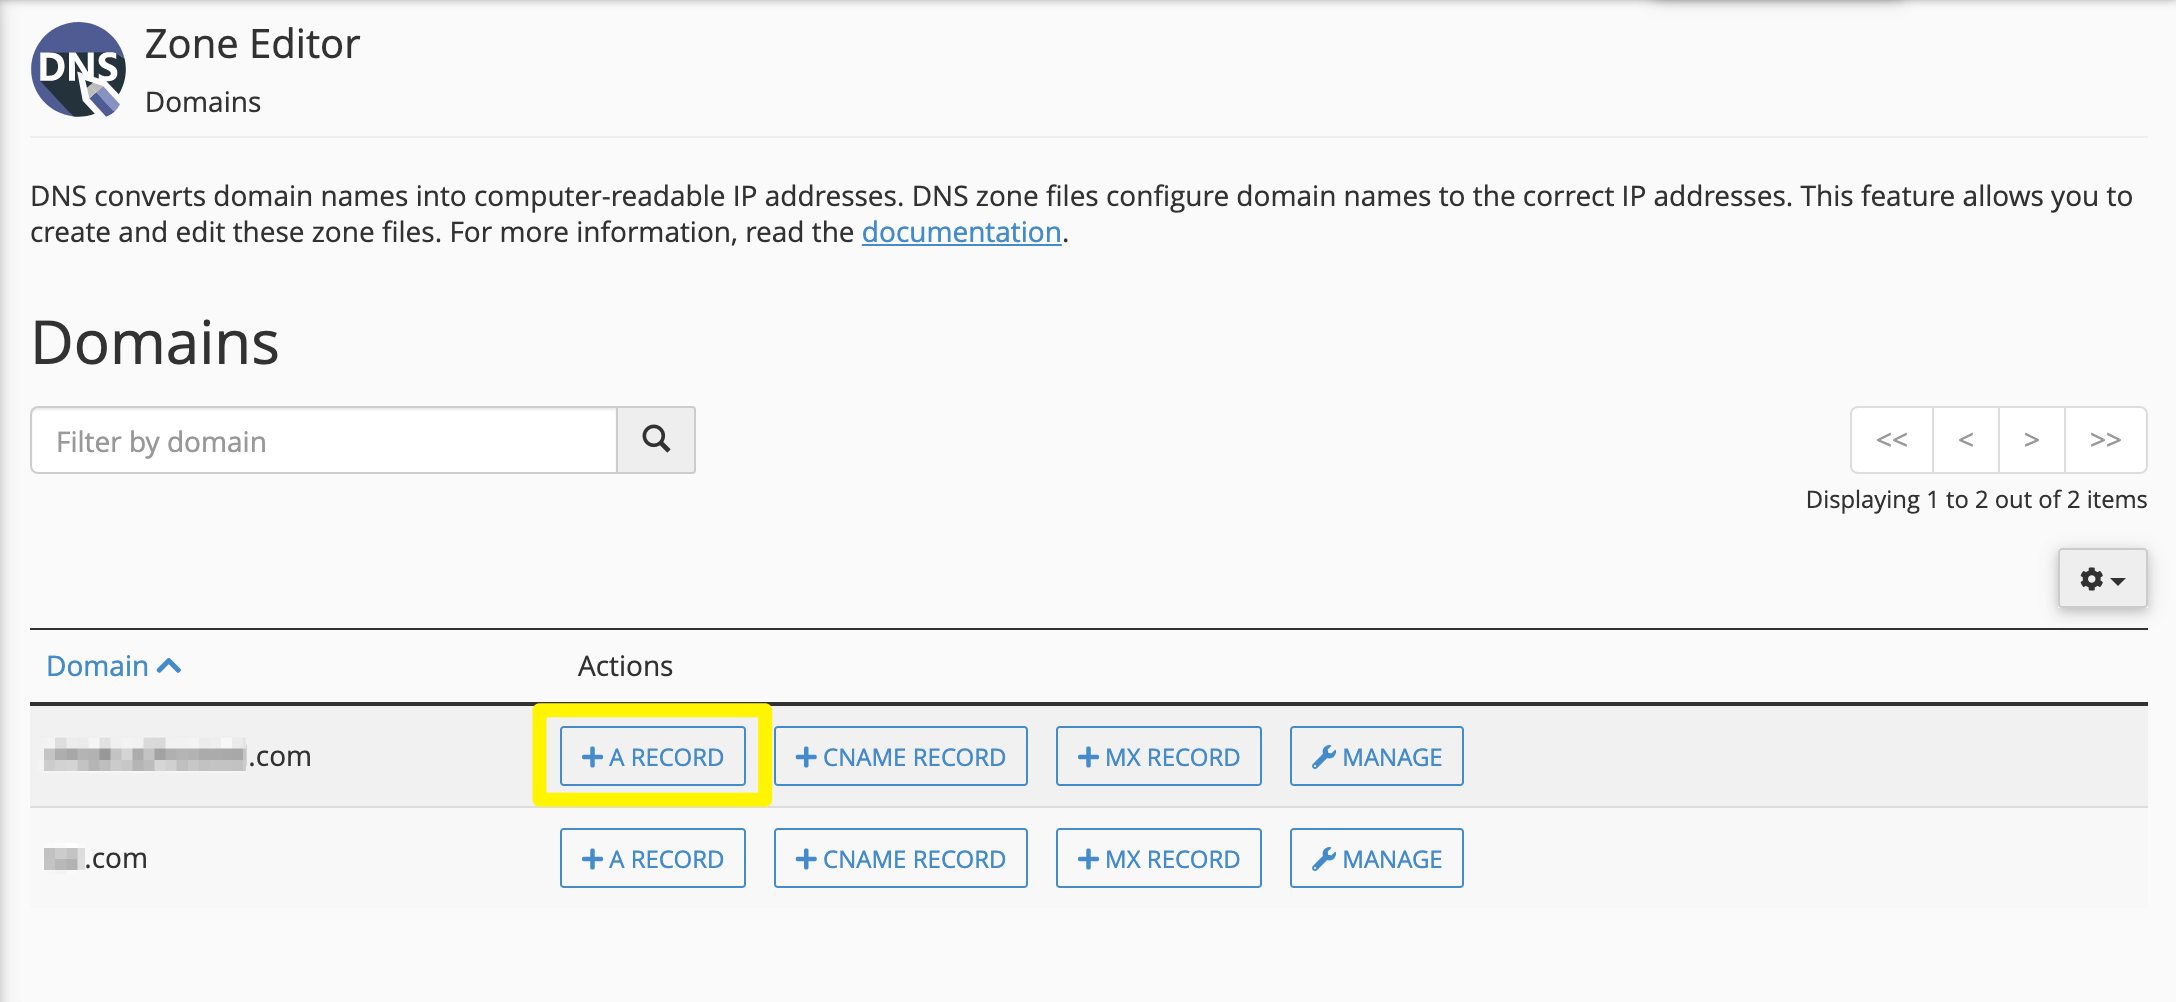
Here all you have to do is click on + A Record. Then you should be able to point your domain or those of your clients towards your new nameservers.
Conclusion
Nameservers are a convenient tool that enables your visitors to bypass the need to remember numerical IP addresses in favor of more intuitive domain names. Depending on your specific needs, you may have to change your default nameservers using a few straightforward steps.
In this article, we discussed two methods for changing your nameservers:
- Change your current nameservers by adding your hosting provider’s nameservers in your account’s DNS settings.
- Configure a custom nameserver for your dedicated, VPS, or reseller hosting account.
Do you have any questions about nameservers or how to change them? Ask away in the comments section below!
Image by vijay0401 / shutterstock


Leave A Reply