
Knowing how to use the Image block comes in handy when you want to insert a single media file into a post or page on your WordPress site. However, what if you want to add a collection of photos? You could check out some of WordPress’ popular gallery plugins. Or, you can use the Gallery block.
The WordPress Gallery block makes it easy and quick to add multiple images to your WordPress posts and pages. In this article, we’ll explain what the Gallery block is and how it works. We’ll also provide some tips and best practices for using it effectively on your website. Let’s get to it!
How to Add the Gallery Block to Your Page or Post
To add the Gallery block to your WordPress site, first navigate to any page or post (new or existing). Next, click on the Add Block button – the plus (+) icon – and search for “Gallery”:
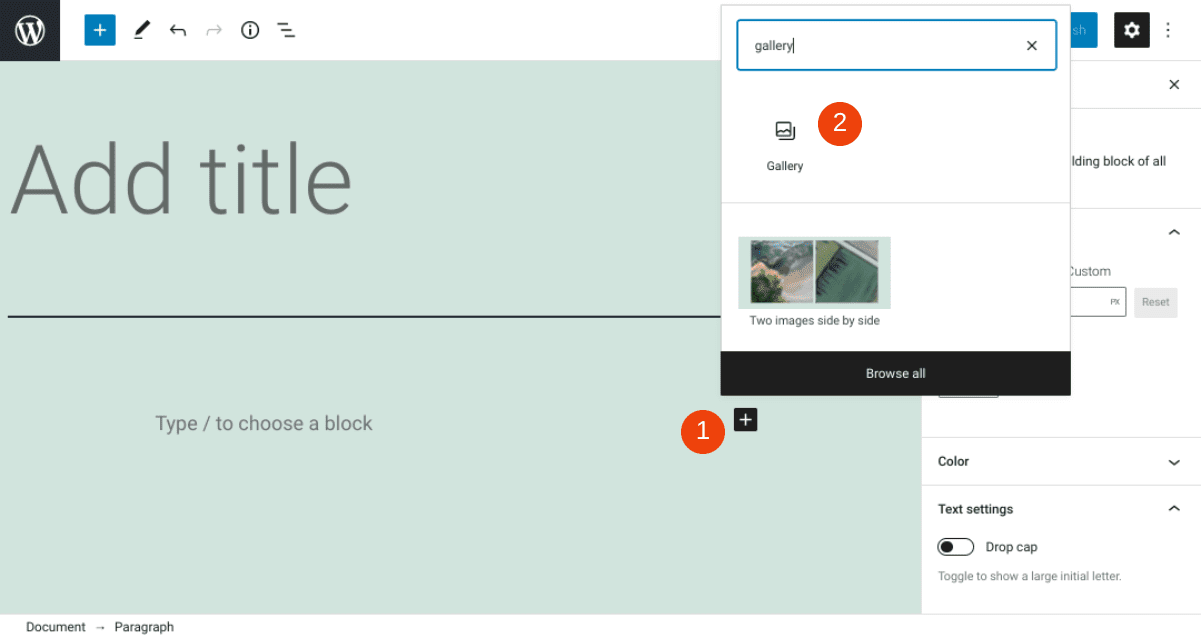
You can click on the Gallery block to insert it, or drag and drop the icon into the editor. Alternatively, you can type “/gallery” into the editor directly, and then hit your Enter key.
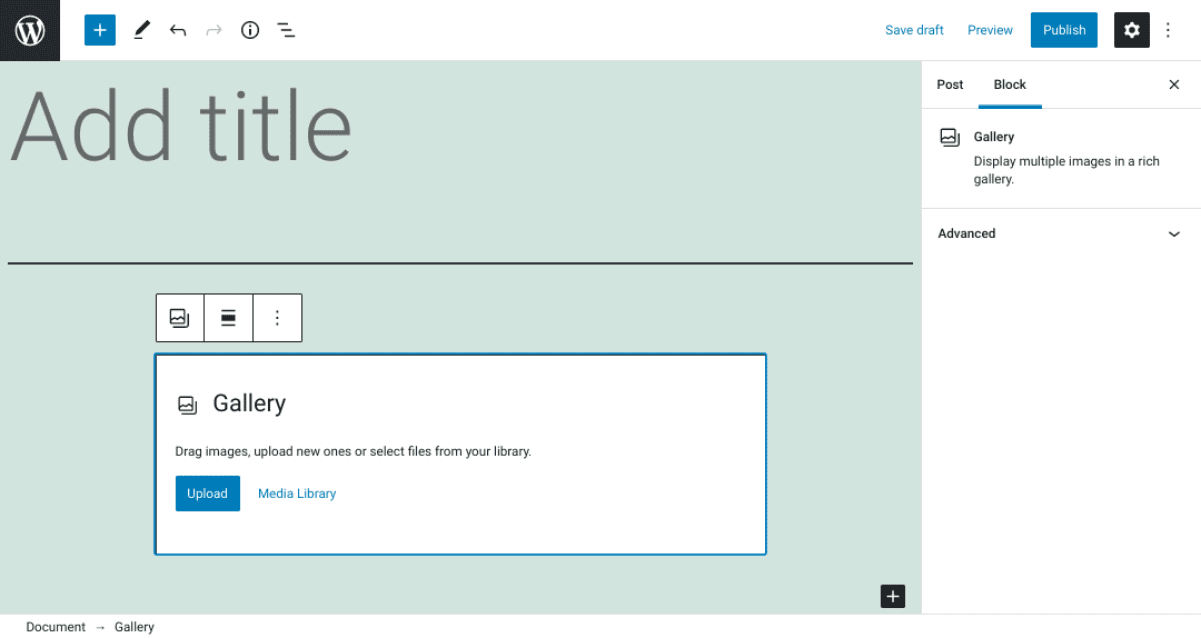
Once you insert the Gallery block, you’ll have a few options for adding your photos. You can either click on the Upload button to select images from your computer, or select Media Library to choose photos that are already uploaded to your website:
With either option, you can search for and select all the photos you want to use. Afterwards, they will appear within the block:
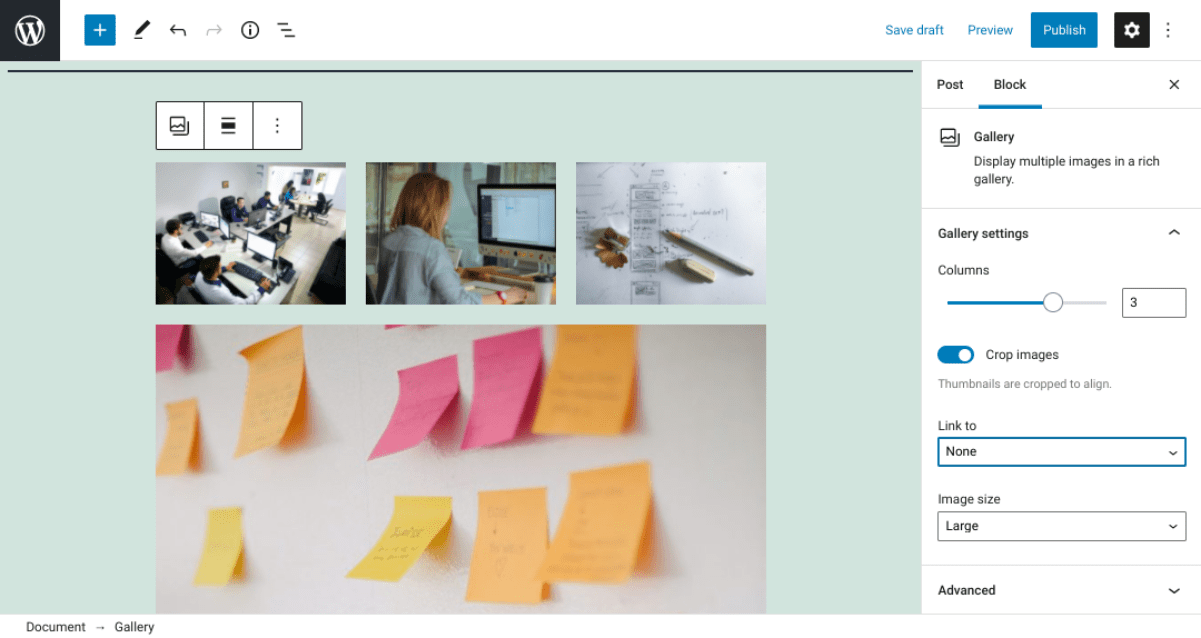
As you can see, there is an option to adjust the block’s alignment in the top toolbar, as well as various settings in the right-hand menu. Let’s take a closer look at what each of these options are and how to use them.
Gallery Block Settings and Options
In the toolbar for the Gallery block, you can click on the Alignment icon to change the gallery’s position on the page. The default is left-alignment, but you can move the block to the right or center of the page:
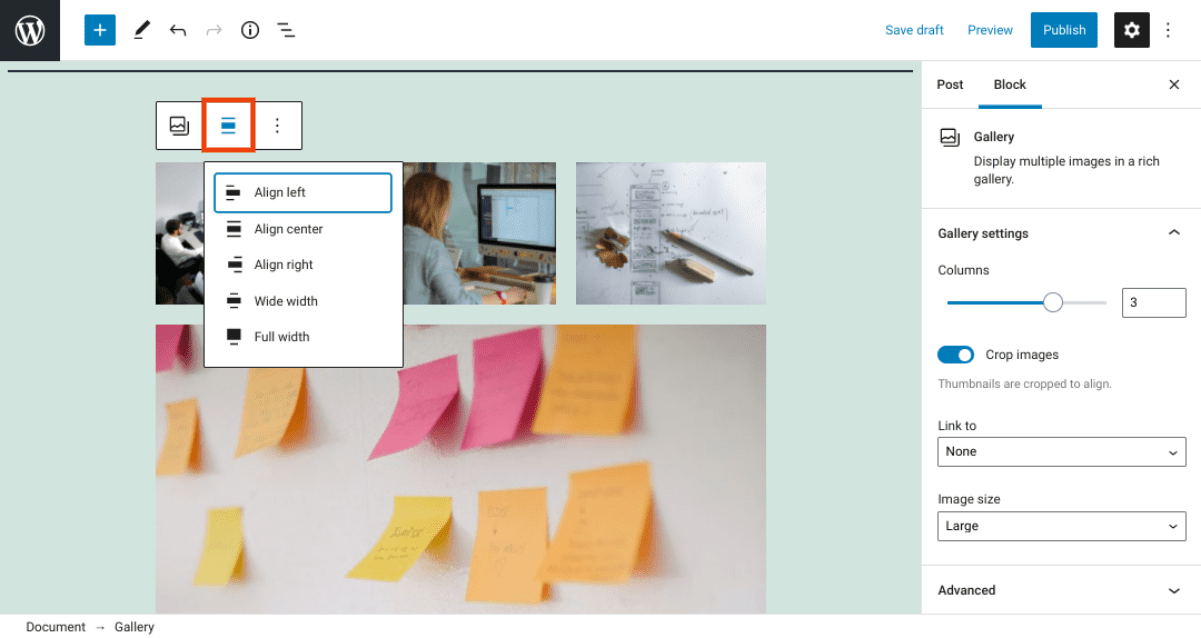
You can also choose from Full or Wide width – the latter will extend the gallery beyond the typical content section width for your theme. If you click on the three vertical dots, you’ll find a handful of other options, including the option to:
- Copy the block
- Insert another block before or after the current one
- Move the Gallery block
- Edit the block as HTML
- Add the Gallery block to your reusable blocks
One of the most useful things about the Gallery block is that it doesn’t just let you add multiple photos to your WordPress page or post simultaneously. You can also use it to arrange those images to your liking. For example, you can customize the number of columns included, and the sizes of the images in the gallery.
You can change the number of gallery columns under the Gallery settings section in the right-hand menu:
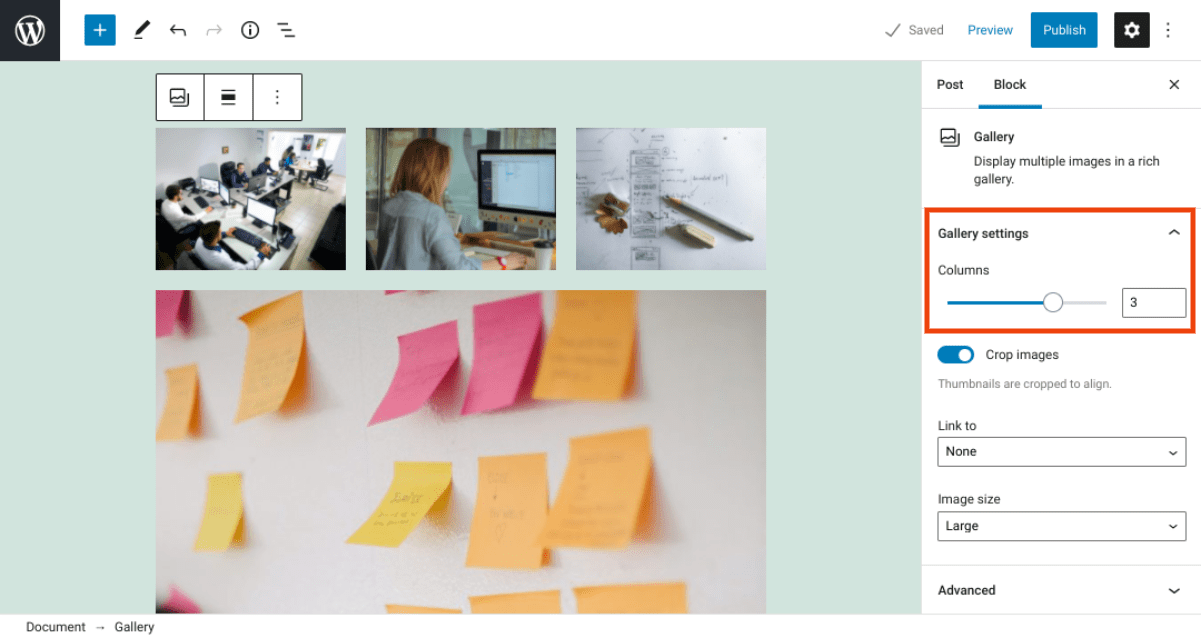
To change the number of columns, you can either use the slider or enter the value you want into the text field. You can also use the Crop images toggle option:
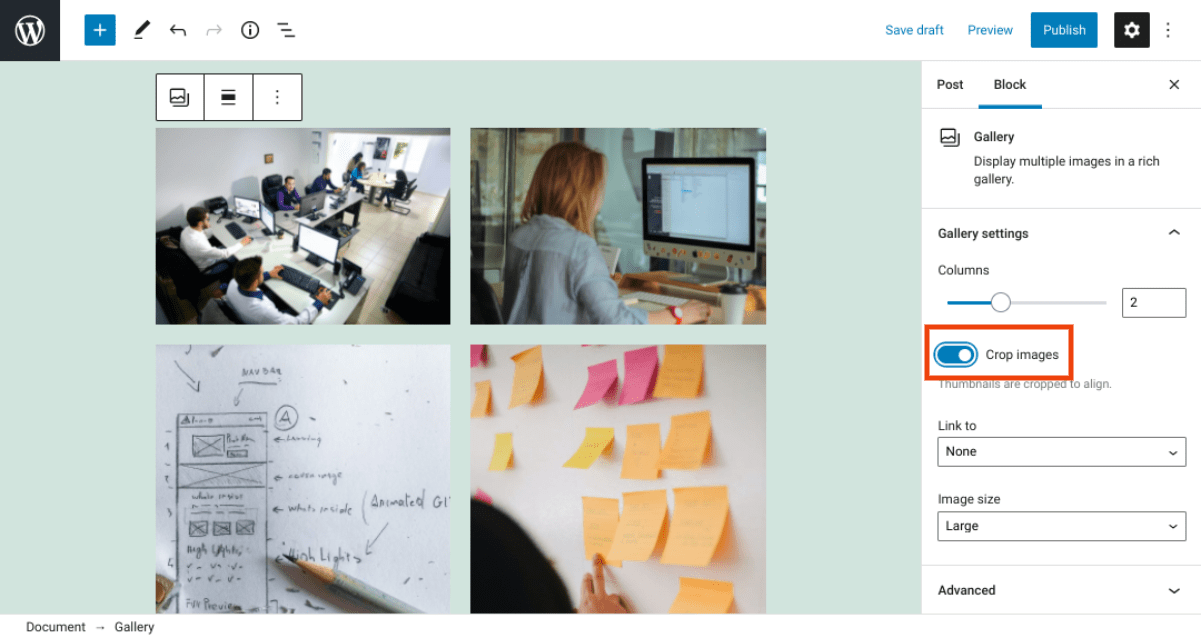
This setting is enabled by default, so that the images are cropped evenly. However, if you turn it off, the images will automatically appear in their original versions.
Under the Link to drop-down menu, you can choose to hyperlink the gallery to an Attachment Page or Media File. Using the Image size drop-down, you can adjust the photos’ sizes, with the options being Thumbnail, Medium, Large, or Full Size.
Finally, you’ll find a few more options by clicking on the individual images within the gallery:
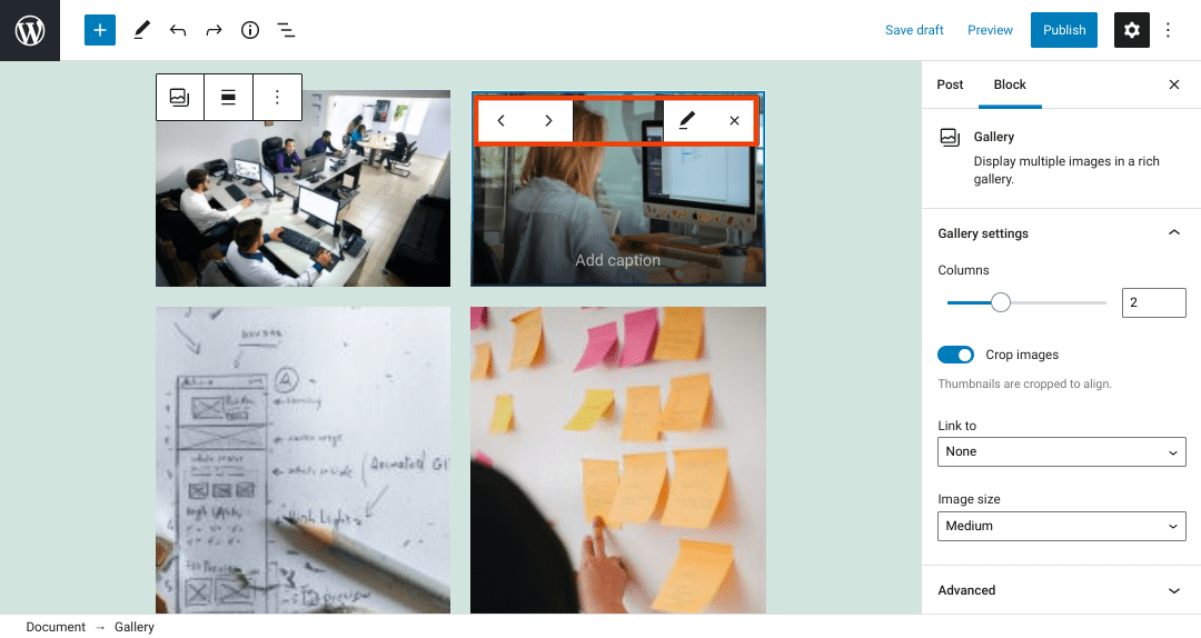
If you want to edit a single photo, you can simply click on the pencil icon. You can select the X icon to remove it from the Gallery block entirely. To move it forward or backward in the lineup of photos, you can use the arrow buttons.
Tips and Best Practices for Using the Gallery Block Effectively
Now that we’ve covered the basics of the Gallery block, you’re ready to learn how to put it to use effectively. There are a handful of best practices you can keep in mind to get the most out of this WordPress feature.
First, we recommend ensuring that the Crop images feature is turned on after you insert the Gallery block. This option can be particularly useful when you have images of various sizes and shapes – which can sometimes appear messy by default.
When you enable this feature, it ensures that all images within the gallery appear uniform. This can help make it look more professional, organized, and aesthetically pleasing.
Next, it’s important to make sure that each image you upload to a WordPress gallery is properly optimized. This includes:
- Choosing an SEO-friendly file name
- Adding alternative text (“alt text”)
- Making sure each image is compressed
Using a WordPress image optimization plugin can automate the process and enhance your website’s performance. It can also boost your search engine rankings.
Finally, you might consider adding captions to each image within your gallery. This can help provide necessary context and background information to your visitors as they browse through it.
Frequently Asked Questions About the Gallery Block
At this point, you should have a firm grasp on the Gallery block and how to use it. To make sure all the basics are covered, let’s look at some frequently asked questions about this element.
Where Do I Find the Gallery Block in WordPress?
To locate the Gallery block, navigate to any post or page. Next, click on the plus (+) icon and type “Gallery” into the search field. Simply click on the Gallery option, or drag and drop it into the editor to insert the block. Alternatively, you can find the Gallery block by typing “/gallery” into the editor directly, and then hitting Enter on your keyboard.
What Does the Gallery Block Do?
The Gallery block lets you add multiple photos to your post in one location. You can easily resize and arrange them in an aesthetically-pleasing way directly within the WordPress Block Editor. For example, you can decide the number of columns to use and adjust the images’ sizing.
Can I Add the Gallery Block Anywhere in WordPress?
You can add the Gallery block to any page or post on your WordPress site. Additionally, you can use WordPress widgets to add the Gallery block in other areas of your site, such as the footer.
Conclusion
The process of inserting an image into a WordPress post or page is simple enough. However, there might be times when you want to group multiple photos and add them all at once. When that’s the case, you can take advantages of the Gallery block.
As we discussed in this post, you can easily insert this block into your posts and pages (as well as sidebar and footer areas via widgets) to effortlessly upload and arrange multiple images at once. This block lets you seamlessly resize and organize the photos to your liking. You can use it to enhance your pages’ overall look and feel, without having to exit the editor or use a WordPress gallery plugin.
Do you have any questions about using the Gallery block? Let us know in the comments section below!
Featured Image via PureSolution / shutterstock


hello in the module the responsive settings are missing…
and few customization possibilities..
don’t you think?
Best R.
That, as a representative of Elegant Themes (Famous for Divi and its amazing builder), was a particularly weak response Nathan…
I suppose you are best positioned to tell us what percentage of your readers use the WordPress Editor exclusively and not the Divi Builder?
I can also understand the need to attract other readers to your blog but it seems like these posts have replaced the amazing technical how to posts we have had in the past.
I mean, as a Divi Builder user, I cannot use these blocks in a Divi layout. I can only use a Divi layout in the WordPress editor, which I find horrible to use and hardly see any point in inserting a Divi layout into the default editor. Therefore, I find these tutorials, at least for me as a Divi Builder user, somewhat pointless.
I will concede, now that we are being forced to use the Gutenberg Editor in all of our sidebars, there is some value to being aware of the editor’s features.
That said, I personally have not used a sidebar in a very long time and due to my dislike of that editor probably won’t be using sidebars in the future either.
I understand that you’d prefer content focuses specifically on Divi, but we do one blog post per day on Divi as it is. This post was intended to be our one post per day on a related subject.
what’s this have to do with divi?
My thoughts exactly. I am not sure you can use any of this in conjunction with Divi, even if you design a Blog Page template that allows people to insert text and photos through the interface on the page (without going into the Divi Builder)
There have been several articles in this vein lately. Maybe Elegant themes is running out of “problems” to solve? I could give them a list.
This particular article has nothing to do with Divi directly. However, we are a WordPress theme that integrates with the WordPress editor. This post is meant to help folks use the default WordPress editor better.
And why are you going to use WordPress editor when you can use Divi’s one? Plus you usually install “Disable Gutenberg” Plugin to go back to old editor :/
Personally, I don’t disable Gutenberg when creating a new website. I think it’s a great editor for blogging. I like to use Divi’s theme builder to create a blog post template and then create all of my content with the default WordPress block editor.
A very timely post for where I’m currently struggling a bit.
A couple of questions:
1.I’m using the Divi theme. Is it preferable to create my posts thorough using the Divi Builder or the WP Block editor as far as gallery inclusions are concerned?
2. Display of captions I find to be problematic. There seems to be more than one place to enter the image captions for starters. What’s the recommended way to enter image captions to ensure they display properly in posts/pages?
Thanks in advance.
Hi Tony,
You can use both the Divi Builder and the WP Block Editor to add image galleries – Divi comes with its own Gallery module.
There are three different places where you can add a caption to the photos – when choosing your images in the media library, when reviewing your selected gallery images, and directly on your gallery images in the blog post. The good news is that they are all the same, so you can choose whichever option you feel most comfortable with and it won’t make any difference to the end result.
How can I use the gallery block to create a gallery with images of one single category? For example, if I have portraits, landscapes and animals in my media library. I want to create a gallery with landscapes only. Do I need tags? Categories? Does the gallery block allow suvc filtering?
Hi Gardenia,
I’m afraid this feature is not available (yet!). However, you can use a WordPress plugin to add tags and categories to your images: https://wordpress.org/plugins/search/taxonomy+images/