
Presets in Divi 5 are a powerful way to keep your design consistent sitewide. And with the Preset Manager and Preset Preview, you can refine changes in a focused workflow before you commit them across your pages.
Still, the best preset decisions often happen in context. That is where Divi 5’s Canvases come in. A detached canvas can act as a dedicated Preset Playground where you build realistic examples, compare variations side by side, and document what works, all while your live pages stay clean and untouched. Here’s how to set one up.
Divi 5’s Preset System: A Quick Overview
Divi 5’s Preset System gives you reusable styles that work across your entire site. Think of presets as design packages you create once and apply everywhere. When you update a preset, every element using it changes instantly.
Element Presets capture complete designs for your core building blocks. These include Sections, Rows, Columns, and Modules. Style a Button Module with specific colors, typography, and spacing, then save it as an Element Preset. Now you can apply that exact design to any page with one click.
Option Group Presets focus on specific design settings, such as typography, backgrounds, spacing, or borders. Create a preset for your H1 styles, and you can apply just those heading settings to different modules throughout your site. They’re modular building blocks you can layer and combine.
Stacked Presets let you layer multiple presets on a single element. Apply a background gradient from one preset, alignment from another, and spacing from a third. They all merge into a unified design.
While Nested Presets preserve your Option Group Presets inside Element Presets. Build an Element Preset from a module that already uses Option Group Presets, and those connections stay intact. This keeps your design system organized and maintainable.
The Case For A Dedicated Preset Playground
Presets make consistency easy. When you update a preset, every element using it stays perfectly in sync. And with Divi 5’s Preset Manager, you can refine changes in a focused workflow that includes a Preset Preview, so you can see what you are adjusting before you commit it sitewide.
A Preset Playground takes that one step further by adding real context. Instead of previewing a preset on its own, you can build a detached canvas filled with the exact modules and layouts you use most, then test presets in realistic scenarios, side by side. It is a practical way to explore variations, see how typography, spacing, and buttons feel together, and document your decisions.
This is especially helpful on new sites. Your real pages stay clean and purposeful, while your playground canvas becomes the place where you develop the system: experiment, compare, and finalize. Use the Preset Preview for quick iteration, and use the Preset Playground canvas to validate those choices in full layouts before rolling them out across your site.
What Are Canvases In Divi 5?
We recently introduced Canvases. These are workspaces inside the Visual Builder where you drop sections, add modules, and build layouts. It works exactly like building a regular page.
Every page you create includes a Main Canvas automatically. This workspace holds all your visible content, everything that shows up when someone lands on your site. Add a hero section, drop in some Text Modules, and include an image gallery. All of that lives in your Main Canvas and appears on the front end.
Detached canvases don’t appear in your main page area while you’re building. The Visual Builder keeps them in their own isolated spaces, completely separate from your Main Canvas. You still add sections, style modules, and arrange full layouts inside them. They just stay hidden until you decide to use them somewhere.
Canvases can be local or global. Local canvases belong to a single page. Global canvases become available sitewide, accessible from any page you open. This works well for menus or popups that need to appear across multiple locations.
How Canvases Can Be Used For Experimenting
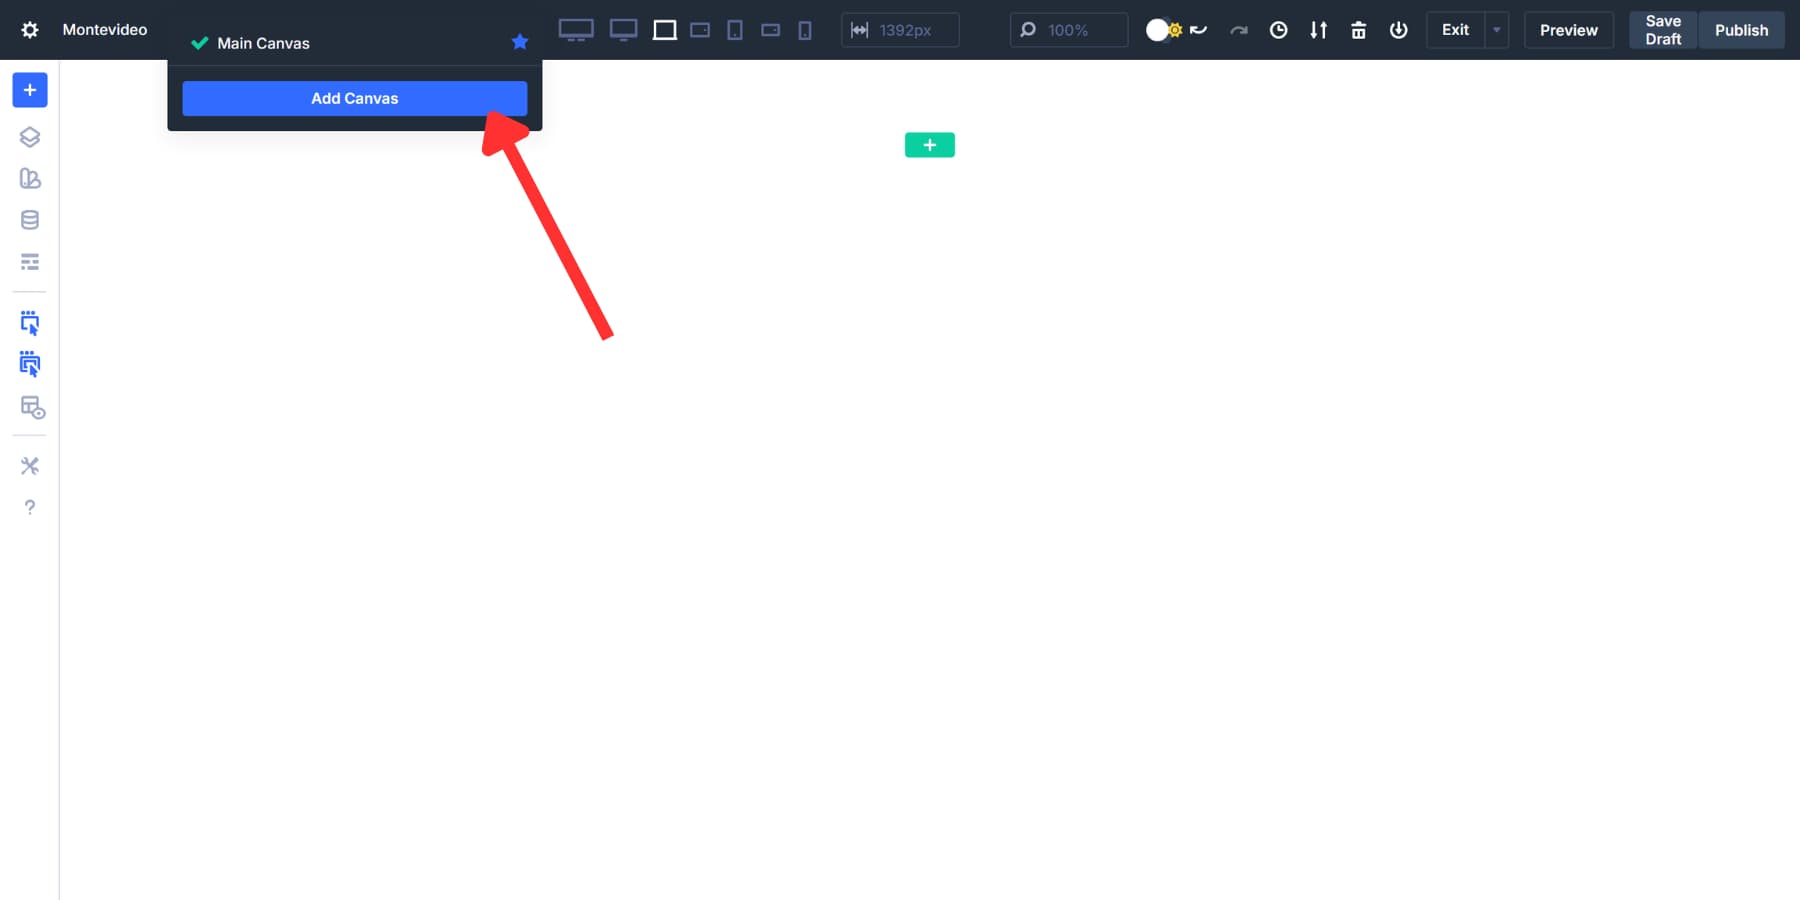
You can duplicate your Main Canvas to create a testing version.
![]()
Detached canvases provide a safe space to test ideas without affecting your live site. So, you can make whatever changes you want. Try a bolder font on your heading presets by building it in a canvas first. Test different layout structures there. Everything you build stays isolated until you decide to use it.
When you’re satisfied with your experiments, assign the canvas as the new Main Canvas to make it go live with a single click. The old version doesn’t disappear. It just reverts to a detached canvas you can reference later.
This works well for preset development. Create a canvas specifically for testing new presets. Drop in example modules, apply your preset, and see how it looks. Adjust the colors, tweak the spacing, refine the typography. Your live pages never change during this process, and you can create as many canvases as you like.
How To Set Up Your Preset Playground
Building your Preset Playground takes just a few minutes. The goal here is a single workspace where you can freely experiment without affecting your live pages. So, let’s walk through creating a dedicated canvas, adding example modules to test your presets, and setting up a system that keeps everything organized.
Create A New Canvas For Presets
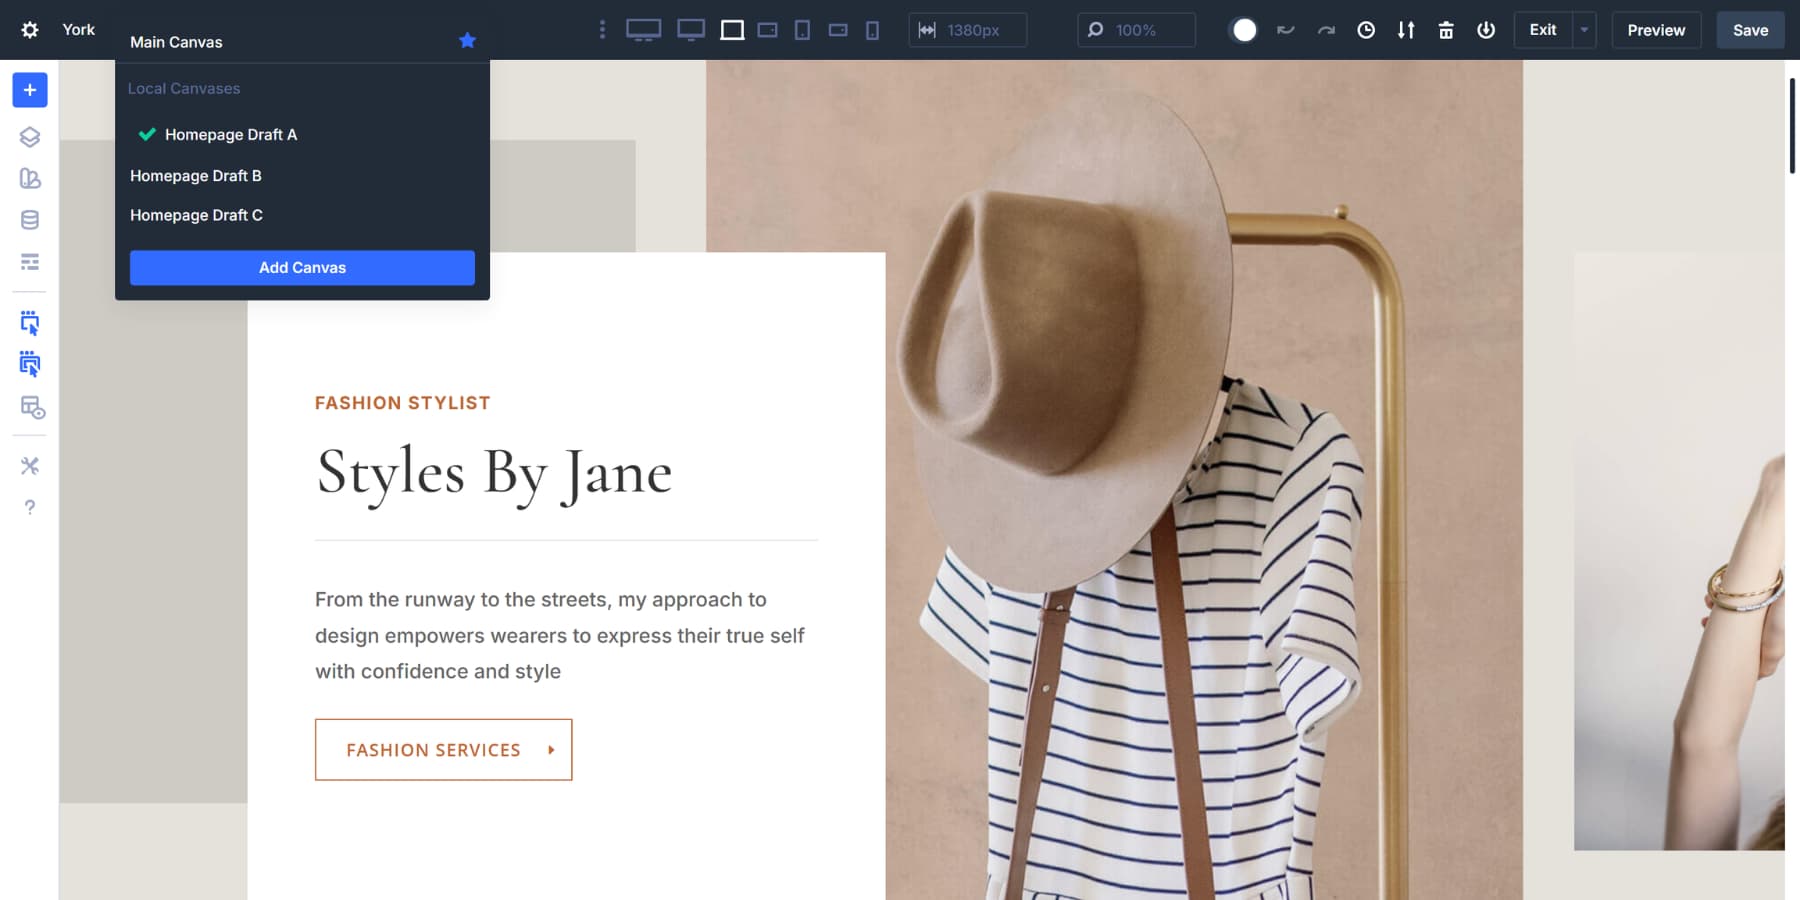
Open any page in the Visual Builder. Look at the top toolbar. You’ll see a canvas dropdown menu right there. Click it, then select Add Canvas.
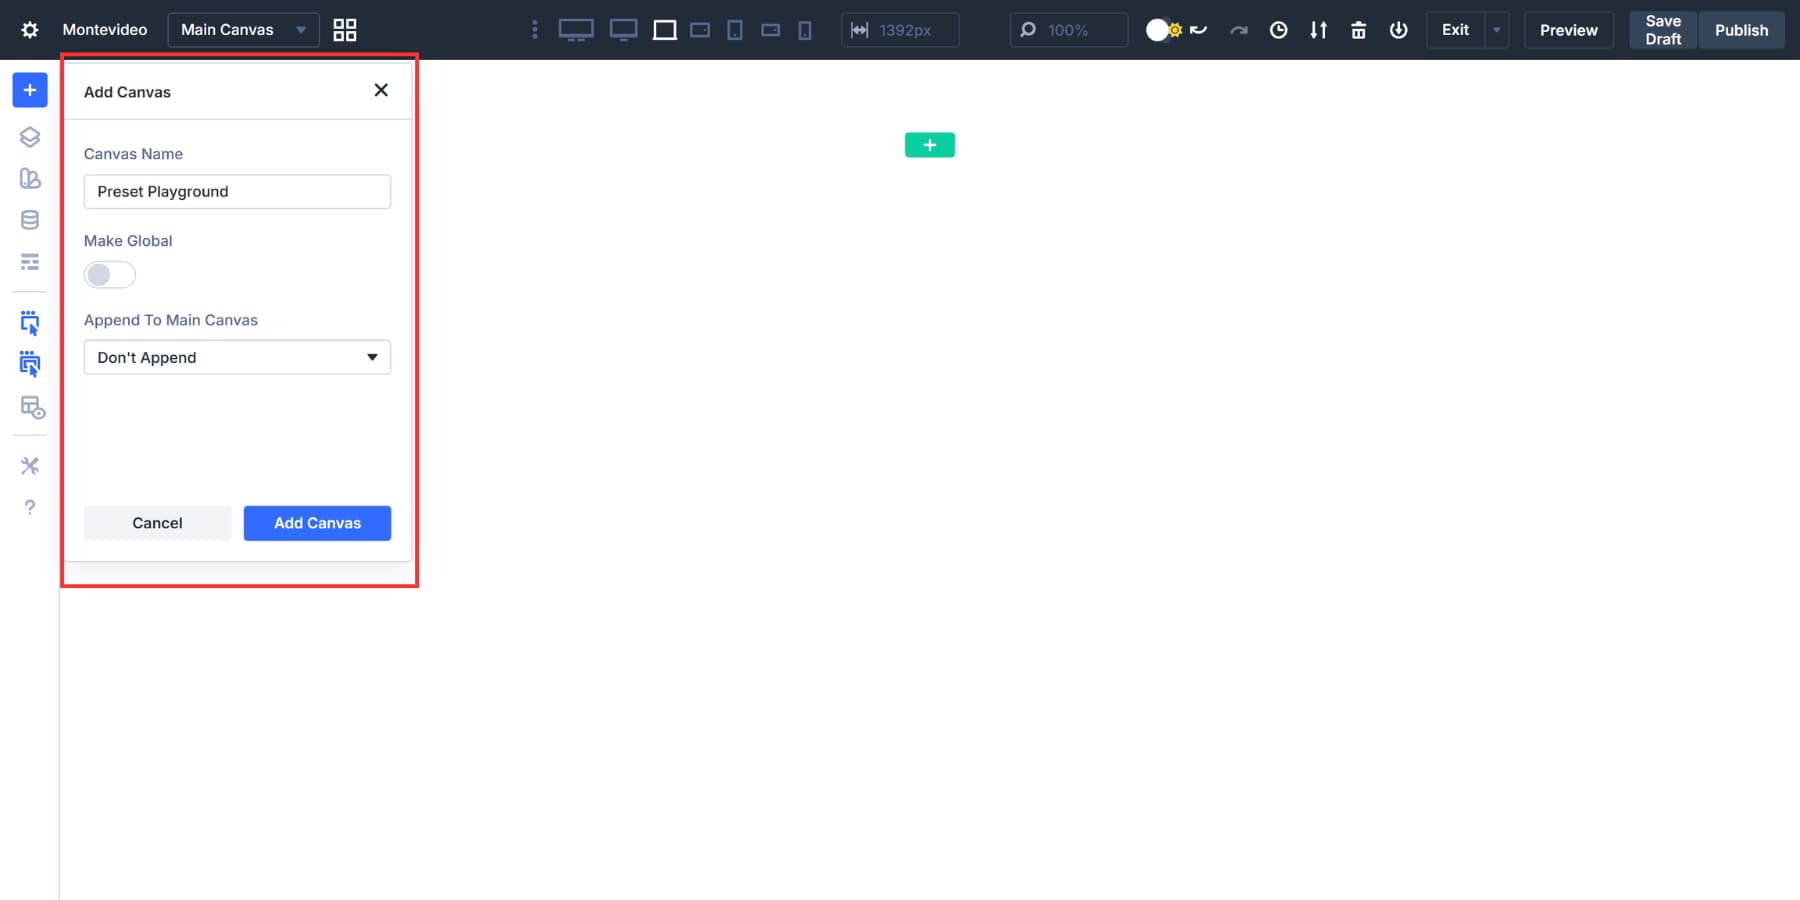
A settings panel appears where you can name your new workspace. Call it something clear, like Preset Playground or Preset Testing. This makes it easy to find later when you need it.
You’ll see an option to make the canvas global or keep it local. Local works fine here because this playground serves a single site. Global canvases become accessible across every page, which isn’t needed for a testing space.
The ‘Append To Main Canvas’ toggle remains off. This keeps your playground hidden from view. Then click Save. You will be taken to this new canvas.
Switch between canvases anytime using that same dropdown menu. You can also click the Canvas Grid View icon next to the dropdown to see all your canvases at once. This visual layout makes managing multiple workspaces simple.
Build Your First Preset Examples
Start building your testing library. Add a section to your Preset Playground canvas, then drop in the modules you’ll use most often.
Text Modules with headings work perfectly here. Button Modules, too. And Image Modules round out your testing setup. These three cover the foundation of almost every design you’ll build.
Start With Option Group Presets
Begin with Option Group Presets, not Element Presets. This matters because Option Group Presets work across any element type.
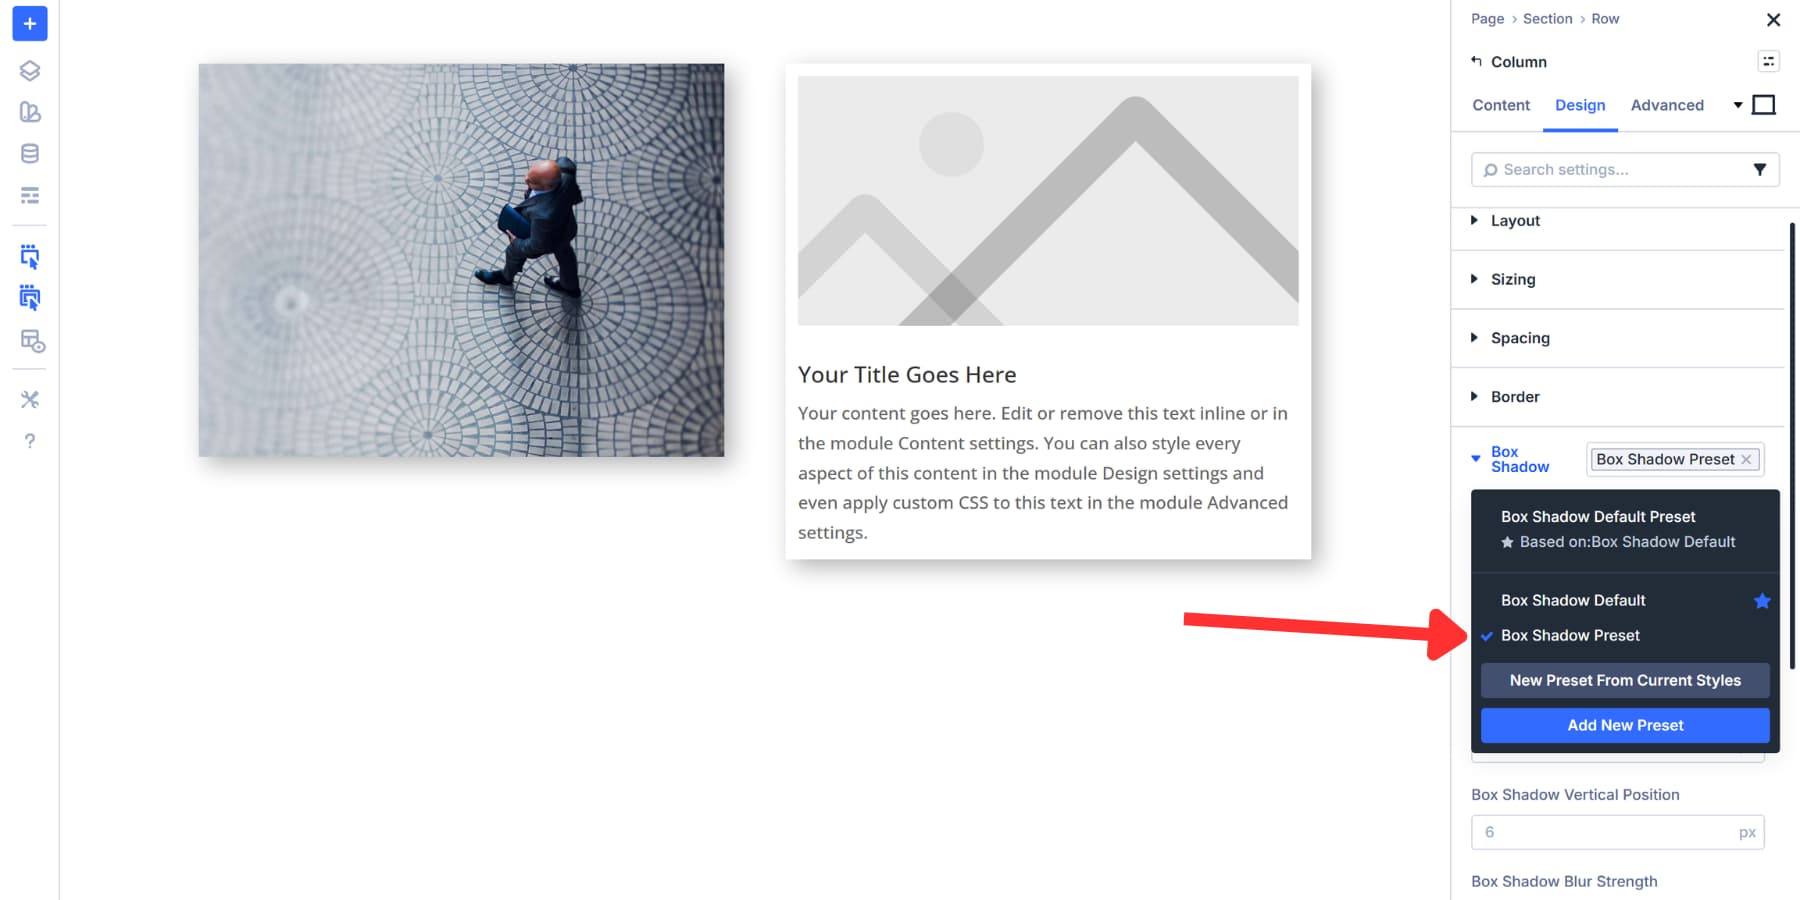
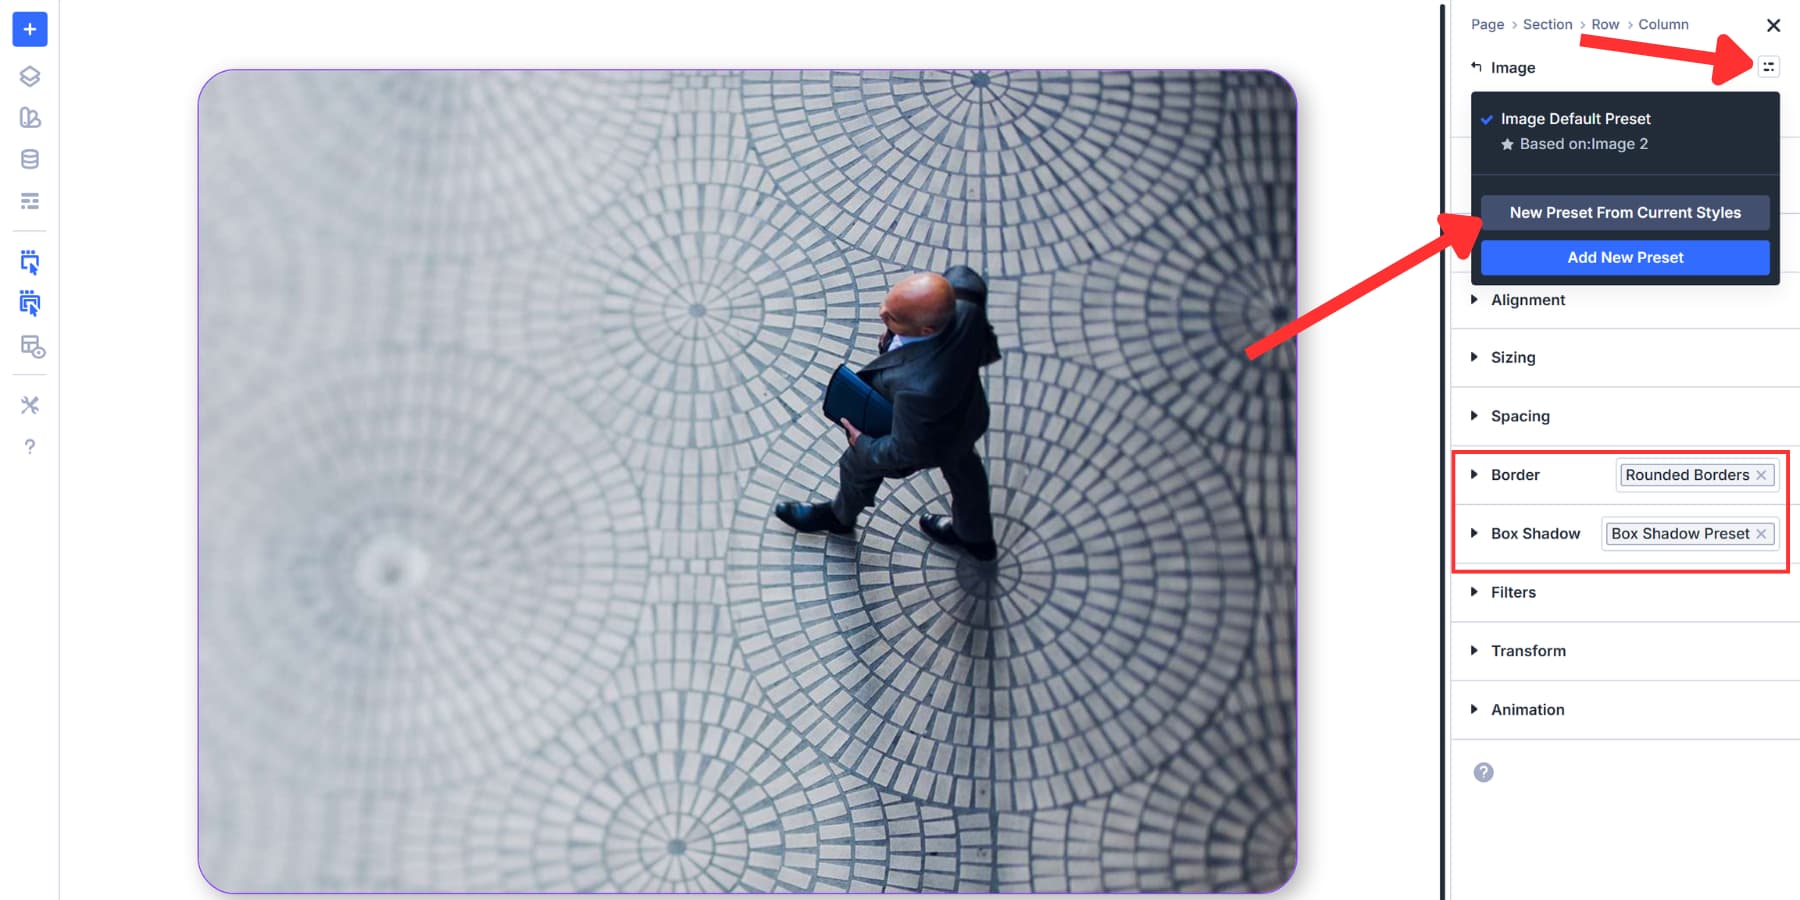
For example, create a shadow Option Group Preset on an image, then save it by clicking the presets icon.
![]()
Then, you can apply that exact shadow to a column later by going to the same setting tab, clicking on the icon, and selecting the Option Group. Same shadow, different elements, total consistency.
This is a great time to start using Design Variables instead of hardcoded values. Open the Variable Manager from the sidebar. Create color variables for your button backgrounds and text. Add number variables for spacing and border radius. Set up font variables for your typography. Now apply these variables to your button settings.
With that out of the way, you don’t need to remember the hex codes, the radius values, font sizes, and more. Just document it once and reuse it whenever needed. And, it goes without saying, if you update the Design Variable, the change cascades to every setting that references it.
This approach gives you building blocks. Your shadow preset works on images today and columns tomorrow. Your border radius preset applies to CTAs just as easily as it does to sections. You’re building a reusable design system, not just styling individual modules.
With that in mind, set up similar Option Group Presets you think can be reused across elements: borders, animations, spacing, layouts, and more.
Build Element Presets From Your Options
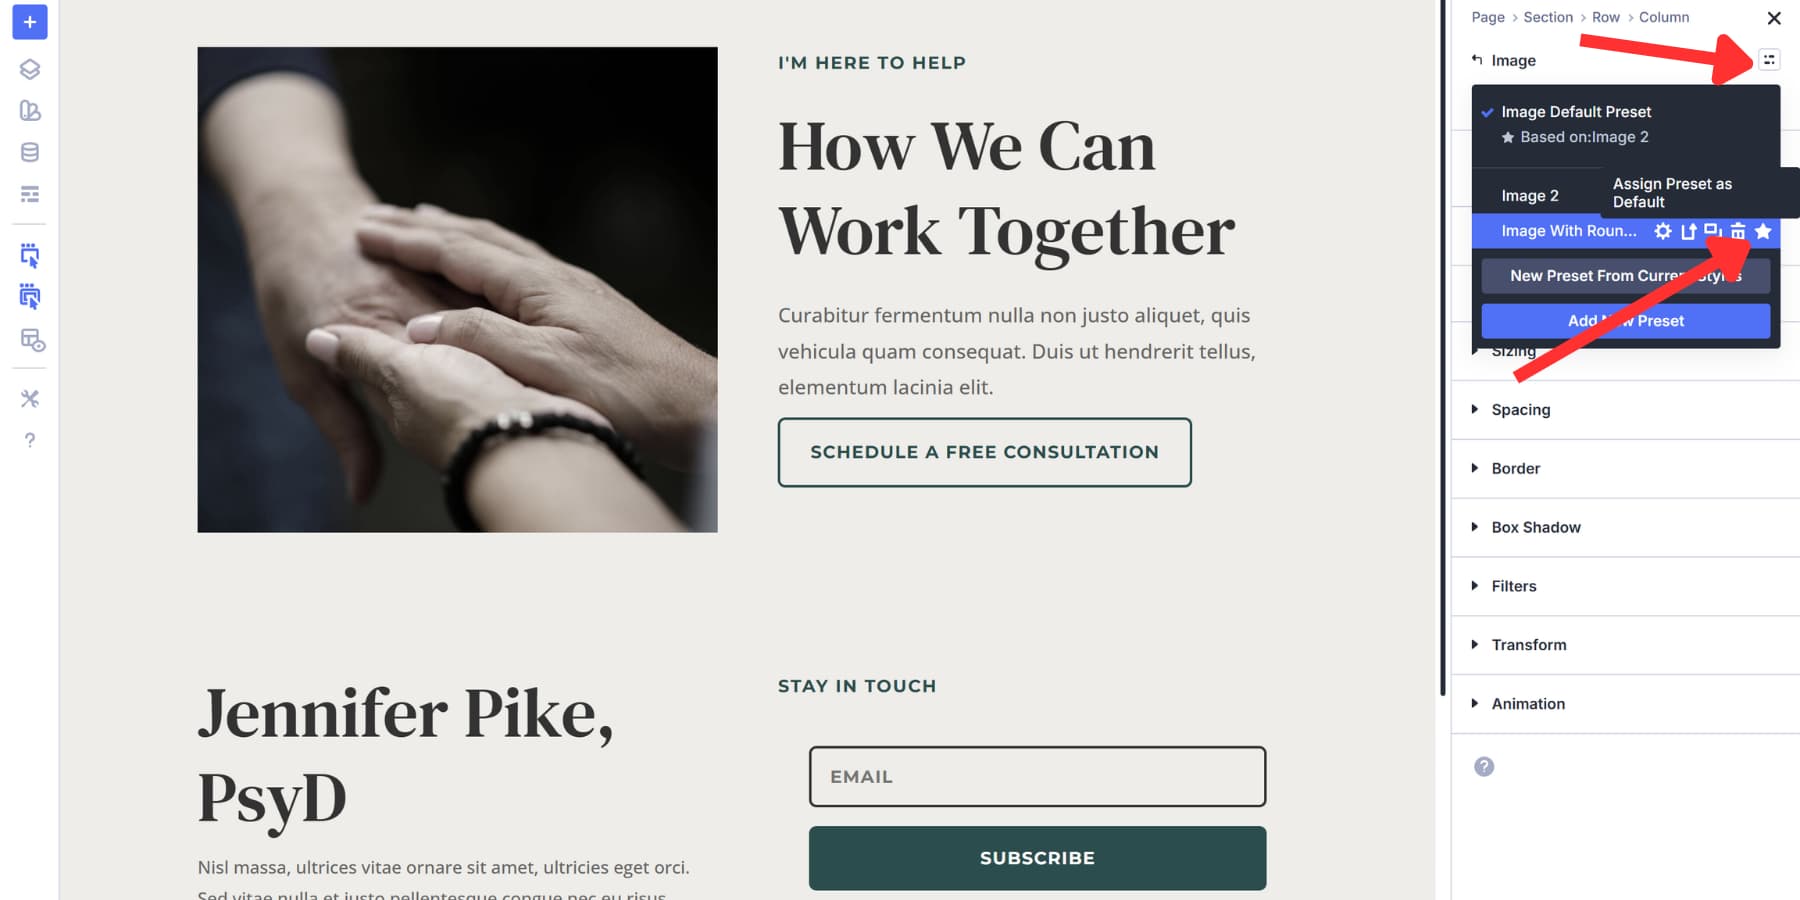
Once you have created corresponding Option Group Presets, build your Element Presets by clicking on the Element Preset icon on the top right. Those Option Group Presets stay nested inside, keeping everything connected and maintainable.
Now, when you add an image to your main canvas, select the Element Preset from the same option, and the image inherits your preset.
To save time, click the Star icon to mark the styling as default, so you don’t have to assign the image preset each time you add it manually.
Similarly, the hardcoded values take precedence over the preset. You can apply a preset to an image and adjust its radius in the settings; the modified value will replace the preset value for that image.

You can use this to create variations of the preset as well. Apply a preset, modify it, or create a new preset from the current styles.
Repeat this process with the Text and Image Modules. Build focused Option Group Presets first. Then combine them into complete Element Presets. Your playground becomes a testing ground where every preset can be mixed, stacked, and refined before going live.
Organize Your Playground (Optional)
This is an entirely optional step, as your Preset Playground works fine without organization, but adding structure might save you time in the long run.
Setting up separate sections for different preset categories makes everything easier to find. Buttons in one section, text presets in another, images somewhere else. You could use rows to separate active presets from experimental variations and archived versions.
Take this a few steps further by labelling sections clearly with names like “Button Presets Testing” or “Typography Variations” so you know exactly what you’re looking at when you return months later.
Adding Notes And Making The Playground Global
Also, consider adding Text Modules between sections to document your reasoning as you work. Quick notes on why you chose specific colors or spacing values can turn your playground into a knowledge base rather than just a testing space.
This documentation may be helpful when clients inquire about your design choices. Instead of trying to remember why you picked that specific button style weeks ago, you can walk them through the thought process you documented in real-time. This canvas could also double as a reference guide.
Everyone, including your team and client, can use this playground from any page they are working on to understand the decision-making process, what to use, where to use it, and why it exists. This can significantly reduce back-and-forth.
Using The Preset Playground In Your Workflow
The presets you built in your playground are ready to deploy across your site. Apply them to Button Modules, Text Modules, and Image Modules on your actual pages, and they work instantly because you already tested them.
Return to your playground canvas anytime you need new presets. Add the module to the appropriate section, style it, test variations, and save the preset once you’re satisfied. Then apply it to your live pages.
This workflow keeps everything separated. Your playground canvas stays detached, so visitors never see your testing. Build as many variations as you need in that same canvas, trying different colors for buttons, adjusting text preset spacing, or testing shadow combinations on images. Everything stays organized in one space.
Try Canvases In Divi 5 Today!
Preset Playgrounds change how you approach design decisions in Divi 5. Build yours today, and you’ll stop hesitating before trying new ideas.
The canvas stays separate, your experiments stay contained, and your live site stays untouched until you choose otherwise. This workflow works equally well for new sites and existing design systems.


Does the additional Canvases add bytes to rendered page size?
Hey, Manas! Unused canvas are not appended to page and do not contribute to its size.