
Want to offer quality educational content via WordPress? One great way to do that is to add screencasts to WordPress. Whether you need to educate your clients or your website visitors, screencasts are an excellent choice.
In this post, I’ll discuss some of the benefits of screencasts and how you can add them to both the WordPress front-end and dashboard. Then, at the end, I’ll give you a few quality tools you can use to record your own screencasts.
Screencasts Benefit You and Viewers
In a simple sense, screencasts are just a recording of a computer screen’s output with audio added on top. If you’re recording your own screencast, the video will be an exact copy of everything that you see on your screen (or a selected portion of your screen). While it’s possible to add editing effects later on, the base video is always your computer screen.
Screencasts are perfect for educational use. They allow you to place every action you describe in its exact context. For example, instead of saying “Go to Plugins and click Add New” you can actually show people how to do that, all while narrating the audio. This gives your viewers both a visual and auditory method of learning.
And the best part is that if viewers ever get confused or need clarification, they can pause or rewind to their heart’s content.
But screencasts don’t just benefit your viewers – they also benefit you, the creator. While screencasts certainly take time to create, it’s still easier to create a detailed screencast than it is to type up a detailed 1,500-word post. Basically, you can create the same educational value with less time invested.
And if you’re creating screencasts for clients, screencasts can save you a ton of time by eliminating the need to provide support for every tiny issue.
How Can You Use Screencasts With WordPress?
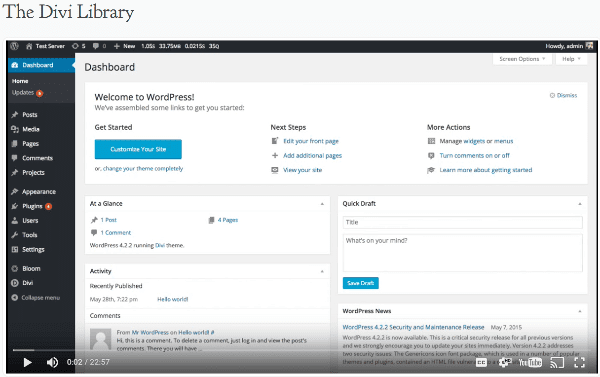
Obviously, the main use of screencasts is to embed them on your front-end site. You can use them in regular posts or pages, as part of a knowledge base (like the Divi screenshot above), or privately as course content for a membership site.
But that’s only part of the puzzle. If you’re a developer creating themes/plugins or WordPress sites for clients, you can also embed screencasts in the WordPress dashboard to help onboard users and give in-dashboard support.
How to Add Screencasts to WordPress Front-End
Here’s the thing about embedding screencasts on the front-end:
You really don’t need anything special. While you can host your own screencasts and use the native WordPress video player, I think it’s easiest to just upload your screencasts to YouTube or Vimeo and embed them in your content that way. Just make sure to use the proper privacy settings if you don’t want your screencasts to be 100% public. Or if you are using a service like Screencast to create your screencasts, you can embed them directly into your page using the WordPress Screencast embed block.
I searched around for a plugin to help accomplish this and I couldn’t find a single one. And you know what? I don’t think you need one.
But if you do want more control over how your screencasts behave, you might want to go with a plugin like YouTube Embed Plus.
YouTube Embed Plus Features

First off, YouTube Embed Plus lets you create responsive galleries and playlists, which is great if you need to embed a whole series of screencasts. It’s one of the top recommendations for YouTube WordPress plugins.
It also lets you enable autoplay, which, used judiciously, is a good way to push visitors to actually watch your screencasts.
And if you go with the Pro version of the plugin, you’ll also get access to lazy loading, video SEO features, and more.
Again, this plugin is not necessary to embed screencasts on the WordPress front-end, but it does give you more options for embedding YouTube-hosted screencasts.
Price: Free (Pro version costs $19) | More Information
How to Embed Screencast Tutorials in the WordPress Dashboard
While it’s totally possible to embed your own screencast videos in the WordPress dashboard, you don’t need to if you just want to include general WordPress tutorials. That’s because some helpful companies have already created WordPress tutorial videos that you can embed directly via a plugin.
I’ll first cover embedding general WordPress video tutorials, then I’ll give you some options for embedding your own screencasts.
WP101
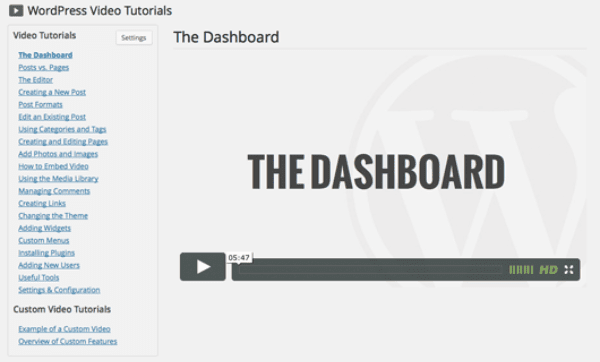
WP101 is a popular tutorial series for WordPress. While their main project is consumer-facing, they also offer a developer focused plugin that lets developers easily embed WP101’s tutorial videos directly in clients’ dashboards.
Literally, all you need to do is install the plugin, add your WP101 API key, and select which tutorial videos you want to display.
WP101 has a general 20-video “Getting Started” series as well as a detailed series on Yoast SEO.
And the best part is the tutorial videos are white-labeled, so your clients will never know you outsourced your tutorial videos. Cool, right?
The plugin also lets you add your own videos to the list of tutorial videos. So if you want to outsource the general tutorials but still create a few specific tutorials of your own, you can do that.
Price: Starts at $99/yr | More Information
Sidekick

Sidekick isn’t a pure screencast solution, but it accomplishes the same end result, so that’s why I’m still including it on this list.
It adds over 100 interactive walkthroughs to you or your clients’ dashboards. What do I mean by interactive walkthrough? Sidekick will actually show where to click on the real dashboard interface, along with audio narration. It’s kind of like tooltip onboarding on steroids.
If you go with the Pro version, you’ll get access to additional walkthroughs as well as analytics.
Price: Free. Pro version costs $5/month per site | More Information
Custom Dashboard Widgets
General WordPress tutorial videos won’t work for all situations. If you need to explain your own plugin/theme/feature, you’ll obviously need to create and embed your own screencasts.
To do that, you can use a custom dashboard widget to embed the video. In Tom’s article on customizing the WordPress dashboard for clients, he shows you exactly how you can add a custom dashboard widget. All you need to do is add a simple function call.
Wrapping Up
Whether you’re trying to help your clients or your visitors, adding screencasts to WordPress is a great way to include educational content. If you want to include screencasts on your front-end site, you should go with an external service like YouTube or Vimeo and embed them that way.
If you want to include helpful tutorials for your clients, you can either go with something pre-made like WP101 and Sidekick, or you can create your own screencasts and embed them with custom dashboard widgets.
Have you used screencasts on your WordPress site? If so, what’s your personal strategy?
Article thumbnail image by RedlineVector / shutterstock.com


Just one mention about editing:
Forget all cheap and bad editors. And forget all the expensive ones 🙂 This includes Final Cut, Premiere, Avid Media Composer, Sony Vegas and everything else that is not a real video editor.
Go to the website of Blackmagic Design and download DaVinci Resolve. It is the absolutely best editor you will get for free. And better than most you will have to pay for!
For normal editing, you do not need the paid version. And you do not need to worry about the color correction part. There are plenty of tutorials out there, but as soon as I can take some time to do it, I will write up a short intro.
The only downside is that you need a graphics card that is above the cheapest (embedded) stuff. But an ok nVidia card will do.
need to try Youtube embed ,, thanks for the post..
Brenda,
Great article. Inserting video into a post or page is dead easy and very worthwhile.
I started to write all I have to say, but my comment started turning into a blog post sized tome. So, I zapped the prose which left my list of what I like best.
Video Screen Capture: Camtasia (PC & Mac – $$)
Audio Editing: Audacity (PC, Mac & Linux – Free)
Creating Animated logos, titles and such: Renderman (PC, Mac & Linux – $$$) or Blender (PC, Mac & Linux – Free)
Video Editing: Final Cut Pro (Mac – $$$) or Blender (PC, Mac, Linux – Free)
Converting and compressing video; Handbrake (PC, Mac & Linux – Free)
Teleprompter: I just use Powerpoint ($$) or Libre Office (Free), but there’s a lot out there. Hint: Unless you’re an actor, don’t try to memorize a script. Certainly write one and read it through a few times. Then bullet point the script and put that in front of you.
Audio Hardware: Blue Yeti or Shure microphones (there are other great ones, I just prefer Shure). Whatever you decide, absolutely get a pop filter. Check with a quality music store.
Video Hardware (for putting a face to the screen cast): There are a lot of cameras out there. I prefer Canon. When starting out, however, there’s no need to spend thousands. Just use your iOS or Android phone or tablet. With the right lighting (lighting is very important), framing and a good tripod or some other way to hold the device, you’ll be amazed at the quality.
Set aside enough time to do multiple takes and to learn the hardware and software. If you can produce your first or second decent screen cast or video cast in a week, you’re probably from another planet.
Screen your takes on a big screen. Either a larger laptop or desktop screen or, better yet, cast them to your TV. The bigger the screen, the easier it is to spot the flaws. (Check your background — Nobody want’s to see your laundry hamper).
Finally, watch a lot of screen casts and video casts on YouTube. What did they do right? What did they do wrong? Pick up as many tips and tricks as you can.
Thanks for mentioning our WP101 Plugin in this roundup. We love putting our videos to work for WordPress professionals and their clients!
And excellent advice, David in Mississippi!
For those of you wanting more information about how to actually create great screencasts, you might find this article helpful from my personal blog: https://shawnhesketh.com/create-screencasts/
In it, I shared all my best tips and tricks from years of creating the WordPress 101 tutorial videos. Hope you find it helpful!
Very useful, thanks!
However, another issue that goes hand in hand with this and sorely needs addressing is screencast quality.
All of us have been frustrated by the plethora of amateur-produced screencasts out there, where the person posting the so-called tutorial simply hit RECORD then posted their result. This is one of the surest ways to convince your clients you are NOT a professional.
To produce a professional-quality screencast takes PRACTICE. But you can immediately put yourself ahead of 95% of the rest by following a few simple steps:
1. WRITE a good script. This is the only way to be sure you say exactly what you want to say, at the right time, with the right inflection.
2. Record and edit the VOICE first. I use Audacity which is free and amazingly powerful. With this, I can easily remove (or silence) any ums, ahs, mouth clicks or plosives, and remove noise such as an A/C fan. I can also remove any periods of silence, so the audio is paced correctly and seems crisp and authoritative.
3. Assemble your video assets. Your script should not only contain all the words you want to say, but it should also list what you want to show on the screen at that point in your video. (I do this in a 2-column table in a word processor.) Go through this list and make sure you have all the photos, extra audio clips, graphics, and other things you’ll need.
4. Record any video clips needed. Do this while playing back the appropriate section of your audio, so the screen actions sync up with the words. Many screen recording programs will do this. I prefer Camtasia (currently selling for $199, $20 discount for non-profits) because it has an amazing and awesome editor, and can produce almost any kind of video you want.
5. EDIT your video. For this, you will need a good video editor. As I said, for this, I prefer Camtasia, but I also have had very good results with PowerDirector. I’m sure there are many others out there that will do a great job, but this is all I have experience with. If you are serious about making a more professional video, then you should be willing to invest money in a decent video editor. If you try to go cheap, your videos may look cheap.
Start with the audio track, as this is the only track that is continuous from beginning to end. Add in all your other video assets and clips, and adjust them so they happen at exactly the right time in the audio. Add in any needed overlays (like boxes or arrows or text balloons, etc.) and do any zooming or panning needed to focus your viewer’s attention on the specific area of the screen to which you need their attention directed.
It is extremely frustrating to be watching an otherwise good tutorial, but then the words say something like “then you click right here…” and they are showing you their entire computer screen and the place where they are clicking is so small you can’t make out what they’re doing. Zoom in, for pete’s sake! Let us SEE what you’re doing.
Don’t be surprised if producing a 2-minute video takes you six or eight hours of work before you’re finally satisfied with the results. This time will go down as you gain experience, but it will always take longer than you think it should.
Is it worth it? In my opinion, yes! For you, I guess that depends on how professional you want your videos to be.
Hope this helps. Take care, all.
I use Camtasia Studio to create videotutorials, I edit them and then I upload them to youtube, later I use divi video module and it’s ready !!
Interesting post – thanks!
I really love the WPBizPlugins Custom Admin Help Boxes, but it hasn’t been updated recently…. That’s really a pity (so, WPBIZ: please update)!
I want to make my own screencasts in Dutch showing my clients around in their own website. I’m not really interested in general prefab made casts. Also, every website has different plugins and those often need explanation to clients which are not included in prefab casts.
Thanks Brenda. How do you create a screencast in the first place though?
Hi Richard, I always use a chrome plugin, screencastify. The free version lets you record up to 10 mins. I you have a webcam you can also include a small view of yourself in the corner. We use this tool also to record users when conducting usability research. Works perfectly!
Very useful post for adding screenshots in wordpress. Thanks for sharing