
Every website rebuild starts with the same question: how much time will this take? The Divi 5 Design System was designed to get you off and running as quickly as possible. Instead of rebuilding from scratch, you rebrand what already exists. Change colors, fonts, sizes, and presets, and watch an entire website transform.
We’ve chosen to give three detailed examples of how easy it is to completely change the design system to fit your needs. Each Section transformation required fewer than 25 actions. No custom CSS overrides. No element-by-element adjustments. Just deliberate changes to Design Variables and Presets that cascade through an entire site.
This is the second-to-last day of our Cyber Monday sale. If you’ve been evaluating whether Divi delivers the efficiency it promises, these examples provide direct evidence. The Design System isn’t a feature you’ll use occasionally. It’s a complete paradigm for the future of designing with Divi. Whether you choose to customize it or learn from how our designers set up Divi, the Design System for Divi 5 is an invaluable resource you’ll keep coming back to.
Real-World Rebranding Examples
The following transformations use actual sections from the Divi 5 Design System library. Each example starts with a pre-built layout and applies a targeted series of changes to achieve a completely different brand identity. The methodology remains consistent: change global variables first, apply presets strategically, and make module-level adjustments last.
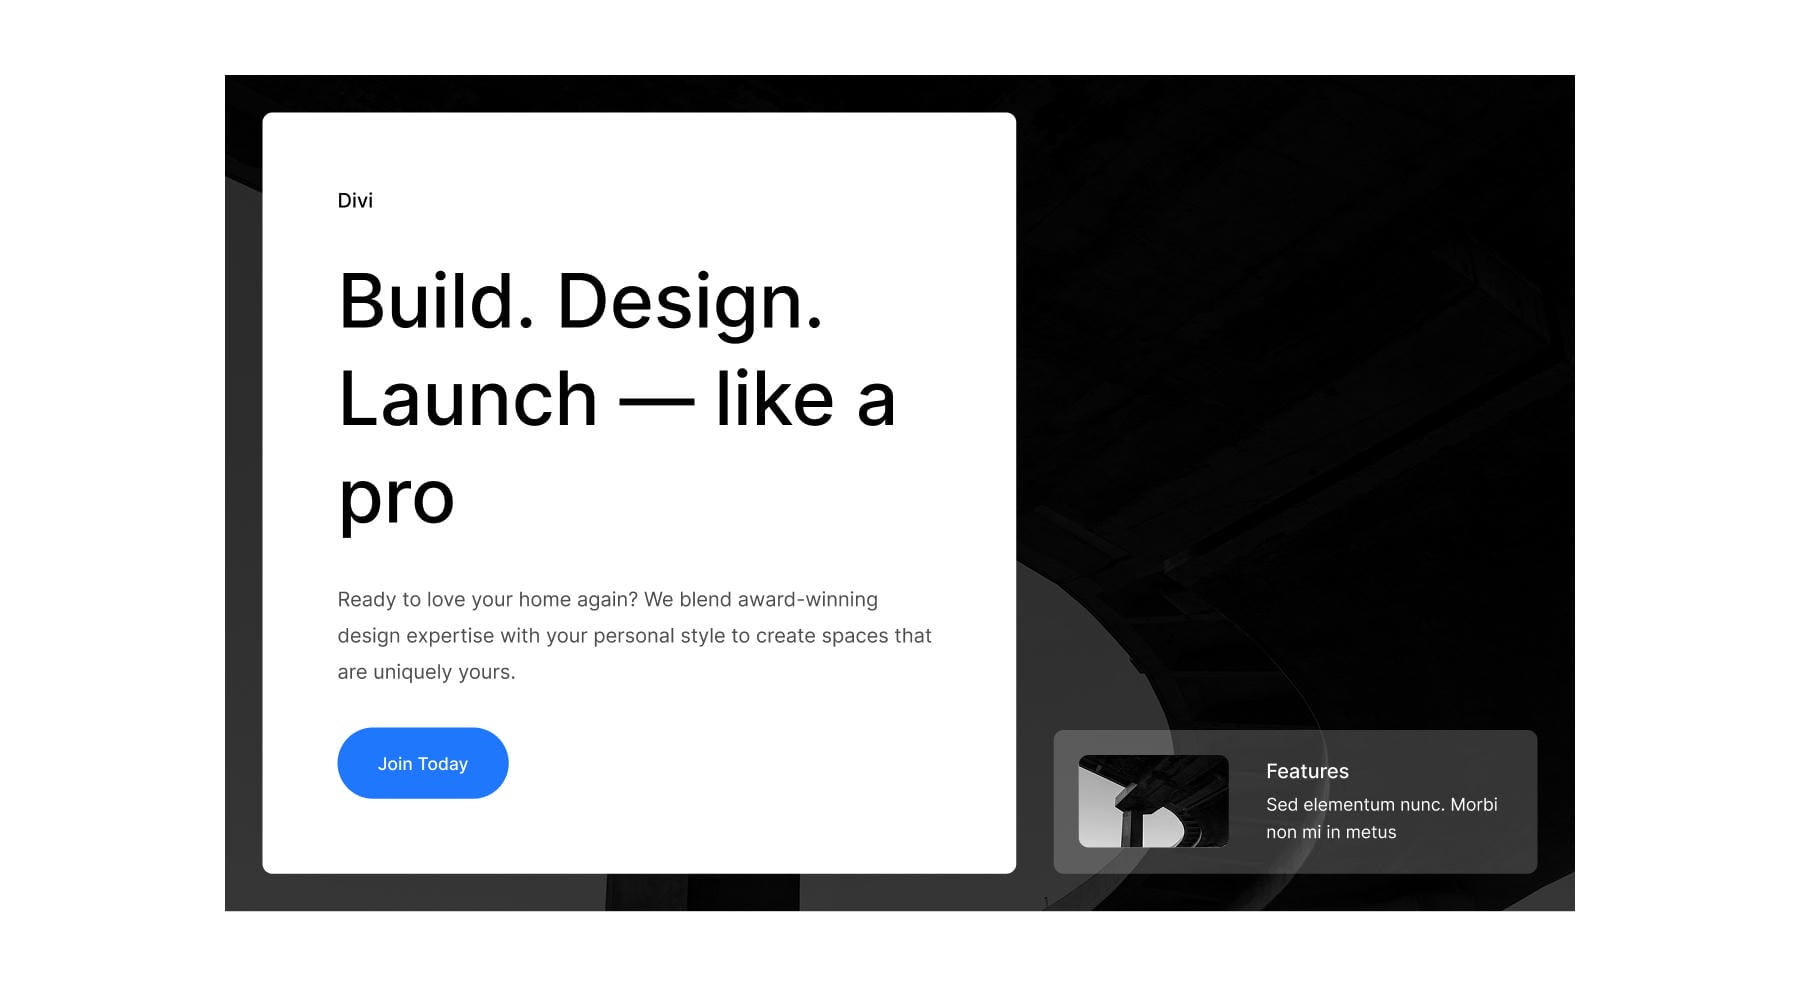
Corporate to Adventure Hero Section
This transformation takes Hero Section #28 from the Sections library and converts it into an adventure tourism landing section.
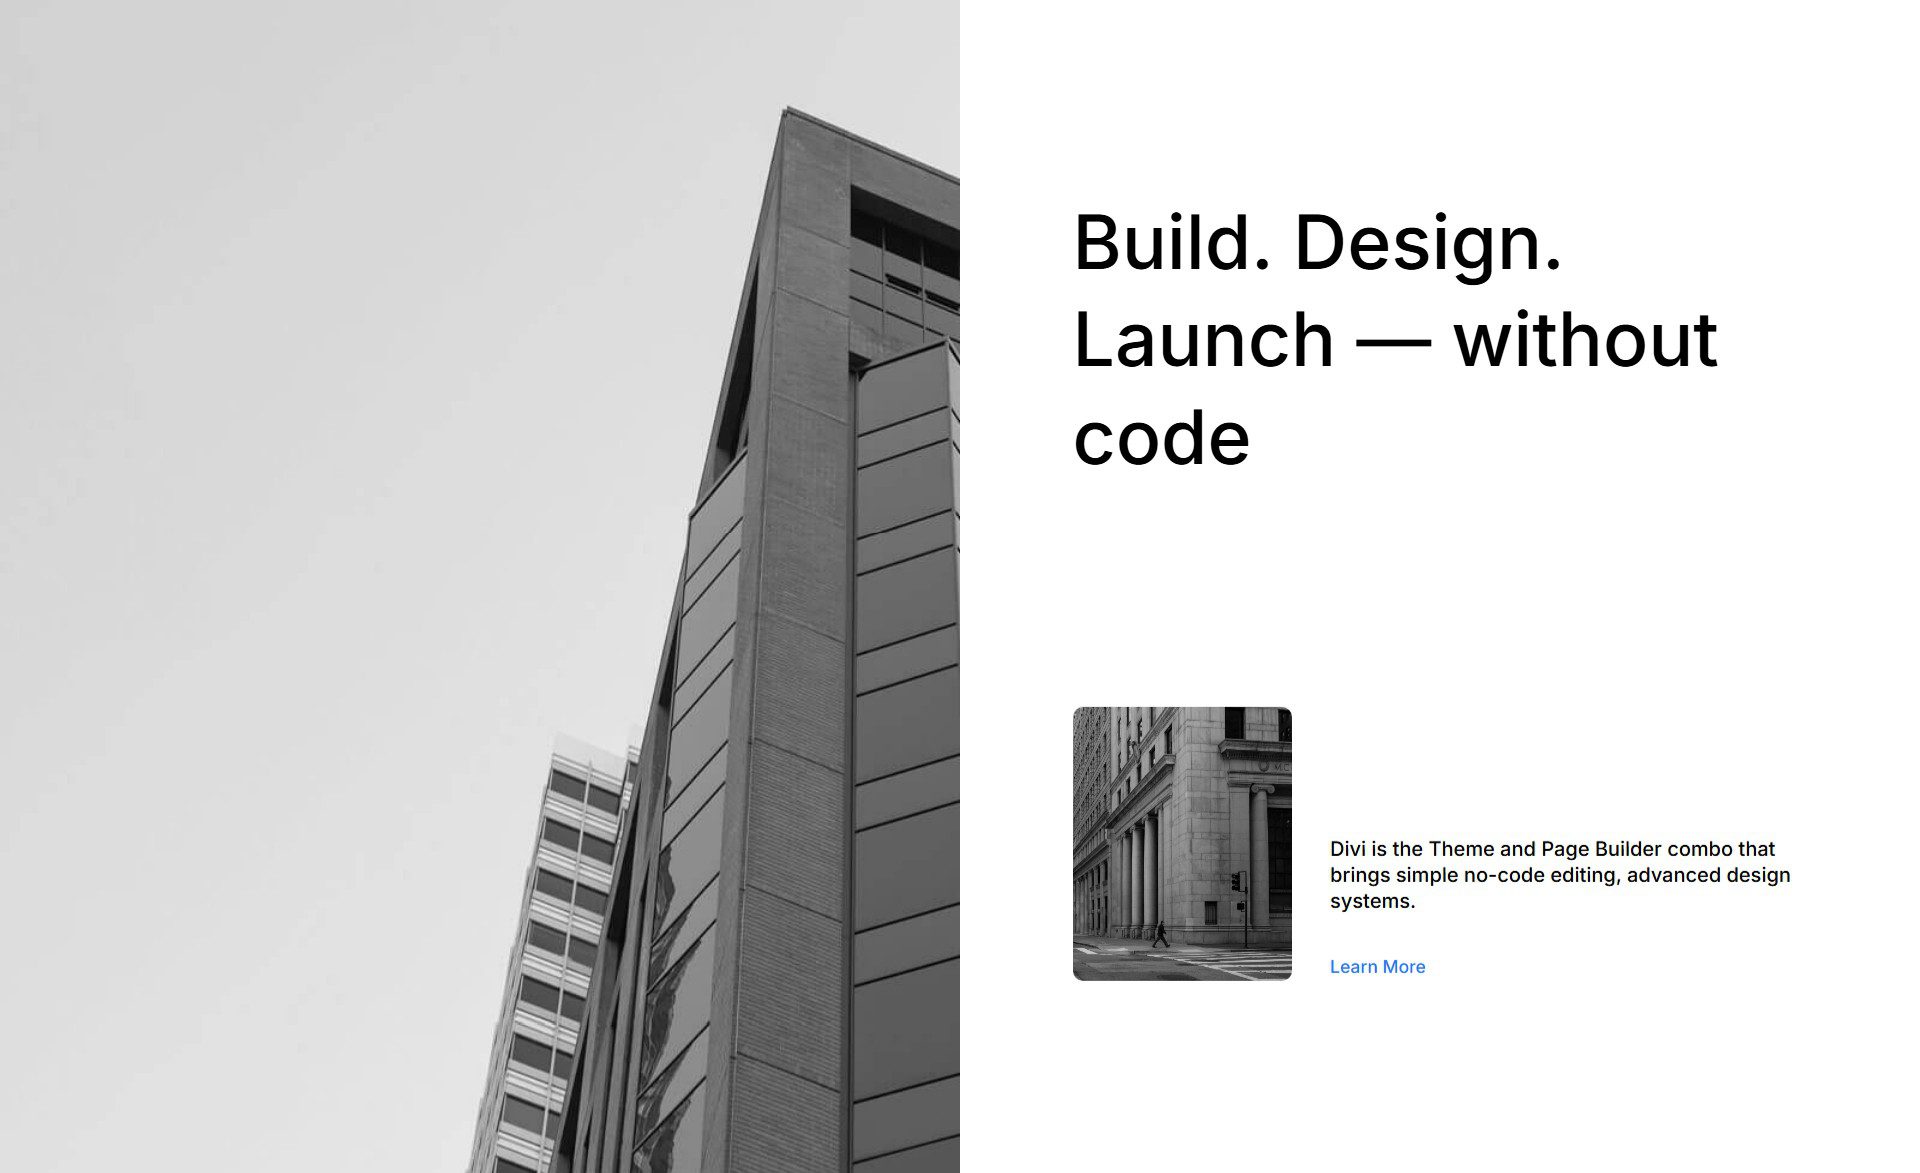
The transformation requires ~17 actions. Total implementation time for an average Divi user: approximately 8 minutes.
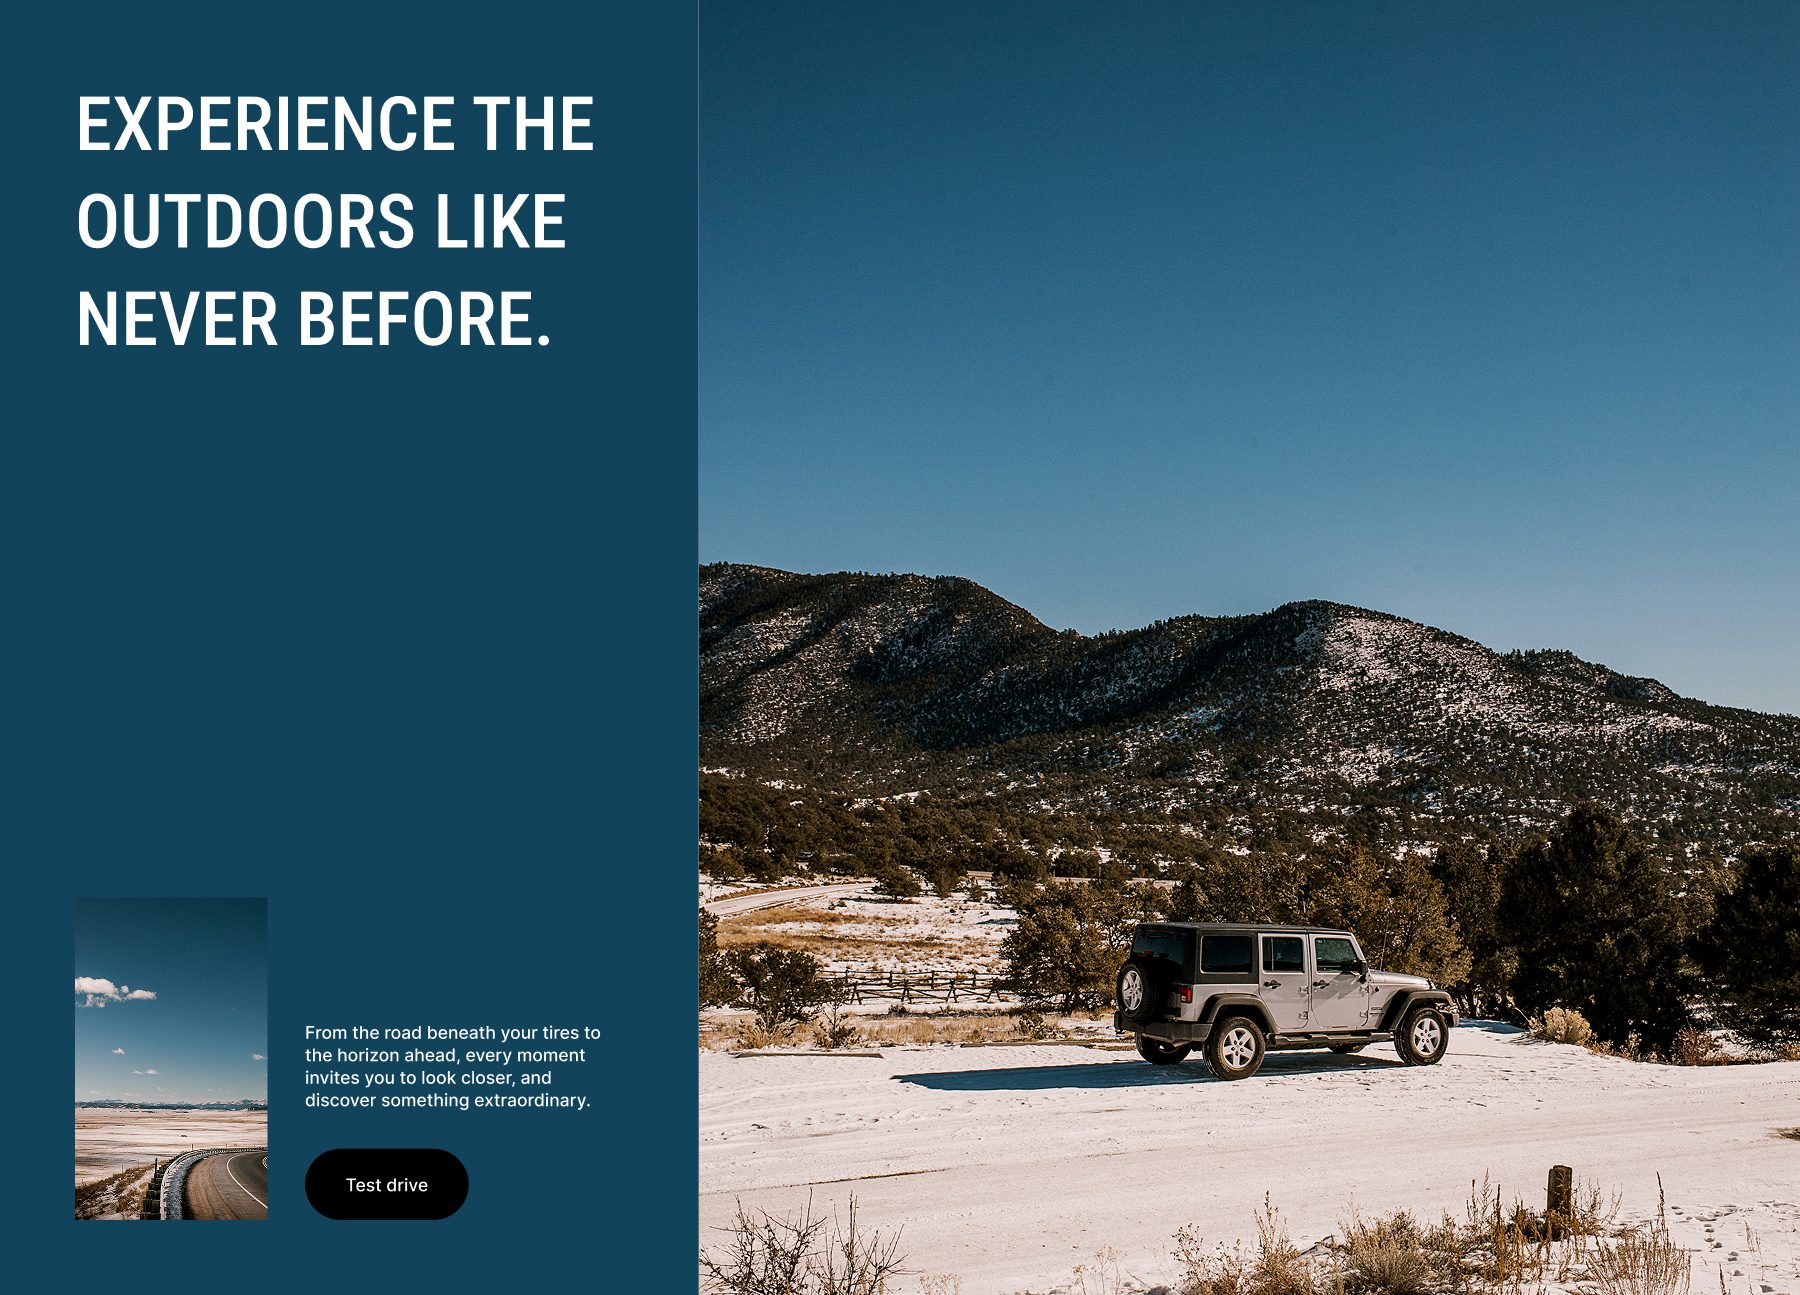
After
Global Changes via WordPress Customizer
Open the WordPress Customizer.
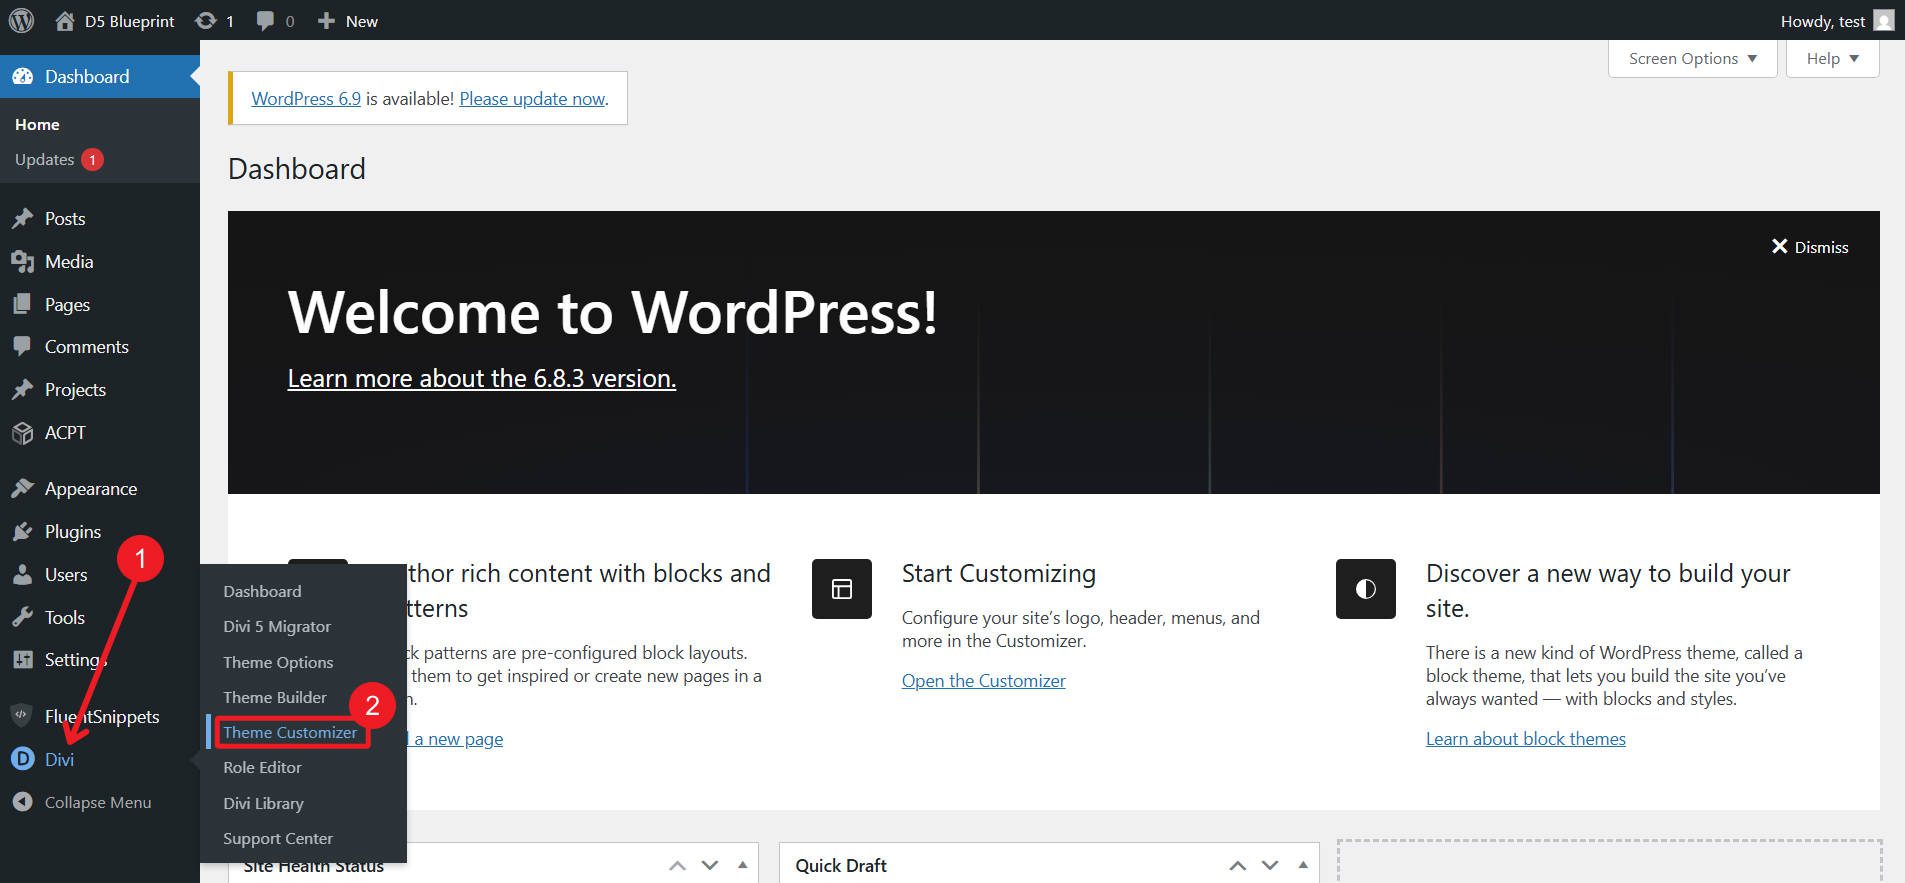
Navigate to General Settings > Layout Settings. Change the Primary Color variable to #11435B.
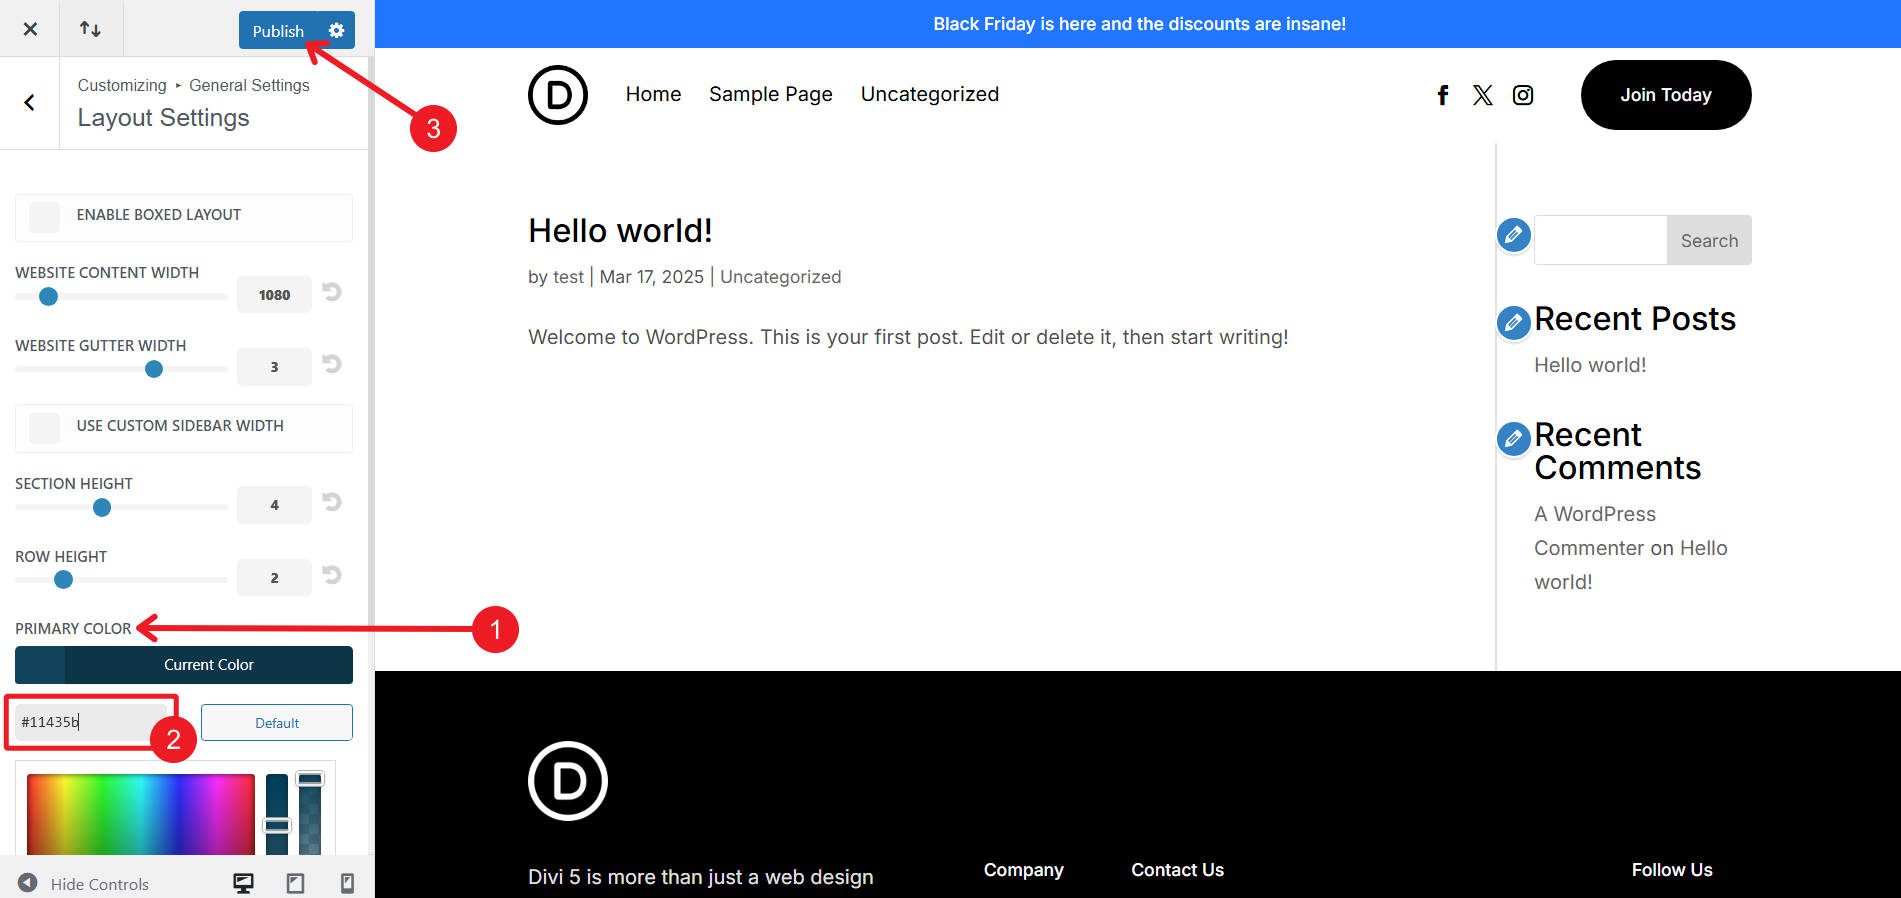
The primary color can also be easily changed in Divi 5’s Color Design Variable Manager.
Inside the WordPress Customizer, navigate to General Settings >Typography. Change the Header Font Family to Roboto Condensed. While there, also set the Header Font Style to All Caps.
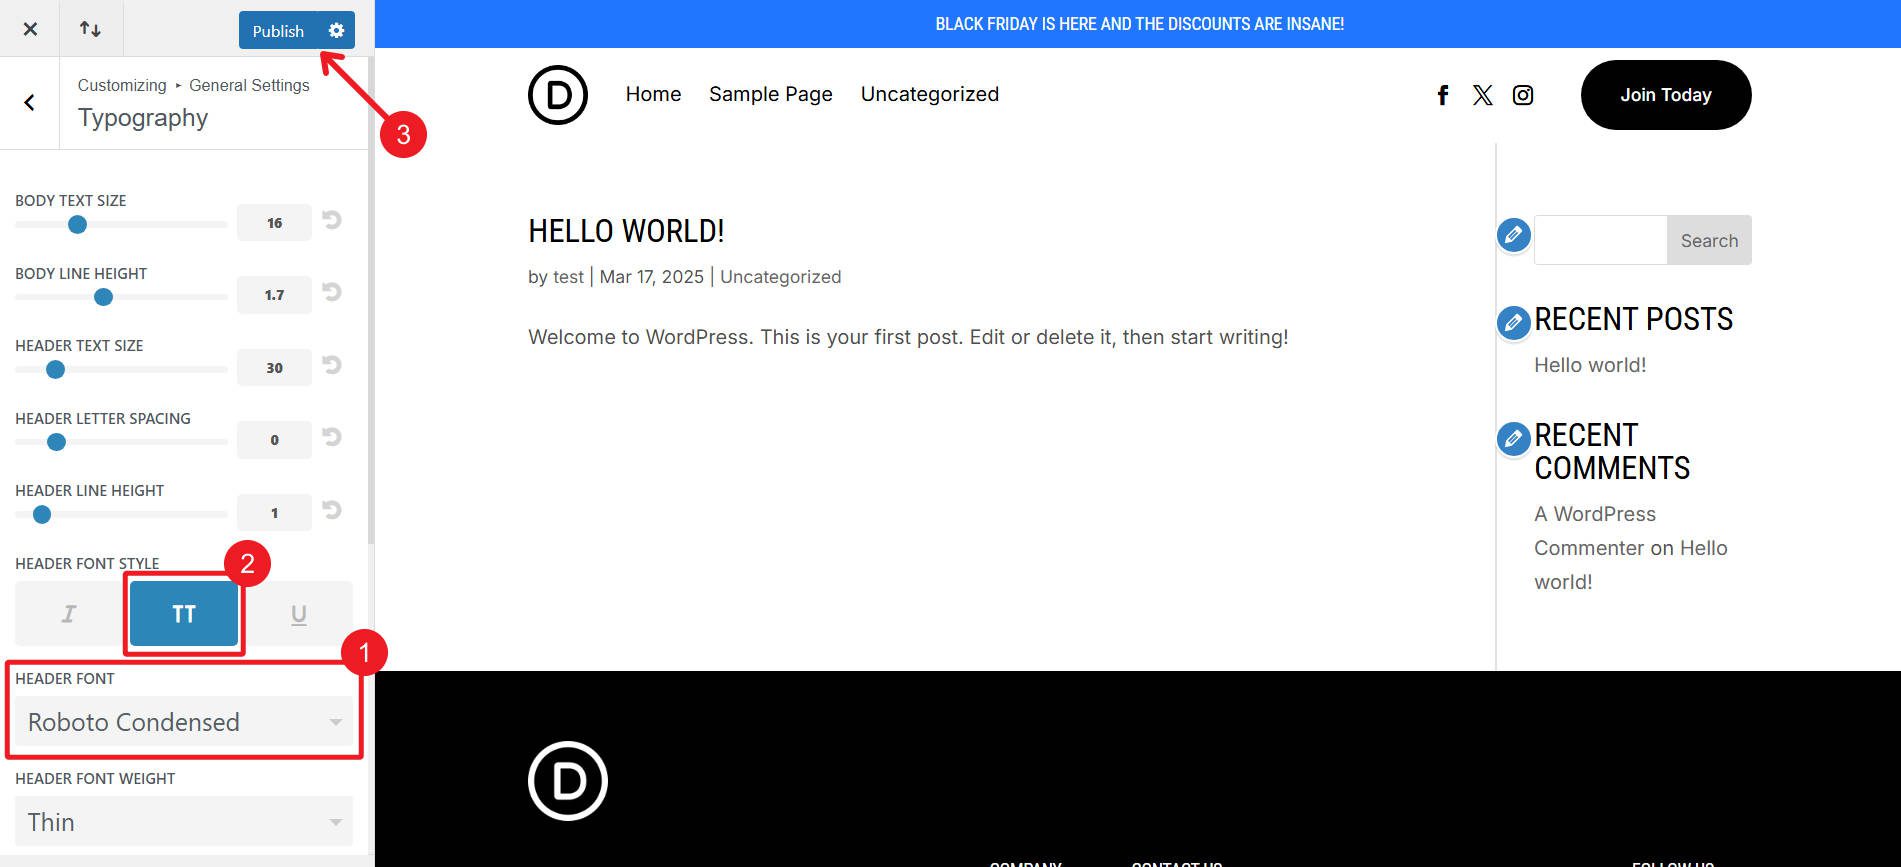
The Heading Font can also be changed easily in Divi 5’s Font Design Variable Manager. All caps can be done with Default and other Presets, but it is a single step in the customizer.
Publish all Customizer changes.
Structural and Design Changes
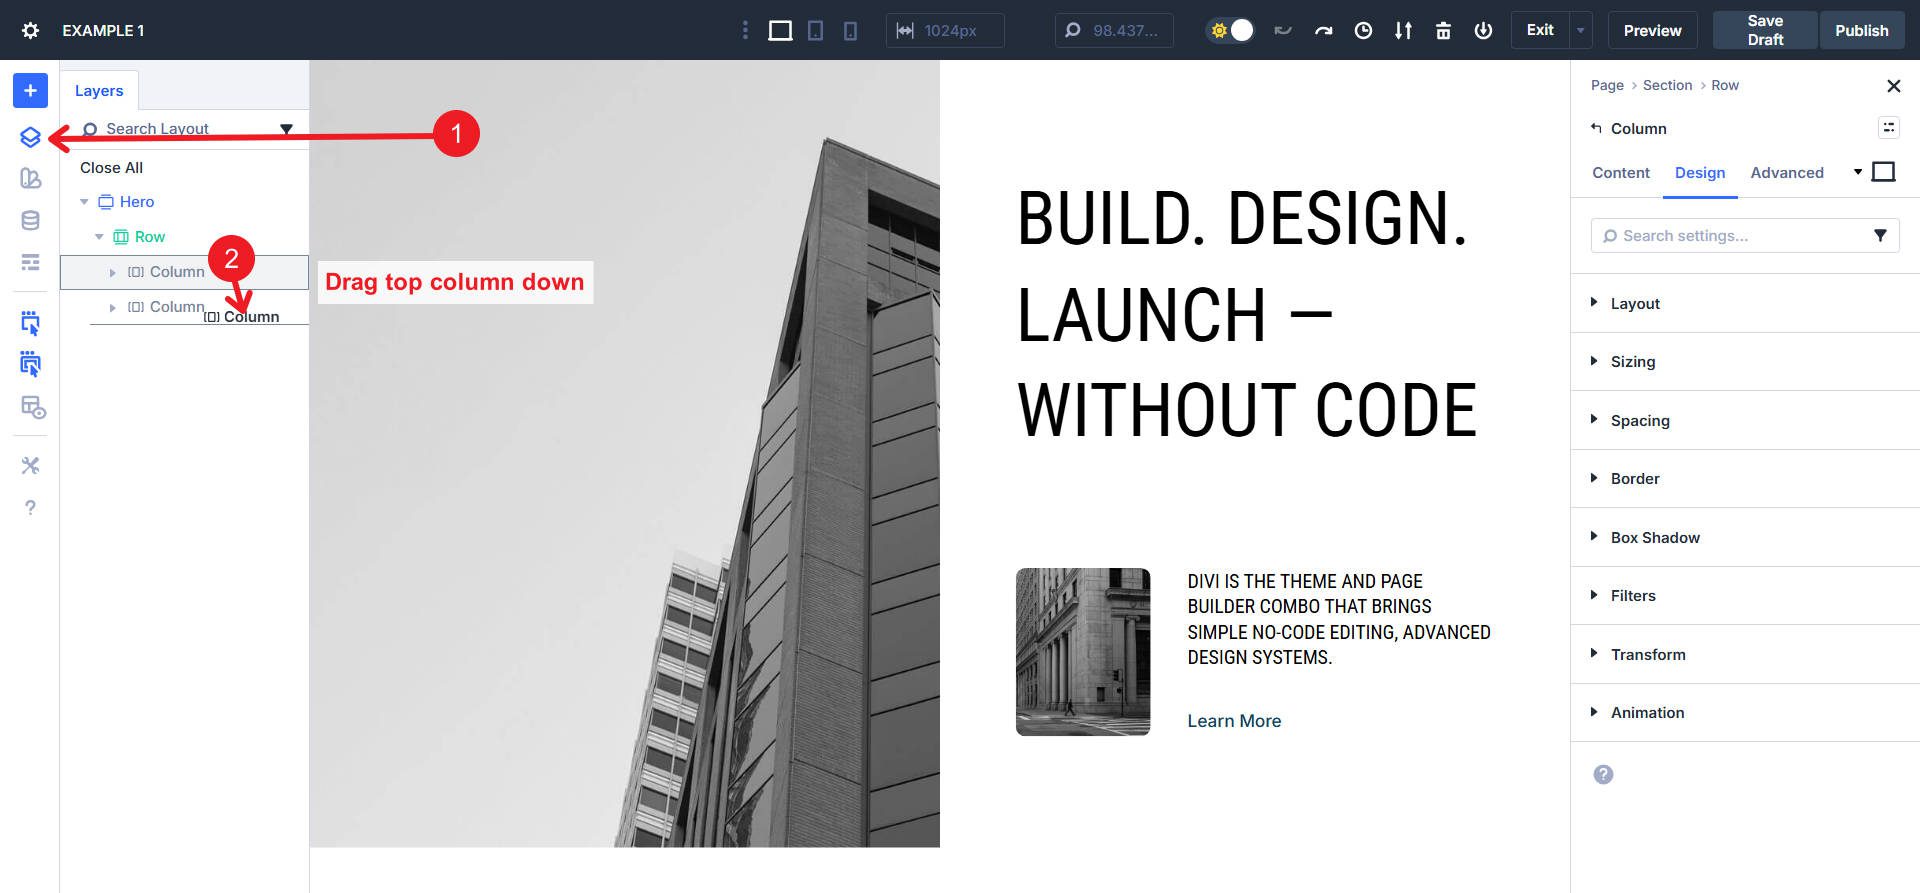
First, swap the order of the two main columns in the parent row. This is easiest done in the Layers panel by dragging the first column down.
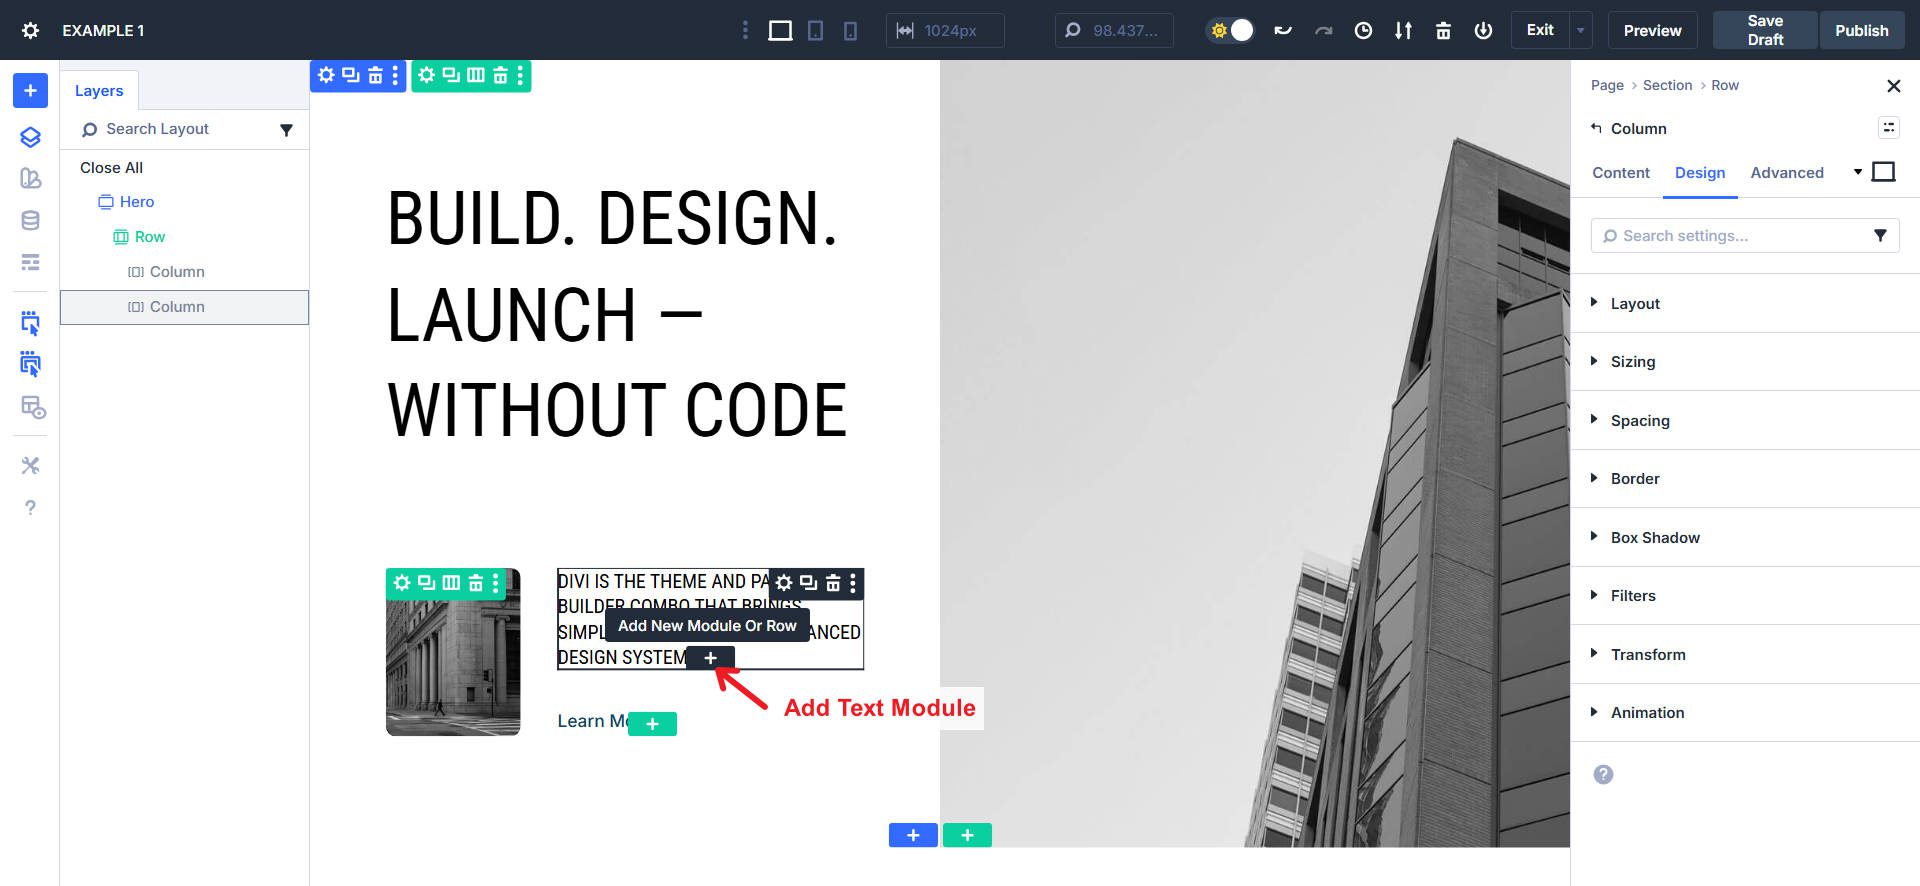
Add a Text Module under this Heading Module. Copy the text (or add the updated content) from the heading module, place it into the new Text Module, and delete the old Heading Module.
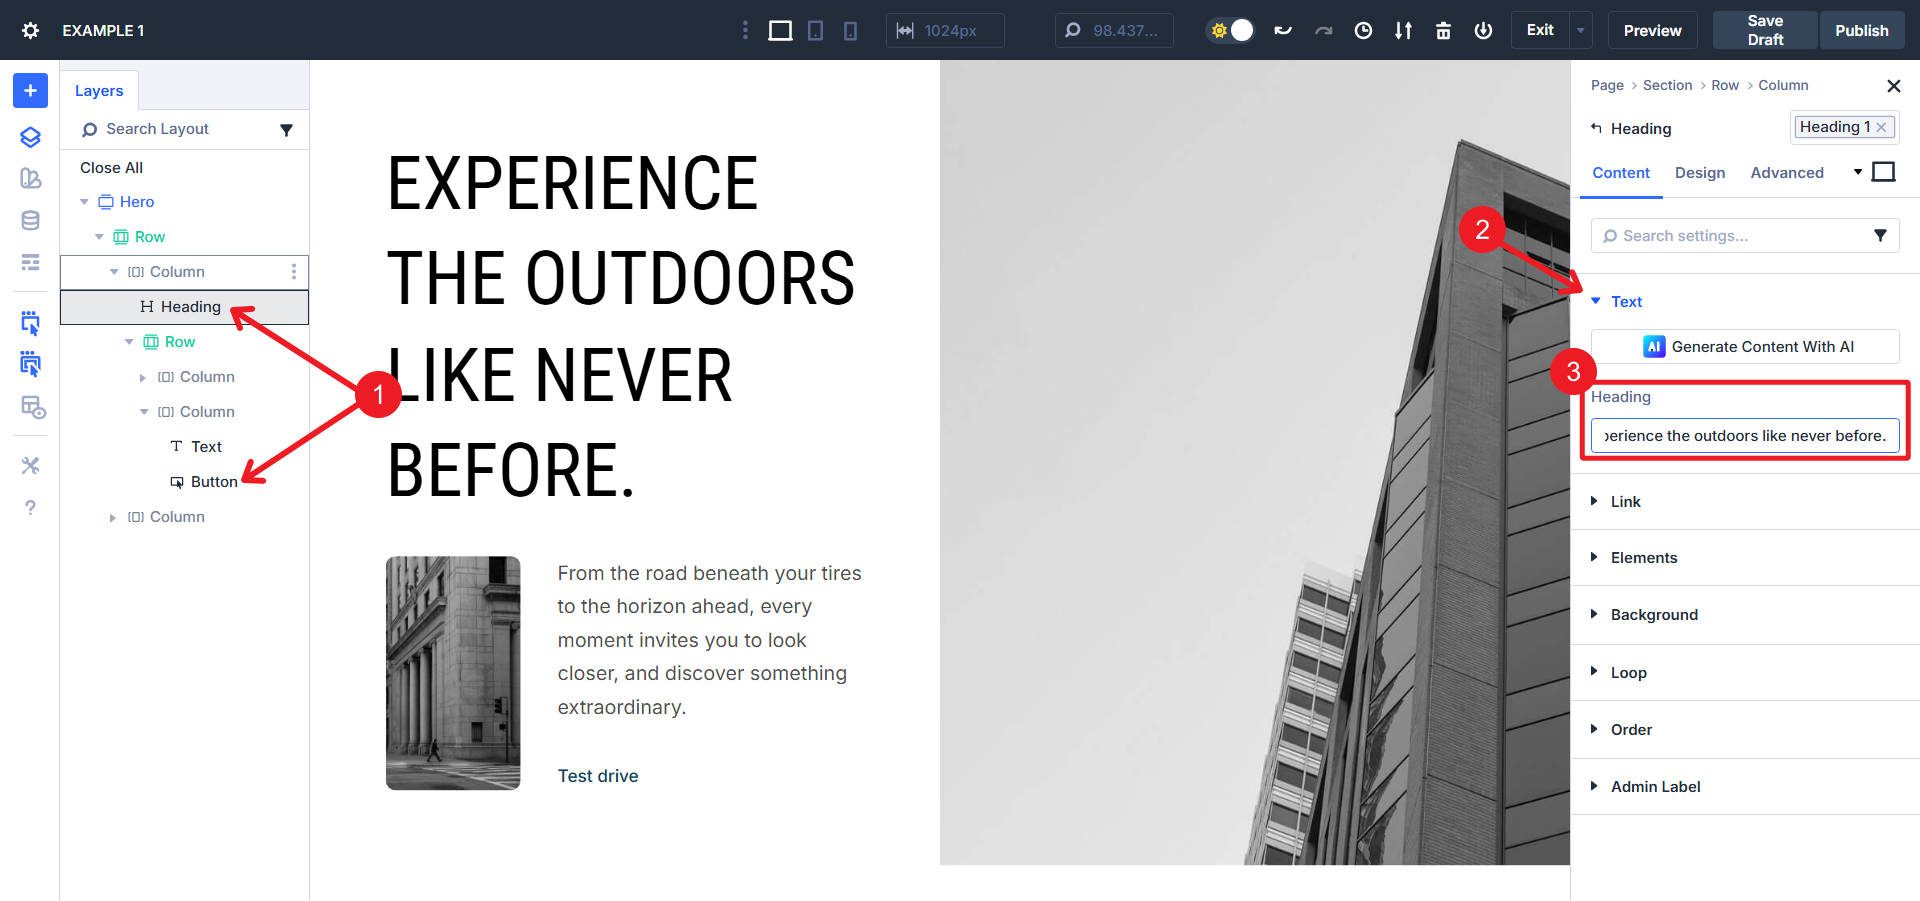
Click the Main Heading (and after it, the button). In the Content tab, update the heading text and then the button text.
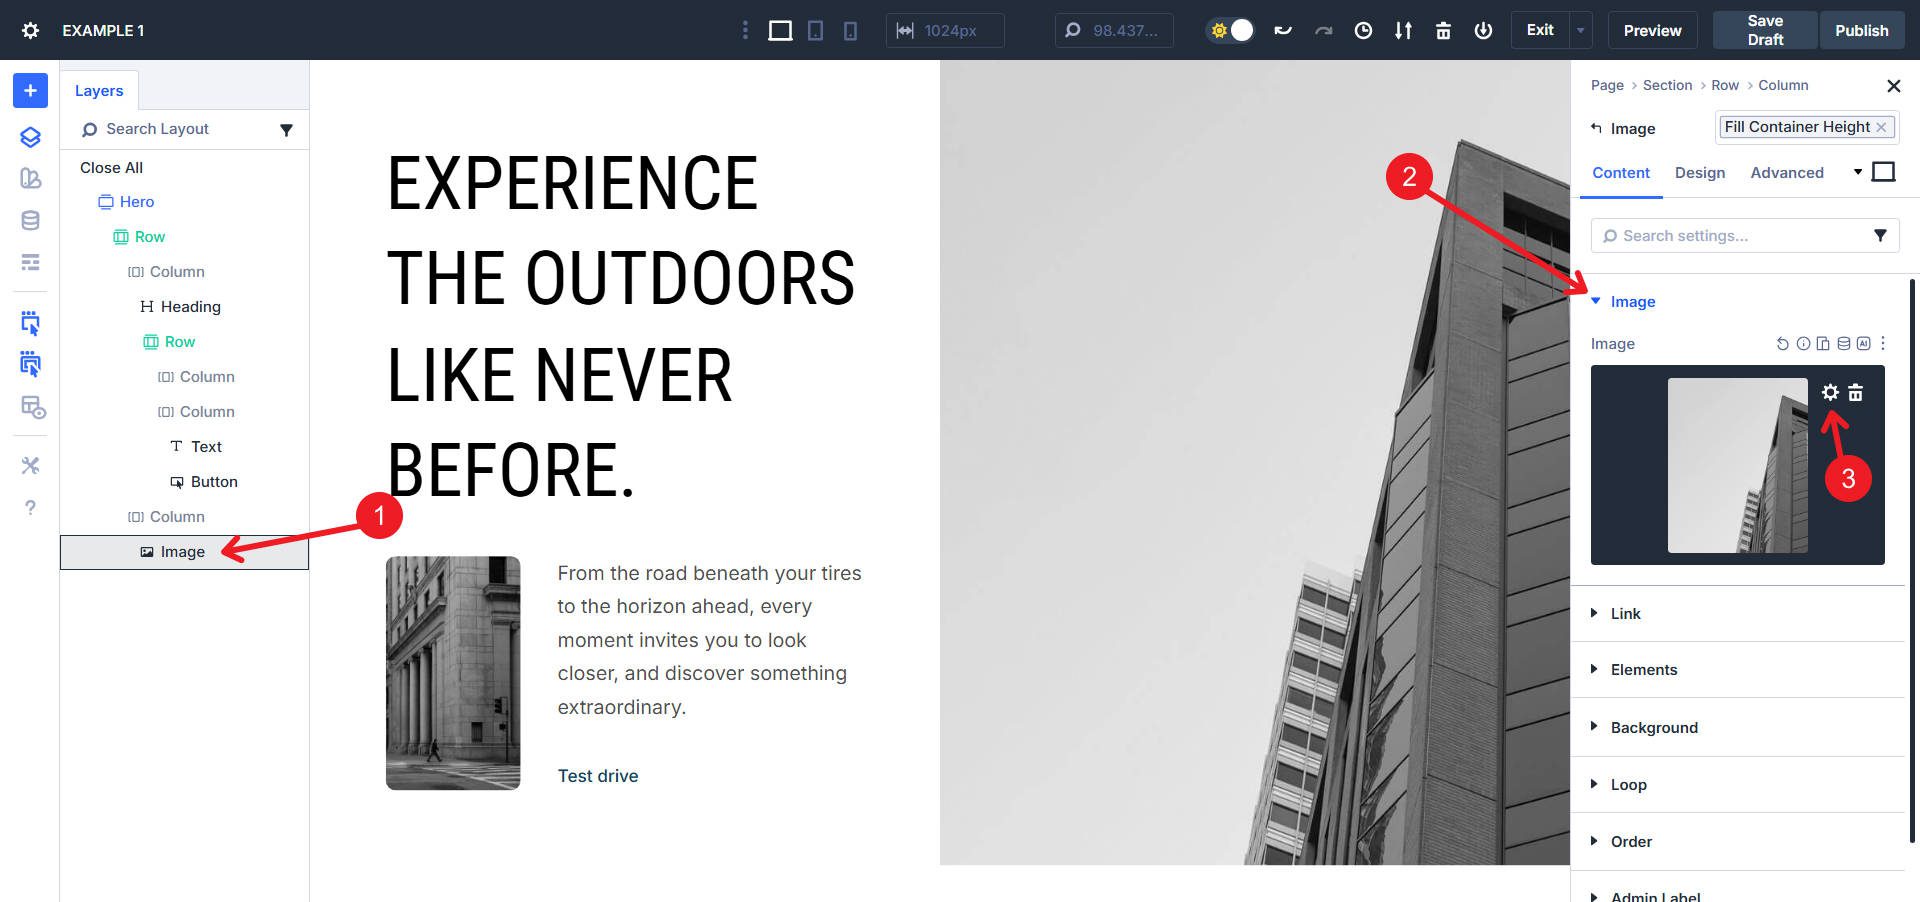
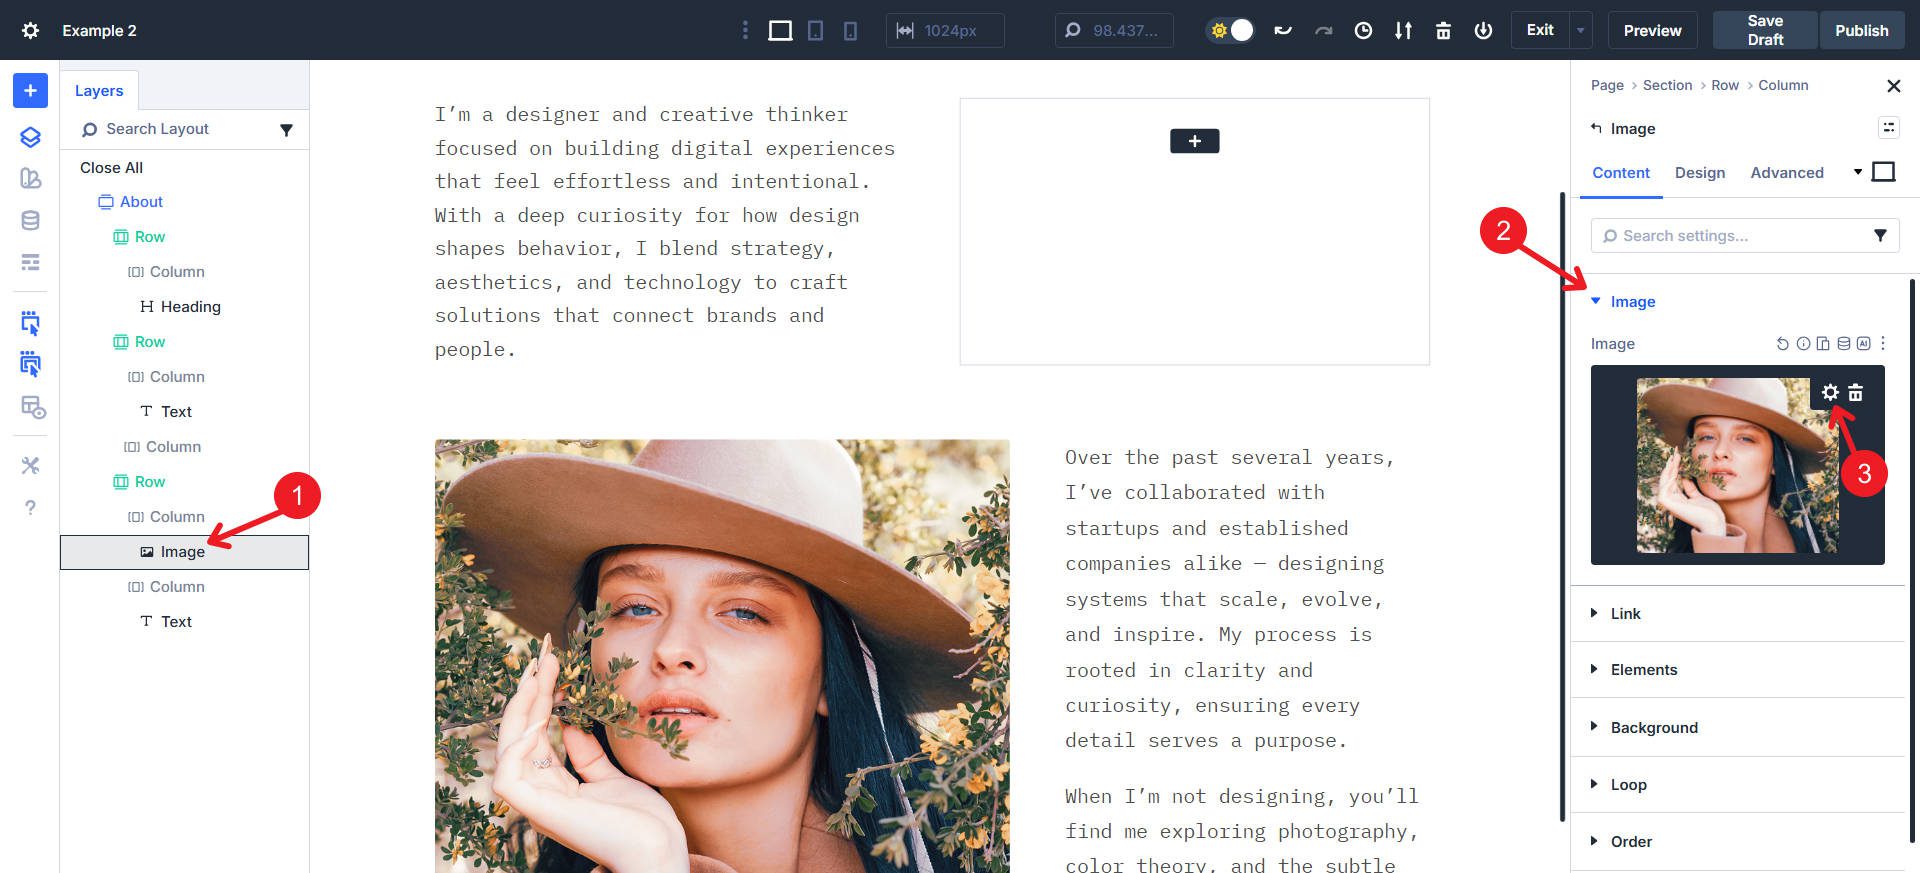
Click on each image module in column two. In the Content tab, click the Gear Icon and select the new image from the media library. You can find a similar image on Unsplash.
Click on the row containing the main heading and body text. In the settings panel, locate the Column Structure option under the Design tab. Choose the 2/5 – 3/5 configuration.
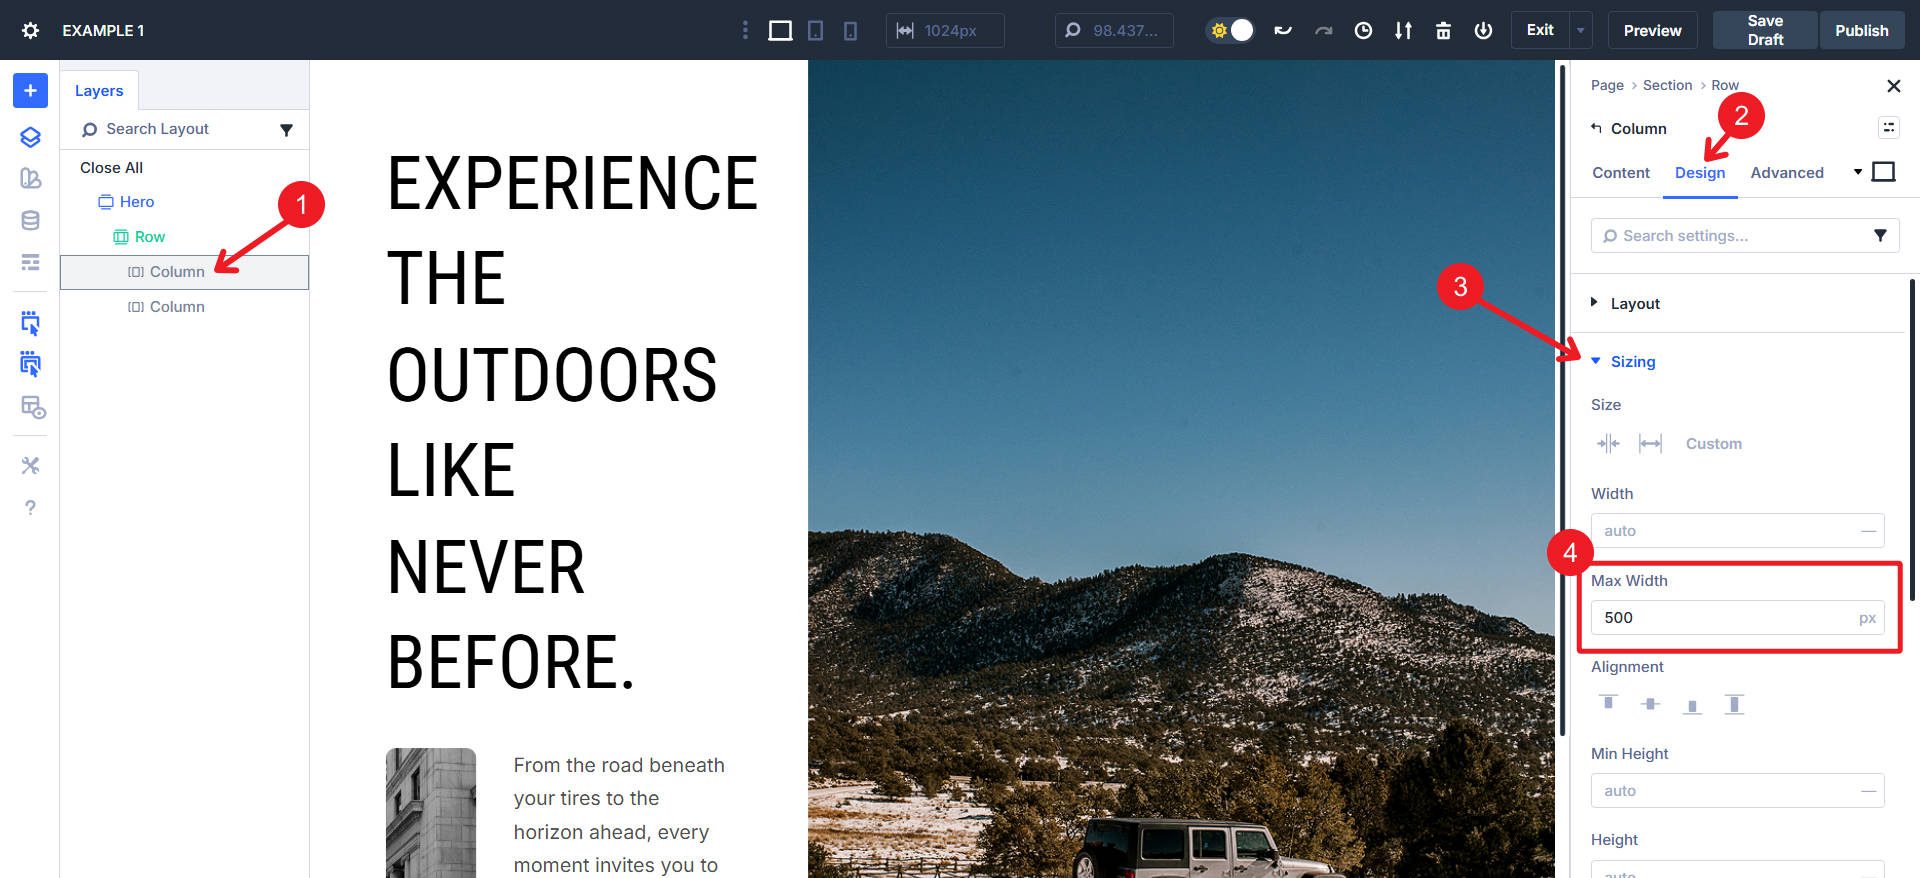
Click on the left column. In the Sizing Option Group under the Design tab, enter 500px in the Max Width field.
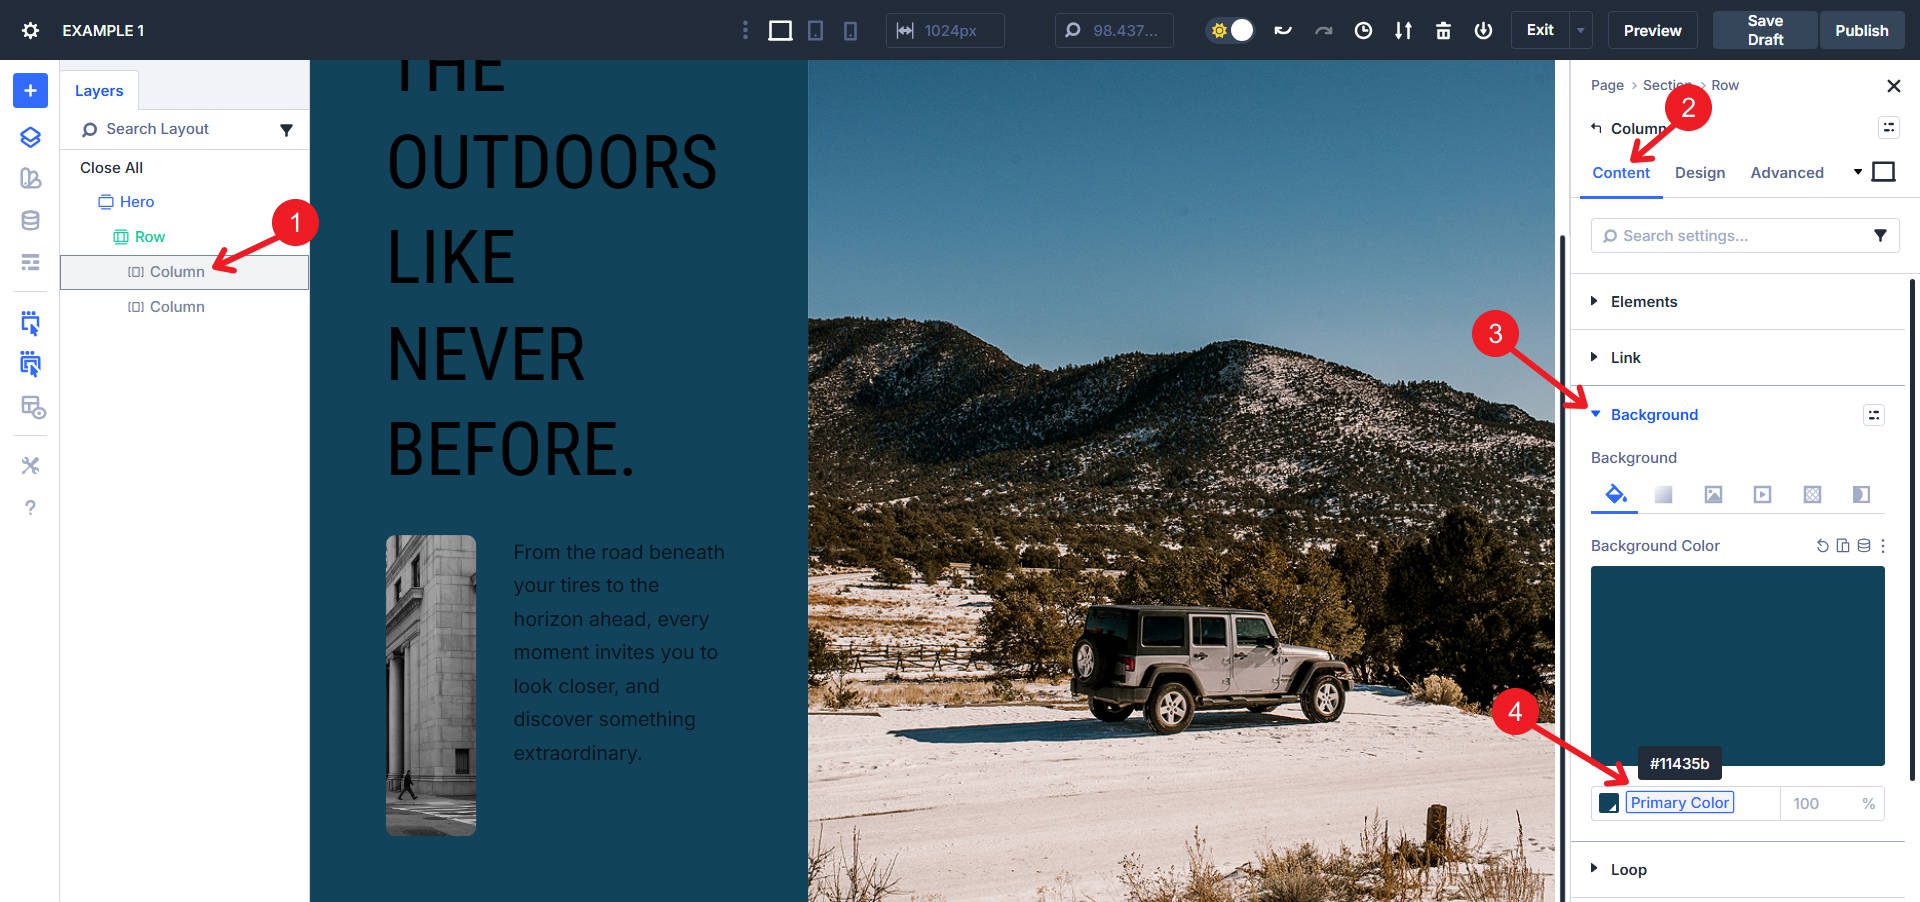
With the left column selected, open Background. Select Primary Color from the Design Variable options for Background Color.
Change the Heading and Body Text color of all the elements in the left column to white.
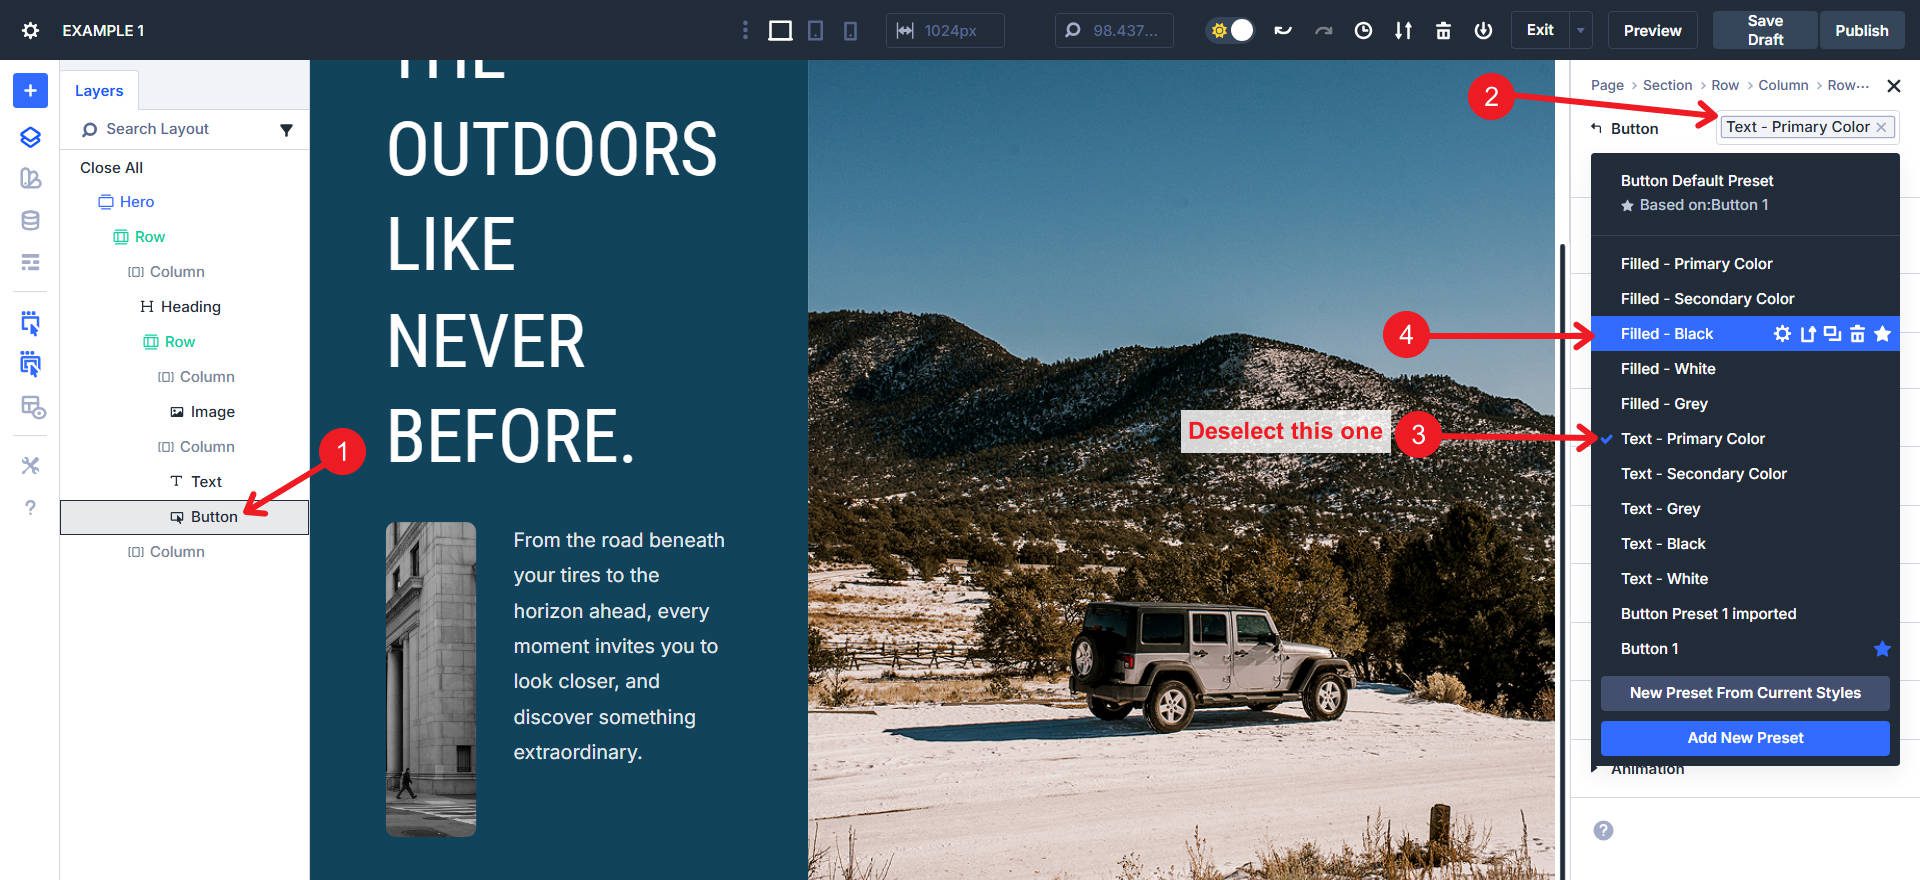
Change the Button’s Element Preset to Filled – Black. Deselect the previous preset to avoid styling conflicts and overstyling.
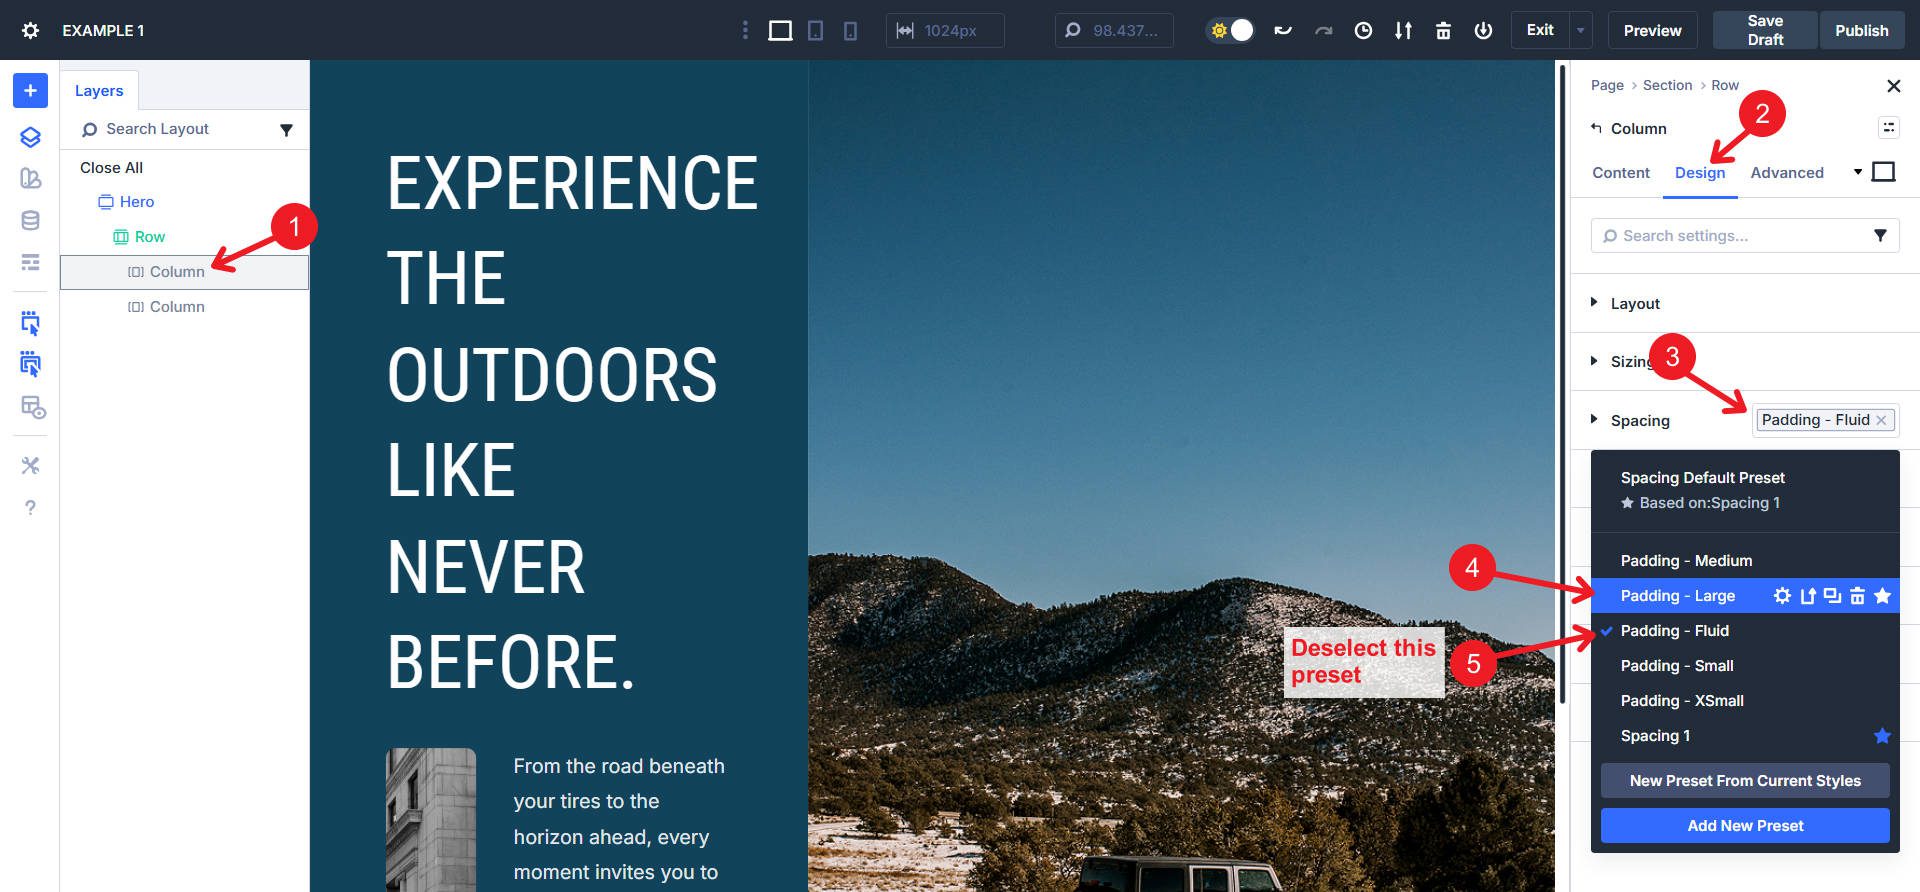
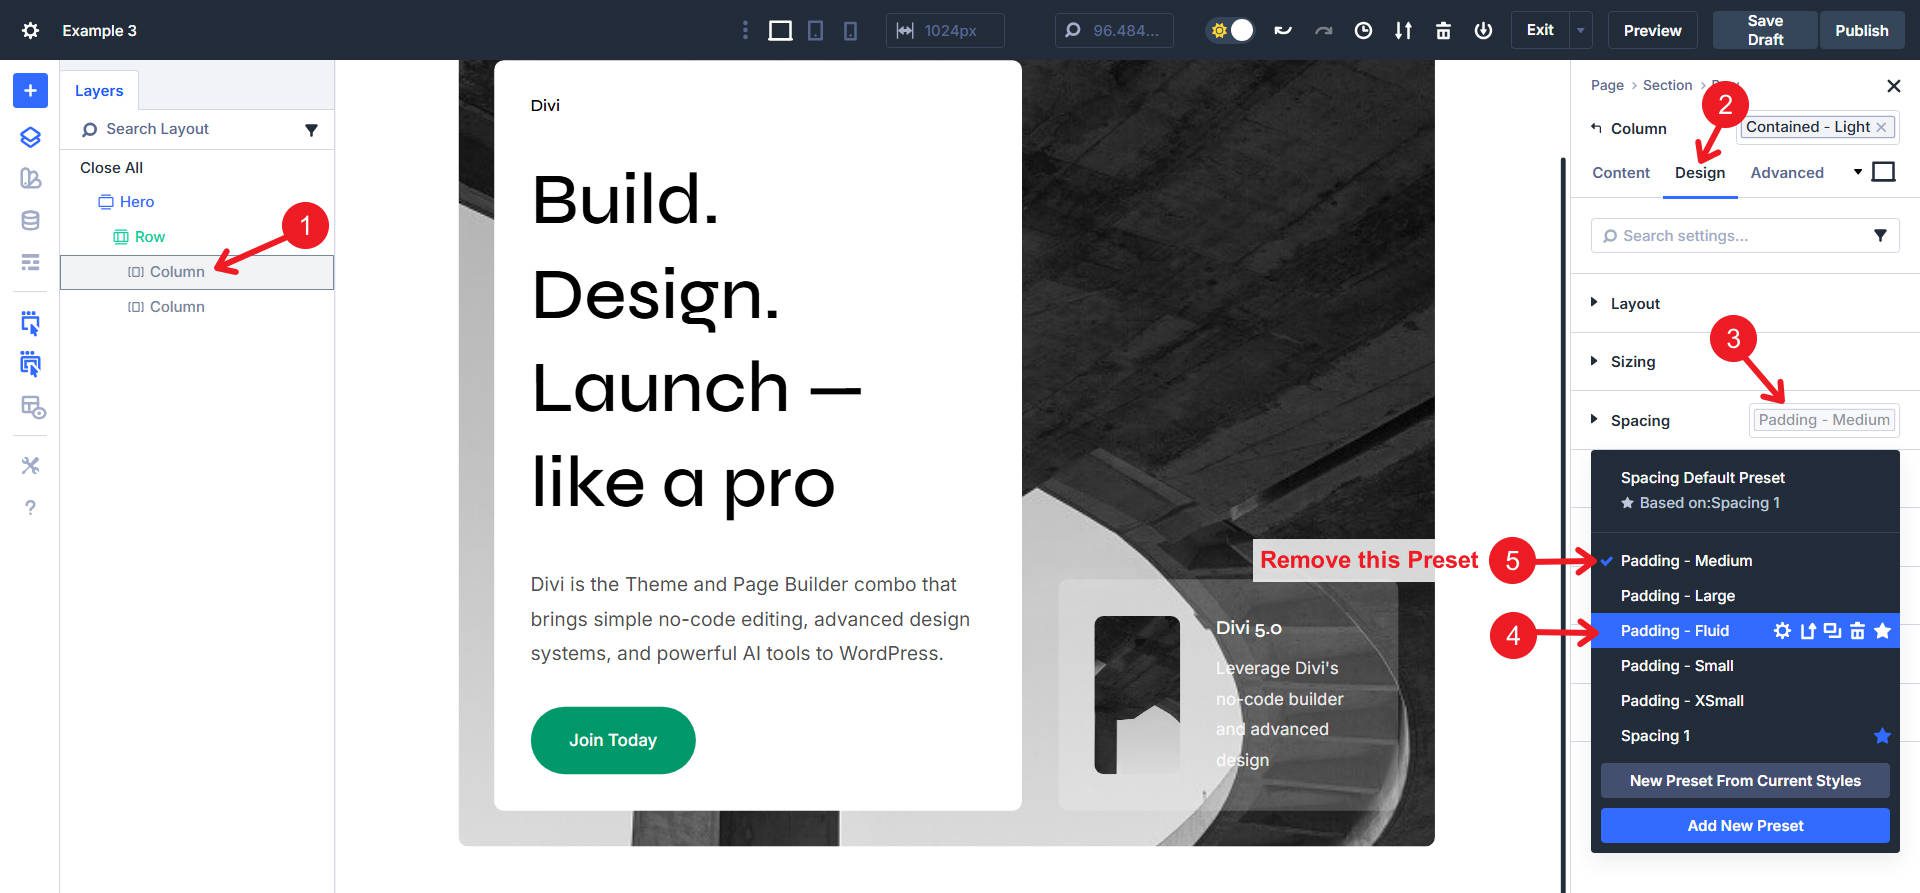
With the left column selected, click the Design tab and scroll to Spacing. Click the preset chip and select Padding – Large. Deselect Padding – Fluid.
Locate the Inner Row of the left column. Open its settings and under Elements, change the Column Structure to 2/5 – 3/5.
If the section is too tall for your liking, you can try cropping or adjusting the image size in the right column.
Minimalist to Warm About Us Section
This transformation turns About Section #5 from the Sections library into a warm, artistic personal brand statement.
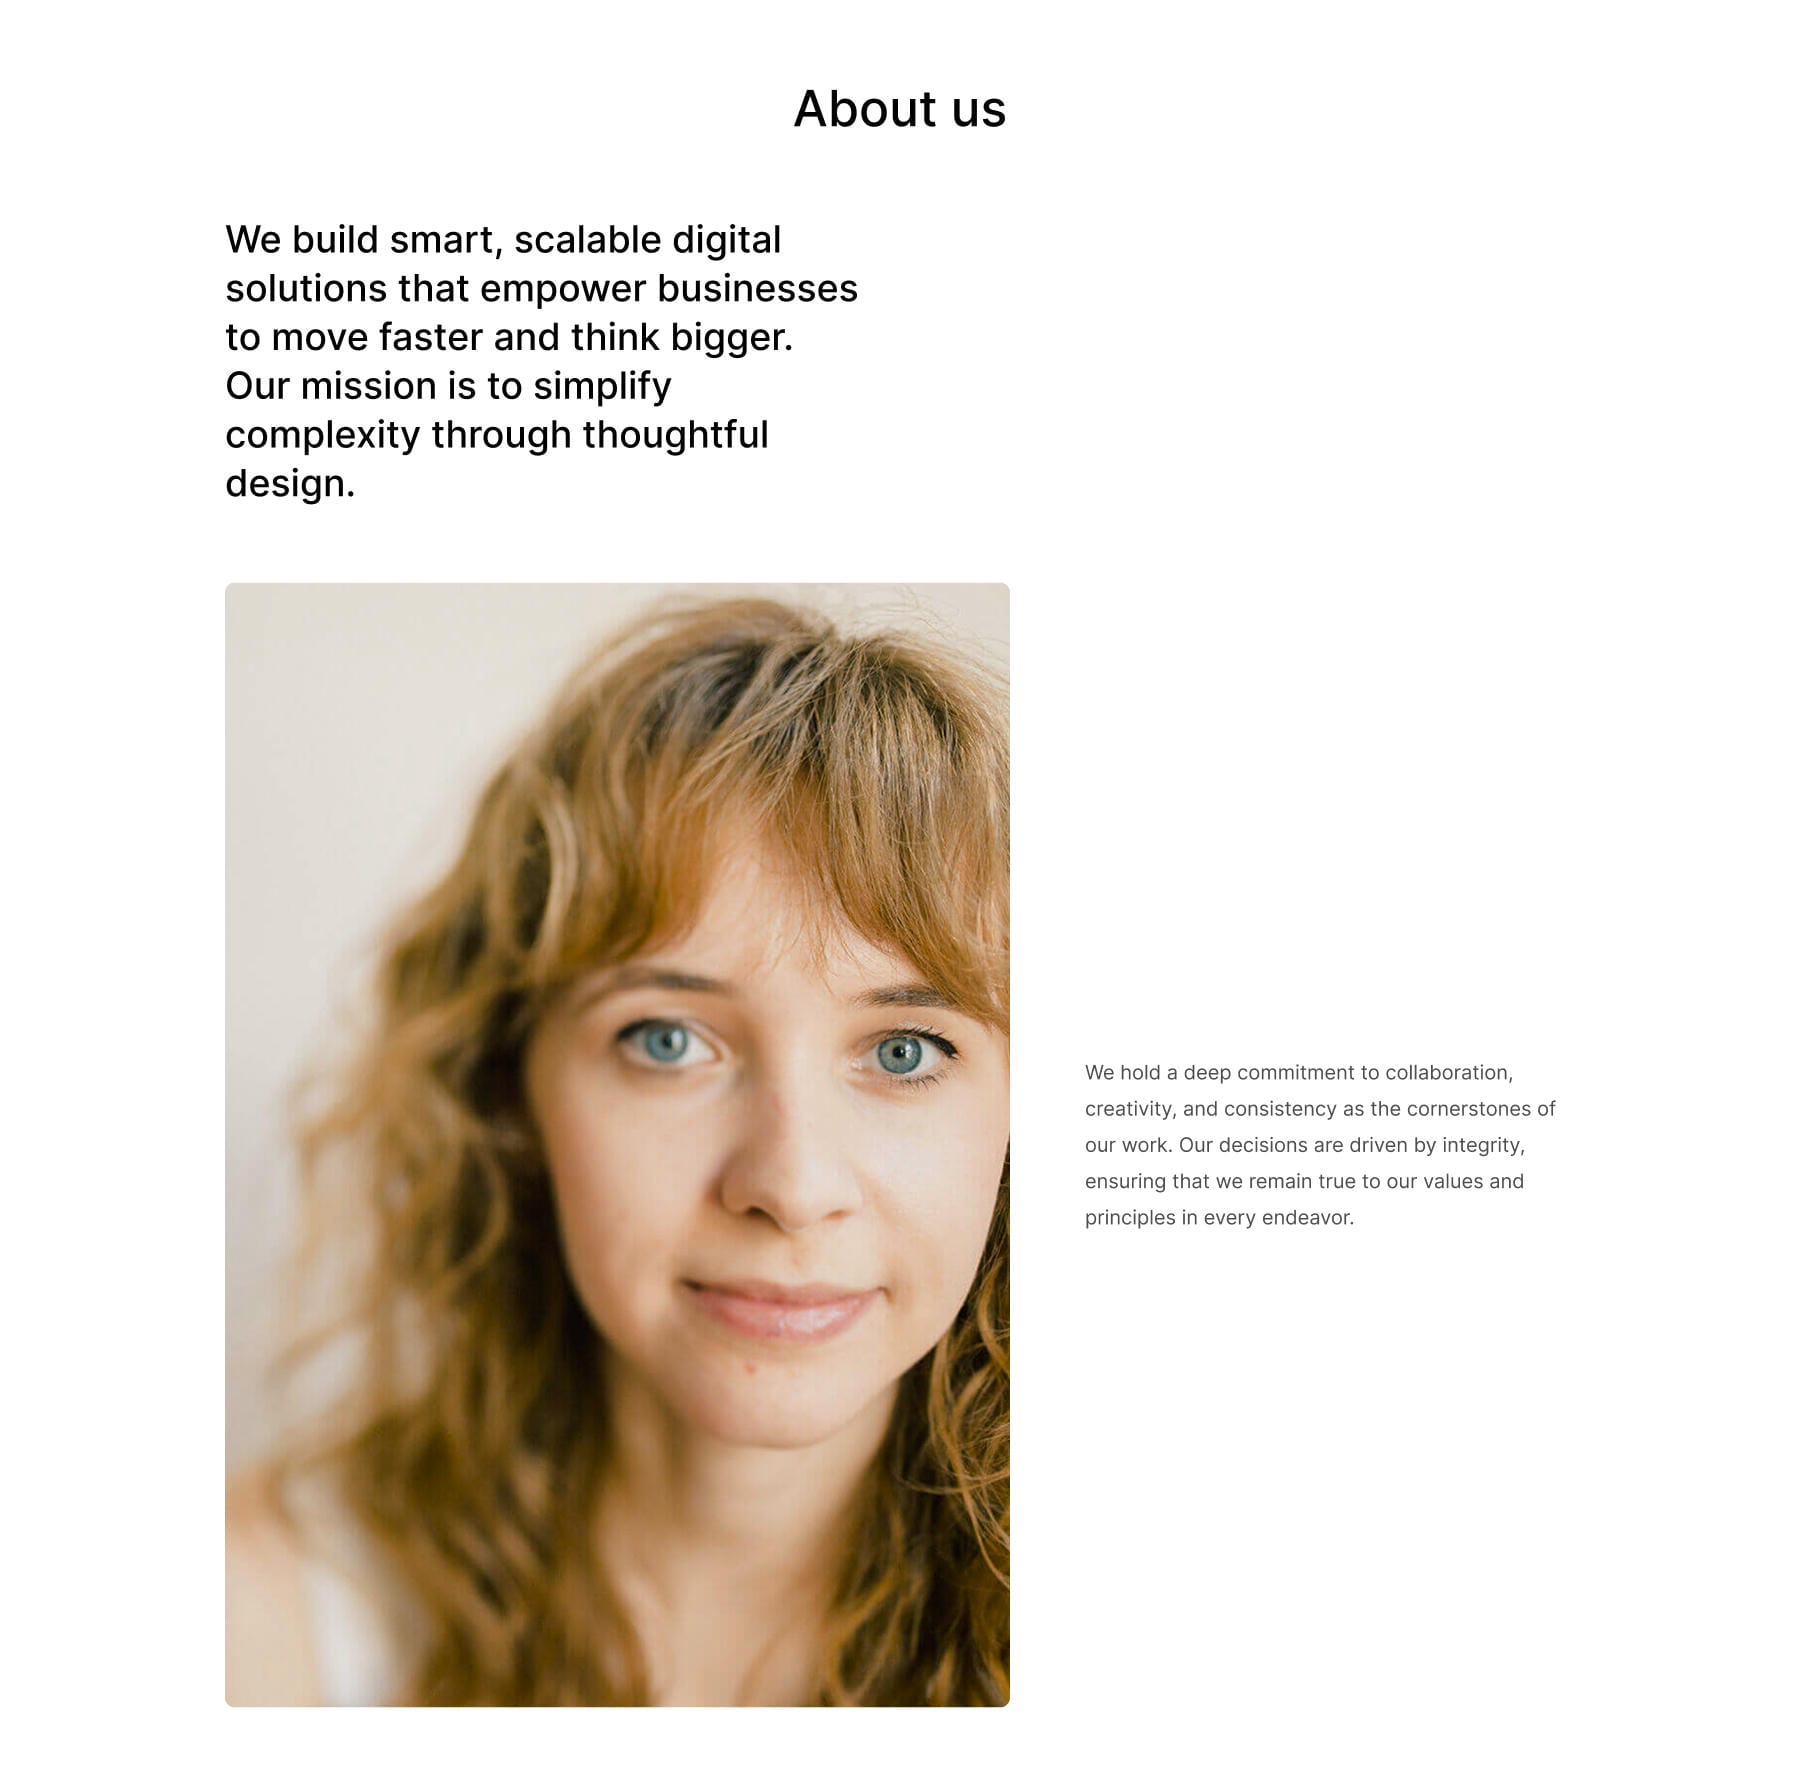
Before
The transformation requires ~23 actions across WordPress Customizer, Design Variable Manager, and preset adjustments. Implementation time: approximately 12-15 minutes.
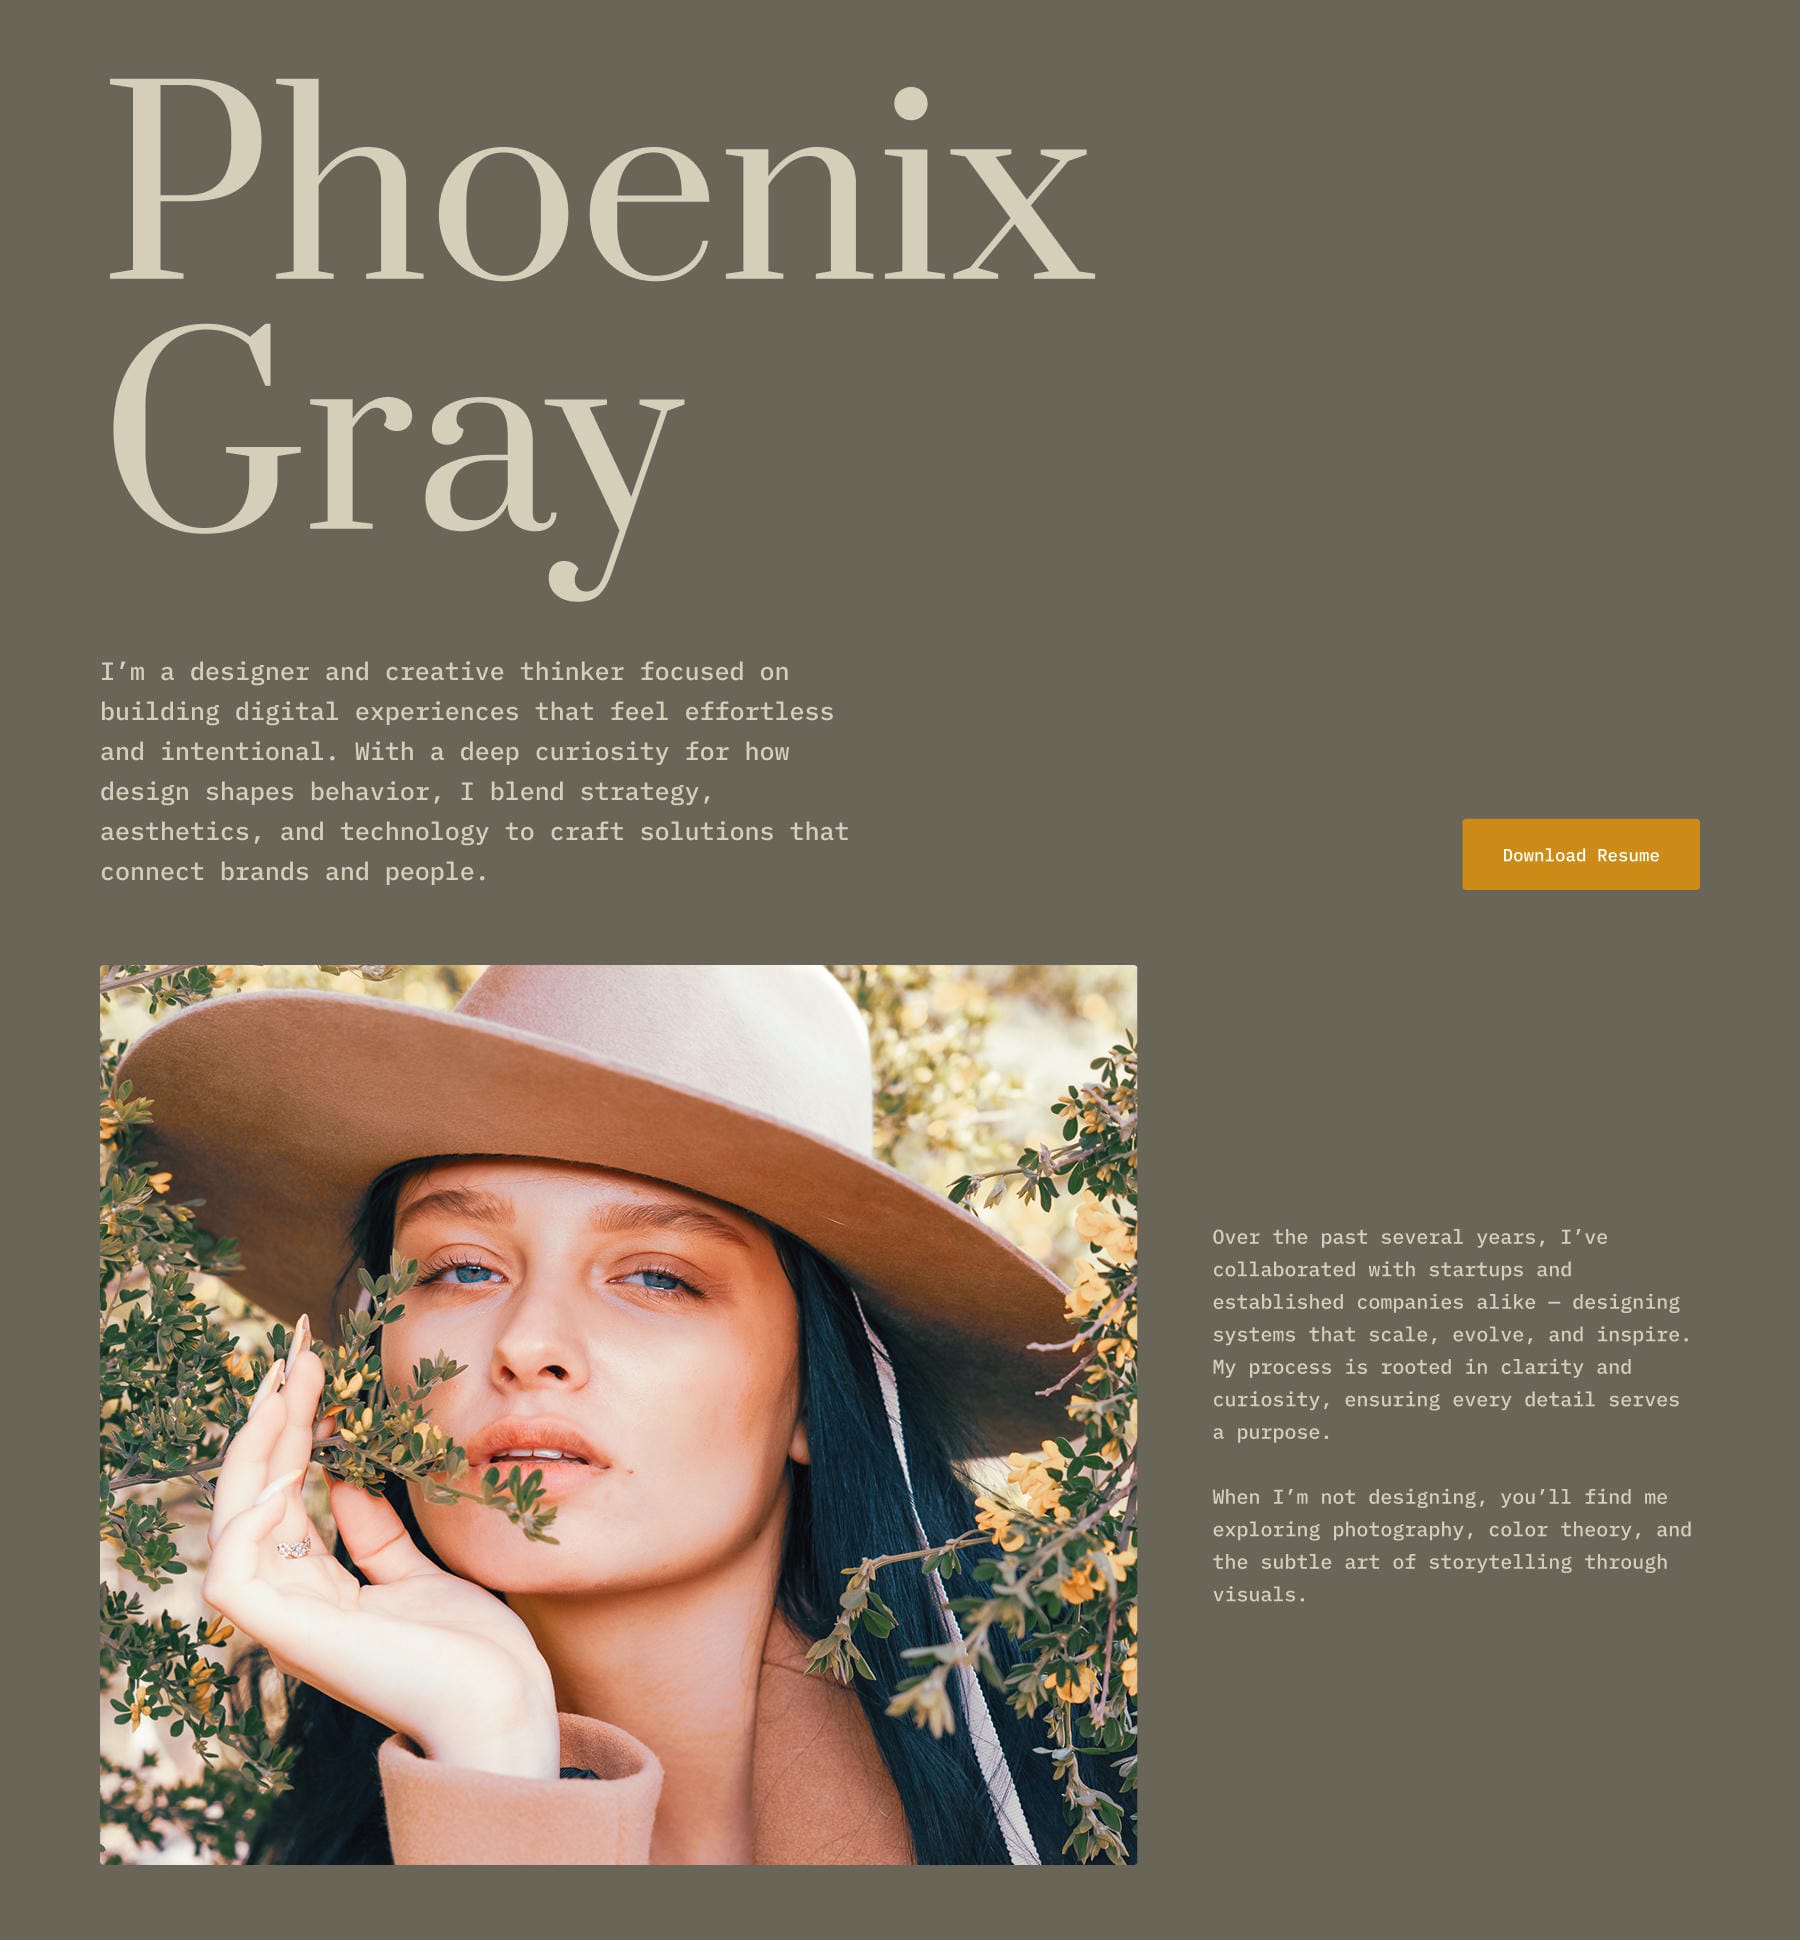
After
Global Customizer Changes
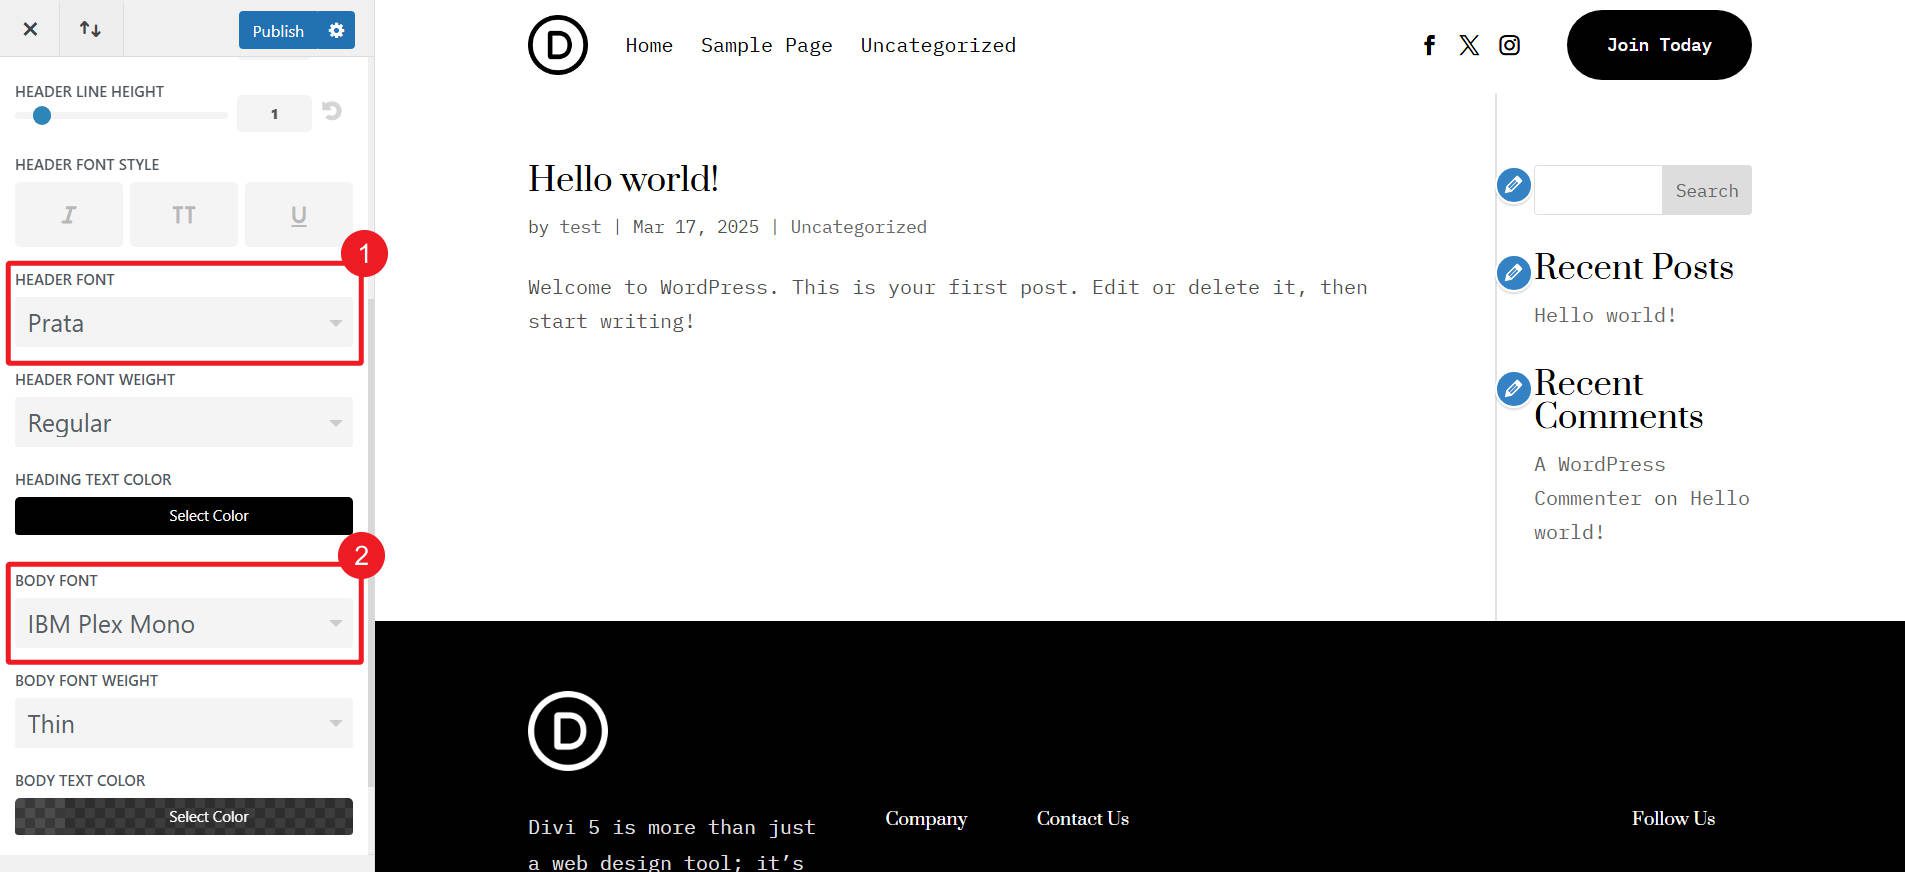
Open Divi > Customizer and navigate to General Settings > Typography. Change the Heading Text Font to Prata. Change the Body Text Font to IBM Plex Mono.
This is easily done via the Design Variable Manager
Go to General Settings > Layout Settings and change the Primary Color to #F4AA2C. Also, set the Website Content Width to 1280px.
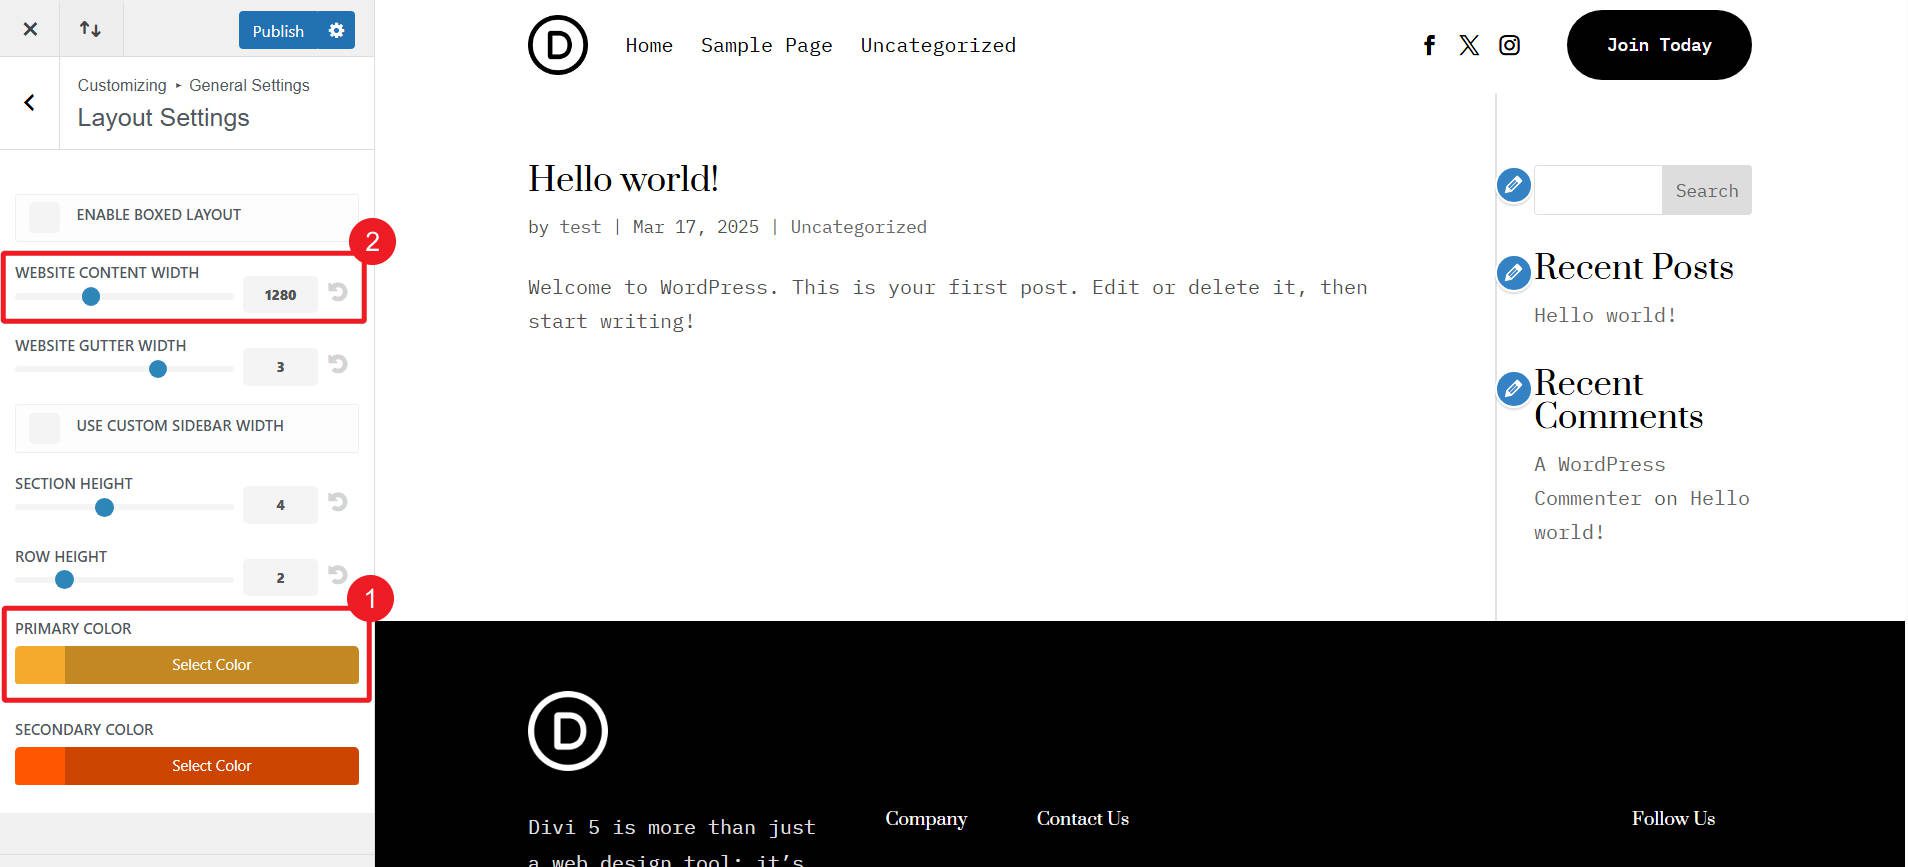
The Primary color is easily edited via the Design Variable Manager, while the Website Content Width can easily be edited in Divi 5 by changing the default Preset for Rows and adjusting its width setting.
Publish all Customizer changes.
Design Variable Manager Changes
Once the About Us layout is added to the page, open the Design Variable Manager from the Persistent Left Sidebar. Make these changes:
Locate Heading Text Color – Light and Body Text Color – Light in the Color Variables section. Change their color value to #D6CEBB.
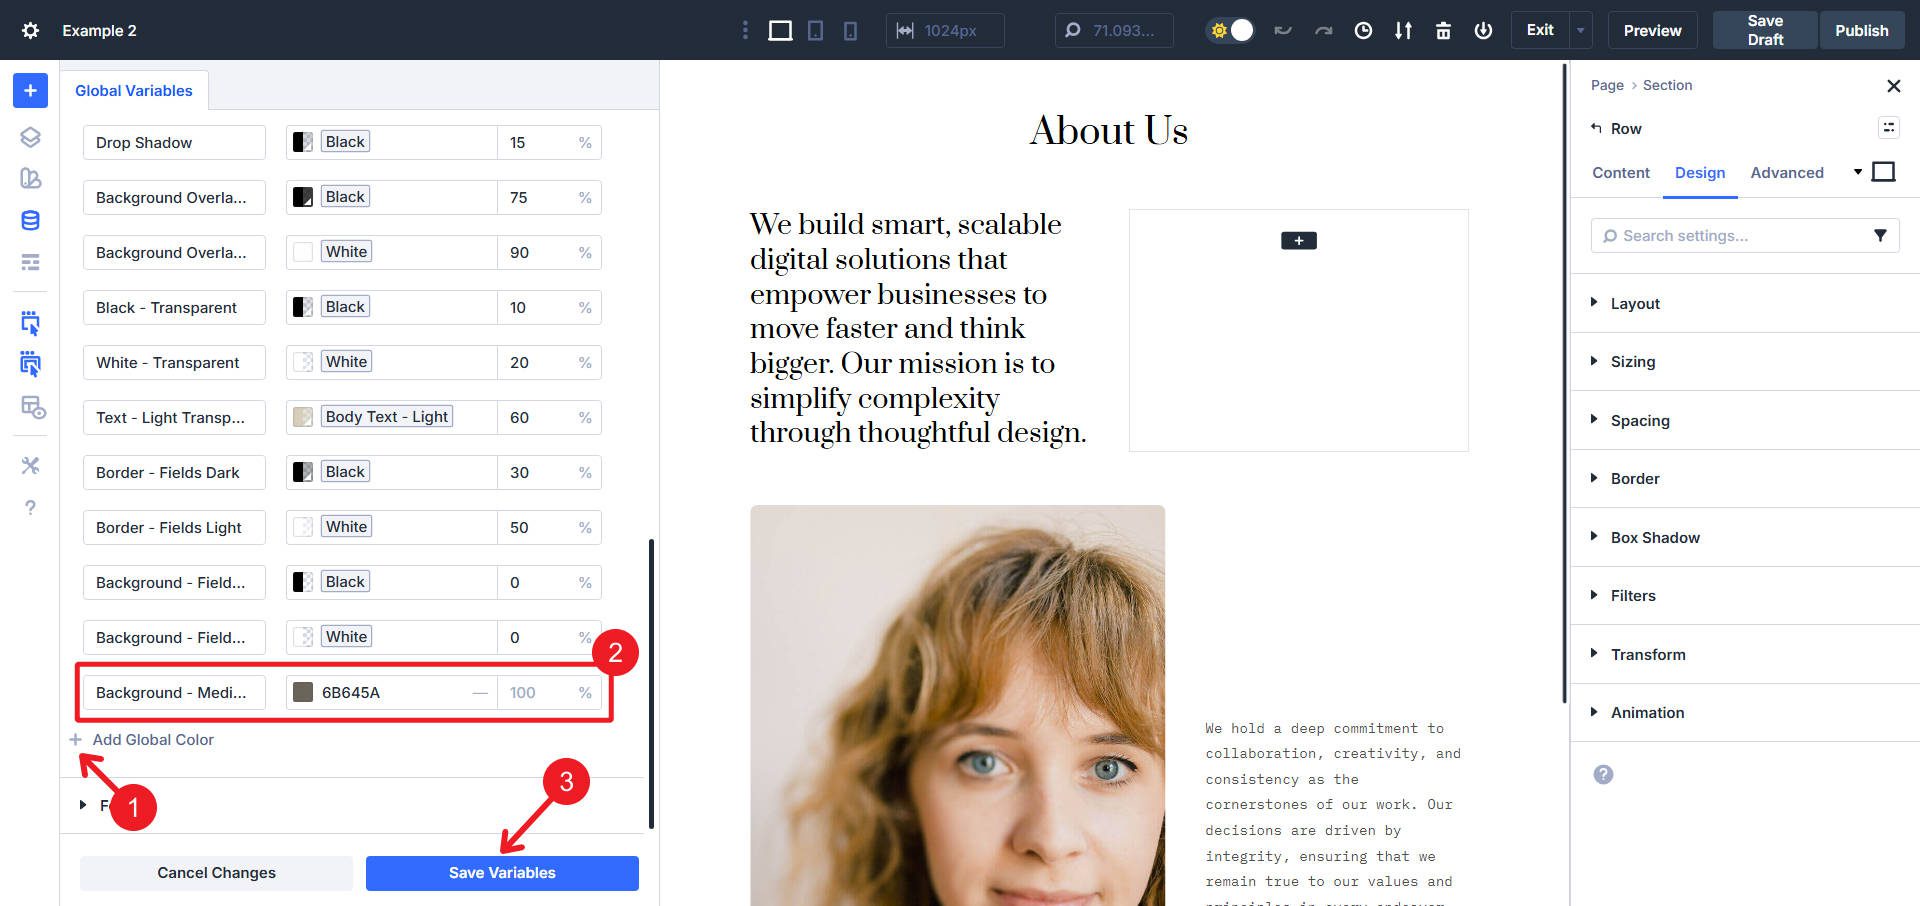
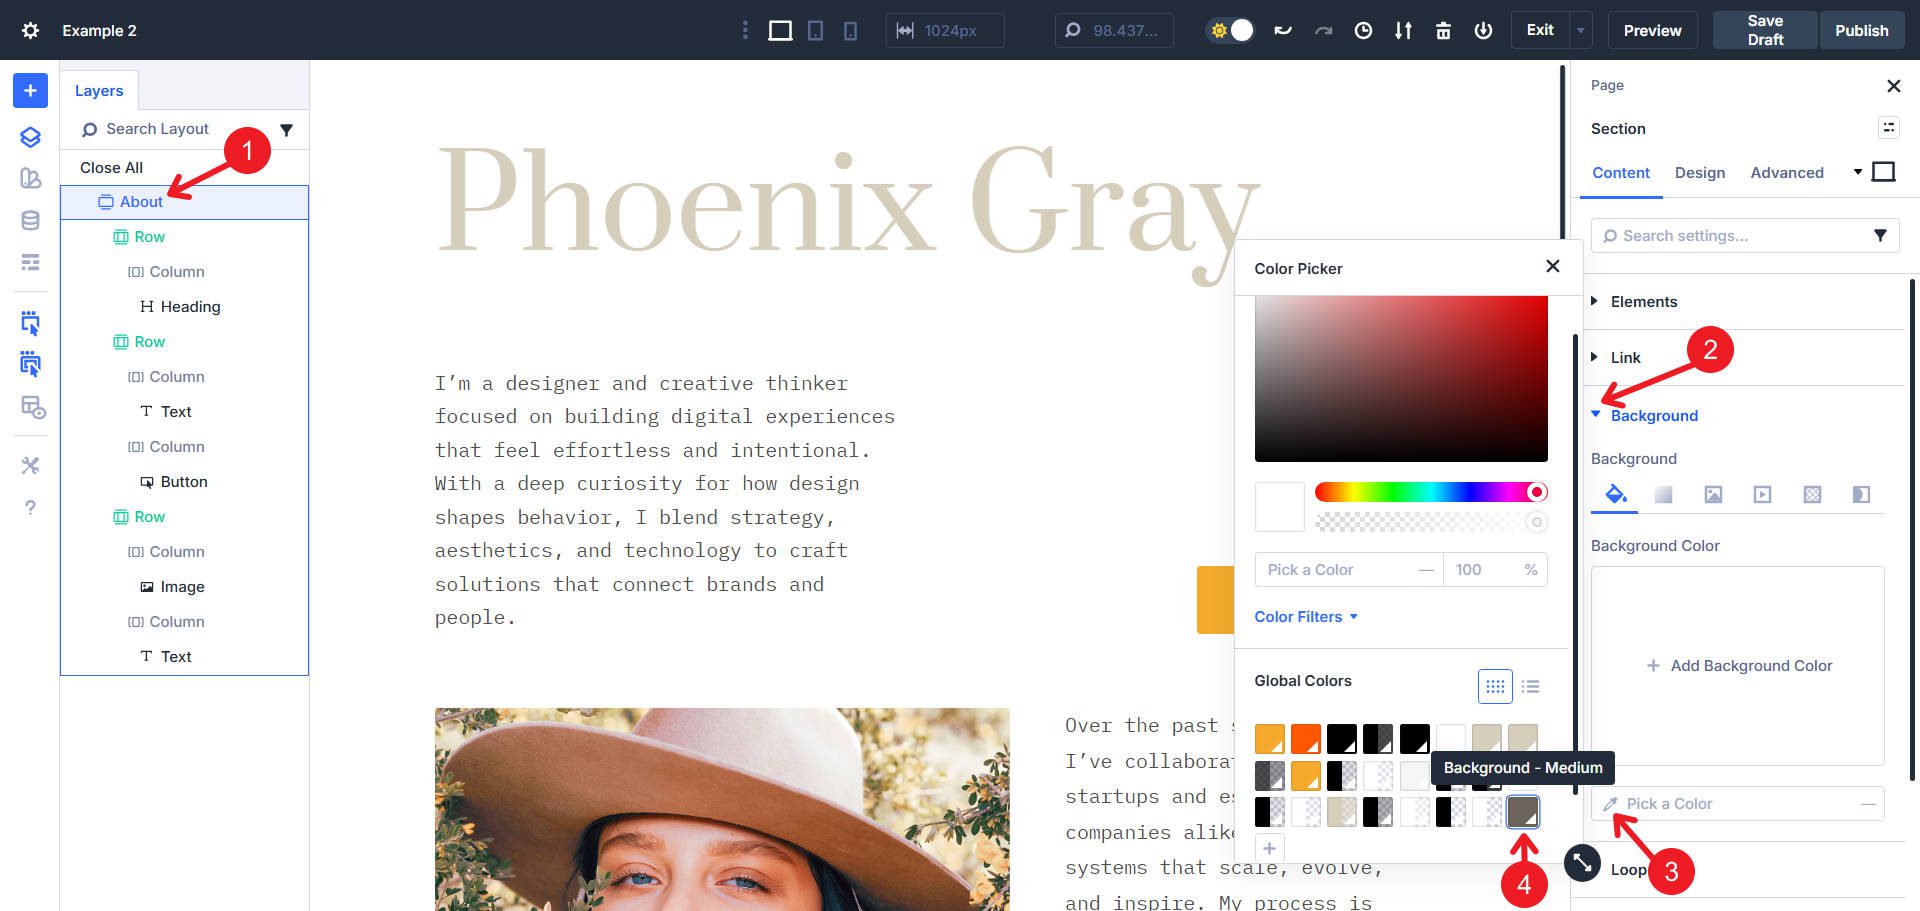
Then, Add Global Color in the Color Variables section. Name it Background – Medium and set the value to #6B645A. Click Save.
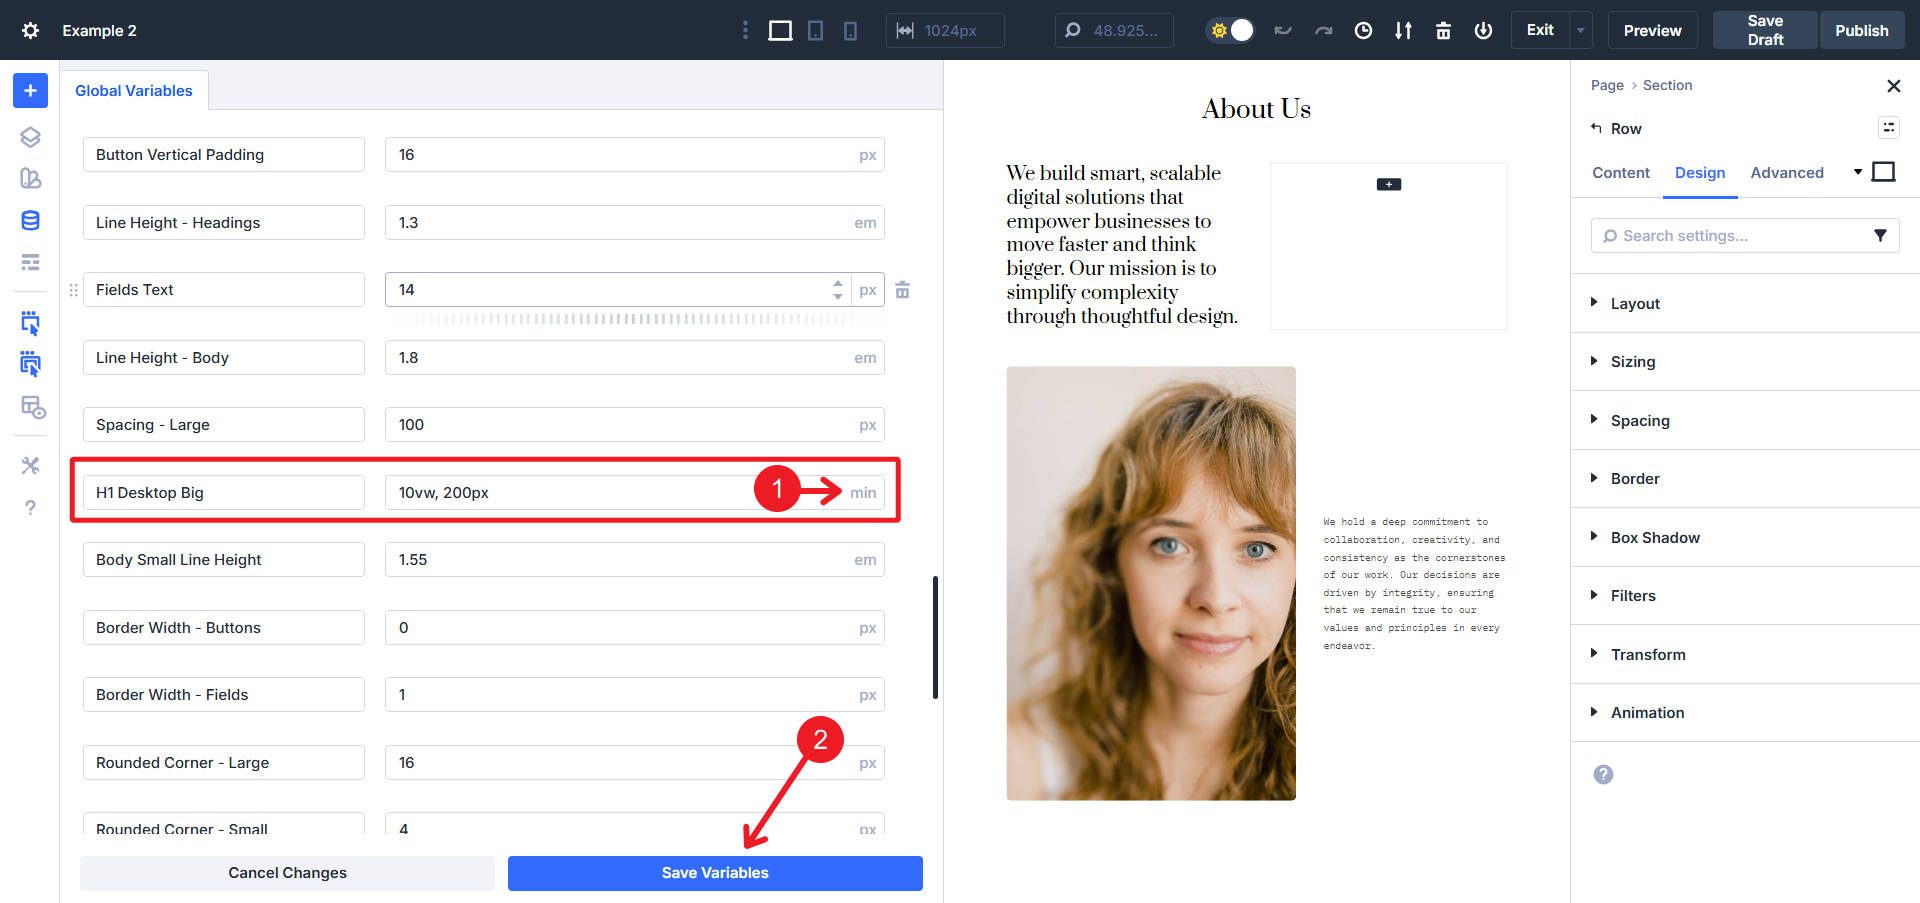
Navigate to Number Variables and change H1 Desktop Big to min(10vw, 200px).
Then, change Rounded Corners – Buttons and Rounded Corners – Regular to 3px.
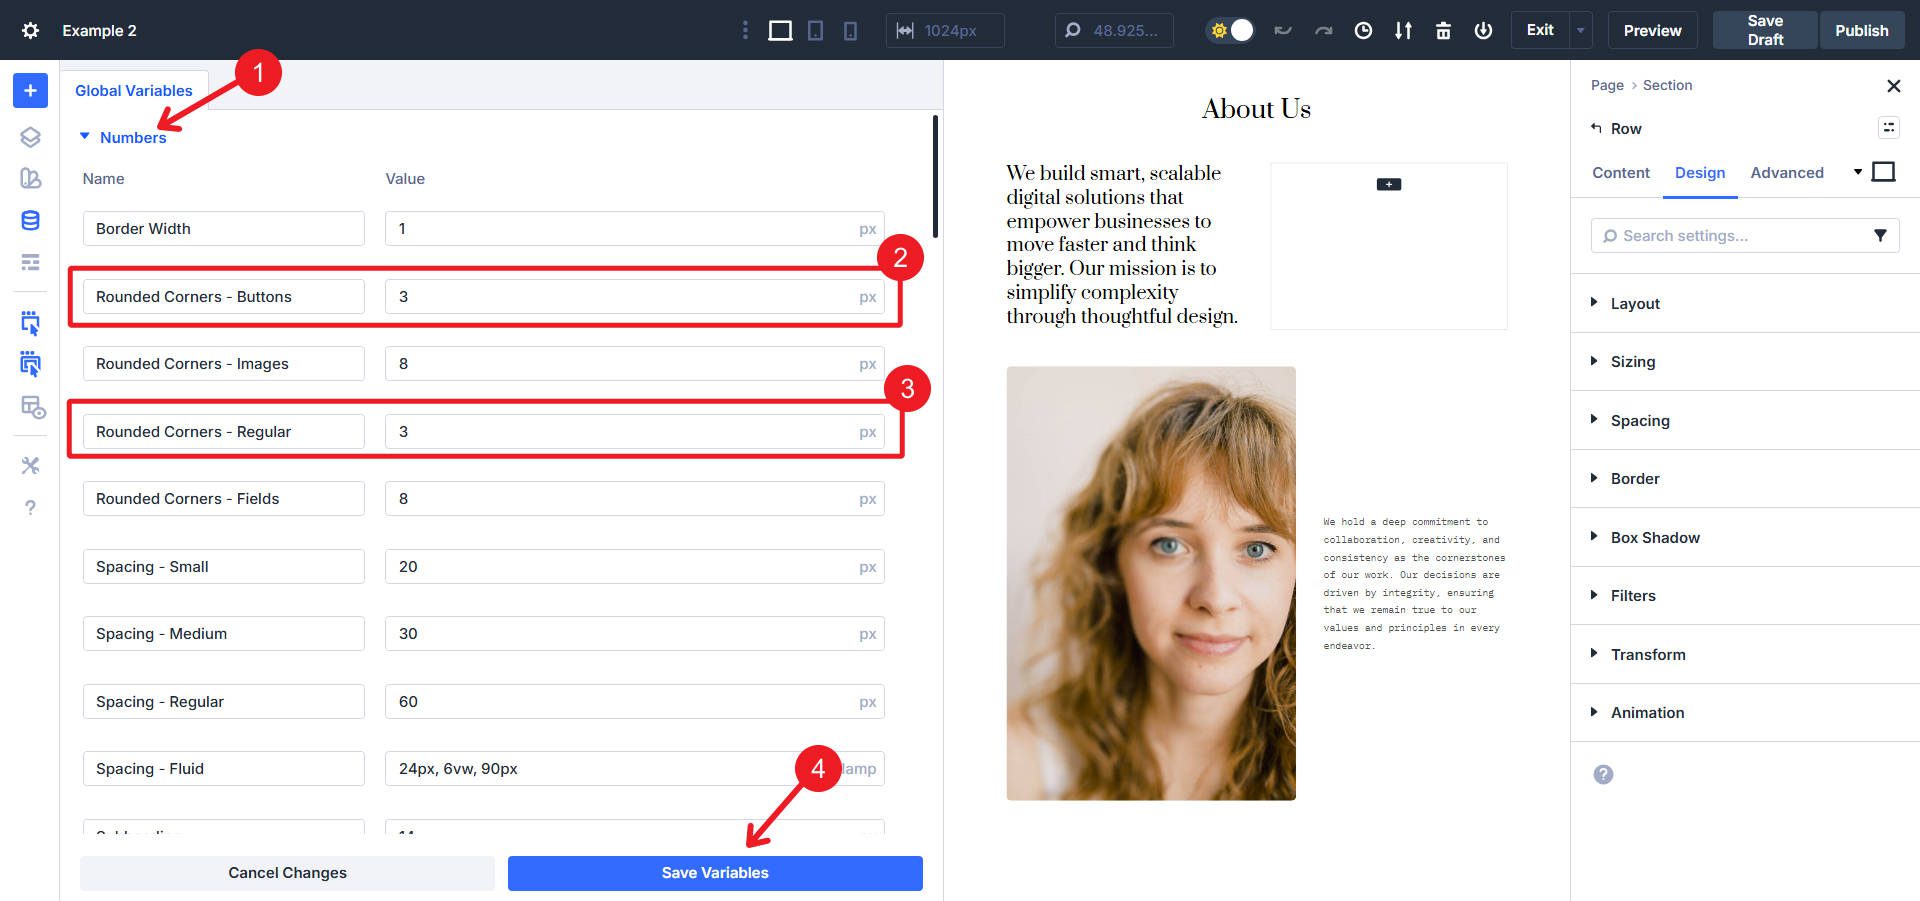
Make sure to Save Variables.
Structural and Design Changes
The Heading Module that says “We build smart…” needs to be swapped with a Text Module. Add a Text Module under it and delete the Heading Module. While you are at that, also change the text with the new personal brand messaging across all Heading and Text Modules.
For the Image Module, replace the image with a different one that matches the color scheme. A square image works well here (or a landscape).
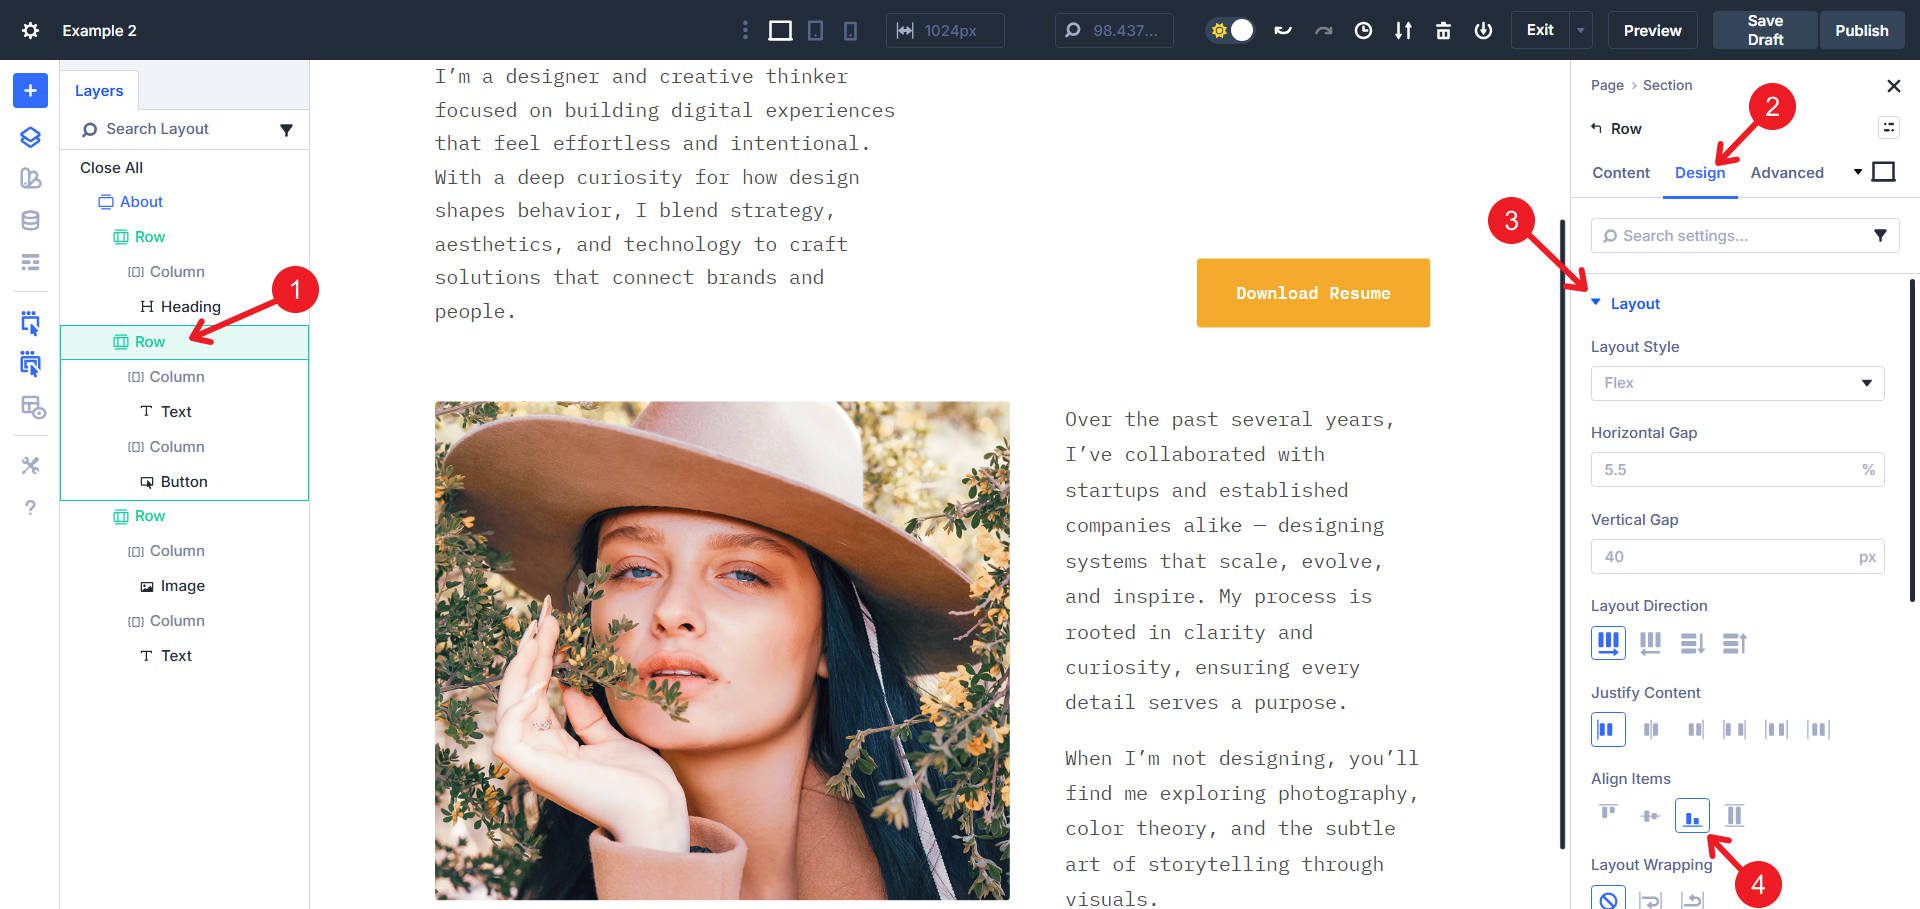
Next, we need to add the missing Button Module in the empty right column of Inner Row two. Give it the Element Preset Filled – Primary. Update the button text to Download Resume and enable Right alignment for the button.
Click on the second Inner Row itself and go into Design > Layout > Align Items and set it to End.
Click on the main heading module and set the Element Preset to Heading 1 Big and remove the Heading 2 Preset. Then, go to Design > Heading Text and set the text alignment to ‘Left’. Lastly, in the Text Color field, select Heading Text – Light from the color variable list.
Now for some color adjustments. Click on the About section and set its Background color to the variable Background – Medium.
For both Text Modules, click on their settings and navigate to Design > Text > OG Preset dropdown, then select Light Text.
Click on the Inner Row containing the first Text Module. In the Structure Template picker, select the 2/3 – 1/3 structure.
And that’s a wrap for this transformation. You saw how the Design Variables were already included in many of the Presets, making changes very easy.
Tech to Healthcare Hero Section
This transformation takes Hero Section #5 from the Sections library from a bold corporate tech layout to a clean healthcare section.
Before
The transformation requires ~23 steps across WordPress Customizer, Design Variable Manager, and extensive layout restructuring. Implementation time: approximately 15-18 minutes.
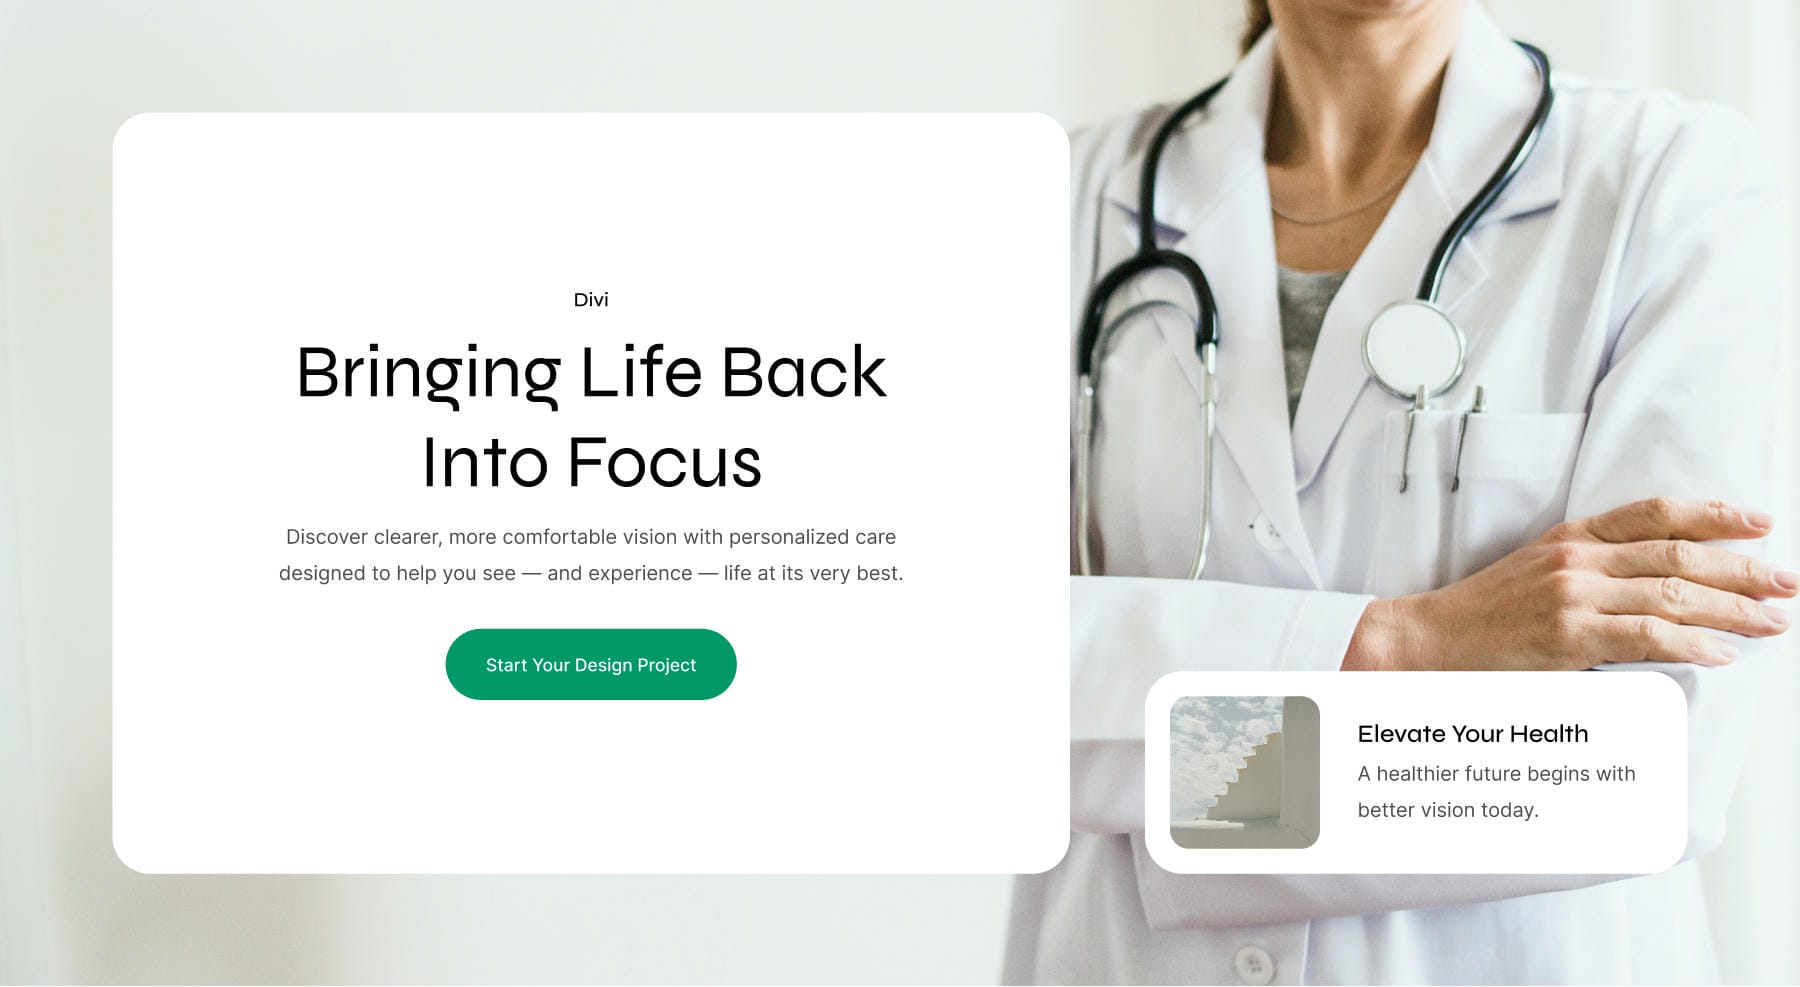
After
Global Customizer Changes
Open the Divi Theme Customizer and navigate to General Settings > Typography. Change the Heading Text Font to Syne.
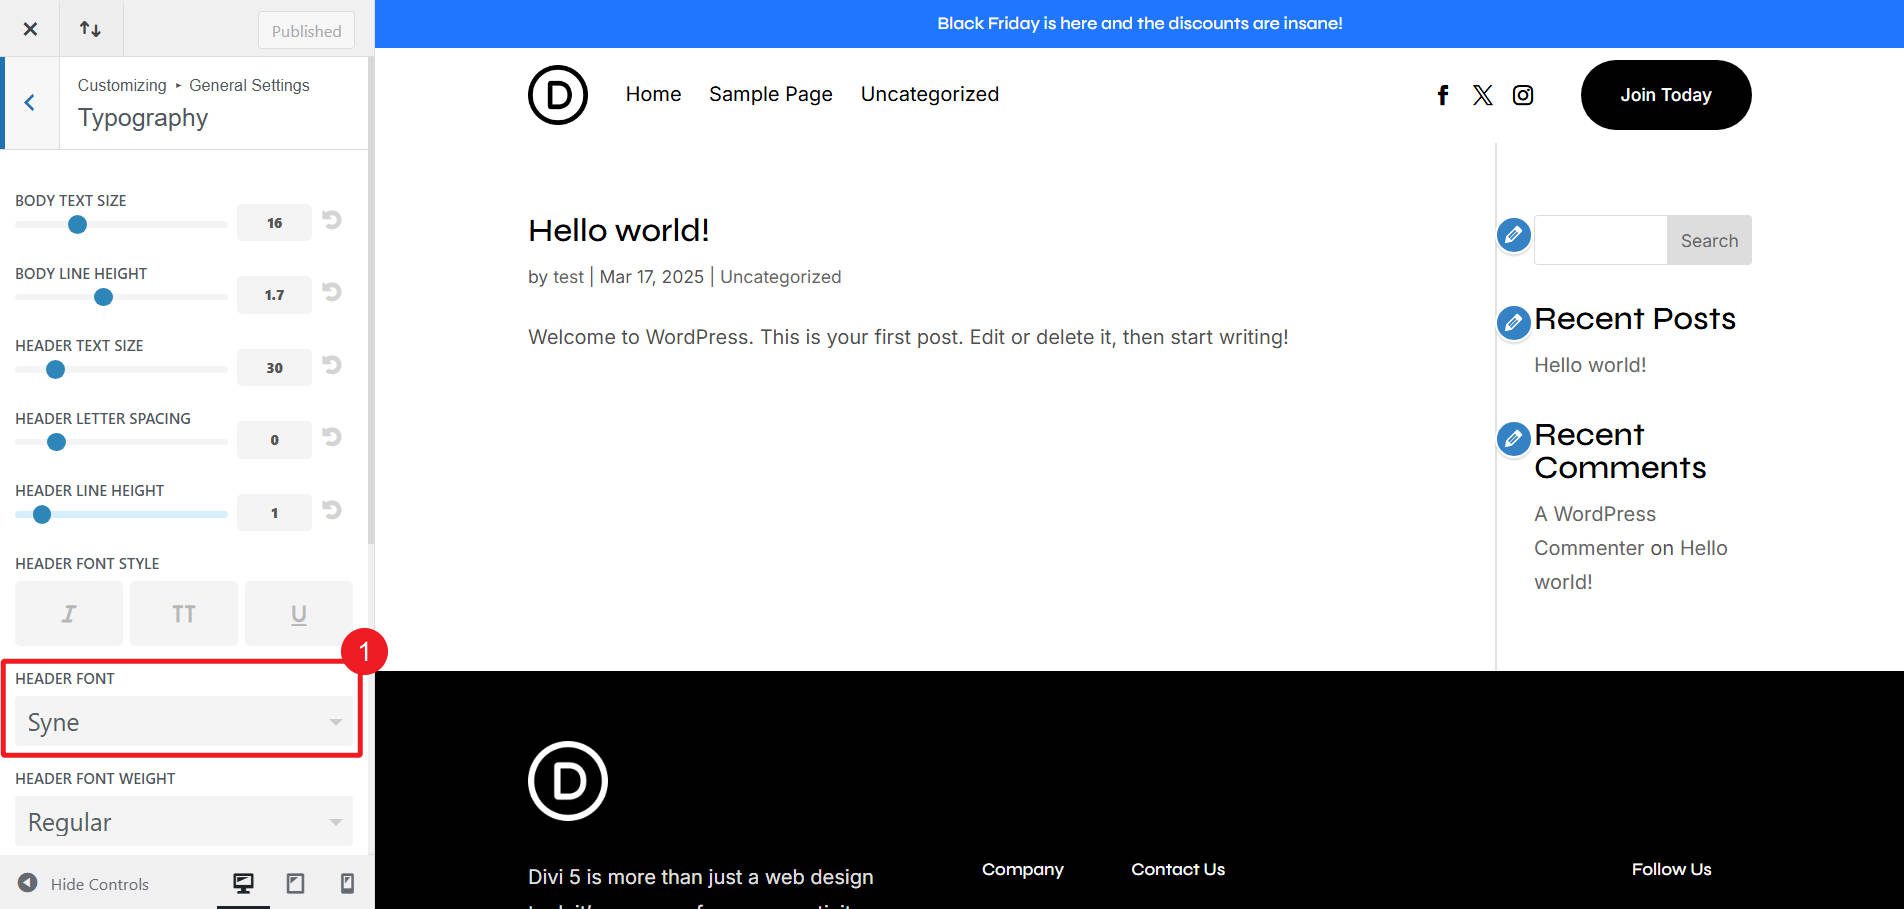
This is also easily done inside the Visual Builder in the Design Variable Manager under Fonts
Go to the General Settings > Layout Settings and change the Primary Color to #00986A.
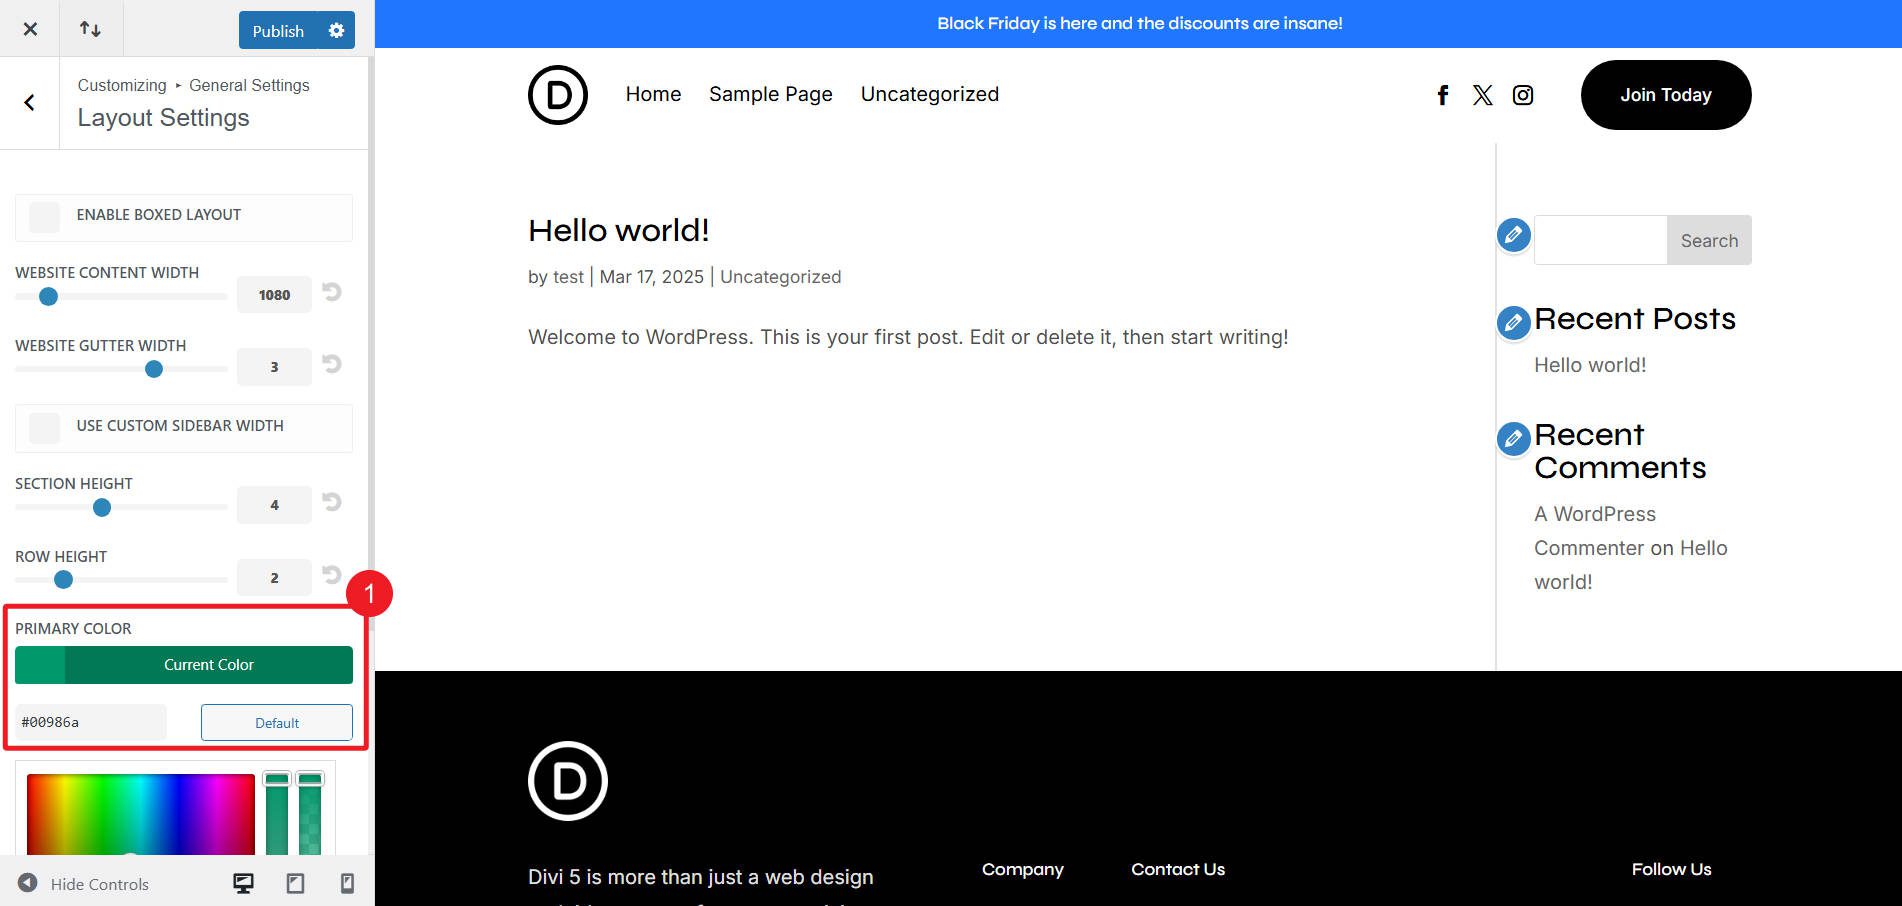
This is also easily done inside the Visual Builder in the Design Variable Manager under Colors
Then, publish the Customizer changes.
Structural and Design Changes
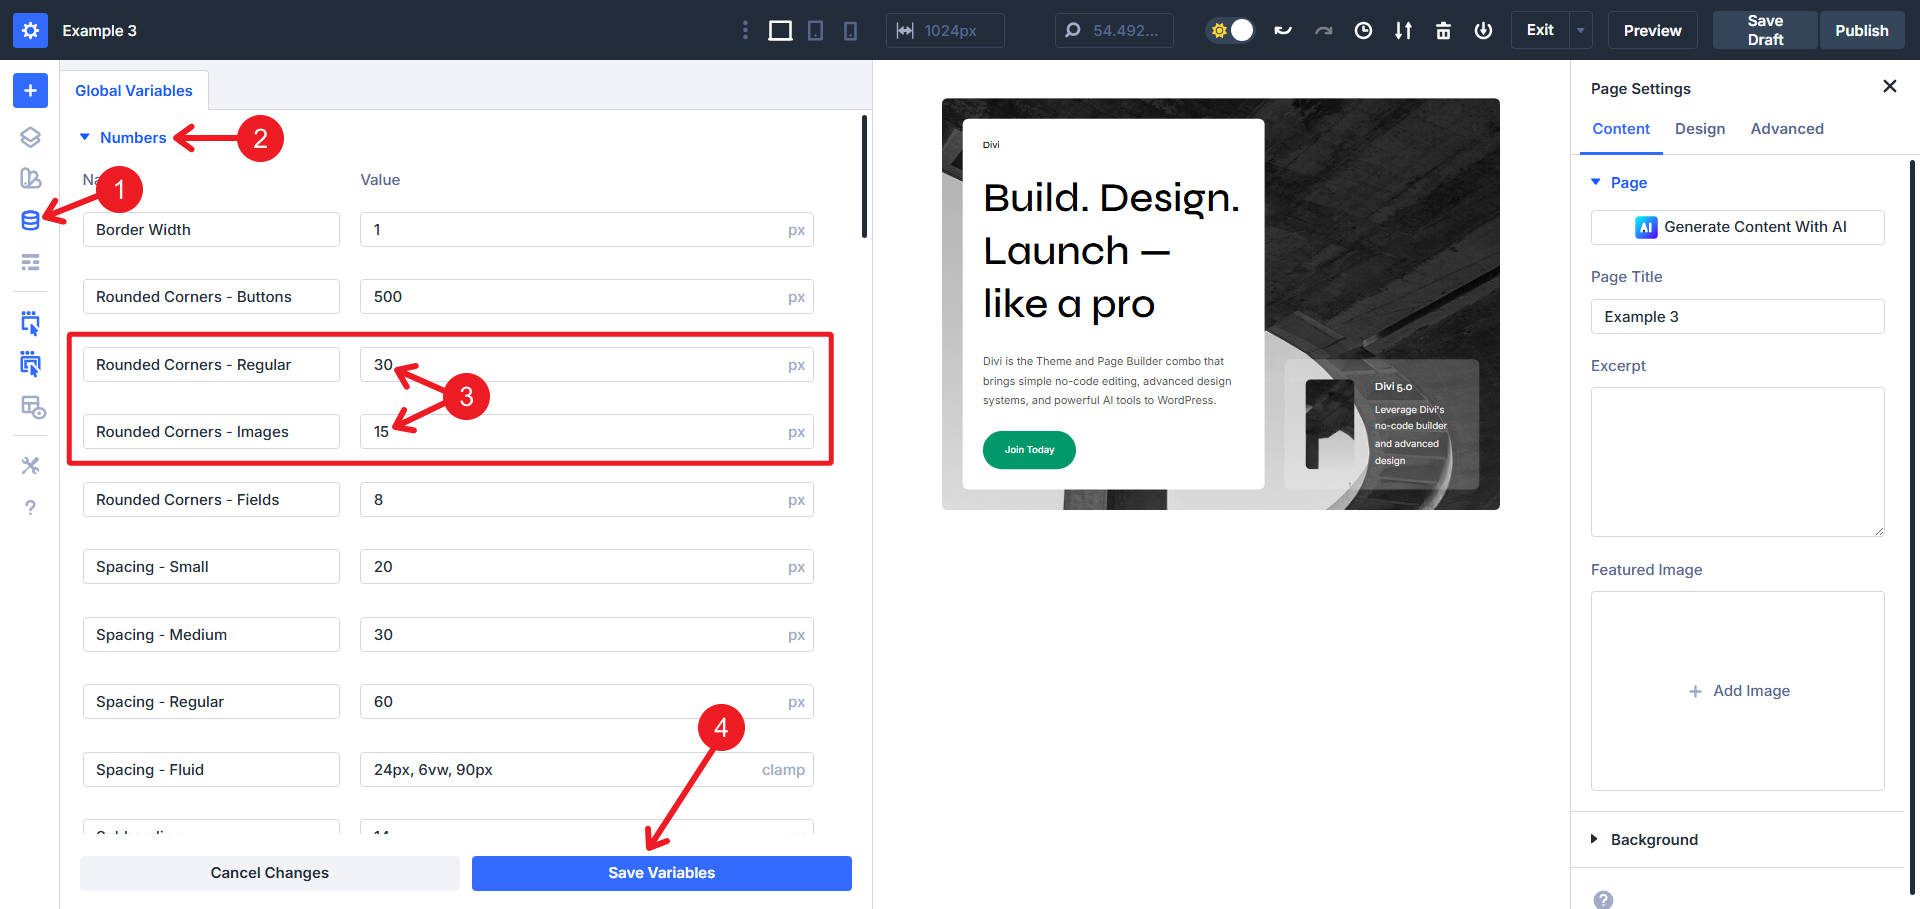
After adding the layout to a new page, open the Design Variable Manager. Navigate to Number Variables and locate Rounded Corners – Regular and change it to 30px. While there, change Rounded Corners – Images to 15px.
Click on the left column. In Design > Spacing, change the preset from “Padding – Medium” to “Padding – Fluid“.
You may need to make this change within the ‘Contained – Light’ Element Preset (remember that you can now nest original presets in element presets).
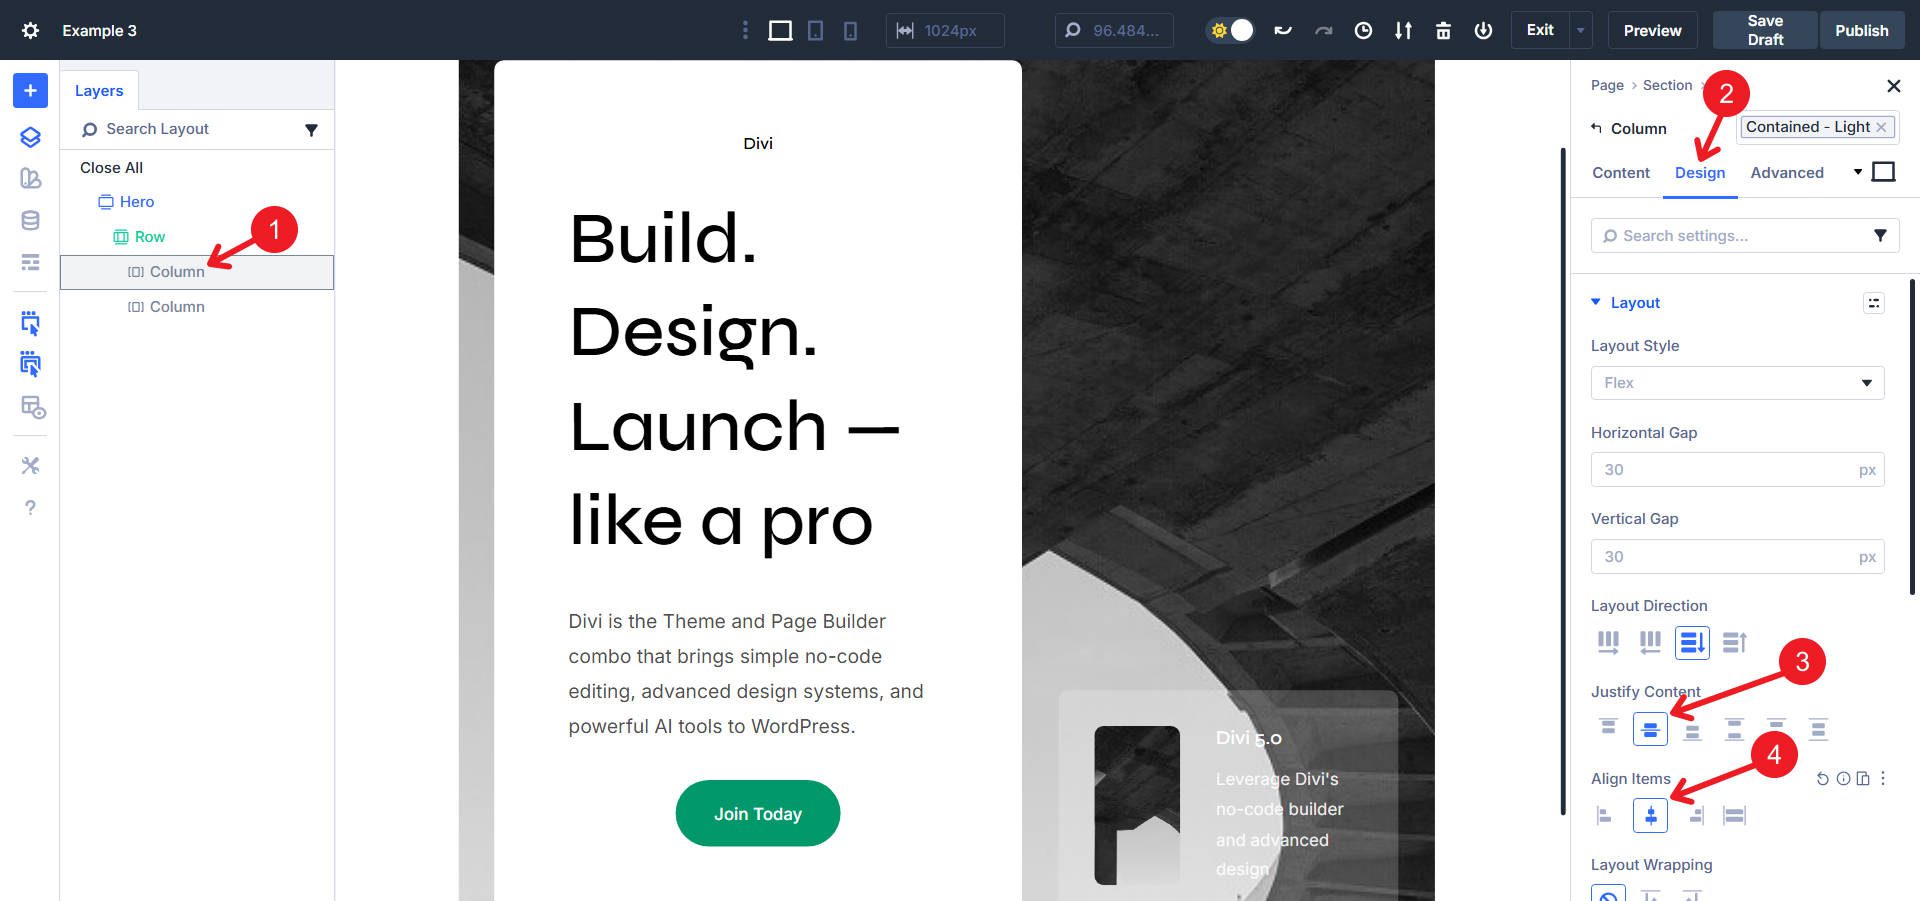
In Design > Layout, set “Justify Content” to Center and “Align Items” to Center.
Click the Add New Module icon in the left column, select the Group Module, and drag all existing elements into this new Group. In the Group’s Layout options, set Align Items to Center. While in the Group settings, go to Sizing and set max width to 510px
Set the Text Alignment to Center for all Text and heading modules within the Group.
In the Right column, we will reset the Heading Text Option Group on the Heading Module and reset the Background on the Inner Row. We will also remove the Light Text Preset from the Text Module. This will get our background and text colors where we need them.
Click on the main Row and Reset all Background styles, and add a new medical Background Image.
Then, in the same Row, remove the Contained – Light Element Preset. In Design > Sizing, change Width to 100% and Max Width to none. Also, set the Minimum Height to 80vh and enable Grow to Fill. In Design > Spacing, add the Fluid – Spacing Preset.
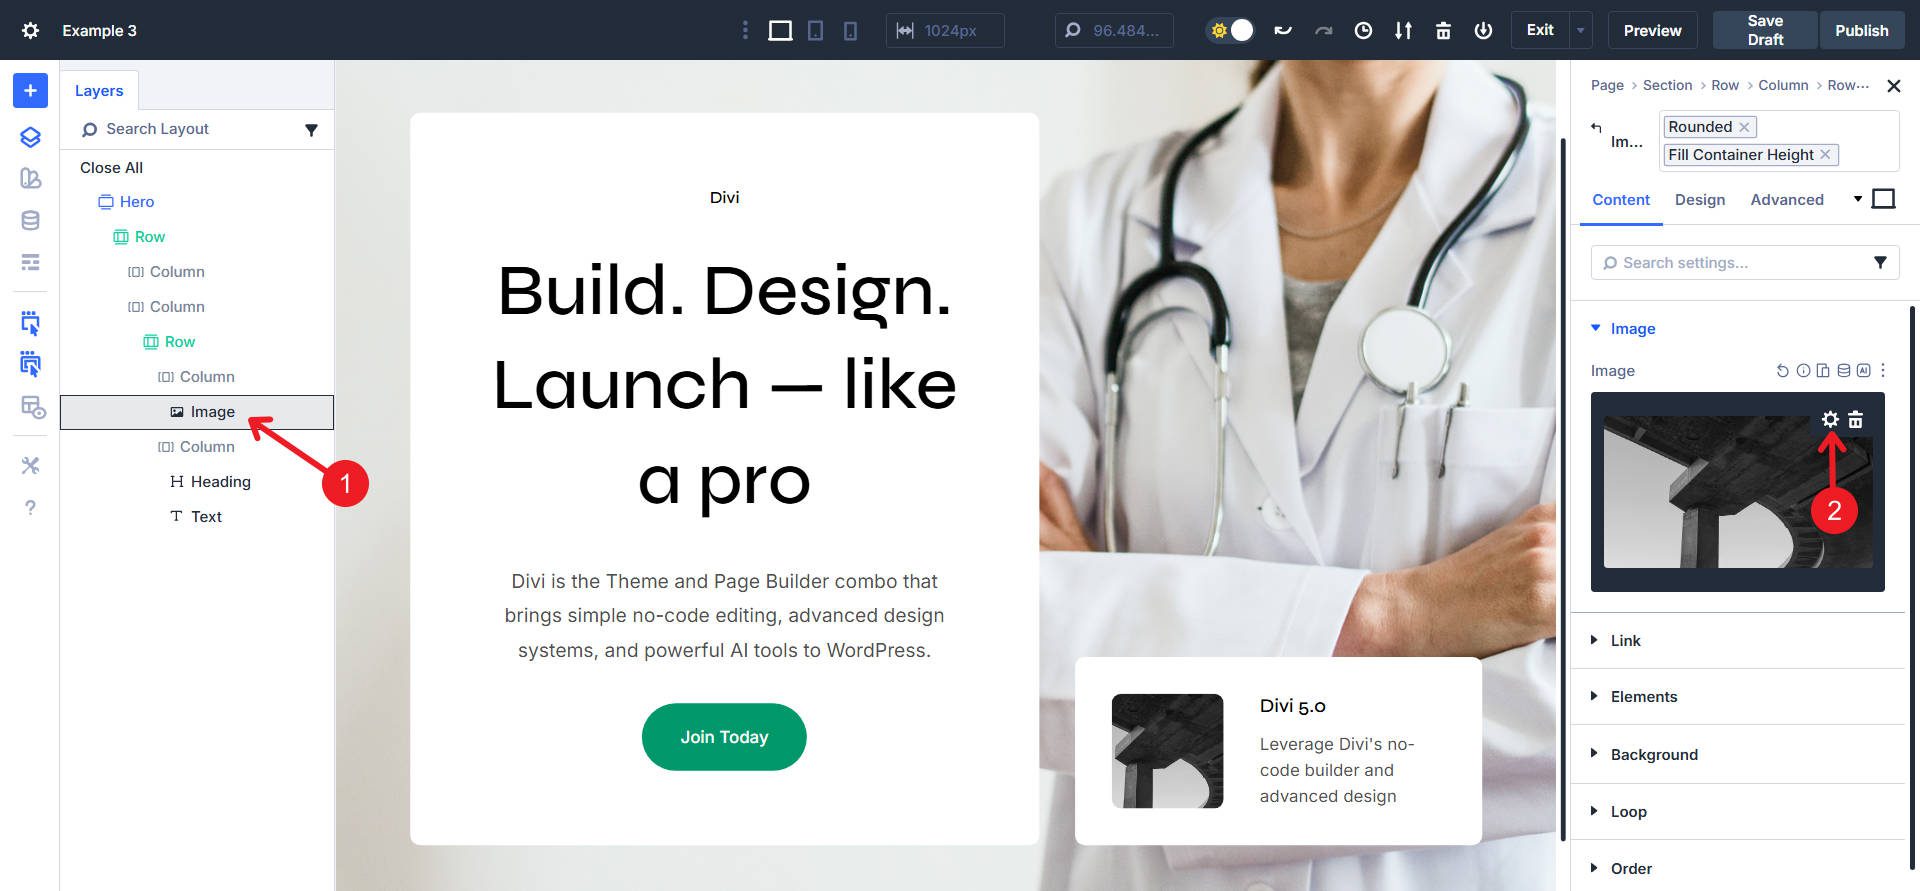
Click on the small image module. In the Content tab, click Replace Image and select the new healthcare thumbnail.
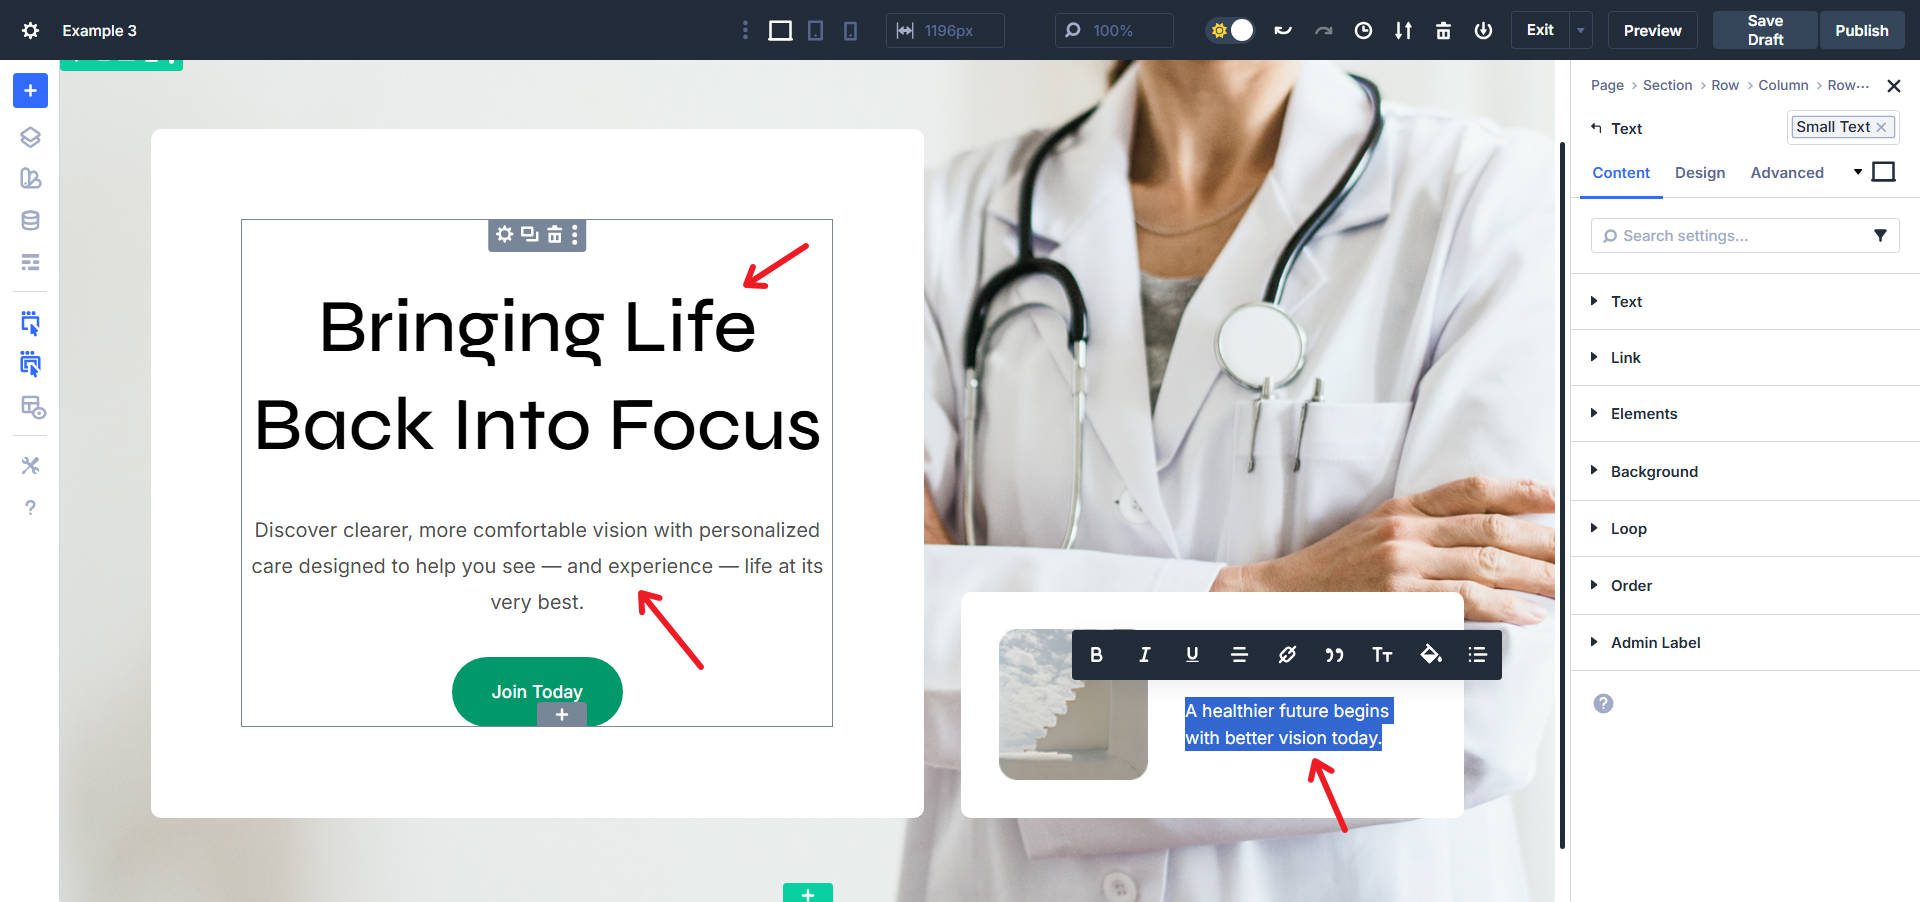
Click on each text module. Update the content to reflect healthcare messaging.
And now we are done with this CTA Hero transformation!
Understanding Design System Efficiency
The transformations above share a standard order. Global variables do a lot for us right at the beginning. They often made changes inside Presets, resulting in numerous cascading updates in short order. In some instances, we changed out Presets or simply removed one, but that was still incredibly fast. Lastly, we often applied changes to particular containers and elements in the Design > Layout/Sizing/Spacing tabs.
Editing with Design Variables first, then Presets, and finally making Element-level changes ensures we are being the most efficient (in terms of both our time and the CSS applied to our designs). Starting from a Design System like this makes it easily adaptable and gives you a lot to work with right off the bat.
If you had to set up all these Design Variables and Presets and also build all these Section Layouts, you’d have sunk dozens of hours up front. However, with this system, you benefit from everything working together from the start.
Get The Exclusive Design System Before It’s Gone!
The Divi 5 Design System eliminates having to choose between speed and quality. These transformations prove that comprehensive rebranding doesn’t require comprehensive rebuilding. When your design decisions flow through a single source of truth, global variables controlling presets controlling modules, you change everything by changing very little.
Tomorrow, this Cyber Monday offer expires. The question isn’t whether the Design System delivers efficiency — these examples provide that evidence. The question is whether you’ll have access to this system when your next project deadline arrives. Every transformation you just saw, every efficiency gain demonstrated here, every hour saved becomes available the moment you purchase any of these qualifying products:
- Divi Pro (80% Off) — The complete Divi ecosystem, including Divi 5, Divi AI, Divi Cloud, Divi VIP, Divi Teams, Divi Dash, all DonDivi plugins, and a $50 Divi Marketplace credit. Available in lifetime and yearly options.
- Membership Repackaging (Up to 80% Off) — Existing members can upgrade to Divi Pro to reduce subscription costs while benefiting from products like Divi AI, Cloud, Teams, VIP Support, DonDivi plugins, and a $50 marketplace credit.
- Divi AI (70% Off) — AI-powered design, writing, and coding directly in Divi. Generates layouts, content, and images instantly.
- Divi Cloud (44% Off) — Cloud-sync your entire Divi Library across all sites (including this Design System!). Save and reuse layouts anywhere for faster client delivery.
- Divi Teams (44% Off) — Team collaboration with shared access, roles, and permissions. Built for agencies managing multiple clients.
- Divi VIP (44% Off) — Priority support with 30-minute response times, 24/7 availability, and 10% off all Marketplace products.
- Marketplace Bundles (70% Off) — Curated collections of Divi modules, child themes, marketing tools, ecommerce features, and blog upgrades. Five Cyber Monday-only bundles, all Divi 5-ready.
After completing a qualifying purchase, download the Design System through the Perks section in your Elegant Themes Members’ Area.
The Design System library includes hundreds of pre-built sections, all designed to work with this same variable-driven approach. Your next website rebrand takes hours, not days. But only if you act before midnight tomorrow. Get Divi Pro now while this offer still stands.


Leave A Reply