

Search Engine Optimization (SEO) is one of the most important aspects of any website. It works side by side with writing good original content and keyword research, and is crucial to rank higher in search engine results pages (SERPs). While WordPress does have some search engine friendly aspects to it, you’ll need a little help from an SEO plugin to score a higher ranking. The Yoast SEO Plugin adds that help to the WordPress editor.
In this post, we’ll give you an overview of what it is, walk you through its first-time configuration, and show you how to use it step-by-step. Let’s get started.
What Is Yoast SEO
The Yoast SEO Plugin for WordPress is an all-in-one SEO solution for your website. It provides in-depth SEO analysis, snippet previews, readability tools, and webmaster tools that walk you through configuring SEO. With more than 10 million active installs and so many tools in its arsenal, Yoast is considered one of the top WordPress SEO plugins.
You can start with the free version on WordPress.org, then upgrade to Yoast SEO Premium for $118.80 per year for one site, excluding VAT. Premium adds multiple keyphrases, a redirect manager, internal linking suggestions, social previews, and AI tools. The free version may include trial Sparks for AI; paid plans also have usage and rate limits. Yoast explains these in its AI features FAQ.
The free walkthrough below covers setup and the editor tools. Premium builds on that workflow when you need help maintaining a larger content library:
- Multiple keyphrases: Check a page against up to five keyphrases, including related terms. Synonym and word-form recognition helps the analysis account for natural wording.
- Redirect manager: When you move or delete content, Premium prompts you to redirect the old URL. Choose a relevant replacement page so visitors can continue the task they started. Yoast’s redirect manager guide covers the available redirect types.
- Internal linking suggestions: Premium suggests related pages while you write. Its orphaned content workout also helps you find posts without incoming internal links.
- AI tools: Premium can suggest SEO titles and descriptions. AI Optimize proposes edits for supported keyphrase and readability checks; review each suggestion before applying it. The Premium bulk editor can also draft metadata for several posts for you to review together.
- Social previews: Check how your chosen image, title, and description fit a sharing card before publishing. Premium’s previews accompany the Social controls covered below.
- Insights: Premium adds a prominent-words list to the reading statistics. Use it to check whether the words you repeat match the subject you intended to cover, rather than adding keywords just to improve a score.
How To Use Yoast SEO Plugin In WordPress (Step By Step)
Here is everything you need to configure Yoast SEO. We’ll cover installation, the first-time configuration, how to set up on-page SEO and give you an in-depth look at the SEO dashboard and settings.
Install And Activate The Yoast SEO Plugin
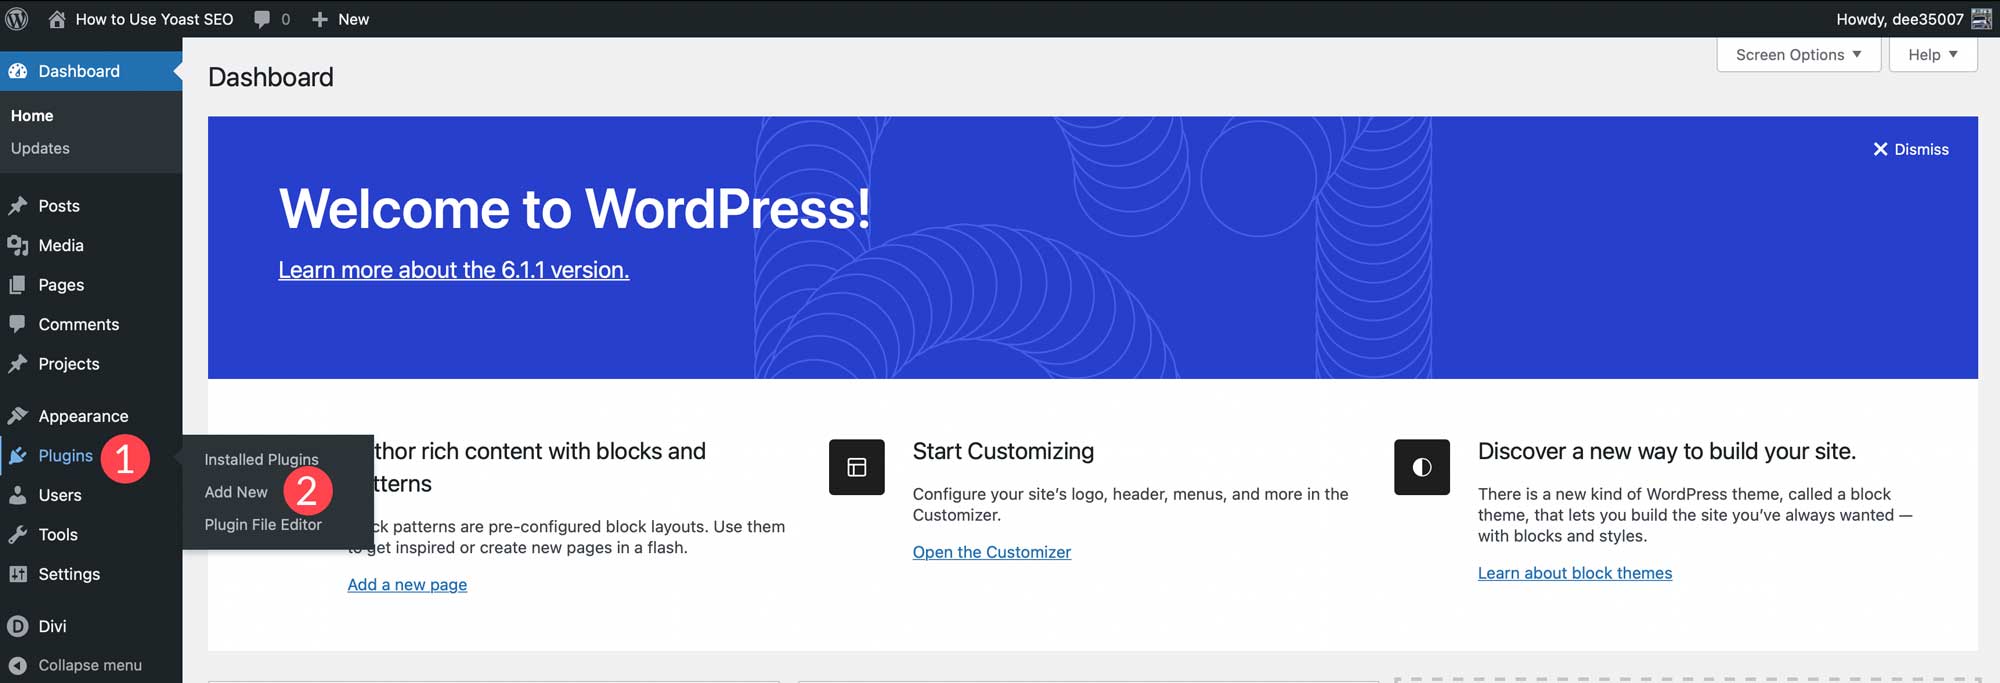
Start by logging in to your WordPress dashboard. Next, navigate to Plugins > Add New.
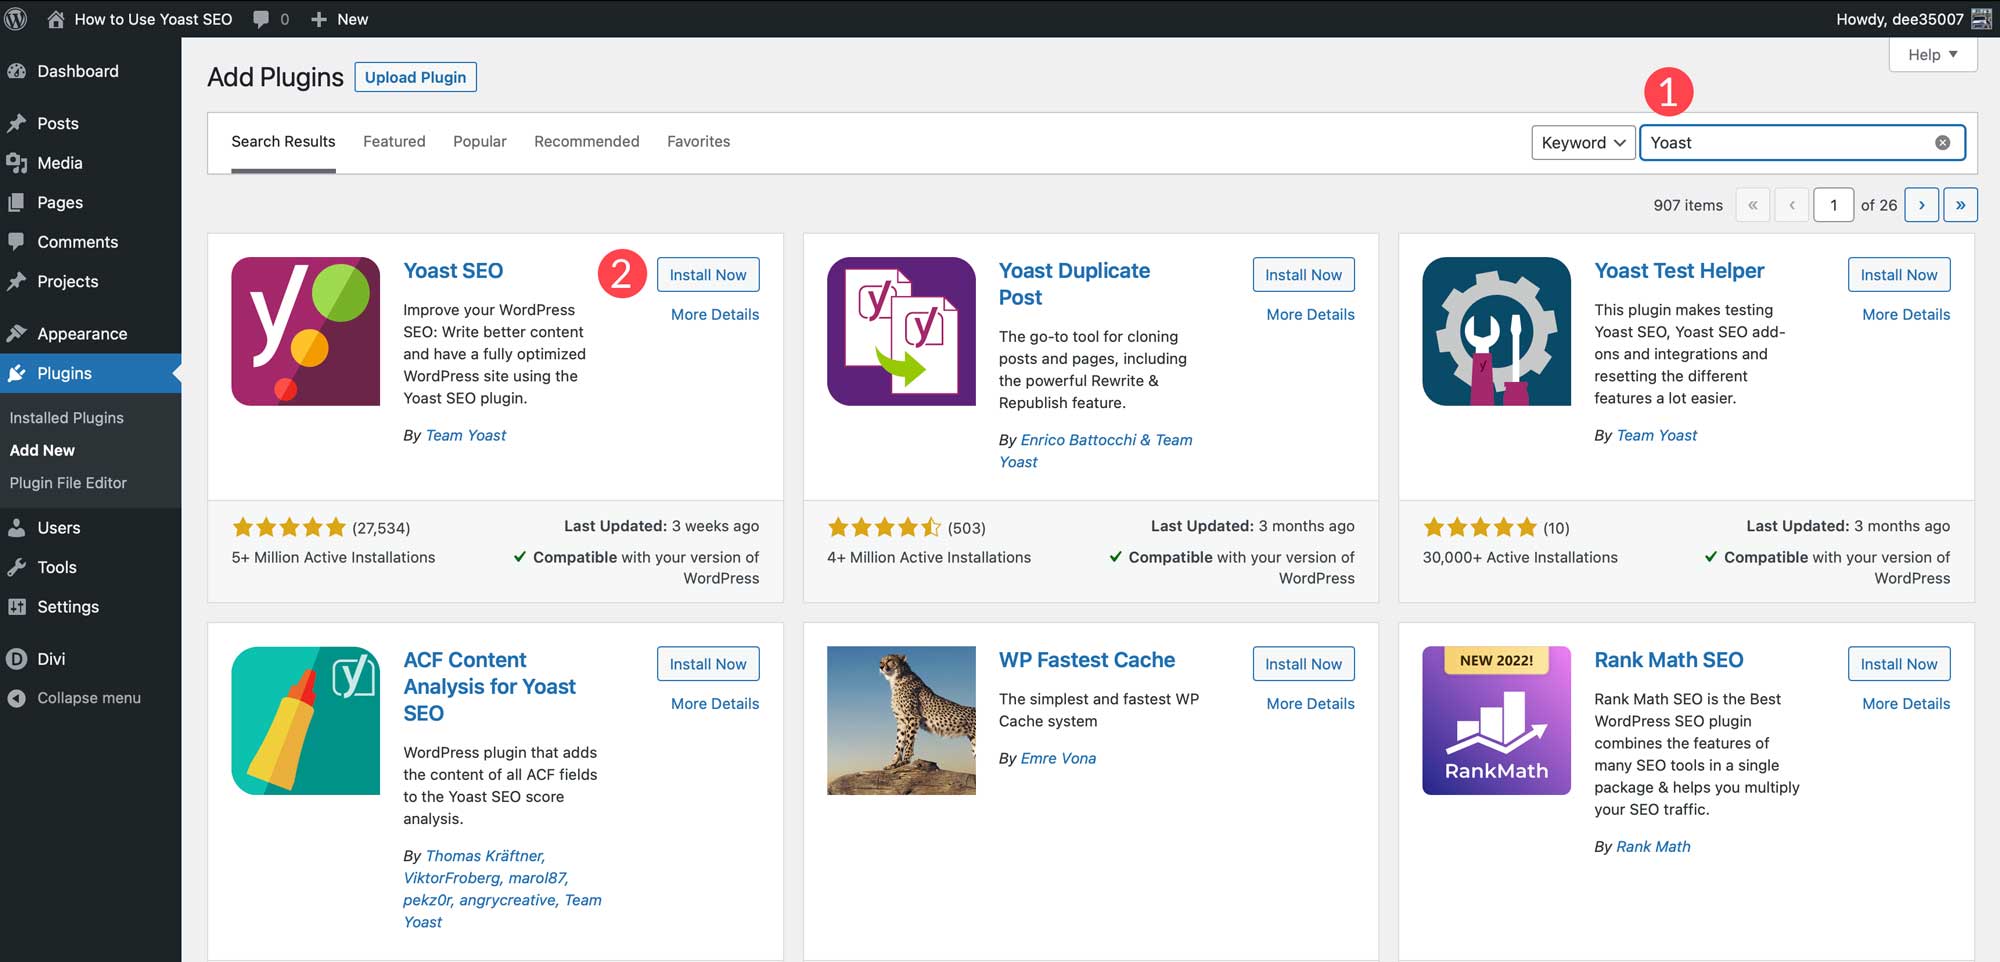
Type Yoast into the search bar. When the page refreshes, select the plugin, then click the Install Now button.
Finally, click the Activate button to activate the plugin.
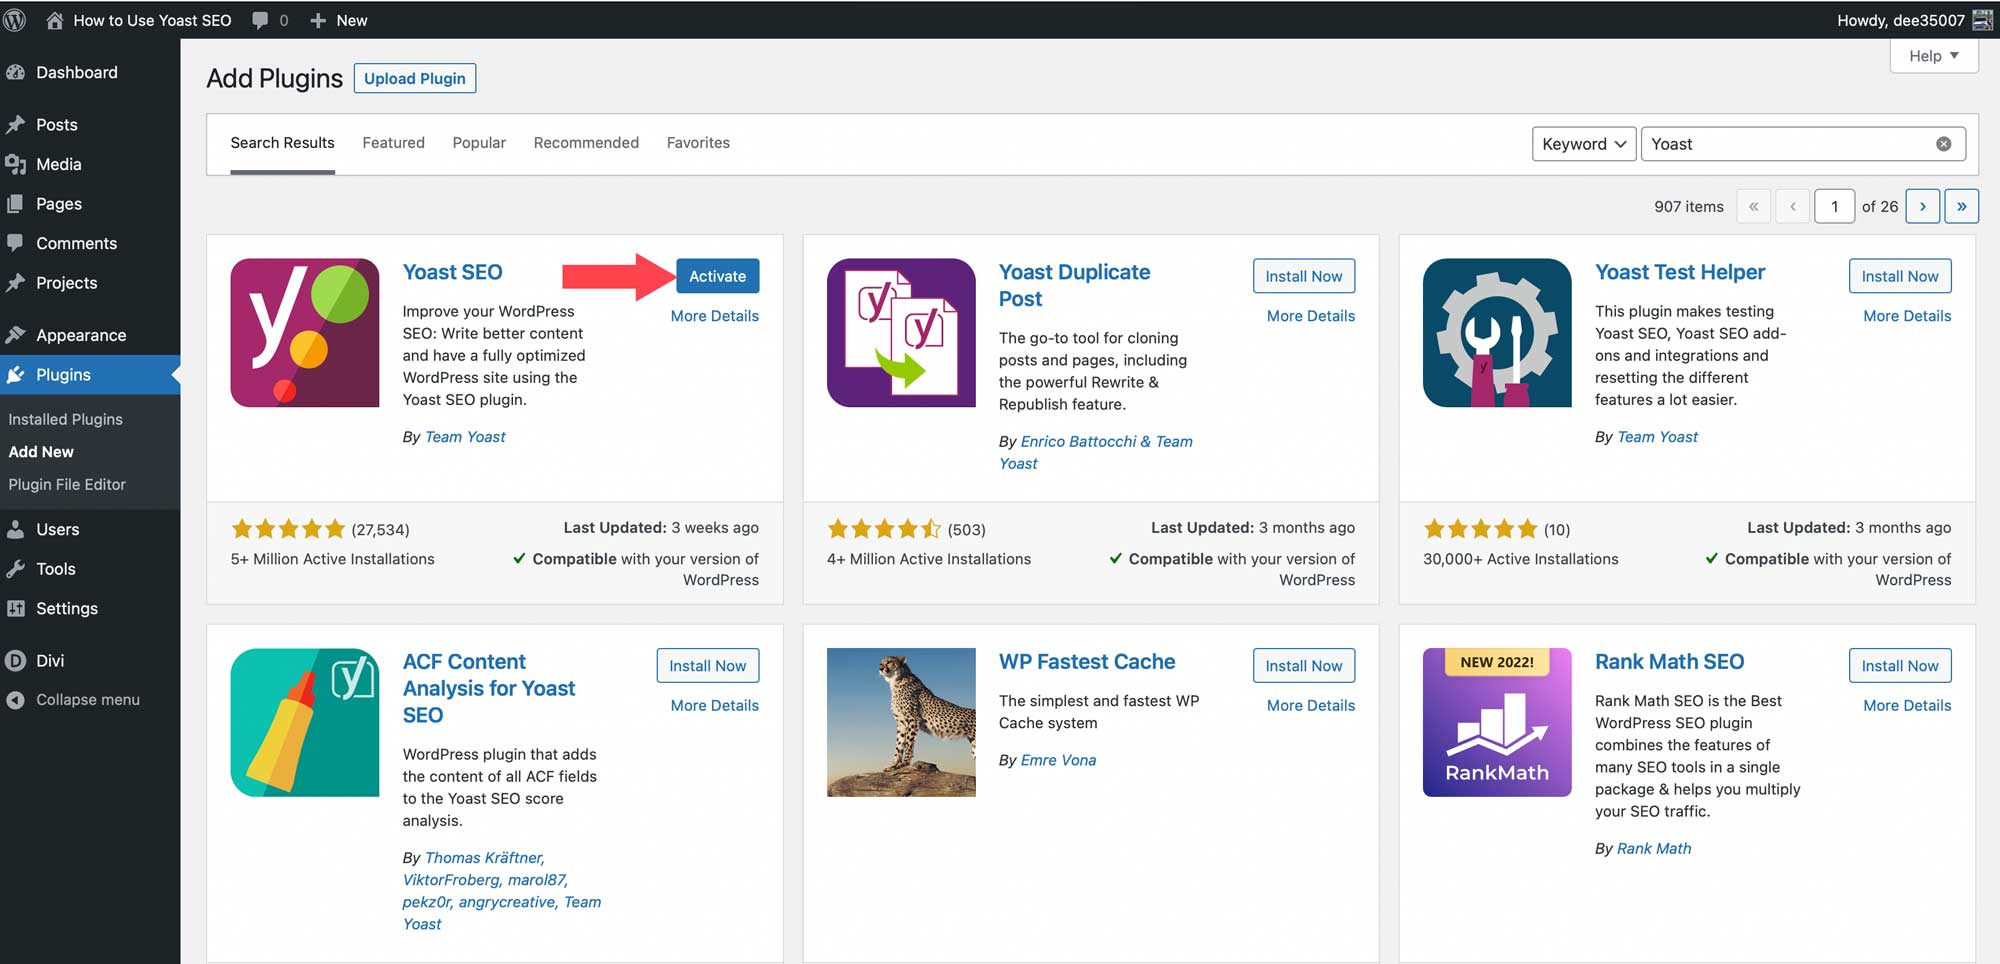
When the page refreshes, you’ll be directed to the welcome screen to start the first-time configuration.
Complete First-Time Configuration
The first-time configuration of the Yoast SEO plugin optimizes your data to allow search engines to find your site easier, enter important site information, add social media profile pages, and configure your personal preferences. It has five steps, and you can return to it any time under Yoast SEO > General > First-time configuration.
Click the Start configuration button to get started.
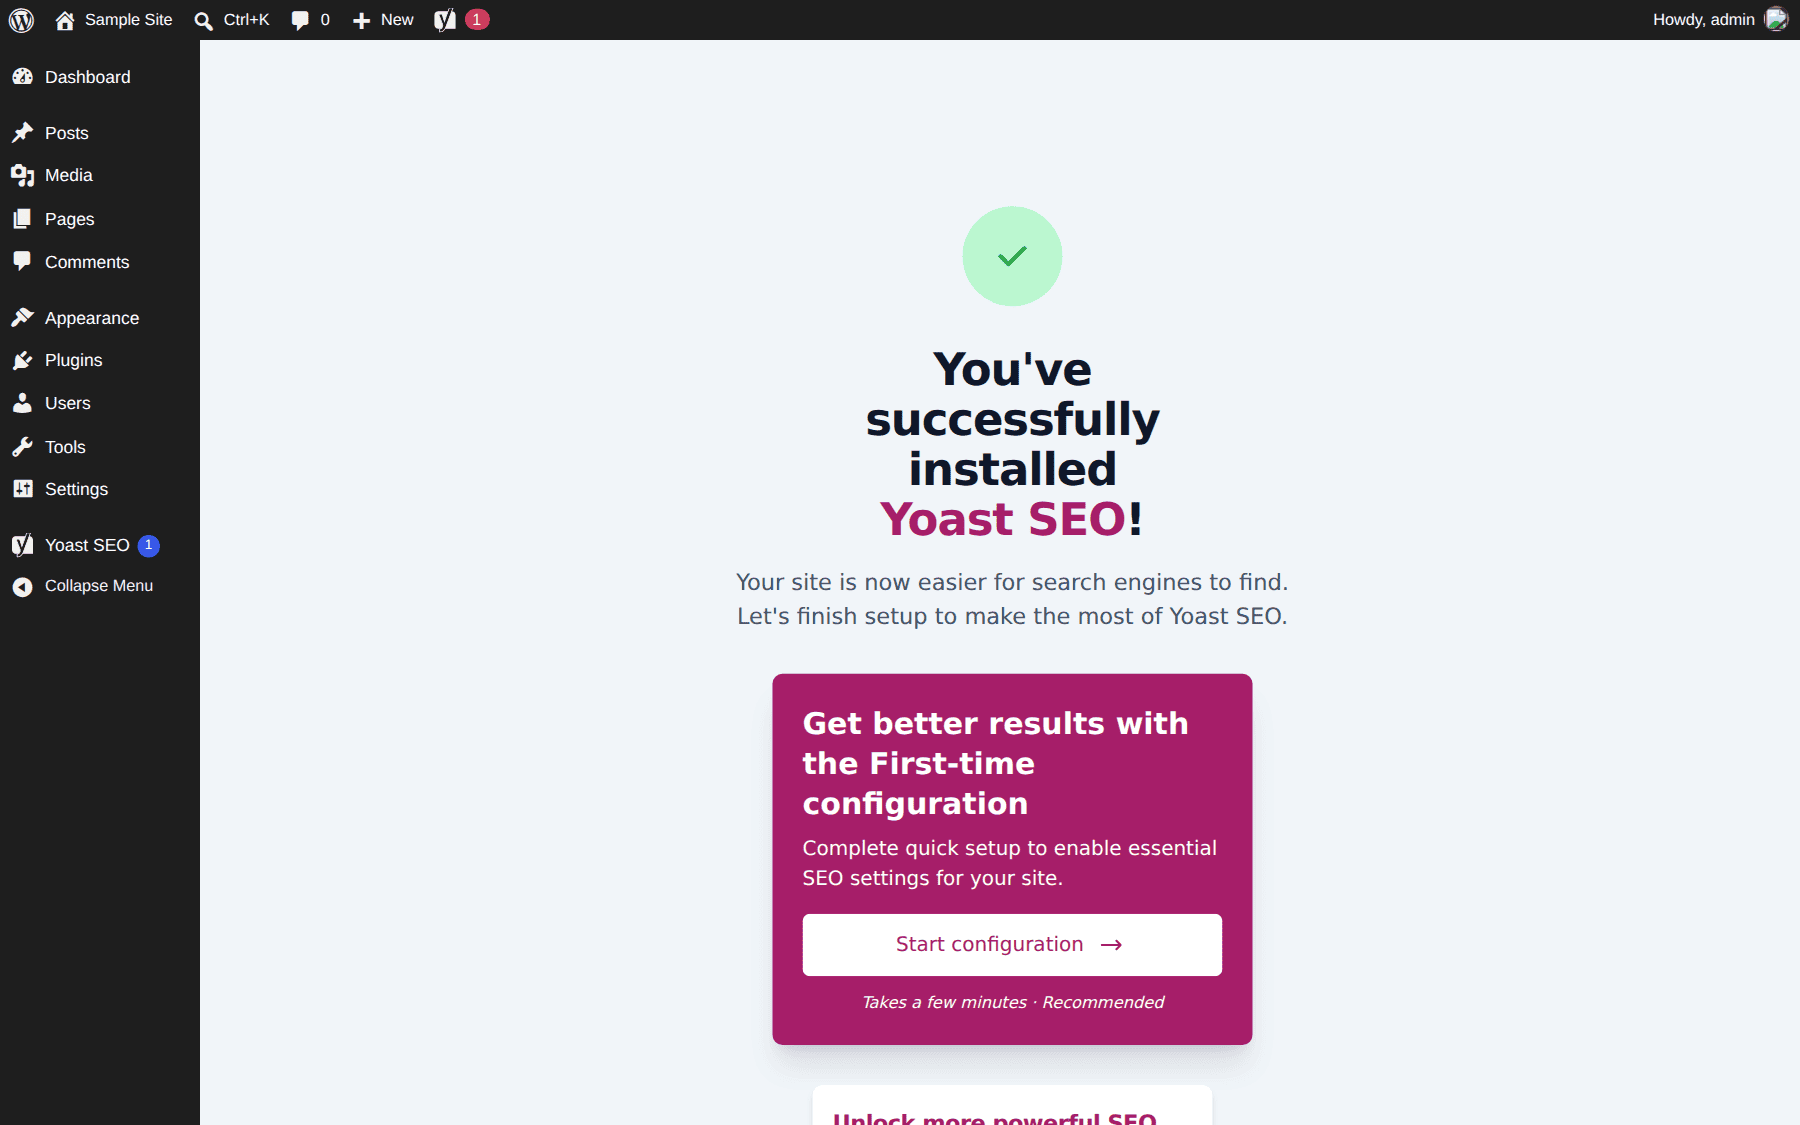
SEO Data Optimization
Yoast SEO helps give search engines such as Google a better understanding of your site. First, you’ll want to start SEO data optimization. Yoast will store the metadata for all pages and posts in a database table called the indexables. It streamlines the indexing process into one database request, reduces page speed loading times, and helps search engines find your site.
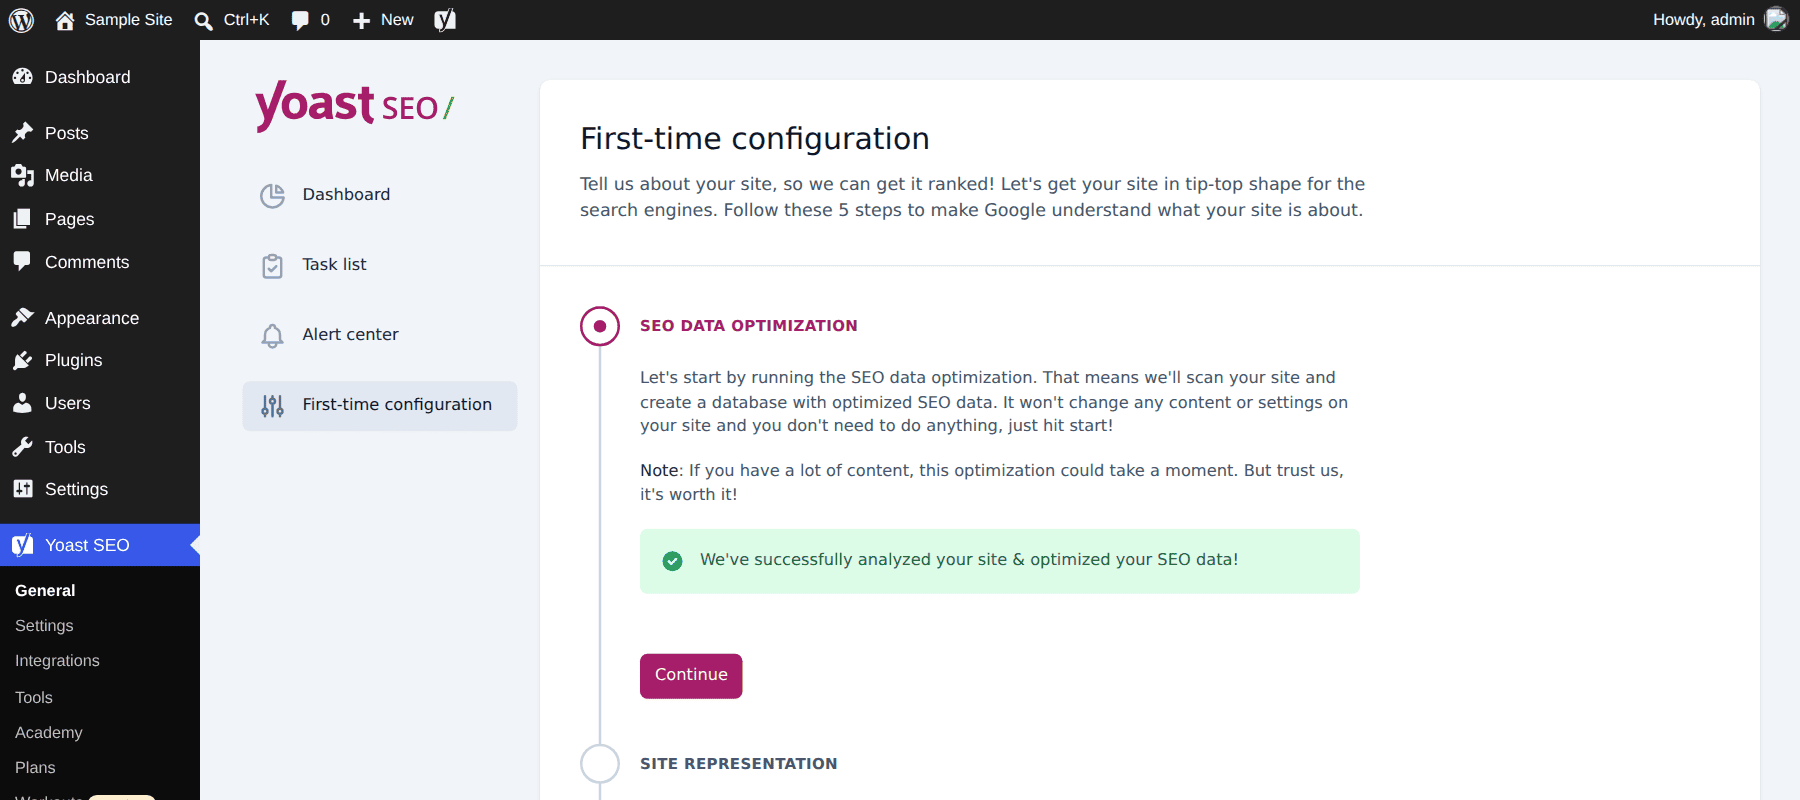
Site Representation
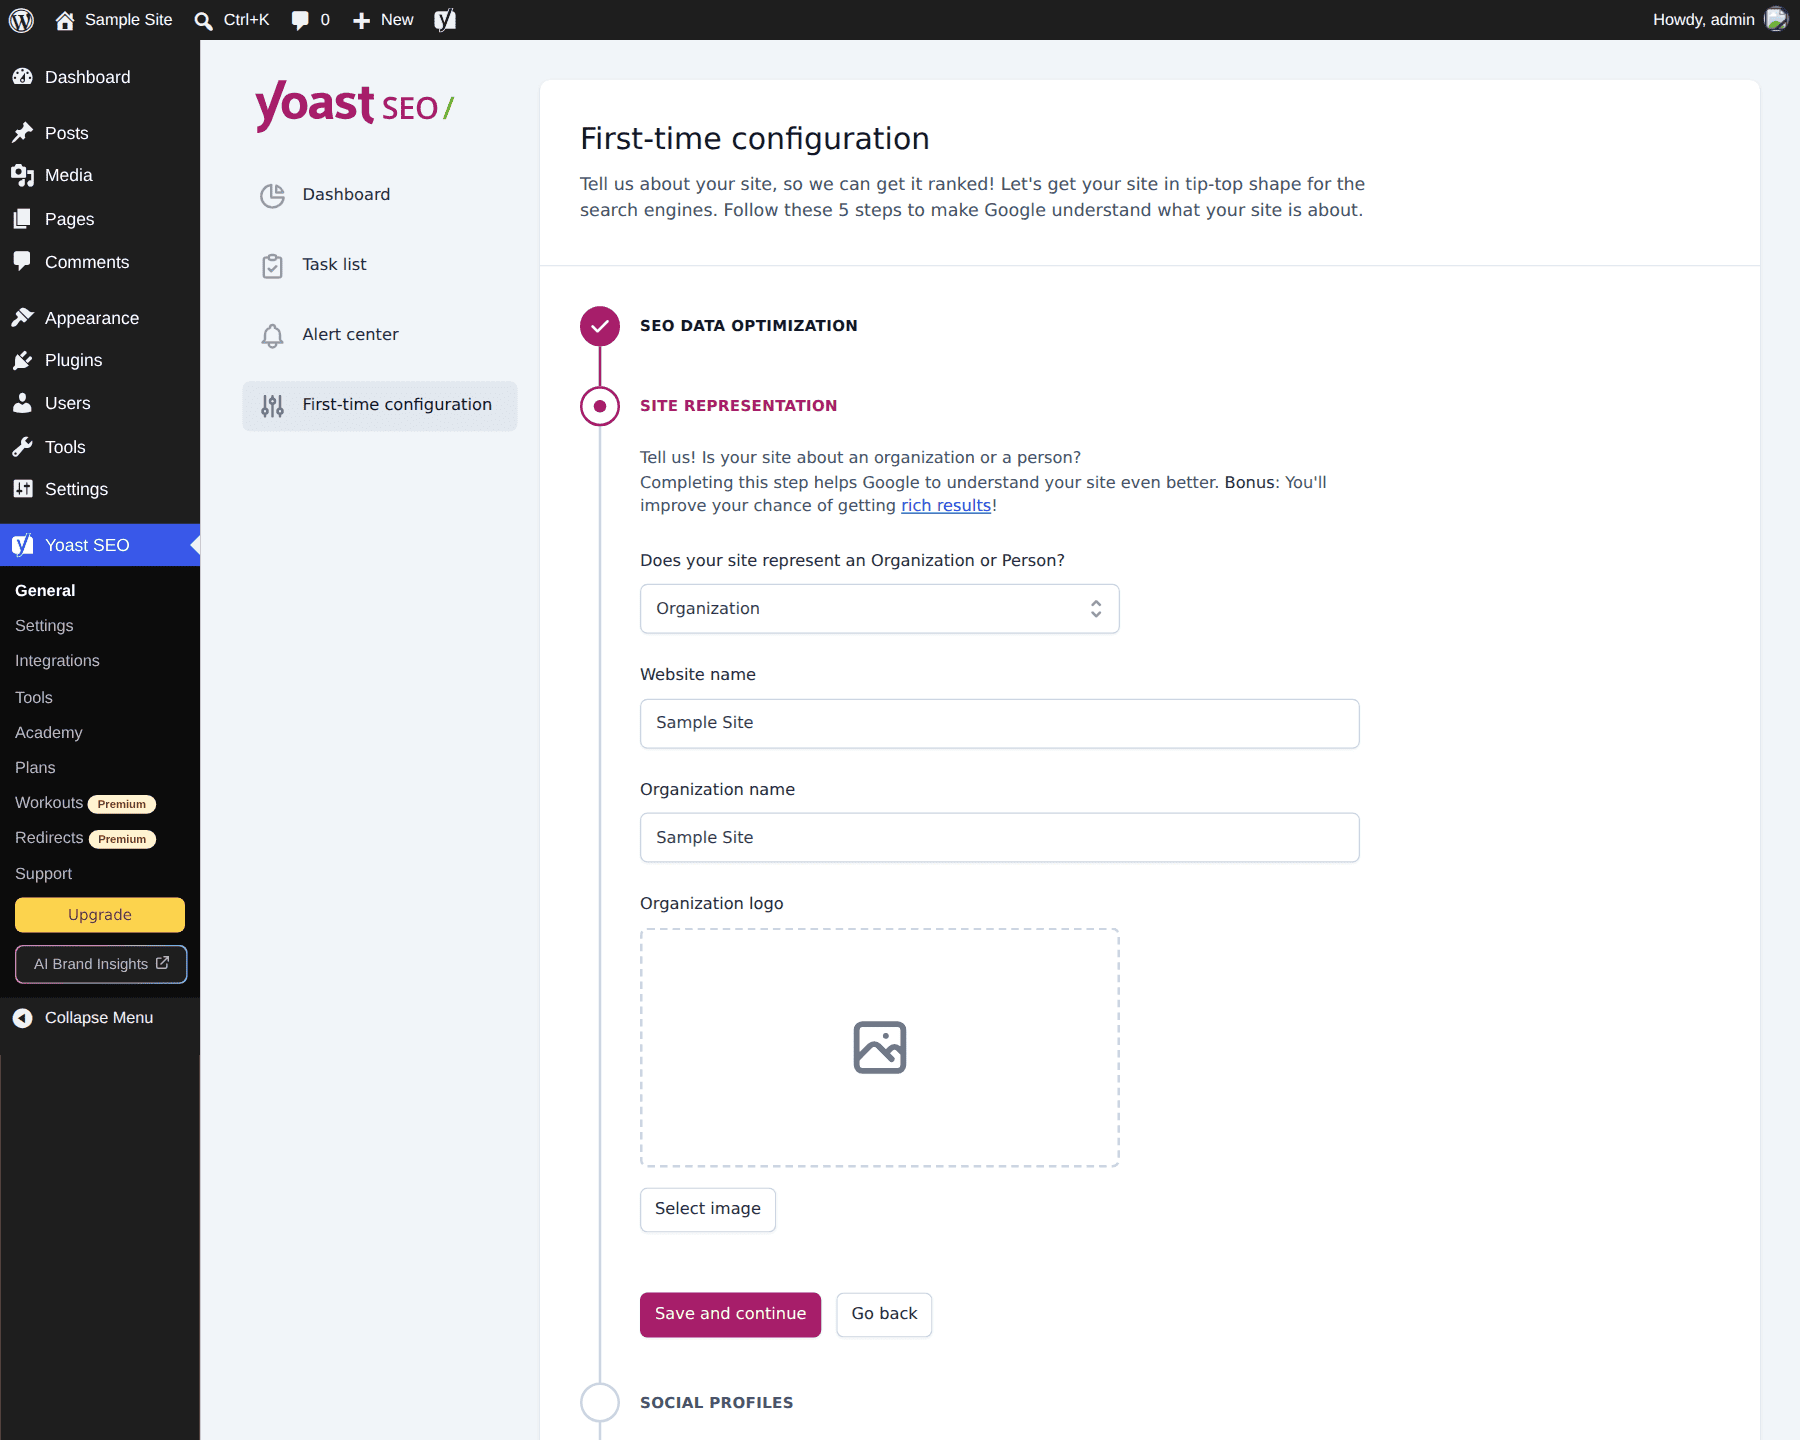
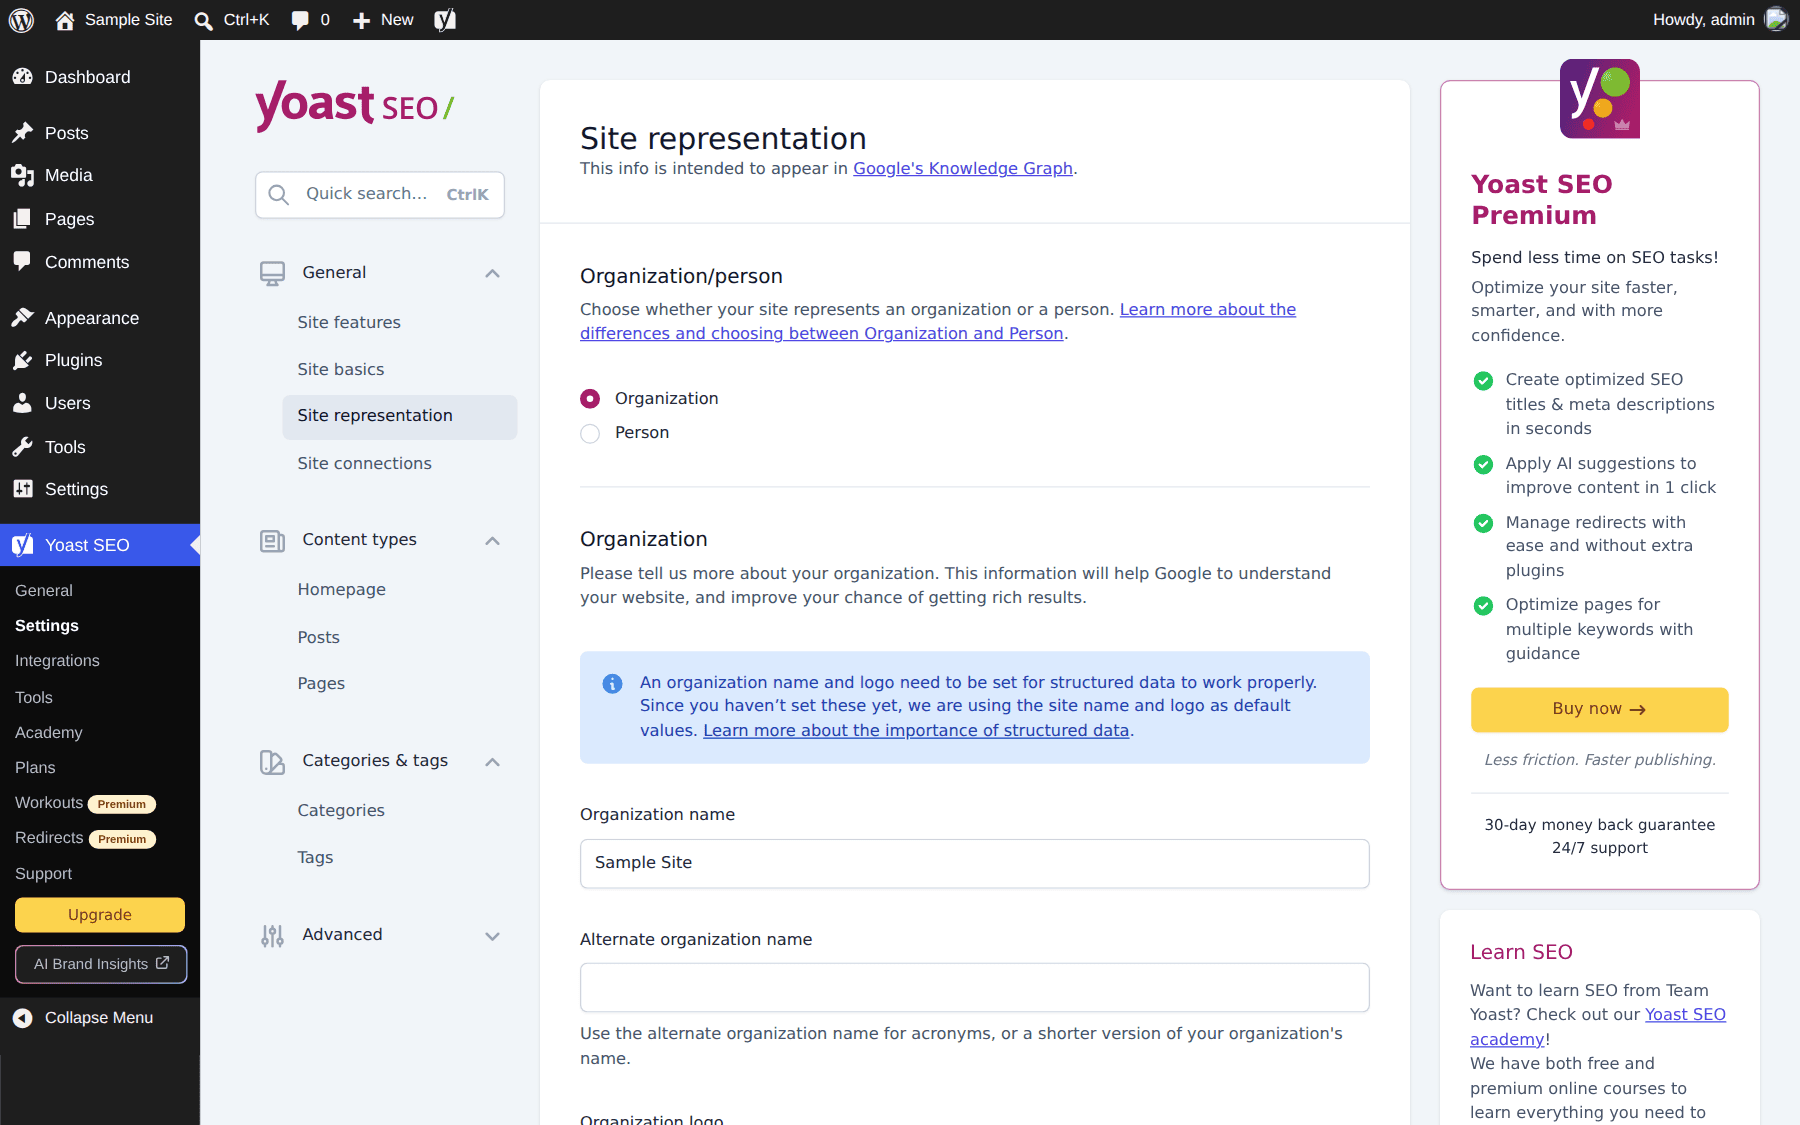
The next step helps search engines identify your website. Choose whether the site represents an organization or a person, then enter the website name, the organization name, and a logo.
Social Profiles
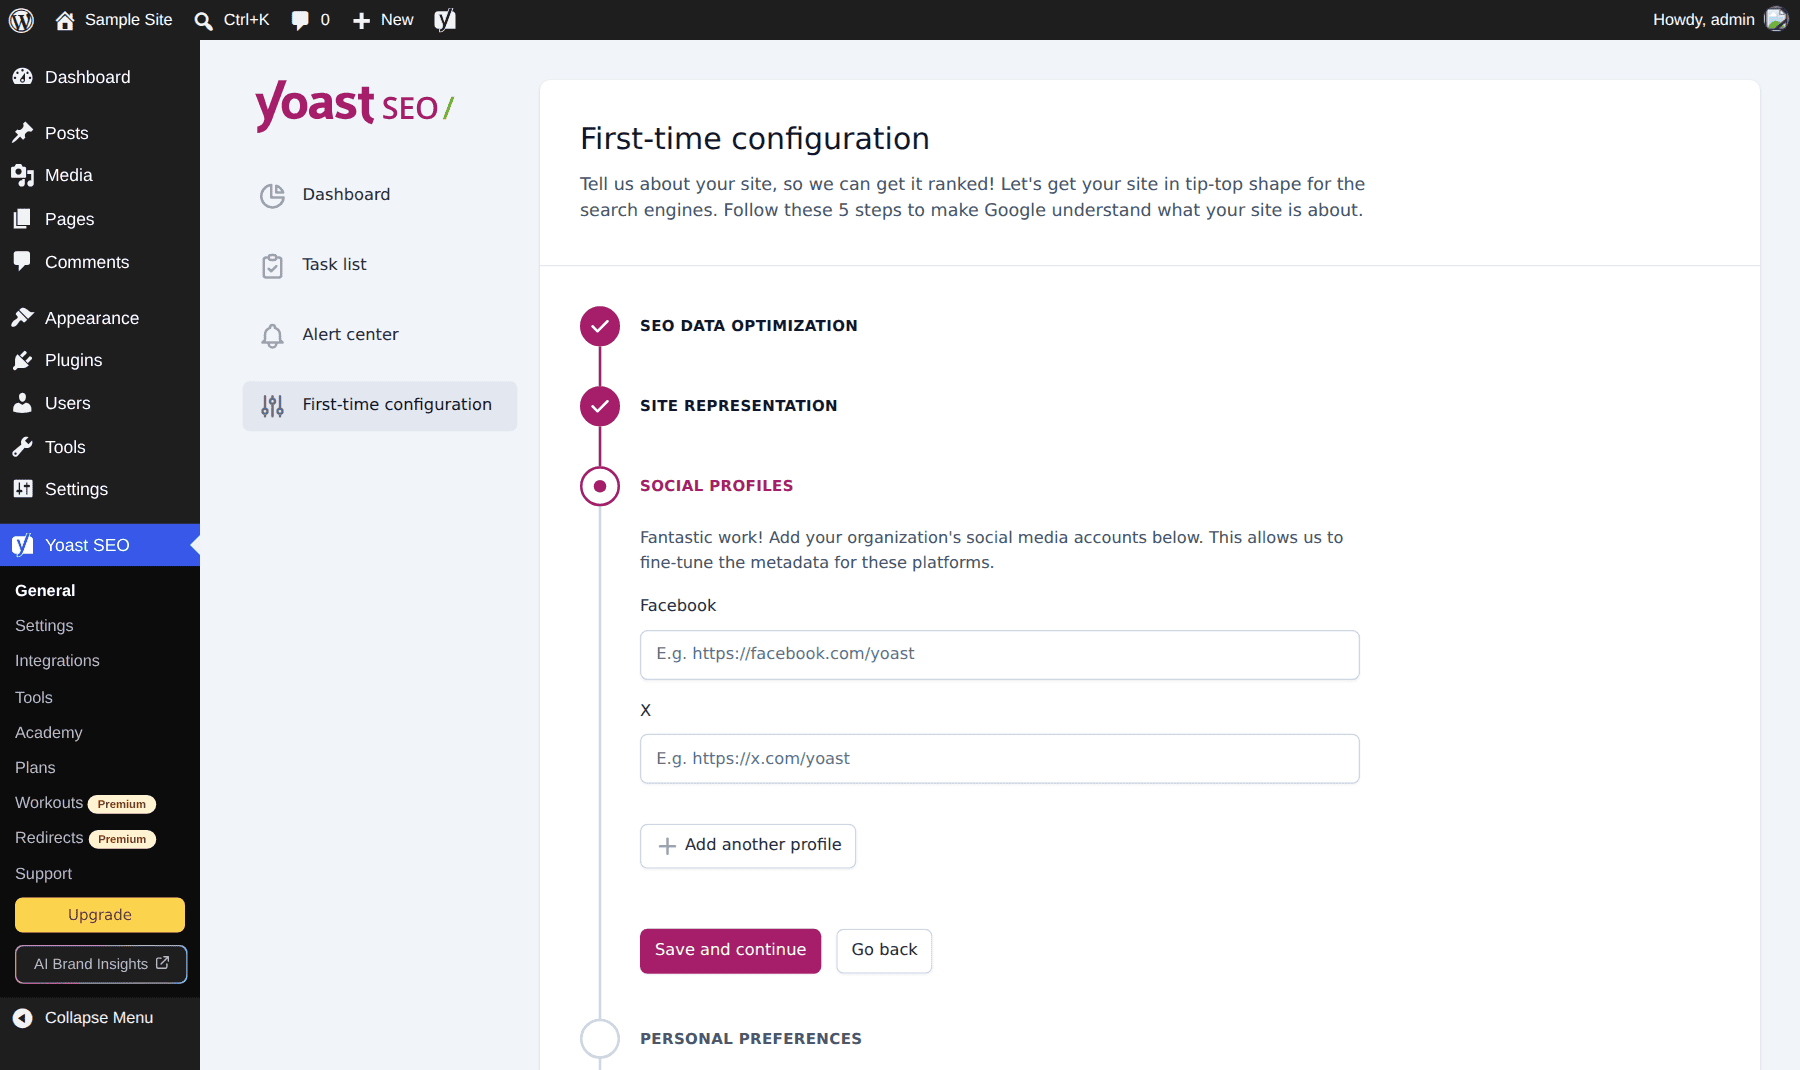
Yoast displays Facebook and X by default, but you can add as many additional profiles as needed here.
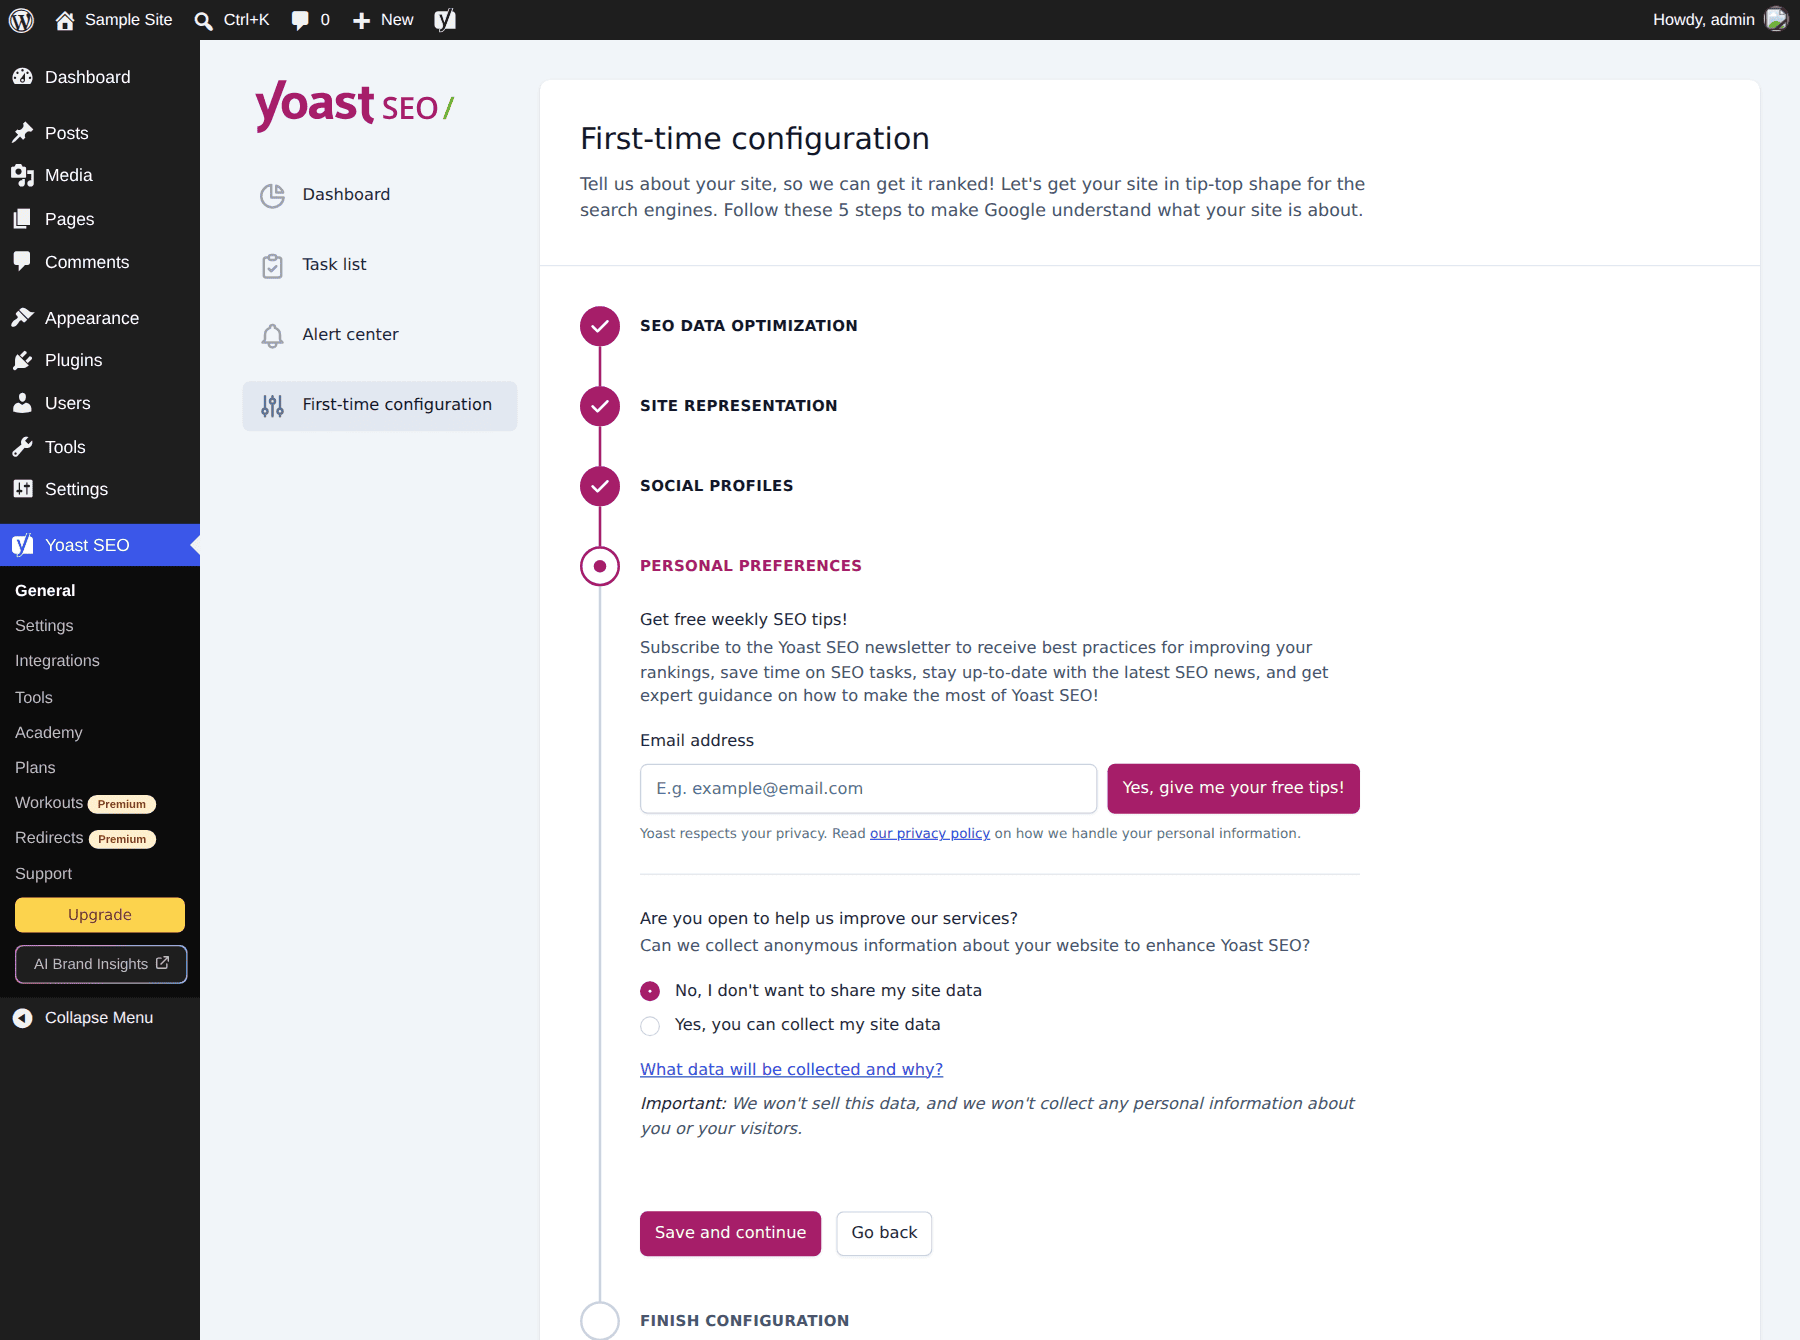
Yoast SEO Personal Preferences
Next, choose whether Yoast can collect anonymous data about your website, such as your plugins, theme, and server information, and you can also sign up for the Yoast newsletter. A last step, Finish configuration, confirms that setup is complete.
At this point, you should have most of what you need already in place. We’ll get to the dashboard options in more detail later. But for now, let’s look at how Yoast SEO works for on-page SEO.
How To Use The Yoast SEO Meta Box (For On-Page SEO)
The Yoast SEO meta box is an on-page SEO tool that allows you to optimize your SEO content for each post/page in real-time. Using the meta box increases the chance of better rankings, because every post gets checked before it appears in SERPs.
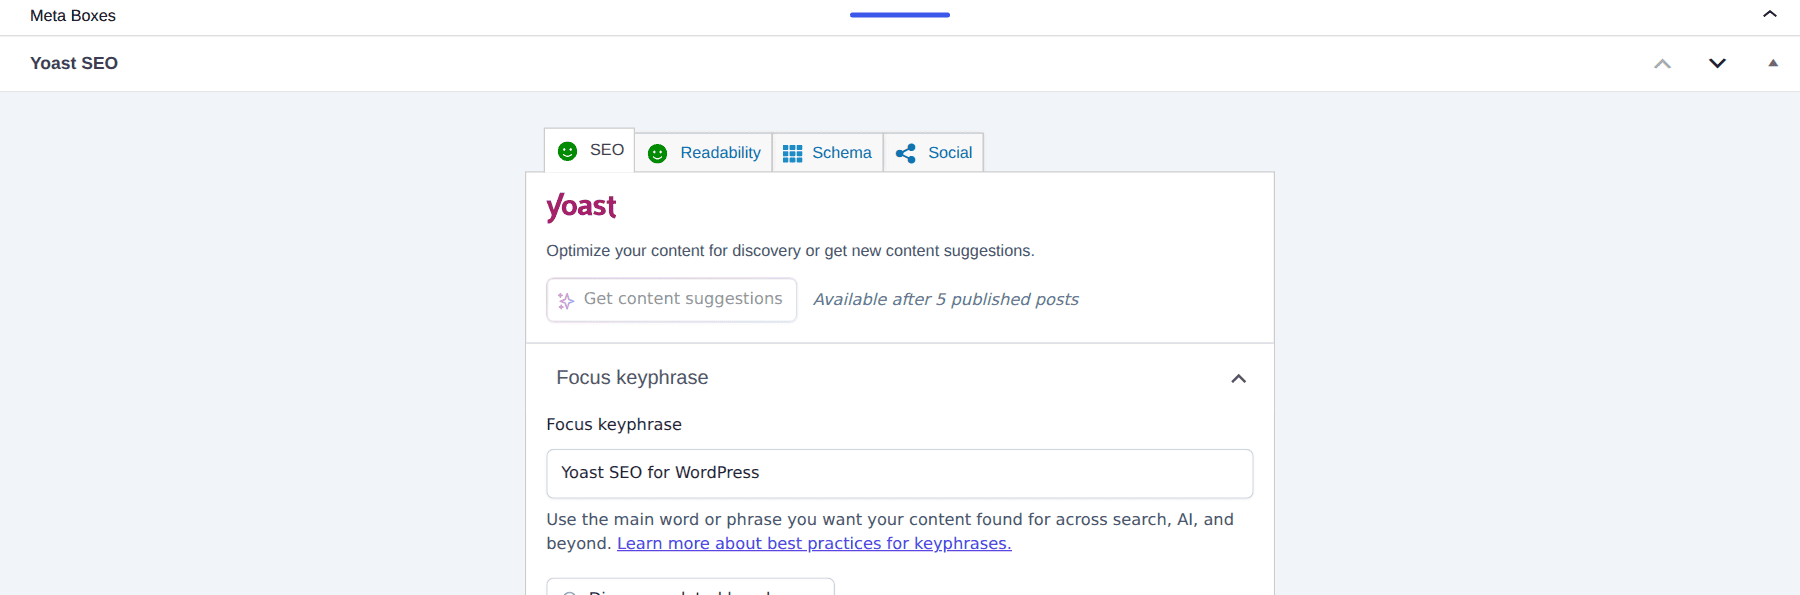
You can find the meta box at the bottom of the page editor. In the block editor, it sits in the Meta Boxes panel below your content.
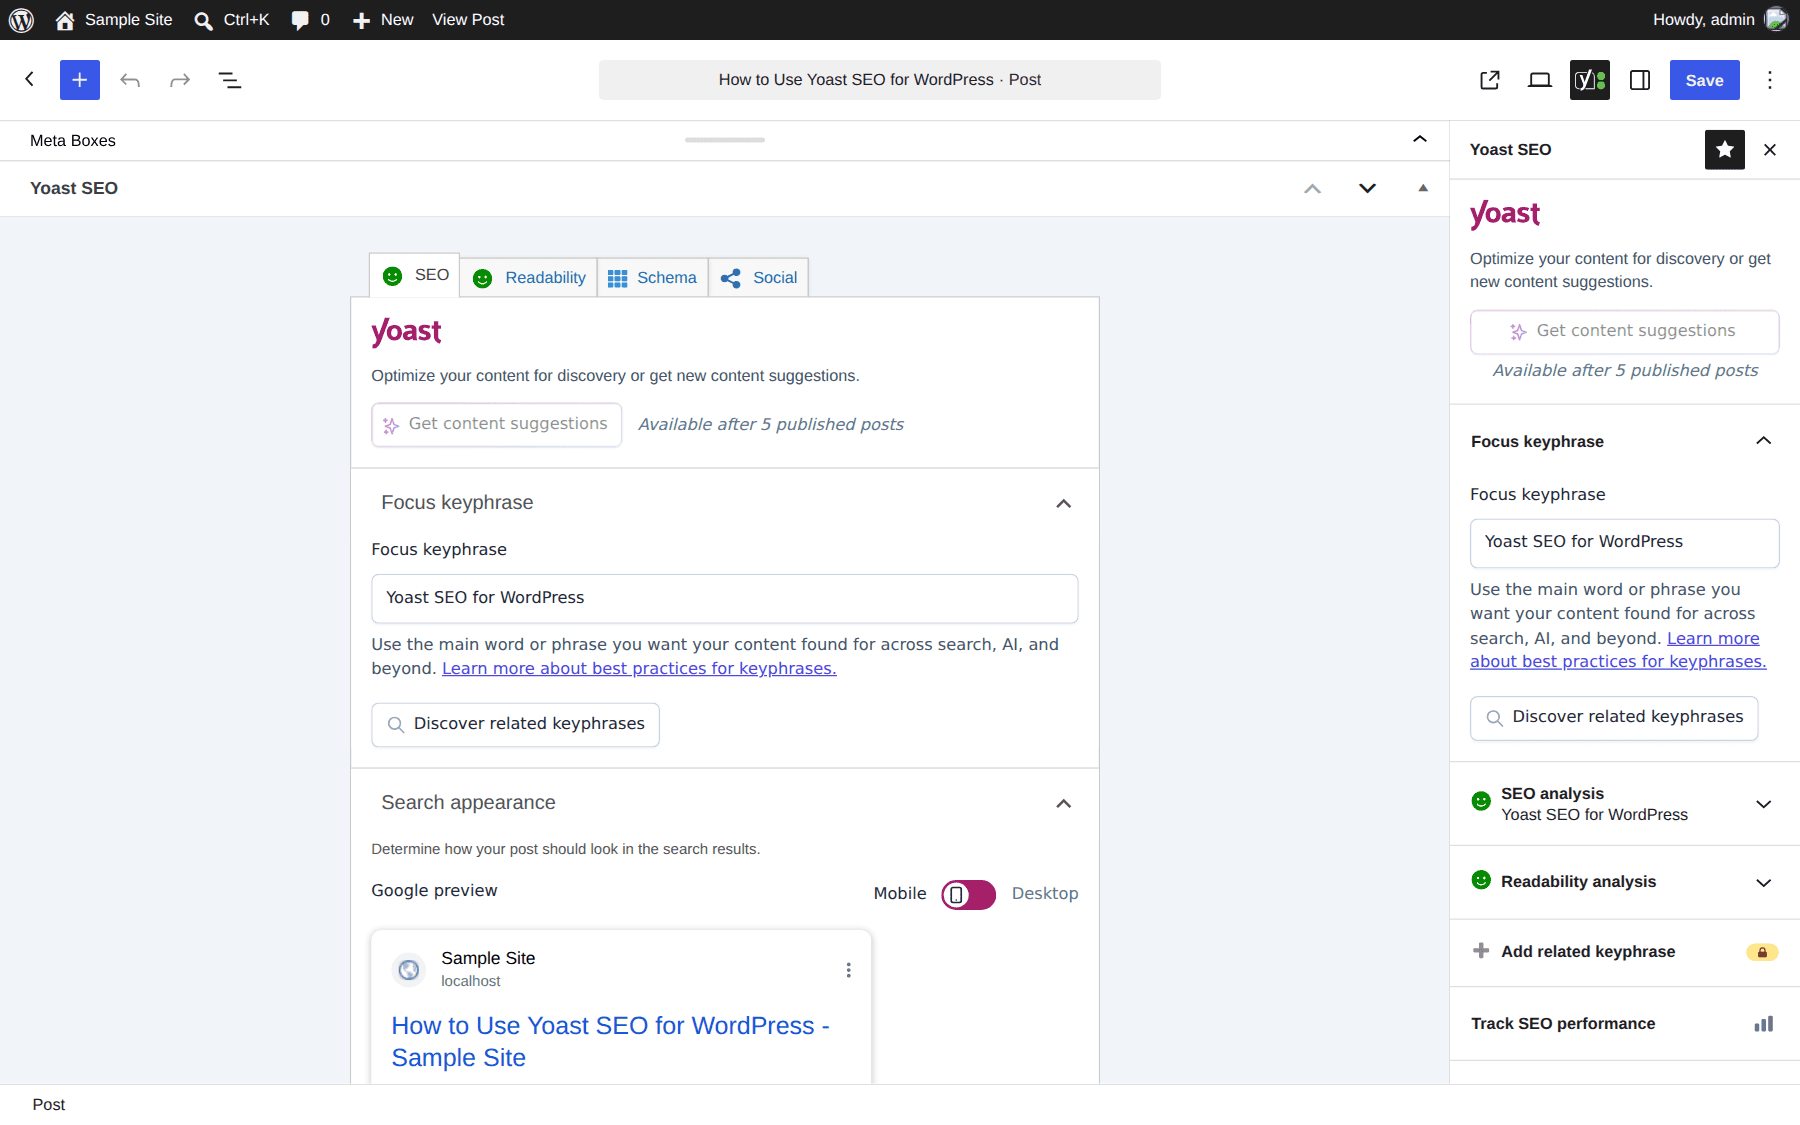
The block editor also has a Yoast icon at the top right. Click it to open the same options in a sidebar next to your content.
SEO
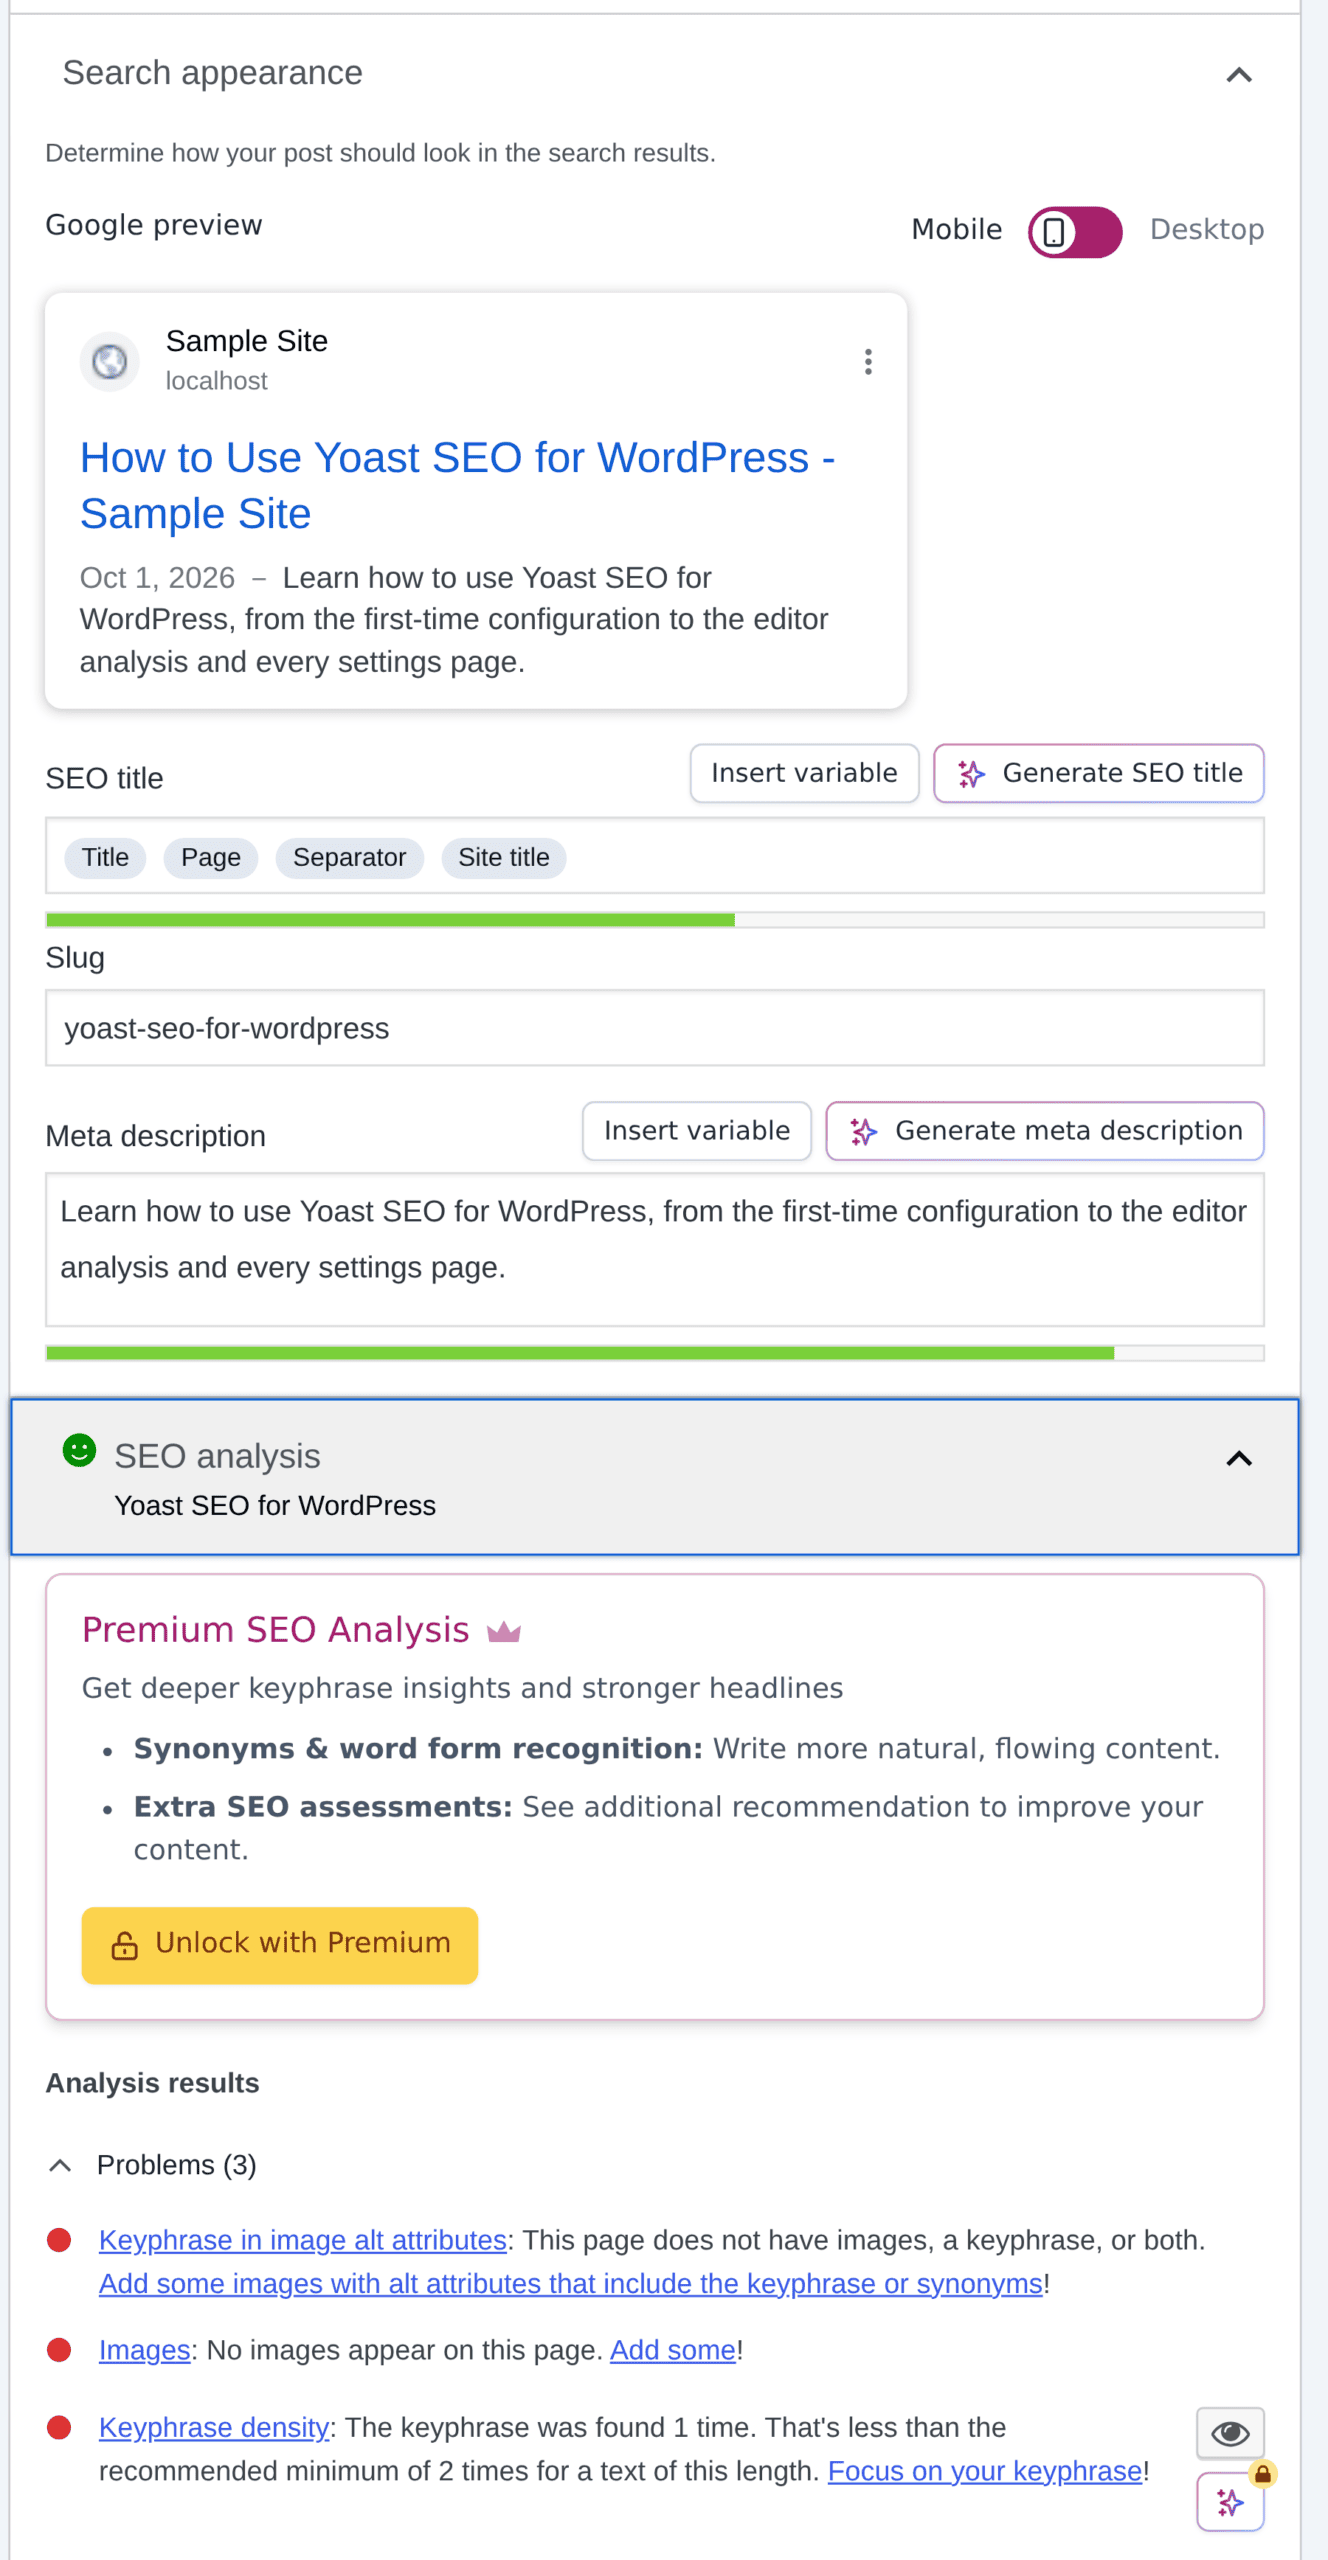
The SEO tab gives you an analysis of your post’s content in real-time. It uses the green light system, which rates your post content as good, okay, or needs improvement. Once a keyphrase is inserted, Yoast analyzes the content and suggests improvements.
Focus Keyphrase
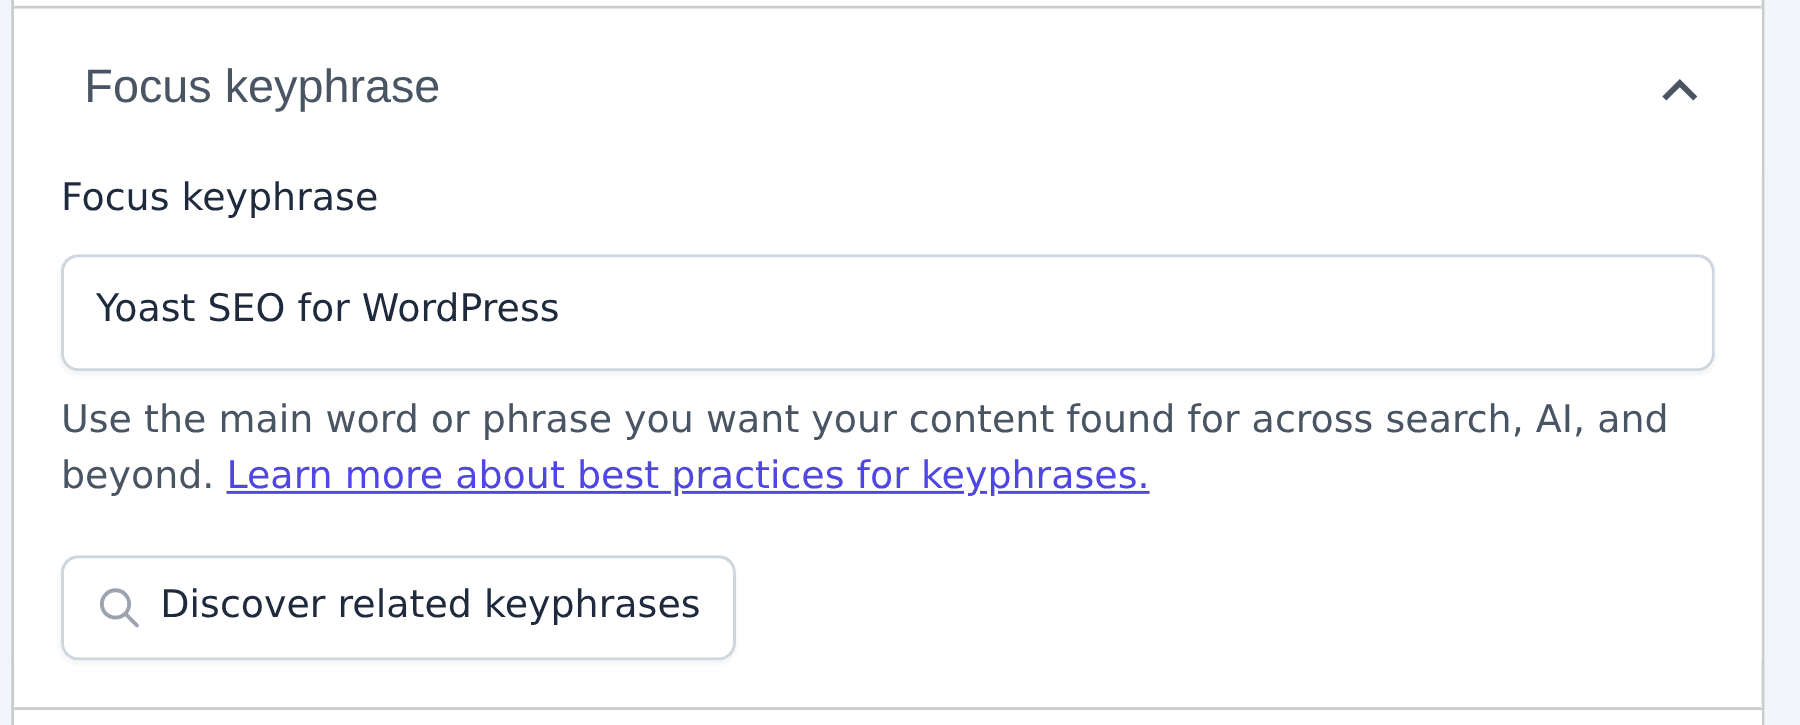
A keyphrase (or keyword) is the main word or phrase you want your content to rank for in search results. You’ll want to do keyword research beforehand to find the right focus keyphrase.
You can also click the Discover related keyphrases button in the meta box to find more related keywords you wish to rank for. Analyzing a post against more than one keyphrase takes Premium.
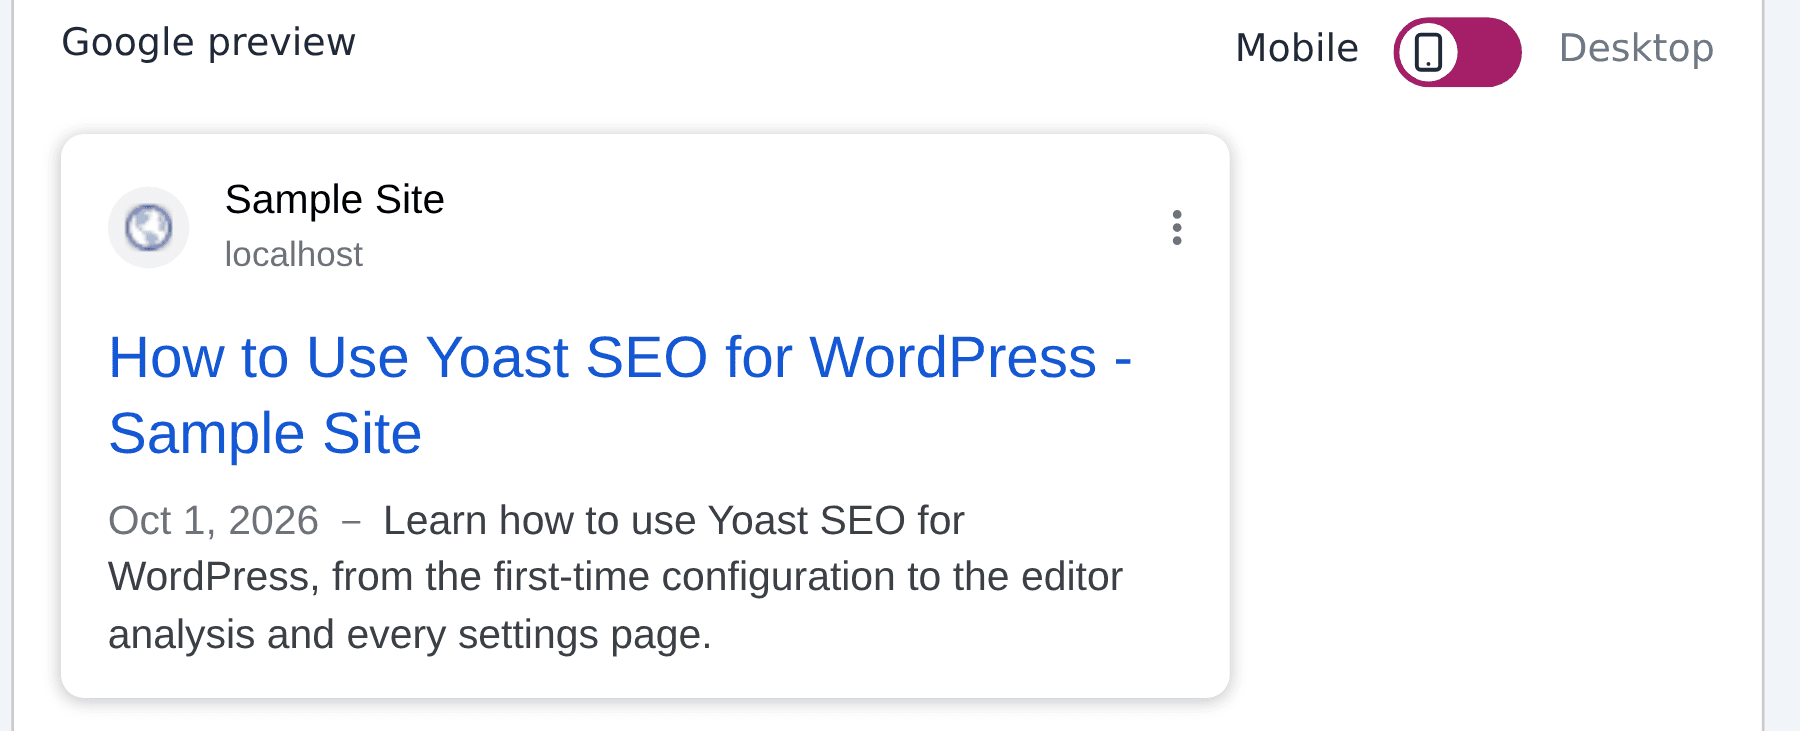
Google Preview
Google Preview gives you a glimpse of how your post will appear in search results in both desktop and mobile formats.
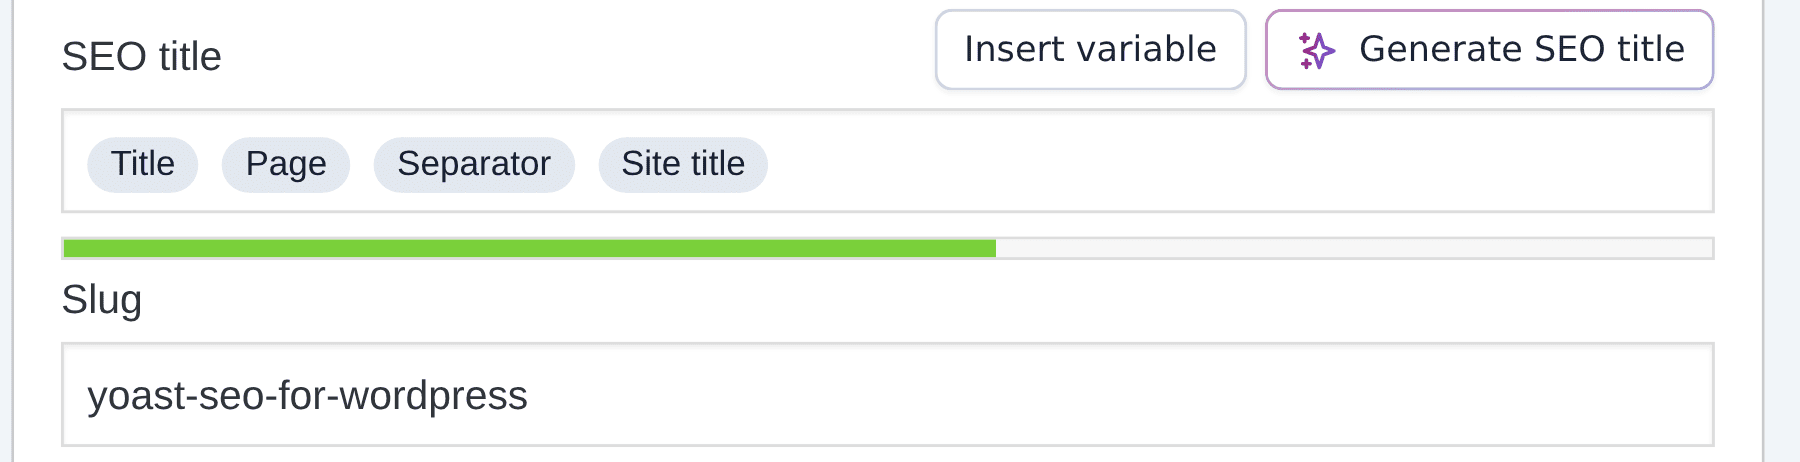
SEO Title & Slug (URL)
The SEO Page Title and the URL slug can be optimized here. Make sure both are not too long, and include your keyphrase. The Generate SEO title button asks Yoast AI for a suggestion.
Meta Description
The meta description is one of the most important parts of optimizing on-page SEO. It can give your potential visitors a reason to click. Therefore, it’s crucial to write a perfect meta description that includes your keyword(s) and describes the content accurately. Generate meta description works the same way as the title button.
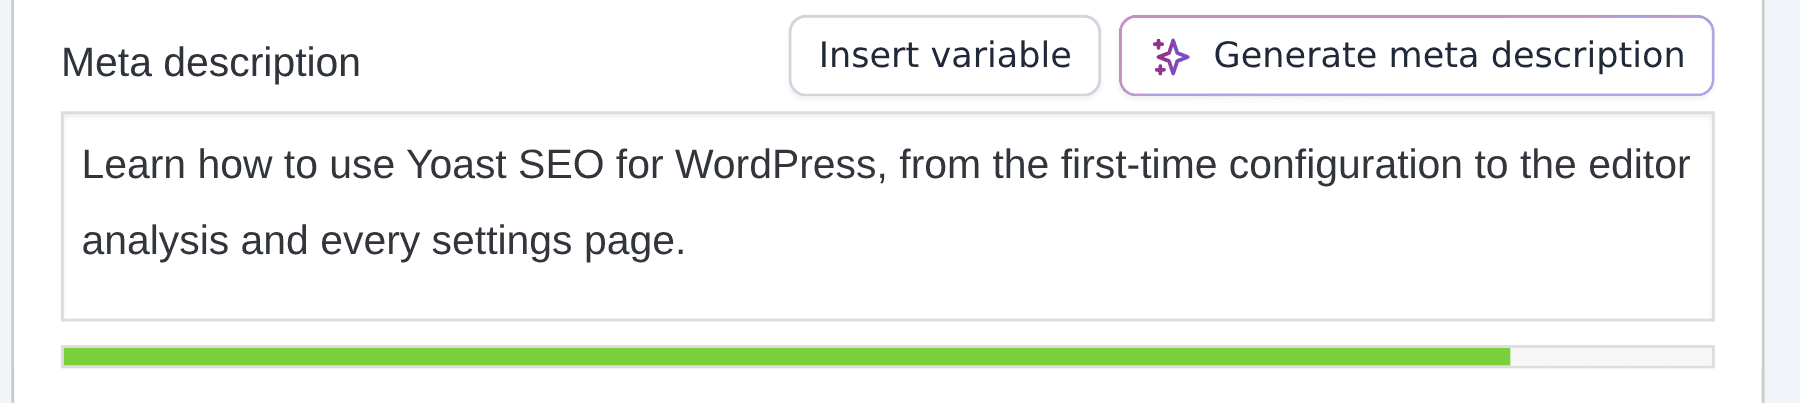
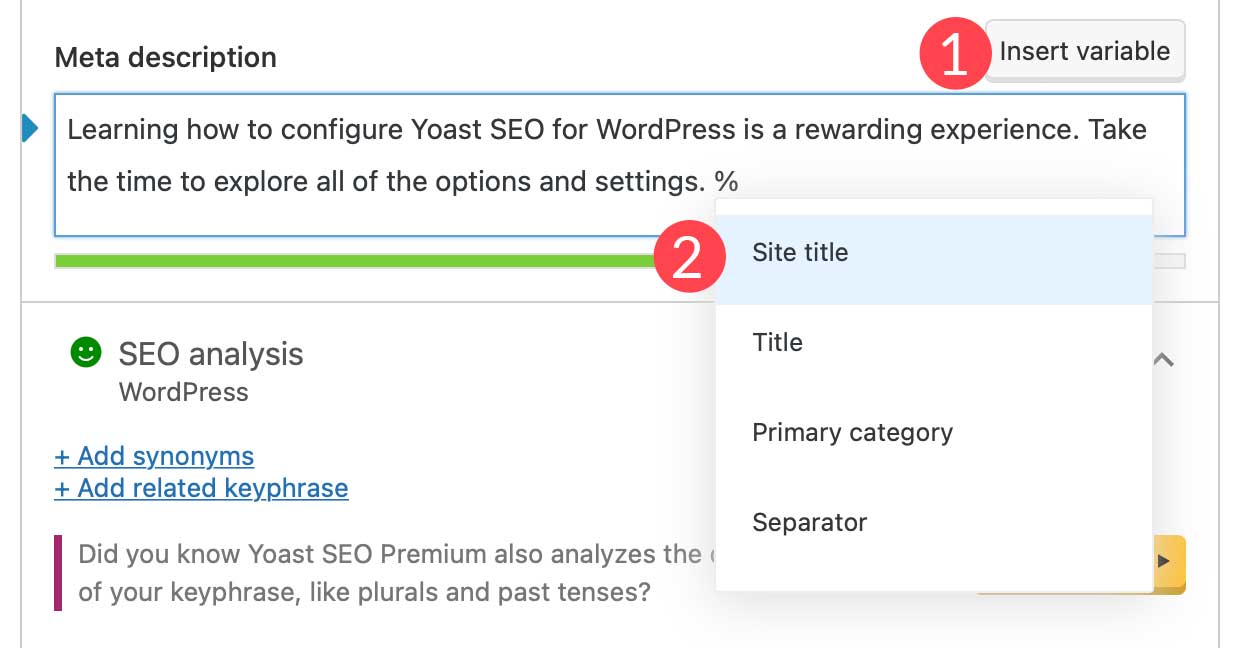
Yoast allows you to insert variables into the meta description, such as site title, post title, primary category, and separator.
SEO Analysis
Under SEO analysis, Yoast provides an on-page SEO score and a checklist that you can use to optimize specific tasks to achieve a green light. It sorts every check into problems, improvements, and good results.
The best approach is to write good content from the start to achieve a green light. For some great tips, check out how to write quality SEO content.
In addition to listing SEO suggestions for text content and links, the SEO analysis will also check to ensure you have images with keyphrases added to alt text. But it won’t account for image size, so you will need additional plugins for image optimization and caching to account for page speed SEO.
For more ways to optimize your post for SEO, check these advanced SEO techniques.
Cornerstone Content
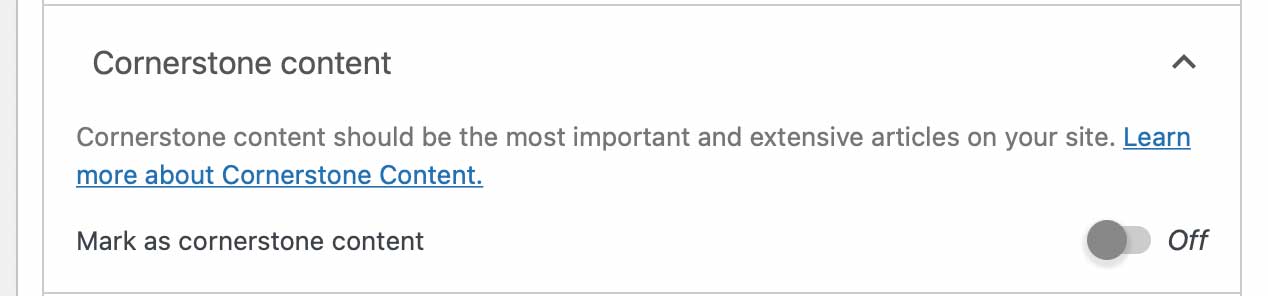
If the post is considered cornerstone content, you mark it as such here. If you’re unsure what this means, check out How to Optimize Cornerstone Content for SEO.
Advanced Features
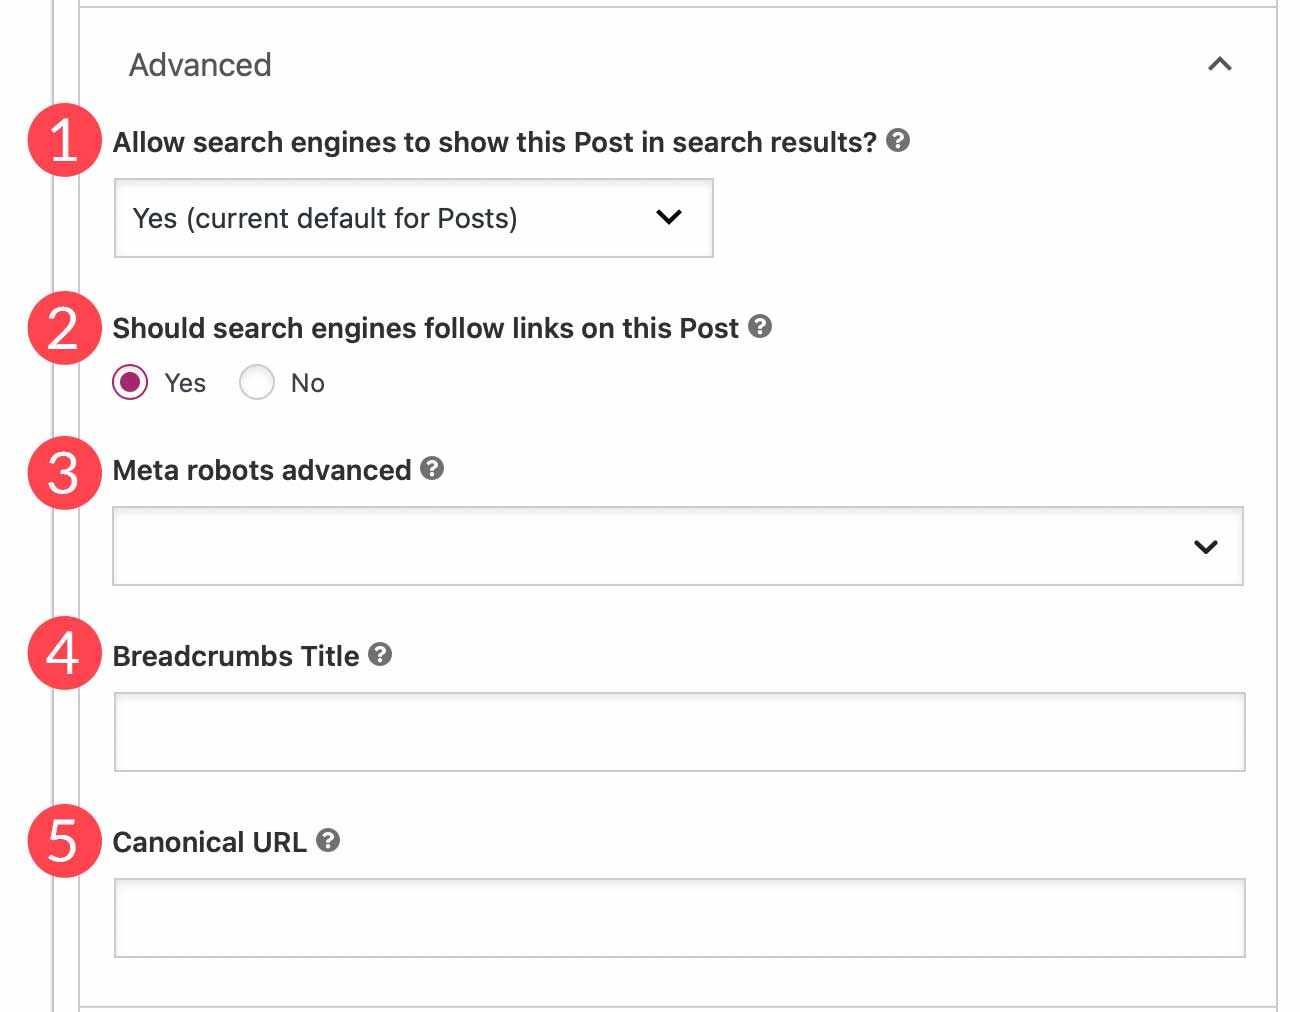
Under Advanced, you have additional SEO options for your post. You can choose whether or not to allow search engines to show the post in search results, set follow links, select robot options, assign a breadcrumb title, and insert a canonical URL.
Insights
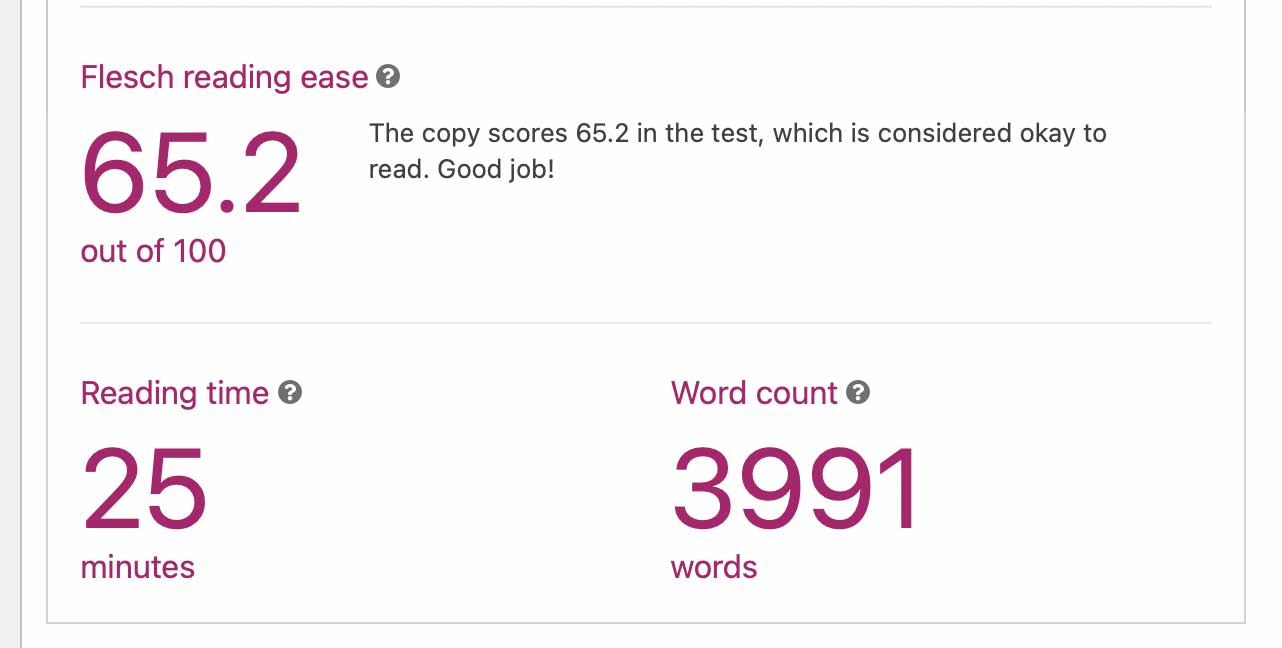
Here you can view the Flesch reading ease score of the post. This gives you insight as to how difficult it is to read your post. Plus, it contains the word count and estimated reading time. Premium options give you a breakdown of the most used words in your content so that you can cross-check your most used words with prominent words in search results focused on the same subject.
Readability
Yoast scores readability with the Flesch reading ease scale. A score from 60 to 69 is standard, which a high school student can follow, and scores above 70 read easier still, according to the Flesch reading ease scale. For most posts, aim for 60 or higher.
Like with SEO analysis, the scores are based on factors that are highlighted as problems (red), improvements (orange), and good results (green). Plus, you can quickly locate problem areas by clicking the “eye” icon next to each item in the list.
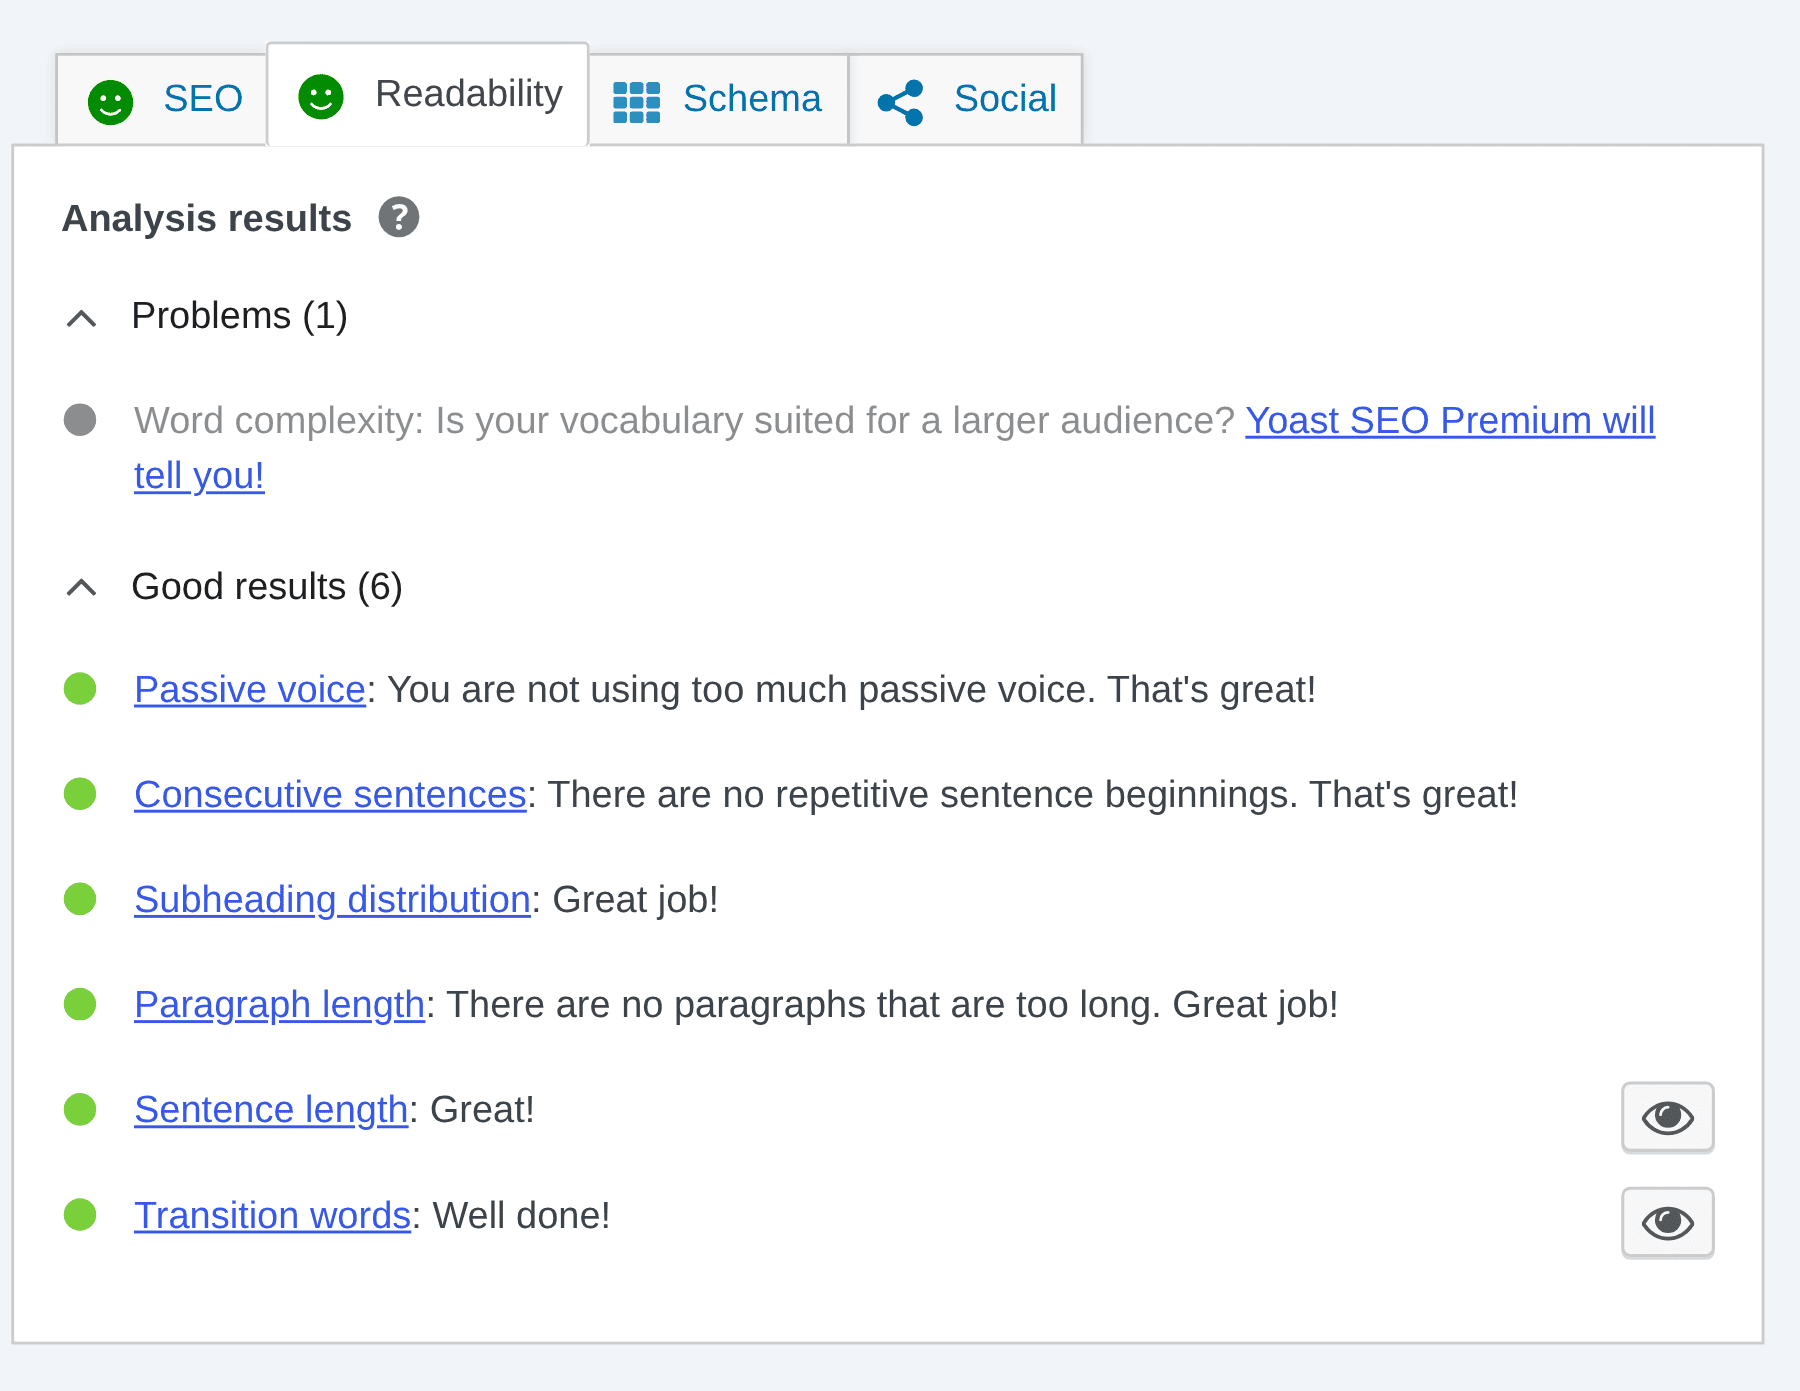
To learn more readability tips, check out How to Get the Perfect Yoast SEO Readability Score.
Schema
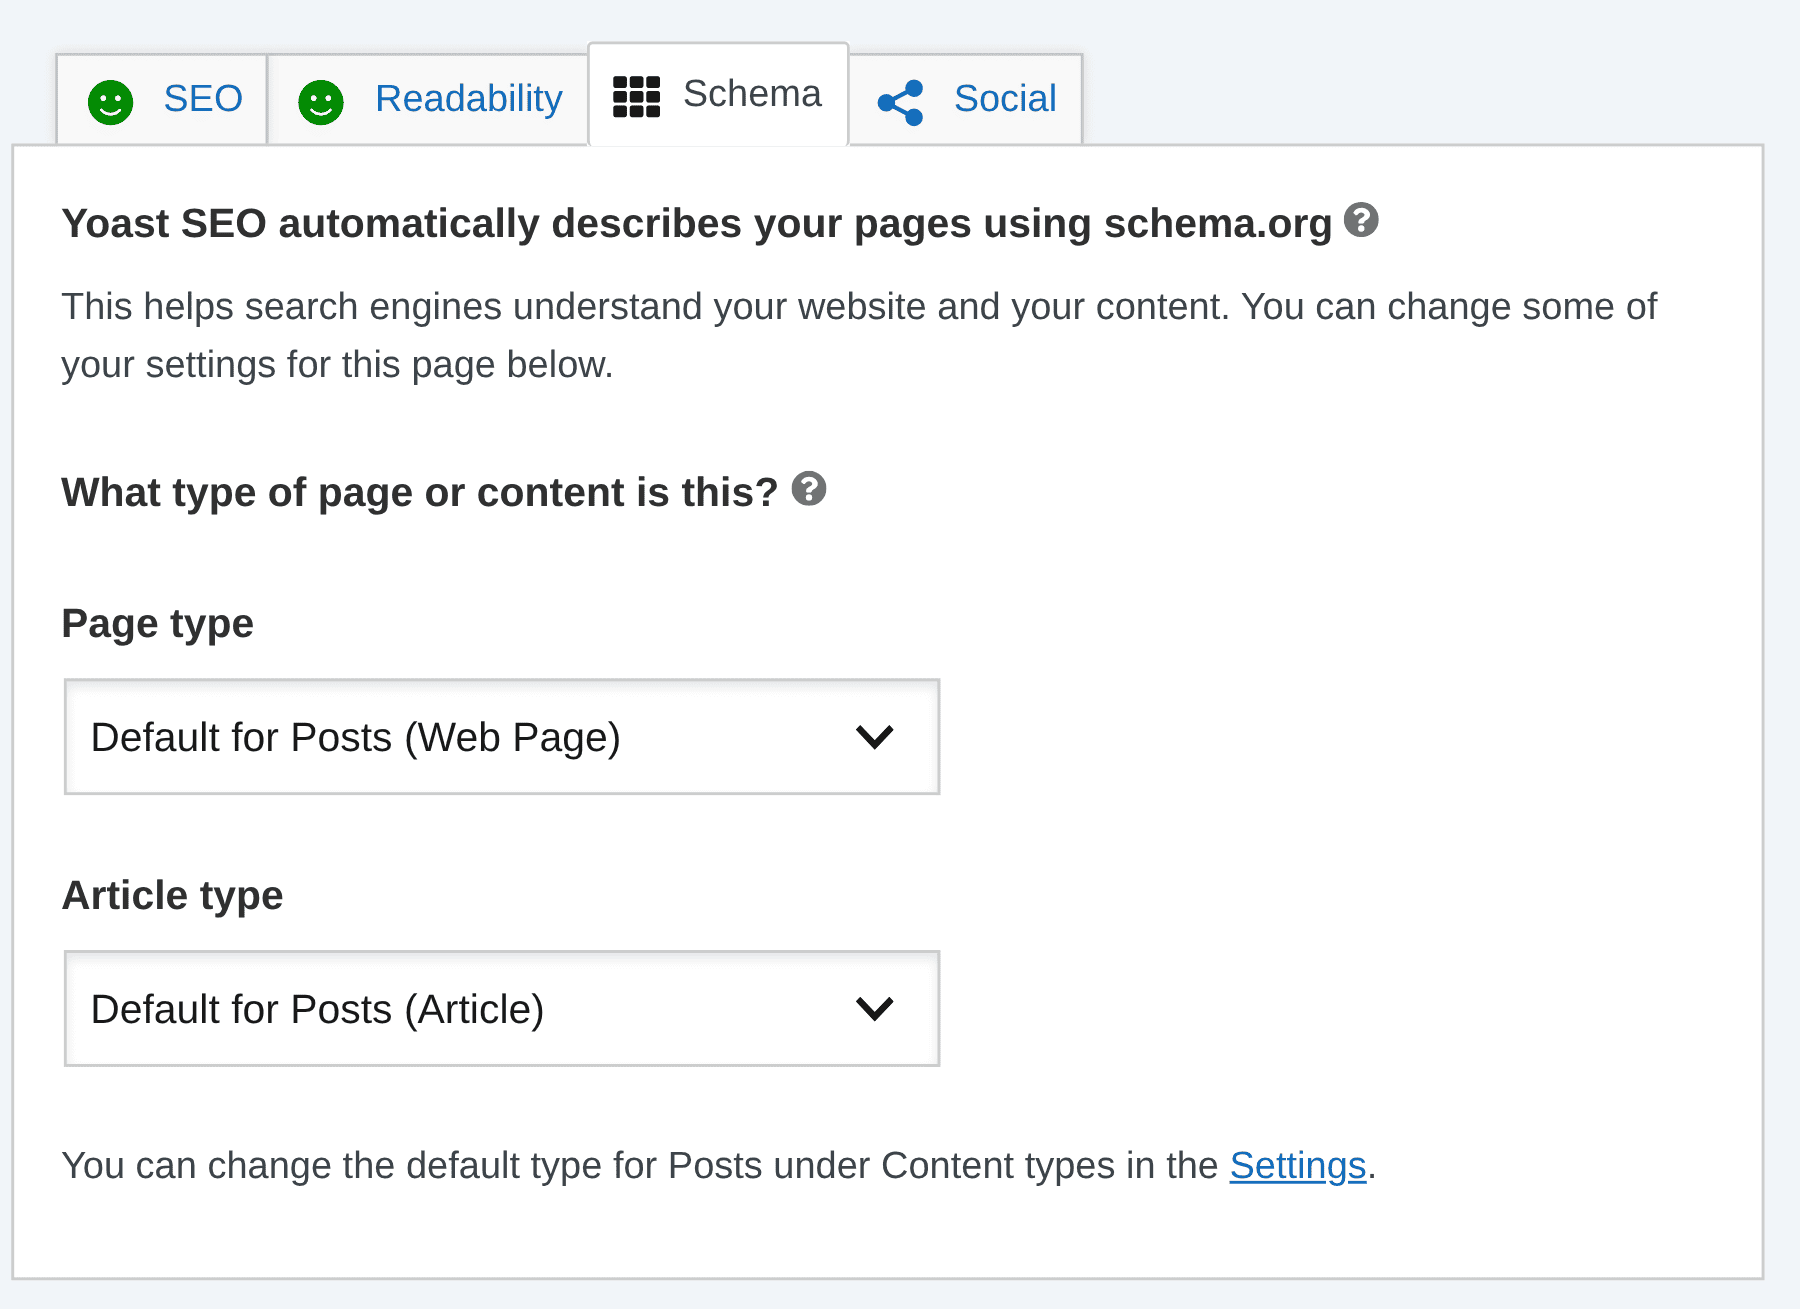
Under Schema, you can use Schema markup to optimize your site’s SEO, making it easier to index by search engines. In Yoast SEO, you can change schema settings in the dashboard or on individual posts and pages here. Now, there isn’t a need for you to have a separate schema plugin on your site; Yoast’s Schema settings have got you covered.
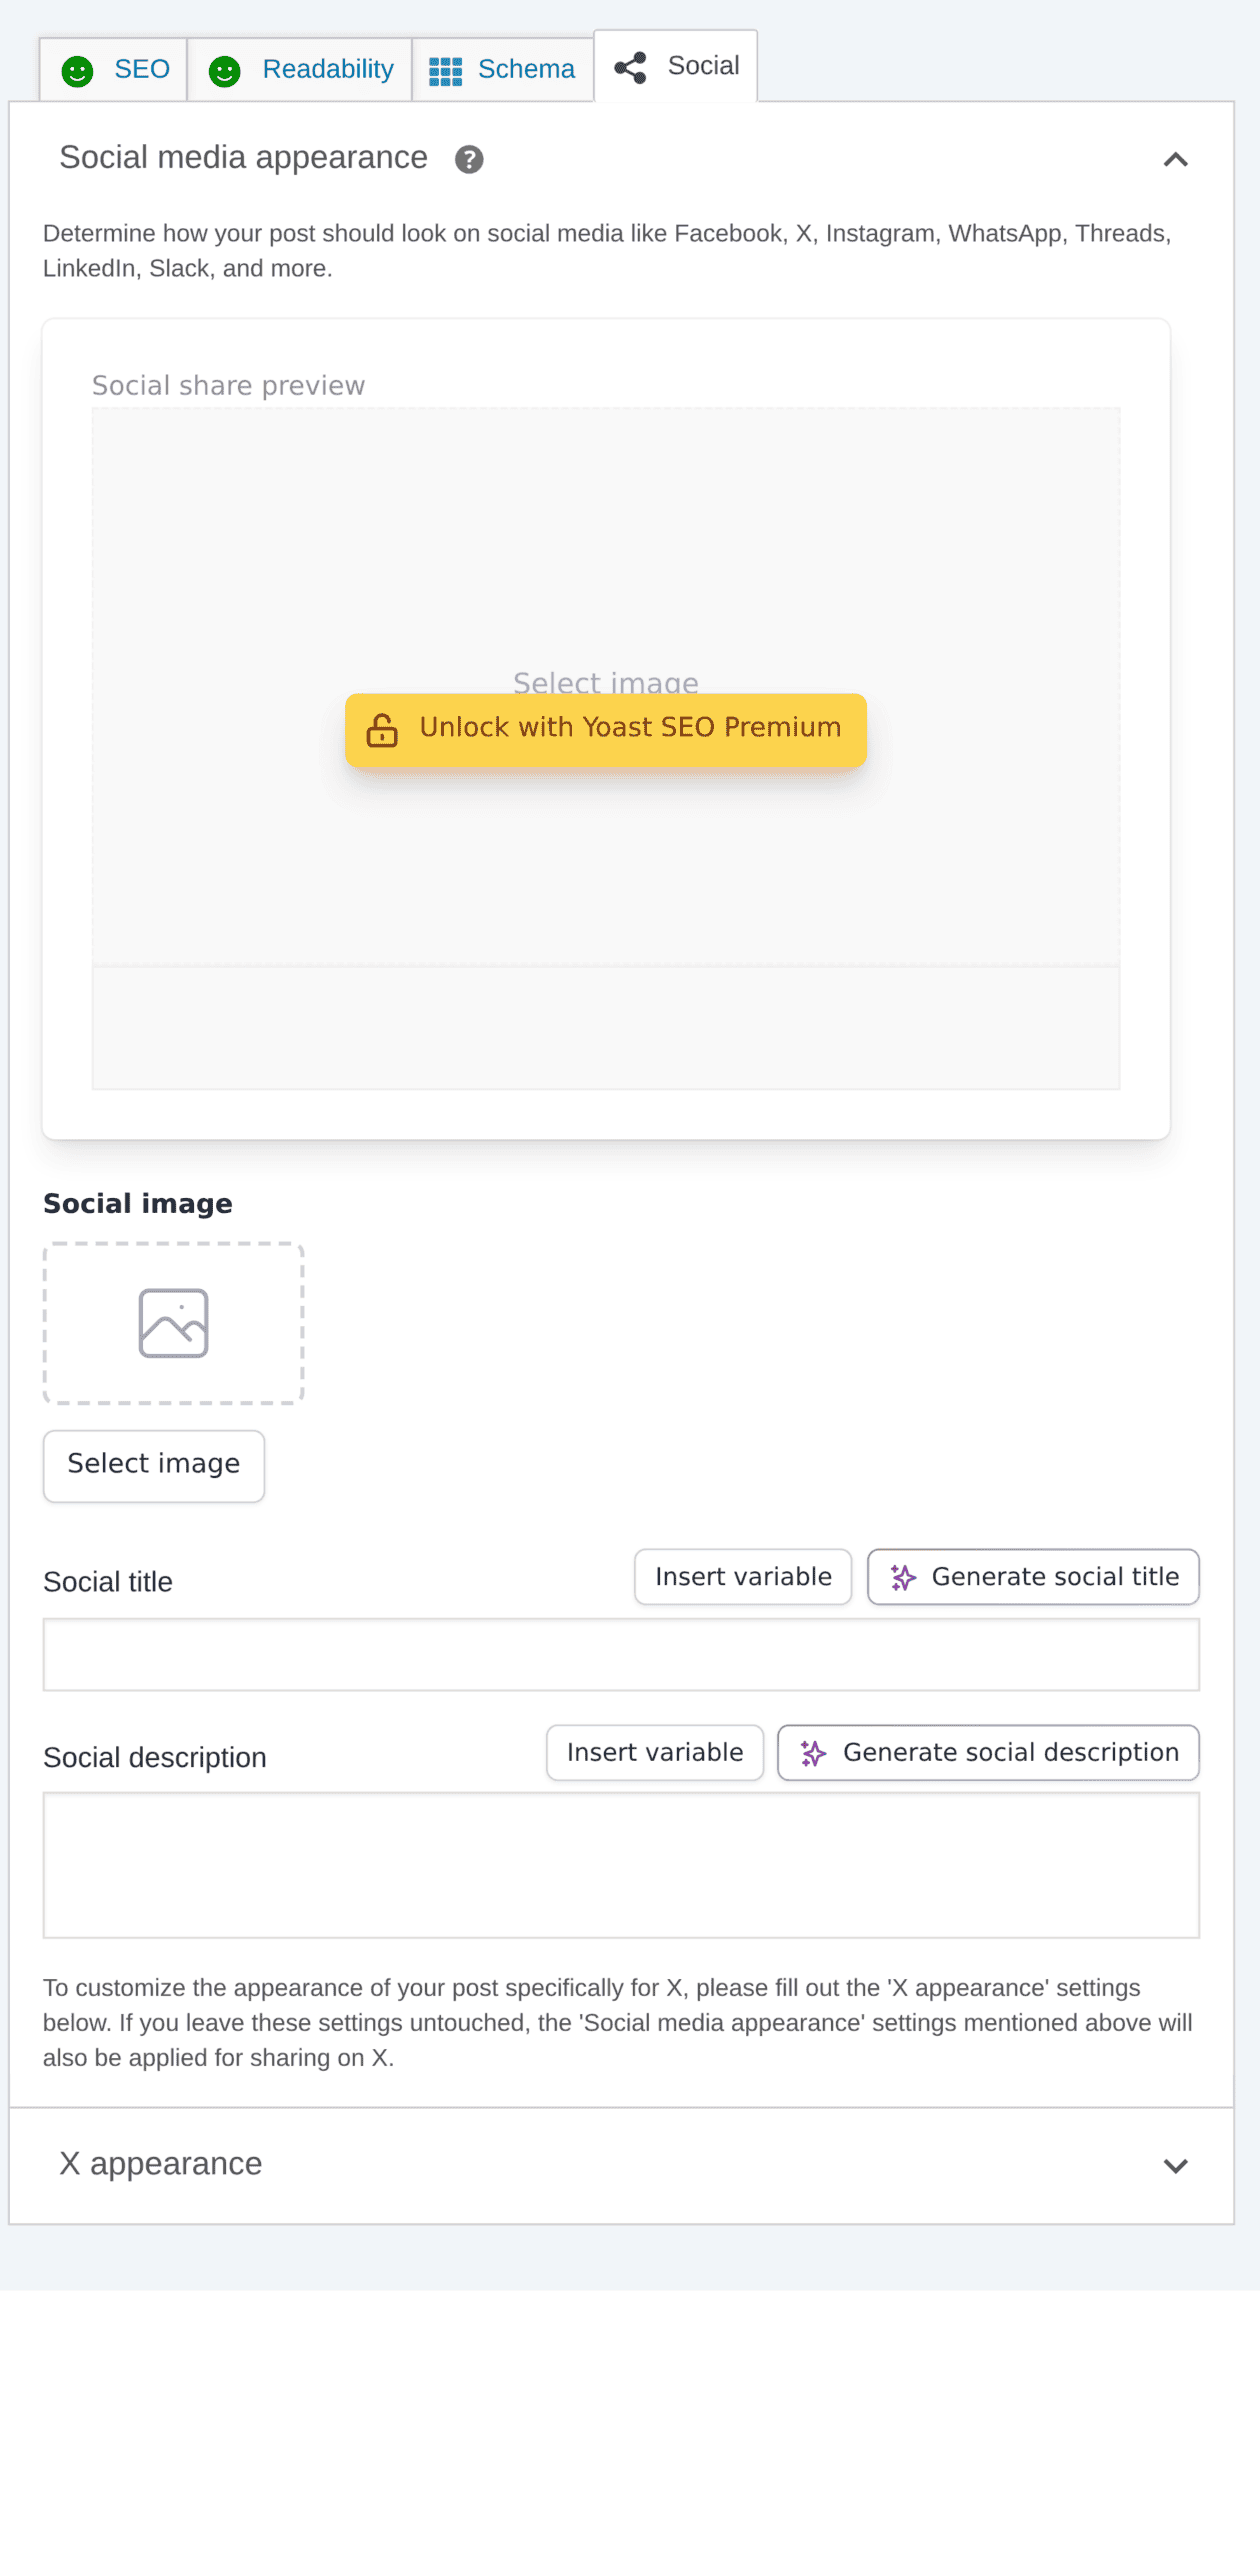
The Social tab allows you to control how your post’s preview is displayed on social media platforms. You can assign a custom image, title, and description for each. Because social media platforms have a different display for posts on their platforms, Premium adds previews for each one.
Explore The Yoast SEO Plugin Dashboard
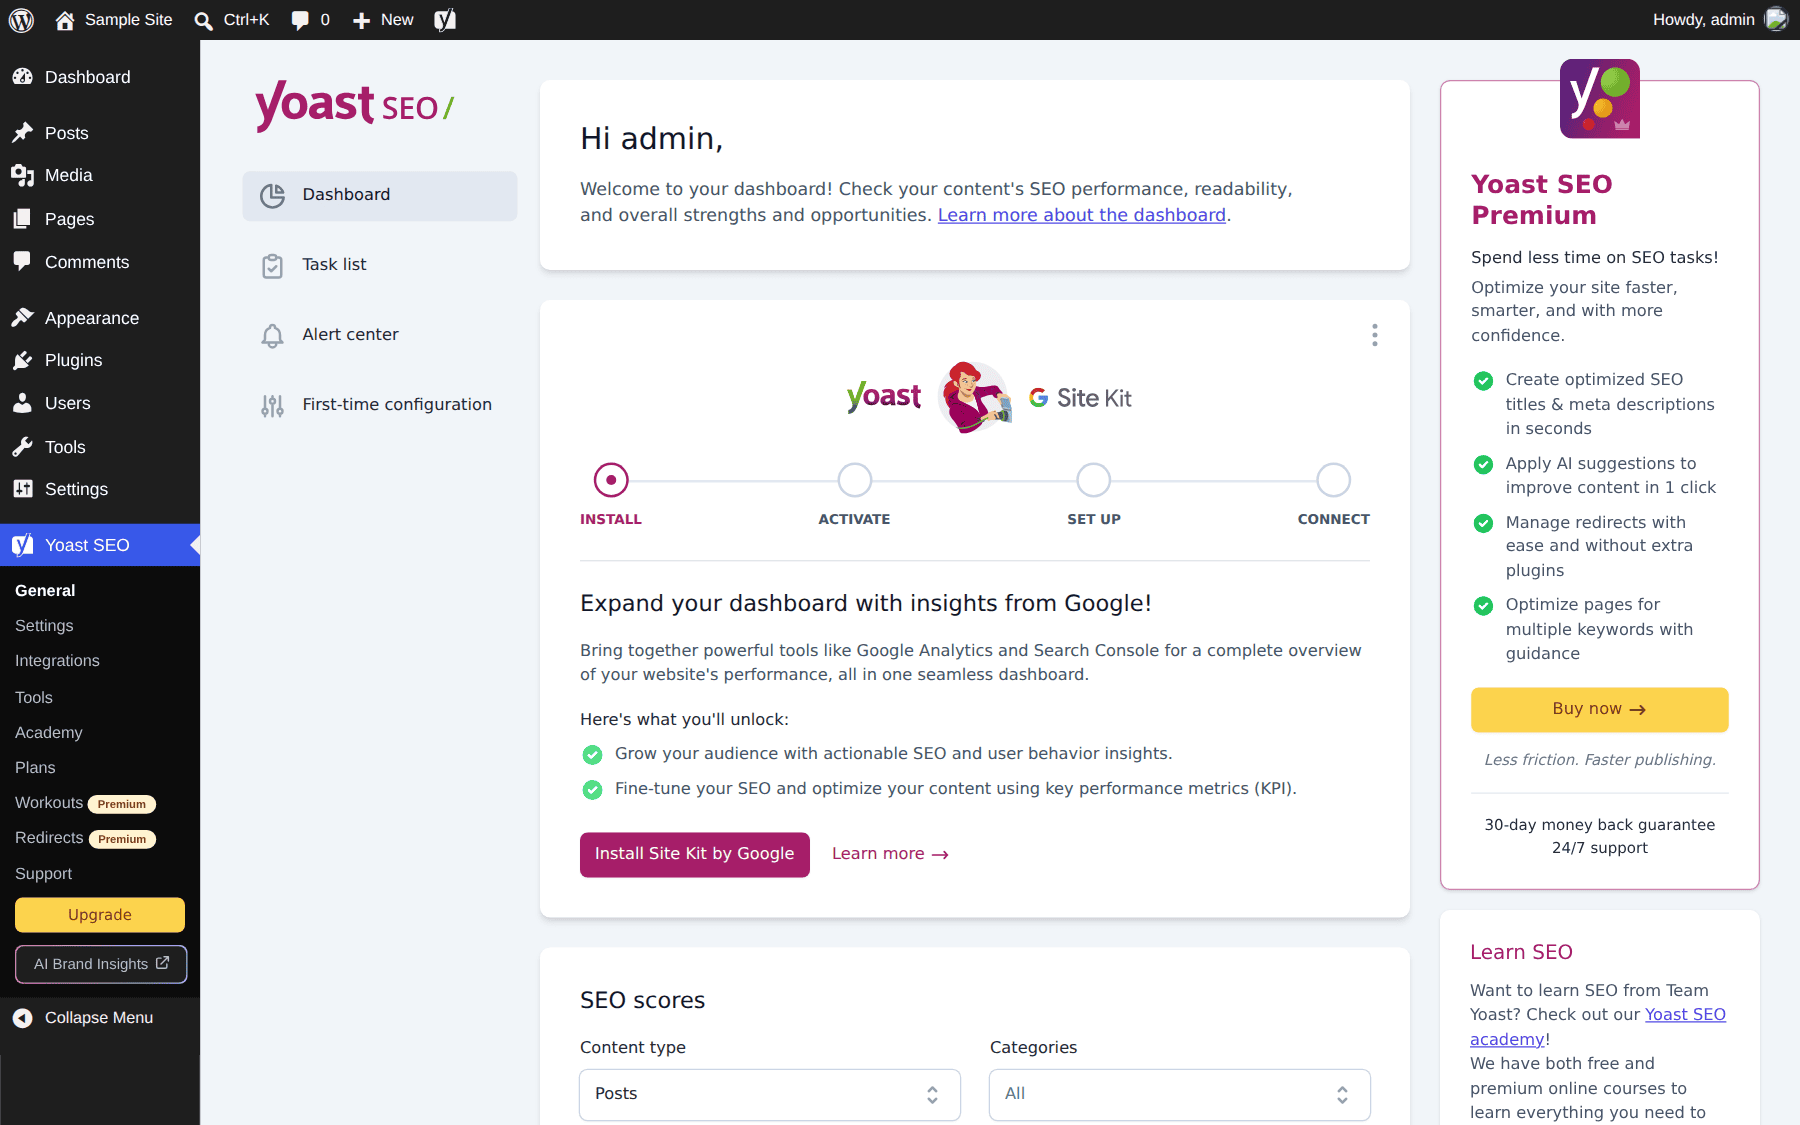
The Yoast SEO menu has four pages: General, Settings, Integrations, and Tools. General is the dashboard, where you can view notifications, SEO scores for your posts, and the first-time configuration.
Most options live on the Settings page, which groups them into General, Content Types, Categories & Tags, and Advanced.
Yoast SEO Site Features
Out of the box, the most important features are enabled. However, others are available, such as llms.txt, which generates a file that points AI assistants to your most relevant content, and inclusivity, which detects content that may be offensive to certain groups.
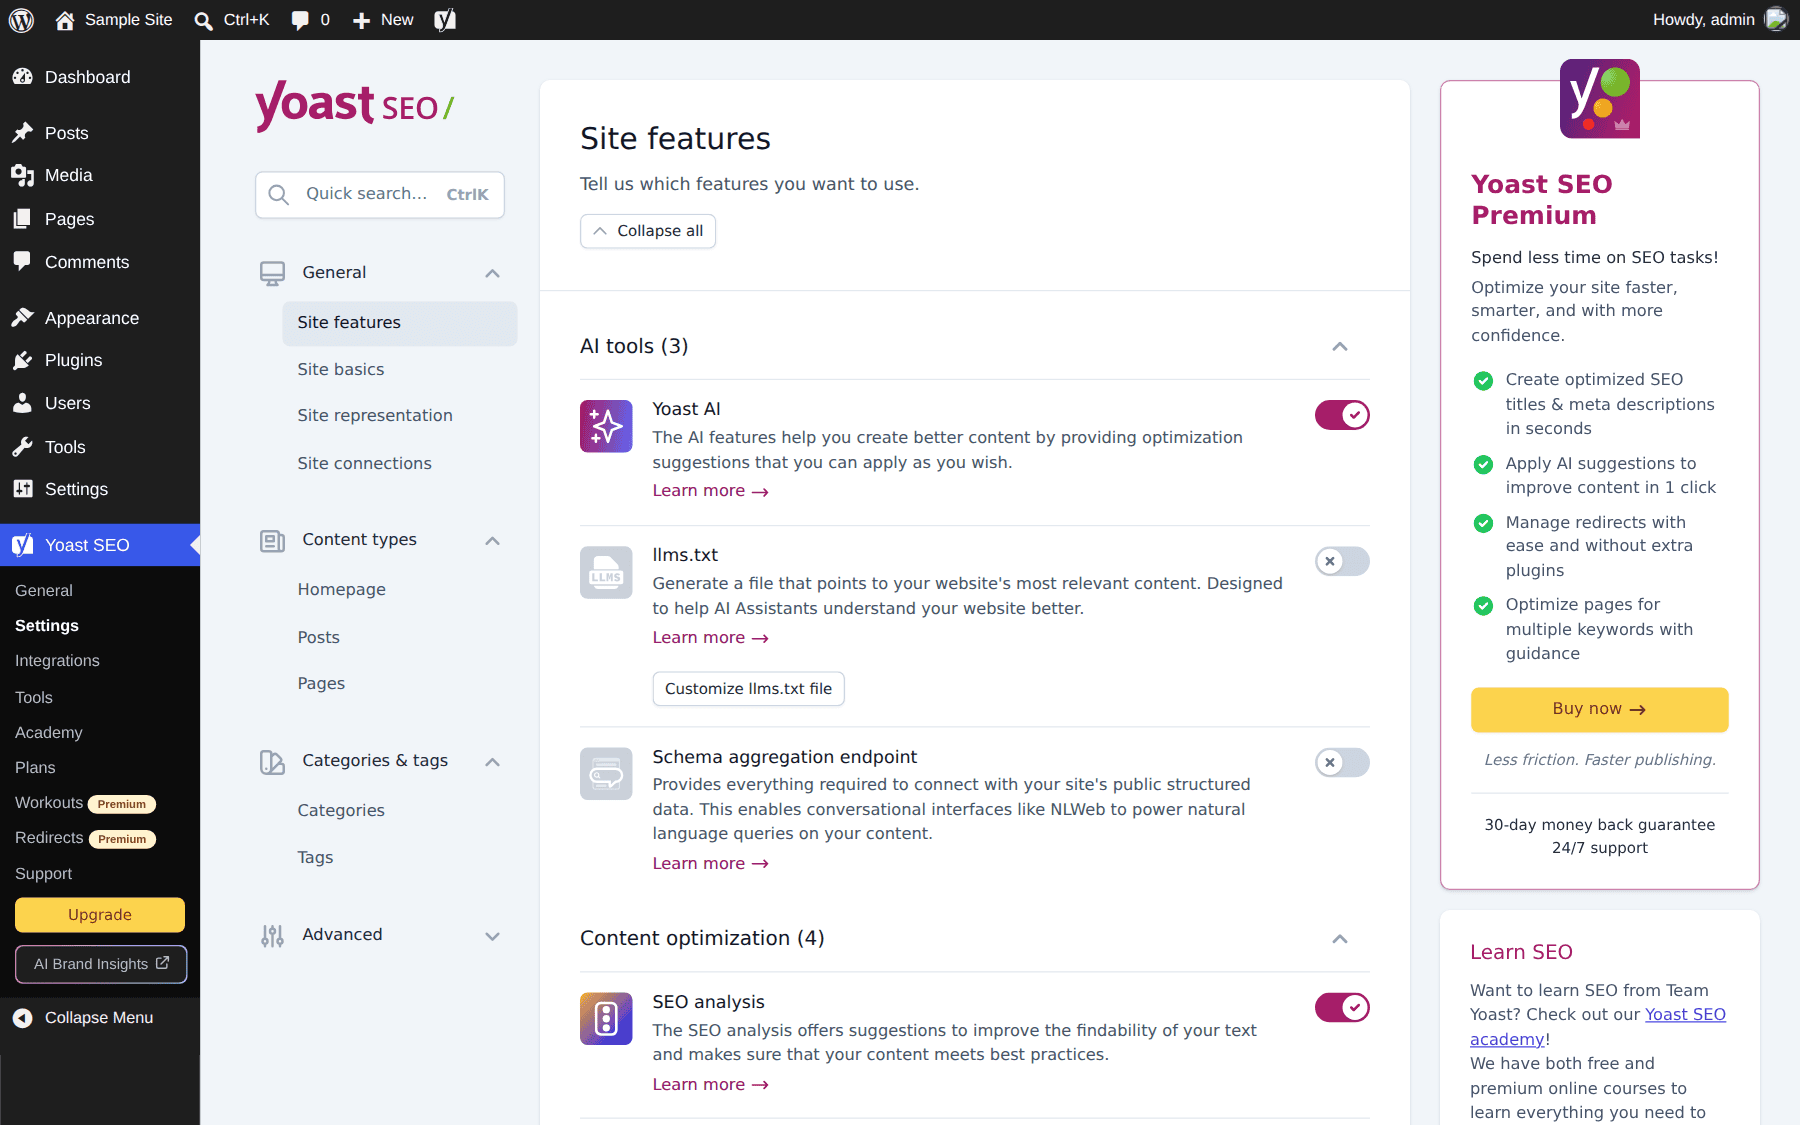
- Yoast AI: Suggests titles, meta descriptions, and content improvements.
- llms.txt: Generates a file that points AI assistants to the most relevant pages on your site.
- Schema aggregation endpoint: Exposes your structured data to conversational interfaces such as NLWeb.
- SEO analysis: Measures on-page SEO.
- Readability analysis: Scores the structure and style of each post.
- Inclusive language analysis: Detects derogatory content with options to correct it.
- Insights: Reveals your reading ease score, estimated reading time, and word count, and with Premium the words you use most often.
- Cornerstone content: Lets you mark a post as cornerstone content.
- Text link counter: Detects the number of internal links in posts.
- Internal linking suggestions: A premium feature that suggests relevant posts or pages to link to while you write.
- Schema Framework: Outputs structured data.
- XML sitemaps: Optimize what to include in your XML sitemap and submit it to Google.
- REST API endpoint: Gives headless WordPress sites the ability to add metadata to individual URLs.
- IndexNow: A premium feature that enables automatic pings on Bing and Yandex.
- Open Graph data: Allows Facebook and other social media to display a preview with images and text.
- X card data: Lets X show a preview.
- Slack sharing: Shares an author byline and reading time estimate in Slack channels.
- Task list: Guides you through important SEO tasks.
- Admin bar menu: Grants access to Yoast tools on the front end of your WordPress site.
Set Up Social Profiles
Your social profiles live under Site Representation > Other Profiles. The information you added in the first-time configuration is already there, so for most users there is no need to modify anything. You can add other platforms such as Instagram, Pinterest, YouTube, or LinkedIn.
Content Types
This section controls the search appearance options for posts, pages, and the homepage. You can enable all post types, enable only some, and configure the settings for each. Basic settings include options to streamline SEO titles and meta descriptions. If entered here, your posts and pages will use the same SEO title structure and meta description.
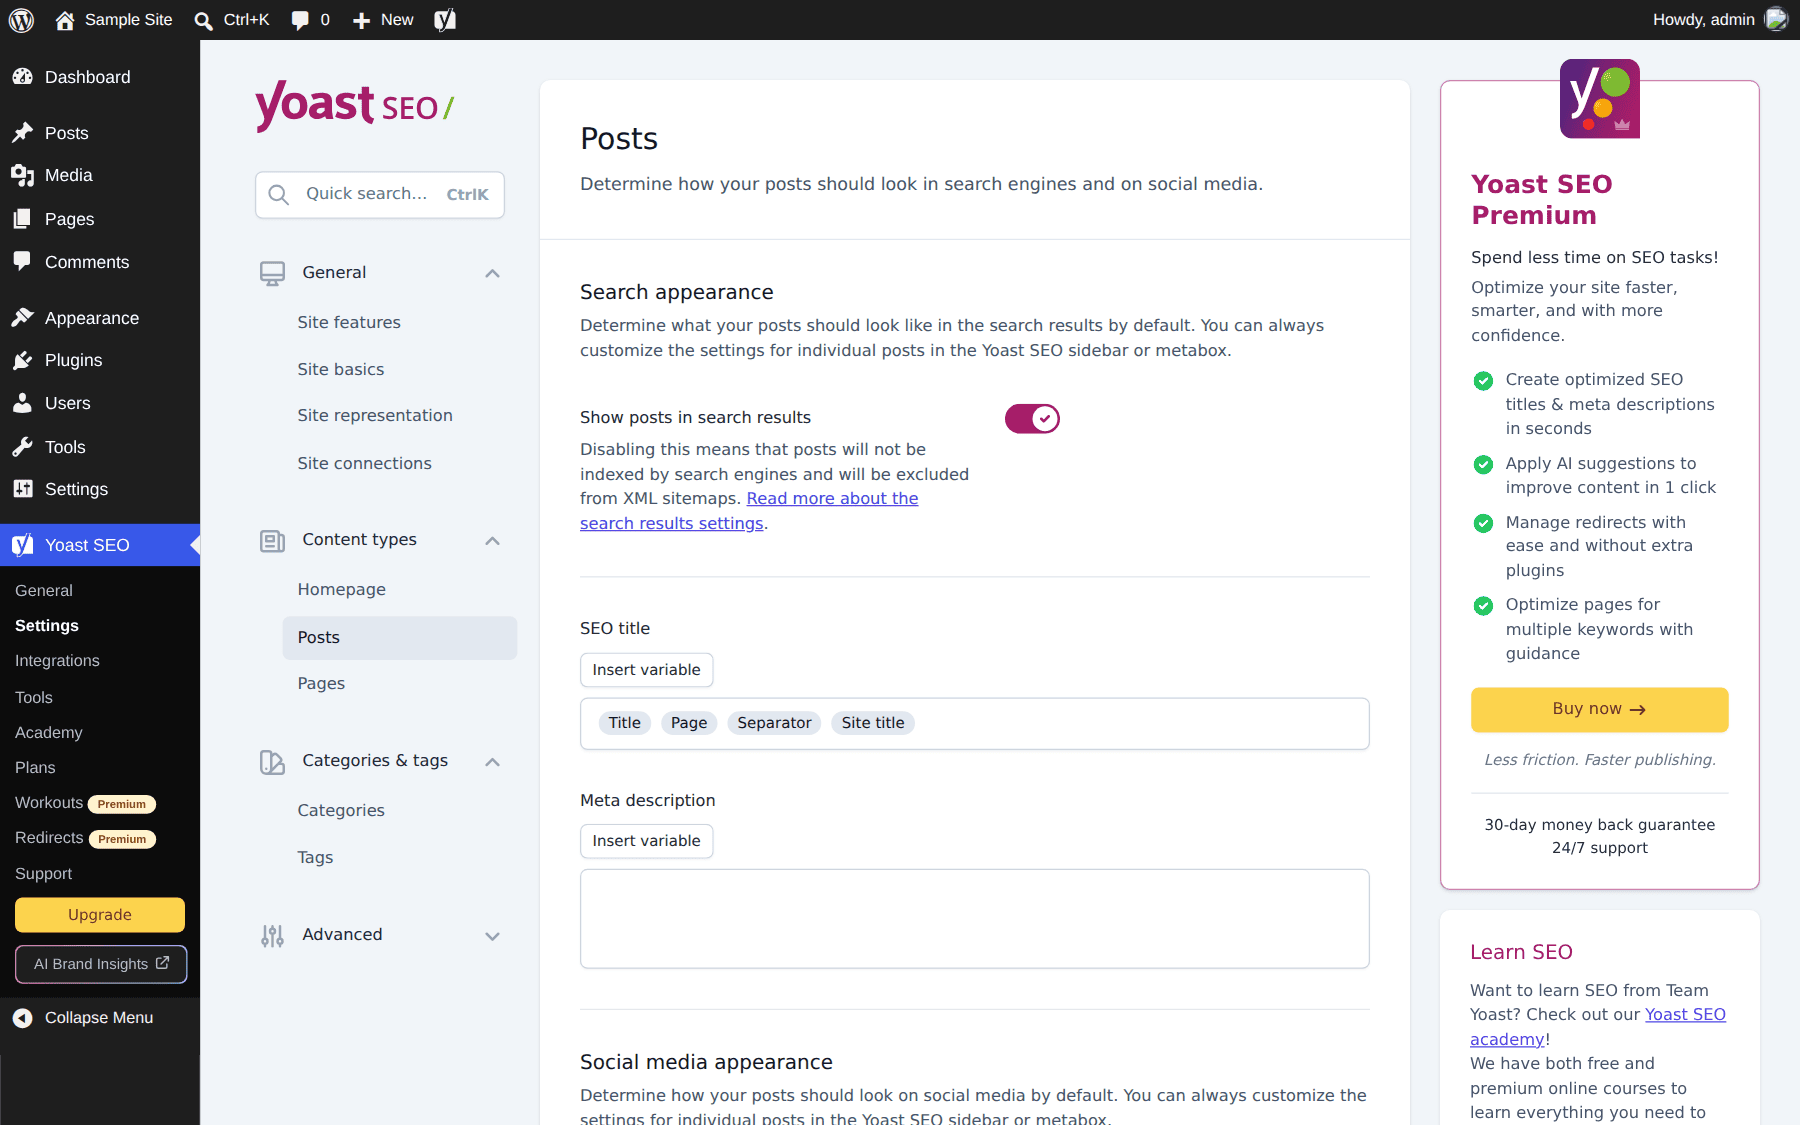
The options include:
- Title & Meta Description
- Social image
- Social title
- Social description
These settings are identical to the content types settings, except they apply to taxonomies.
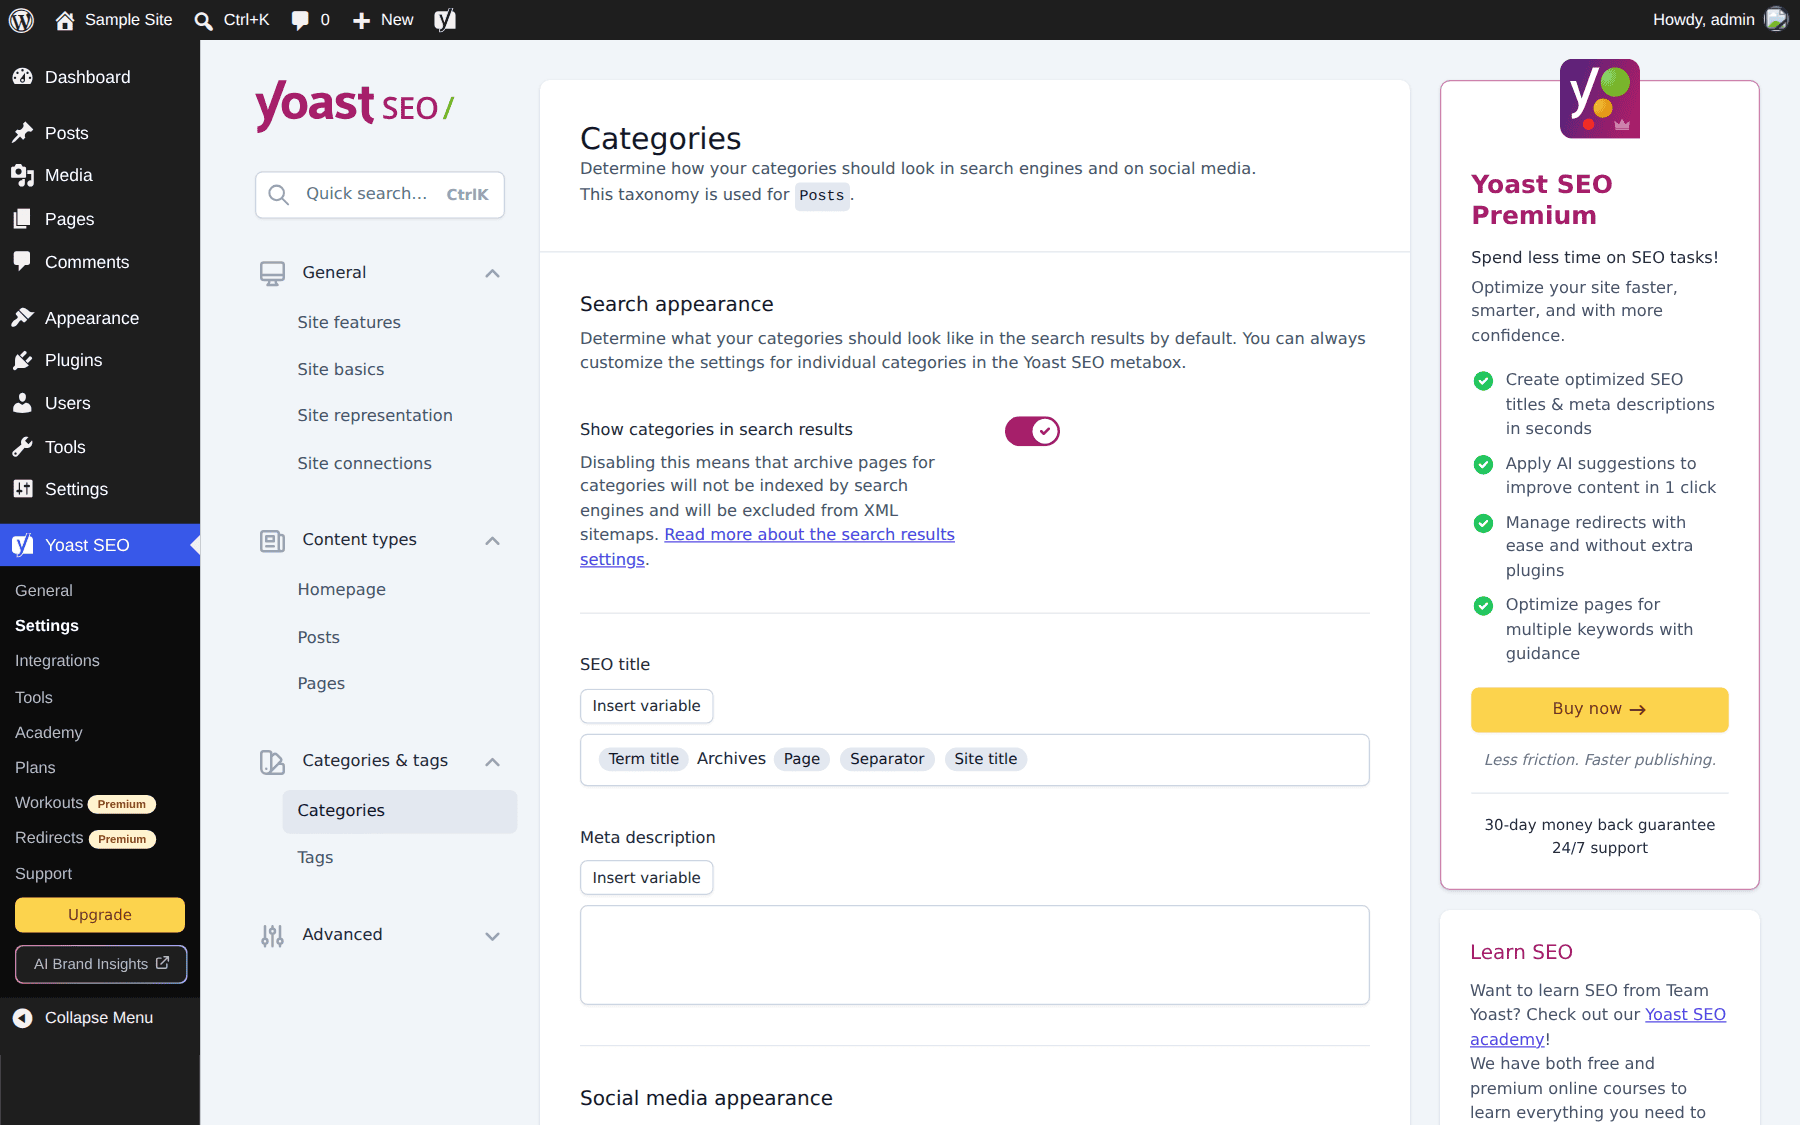
Yoast SEO Advanced Settings
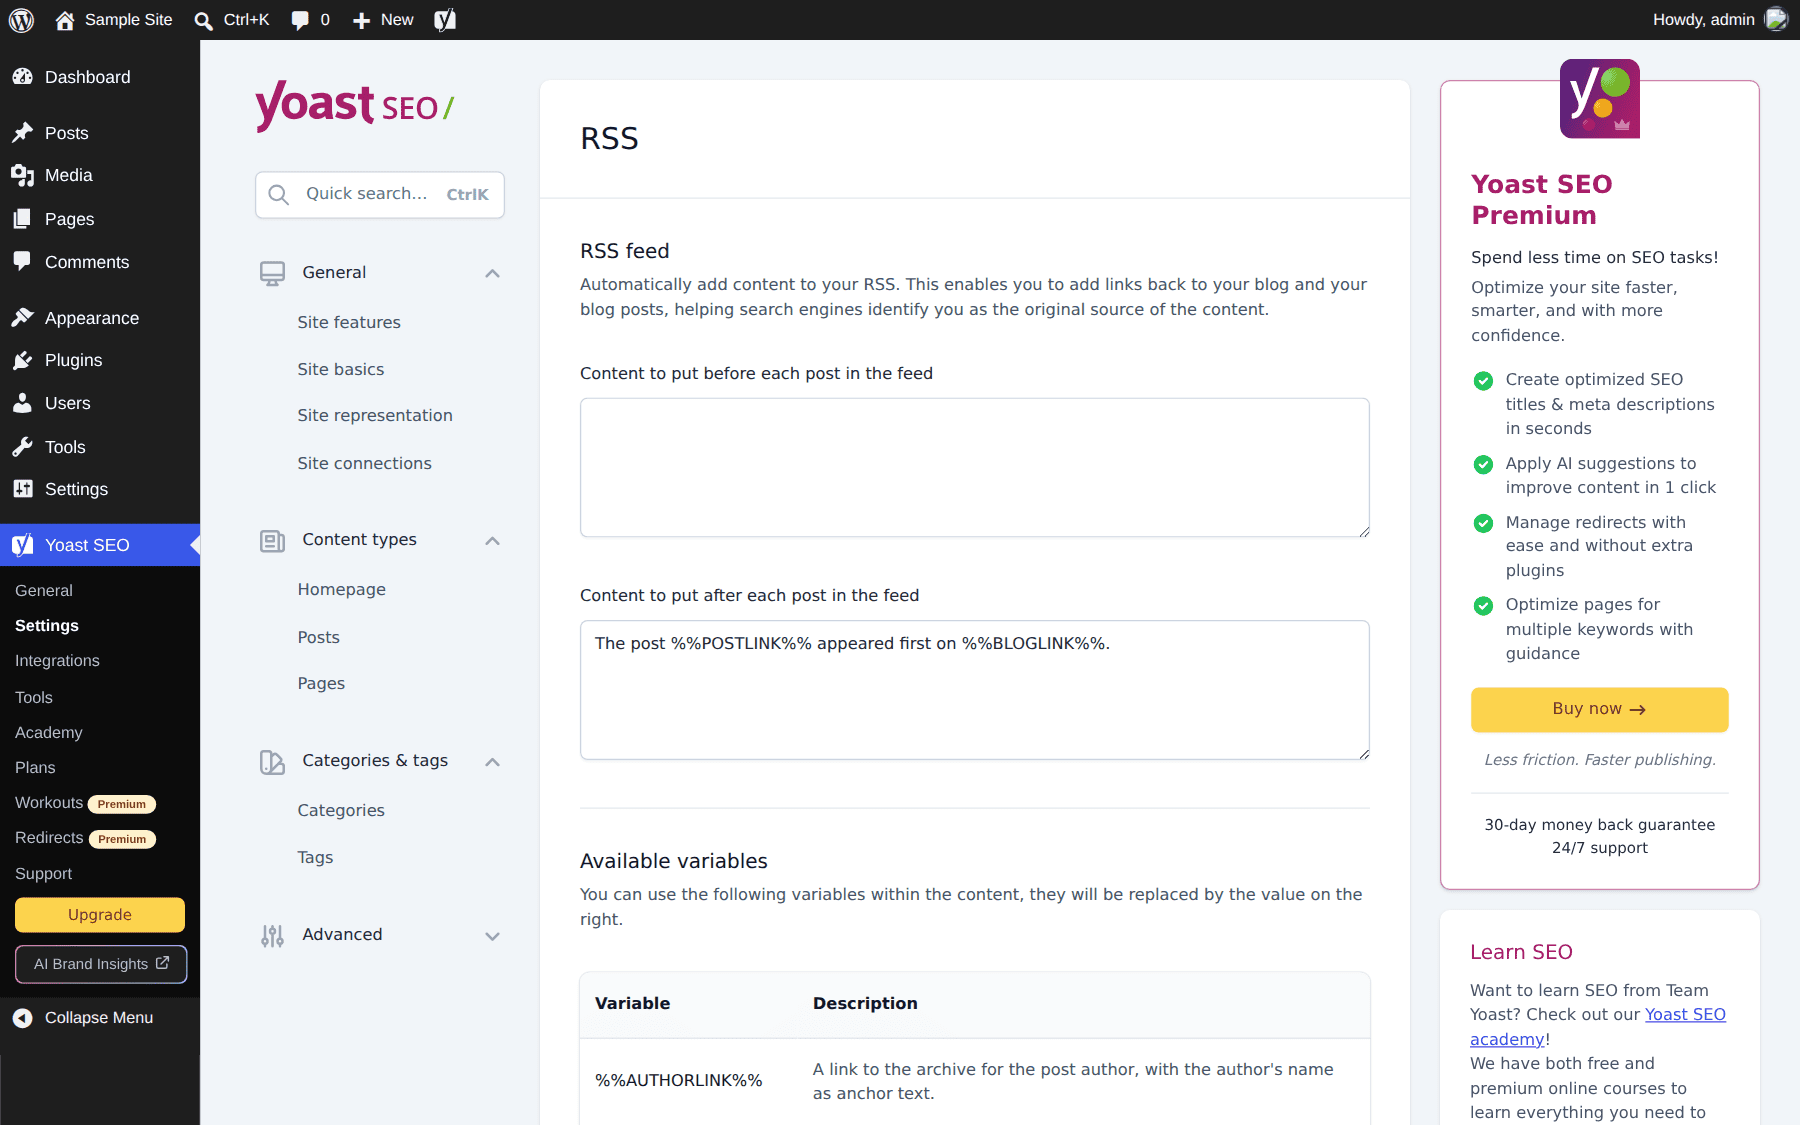
Under this group, you can configure the Schema framework, crawl optimization, breadcrumbs, and other pages such as author archives, date archives, format archives, and special pages. There are additional settings for media pages and RSS feeds.
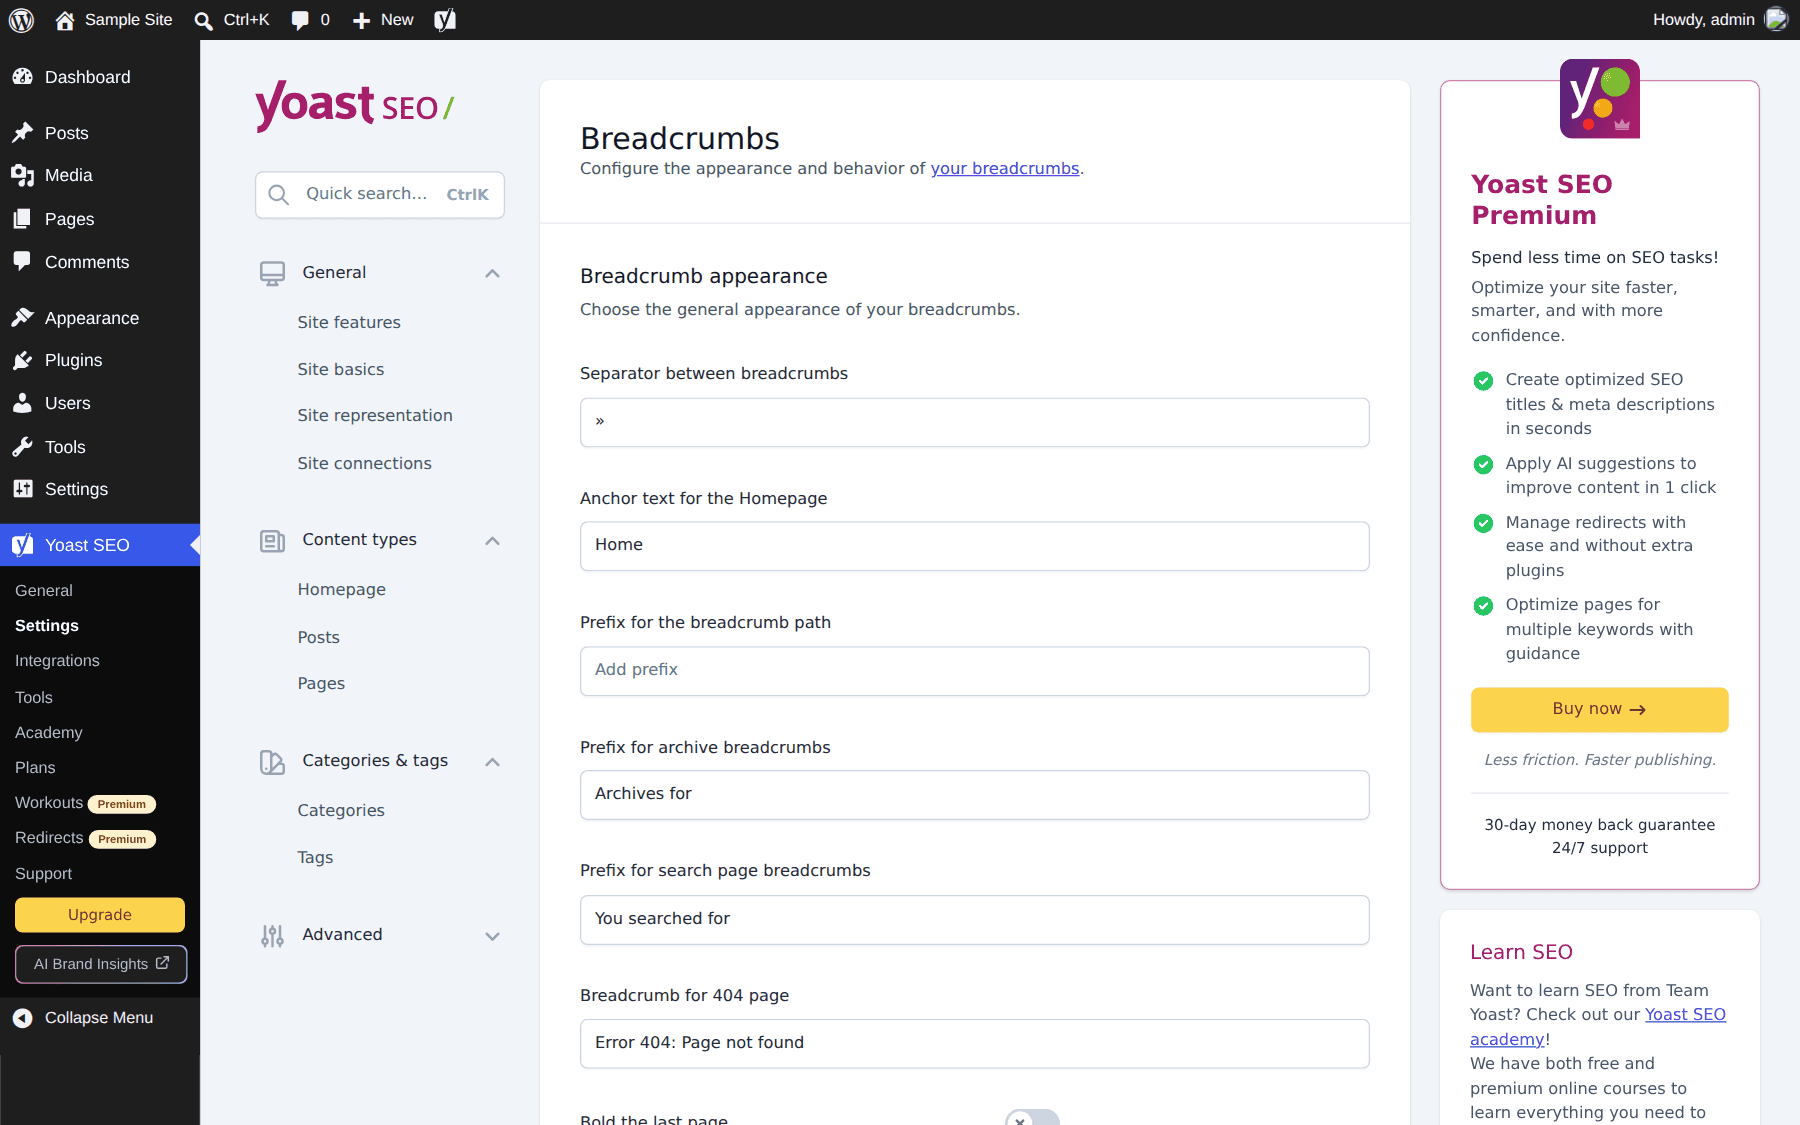
Breadcrumbs
The breadcrumbs settings in Yoast SEO allow you to customize the appearance of breadcrumbs on your site. There are plenty of options that enable you to customize the display of your breadcrumb navigation, and choose which taxonomies to show for content types.
Archives
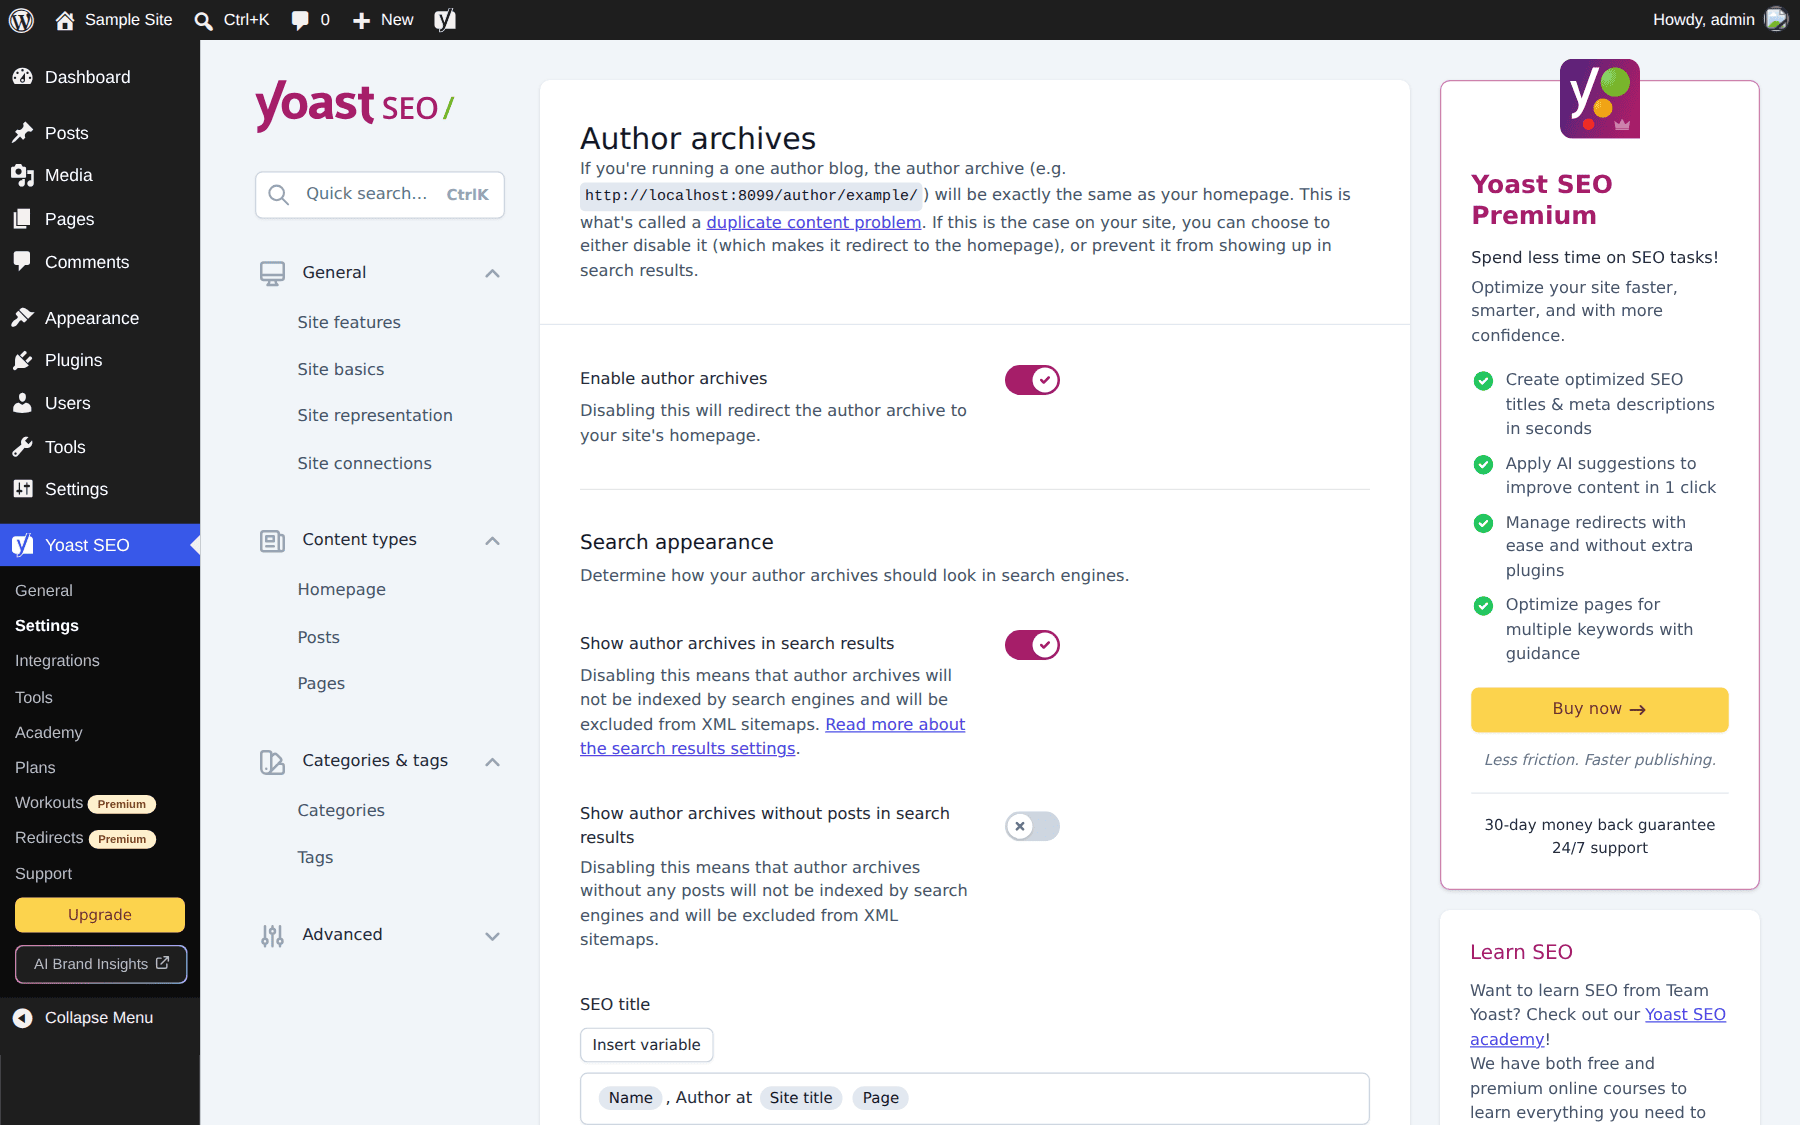
Author archives, date archives, and format archives each have their own page. You can disable any of them, and you can show or hide author archives for authors without posts. Like other search appearance settings, you can create a custom SEO title and meta description as well. Those with a premium version of the Yoast SEO plugin can configure how these types of pages will display on social media.
Media
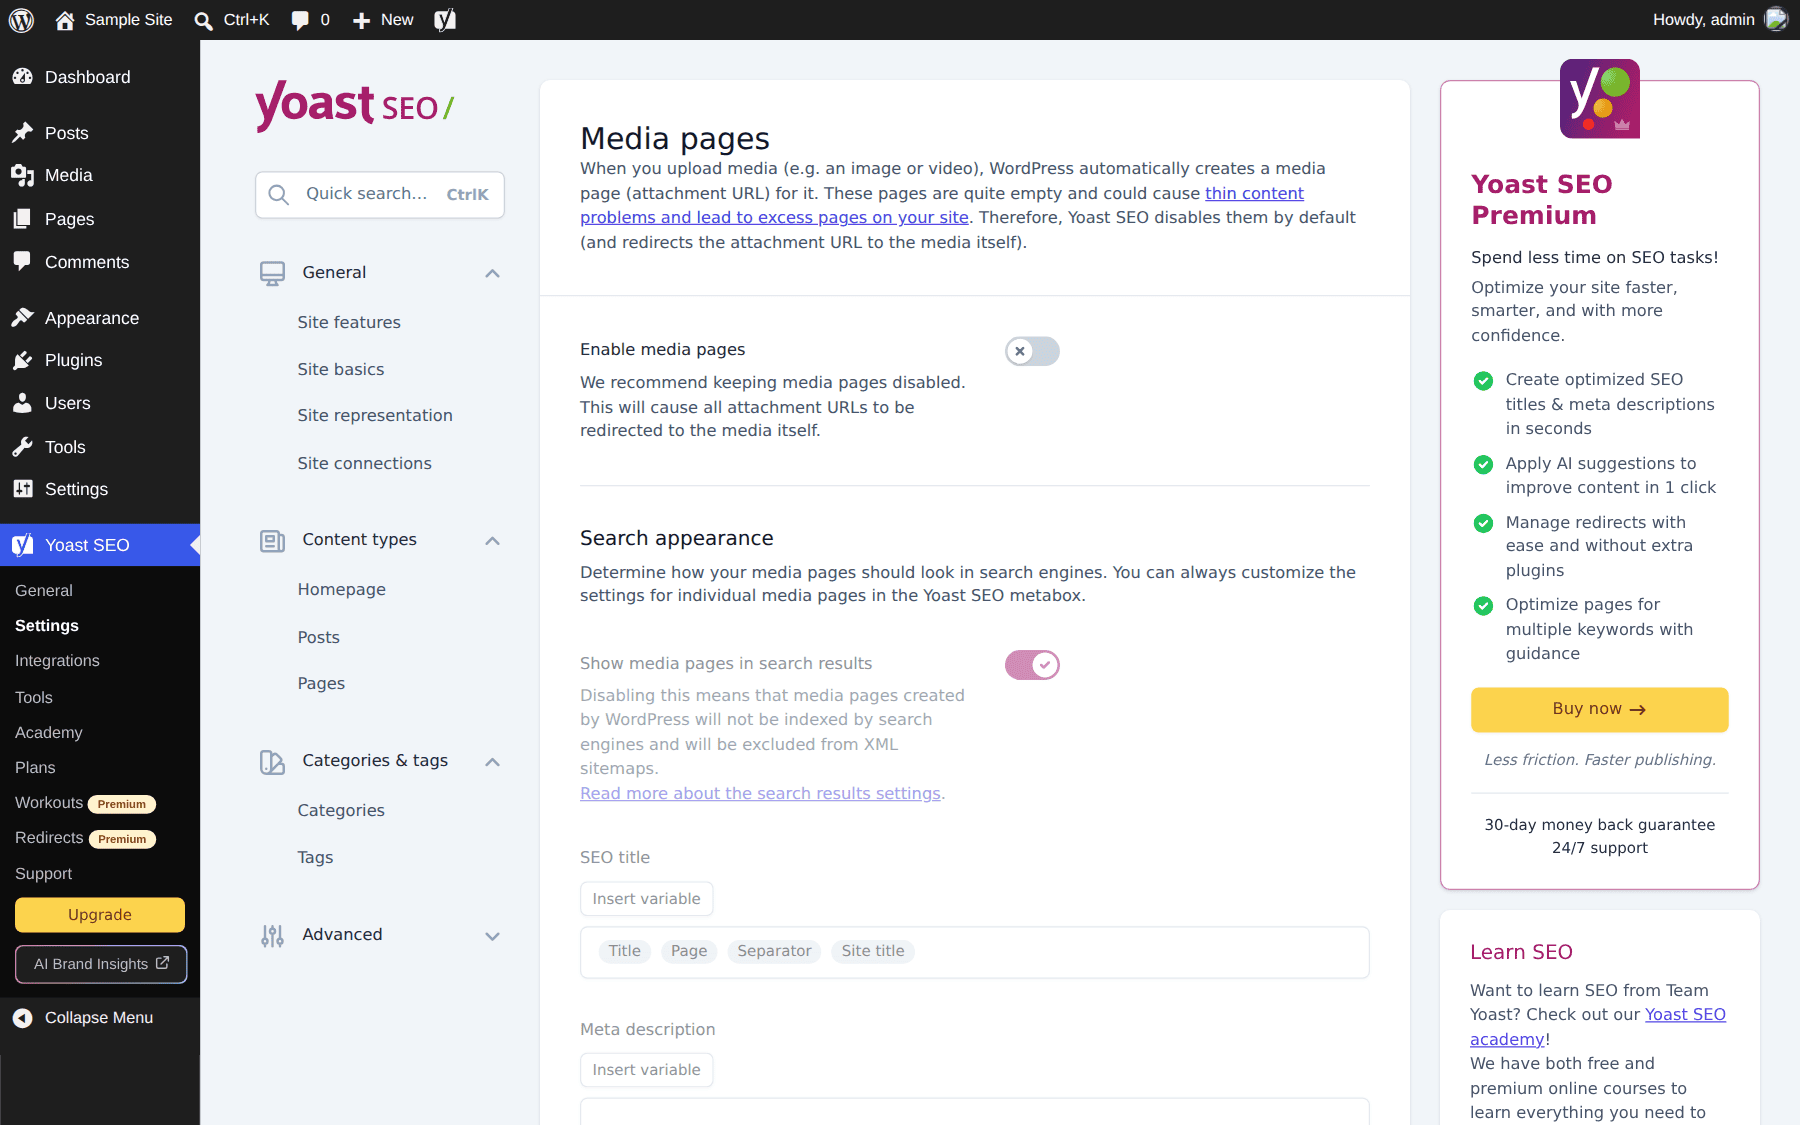
Yoast disables media page URLs by default because they serve no purpose in SEO. If you wish to enable media URLs, you can do so here. Once enabled, you can configure search appearance options, schema, and SEO controls and assessments, which determines whether Yoast SEO tools and controls are visible in the attachment editor.
RSS
The Yoast SEO plugin has an automatic tool that allows you to add content to your RSS feed. You can assign content to appear before each post in the feed and add content after each post. Additionally, you can input variables that perform various options, such as adding a link to the post, where the title is the anchor text.
Integrations
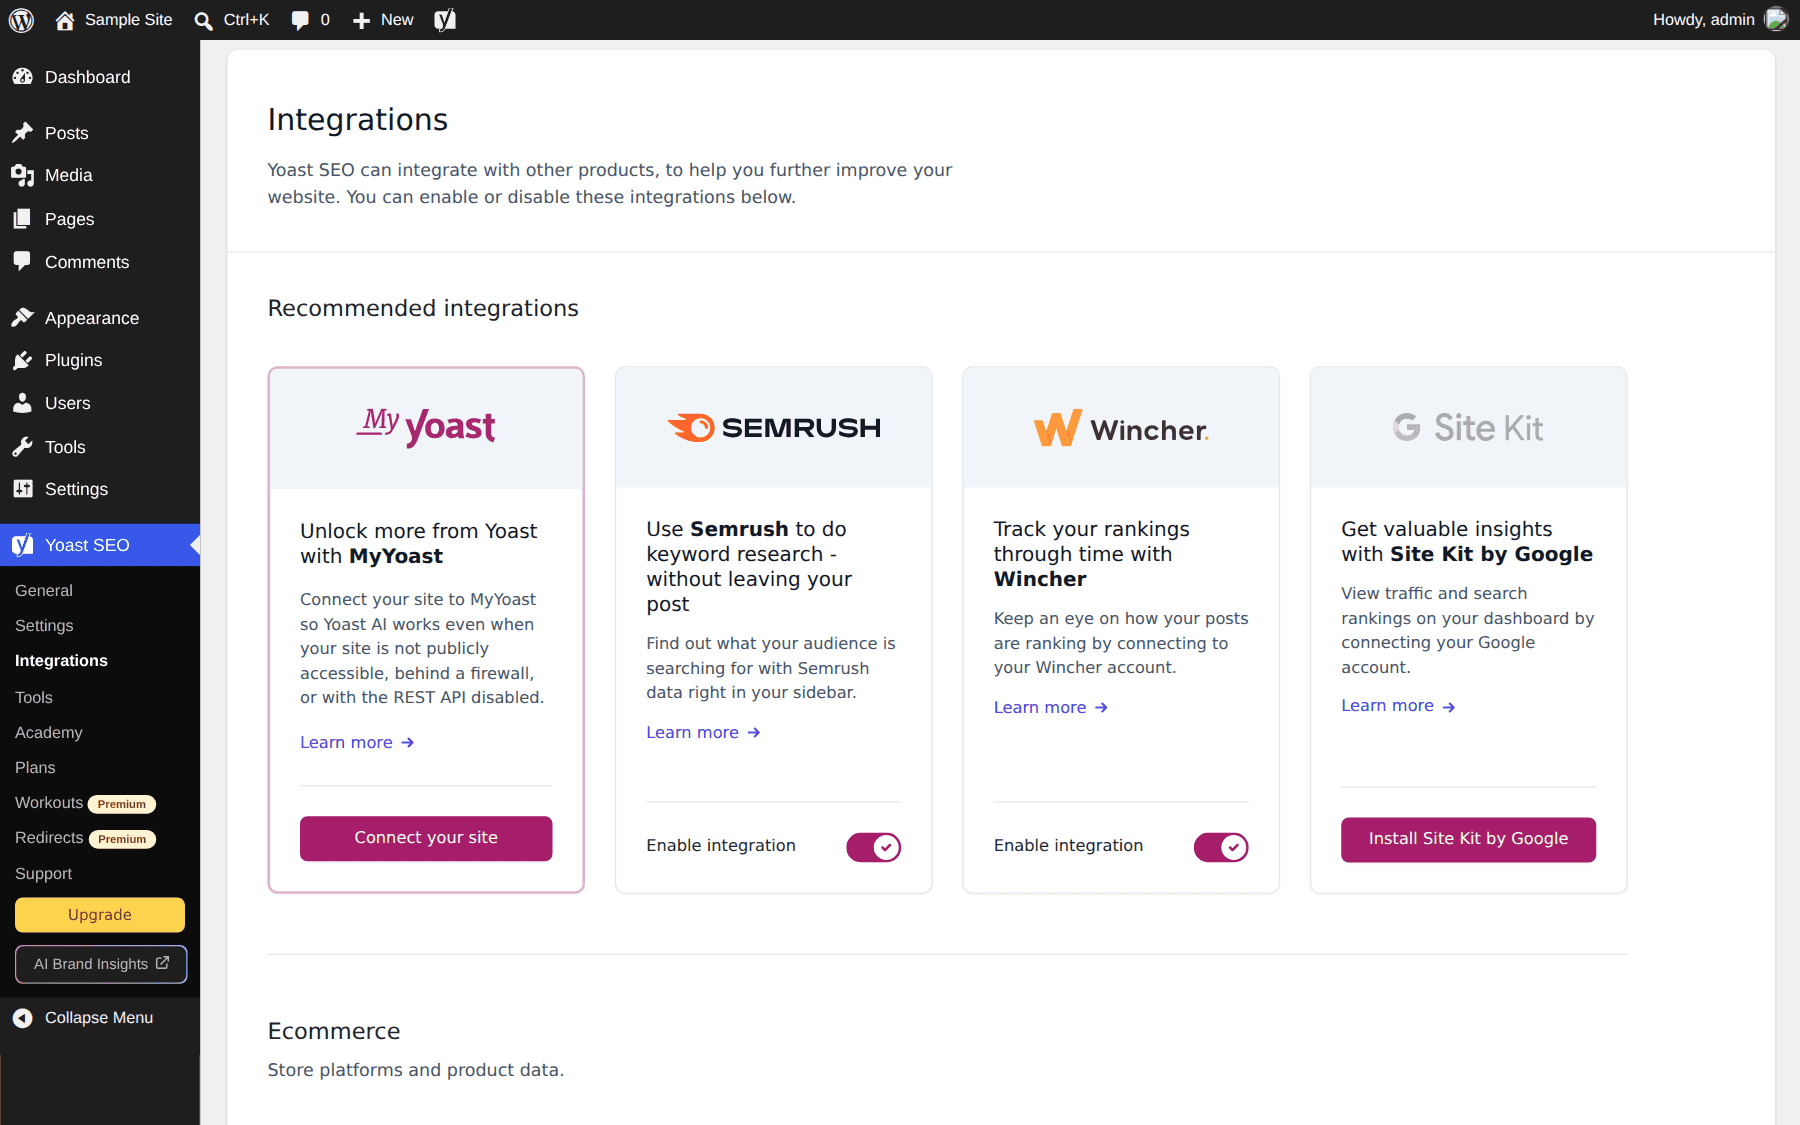
Under Yoast SEO > Integrations, you’ll find a list of integrations, including Semrush, Wincher, Site Kit by Google, and WooCommerce. Some integrations are only available with Premium.
Yoast SEO Tools
A few handy tools with Yoast allow you to speed up your site, save time editing, and configure essential SEO files on your server.
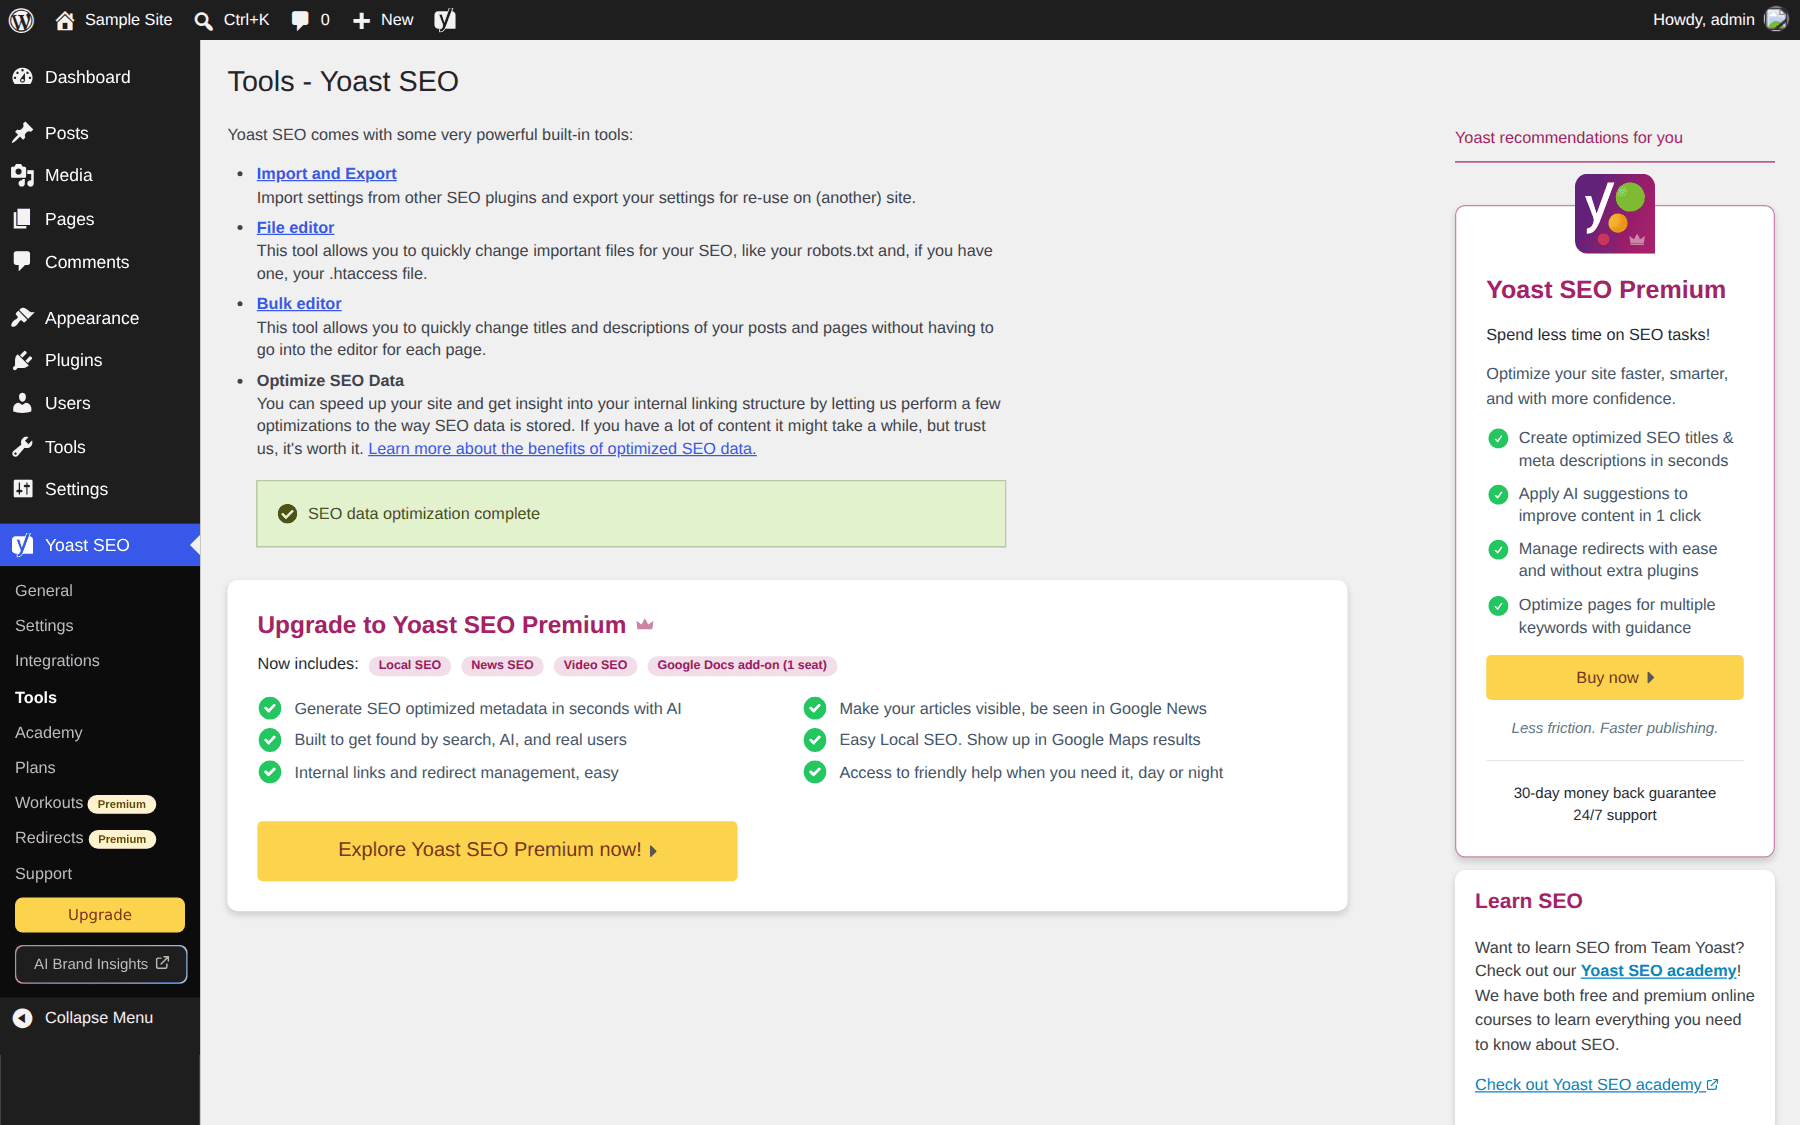
- Import and export: Import settings from another SEO plugin or export your settings for use on other sites.
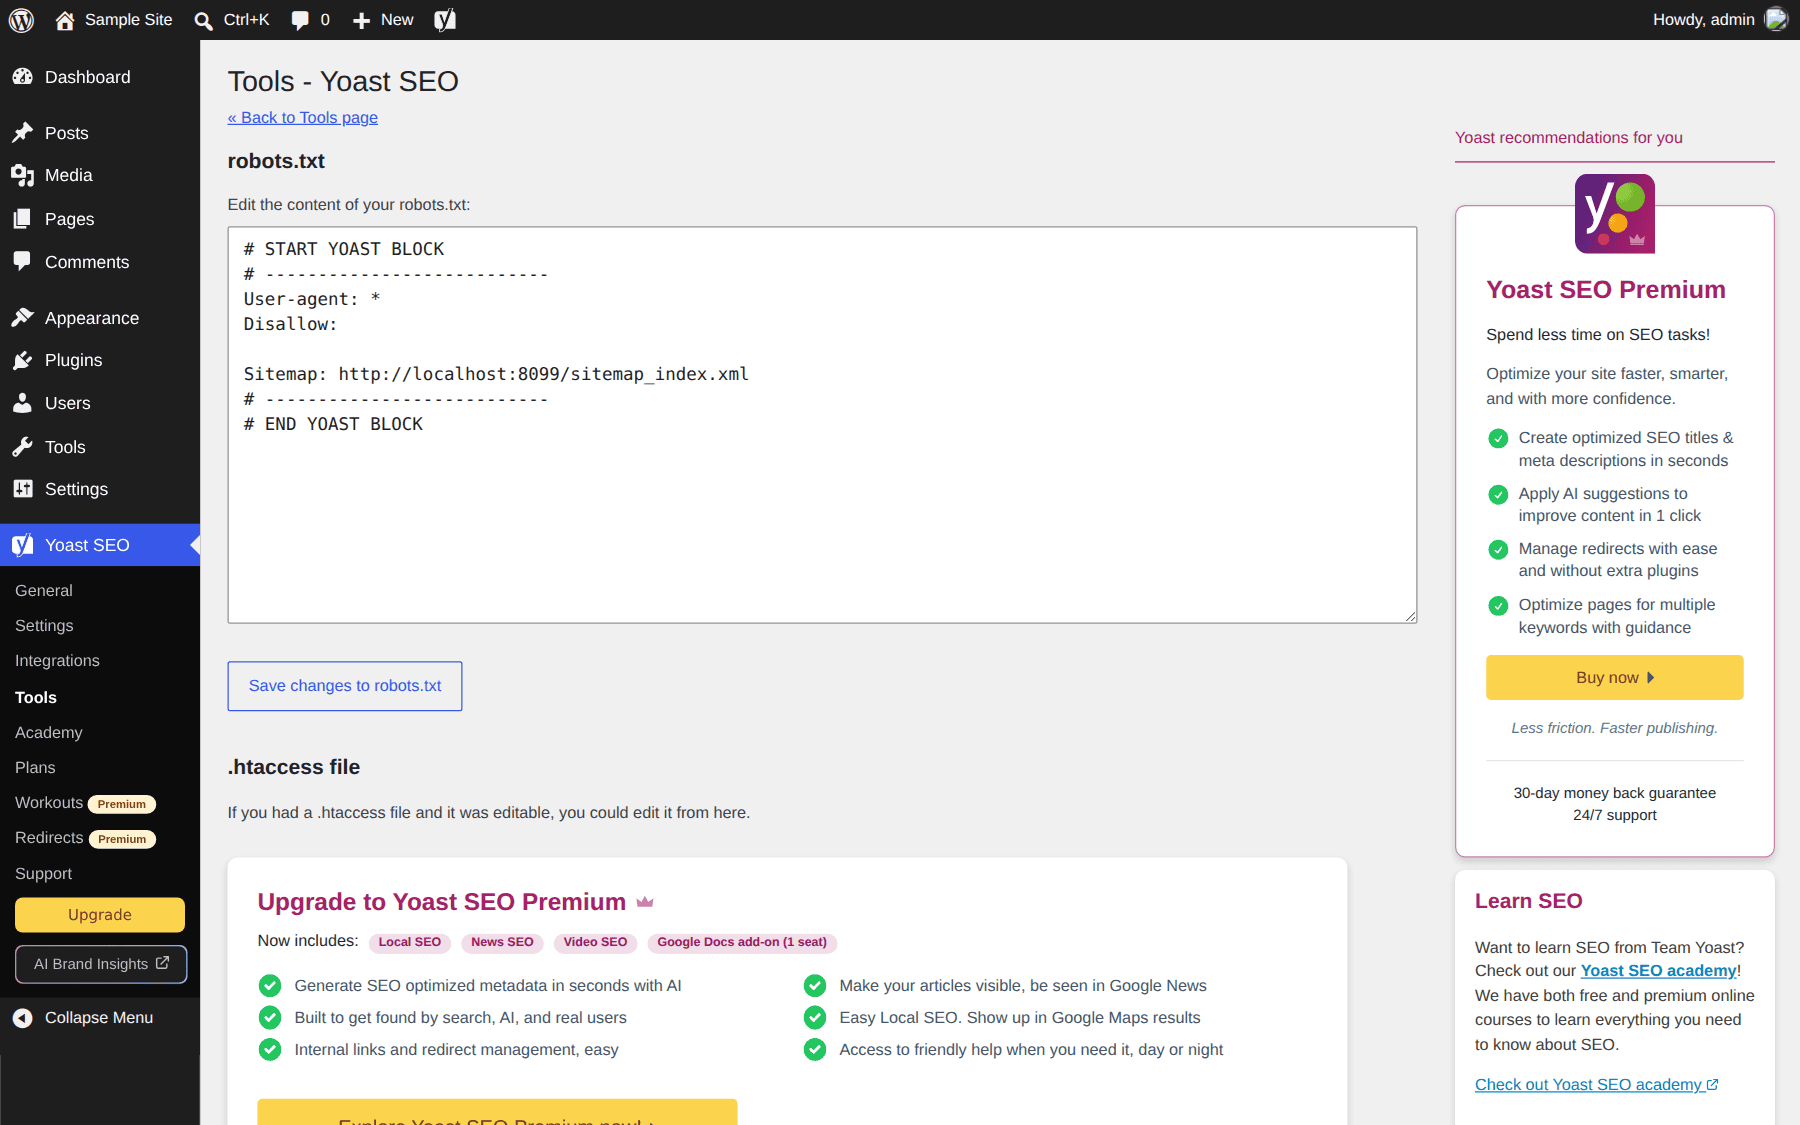
- File editor: Create a robots.txt file or edit your .htaccess file.
- Bulk editor: Bulk edit SEO titles and meta descriptions.
- Optimize SEO data: Run the data optimization tool to rebuild the SEO data table.
Yoast SEO Plugin FAQs
Since Yoast SEO is a broad topic, you’re bound to have questions. Hopefully, these will help.
Does Yoast SEO Have Tutorials I Can Follow?
How Do I Add My Website to the Google Search Console?
Is Configuring SEO Different If I Have a WooCommerce Site?
How Important Is Google Preview Where SEO Is Concerned?
Yoast SEO Is WordPress’ Best Friend
SEO is a highly advanced topic that requires quite a bit of understanding to master. You’ve taken the first step in that journey by learning how to use Yoast SEO. Thankfully, we offer countless resources to aid you along the way. By brushing up on your SEO techniques, gaining a better understanding of linking strategies, and recognizing the importance of mobile SEO, you’ll have the tools necessary to up those rankings. With those additional resources, you’ll be ready to reach the top of the proverbial SEO mountain in no time.
Are you interested in other SEO plugins? Check out our list of the best WordPress SEO plugins.
Do you use Yoast SEO on your website? Let us know by dropping a comment below.




I agree with you, “Yoast SEO is WordPress’ Best Friend”. Unfortunately, there is no way to access it **directly** from blog posts that use the Divi builder. Currently, you have to toggle between the Divi builder and the regular “edit this post”. Adding a new tab for accessing page plugins to the page settings would be fantastic. While we’re at it, it’d be great to be able to access and edit the slug and post format from there as well. 🙂 Otherwise, I’m loving Divi and have for —- I’ve lost count of how many years.