
Whether you or looking for a fresh new look for an image gallery or just wanting a nice display for product images, this tutorial should help. Normally, when adding images to a Divi website, we may limit the design to one image per column. While this is traditionally a safe and clean design, you may find that grouping images within the same column can create beautiful image bundle designs that look great in single or multiple column layouts.
In this tutorial, we are going to show you how to use Divi’s built-in position options to design 3 creative image bundles you can use for your website in all sorts of ways.
Let’s get started.
- 1 Sneak Peek
- 2 Download the Layout for FREE
- 3 Download For Free
- 4 What You Need to Get Started
- 5 Designing Image Bundle #1
-
6
Designing Image Bundle #2
- 6.1 Add Center Image
- 6.2 Add Top Left Image
- 6.3 Column Spacing
- 6.4 Add Top Right Image
- 6.5 Add Bottom Left Image
- 6.6 Add Bottom Right Image
- 6.7 Add Box Shadow Design Accent
- 6.8 Add Text to Left Column
- 6.9 Left Column Padding
- 6.10 Add Text to Right Column
- 6.11 Right Column Padding
- 6.12 Section Background
- 6.13 Adding Image Bundle to Multiple Columns
- 6.14 Final Result
- 7 Image Bundle Design #3
- 8 Final Thoughts
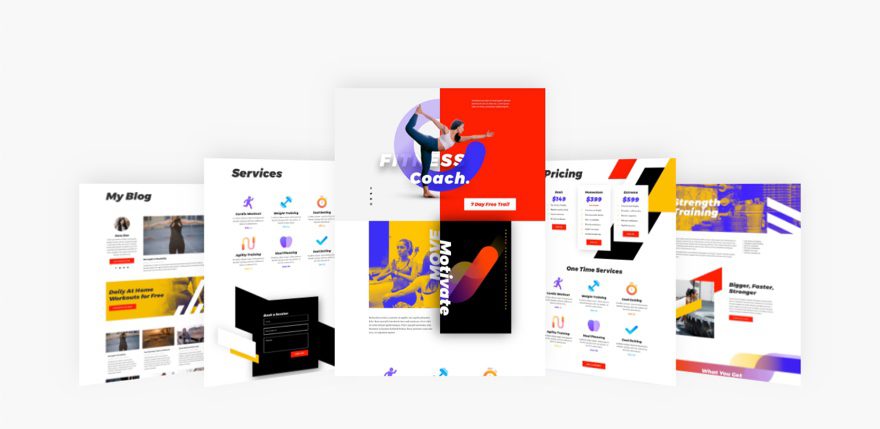
Sneak Peek
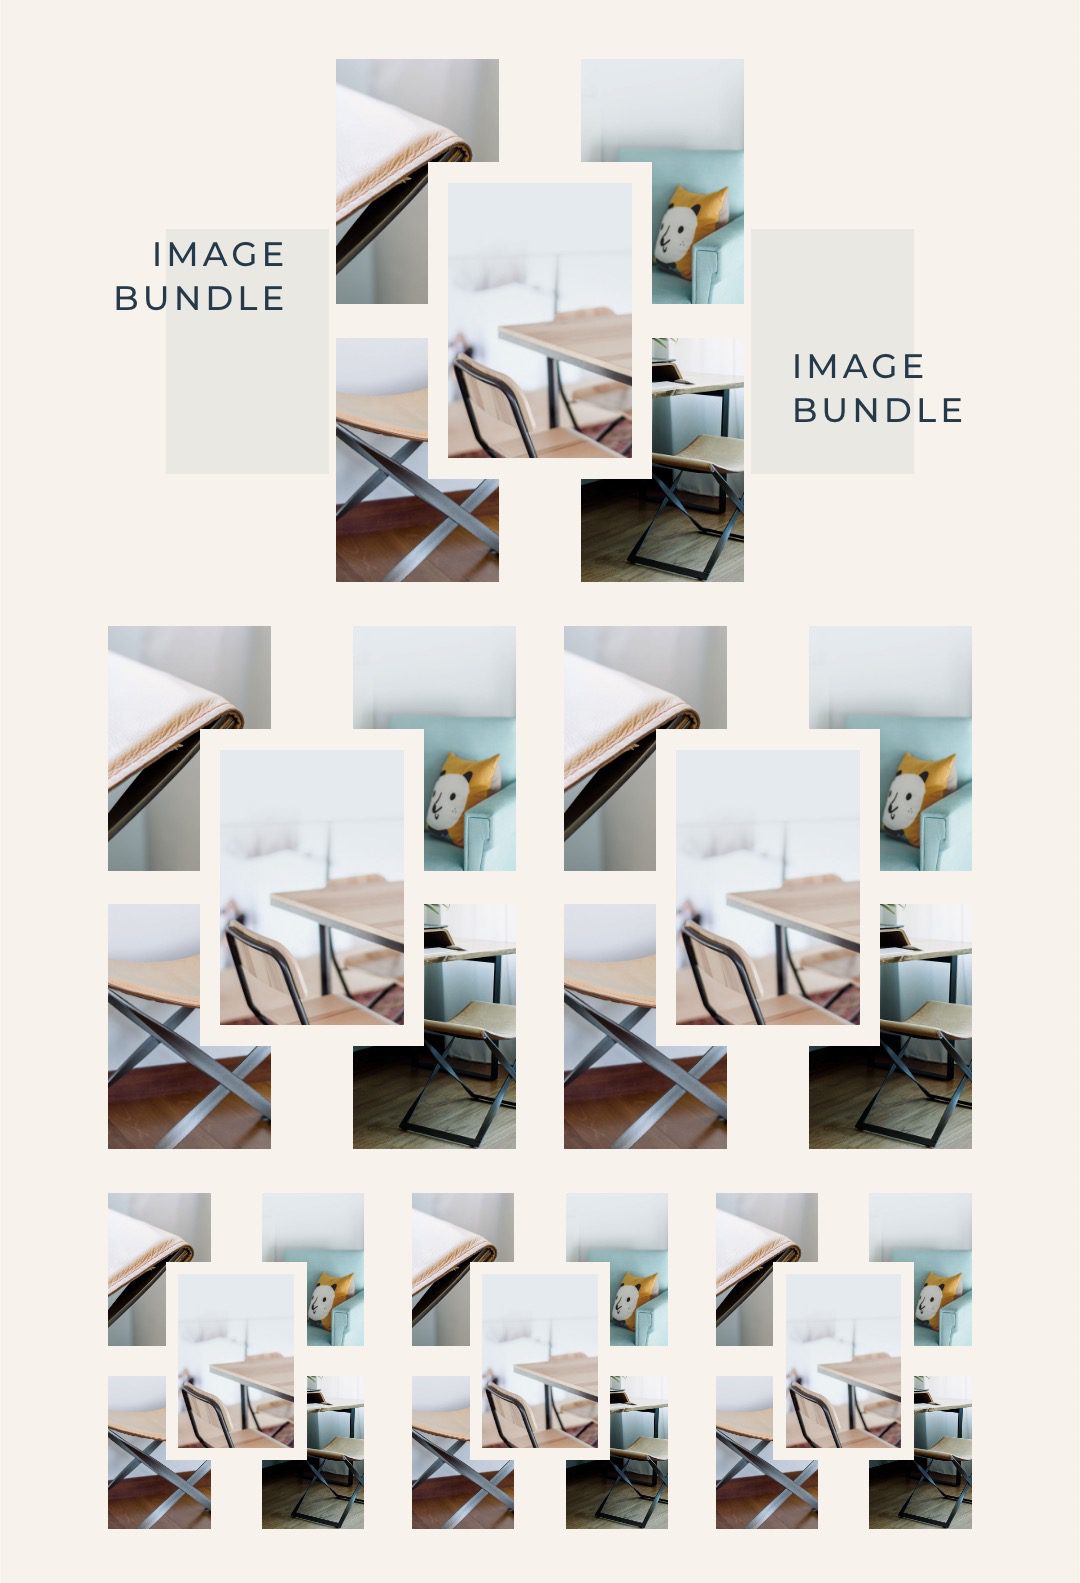
Here is a quick look at the designs we’ll build in this tutorial.
Image Bundle Design #1

Image Bundle Design #2
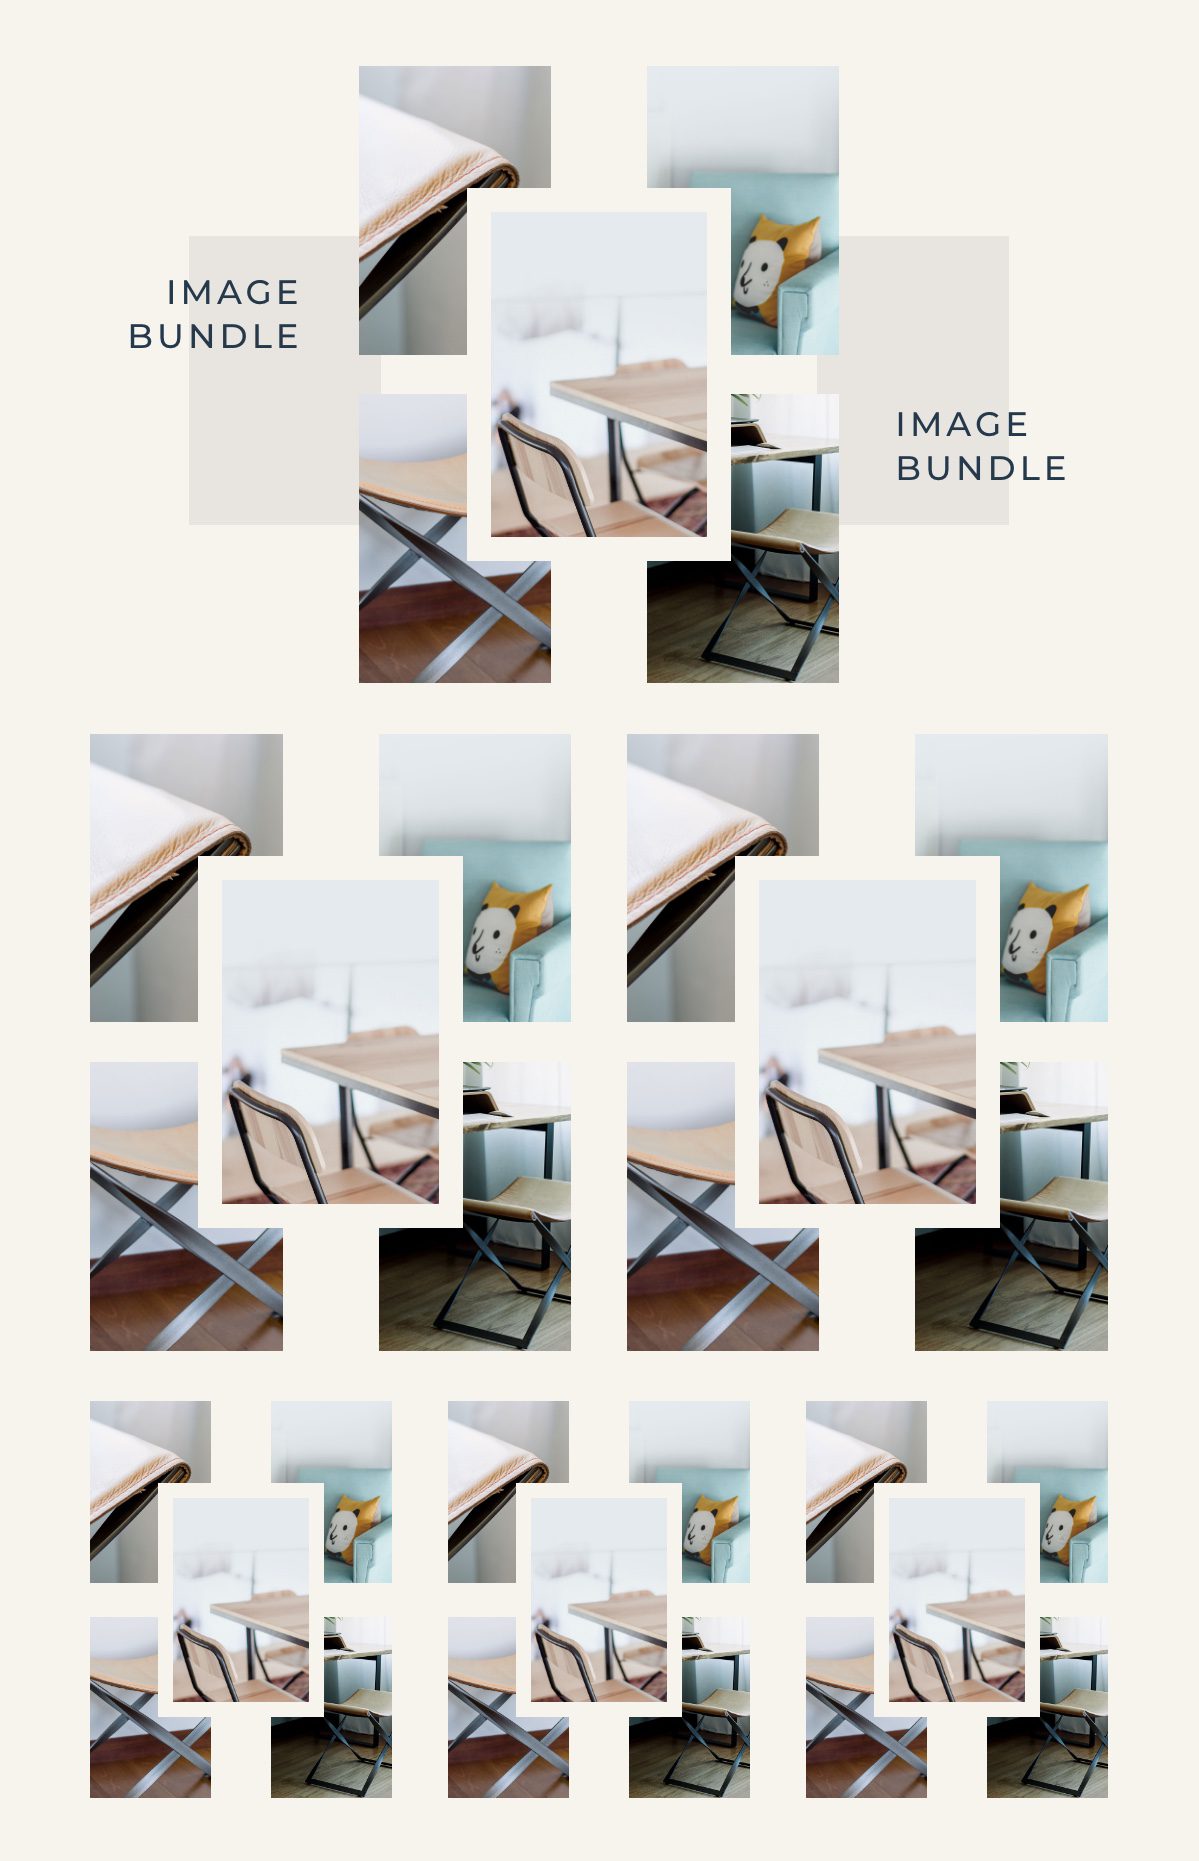
Image Bundle Design #3
Download the Layout for FREE
To lay your hands on the designs from this tutorial, you will first need to download it using the button below. To gain access to the download you will need to subscribe to our newsletter by using the form below. As a new subscriber, you will receive even more Divi goodness and a free Divi Layout pack every Monday! If you’re already on the list, simply enter your email address below and click download. You will not be “resubscribed” or receive extra emails.

To import the section layout to your Divi Library, navigate to the Divi Library.
Click the Import button.
In the portability popup, select the import tab and choose the download file from your computer.
Then click the import button.

Once done, the section layout will be available in the Divi Builder.
Let’s get to the tutorial, shall we?
What You Need to Get Started

To get started, you will need to do the following:
- If you haven’t yet, install and activate the Divi Theme.
- Create a new page in WordPress and use the Divi Builder to edit the page on the front end (visual builder).
- Choose the option “Build From Scratch”.
After that, you will have a blank canvas to start designing in Divi.
Designing Image Bundle #1
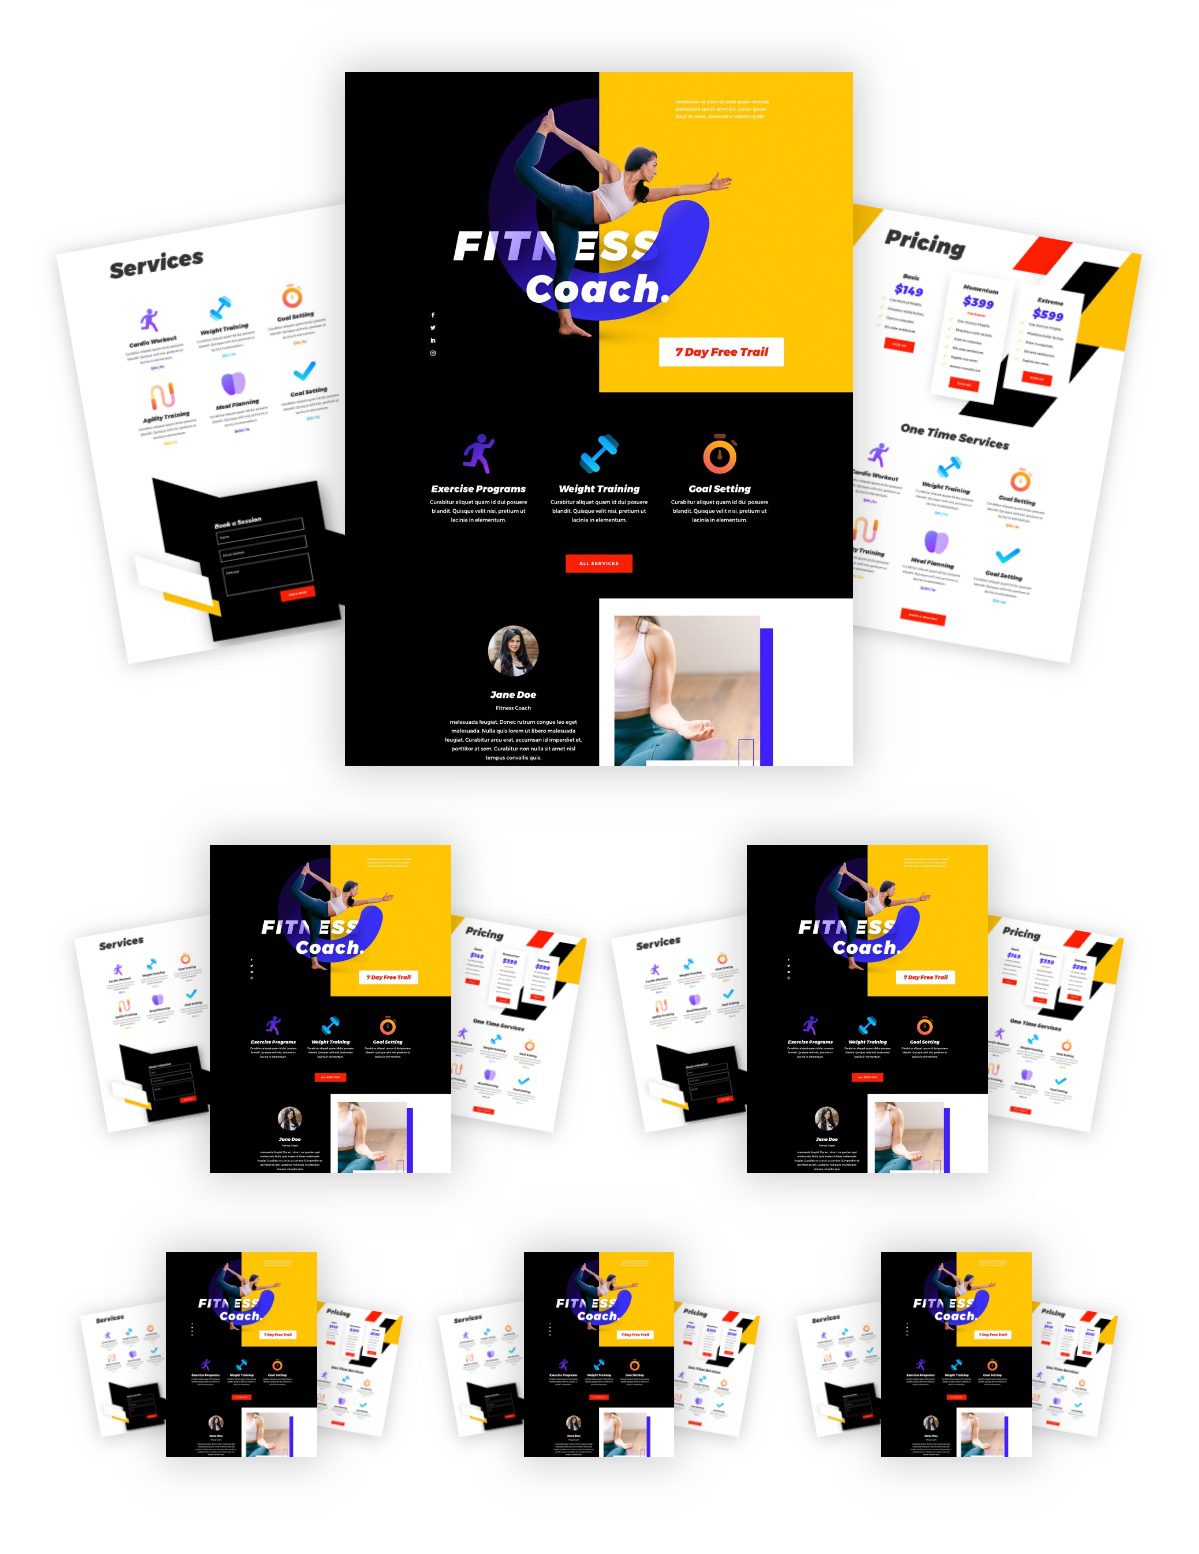
For this first image bundle design, we are going to position two (slightly rotated) images on each side of a center image.
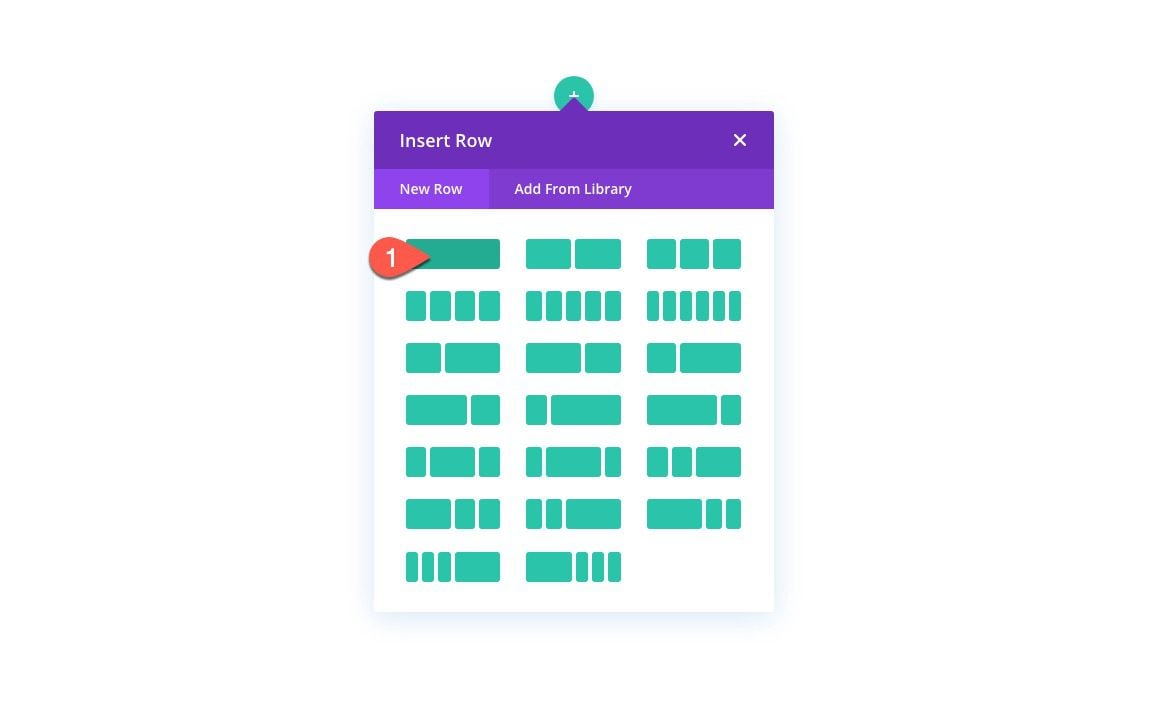
Start by adding a one-column row to a regular section.
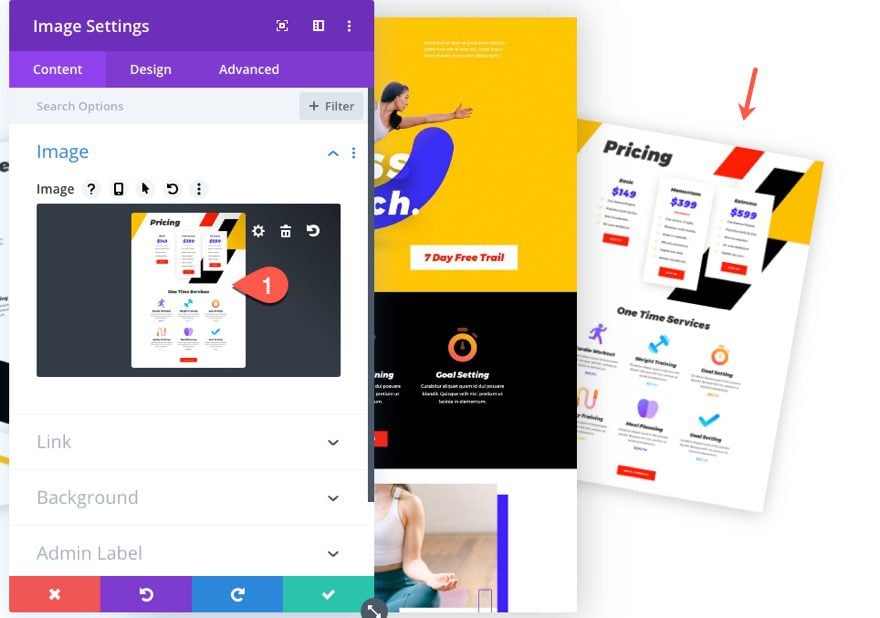
Add Middle Image
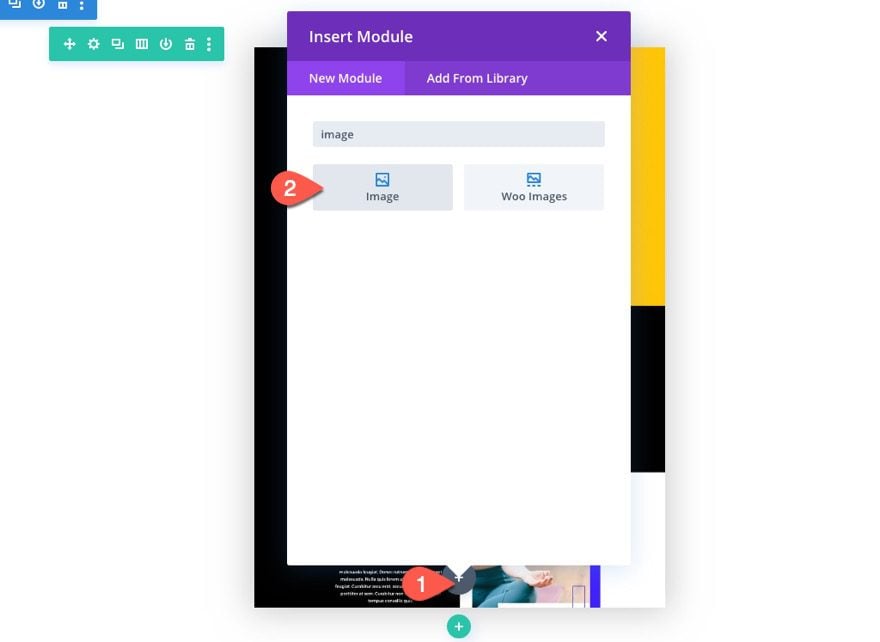
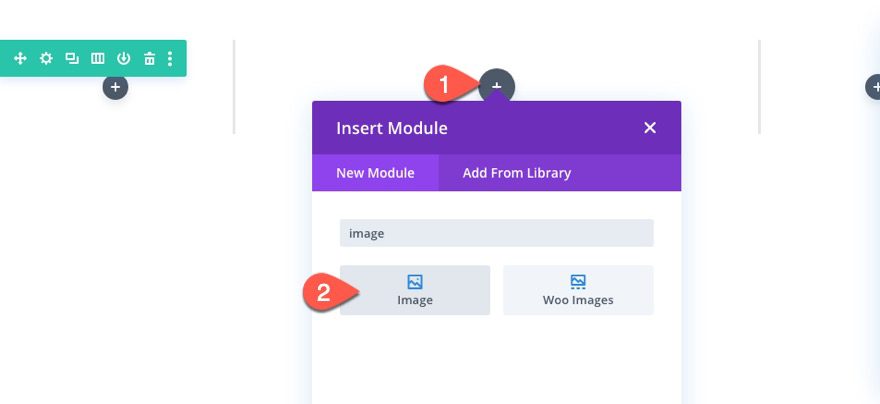
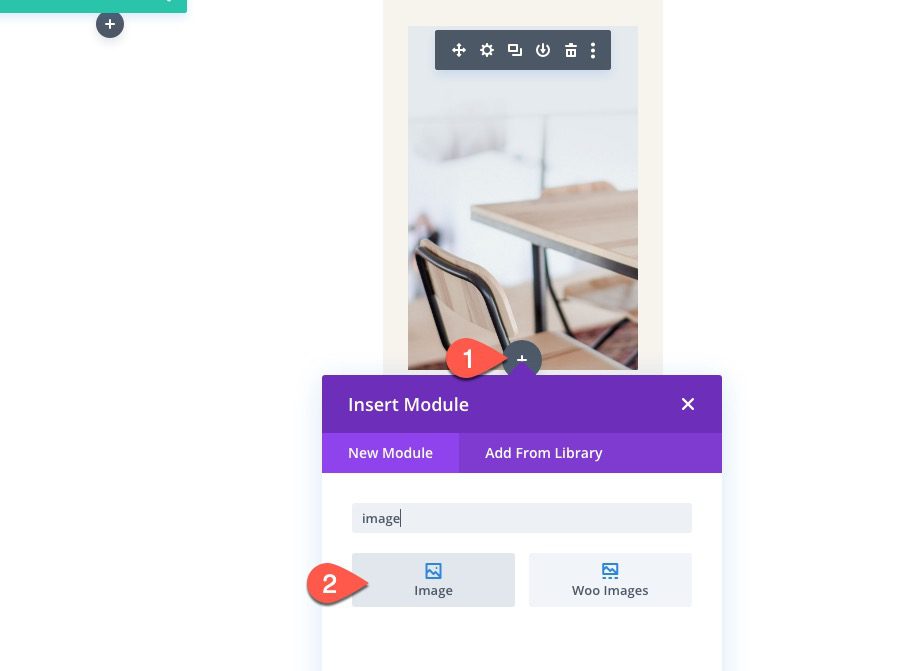
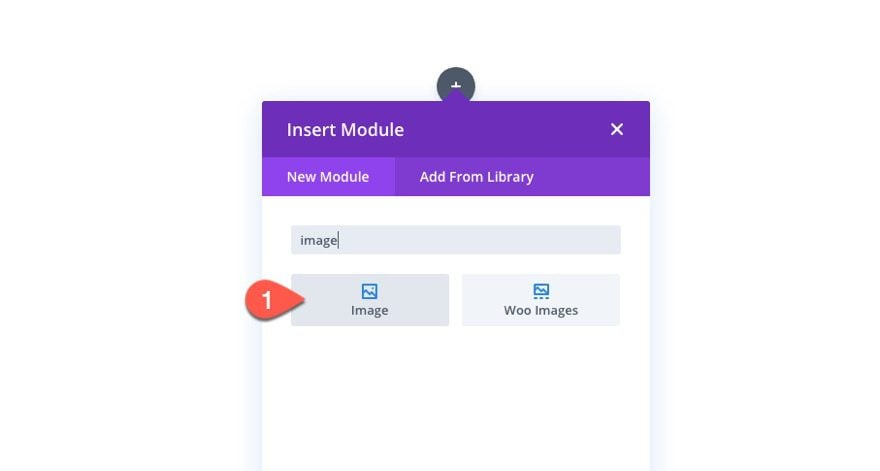
Inside the column, add an image module.
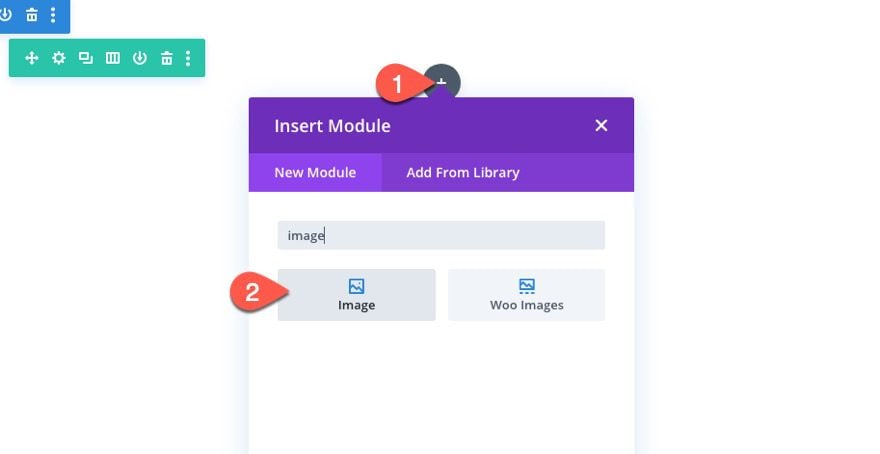
Then upload an image to the module.
For these images, we are going to use screenshots from the Fitness Coach Layout Pack. Each of them should be 880px by 1200px.
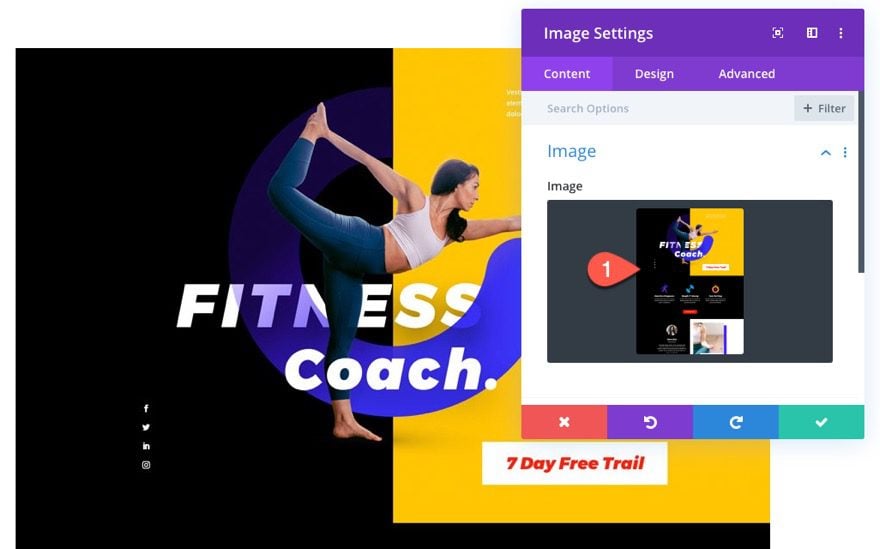
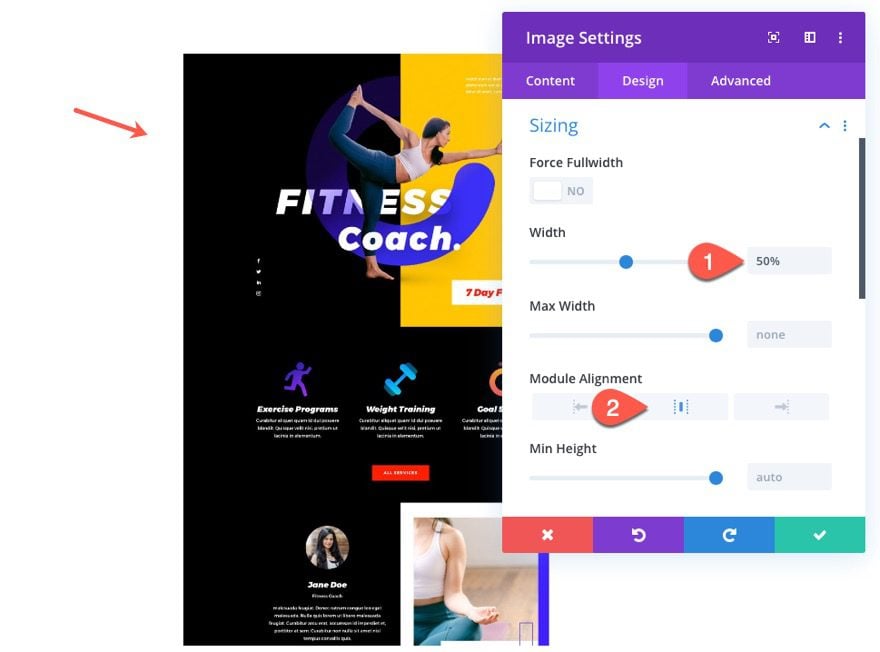
Open the image settings and update the following:
- Width: 50%
- Module Alignment: center
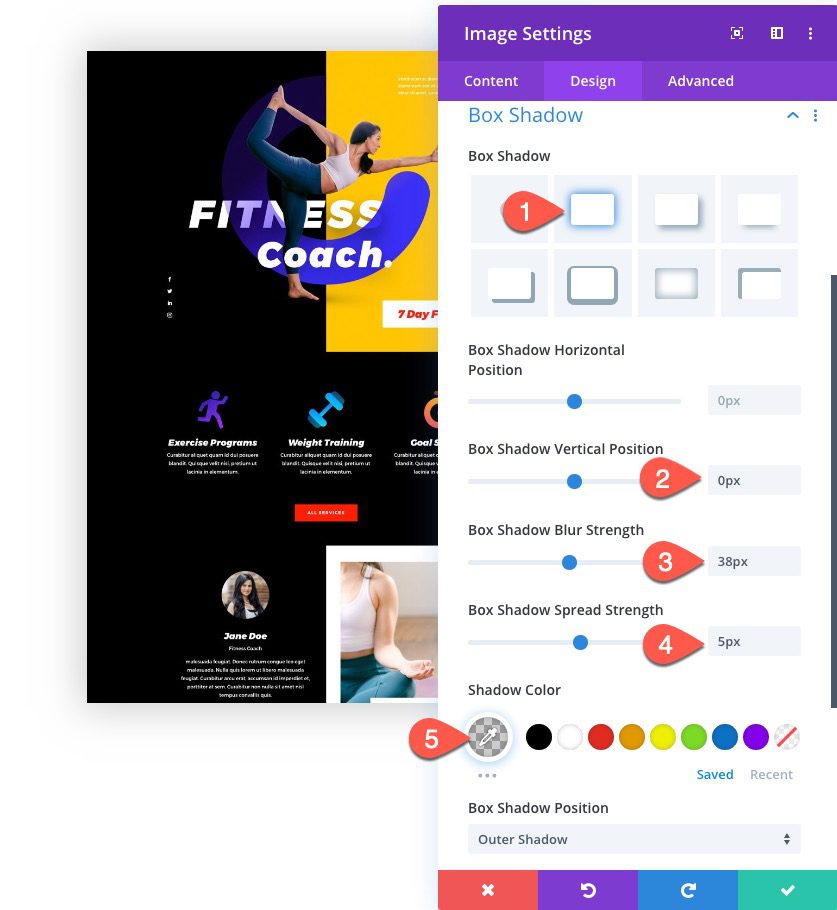
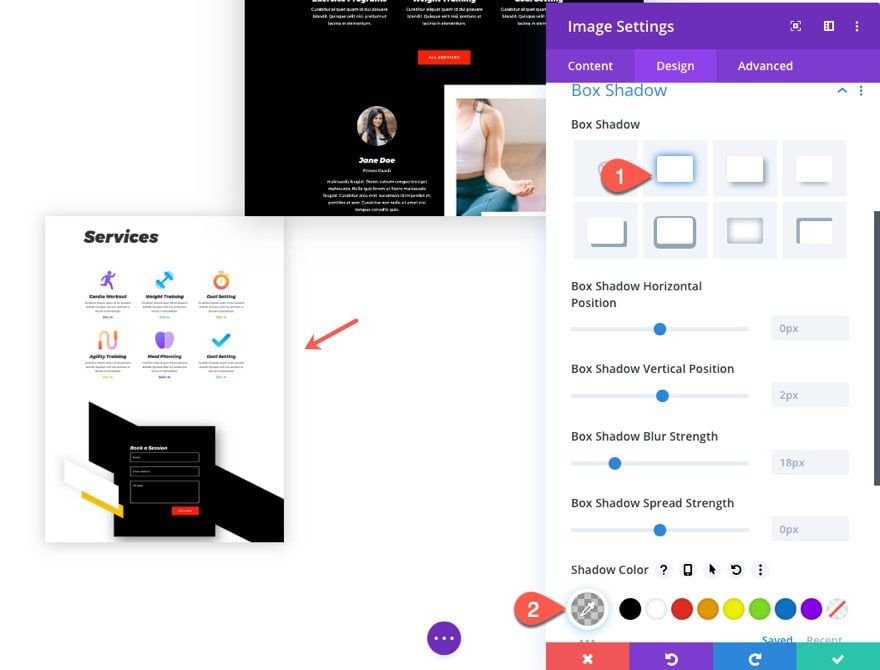
Add a box shadow as follows:
- box Shadow: see screenshot
- Box Shadow Vertical Position: 0px
- Box Shadow Blur Strength: 38px
- Box Shadow Spread Strength: 5px
- Shadow Color: rgba(0,0,0,0.2)
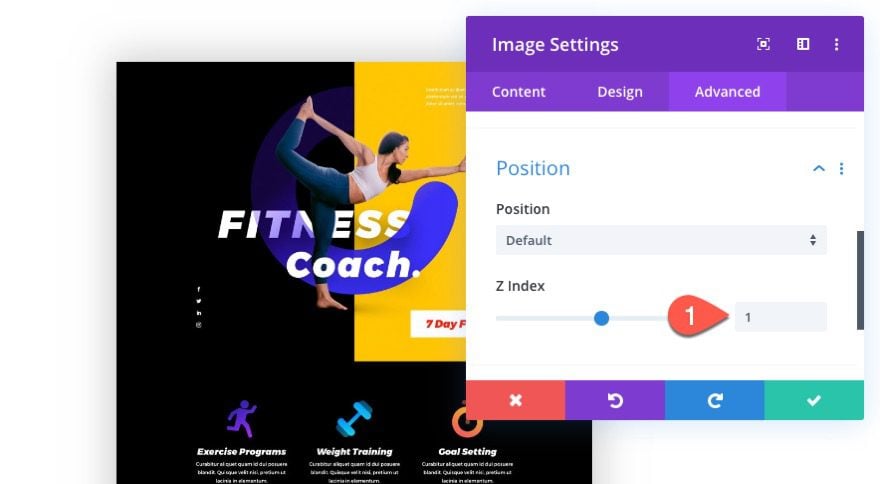
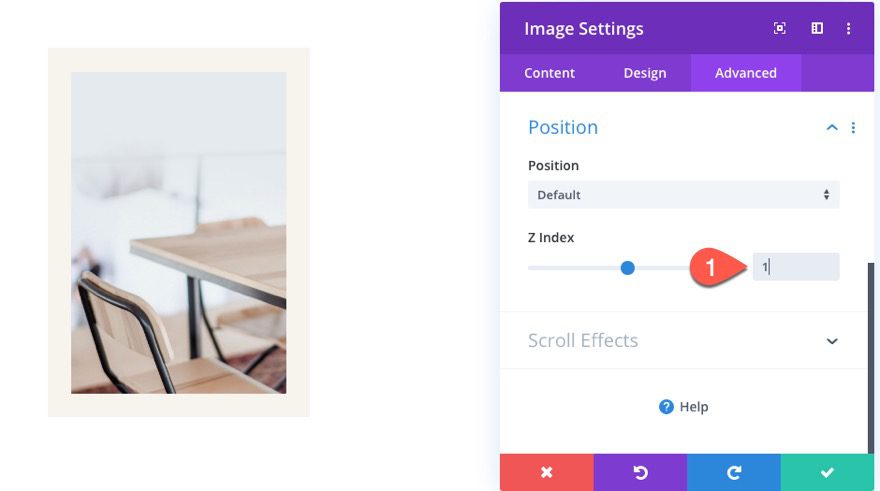
Then set the Z Index to 1 so that it stays above the other images in the bundle.
- Z Index: 1
Add Left Image
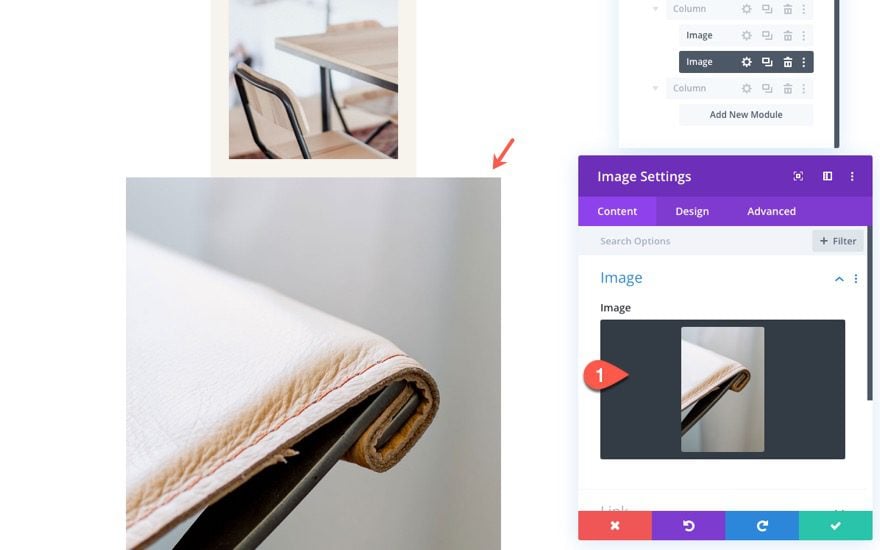
To create the left image in the bundle, add a new image under the middle image.
Update the image with a new one (make sure they are all the same size for the best results).
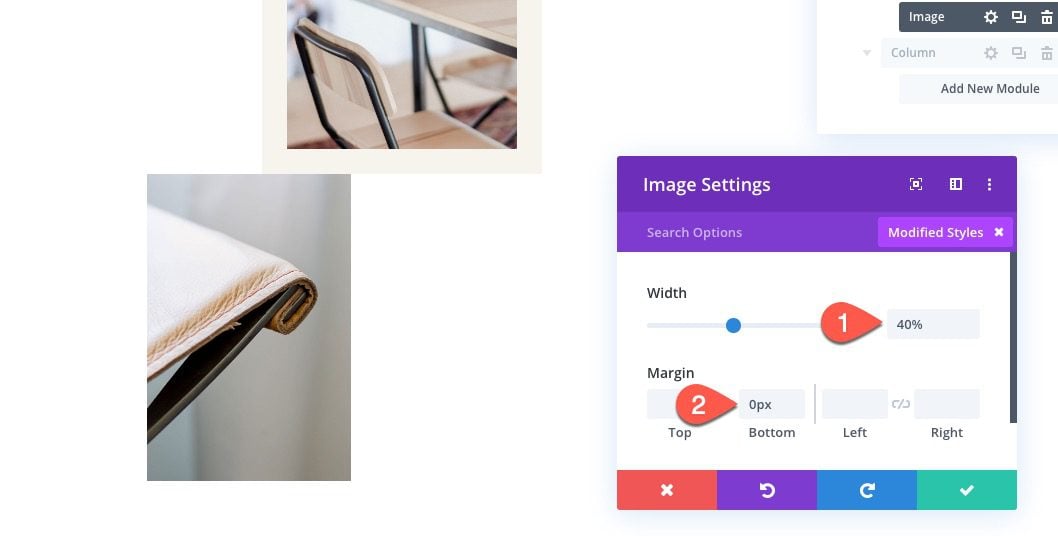
Under the design tab, update the width as follows:
- width: 30%
Then add the box shadow as follows:
- Box Shadow: see screenshot
- Shadow Color: rgba(0,0,0,0.2)
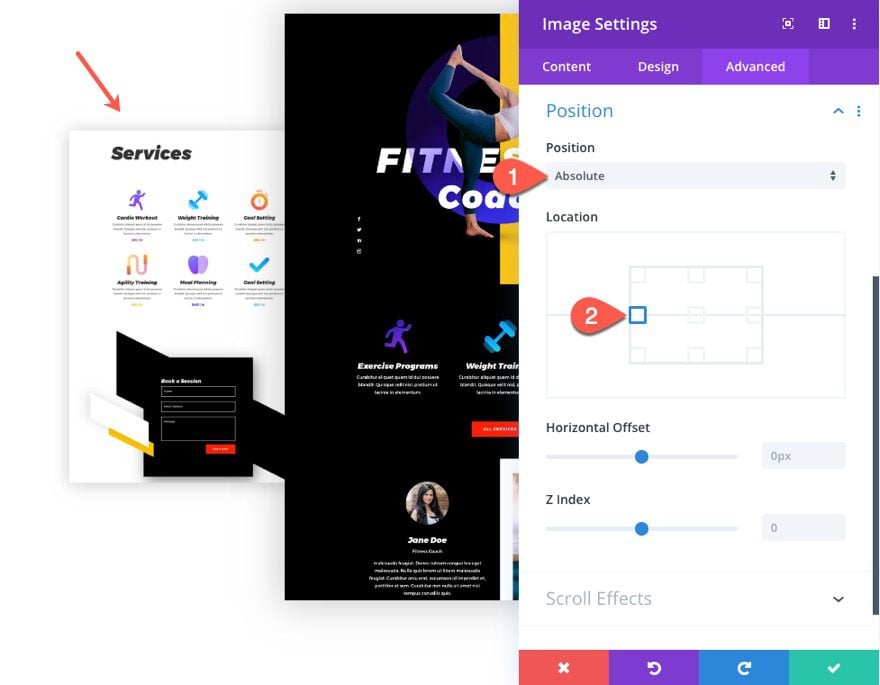
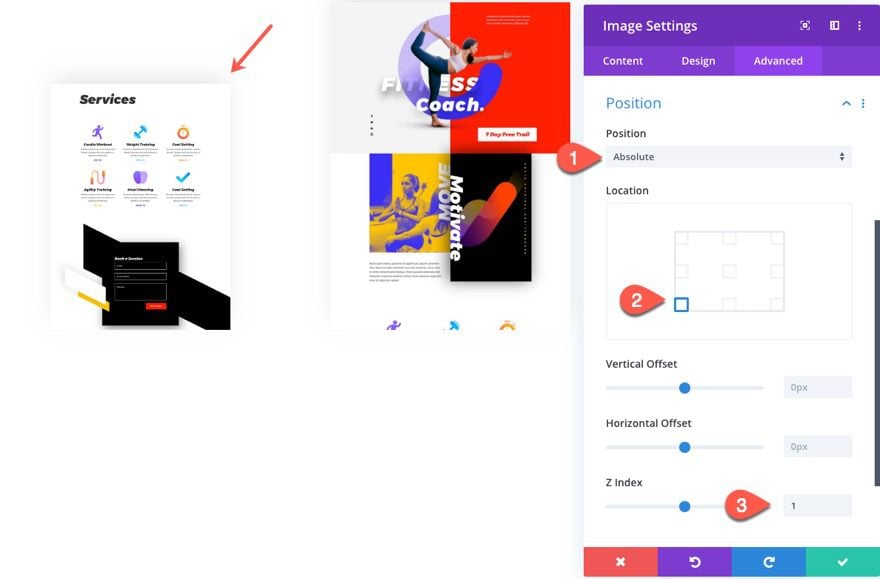
Next, give the image an absolute position at the left center location so that it sits adjacent to the middle image on the left side.
- position: absolute
- Location: left center
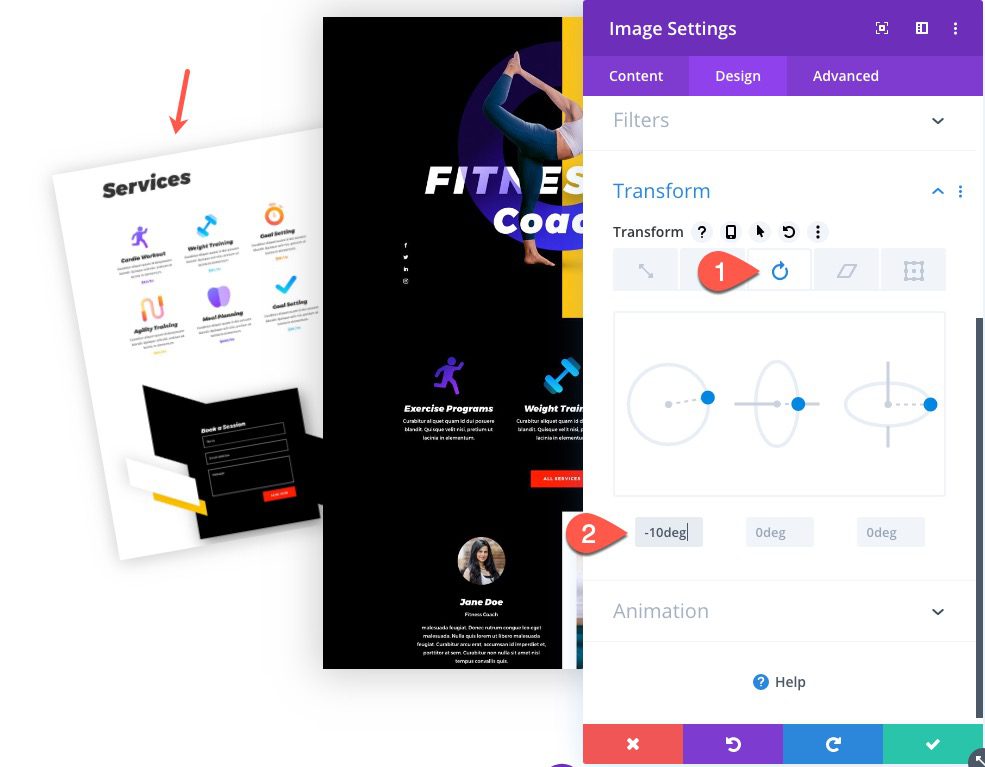
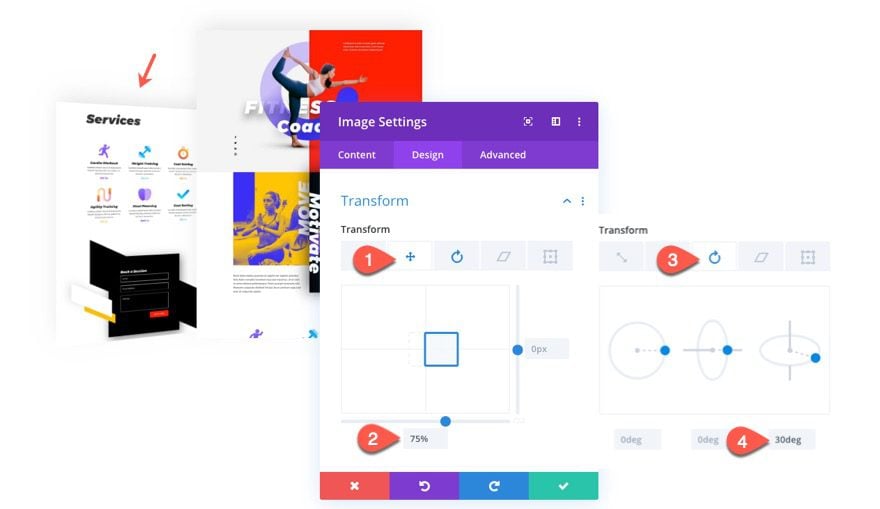
To give the image a little rotation, update the transform rotate option as follows:
Transform Rotate Z Axis: -10deg
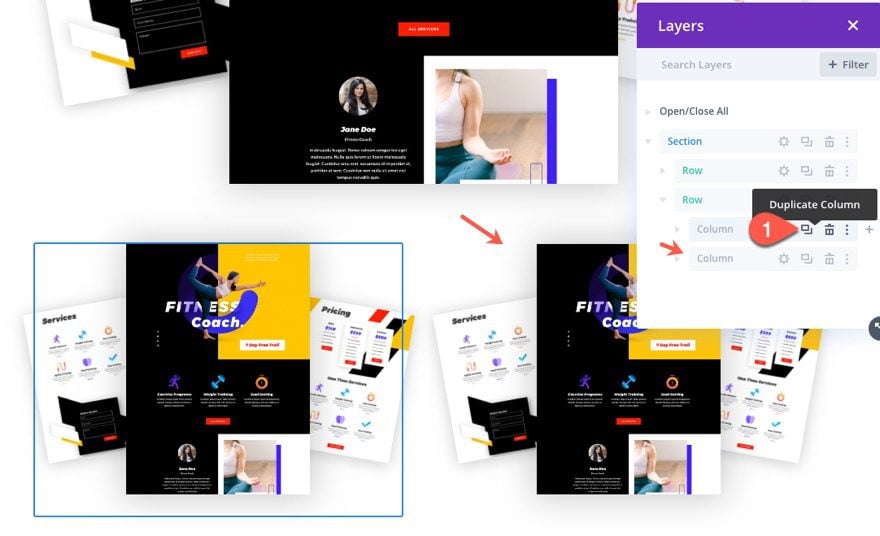
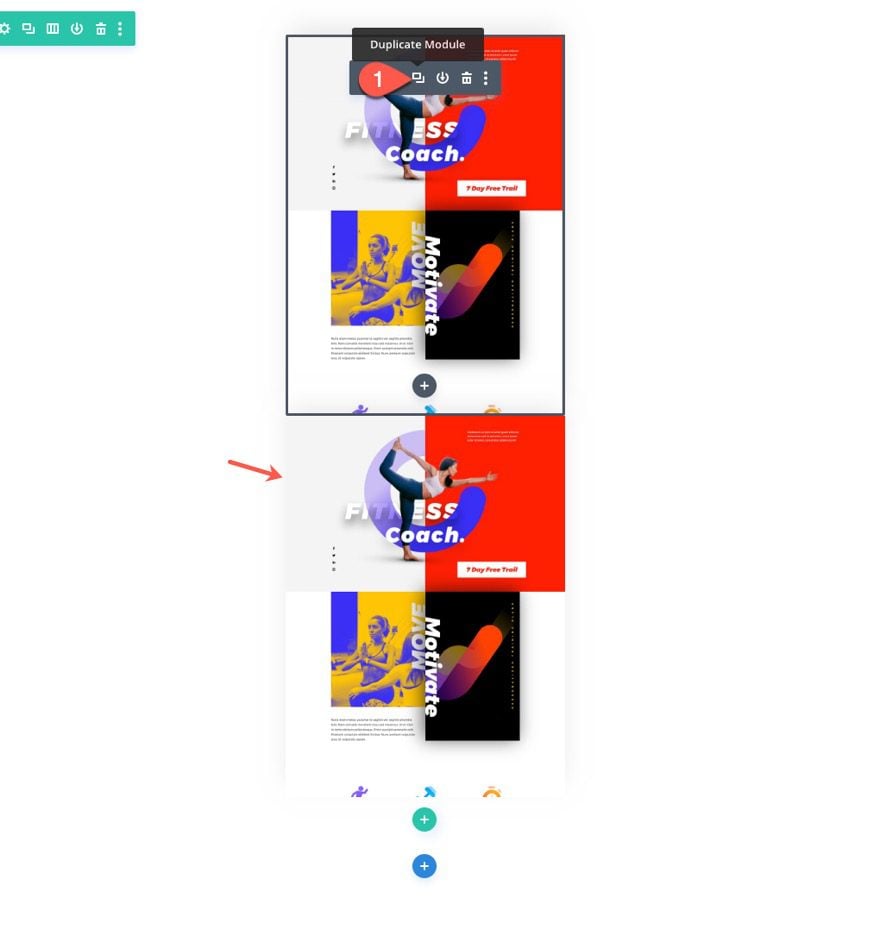
Add the Right Image
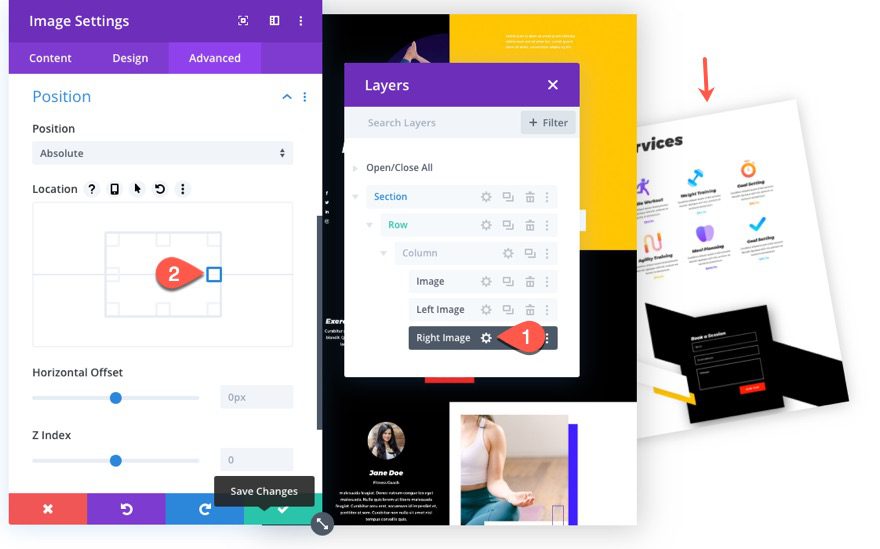
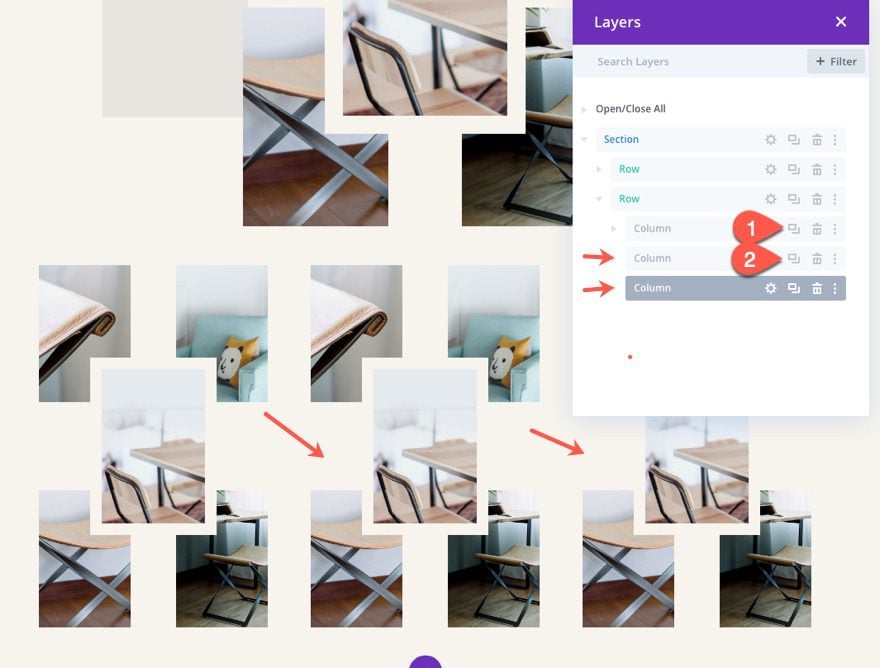
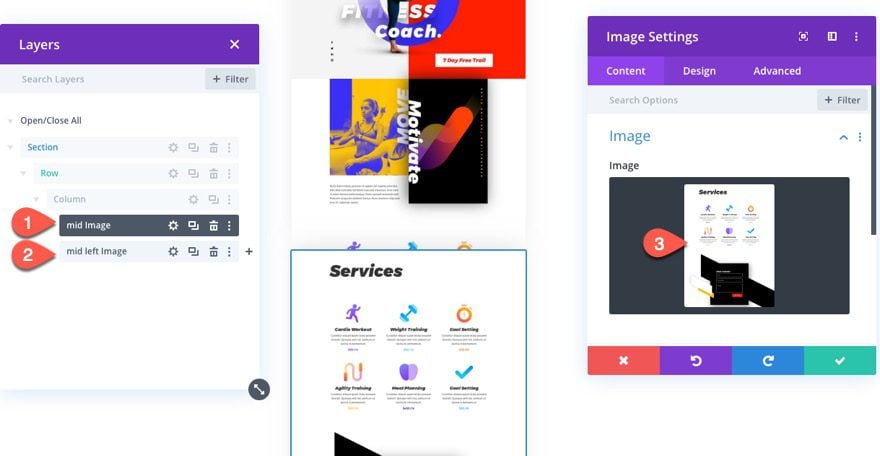
To create the right image, open the Layers box, and duplicate the left image.

Label the image modules (left image, right image, etc.) so that you can easily identify them later on. Then open the settings for the duplicate image and adjust the location as follows:
- location: right center
Then adjust the transform rotate option as follows:
- Transform Rotate Z Index: 10deg
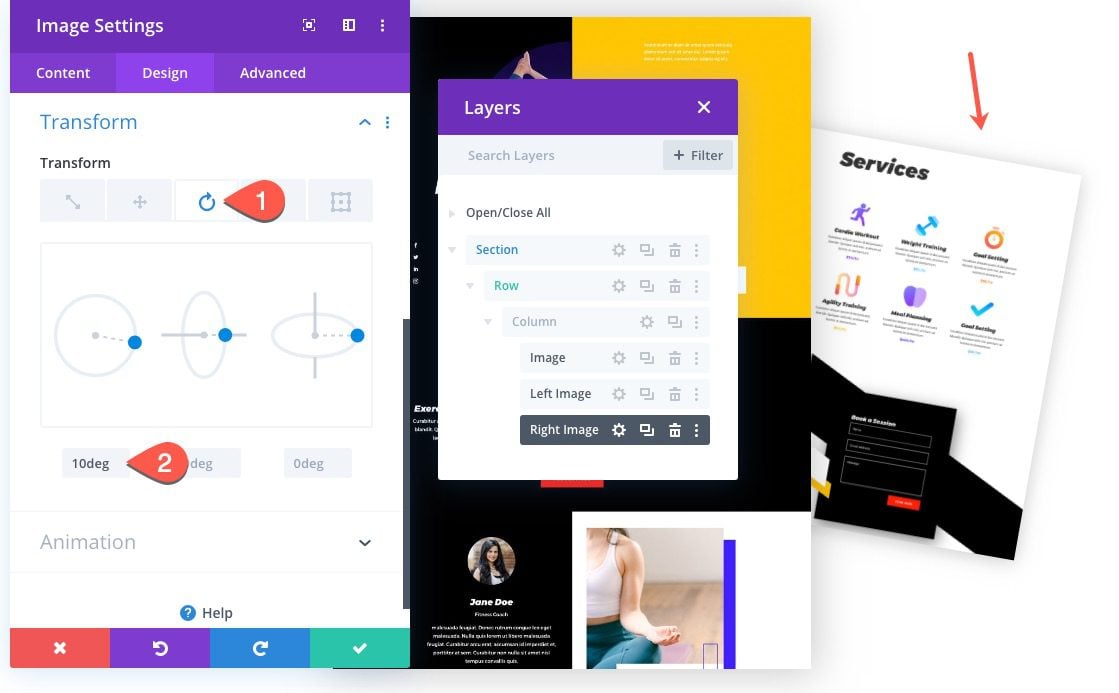
Don’t forget to swap the duplicate image with a new one.
Now check out the result so far.
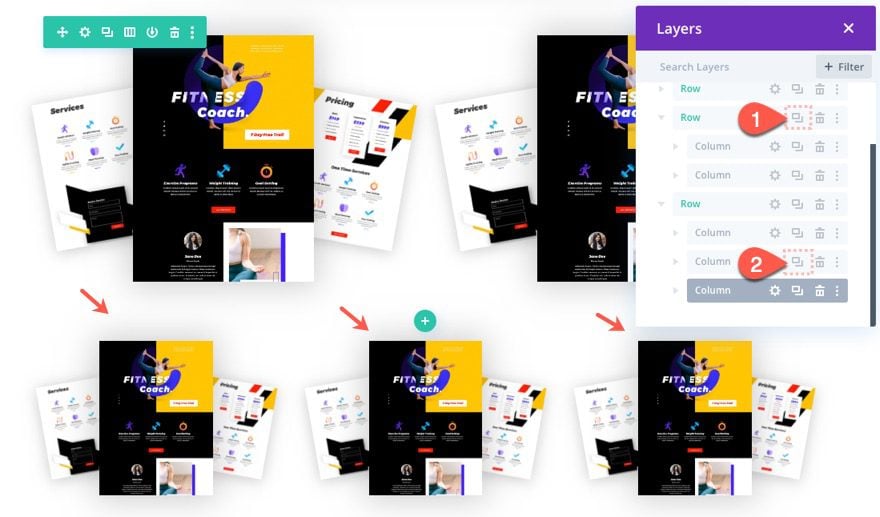
Adding Image Bundle to Multiple Columns
Because the images are positioned within one column, you can easily add this image bundle design to multiple column layouts.
To add the image bundle to multiple columns, duplicate the row containing the current image bundle.
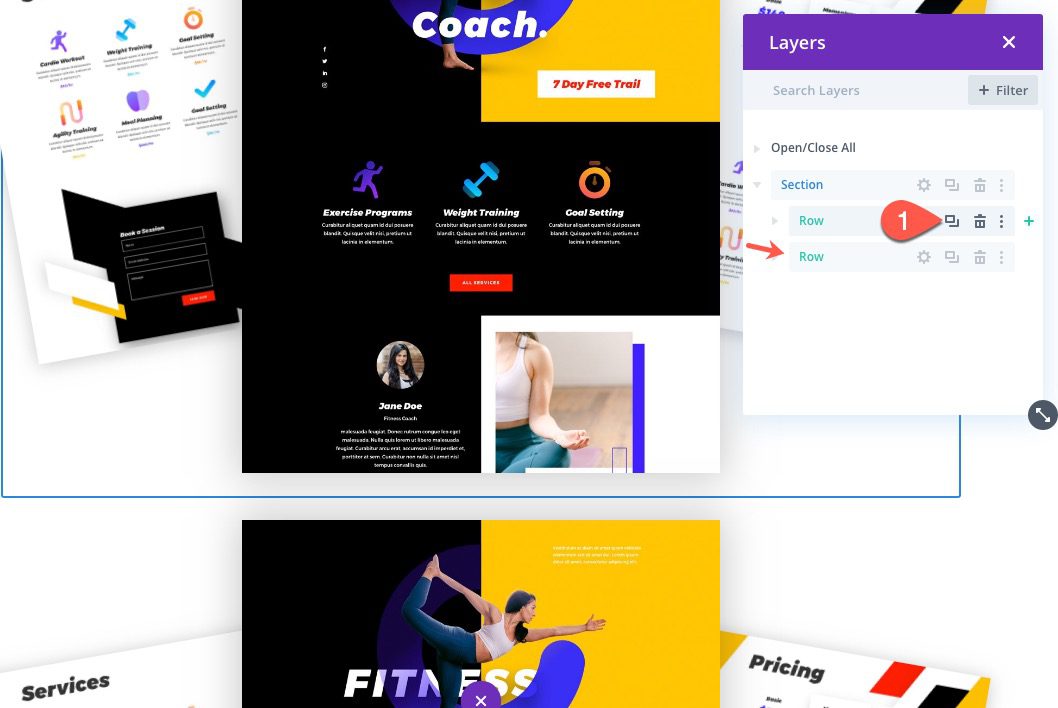
In the duplicate row, duplicate the column to create another column with the image bundle included. This will create the image bundles in a two-column layout.
To create a row of three image bundles, duplicate the two-column row, and then duplicate one of the columns in the duplicate row. This will give you a three-column layout.
Final Result
Here is the final design for image bundle #1.
Designing Image Bundle #2
This next design features an image bundle with five images – one image in the center and four on each corner of the column.
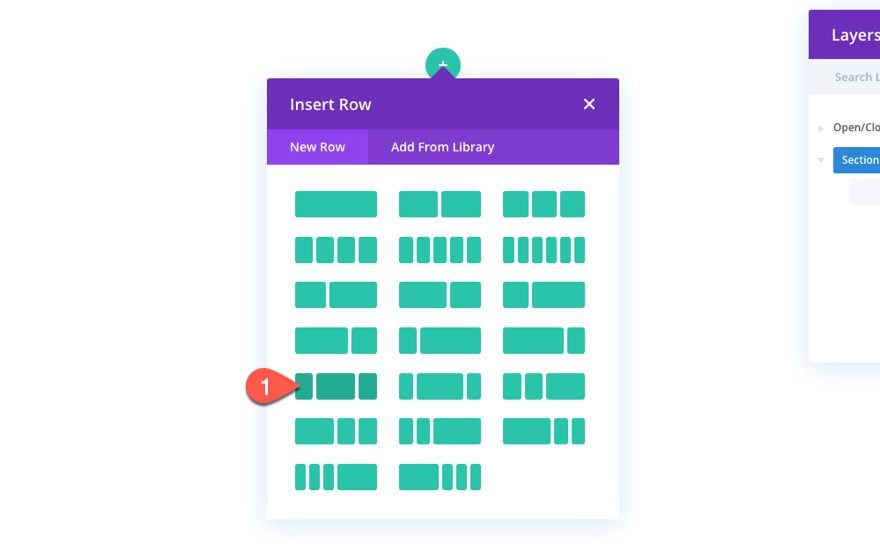
To start, create a new regular section with a one-fourth one-half one-fourth column row.
Add Center Image
In the middle column, add an image module.
Then upload an image to the module. We are using images from the Furniture Store Layout Pack (each 800px by 1200).
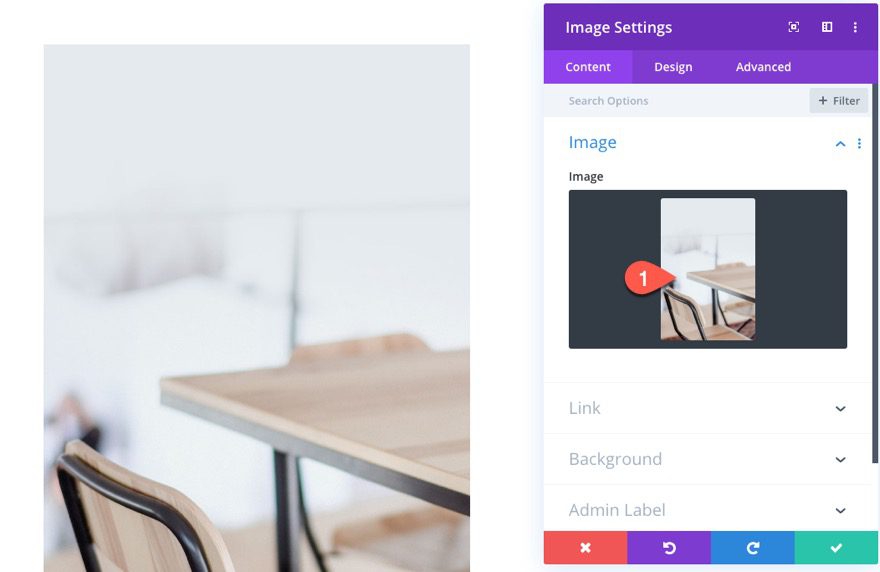
Under the design tab, update the following:
- Background Color: #f7f3ec
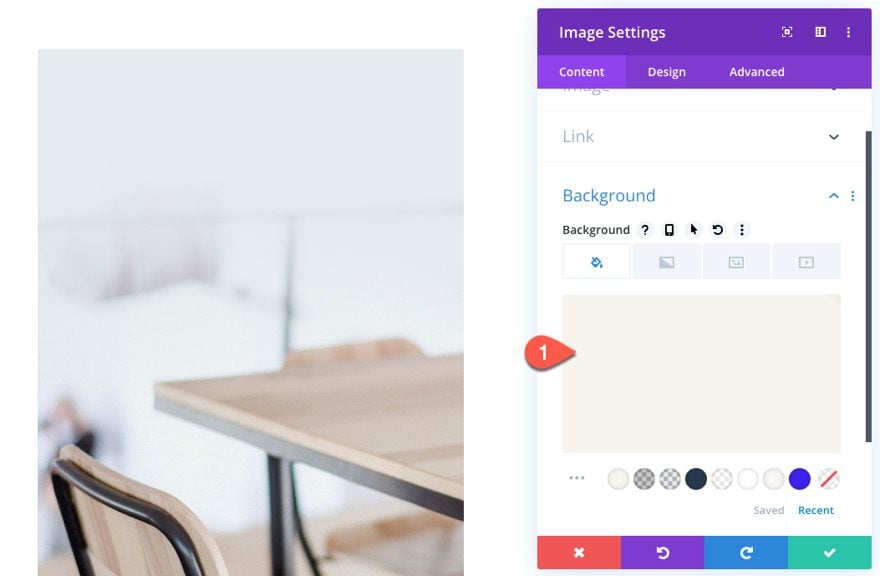
- Width: 55%
- Module Alignment: center
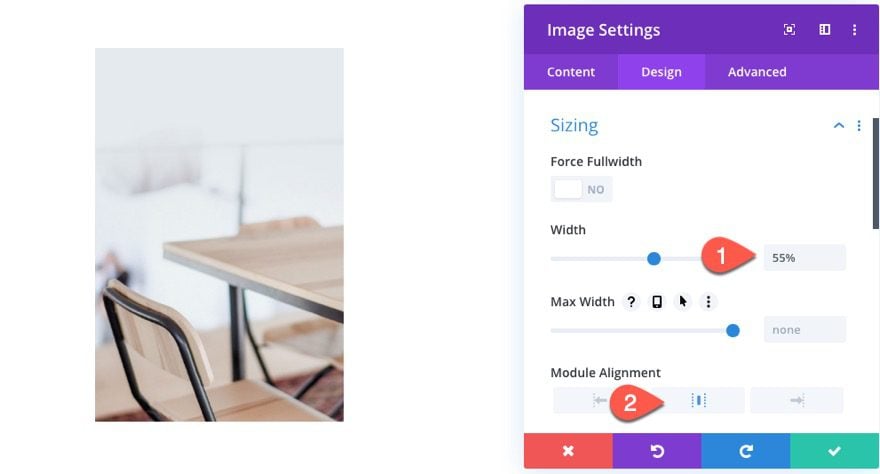
- Margin: 0px
- Padding: 5% top, 5% bottom, 5% left, 5% right
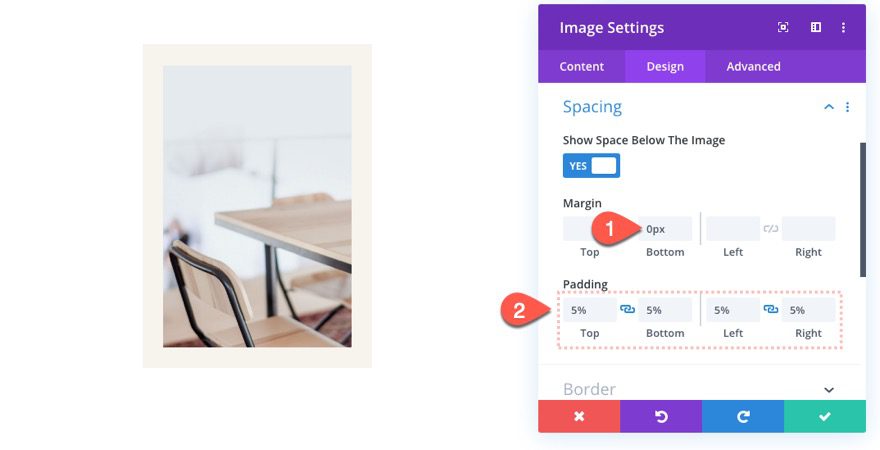
Under the advanced tab, up the Z Index by 1 to make sure the image stays above the other images in Z space.
- Z Index: 1
Add Top Left Image
To add the top left image, add a new image module under the center image in the middle column.
Upload a new image to the module.
Then update the design settings as follows:
- Width: 40%
- Margin: 0px bottom
Column Spacing
The height of the column is determined by the height of the center image and the amount of top and bottom padding we add. So, to give our absolutely positioned images the proper spacing, we need to increase the height of the column by increasing the top and bottom padding.
- Padding (desktop): 12% top, 12% bottom
- Padding (tablet): 24% top, 24% bottom

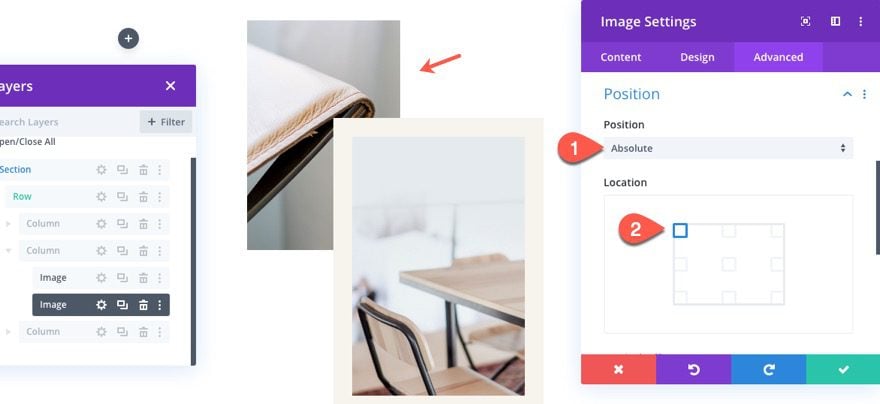
Next, give the top left image an absolute positon as follows:
- Position: Absolute
- Location: top left
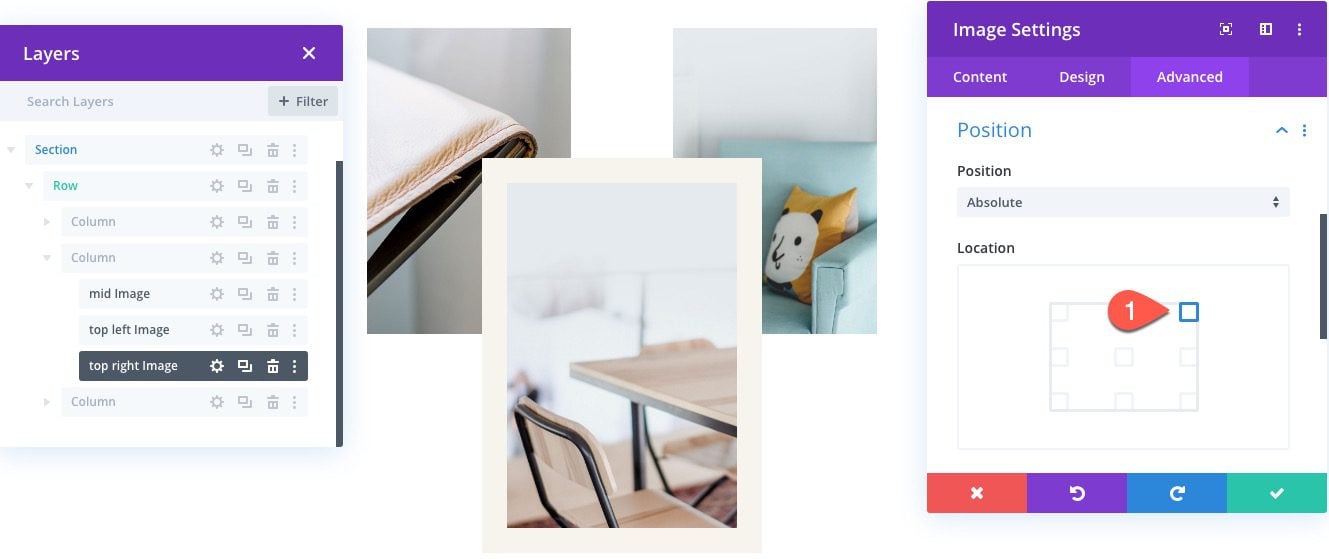
Add Top Right Image
Now that the top left image is in place, duplicate the image to create the top right image.
(At this point, it is a good idea to add labels to each of the images for easy identification later on.)

Open the duplicate (top right) image and update the absolute position location:
- Location: top right
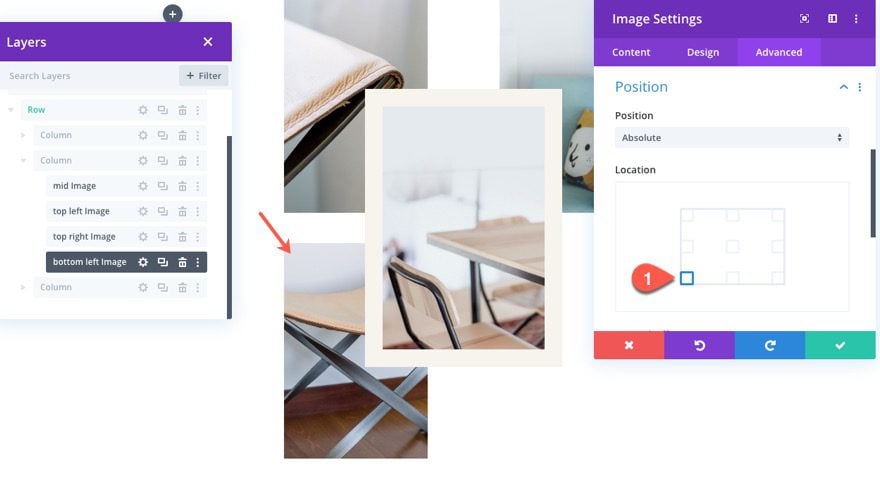
Add Bottom Left Image
To create the bottom left image, duplicate the top right image, and update the labels as needed.
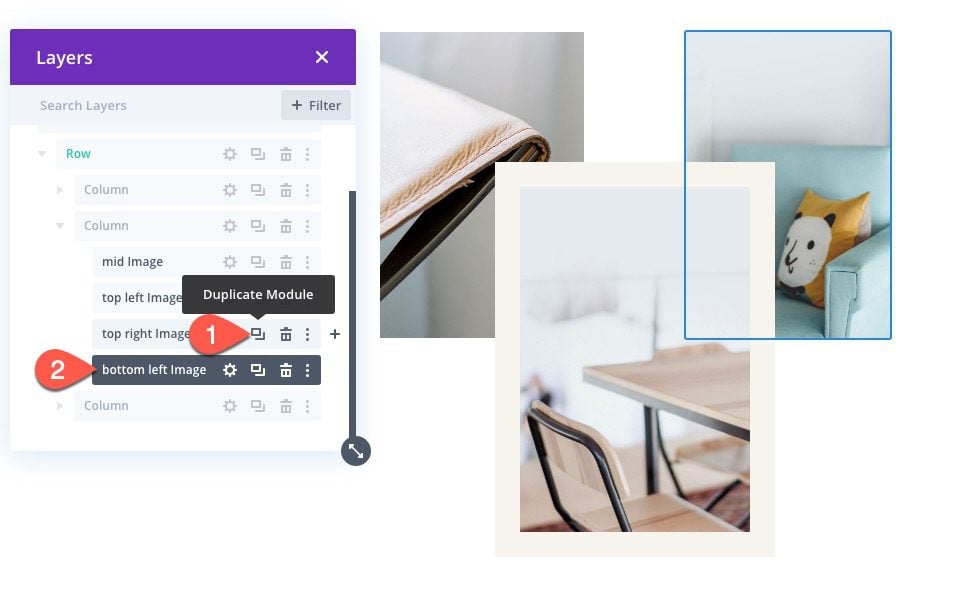
Open the settings for the duplicate (bottom left) image and update the absolute position location:
- Location: bottom left
Add Bottom Right Image
To create the bottom right image, duplicate the bottom left image, and update the label as needed. Then update the image and give it a new location:
- Location: bottom right

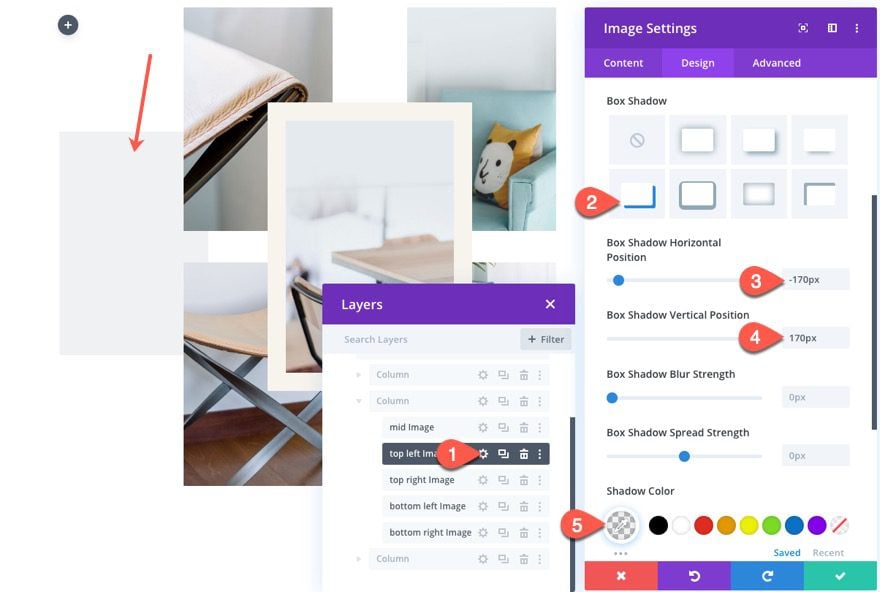
Add Box Shadow Design Accent
To add a nice design accent, we can add a box shadow to the top left image as follows:
- Box Shadow: see screenshot
- Box Shadow Horizontal Position: -170px
- Box Shadow Vertical Position: 170px
- Shadow Color: rgba(36,57,74,0.07)
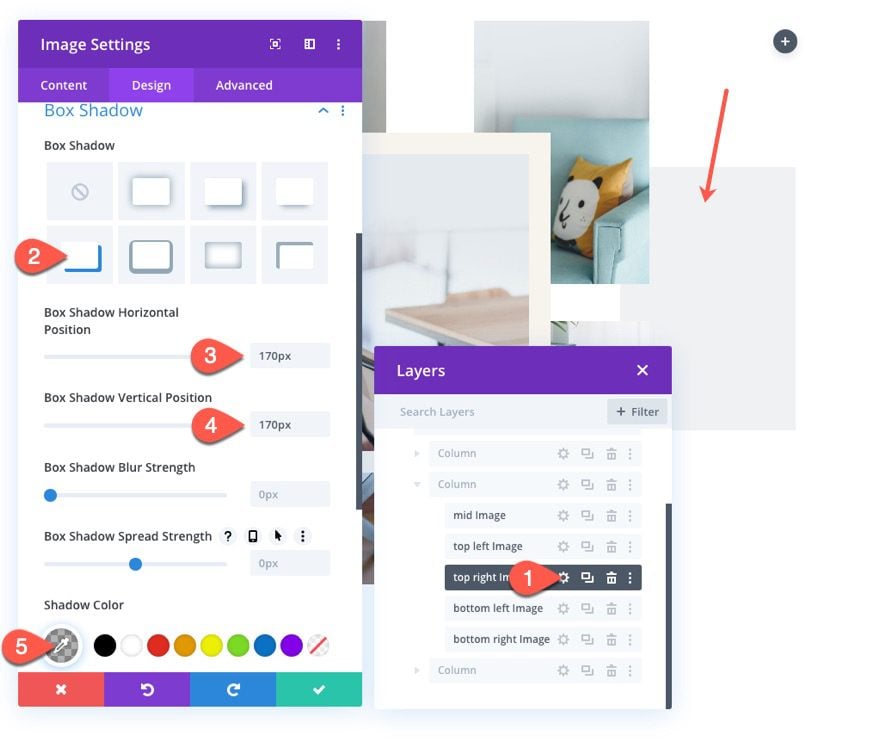
Add a complimentary box-shadow design accent to the top right image as follows:
- Box Shadow: see screenshot
- Box Shadow Horizontal Position: 170px
- Box Shadow Vertical Position: 170px
- Shadow Color: rgba(36,57,74,0.07)
Add Text to Left Column
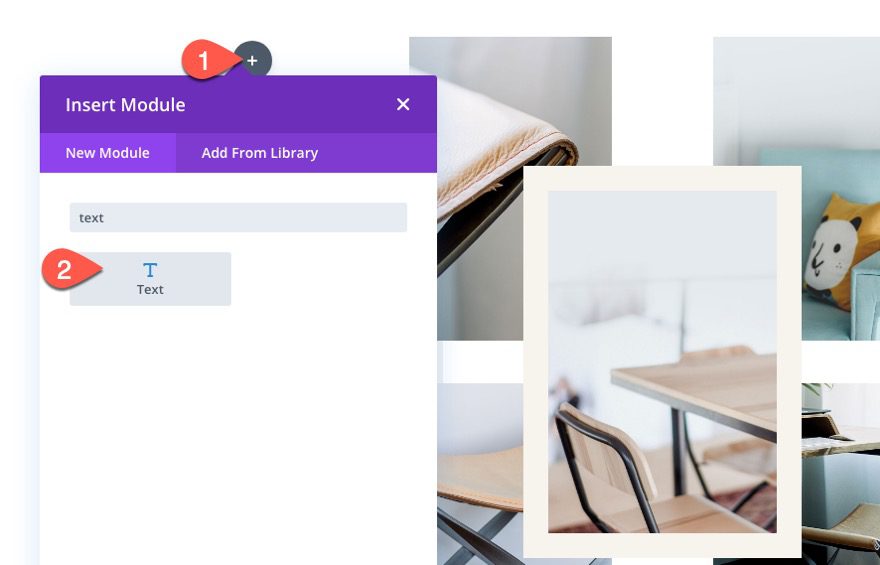
To add some text to the design, add a new text module to the left column.
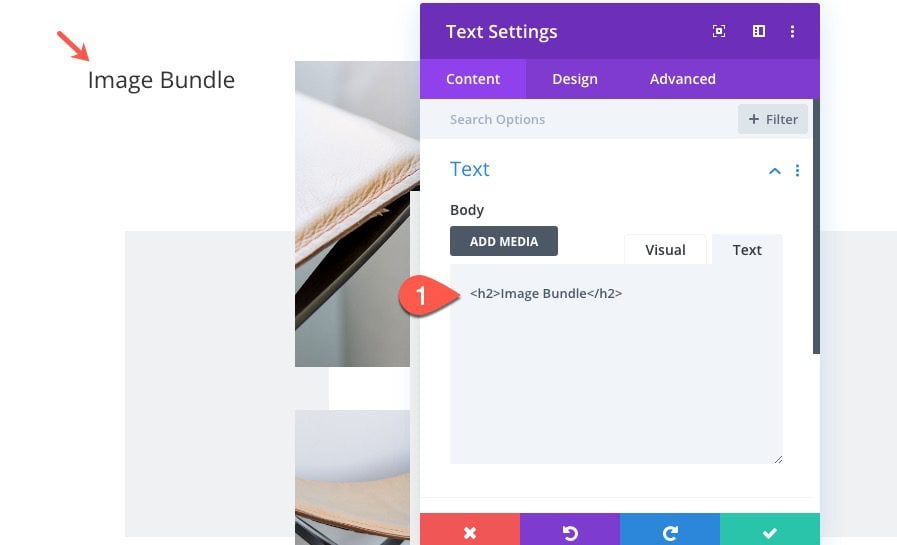
Content
Then update the content with the following:
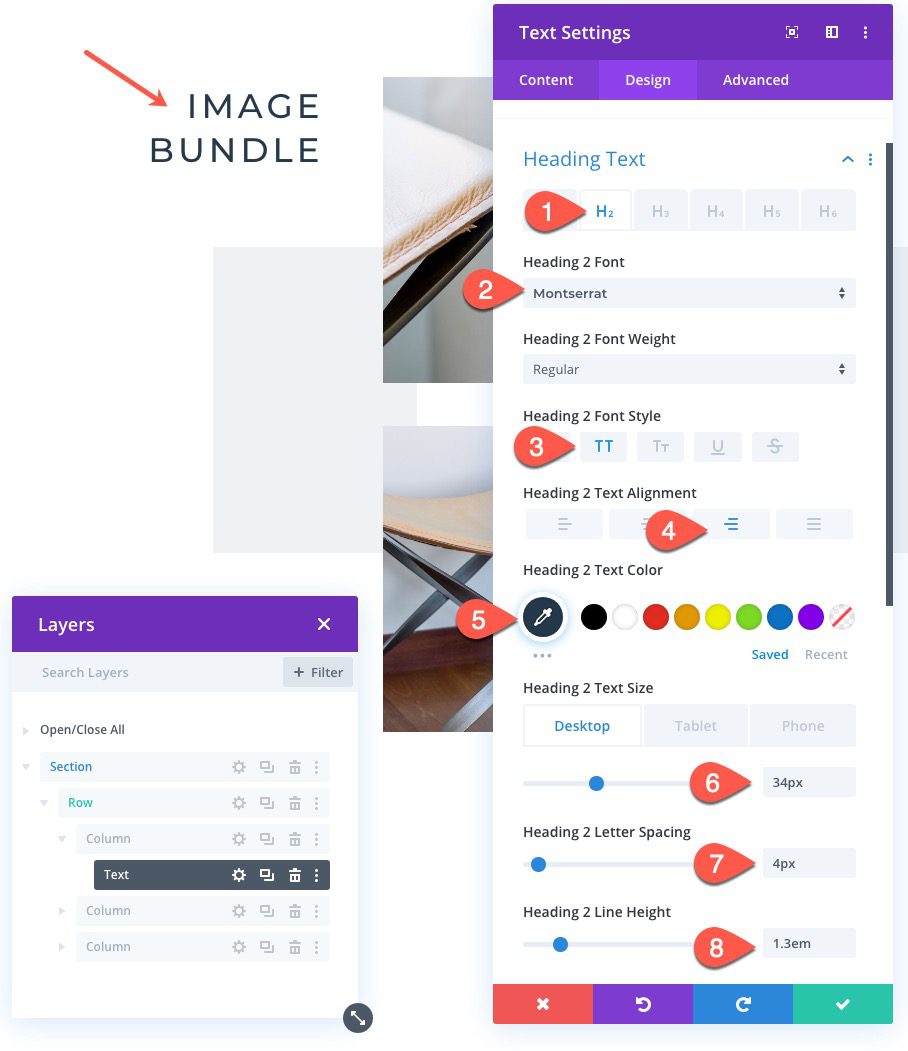
<h2>Image Bundle</h2>
Text Design
Under the design tab, update the following:
- Heading 2 Font: Montserrat
- Heading 2 Font Style: TT
- Heading 2 Text Alignment: right
- Heading 2 Text Color: #24394a
- Heading 2 Text Size: 34px
- Heading 2 Letter Spacing: 4px
- Heading 2 Line Height: 1.3em
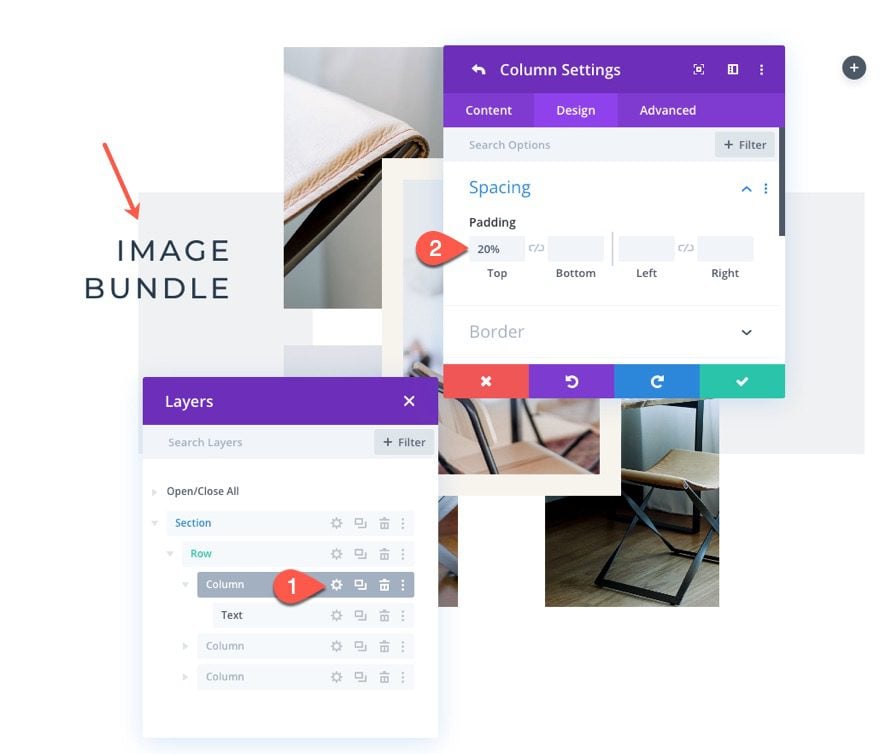
Left Column Padding
To bring the text down a bit, open the settings for the left column, and update the following padding:
- Padding: 20% left
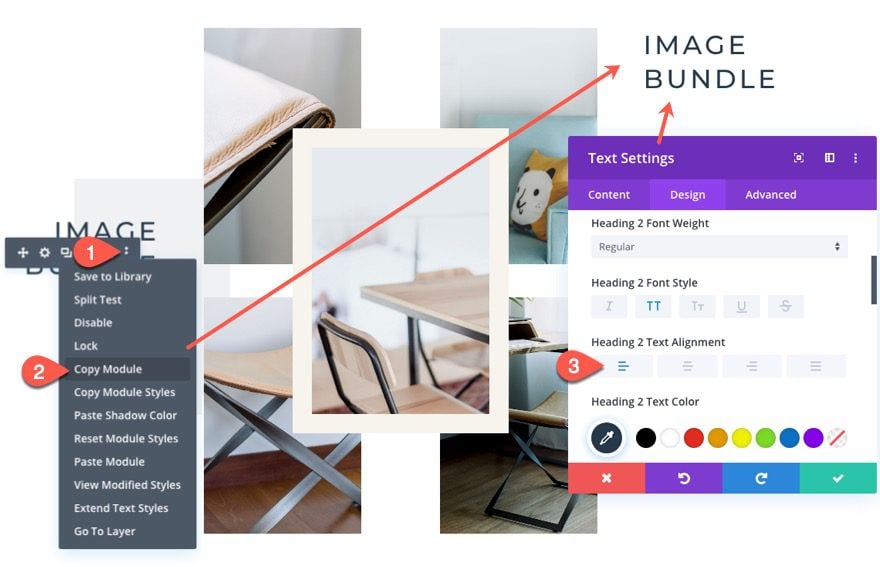
Add Text to Right Column
To create the right column text, copy the text module in the left column, and paste it in the right column. Then open the text settings and update the following:
- Heading 2 Text Alignment: left
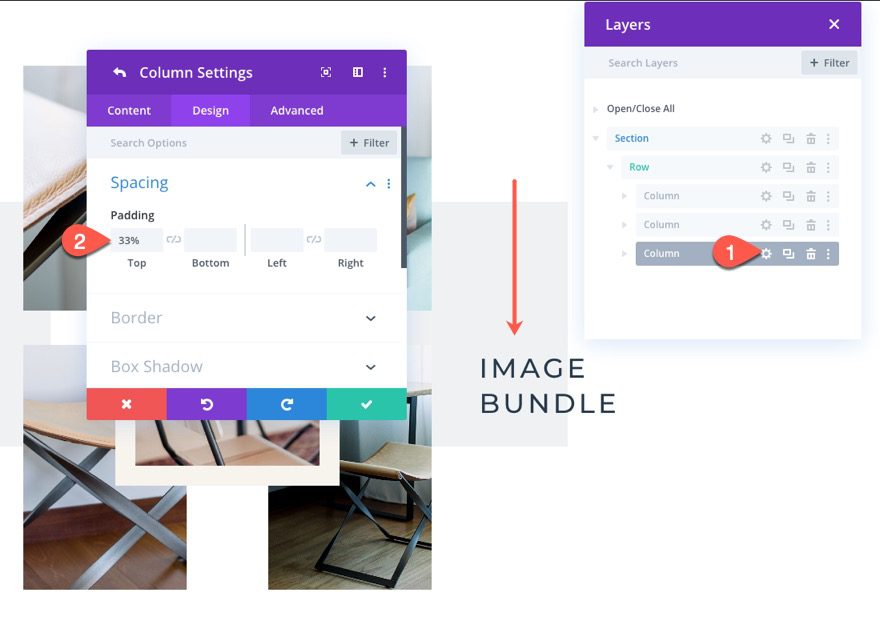
Right Column Padding
Just like we did for the left column, add the following padding to the right column (column 3) to bring down the text module.
- Padding: 33% top
Section Background
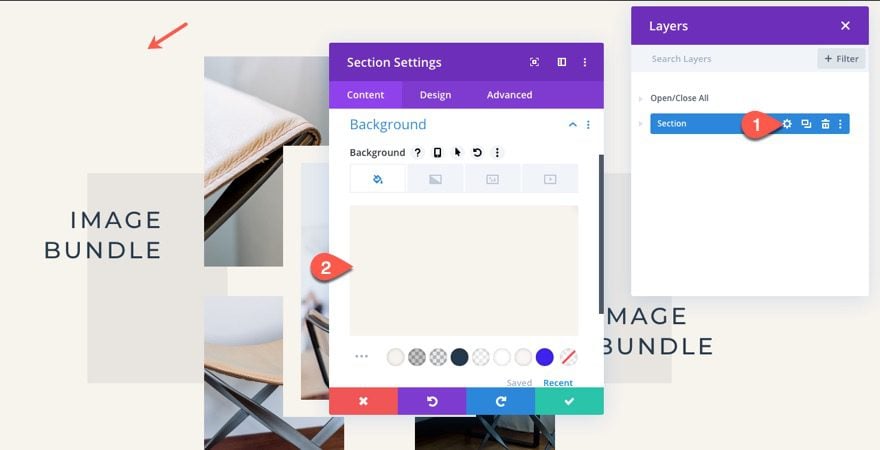
To finish the design, open the section settings and add the following background color:
- Background Color: #f7f3ec
Here is the result so far.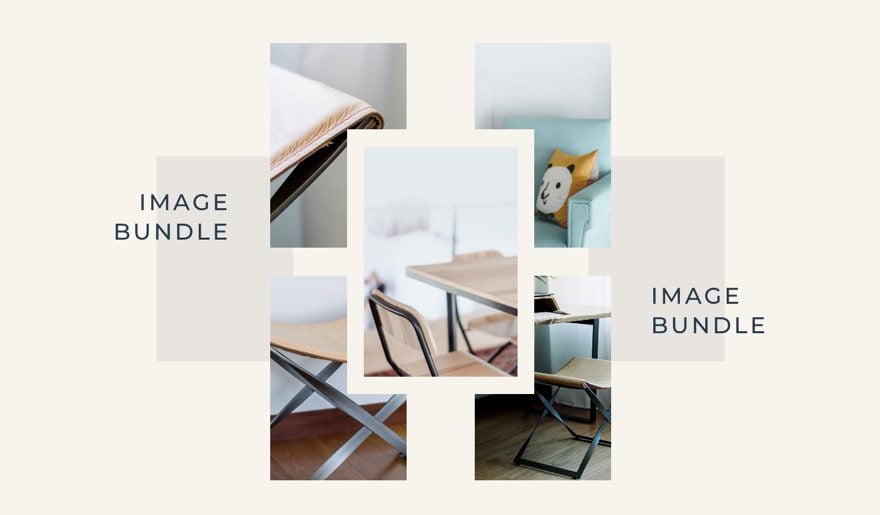
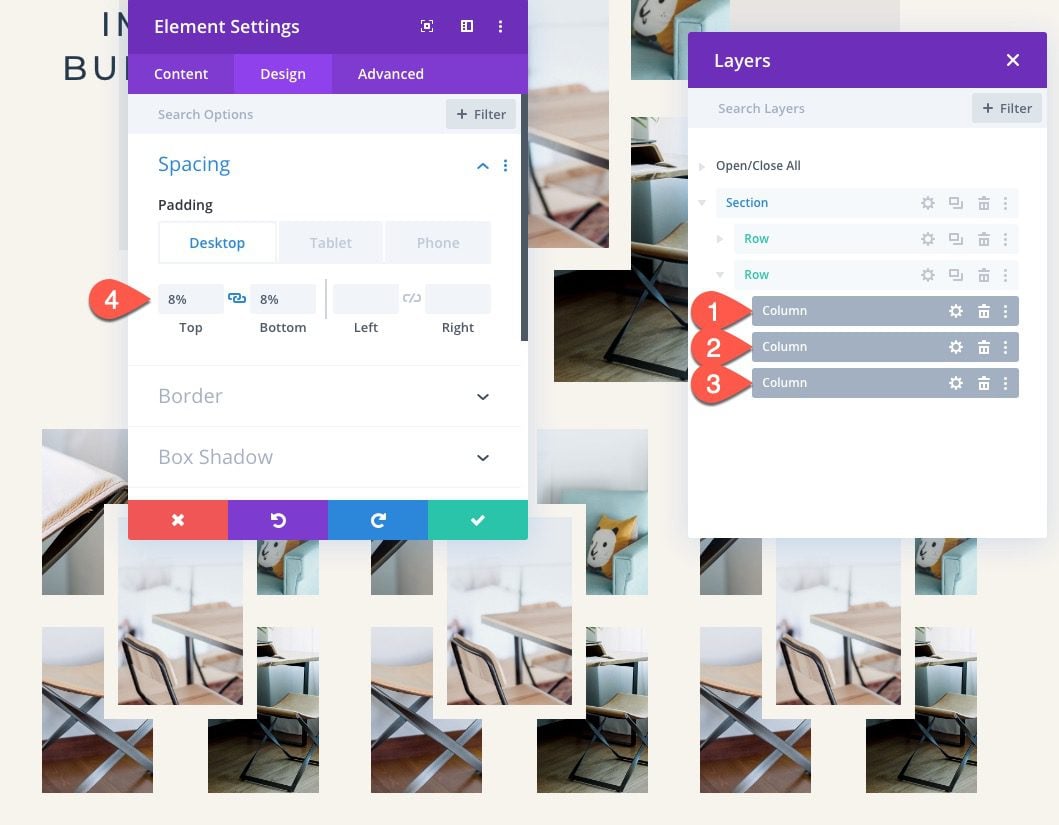
Adding Image Bundle to Multiple Columns
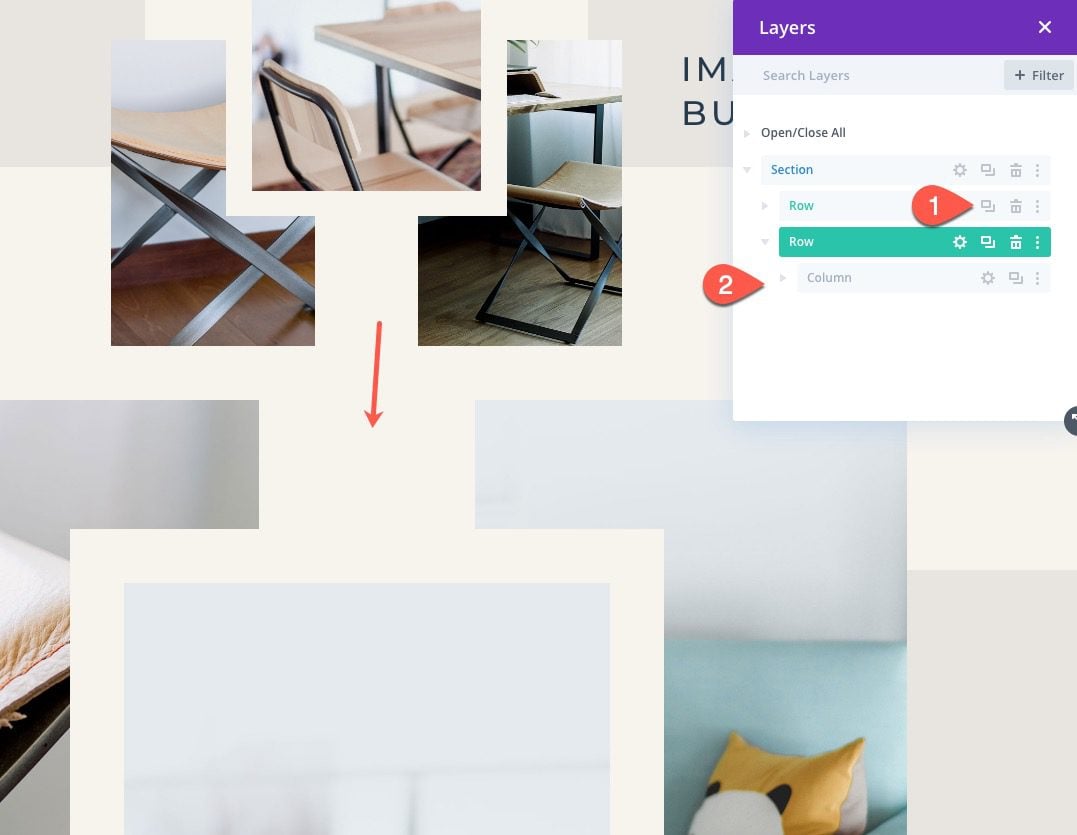
To add this image bundle to multiple columns, duplicate the row and then delete the left and right columns in the duplicate row, leaving only the column with the image bundle.
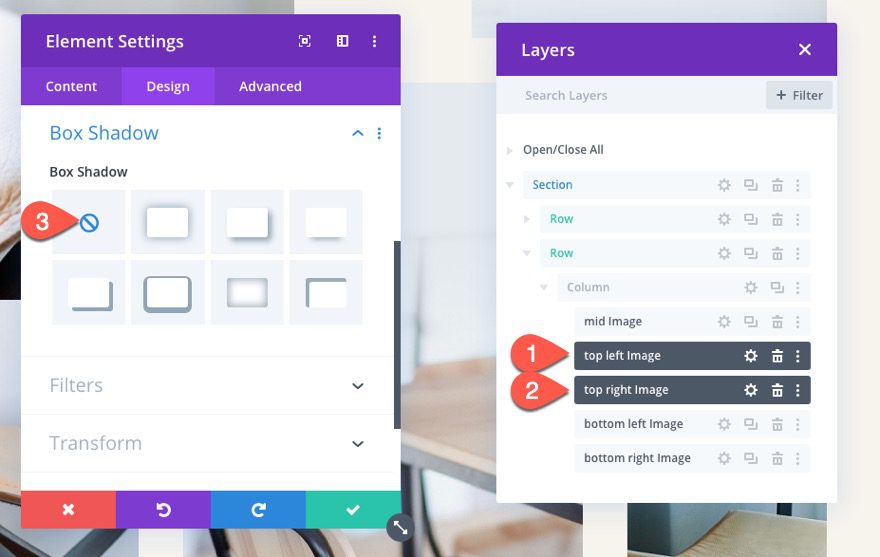
Using multi-select, select the top left image and the top right image. Open the settings, and take out the box-shadow.
Then duplicate the column once or twice to create the multiple columns with the image bundles included.
If you are creating a three column layout for your image bundle, open the column settings for each column and update the padding as follows:
- padding: 8% top, 8% bottom
Final Result
Here is the final result.
And here it is on mobile.

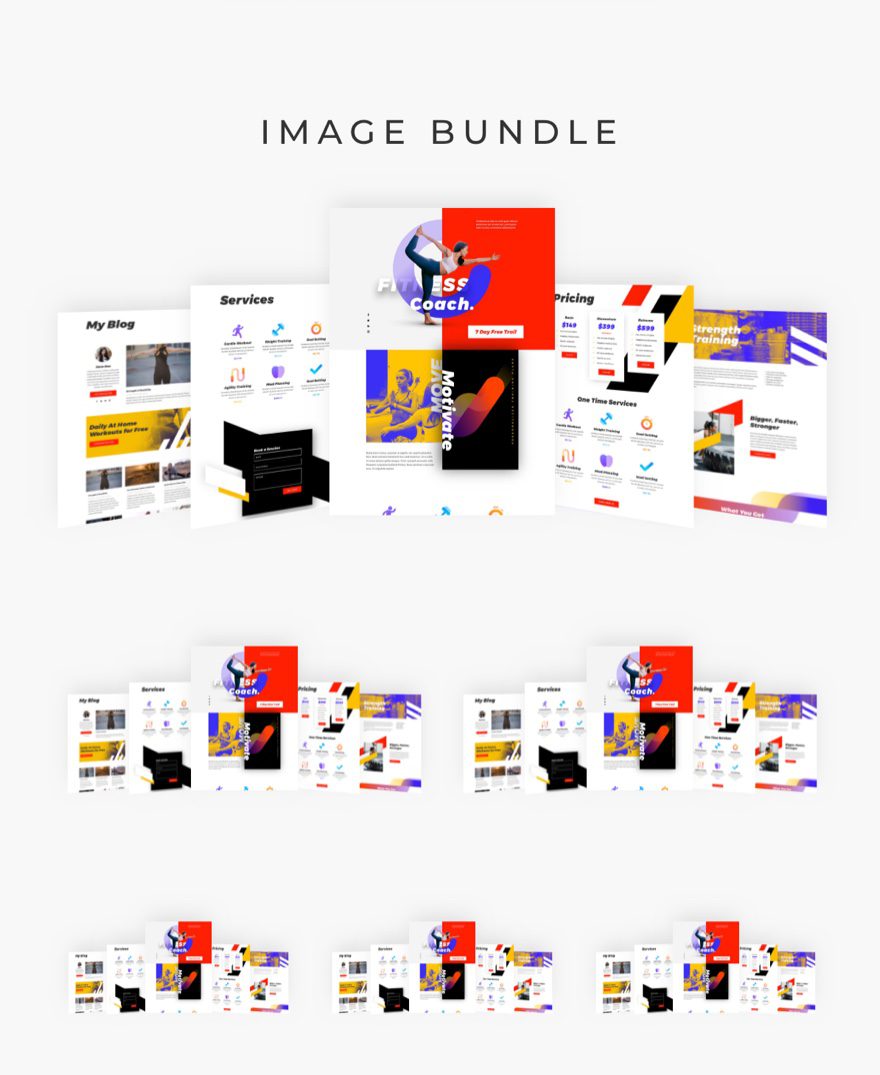
Image Bundle Design #3
For this last image bundle design, we are going to position 5 images side-by-side with subtle 3D rotation to create a nice display for things like child themes or layout packs.
Add Row
To start, add a one-column row to a regular section.
Add Middle Image
Inside the row, add an image module.
Then upload an image to the image module. We are using the same 880px by 1200px screenshots from the Fitness Coach Layout Pack that we used for design #1.

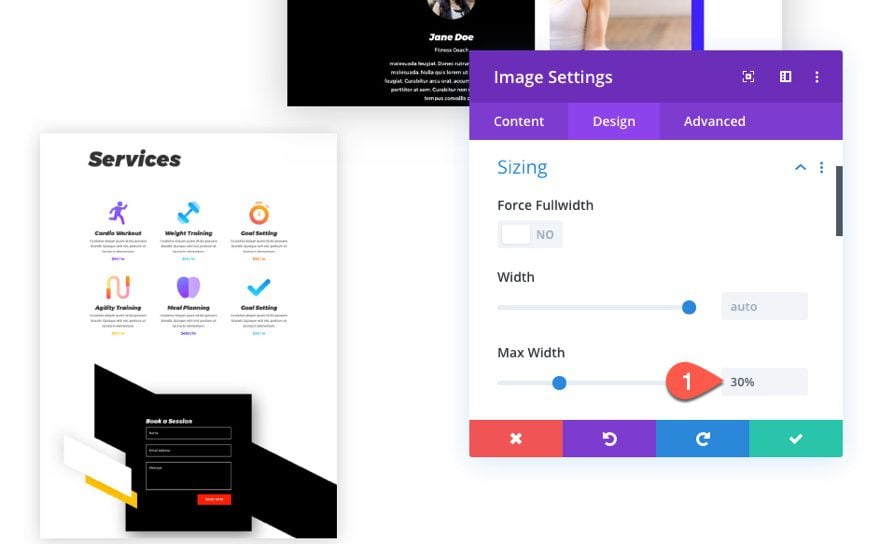
Under the design tab, update the sizing options as follows:
- Width: 30%
- Module Alignment: center

Then give the image a subtle box-shadow:
- Box Shadow: see screenshot
- Box Shadow Vertical Position: -12px
- Box Shadow Blur Strength: 28px
- Shadow Color: rgba(0,0,0,0.11)
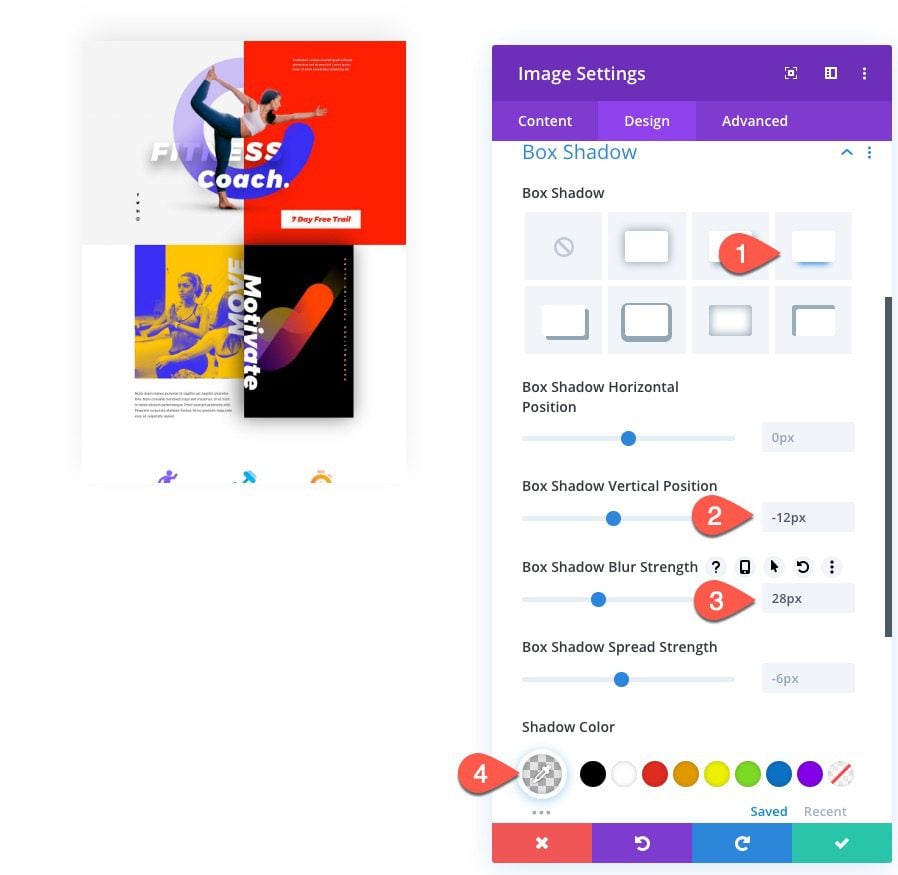
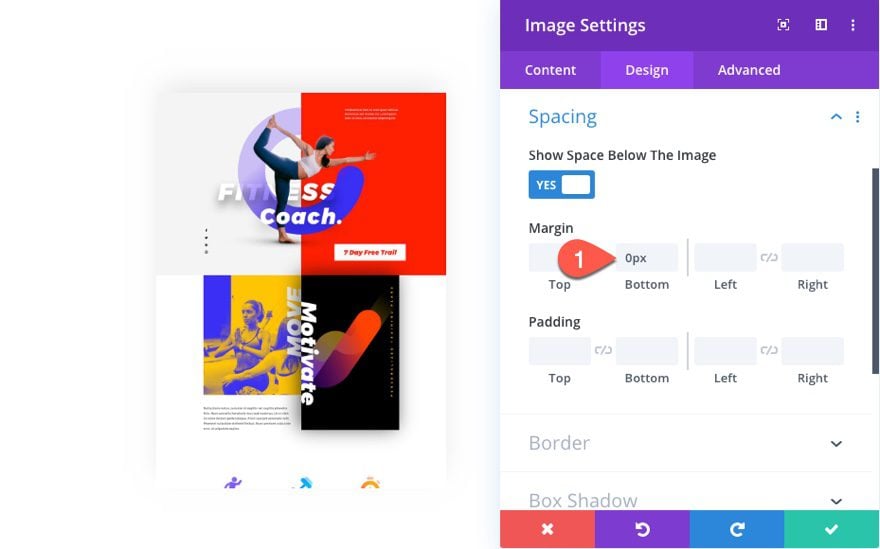
Next, take out the default bottom margin by setting it to 0px.
- Margin: 0px bottom
To make sure the image stays above the other images when overlapping, adjust the Z Index.
- Z Index: 2

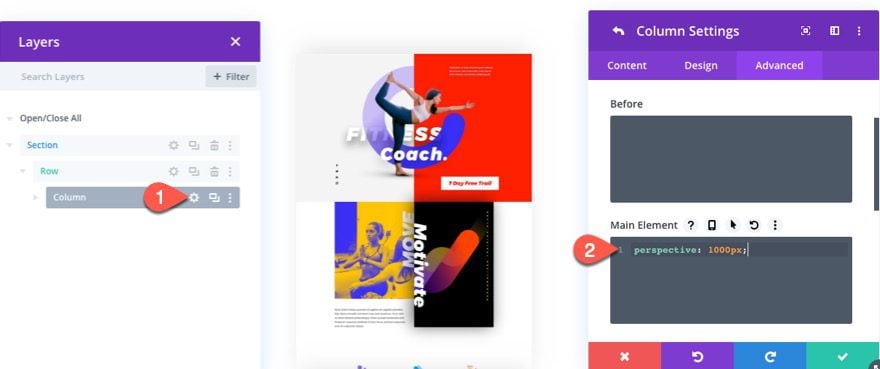
Add Column Perspective
Before we add the rest of the images to the image bundle, we need to add custom CSS to the column that will add perspective to the images when rotating them using the transform options. This creates a realistic 3D effect.
Add Middle Left Image
Now that we have our perspective in place, we can start adding the other images.
To create the middle left image, duplicate the middle image.
Update the image labels in the Layers box as needed, then update the duplicate image module with a new image.
Open the settings for the image and update the absolute position location and Z Index as follows:
- Location: bottom left
- Z Index: 1
Then add the following transform options to position and rotate the image.
- Transform Translate X Axis: 75%
- Transform Rotate X Axis: 30deg
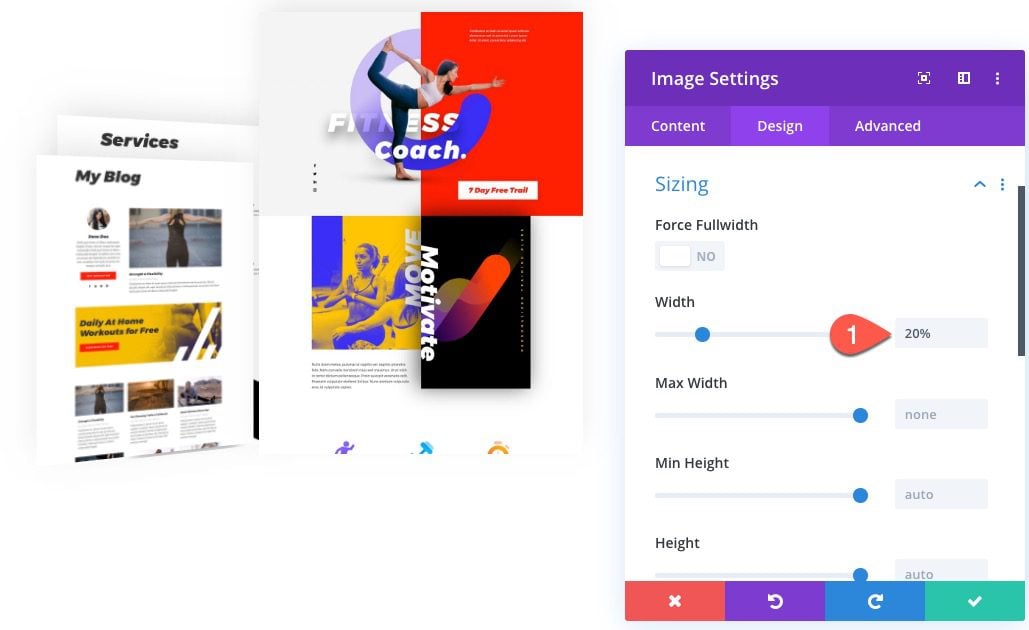
Add Left Image
To create the left image, duplicate the middle left image we just created.
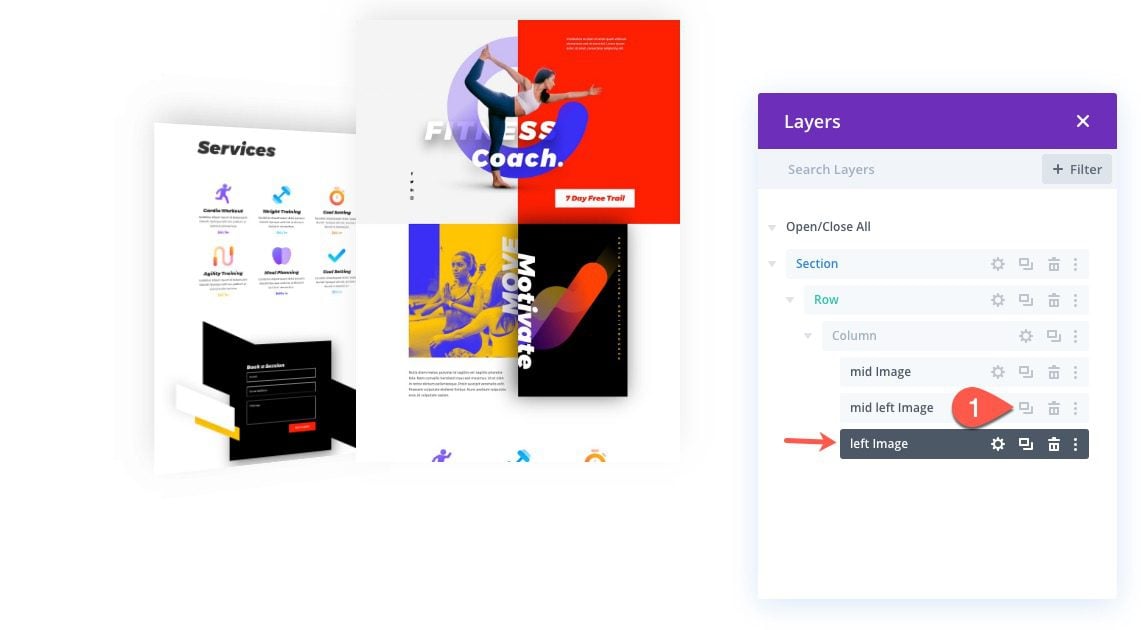
Open the settings for the new image and update the width:
- Width: 20%
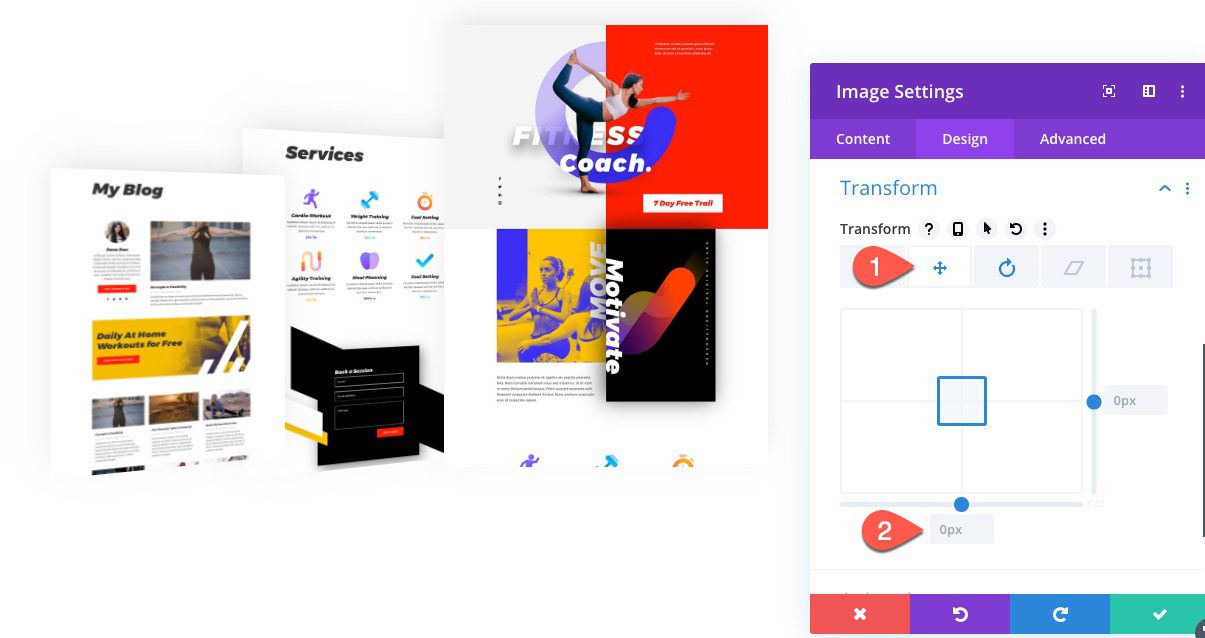
Then adjust the transform translate option as follows:
- Transform Translate X Axis: 0px
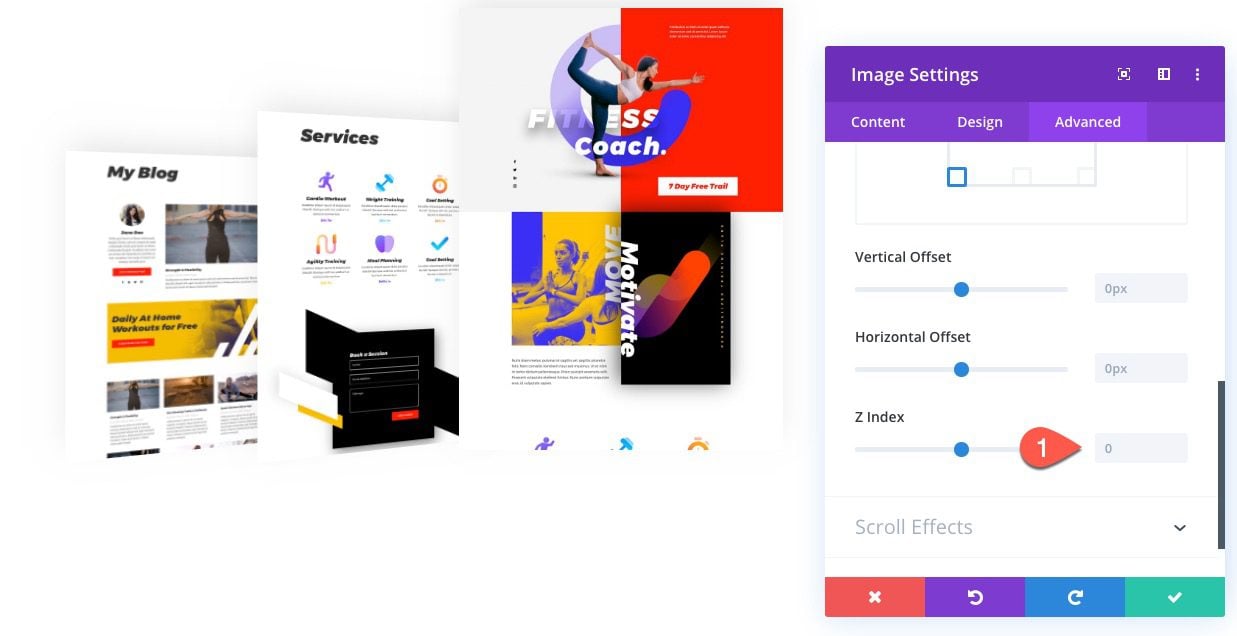
Then adjust the Z Index so that the image stays behind the middle left image.
- Z Index: 0
Add Middle Right Image
Next, we are going to add a middle right image to the image bundle.
To create the image, open the Layers popup. Then duplicate the middle left image, drag the duplicate image below the left image, and then label it accordingly (ie. “mid right image”).
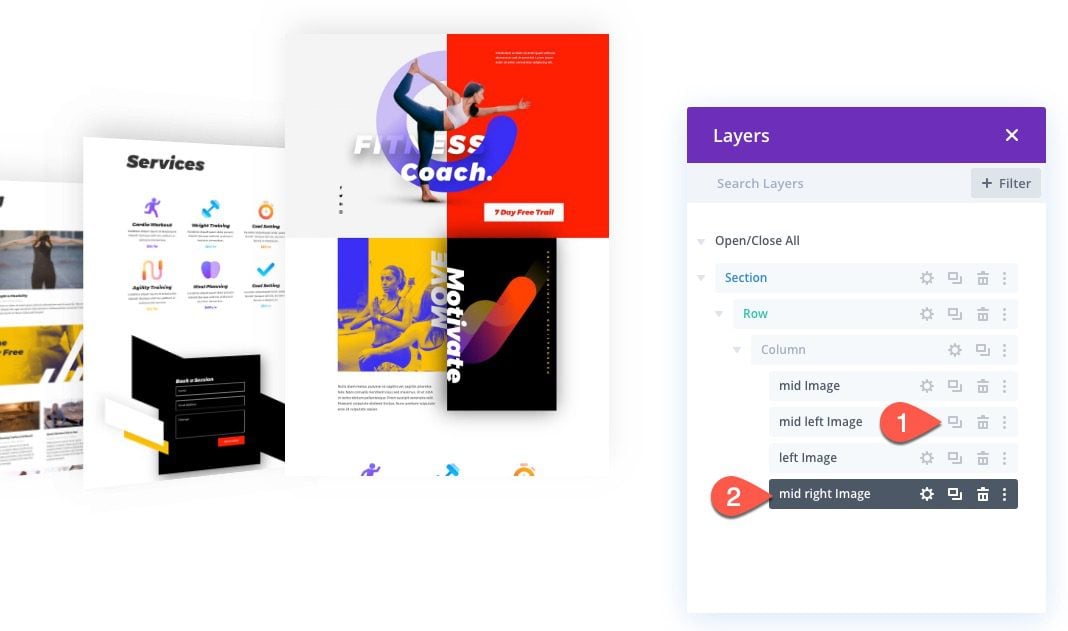
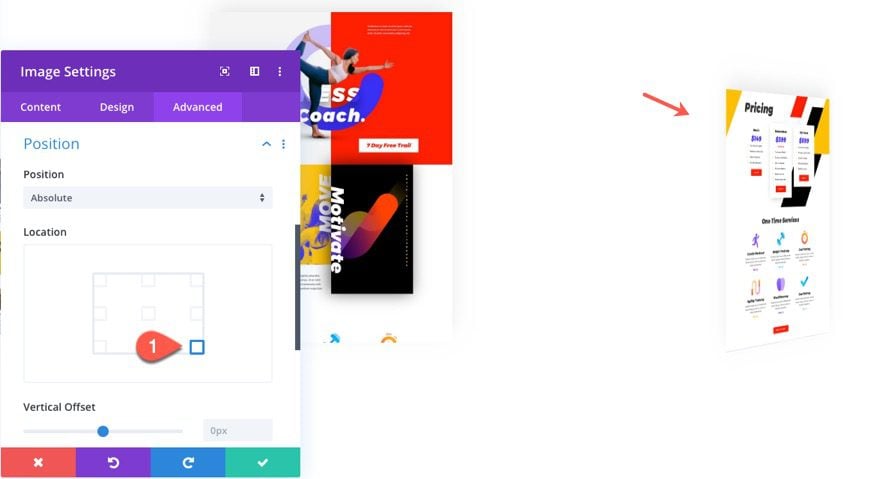
Open the settings for the middle right image and change the absolute position location as follows:
- Location: bottom right
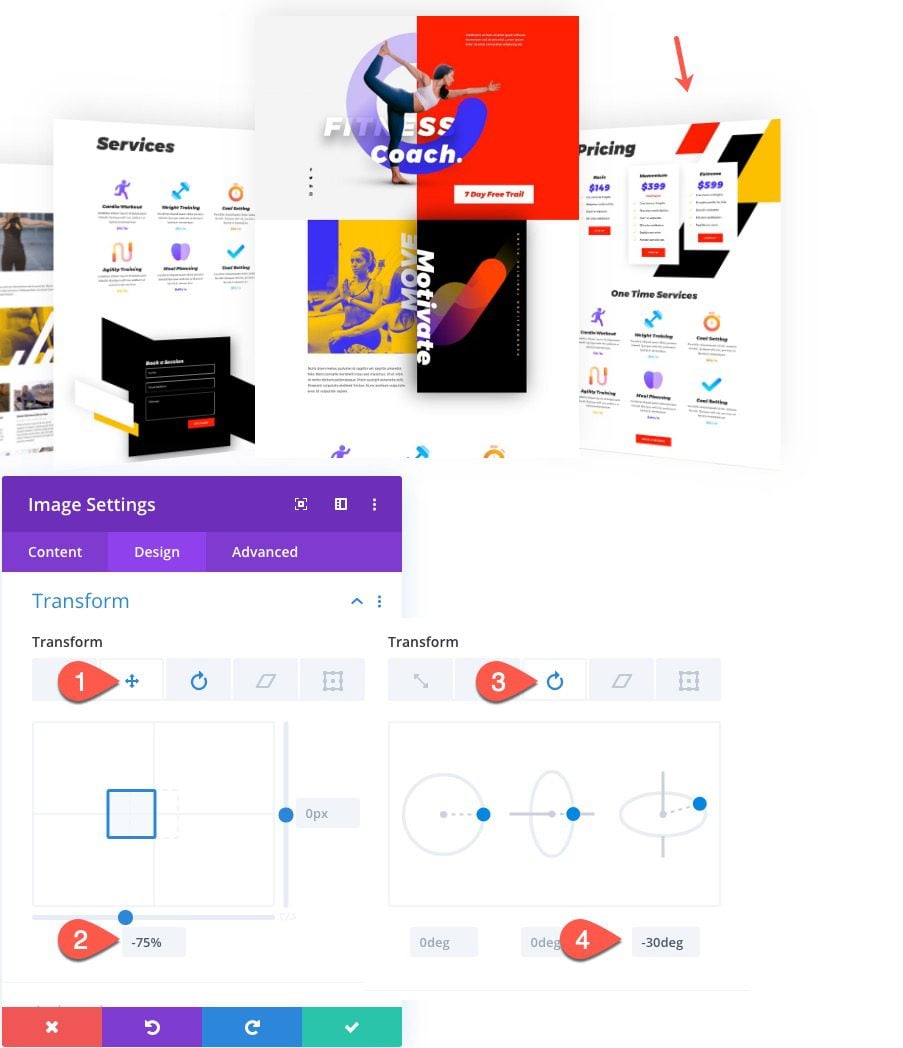
Then adjust the transform options as follows:
- Transform Translate X Axis: -75%
- Transform Rotate X Axis: -30deg
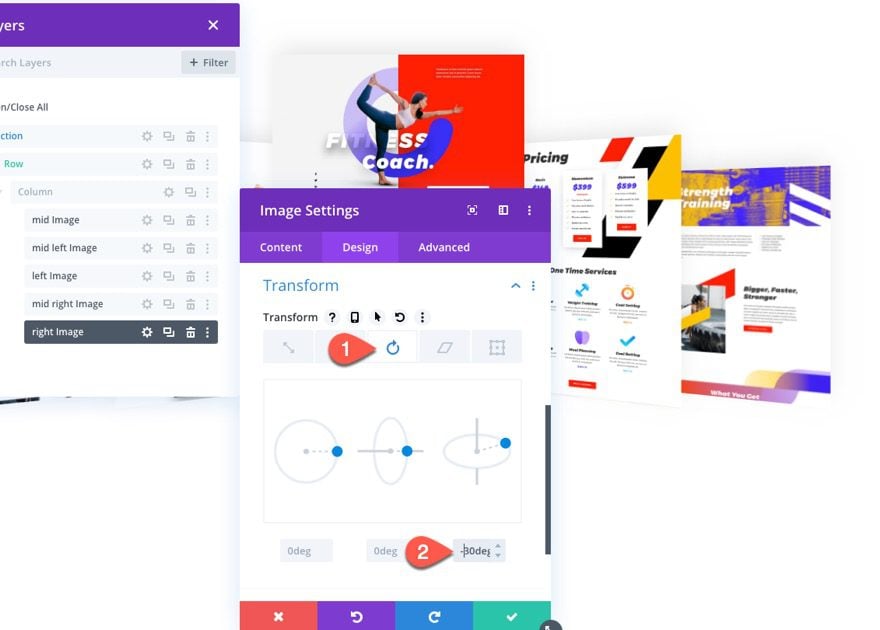
Add Right Image
To create the right image (the last one), we can duplicate the left image. Then drag the duplicate image under the middle right image and label it “right image”.
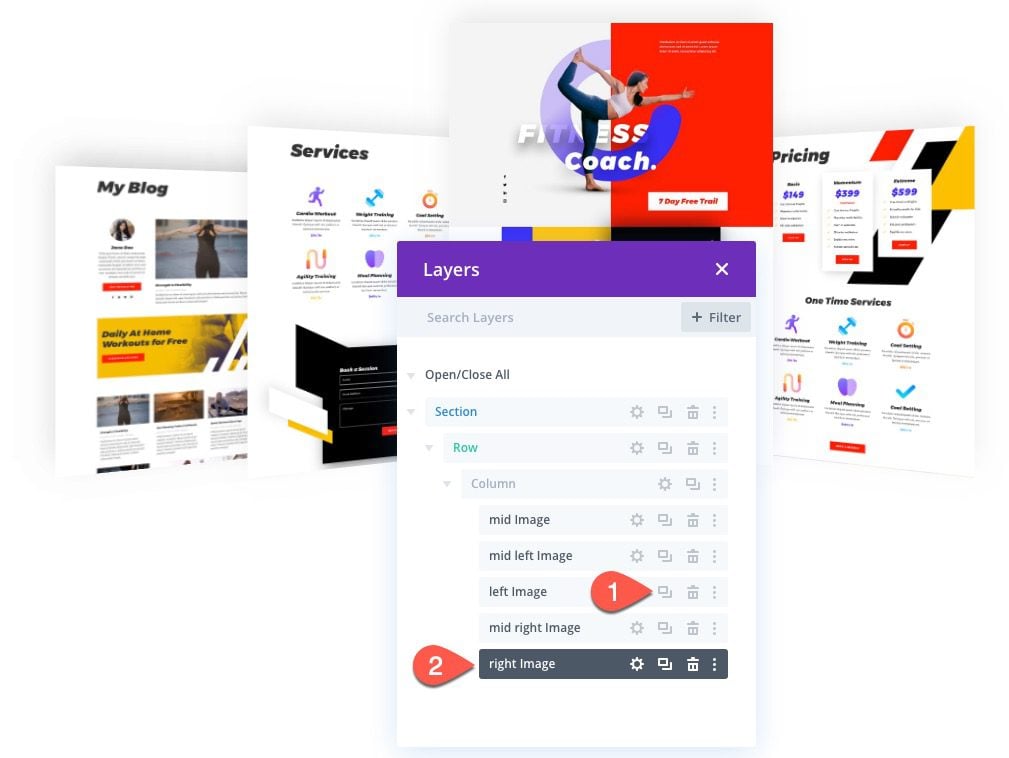
Open the right image settings and update the absolute position location as follows:
- Location: bottom right
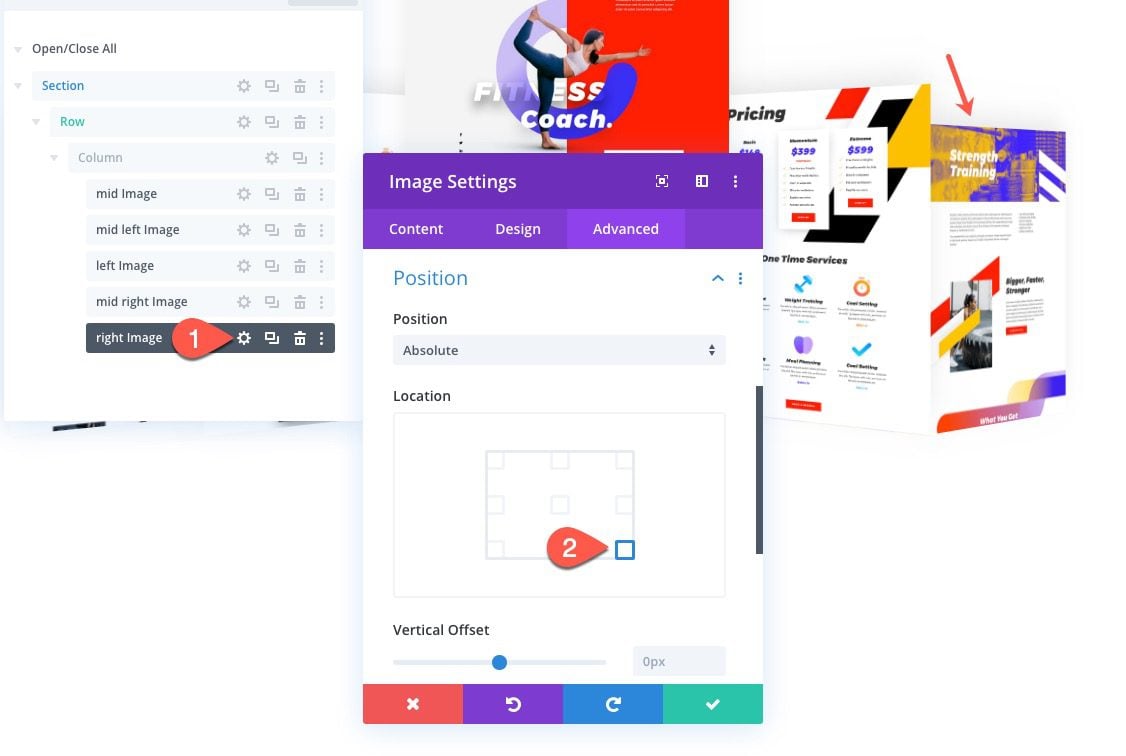
Next, adjust the transform rotation.
- Transform Rotate X Axis: -30deg
Check out the result so far.
And here is the same image bundle added to multiple columns.
Final Thoughts
Once we understand how Divi’s absolute position option works, we can use it to create some pretty awesome image bundle designs. The best part about these image bundles is that they exist within a single column so that they will look great on multiple columns and scale perfectly on mobile too.
I hope this gives you some inspiration to create amazing image displays for your next project.
I look forward to hearing from you in the comments.
Cheers!


Enjoyed this. Very timely. Really dig the fact that layouts are now being included in tutorials.
Thanks, Britt. I agree. They are helpful, indeed.
Thanks Jason, Great tutorial!
You’re welcome!