
Designing a 3D photo wall seems like something only possible using a photo editor like Photoshop or Sketch. But it’s not! These days there are a ton of seemingly impossible designs you can build on the web using just CSS. And with a page builder like Divi, you don’t even need to know much about CSS to create these kind of designs. That’s why today, I’m going to show you how to design 3D photo walls in Divi.
The trick is to use the perspective css property. With just a single line of CSS added to a parent element, you can use Divi’s built-in transform options to rotate items into life-like 3D designs.
Let’s get started!
- 1 Sneak Peek
- 2 Download the 3D Photo Wall design examples Layout for FREE
- 3 Download For Free
- 4 Getting Started
- 5 Understanding How Perspective Works with Transform Options
-
6
Designing Top and Bottom 3D Photo Walls
- 6.1 Creating the Top 3D Photo Wall
- 6.2 Customize the Section to Add Perspective and Hide Overflow
- 6.3 Update Row Settings: Width and Gutter Width
- 6.4 Update Row Settings: Transform Rotate and Origin
- 6.5 Update Row Settings: Custom Column Widths
- 6.6 Create the Heading Section
- 6.7 Create the Bottom 3D Photo wall (or Floor)
- 6.8 Final Design
- 7 Creating Left and Right 3D Photo Walls
- 8 Final Thoughts
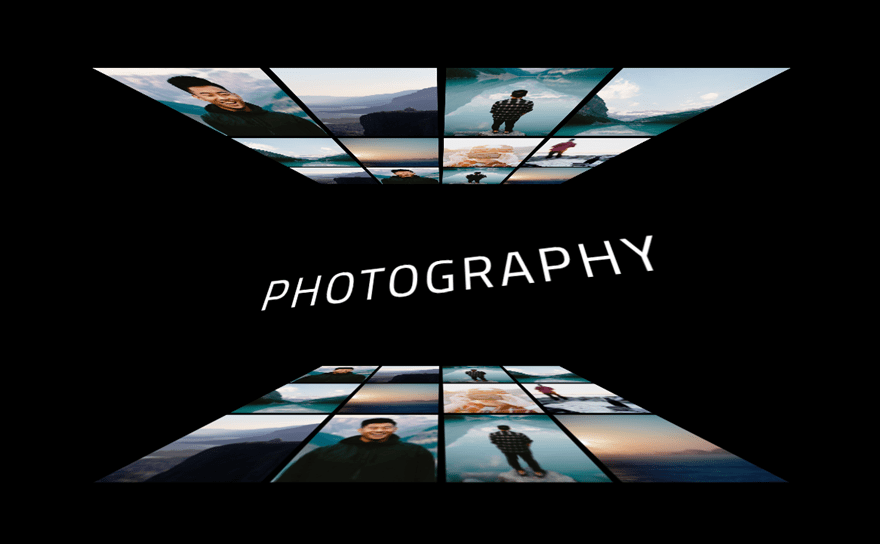
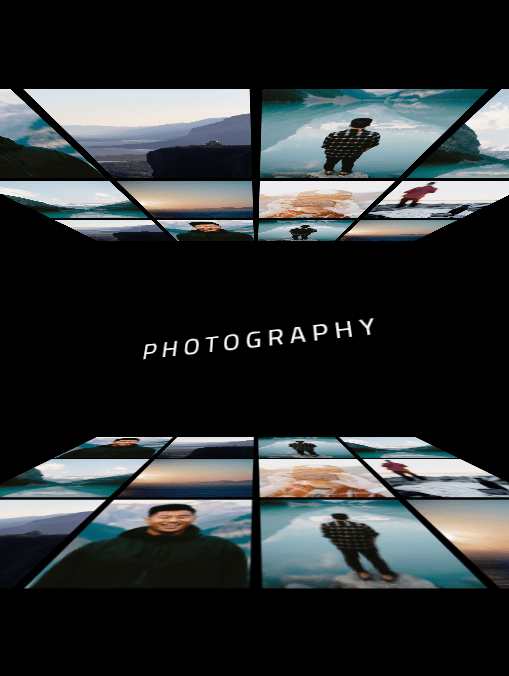
Sneak Peek
Here is a sneak peek of the 3D Photo walls we will be designing today.
Download the 3D Photo Wall design examples Layout for FREE
To lay your hands on the 3D photo wall designs from this tutorial, you will first need to download it using the button below. To gain access to the download you will need to subscribe to our newsletter by using the form below. As a new subscriber, you will receive even more Divi goodness and a free Divi Layout pack every Monday! If you’re already on the list, simply enter your email address below and click download. You will not be “resubscribed” or receive extra emails.

To import the layout to your page, simply extract the zip file and drag the json file into the Divi Builder.
Let’s get to the tutorial shall we?
Subscribe To Our Youtube Channel
Getting Started
To get started with this tutorial, all you need is the Divi Theme installed and active. You will need some images to work with, so feel free to use the same images I’m using from the Travel Agency Layout Pack. After that, you will need to create a new page, give the page and title, and deploy the Divi Builder to build on the front end. Then select the option “build from scratch”. That’s it. Your design canvas awaits!
Understanding How Perspective Works with Transform Options
If you ever took a basic art class, you probably are familiar with perspective. It is a technique used by artists to draw objects that appear to be 3D even though it exists on a 2D piece of paper or canvas. In web design, you can position elements in 3D positions using the transform property. In Divi, these transform options are built-in to the Divi builder. The main transform property that puts an element in a 3D position is transform rotate, which allow you to rotate items along the z, x, or y axis. However, if you rotate an item using transform rotate, the element won’t appear as 3D unless the perspective property is applied.
For example, let’s say you have a single image module with an image added to a one column row.

Then you use the transform rotate property to rotate the image along the x axis. The image will rotate but remain 2D so the image simply look like it was squeezed from the top and bottom to become shorter.
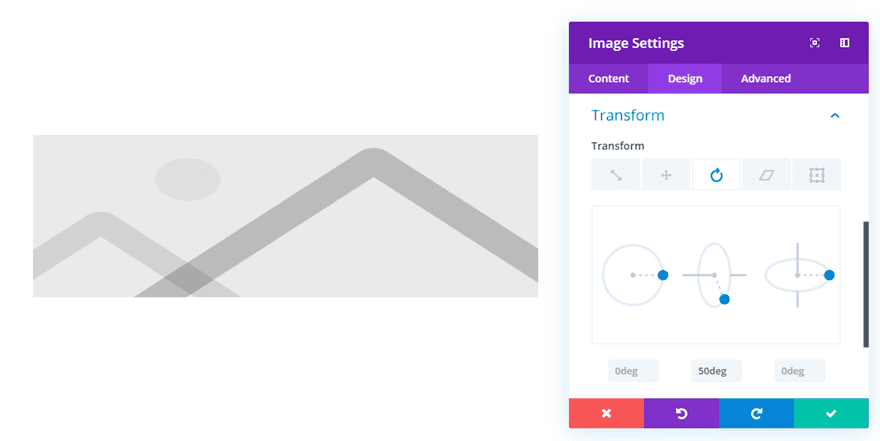
Now if you add perspective using small snippet of CSS to the Row’s main element (which is a parent element of the image), you add perspective to the image. Depending on the perspective value, you can increase or decrease the distance the object appears from the user looking at the screen. Here is an example of what the image will look like if you add “perspective: 600px” to the Row.
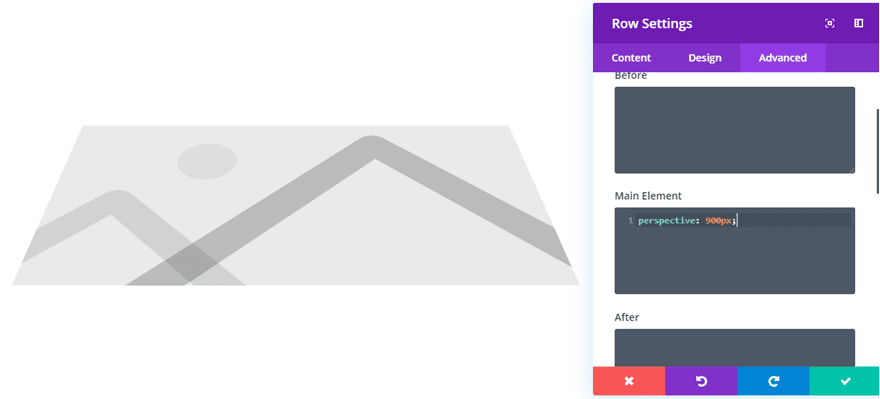
You can see that the top portion of the image is smaller and the bottom of the image is larger, creating the perspective 3D effect. Basically the image looks 900px away from the user viewing the page.
In this tutorial, I will be using this same technique to rotate an entire row of images and then adding perspective to the parent section to create 3D photo walls.
Designing Top and Bottom 3D Photo Walls
In this first design, we are going to add a 3D photo wall at the top and at the bottom of a single like of text which can be used as a heading. Here’s how to do it.
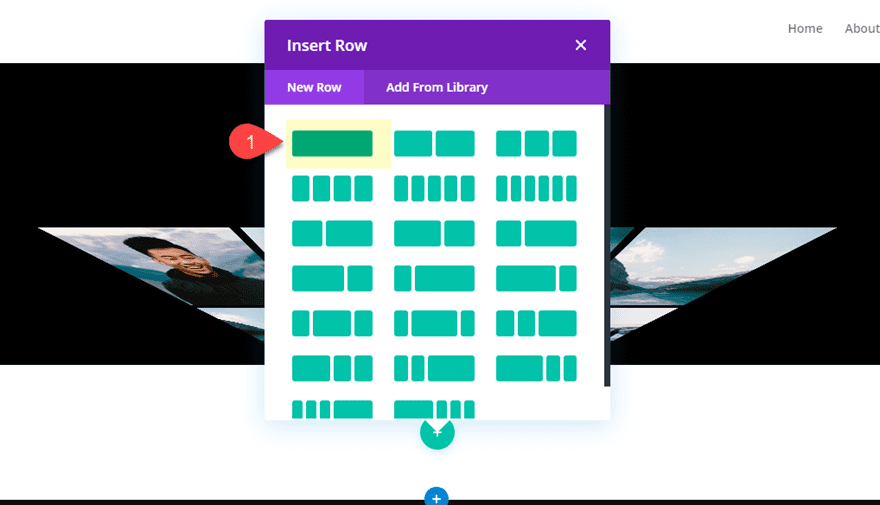
Creating the Top 3D Photo Wall
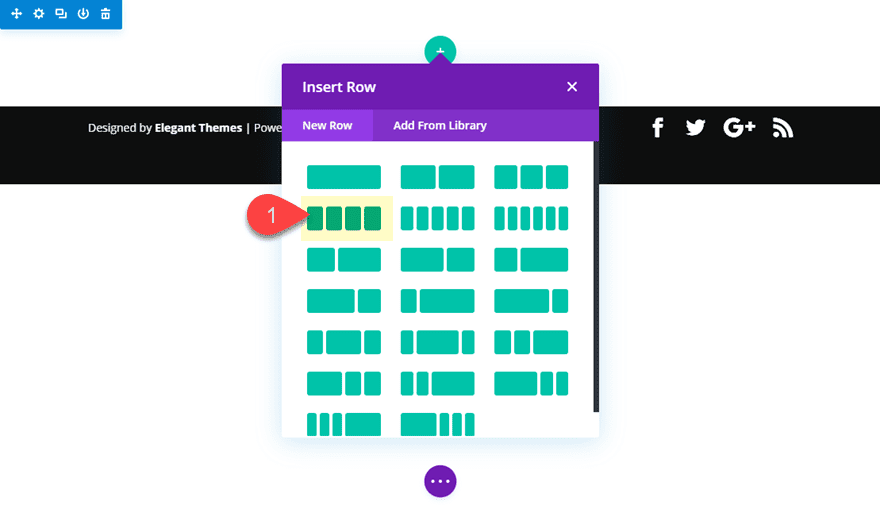
To get things started on your new page, create a regular section with a four-column row.
In column 1, add an image module with your first image. All of the images I’m using in this example are 600px by 800px.
Once you upload your image to the image module, update the padding as follows:
Custom Padding: 3% top, 3% bottom, 3% left, 3% right
Duplicate (or copy and paste) the image and add them to each of the four columns so that you have three images in each of the four columns like this.
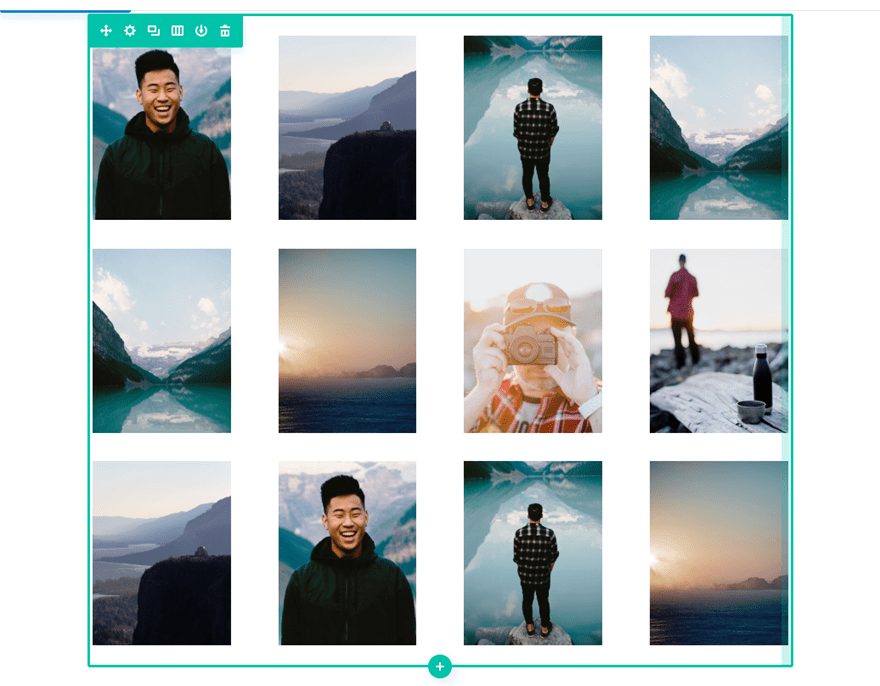
This will serve as the top wall (or ceiling) that we will rotate and add perspective to create the 3D wall design.
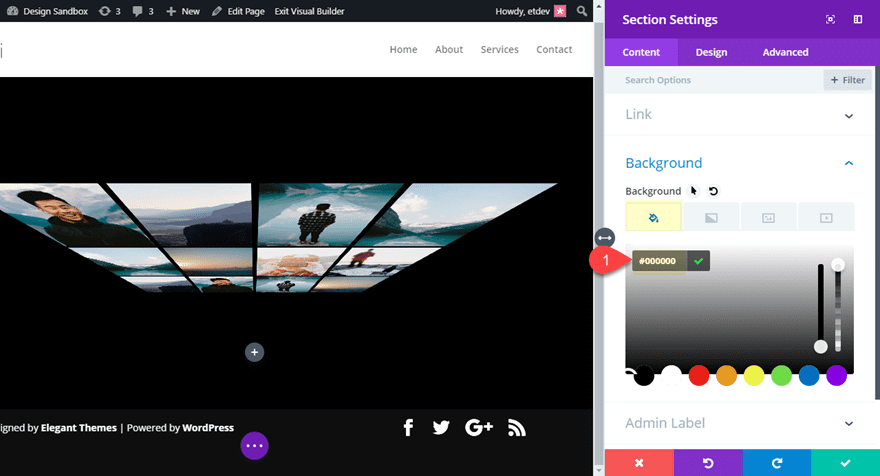
Customize the Section to Add Perspective and Hide Overflow
Since we are going to be rotating the row module (not individual images), we need to add the perspective property to the row’s parent which is the section. And in order to keep the images from going outside of the section container, we must add overflow hidden to both the vertical and horizontal overflow.
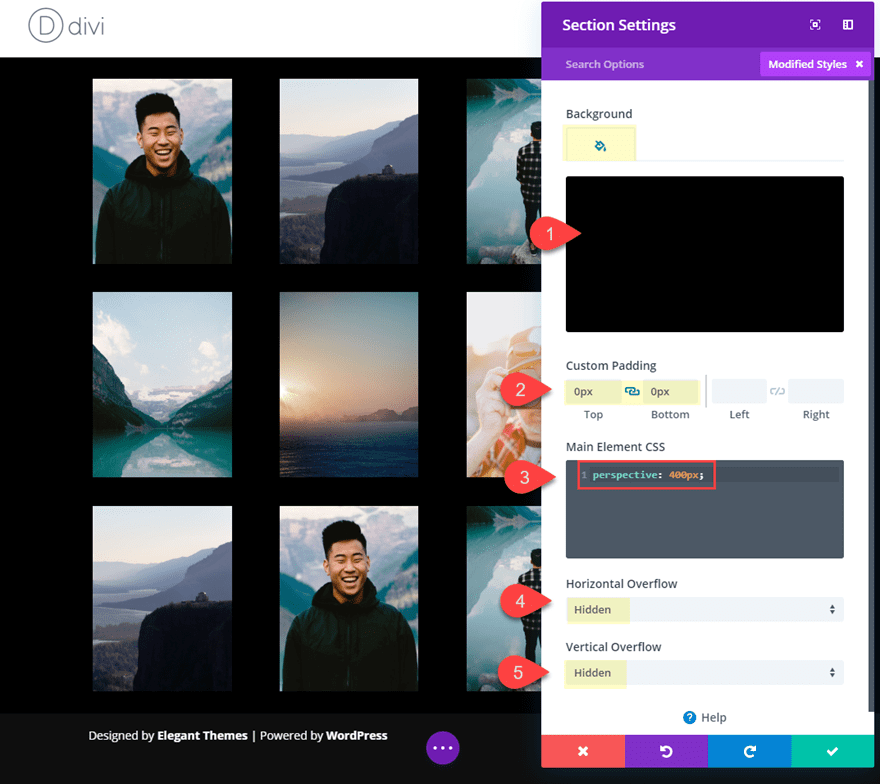
To do this open up the section setting and update the following:
Background Color: #000000
Custom Padding: 0px top, 0px bottom
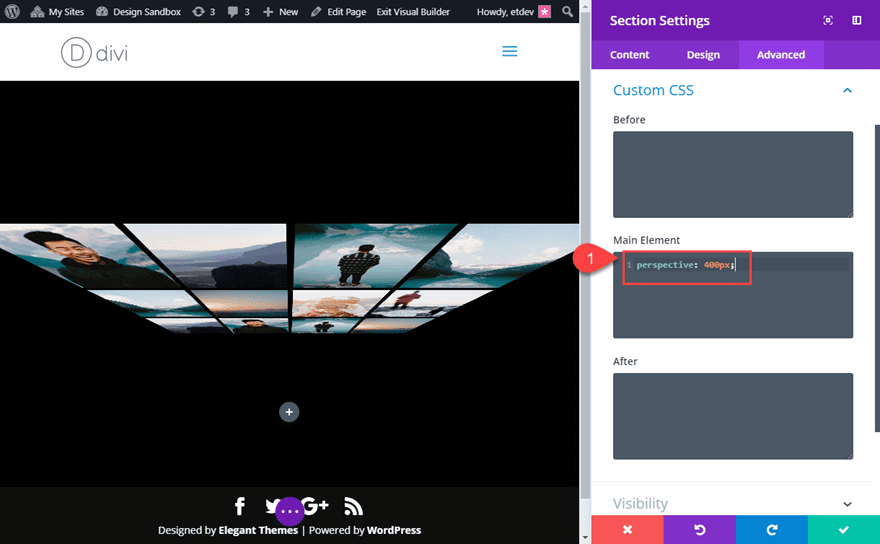
To add the perspective property, add the following custom CSS to the main element:
Main Element CSS:
perspective: 400px;
The see the overflow properties as follows:
Horizontal Overflow: hidden
Vertical Overflow: hidden
Update Row Settings: Width and Gutter Width
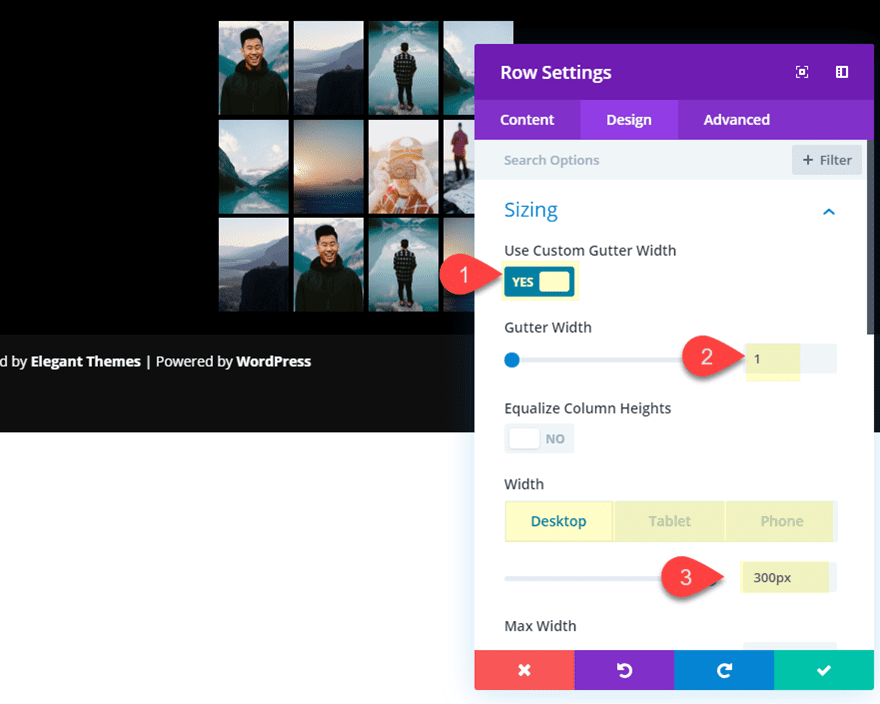
Now it’s time to customize the row to prepare it for the rotated 3D design. To do this we are going to shrink the width and get rid of any margin between the images by updating the gutter width.
Open the row settings and update the following:
Gutter Width: 1
Width: 300px (desktop, tablet, and phone)
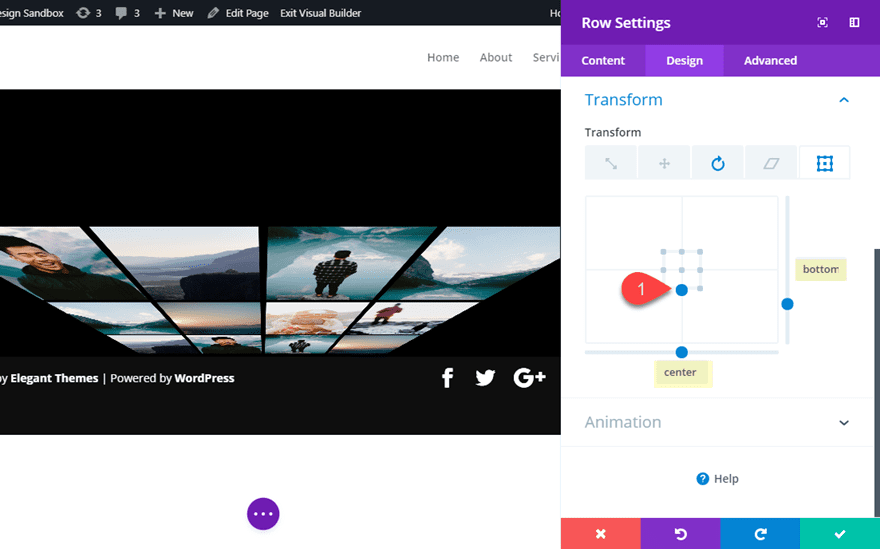
Update Row Settings: Transform Rotate and Origin
Now use the transform rotate option to rotate the row as follows:
Transform Rotate Y Axis: -58deg
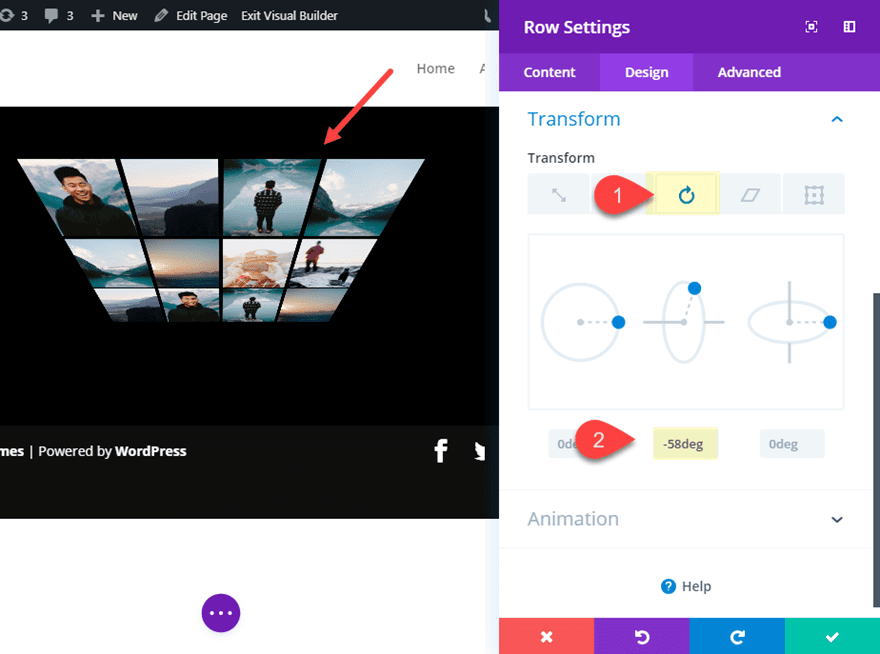
The change the Transform Origin as follows:
Transform Origin: bottom center (or 100% 50%)
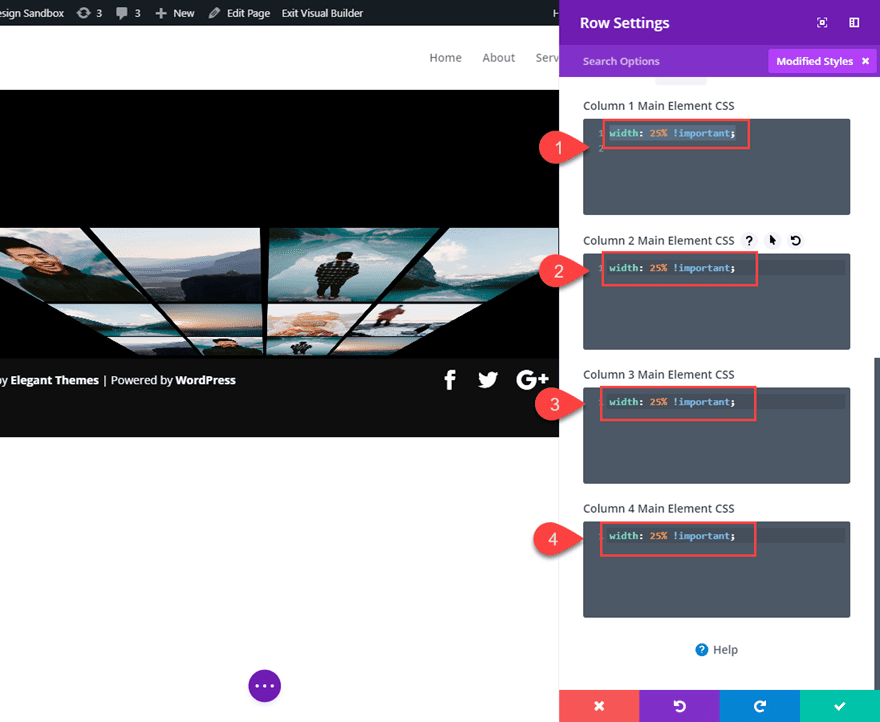
Update Row Settings: Custom Column Widths
Since we want the four-column layout to remain on tablet and phone displays, we need to override the css for column width at those breakpoints. To do this we need to add a width css property to each of the columns. Under the advanced tab, add the following custom CSS snippet to each column’s main element as follows:
(note: make sure the gutter width is set to 1 or this will not work)
Column 1 Main Element:
width: 25% !important;
Column 2 Main Element:
width: 25% !important;
Column 3 Main Element:
width: 25% !important;
Column 4 Main Element:
width: 25% !important;
That’s it. Our first 3d photo wall has been created.
Create the Heading Section
To create our heading for the design, we need to create a new regular section with a one-column row directly under the current section.
Before you add a module, update the section with a black background:
Background Color: #000000
Then add the same perspective property to the section’s main element as we did before as follows:
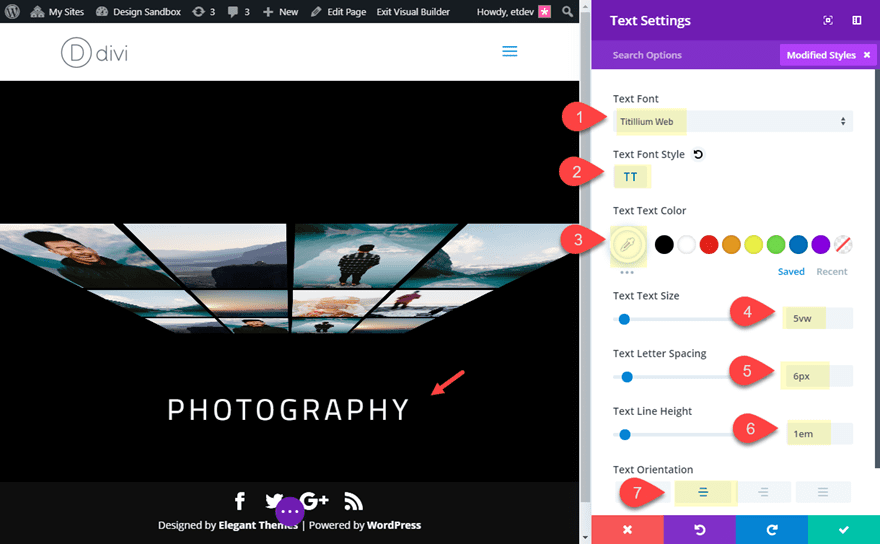
Then add a text module to the row with the following:
Content: Photography
Text Font: Titillium Web
Text Font Style: TT
Text Text Color: #ffffff
Text Text Size: 5vw
Text Letter Spacing: 6px
Text Line Height: 1em
Text Orientation: Center
Now, we can add a transform rotation to the text module. With the perspective set at the parent (or section) the 3D effect will occur once we rotate the text.
Add the transform rotate values as follows:
Transform Rotate X Axis: -12deg
Transform Rotate Y Axis: 32deg

Now we are ready to create the bottom 3D photo wall.
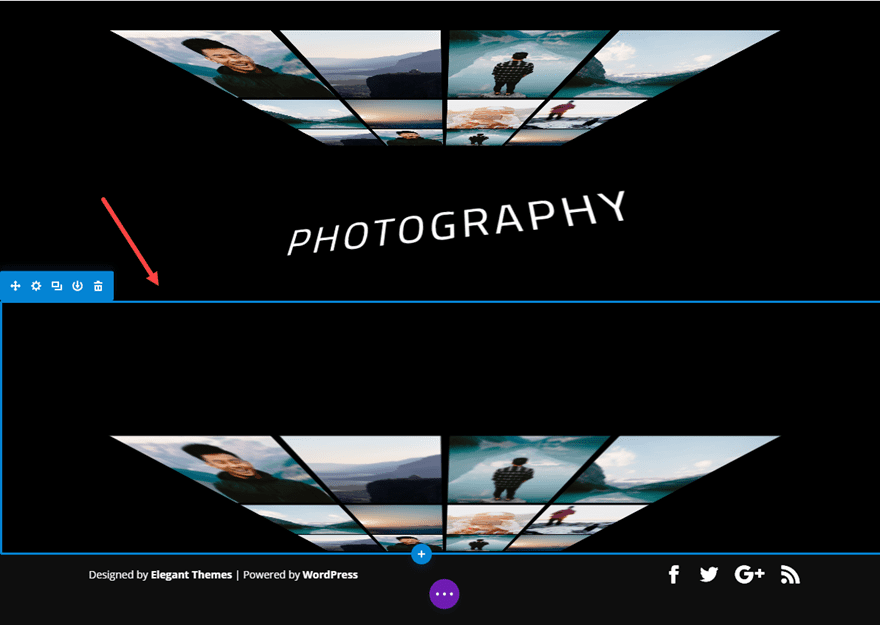
Create the Bottom 3D Photo wall (or Floor)
To create the bottom 3D photo wall, we can simply copy and paste the top section containing the top wall and paste it directly under the heading section.
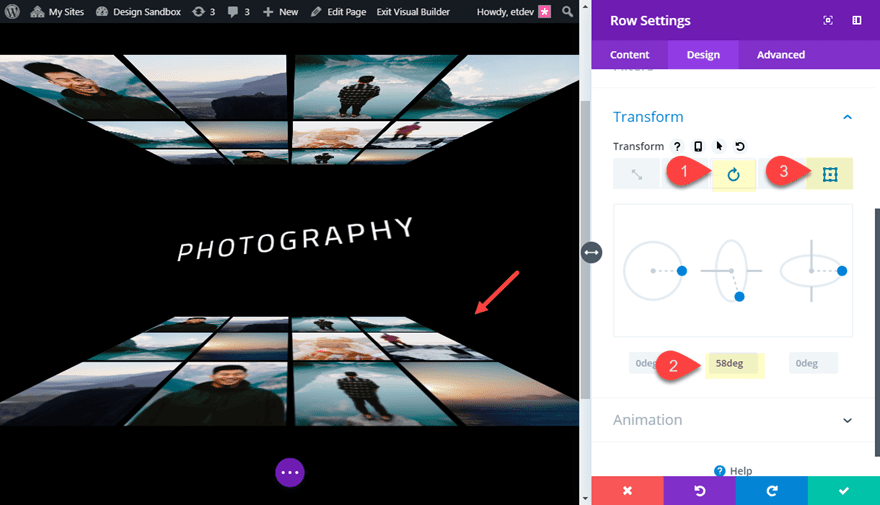
Next, update the row settings of the new section as follows:
Transform Rotate Y Axis: 58deg
Transform Origin: Top Center
Final Design
That’s it! Let’s check out the final design.
The design will also remain intact on mobile as well (aside from a little overflow).
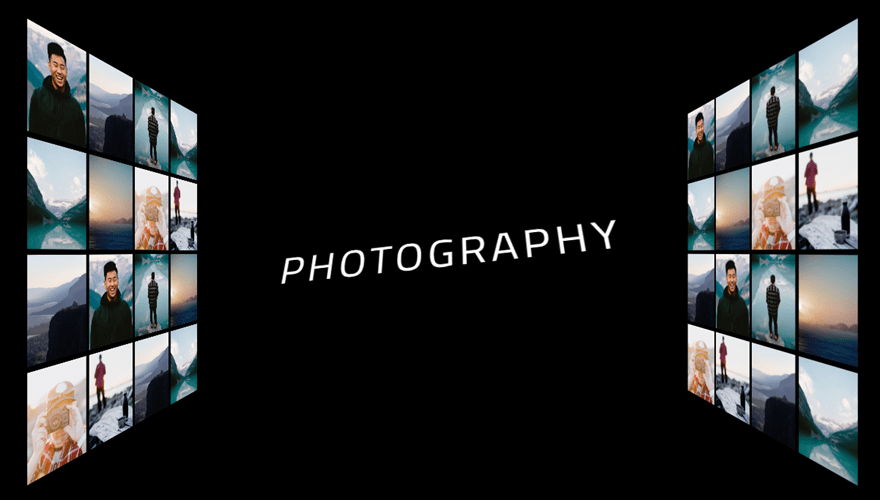
Creating Left and Right 3D Photo Walls
For this next design, we are going to create 3D photo walls on the left and right side of our heading instead of the top and bottom. To jumpstart the design process, we will be using some of our prebuilt designs in our first example.
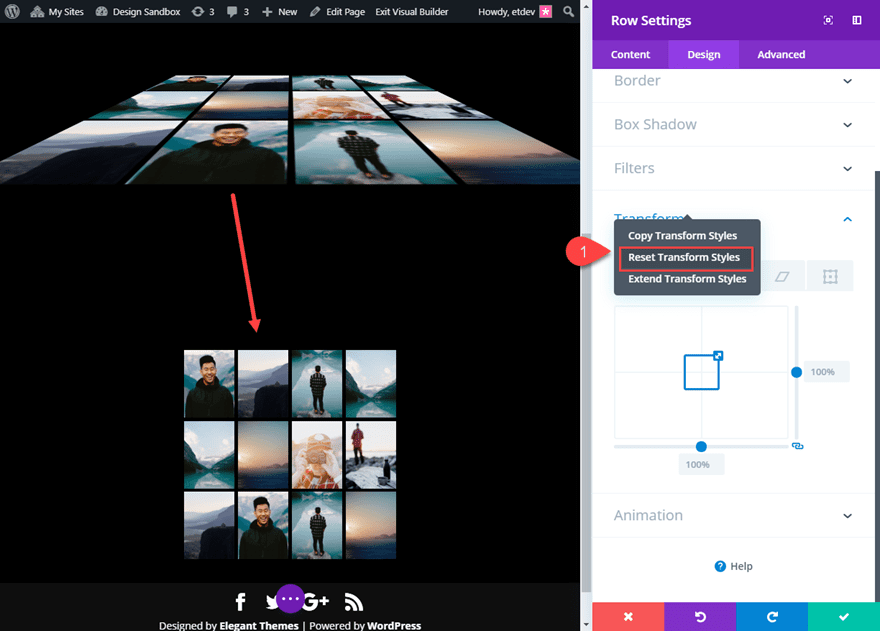
Toi start, duplicate the bottom section of the first design example containing the bottom image wall. Then open the row settings of the new section and reset the transform options back to the default state.
Next duplicate the row.
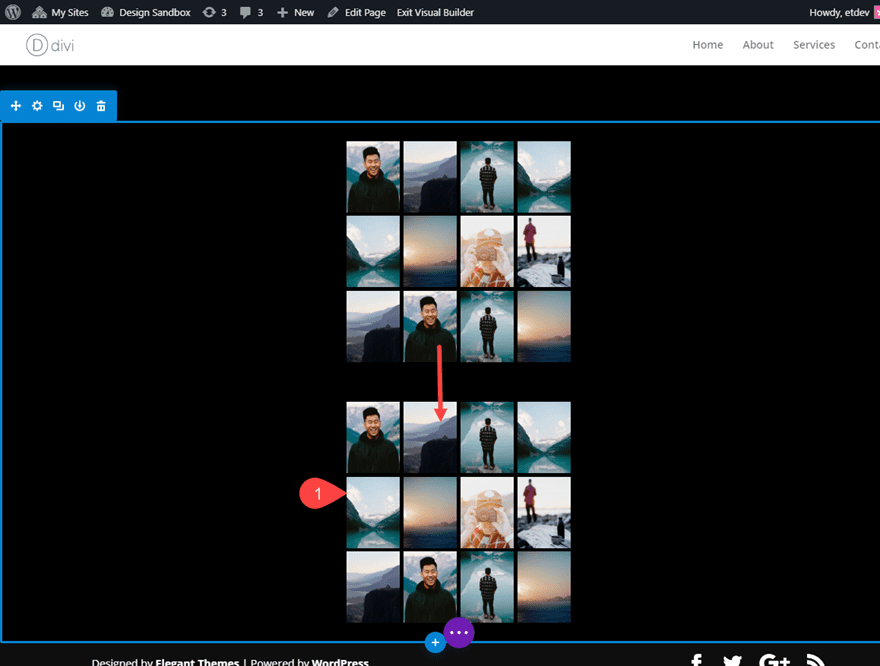
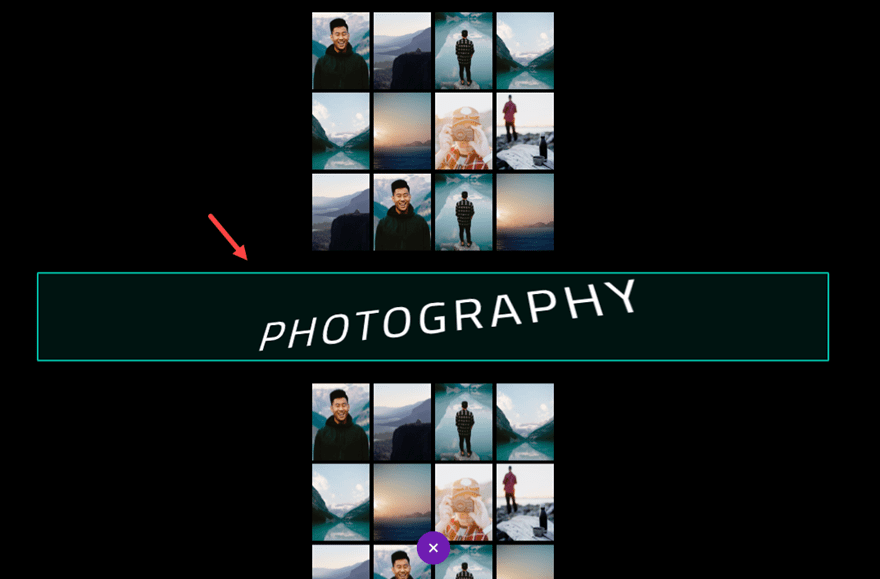
Next, copy the Row (not the section) containing the text module with the heading in the first design example. Then paste it between the two rows containing the images.
This is a similar setup to the first design, except all of our rows are inside of one section. This is important for the next step.
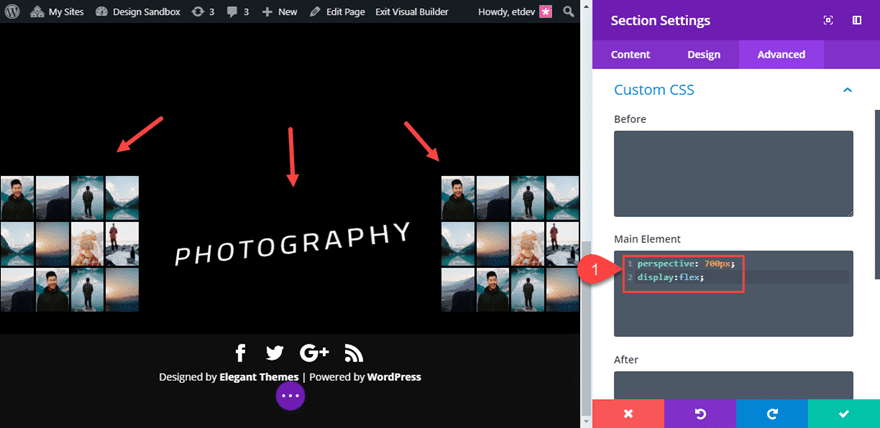
We want our two image walls to be on the left and right of the page with the text in the center. An easy way to do this is to use display flex on our section. This will align our rows horizontally within the section.
To do this, open the section settings and add the following custom CSS to the Main Element:
(Notice we are bumping up the perspective value to 700px to create more “Z space” distance of the user’s perspective.)
Main Element CSS:
perspective: 700px;
display:flex;
And voila! Our walls are in place and ready for rotation.
Add More Images for a higher wall
To make our 3D photo wall a bit higher, all we need to do is add another image to each of our four columns in each of the rows containing images. Just make sure they carry over the 3% padding like the others.
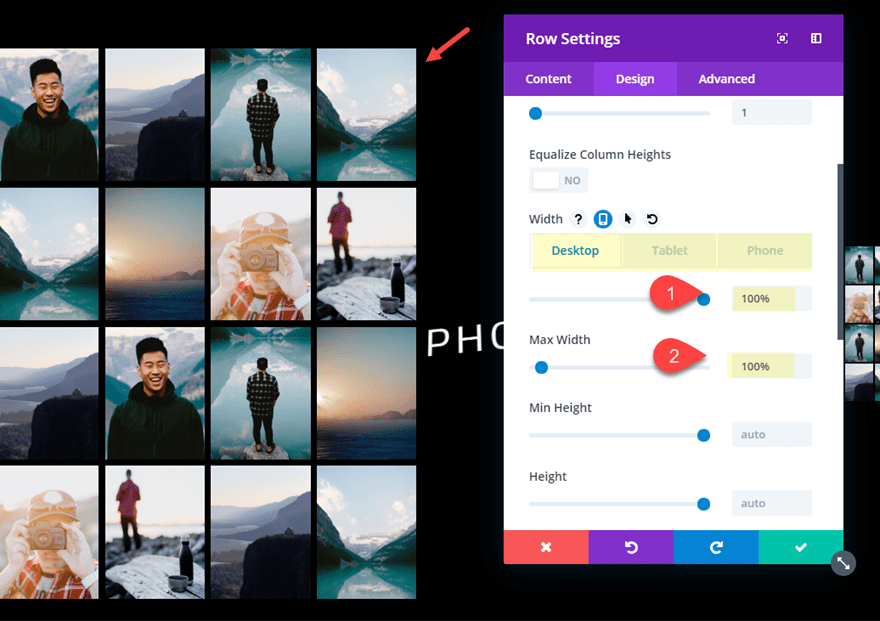
Changing the Width of the Two Side Rows
Before we rotate our image wall, first we need to adjust their width to 100%. Open the row settings for the image wall on the left side and update the following:
Width: 100% (desktop, tablet, phone)
Max-width: 100%
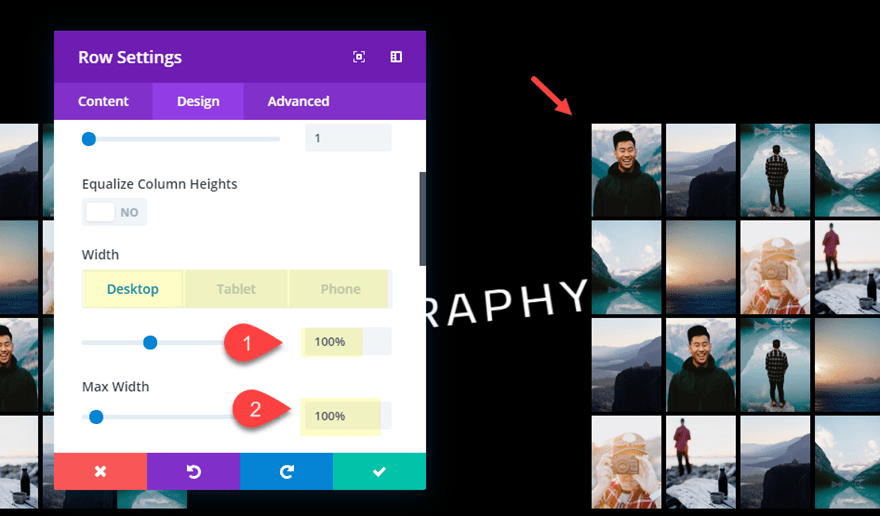
Then do the same for the row on the right side.
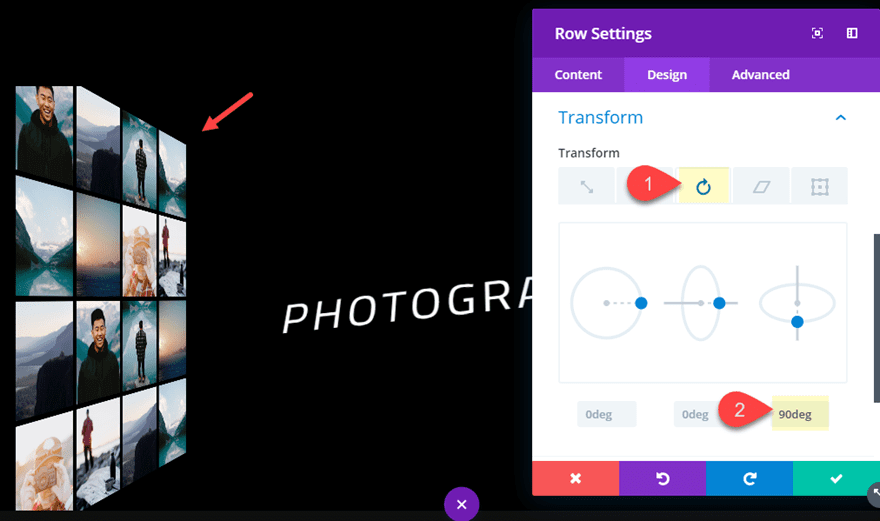
Rotating the Side Rows for 3D Effect
Now we are ready to add our transform rotation to each of our rows. First, open the row settings for the left row and update the following:
Transform Rotate X Axis: 90deg
Next, open the row settings for the row on the right side and update the following:
Transform Rotate X Axis: -90deg
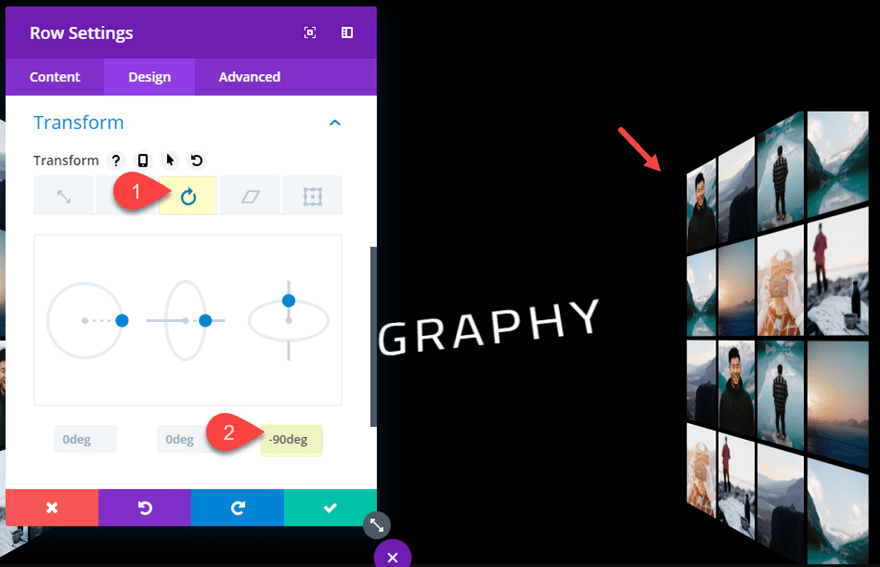
With our perspective in place at the section level, our rows will display as 3D photo walls on each side of our text module.
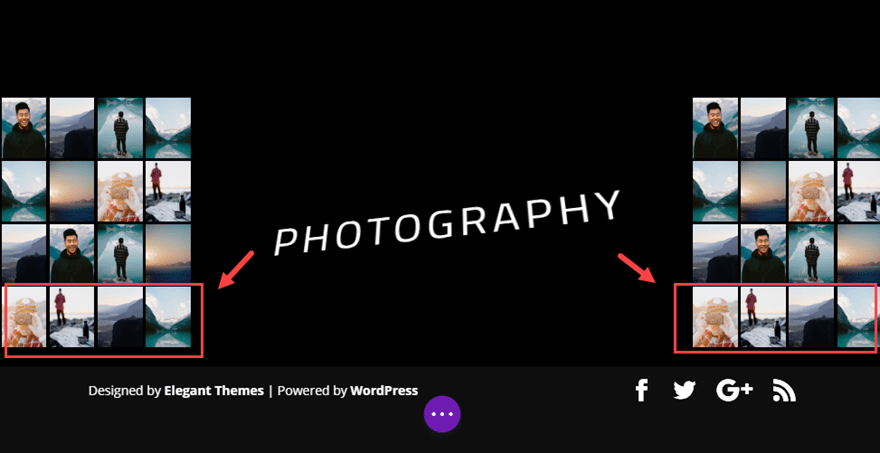
Final Result
Let’s check out the final result.
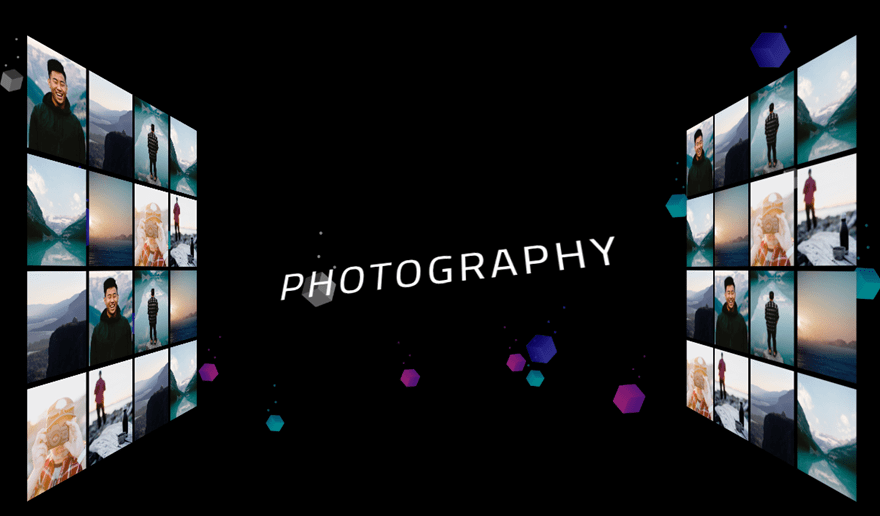
To put a little icing on the cake, you can add a background image with 3D graphical elements. Here is an example of the design with a background image taken from the Cryptocurrency Layout Pack.
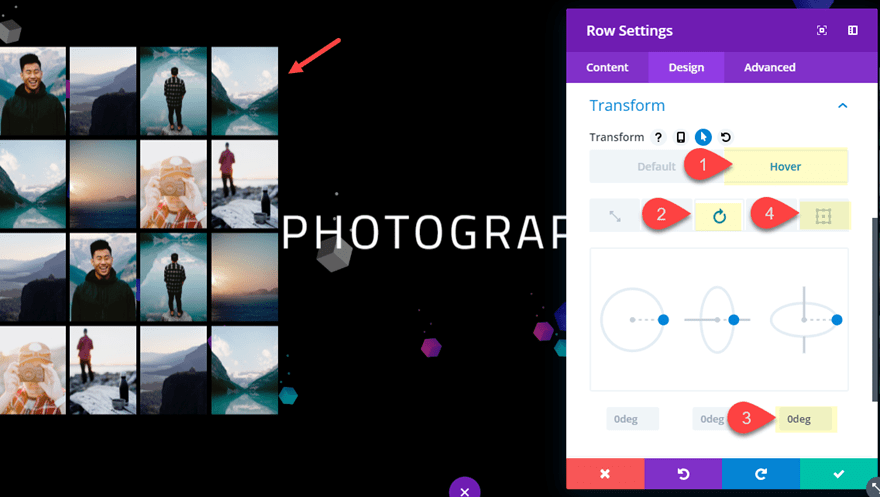
Bonus Hover Effect: Swing those walls into View on Hover!
You can easily add a transform rotate hover effect that will allow the user to view the image wall by swinging it into view on hover. To do this open the left row settings and update the following:
Transform Origin: left center
Transform Rotate X Axis (hover): 0deg
Then on the right row settings, update the following:
Transform Origin: right center
Transform Rotate X Axis (hover): 0deg
Now check out the result.
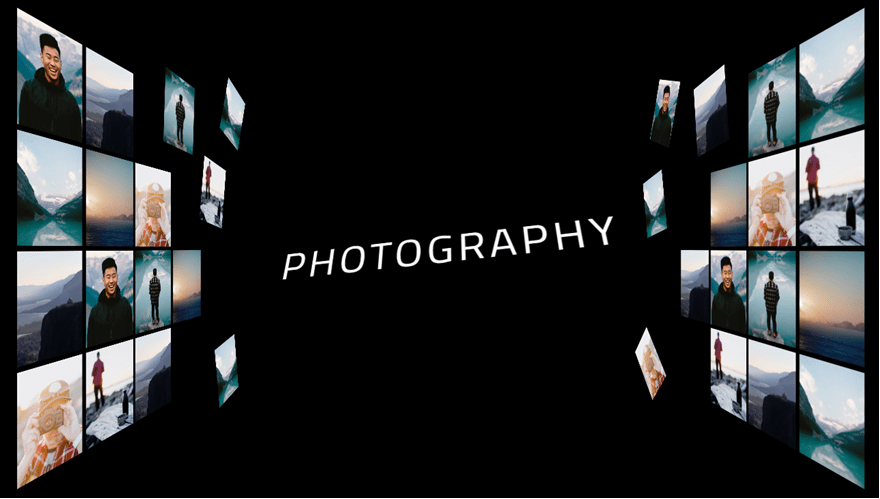
Bonus Design Effect: Make Images Break Away into Space
Since the Row of Images in being rotated with perspective in place, you can move the images within your row using transform translate. What is cool about this is that the movement will stay along the 3D plane. To do this, simply open the settings of an image and use the transform translate option to move the image outside of the grid into space!
Here is an example of what that would look like by adding a few transform translate values to images.
Final Thoughts
Creating 3D Photo Walls in Divi really does make an impressive impact on the design of a page. And I must say it is really fun to experiment with different designs using the techniques in this article. The perspective property works hand in hand with the transform options to create countless life like 3D designs! And don’t forget these rows (or walls) can be filled with any module in Divi. So feel free to try out some blurbs as well. I hope this will inspire you to create something unique today.
I look forward to hearing from you in the comments.
Cheers!


Hi Jason
looks great also love the look of the new site except the download buttons do not show I am using Chrome browser
I absolutely love using the transform elements and this is an excellent example.
Freaking love it! Thanks
In a simple word, it’s amazing. It is a very creative effort and I hope we will get new creative thinking and design ideas in the future.
Not sure if this affects anyone else, but when I start adding the transform + perspective css, using the backend & front end visual builder stops working. Both the Row and Image Modules become unclickable, the row won’t highlight, or the menu ribbon doesn’t appear on hover. In click mode, I can click to reveal the ribbon, but the transform controls don’t affect the rendered output, it just stays at the default perspective.
Have you noticed any issues with the builder doing these?
Emilio,
Usually if I run into an issue with not being able to click on an element with an advanced design like this, I deploy grid mode to select the item I need and then go back to hover mode once the element is selected in order to get a visual of the design while editing. And if there is a bug, I’m sure it will be rectified. I’ll check it out.
Thanks.
I have noticed this, and it is particularly acute in this exercise. I think it something that will be rectified in time. Flipping in into the wireframe to select elements is the way to go for the moment.
I have noticed this, and it is particularly acute in this exercise. I think it something that will be rectified in time. Flipping in into the wireframe to select elements is the way to go for the moment.
Stephen,
Yes. For some cases, it is nice to be able to select an element in wireframe and then switch back to desktop view once the settings modal is active.
designing a 3D photo wall seems like something only possible using a photo editor like photoshop or sketch.
I’m really thankful that you have written this article as i just bought my new home and after reading your article, i,m definitely going to make a 3d wall in my house.
Very cool!
love all your shared tutorial!!written with passion & quality!!make divi good brand. hope will amaze community here. thanks.
So glad you like it, Joseph. Thanks for the support.
That’s beautiful and so unique! Congrats! Please, Live Demo instead of gif.
Elisandro,
Thanks. Sorry there isn’t a live demo. You can always download the layout to have a closer look.
Hi, Jason. I mean, the UX will be best with an instant Live Demo on the tutorials. I hope I’m not sounding like I’m complaining. It is only a suggestion. Thank you. 🙂
I mean: The gifs are great when used to show a specific part of the tutorial as you did. I’m talking about the final version to be available as a live demo as well.
Another great feature of Divi put to great use in this tutorial. This definitely gives me a lot of ideas for future designs.
Awesome. Great to hear, Karl!
Looks amazing! Looking forward to trying it out.
Yay! It is actually pretty fun to build. I thought so at least. I love moving those images around in 3D Space.
Clever. Nicely done. Keep up the good work – and thanks for taking the time to share…
Great to hear! thanks, Chris
Thanks Jason. Originally when the transform update was released I was looking for the perspective setting. You can of course add this to the enclosing element, as you have done here.
Brilliant. Are you going to produce a YT video for it?
Thanks Asit. And, Yes. We will eventually get the video up there. Sometimes it may take a few days.
Thank for your ideas!