
The WordPress Table Block allows you to create a table for your posts or pages. This is great for showing tabulated data. It’s easy to use and it can be styled to work with your website’s design.
In this article, we’ll look closely at the Table Block. We’ll see how to add it to posts and pages, its settings and options, best practices, and the frequently asked questions.
How to Add the Table Block to your Post or Page
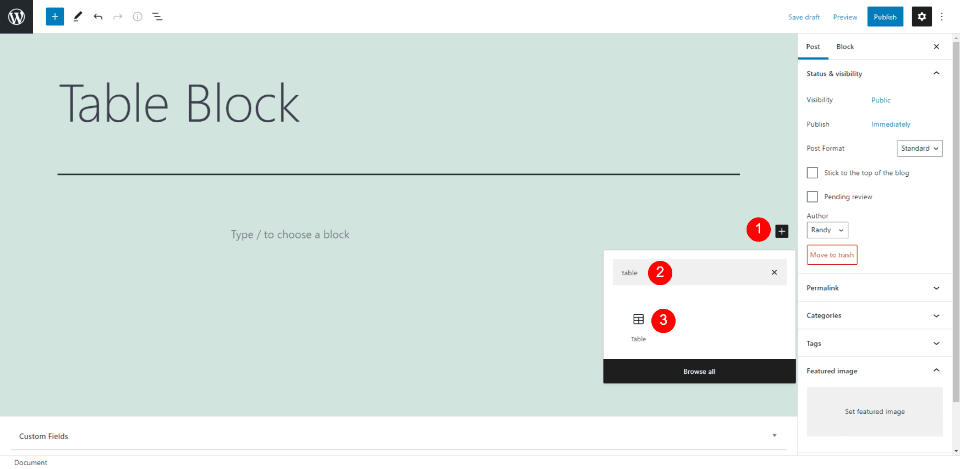
Click the block inserter where you want to add the block and search for Table. When the Table Block appears, click it to add it to your content. Alternately, you can use the inserter in the upper left of the screen, or type /table and hit enter.
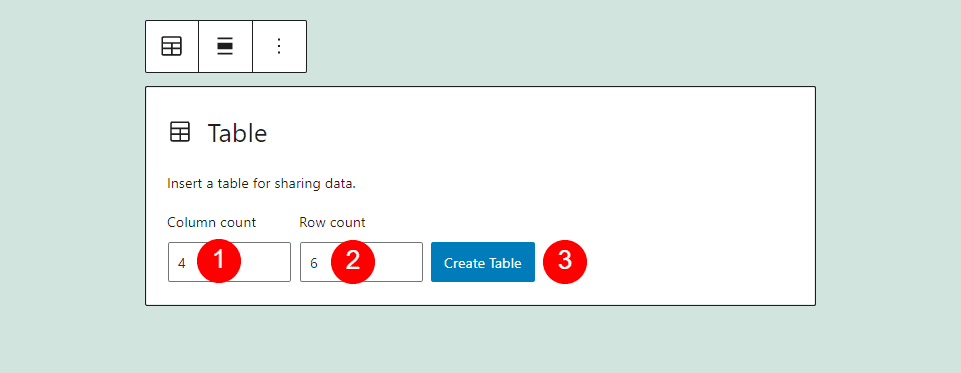
This adds the Table Block where you can specify the number of columns and rows. Enter the number of columns and rows you want for your table and click Create Table.
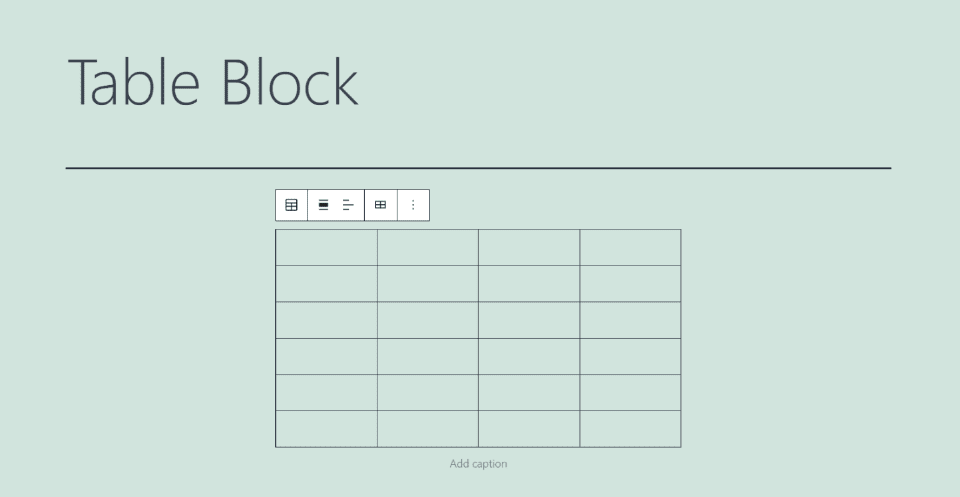
Your table will appear on the screen where you can add content to the cell and add a caption at the bottom. The default styling will vary based on the WordPress theme you’re using. I’m using the Twenty Twenty-One WordPress theme for my examples.
Table Block Settings and Options
Let’s look at the settings and options.
Table Block Toolbar
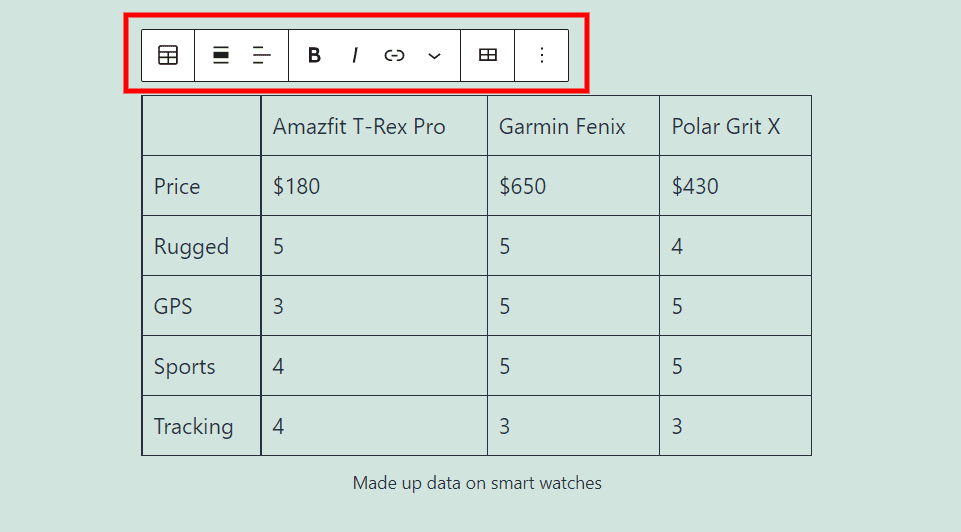
The Table Block toolbar appears above the table when you click on the table.
Change Block Type or Style
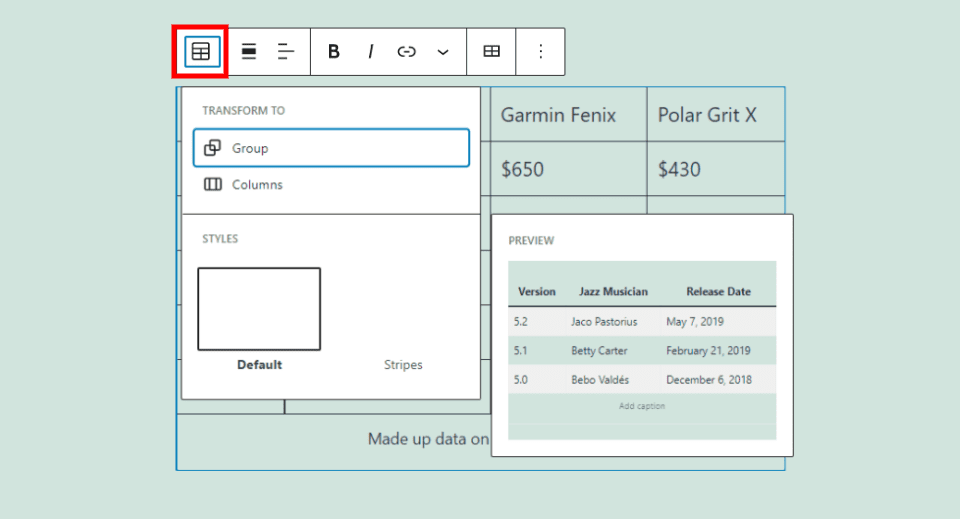
This lets you add the table to a group, set the number of columns for the layout (not table columns), and select the style you want for the table. There are two options for the style. The default style has a solid background, while Stripes adds a gray stripe to every other line. Hovering over the options provides a preview.
Change Alignment
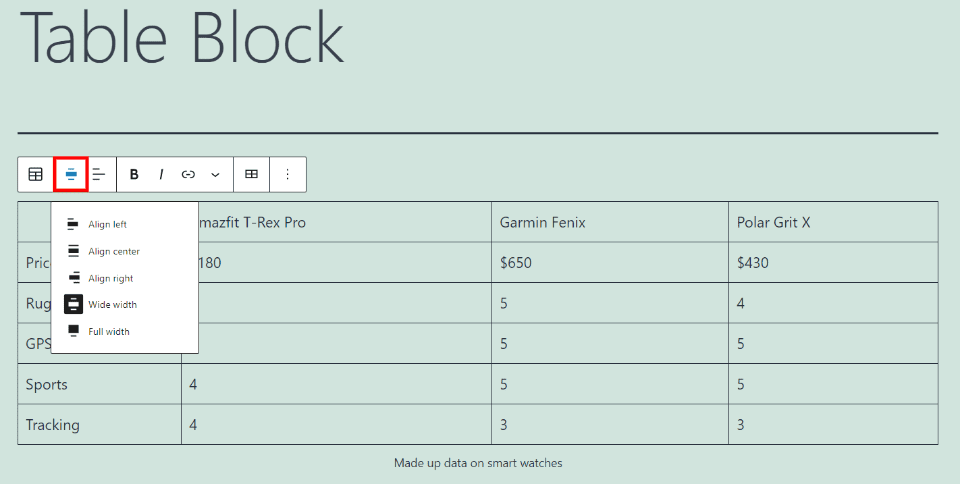
Set the table to left, center, right, wide width, or full width. Wide width and Full width are not supported by all themes. I’ve set it to wide width in this example.
Column Alignment
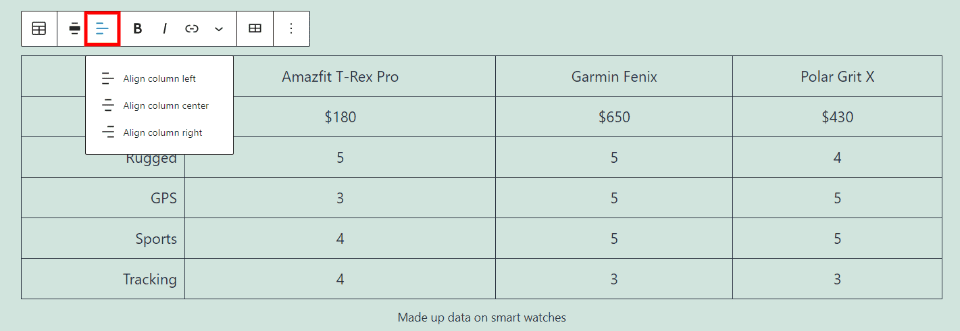
Choose the alignment for each column individually. Set them to left, center, or right alignment. In this example, I’ve set the left column to Right and set the rest to Center.
Bold and Italic
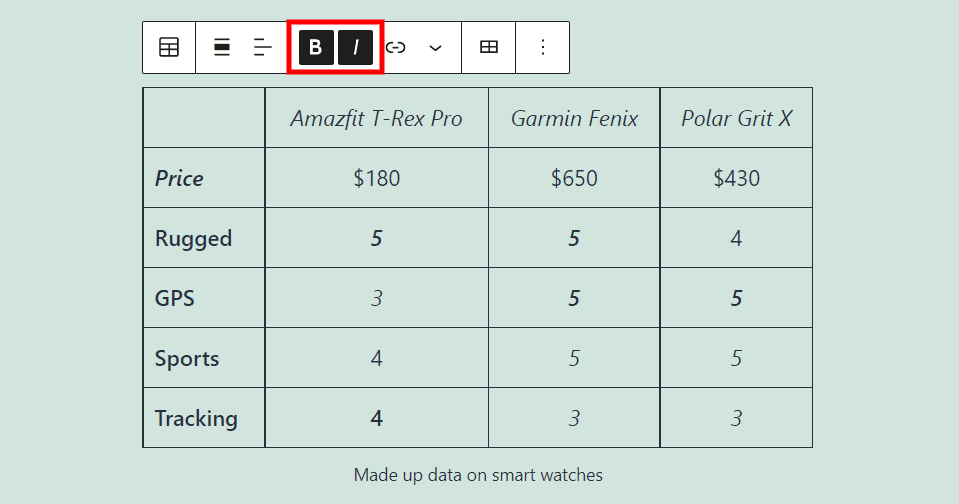
Bold and italic settings adjust the text that you’ve highlighted. Any text within the table or the caption can be made bold, italic, or both. You must select every cell independently.
Link
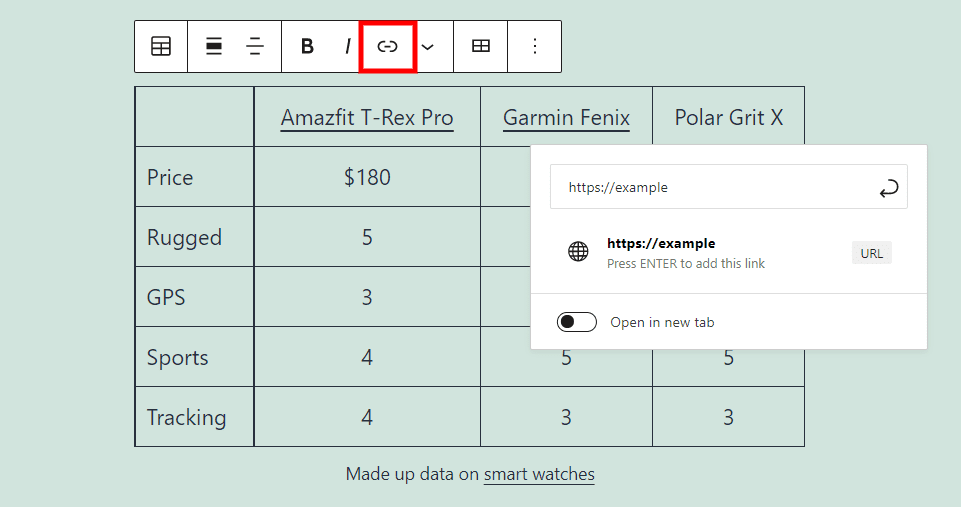
Add a link to anything in the table or caption. I’ve added links to the watch names and in the caption for this example. As you type a URL, it searches your website for URLs you’ve used before and offers them as suggestions.
More Table Options
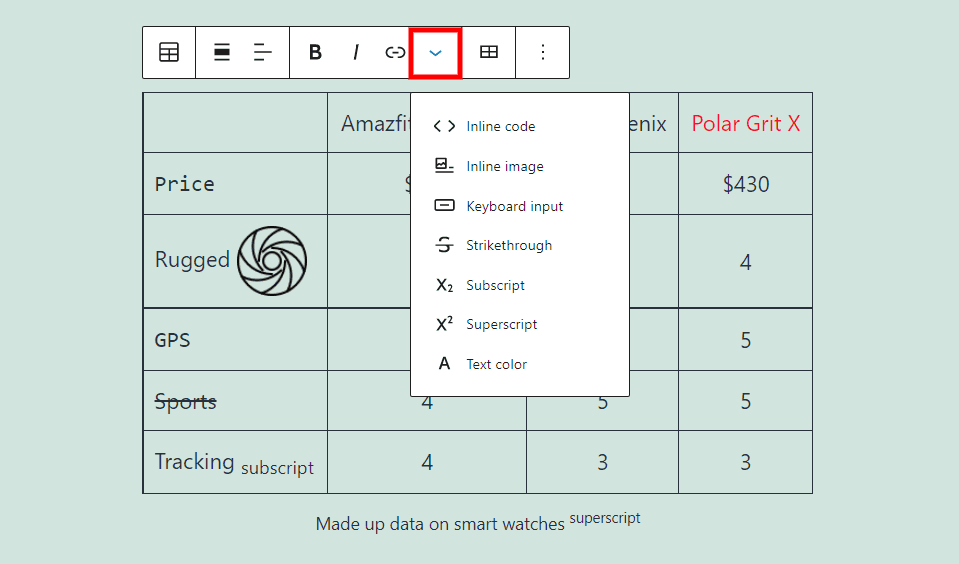
This opens a dropdown box with several options. Each of the following options is added to the image above:
Inline Code – shows the text styled as code.
Inline Image – opens the Media Library where you can select an image to place inline at the location of your cursor. You can select the image to change its width.
Keyboard Input – adds keyboard tags to your content to define keyboard input. It’s displayed with the browser’s default monospace font.
Strikethrough – places a line through the text you’ve highlighted.
Subscript – makes the text you’ve highlighted as a subscript.
Superscript – makes the text you’ve highlighted as superscript.
Text Color – lets you change the color of the text you’ve highlighted. You can select from pre-made colors, choose a color using the color picker tool, or enter the value as either a hex or RBG code.
Edit Table
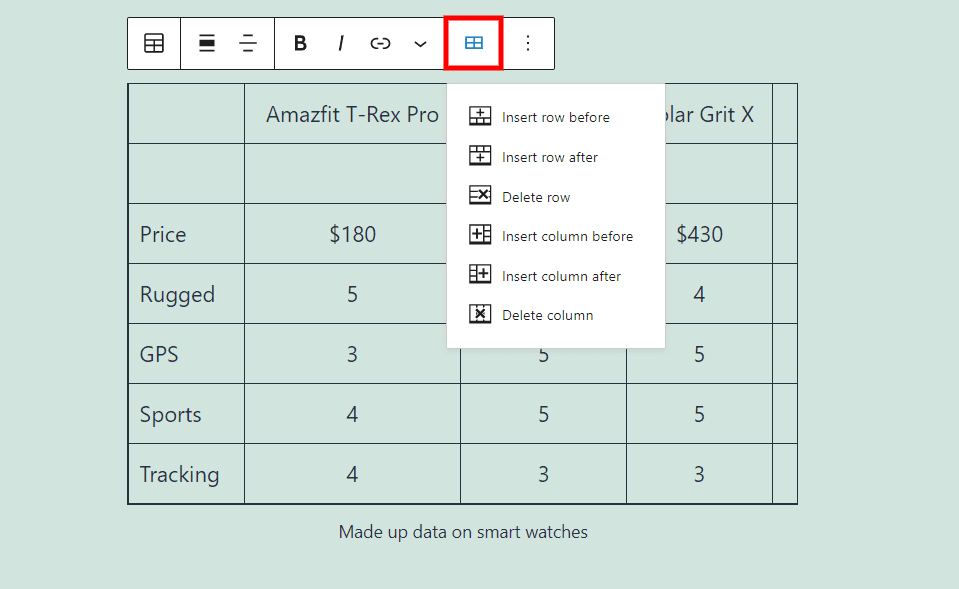
The Edit Table option opens a dropdown box where you can insert or delete rows and columns. Add them before or after the row or column you’ve selected. This makes it easy to change the size of your table at any time. I’ve added both in this example.
Block Options
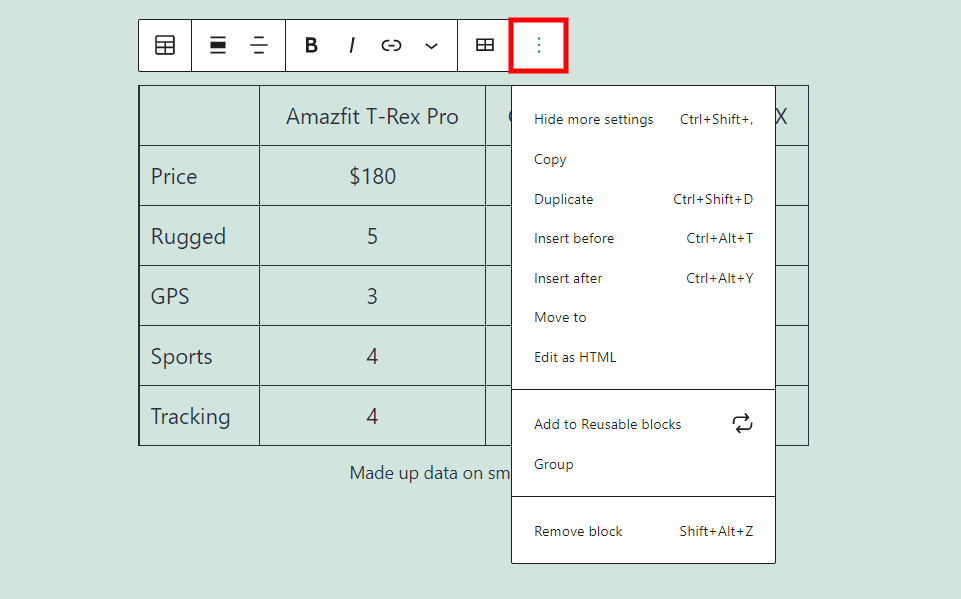
The Table Block options button opens a dropdown box with more options to choose from. The Table options include:
Hide More Settings – this option hides the right sidebar to give you a cleaner workspace.
Copy – copies the Table Block to your clipboard. You can then paste it anywhere you want within that page or post.
Duplicate – creates a duplicate of the Table Block under the table.
Insert Before – inserts space for a block before the Table Block.
Insert After – inserts space for a block after the Table Block.
Move To – places a blue line within the block editor. You can move the line up or down using the arrow keys. Once you get the blue line to the location that you want to move your Table Block to hit Enter and your block is automatically moved to the new location.
Edit as HTML – this option changes to the code editor so you can the content as HTML.
Add to Reusable Blocks – this option adds your Table Block to the reusable blocks so you can use it again on any page or post.
Group – this creates a group so you can adjust all the blocks together.
Remove Block – this option deletes the Table Block.
Table Block Settings
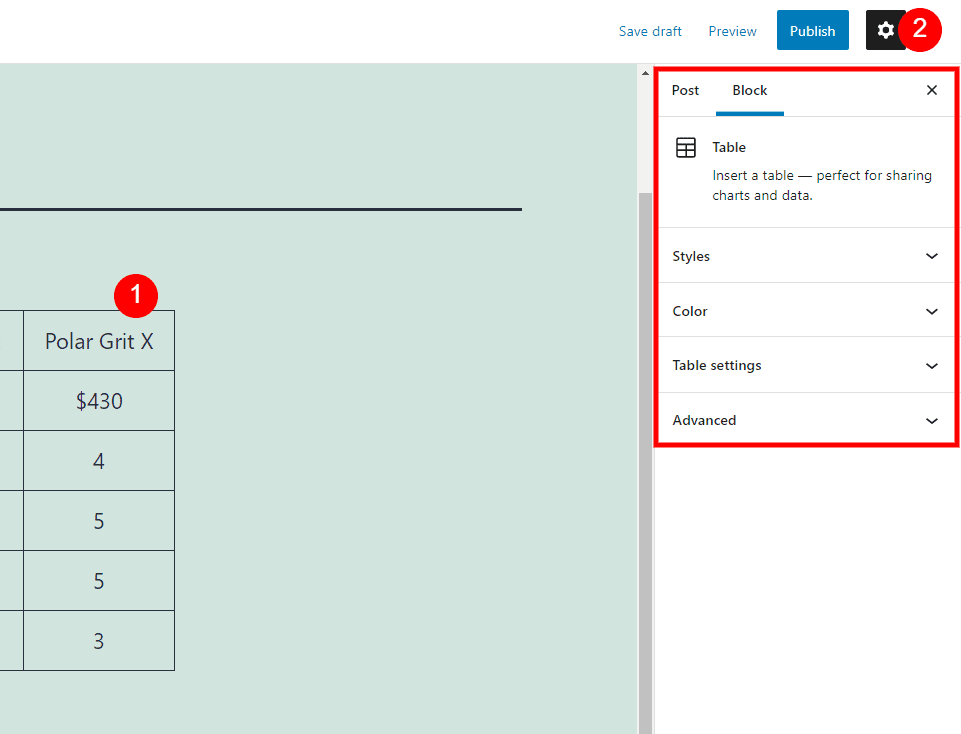
The Table Block settings are placed with the other settings in the right sidebar. Click on the gear icon in the upper right corner if the sidebar is not open, and then click anywhere in the Table Block to show the settings. You’ll see the word Table with an icon and a short description. You’ll also see options for Styles, Color, Table Settings, and Advanced. Click on each of the titles to open their settings.
Styles
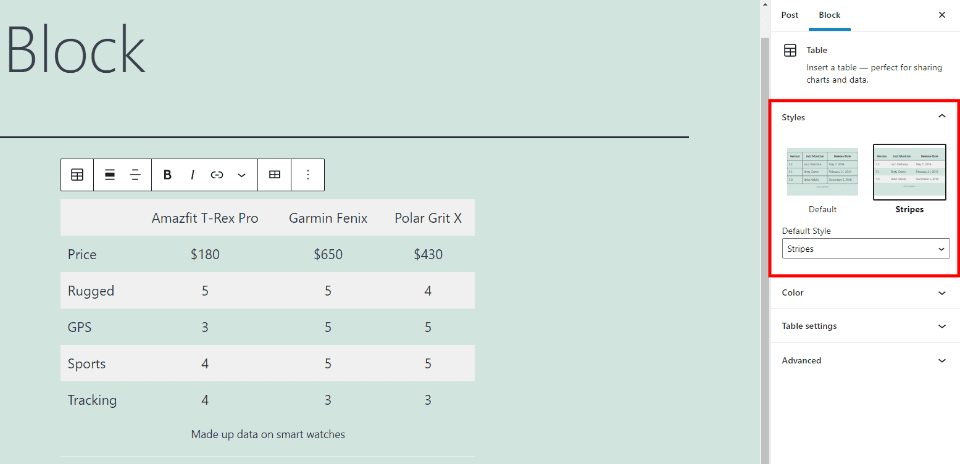
The Table Block Styles let you select between a non-striped or striped table. You can also set the default style in the dropdown box under the two styles, or you can leave it as not set. The styles provide a preview
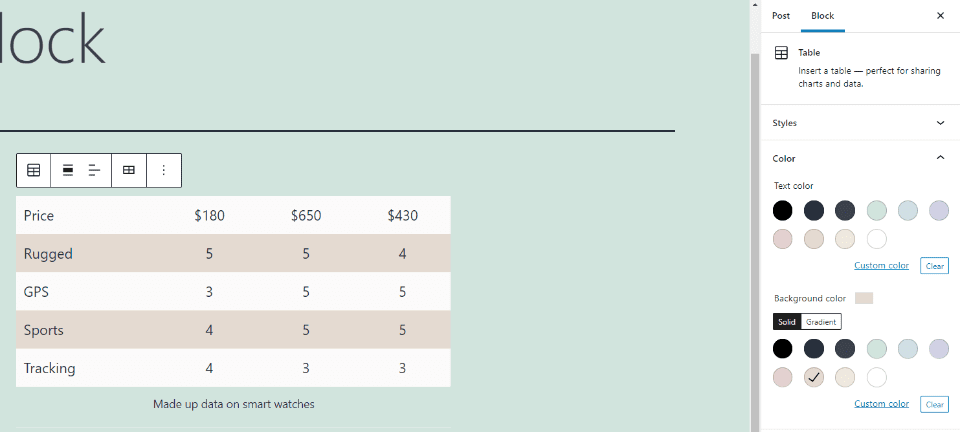
Color
Color gives you control over the text, grid, and background colors of the Table Block. Choose from several pre-selected colors or select a custom color from the color picker.
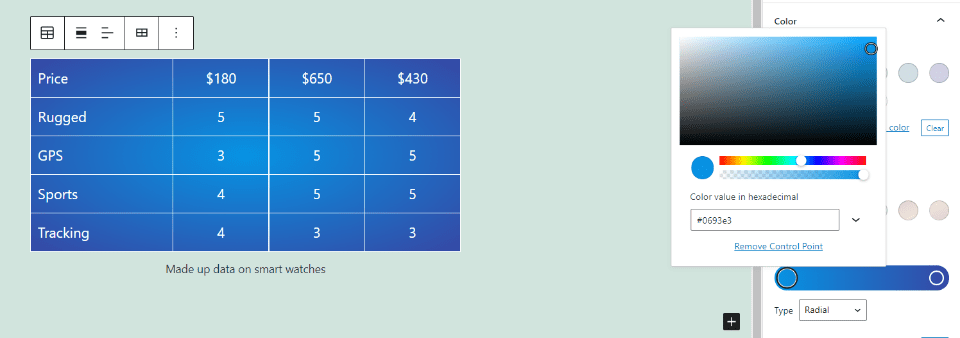
For the text and grid, choose a single. For the background, choose a solid color or create a gradient. Both the text and background colors let you input the hex or RGB code. The background gradient can be linear or radial. Linear includes a setting allowing you to control the direction.
In the example above, I’ve selected white for the text and grid, and selected a few shades of blue for a radial gradient.
If you’ve selected the Stripe style, the Background color will control the striped color of the background. Stripes can be a solid or gradient background.
Table Settings

The Table Settings provide options that can be toggled on or off. The settings include:
Fixed width – makes the cells the same size, so the table looks consistent. It keeps the cells from adapting to the size of its content and making them different sizes.
Header Section – adds a row to the top with bold text. It’s separated from the other cells with a bold line. These stand apart and work as labels for the columns.
Footer Section – adds a row to the bottom of the table that works as a footer. It’s separated from the other cells with a bold line, but the text isn’t bold by default. This is good for summarizing information, providing a total, or repeating the title for large tables.
Advanced
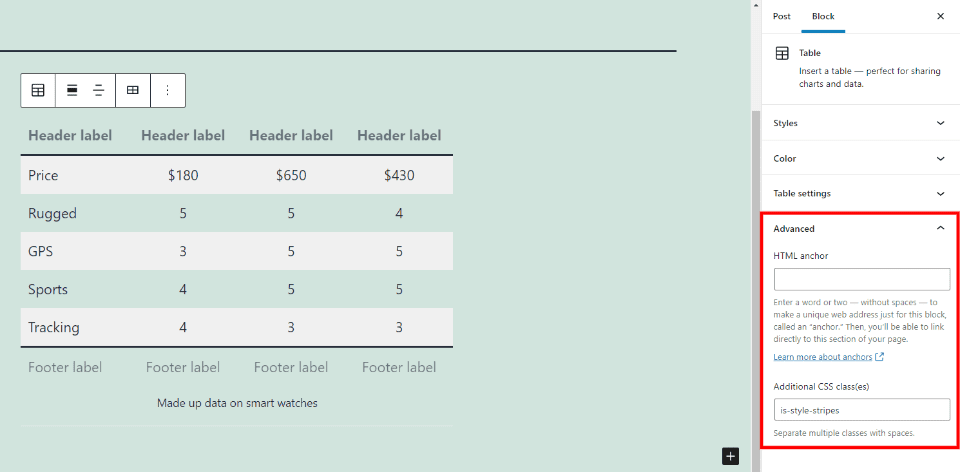
The Advanced Table Block settings include an option for an HTML anchor and a field to add Additional CSS classes. The anchor works as a special URL so you can link directly to the Table Block. The CSS classes field allows you to add a custom CSS class to style the block. It has a class by default for the Style that you have selected in the Style settings.
Tips and Best Practices for Using the Table Block Effectively
Use the Table Block any time you need to display tabulated data or content. Don’t use them to create columns. The Columns Block is best for this.
Add a title for the table with the Paragraph Block.
Create titles for the rows by adding a header. Use clear labels that are easy to understand.
Use Fixed Width to make the table look more polished and professional.
Select Stripes for larger tables to make them easier to read.
Use a Footer to summarize information or to show the titles again if the table is large.
Frequently Asked Questions about the Table Block
What’s the best use of the Table Block?
This block is great for creating tables and charts.
Can the Table Block be used to create columns?
Yes, but it doesn’t give you enough control over the columns. It’s best to use the Column Block for this.
Can the table size be changed later?
Yes. Insert or delete rows or columns using the Table’s options.
Conclusion
That’s our look at the WordPress Table Block. This is an excellent block for creating basic tables and you can even style them to some degree to match your website. This block is one of the advantages of the Block Editor. The tables created with this block are simple, but they work great and they’re easy to build. If you are looking for more advanced tables, take a look at what Divi TableMaker and these WordPress table-making plugins can do for you.
We want to hear from you. Do you use the Table Block in your WordPress content? Let us know about your experience in the comments.
Featured Image via Seahorse Vector / shutterstock.com


How can I make this table mobile-optimized? It’s showing up full width, and won’t change when I adjust the width in sizing while selecting mobile view.
Can we use the wordpress table block inside a divi active page? How
The same Mario’s question: Is it Responsive?
Many thanks, Randy, for a great breakdown on the new-ish WordPress table block. And congrat’s to the Gutenberg team and WordPress Make-ers for their efforts. It is truly a friendly and powerful element.
All that is needed now is to make it agree with WCAG 2.1 AA accessibility guidelines, so that tables can be more usable by the 1-in-4 users out there with some kind of disability. The caption element, for example, needs to precede all other table elements in the markup (first element after ), as it acts as a header for the whole table (remember people using screen readers need to know what collection of data they are going to be “shown”). Scoping of columns and rows adds an attribute to distinguish the two, especially when there are headers in both (as in more complex tables). Maybe a summary element is needed (for more complex tables, an explanation in text of how the table is designed).
Making the web accessible may seem like a hassle, but I not leaving 25% of an audience or market behind makes it worth the effort. Also, I believe that it improves the web for all users.
Is the WP Table Block mobil (responsive) friendly?