At any given time, you should know precisely what your next blog post will be. That means having titles and topic ideas prepared in advance, knowing when each post should go live, and more. Without that level of organization, growing a successful blog can be an uphill battle.
The best way to organize all of the necessary information is with a content calendar. In this article, we’ll walk you through the many reasons you can benefit from a content calendar. Then we’ll introduce you to one of our favorite tools for the job, PublishPress, and show you how to use it.
Let’s get to work!
Why You Should Consider a Content Calendar for Your Website
If you’re anything like us, you already use a personal calendar to help you keep track of the many things you have to do. That might include dentist appointments, picking up the dry cleaning, going to the grocery store, and pretty much anything else you can schedule in advance.
Content calendars are like personal schedules on steroids. Depending on how far ahead you want to plan, you can set dates for future content months in advance. A calendar also enables you to assign tasks to specific team members, review their progress, make sure you’re focusing on the right topics and keywords, and more:
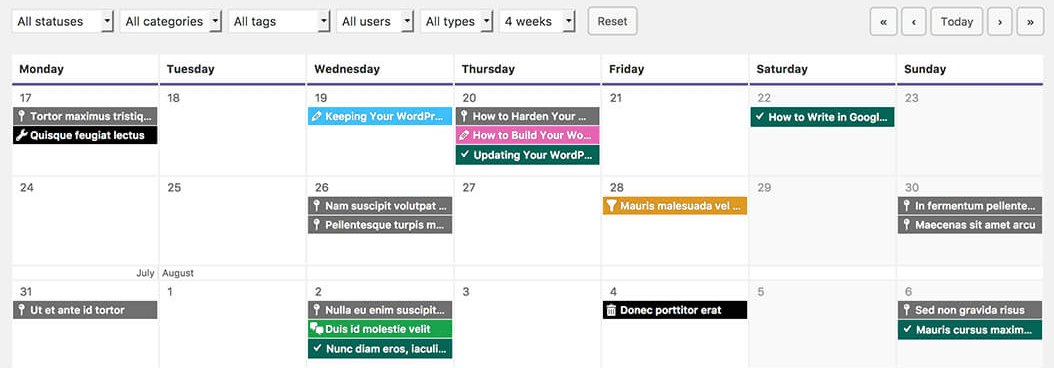
Also sometimes called an editorial calendar, this feature lets you lay out your blog’s strategy in as much depth as you’d like. There are a lot of collaboration tools you can use to achieve similar results, but it’s hard to beat content calendars for their sheer ease of use.
An Introduction to PublishPress

If you want to add a content calendar to your WordPress site, you’ll need the right tool. For example, PublishPress is a content calendar plugin that includes advanced editorial functionality. With this solution, you can set up a master calendar within WordPress, and then use it to schedule tasks, configure notifications, share editorial comments, and more.
One of the best aspects of this plugin is that it adds a broad range of content “statuses” that go beyond the basics of draft and published. These additional statuses enable you to check out the progress of all upcoming content just by taking a look at your calendar.
If you run a website that publishes content regularly, you can probably benefit from using a plugin like PublishPress. The more frequent your content schedule is, the more you can get from implementing a system that helps you keep things organized. In particular, content teams with multiple members should find the collaboration and communication features on offer to be a significant boon.
Pricing: The free version of PublishPress includes all of the features we’ve mentioned here. You can also get premium add-ons to extend the plugin’s functionality.
How to Use the PublishPress Content Calendar to Plan and Organize Your WordPress Site’s Posts (In 3 Steps)
The best part is that using PublishPress to set up your content calendar and access other key features is simple. Let’s walk through how to get started with the free version of this plugin.
Step 1: Add a New Post to the PublishPress Calendar
When you install the PublishPress plugin, you’ll notice a new PublishPress tab in your dashboard. Clicking on it will send you right to your new content calendar:
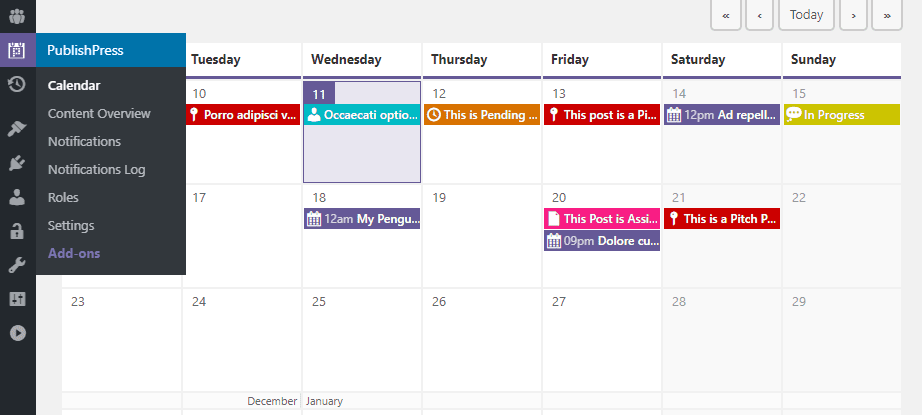
Of course, your calendar should be empty at the moment. You can fix that by selecting a date, and PublishPress will ask you what kind of content you want to schedule:
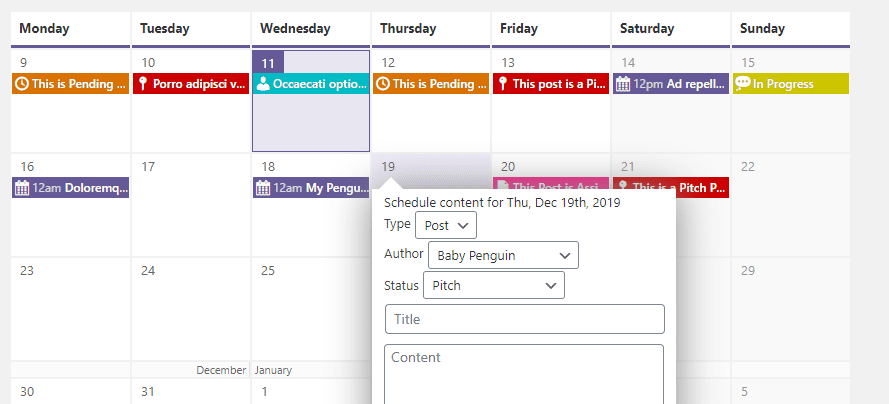
From the start, PublishPress enables you to choose from among seven content statuses, beginning with pitches and going all the way up to “published”:
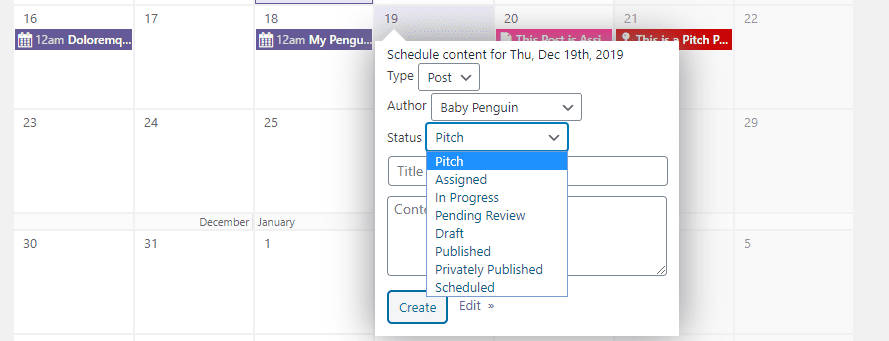
Once you add a task to the calendar, the plugin will automatically create a post for it. If you click on the Edit button from any task on the calendar, you can jump directly to that post and get to work on it.
You’ll also notice that every item on the calendar is color-coded. Each color corresponds to a post or page status, and here’s a handy cheat sheet to remember what color stands for each type of task:
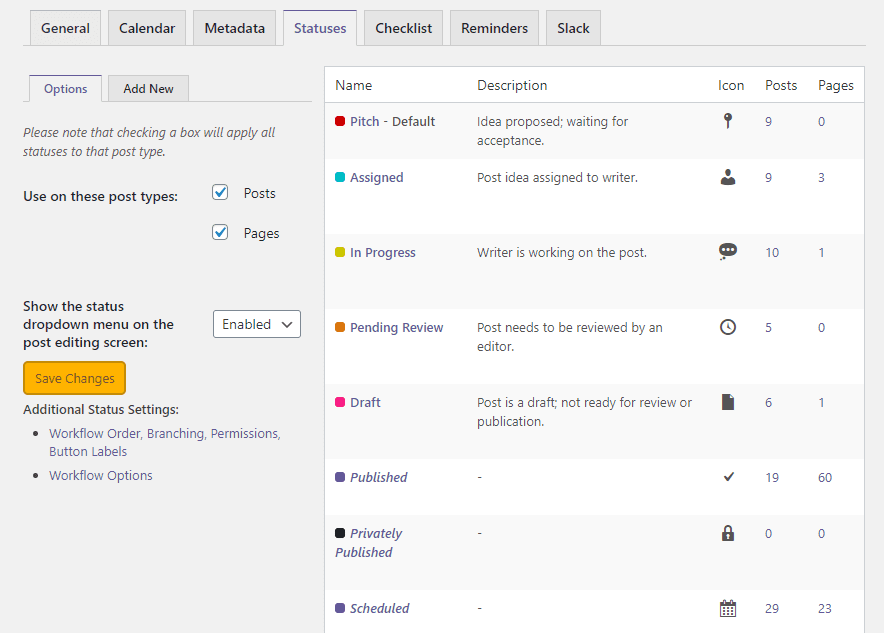
This cheat sheet is available under PublishPress > Statuses at all times, and it also contains an overview of how much content is in your calendar for each status.
Step 2: Configure Notifications for Upcoming Posts
Now that you know the basics of adding new content to your calendar, let’s go over notifications. Out of the box, PublishPress ships with a number of pre-configured notifications. For example, the plugin reminds authors to share content on social media, notify editors when there’s content to proofread, and more:

You can review your existing notification configurations from the PublishPress > Notifications tab. If you mouse over any configuration, you’ll get access to an Edit option:

PublishPress gives you access to a broad range of options to configure your notifications. For example, you can tweak when each reminder should go out, who it should be sent to, and which type of content should trigger it:

You can also edit the body of your notification messages, which go out via email:
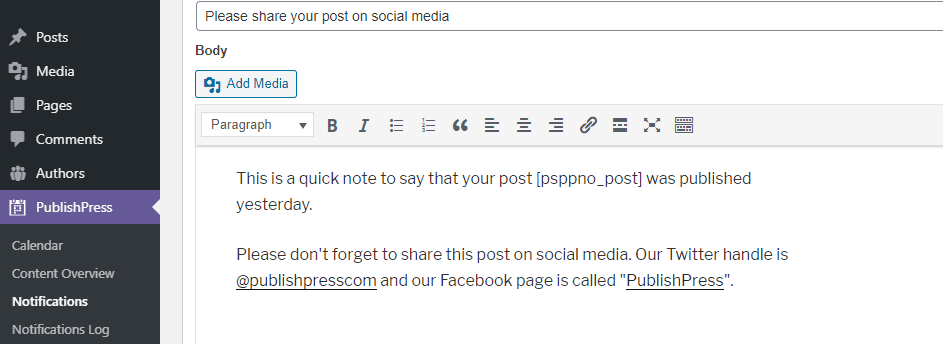
With PublishPress, you can set up as many notification templates as you want. The default options are excellent, but if you plan on getting the most from this plugin, we recommend that you tweak them to fit your workflow.
Along with the editorial calendar itself, the notifications system is really what makes this plugin stand out. The more you customize your notifications to match your needs, the more you can automate your editorial process. This makes the feature especially valuable for large teams.
One of the weaknesses of unmodified WordPress is that it doesn’t provide enough tools for editorial collaboration. Working on or editing an article as part of a team can be a complicated process. Therefore, any features that simplify that workflow are always welcome.
PublishPress includes one such feature out of the box: editorial comments. When you access the post editor with the plugin active, you’ll notice a new widget called Editorial Comments:

Adding these comments is a straightforward process. Anyone with access to the post or page can do it, and it provides you with a place to discuss aspects of the article while it’s still in progress:
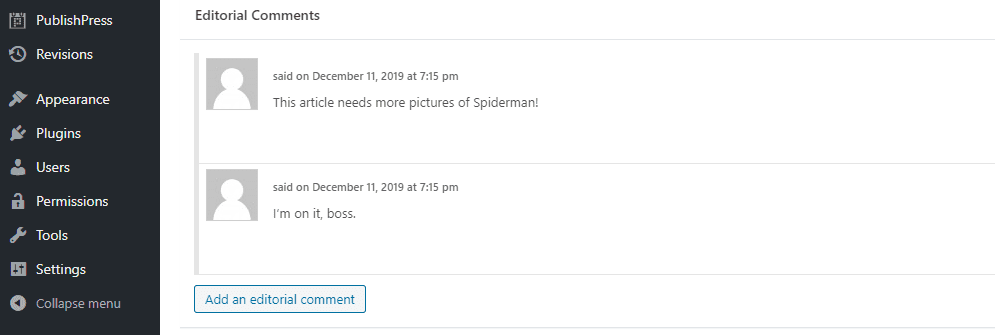
To get the most out of the comments system, you might want to set up notifications so that everyone involved gets an email when a new comment goes live. That way, members of your team can be kept in the loop about changes or revision requests.
Our Final Thoughts on PublishPress
As we’ve made clear, content calendars are incredibly useful for websites with hectic publication schedules. Even so, you don’t want to opt for a tool that’s too complicated to use, or that hides most of its best features behind a paywall.
Fortunately, using PublishPress is a very straightforward experience. This plugin extends WordPress’ base functionality nicely, without overhauling the experience entirely. Its free version is also powerful enough for most websites, so it doesn’t force regular users to pay for extensions.
In other words, this is a tool we’d recommend for just about any WordPress user looking to set up a fast and flexible content calendar. When you throw notifications and editorial comments into the mix, PublishPress can be a valuable way to manage your website’s content creation team.
Conclusion
There are few WordPress tools more straightforward yet useful than content calendars. With a calendar, you can easily plan out your content strategy, since you’ll always know what’s going to get published and when. If you work as part of a team, a calendar can be an invaluable tool for keeping things organized.
If your website’s growth strategy depends on content, you can likely benefit from using PublishPress. Getting started with the plugin is simple as well. Right away, it enables you to:
- Add a new post to the PublishPress calendar.
- Configure notifications for upcoming posts.
- Share editorial comments with authors.
Do you have any questions about how to set up your content calendar? Let’s go over them in the comments section below!
Article thumbnail image by Pretty Vectors / shutterstock.com


Leave A Reply