
In 2019, retail e-commerce sales worldwide amounted to $3.53 trillion, and 2020 seems set to be a record-breaking year for online retail. By launching your online store now, you could connect with a huge audience. However, you’ll need a way to rapidly set up your online store. WooCommerce’s CSV import functionality can help.
In this article, we’ll show how to add hundreds or even thousands of products to your online store in record time, using WooCommerce and a Comma-Separated Value (CSV) file.
Let’s get started!
What Are CSV Files (And Why You Might Want to Use Them)
A Comma-Separated Values (CSV) file is a plain text file that contains a list of data, separated by commas. CSV files are commonly used to export complex data from one application, and import it into another. Accounting software often makes use of this, especially if you’re importing payment information taken from PayPal (and similar).
WordPress has full support for exporting and importing data in the CSV format, and WooCommerce has a built-in product CSV importer too. This means you can import, export and update all your products as a single CSV file.
WooCommerce makes it easy to create an online store, but adding each product manually can still be a time-consuming process. By importing your products as a CSV file, you can often save a considerable amount of time.
CSV files can also be useful if you’re migrating from an alternative e-commerce platform. Depending on your current platform, you can often export your entire product catalog as a single CSV file. You can then upload this file to your new WooCommerce store, and instantly have fully-stocked shelves.
If you run multiple e-commerce stores, you can also use CSV files to sync all your products. This can save you time, while ensuring consistency by reducing the possibility for human error.
It’s also possible to update existing products using a CSV file. This can be useful if you ever need to modify multiple products simultaneously. For example, perhaps you’re organizing a site-wide sale and need to update dozens or even hundreds of prices.
How to Import CSV Files and Product IDs Into WooCommerce (5 Steps)
The sooner your store is open for business, the sooner you can start earning money. Here’s how you can add thousands of products to your WooCommerce store, in five easy steps.
Step 1: Create Your CSV File
There are a few different ways to create a CSV file. If you’re migrating from an alternative e-commerce platform, you can often export your products as a CSV file. This will have the correct formatting and contain all the required information, so you can jump straight to step three. If you’re unsure whether your current e-commerce platform supports CSV exports, check the platform’s website or user manual for more information.
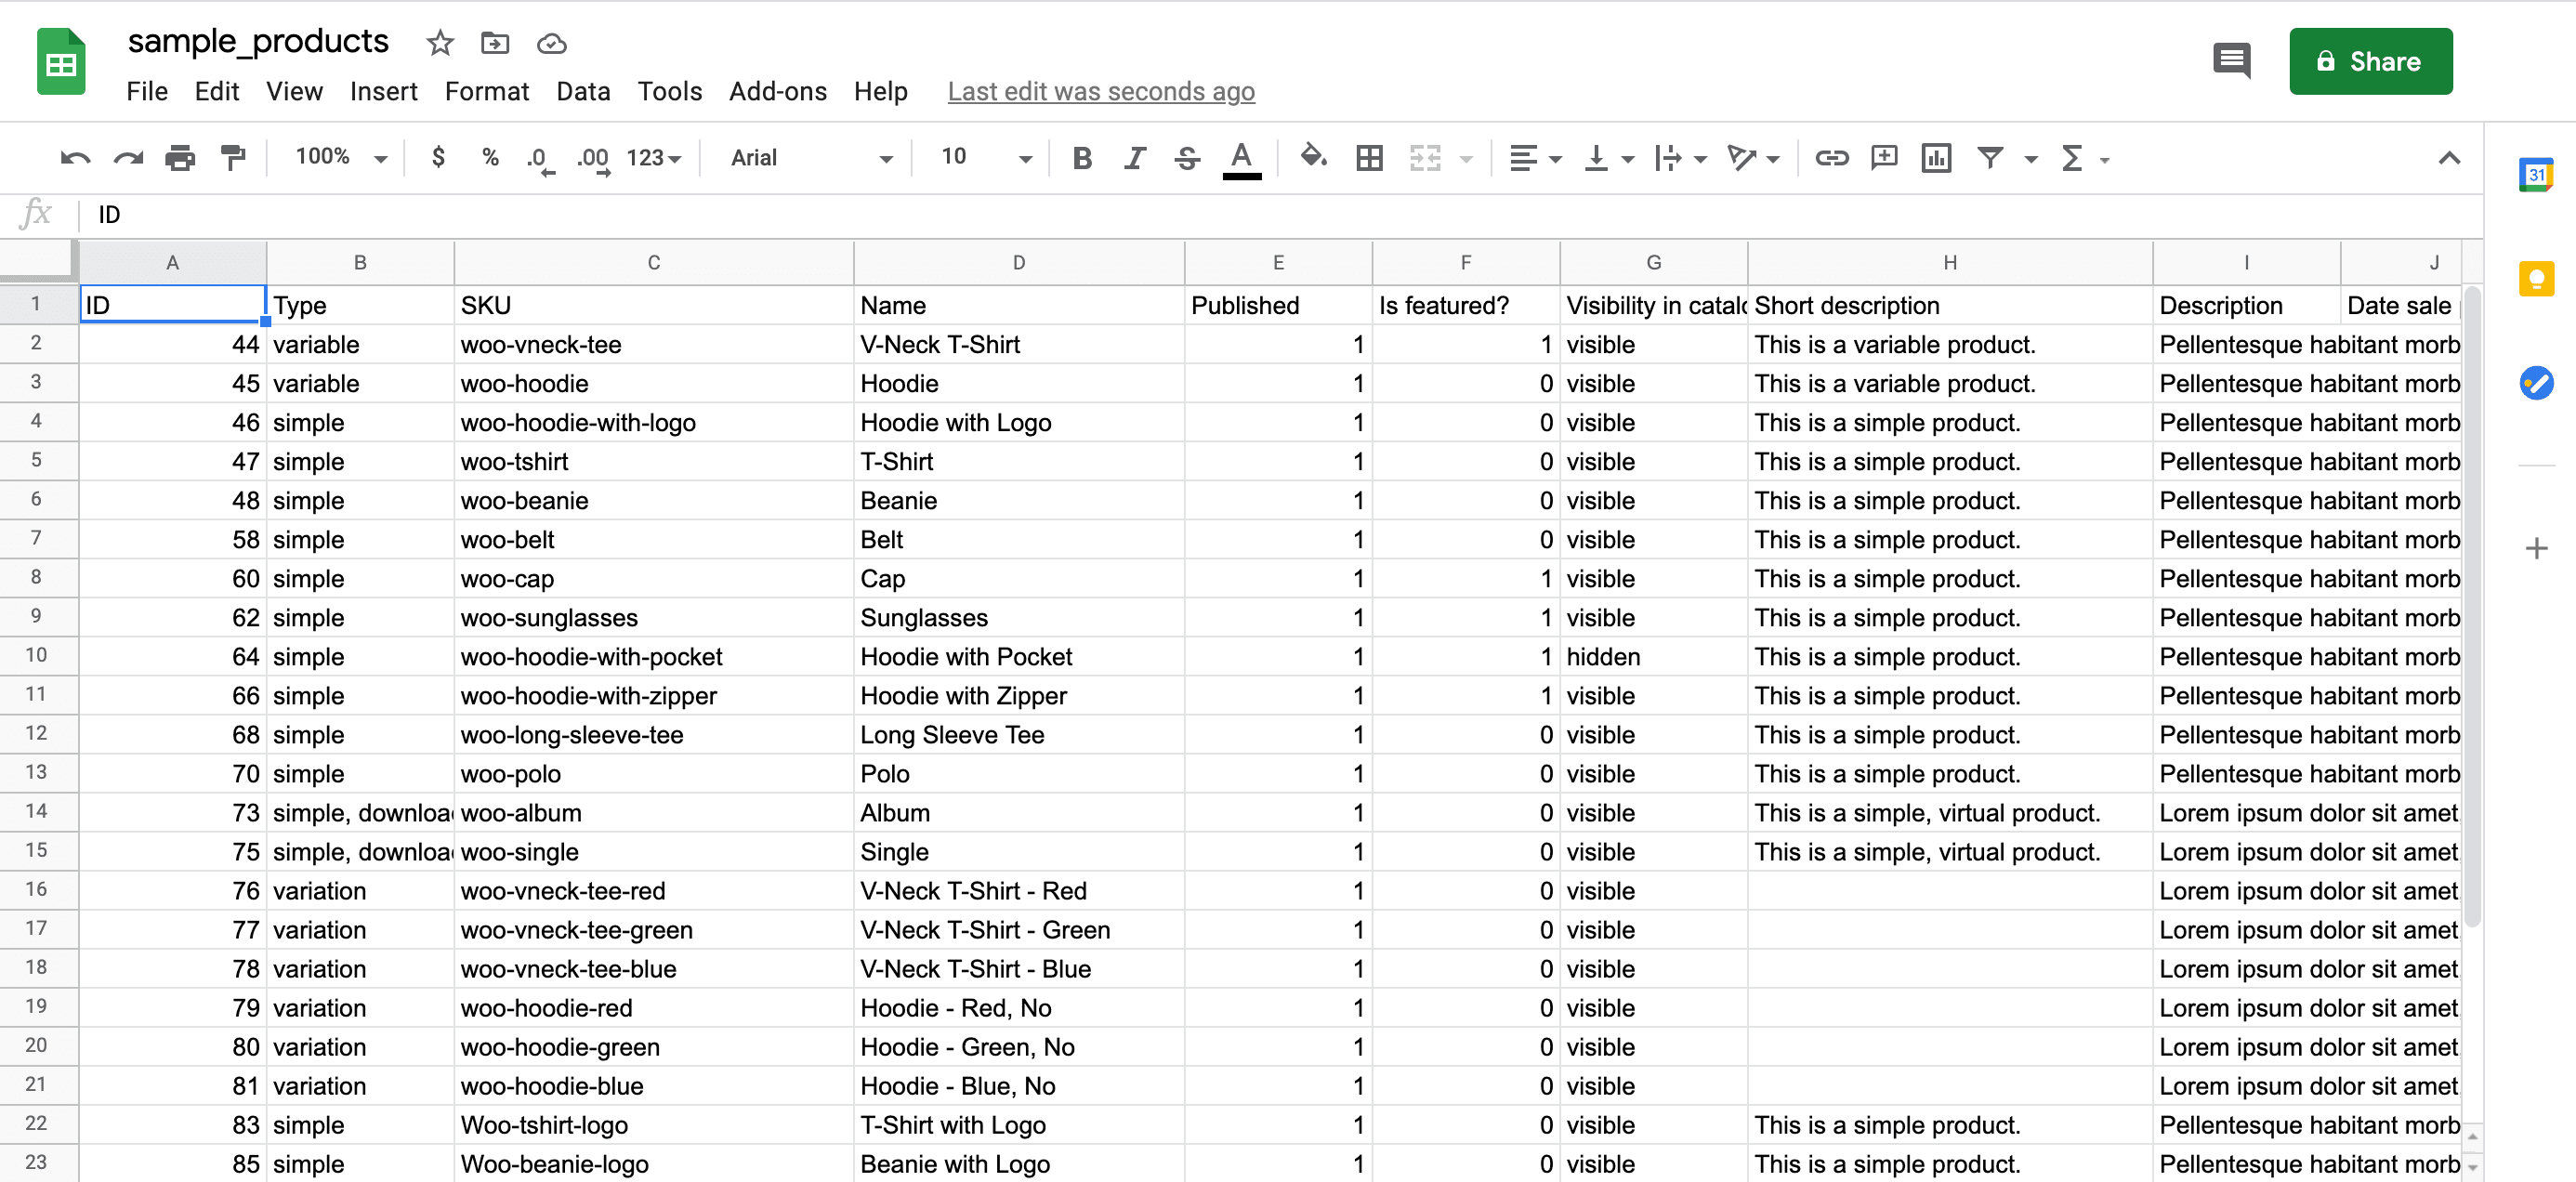
You can also download a sample CSV file from GitHub. This provides a structure for adding your own product information. You can open this file using any compatible application, including Google Sheets.
Alternatively, you can create your own CSV file, although you’ll have to use the correct column headings. Here, it may help to refer to the WooCommerce CSV Import Schema.
Step 2: Add Your Products to the CSV File
Once you have your CSV file, you can add products using the WooCommerce Product CSV Import Schema. Even if you’re not using sample_products.csv, it may help to refer to this file as an example of correct CSV formatting. Also, the sample_products.csv file contains a product ID column. This ID is how WooCommerce identifies each product in your store.
While you could provide a unique product ID for each product, this isn’t necessary. If you don’t provide this information, WooCommerce will assign each product an ID automatically. This can help you avoid conflicts and other errors. For example, you may accidentally use the same ID for multiple products, which would cause issues down the line.
To keep things nice and simple, we recommend deleting the product IDs from your sample_products.csv file. If you’re creating your own CSV file, you can omit the product ID column entirely.
Step 3: Upload Your CSV File to WordPress
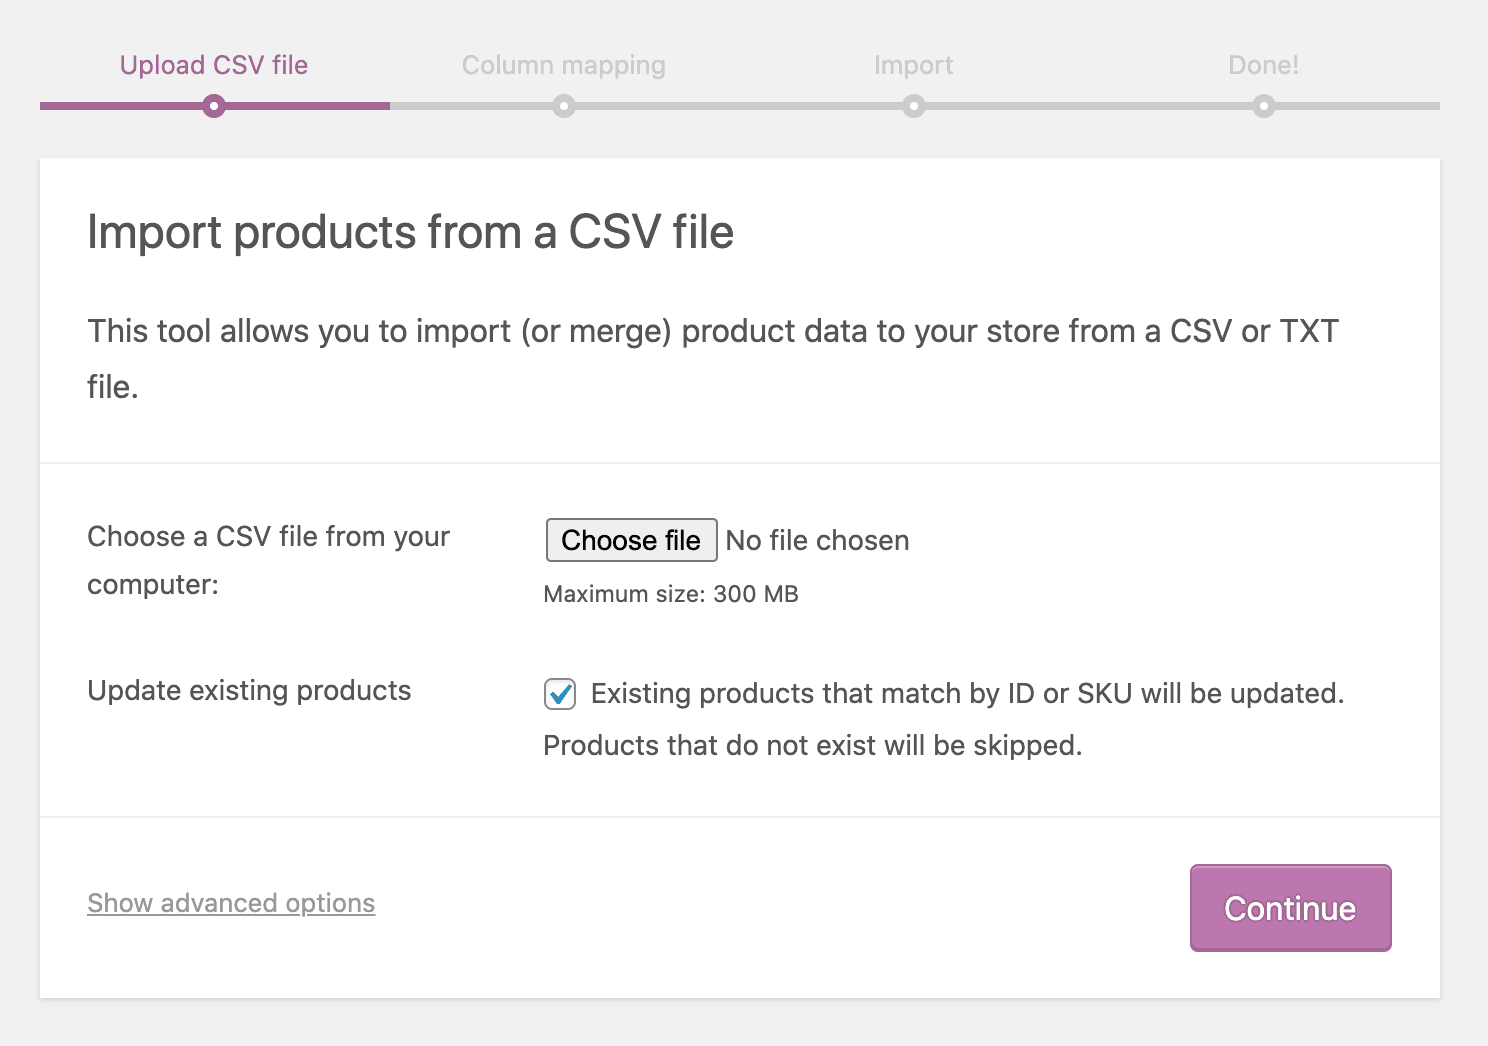
In your WordPress dashboard, navigate to WooCommerce > Products. From here, select the Import button. Next, select Choose file and upload your WooCommerce CSV import file. Since we’re importing new products, deselect the Existing products that match by ID or SKU will be updated checkbox. Select Continue, and WooCommerce will display the Column Mapping screen:
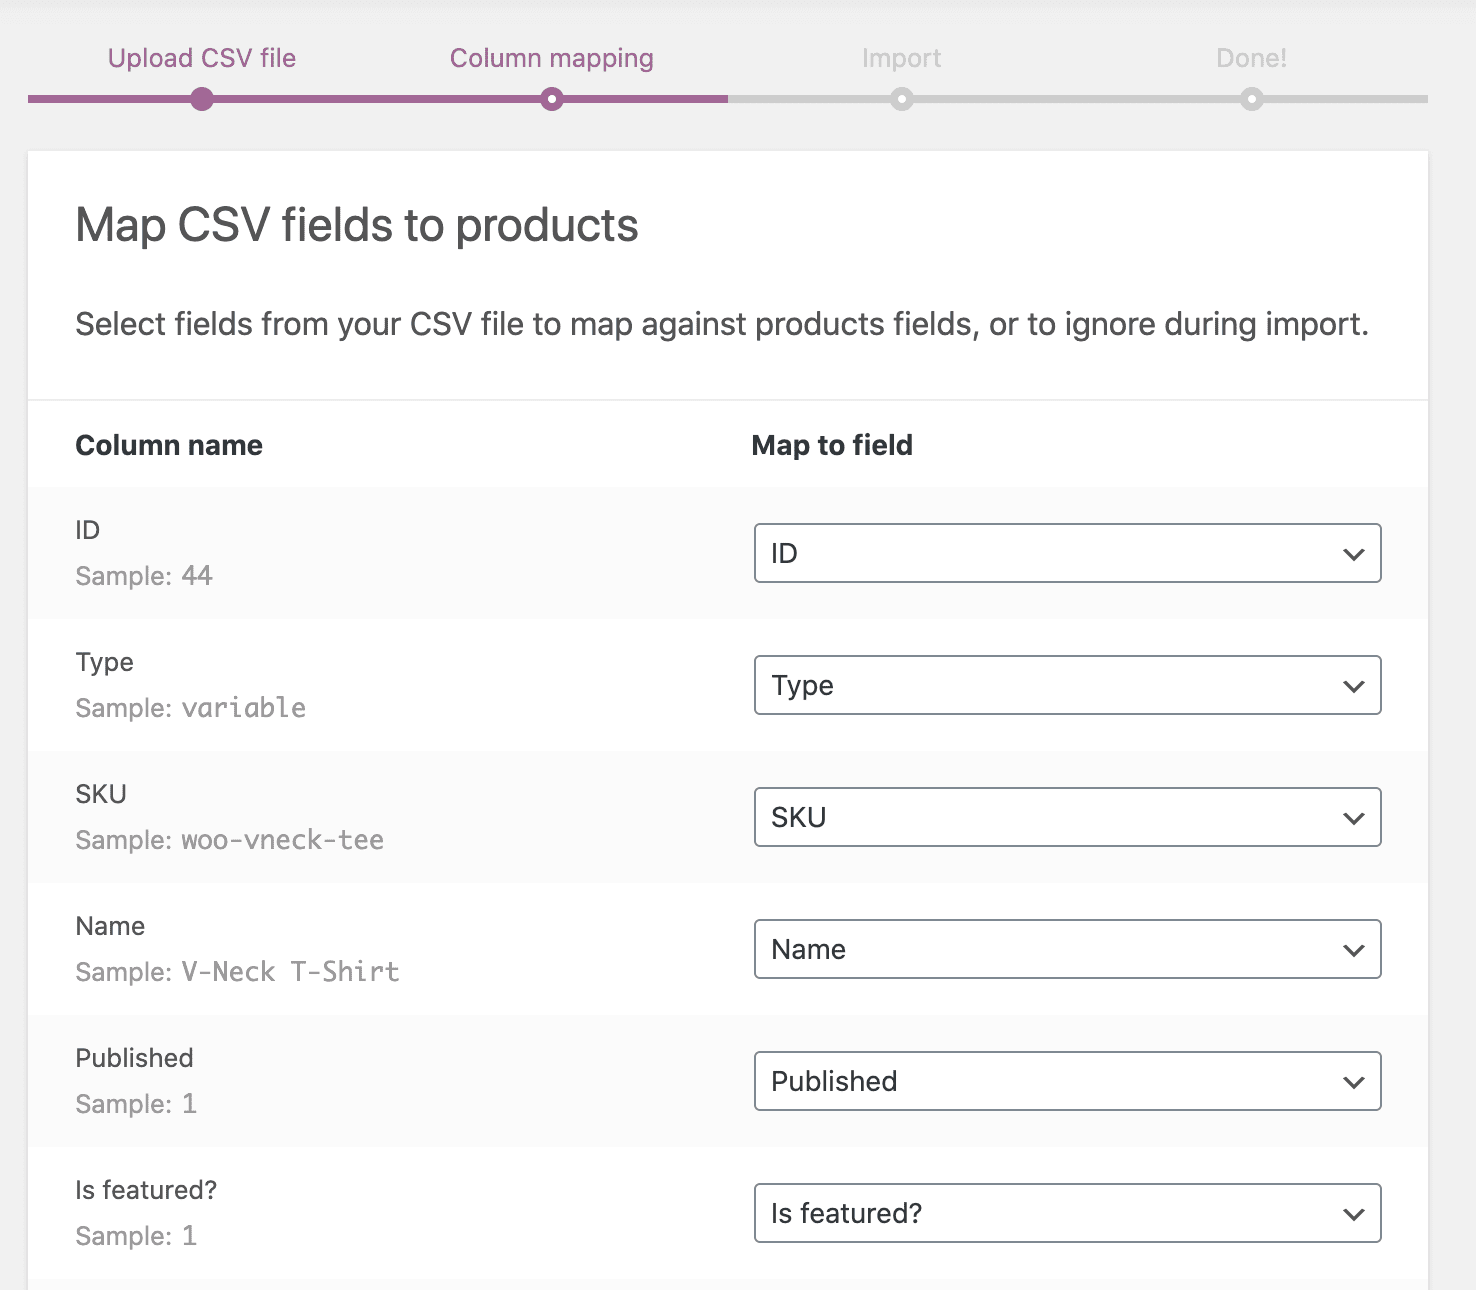
WooCommerce will attempt to map each of your column names to a Field. It’s worth checking each of these mappings to ensure that WooCommerce has matched the column name and field correctly.

If you identify any inconsistencies, open the Column Name’s accompanying drop-down menu. You can then select the correct field.

If required, you can instruct WooCommerce not to import specific columns by opening that column’s accompanying drop-down menu and choosing Do not import. Once you’re happy with your selection, click Run the Importer.
Step 4: Check Your WooCommerce Store
Depending on the size of your product catalog, the import process may take a few minutes. However, it’s important not to refresh your browser or close the tab until you see the Import complete message.
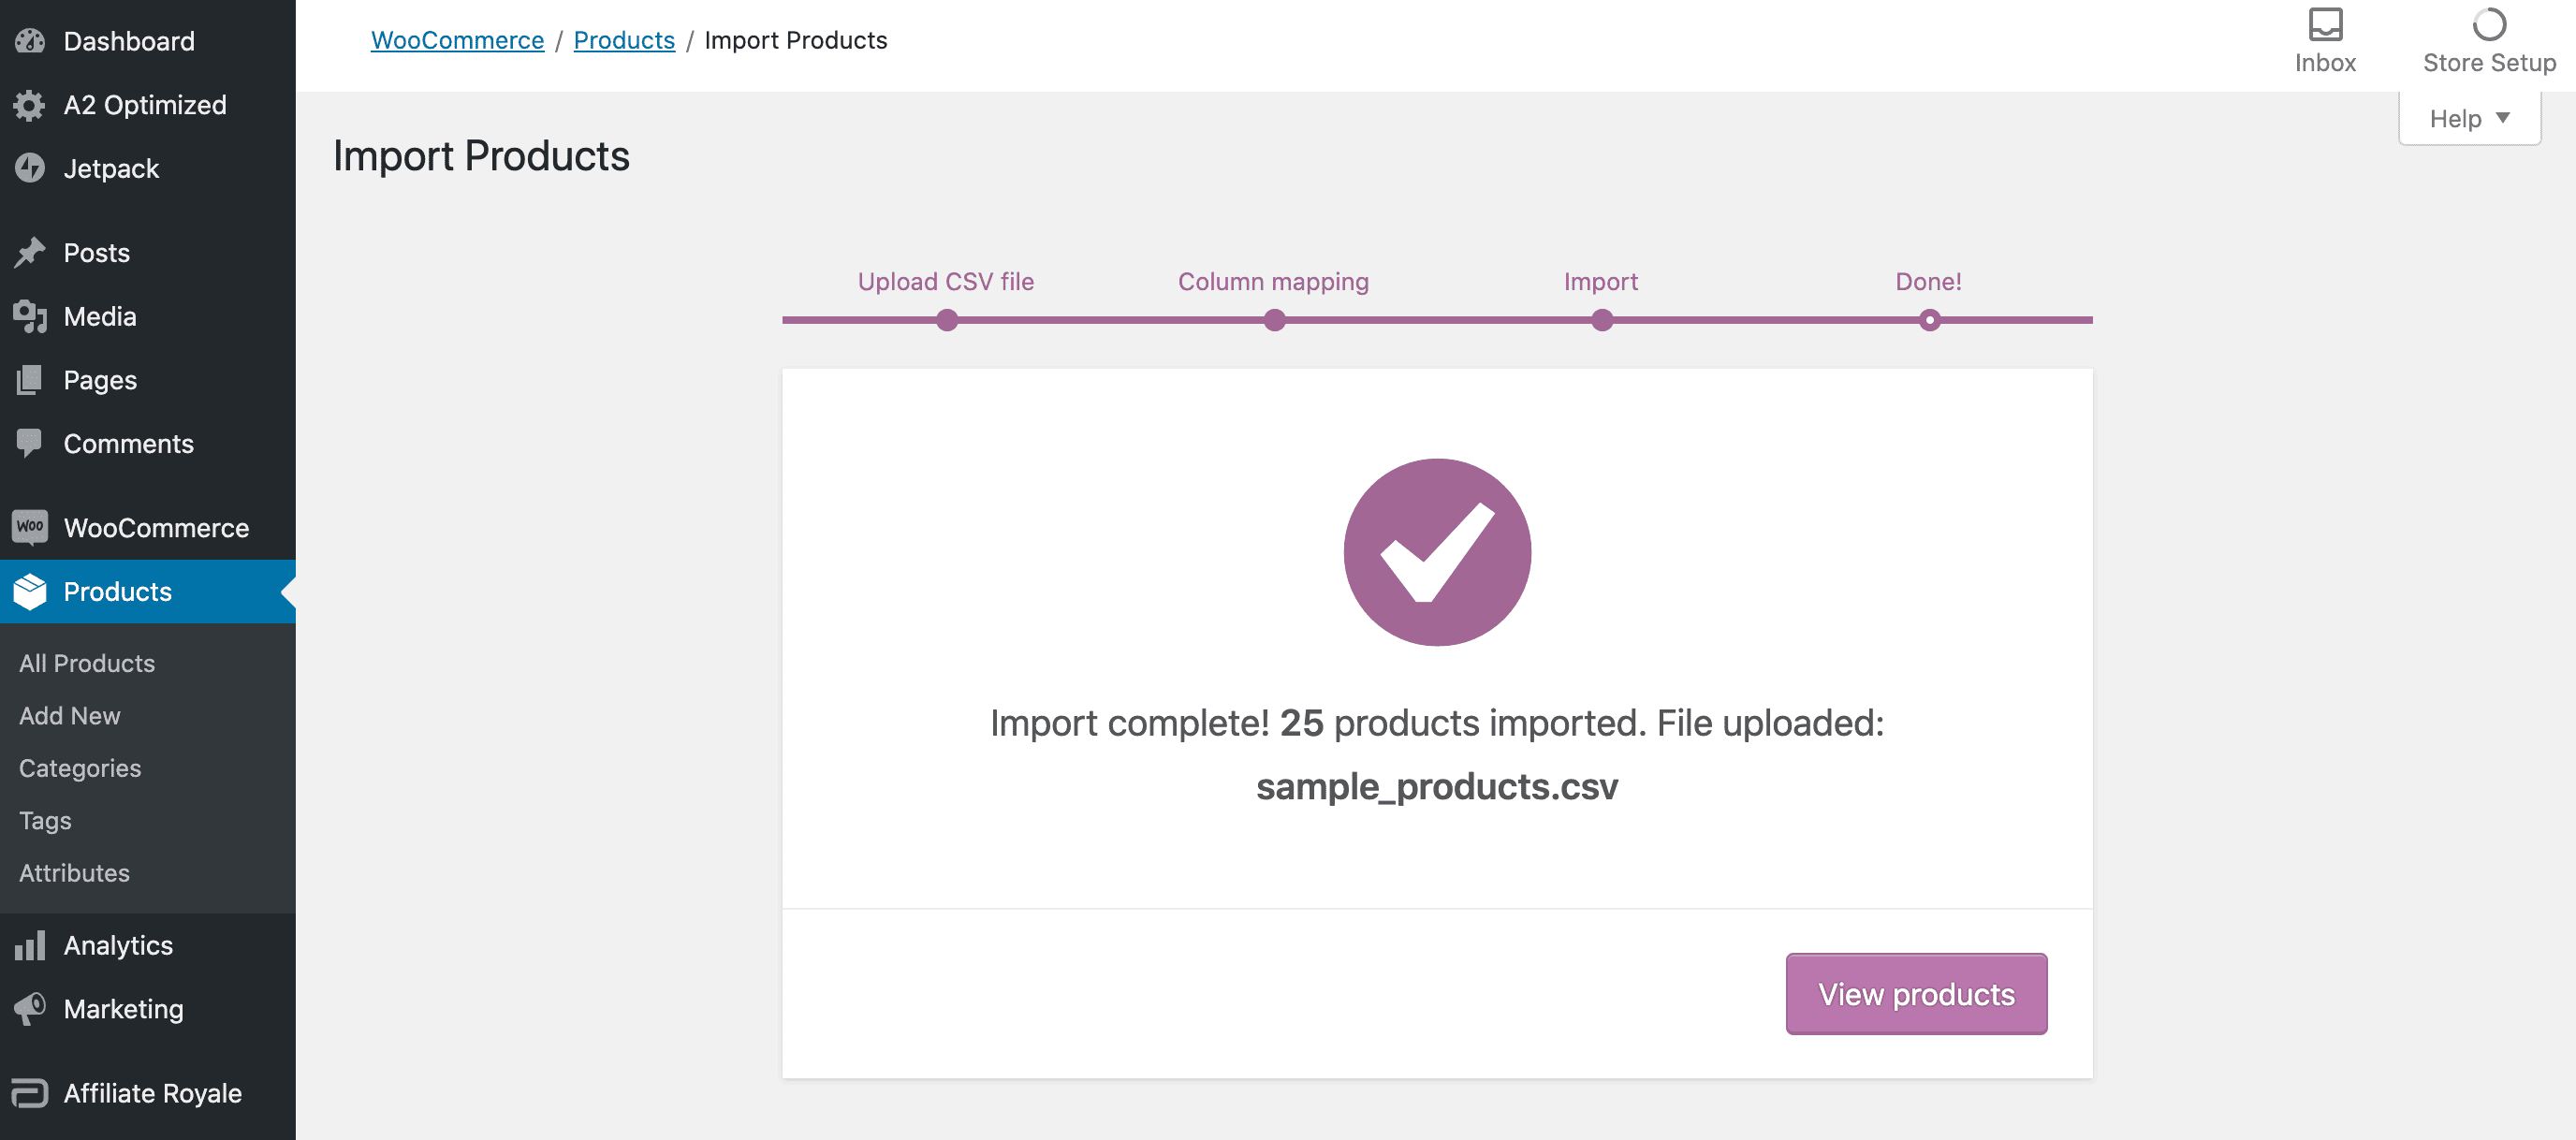
Let’s check our products have been imported successfully. In WordPress’ left-hand menu, navigate to WooCommerce > Products > All products.
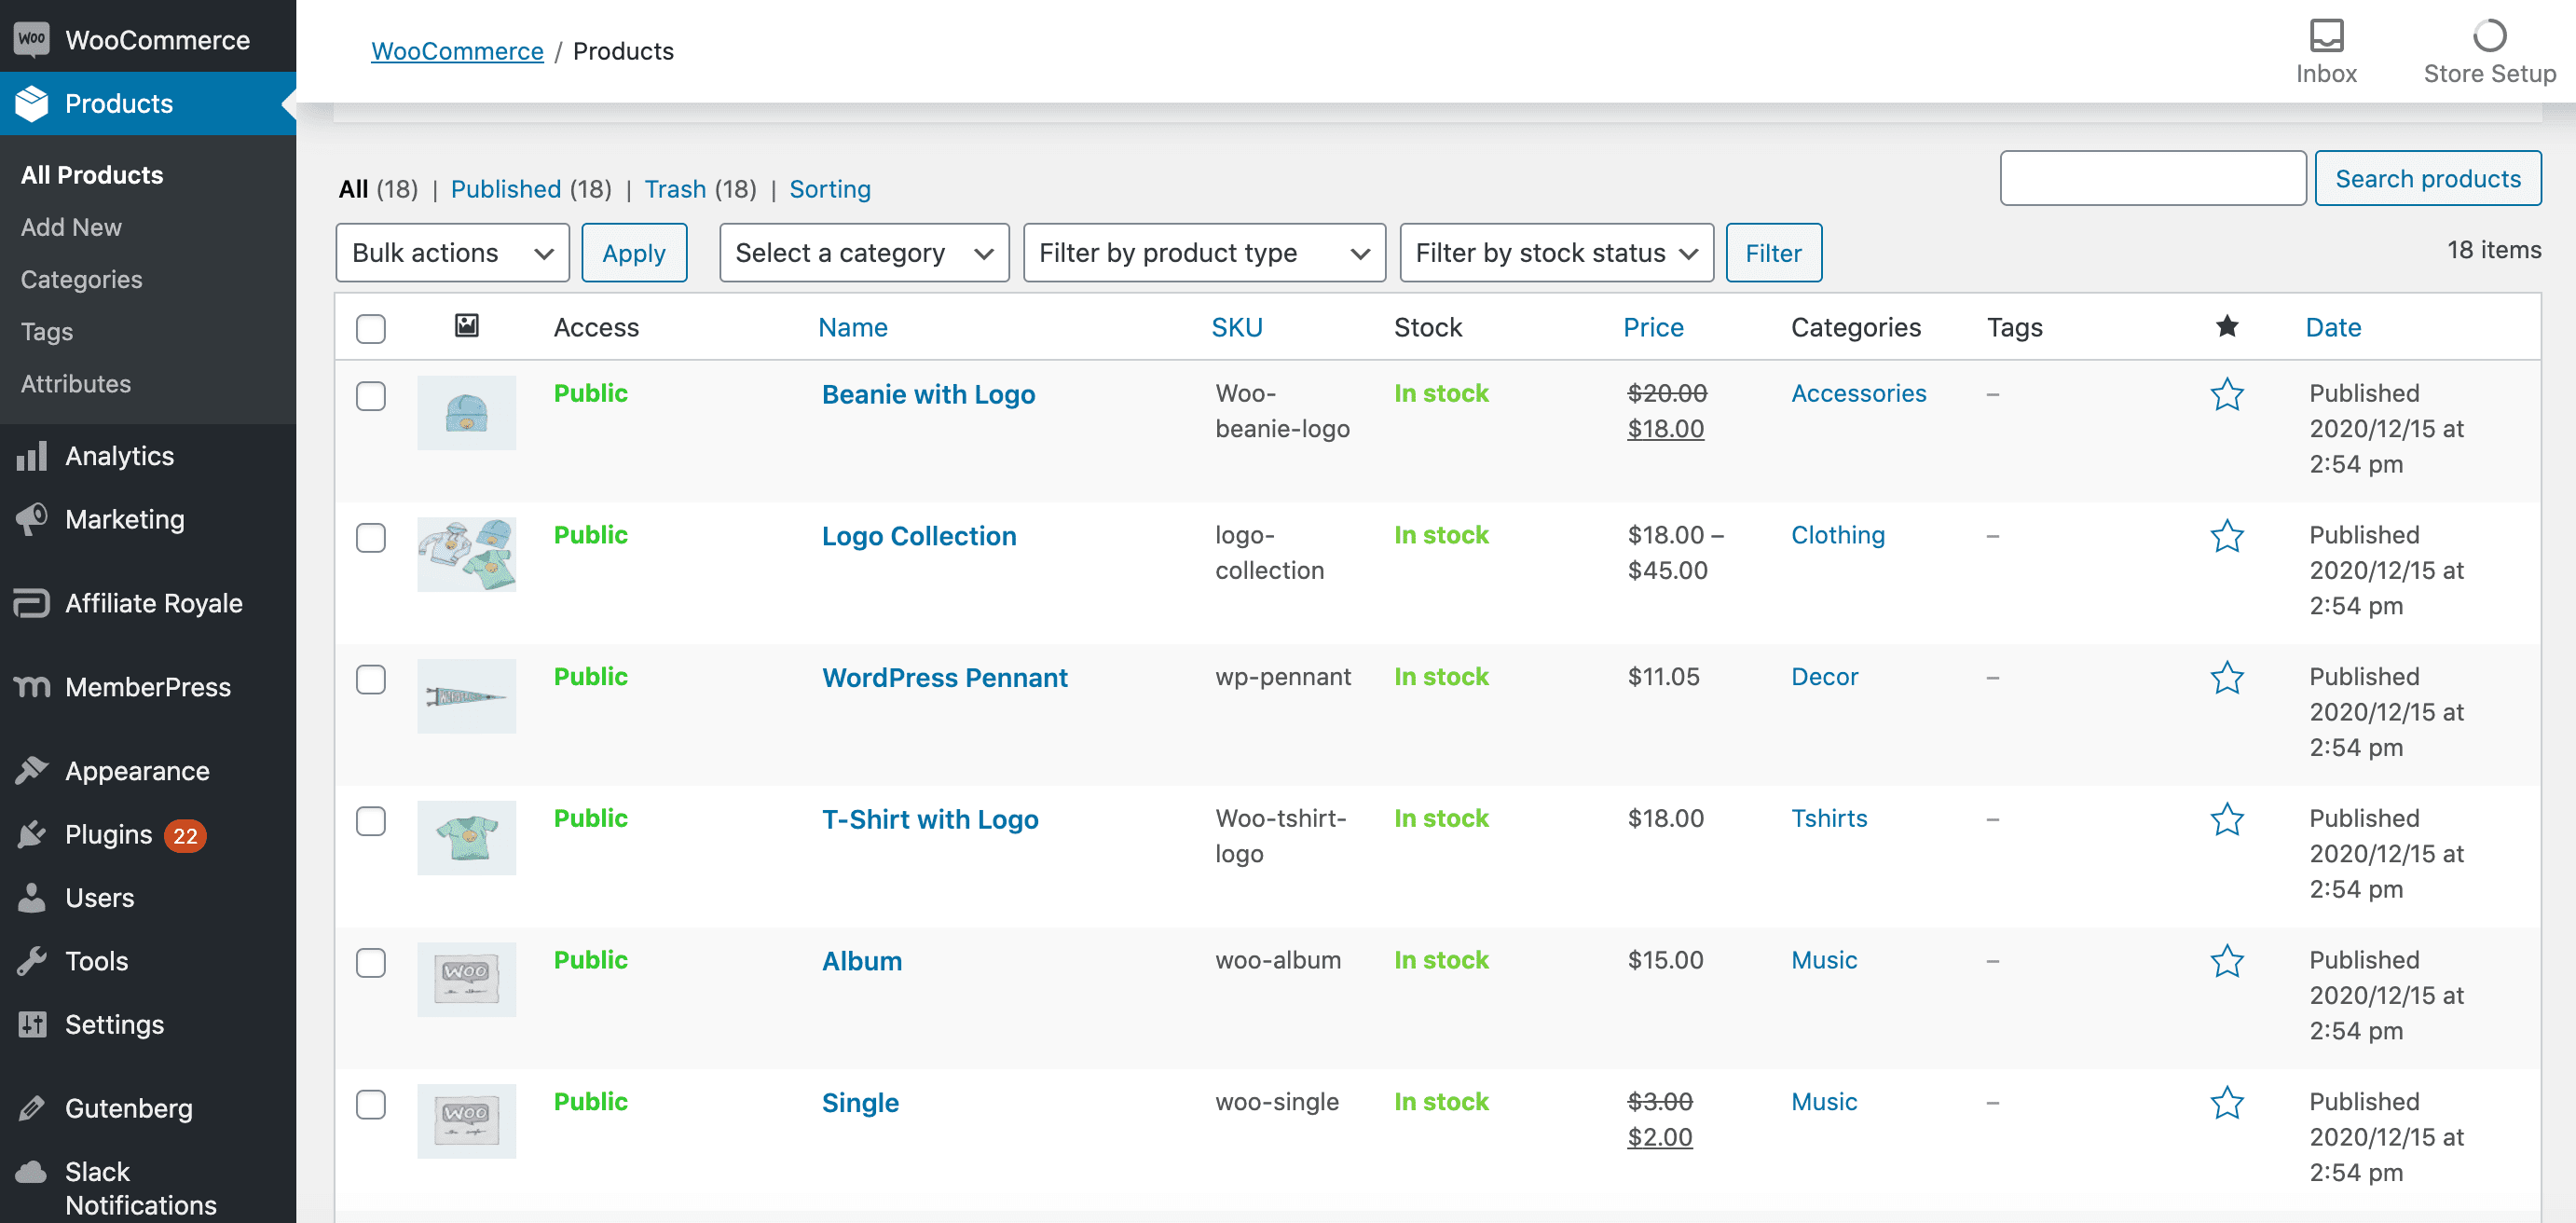
You should see all the products that were included in your WooCommerce CSV import file. You can now start selling these products via your WooCommerce store.

Now you have some stock, you may want to design a more engaging and attention-grabbing product page. If you’re a Divi user, you can convert all the standard WooCommerce product elements into Divi Woo modules.
This enables you to create a completely custom product page. It will also help your e-commerce store stand out from the competition, while also perfectly reflecting your brand.

This is all you need to create an online store. However, at some point you may need to update a large number of products simultaneously. For example, you might be preparing for a sale, or a supplier may change their brand name. This is another area where a CSV file can save you a significant amount of time and effort.
Step 5: Updating Your WooCommerce Products
If you need to update multiple products, you can add all the new information to a WooCommerce CSV import file. You can then upload this file, and WooCommerce will make the required changes. This is often quicker and easier than editing each product individually.
When you’re updating a product, it’s important to provide the correct product ID. You can retrieve this information by navigating to WooCommerce > Products > All Products. You can then hover over the product in question, and its ID will appear.
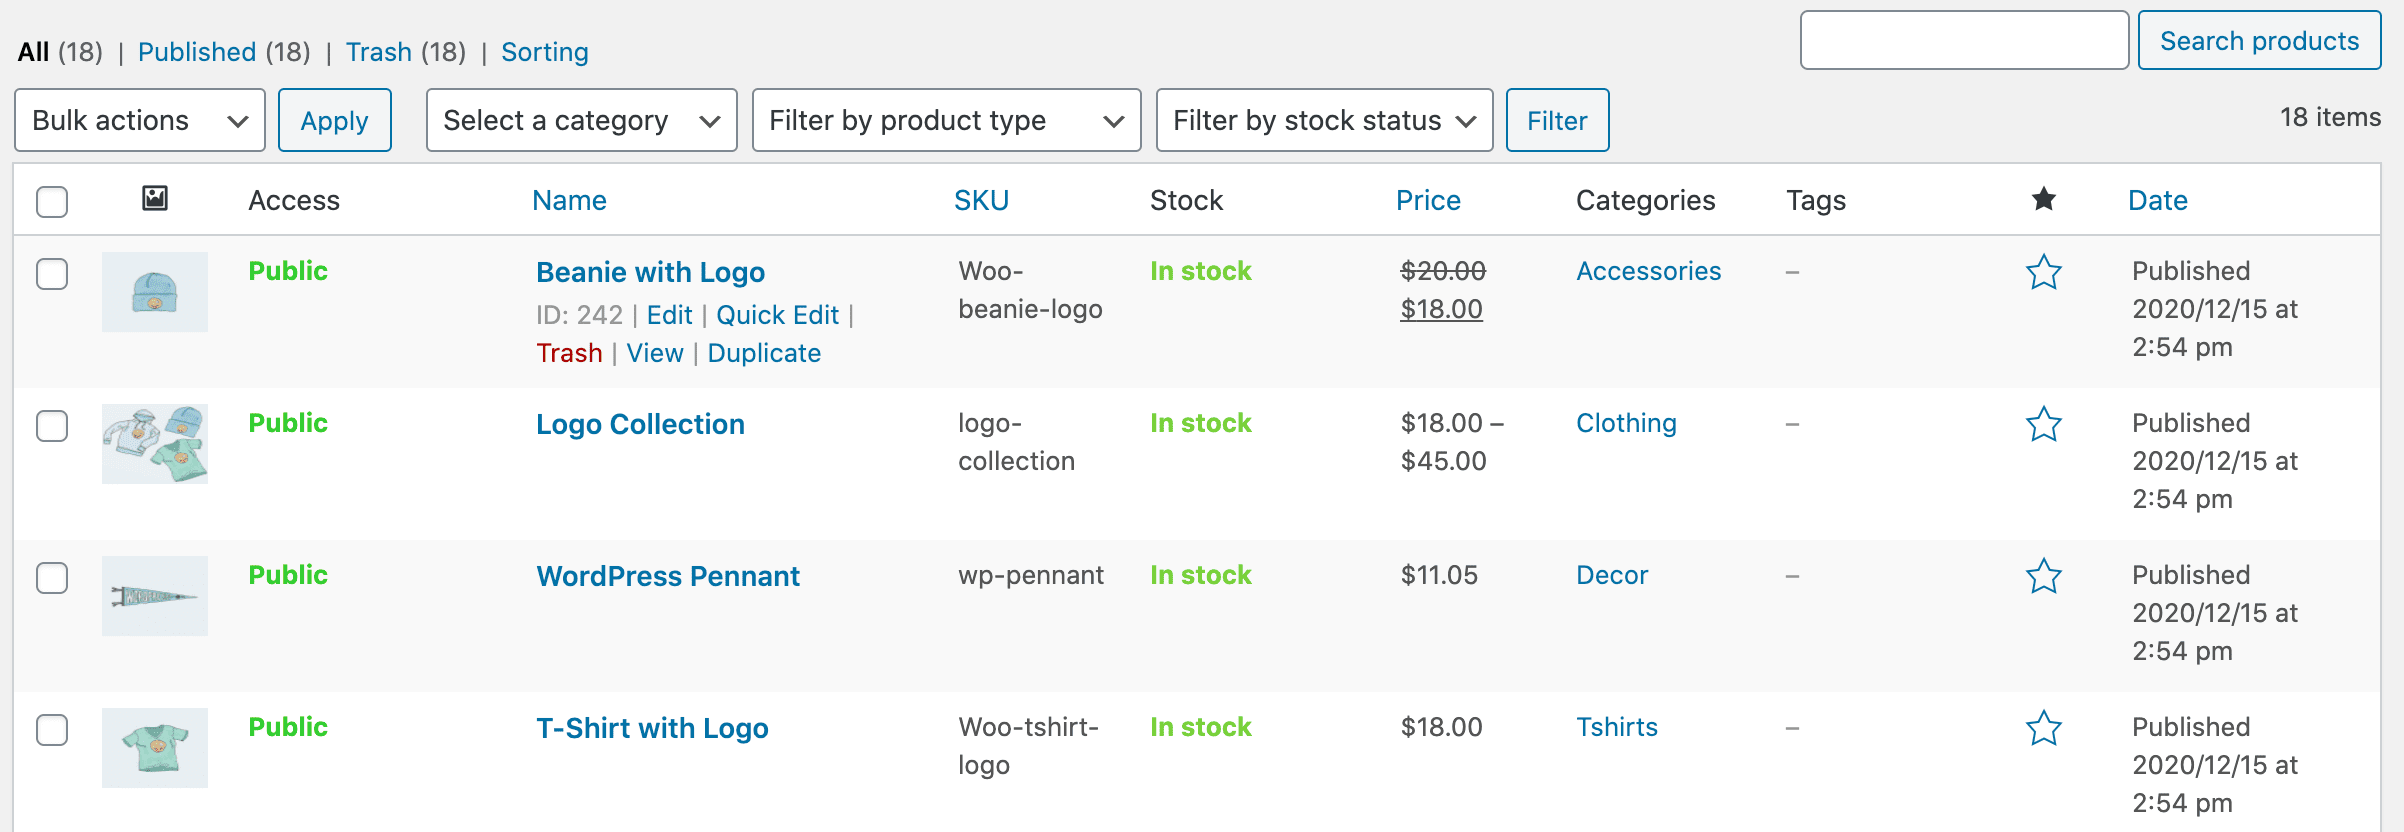
If the product has a Stock Keeping Unit (SKU) value, you’ll also need to provide this information in your CSV file. You’ll find the SKU value alongside the product ID.
After creating your CSV file, navigate to WooCommerce > Products > Import. Since we’re updating existing products, make sure you select the Existing products… checkbox.
You can now upload your CSV file, and complete the import process as normal. WooCommerce will apply this new information to the specified products only.
Conclusion
Uploading your products can be the most time-consuming part of launching an online store. However, Comma-Separated Value (CSV) files can help you stock those shelves in record time.
If you’ve decided to launch an e-commerce store, you can upload hundreds of individual products as a single CSV file. Here’s the four step process:
- Create your WooCommerce CSV import file.
- Upload your CSV file to WordPress.
- Check your WooCommerce store.
- Update your products, using the CSV method.
Do you have any questions about how to import your products as a CSV file? Let’s talk about them in the comments section below!
Featured image by Garfieldbigberm / shutterstock.com.


Excellent article – I’ve been wondering about those ID numbers for quite a while and this clears that up completely – many thanks.
Glad to be of assistance, Brian!
Awesome Pro-tip
Thanks, hidayath!