WordPress is a highly-flexible platform that you can easily tailor to meet your needs. However, that versatility sometimes means a lot of menus and options to sift through. For instance, the WordPress media upload settings can seem overwhelming at first glance, especially if you’re a newcomer to the Content Management System (CMS). Fortunately, learning how to navigate these settings isn’t difficult.
In this article, we’ll look at the WordPress media upload settings, which enable you to adjust the size and organization of media files added to your website. We’ll also explain what each option does, and how you can use them to get the most out of WordPress.
Let’s jump in!
Subscribe To Our Youtube Channel
An Introduction to the WordPress Media Upload Settings
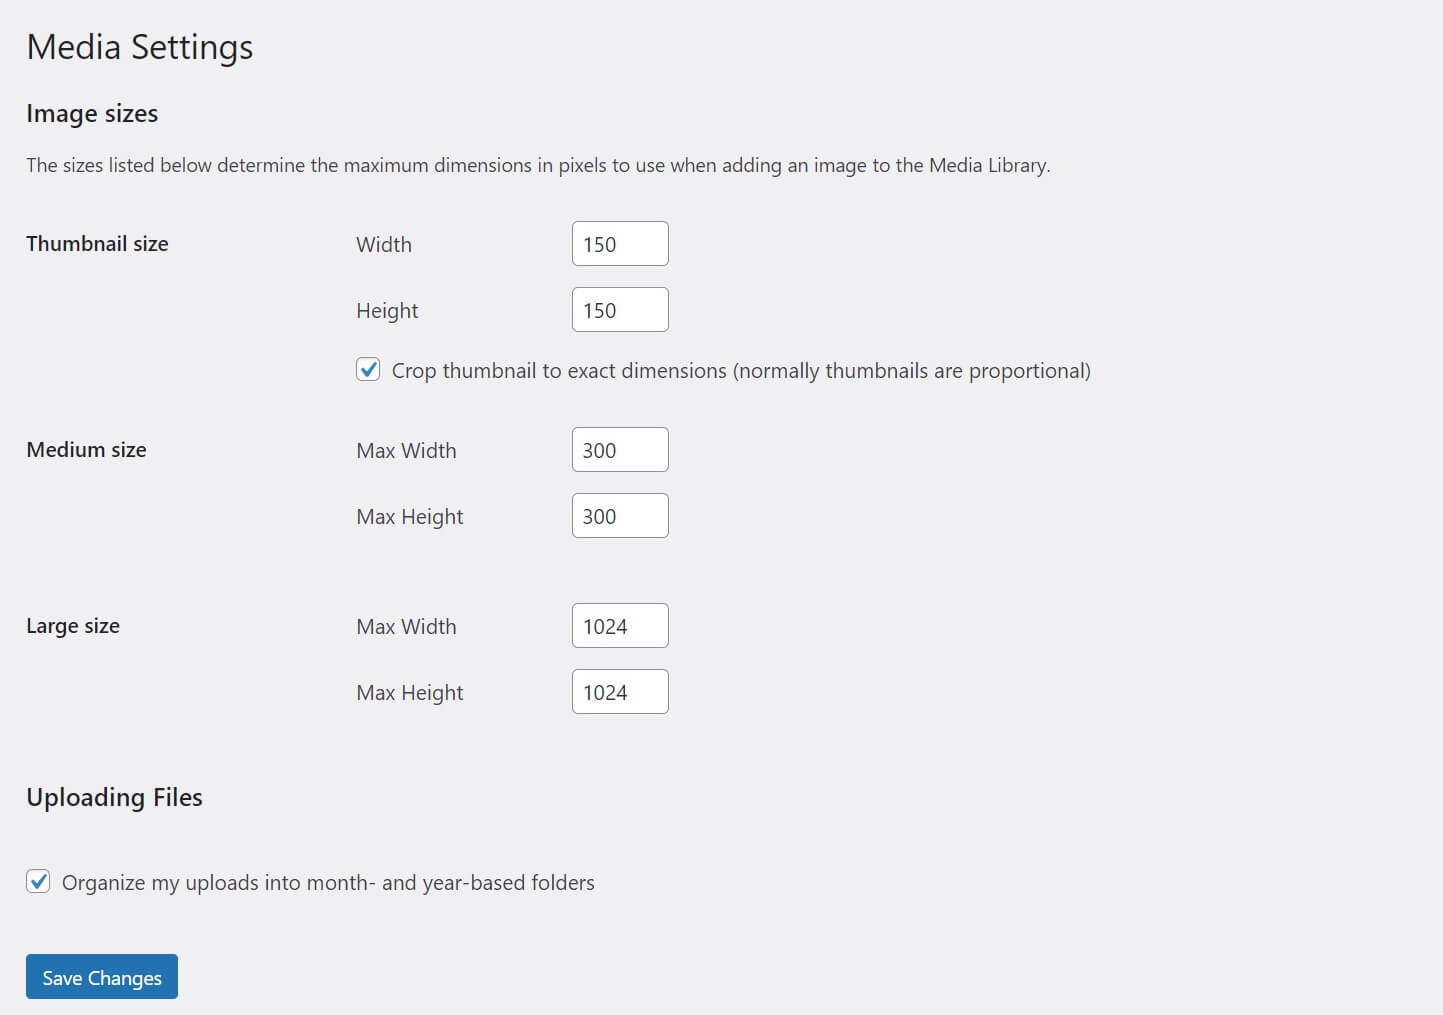
The options on the WordPress Media Settings page control various aspects of the image and media files used on your WordPress site – including on your pages and posts. You can find this in the WordPress dashboard by navigating to Settings > Media:

There are only a handful of settings on this screen, but they can have a significant impact on how media appears on your site. They also affect how much storage space the media takes up, which can be an important consideration for many site owners.
Before we dig into the settings themselves, let’s cover a few basic concepts. When you upload an image file to WordPress, it automatically creates three additional copies in different sizes: thumbnail, medium, and large.
This simplifies the process of resizing images. These default sizes are also used in various spots throughout many WordPress themes. For example, thumbnails are often used on the main page of a blog, in order to display a featured image for each post. On the other hand, you might use large images for sliders or hero sections.
The settings on this page control the actual dimensions of those predefined image sizes. There’s also an option that determines how images are stored in your WordPress site’s file system. This control can make finding items much easier (or harder), depending on how you configure it.
How to Configure Your WordPress Media Settings
Now that we have the basics out of the way, it’s time to dive into each element on the WordPress Media Settings page. Below, we’ll cover the options in order, and provide recommendations for how to configure each one. Remember to save your changes whenever you modify a setting on this page.
Image Size Settings
The first section on this screen contains the settings for the three automatically-created image sizes: thumbnail, medium, and large. You can change each of these independently. For example, if you like the thumbnail size as-is but would prefer for medium and large images to be a bit bigger, you can change the latter dimensions without affecting your thumbnails.
If you don’t want WordPress to create these additional images at all, you can simply adjust the values to “0”. WordPress will skip any size with that value. This is handy for conserving server storage space server, or if you never use a particular image size.
After all, remember that the system is creating these copies for every image you upload, regardless of whether you use them. There’s no reason to fill up your storage space with files that you’ll never use. Keeping too many images and other media files on your site can also have a negative impact on performance.
The thumbnail size also has another option: Crop thumbnail to exact dimensions. Thumbnails are typically proportional (equal width and height). However, this checkbox enables you to set different sizes for those dimensions, to achieve rectangular images:

This option can be useful for certain website designs, and there’s no right or wrong approach here. However, keep in mind that some WordPress themes may still crop thumbnail images into squares regardless of which size you choose, so you’ll have to experiment to determine what works best for your site.
As for what sizes are best, there’s also no hard-and-fast rule. In many cases, the default sizes will work just fine. Larger sizes provide a clearer image quality, especially when users zoom in on the page. However, they also take up more storage space, so you’ll need to weigh the benefits against that drawback.
File Upload Setting
The final section on the WordPress Media Settings page only contains a single option: Organize my uploads into month- and year-based folders. However, it’s an important one. This setting can have a profound impact on your ability to locate your site’s files down the road.
If you select this option, when you upload new files, WordPress will organize them into folders based on the year and month they were uploaded:

This system can make it much easier to locate a particular file. If you leave the box unchecked, all of your media files get added to the uploads folder in your WordPress directory, with no organization at all.
If you only have a handful of images on your site, that may actually make them easier to find. On the other hand, if you upload a lot of media, you’ll almost certainly want to leave the option selected.
Note that this setting only applies to media files as viewed in your site’s file system. They’ll still be organized in simple chronological order when you view them in the WordPress Media Library. You can also use plugins to improve media file organization on your website.
Conclusion
Whether you’re new to WordPress or simply digging into the settings pages for the first time, the number of options available can seem overwhelming. However, once you know what you’re looking at, you’ll be able to select the options that are right for your website.
The WordPress Media Settings page is fairly easy to digest. It contains a few options for adjusting image sizes, and lets you determine the organizational structure for your media files. Knowing your way around this screen and its controls is particularly useful for keeping your Media Library easy to use.
Do you have any questions about how to configure your WordPress media settings? Let us know in the comments section below!
Featured Image via ProStockStudio / shutterstock.com


Hello everyone. For more guidance on image sizes in Divi, I would recommend the post on this blog titled “The Ultimate Guide to Using Images Within Divi”.
Thank you for sharing a good resourceful article. I want to know about is this Divi theme uses the WP core image sizes?
I would love to know some additional recommendations on file dimensions for large images such as a slider or full width image
Does the Divi theme use the WP core image sizes at all, or do you only use your own sizes you generate?