
Gravity Forms from Rocket Genius is a powerful tool for creating simple or advanced forms for WordPress. When it comes to the best WordPress form plugins, Gravity Forms has been a clear leader for years. It’s a premium plugin that lets you easily create and manage forms, even adding conditions and styling, creating multiple pages, limiting entries, and scheduling when the forms go live – all without having to touch a single line of code. On top of all of that, it’s intuitive to use.
In this article we’ll take a look at Gravity Forms Personal edition, see its main features, and look at an example form. Images for the examples were taken from Unsplash.com.
- Click here to visit the GF website: Gravity Forms
Installation
To install the plugin, upload it (select Plugins in the dashboard, click Add New, and then select Upload) and then activate it. Once the plugin is activated you’ll have to paste in your license key and choose a few settings. Once the plugin is installed you’ll see Forms added to your dashboard menu. Select Forms and then go to Settings to finished setting up Gravity Forms.
License Key

Paste your license key into the field and select Next. Gravity Forms will not work without the license key.
Background Updates
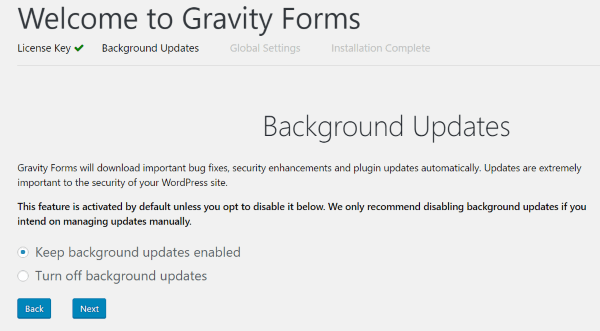
Here you can choose to allow Gravity Forms to automatically update (this is the default setting and is recommended) or you can perform the updates manually. I recommend keeping the default setting and selecting Next.
Global Settings
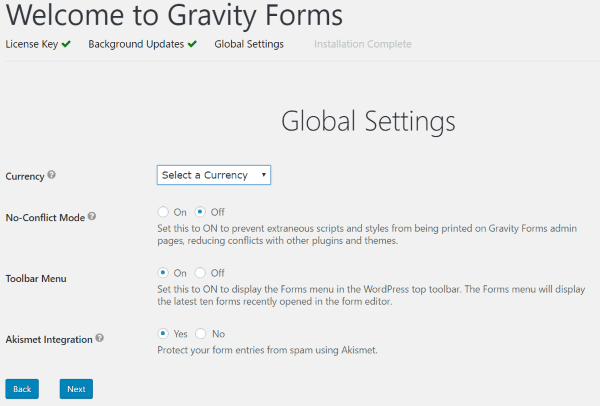
The first setting in the global settings is your currency. The currency is used in the pricing fields and price calculations of your forms. There are 25 currencies to choose from.
Next is no-conflict mode. This is off by default. Enable this if there are any conflicts with your other plugins or with Divi or child themes. This will keep styles and scripts from being printed on your Gravity Forms admin pages.
The toolbar menu will display the forms menu within the top toolbar. It will display the last 10 forms that you’ve opened. It’s set to on by default.
Akismet integration uses Akismet to protect your forms from spam entries. This is also set to on by default.
I recommend selecting your currency and leaving the rest set to default. Hit Next to finish installation. You can change these settings any time in the settings menu.
New Form

Select New Form (under Forms in the dashboard menu) and you’ll get a popup where you can name your form and give it a description.
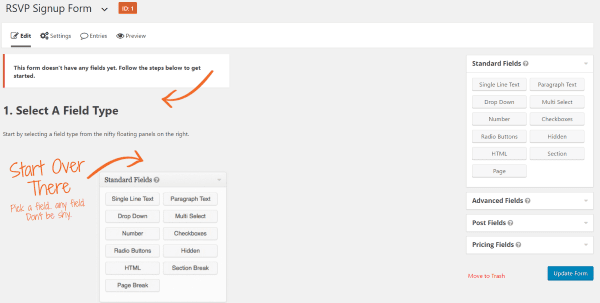
Next you’ll see a screen with fields and a quick walkthrough that shows how to create a form. Instructions include:
- Select a field type
- Click to add a field
- Edit field options
- Drag to arrange fields
- Save your form
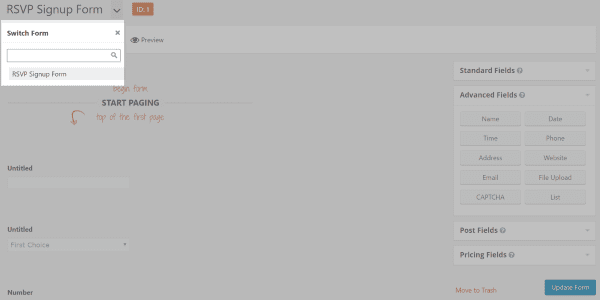
Across the top you’ll see the name of the form you’re working on next to a down arrow. The down arrow opens a modal window with a search box and a list of your forms. Here you can easily change between forms.
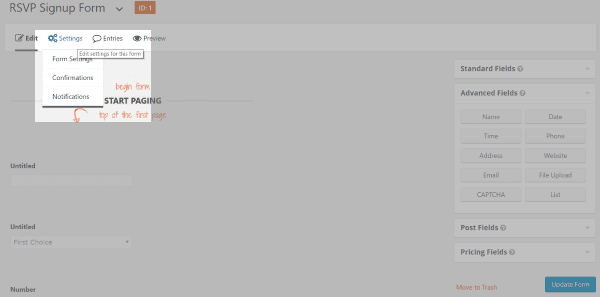
Under this is a menu strip that includes Edit, Settings (for forms, confirmations, and notifications), Entries, and Preview. This lets you navigate through settings for your current form. Let’s look at them in detail.
Edit
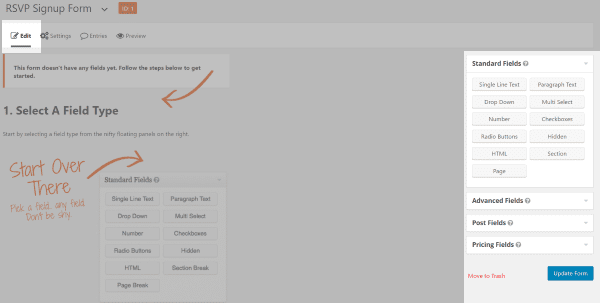
All of the fields to create the forms are placed on the right side of the screen. Practically every setting has a question mark that reveals information on hover about how to use that feature. The fields are divided into four categories:
- Standard (11 fields)
- Advanced (10 fields)
- Post (7 fields)
- Pricing (5 fields)
Open the categories to see the fields to choose. To create the form start clicking on the fields you want to add to your form. It doesn’t matter what order because you can drag and drop them in the order you want them.
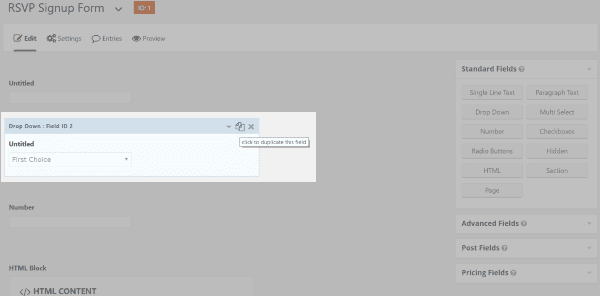
After clicking the fields you’ll see them appear on your canvas. Here you’ll be able to customize every field.
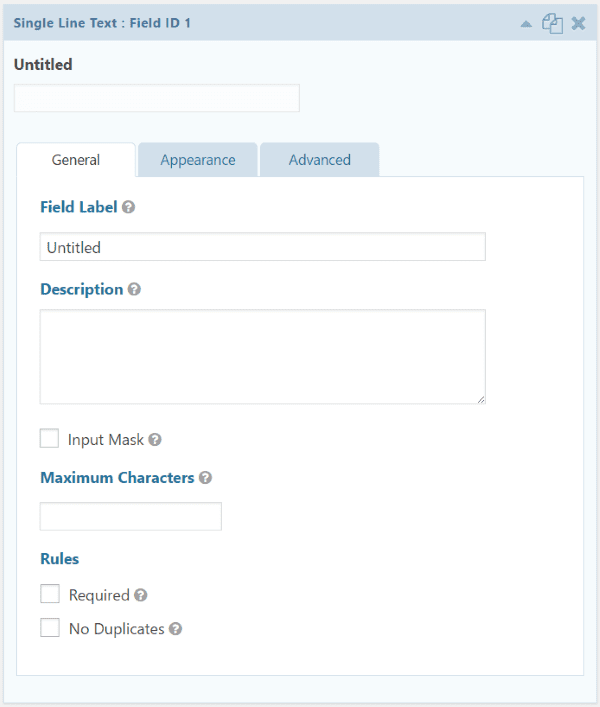
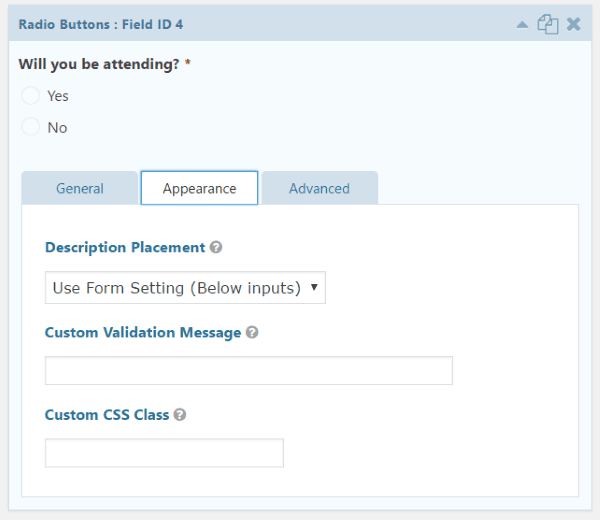
Selecting the fields opens their settings. The settings contain three tabs: General, Appearance, and Advanced. The setting are different for each field type. You can duplicate any field.
The General settings include labels, descriptions, an input mask, maximum number of characters, rules, choices, number format, ranges, calculations, button type, button text, etc.
The Appearance settings include CSS class fields, placeholders, description placements, custom messages, field sizes, enabling user interfaces, allow fields to be populated dynamically, etc.
The Advanced settings include labels, default values, visibility, allow the field to be populated dynamically, enable conditional logic, next button conditional logic, enable rich text editor, etc.
Settings
Settings include Form Settings, Confirmation, and Notifications. Here’s a closer look at each one.
Form Settings
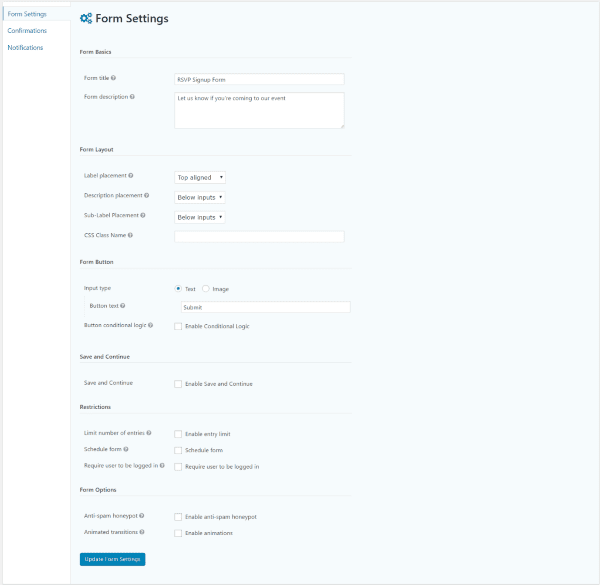
Form Settings include:
- Basics – title and description
- Layout – label, description, sub-label placement, and CSS class
- Button – choose text or image, enter the button text, and enable conditional logic
- Save and Continue – enable the save and continue feature
- Restrictions – limit the number of entries, schedule the time-period when the form is active, and require users to be logged in
- Form Options – anti-spam honeypot (reCAPTHCA alternative), and animated transitions
Confirmations
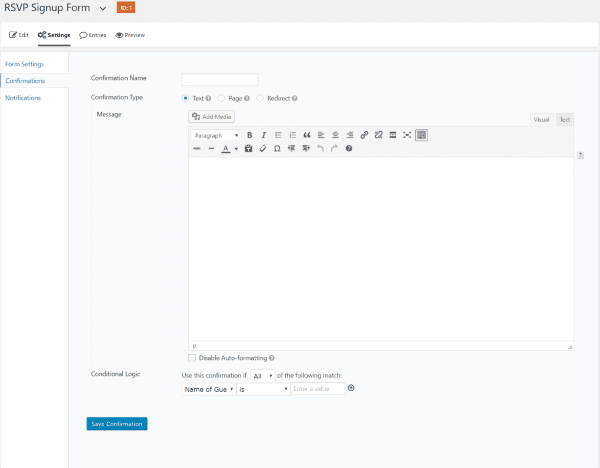
Create the confirmation that displays after the user submits the form. If you don’t customize your own confirmation it will use the default.
Notifications
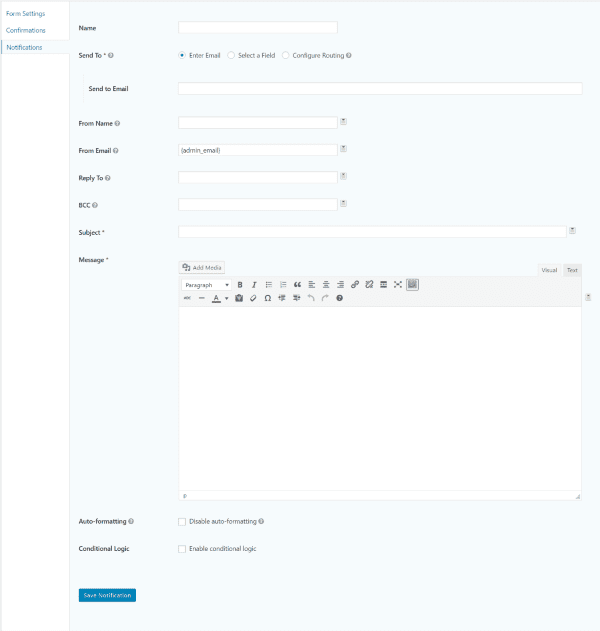
Create the notification and decide who it’s sent to. You can leave this empty if you want to send them to the admin by default.
Creating a Form
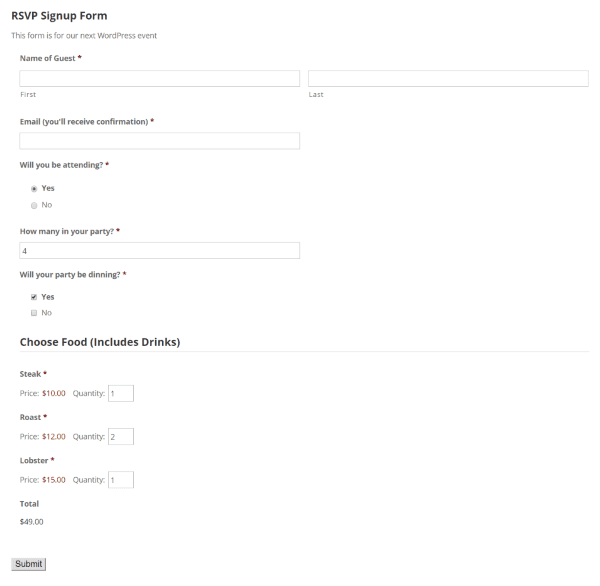
For this example I wanted to create an RSVP form for an event. The form will allow the reader to enter their name and select whether or not they will attend the event. If not, the form will use conditional logic so no other fields will display. If they will attend, other fields will display where they can make selections for food. After they’ve made their selections, the form will calculate pricing and give them a total. I’ve selected certain fields as required and I’ve given placeholder values as examples for the user. Fields are named using descriptive labels that are easy for the user to understand.
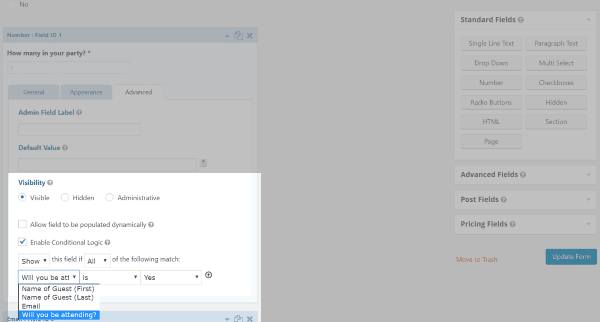
This form includes several conditional logic elements. It will only ask how many in your party if you are attending, and it will only ask for food choices if you are dining.
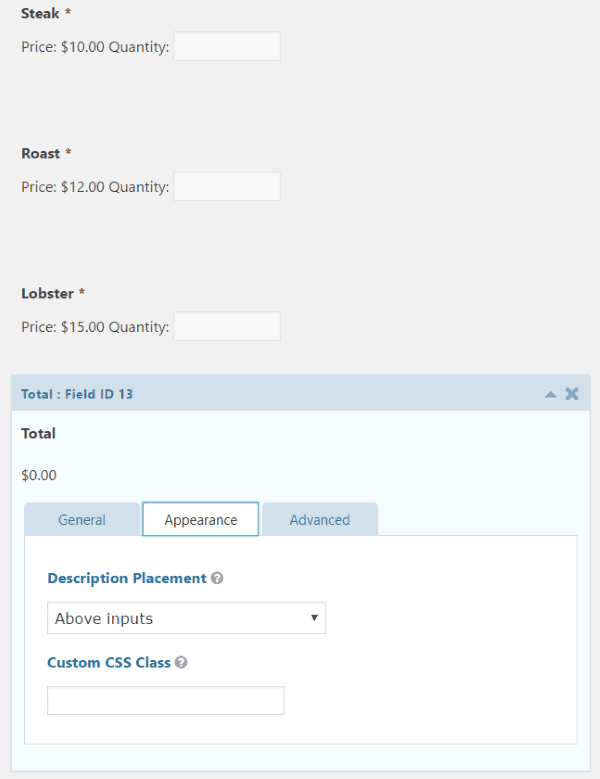
The food choices are product fields. They will only display if the user selects that they will be dining. The Total field uses the number fields above it to calculate a total. I didn’t select the fields for it to use. I only selected to use above inputs and it does the rest. The Total field also uses conditional logic so it will only display if the user is dining.
Preview
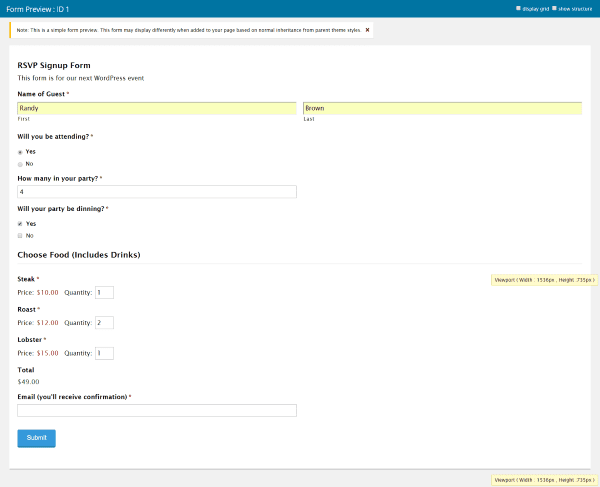
The form worked as expected on the first try. The conditional logical revealed the next section as I made my choices. This preview does not include any of the styling that I can add, but it does show how everything works. If I wanted a form with multiple pages I would simply add a page field.
Forms
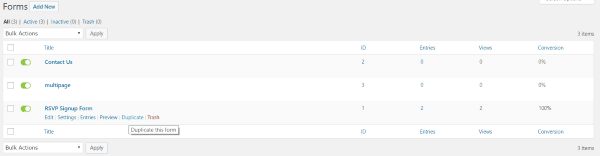
The Forms menu shows your list of forms. Here you can choose to edit, adjust settings, see the entries, preview the form, duplicate the form, and delete it. You can also view and sort them by title, ID, entries, views, and conversion percentage. You can also access these settings from the WordPress menu at the top of the screen. Each form has its own dropdown menu items where you can make you choices. You can also create a new form by clicking New Form. It will redirect you to the form creator.
Adding Forms to Pages and Posts
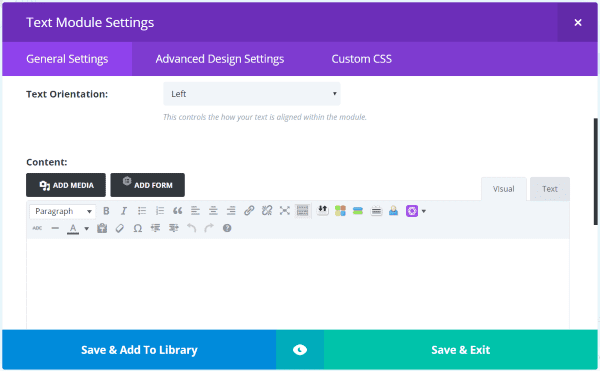
A new button is added to the visual editor that will open your list of forms. This also appears in text modules within the Divi Builder.
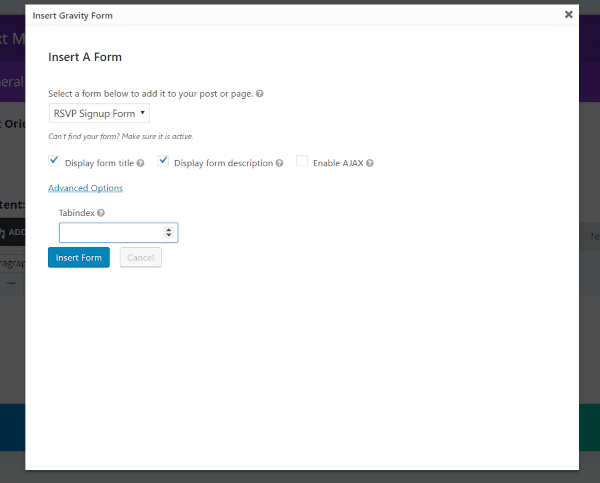
Select to add a form and you’ll get a modal popup with a dropdown box and several options. Choose the form you want to add and click Insert Form. You can also make a few other selections here including to display the form’s title and description and to enable AJAX to submit the form. An advanced option lets you specify the starting tab index for the fields. Once you insert the form a shortcode will be placed within your content.
Here’s a look at the standard form without any styling.
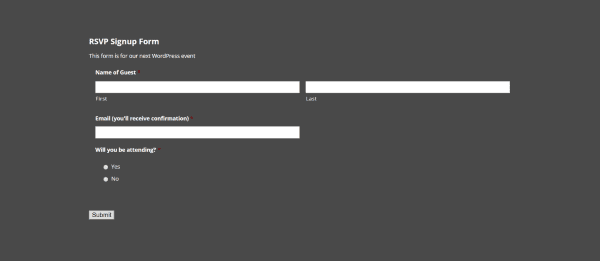
Here’s the form using a dark background within the Divi section. The text for the module is set to light.
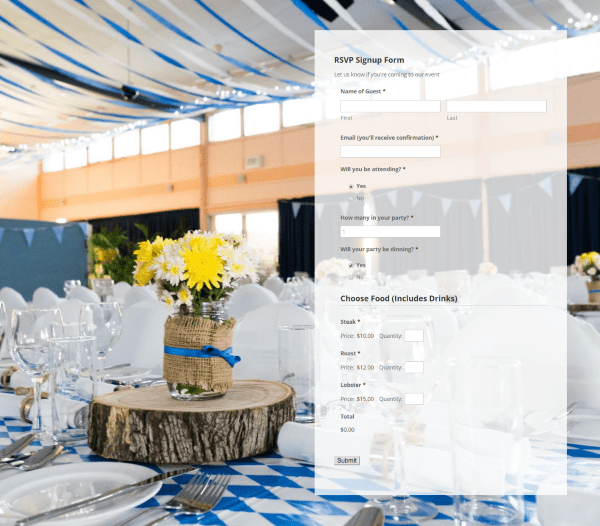
This example uses an image in the background of the section. It’s a two-column row with the form in the right column and the left column is empty. I created a white background for the right column with an opacity of 80% and padding of 50 for all sides. The text is set to dark. This works great for events such as weddings, family get-togethers, reunions, parties, etc.
Confirmation

Once the user inputs their information and hits the submit button they’re get a message confirming that you’ve received their entry. You can customize this message but I’ve used the default setting. You’ll get the results in your email (or the email you specified in the settings).
Entries
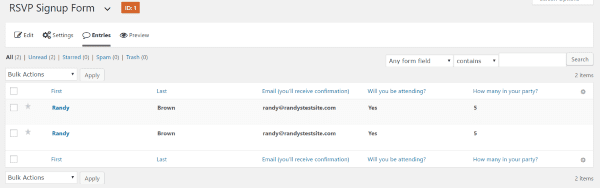
Entries gives you a list of every entry for each form. You can view them, mark them as read or as spam, and delete them. The columns are the fields of the form. You can choose which fields display.
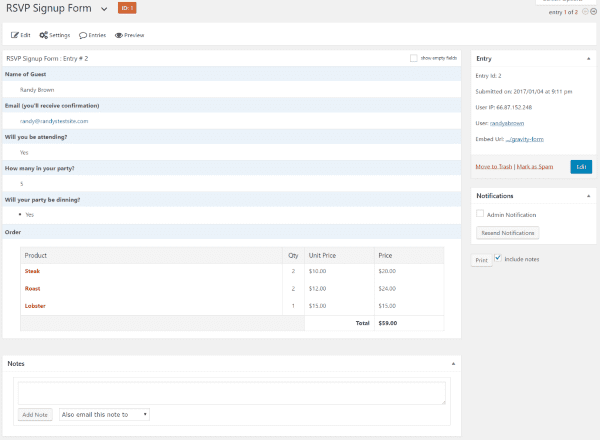
Viewing the entry gives you all of the information in a spreadsheet-style page. You can edit, mark as spam, resend the notification, and even print it. You can also make notes and send the note itself as an email.
Import/Export
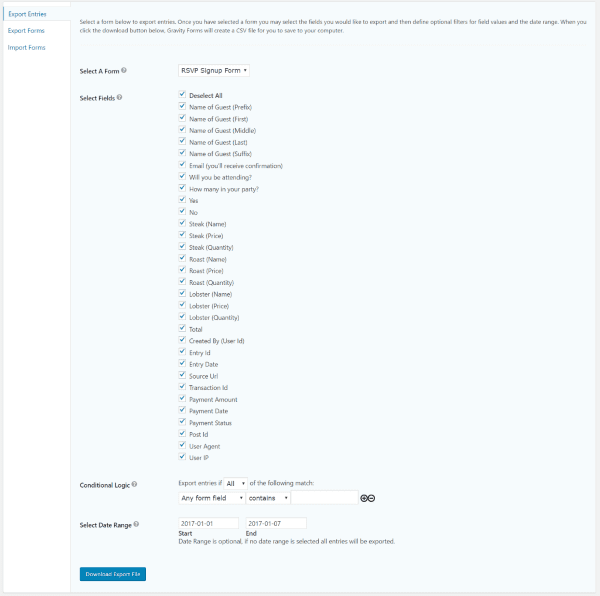
You can import forms and export your forms and entries. The forms are exported as a JSON file. Importing and exporting forms are straightforward, but there’s more to exporting entries. First, choose the form, then select all of the fields you want to include. Then set conditional logic and set date ranges if you need to. The conditional logic lets you choose all or individual fields that either contain a certain value or is a certain value. You can add as many conditions as you want. The entries are exported as CSV files.
Styling
By default Gravity Forms is designed to look good with just about any theme. But part of what makes both WordPress and Gravity Forms great is their flexibility. And that is still very much the case when it comes to styling. If the default look of Gravity Forms is not what you would prefer, they’ve made every element targetable by css to get exactly the look you’re after.
Custom CSS Classes
Another way to style the forms is by using a custom CSS class. Several lists of ready-made classes are available in the documentation. Copy and paste the CSS class into the Appearance setting for each field. Another place you can add the CSS class is under Settings, Form Settings, and CSS Class.
Here are a couple of the types of CSS classes provided in the documentation.
CSS Ready Classes
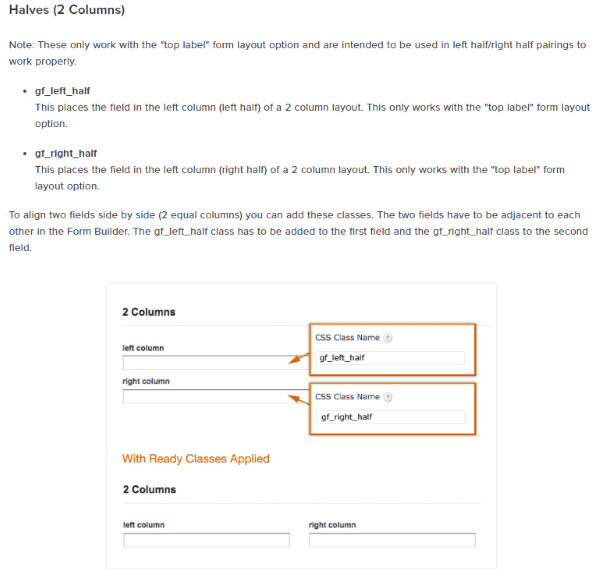
Ready Classes affect the layout. With Ready Classes you can add multiple columns, create a fluid inline form, show lists, create a horizontal form, create scrolling text, create sections, etc.
CSS Targeting Samples
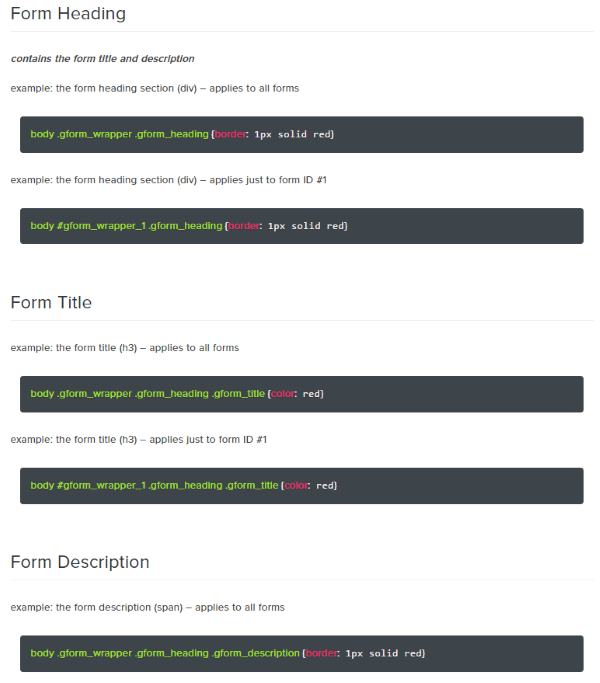
The documentation also includes lots of CSS examples to create styles. Every detail of every field can be styled using these targeting samples. So if you want a different color background within the field, different color for a certain font, or want a field to have a border, you can do that with these examples. Simply copy and paste them, and then modify them to suit your needs.
License, Price, Updates, Support
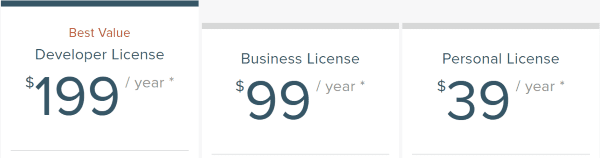
There are three prices depending of the type of licensing you want:
Developer is $199 per year and can be used on unlimited websites, works with multi-site, and includes Basic and Advanced add-ons.
Business is $99 per year. It can be used with 3 websites and includes Basic add-ons.
Personal is $39 per year and can be used on 1 website. It does not include add-ons.
- Click here to see the options at the GF website: Gravity Forms
Updates and support are for 12 months. Support is provided through a ticket system. The Business and Personal license includes the standard ticket system while the Developer license includes a priority ticket system.
Extensions
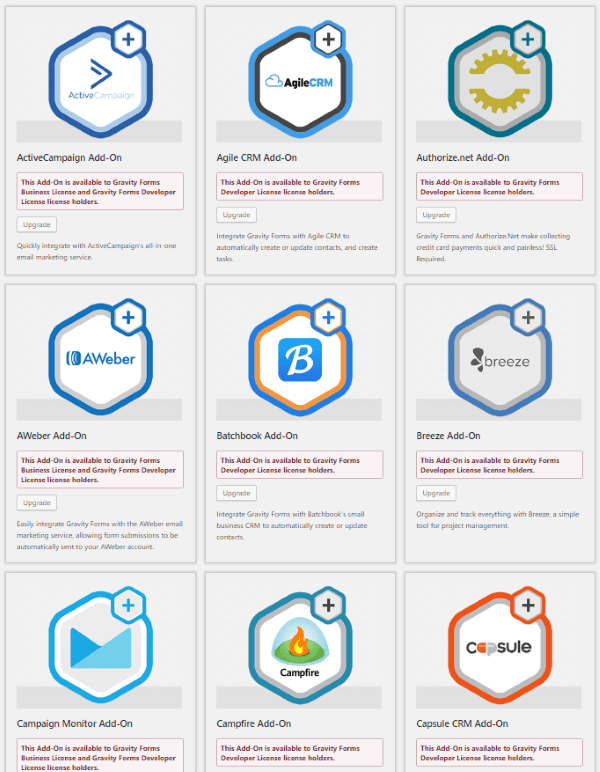
There are 35 extensions to give your forms more functionality. For example, with a CRM add-on, you can use gravity forms like a CRM plugin to integrate a CRM with your site. Or, with the Mailchimp add-on, it can function like a newsletter plugin to build an email opt-in form. Your access to them is based on the license you choose.
The Business license includes:
- ActiveCampaign
- AWeber
- Campaign Monitor
- CleverReach
- Emma
- GetResponse
- iContact
- Mad Mimi
- MailChimp
The Developer license includes all of the extensions in the Business license and adds:
- Agile CRM
- net
- Batchbook
- Breeze
- Campfire
- Capsule CRM
- Coupons
- Dropbox
- FreshBooks
- Help Scout
- Highrise
- HipChat
- Partial Entries
- PayPal
- PayPal Payments Pro
- Polls
- Quiz
- Signature
- Slack
- Stripe
- Survey
- Trello
- Twilio
- User Registration
- Zapier
- Zoho CRM
Documentation
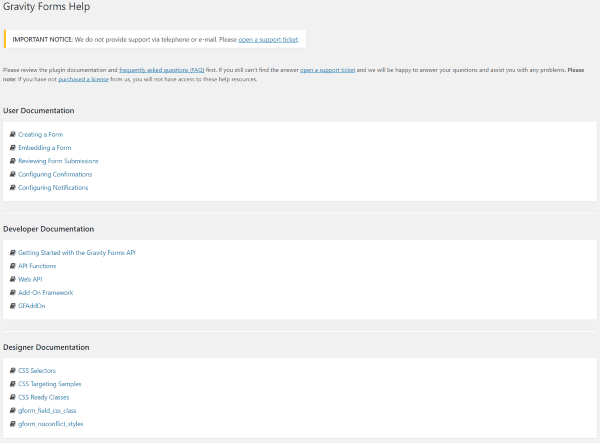
Documentation is provided on the website. The dashboard menu includes Help which has links to User, Developer, and Designer documentation. The links take you directly to the topic you want. It also includes a link to the FAQ page. The website includes user’s guides and a knowledge base. Online documentation can be searched. I found it easy to navigate and it had everything I searched for.
Final Thoughts
Gravity Forms is a powerful forms creator with lots of features. I found the forms easy and intuitive to create. The example that I created for RSVP (including conditional logic) was created without looking at the documentation.
It doesn’t have any pre-made forms to get you started but the forms are easy to create. Styling could be simpler but using the documentation you can copy, paste, and modify the styles to create a form to match your branding or needs. The Personal license can create the majority of forms that most will need. The extensions greatly enhance the types of forms you can create.
The ease of creating forms by choosing the fields, dragging and dropping them where you want them, adding conditions, scheduling, performing pricing calculations, limiting entries per form, customizing the confirmations per form, and receiving those entries in any email you specify makes Gravity Forms an excellent choice for WordPress users of all levels.
Have you tried Gravity Forms? Let us know about your experience in the comments below!
Featured Image by Oleh Markov / shutterstock.com


Thank you for the nice overview. Check the spelling of “dinning”, it should be “dining”.
Thanks for the heads up. Fixed.
Do you know if you can have multiple file upload fields? I need to create a form for a photo competition and I need to be able to upload six files.
Or any other alternatives?
Gravity Forms is a fantastic WordPress plugin for creating forms.
I use it for more than four years and i love it!
I’ve been using Gravity Forms for years and am always happy with it. The conditional logic is awesome! And the plugin can handle the conditions even in the confirmation and notification. The dynamic query for fields is also awesome!