
Among the many new builder features, Divi 5 also implements several efficiency improvements. These include improvements to the UI and those that help you with a smoother workflow. Not only is Divi faster (from a technical standpoint), but it is also faster to use.
Extend Attributes is one of our favorite efficiency features. It started as Extend Styles in Divi 4 and extended only element-level styles to other elements. Extend Attributes makes this initial feature 10 times more powerful. In this post, we’ll show you how to extend presets in Divi 5, so you can make even more targeted changes throughout your page design.
Let’s get to it!
Presets In Divi 5
Presets allow you to group related styles for reuse across your whole site. They are a visual, no-code way of approaching a class-based design system.
For instance, a button element may have styles for the text, the button background, the border radius, icons, and hover states. When you want to reuse the styles, you save them as a preset (or a few presets, depending on your own system) and apply those presets to other Button Modules.
The Two Types Of Presets
Though we’ve covered this in detail elsewhere, here’s a refresher. There are two types of Presets in Divi. Element Presets and Option Group Presets.
Element Presets are presets that accept styles only from similar types of elements. Button-level presets can be used on other Button Modules. Section or Row-level presets can be used on other Sections or Rows. The design options of a button and a row are vastly different, so they can’t really share an Element Preset.
However, even these two very different elements share some design settings in common. They both can accept a background color, interactions, z-index, and others. Realizing that designers could save a lot more time and design with more consistency if they had access to save presets on the Option Group level, we allowed just that.
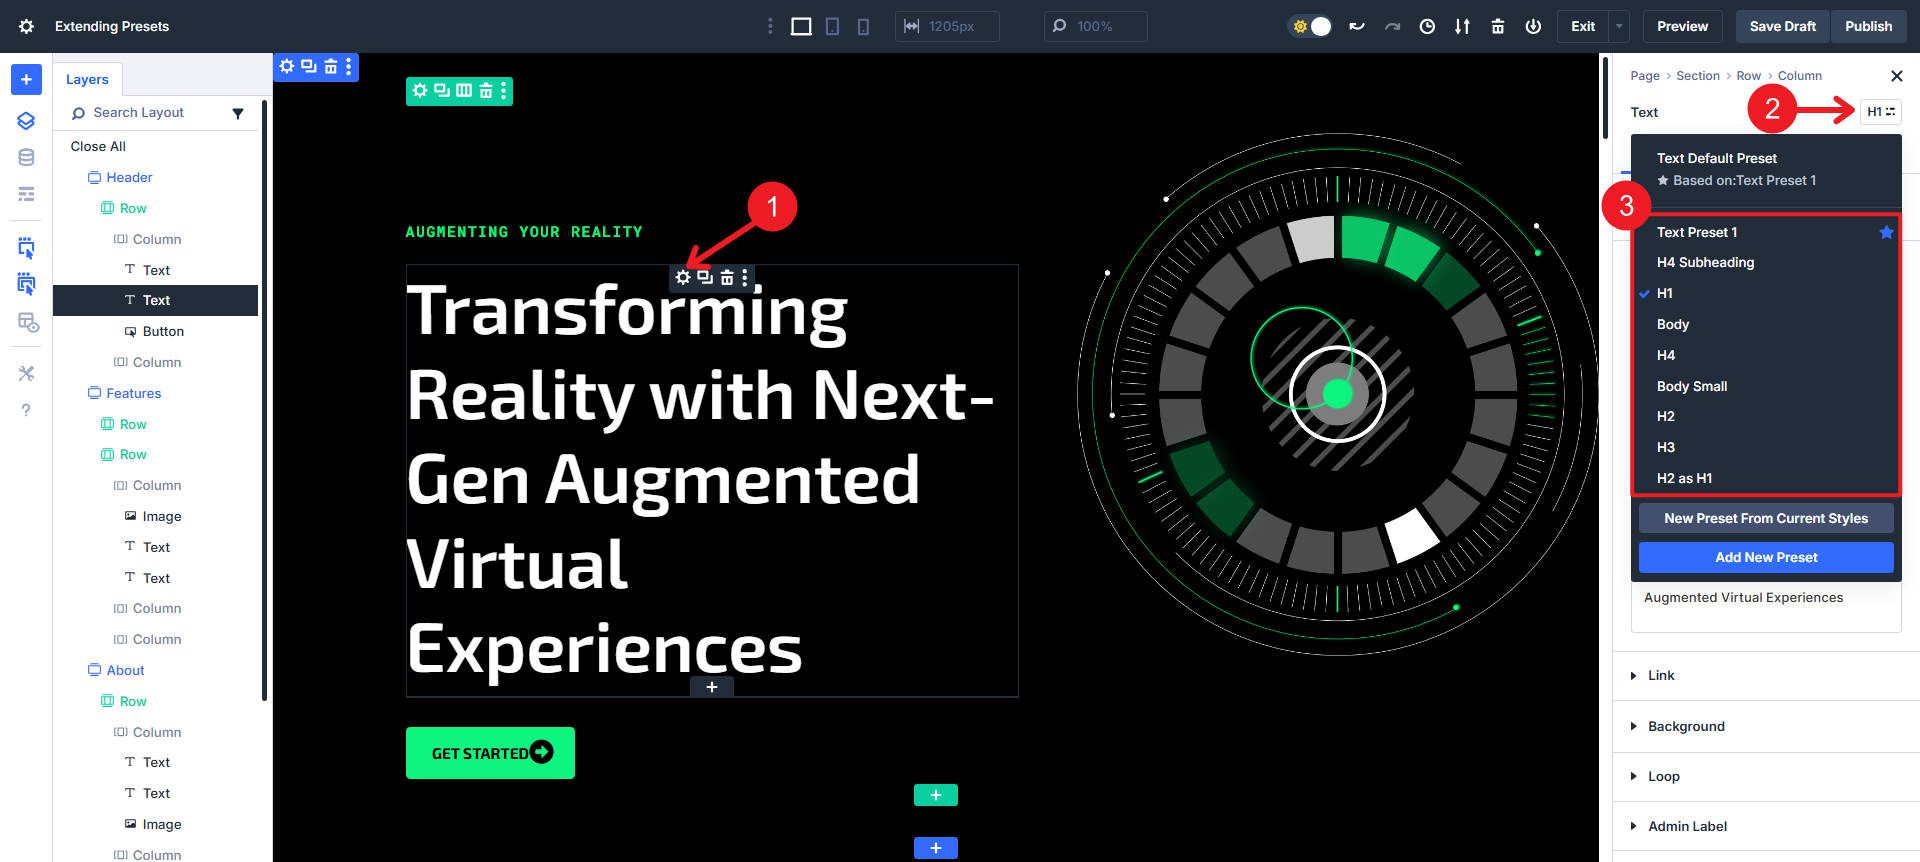
Option Group Presets are smaller, more atomic groups of design styles. You can tell what an Option Group in Divi is based on if it has a dedicated dropdown in the Settings/Design panel on the right. Not all Option Groups allow for presets (like the Loop Option Group), but nearly all design-related OGs have the ability to save presets. When you hover over one of these OGs that support presets, you’ll see an icon appear. Clicking this will show all the currently saved Presets under that Option Group (each at least has a “Default”).
How To Extend Presets In Divi
Extending Presets is a great way to fill out a wire-framed page with your designs to selective elements (or Option Groups) as you work through your design. They only require one thing — for you to have applied styles to at least one preset. You can’t extend ‘nothing.’ Likewise, all similar elements already share the same default preset. So you need to design something and create a preset to start extending.
Create An Element Preset
We’ll start with the easier preset, an element preset. A CTA Module is an excellent place to start. Buttons are also good because chances are you’ll have at least a couple of variations, so it is a good candidate for a preset.
Add your Module to a page in Divi. I will use a CTA Module because it has multiple sub-elements I’d like to design simultaneously. Once you have a button design, you can save those element-level styles as an Element Preset. This way, those styles are easily reusable on other CTA Modules. Create a new Preset based on current styles to do this quickly.
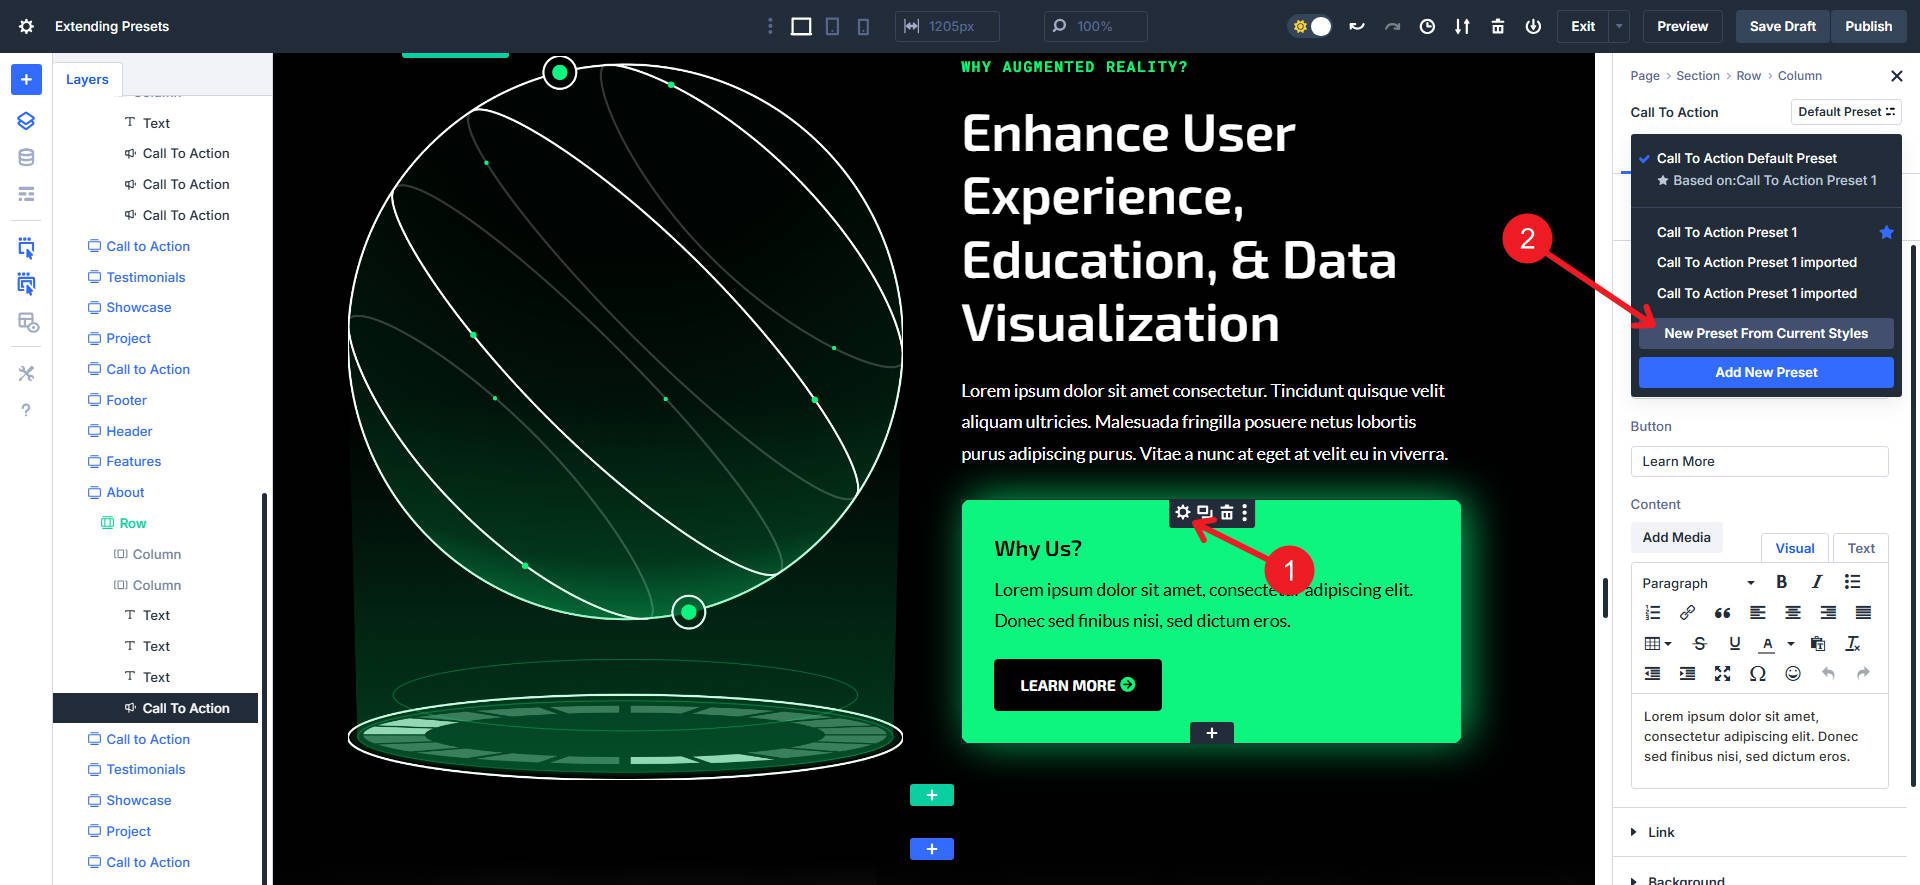
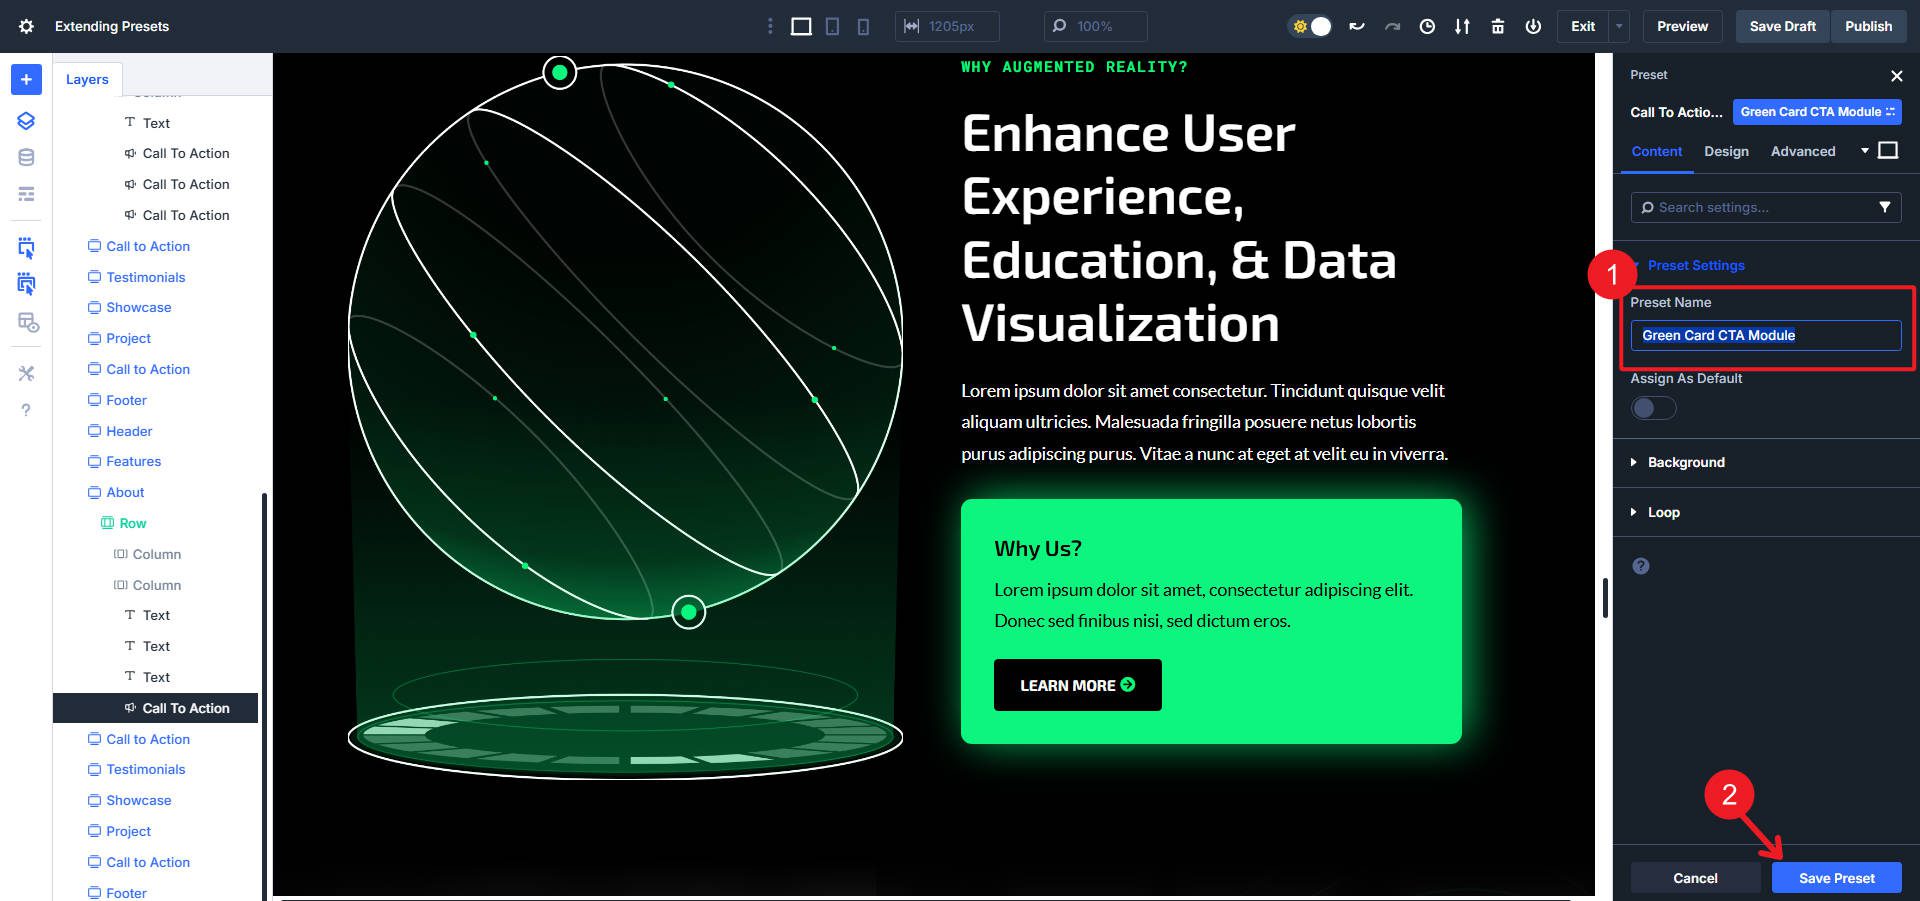
Make sure to give it a helpful/descriptive name and save the Element Preset. Now, you can use that Preset on other Modules of the same kind. Importantly, for extending it to multiple buttons on a page, you now have a Preset to extend.
Create An Option Group Preset
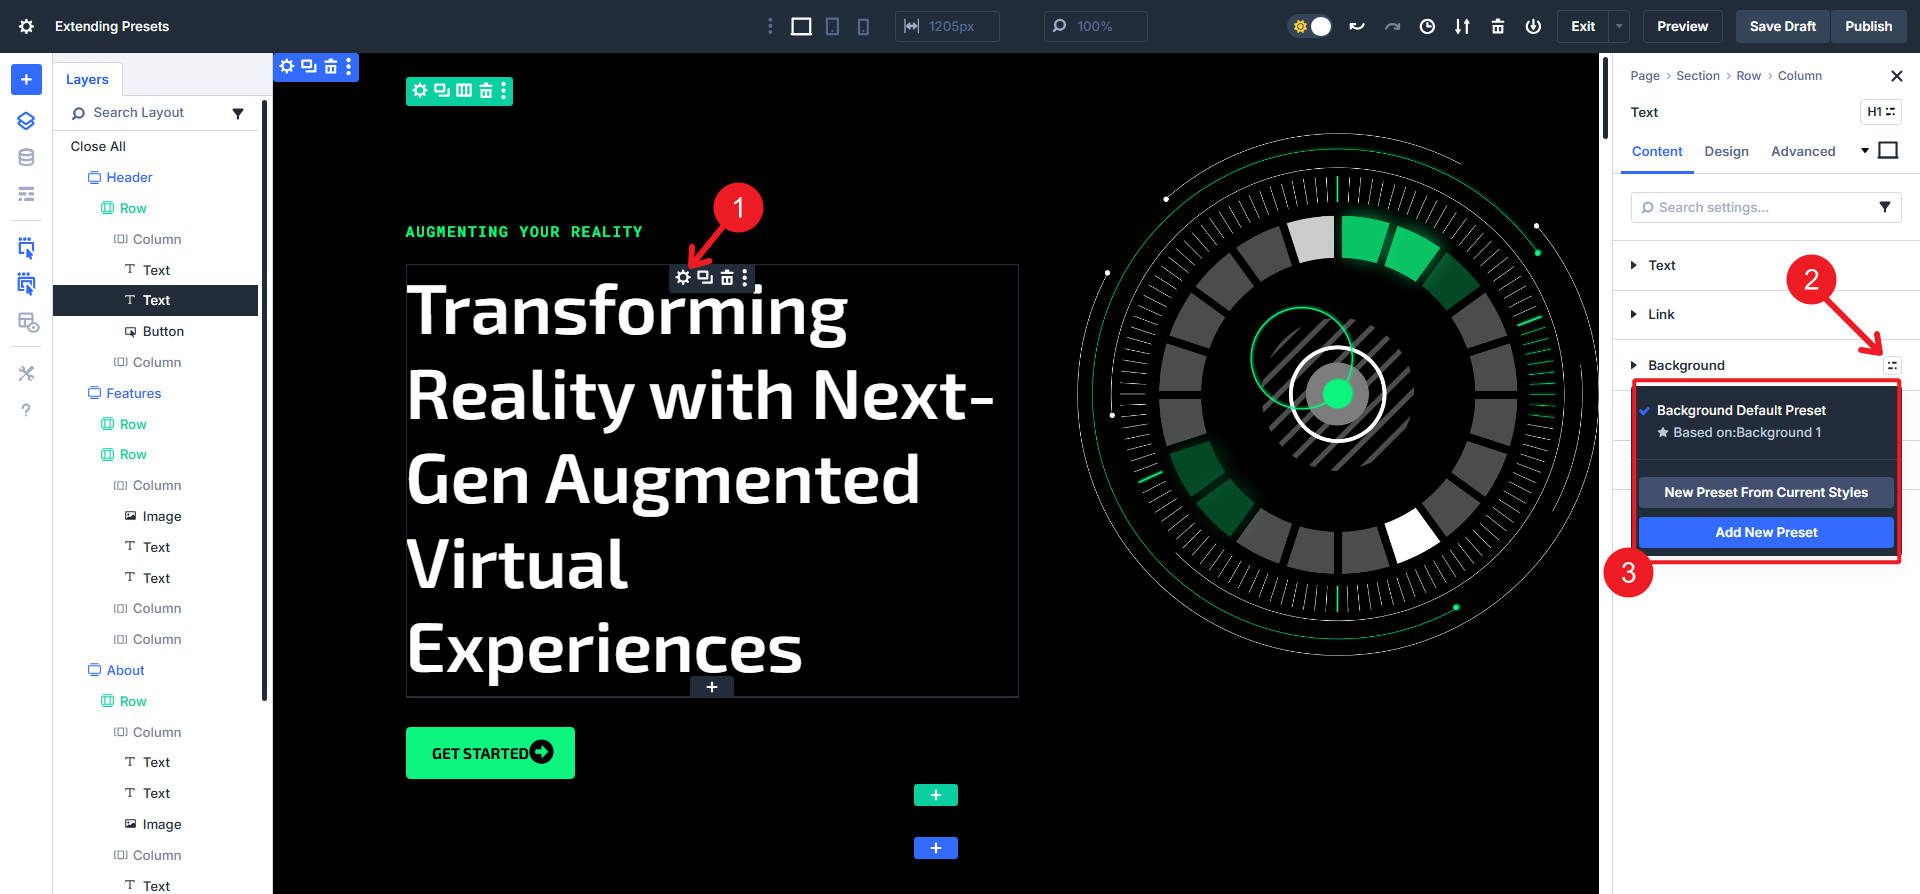
Option Group Presets are modular and target a single style group — think borders, spacing, or titles/headings — things that exist on multiple modules or containers. Here, I set up a design for an element background. Then, open the OG Preset dropdown menu.
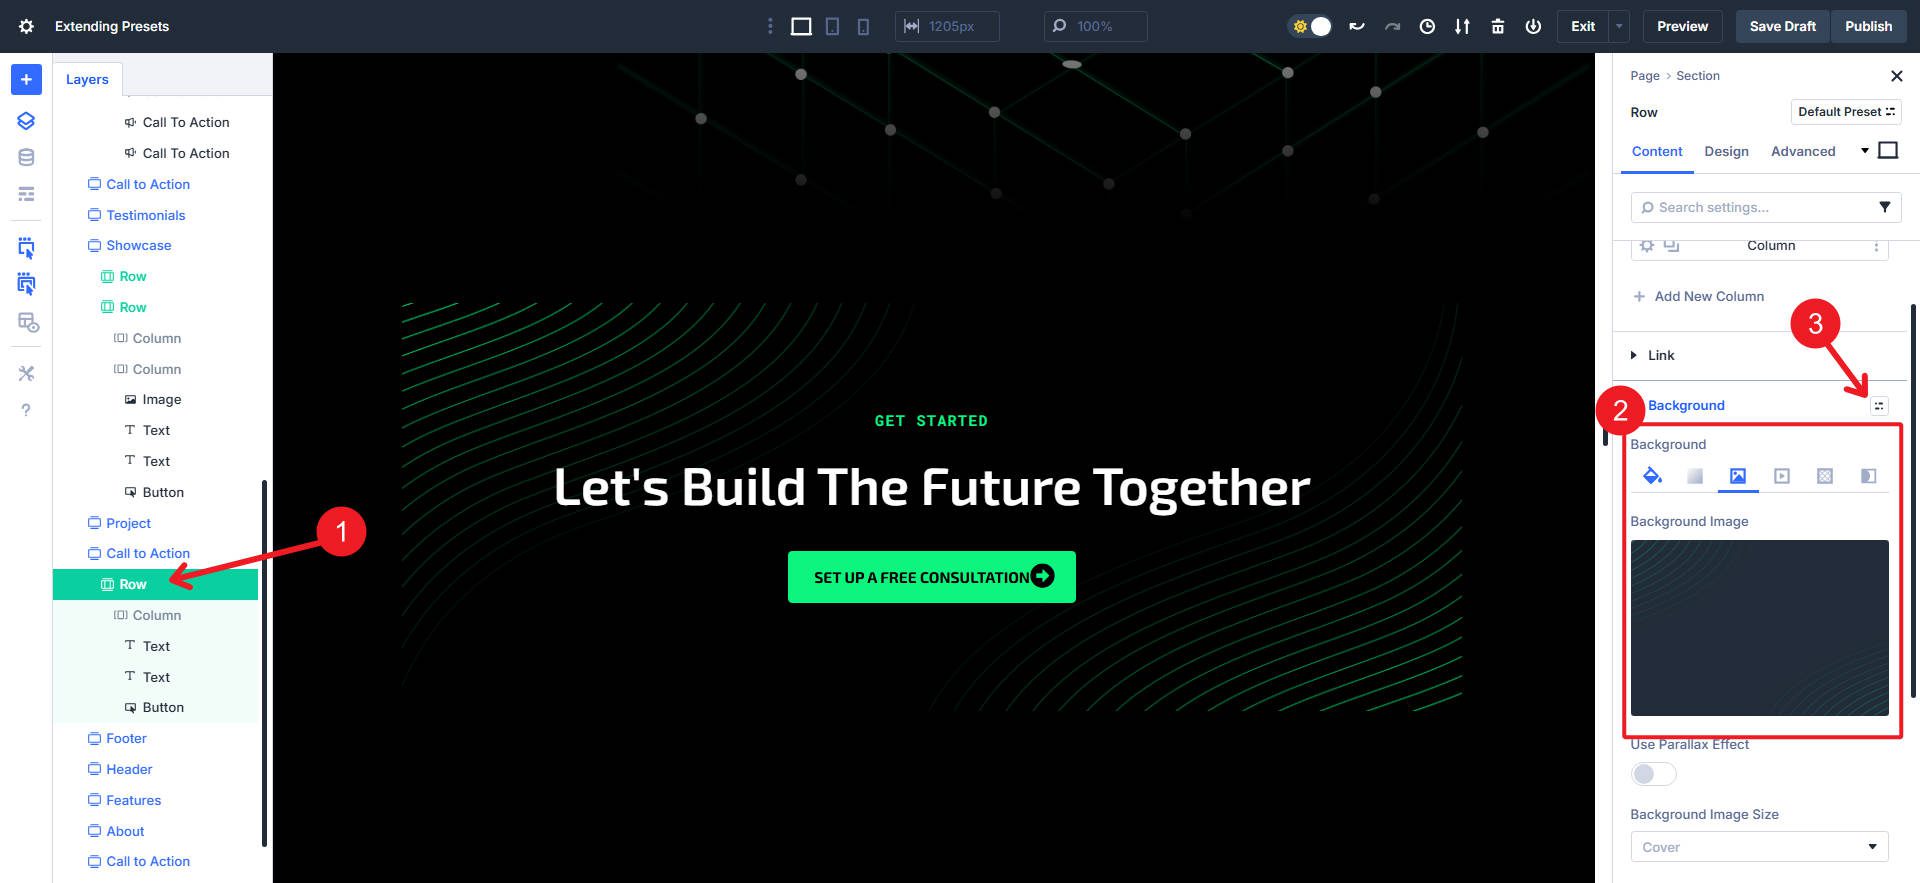
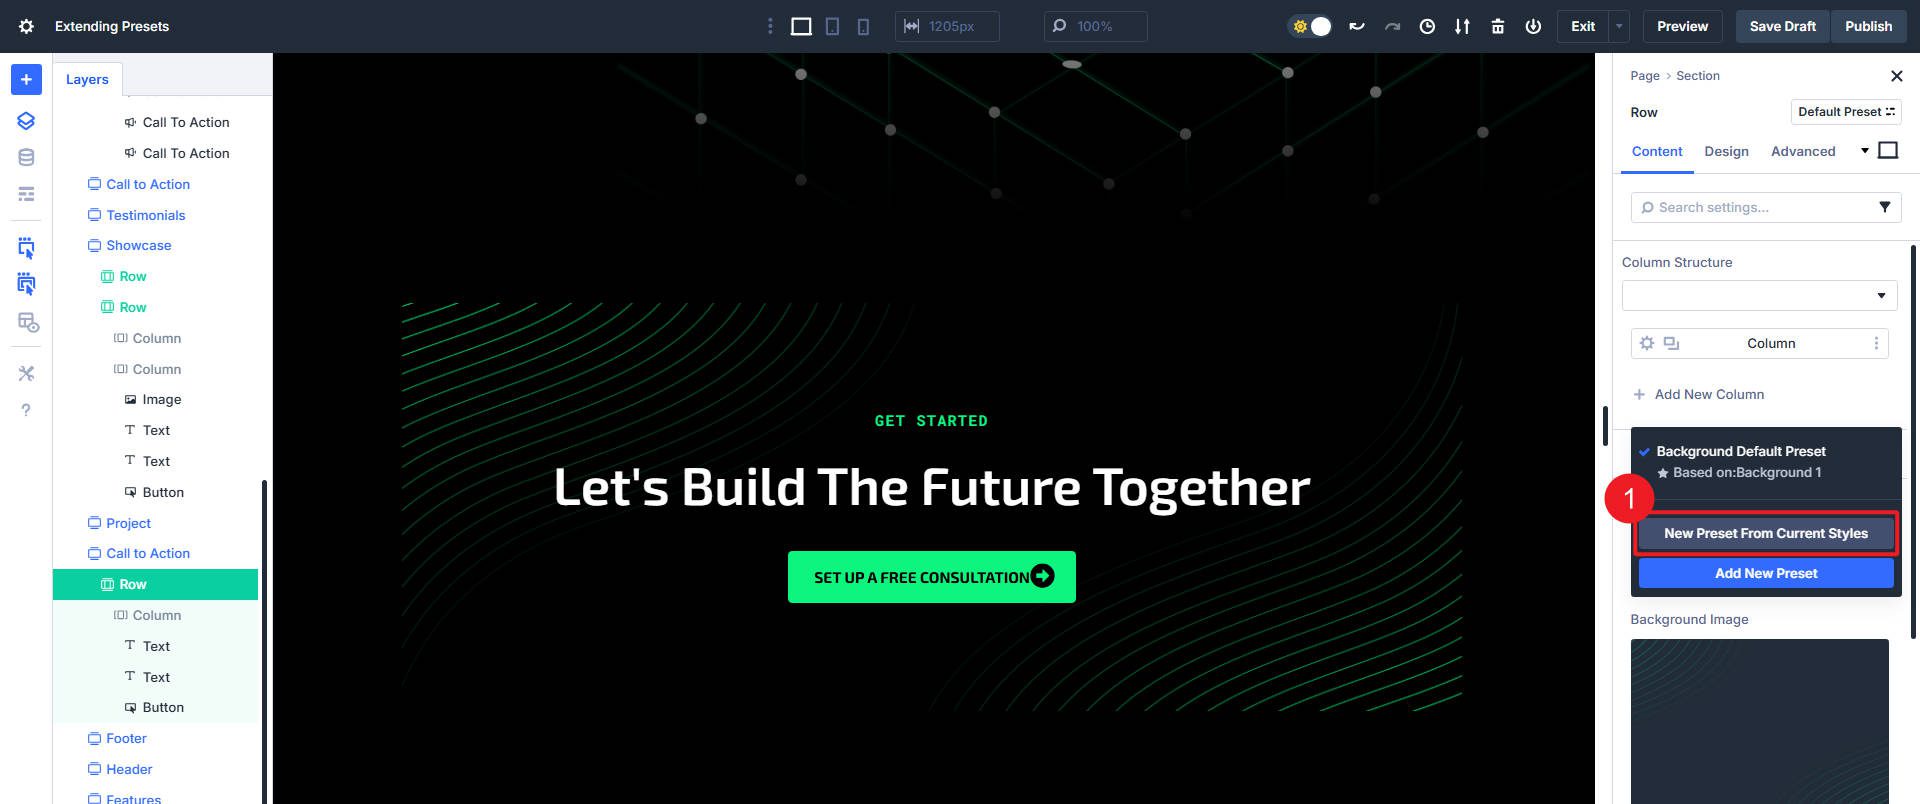
We can move the styles from the Option Group to an OG Preset by clicking “New Preset From Current Styles.”
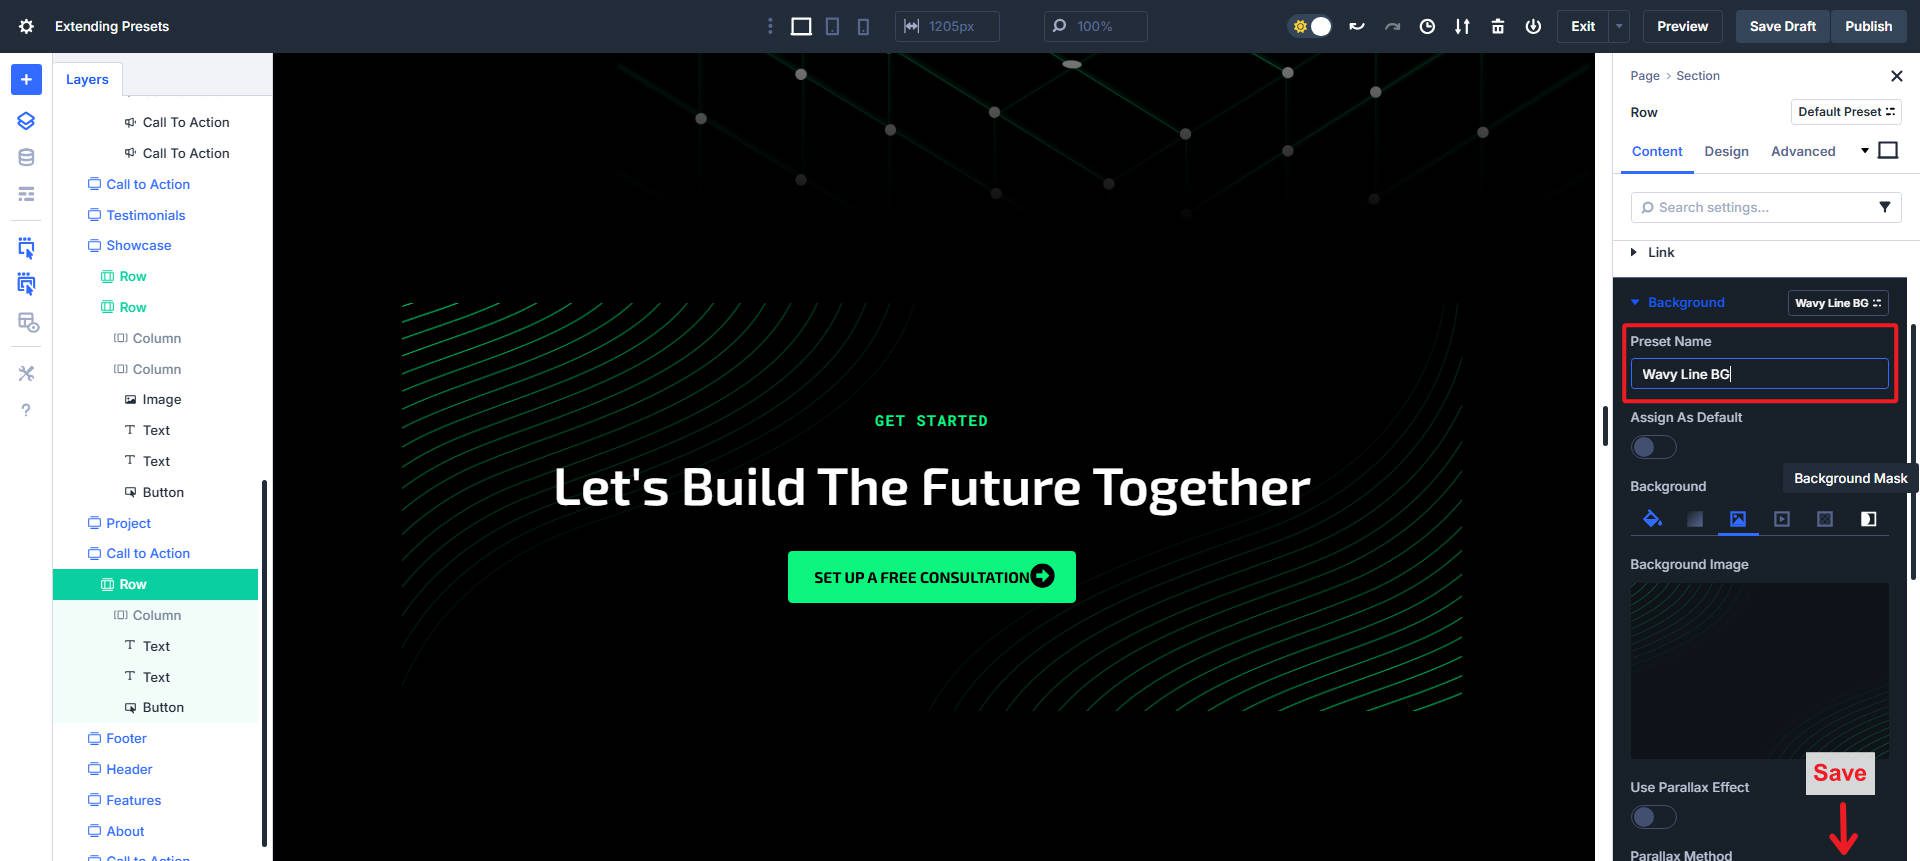
Give the Preset a name and click “Save.”
How To Open The Extend Preset Panel
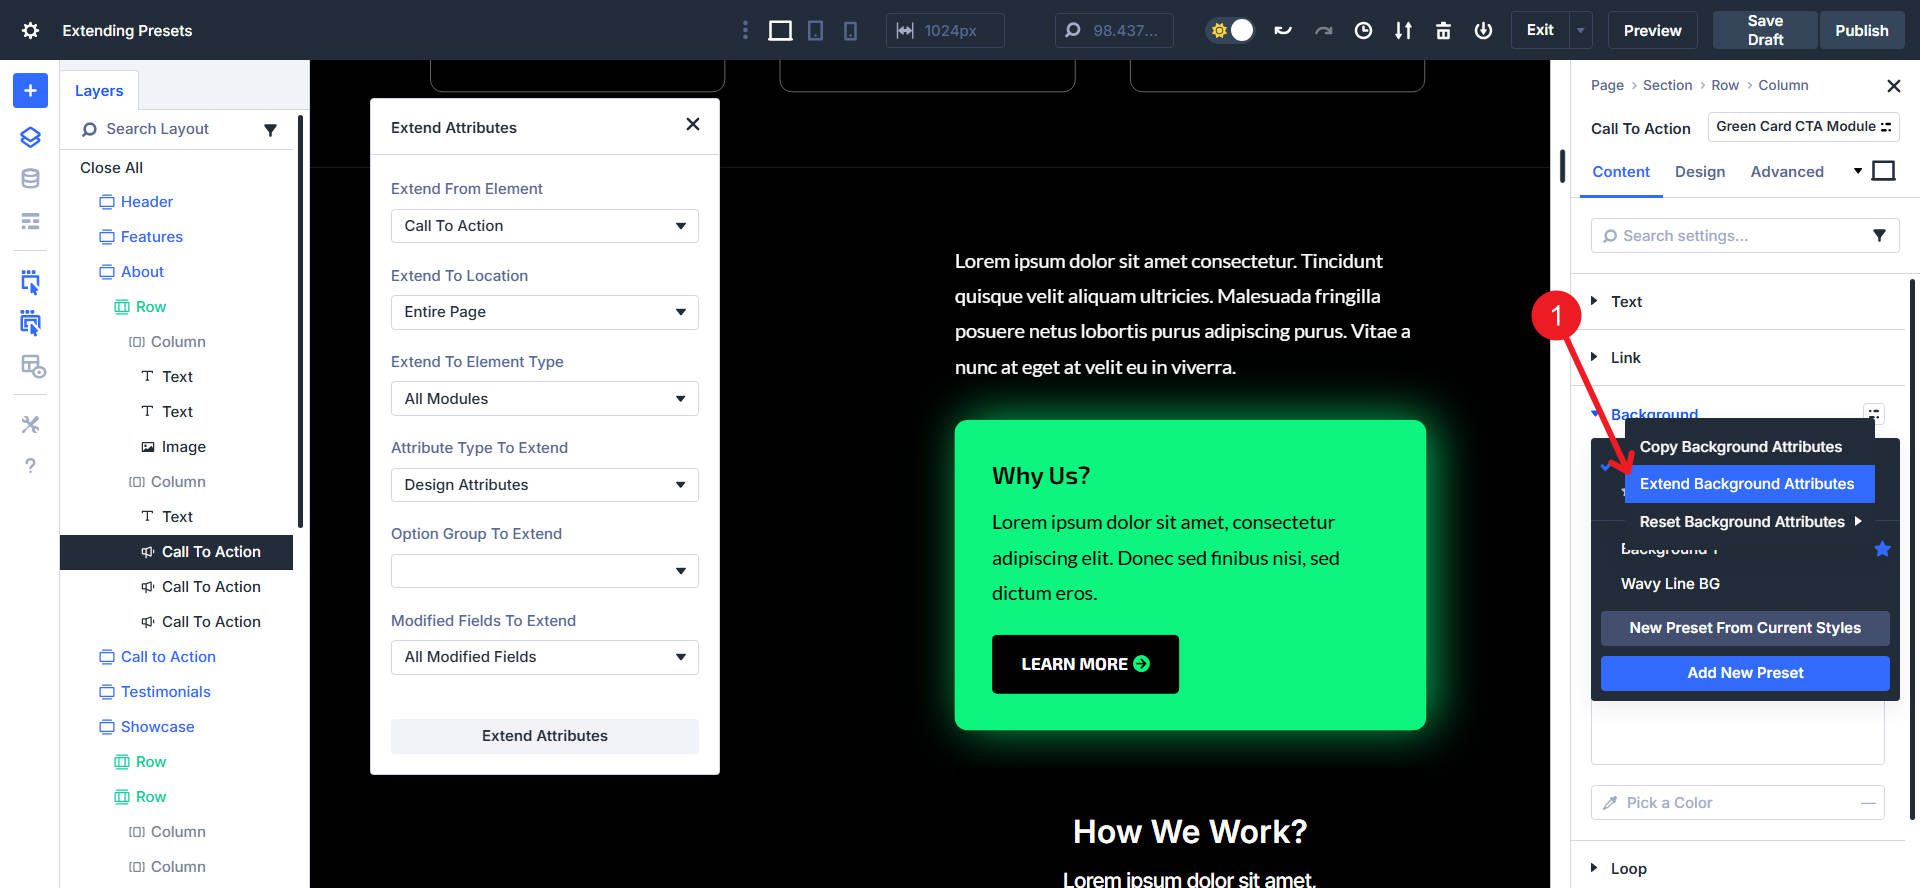
Right-click in the visual editor, click the three-dot icon in the Layers Panel, or right-click the Group Preset icon of the Option Group you want to extend.
After right-clicking any of these surfaces, find and select “Extend Attributes.” When you attempt to extend a Group Preset, you will see “Extend * Attributes” (where * is the group name you are extending from). So, for this example, we see “Extend Background Attributes.” This brings a preselected Extend Modal which we can customize to our needs.
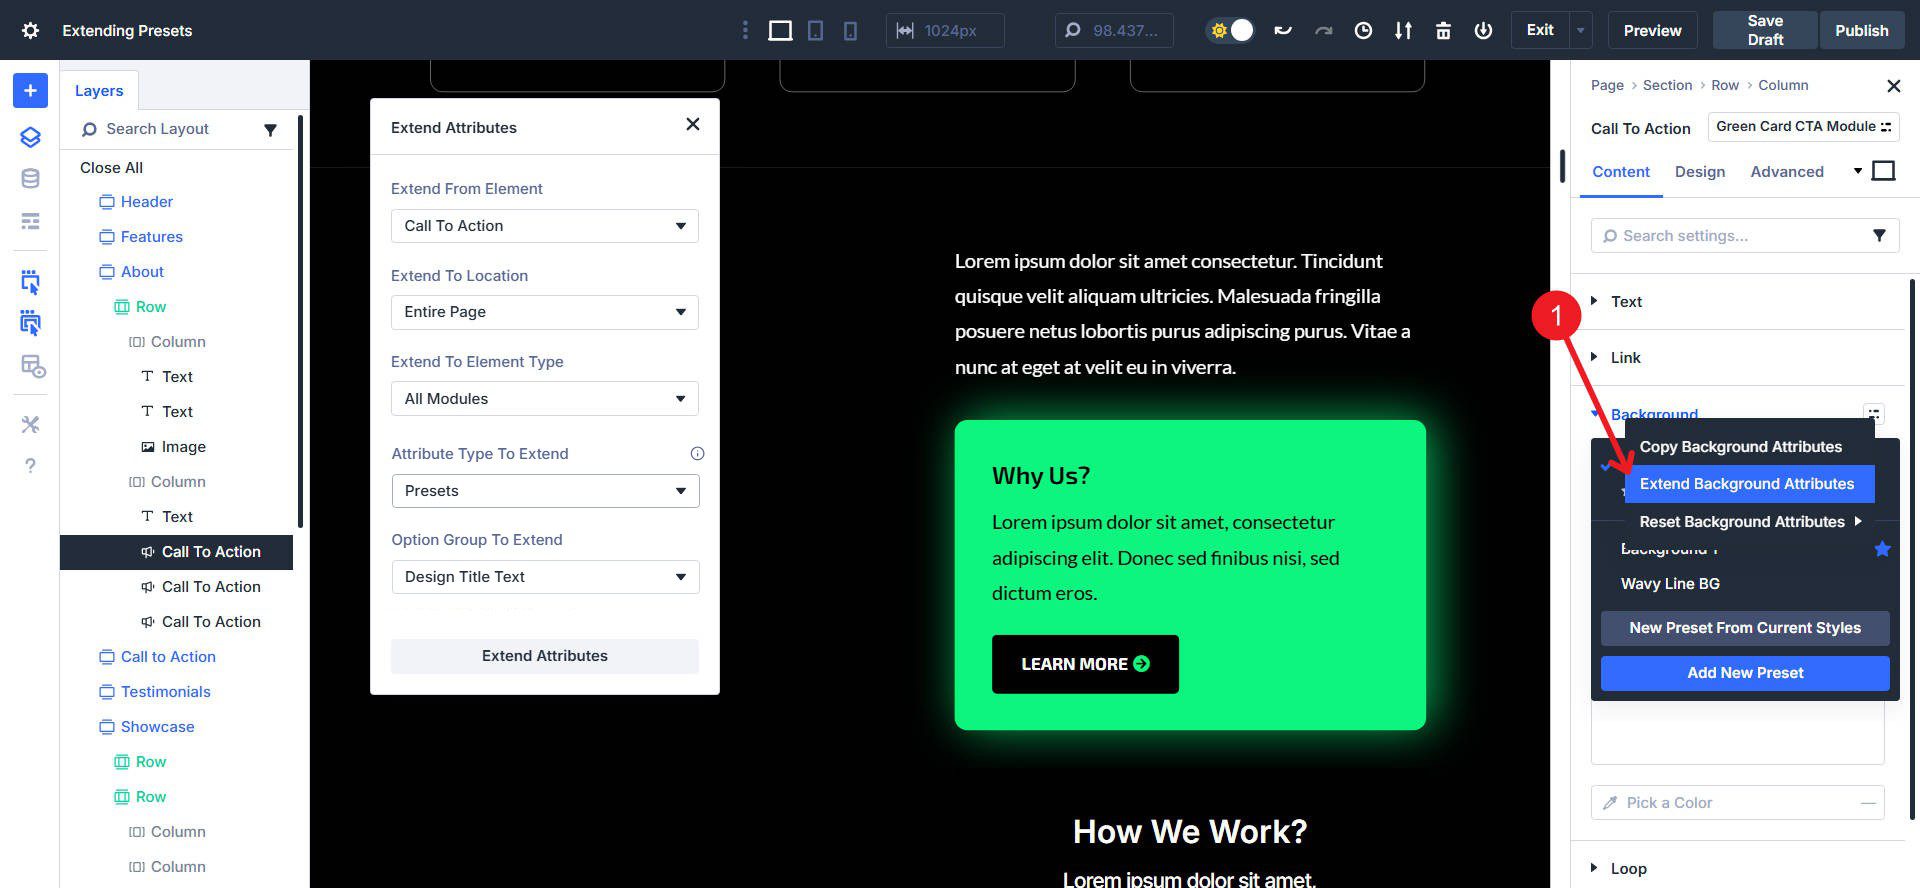
The Extend Presets option only works for Option Group Presets. If you want to Extend Element Presets, you have to use Extend Design Attributes option (or manually apply the Element Preset, which does not take much time).
Using The Extend Panel
There are a lot of different options in the Extend Panel. But a few of them are auto-filled, and the others help you manage the scope of your extend action. Here’s a breakdown of each option.
Extend From Element
Typically prefilled from whatever you originally right-click to extend.
Extend To Location
This refers to the scope that the extend will go through. Extend through the whole page, the parent section/row, or only down through its children.
Extend To Element Type
This is an important option that limits the type of elements (modules or containers) that will receive the preset. For example, if you want to apply a Border Radius OG Preset to only buttons, you can limit the element type.
Attribute Type To Extend
This is usually preselected based on what you choose to extend for presets, but you modify it to be more or less specific.
- All Attributes – Extend everything, including content, presets, and modified styles you copied from the source element.
- Design Attributes – Extend all design-related attributes, including presets and modified styles, from the source element. **This is the only way to extend Element Presets.
- Style Attributes – Extend only the modified styles you copied from the source element (so no Presets are extended with this option).
- Content Attributes – Extend only the content attributes you copied from the source element.
- Presets – Extend only the Option Group Preset(s) from the source element.
Modified Fields To Extend
This option is not available when extending only a Preset. But if you are extending Design Attributes (Presets + Modified Styles), you might see this option to limit to very specific modified styles (thus not extending a Preset).
When To Use Extend Presets
Presets are a phenomenal tool. They are easy to set up and even easier to deploy to modules or option groups. They take your hard work and make it usable across your site. Adding a preset to a module was easy in and of itself. Simply enter an unstyled module/element/option group and assign the Preset.
However, if you have many such modules/elements/option groups to which you want to assign the Preset, you can extend it to all at once. The time savings are more pronounced when you realize that you can extend Presets and static styles at the same time. Way less copying and pasting. Below is an Element Preset for the CTA Module being extended, along with a CSS class to all matching elements.
This extended all presets, static designs, and even CSS classes from the original CTA Module to the next. Imagine having another CTA card stack lower down the page and extending all of this in 7 seconds to 5 modules.
Try Extend Attributes In Divi 5 Today
Divi 5 is improving in every category. It’s faster, has more features, and has crisp UI and time-saving shortcuts. It has never been a better time to be a Divi user.
If you want more, read the feature deep dives. Start with Design Variables for a scalable system you can rely on. Then, learn about Preset-based design. If you need more, follow that up with learning more about Extend Attributes.
Ready to try Divi 5? Use it on your next new site build or jump into the demo to see how Divi 5 is built for the future of website building.


Leave A Reply