
With the Loop Builder feature in Divi 5, you can easily create a responsive grid using the free version of Advanced Custom Fields (ACF). In this post, we’ll demonstrate how to configure ACF, set up CSS Grid, and use the Loop Builder to build a team portfolio grid in well under an hour.
If you haven’t already, head over to the Elegant Themes Members’ Area and download the latest Divi 5 Beta so you can follow along with the tutorial.
Let’s dive in.
What Is Loop Builder?
Divi 5’s Loop Builder is a feature that enables you to create dynamic, repeatable layouts directly in the Visual Builder or Theme Builder. This removes the limitations of Divi’s standard Blog and Portfolio Modules. Unlike traditional modules, the Loop Builder provides full control over queries and designs for virtually any content type.
You can loop through posts, terms, users, or custom post types — like projects, or in the case of this tutorial, team members — pulling in dynamic data effortlessly. Style just one card in the Loop, and every additional item automatically inherits that design, saving hours of manual tweaking. Incorporate Flexbox and CSS Grid for advanced layouts, such as masonry grids and carousels (using the Group Carousel module), to achieve perfectly symmetrical arrangements. It works seamlessly whether you’re building on a page in the Visual Builder or globally in the Theme Builder, making it ideal for scalable, maintainable sites.
How To Build A Team Directory Using Loop Builder
For this tutorial, we’ll be creating a custom post type for Team Members using the free version of ACF. Below, we walk through the steps to set up ACF, including creating a custom post type, field group, and custom fields to tie into the Loop. By the end of this post, you’ll know how to build a fully responsive team member showcase that you can use on any Divi website.
Step 1: Configure ACF
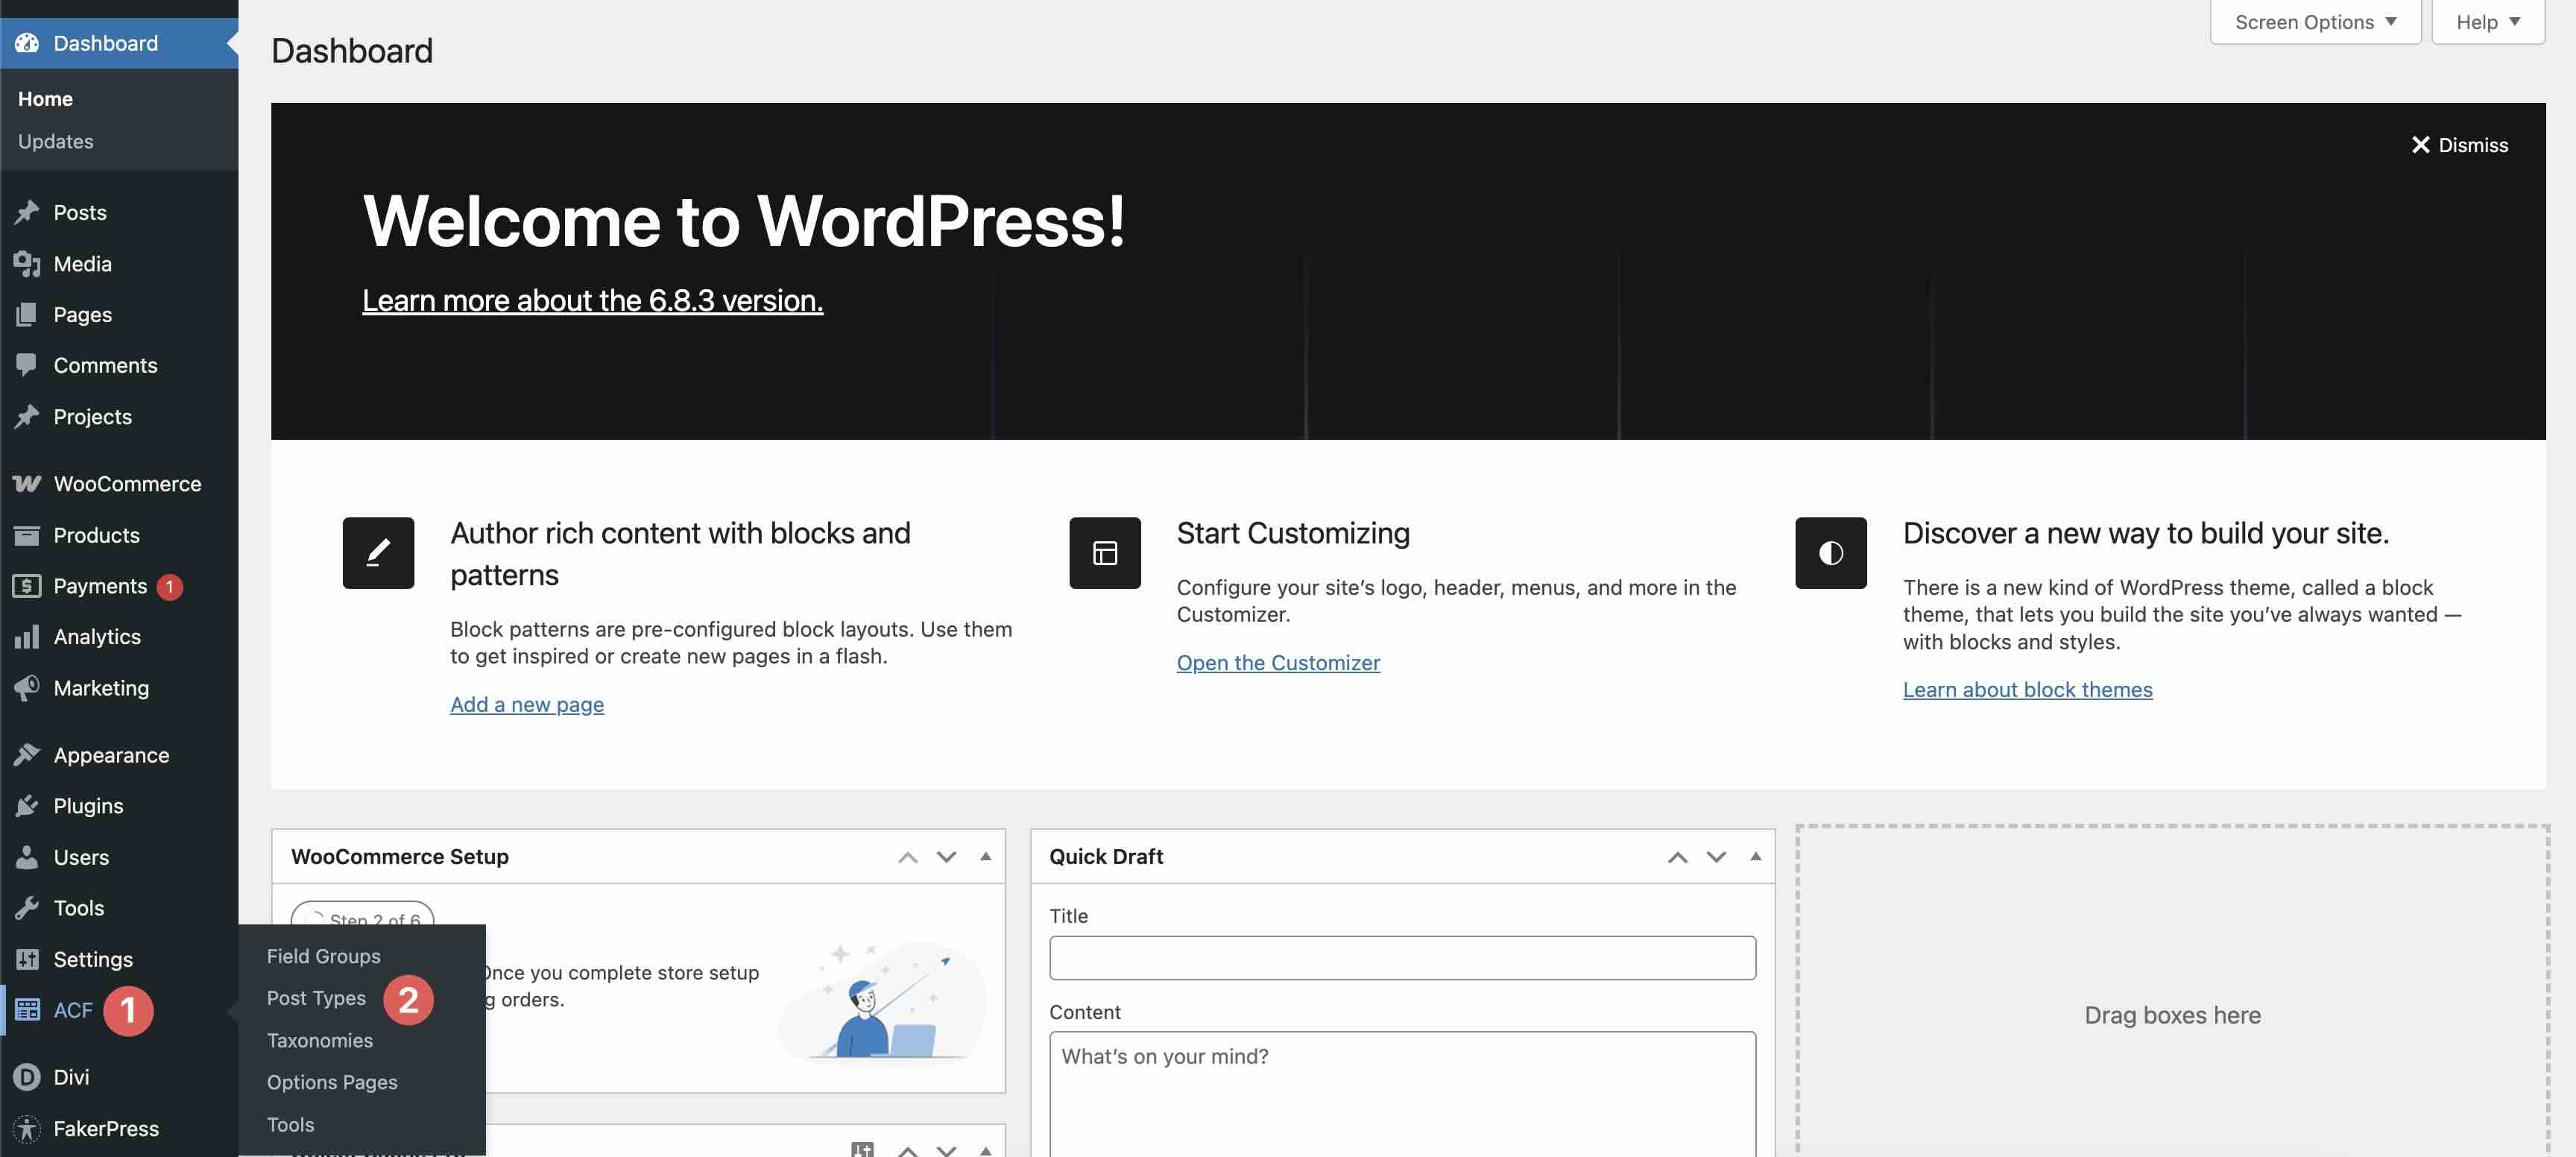
Get started by installing the free version of Advanced Custom Fields (ACF) on your Divi website. Activate the plugin and navigate to ACF > Post Types.
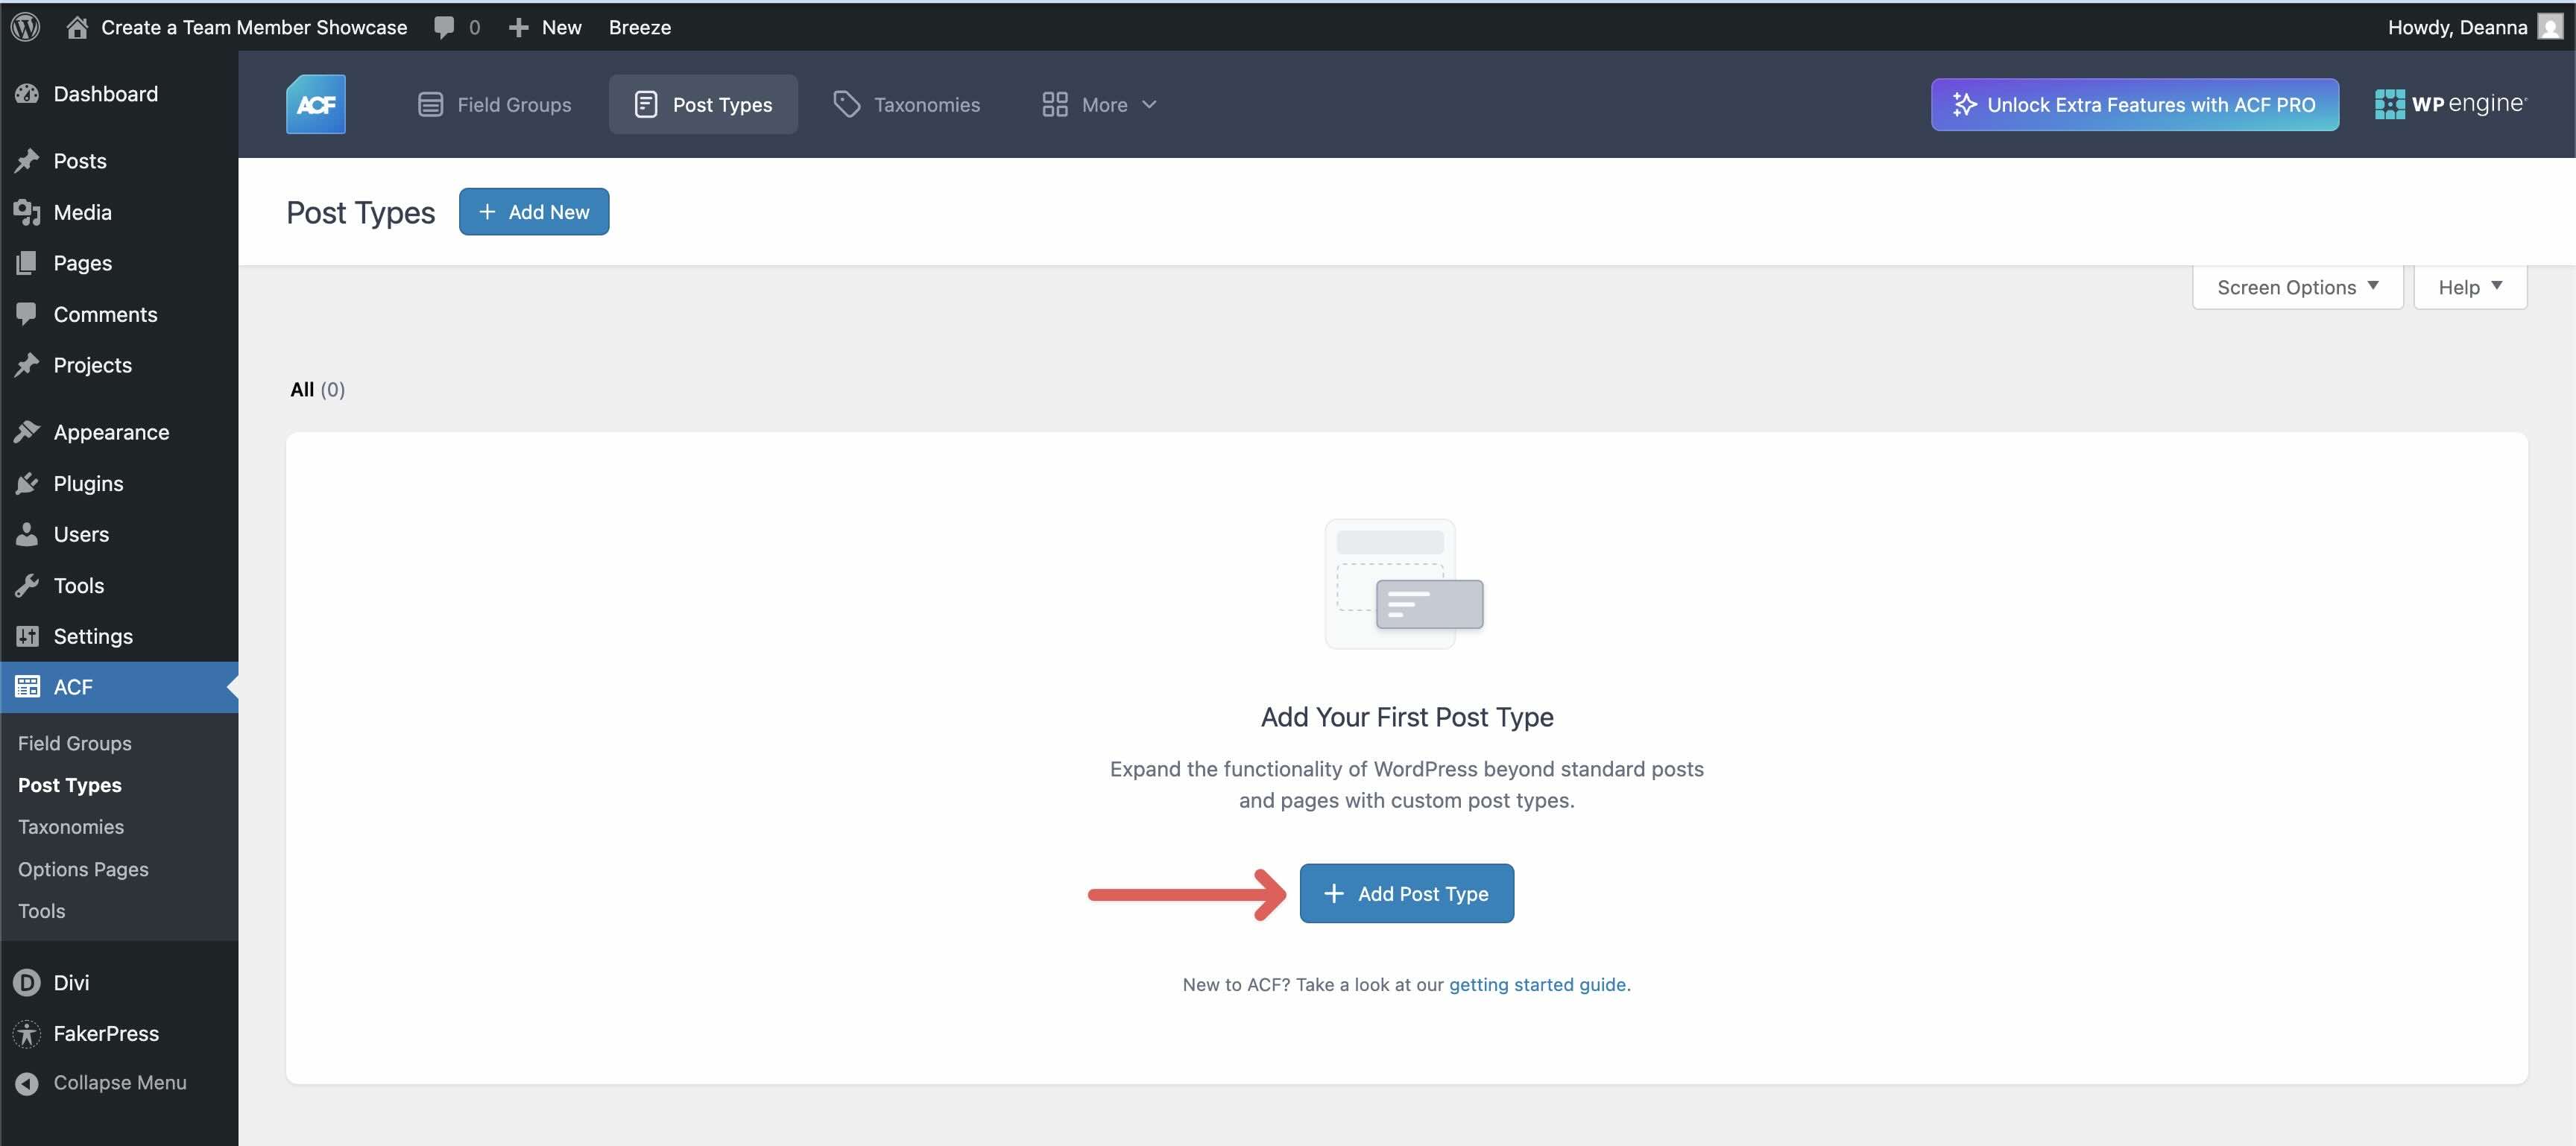
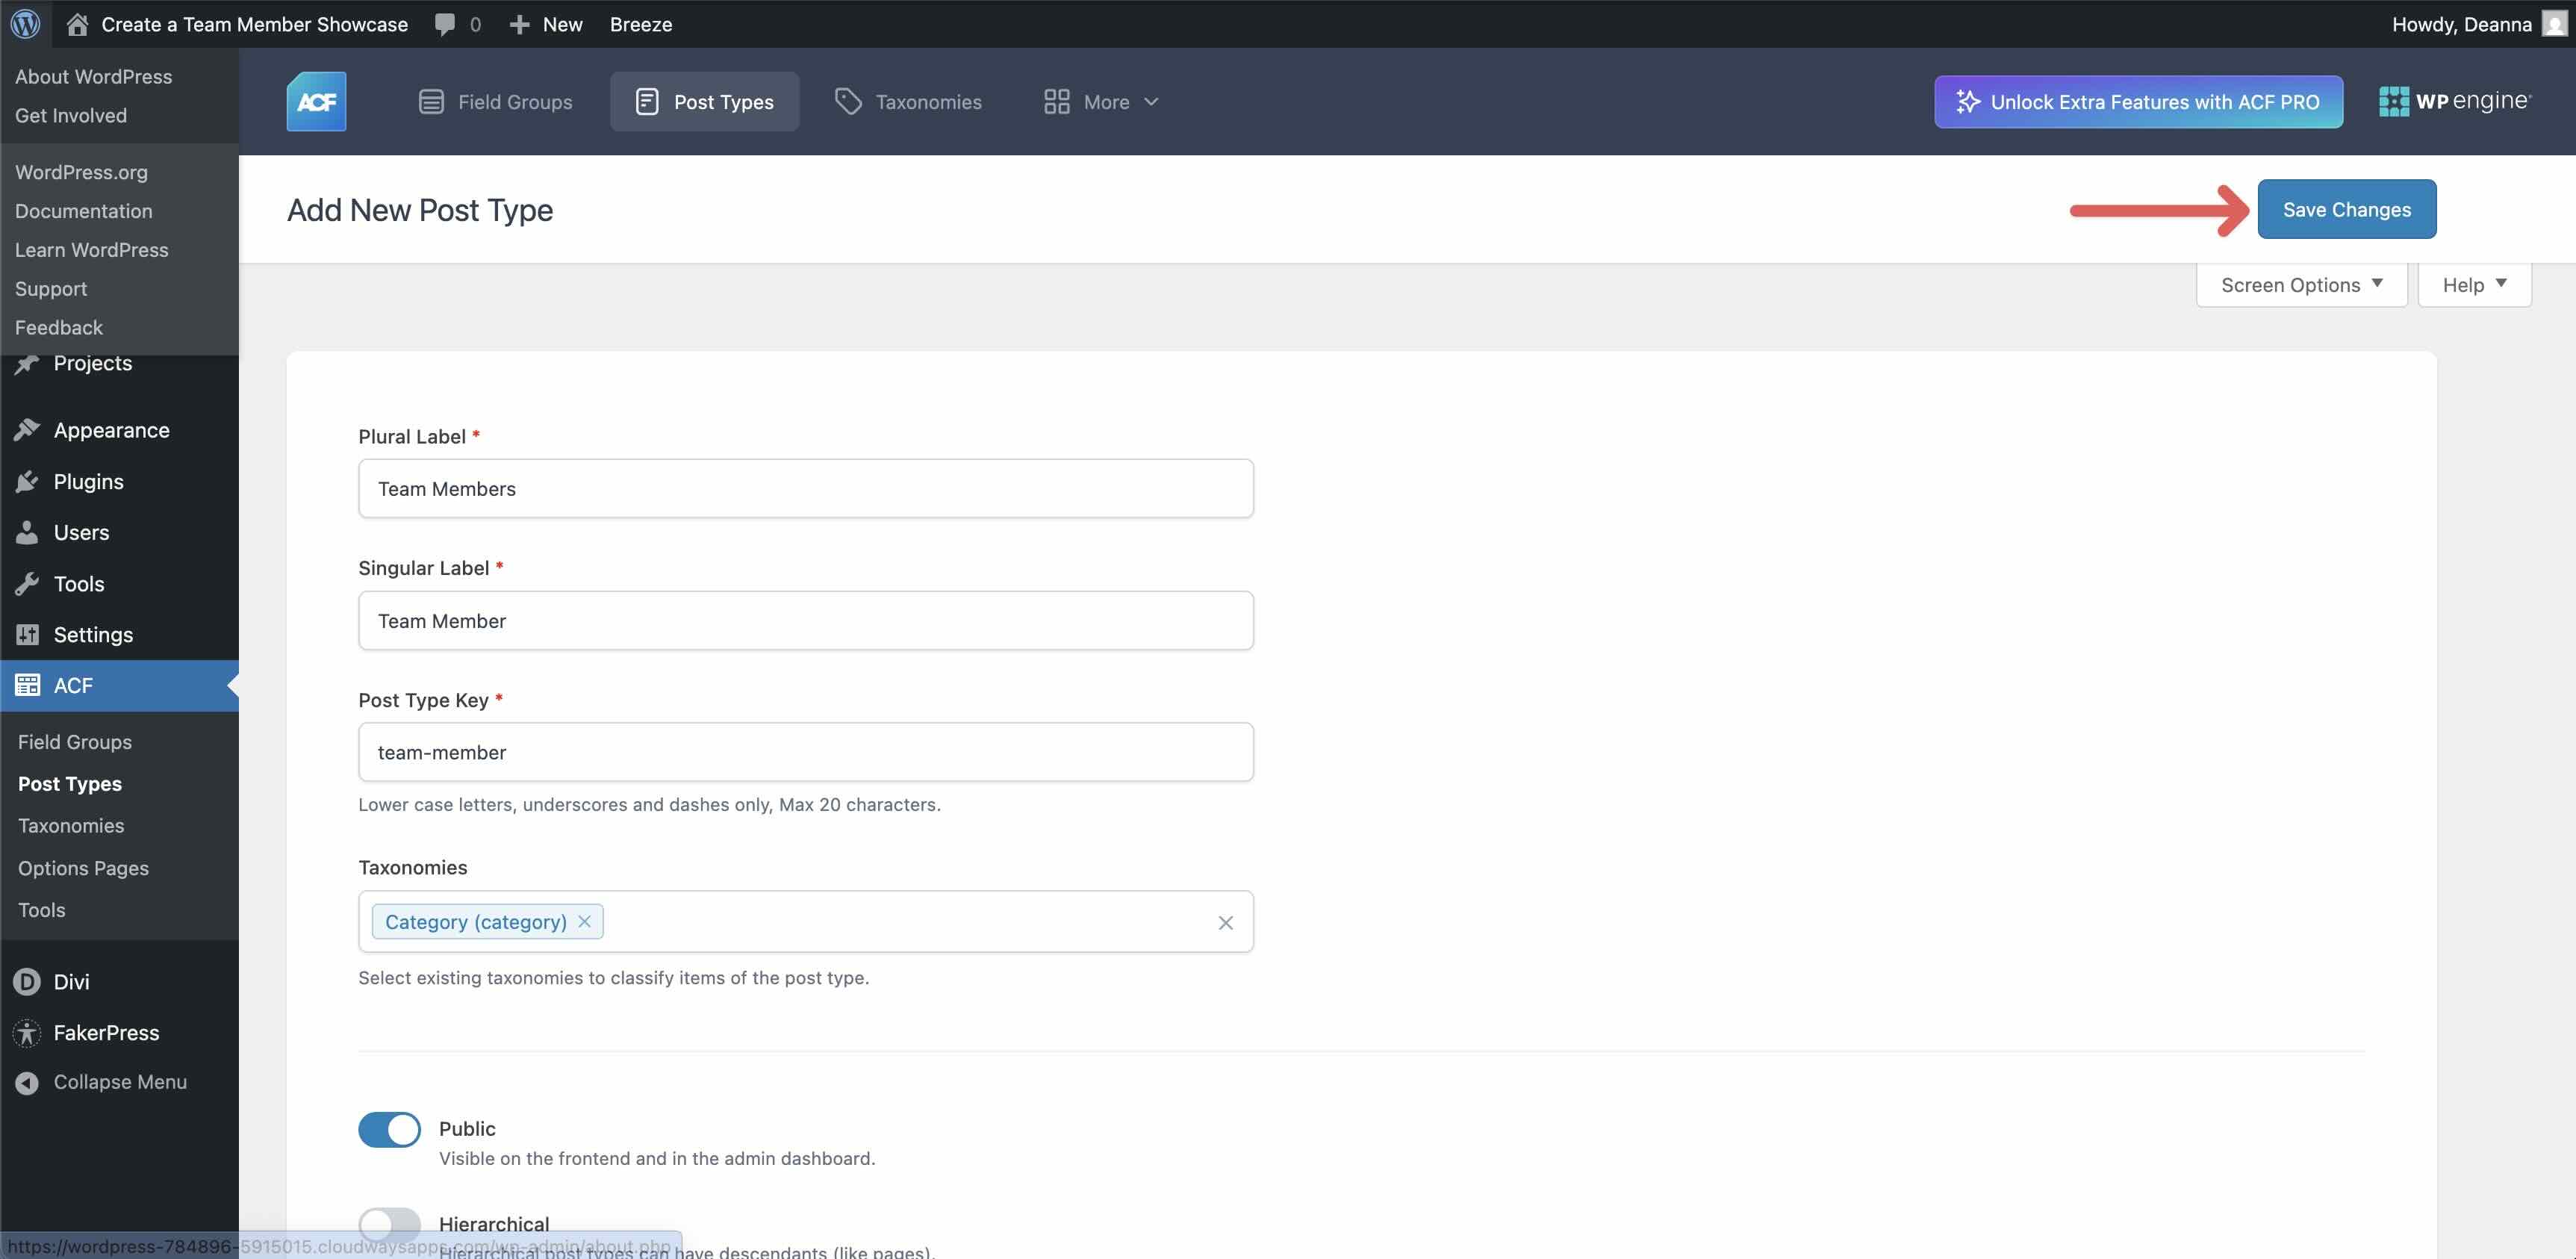
Click the + Add Post Type button to create a new post type.
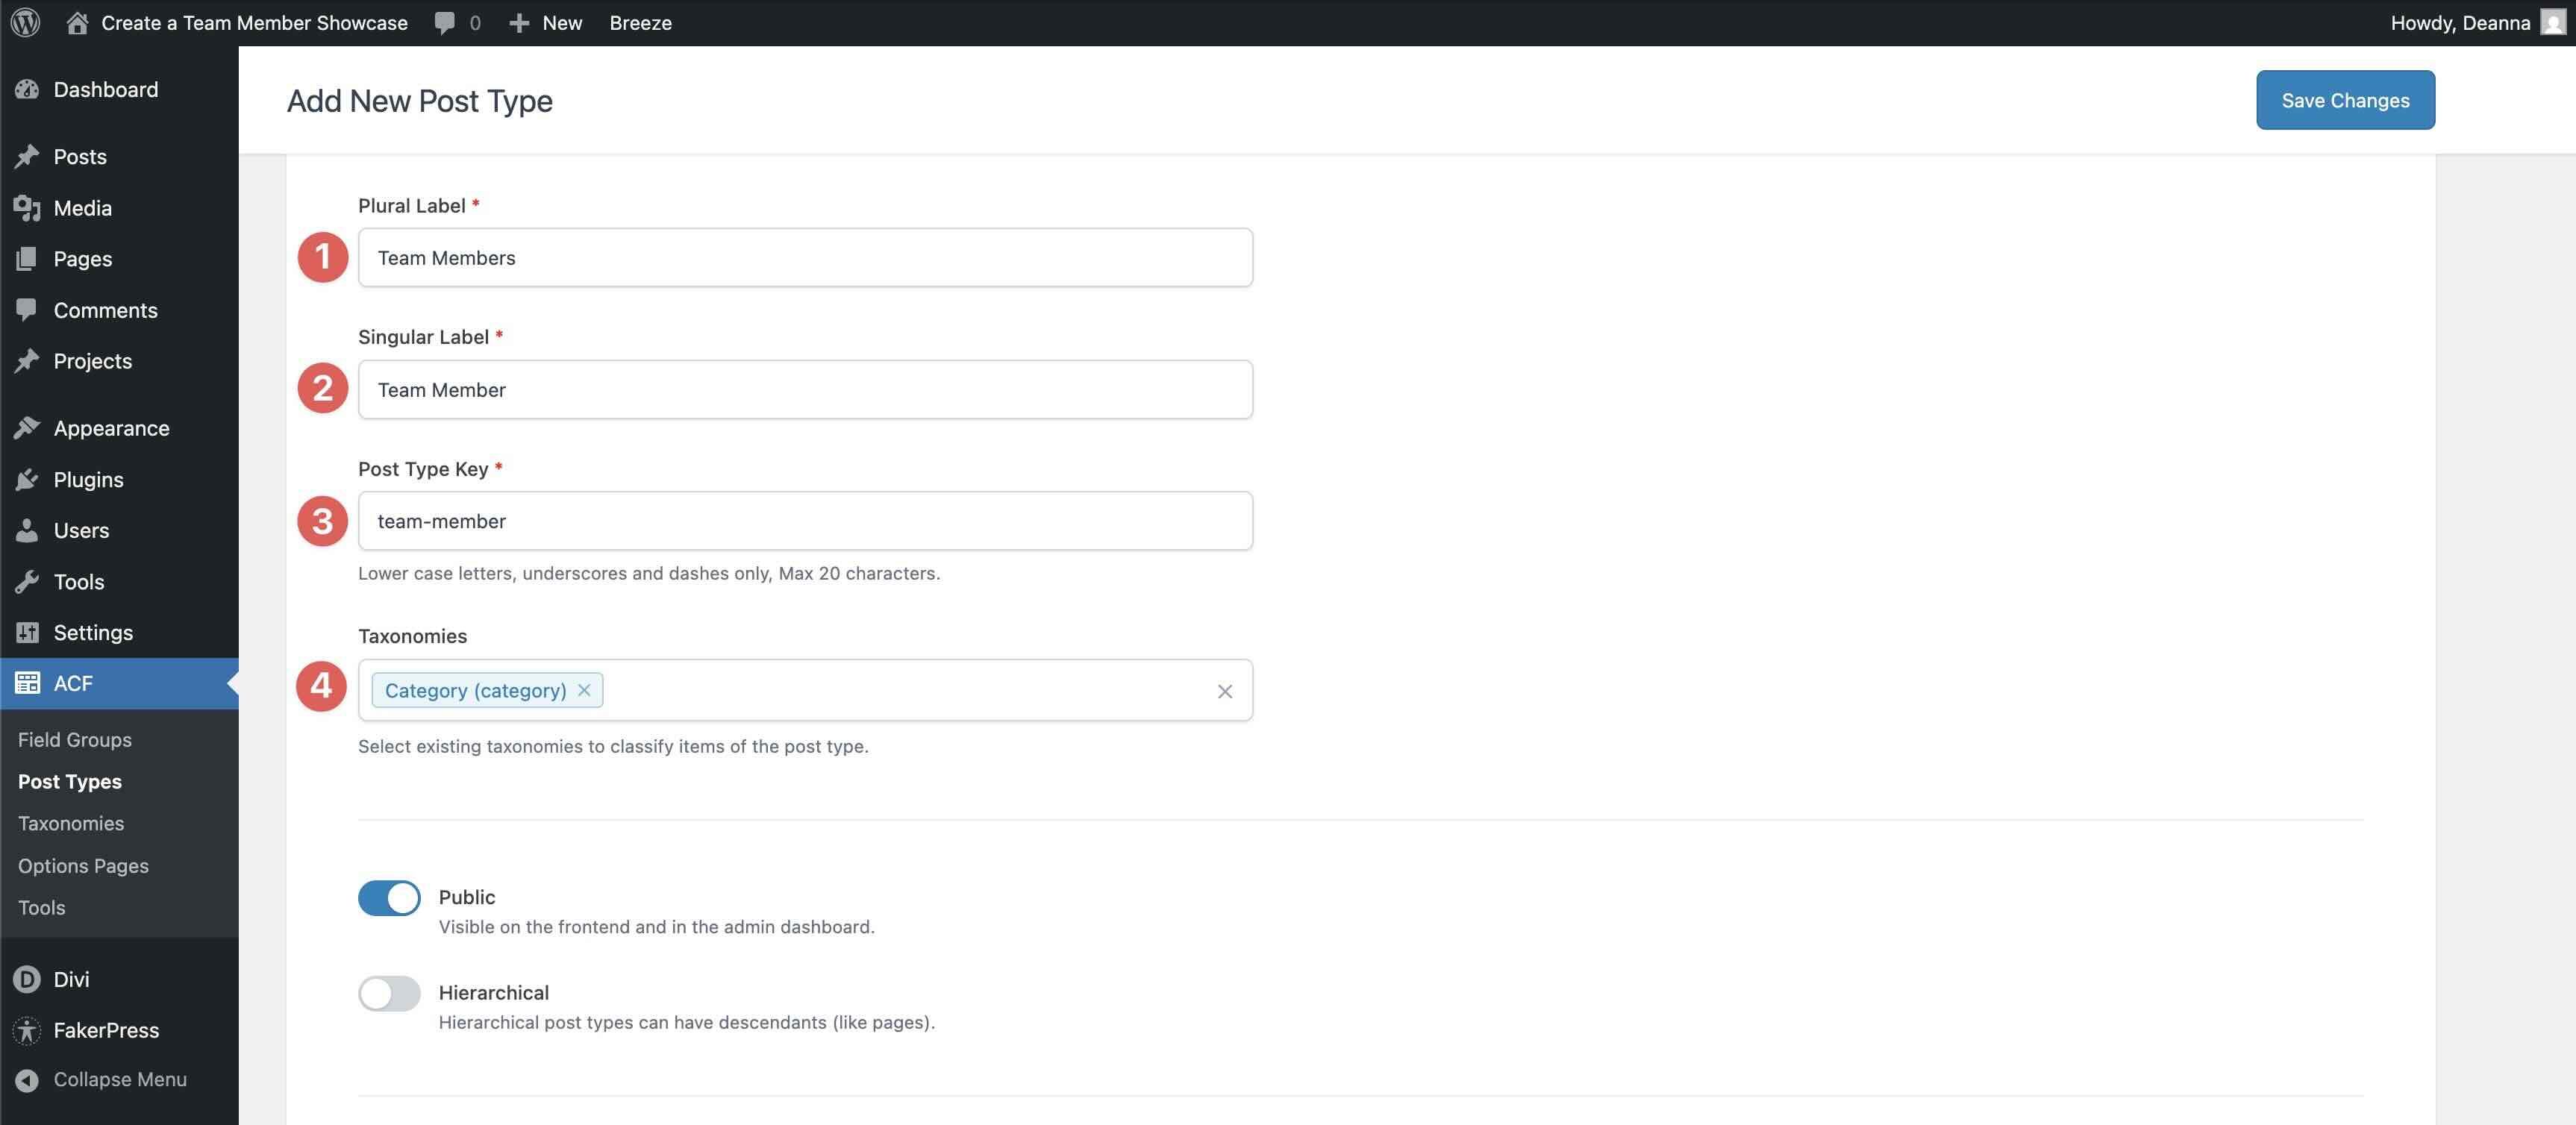
Fill in the essential labels:
- Plural Label: Teams
- Singular Label: Team Member
- Post Type Key: team_member
- Taxonomies: Category
Ensure that Public is toggled on.
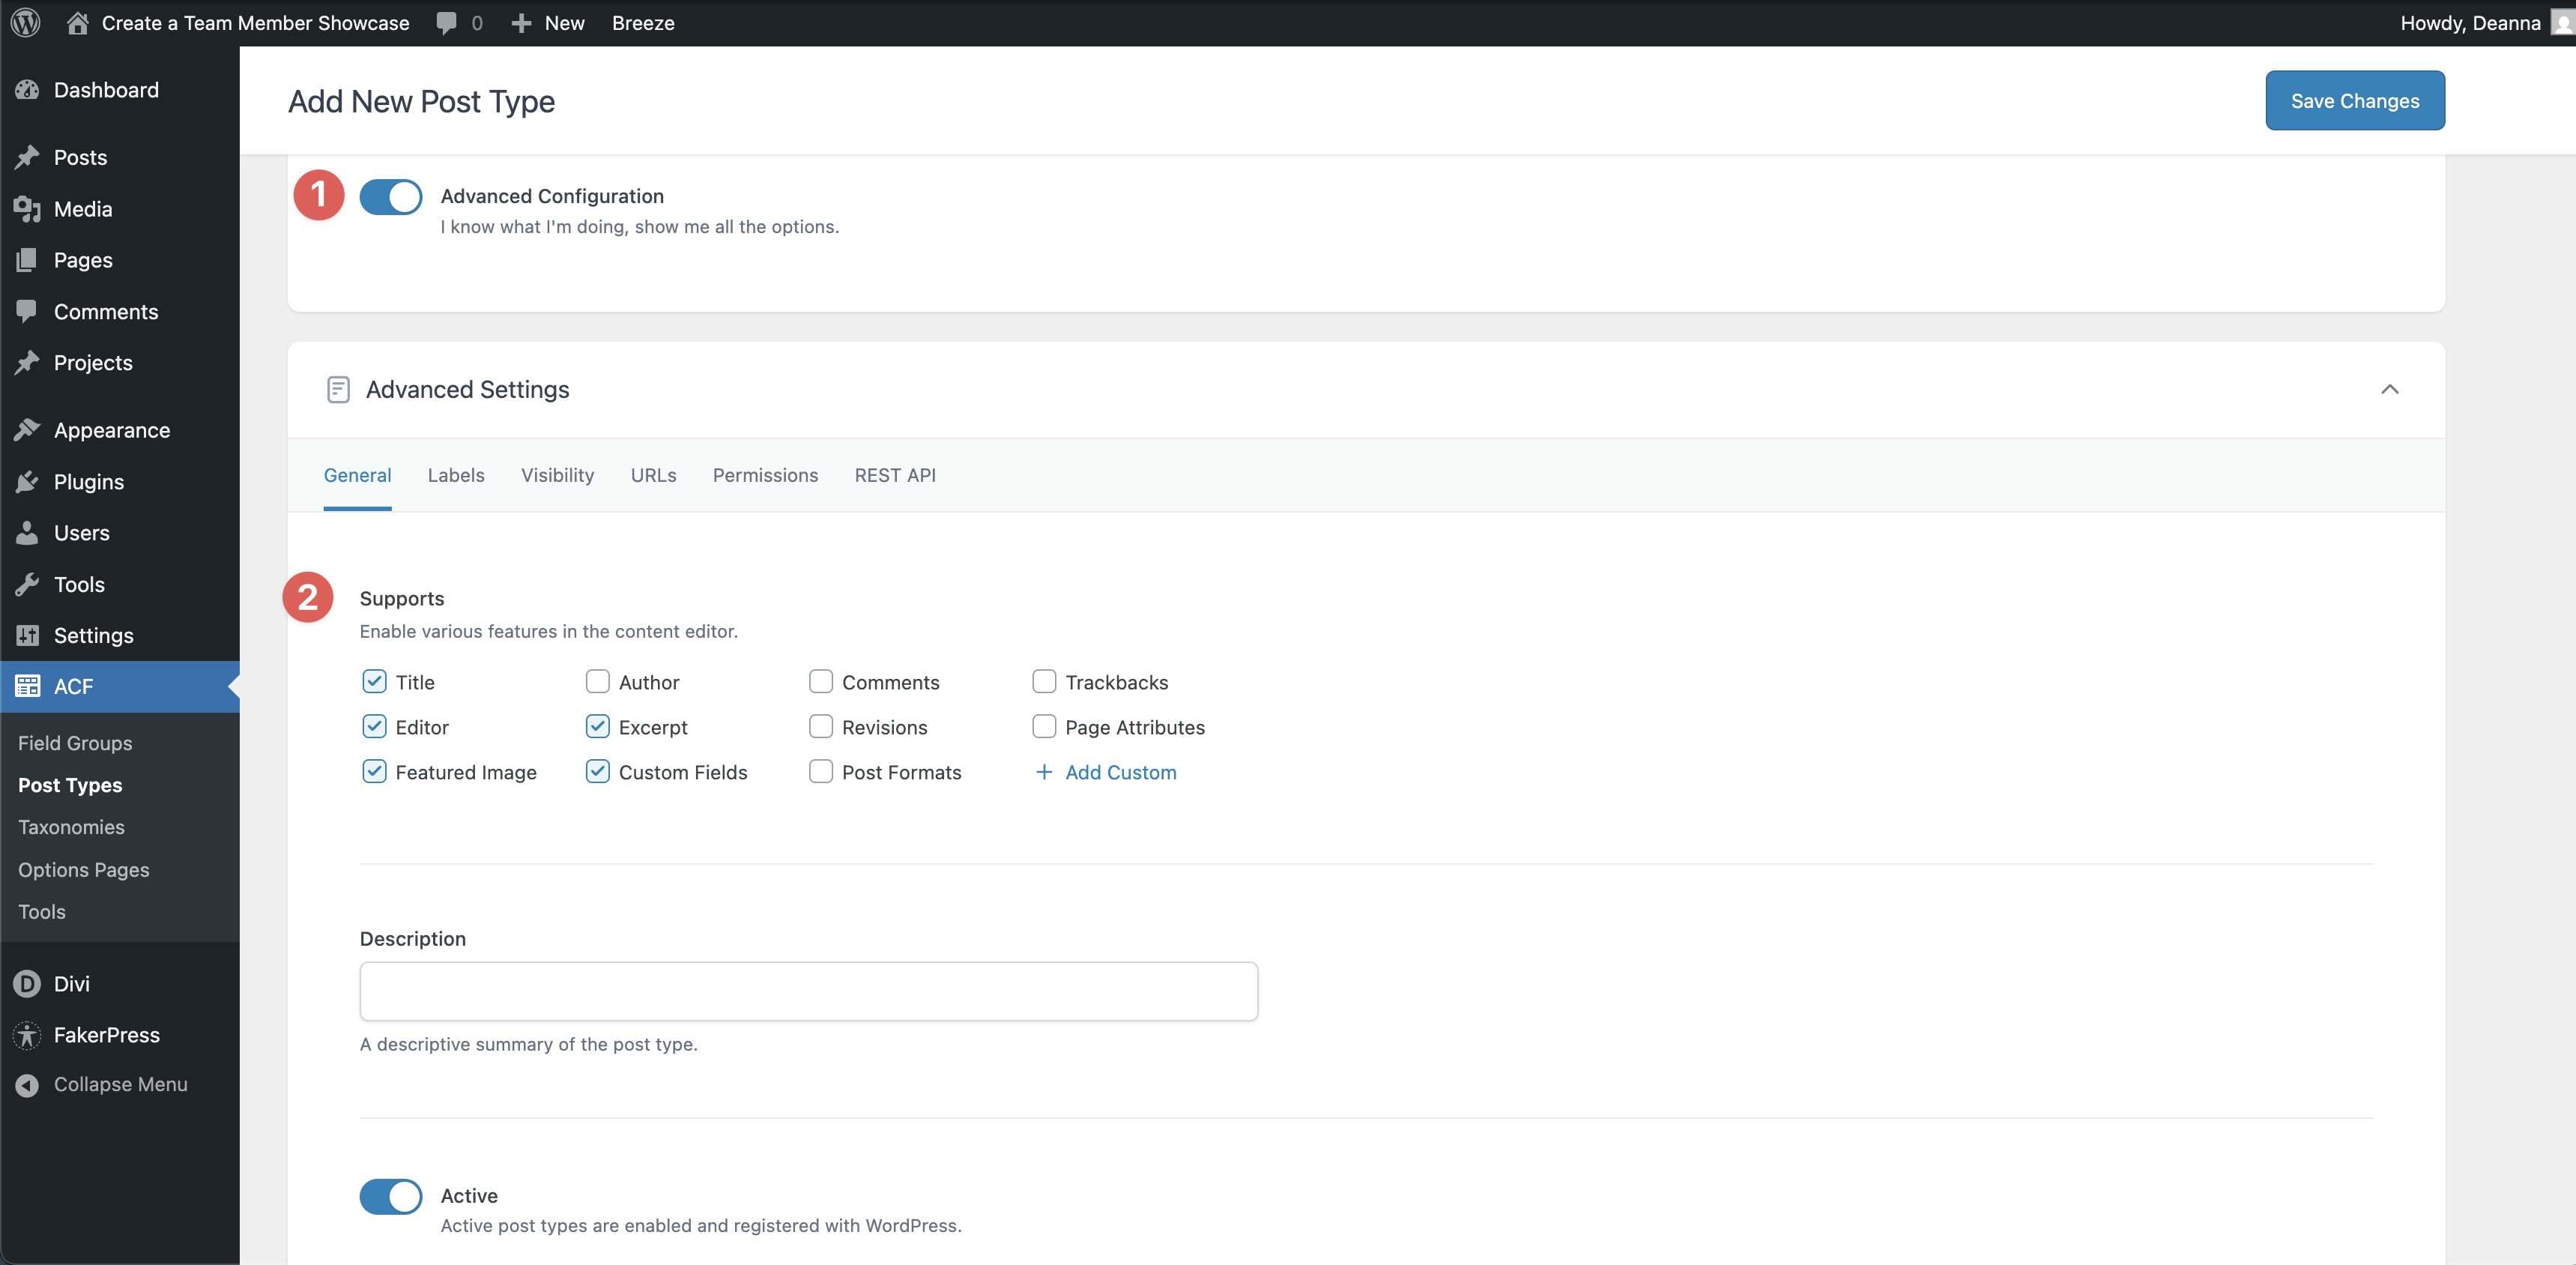
Toggle on Advanced Configuration. In the General tab, ensure that Featured Image, Title, Editor, Excerpt, and Custom Fields are enabled.
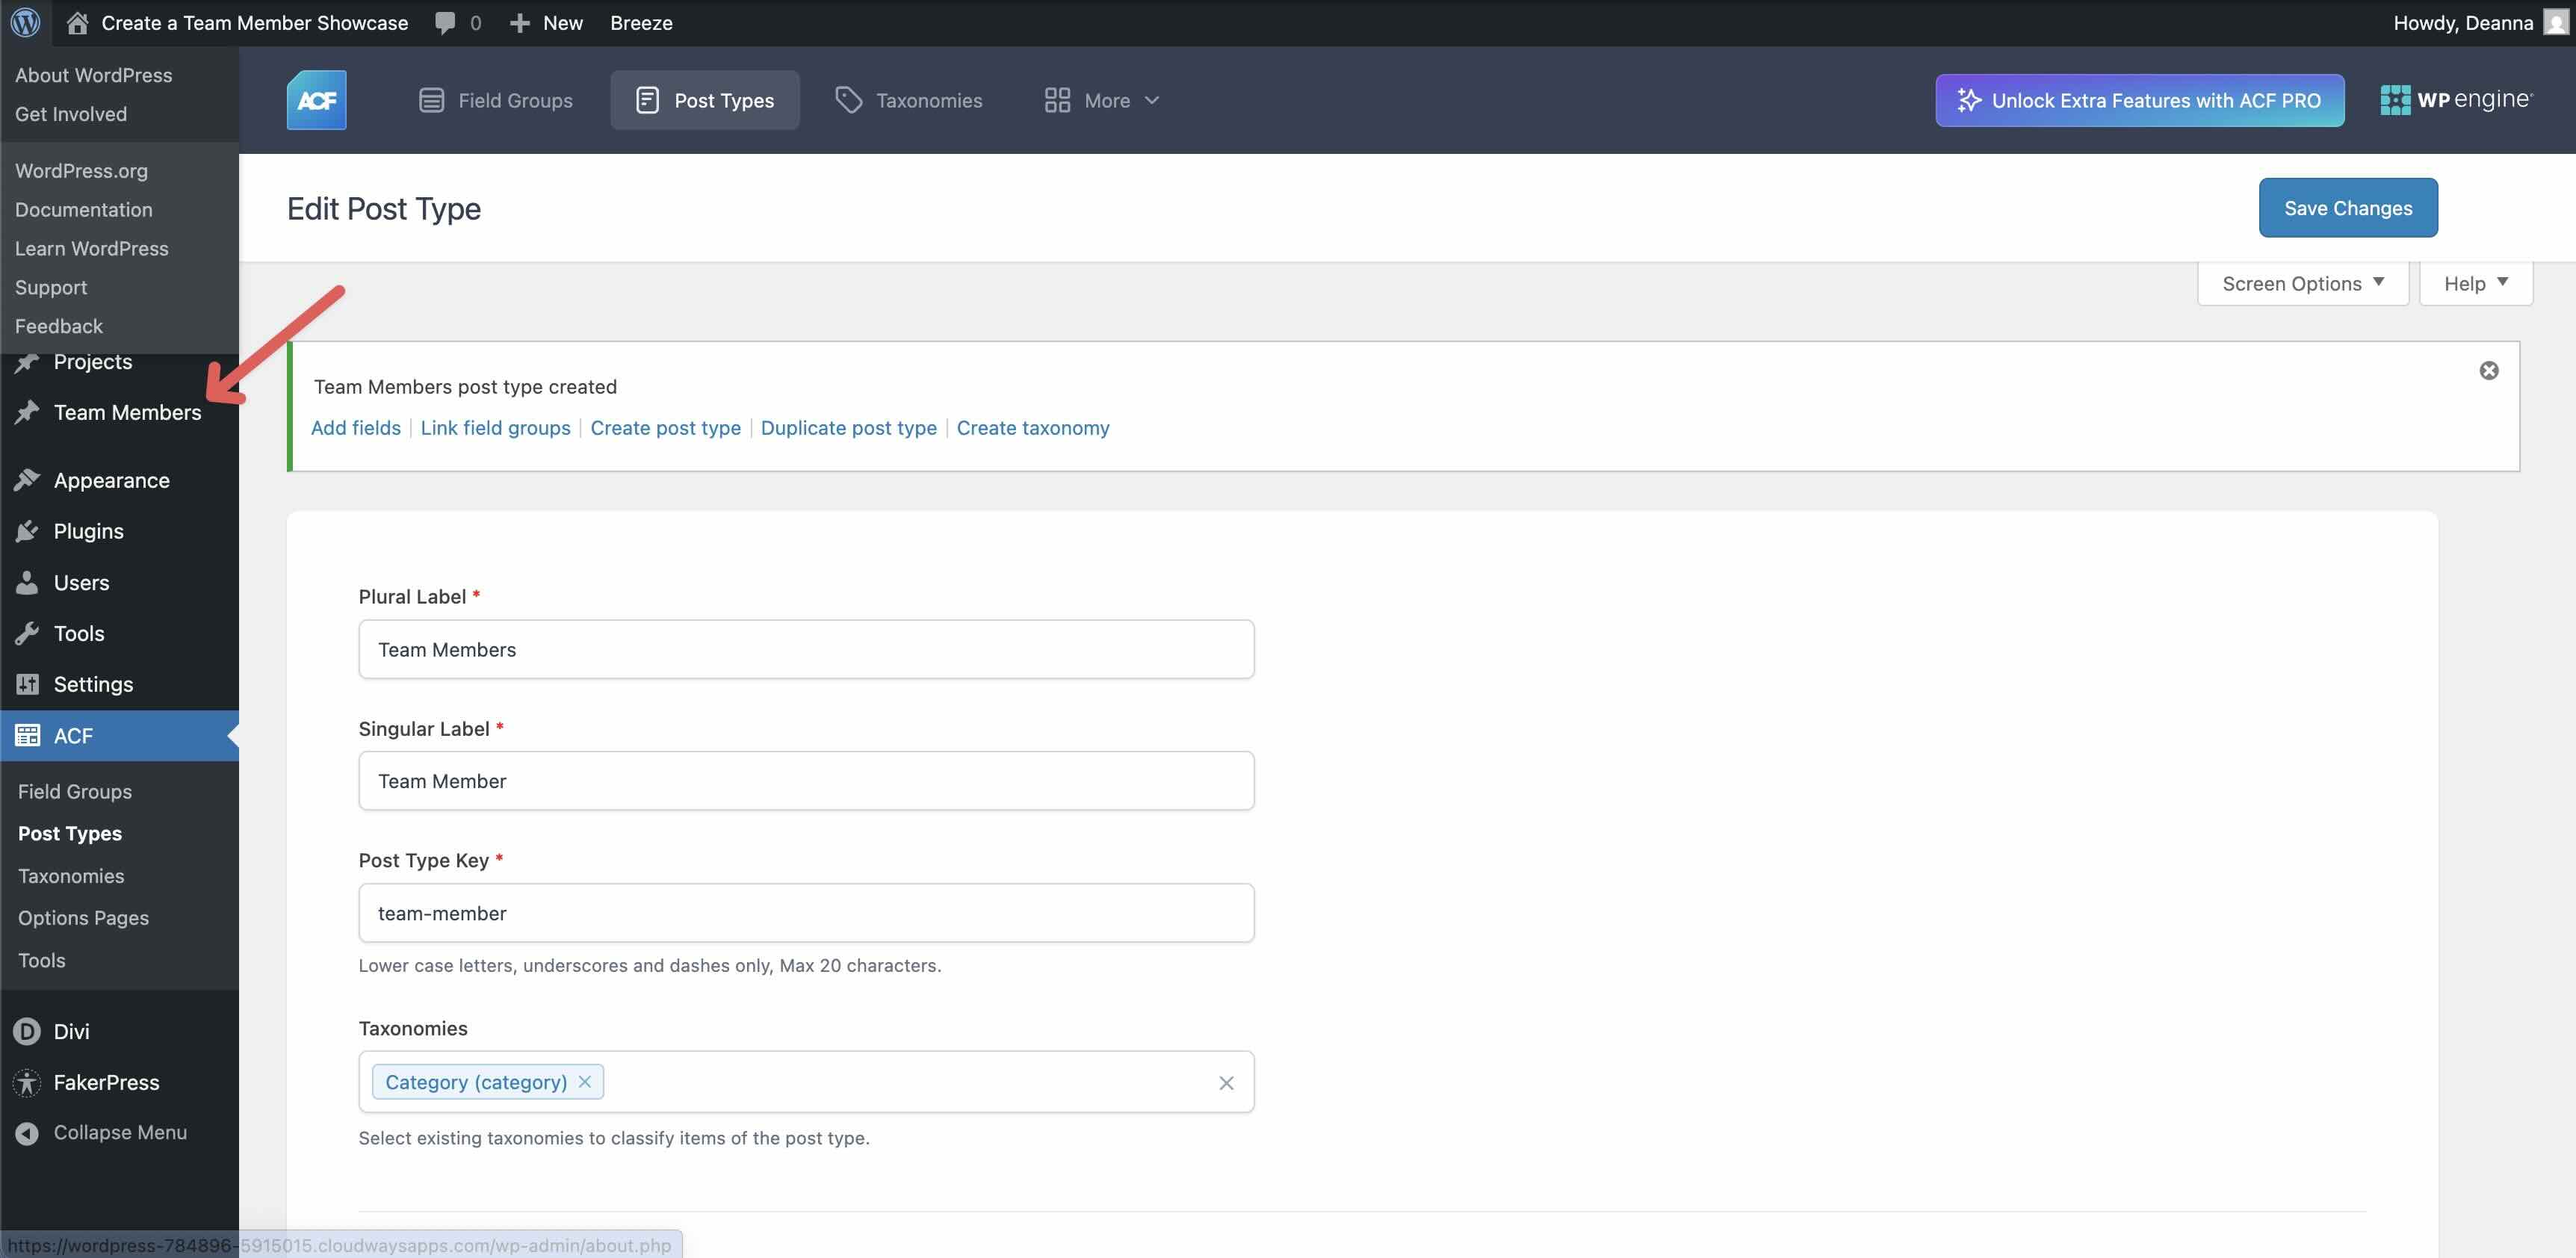
The final step is to click the Save Changes.
Look at the left-hand toolbar to ensure the Team Members post type appears after saving.
Create The Field Group
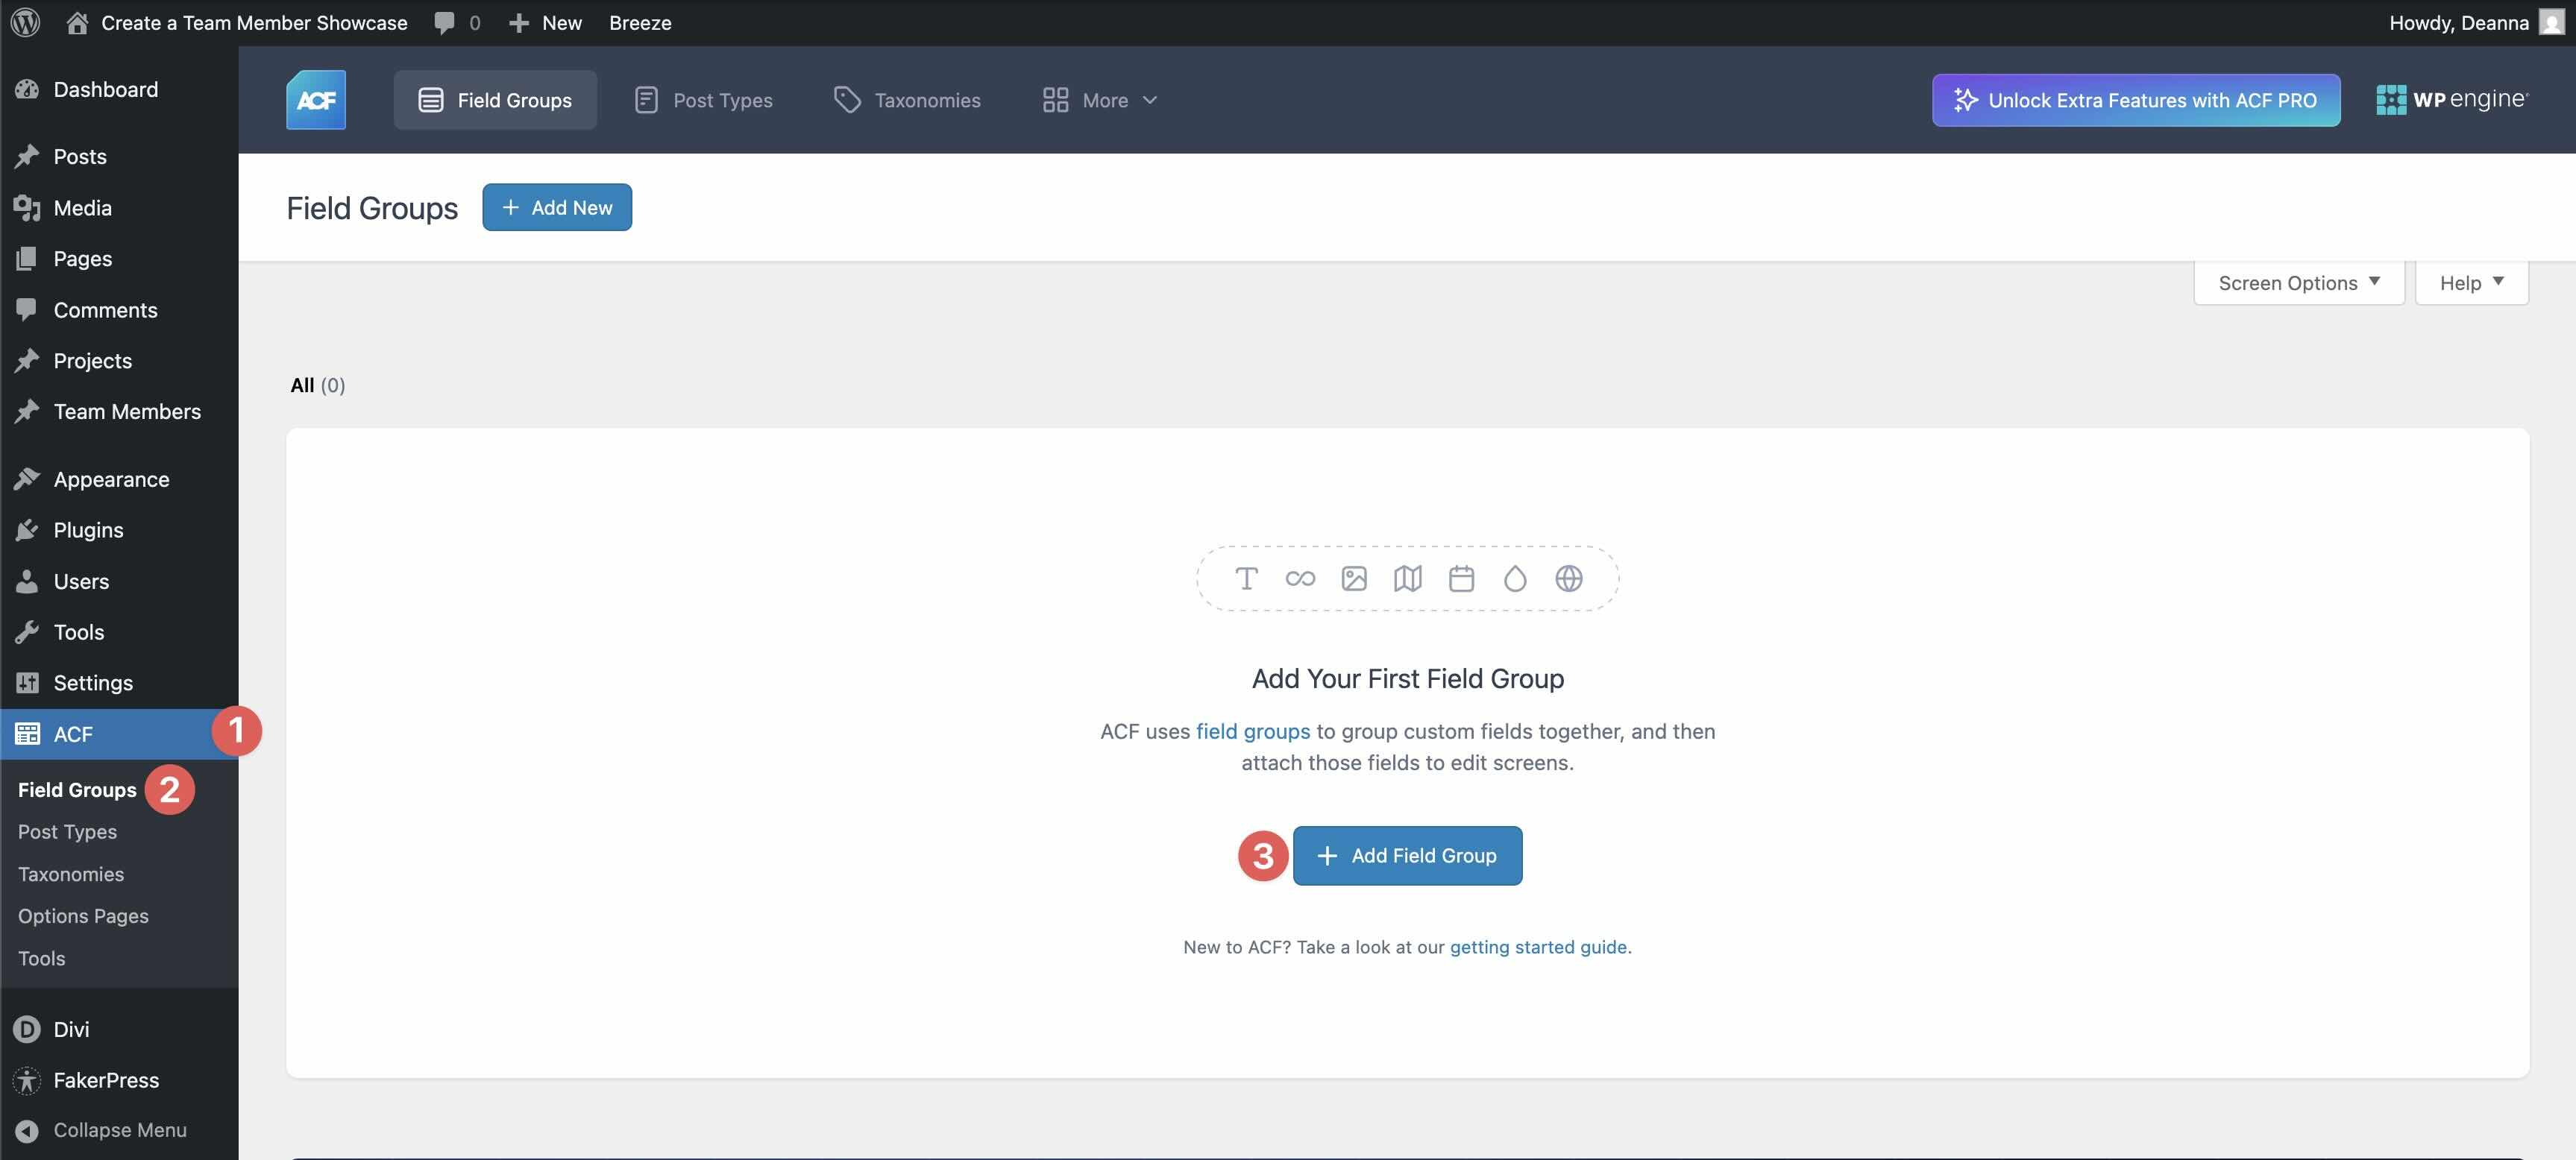
Navigate to ACF > Field Groups and click the + Add Field Group button to create a new group.
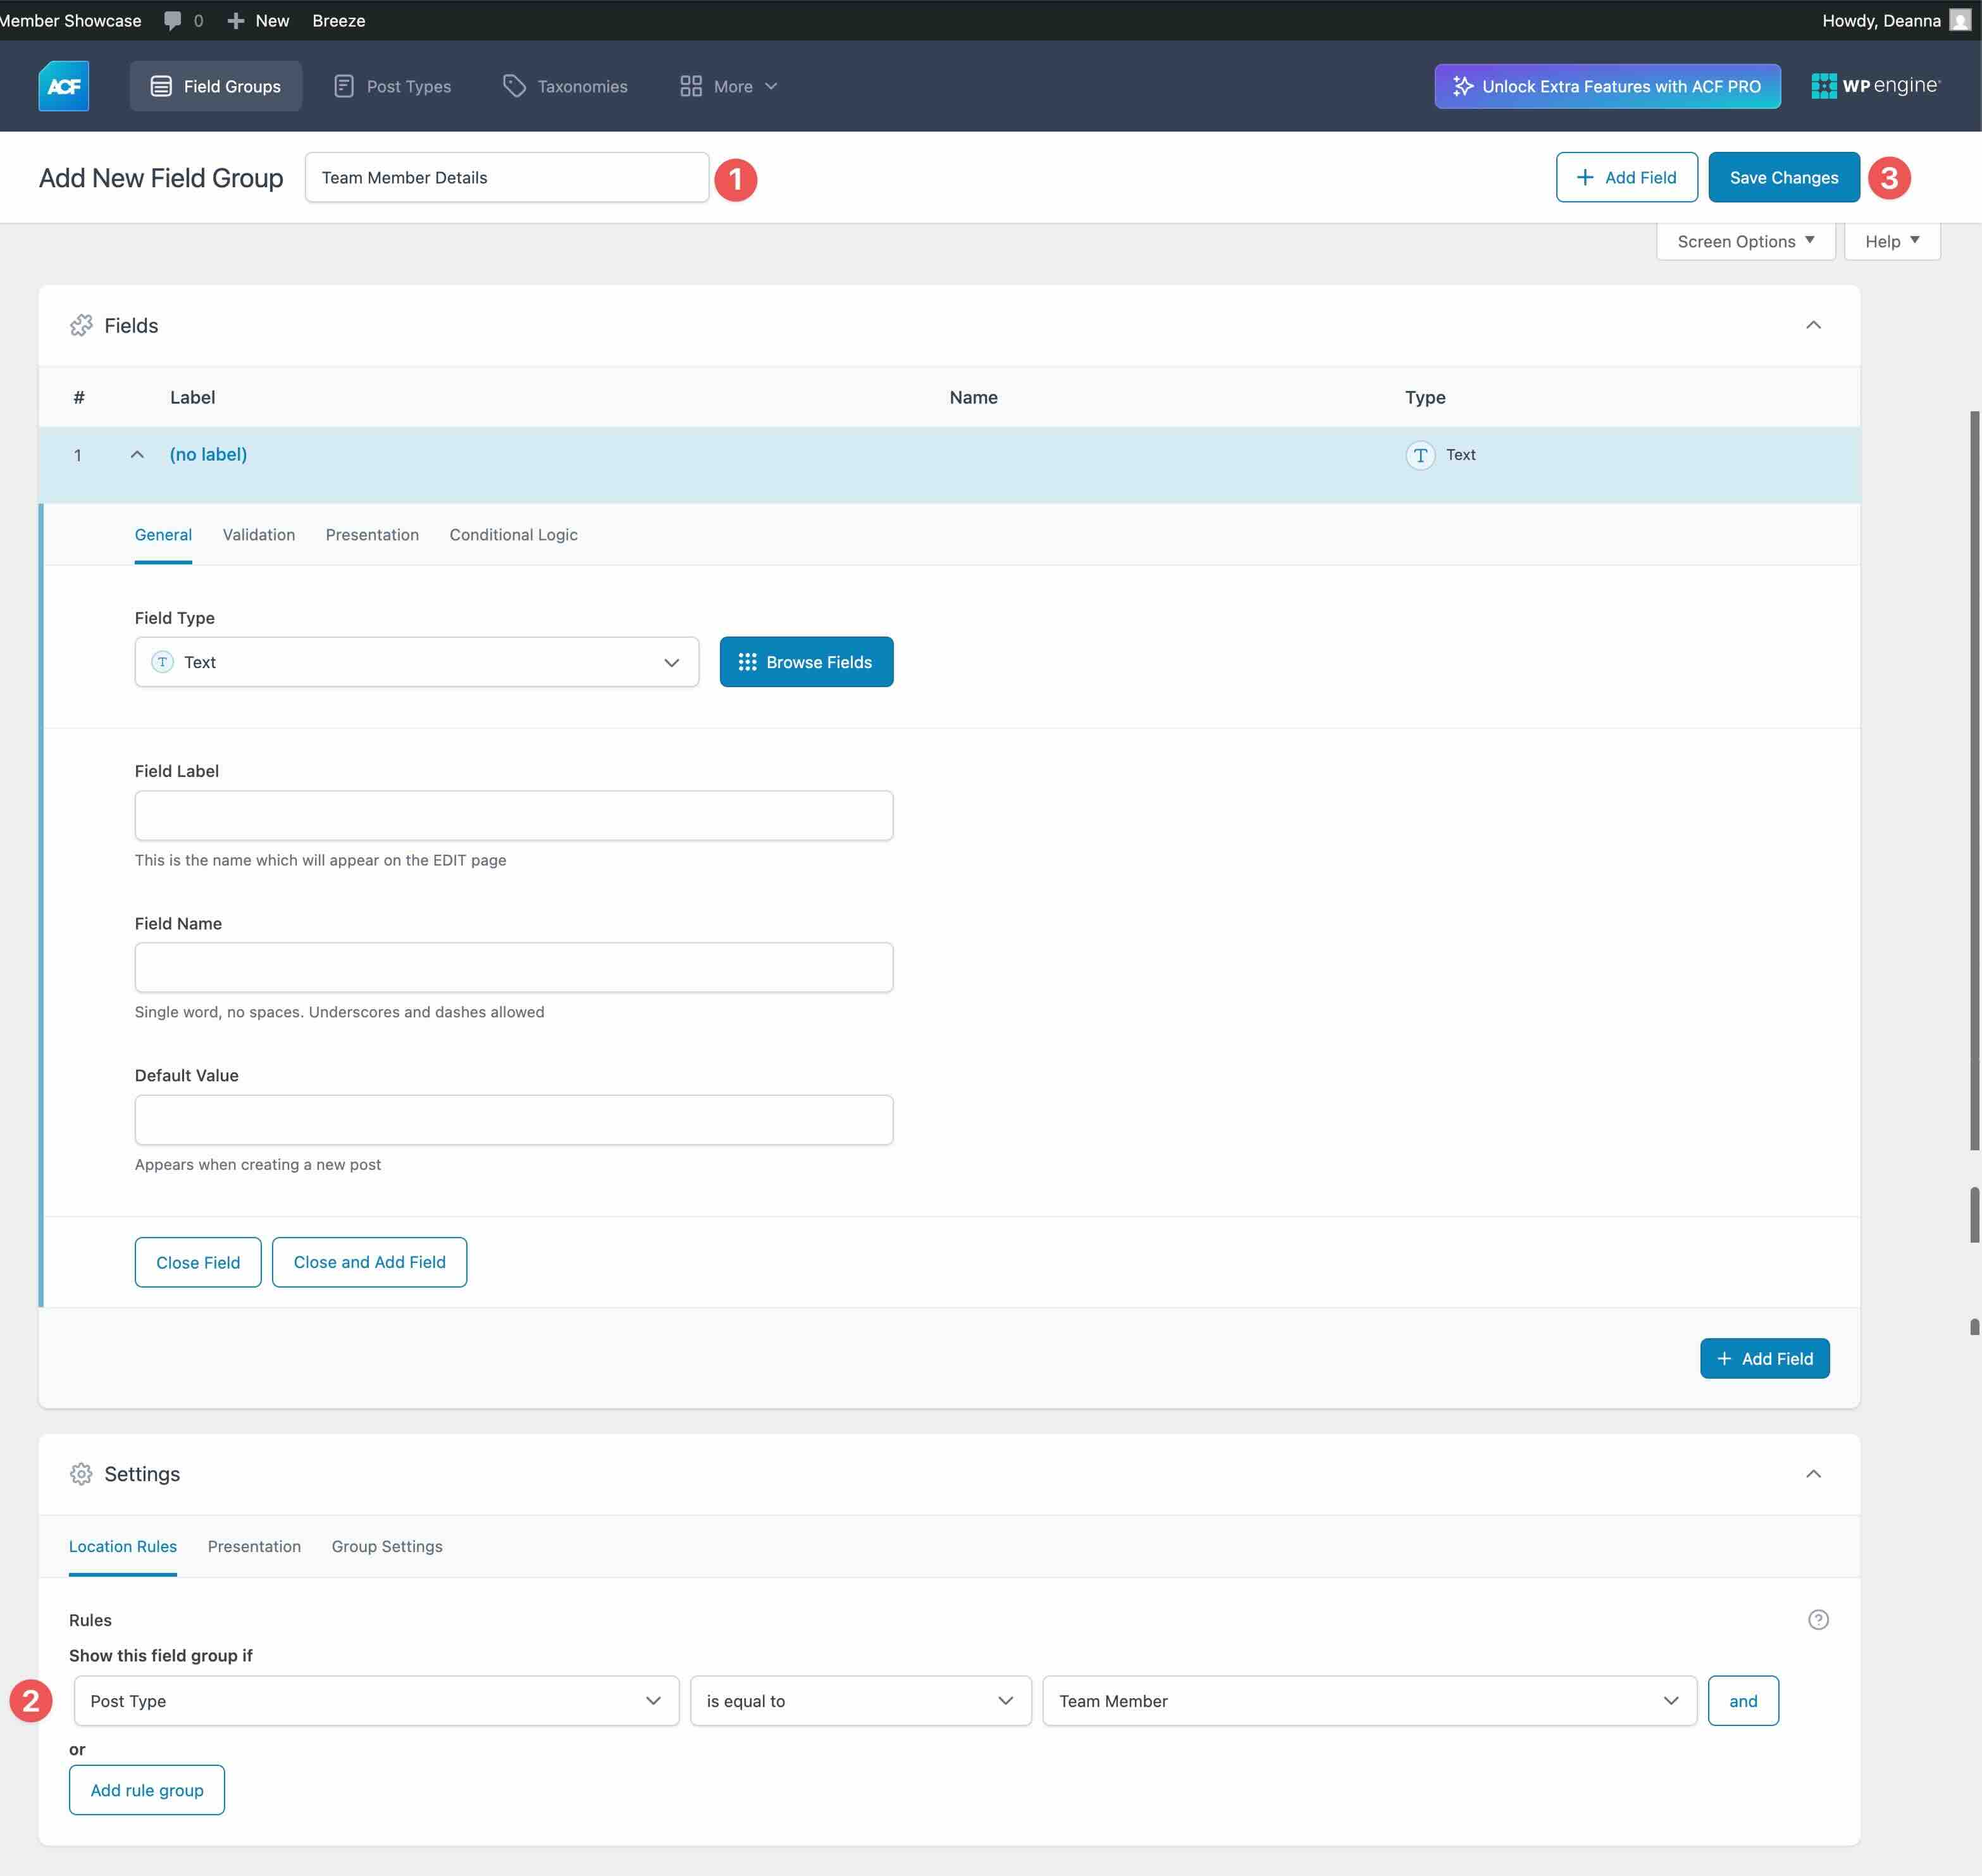
Assign the title Team Member Details to the field group. Scroll down to Settings, and create a new Rule: Post Type > is equal to > Team Member. Click the Save Changes button to save the group.
Create The Custom Fields
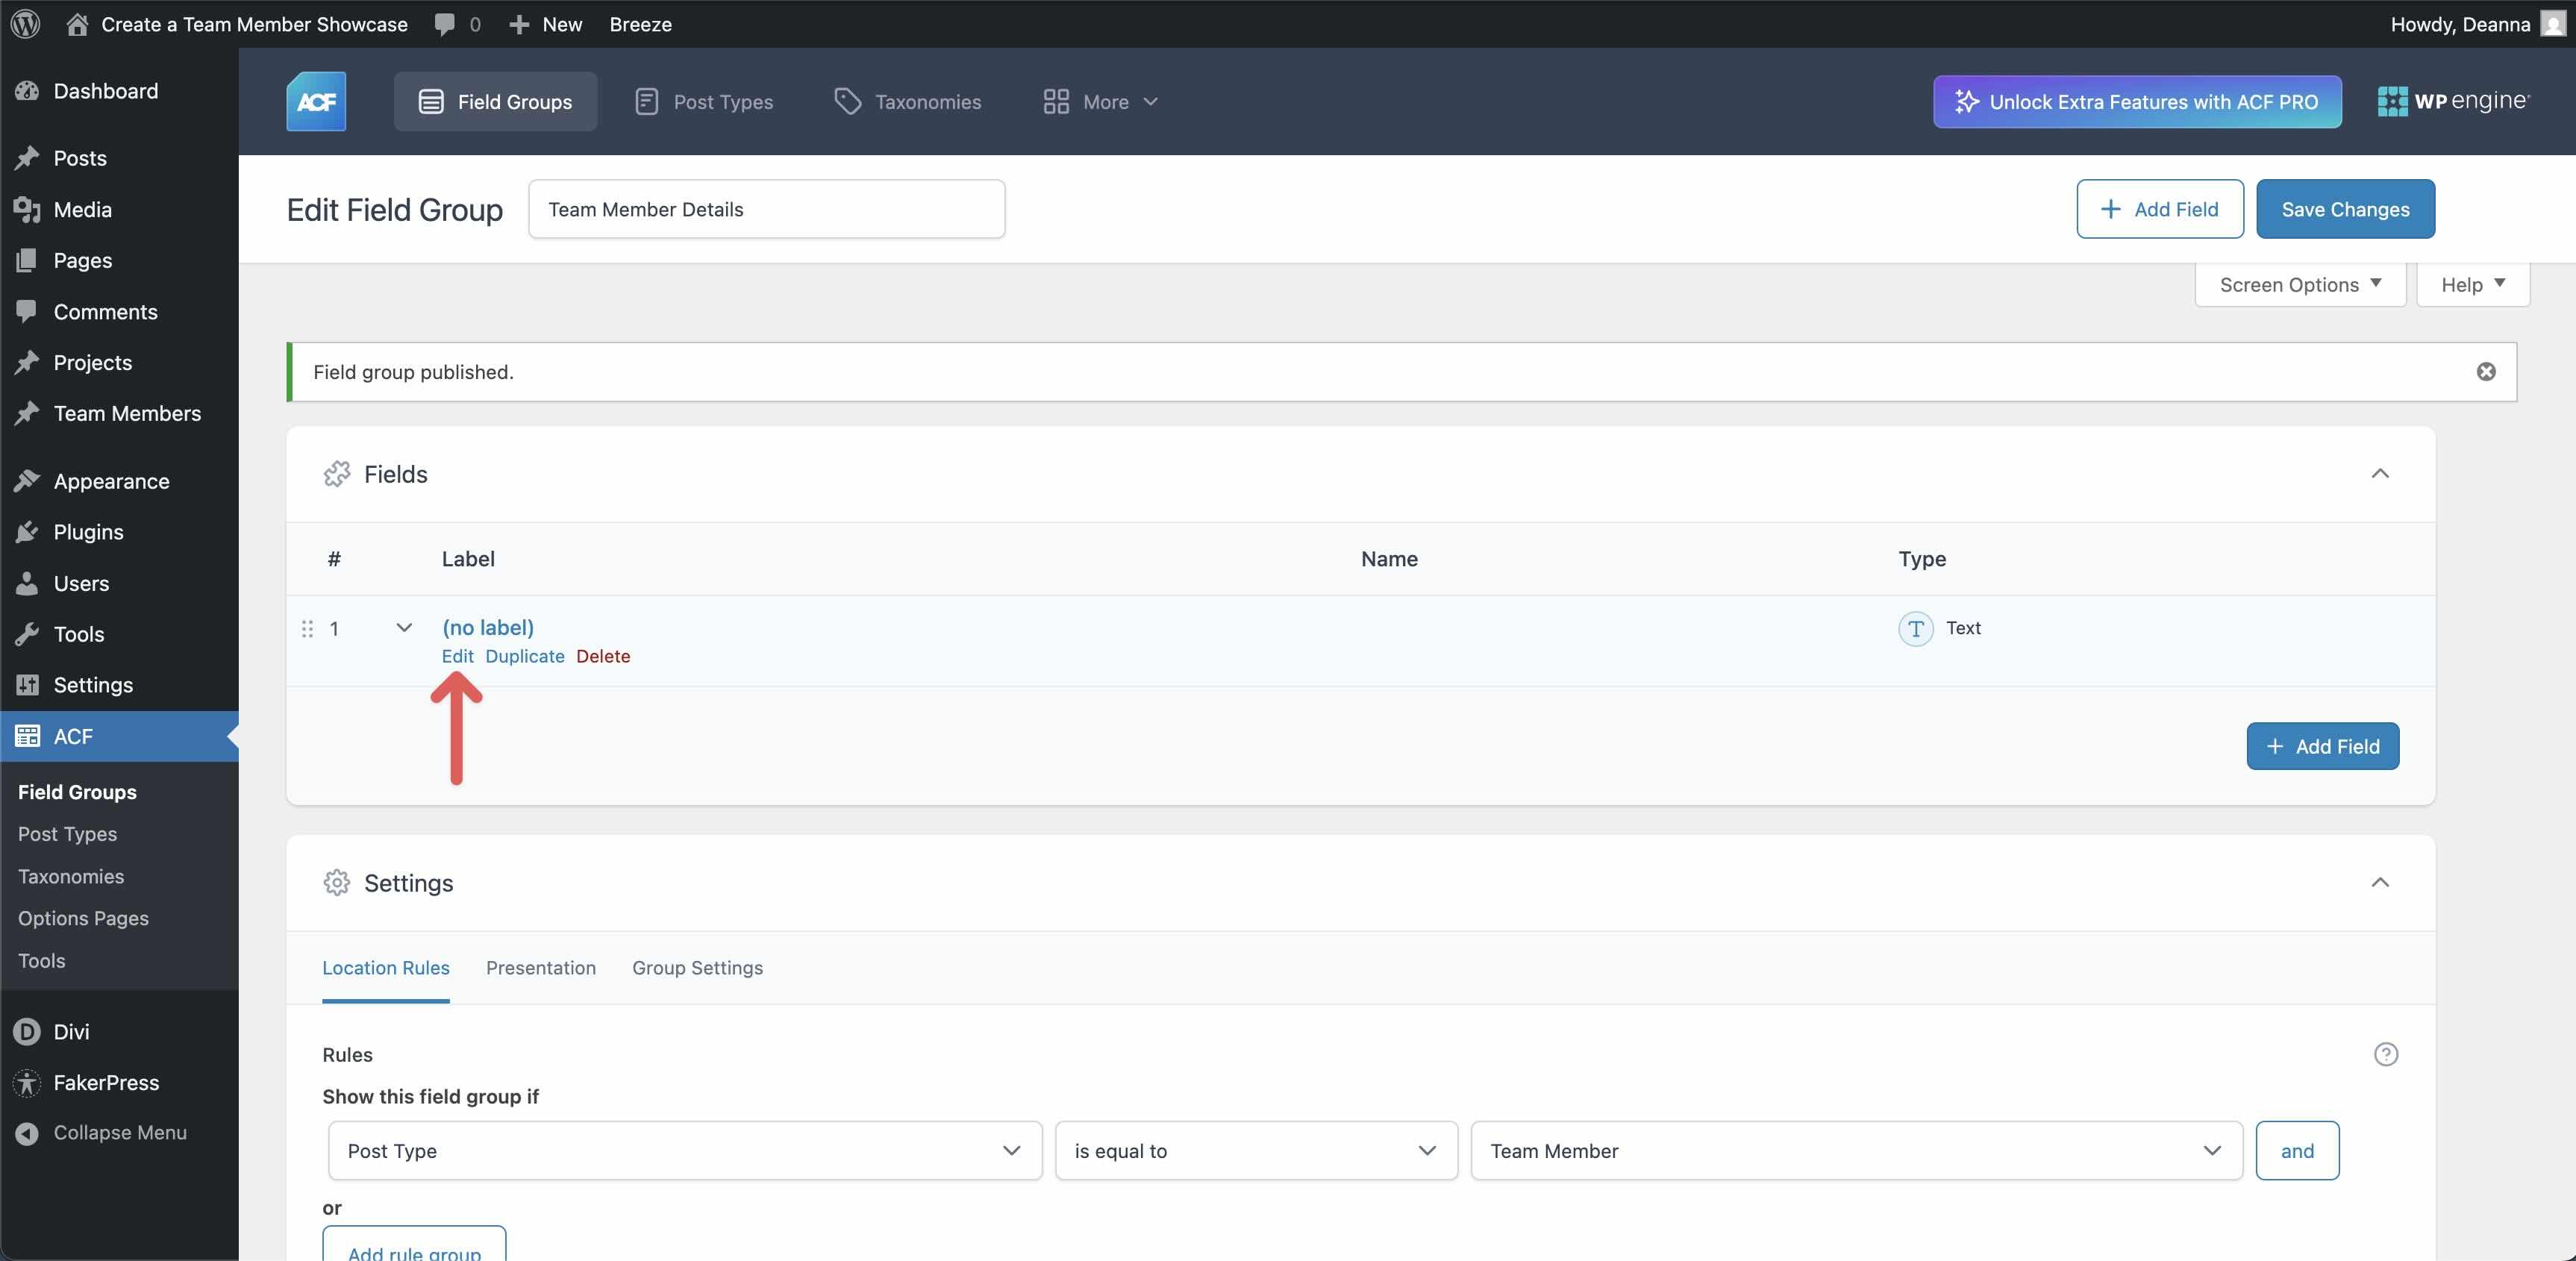
Now that the post type and field group are created, we need to create our custom fields. By default, ACF creates the first one for you. Hover over the field name to reveal the settings. Click Edit.
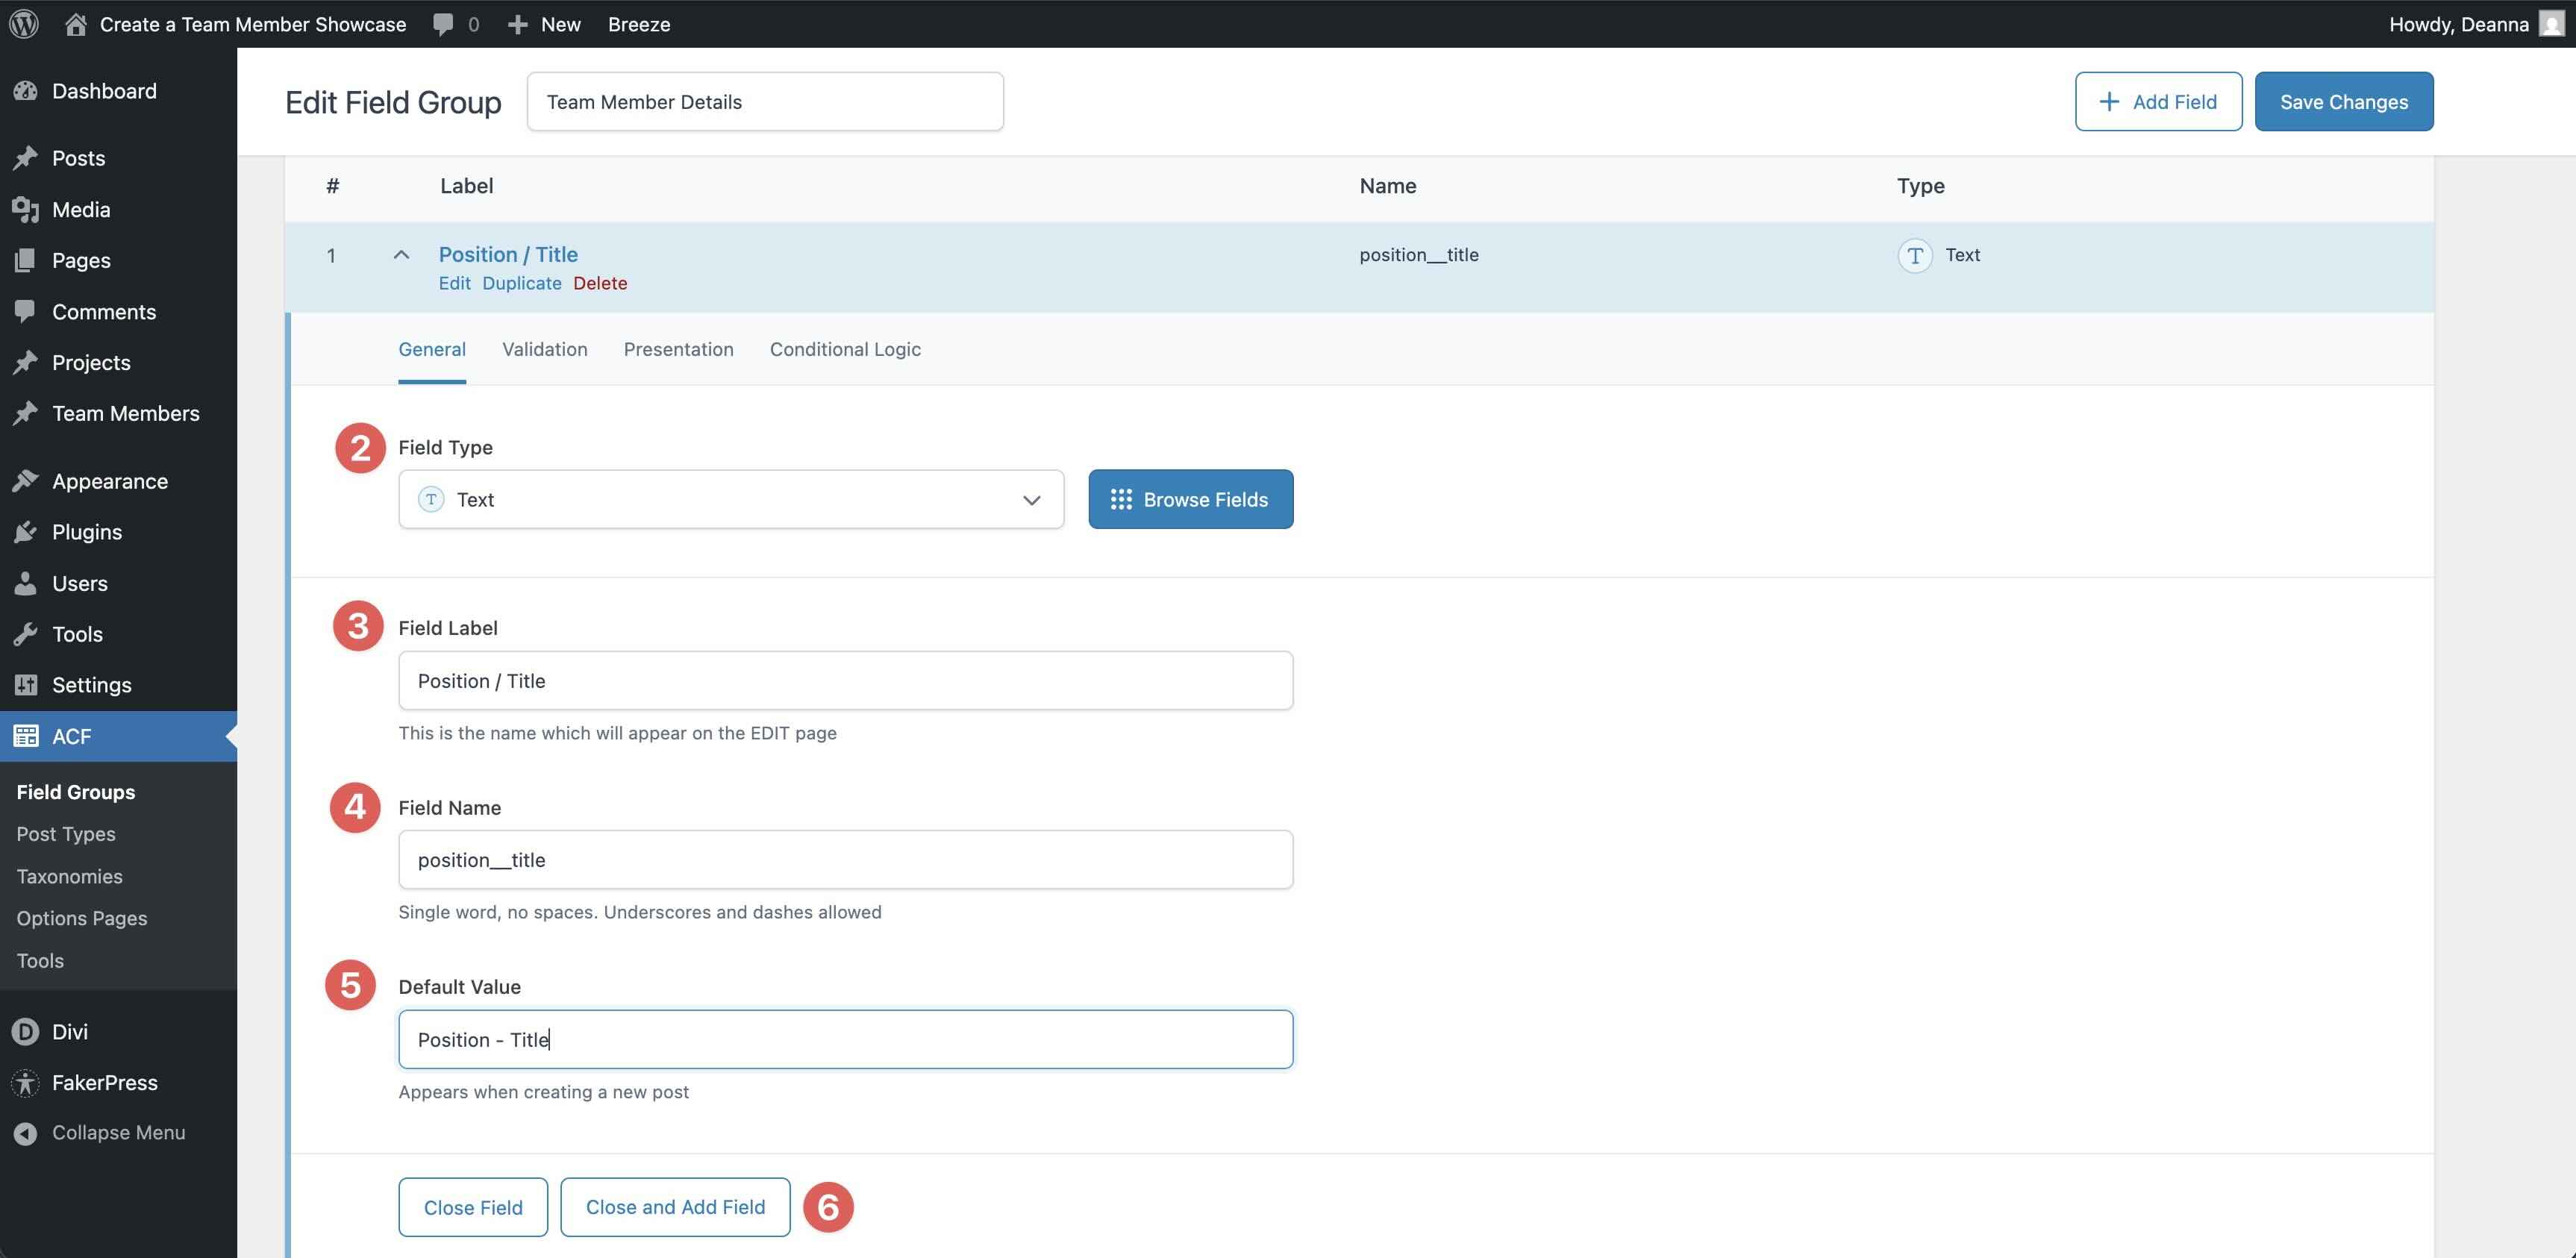
Select Text as the Field Type, Position/Title as the Field Label, position_title as the Field Name, and Position – Title as the Default Value. Next, click Close and Add Field.
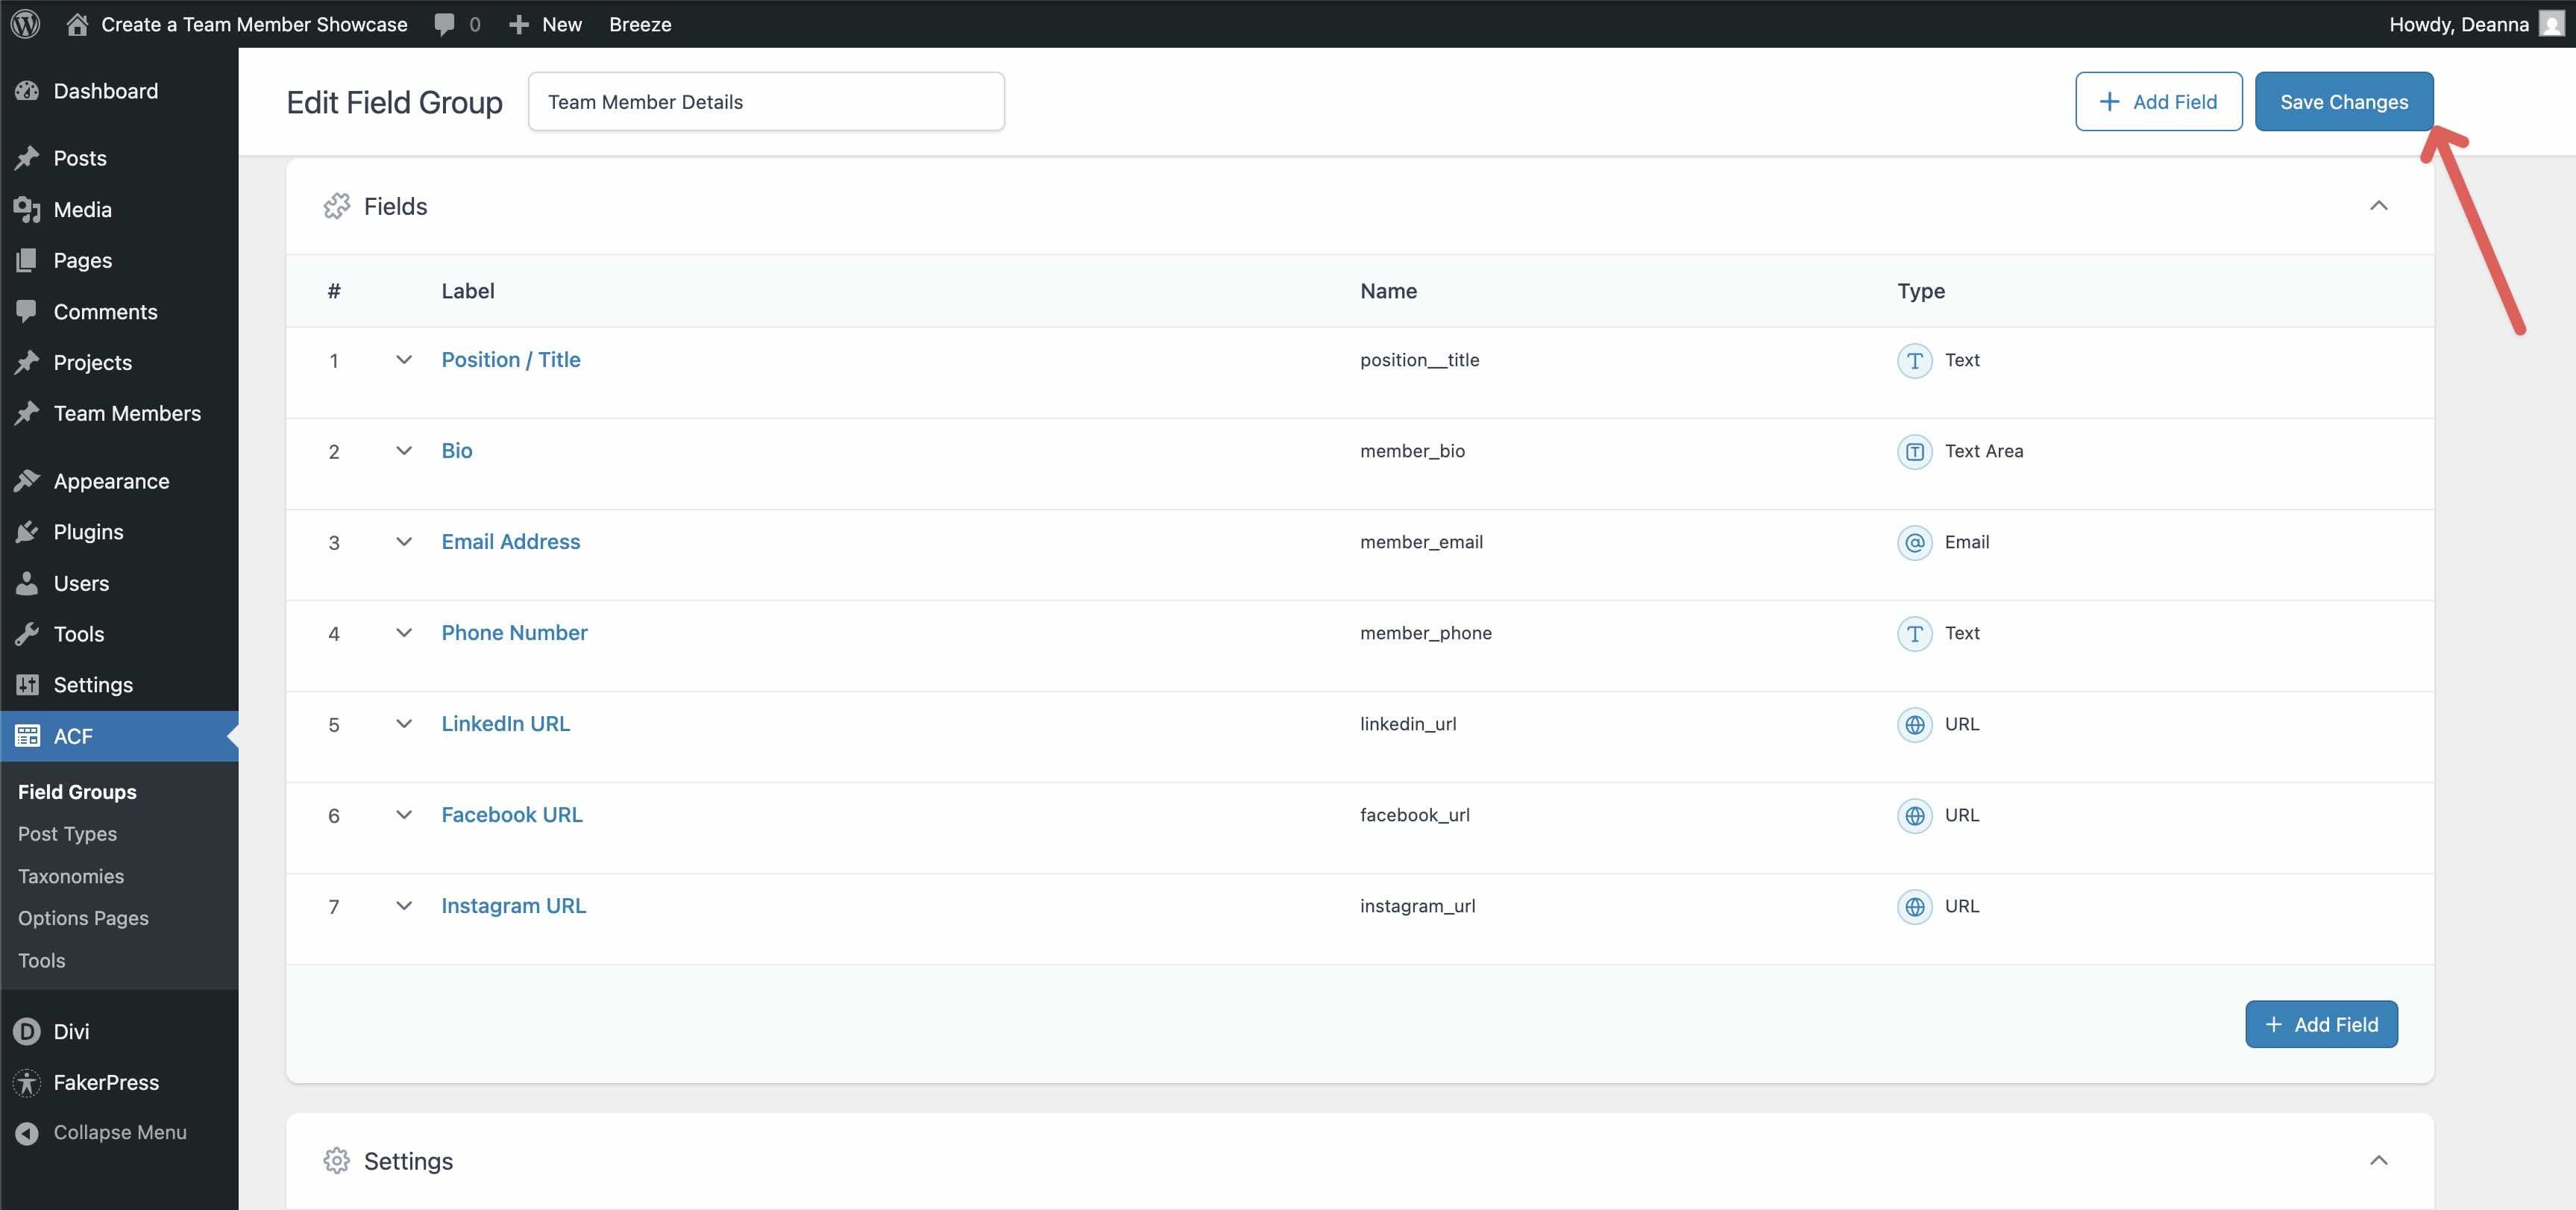
Repeat the steps to add the remaining fields. Rather than write out all of the fields and their information here, we’ve created a table to help you:
| Field Label | Field Name | Field Type |
|---|---|---|
| Position / Title | position_title | Text |
| Bio | member_bio | Text Area |
| Email Address | member_email | |
| Phone Number | member_phone | Text |
| LinkedIn URL | linkedin_url | URL |
| Facebook URL | facebook_url | URL |
| Instagram URL | instagram_url | URL |
Once all fields are created, click Save Changes at the top right of the screen.
Create The First Team Member
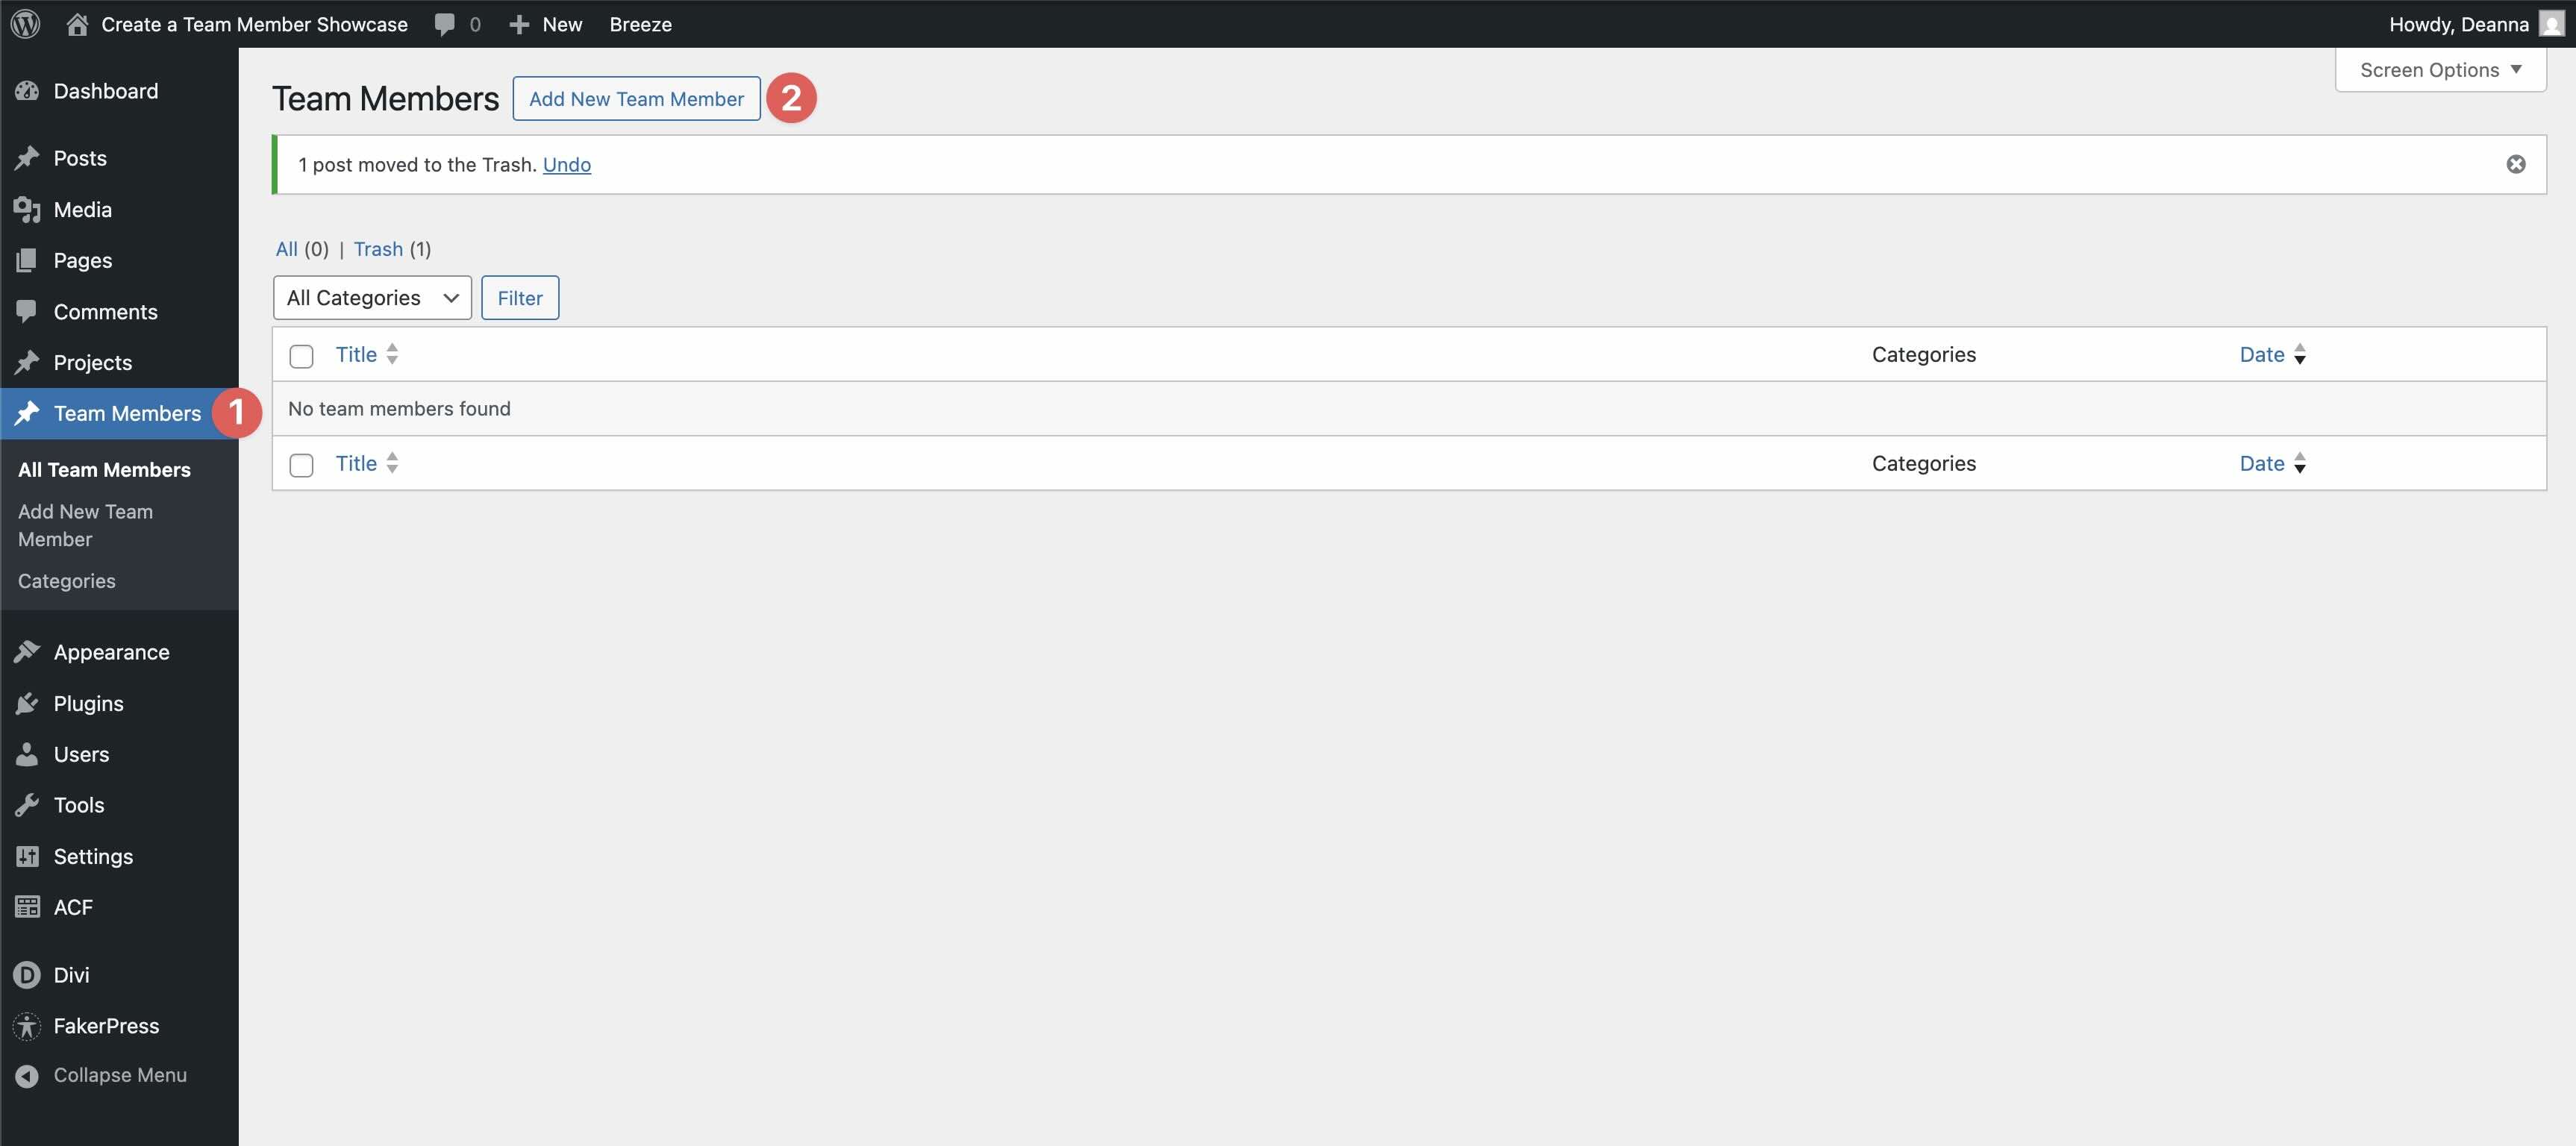
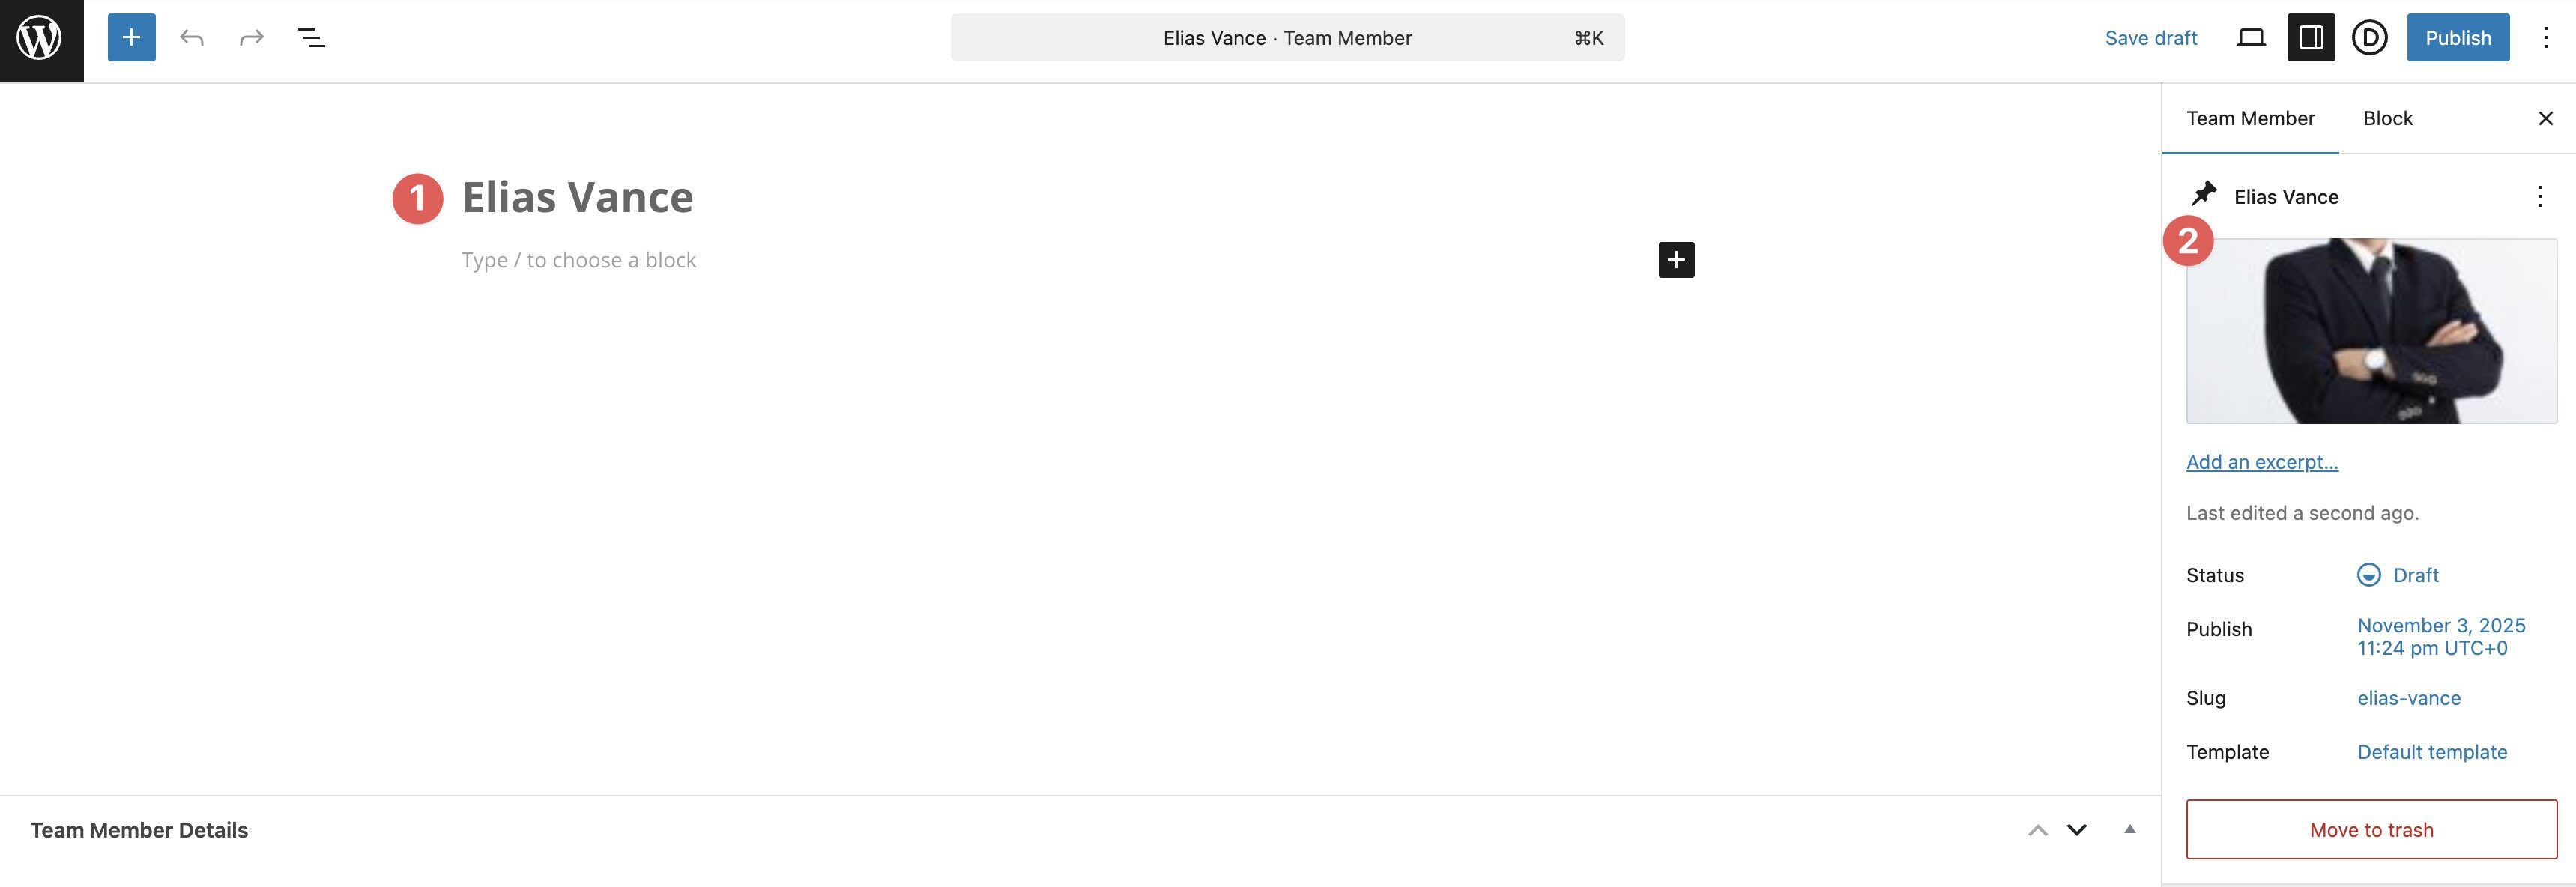
Navigate to Team Members > Add New Team Member.
When the Team Member post is revealed, add a Title and a Featured Image.
Fill in the custom fields with your information.
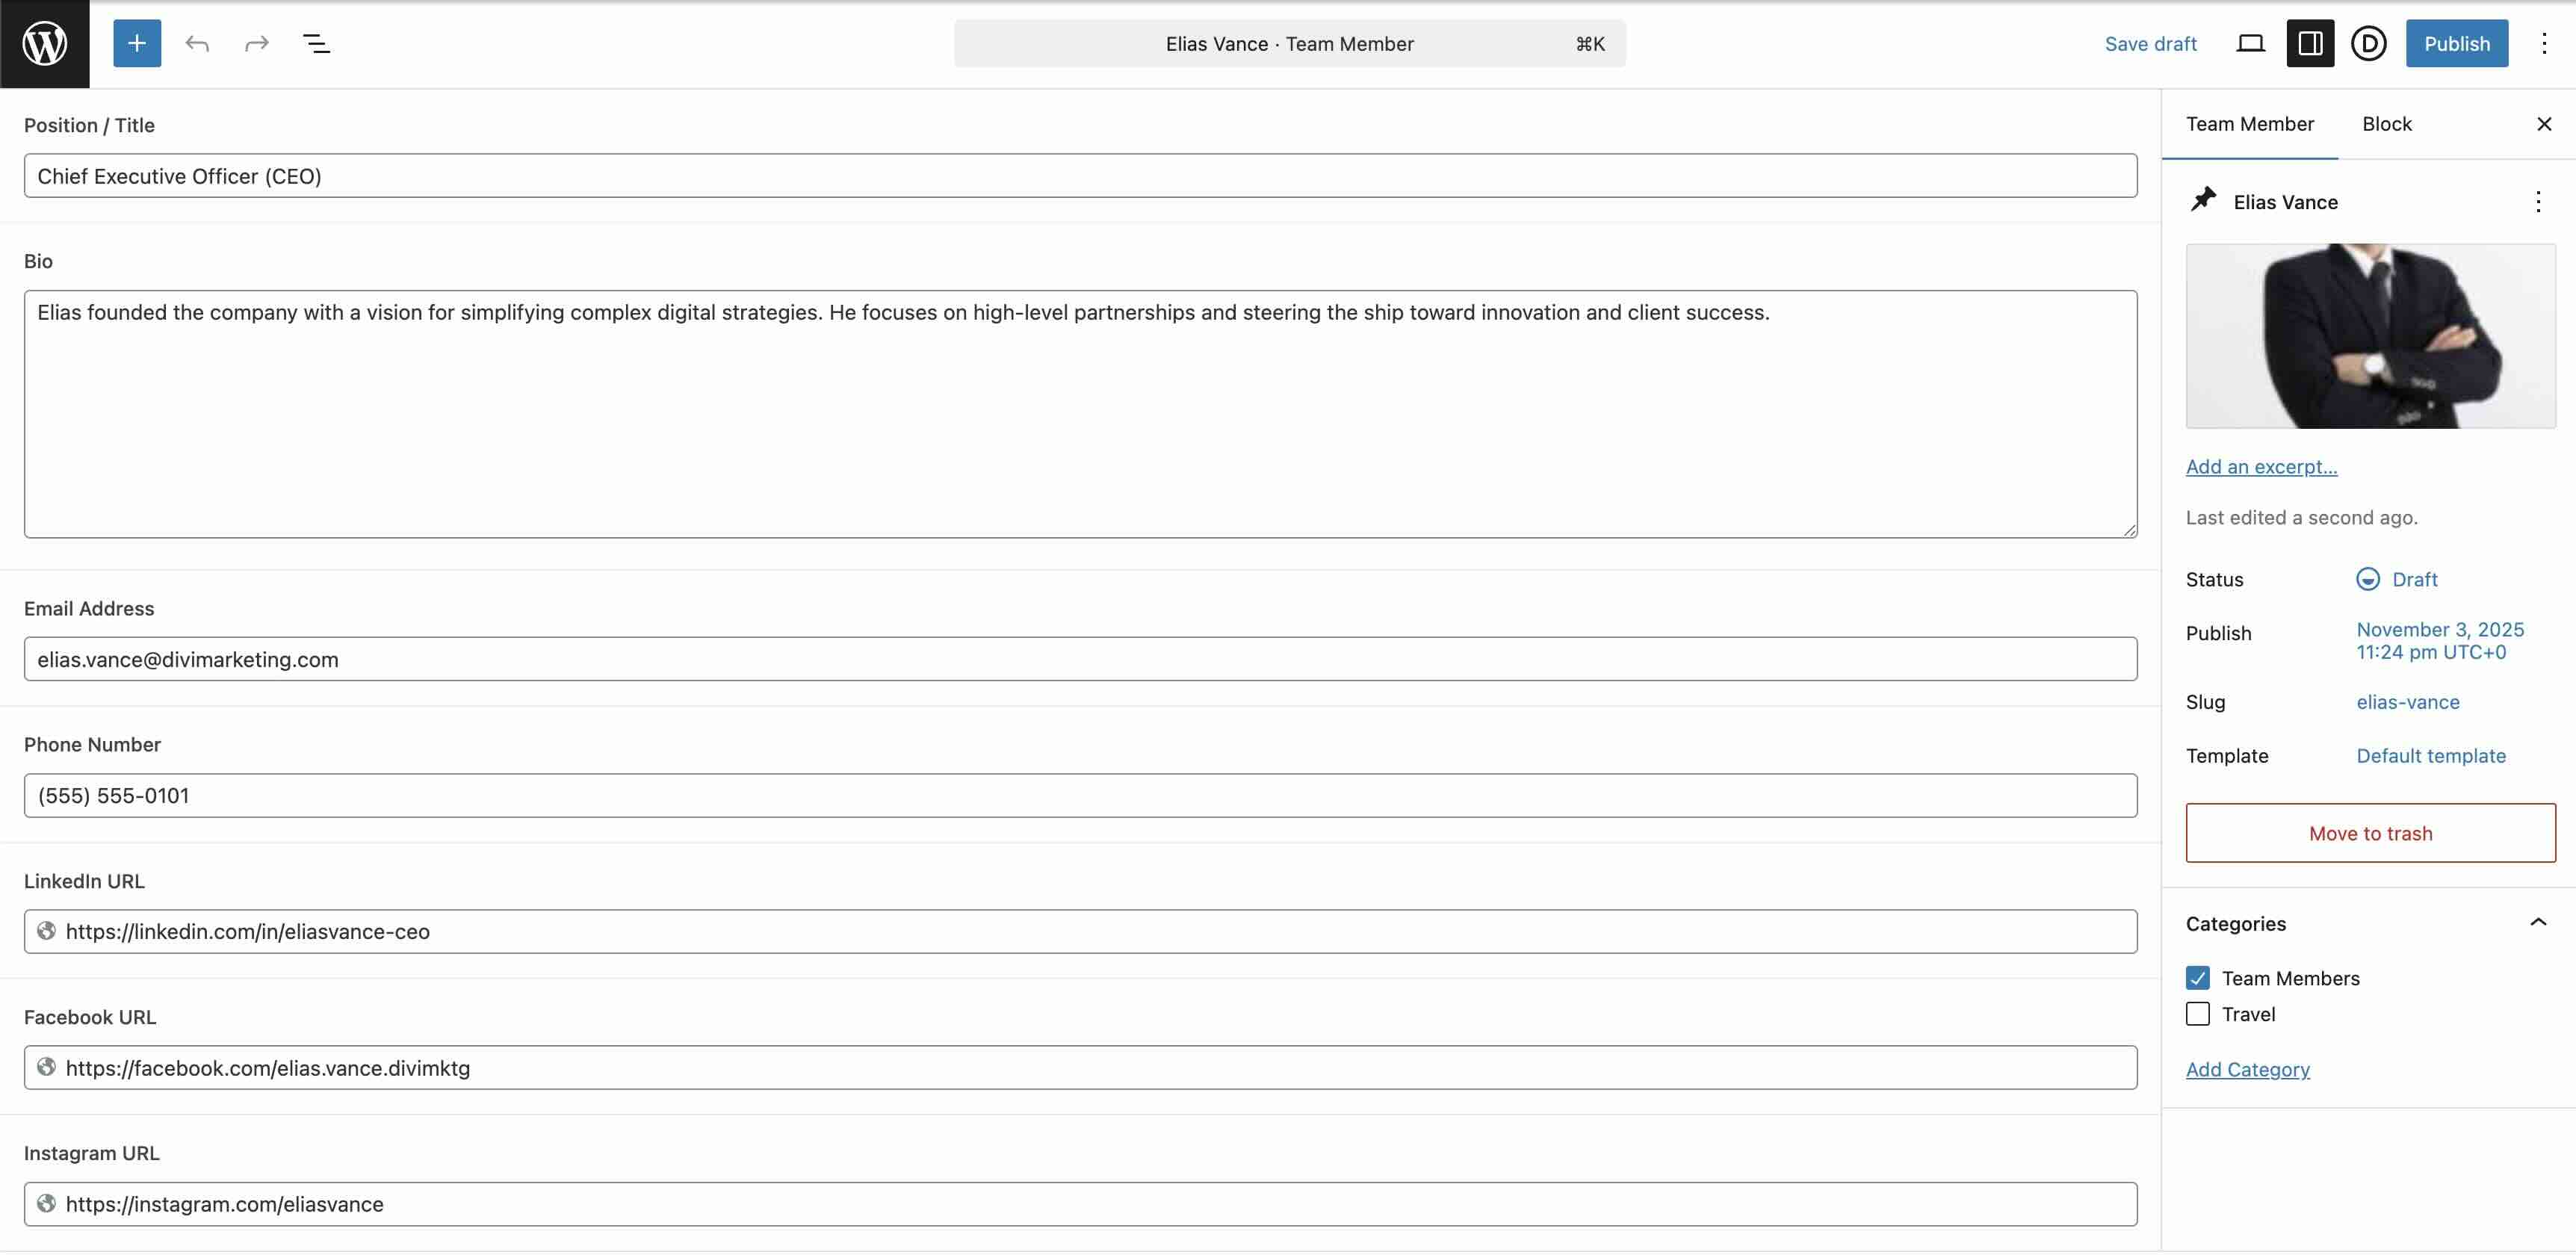
Repeat these steps to create all of your Team Member posts.
Step 2: Create The Loop
Start by creating a new page in Divi or opening an existing one. For this post, we’ll use the Web Design starter site and add a team member showcase to the About page.
Start by adding a single-column Flex Row to the page.

Open the Row settings, expand the Elements menu, and click the Edit icon for the Column.

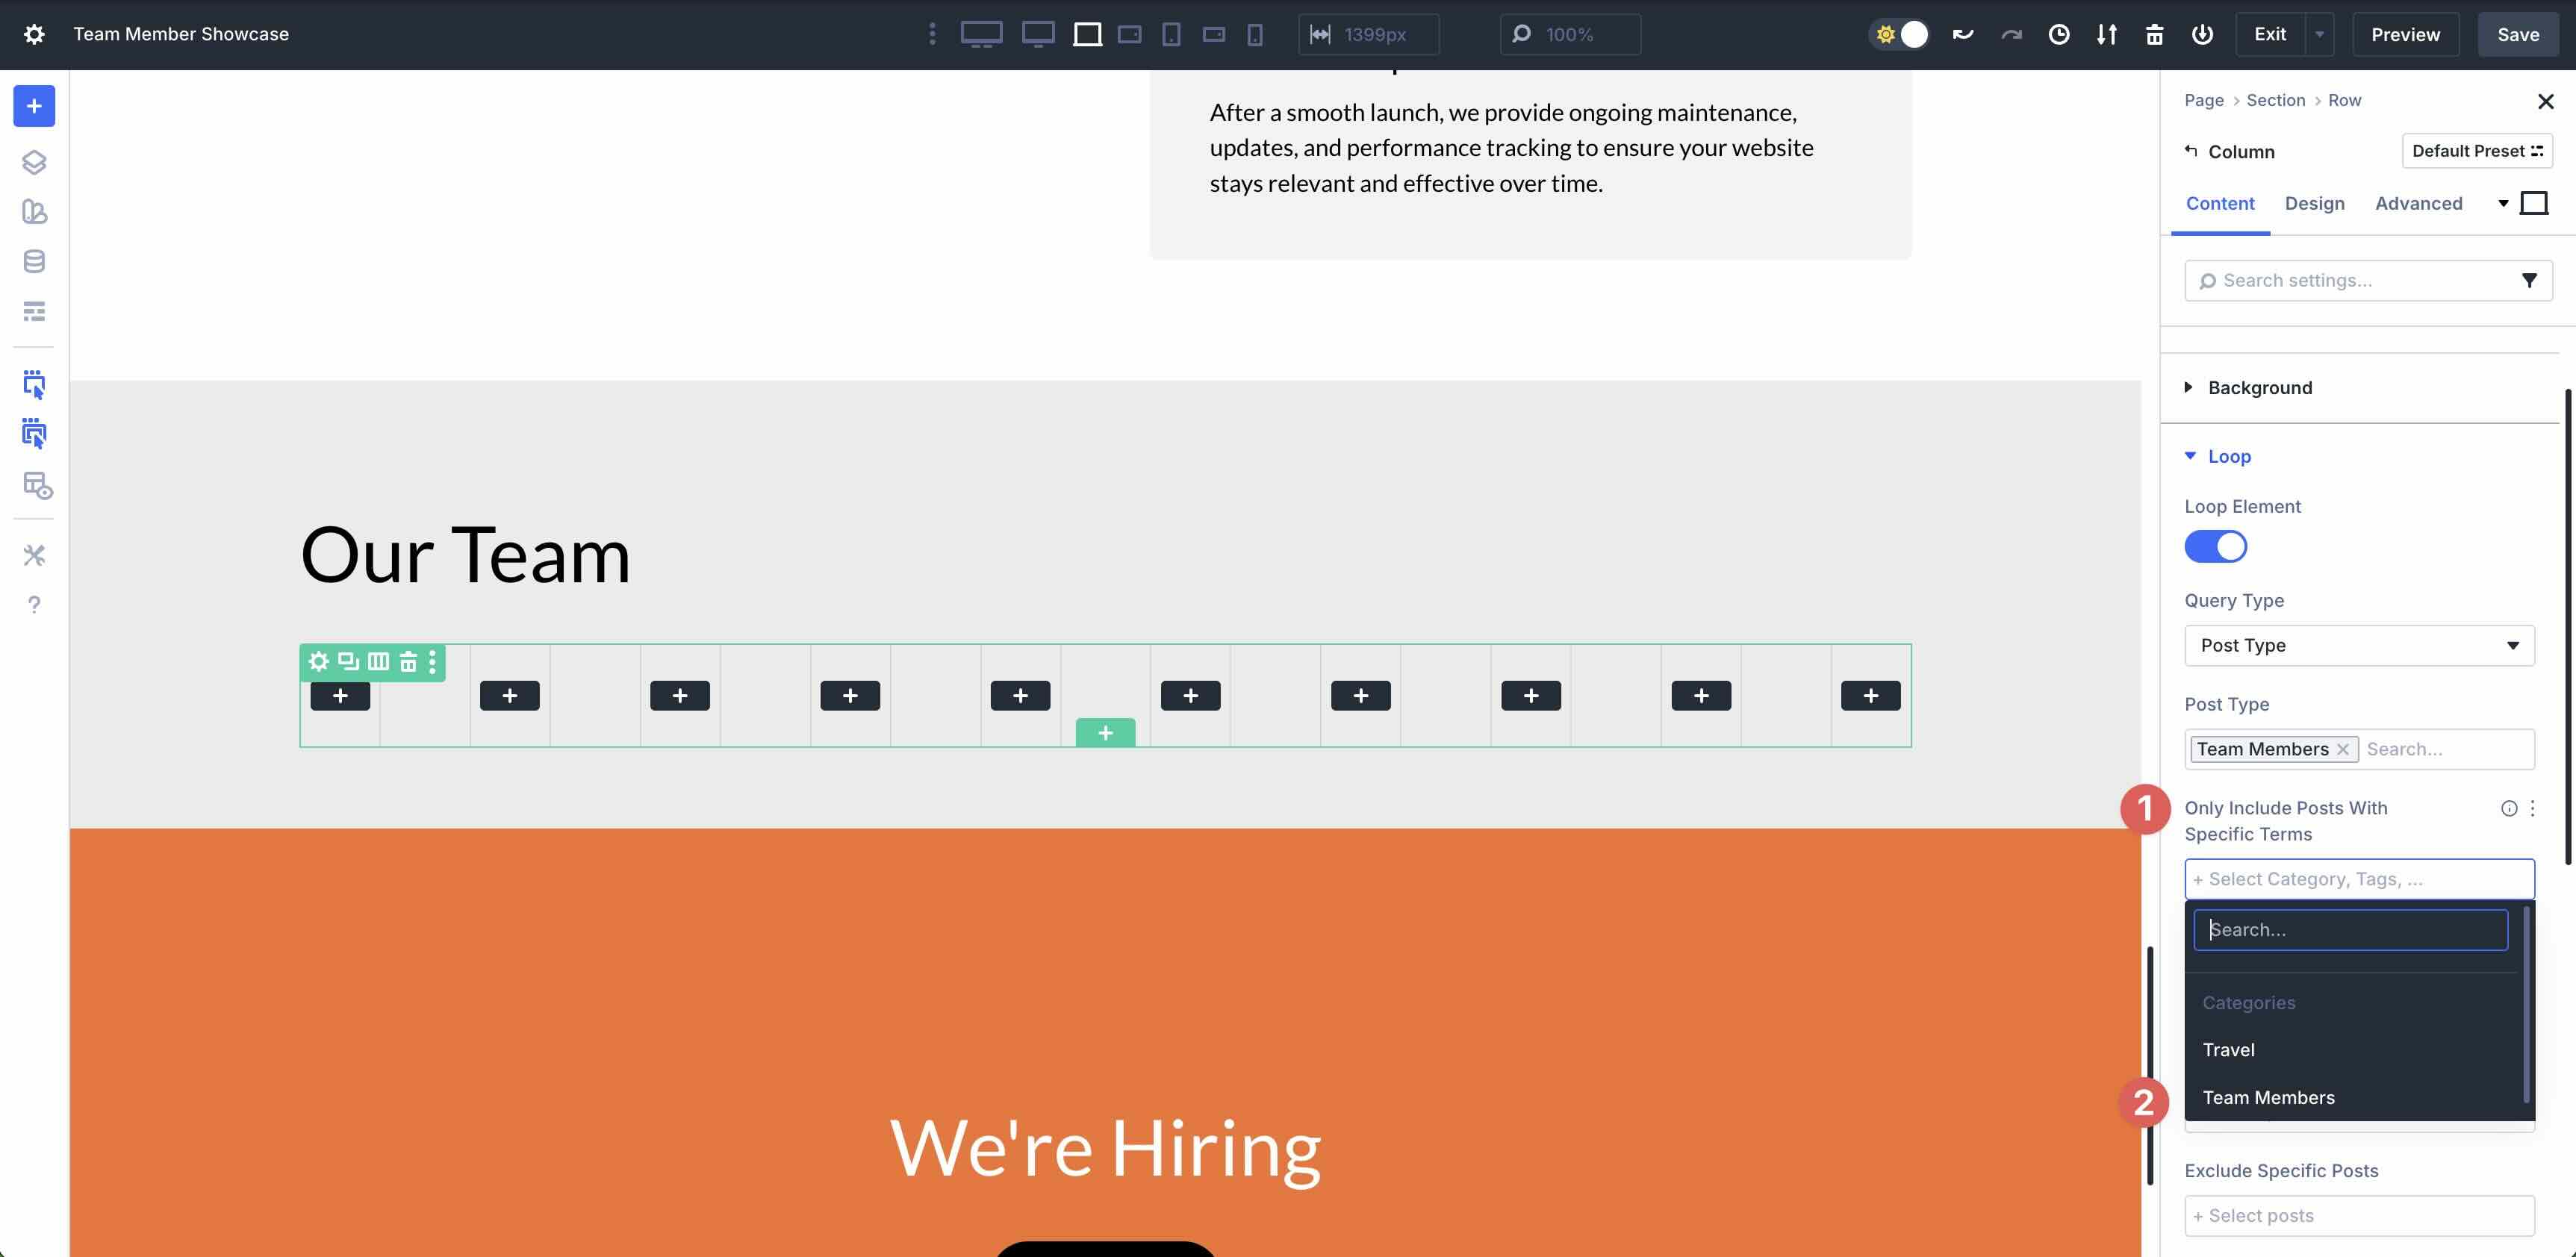
Expand the Loop menu, and enable Loop Element.
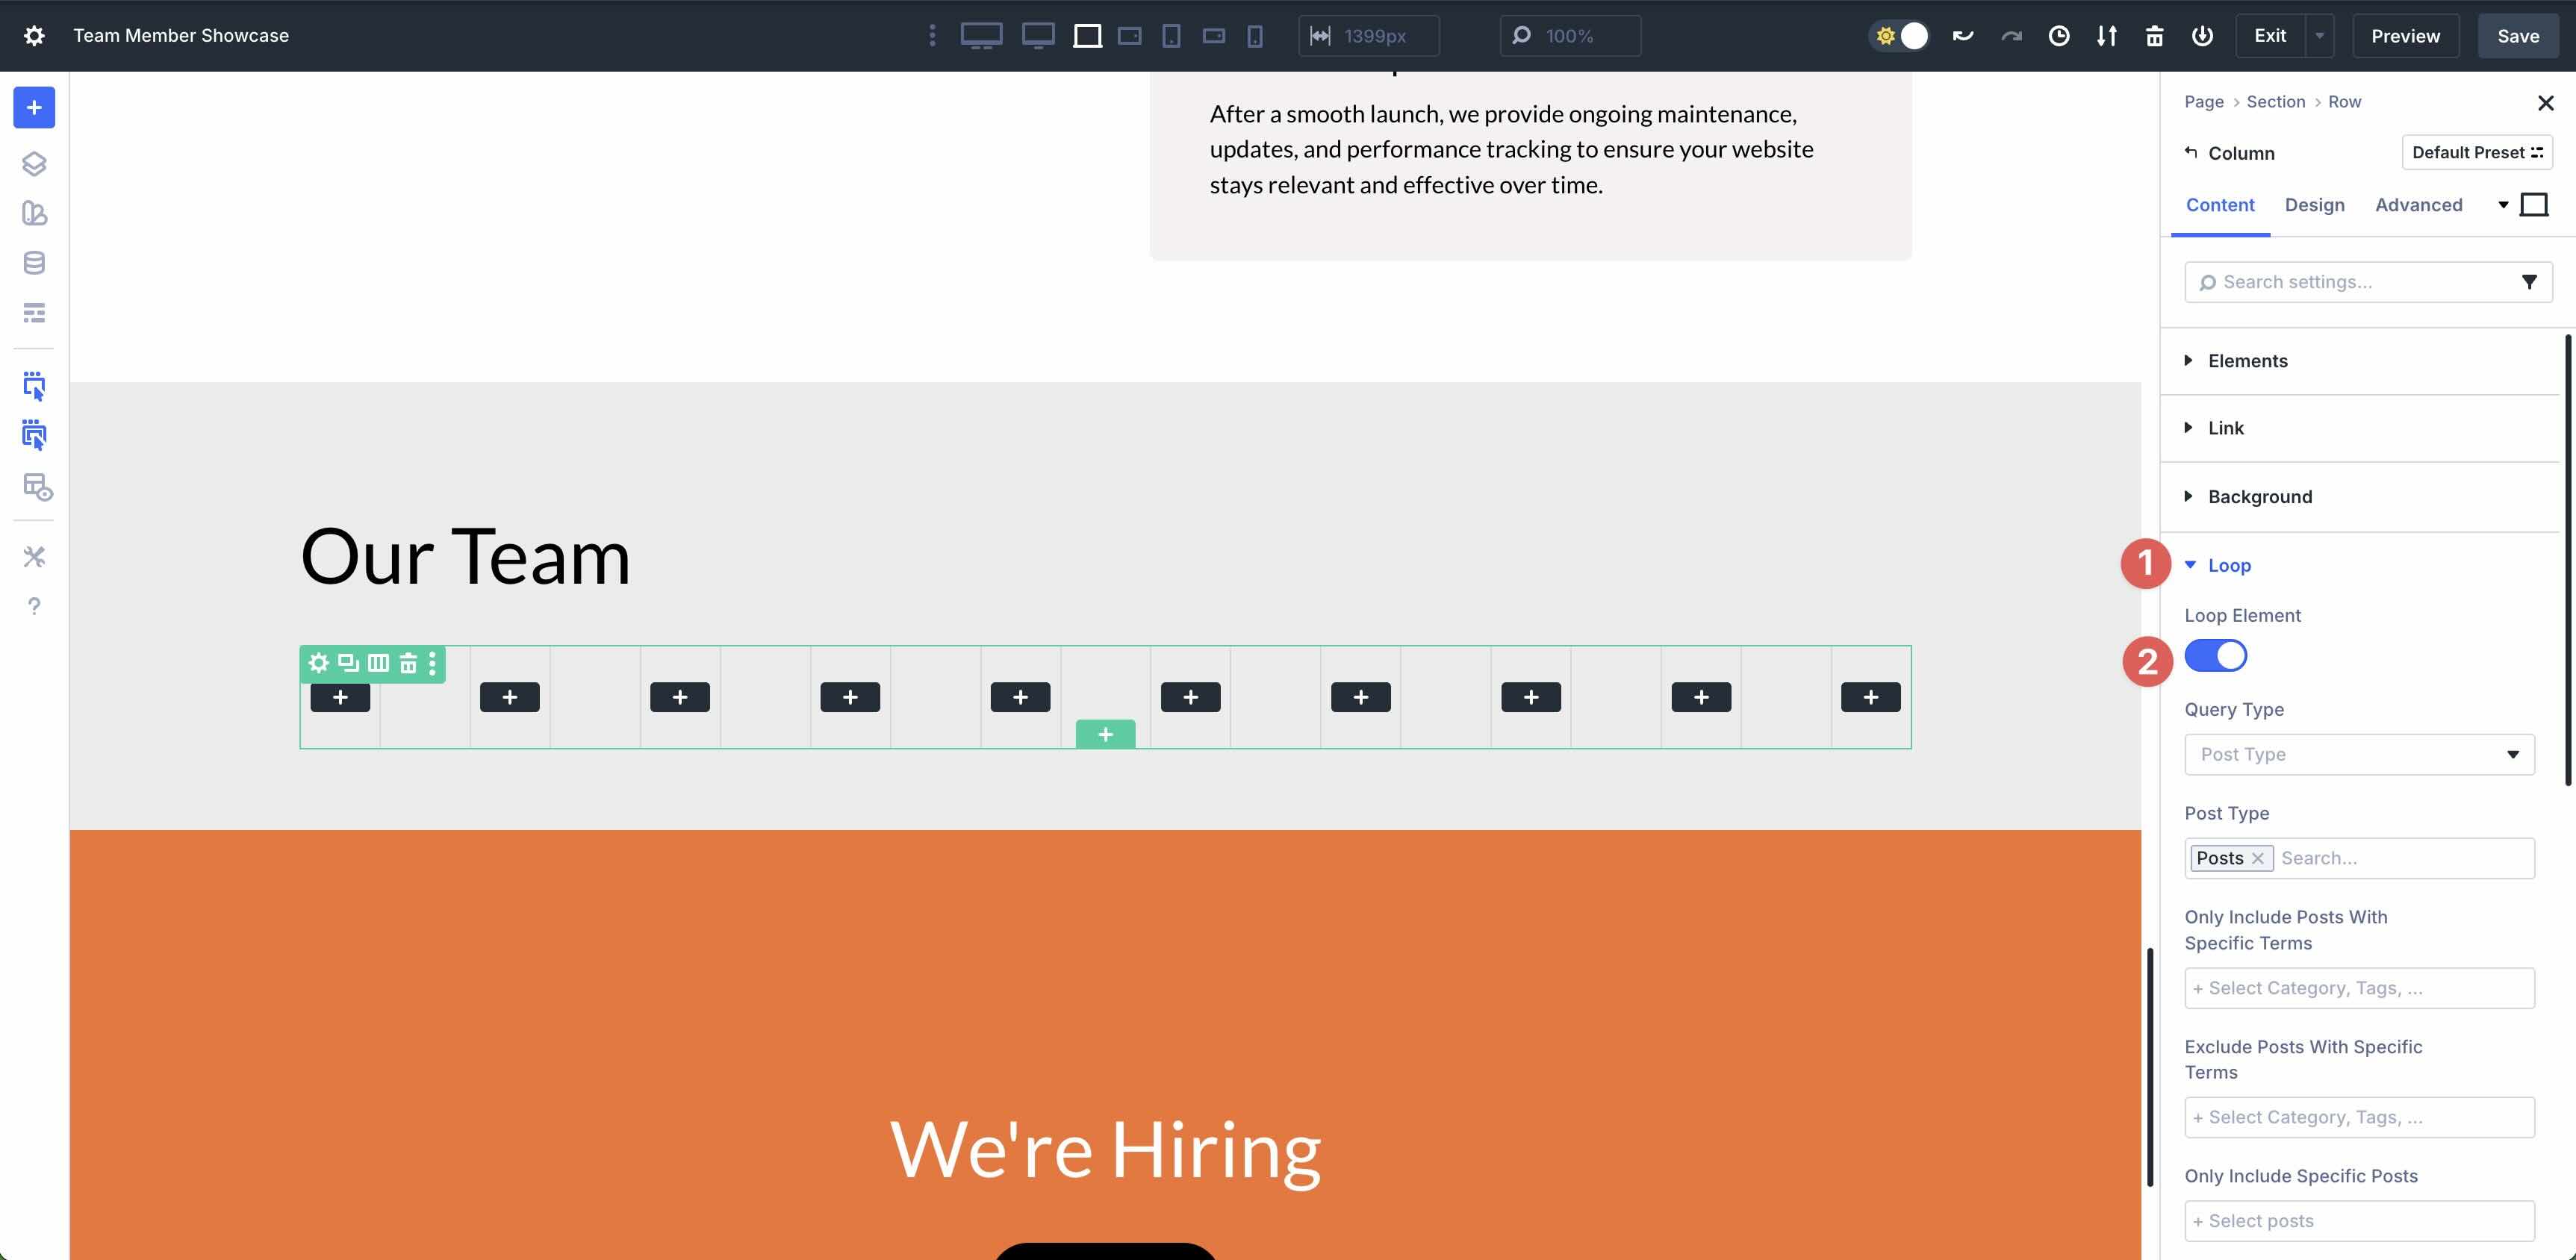
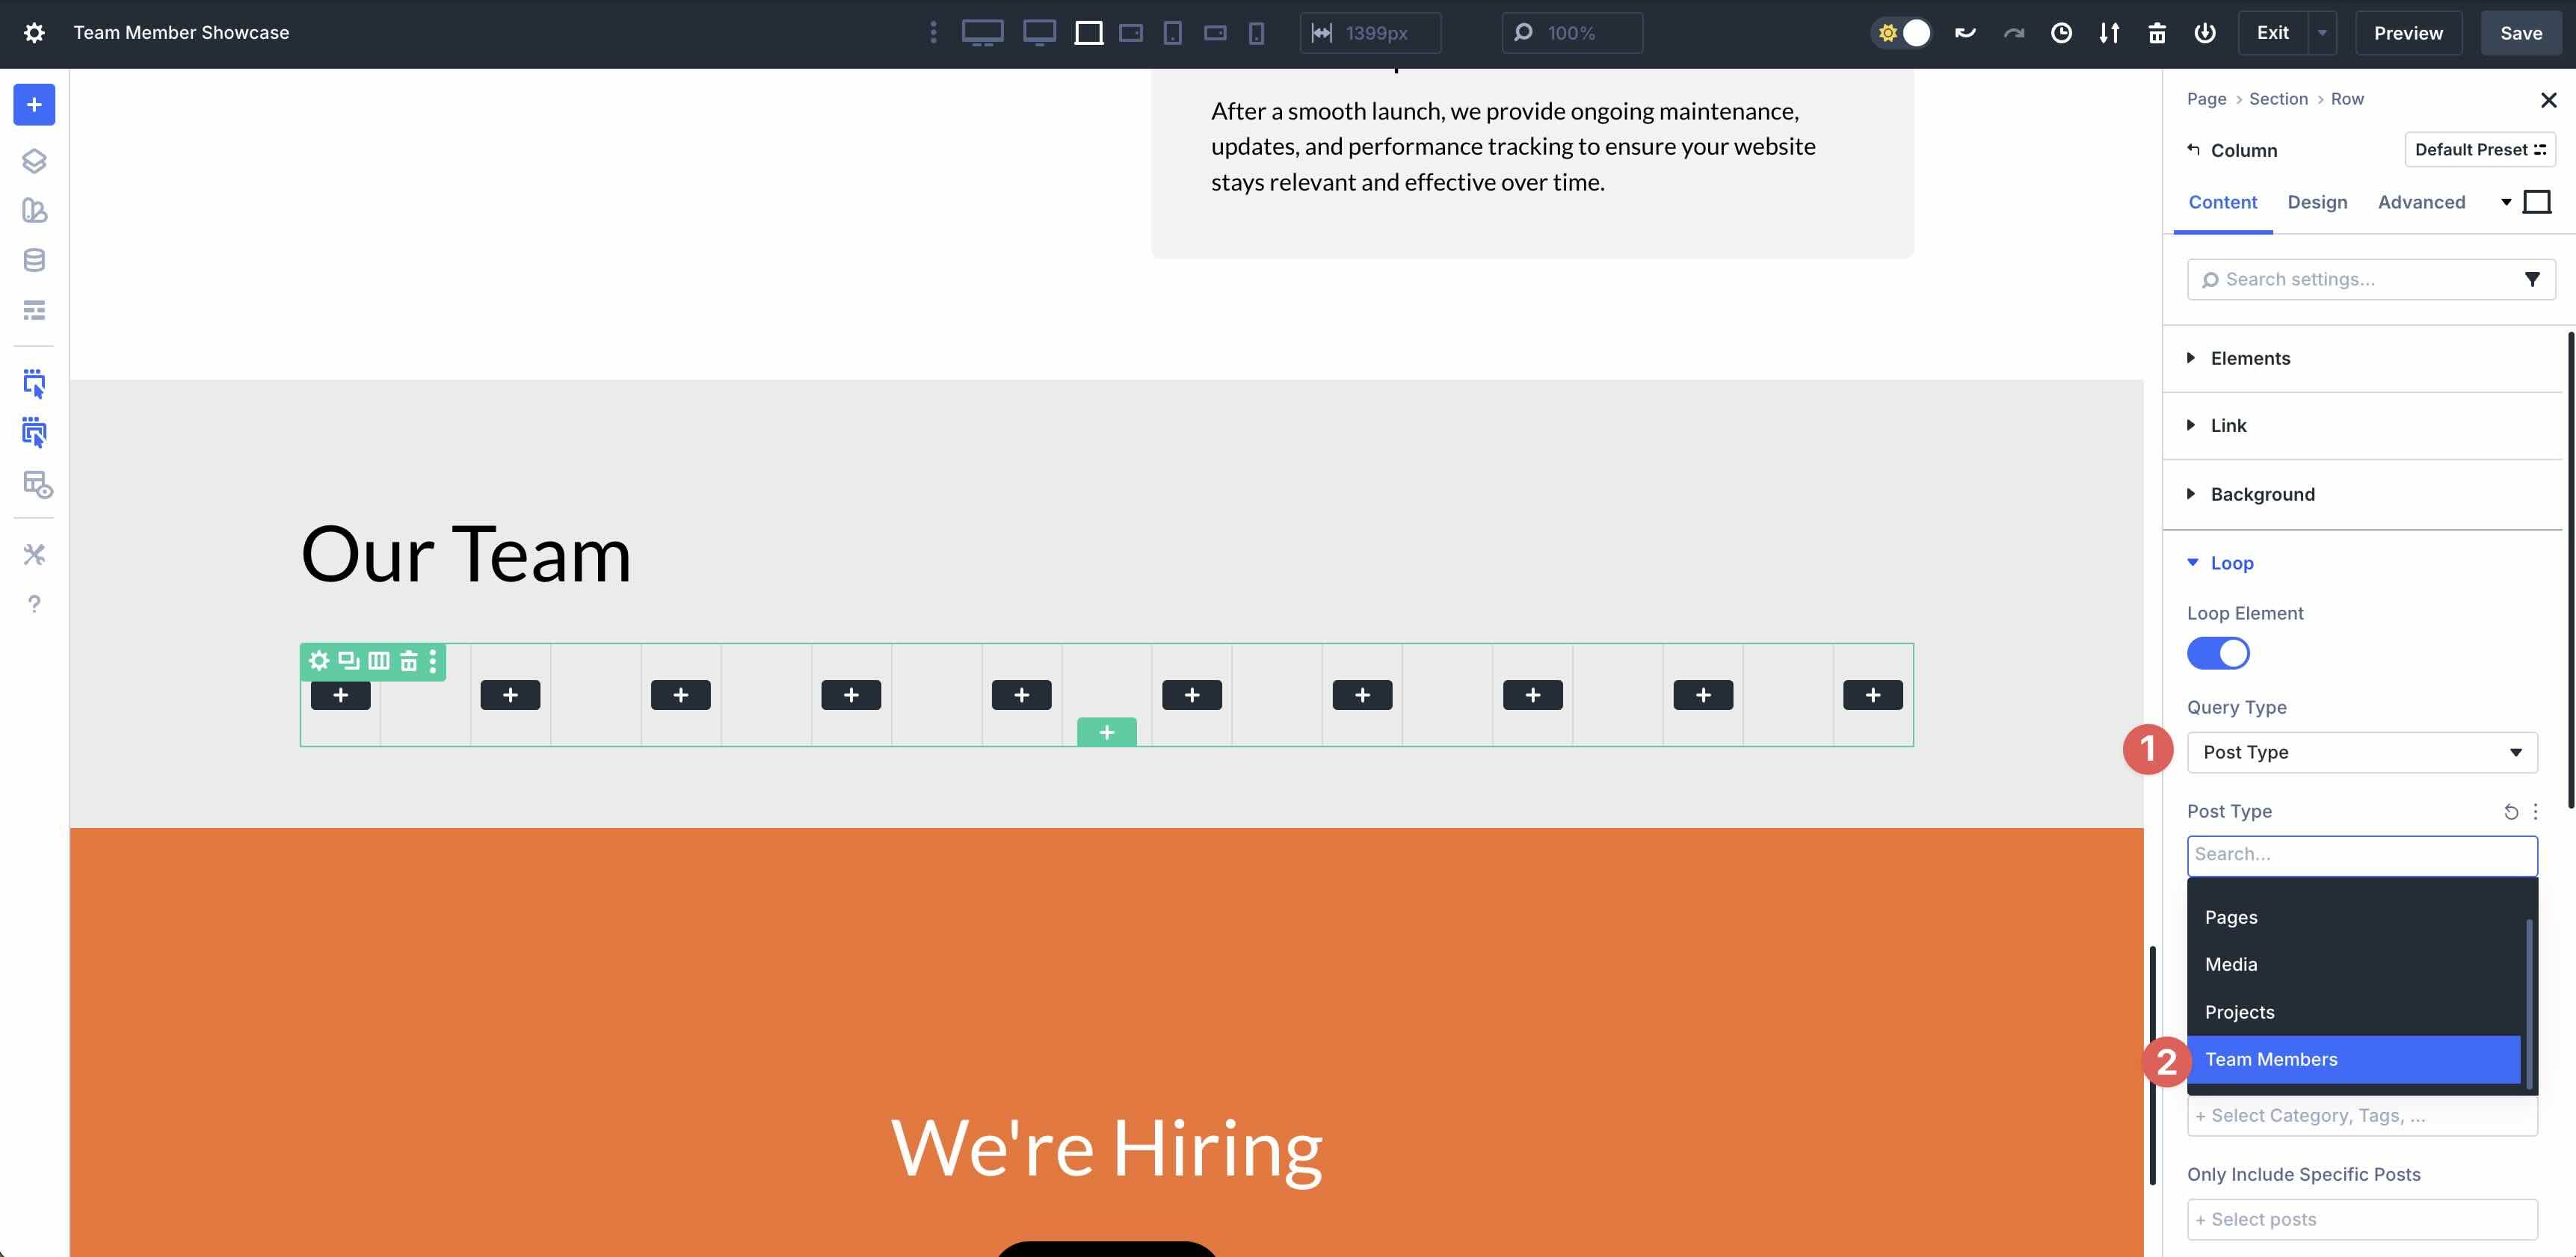
Keep Post Type selected in the Query Type field. In the Post Type field, select the Team Members custom post type.
In the Only Include Posts With Specific Terms field, select Team Members.
For the Posts Per Page field, enter 12. This will display all 12 posts on the Loop.

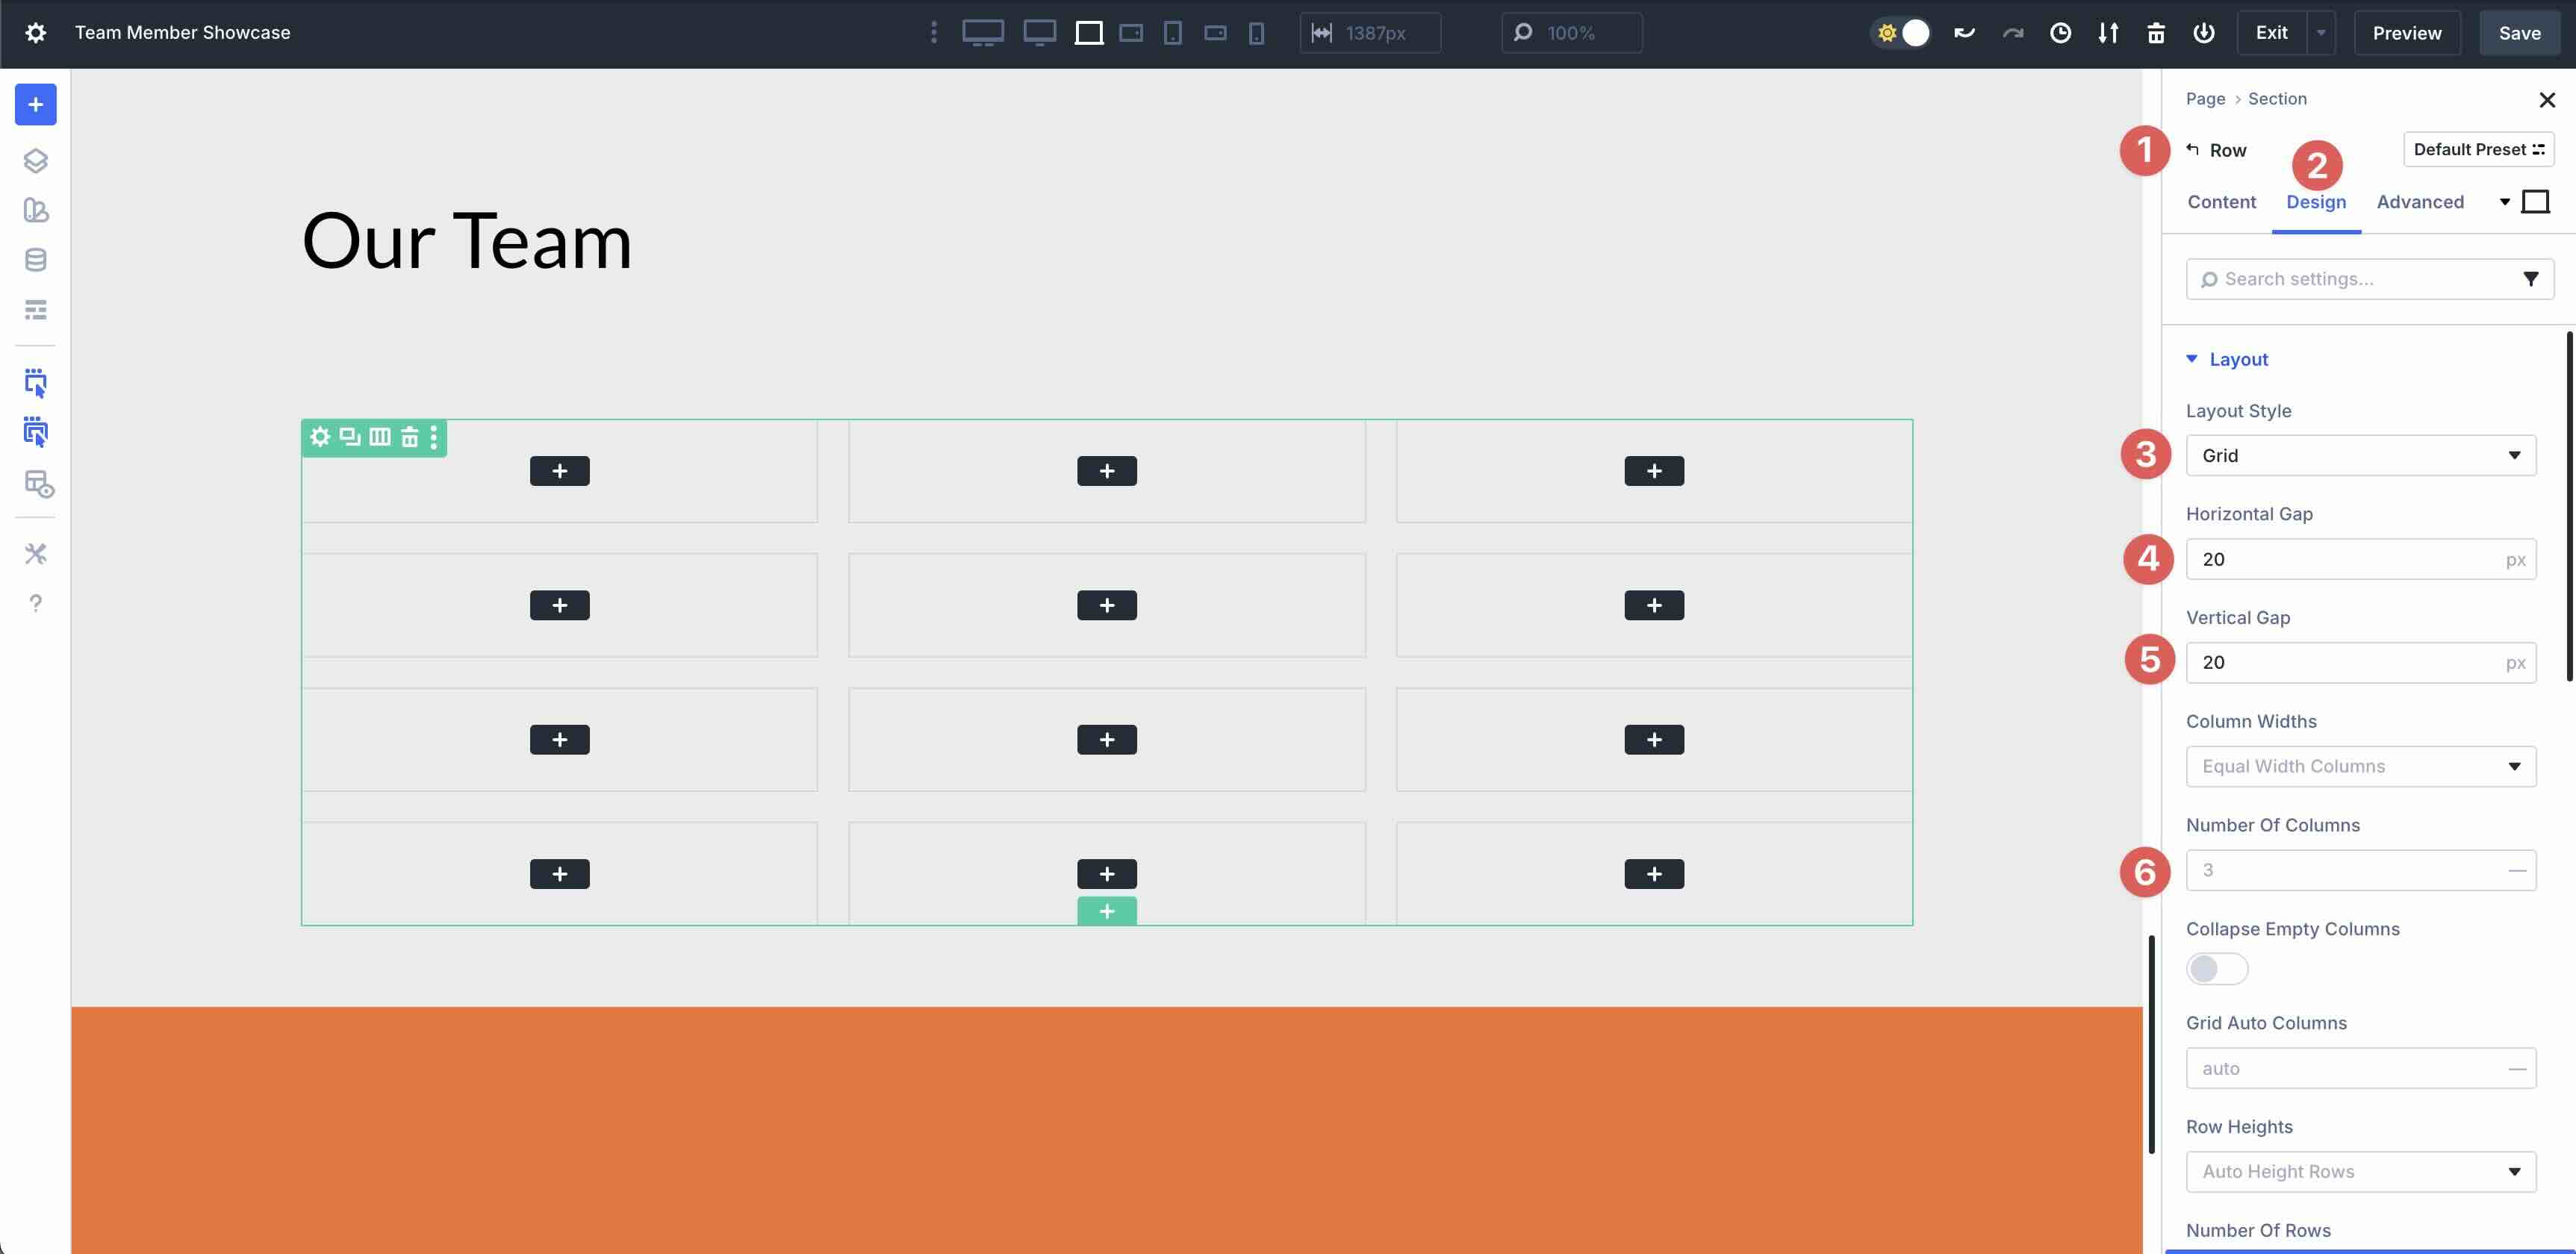
Switch to the Design tab in the Row settings. Swap the Layout Style to Grid and assign a 20px Vertical and Horizontal Gap to the Row. Set the Number of Columns to 3.
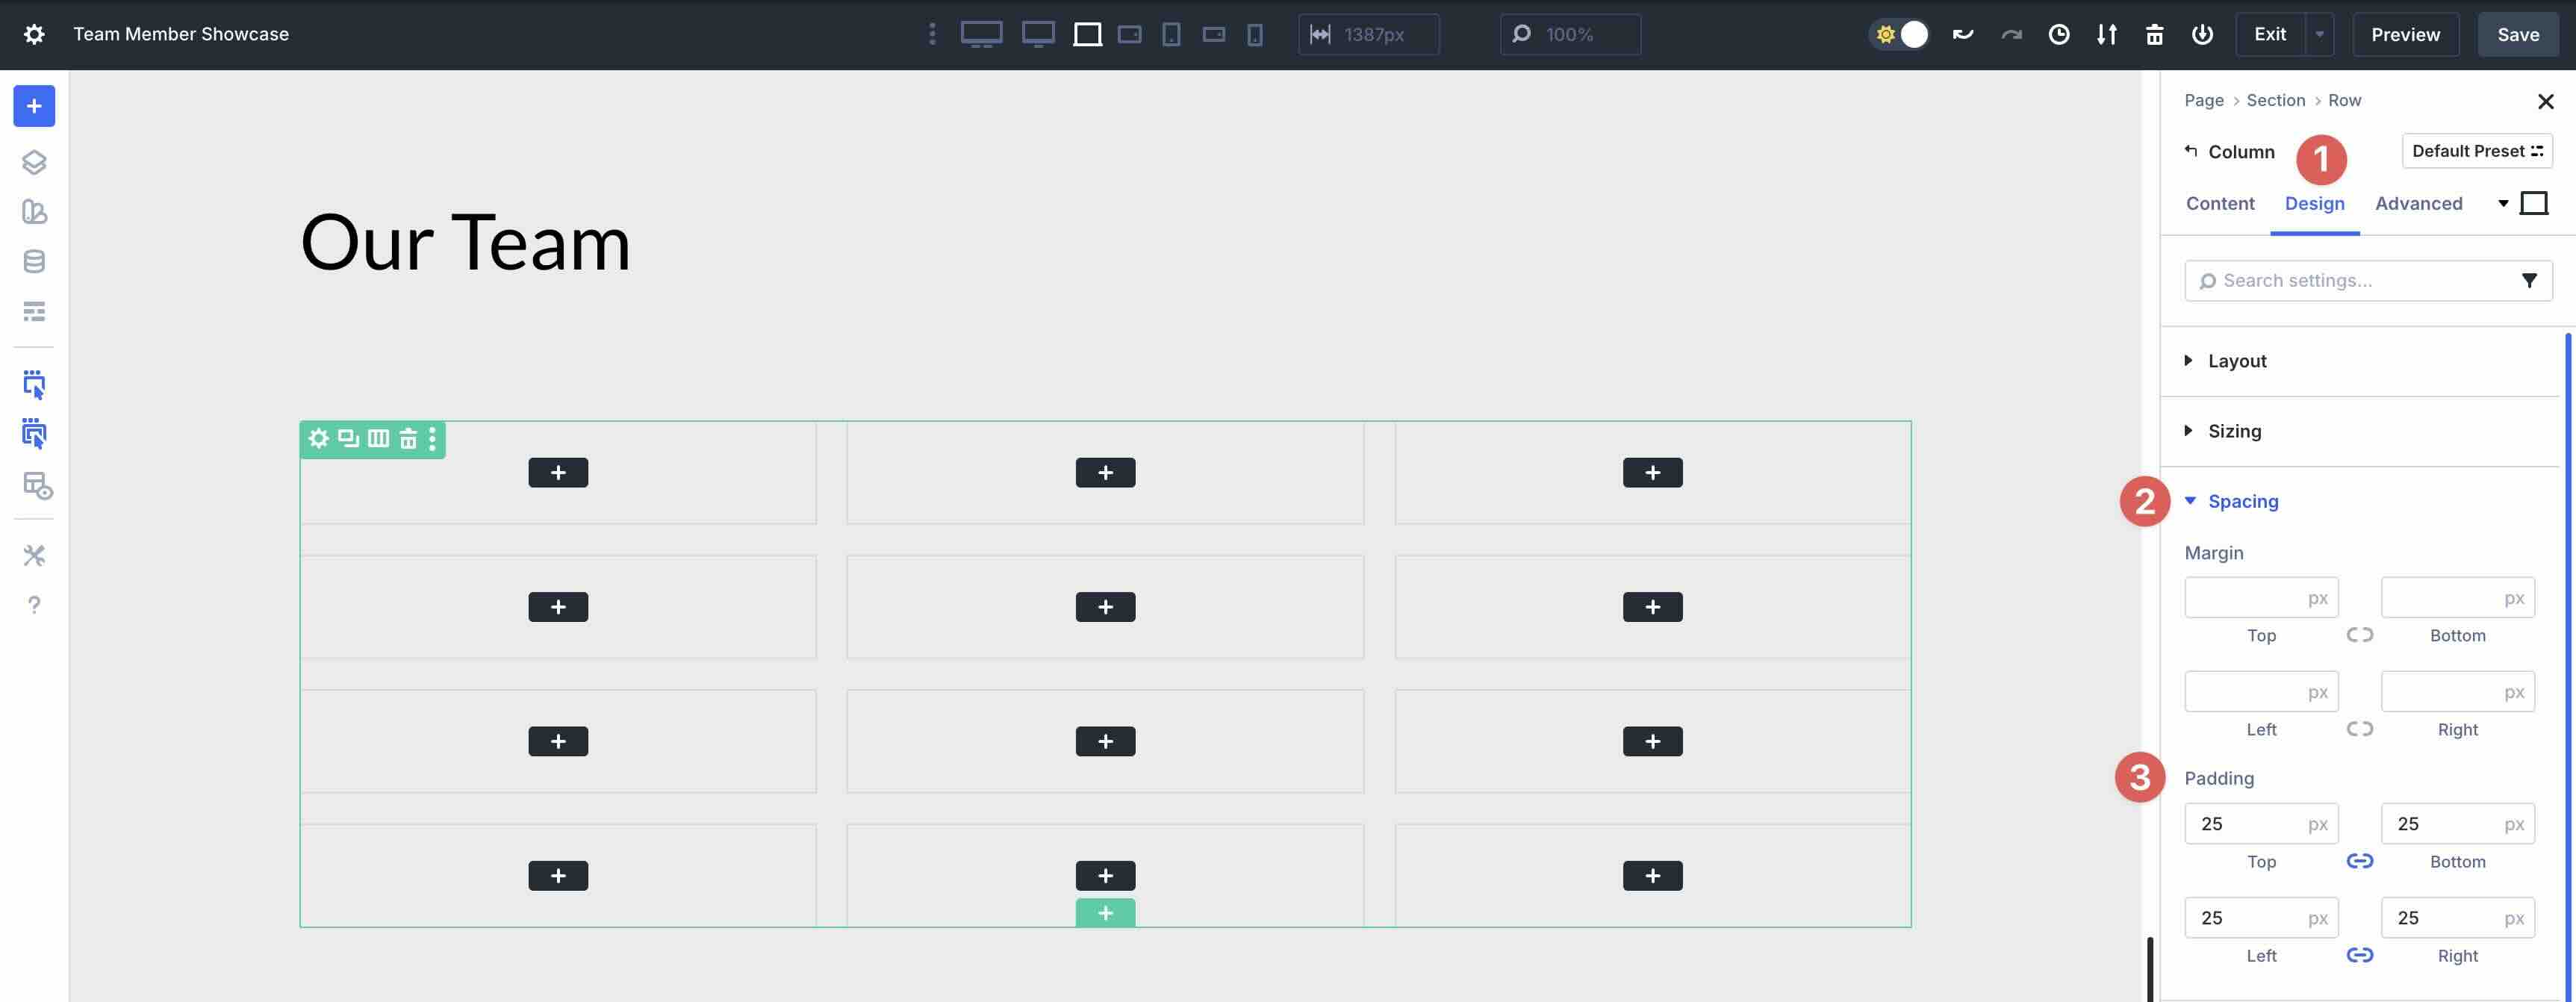
Step 3: Style Column
With our Loop in place, we can style the Column that will house the content. Click into the single Column of the Row. Navigate to the Design tab. Expand the Spacing menu and add 25px Padding to all sides.
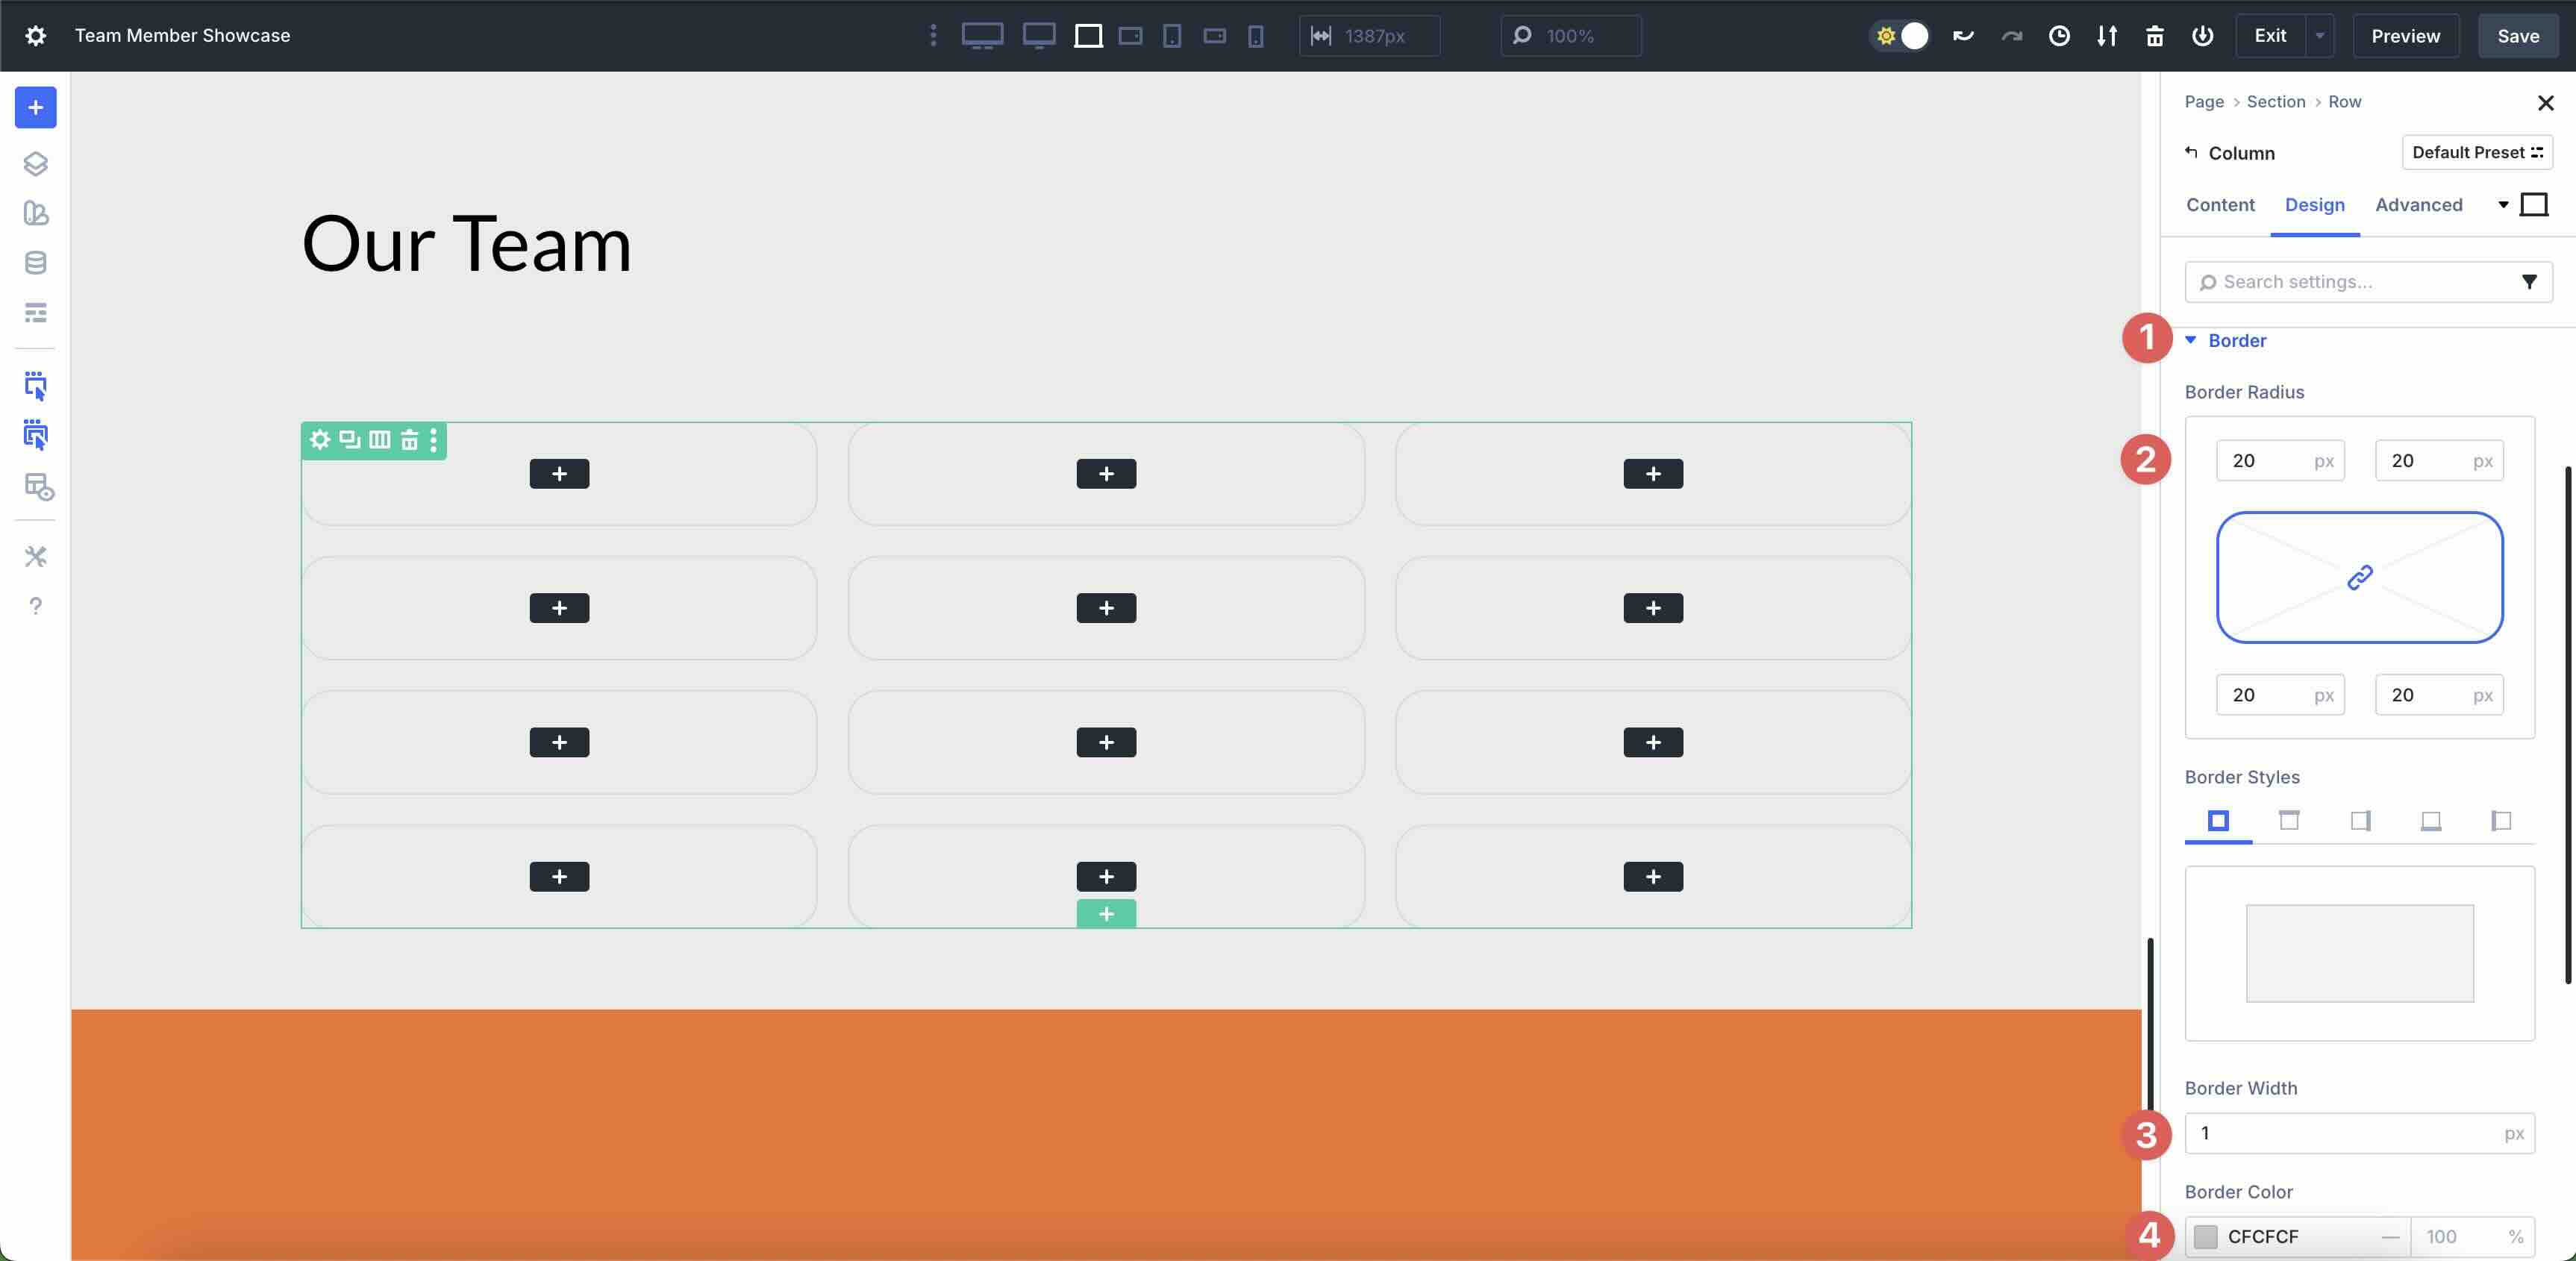
Next, expand the Border menu. Add 20px Border Radius to the Column. Under the Border Styles settings, enter 1px Border Width and assign #cfcfcf as the Border Color.
While in the column settings, navigate back to the Content tab. Expand the Background menu and assign #ffffff as the Background Color.
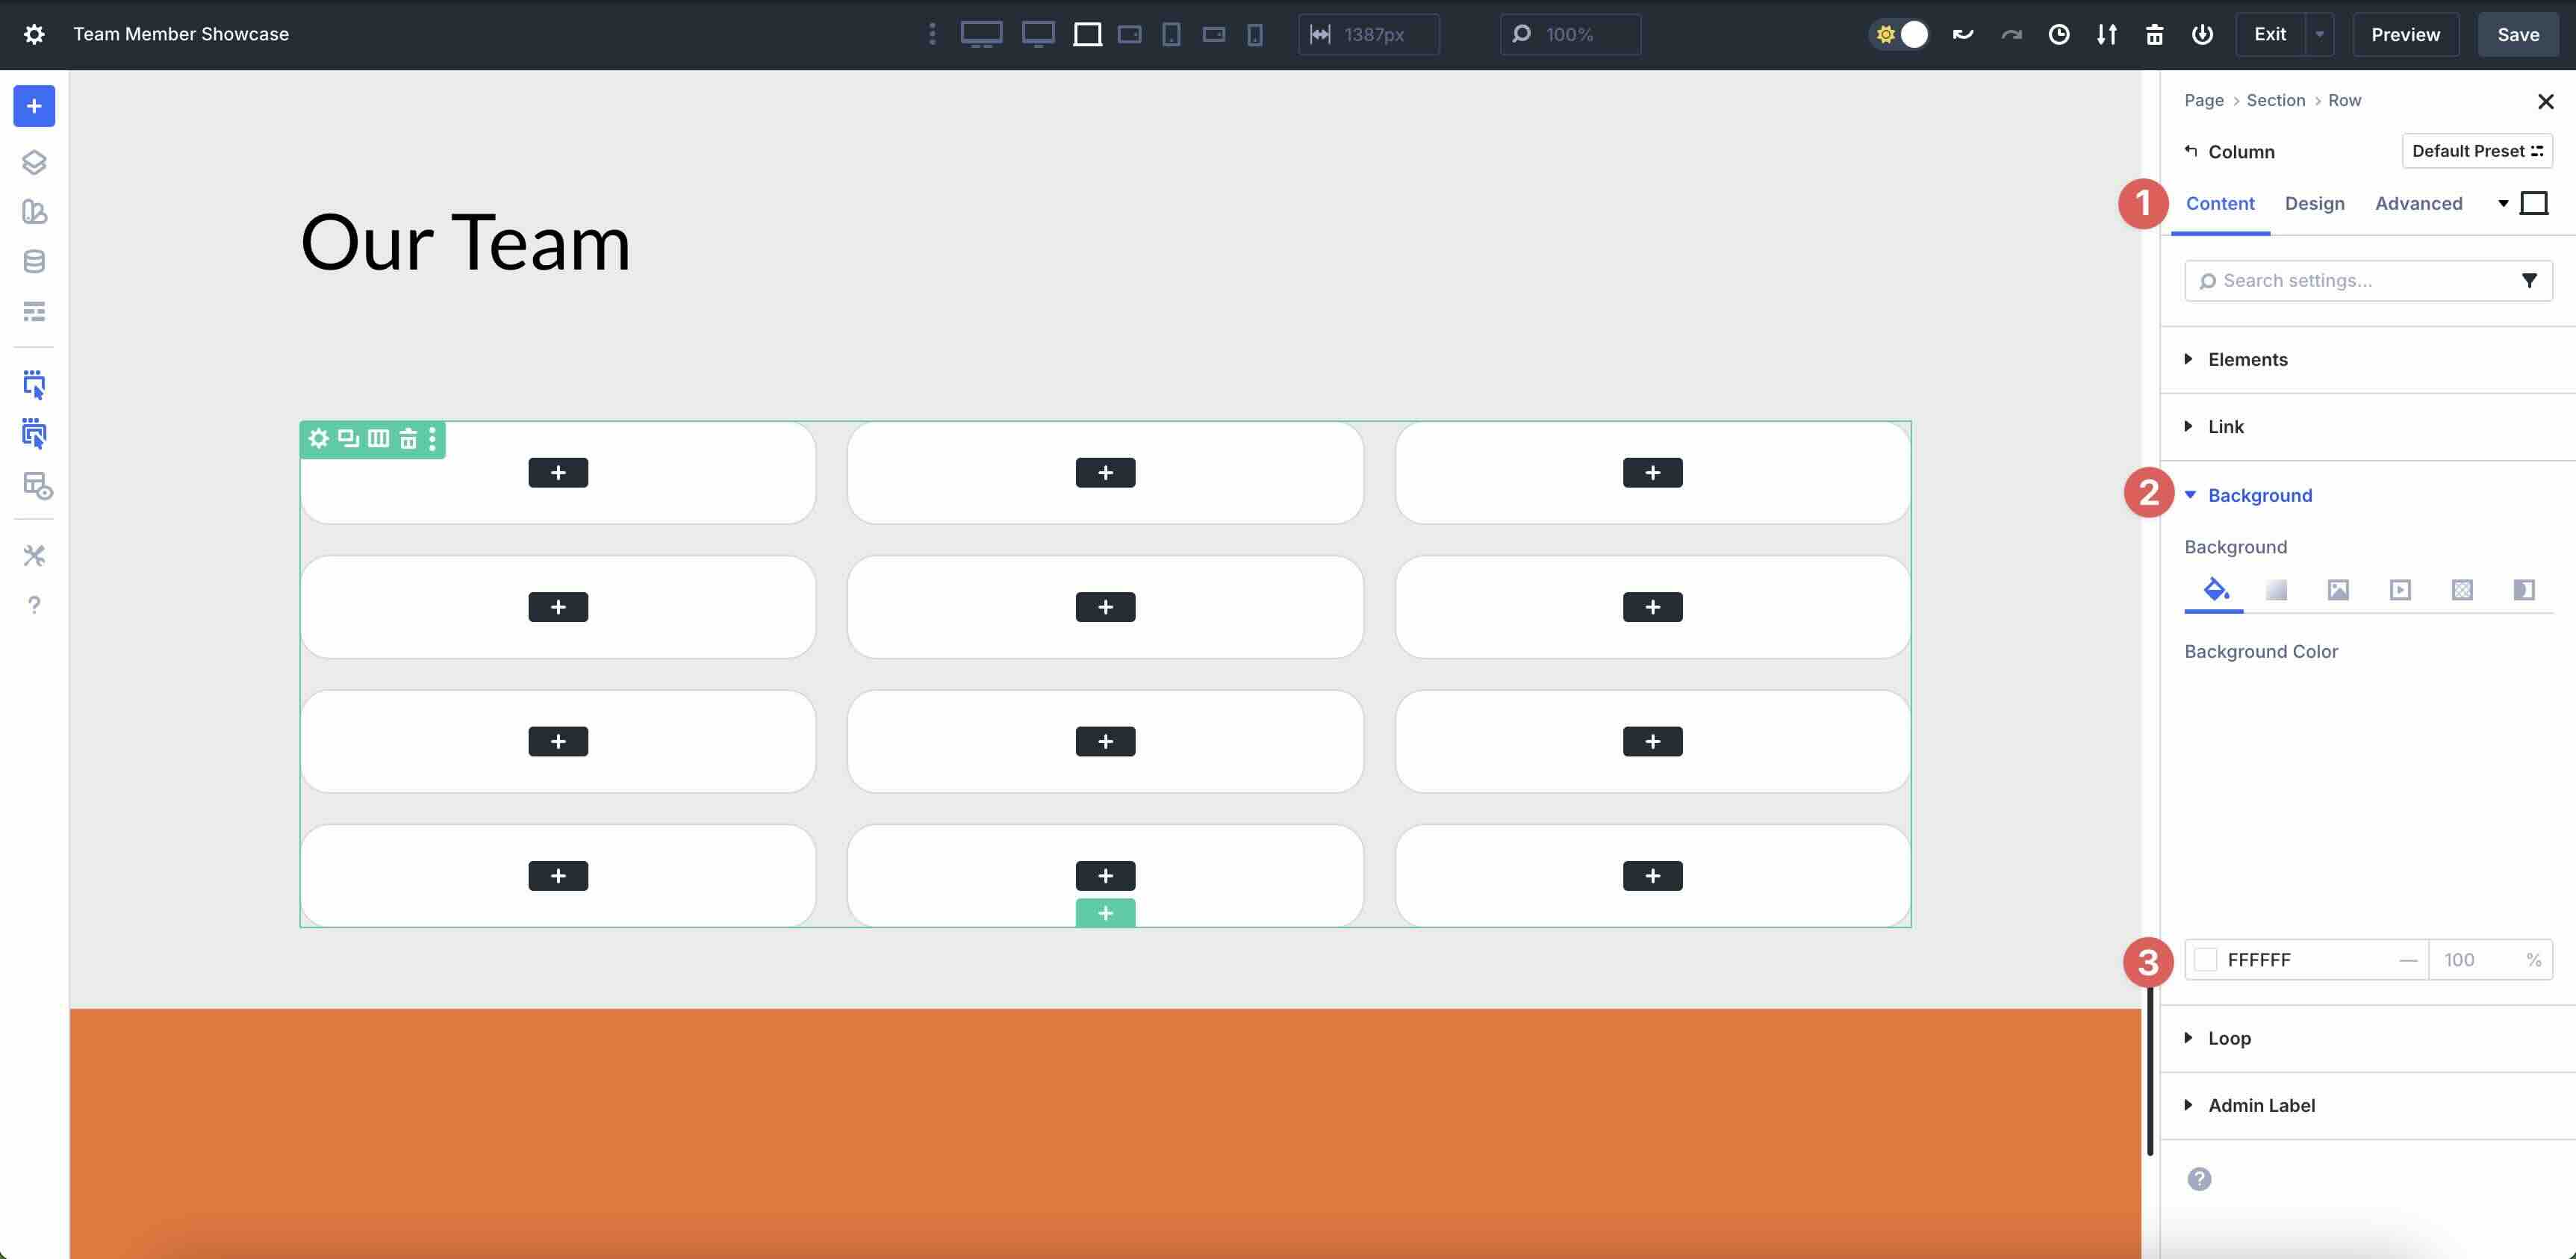
Step 4: Add Content To Column
Now, we can start adding content to the Column. Click into the first Column of the Loop to add an Image module.
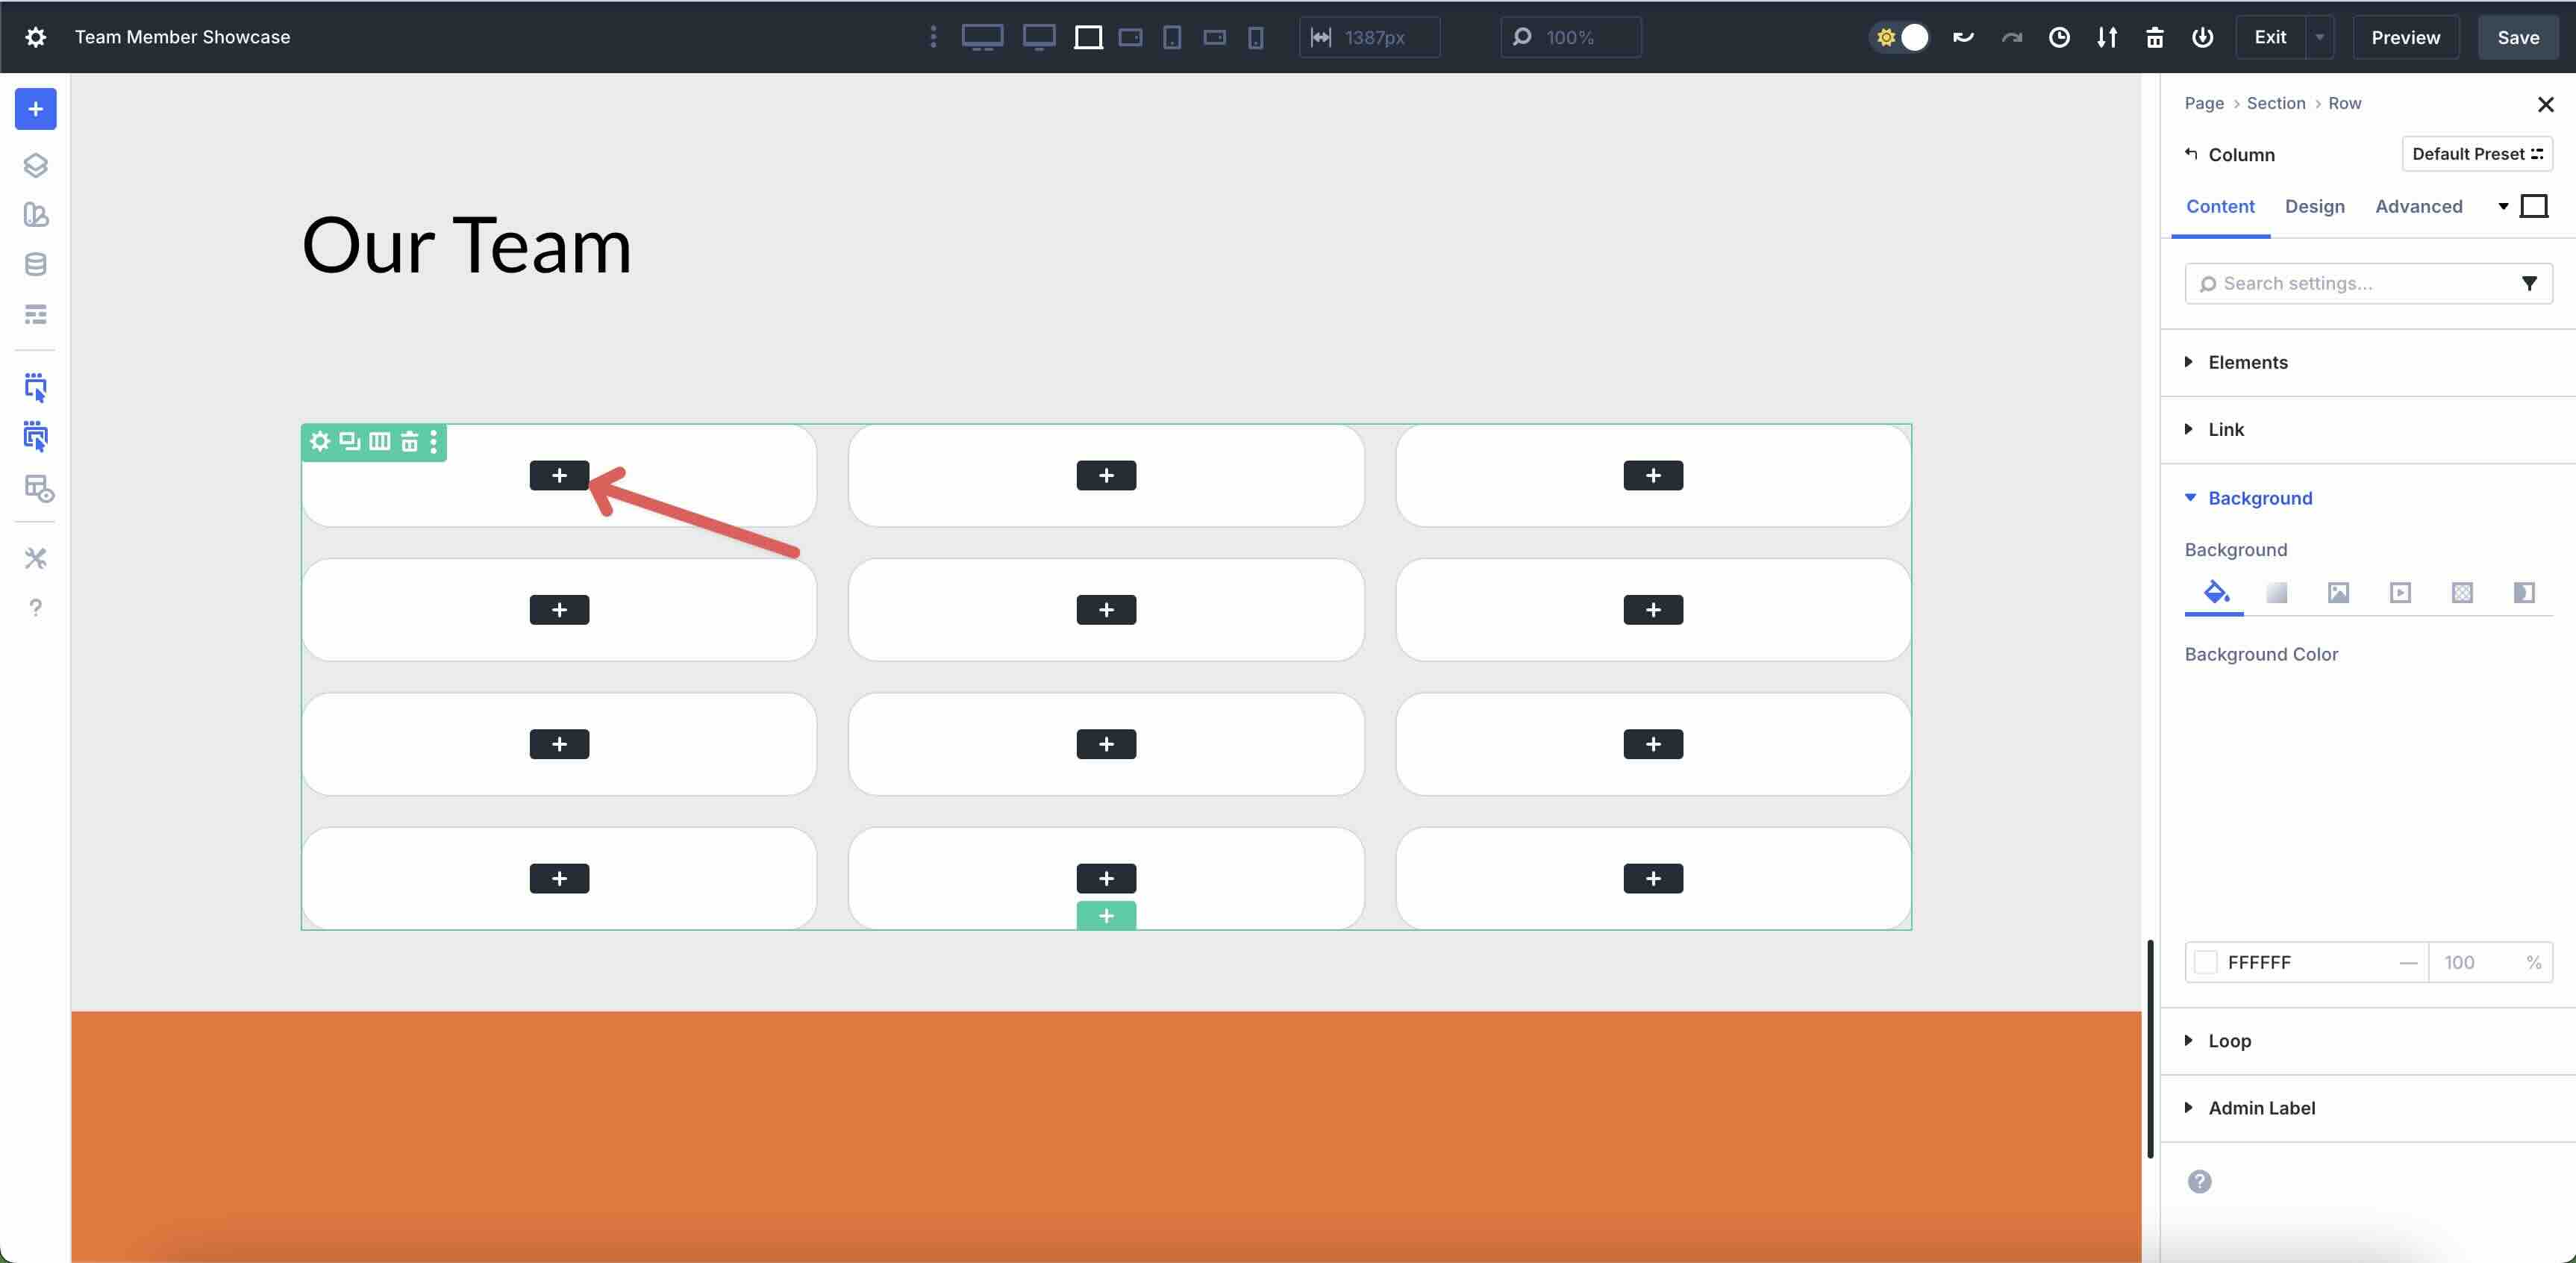
Hover above the image field to reveal the Dynamic Content icon.
![]()
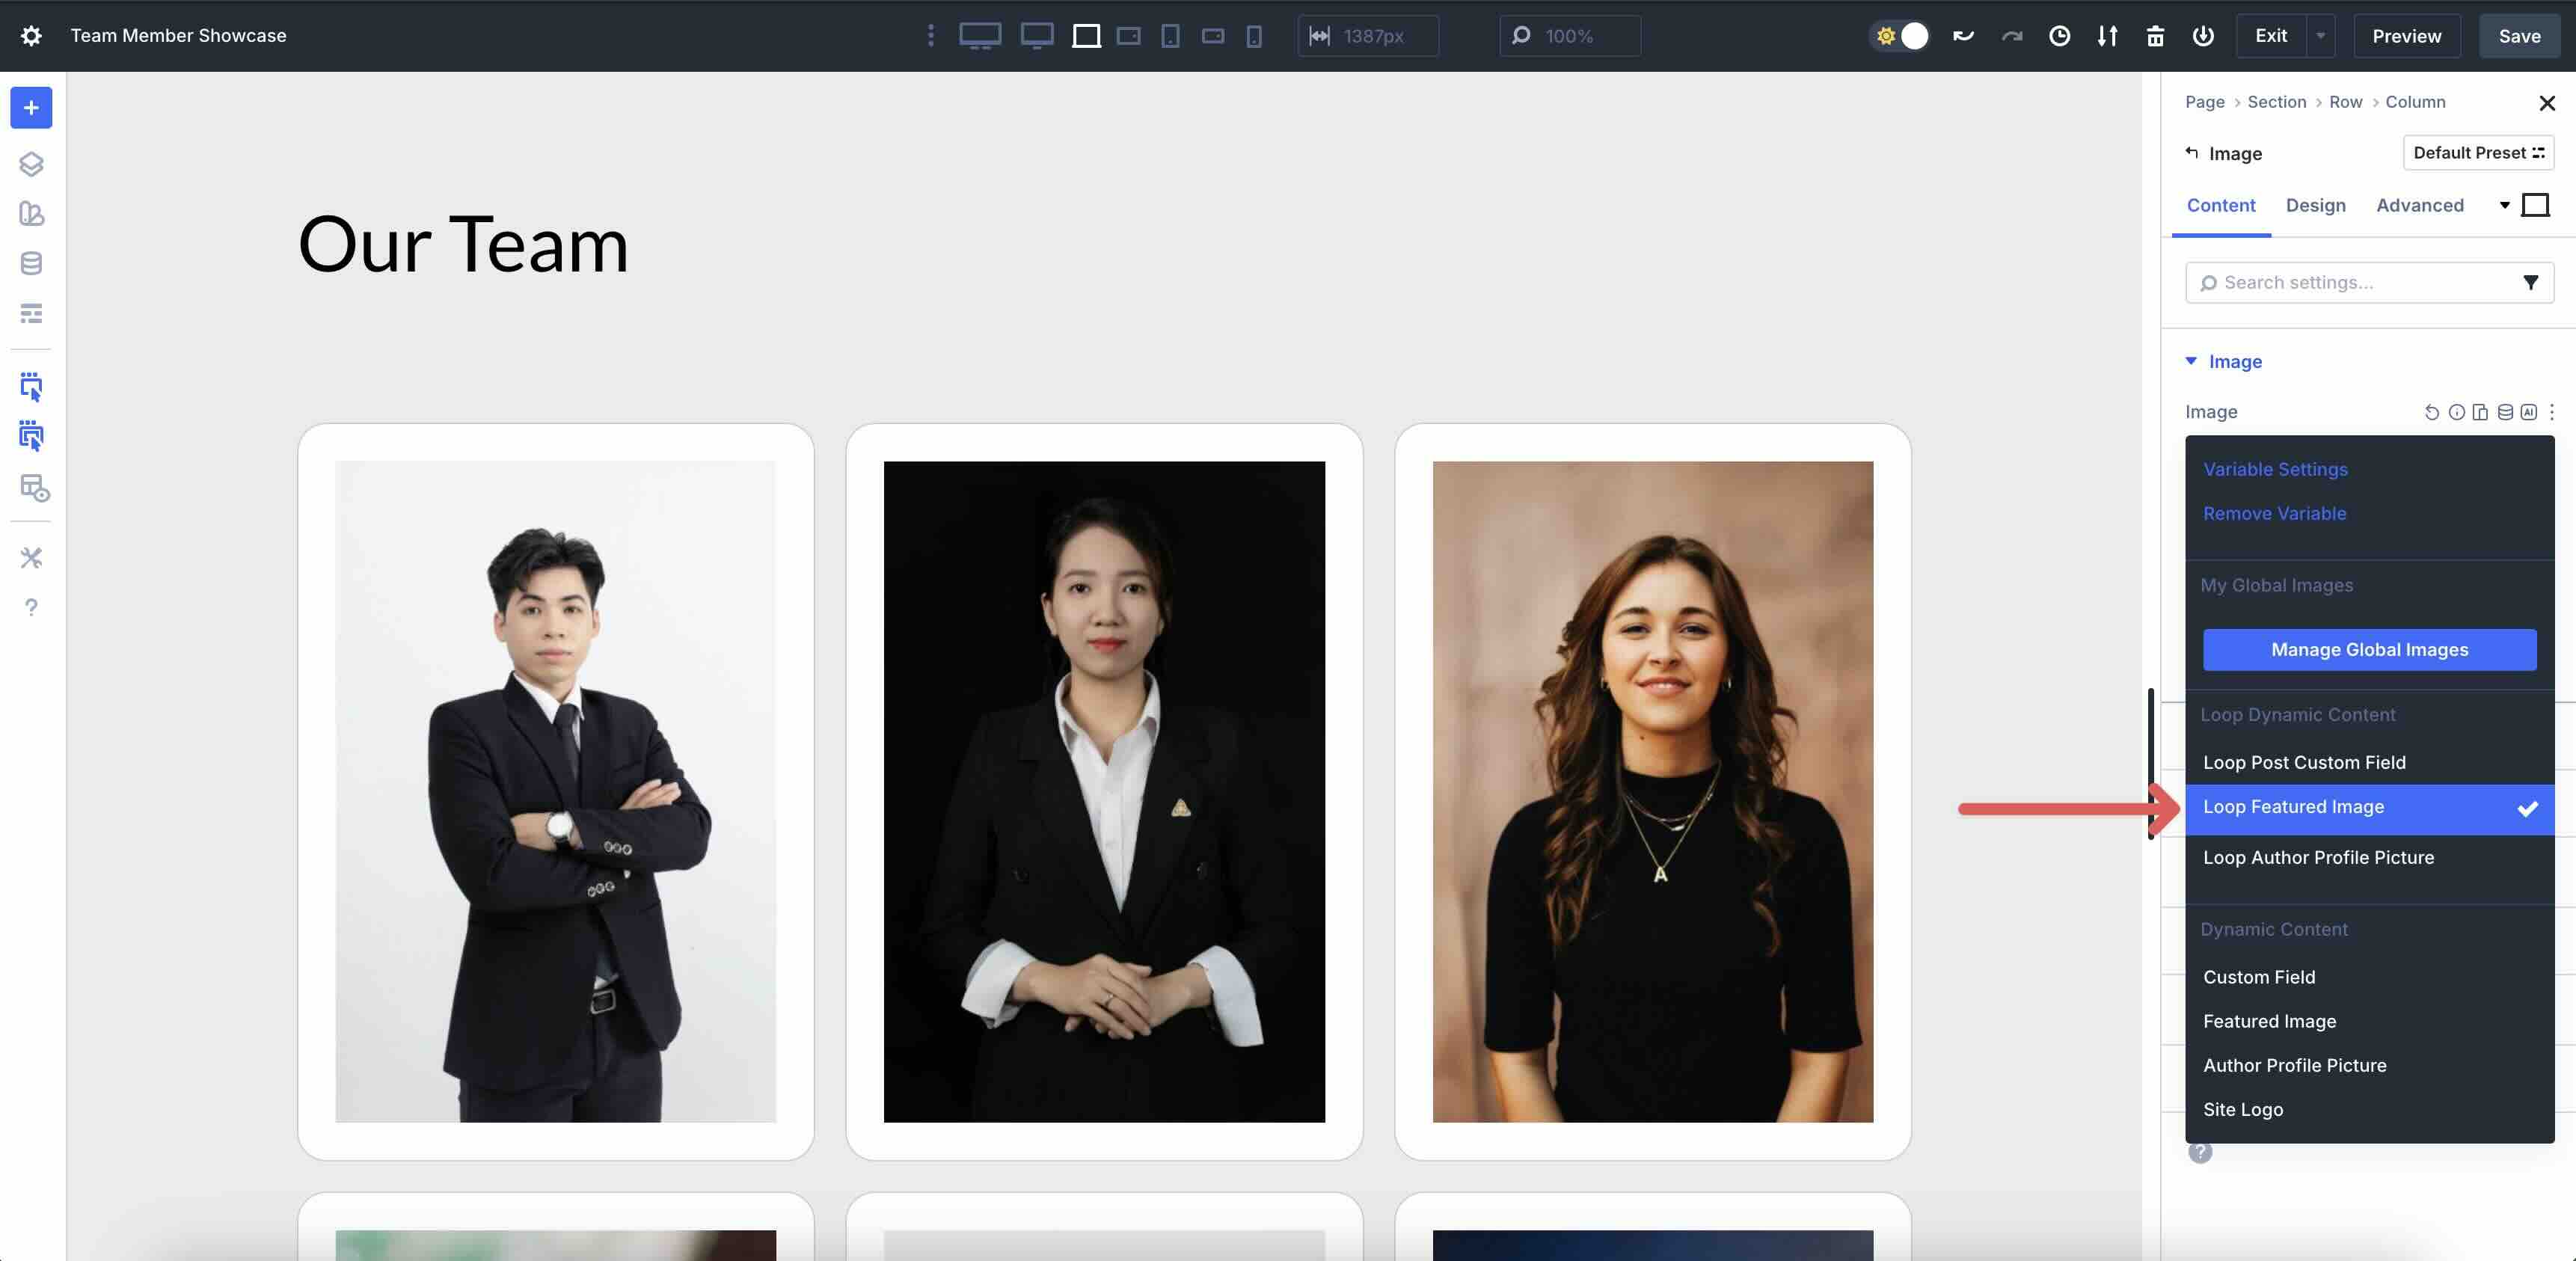
Select Loop Featured Image as the dynamic tag. Style the image as desired.
Add Heading Modules
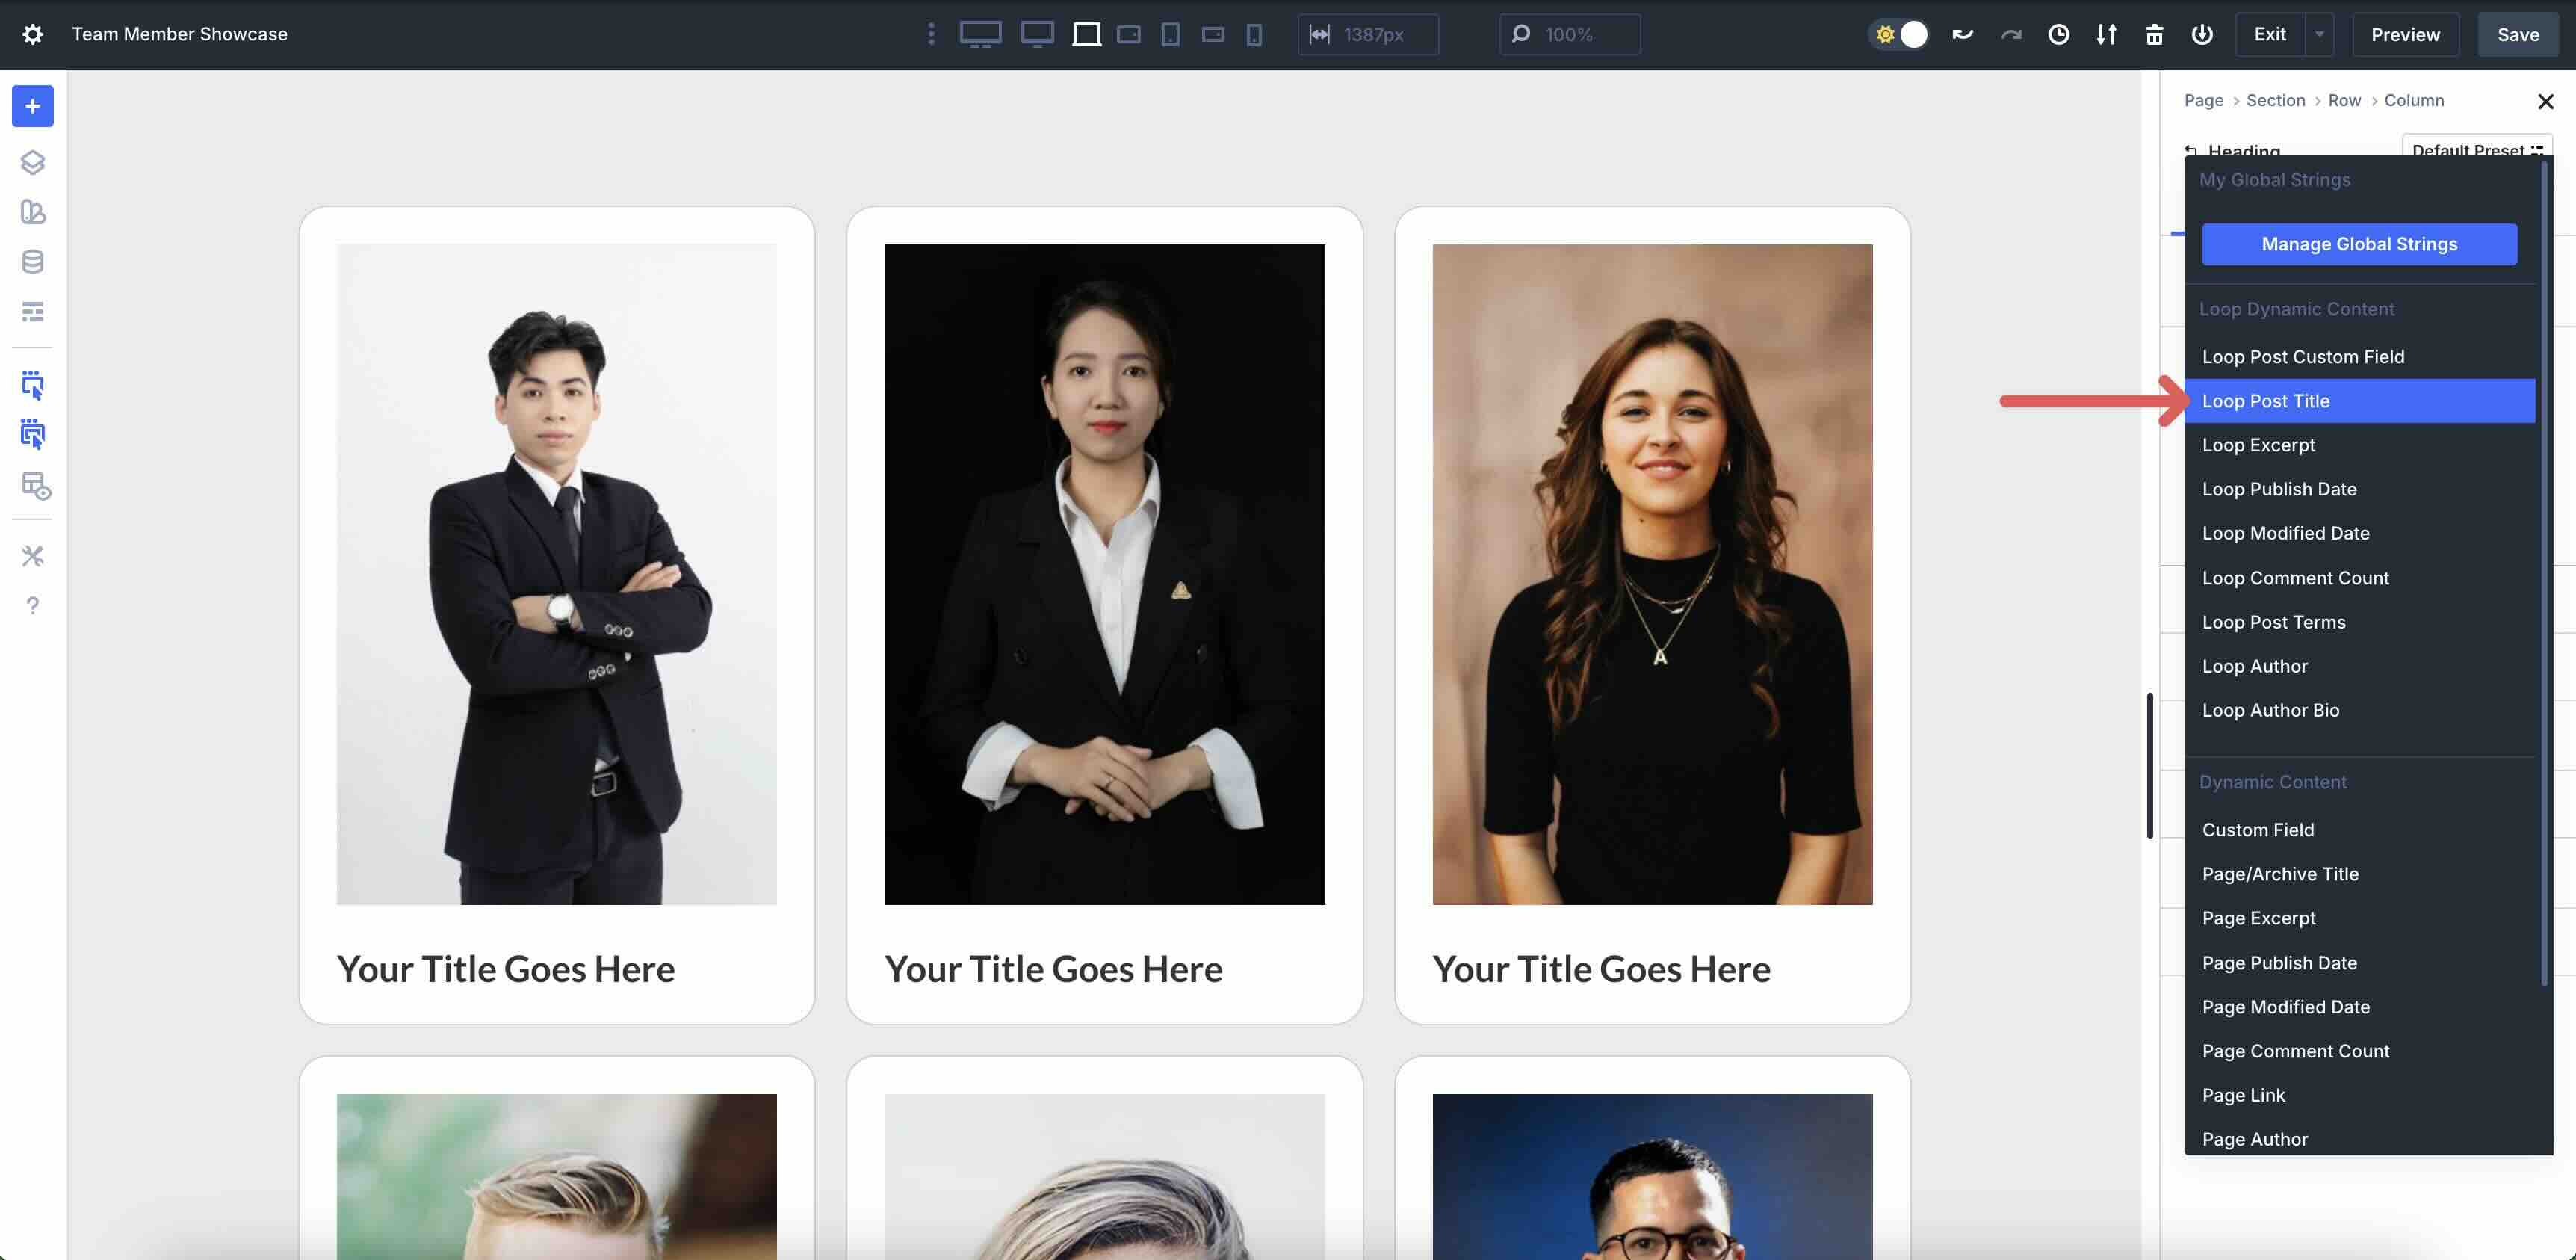
Click the black + icon to add a Heading module.

Click the Dynamic Content icon for the Heading module and select Loop Post Title.
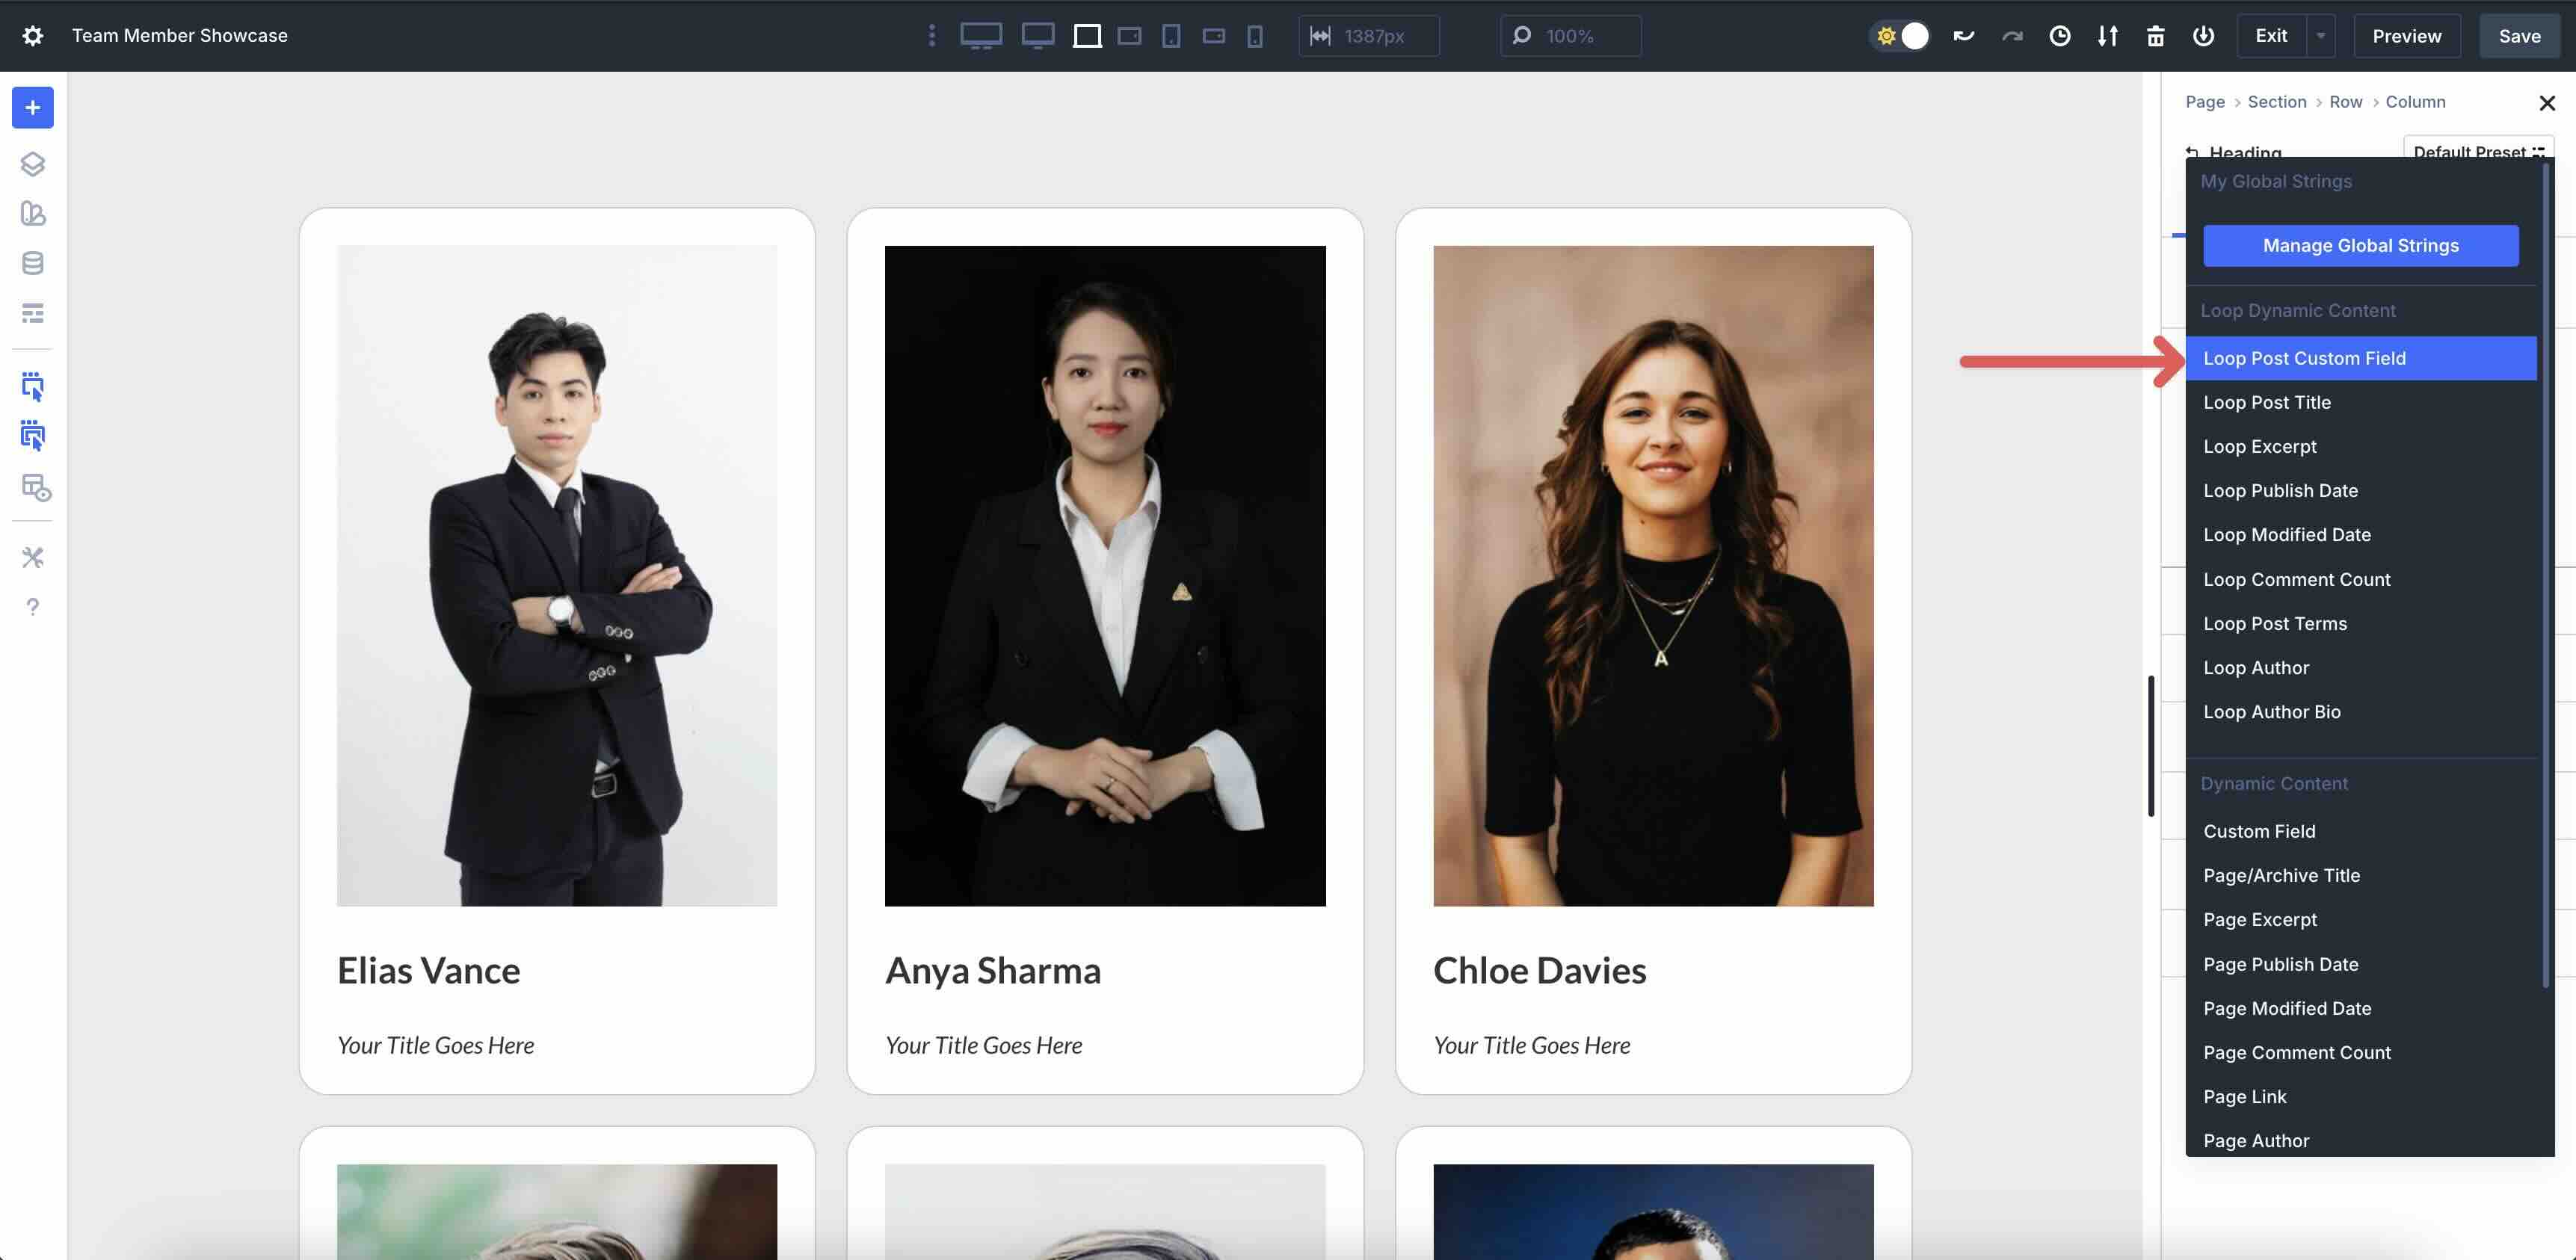
Add another Heading module to the Column. This time, select the Loop Post Custom Field option.
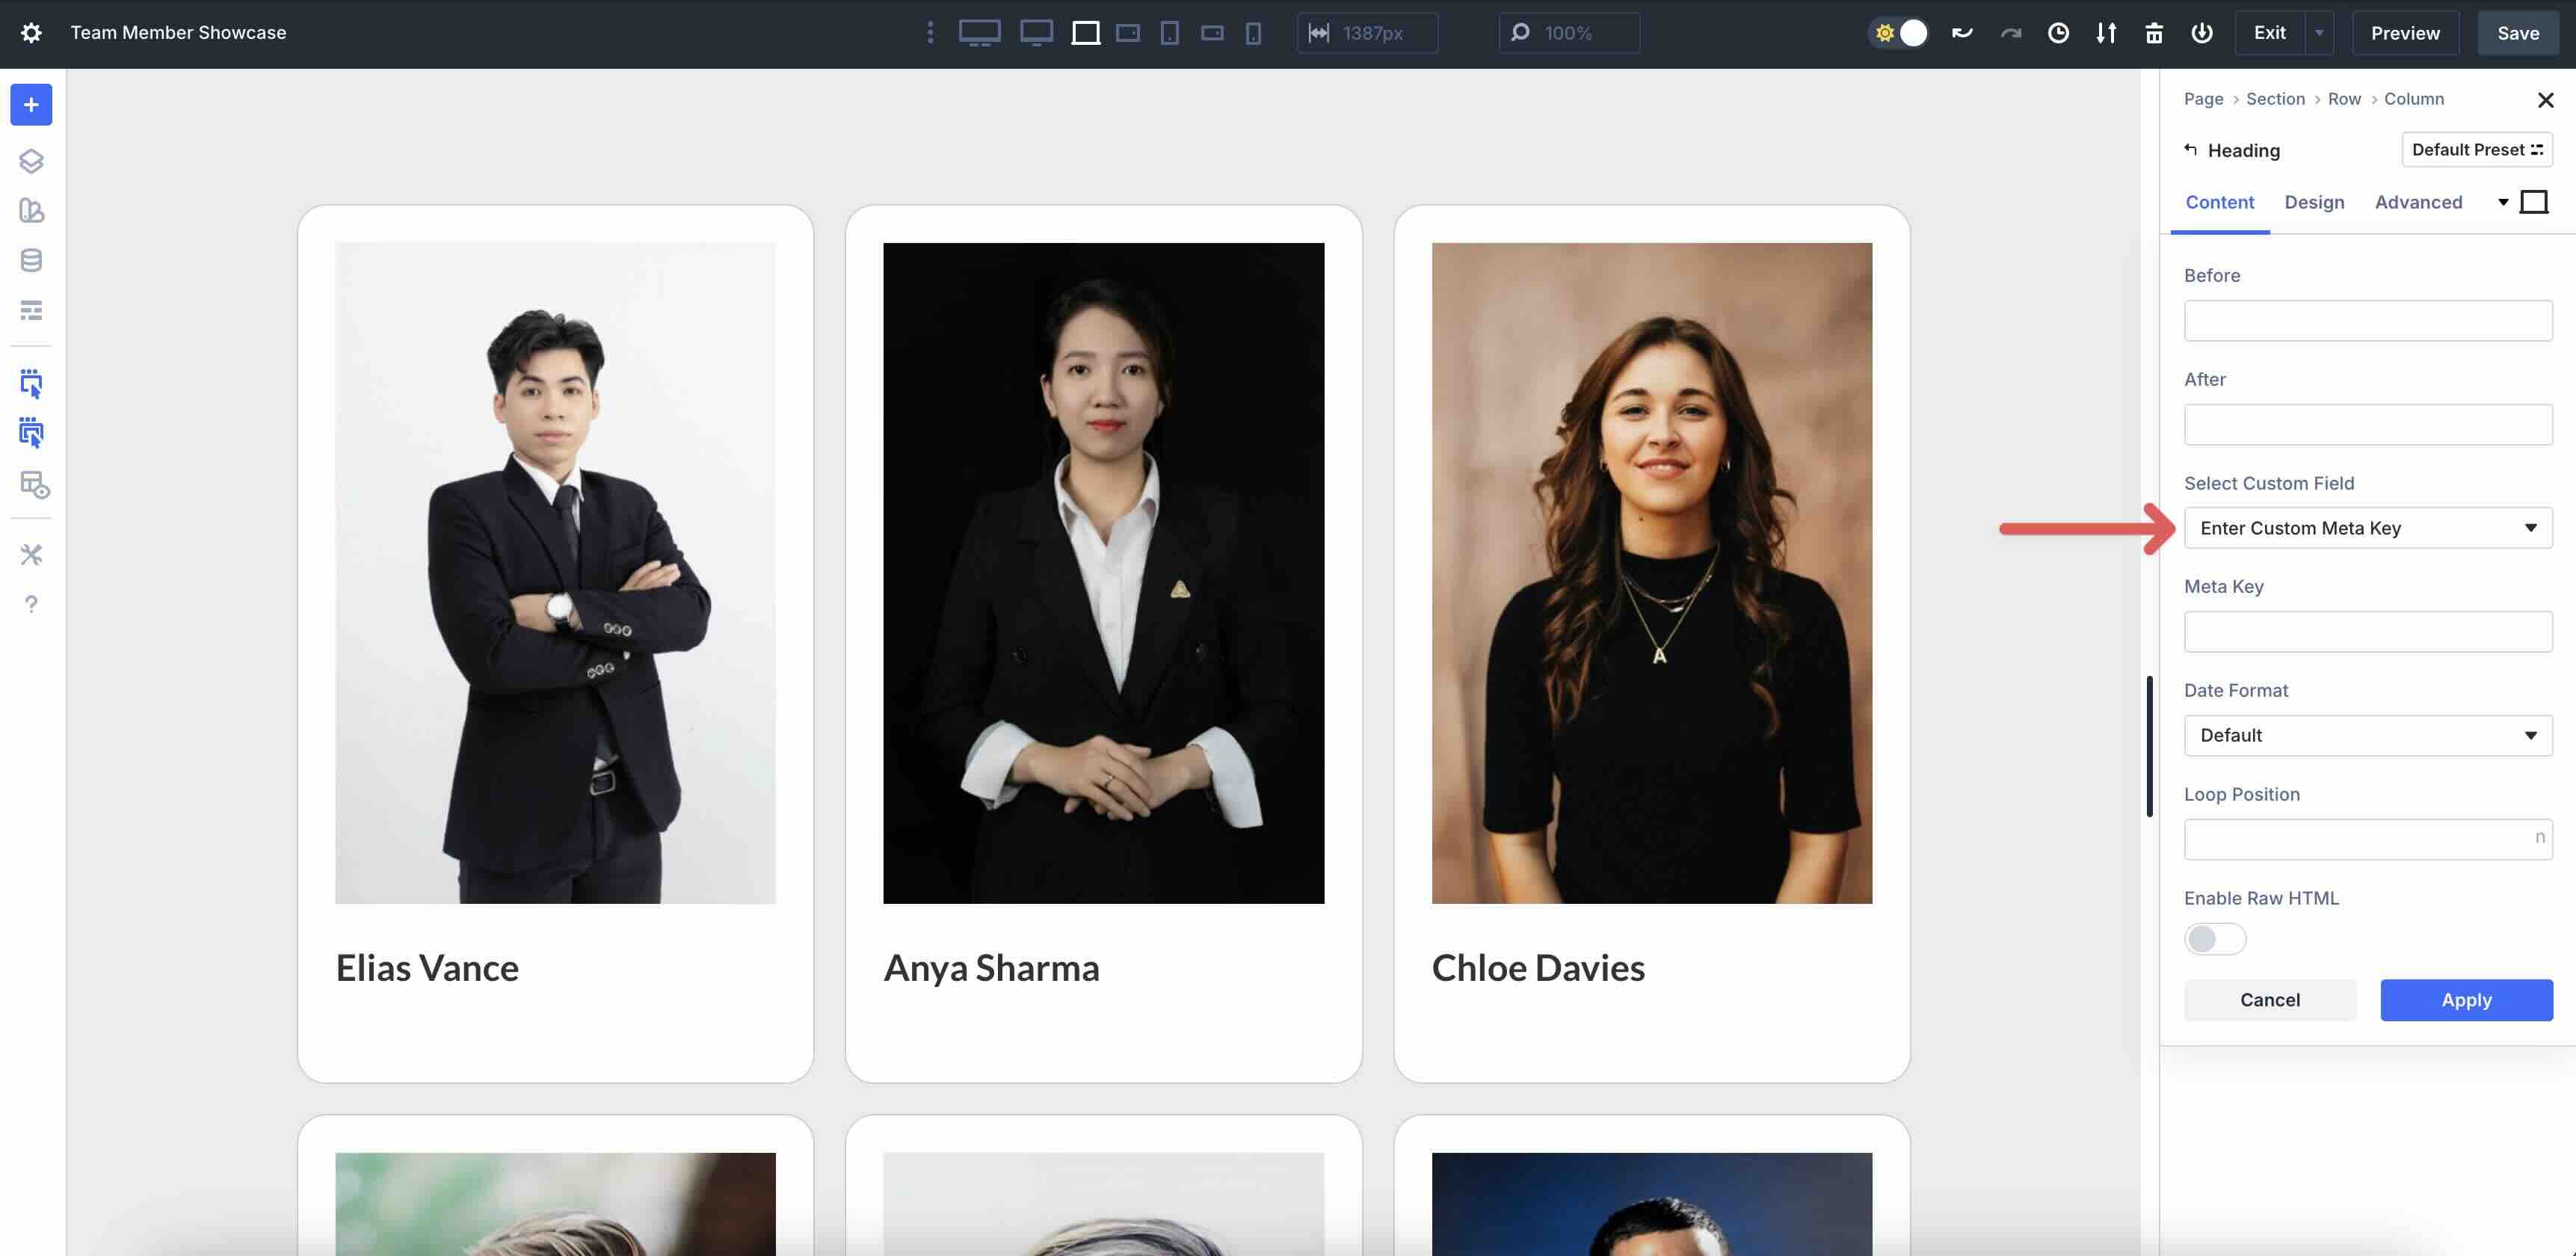
Expand the dropdown menu next to Select Custom Field.
Select Position/Title as the custom field.
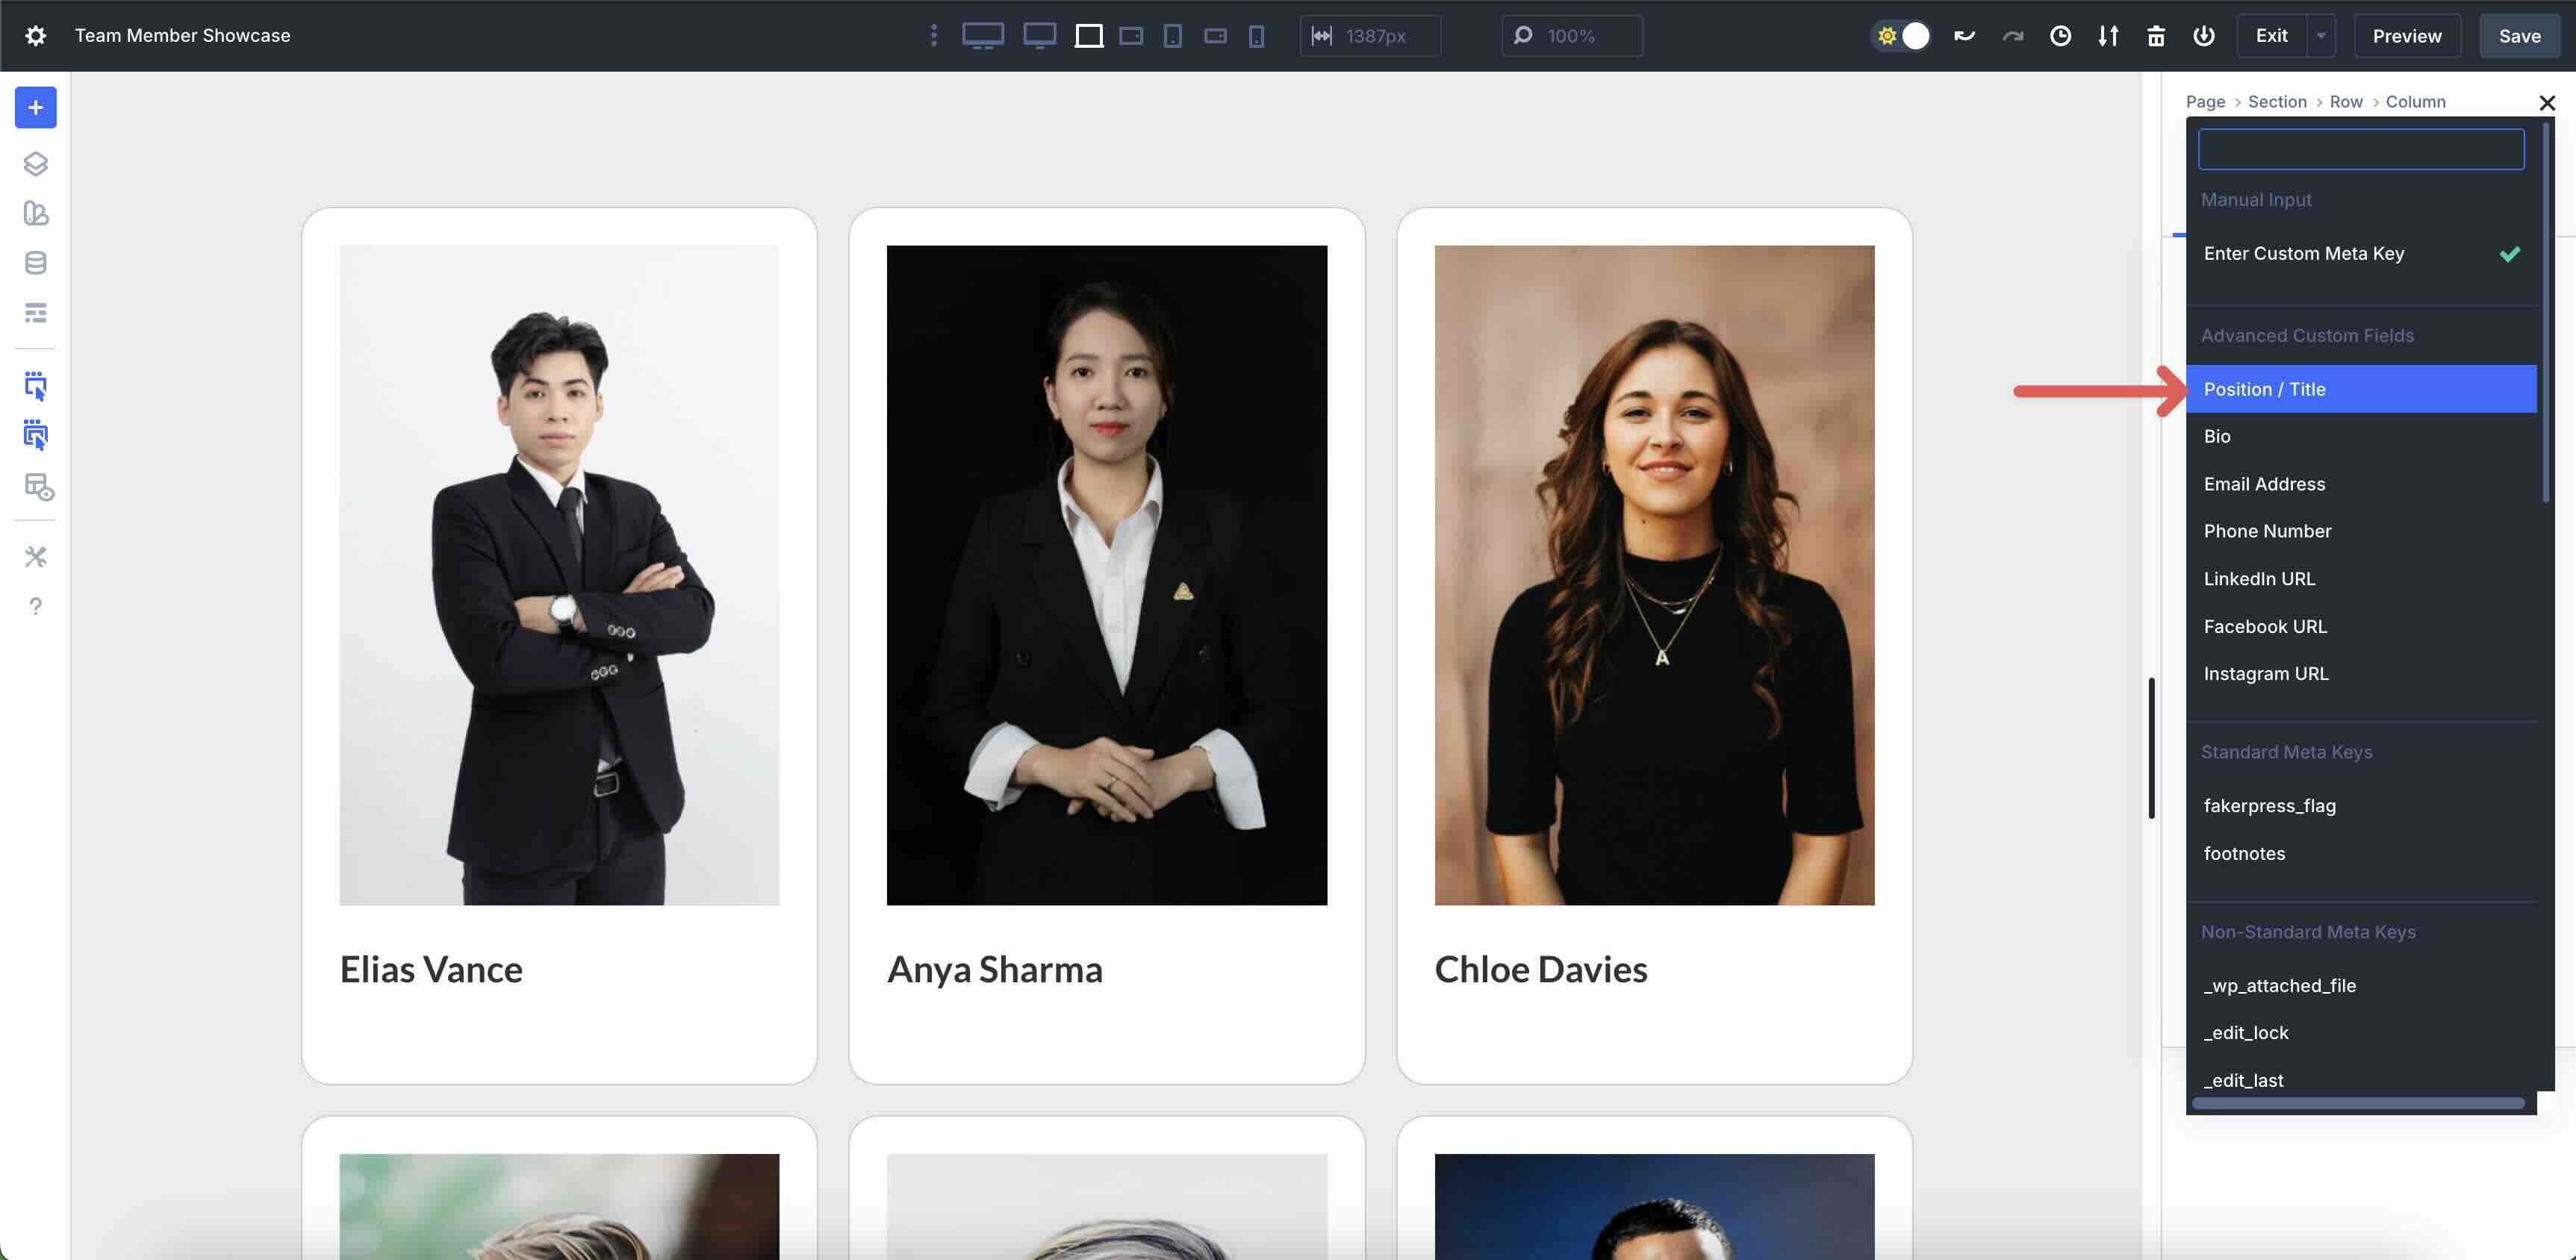
Click the Apply button to assign the custom field to the module. Style the module as desired.

Add A Text Module
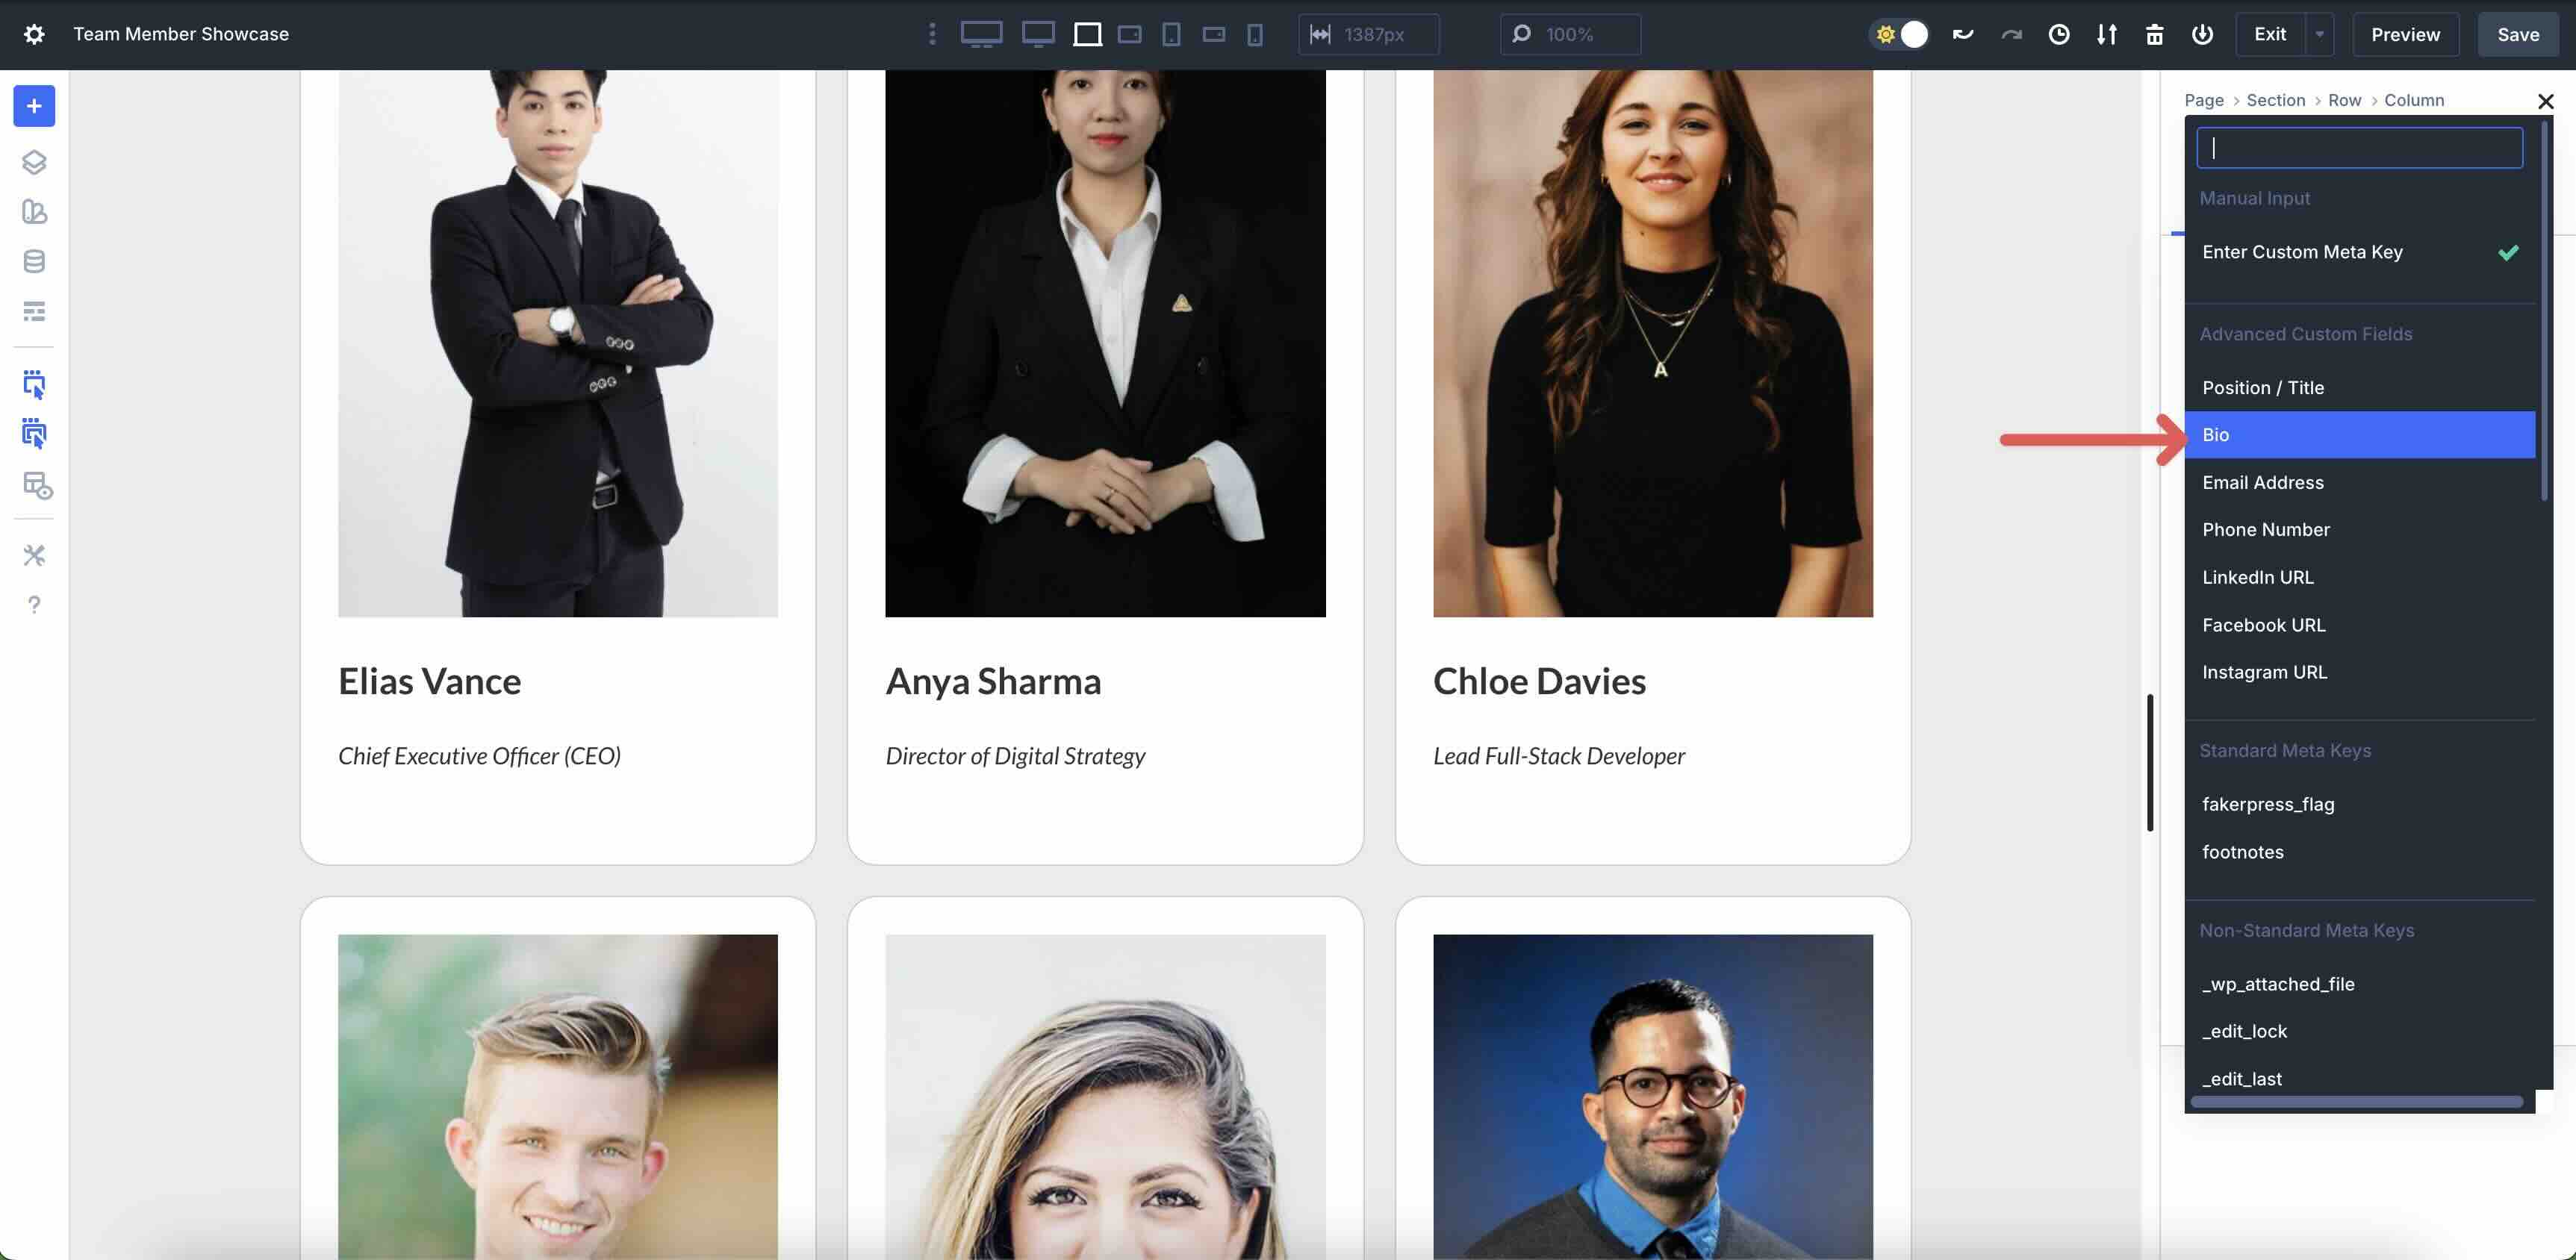
Add a Text module to the Column. Choose Loop Post Custom Field in the Dynamic Content settings and select Bio as the Custom Meta Key.
Add A Nested Row
Next, we’ll add a Nested Row to the first Column. Click the black + icon, tab over to New Row, and select a 5-Column Row.

In the Nested Row’s Design tab, adjust the Horizontal Gap to 10px.
In the Row’s Layout settings, set Align Items to Center.

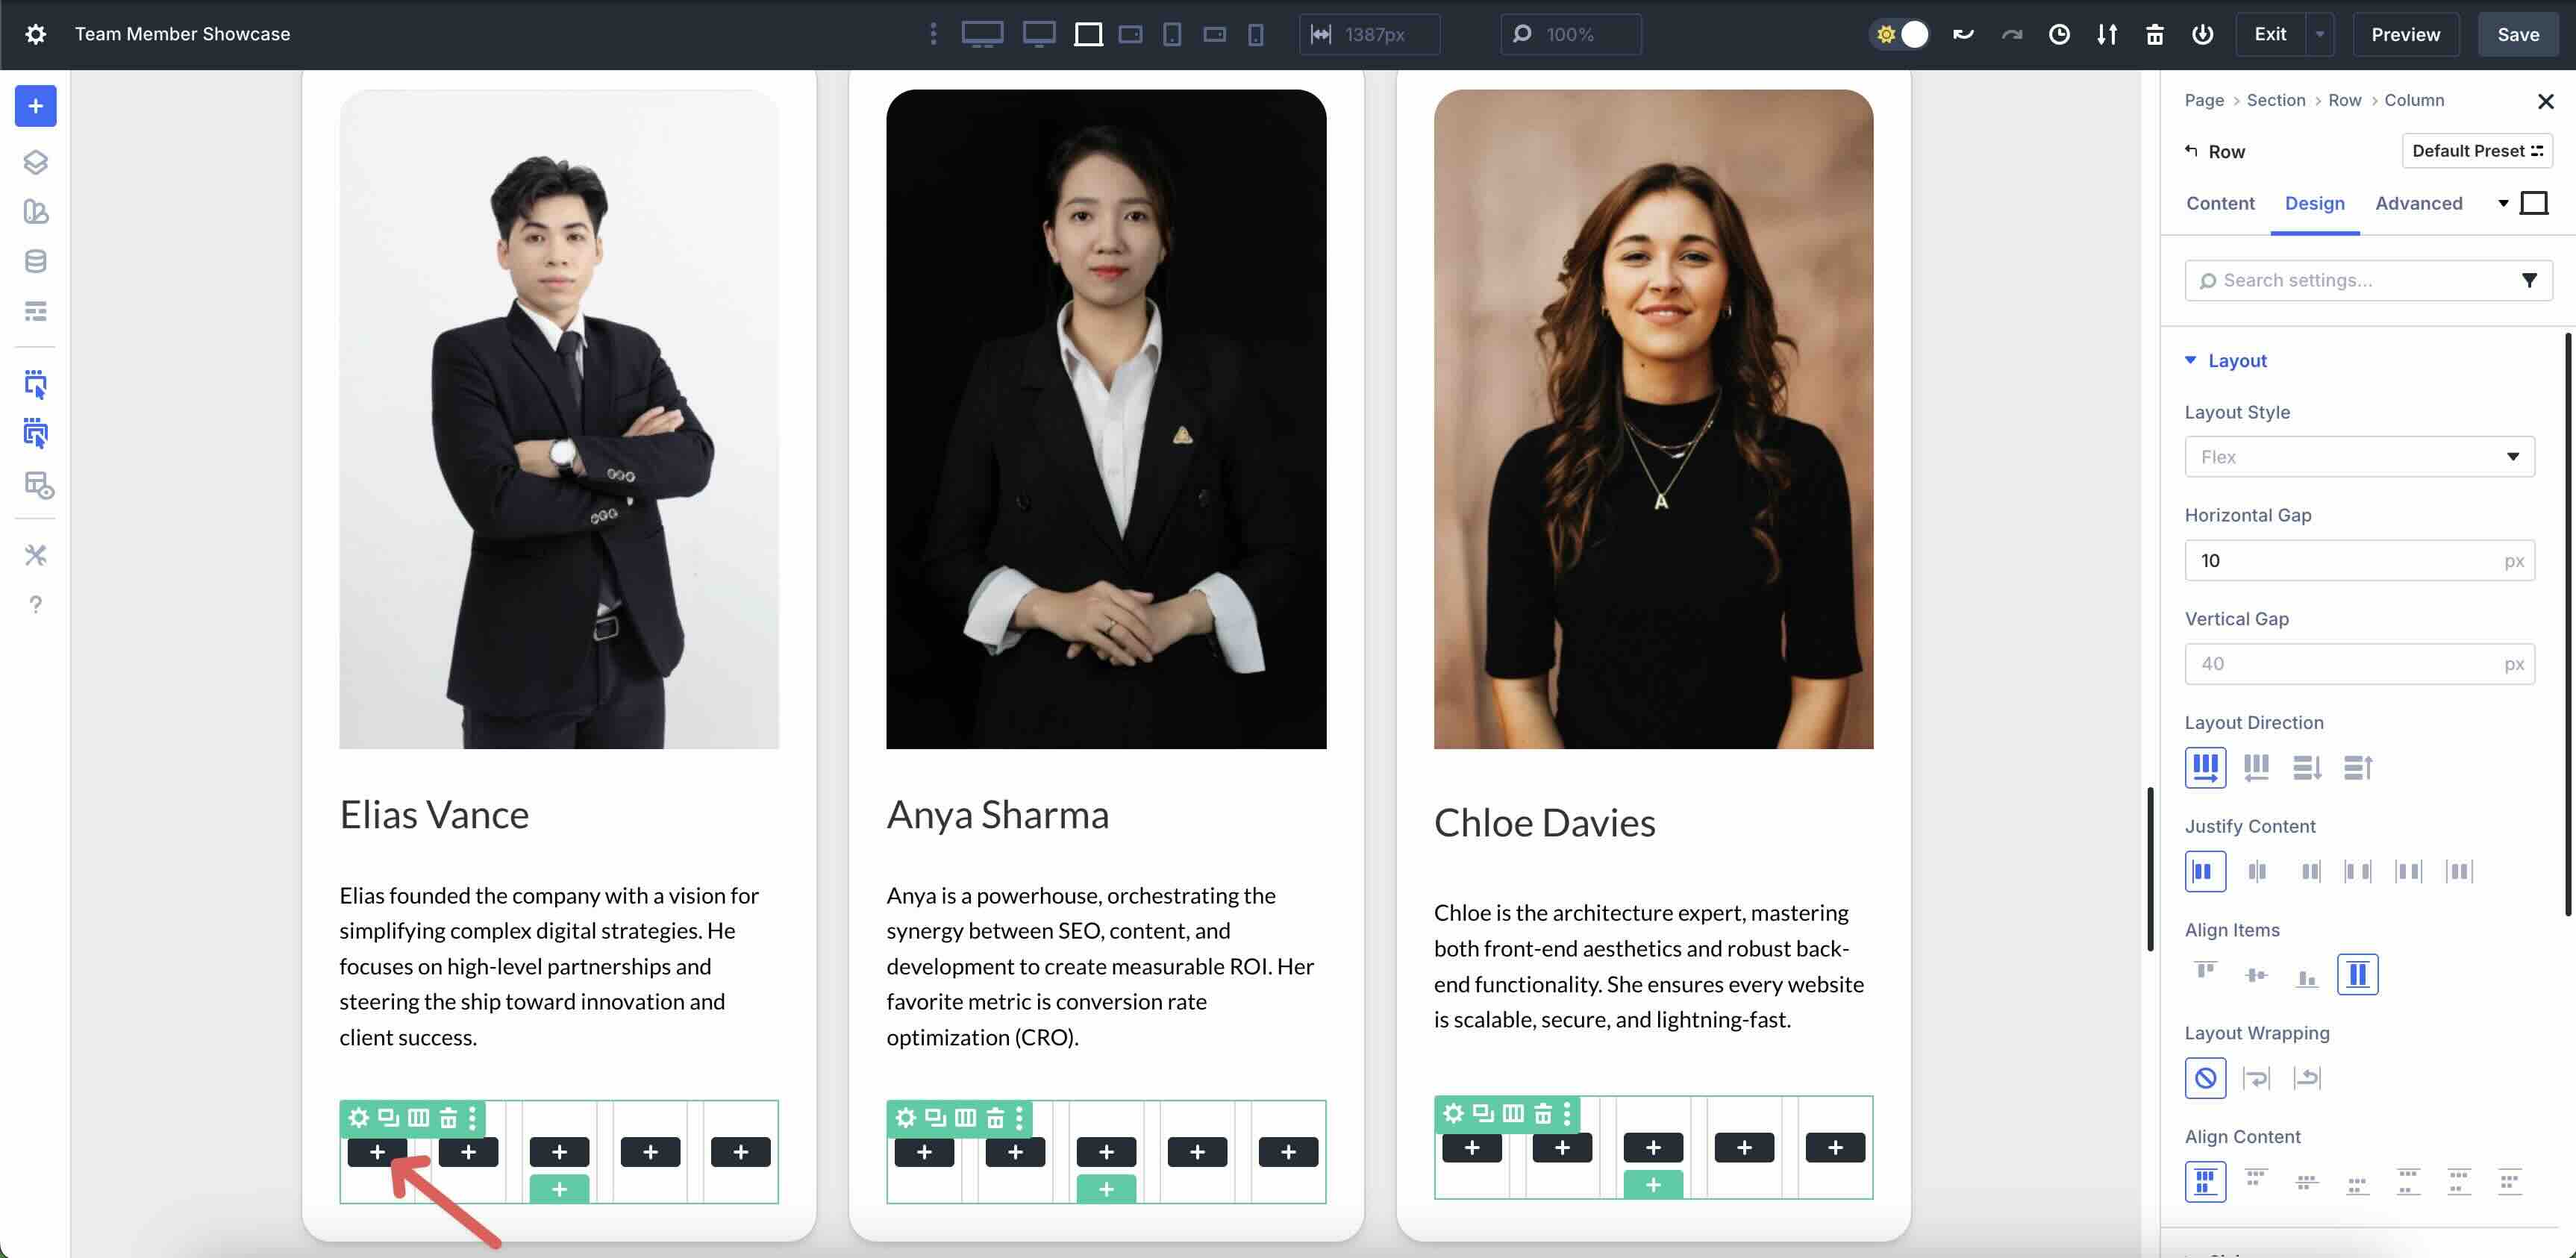
Add Icon Modules
Click into the first Column of the Nested Row and add an Icon module.
Select an Email icon, style the module, and select the Email Address custom field. Click the Apply button to save the content.
Next, right click on the Icon module to copy it.
![]()
Click into the 2nd Column of the Nested Row, right click, and select Paste Module > Paste Module Inside.
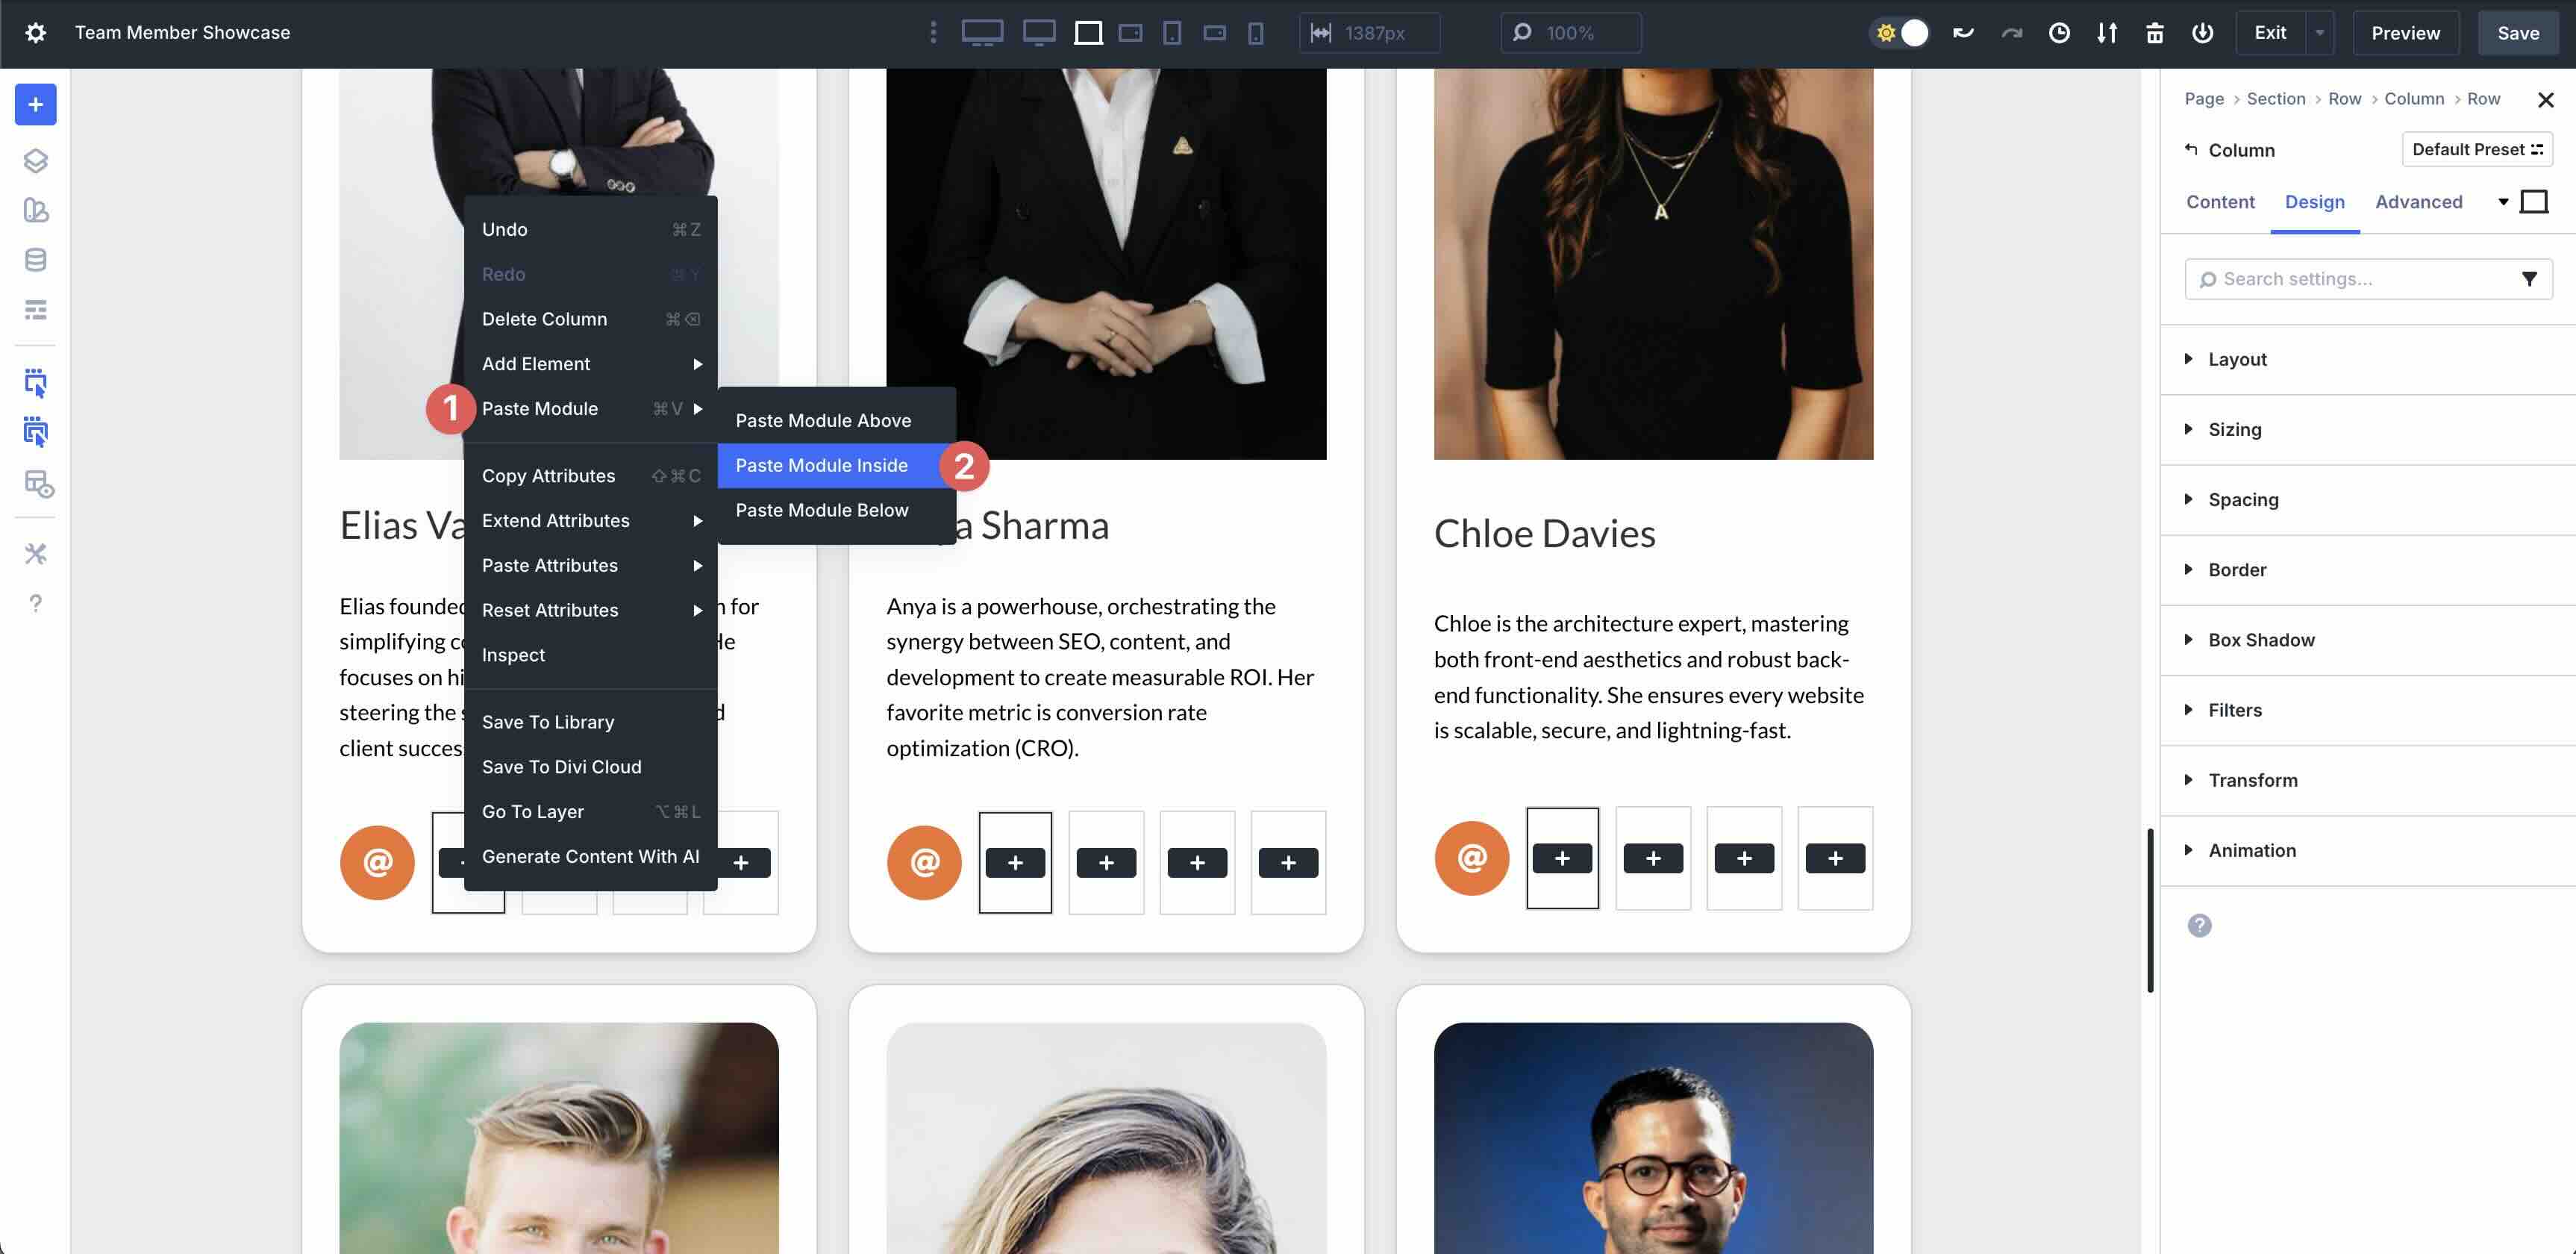
Repeat for the remaining columns.
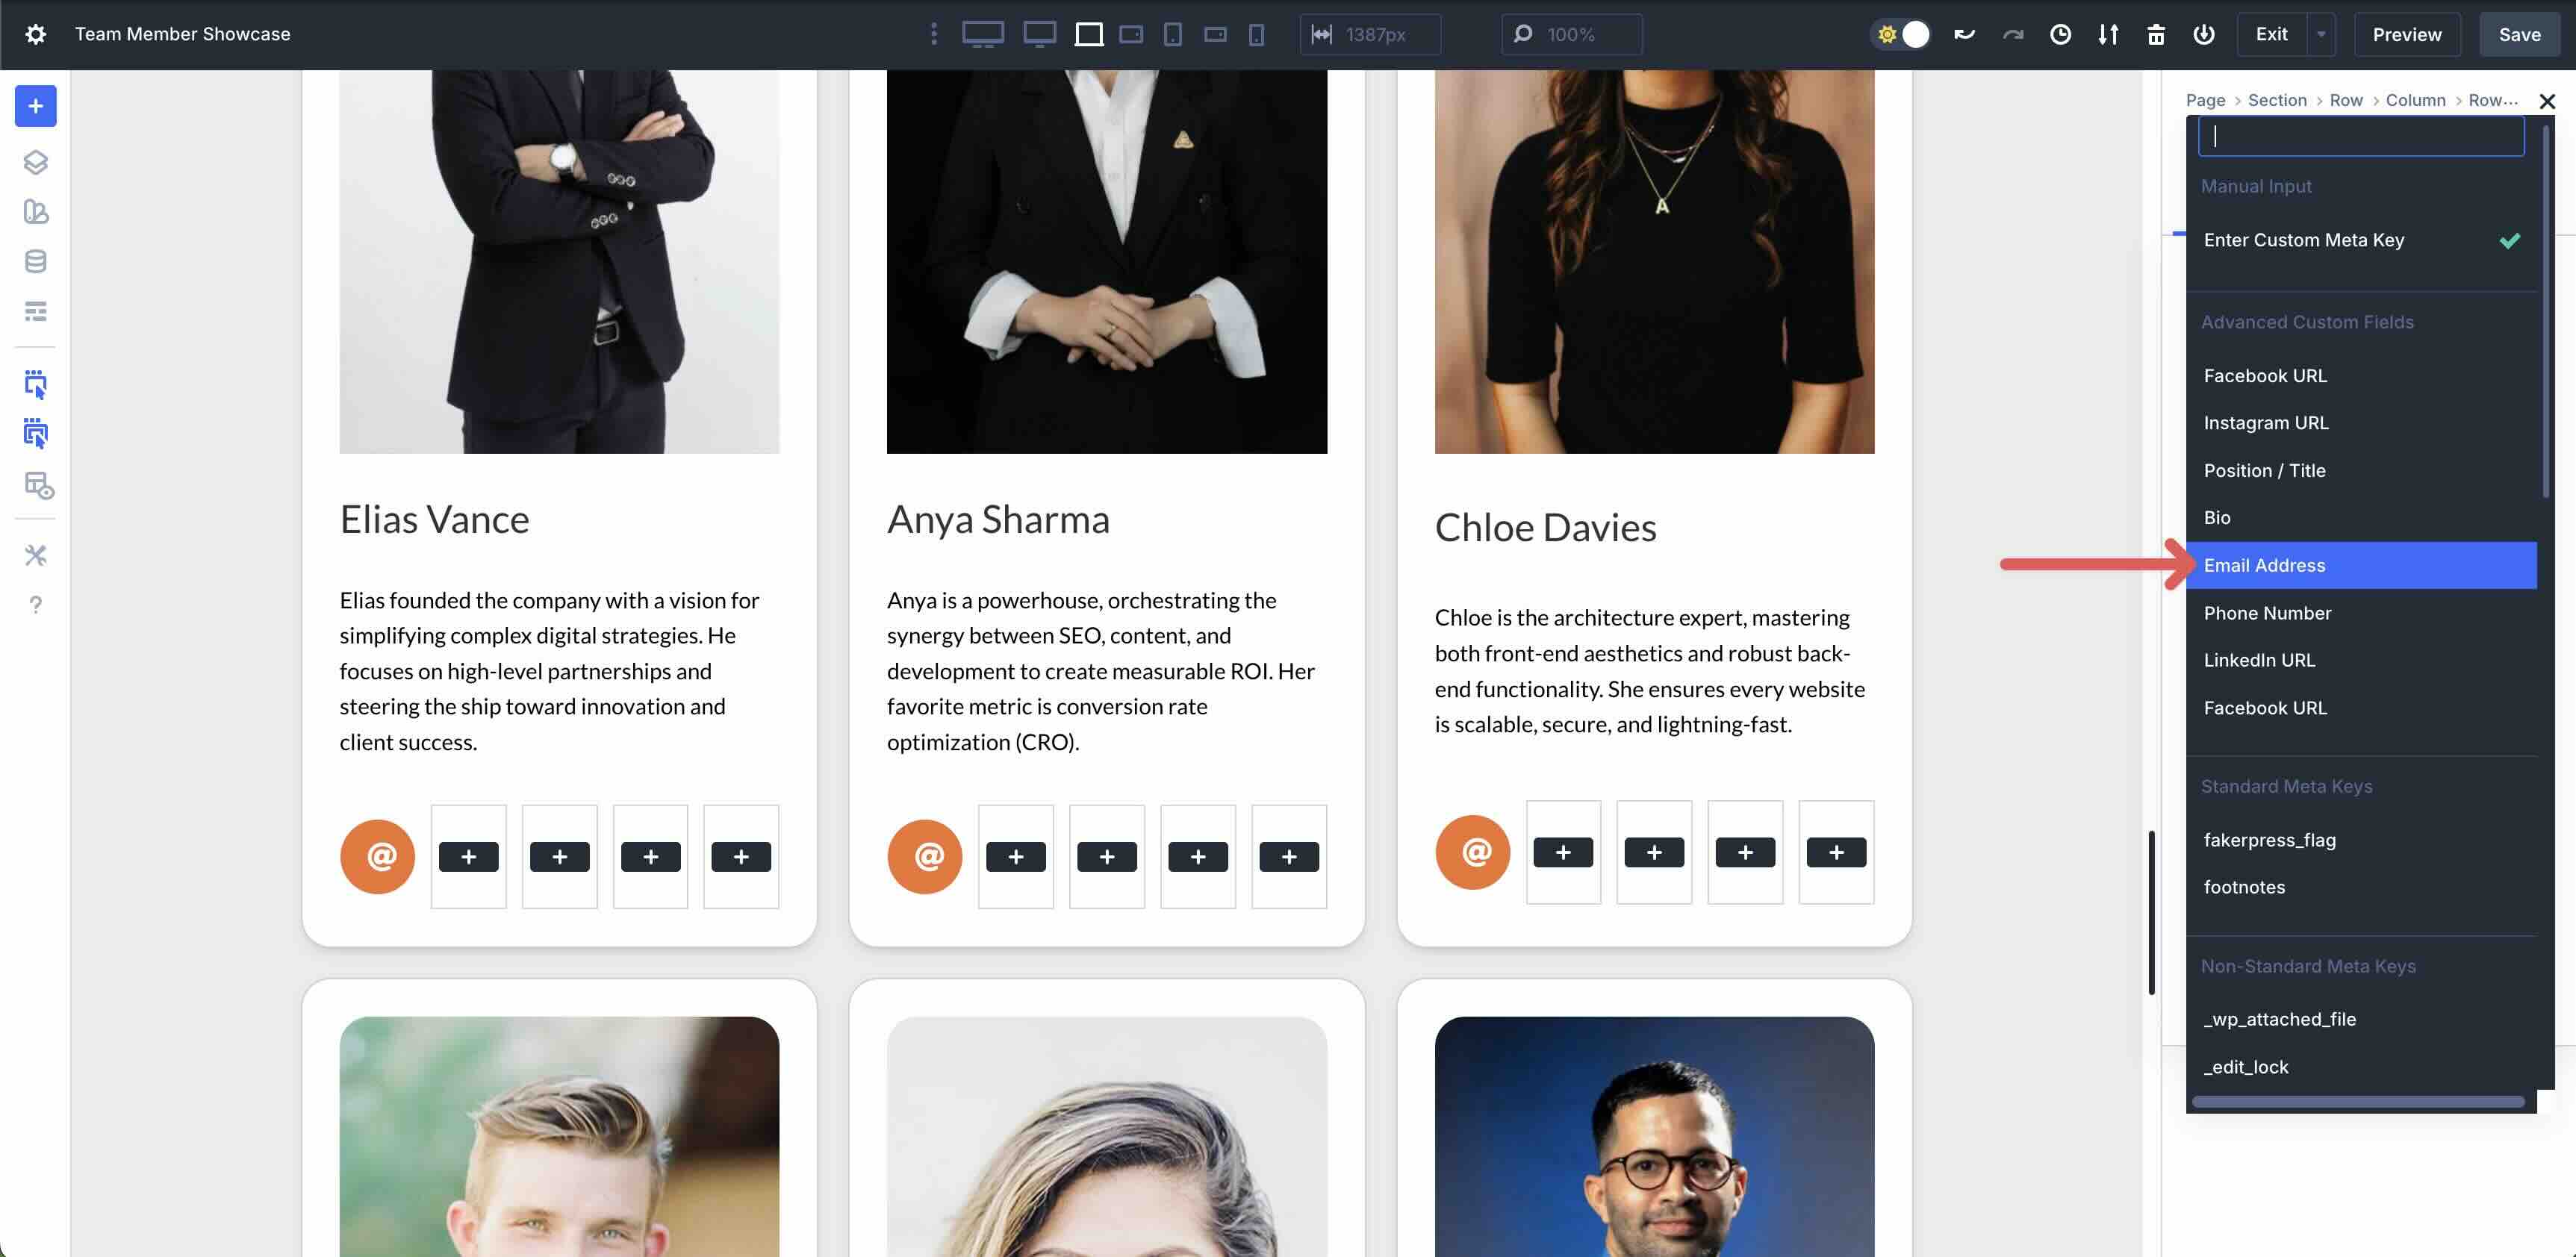
The last step is to replace the icon in each of the Icon modules and assign the appropriate Dynamic Content tag.
![]()
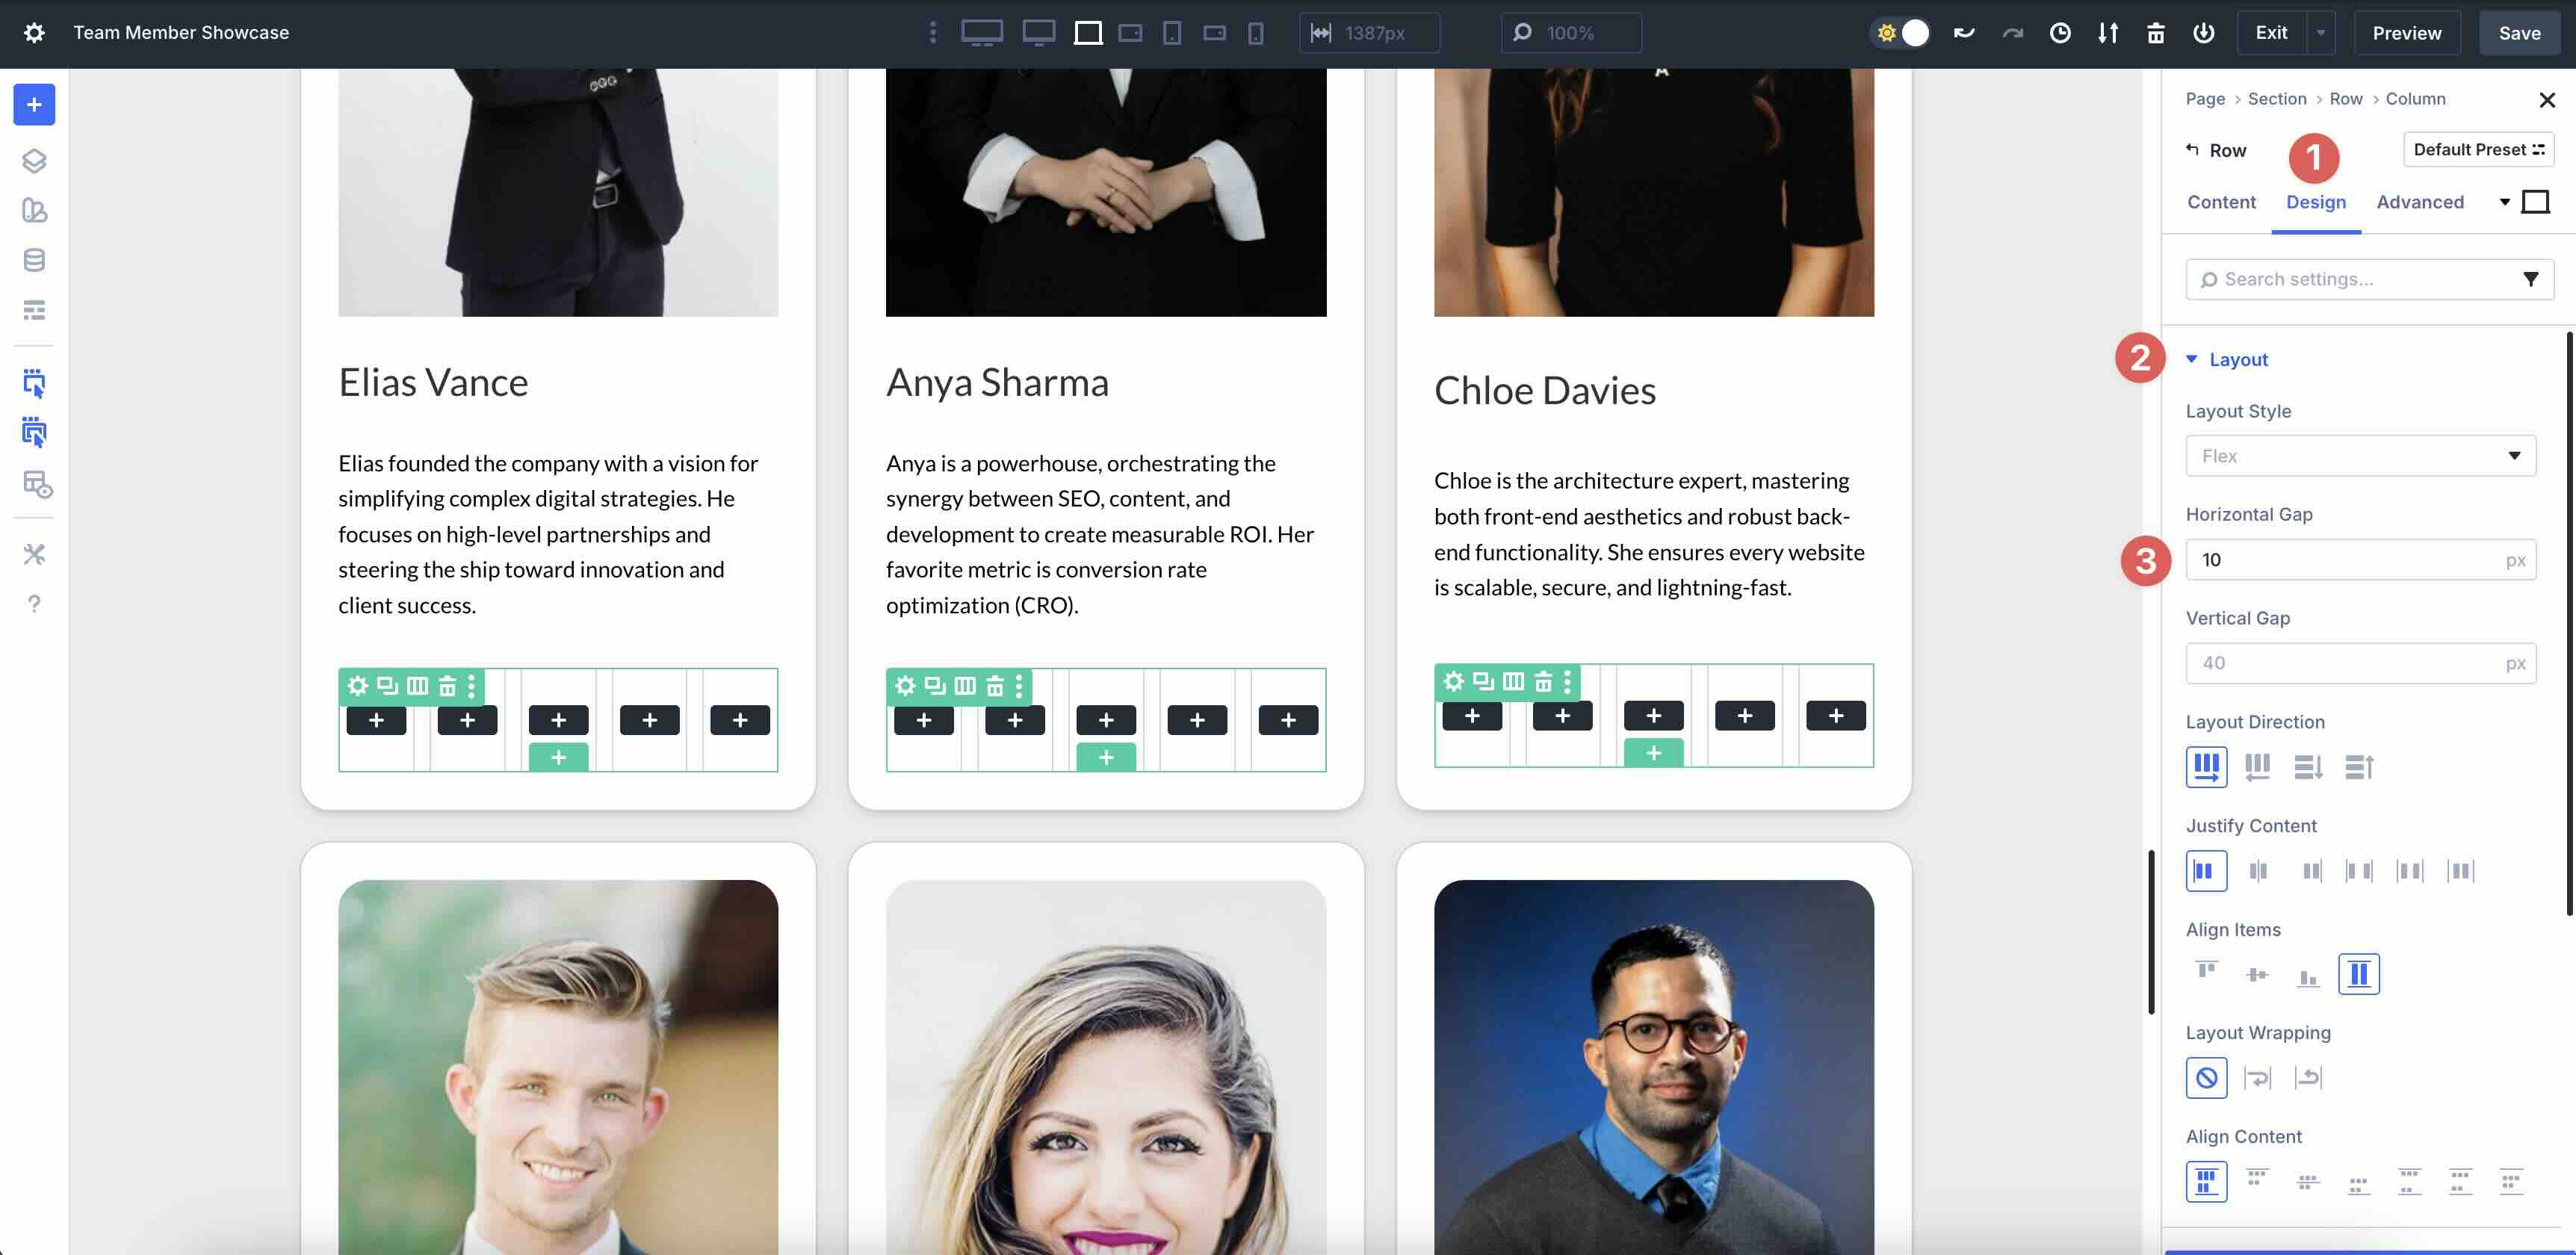
Adjust Vertical Spacing
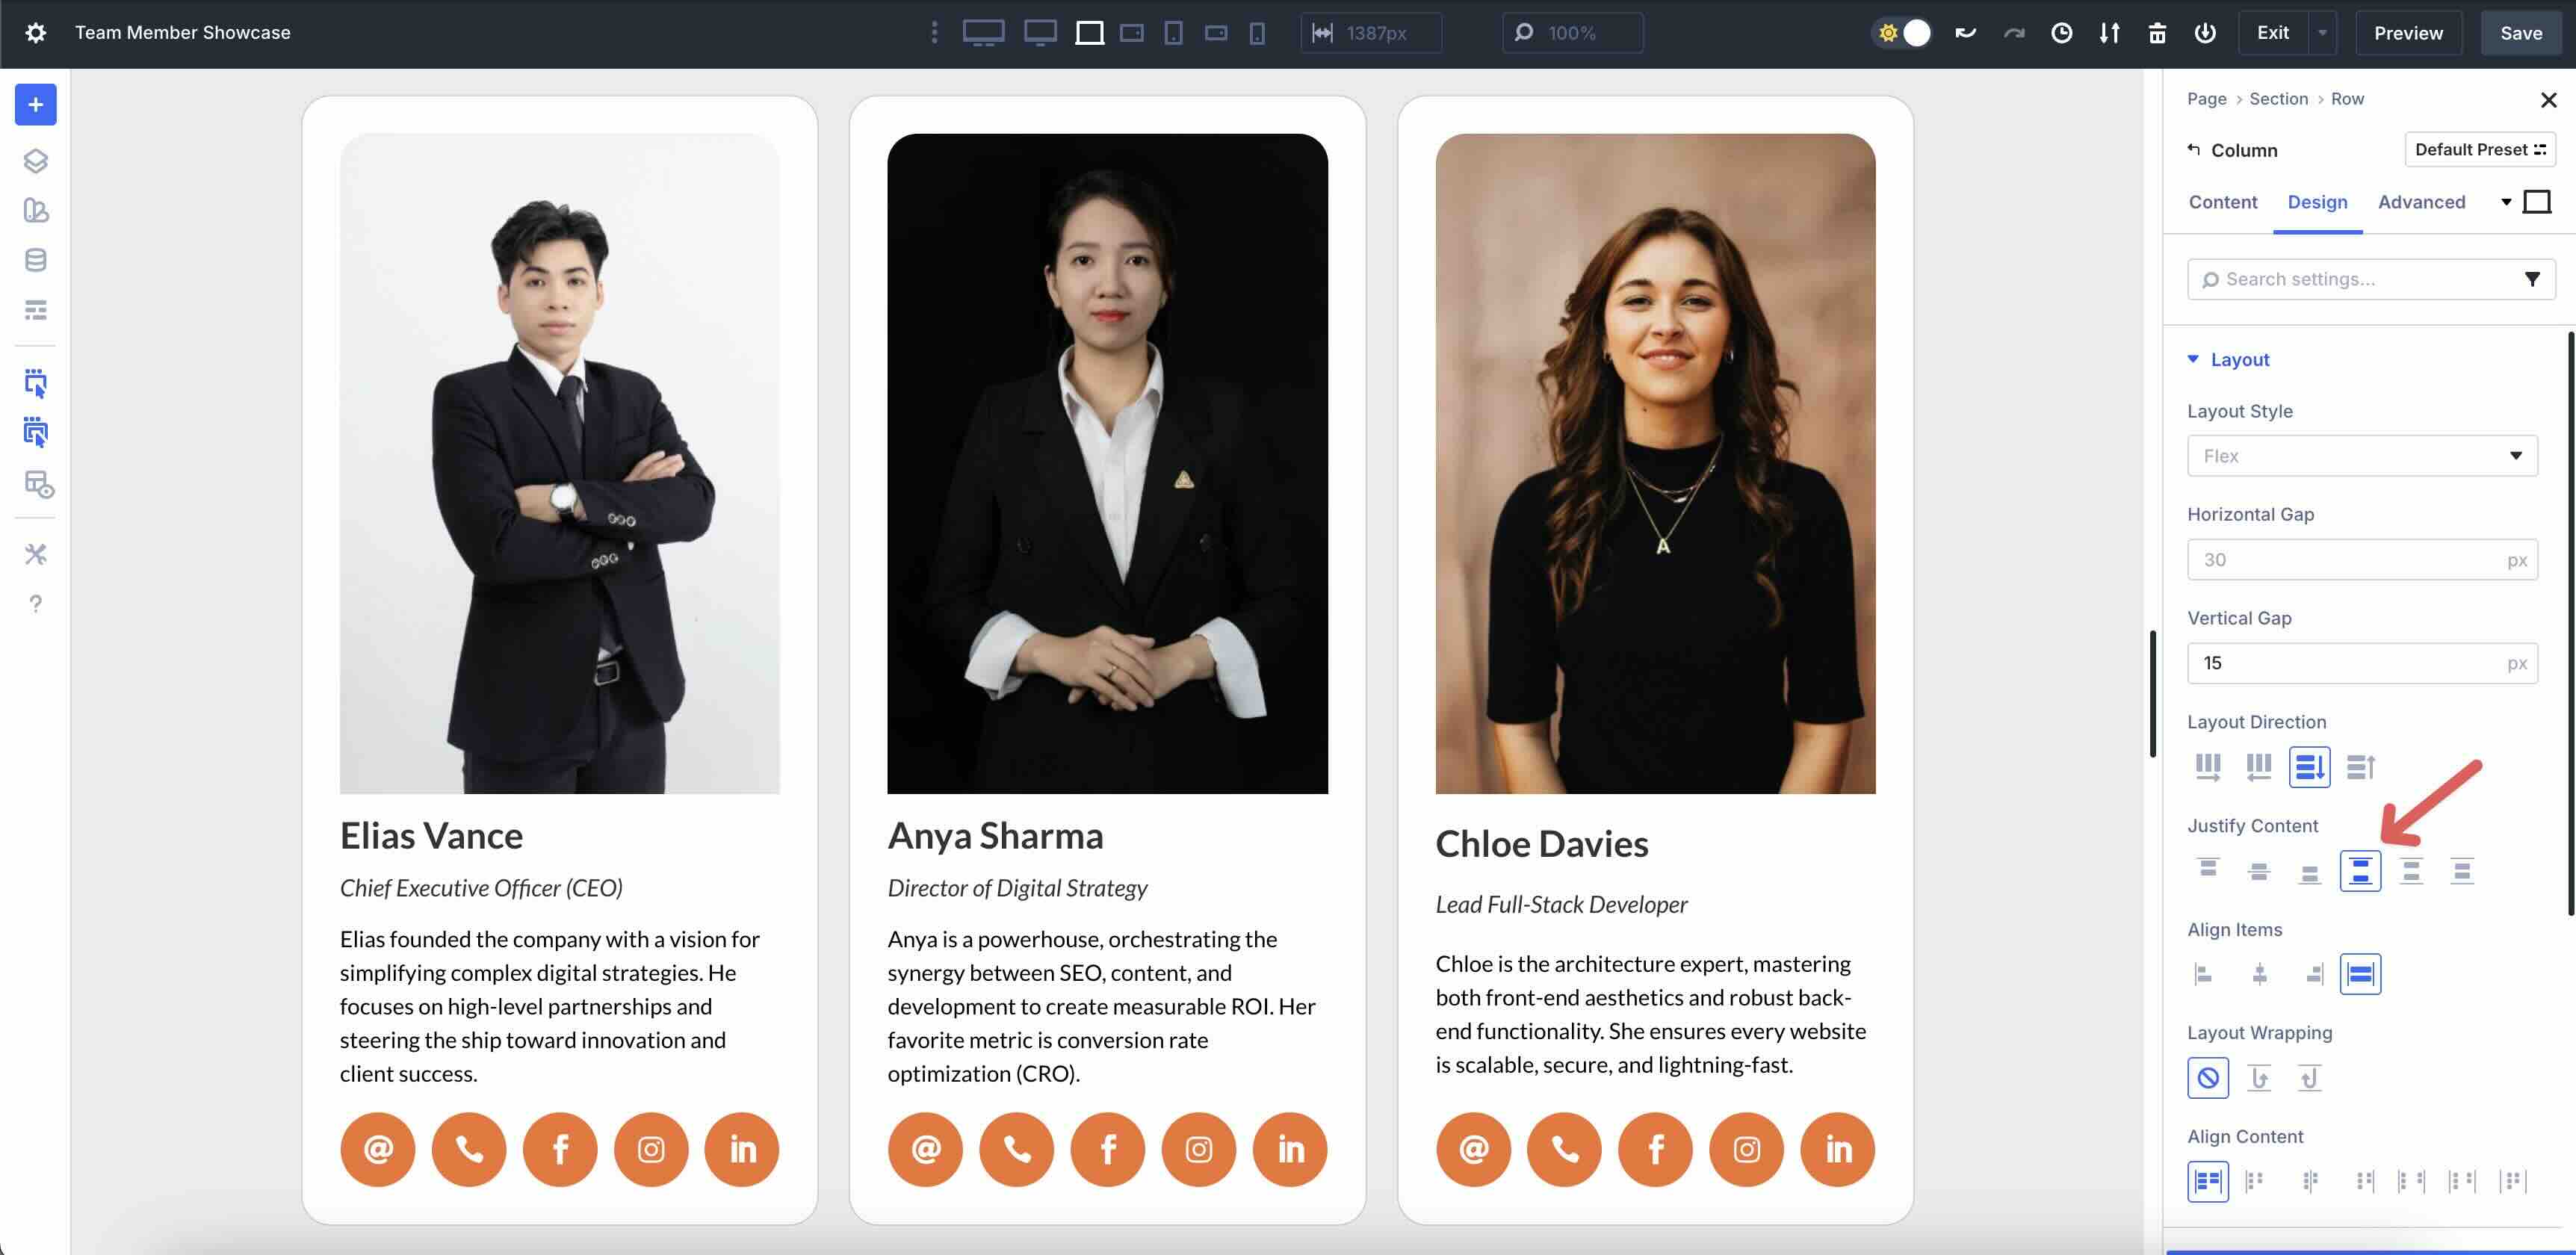
If you’d like to adjust the vertical spacing for the Loop, change the Column’s Vertical Gap in Design > Layout > Vertical Gap.
To ensure that all your cards line up perfectly, adjust the ‘Justify Content’ field to ‘Space Between’.
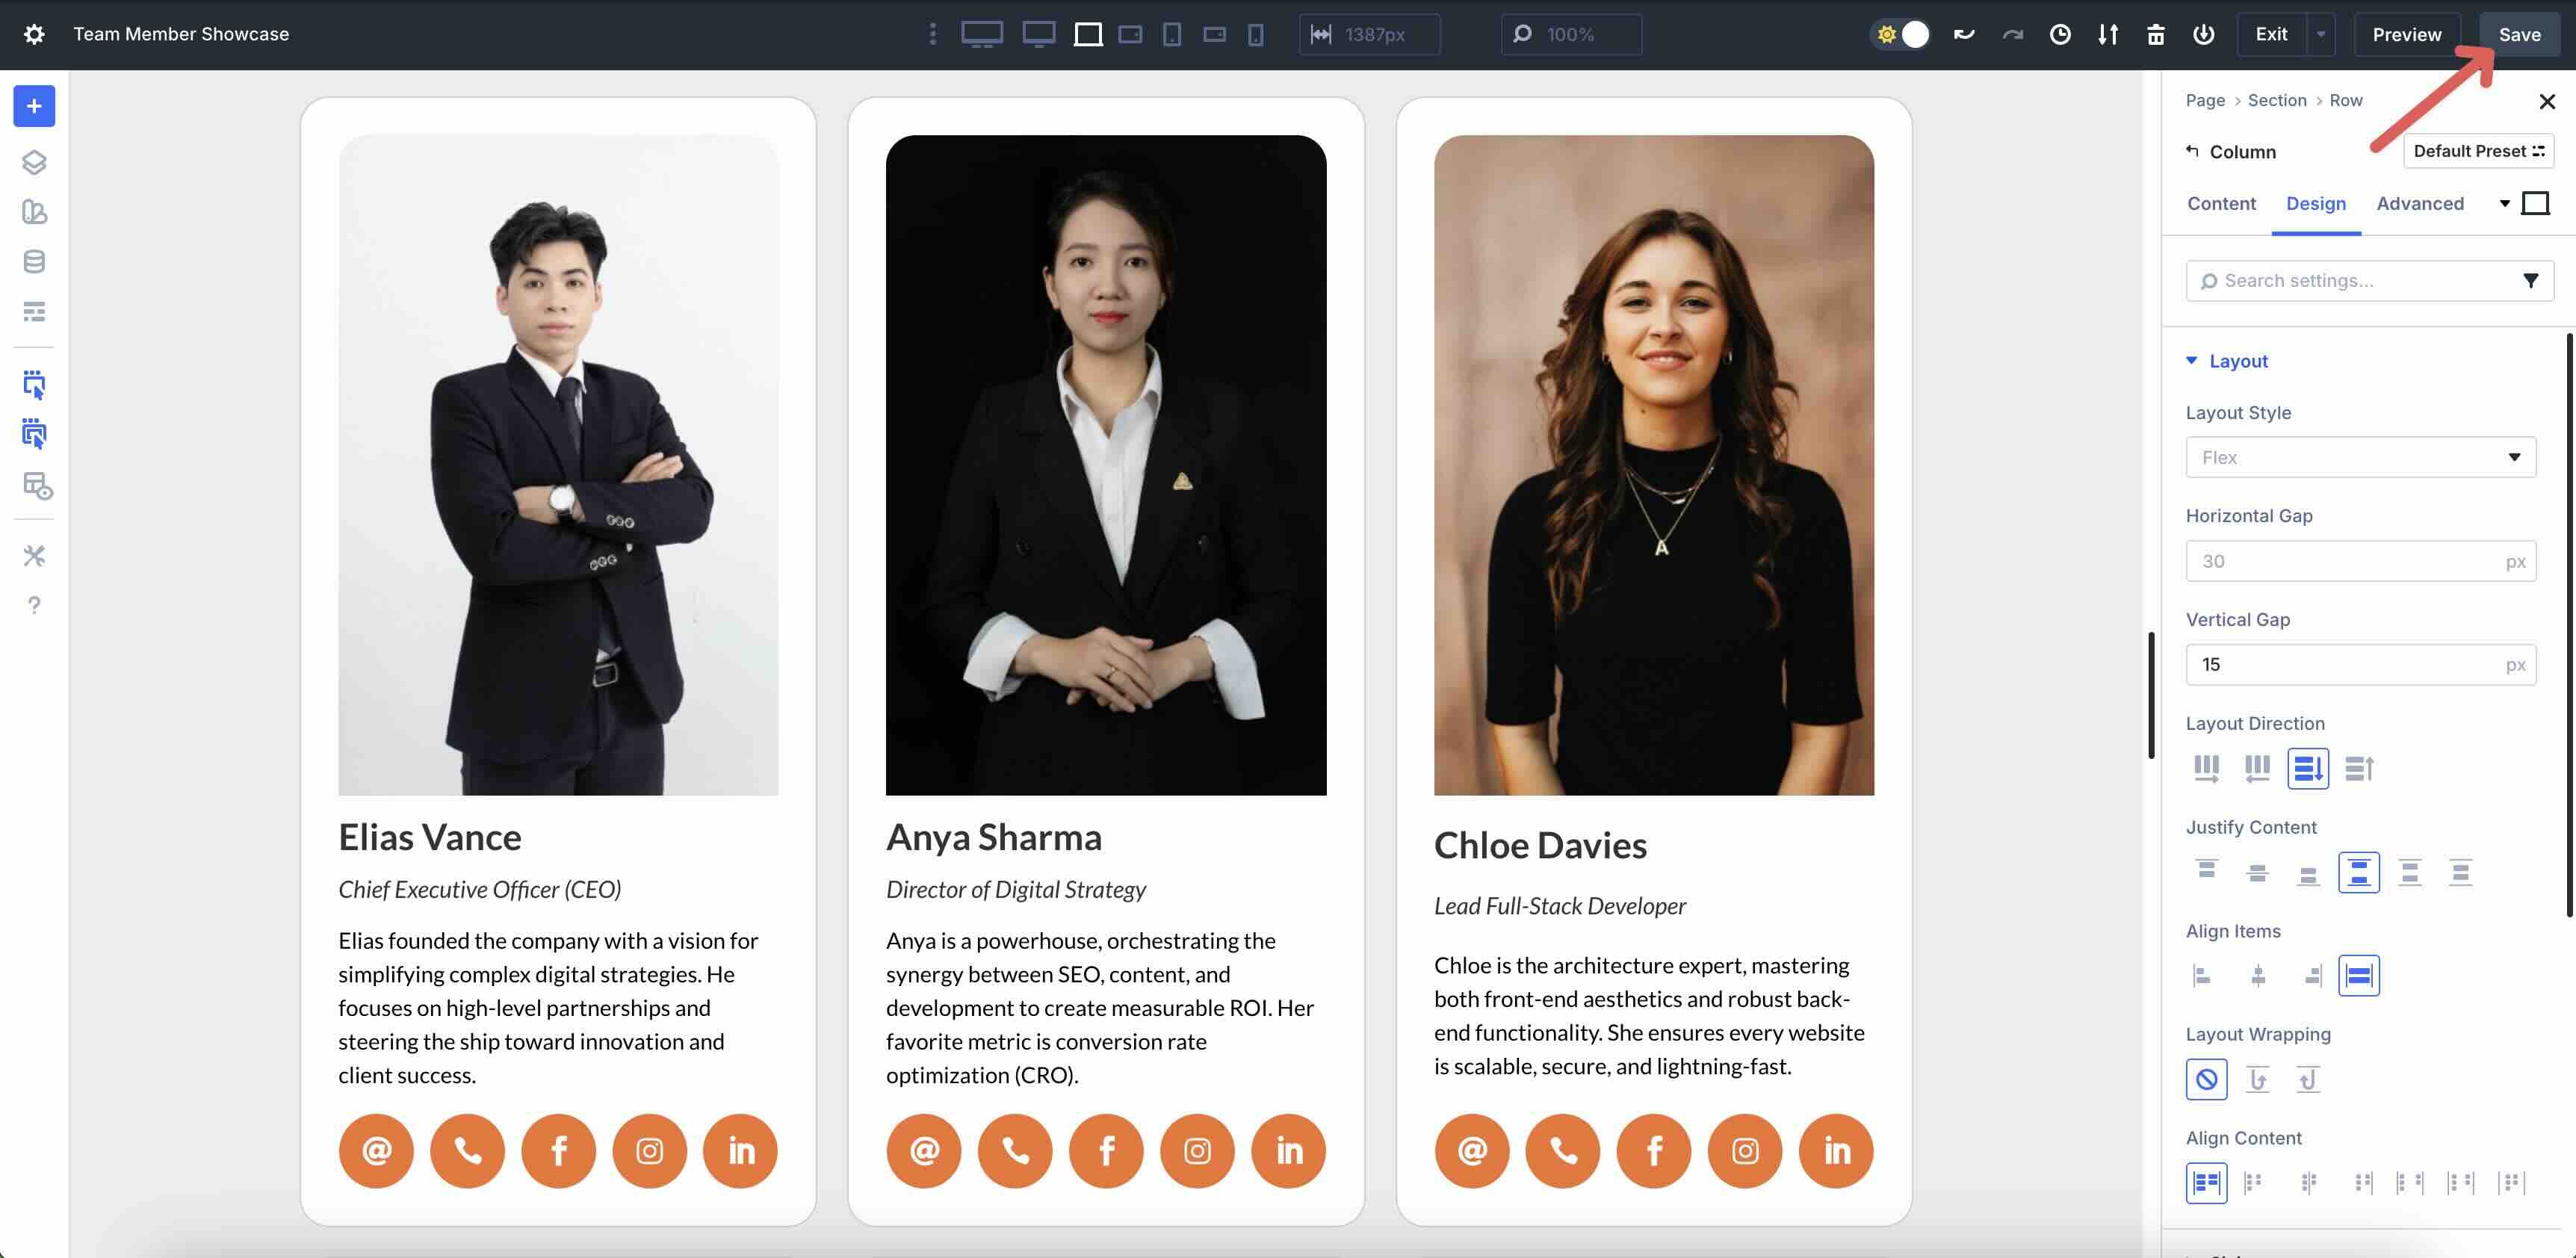
Before proceeding to the next step, save the layout by clicking the Save button at the top right of the Visual Builder.
Step 5: Adjust The Layout For Small Screens
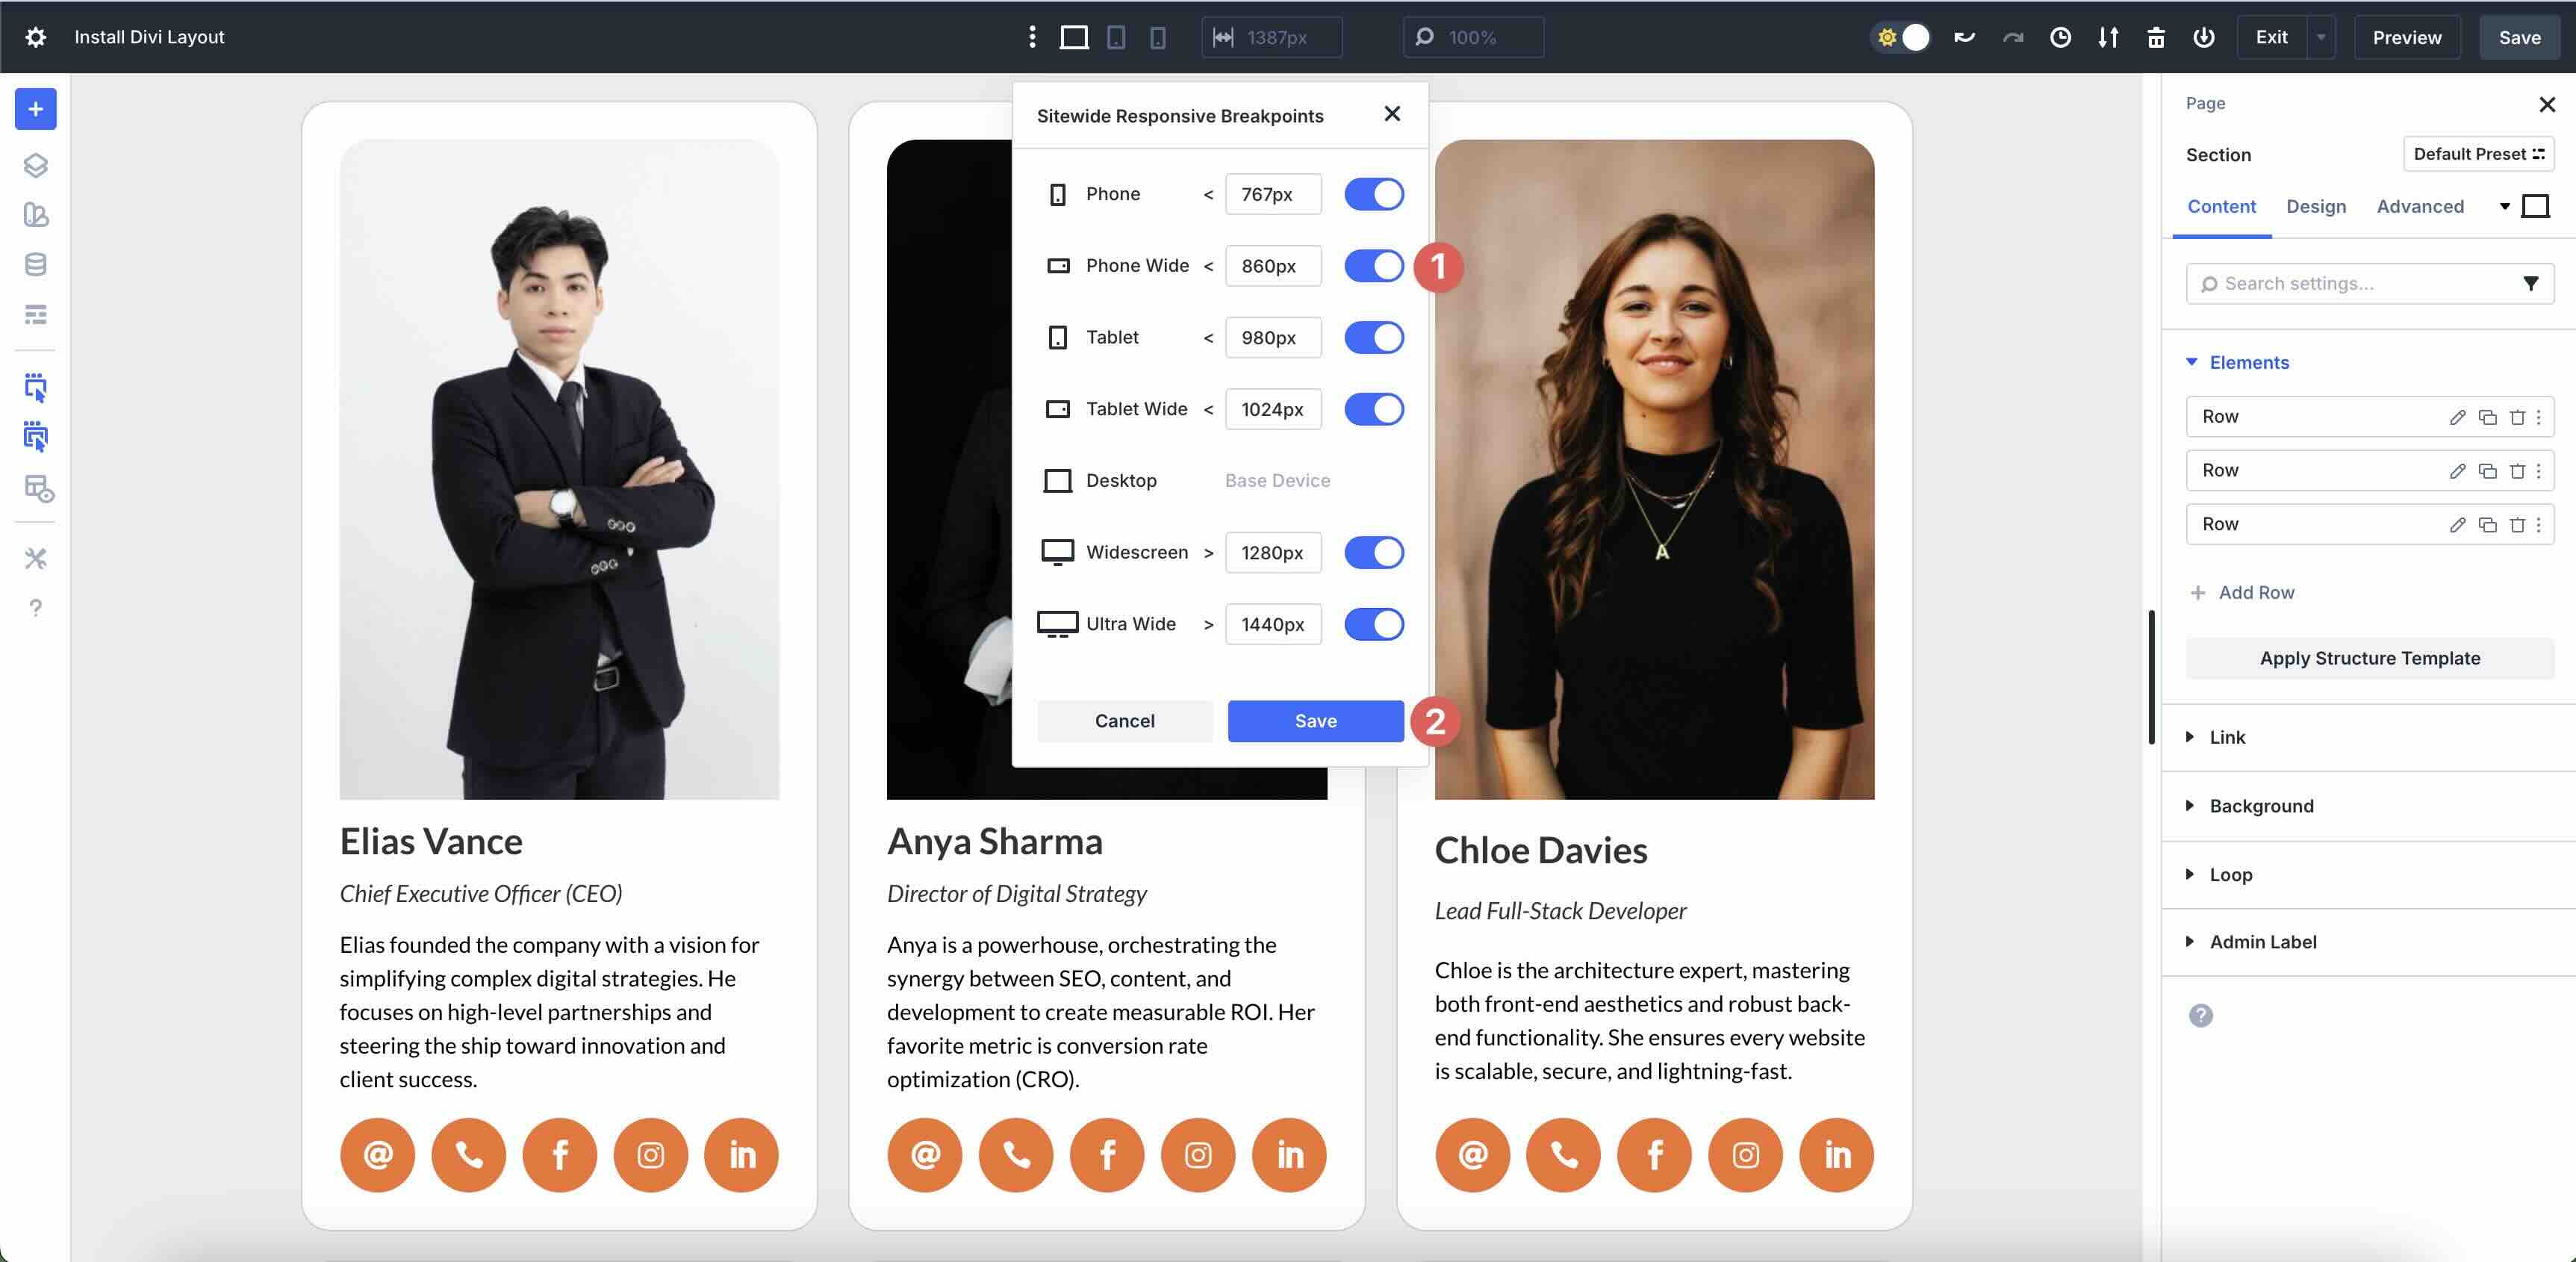
The last step in the process is to make responsive adjustments to the layout. Using Divi 5’s Customizable Responsive Breakpoints, you can fine-tune the design on up to 7 breakpoints, ensuring that the design looks polished on every device.
By default, 3 breakpoints are enabled. However, you can easily enable all 7 by clicking the three-dot ellipsis menu in the top bar in the Visual Builder.

Enable your desired breakpoints by toggling them on. Once complete, click the Save button to continue.
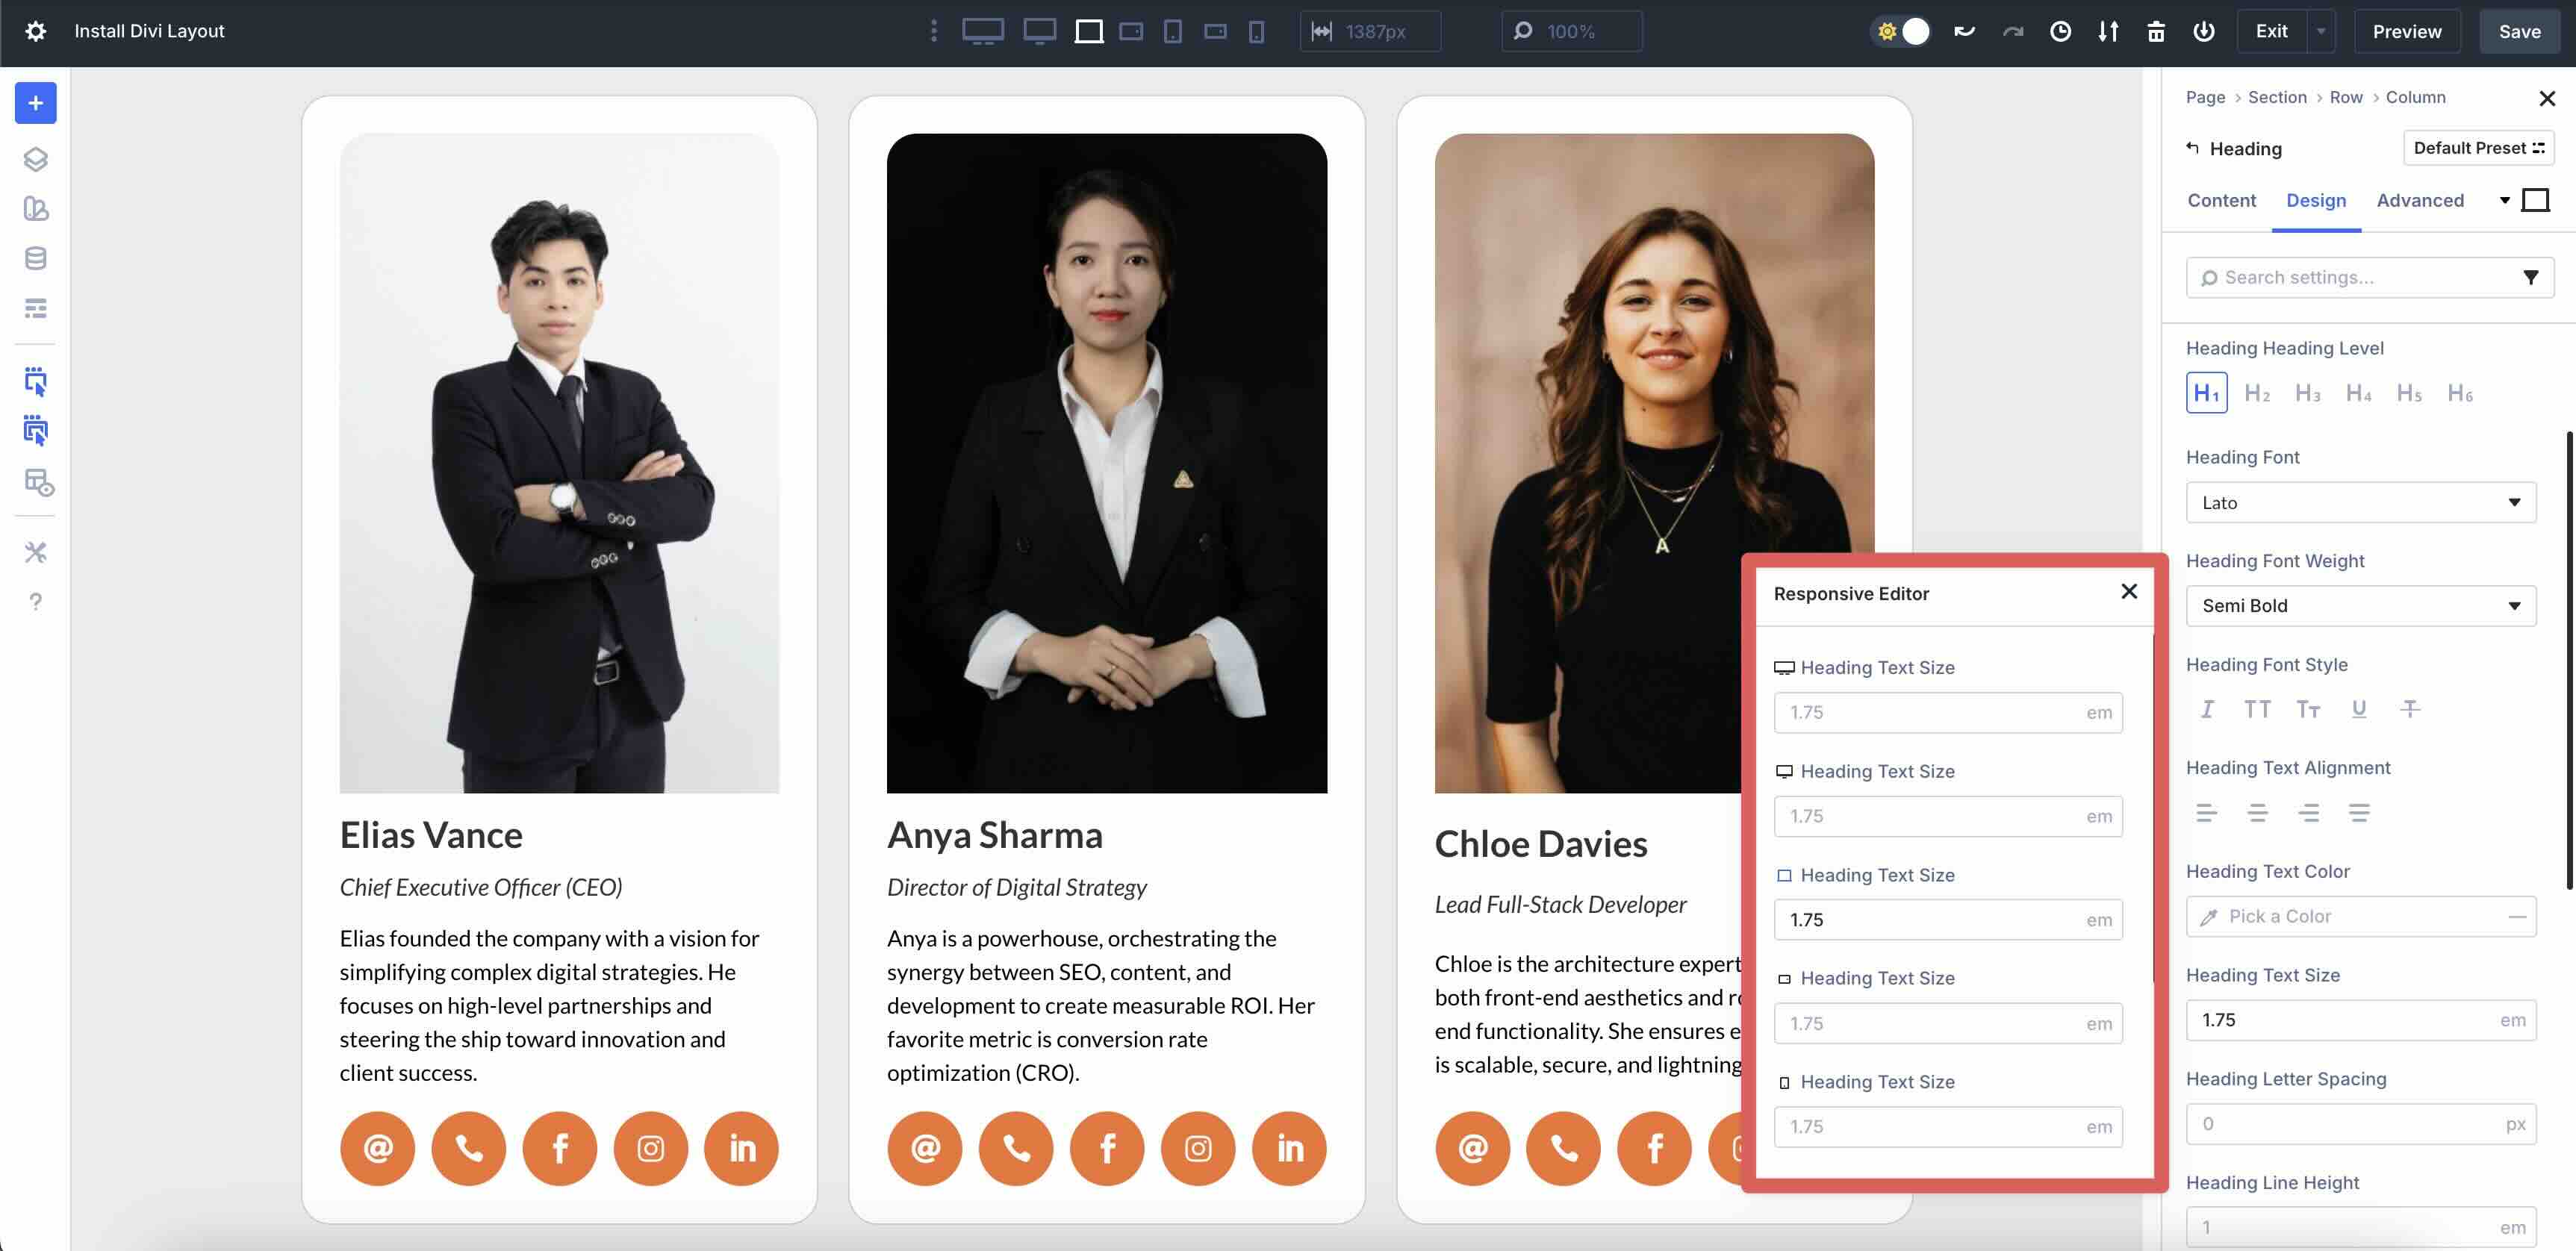
You can also use Divi 5’s Responsive Editor at the Section, Row, Column, or Module level to adjust responsive values as you build your layout. Click the Responsive icon in the design settings of any module to activate it.
![]()
The Responsive Editor modal will appear, allowing you to make adjustments to every breakpoint on the fly.
As you move through each breakpoint, you can adjust the number of columns by clicking the Apply Structure Template button located in the Content tab.
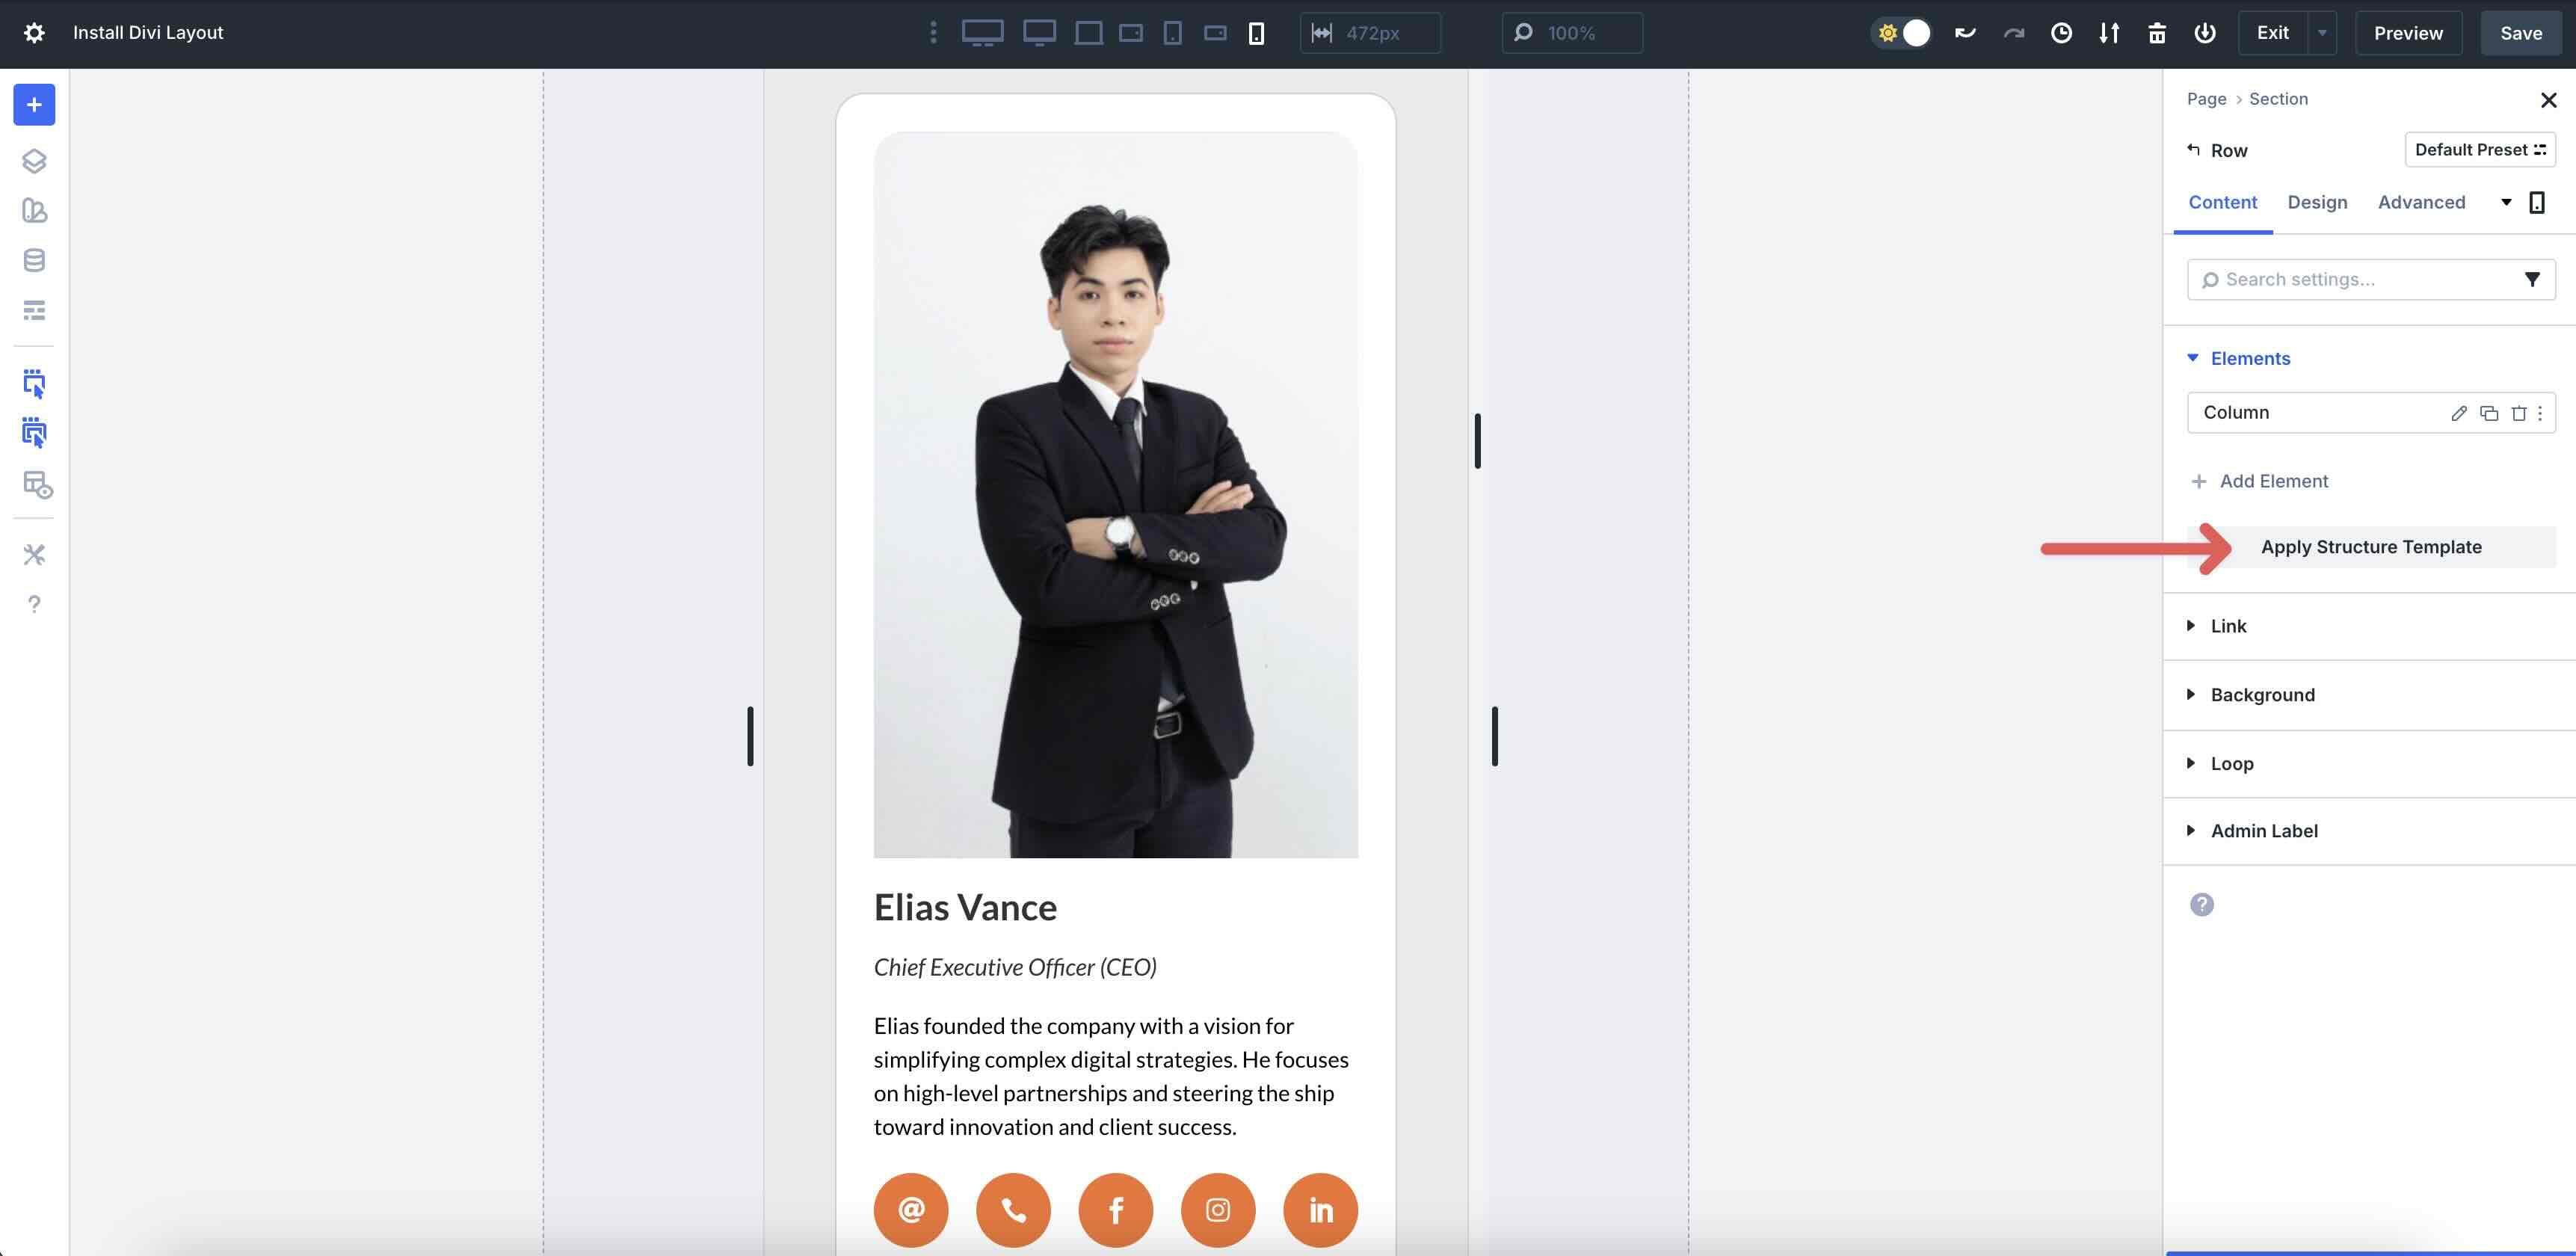
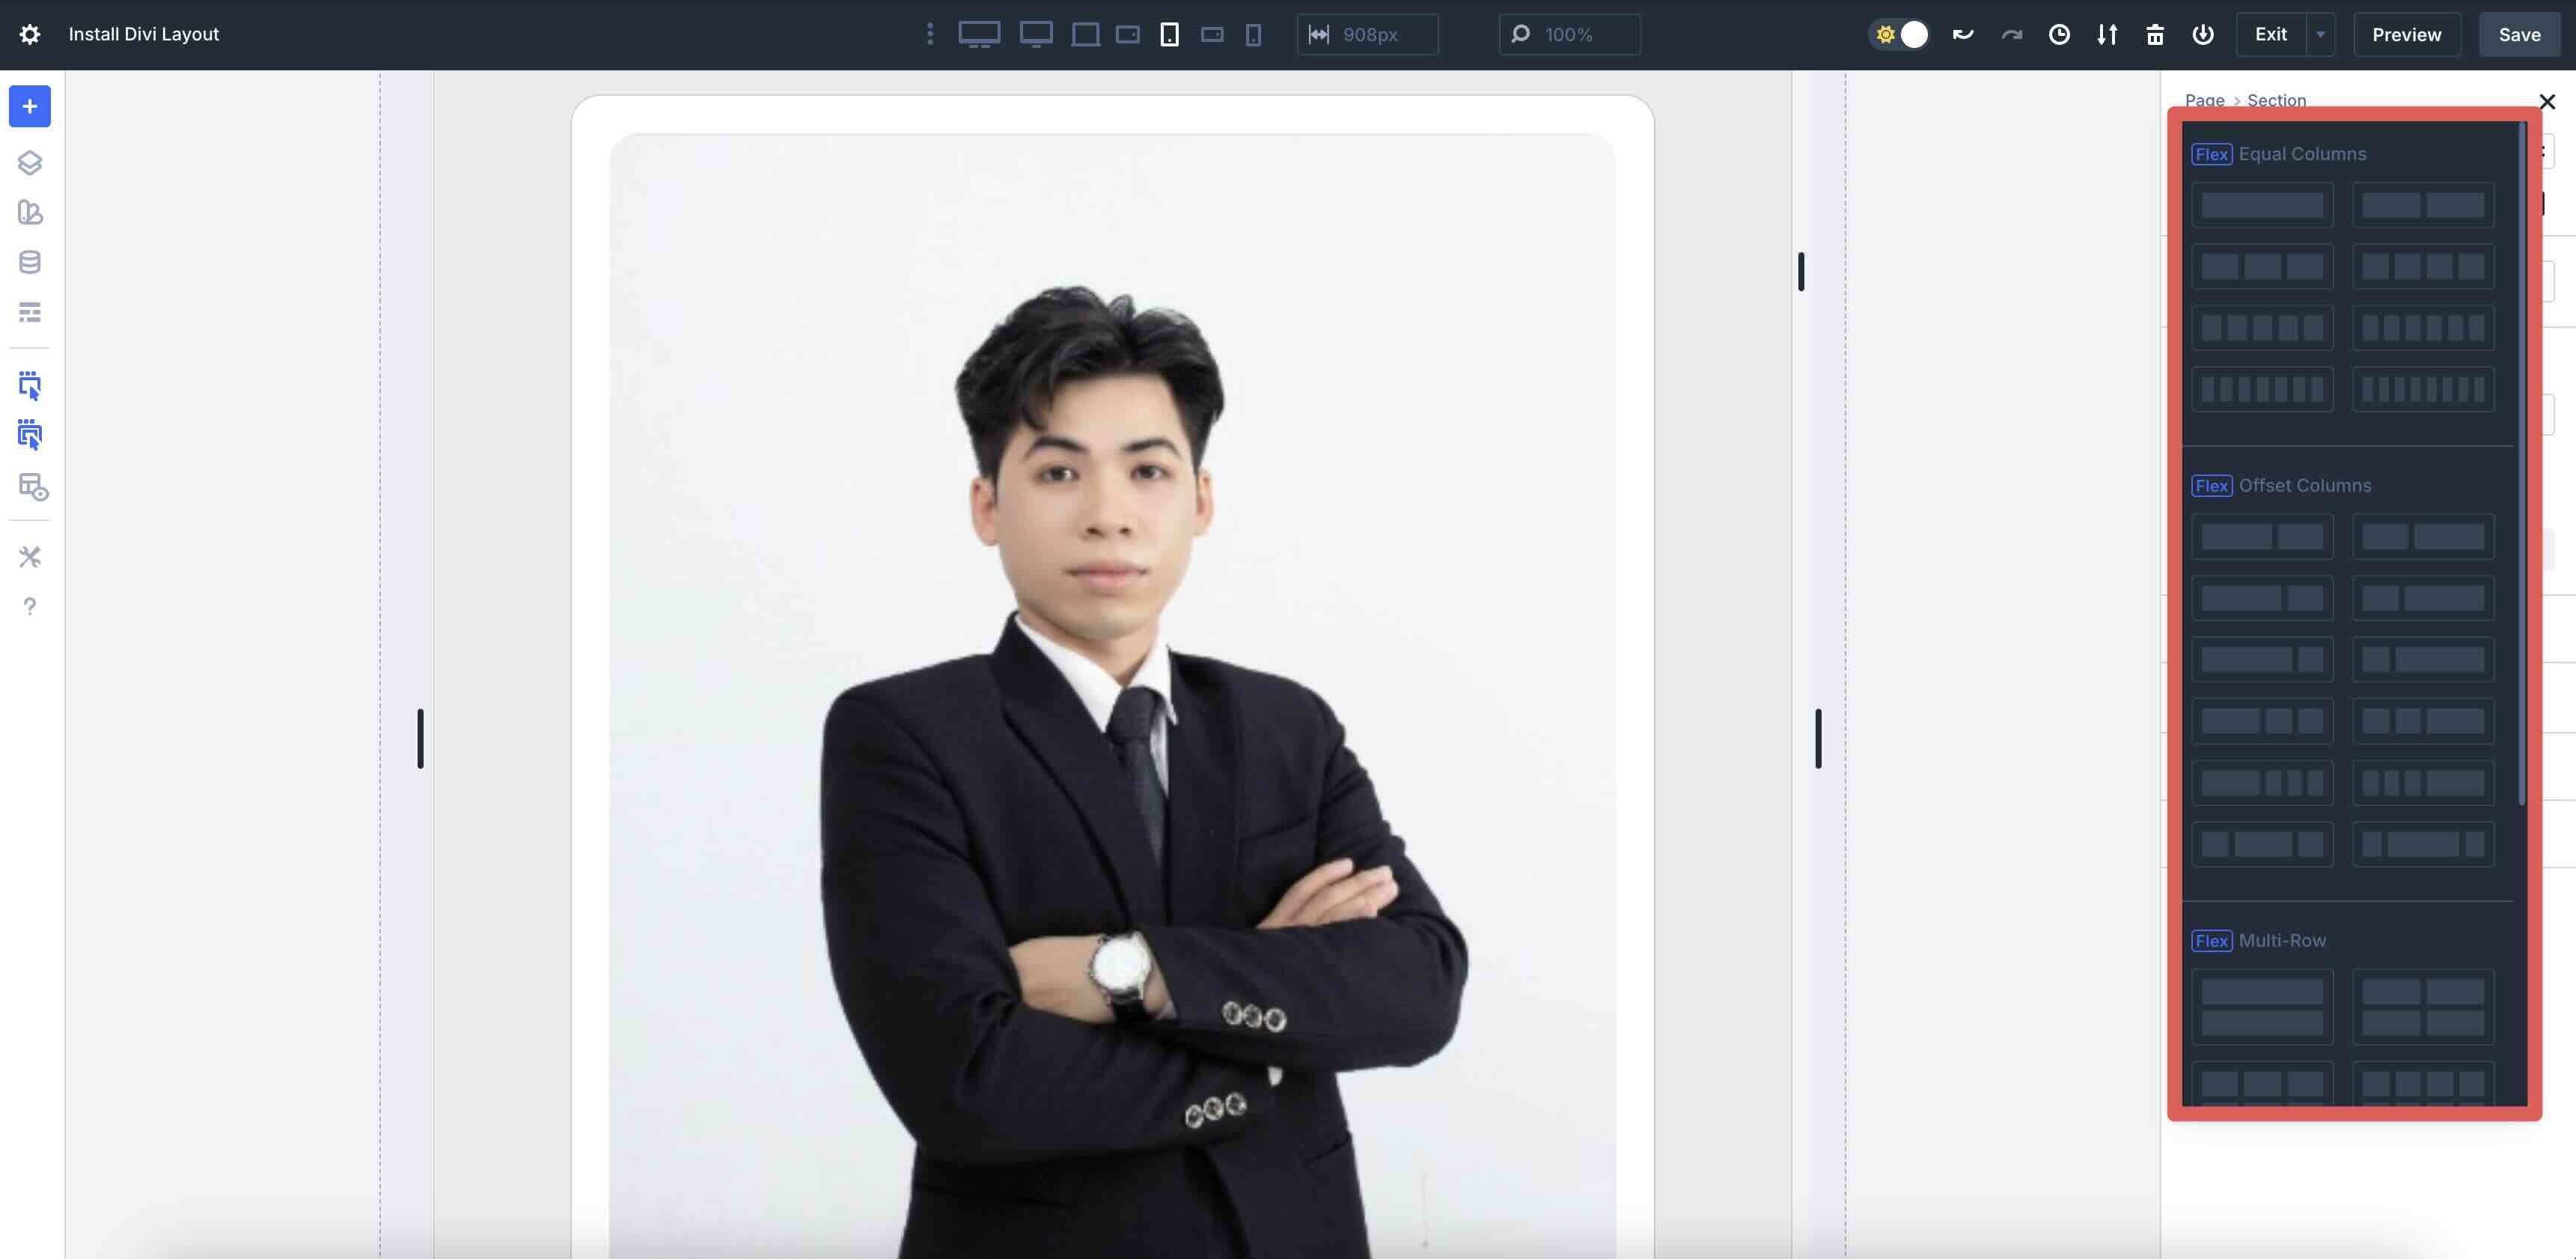
When the modal appears, you can change the Column structure and apply a predefined template with the click of a button.
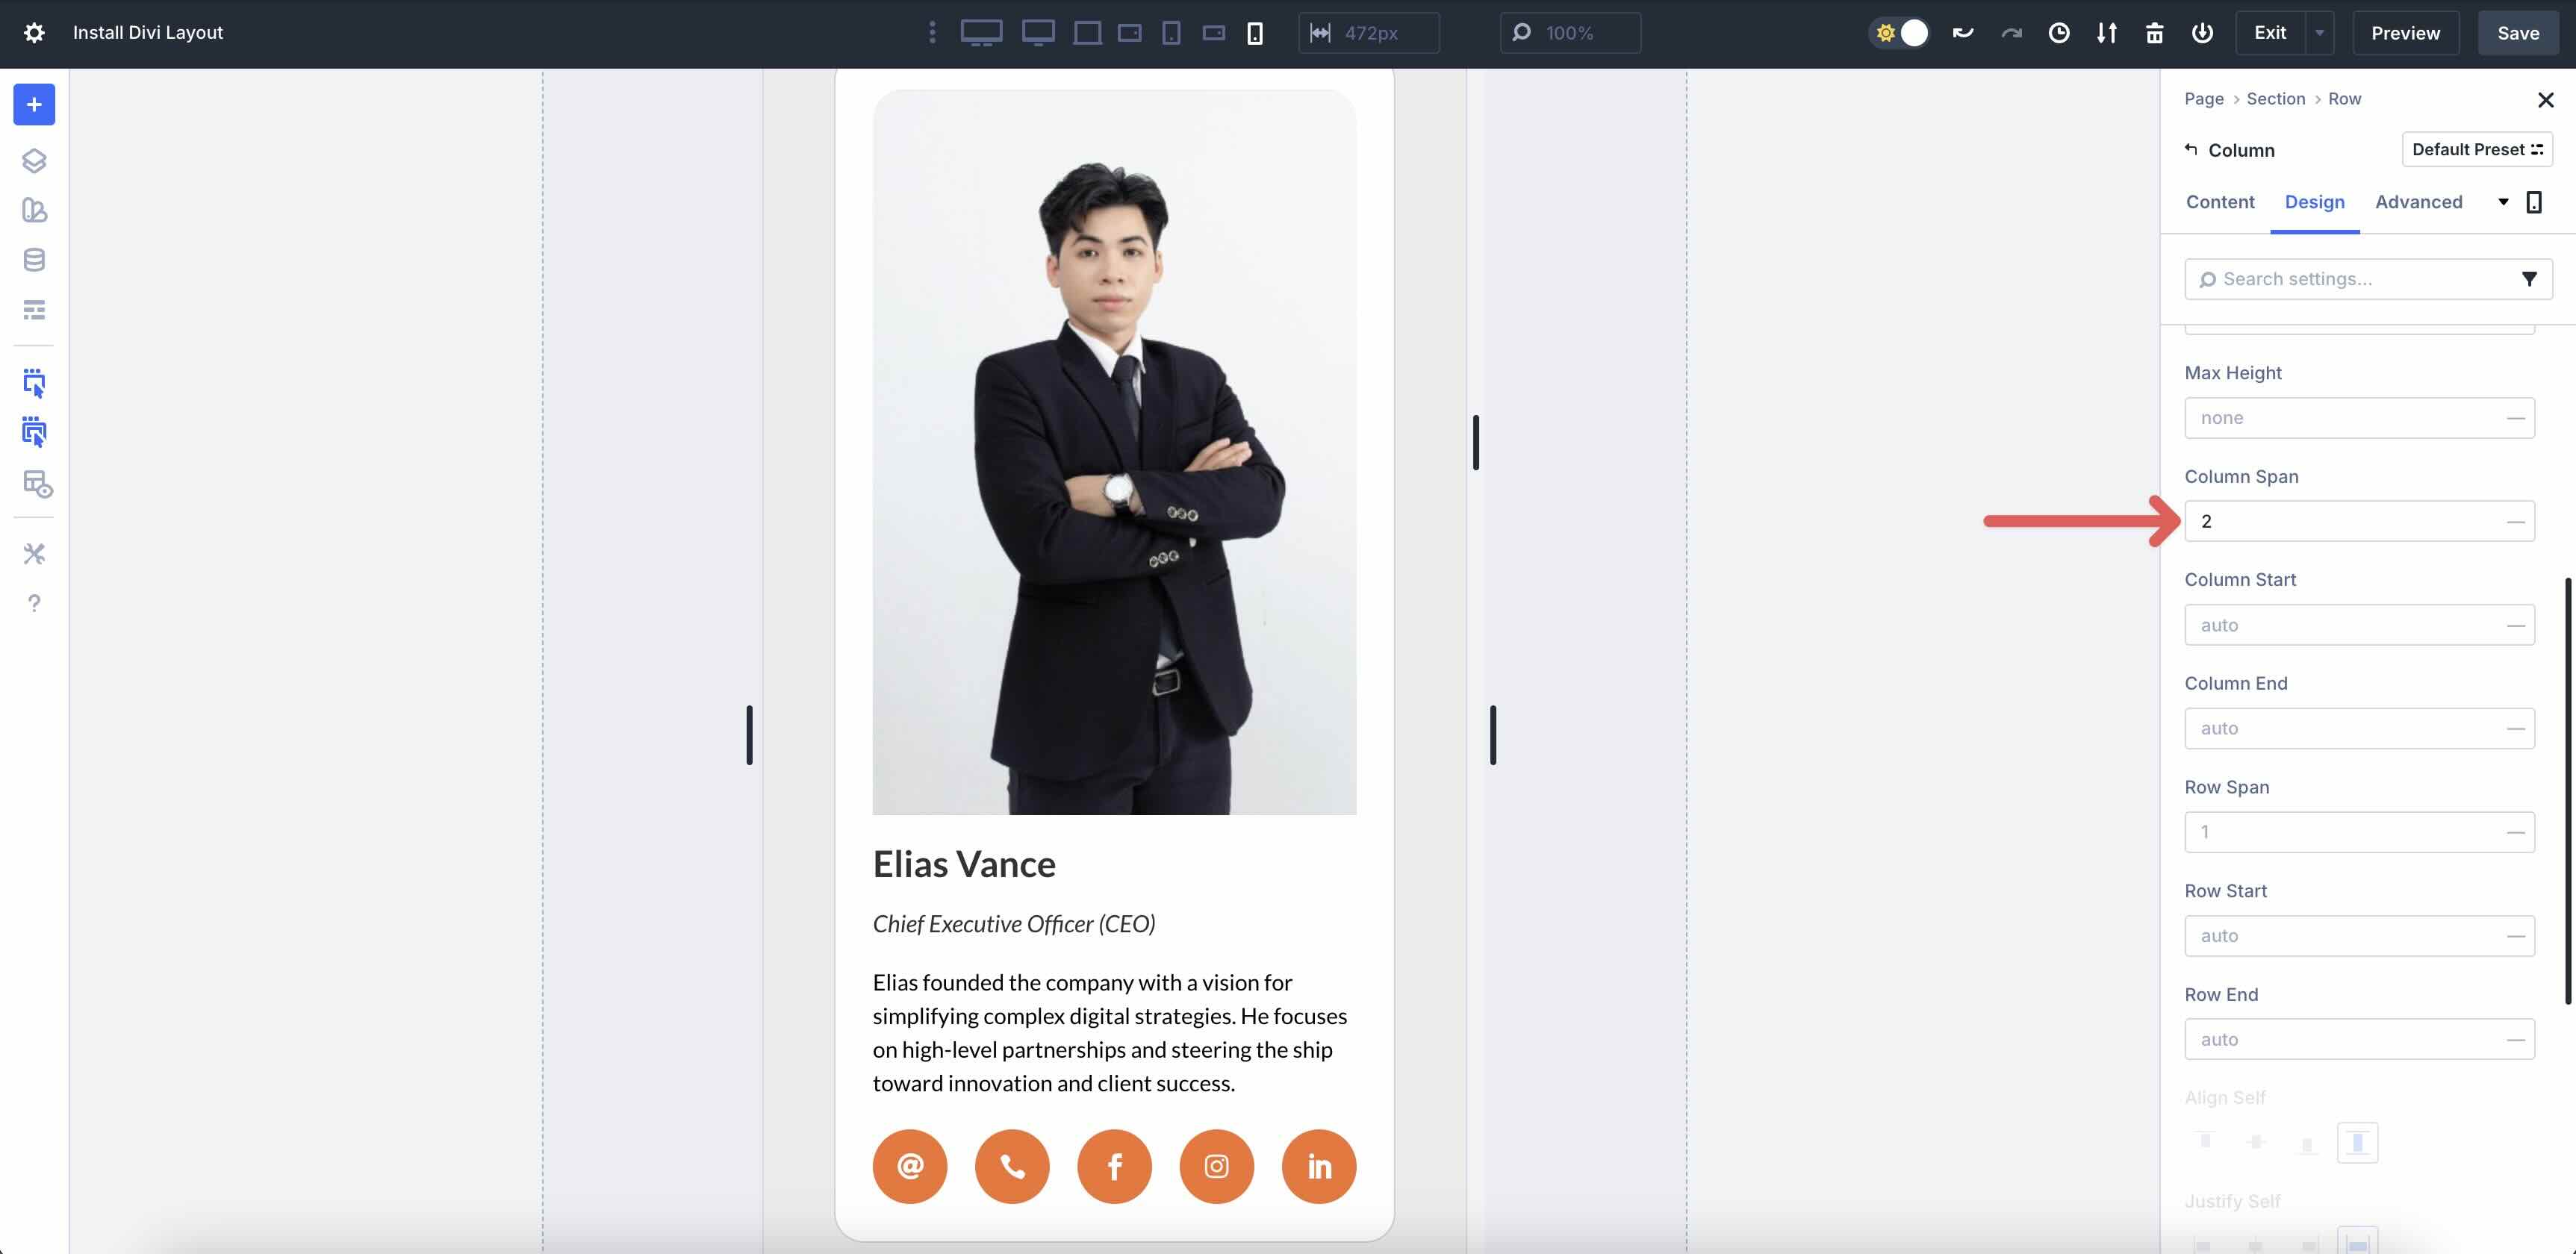
Lastly, adjust the number of Columns for each breakpoint by navigating to the Loop Column’s Design tab. Expand the Sizing menu and change the Column Span for each device.
As you can see, using the Loop Builder with ACF is easy, fast, and allows for endless creative possibilities.
Use The Divi 5 Loop Builder Today!
With Loop Builder, a single setup unlocks an infinite number of possibilities. Swap out post types, tweak queries, or reuse layouts across your site for team showcases, portfolios, testimonials, and beyond. You’ve now built a professional, responsive team directory that’s easy to update as your team grows.
Ready to dive in? Download the latest Divi 5 Beta today and start experimenting with Loop Builder to create dynamic content that wows.


Hello, I tried this tutorial because I had encountered the same issue in another test. Strangely, in the “Edit” view I can see in all columns the background and the border correctly, but when I go to the page they only appear in the first column of the Loop.
Great tutorial.
Thanks
Have you updated to Beta 3?