
A great way to gain followers on your blog this day and age is to offer a free newsletter. A newsletter is a great way to keep your users informed on topics such as your latest blog posts, upcoming events, promotions, deals and more. Some people prefer to read their news via email rather than directly on your blog.
You can add a newsletter anywhere on your website but a great place is right after each blog post. Typically if a user is happy with what they read they will opt in to read more and receive updates.
Today I will show you the steps you can take to optimize your newsletter signup as well as show you how to add a newsletter signup widget to the end of your blog posts.
If you just started your business or website you probably don’t have many followers which means no one to send emails to. A create way to change this is to add a newsletter to multiple pages of your site. If a user is happy with the content they are provided with then there is a good chance they may subscribe to learn more.
Some key benefits of using a Newsletter system are:
- Gaining a following
- Offering incentives to promote business on your website
- Being able to target your loyal audience
- Having people respect your words and opinions
You can literally add a signup for for your newsletter anywhere on your site but there are a few places that work much more than others. Just because you have a spot for a newsletter signup form doesn’t mean you need to add it to your site. Sometimes you can overkill on all of the call to actions to signup. You want the form to benefit your users, not annoy them.
Here’s a list of several places you can add your form:
- A feature post or container – content that gets more attention than other posts/pages etc..
- At the top of your sidebar
- After a single blog post
- Inside your website’s footer
- On your about page
- A span across the top of your site that shows and hides
- A lightbox popup form – this can be overkill but it tends to work for some users, this depends on the subject matter of the website
There are a few newsletter services that are great tools to help you send your emails on time and regularly. These services can help you design your newsletters, schedule the rate at which they are sent, and keep track of your subscribers.
Mail Chimp
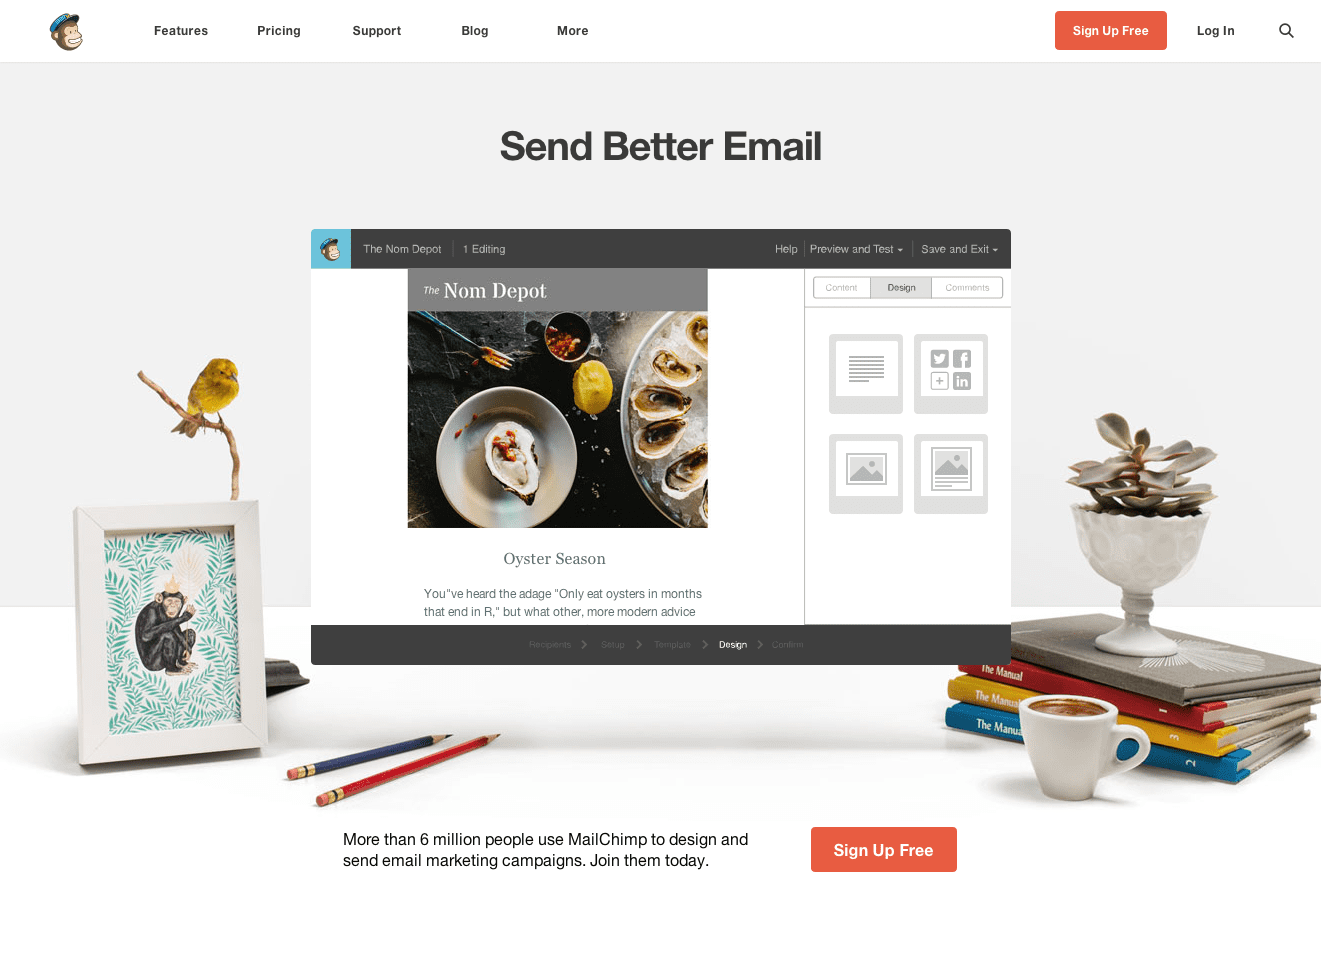
MailChimp is a very popular email marketing service. The service itself offers campaigns to users with are free up until a certain limit. Tons of ready-to-use email templates are ready to use. You can also customize your own by including your branding elements or any content you wish to share. What’s even more is that these email templates are responsive so anyone can read your newsletter no matter what device or platform they are using.
- Pros – Extremely easy to use, geared towards bloggers, cheap
- Cons – Lacks some of the features of it’s competitors
Constant Contact
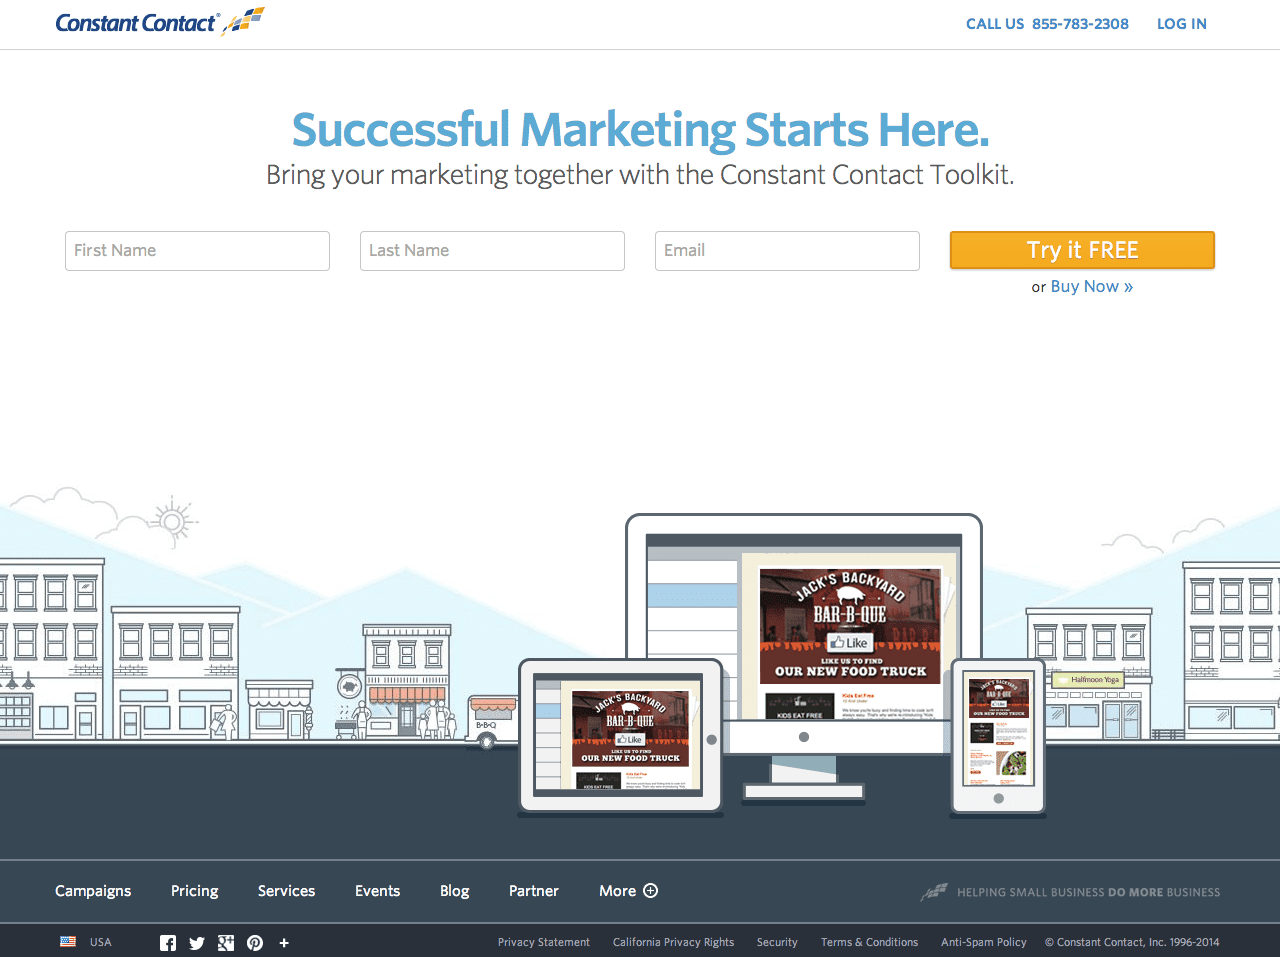
Another extremely popular tool for email marking is Constant Contact. This service picks up where Mail Chimp left off. It’s geared towards businesses rather than bloggers so custom emails and marketing campaigns can be created with ease. There are also pre made templates available but to me aren’t as nicely designed as MailChimps.
- Pros – Targeted for an small business
- Cons – Not really geared towards bloggers
Campaign Monitor
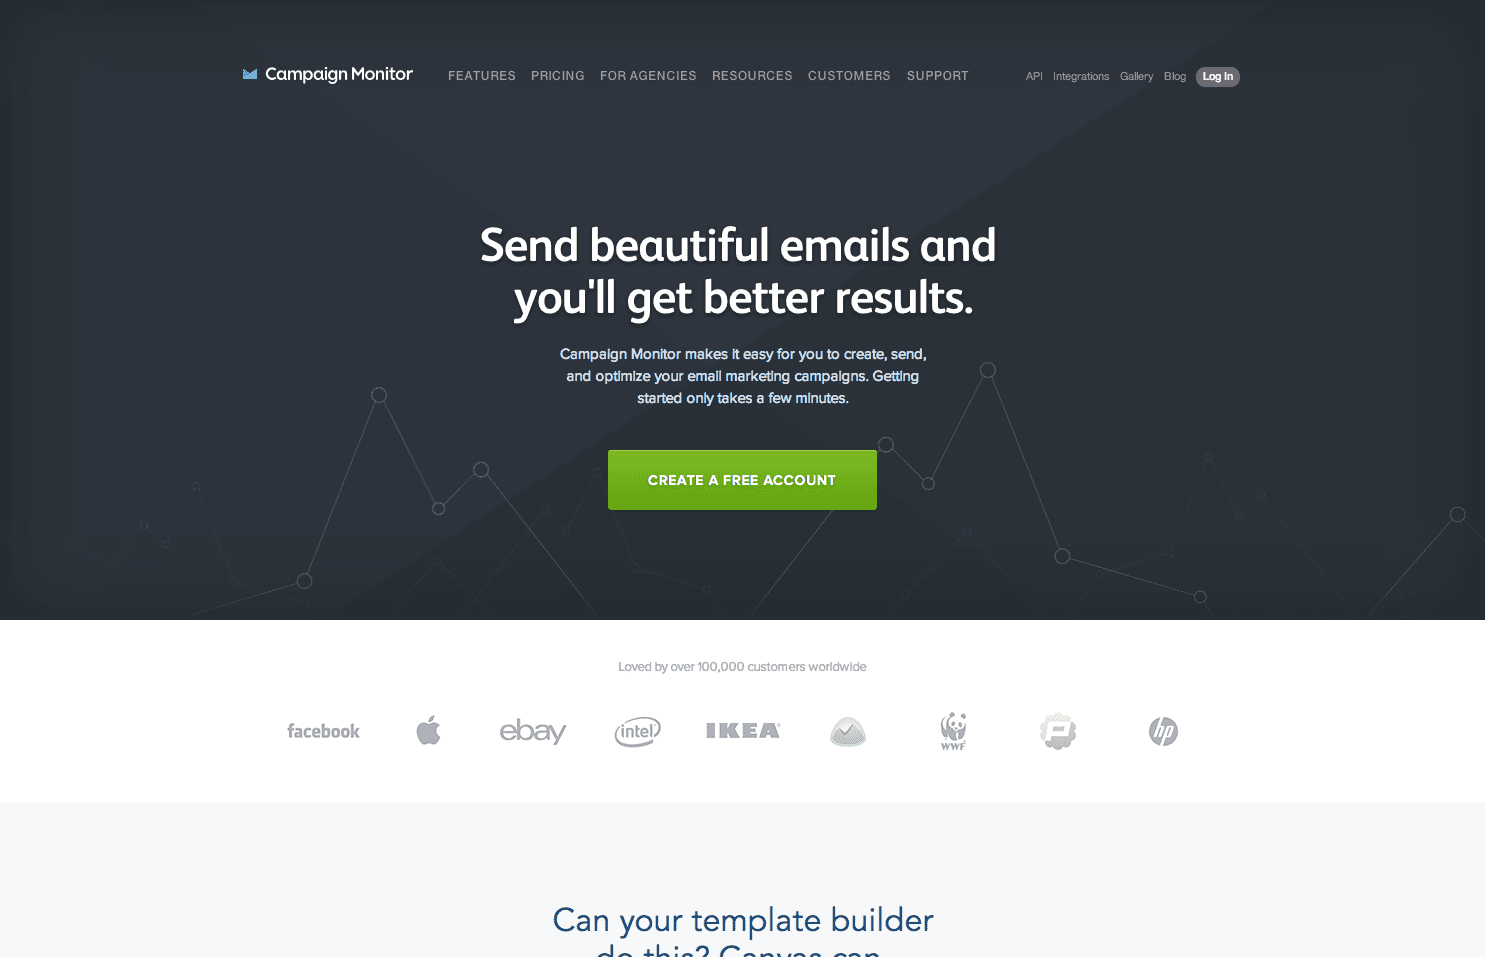
A lot of big names use Campaign Monitor for their email marketing services. Like both Mailchimp and Constant Contact there are pre made templates available for your use or you can create your own custom templates. Campaign Monitor has a unique template builder for users who are into customizing their newsletters or emails. You can also do testing with your campaigns to see what kind of content peeks the interest of your users the most.
- Pros – Professional with big names under their belt.
- Cons – A few less features than other tools
Setting Up Our Theme
Now the time comes for us to take advantage of a WordPress newsletter plugin and include it in our theme as a widgetized area rather than hard coding. For this tutorial you’ll need access to your WordPress theme directory on your website. We will be targeting our single.php file because this is where our complete blog post lives. Our goal is to add a widget just after the end of the blog post. Lets get going.
Note* – I will be using the Harmony theme from the Elegant Themes Library for this tutorial.
Step 1 – Install MailChimp Plugin
Login to the admin area of your website. Head to the plugins panel and do a search for Mailchimp widget in the search field. Install the MailChimp Widget plugin shown below:

Download the Mailchimp Widget Plugin
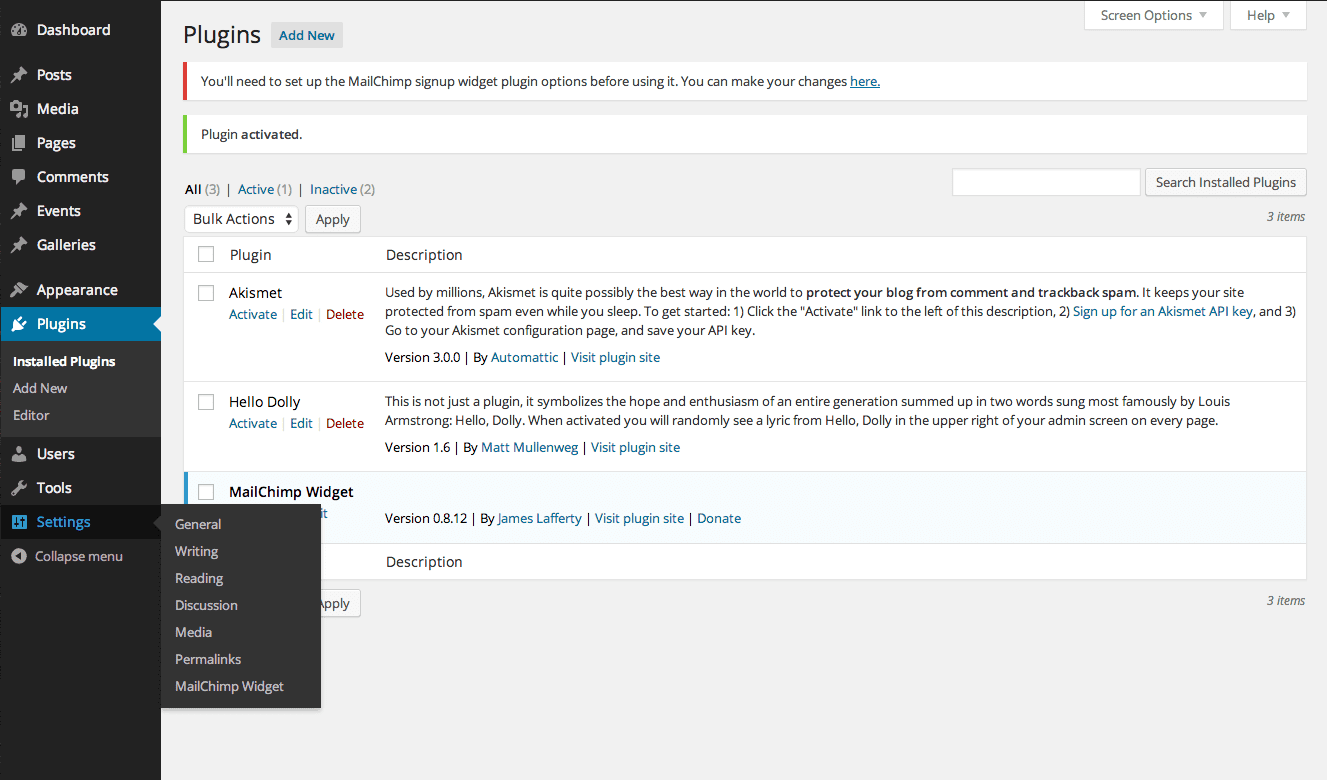
The plugin installed.
Step 2 – Connect Your Mailchimp Account
For the next part of the tutorial you’ll need to create an account with Mailchimp. Creating an account is free and easy. Head to mailchimp.com to sign up if you haven’t already.
With your account made you can now connect your Mailchimp account to the WordPress plugin by entering your Mailchimp API Key. We need to create a list before doing this step so everything works properly. Head back to your Mailchimp account and click on the Lists tab on the left.
A List must be in place for our Mailchimp Widget to work properly.
On the top right you should see a button titled Create List. Click it and make a list called “Newsletter Signup”. Add your default from email and from name. Also be sure to include a brief message to remind your subscribers why they are receiving emails.
With your list setup you can now get your API key.
Head to your account area and click on your name. Once you click on your name click on My Profile. You should now see something similar to below minus my ugly mug 🙂
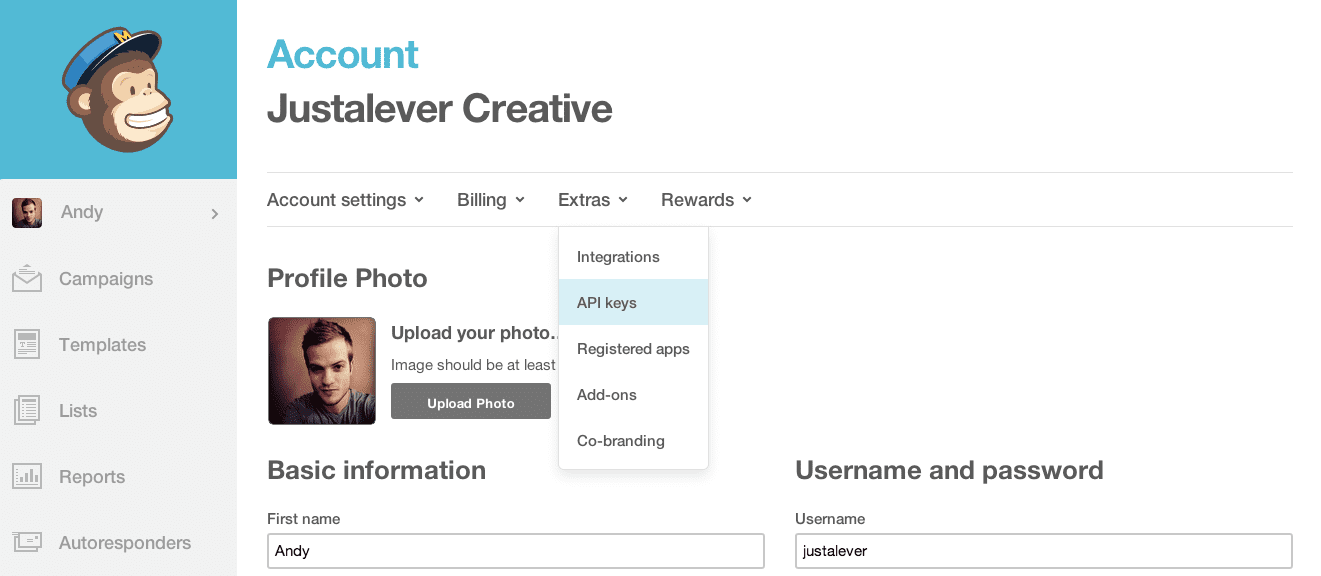
Mailchimp profile area. Look for API Keys in the Extras dropdown.
If you click on the Extras drop down you will see a link for API Keys which is exactly what we want. You will be redirected to a new page where you need to create a new API Key. Make sure you label it for future reference.
Now copy and paste the API Key and head back to your WordPress admin area. Navigate to the Mailchimp Widget settings area that was created when we installed the plugin.
There is a window requesting a new API Key in order for your to proceed. Paste the code in the input field and click Save Changes
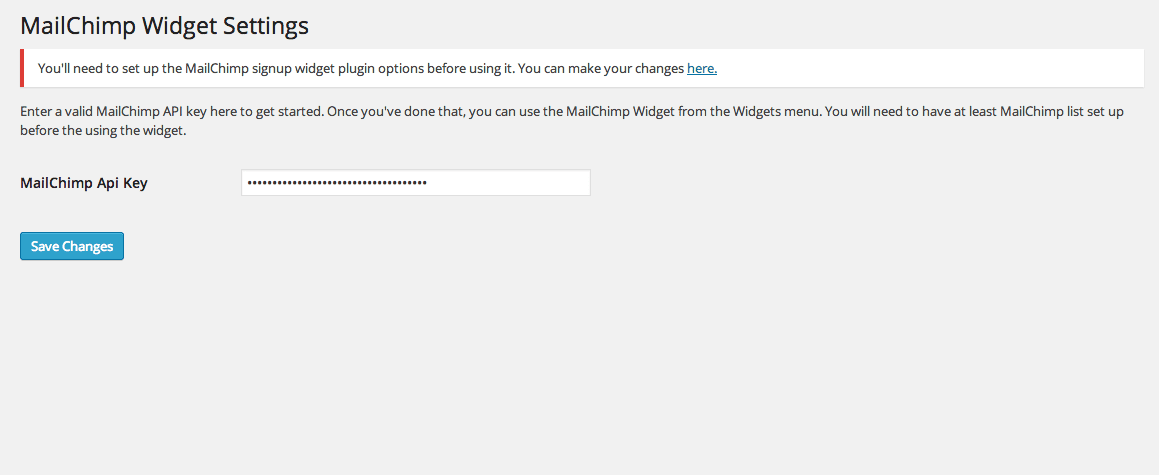
Add your API Key
You should see that your setting have been saved successfully. If this is not the case make sure you copy and pasted your API Key correctly from your Mailchimp Account.
Enabling Our Widget Area
The Harmony theme I’m using from our Elegant Themes Library currently has 4 widget areas enabled. There is a basic Sidebar widget, and 3 footer area widgets.
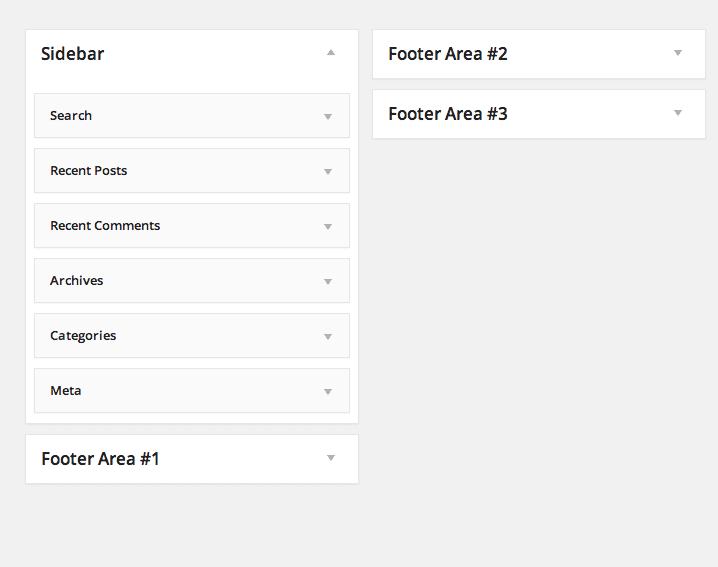
Our Harmony theme’s default widget sections.
Although there is planty of room to add to these already existing widget areas I would like to create a new area for the sole purpose of displaying content after a single blog post. For now this content will focus on our Newsletter Signup Widget but it could be anything like Author meta data, promotions, ad spaces and more.
To add our own custom widget area we need to open our functions.php file within our theme directory. If you don’t already have your theme folder open in a code editor now is the time to fire one up!
If you’re following along with the The Harmony theme then you may notice that it uses PHP includes to include excerpts of code into the functions.php file to make things easier to manage as well as more easy to read.
If you are using your own theme then you’ll likely just need to target the functions.php file like normal.
The code we are looking for is code that establishes or registers our sidebars in the first place. Checkout the code below and find it within your file.
<?php

    register_sidebar( array(
        'name'          => 'Sidebar',
        'id'            => 'sidebar-1',
        'before_widget' => '<div id="%1$s" class="widget %2$s">',
        'after_widget'  => '</div> <!-- end .widget -->',
        'before_title'  => '<h4 class="widgettitle">',
        'after_title'   => '</h4>',
    ) );

?>
Once you found a block of code similar to above simply copy and paste it below to look like the following:
<?php

    register_sidebar( array(
        'name'          => 'Sidebar',
        'id'            => 'sidebar-1',
        'before_widget' => '<div id="%1$s" class="widget %2$s">',
        'after_widget'  => '</div> <!-- end .widget -->',
        'before_title'  => '<h4 class="widgettitle">',
        'after_title'   => '</h4>',
    ) );

    register_sidebar( array(
        'name'          => 'Post Footer',
        'id'            => 'postfooter',
        'before_widget' => '<div id="%1$s" class="widget %2$s">',
        'after_widget'  => '</div> <!-- end .widget -->',
        'before_title'  => '<h4 class="widgettitle">',
        'after_title'   => '</h4>',
    ) );

?>
You’ll notice we didn’t change much but rather only the name and id selectors within the register sidebar array. This function literally defines a new sidebar within your theme. You will have access to it just like the other sidebars shown before. With the file saved, head back to your WordPress admin area and look under your Widgets panel to verify your code worked.
Since I already have 4 sidebar areas in the Harmony Theme active you’ll notice I have added a fifth. Your screen may or may not look similar. Don’t worry about it.
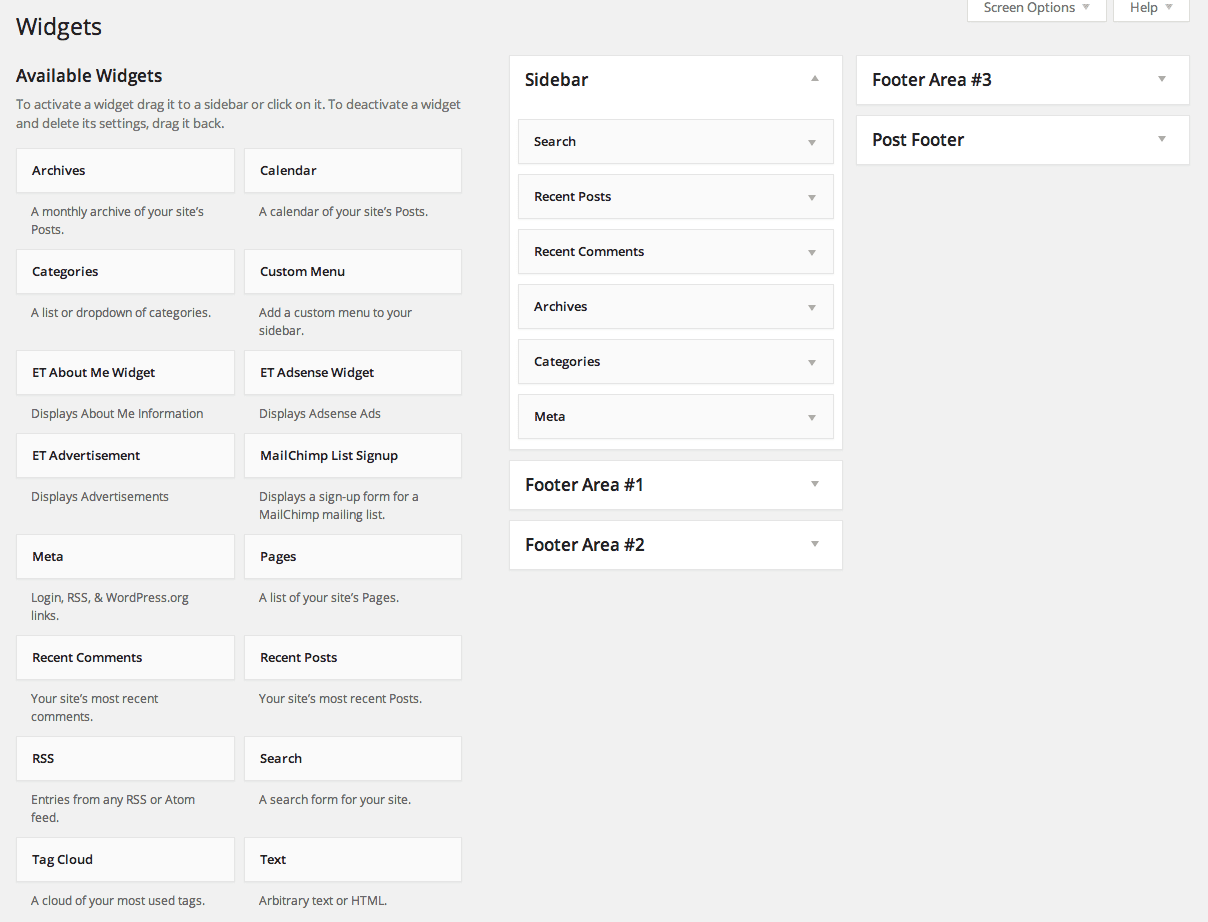
The new post footer widget area has been enabled.
Our sidebar we gave the name Post Footer is now enabled.
Adding the Widget
With our widget area enabled we can drag the Mailchimp Signup widget we installed earlier into the Post Footer widget space. You should see something like below.
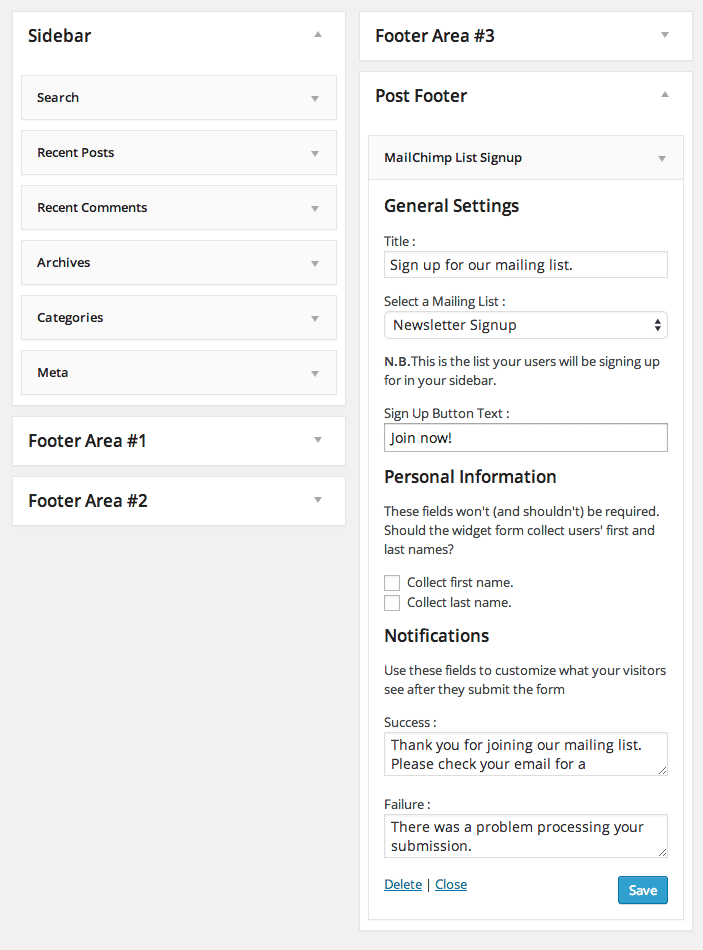
Our new sidebar active with the Mailchimp Widget added.
For now lets leave the widget’s settings at their default values. You might be wondering at this point how the newly registered sidebar is going to be displayed within our theme or even if it’s capable of displaying at all.
Modifiying Our Theme Template
Before we can go further, we need to create a new file that establishes how our new sidebar is structured. Within your theme directory create a new file called sidebar-postfooter.php.
Within that file add the code below:
<?php
    if ( ! is_active_sidebar( 'postfooter' ))
        return;
?>

<div id="postfooter-widget">
    <div class="clearfix container">
    <?php
        $postfooter_sidebars = array( 'postfooter' );
        foreach ( $postfooter_sidebars as $key => $postfooter_sidebar ){
            if ( is_active_sidebar( $postfooter_sidebar ) ) {
                echo '<div class="postfooter-widget' . (  2 == $key ? ' last' : '' ) . '">';
                dynamic_sidebar( $postfooter_sidebar );
                echo '</div> <!-- end .postfooter-widget -->';
            }
        }
    ?>
    </div>
</div>
The code above looks a little complicated but it’s essentially telling WordPress to support the use of our new sidebar. We have also added some HTML to display the content in a more structured way. The foreach loop is looping through any content we add to the widget area. Each new widget that gets added from the WordPress admin area will get a custom class so it’s easier to target with CSS and unique from other widgets.
With our new sidebar enabled we need to include it following our blog posts. We need to target our single.php file since it’s responsibility is to display the entire length of a blog post.
Within the file we need to first find the loop and then find the end of the container encasing the loop. Just after our post content is displayed we need add some PHP to get our new widget sidebar area to display.
Open your single.php file and look for the WordPress loop:
<?php if ( have_posts() ) : while ( have_posts() ) : the_post(); ?>
 // Content goes here
<?php endwhile; else: ?>
<?php endif; ?>
Look inside the loop like above and find where the content is. Once you do add the line below after it.
<?php get_sidebar('postfooter'); ?>
You’ll notice we passed the word postfooter to the php get_sidebar call. You might also notice that the file we created earlier was named sidebar-postfooter.php. This is not a coincidence. WordPress is smart and will use its knowledge to traverse through your theme to find any files associated with the sidebar. Since we passed postfooter to the function, WordPress knew to include the contents of that file into our single.php file. Cool!
Now we test. I’ll head to the WordPress admin area and create a new blog post to show by example. Below you’ll see the blog post in it’s entirety. Notice our new sidebar has been included directly following our content but before the comments area of our blog post. The red border isn’t part of the design but just an annotation to show you the new addition.
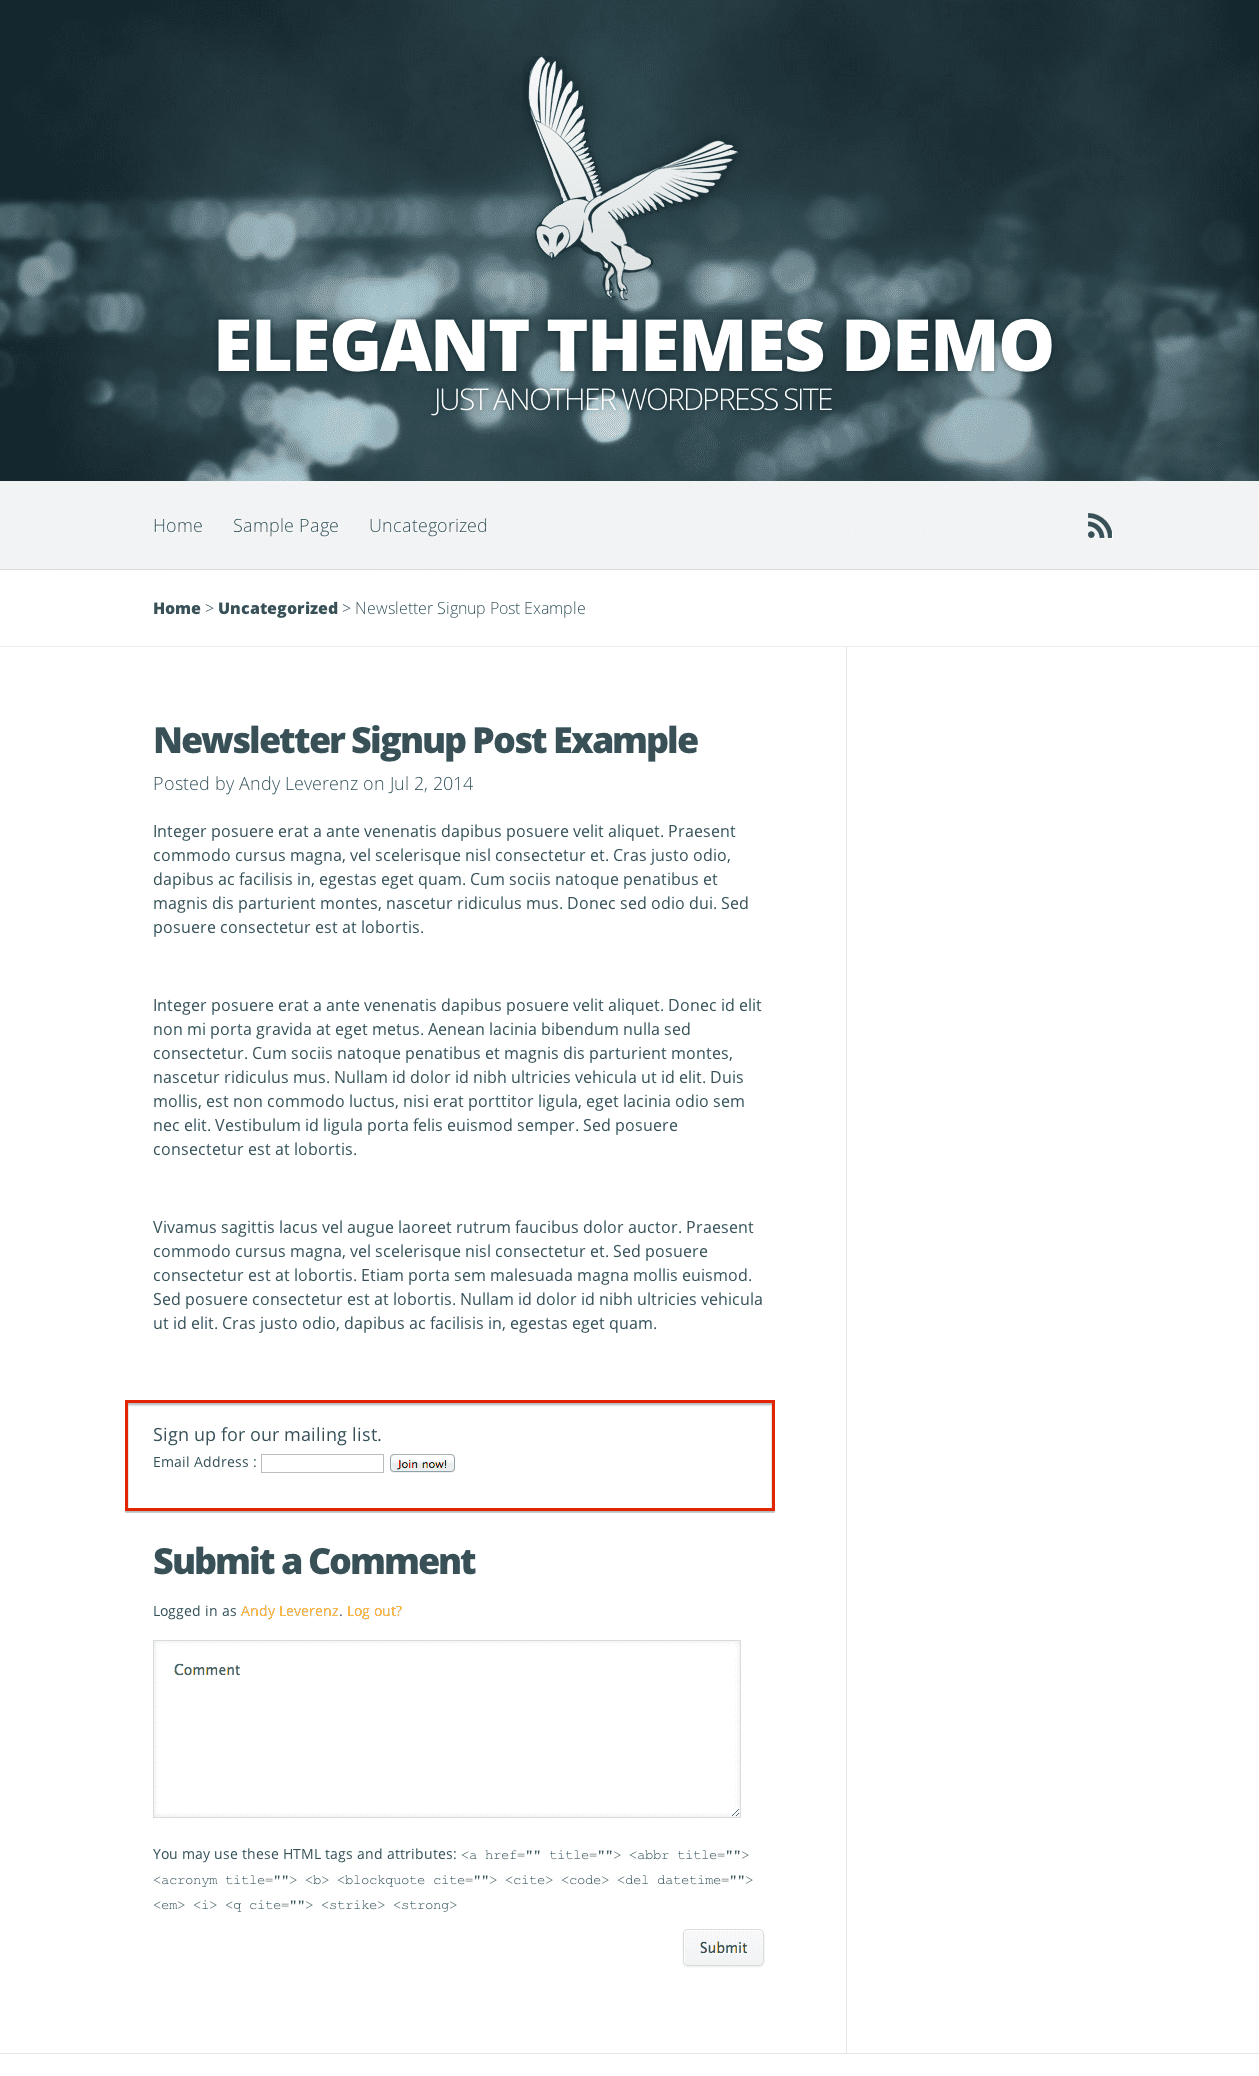
Success! The Newsletter subscription signup is in working order. Style away and call it a day!
From here we can style up our Newsletter form to make it a bit more flashy so it stands out more. Since you might be following along using a different theme I’ll leave this task up to you.
Conclusion
We’ve come a long way to include such a simple element to our blog but the return on investment can be worth all the hard work. Adding a newsletter to your blog is one of the greatest forms of marketing you can do for yourself or your business. In this tutorial we included a simple widget following a blog post but you can also go as far as including a widget or custom field anywhere on your site. Be sure to refer to the small list I created earlier for ideas of the best places to include a newsletter signup form.
Article thumbnail image by totallyPic.com / shutterstock.com


Really helpful.
thanks for sharing
I was wondering if you could explain how to create an email sign up like the one in this website I mention below. It’s very modest, just sits on the left corner of the page and moves when you scroll down the page. I’m a musician building my website and have loved the site this musician has: http://www.justintownesearle.com
It kind of worked for me..The widget was shown, but the contents of the blog post became invisible! So close, yet so far..Sad times!
Hey Andy…
I use Constant Contact… how can I add a signup button or box to the Divi Theme to get new subscribers to my newsletter?…
Thank You…
🙂
Thanks to Google that I landed on your blogpost with such a great info! I have finished designing my news letter. Well done Andy
I spent 1 hour trying to find the code. It just doesn’t exist. How did you all find it?
I could recomend one more plugin allowing to display sign up form in a pop ups: http://freshmail.com/plugin/wordpress-newsletter/
It enables you to define the criteria of popup display:
* after a defined process of page scrolling
* after a defined time spent on the website
* before an attempt to close the browser
and block the popup:
* for smartphones
* for defined UTM tags
* after reaching the maximum number of displays per user
* at a defined frequency
Think this option should come standard with all themes OR you should offer it as a plugin so people who don’t know how to hack code can still benefit.
Absolutely amazing, it worked! I feel like a programmer now 😀
I’ve been all over the Theme Functions (functions.php) file, but I can’t find the register_sidebar coding you’ve mentioned above. Is there another way to enable the post footer? Thanks!
Great! Tks!
I’m trying now to styling the form and label. Do you have any suggestion? It’s correct to work with css on ?
I can’t find the register_sidebar command in my function.php file. Is it possible it’s not there?
Can’t seem to get this to work using the Playbook theme. I can get it as far as seeing the widget appear in Appearance>Widgets, but the mail subscription form is not displaying on posts after inputting the code on single.php?
Any suggestions?
When I created the postfooter it created postfooter #1, #2 and #3? Maybe this has something to do with it?
In my blog, I use Feedburner and have many subscribers, and do not want to lose them. You can make a tutorial for users of Feedburner?
Great post!
You could also just use this plugin to add code to the bottom of your post – much more simple 🙂
https://wordpress.org/plugins/bottom-of-every-post/
Thank you for the awesome tutorial Andy 😀
How do you make the pop up page?
We have another post coming up that will touch on that 🙂
I am also interested in learning that.
how do you make it so that the blog post goes out with a snipet of the content in a newsletter, like you guys do (if you follow) ?
Great tutorial! Thanks!
Thank you!
You need to be able to do this with one of your themes like Divi.
You also should include Aweber
You need be able to have the form redirect to a page after signup, perhaps to a subscribers only page.
Hey Terry,
This can be done on any one of our themes. Just follow the tutorial and you’ll achieve the same results.
AWeber is actually included in our theme builder. You can configure it in your settings.
Mailchimp handles this nicely within their plugin. For other services I’m assuming the results are similar. For the sake of consistency a redirect might prove to be not as user friendly if your users still want to continue reading your blog.
Hi!
Is it possible to “Add code to the bottom of your posts, before the comments” in Divi 2.1 Epanel?
Thanks
Antonio
hi, how to style it according to “Divi” ?
Hi,
I would also love to know how to style the subscribe field similar to how it’s done on Elegant Themes blog. I love the way that the author info and subscribe box look great together and would love to do the same thing on my blog.
What about the fabulous (even if not so easy to setup) and free PHPList?
It would be so nice to have an article about it 🙂
Very helpful article!! easy and informative article, great tutorial for beginners.
I agree with the point. Blog must have subscribe feature at the end of the post description.
Using Mailchimp plugin for Newsletter. Very good and very deep article for newsletter. Thanks for share.
Bravo Andy.! Excellent for those who know least like me. Well explained and very specific.
Thanks Alex
You guys are the best. I love the tips you send. This one is great! Thank you so much.
Thanks for the comment! Great to hear feedback 🙂
yep I use aweber as well and so glad elegant themes is now including them! thanks guys….
Does this apply to Divi 2.0 also, or is all of this taken care of with the modules? Definitely want to be able to add the after post opt-in to my Divi website.
Crystal, this applies to any theme. The code I’ve written will work to create a new sidebar module which you can then include anywhere within your theme.
Thank you for replying. So, just to be sure I understand (sorry, I am a newbie!) I would use the code as you describe above instead of using the Subscribe module for adding an opt-in at the end of posts?
Exactly!
I would like to know this as well. Super excited to figure this one out!
What! Nothing on AWeber?
AWeber is actually included in our theme builder. Simply add your API key and you should be all set.
Great article! Thanks so much for sharing this info. I used to use AWeber, but am planning on making the switch to MailChimp.
Both are great solutions. Thanks Lisa
Great tutorial Andy! I use Mailchimp and I love it. I’ve been playing around with my subscribe bar recently. I put mine in the footer, after a testimonial, in the sidebar, and after each post with coding.
Great locations to add Clay!
How do i get the source Code
Woa..!!! This one is awesome.. I was looking for a tutorial like this. In my view Mailchimp is best
Glad we could help Joel! Thanks
Thanks. I followed but got stuck. I’m using Divi on Stipse.com and I don’t seem able to find that code in functions.php!