
There are many reasons why WordPress is so popular, including its flexibility. For example, WordPress widgets help you perform easy and effective customizations. Understanding how these modules work can help you optimize and enhance your site – specifically your sidebars and footers – without having to touch any code.
In this post, we’ll introduce you to WordPress widgets and explain their uses. We’ll discuss where you can display them on your site, and then walk you through how to showcase, disable, and import or export them.
Let’s get started!
Subscribe To Our Youtube Channel
An Introduction to WordPress Widgets
Widgets are elements you can use to easily display various types of content within your WordPress sidebar and footer areas. These include text, links, images, and more.
For many users, especially beginners without much technical experience, widgets are incredibly helpful. You can use these pre-built modules to enhance both the design and functionality of your pages without having to code in new features manually.
Widgets are small blocks of content, and usually aren’t the main focus of a page. However, that doesn’t mean they don’t play essential roles. For instance, you can use them to display the weather, highlight a location on a map, or provide visitors with a convenient navigation menu.
Whereas WordPress themes enable you to change the entire look and feel of your website, widgets let you add and customize specific features to certain areas. WordPress comes with a variety of default options:
You can use these widgets for everything from displaying search bars to showcasing a list of recent comments or posts. In addition to these out-of-the-box options, there are also ways to create your own widgets.
Plus, some themes and plugins come with their own unique widgets, too. For example, MetaSlider enables you to add image sliders to your widget areas:

Another example is our Monarch social sharing plugin, which lets you showcase your social media accounts:
No matter what kind of widget you’re looking for, you’re bound to find a suitable option.
Where You Can Display WordPress Widgets
There are usually multiple widget areas on a WordPress site. Typically, widgets are placed either in a sidebar or footer. However, those are not the only two options.
The number of widget areas you have available will be dictated largely by your theme. Some themes may offer multiple sidebars, or enable you to add widgets in places such as your site’s header.
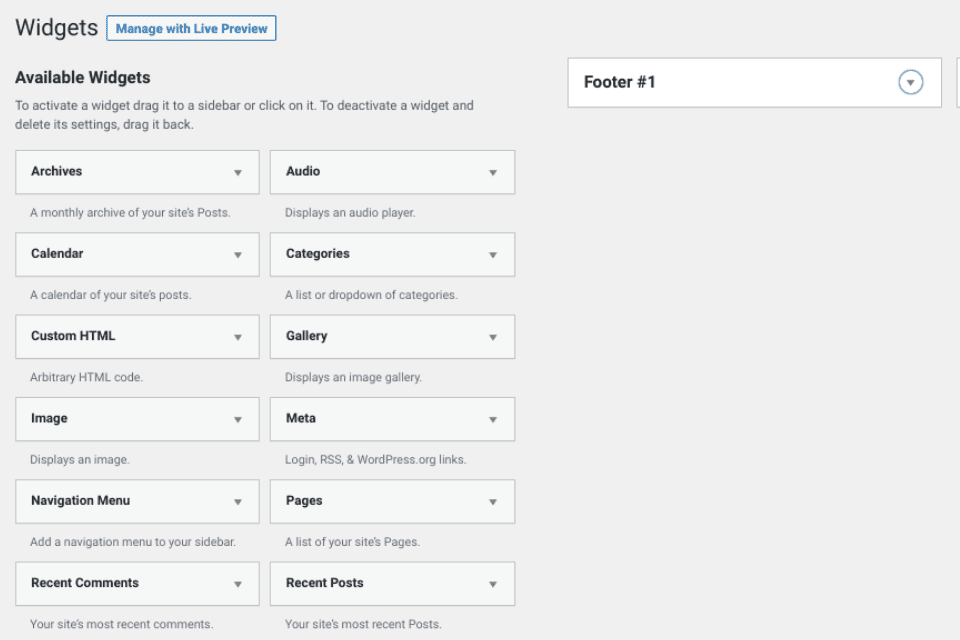
Below is an example of widgets in a sidebar (1) and footer (2):

You can choose to showcase widgets only on specific pages, or across all pages on your site. For example, you may be using a Facebook plugin to showcase your Facebook page and followers. Based on your theme, you could have this widget show your follower box in the footer of every page on your site.
How to Display WordPress Widgets
When it comes to showcasing widgets on your WordPress site, you have a few options. First, it helps to know which areas of your site are widget-friendly.
Adding Widgets from the WordPress Admin Screen
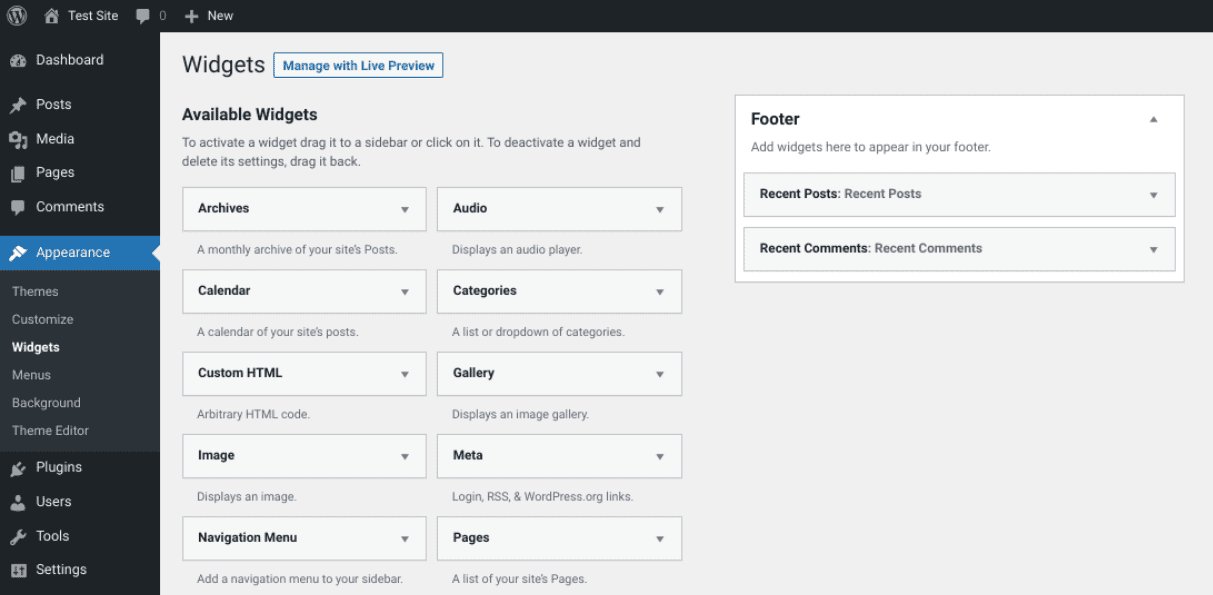
To see where you can display WordPress widgets in your current theme, you can head to Appearance > Widgets in your dashboard:

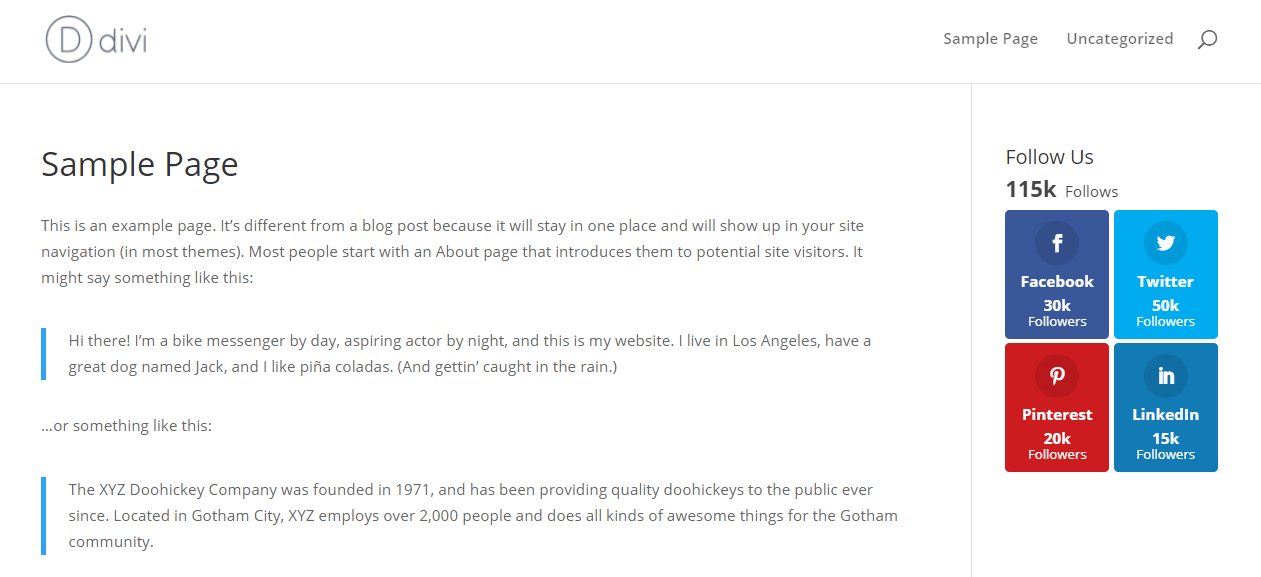
In WordPress’ latest default theme, Twenty Twenty-One, you’ll find only one widget area in the footer:
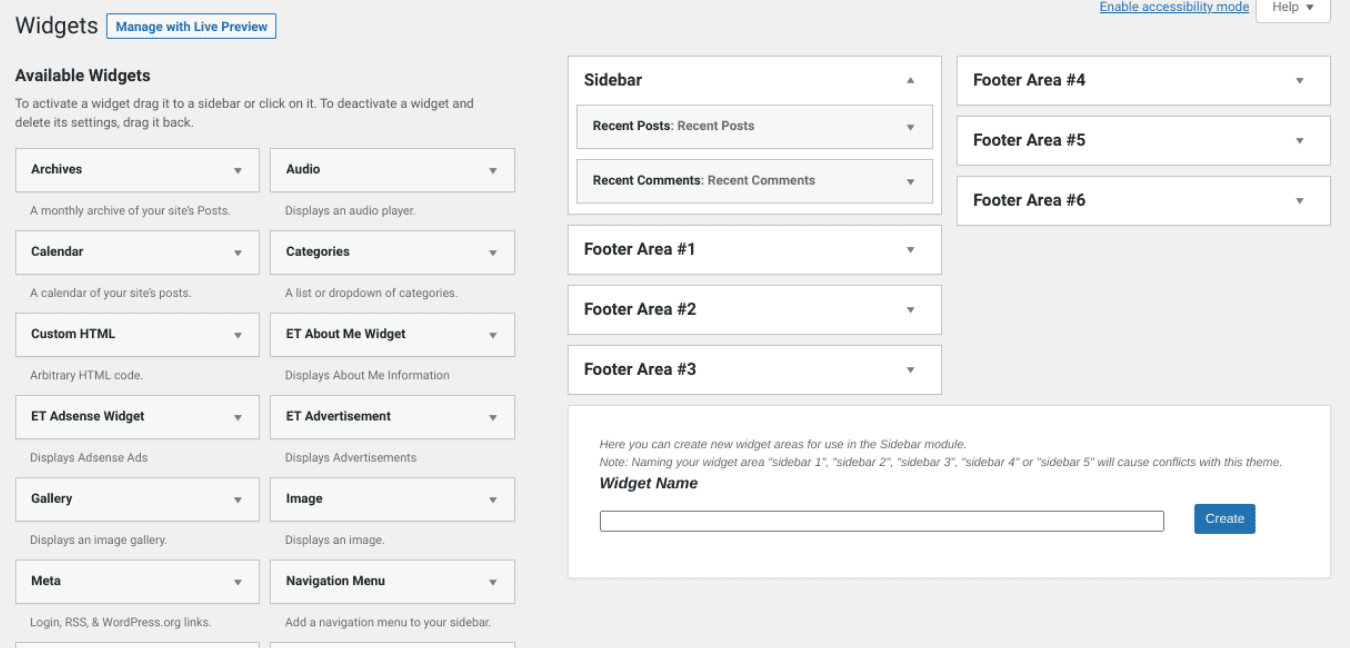
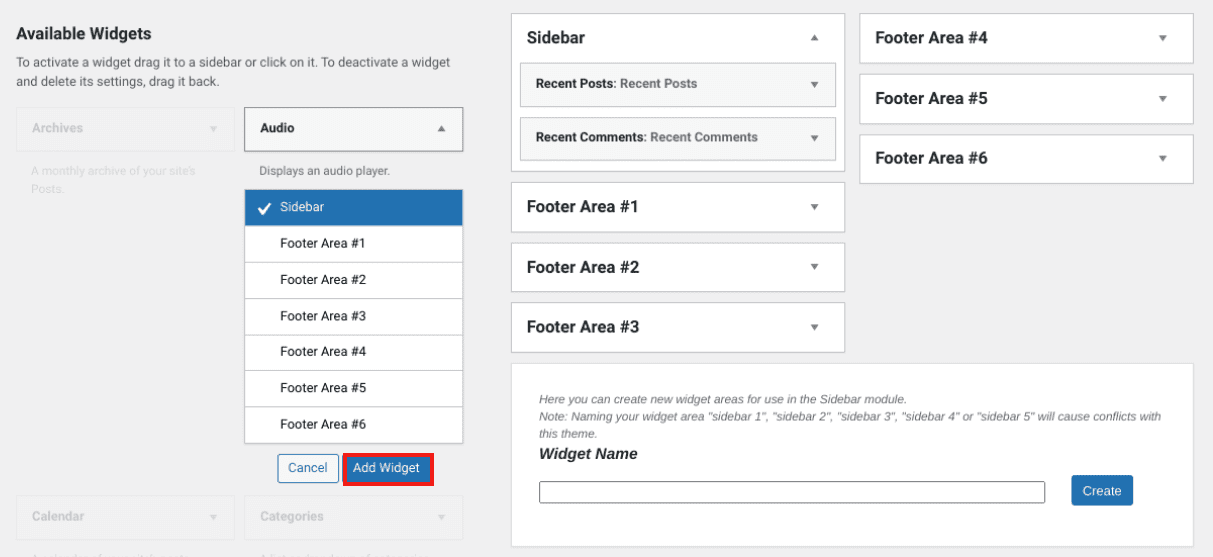
However, if you use our Divi Theme, you’ll have access to a plethora of widget areas, including a sidebar and multiple footers. You’ll also have the option to create your own, new widget areas to use in the sidebar module:
To display a widget in one of these sections, all you have to do is drag and drop your module of choice under the designated section. For example, if you wanted to add a widget to your sidebar, you would place it under the Sidebar panel. As you can see in the example above, we currently have Recent Posts and Recent Comments showing.
Alternatively, you can simply click on the widget, select the area you want to add it to, then click on Add Widget:
The Appearance > Widgets screen is one of two methods you can use to display widgets. Another option is to use the WordPress Theme Customizer.
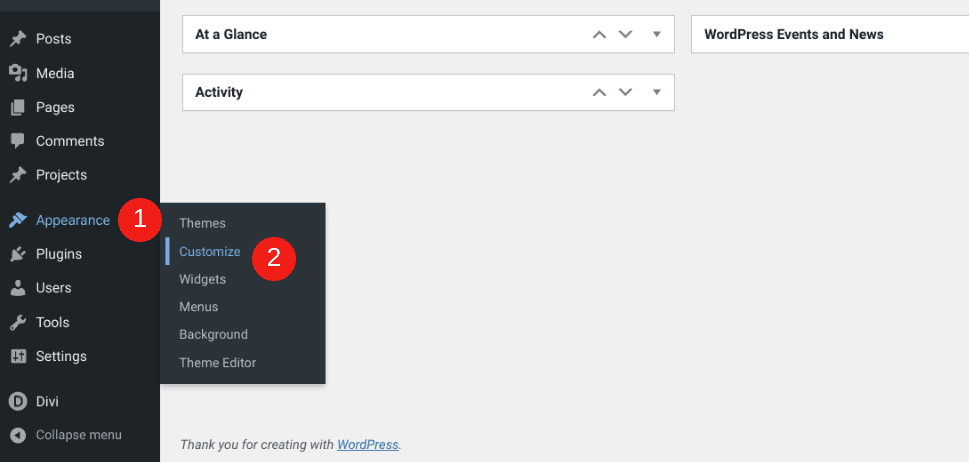
Adding Widgets from the Theme Customizer
To get started, navigate to Appearance > Customize in your dashboard:
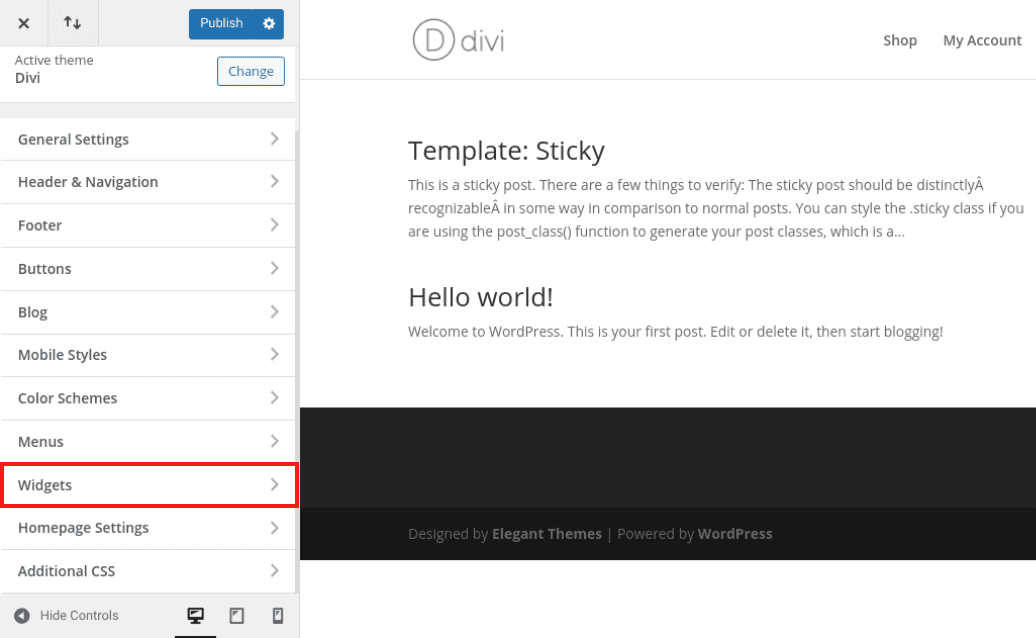
On this page, there will usually be a Widgets section:
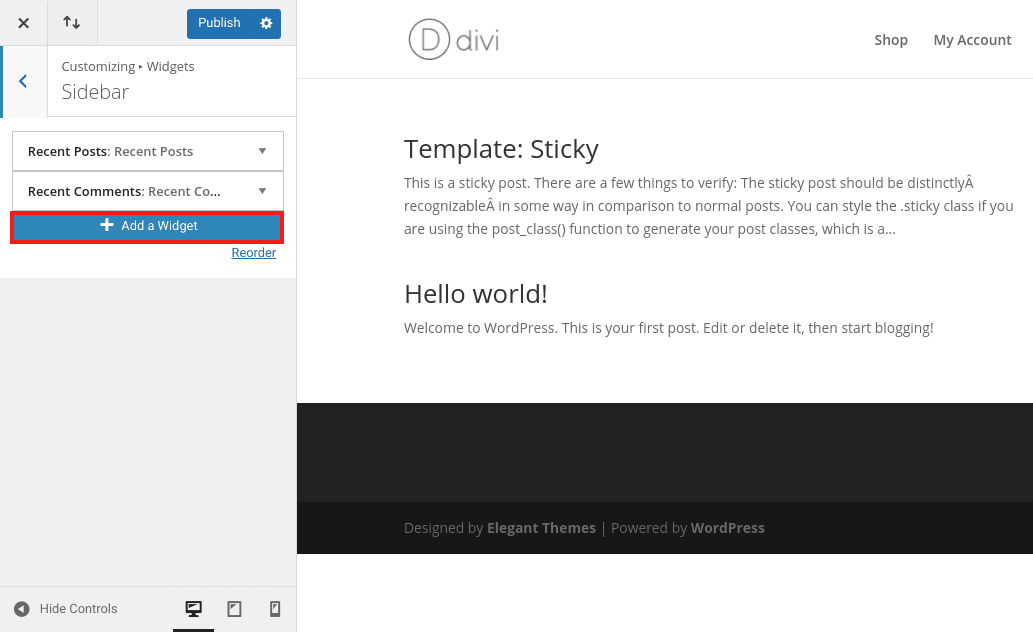
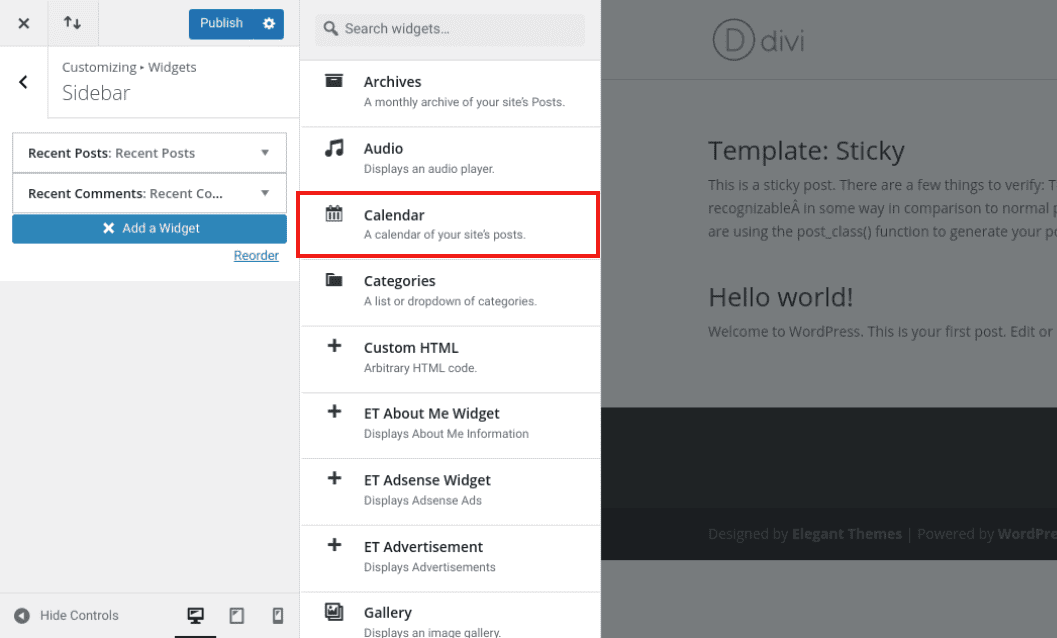
Next, you can select the area you want to add the widget to from the available options. Then click on Add a Widget:
Next, from the list of widget options, choose the module you want to add:
You can give the widget a title if you wish, although it’s not necessary. Note that if you do enter a title, it will be visible on the front end to your visitors.
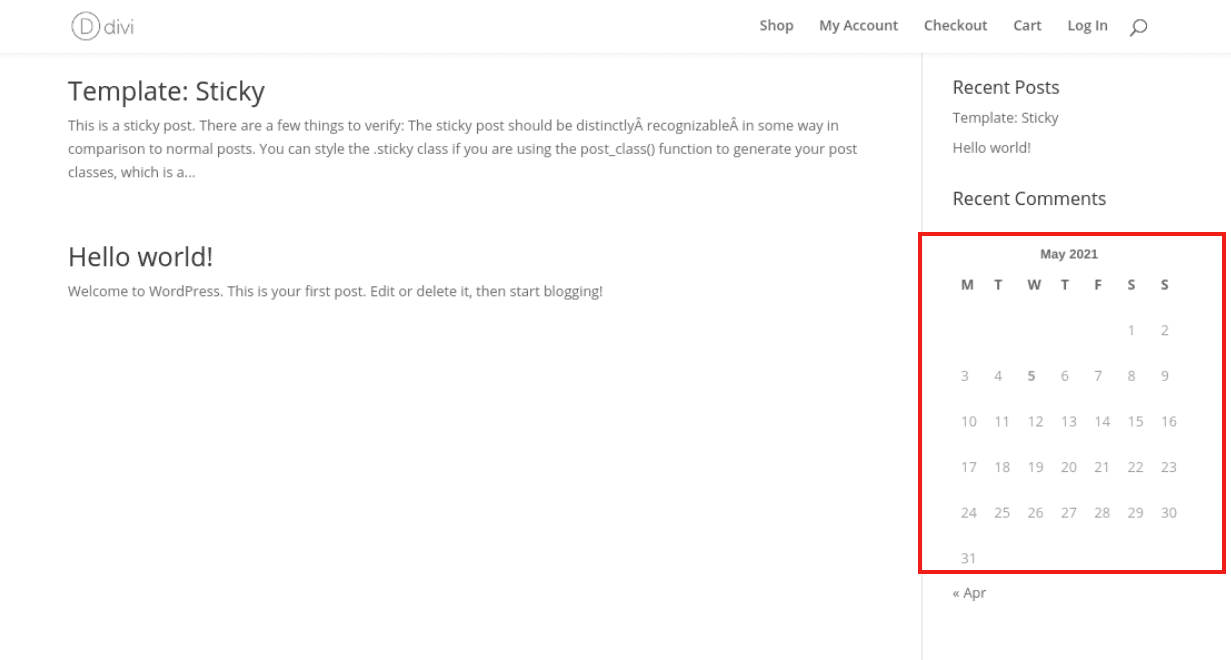
When you’re done, click on Publish to save your changes. Now, when you visit your site, you should see the widget displayed:
That’s it! You can repeat this process to add as many modules as you wish to any widget-friendly area on your site.
How to Disable WordPress Widgets
When you’re experimenting with WordPress widgets, you may need to know how to delete or disable them. Fortunately, the process for doing so is quick and easy, and you have a few options.
Manually Deleting Widgets
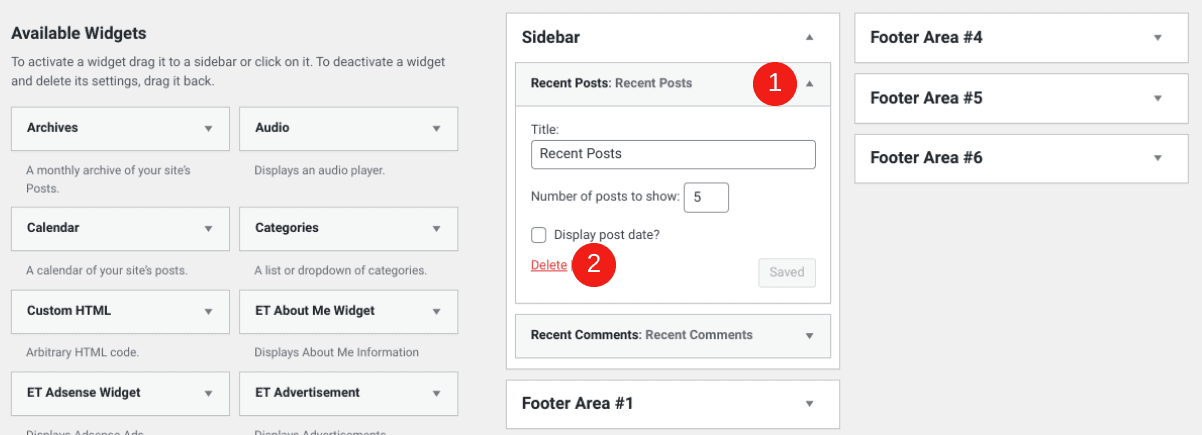
The first method is to manually delete your widgets. Navigate to Appearance > Widgets, and then browse to the widget area that contains the module you want to remove. Click on the arrow to expand it, then click on Delete:
The process is similar if you want to use the Customizer. Navigate to Appearance > Customize > Widgets. Open the widget panel, locate the module you want to delete, and then click on Remove:
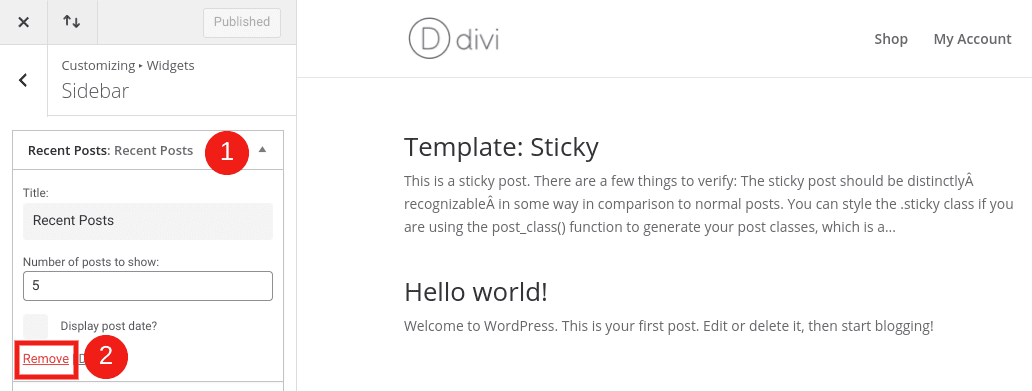
Make sure to select Publish at the top of the Customizer to save your changes.
Marking Widgets as Inactive
Perhaps you want to remove a widget without permanently deleting it. For example, you may want to store it for future use without losing the settings you’ve customized.
If so, you can temporarily mark it as inactive. To do so, navigate to Appearance > Widgets. Next, drag and drop any module you want in the Inactive Widgets section:
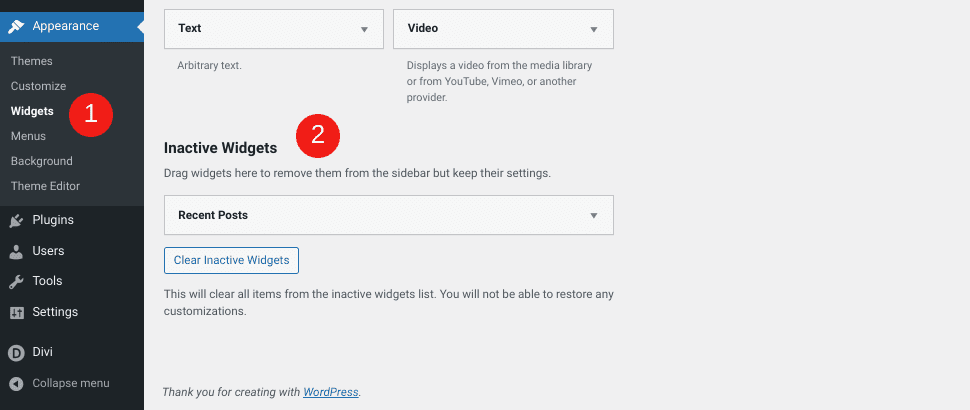
If you want to add these widgets back to your site in the future, doing so is as simple as dragging them to the active widget section or to the widget area of your choice. Alternatively, you can click on the Clear Inactive Widgets button.
Also, note that if you change WordPress themes and your new one offers different widget area options, any modules that don’t fit in the new theme’s widget sections will be listed as inactive.
Using a Plugin to Disable Widgets
A third option for disabling WordPress widgets is to use a plugin. There are a handful of quality options available, depending on what you’re trying to accomplish. Let’s take a look at a few of the best tools.
Widget Disable

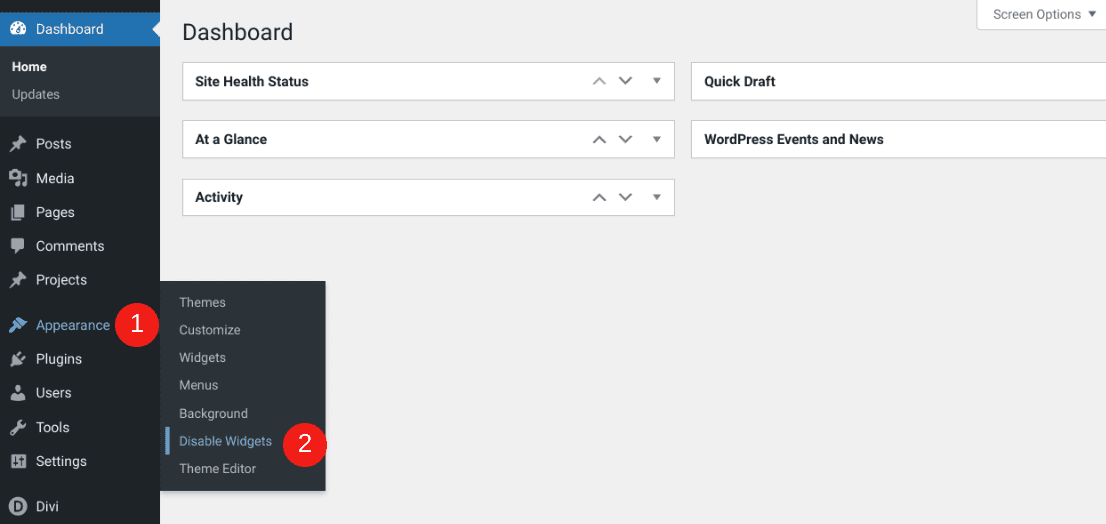
If you want to use a plugin to disable one or several widgets, you can’t go wrong with Widget Disable. This free tool is incredibly easy to use.
Once you install and activate it, simply navigate to Appearance > Disable Widgets:
On this screen, select the widgets you want to disable:
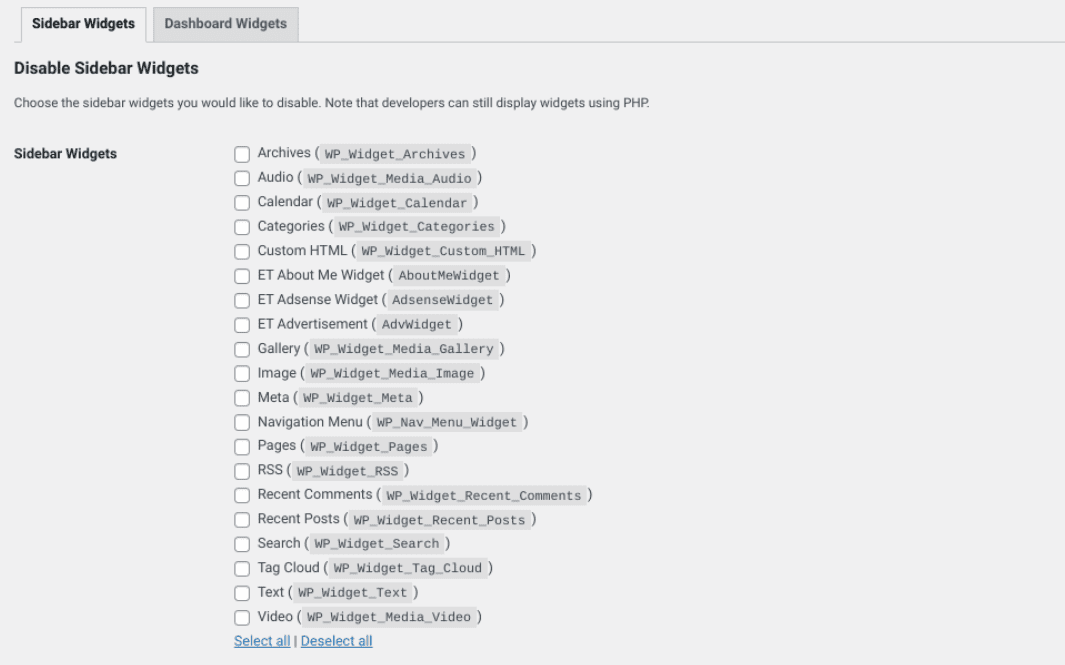
When you’re done, click on Save Changes. Keep in mind that this option lets you disable widgets, but it’s not the ideal solution if you’re only trying to hide the modules. For example, if you plan to use these widgets again in the near future, you’ll want to use a different tool (such as the next plugin).
Widget Options
Another free plugin you can use to control and customize your WordPress widgets is Widget Options. This tool lets you disable widgets entirely, or only turn them off for individual pages.
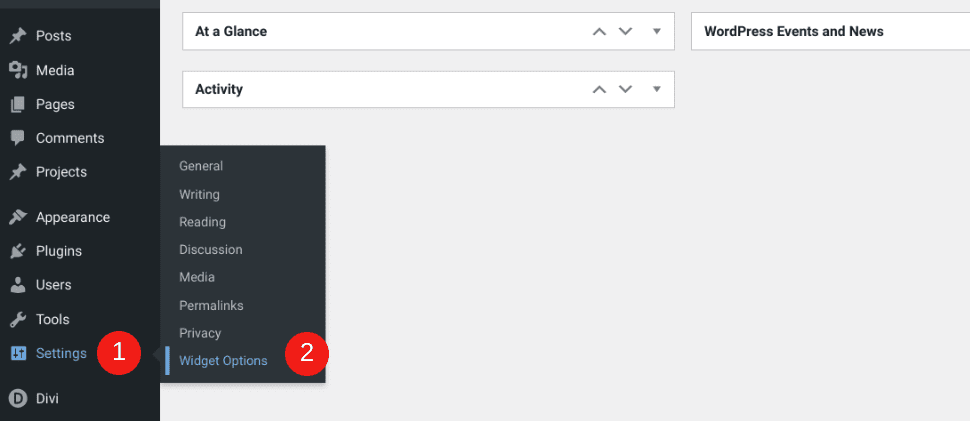
Once the plugin is installed and activated on your site, you can begin using it by navigating to Settings > Widget Options:
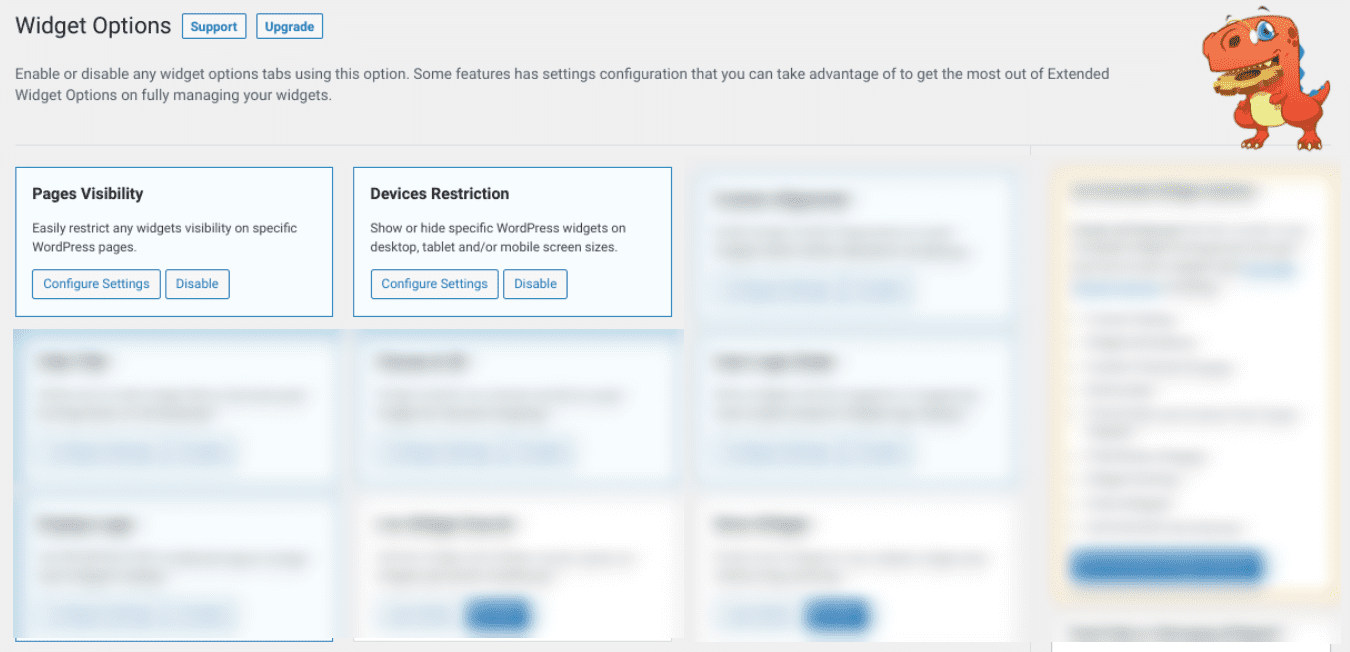
On the next screen, check to make sure the Page Visibility and Device Restriction settings are enabled:
Next, you can go to your widgets screen to explore the variety of customization options:
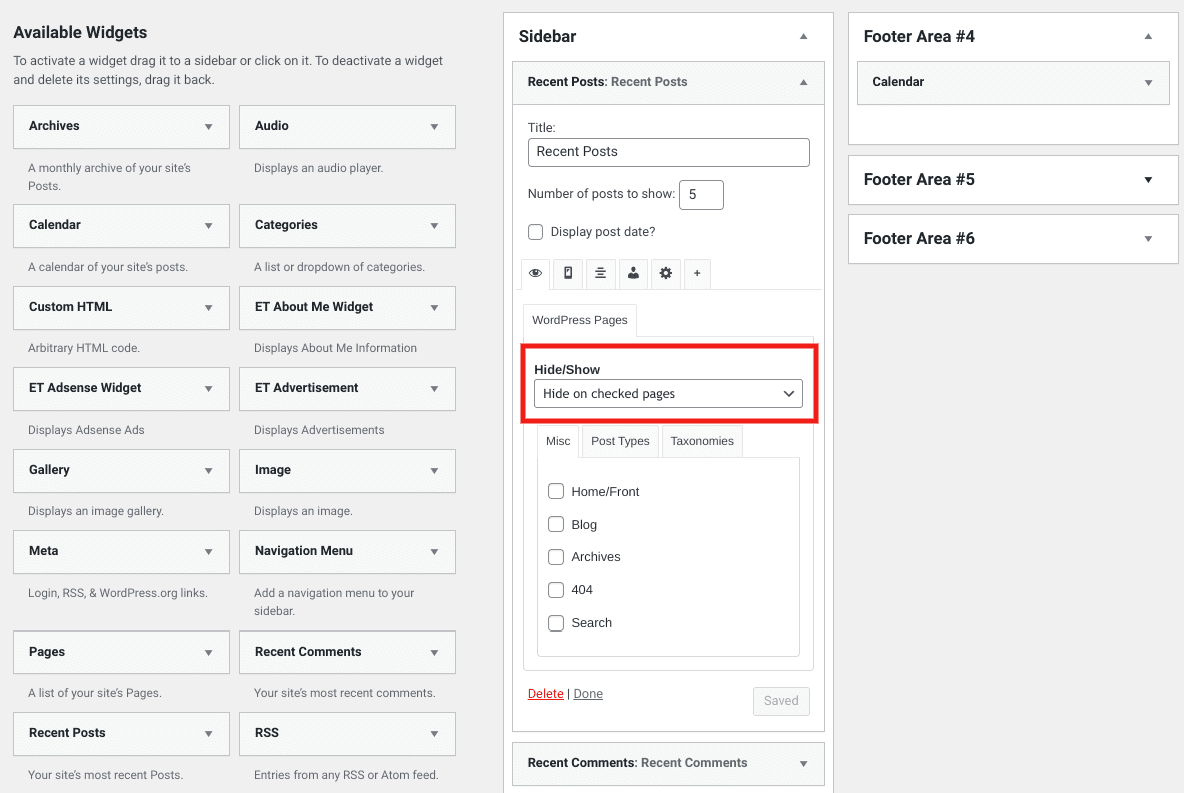
As you can see, you can simply select the pages on which you want to either hide or show a particular widget. When you’re done, click on Save.
Deactivating Widgets Using PHP
The final method you can use to disable widgets is by manually editing your site’s code. Of course, this strategy isn’t for everyone. If you’re uncomfortable working with PHP, we recommend sticking with a plugin.
However, if you have a bit of development experience and would rather not take up unnecessary resources on your site with a third-party plugin, you might find this solution preferable. To unregister WordPress widgets, start by navigating to your functions.php file. (We recommend using a child theme.)
Within that file, add the code snippet to unregister the widget. For example, if you wanted to remove the Calendar widget, you would use the following:
function unregister_default_wp_widgets() { unregister_widget('WP_Widget_Calendar'); } add_action('widgets_init', 'unregister_default_wp_widgets' );
When you’re done, save the file. Now that module won’t appear as an option on your WordPress Widgets screen. If you want to activate it again in the future, you can just delete this code.
How to Import and Export WordPress Widgets
Once your WordPress site has been live for a while and you’ve dedicated time and energy to customizing your widgets, you may want to reuse them on another website. If that’s the case, it helps to know how to import and export your WordPress widgets.
As you might expect, the easiest way to do this is by using a plugin. We recommend Widget Importer & Exporter:

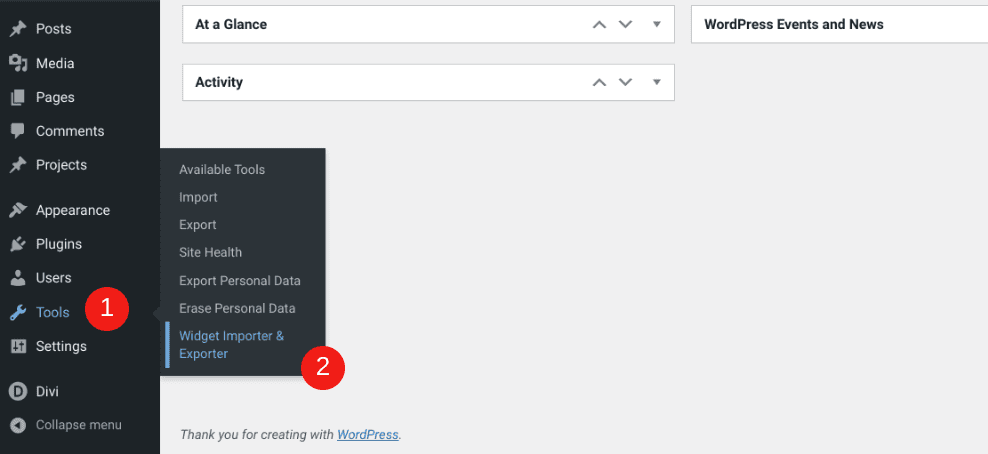
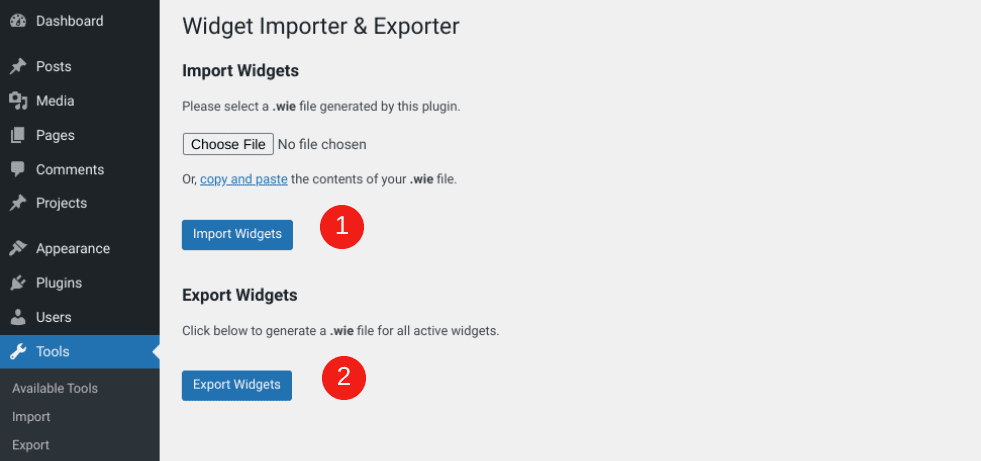
To begin, navigate to Tools > Widget Importer & Exporter:
On this screen, you’ll have two options: (1) Import Widgets and (2) Export Widgets:
If you select the Export Widgets option, the plugin will create a .wie file for the widgets that are currently active in your sidebar and footer areas (as well as any other places you have widgets). This is helpful because it means it will only save your active widgets, rather than a copy of all the default modules you’re not using. You can download and view the file in any code editor.
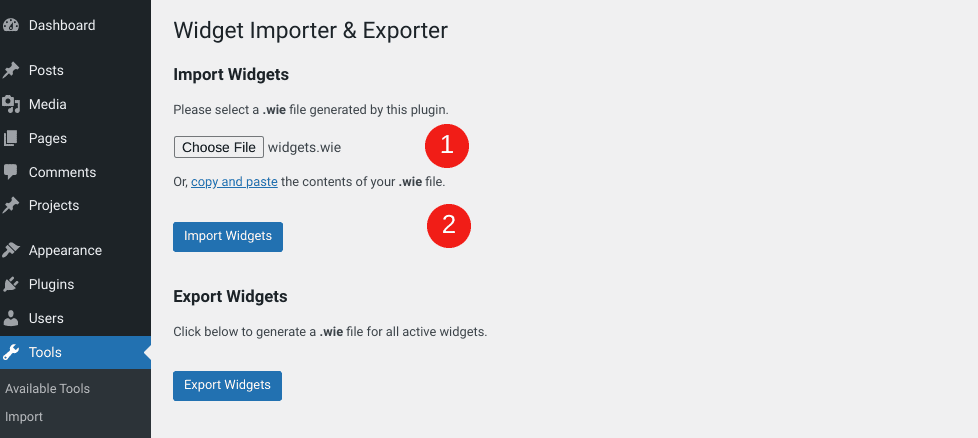
After that, you can import the widgets to another site. Install and activate Widget Importer & Exporter on the new site, then browse to Tools > Widget Importer & Exporter again. Click on Choose File, select the .wie file you just downloaded, and then hit Import Widgets:
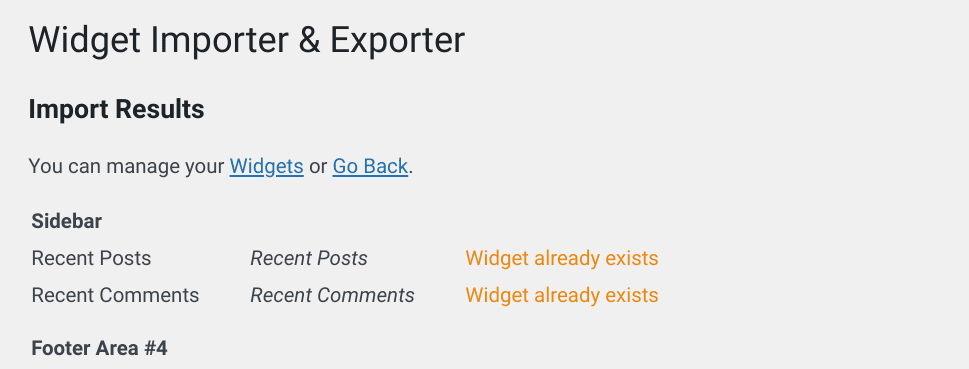
WordPress will bring you to a results page once it’s done with the import process so you know it was successful. If there are any duplicate widgets, it will let you know by marking them with a “Widget already exists” label:
Once the import is complete, you can view your widgets by navigating to Appearance > Widgets. You should now see your widgets displayed on the new site, similar to how they were arranged on your old one.
However, note that the titles of the widget areas on your new site must match up with the titles of the widget areas saved in the .wie file. Otherwise, the plugin won’t know where to place the modules. For example, if your old theme had a section called “Footer #1”, the plugin won’t know to place the modules in a theme that labels that same area as “Footer A”.
If this happens, you’ll see a “Widget area does not exist in theme (using inactive)” message. You can locate these widgets in the Inactive Widgets section, and then manually place them in the appropriate widget areas.
Conclusion
WordPress is a powerful, flexible platform that can enable you to build a beautiful site quickly and easily. However, in order to make the most of your site, it’s important to know how to use one of the CMS’s most versatile features: widgets.
As we discussed in this post, there are multiple places you can display these small content modules on your site, including the sidebar and footer. WordPress offers a plethora of default widgets to choose from. If you use a theme such as Divi, you can even create your own. If you want to disable or remove specific widgets, you can do so manually or by using a plugin such as Widget Options.
Do you have any other questions about using WordPress widgets? Let us know in the comments section below!
Featured Image via Anastacia Trapeznikova / shutterstock.com


I’m still researching and am liking what I learn about Divi. I tend to read the articles on my phone. But when I share your articles and send them to my email account to refer back to them later the title of the article fails to appear automatically in the subject line. It’s kind of a pet peeve of mine that I have to type in a rather poor short version of the article’s real title. So I’m just registering a small complaint.