")
A multilingual website is a great way to open your brand to different countries and people, allowing you to share your content with people from around the globe in a language they can understand. This can be done in various ways. In WordPress, you can easily translate your website into multiple languages using a top multilingual plugin like TranslatePress. In this guide, we’ll explain the options available and show beginners how to translate WordPress websites in an easy step-by-step process.
- 1 Why Translate a WordPress Website?
- 2 Ways to Translate WordPress Websites
-
3
How to Translate WordPress Websites with a Plugin (step by step)
- 3.1 Install TranslatePress
- 3.2 Choose Default Site Language & Secondary Language
- 3.3 Create Language Switcher for Your Website
- 3.4 Start Translating Your Content
- 3.5 Manually Translate WordPress with TranslatePress
- 3.6 Translate WordPress Automatically with TranslatePress
- 3.7 Test Your New Multilingual WordPress Website
- 4 More WordPress Translation Options
- 5 Conclusion
Why Translate a WordPress Website?
There are many reasons why it is a good idea to translate your WordPress website. Here are a few to ponder on:
- Better Index Your Site with Google and Search Engines: When translating your WordPress website with an automatic translator, you may lose search traffic as your pages aren’t indexed. Luckily, WordPress allows you to translate your WordPress website manually with accurate human translations. This leads to a better-indexed website easily found by those who need it most.
- Provide a Better Web Experience for Users: When users can understand your website in their home language, they interact better with your website. Using local phrases, idioms, and dialects is a great way to make users feel at home when navigating your website.
- Increase Traffic and Expand Your Brand: Having your website in multiple languages can expose your brand to new demographics. This, in turn, can lead to greater global brand awareness and increased website traffic from new countries.
- Provide Better Customer Service: A multilanguage website gives your customers the help they need in a language they understand. When coupled with modern tools like an AI chatbot that can function in multiple languages, you can give your clients exceptional service that’ll have them return to your website.
Ways to Translate WordPress Websites
Subscribe To Our Youtube Channel
WordPress has many ways in which it can have a website translated. Depending on your website goals, there might be some methods that work better for you than others:
- Automatic Translation Plugins: WordPress has many translation plugins that automatically translate your website. While this is the easiest way to build your multilingual website, there can be some pitfalls. With some plugins, like the free version of GTranslate, you depend on third-party software to translate the content for users on their browser, so you can’t edit the translation or have it indexed for search engines. Ideally, you should use a plugin that includes auto-translation features for actual content on your page.
- Human Translation: Manually inputting the translation for your website ensures that you have the highest quality when building your multilingual site. However, this method requires additional translation investment and can be more work when building your website.
- External Translation Tools: It’s also possible to use online tools not based on your WordPress website to translate your website. Websites like Google Translate and Babelfish are platforms where you can input words, phrases, documents, and websites to be translated. While this is a quick and free way to translate your website, it isn’t user-friendly for visitors who want to experience your website.
- AI Tools and Plugins: With the rise of AI writing software and other AI tools, many use AI chatbots like ChatGPT to translate their content. Some WordPress AI plugins support generating content in dozens of languages. For example, our Divi AI page builder can translate any block of text with a single click on the fly while creating your site.
How to Translate WordPress Websites with a Plugin (step by step)
Now that we know how to translate a WordPress website and why we would consider website translation in the first place, let’s look at the process of translating a WordPress website. You can choose from several fully-featured translation plugins to build your multilingual website. Our list of the best translation plugins has a variety of plugins that can help you build your first multilingual website. For this tutorial, we’ll work with TranslatePress and the WordPress theme Twenty Twenty-Three, a plugin that allows automatic and manual translation for WordPress websites.
Install TranslatePress
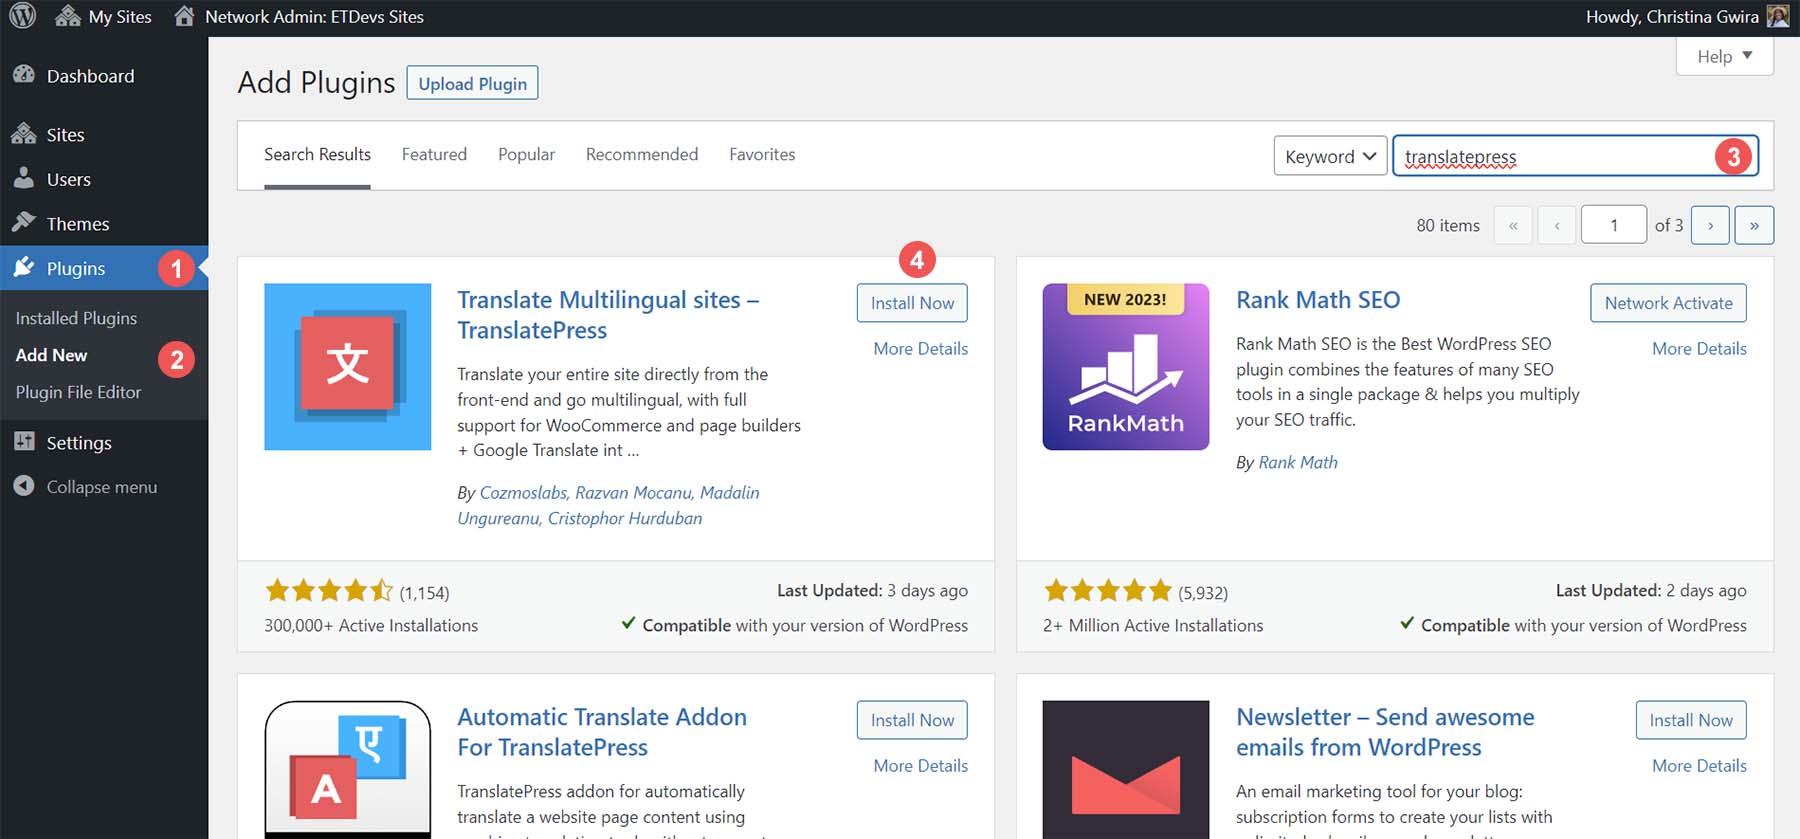
To begin, log in to your WordPress dashboard. Then, hover over the Plugins menu item. Next, click Add New. Search TranslatePress, and click the Install Now button on the TranslatePress card.
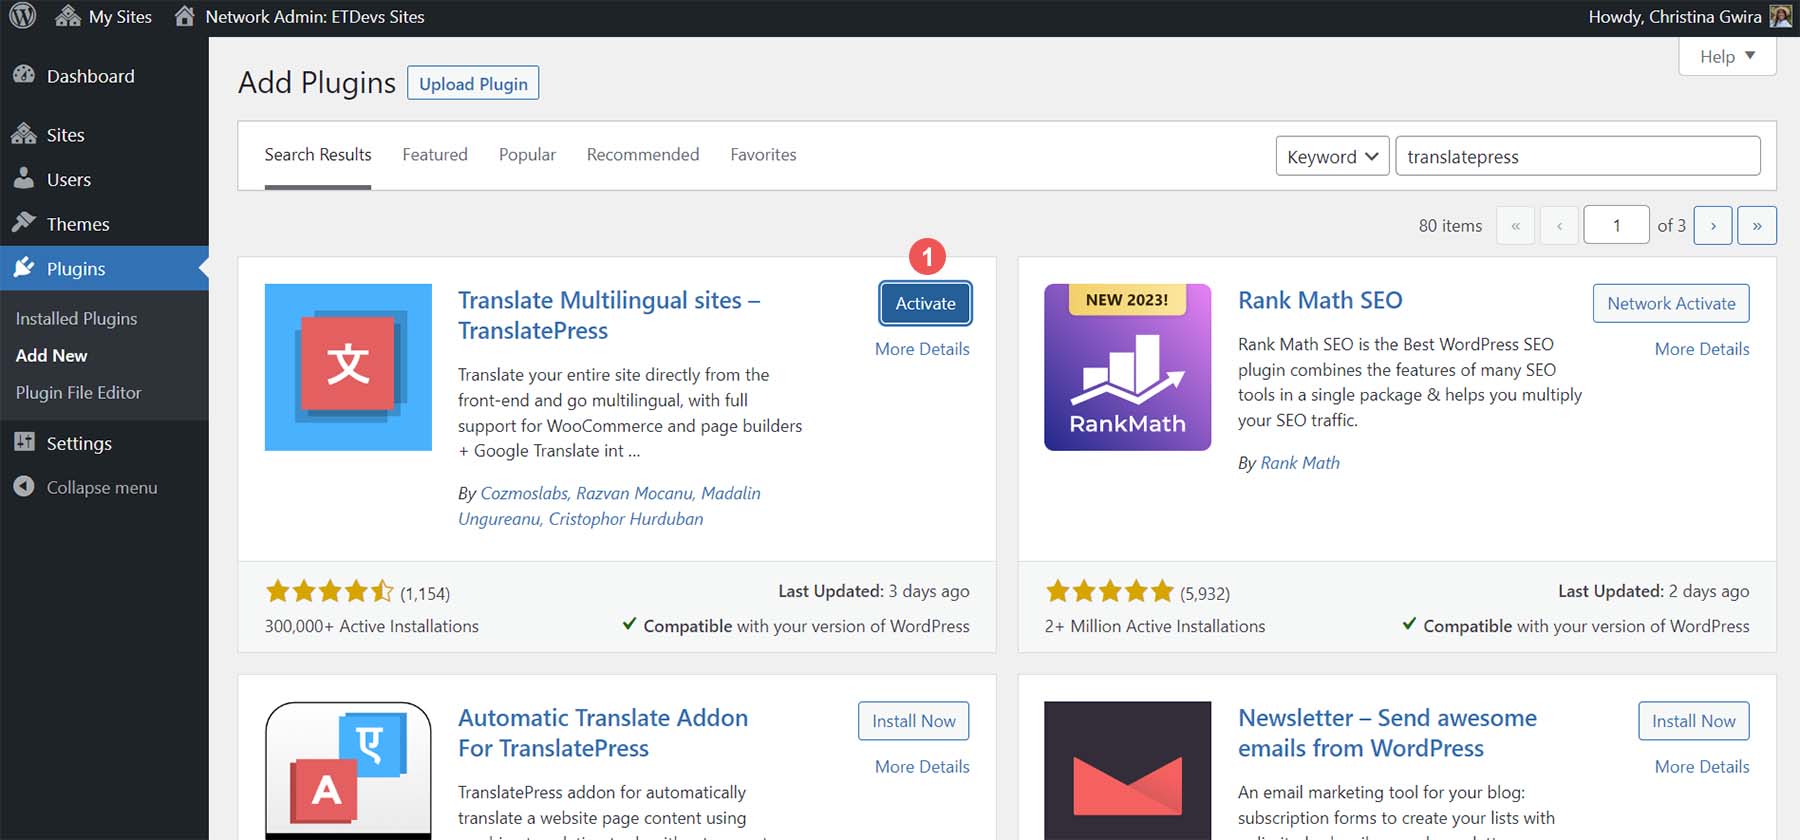
Once the plugin has finished installing, click the blue Activate Now button. You can choose to opt-in to the TranslatePress. However, we skipped that step.
Choose Default Site Language & Secondary Language
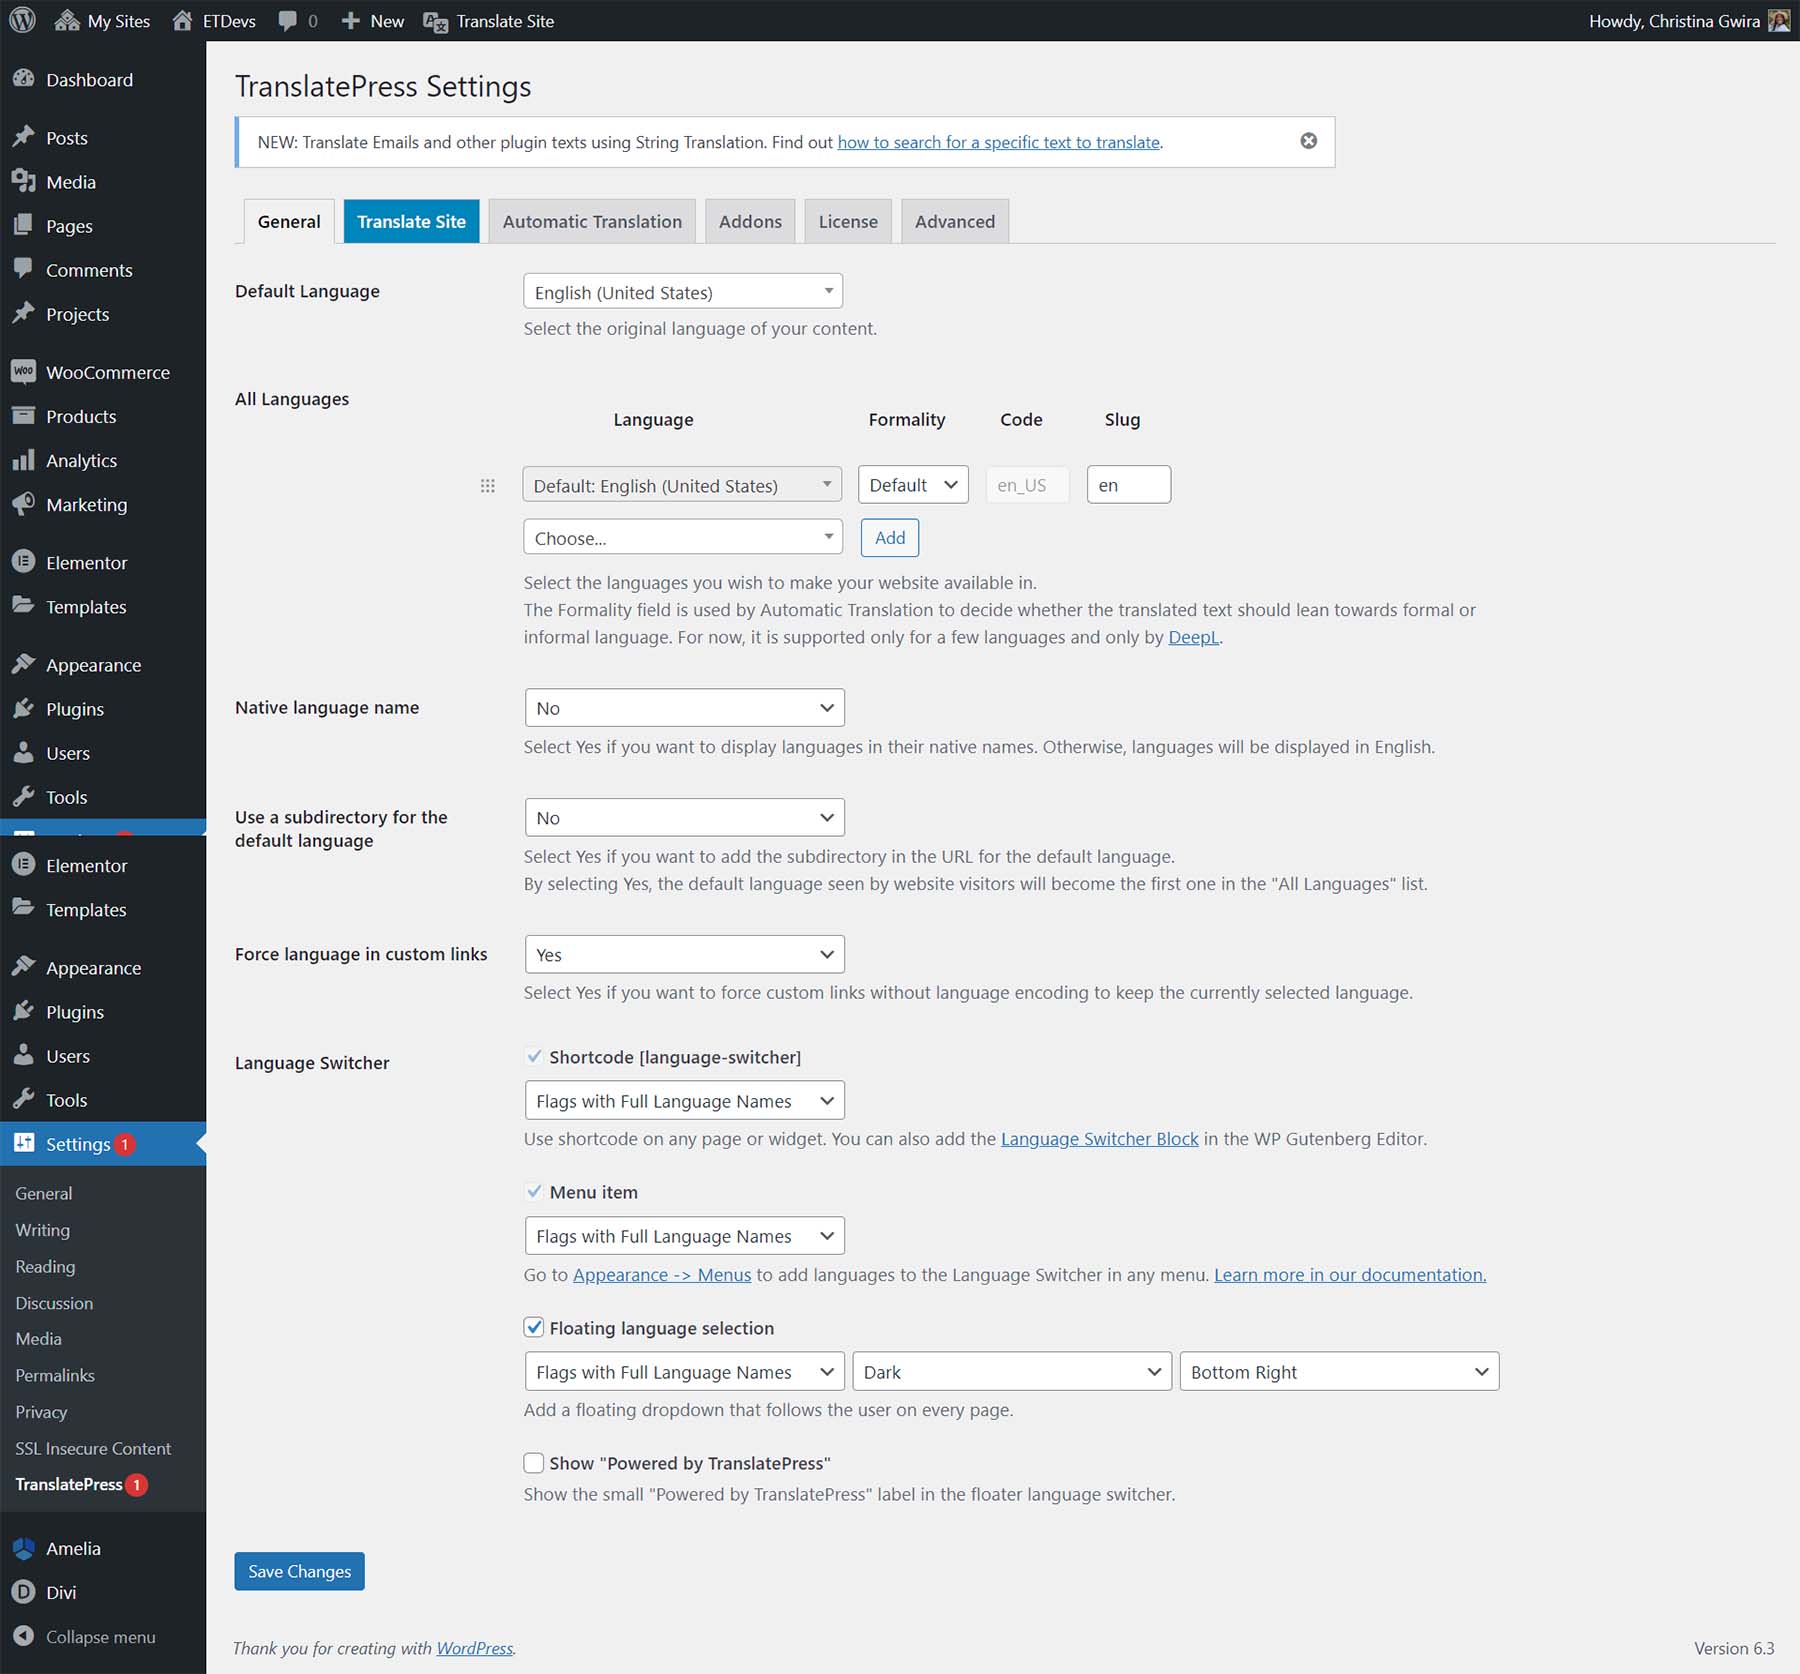
Upon installation, this is what the TranslatePress dashboard and settings look like:
For our tutorial, we will install French as our secondary language. Our default language will be English. To set this up, first, we select our primary language from the Default Language dropdown.
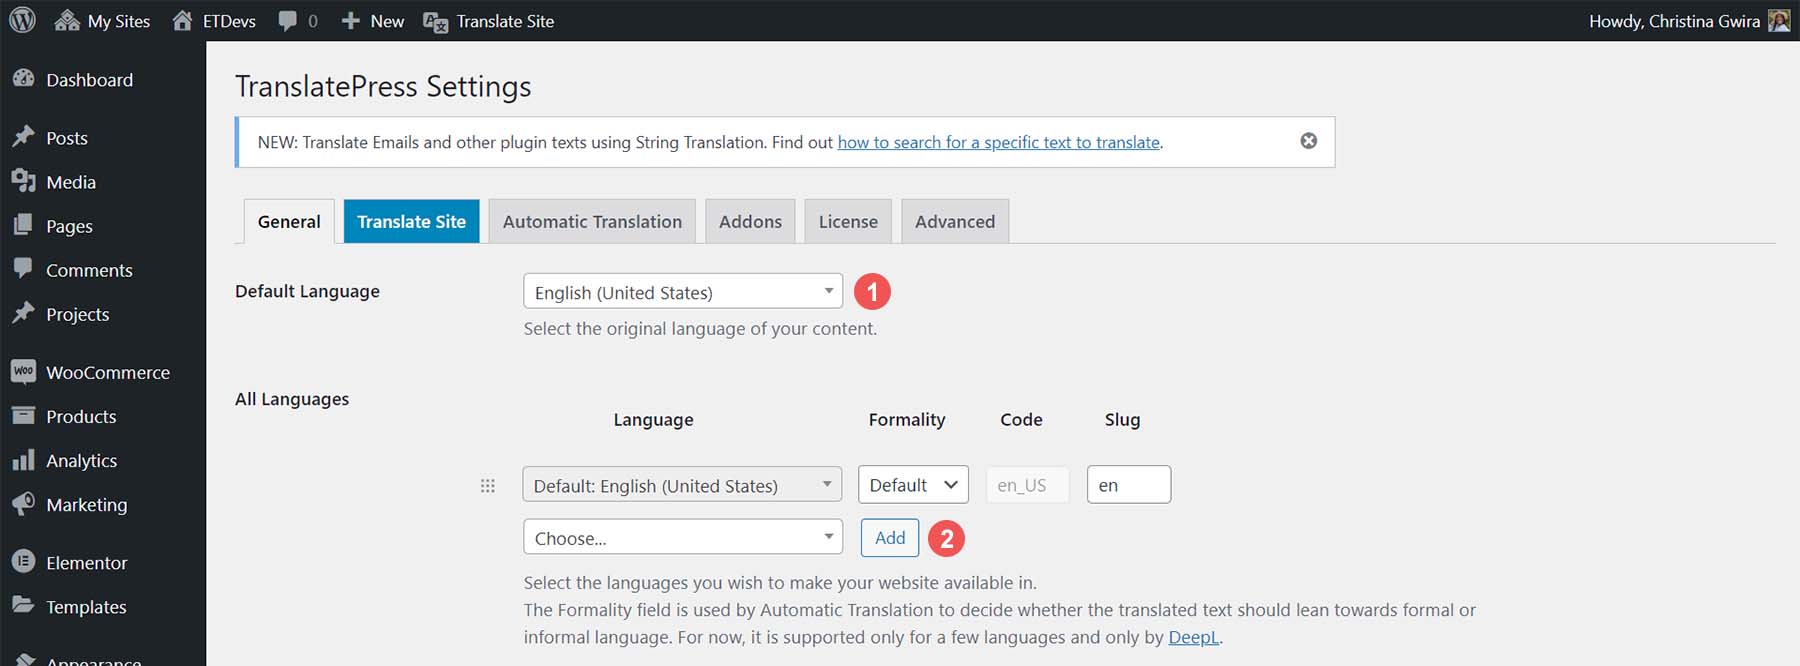
Next, from the All Languages option, select your secondary language. In our case, this will be French (Canadian). You can use the search field to look up your language name. Then, click Add.
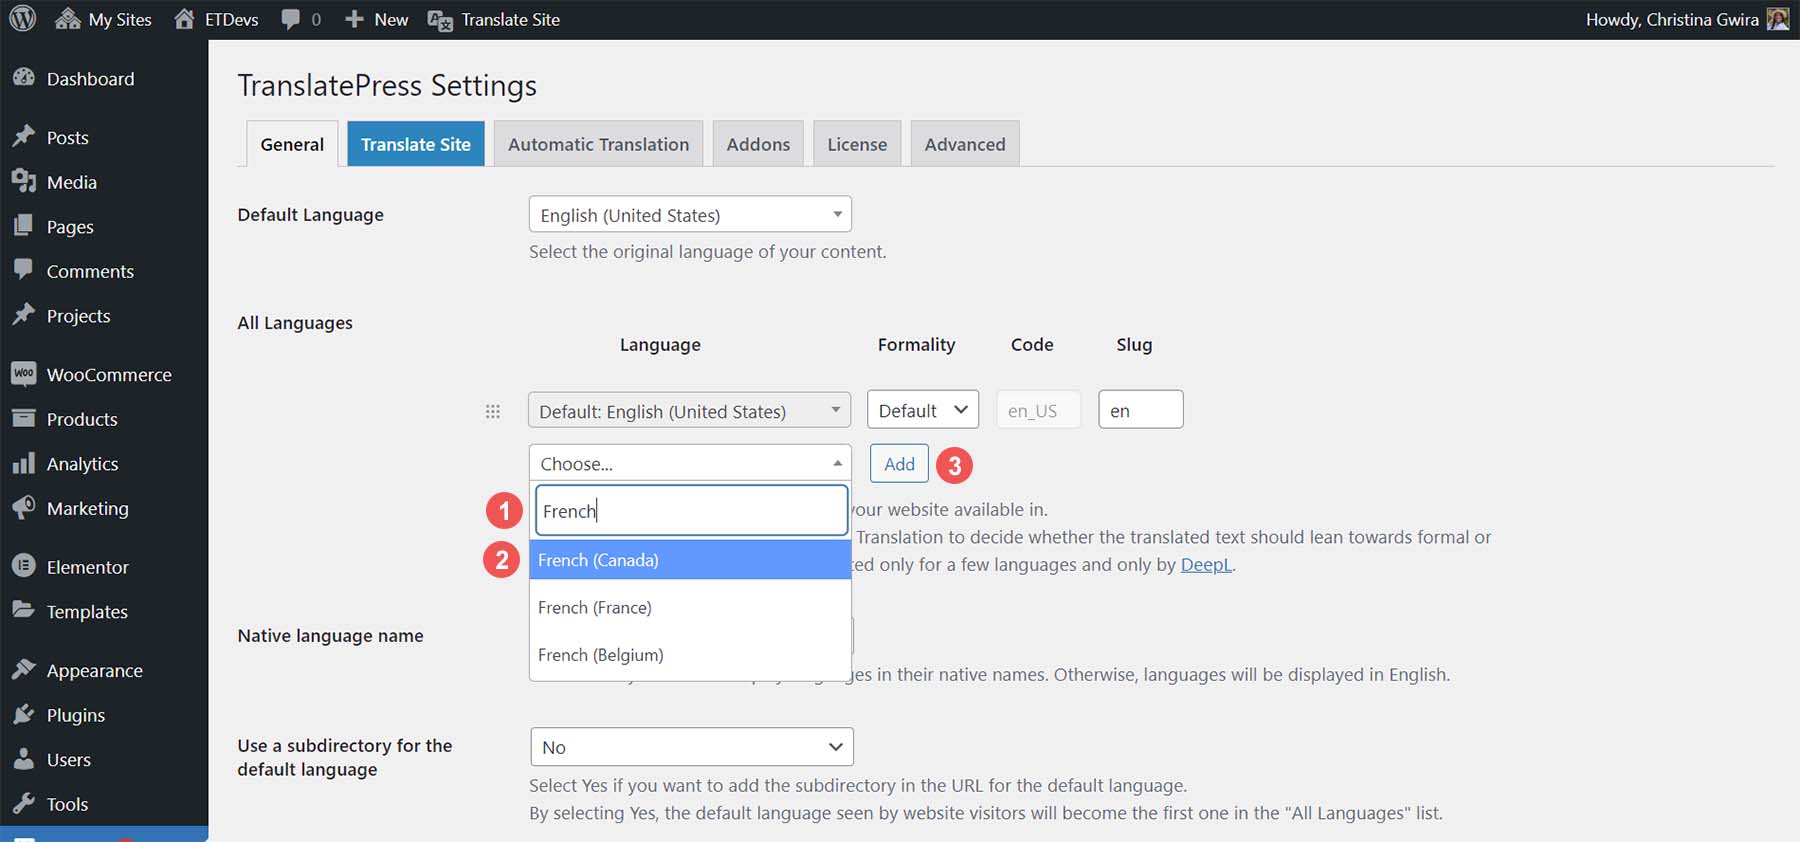
If you’d like, you can change the slug used to represent the languages used on your site. Furthermore, using TranslatePress’s automatic translation option, you can decide the formality used during that process. Scroll down and click Save Changes.
Now that our languages are set, let’s save our changes and prepare to create our language switcher.
Create Language Switcher for Your Website
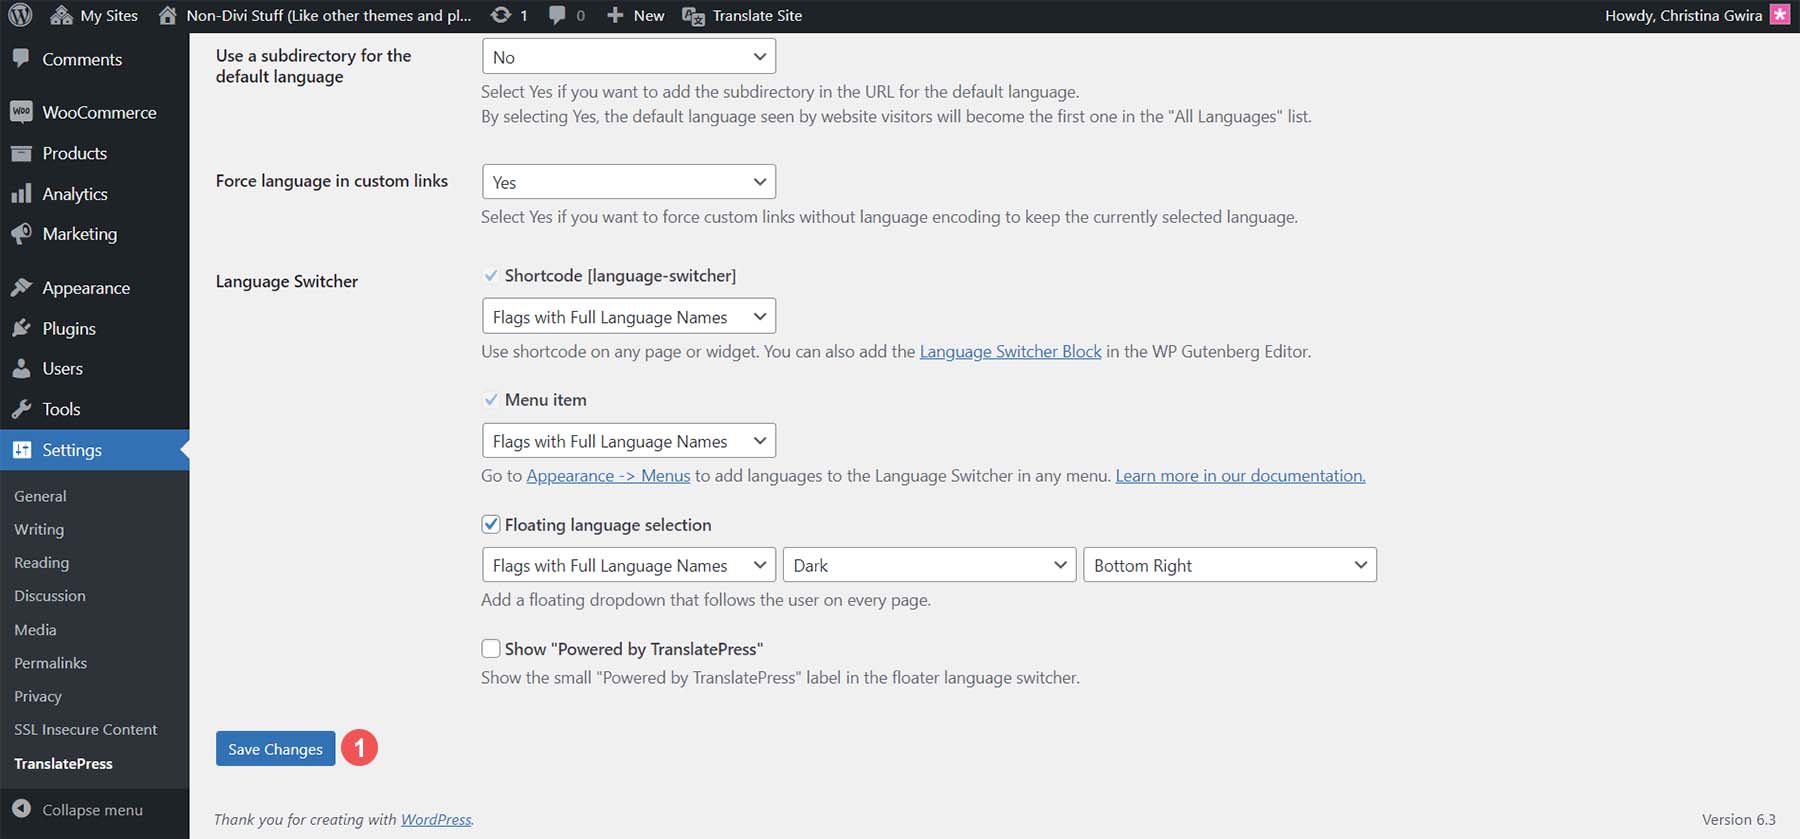
A language switcher is what your users will use to navigate between the different languages on your website’s front end. TranslatePress comes with a variety of ways to show this widget.
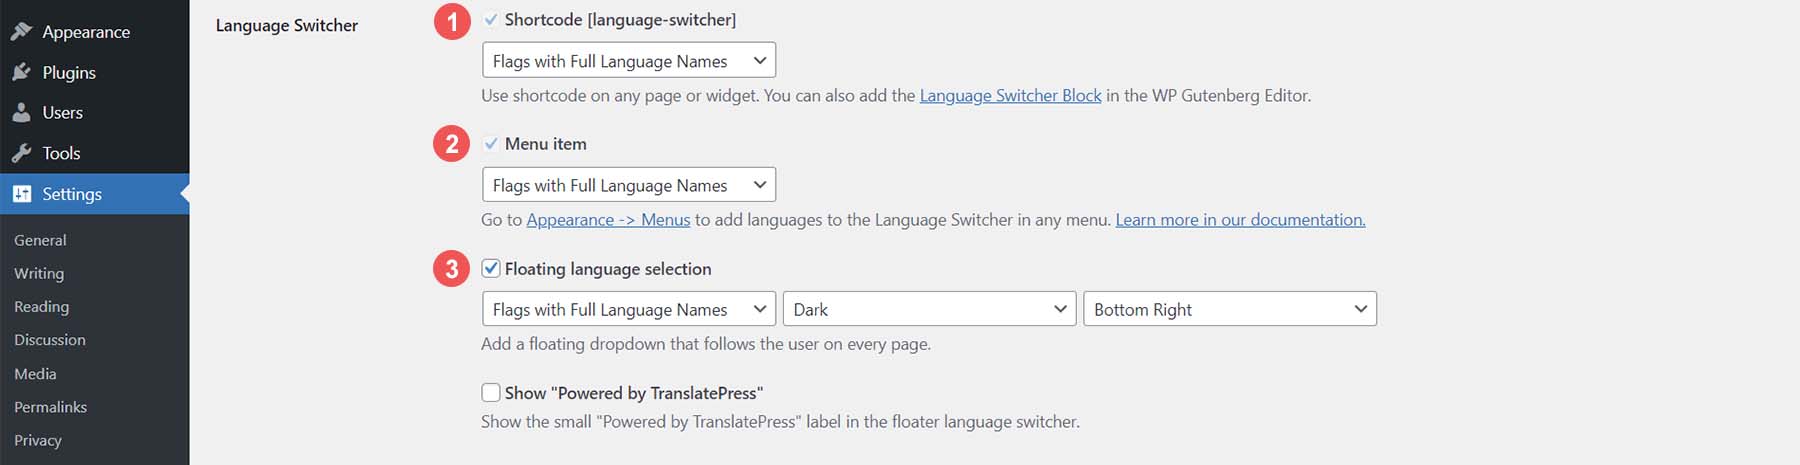
- Shortcode: The [language-switcher] shortcode allows you to use the shortcode
- Menu Item: Adds the language switcher to your WordPress menu
- Floating Language Widget: Adds a floating language widget to your website’s frontend
For example, we’ll use the menu item widget of TranslatePress through the Block Editor. To do this, we start by hovering over Appearance. Then, click on Editor.

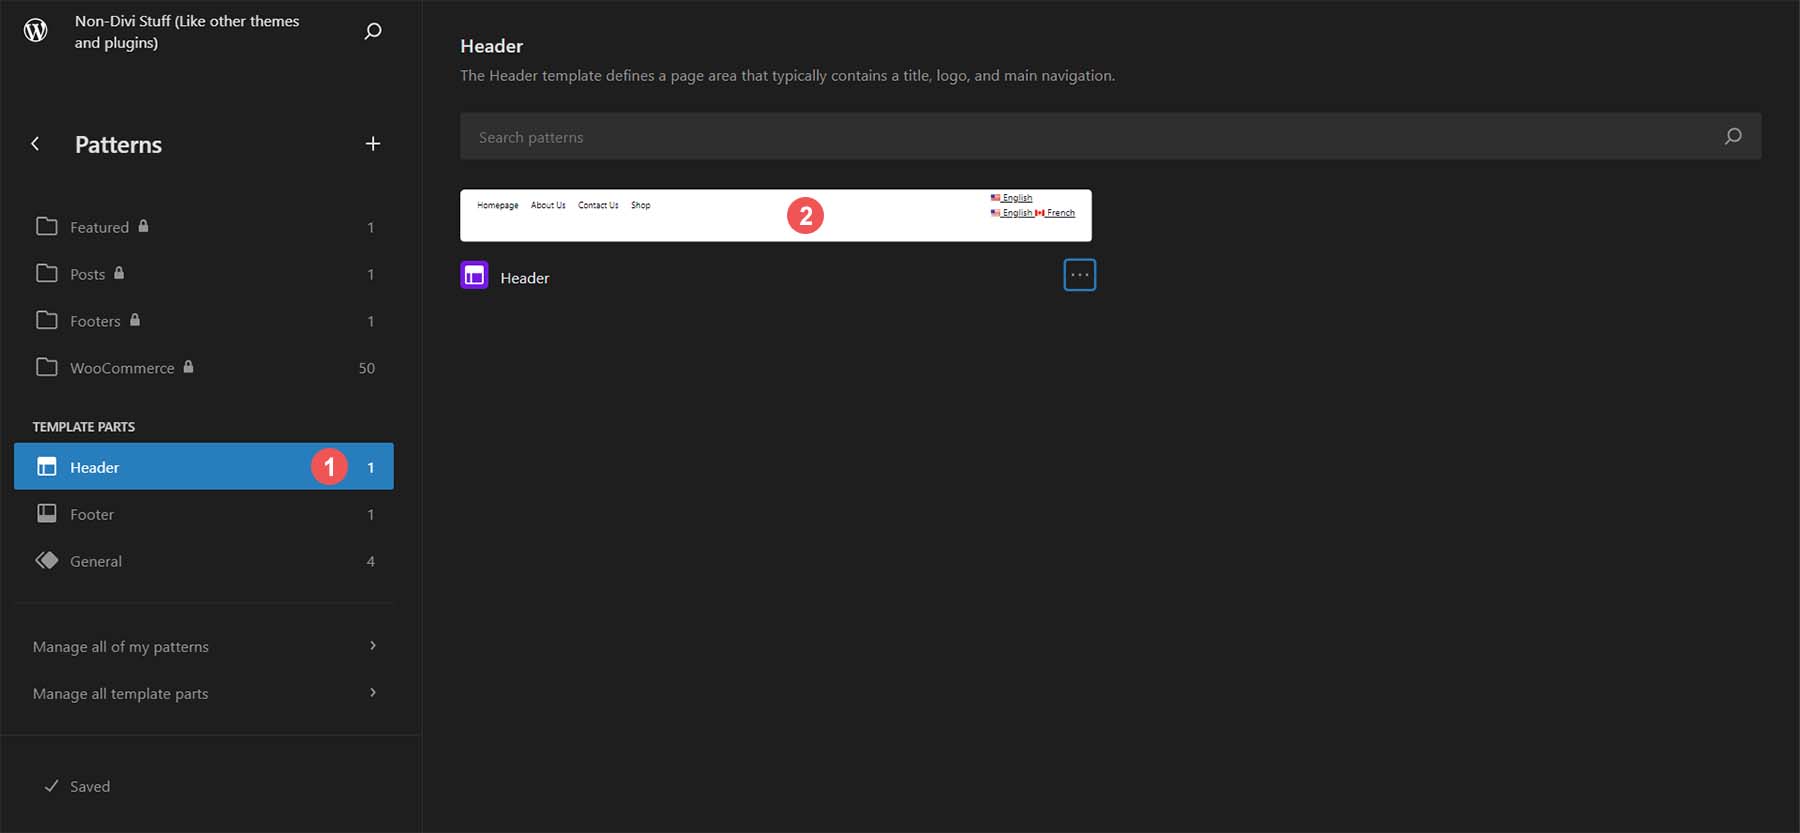
Once in the Block Editor, click Patterns. This will open the various patterns used by our theme.
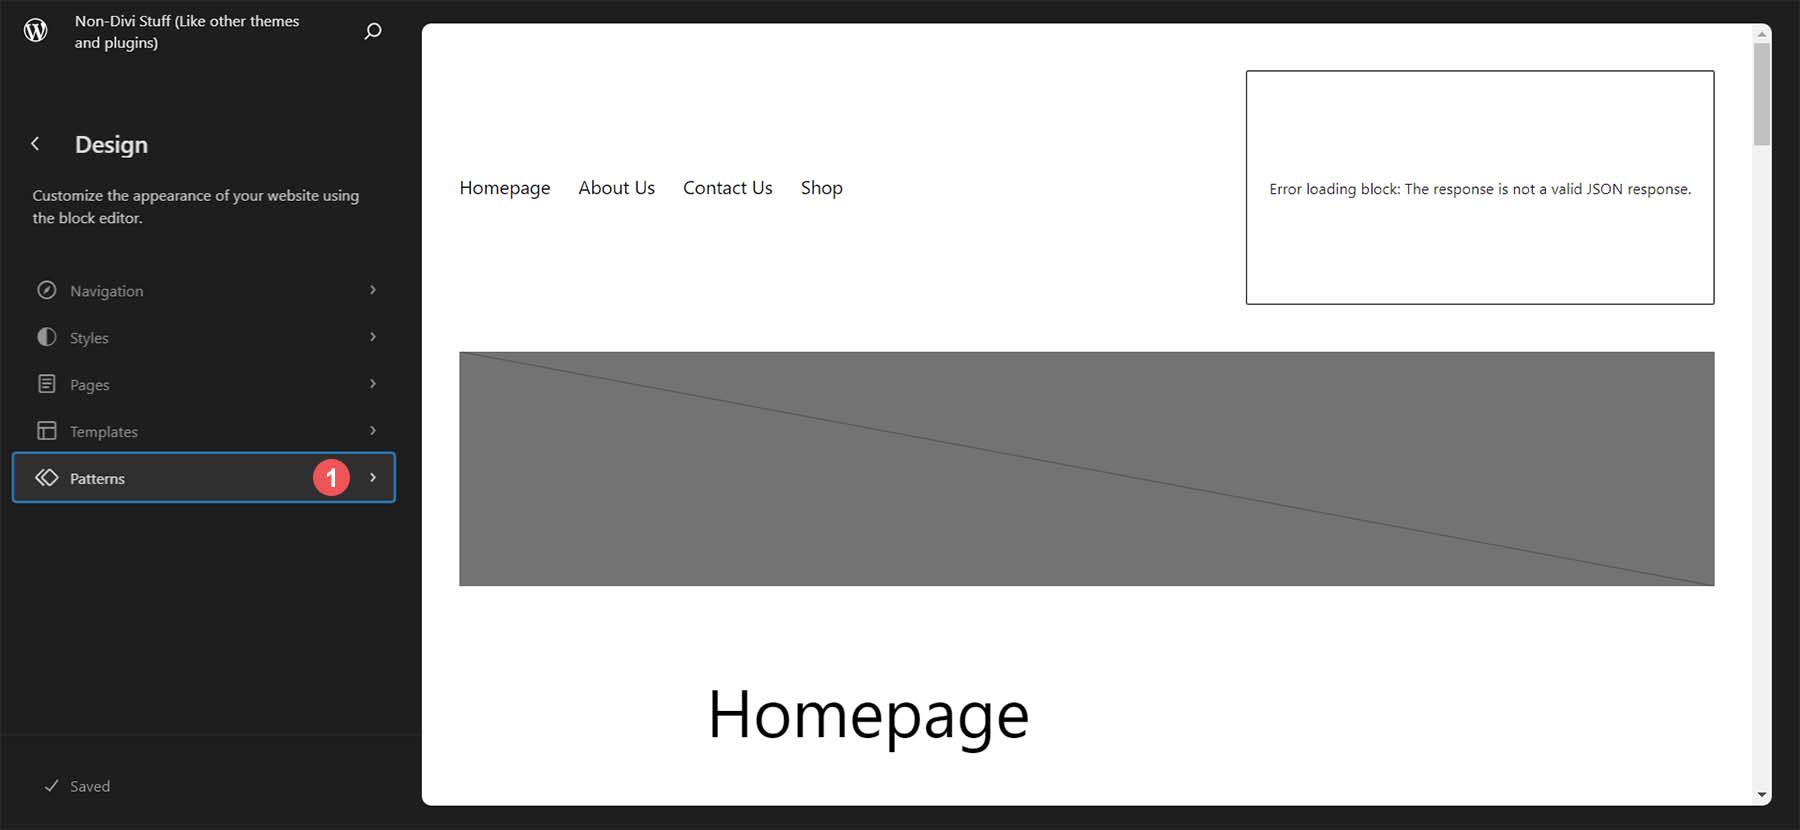
Then, scroll down, and under Template Parts, click Header. Finally, click on the snapshot of the Header Template Part on the right-hand side of the screen. Now, we are editing our Header pattern to add the TranslatePress blog to our menu.
Once in the Header part, we can now add the TranslatePress Block to our Header. Click the plus icon. Then, search for the Language Switcher.
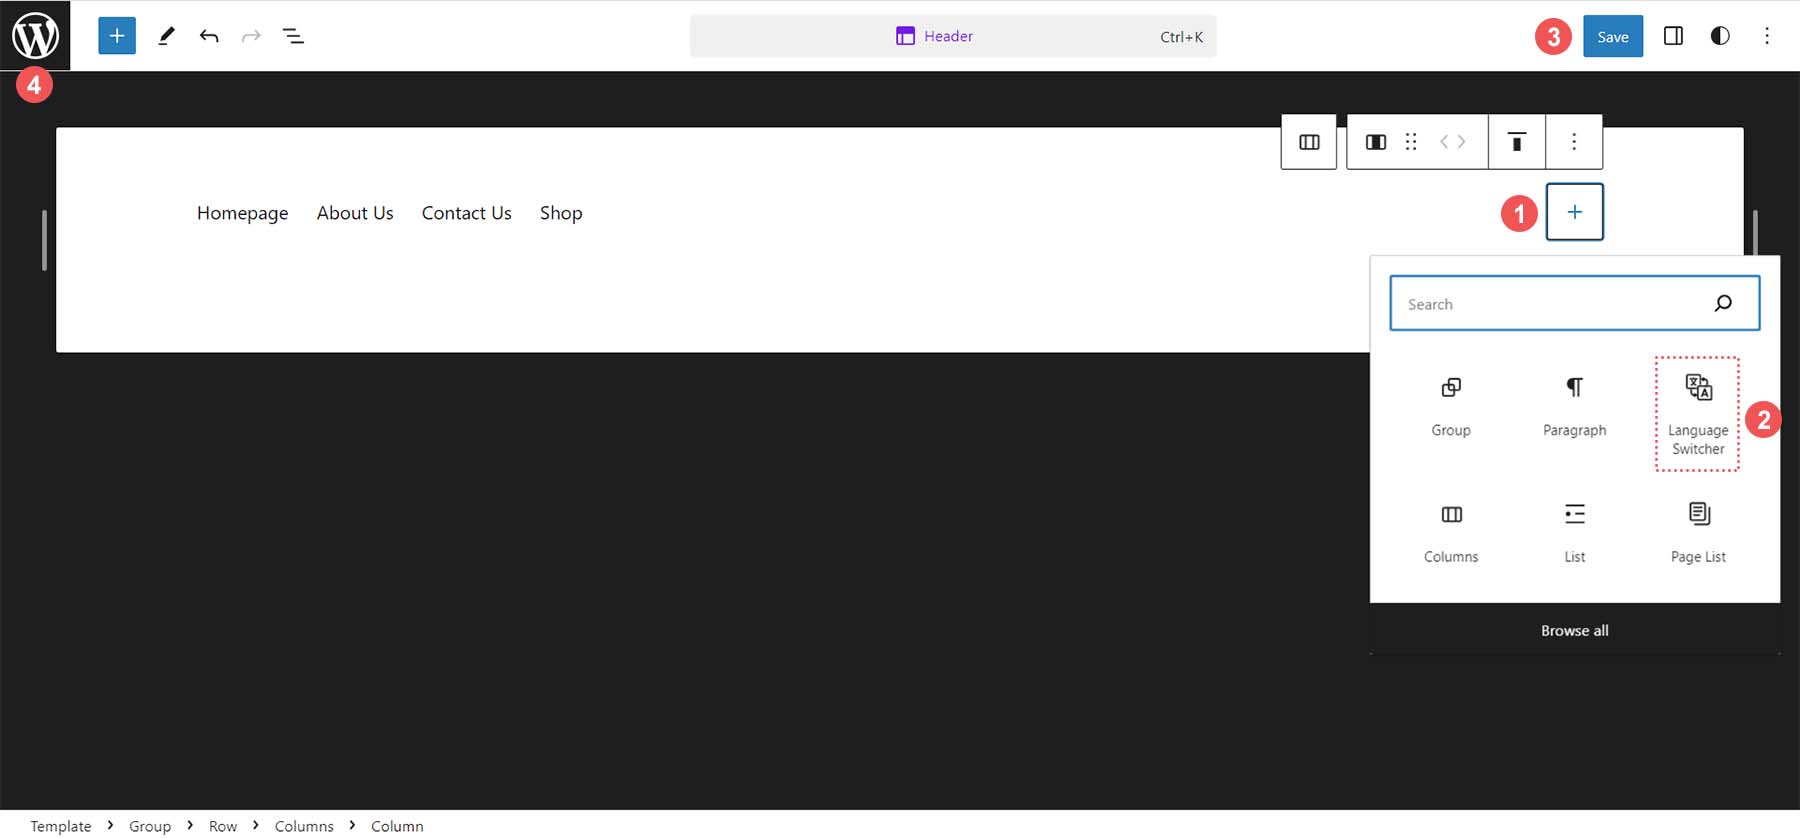
Click on the Language Switcher Block. This will add it to the Header Template Part. Notice that it shows both our primary and secondary language. We can go into the TranslatePress settings and edit how it looks. After, click the blue Save button in the top right.
Now, let’s see how we can customize our Language Switcher Block.
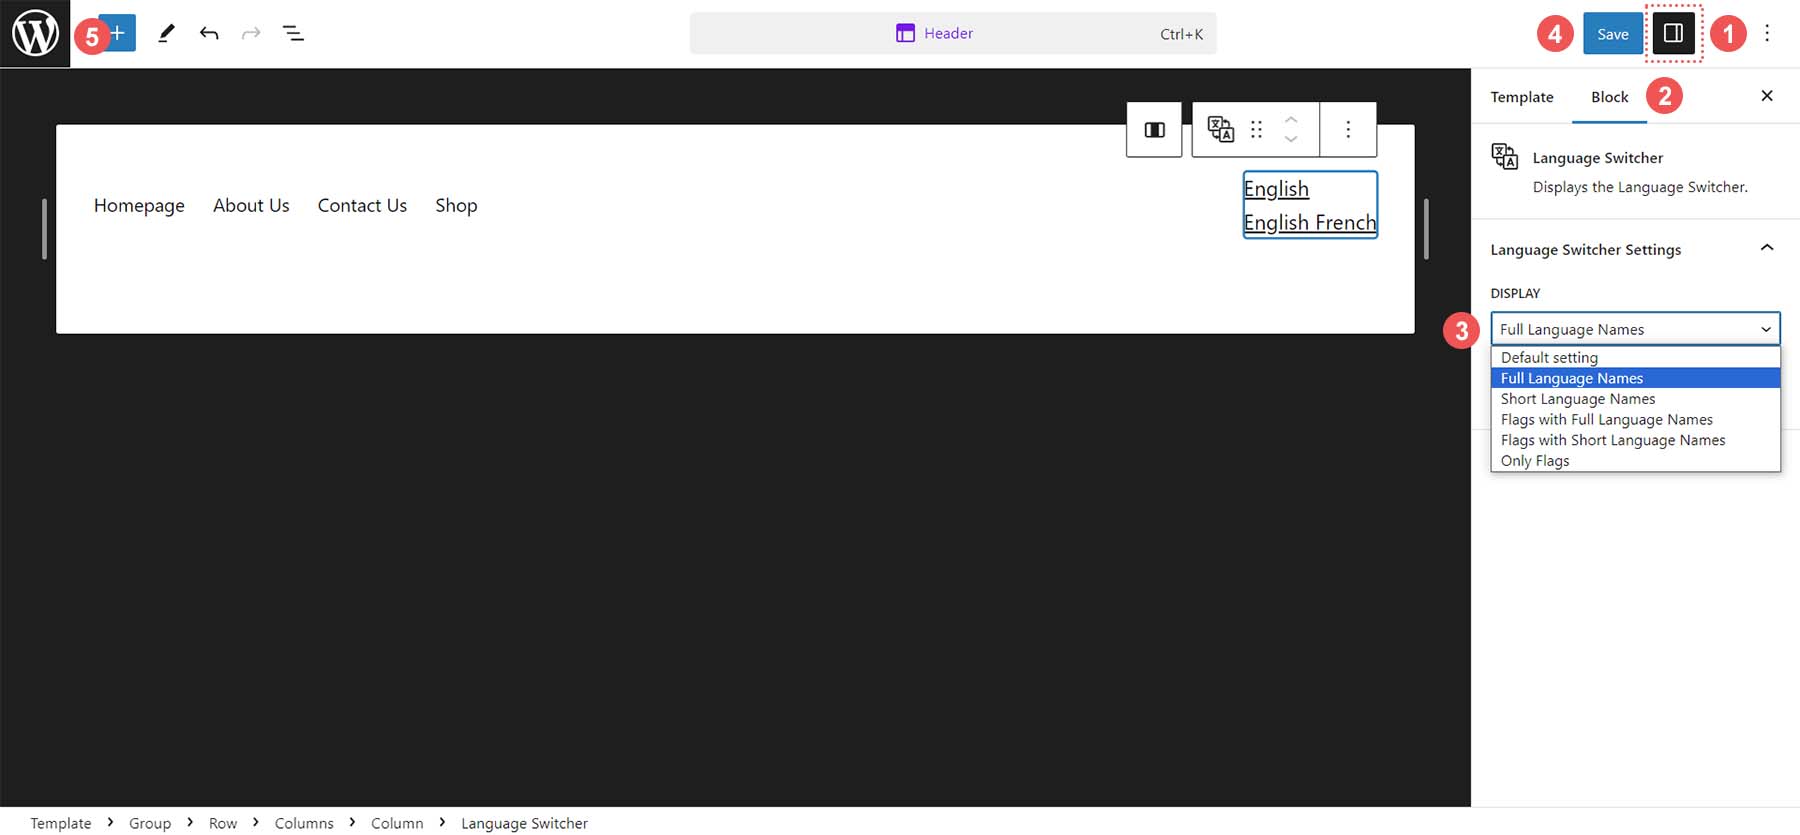
Customizing the Language Switcher Block
With the Language Switcher Block, you can easily decide between five different ways of displaying your Block. First, click on the Language Switcher Block. Then, click on the settings icon from the top right. From there, click on the Display dropdown menu. You are presented with the display options. For our theme, we will choose the Full Language Names view. Then, click the blue Save button. Finally, click the WordPress icon on the top left to exit out of the editor and back to the WordPress dashboard.
Now that we have our Language Switcher, we can start translating our content with TranslatePress.
Start Translating Your Content
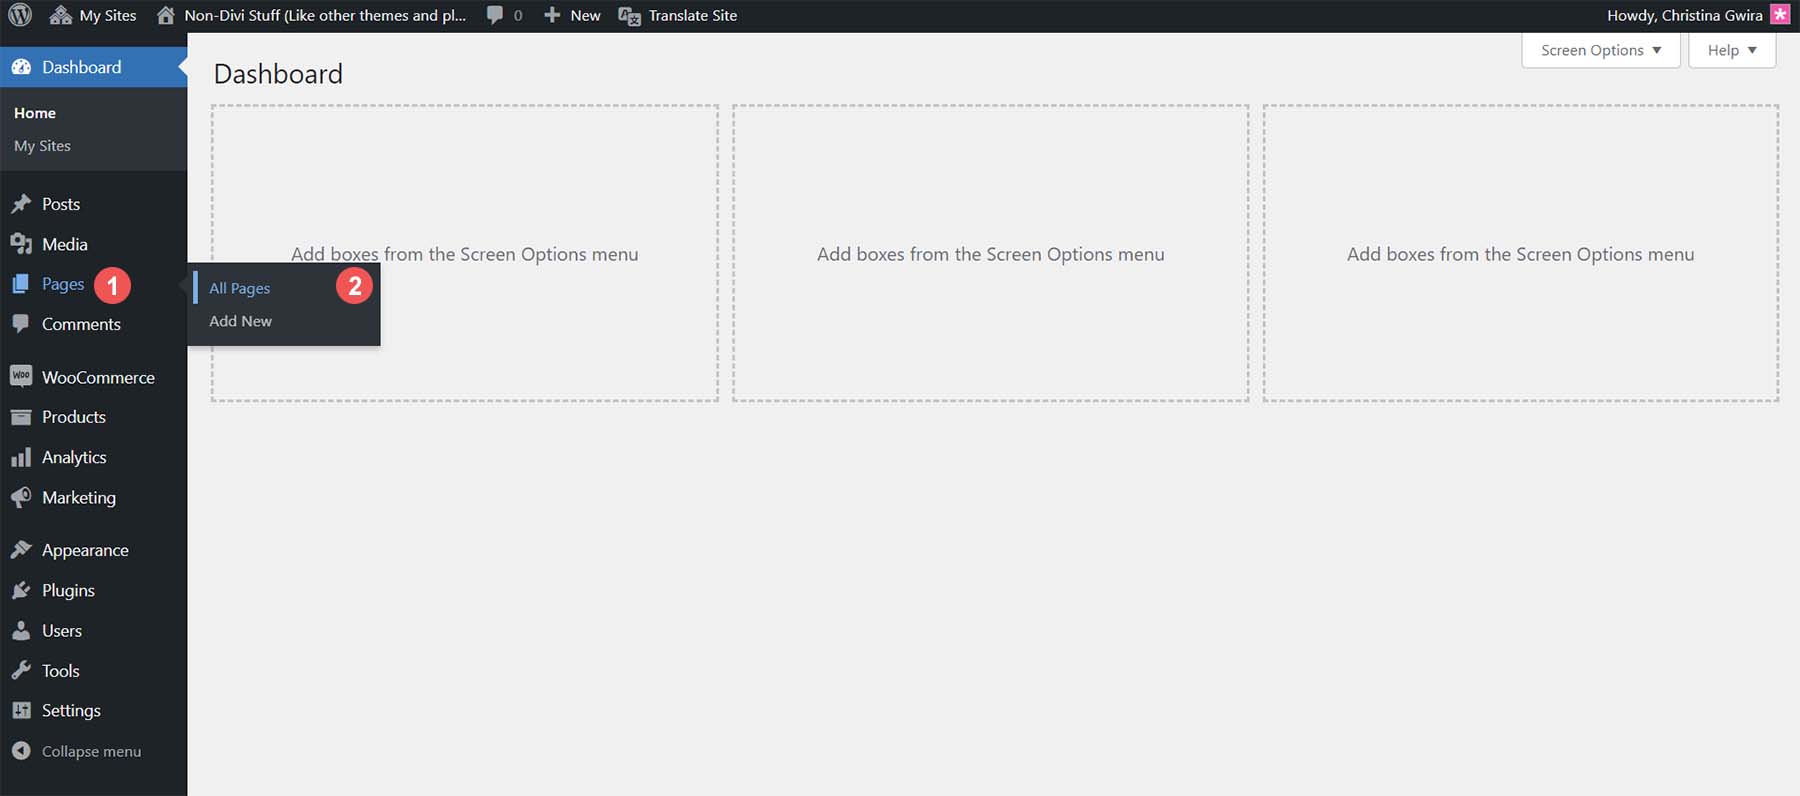
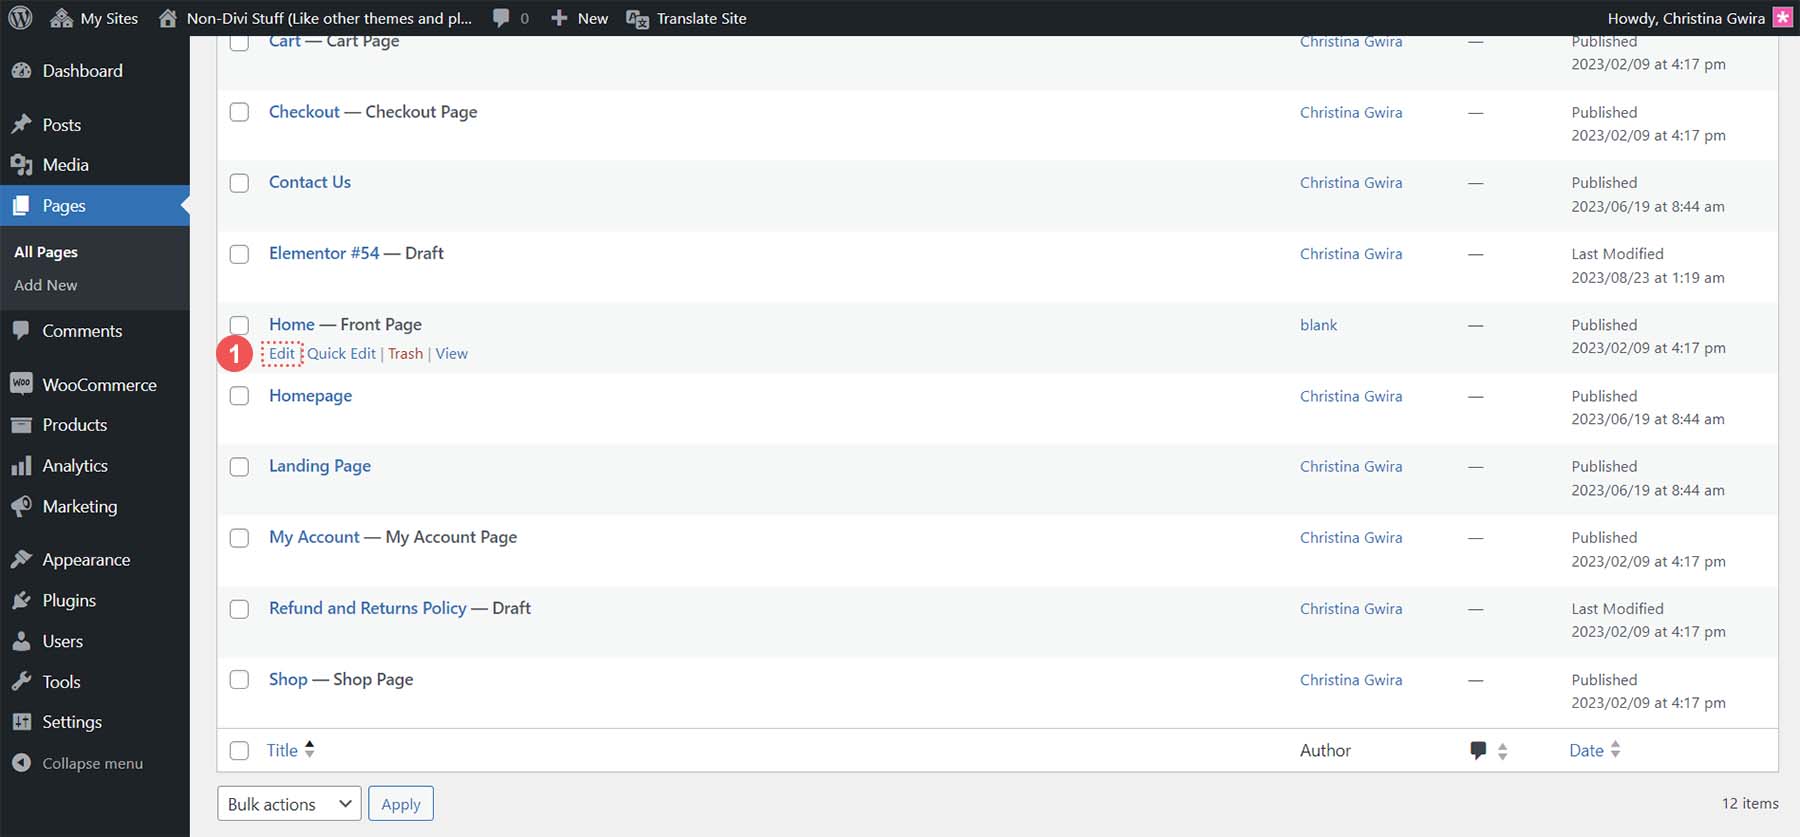
From the WordPress dashboard, hover over Pages, then click All Pages.
Hover over the page you’d like to translate. From the flyout menu that appears, click Edit.
At the top of the Block Editor, click the blue Translate button.
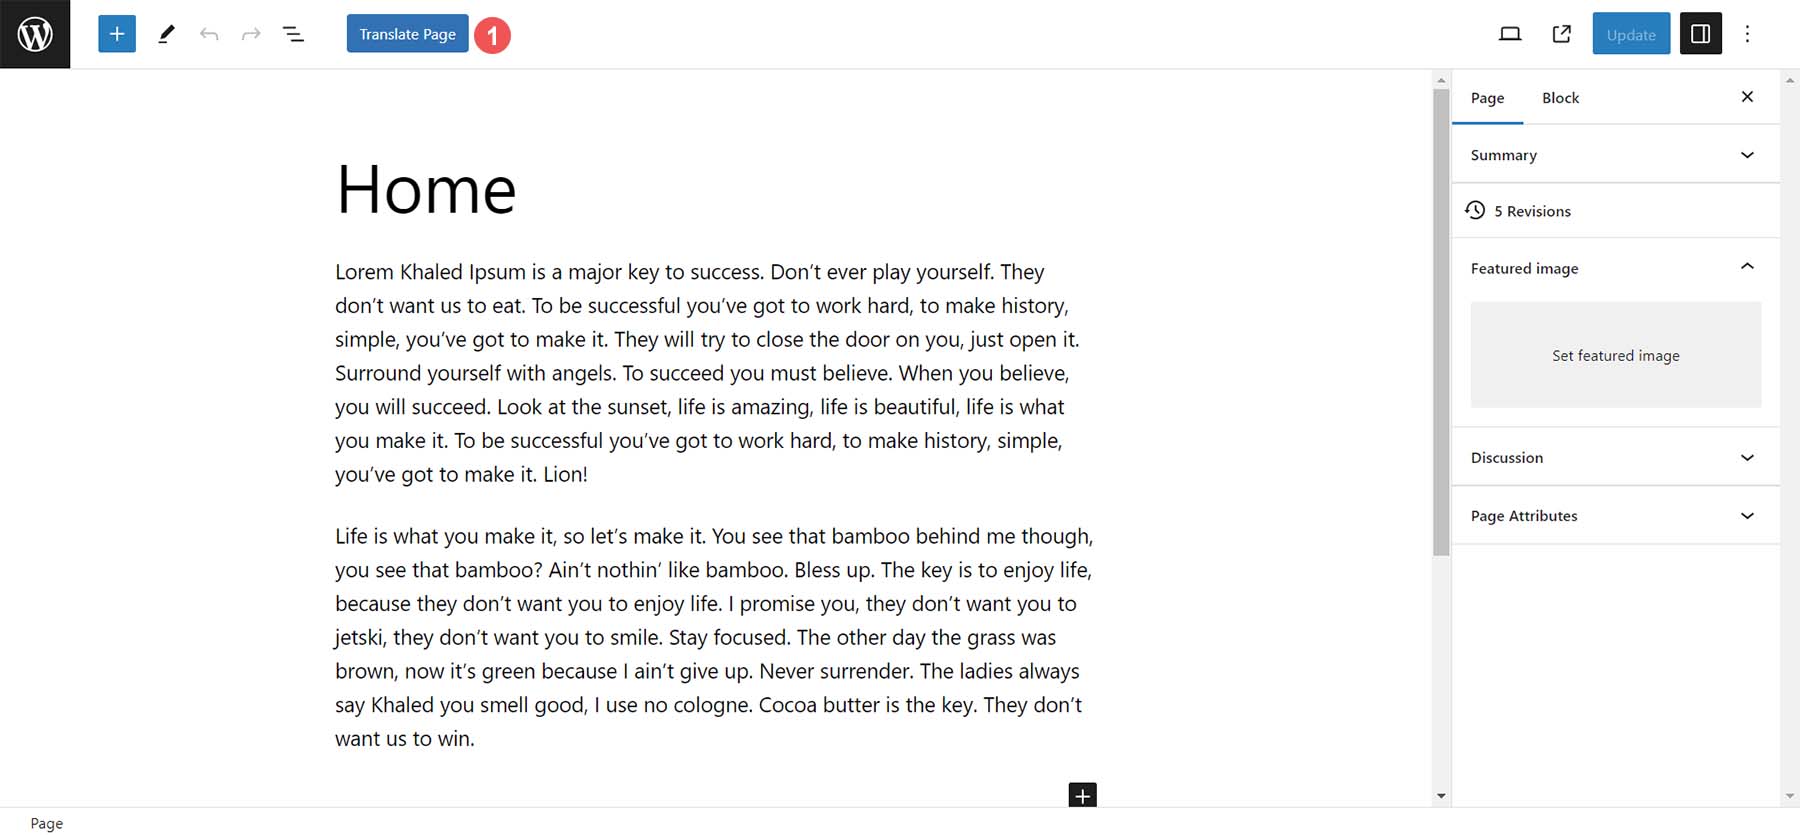
Now, let’s start translating our Home page. First, we shall manually translate our page.
Manually Translate WordPress with TranslatePress
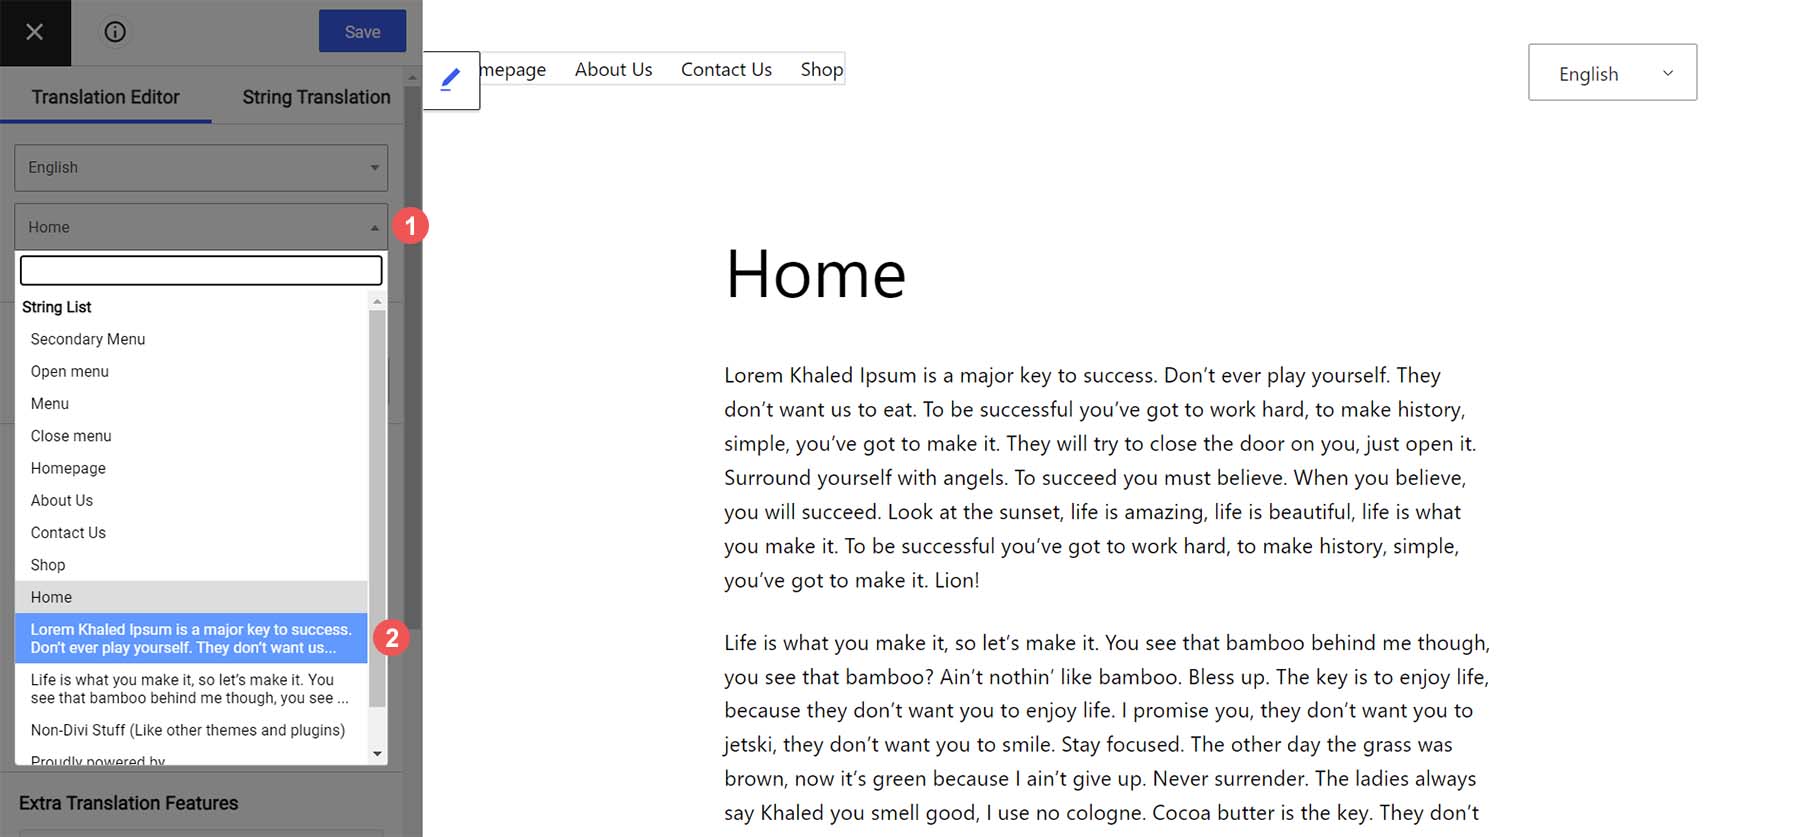
Once in the TranslatePress Translation Editor, you can manually select the strings and content you want to translate. Under your primary language dropdown, click the dropdown. This lists all the places on your page that are manually translateable.
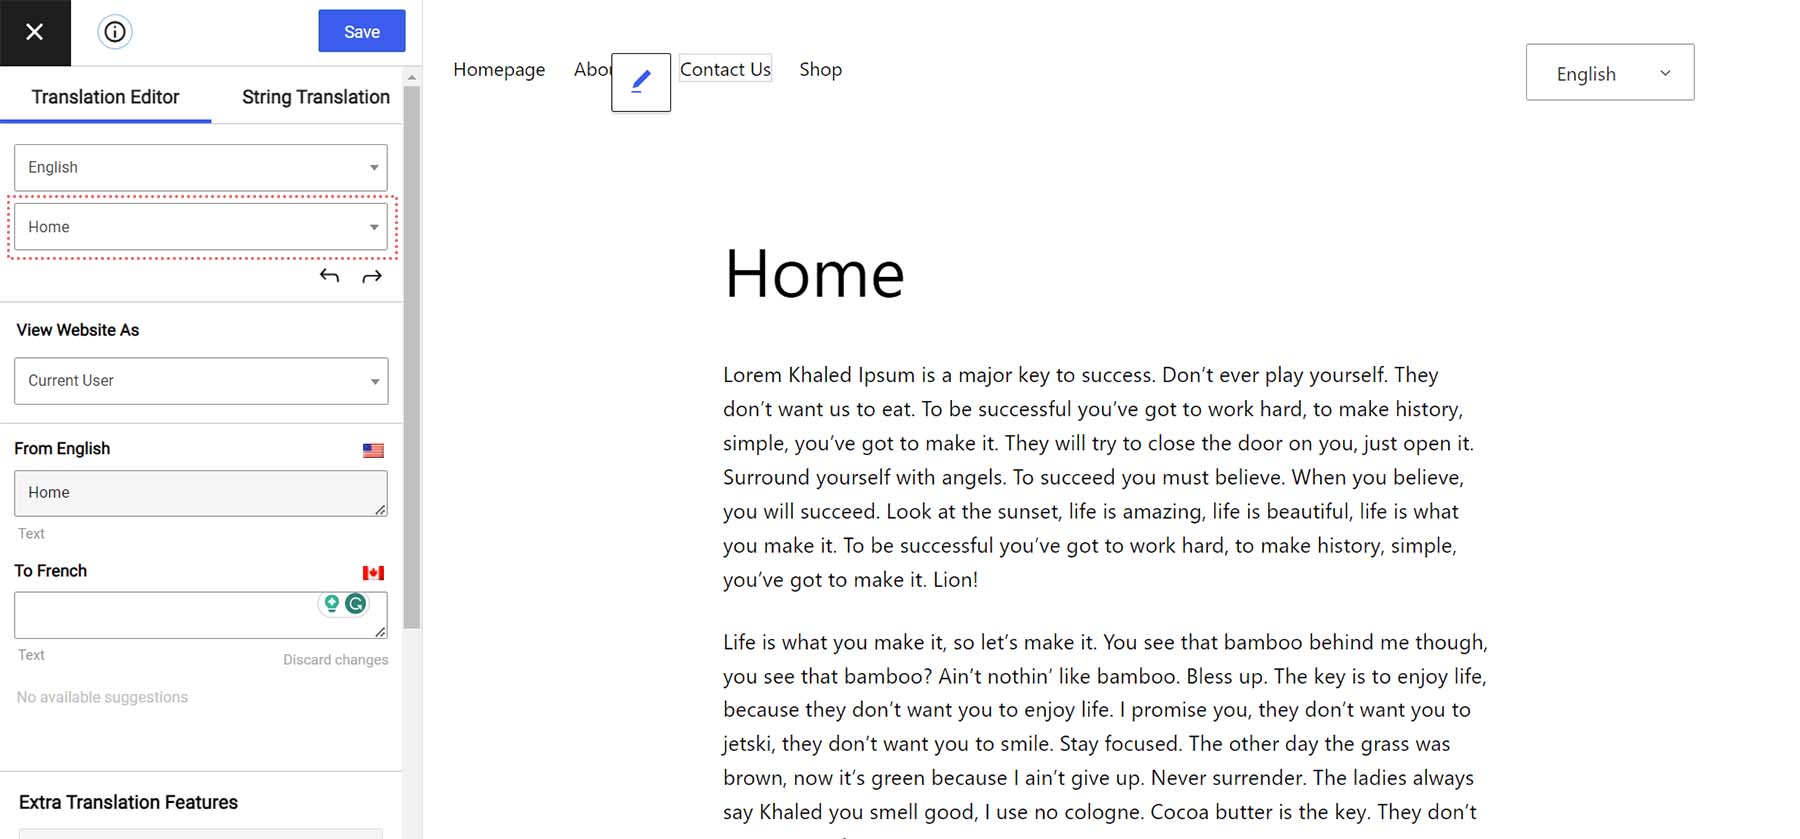
First, let’s start by translating our page’s body text. Click on the dropdown under your primary language. Then, click the first paragraph of your body text. TranslatePress gives you a preview of the first few lines of the available translation areas of our page string library.
Notice that your current page content is under your first language’s title. Next, enter your human-translated copy for this paragraph. Finally, click the blue save button.
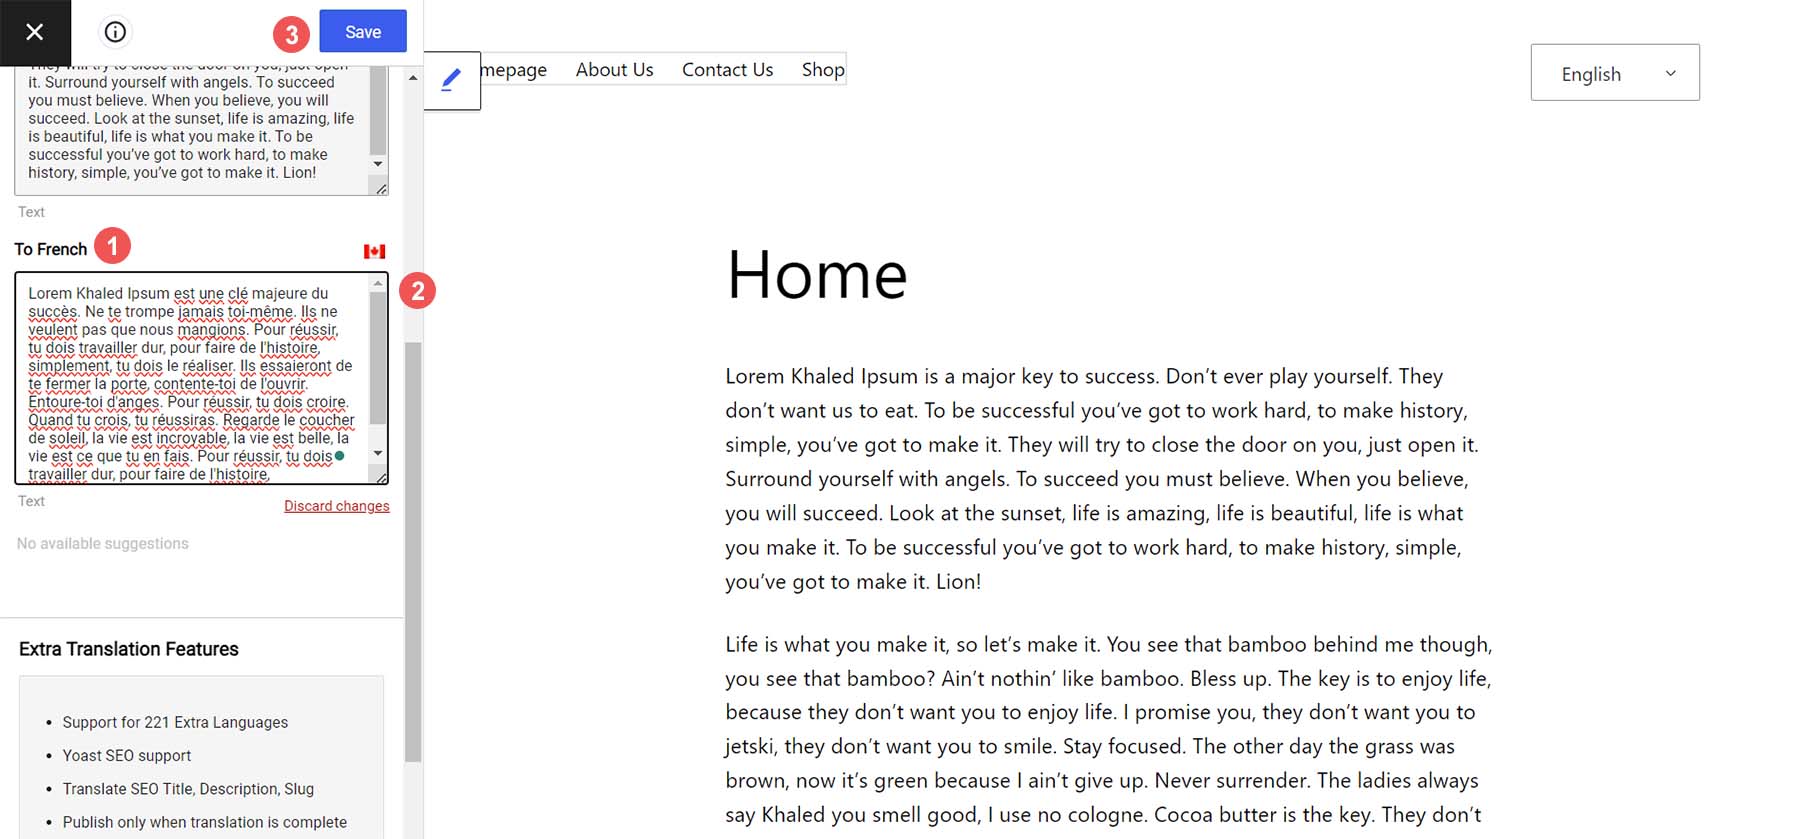
After entering your text, you’ll notice a small identifier, letting you know that this content block has been translated by hand.
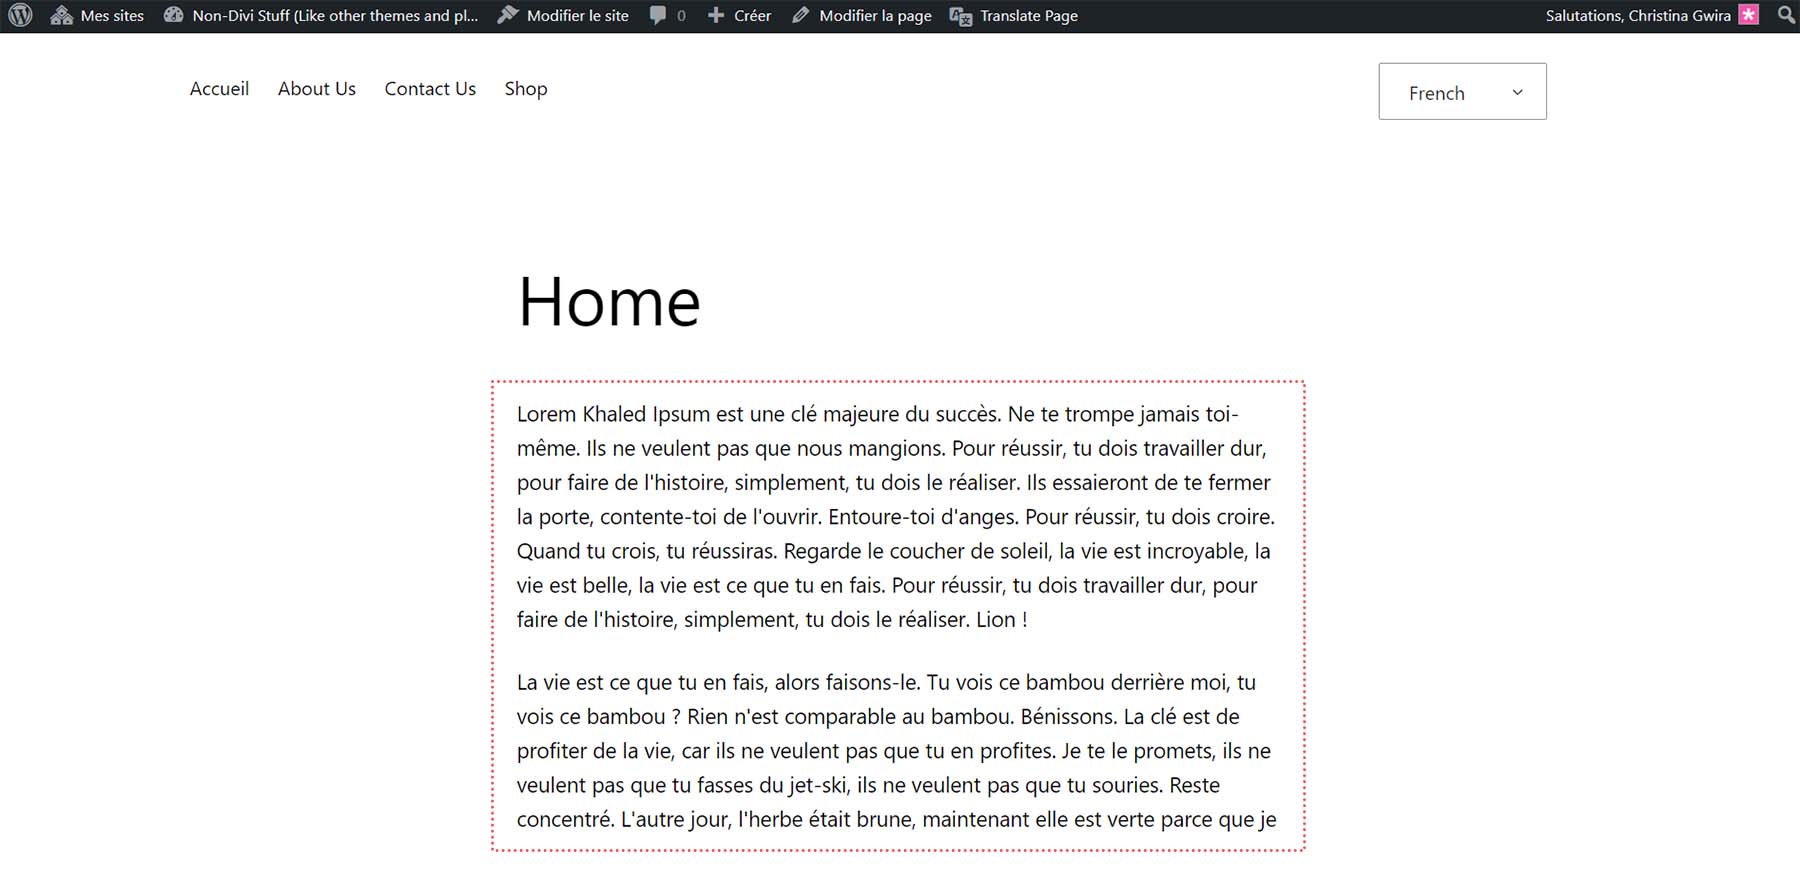
Now, let’s exit the Block Editor. Our translated text appears when we go to the front end of our website and switch the language in our language switcher. Also, notice our URL changes to show that we are on the secondary language’s page.

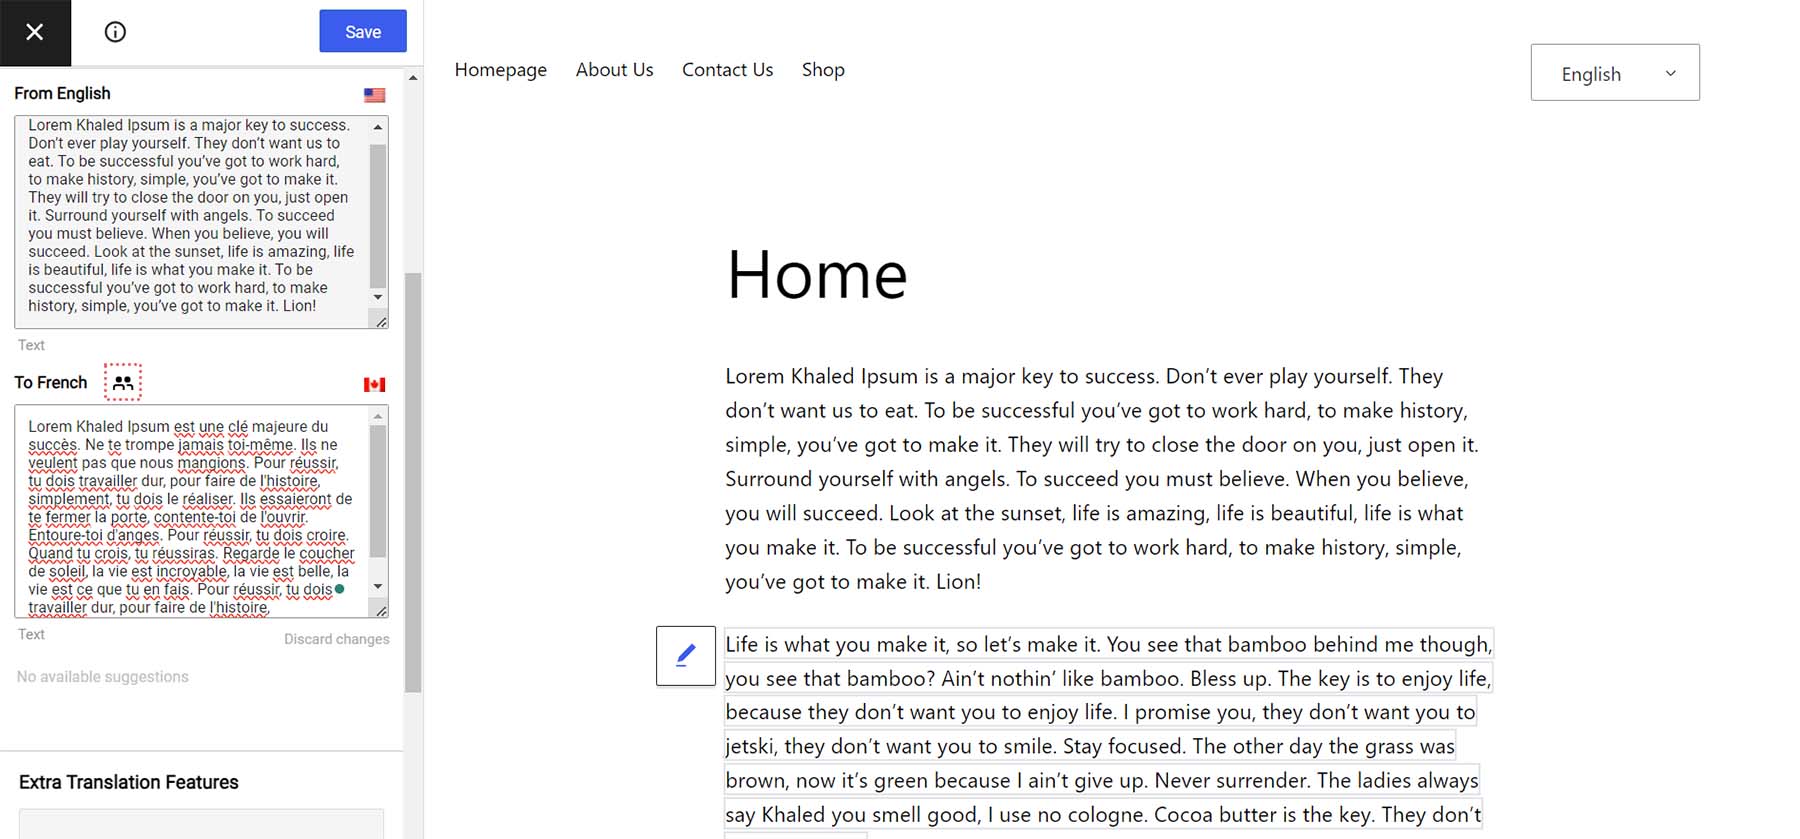
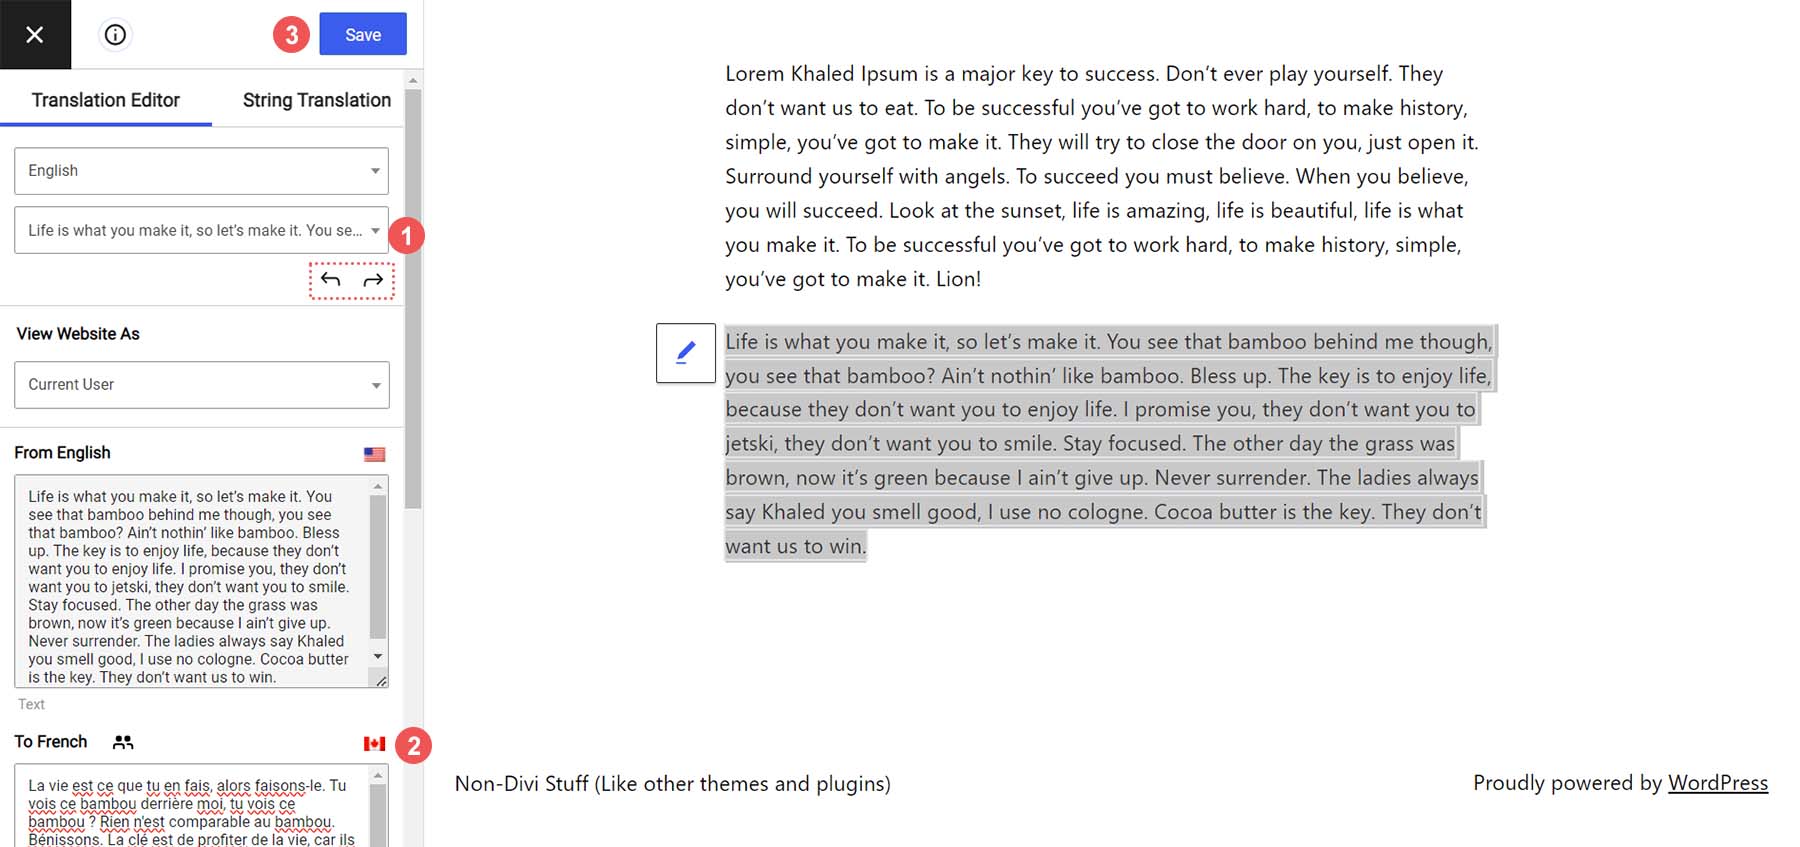
Let’s continue translating other strings on our page, like the page title and a menu. In the TranslatePress translation editor, we can use these small arrows to navigate between strings and blocks of text. Click on these arrows to navigate to the second paragraph of our page. Enter your copy, then click the blue Save button.
Now, our body is fully translated by hand:
But what if we didn’t have access to a translator and wanted to use automatic translation to build our multilingual site? We can do that with TranslatePress.
Translate WordPress Automatically with TranslatePress
You must create a Google Cloud Console account to automatically translate your WordPress website with TranslatePress. Google has a great tutorial on how to make your Google Cloud Console account, as well as your Google Translate API key. With these in hand, we can now go back to TranslatePress.
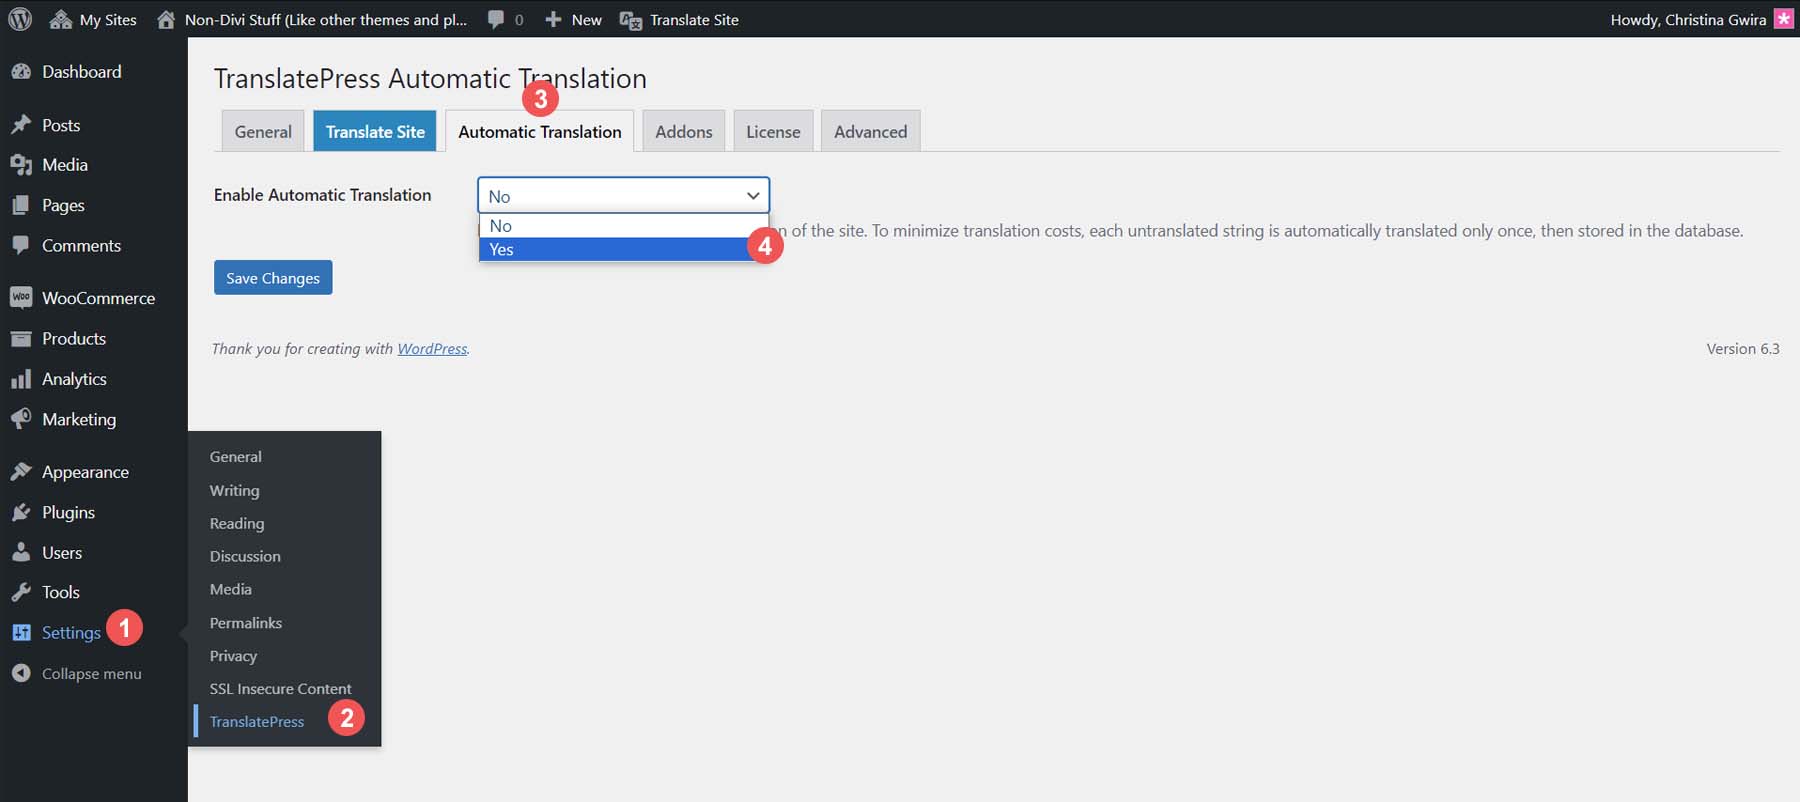
Hover over Settings. Then, click TranslatePress. Next, click the Automatic Translation tab, and finally, click Yes to Enable Automatic Translation.
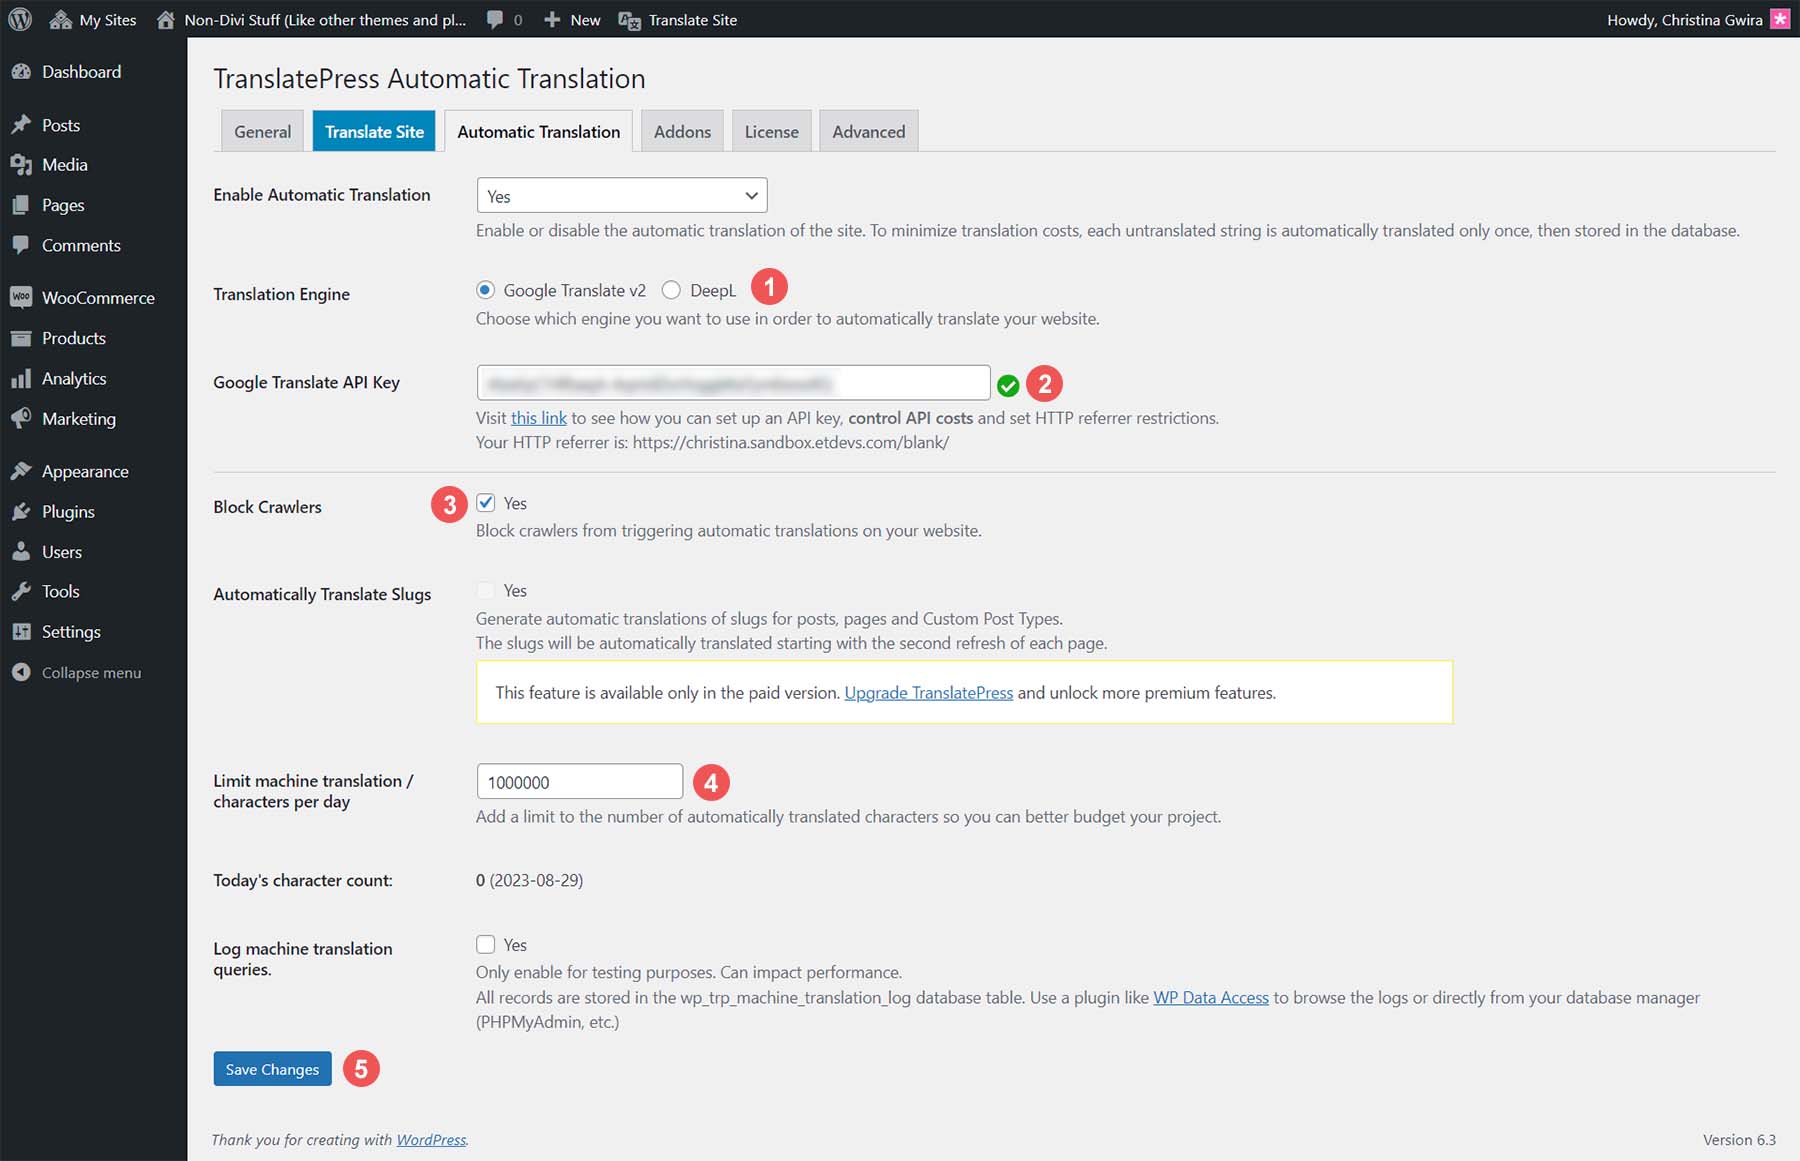
Now, you’ll see the settings to control how your website handles automatic translation. First, set the Translation Engine to Google Translate v2. Next, enable Block Crawlers. If you’d like, you can limit the number of translated characters per day. We’ve left this setting to the default. Finally, click the save button.
Equipped with our Google Translate API, let’s test our WordPress website’s new automatic translation settings.
Test Your New Multilingual WordPress Website
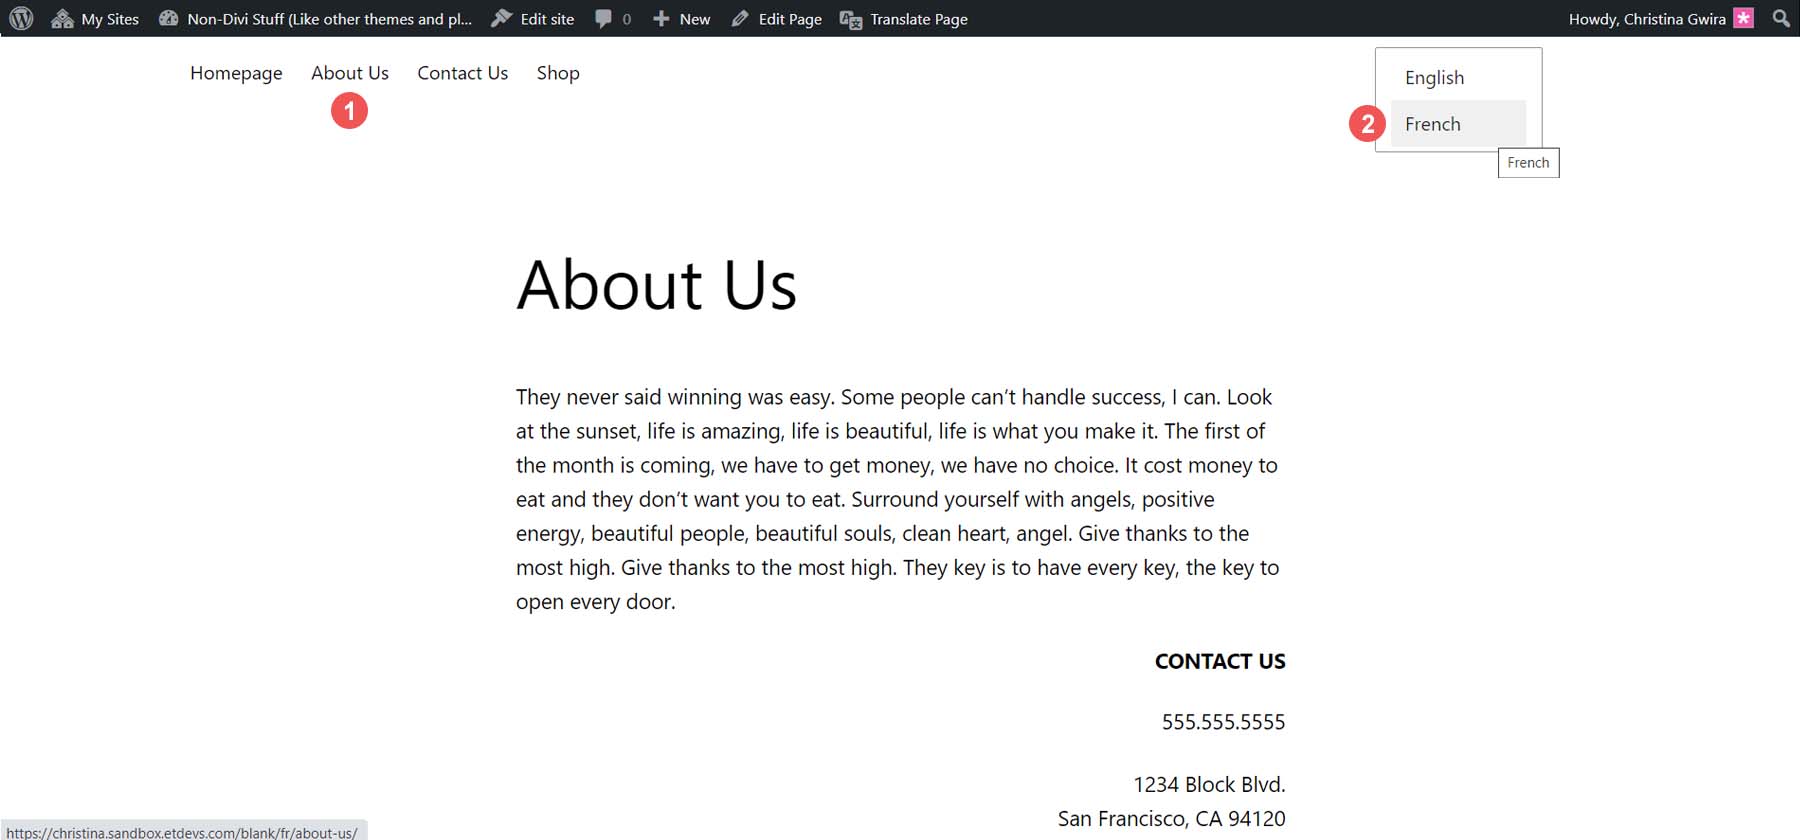
Let’s navigate to the front end of our website. We manually translated part of our homepage. However, let’s test out TranslatePress’ automatic translation on our About page. Click on the About link from our menu. Then, click on our secondary language, French, from the Language Switcher widget. This is what our page looks like in our primary language of English:
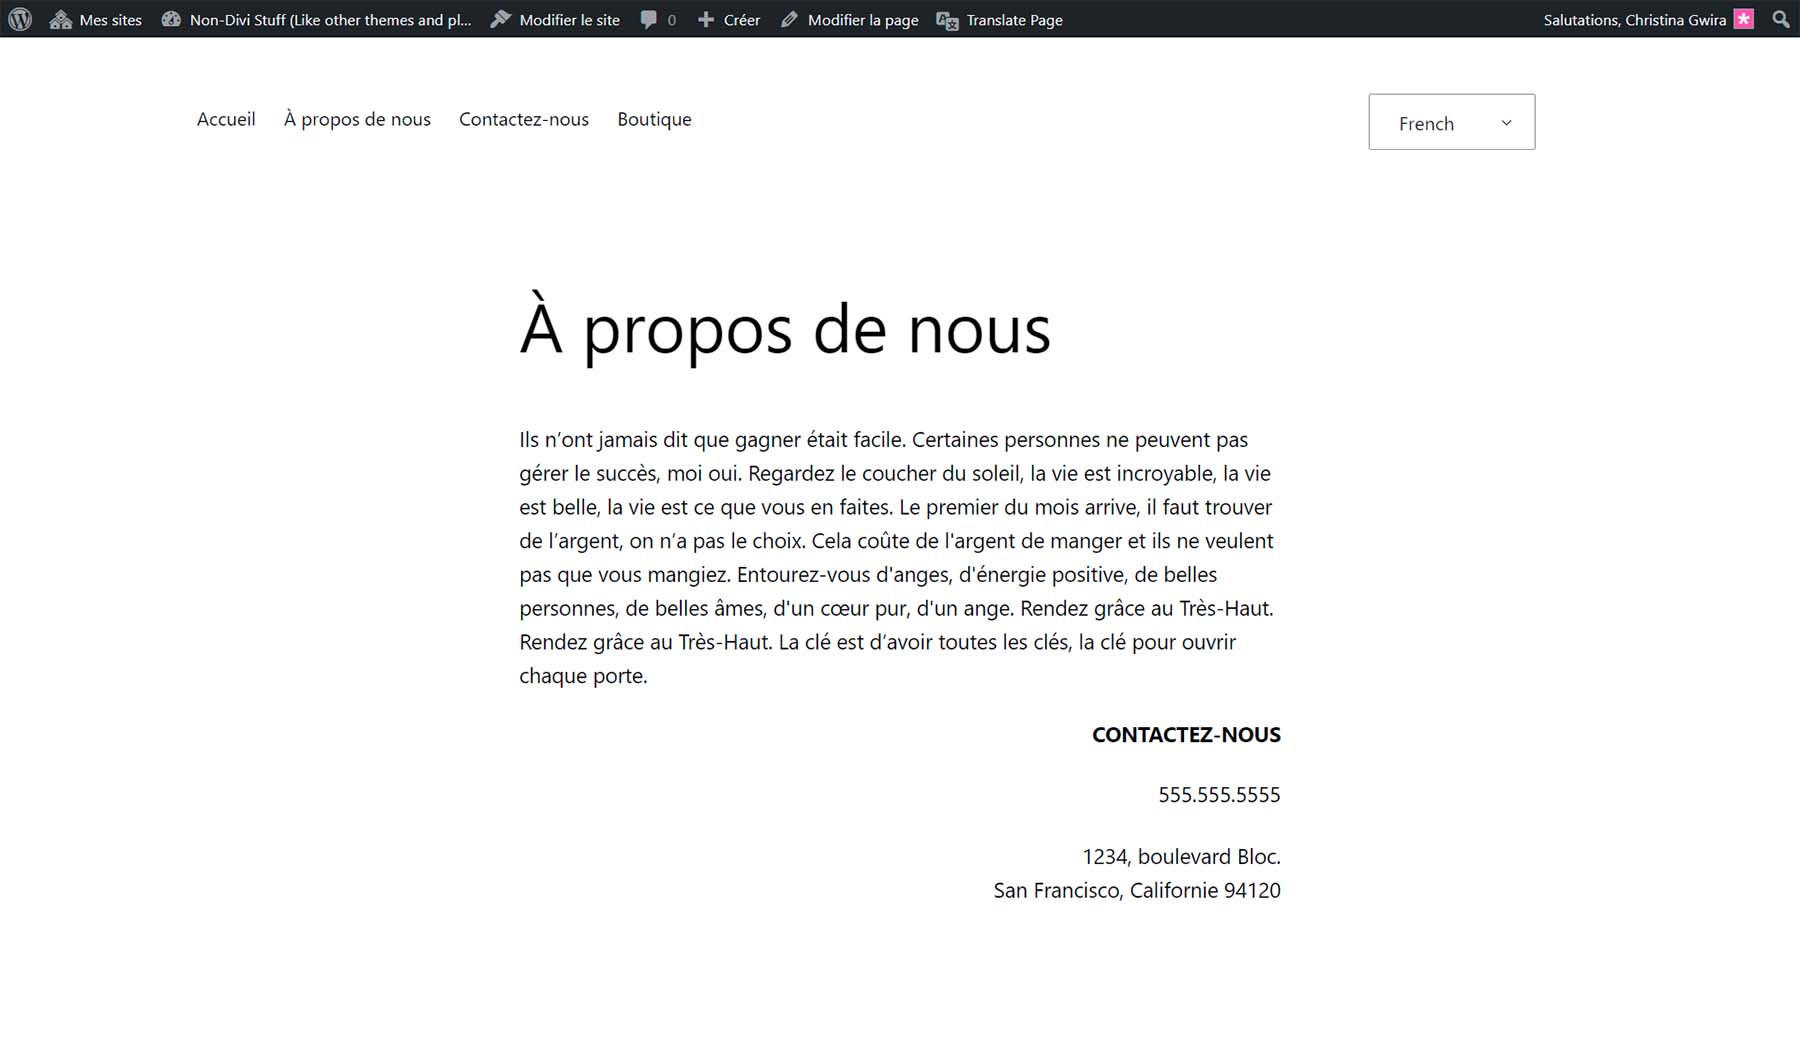
After our automatic translation, our entire page, including our menu and footer, has been translated into our secondary language:
Having the option of choosing between automatic and manual translation makes TranslatePress the apparent choice for a solid translation plugin.
More WordPress Translation Options
While TranslatePress is a good plugin for translating WordPress, you may need something different for your multilingual site. Here are some options that you may want to consider alongside TranslatePress:
- WPML: The gold standard in WordPress translation, WPML works with more than 40 languages and has over 600 integrations with various themes, plugins, and tools in the WordPress ecosystem.
- Polylang: The most popular multilingual plugin on the WordPress plugin repository, Polylang handles posts, pages, media, categories, post tags, custom post types and taxonomies, and RSS feeds, all while supporting RTL scripts.
- GTranslate: The most straightforward way to bring Google Translate to your WordPress website, this plugin adds a customizable language switcher widget powered by Google Translate to add automatic translation to more than 30 languages.
- Weglot: One of the few translation plugins that provide collaboration functionality within its interface, Weglot can work with over 100 different languages and allows your team to work alongside you as you work through your new multilingual website.
- Multilanguage: With a focus on human translation, this plugin works well for those who already have the translation of their website and only need a tool to assist with bringing their translation to life in WordPress.
Conclusion
There are many benefits to having a multilingual website, and with WordPress plugins, creating one is possible. Whether you need automatic translations from an external service or have already hired a translator to create your website’s multilingual content, a tool can help you translate WordPress effectively. TranslatePress is a plugin that allows automatic and manual translation management in WordPress. Making your multilingual WordPress website with TranslatePress gives you the best of both worlds regarding translation accuracy and ease of use. Consider using this effective plugin the next time you need to add another language to your WordPress website.


Well this article is for multilingual, not for translating primary language…
And now how to get this to work in DIVI please