
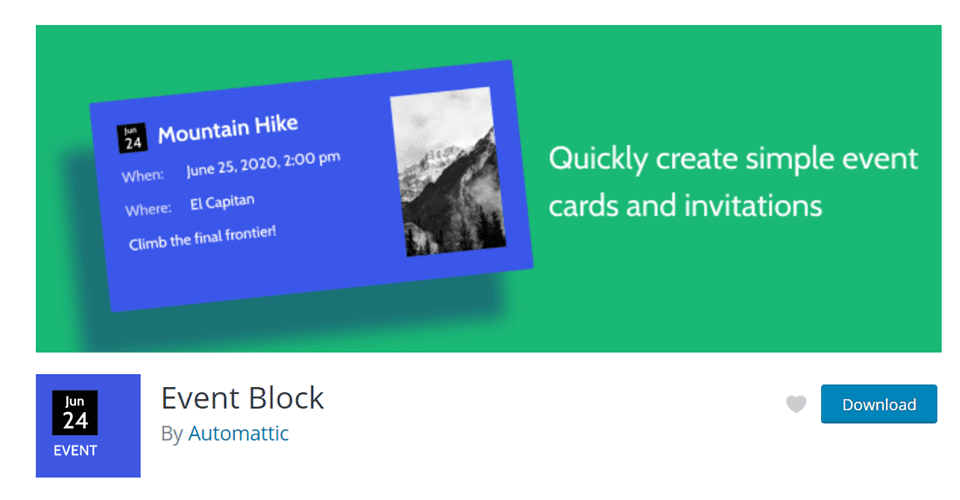
Automattic, the parent company for WordPress, has already published some of the most well-known WP plugins out there. WooCommerce, Jetpack, Akismet, BuddyPress, bbPress…and the list goes on. Now, they have added another powerful plugin to their already-long list: Event Block. It’s an incredibly simple solution to let your users know what you have coming up.
What is the Event Block?
Unlike many new blocks with WordPress 5.8, the Event Block has to be installed manually through the plugin repository instead of the block directory in the editor itself.
The essence of Automattic’s modern design philosophy is in full swing with this plugin. It’s simple, easy-to-use, and stylish. Just navigate to Plugins in your admin panel and search or upload to install it. It will then appear in your plugins list as Event.

The block itself lets you add descriptions of events, times and locations, and add pictures to the card that displays to your visitors. Additionally, you have block-specific options and settings that you can adjust to make the block better fit your site’s design and the event you’re displaying’s look.
How to Add the Event Block to your Post or Page
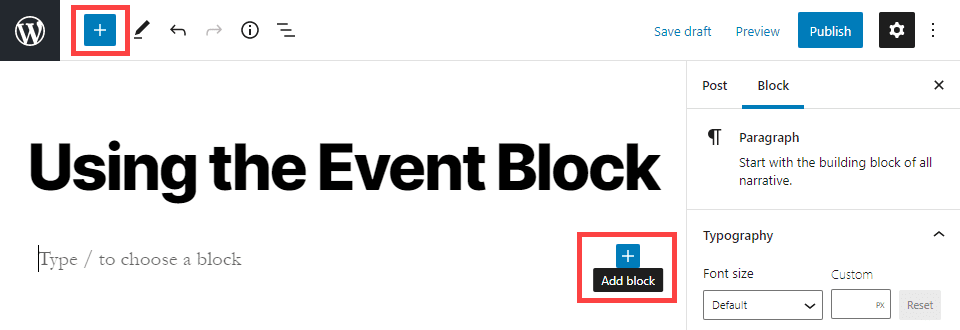
Once you have the plugin installed, adding the Event Block to your page is a cinch. In the WordPress Block Editor, simply press the + button to add a new block. You can find this button in the top toolbar or to the right of any empty block.
The block selection sidebar will appear. You can find the Event Block in the Widgets section if you scroll through and browse the entire set of installed blocks. You can also search for event to find it immediately. (Note that searching for events does not pull up the block.)
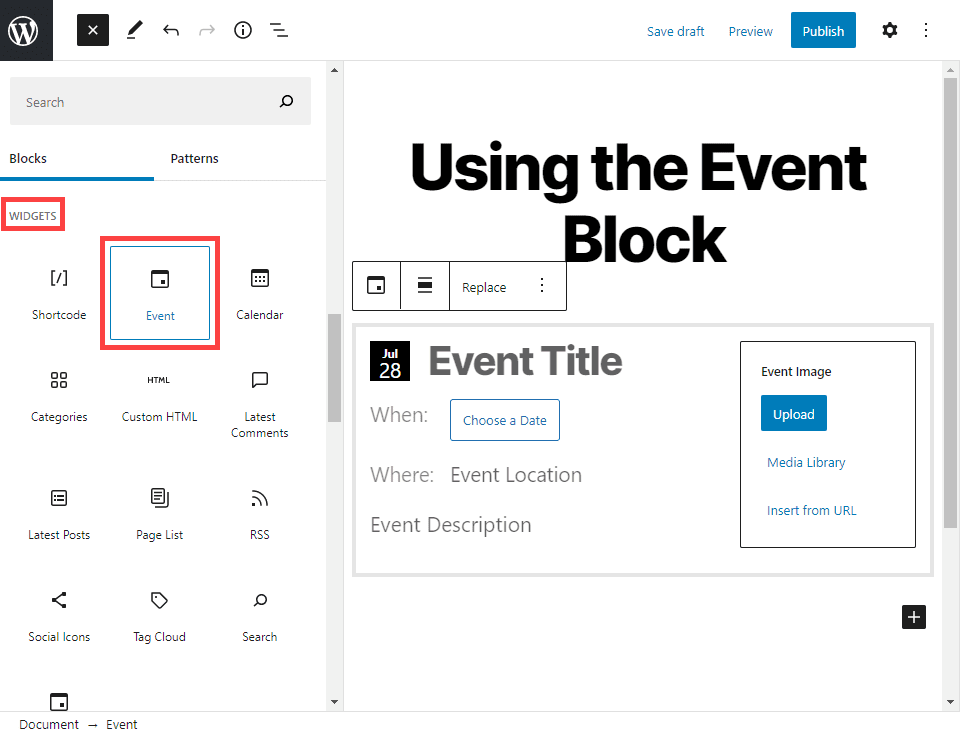
Each block displays a card for a single event. If you are planning on using this to display a festival or series of events (such as the showtimes of a play that runs multiple days), you will either need to include that information in the description or create multiple cards for each individual show.
Event Block Settings and Options
As we said above, one option that is not included is being able to showcase a series of events. Technically, not being able to showcase a range of dates. With that said, let’s check out exactly what the Event Block plugin can do.
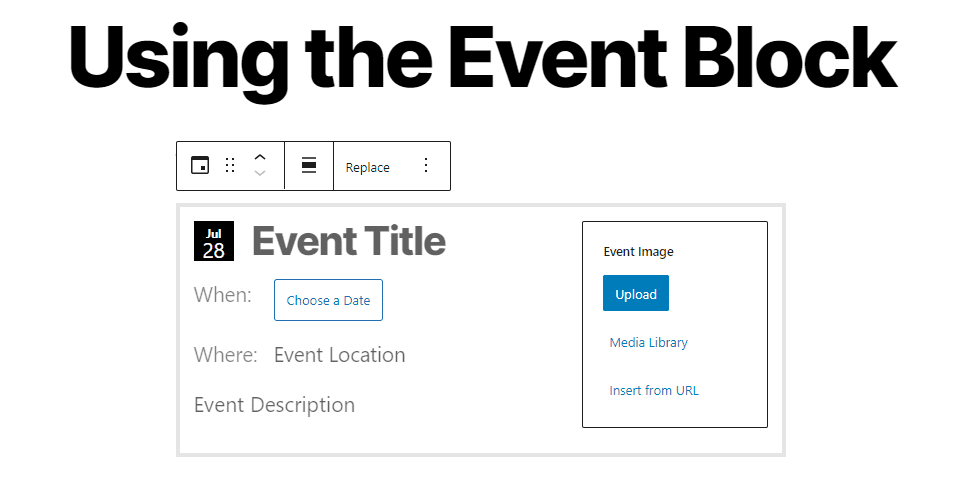
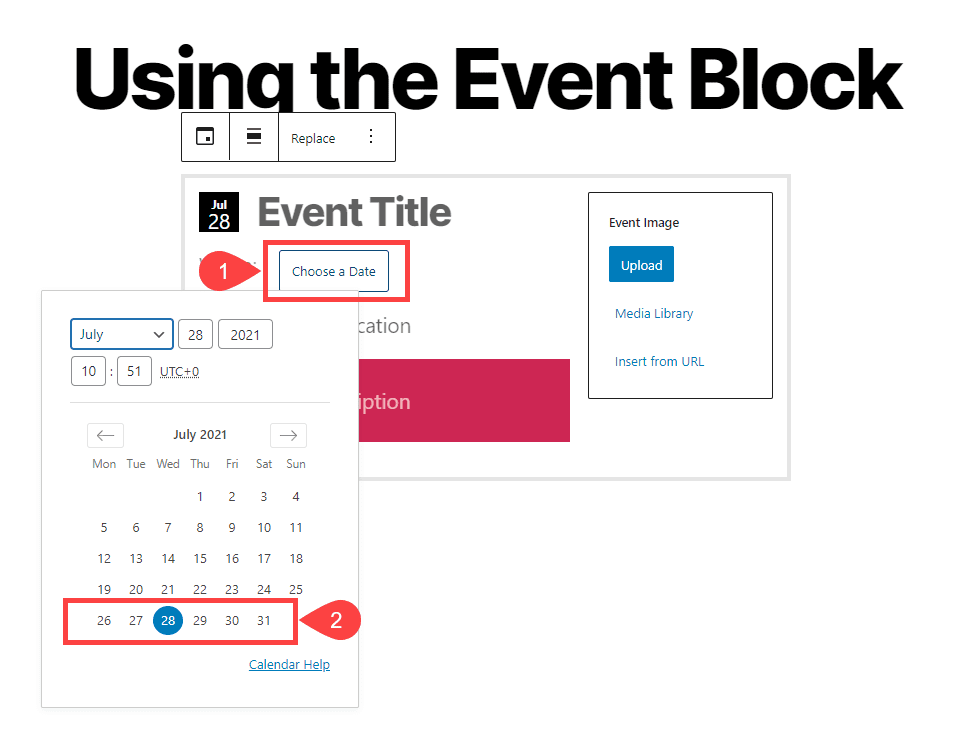
To set the date for the event, simply click the Choose a Date button. A pop-out calendar appears on which you can choose whichever date and time your event is happening. If you don’t select a time, it defaults to the time at which you chose the date. The date will then replace the button and appear in the top-left corner of the block.
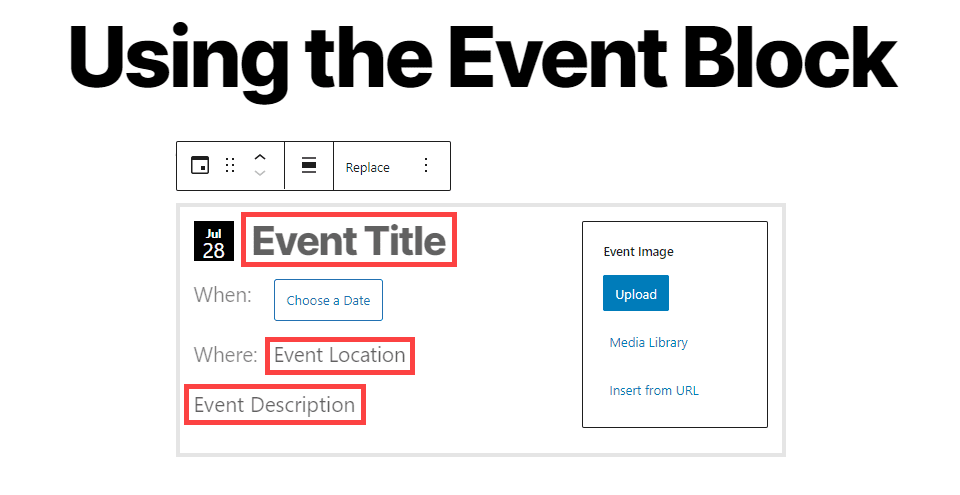
The other fields—title, location, and description—are simply text boxes in which you type the pertinent information. They’re pretty self-explanatory in nature.
A major downside of this card, though, is that the locations are not clickable. To have them link to a map, you will need to include it separately in the post using a block or other method. Phone numbers are clickable on mobile by default.
We should note that you can hyperlink any text in the description or location boxes. Meaning that if you go to Google Maps and input the event’s location, you can take the URL for that search and create a hyperlink using the location text if you choose. It’s not an ideal solution, but perhaps the best one you have without adding other plugins.
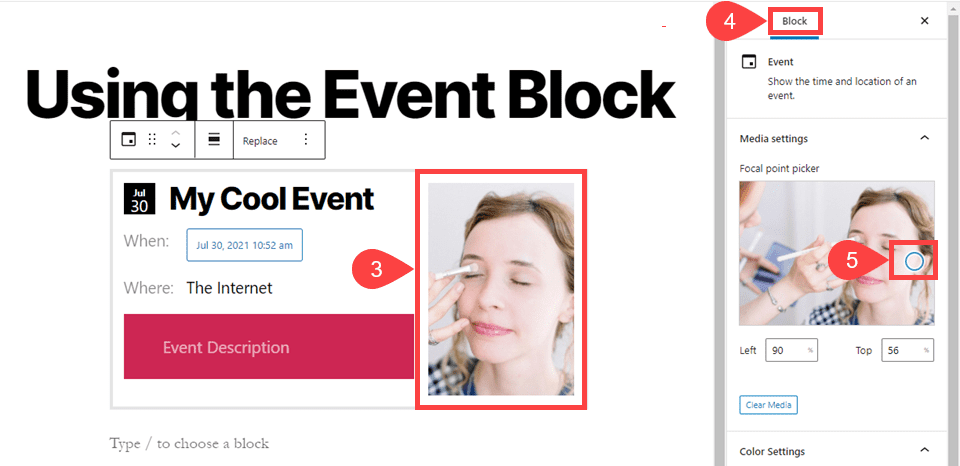
The Event Image is essentially an image block placed at the side of the event block. It will stretch to fit the block. You can adjust the focus of the image in the block settings to the right by positioning the blue circle under the Focal Point Picker heading.
Beneath that is the Color Settings section. You can adjust the block to look however you choose with these, setting a background and text color for the entire block.

Luckily, the editor has a warning for people with a not-great eye for color combinations and will warn you if your chosen combination is hard to read.
Maybe the best option for the Event Block is that you can add sub-blocks into it. Simply press enter/return after the description, and you will get another + button just like in the base editor. From here, you can add any number of other blocks inside the event itself. Even other events.
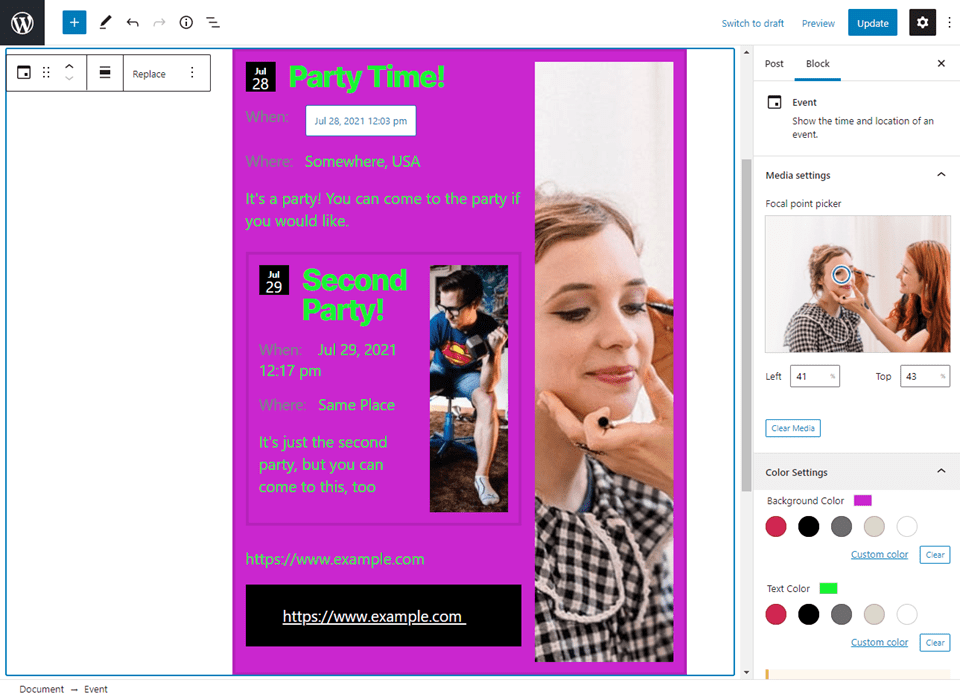
Each individual element within the event block can be adjusted individually. You can treat your newly created event block like a smaller content area of the post or page you are already working on. Each sub-event can have its own design and image, as well as each paragraph block or anything else. The options for the blocks will all appear to the right in the block options sidebar depending on which block you have selected.
The final option for the event block plugin is whether you decide for the event itself to display as a center-aligned element or to stretch the width of your content area.
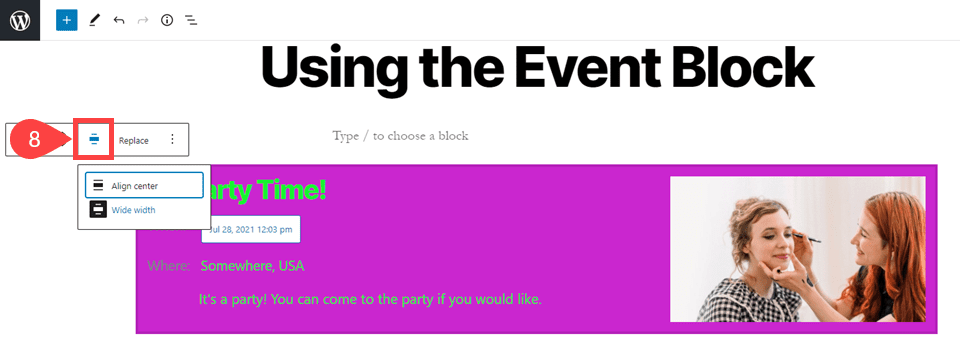
In the context menu, the alignment icon gives you the choice of either. Regardless of which you choose, any sub-blocks that you have created within will adjust themselves to accommodate the change. Images will still focus where you indicate, but they will expand and display more of the base image if the width allows.
Tips and Best Practices for Using the Event Block Effectively
The Event Block plugin is simple and powerful, and you can do a lot with it. Here are a few tips to make sure that your stand out to your guests.
1. Use Color
Don’t let the color options go to waste with the event block. Take advantage of being able to adjust the design so that you can complement your page design as well as other blocks within the event and on the same page.
And if you use blocks within the event block itself, be sure to style them to stand out from their container so that your users will be more likely to notice them.
2. Use Properly Sized Images
Images can make or break an event, really. If your event doesn’t look exciting or engaging, people are less likely to want to attend. Be sure that you use high quality images that work to represent your event in a variety of sizes and shapes. Because the images are responsive and adjust their placement according to the space they have, it’s possible to set up a grainy photograph of nothing in particular.
Always test your images to make sure they display well in multiple aspects.
3. Take Advantages of Sub-Blocks
Don’t be afraid to add complimentary blocks within the event itself. Sure, you can add some to the page content, but if you want to guarantee eyes on that information, embedding it within the event block is the best way to do that.
For instance, you can use the Divi block within an event to use our Maps module since there’s not one default in WordPress, and the event block doesn’t render clickable addresses by default. (Remember, too, that you can use a hyperlink to paste a Google Maps URL to the location if you choose.)
4. Experiment with the Patterns Tab
WordPress 5.8 introduced the Patterns tab to the editor. In combination with the Event Block plugin, you can make some very pleasing page designs with very little effort.
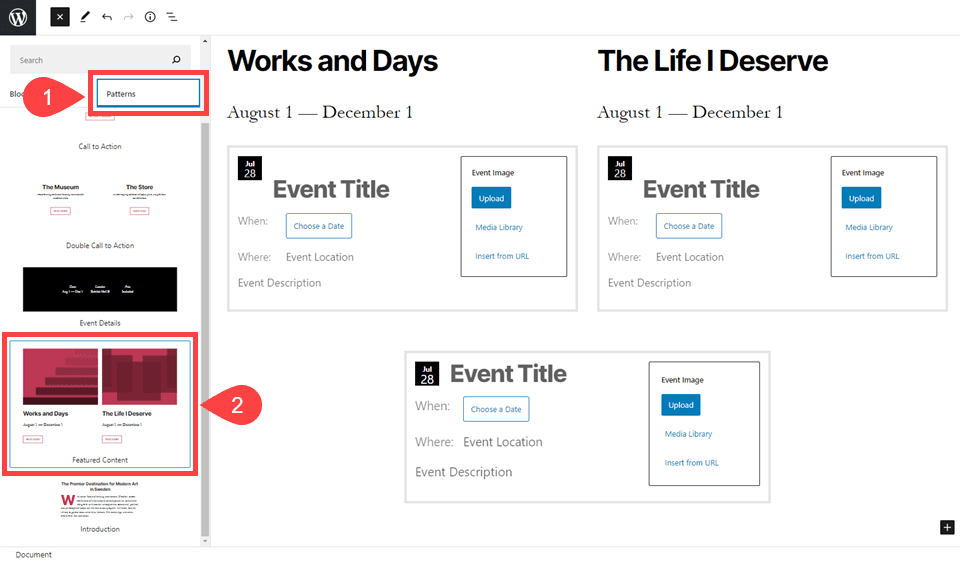
In any situation where you could add a block, you can select the Patterns tab in the left-hand sidebar. Selecting one will add it to your template, and you can go from there. In the image above, we simply added an event block to the bottom of each column the pattern put in, as well as one in a default page column. Because the Gutenberg editor allows for adjustment everywhere, you can experiment with creating your own Patterns, too. That way, your events won’t get lost in a standard grid or list lineup.
Conclusion
The Event Block plugin may not seem robust at first. But with a little thoughtful design and poking through the options, you can spruce up any page with one. With sub-blocks of all kinds available and the ability to nest other events inside it, the event block is sure to enhance just about any kind of site. Whether it’s an in-person event, a virtual party, or even just a placeholder for a big announcement, this plugin is probably the easiest way to do it.
Of course, the easiest solution isn’t necessarily the best solution for everyone. If you are looking for some more robust options, check out our list of the best WordPress events calendar plugins.
What kinds of things have you done with the Event Block plugin so far?
Article featured image by Viktoria Kurpas / shutterstock.com


Is this event block plug in compatible with the Divi Theme?
lol