
The WordPress Audio Block lets you provide playable audio files within your pages and posts. The audio files can be added from your media library or a URL. Users can play the audio from their browsers or download them to listen offline. This is a great way to provide music, podcasts, or other types of audio files for your visitors to hear and use. There are different scalable solutions for handling lots of audio recordings that might be of use to podcasters—see these top podcasting plugins if your needs are greater than a simple audio block.
In this article, we’ll look at the Audio Block and see how it works. We’ll also look at how to add it to your posts and pages, see tips and best practices for using it, and look at the frequently asked questions.
Subscribe To Our Youtube Channel
How to Add the Audio Block to your Post or Page
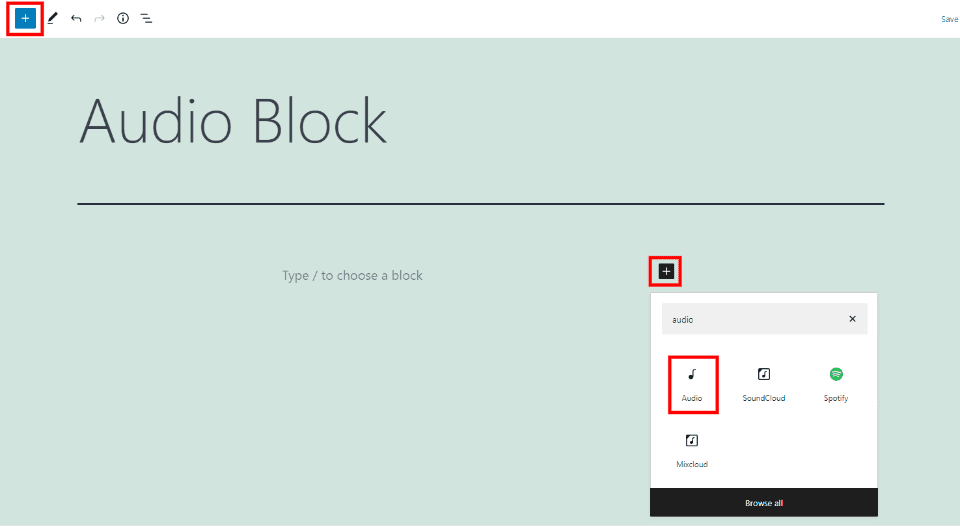
To add an Audio Block, click on the Block Inserter at the location you want to place the block or select it in the upper left corner. Search for Audio and click on it.

Alternately, you can type /audio and hit enter where you want to place the block.
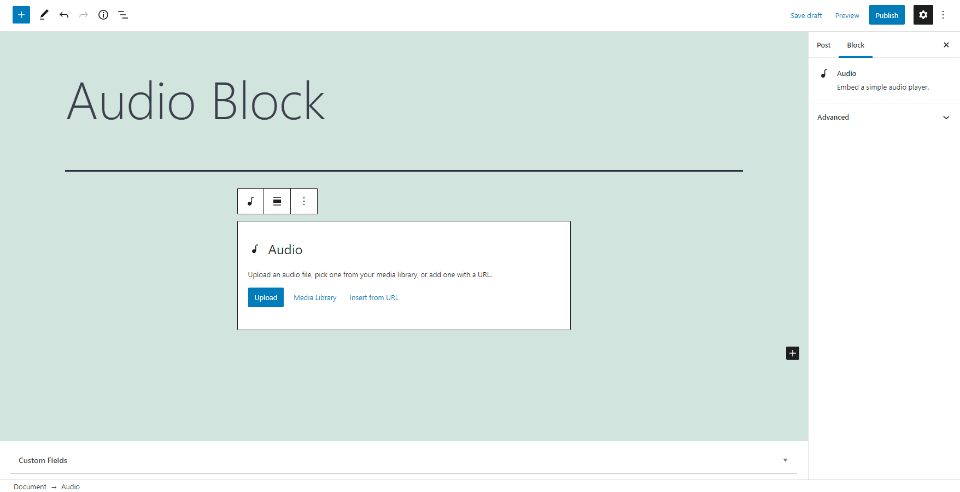
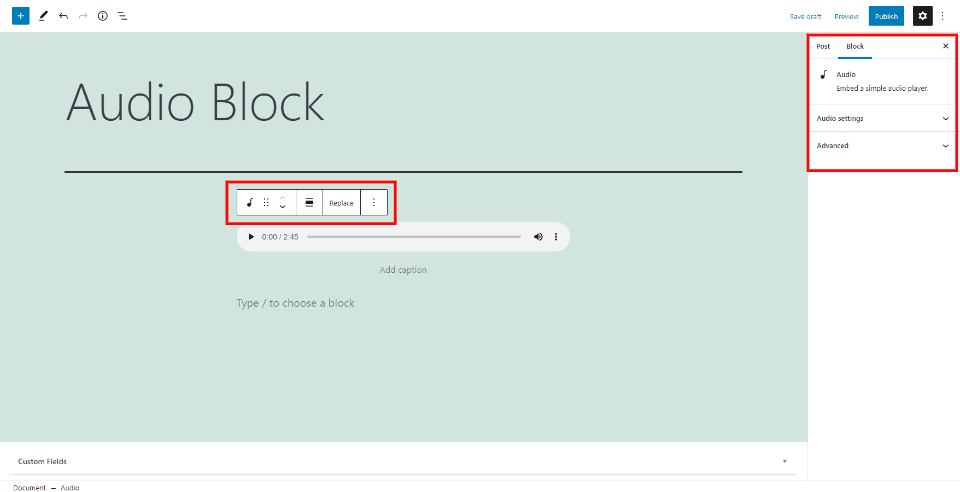
The Audio Block will be added to your content where you can add an audio file to play or download. Click to upload the audio file, choose it from your library, or enter a URL for the file.
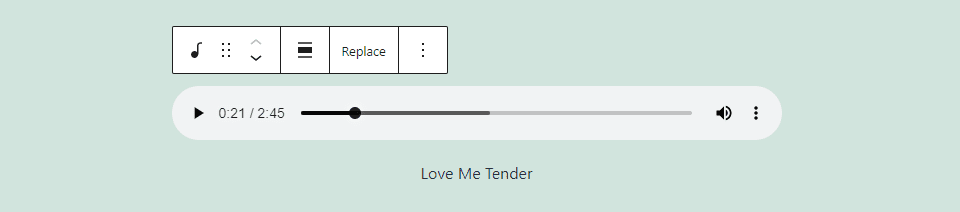
Your audio file will be displayed as an audio player complete with a caption where you can enter the name or other information about the file. It includes the basic audio player options.
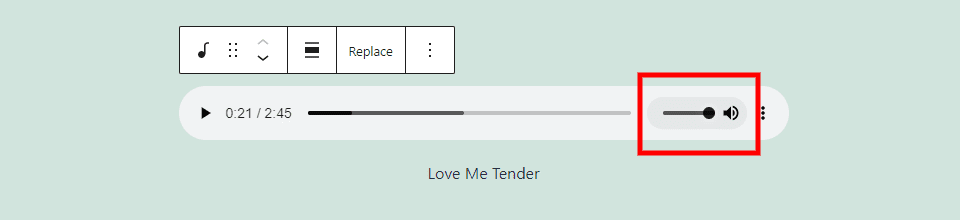
Hovering over the volume icon opens the slider where the user can change the volume level.
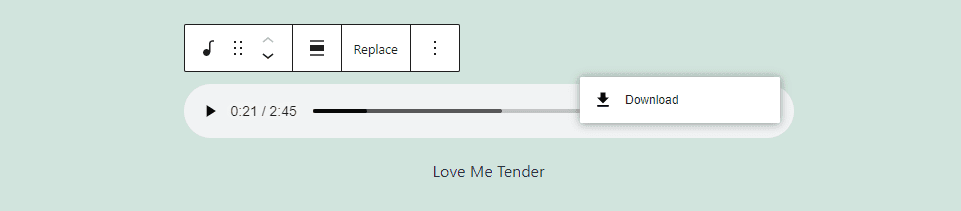
On the right are three dots that open options for the user. This has a download link.
Audio Block Settings and Options
The Audio Block includes settings and options within the block itself and the right sidebar. Let’s look at both.
Audio Block Toolbar
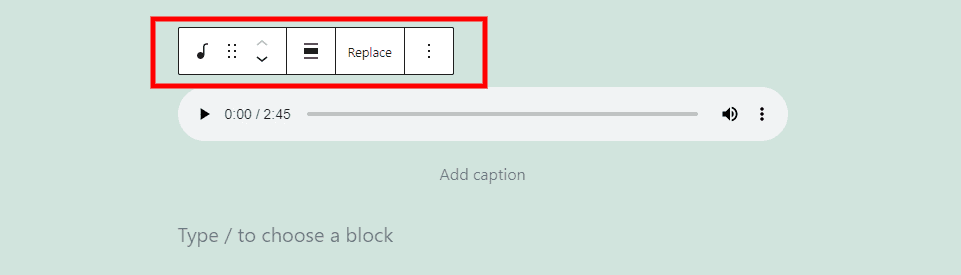
The Audio Block toolbar is placed above the block. It appears when you select the block and includes fewer tools than most of the WordPress blocks.
Change Block Type or Style
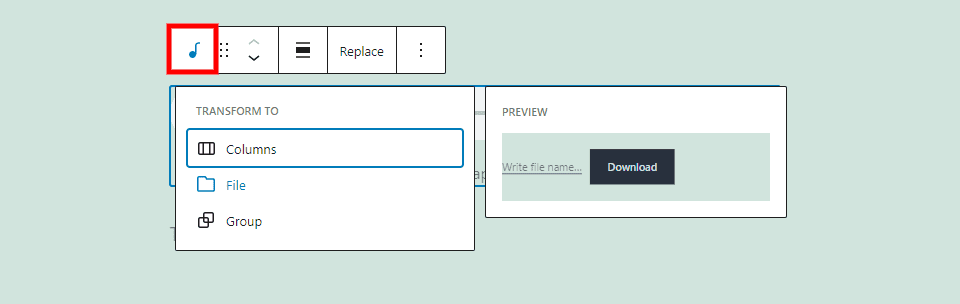
Transform the block to columns, a File Block to allow users to download the audio as a file, or a group that can be styled. I’m hovering over File in this example. It provides a preview of how the file would look as a File Block.
Drag and Move
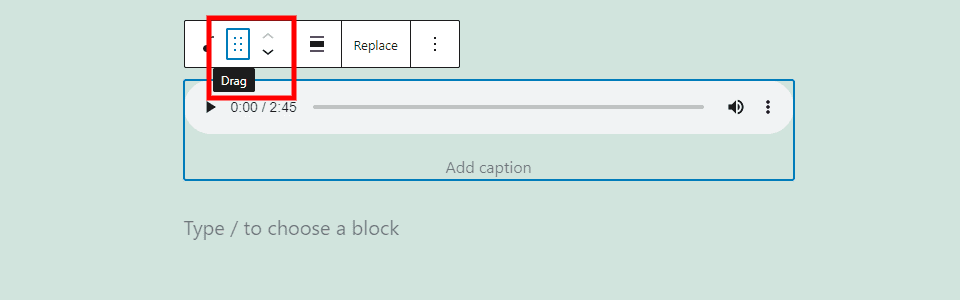
The Drag tool, the icon with 6 dots, lets you drag the block anywhere you want. The Move tool, the up and down arrows, moves the block up or down one content space every time you click on an arrow. Both provide an easy way to move the block around your content area.
Change Alignment
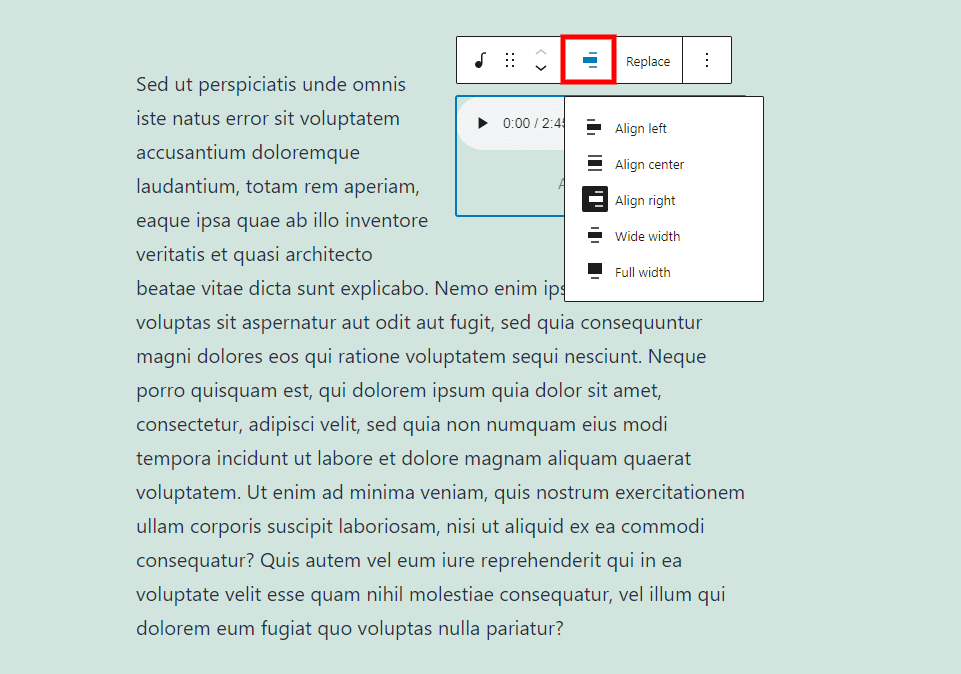
The alignment options determine the block’s placement on the screen. Options include left, right, wide width, and full width. Choosing left or right places it on that side of the screen and wraps it with the content block under it.
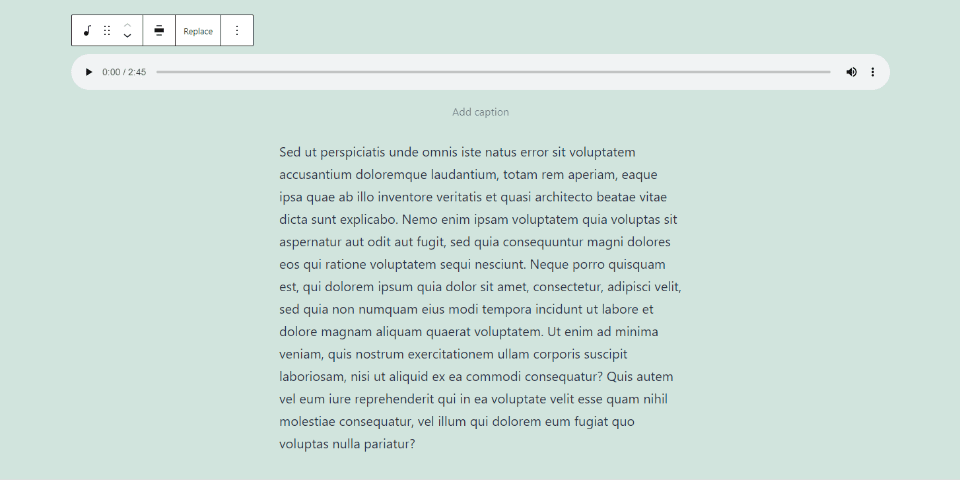
This is the Wide Width, which takes most of the width of the screen.
Replace
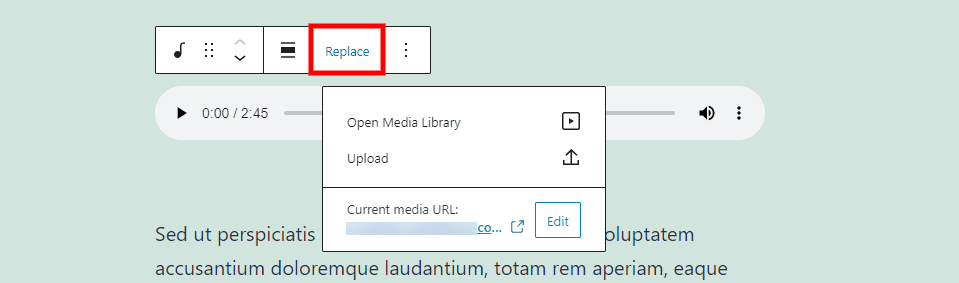
This option lets you replace the audio file without deleting the block. Open the library, upload a file, or input the URL of the file.
Options
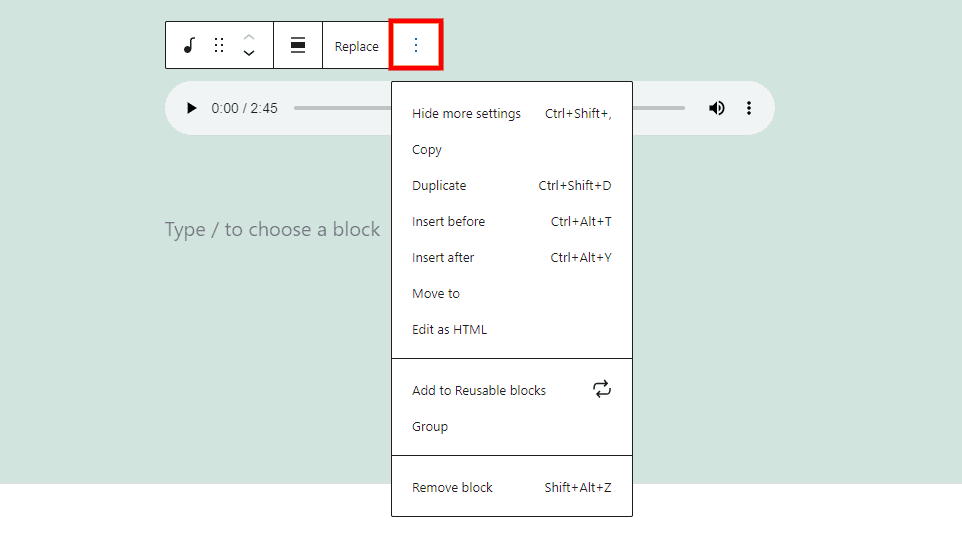
The Option includes the standard settings found in most WordPress blocks:
Hide More Settings – this hides the right sidebar.
Copy – this copies the block so you can paste it somewhere else within your content.
Duplicate – this adds a duplicate of the block under the original.
Insert Before – this places a space for a block before the block.
Insert After – this places a space for a block after the block.
Move To – this lets you move the block using a blue line to choose its placement.
Edit as HTML – this switches the block to the code editor view so you can edit the HTML without changing the rest of the blocks.
Add to Reusable Blocks – this adds the block to your list of reusable blocks.
Group – this adds the block to a group so you can adjust them as a single unit.
Remove Block – this deletes the block.
Caption
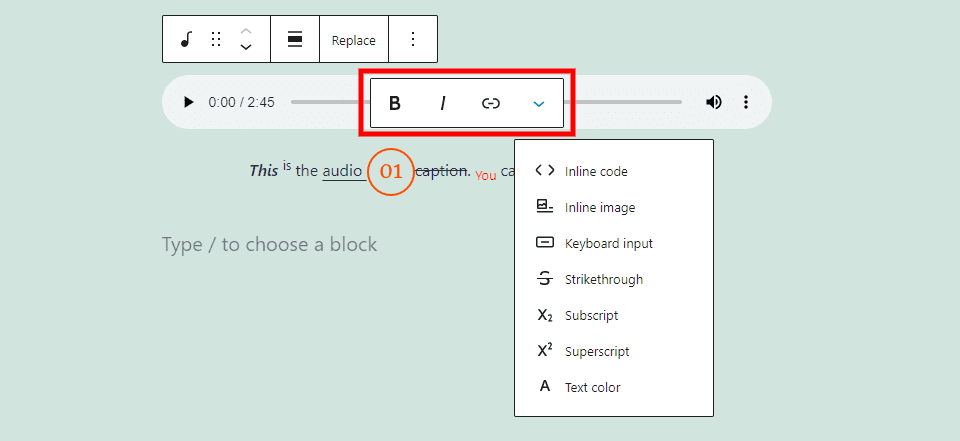
The caption has another set of options that includes settings for bold and italic text, links, and more options. I’ve used many of them in this example. They affect the text you’re highlighting.
The bold and italic options can be used together or independently. I’ve added bold and italic to the word “This” in the example above.
For the link, you’ll see suggestions from those you’ve used before. It includes an option to open the link in a new tab. I’ve added a link to the word “audio” in the example above.
Clicking More Options has settings to style the text. They all affect the text you’re highlighting. I’ve used several of them in the example above. They include:
Inline Code – this styles the text to look like code.
Inline image – this adds an inline image from your media library, as I’ve done between the words “audio” and “caption”.
Keyboard Input –this styles the text with keyboard HTML formatting that your browser uses.
Strikethrough – this places a line through the text, like the word “caption” in the example above.
Subscript – this makes the text lower and smaller than the rest, like the word “You” in the example above.
Superscript – this makes the text higher and smaller than the rest.
Text Color – this opens color tools to change the color of the text, as I’ve done with the word “you” in the example above. Choose from pre-selected colors or create a custom color. For custom colors, you can use the color picker or enter the hex code, RGB code, or HSL code.
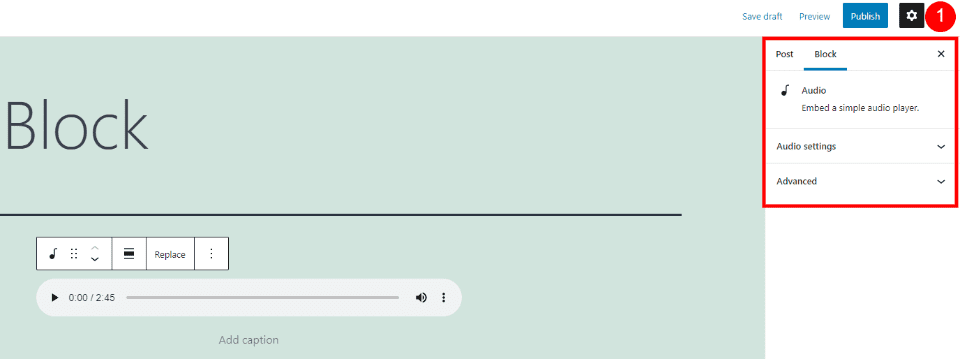
The sidebar settings add audio settings and advanced settings. Select the gear to open the settings if the sidebar isn’t showing. Select the block to see the settings for this specific block. Let’s look closer at the settings.
Audio Settings
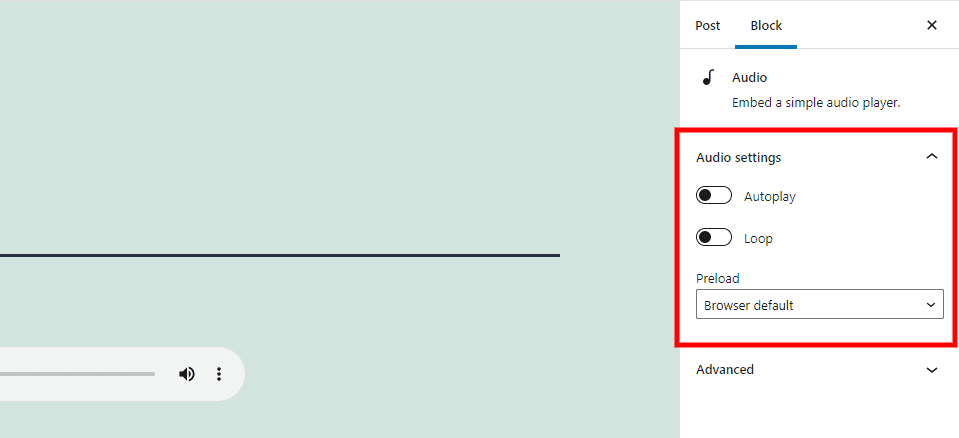
Audio Settings lets you choose how the audio player handles the file. Setting it to autoplay will start the file when the page loads. Setting it to loop makes the file start over when it reaches the end of the file.
You can also choose how the preload works. This determines how much of the file is downloaded when the page loads into the user’s browser. Options include:
Auto – this downloads the entire audio file even if the user doesn’t click to play it.
Metadata – this downloads the text only, which is the basic information about the file. The audio file itself doesn’t download unless the user selects to play the file.
None – no information or data is downloaded automatically.
Advanced
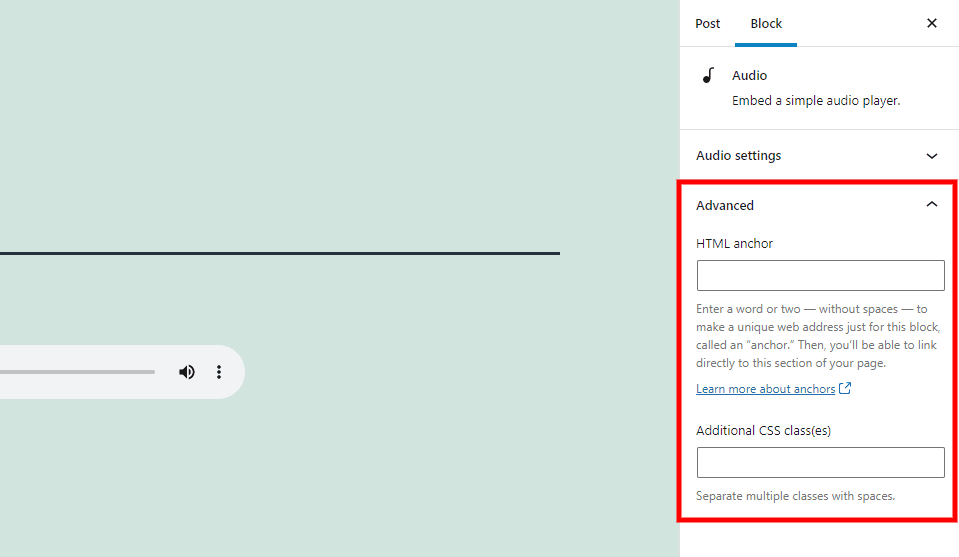
The Advanced settings include fields for the HTML anchor and Additional CSS classes. The HTML anchor is a URL that allows you to link directly to the block. The Additional CSS classes field lets you add CSS classes to style the block.
Tips and Best Practices for Using the Audio Block Effectively
Use the caption to show the name of the audio file.
Use clear headings and paragraphs to describe the files. This informs the user of what to expect.
Set the preload to none or metadata to speed up the page loading for any block that doesn’t need autoplay.
Use autoplay and loop for product CTAs. Disable autoplay and loop for other Audio Blocks on the page.
Choose Group to style the background of the audio player.
Use this block to embed audio into your pages and posts.
Use an Embed Block with the file’s URL if you don’t want to include a download button.
Frequently Asked Questions about the Audio Block
What does the Audio Block do?
It adds an audio player to your website that allows users to play or download an audio file.
What’s the advantage of using the Audio Block?
It creates a player, so users are made aware that an audio file is available for them to listen to.
Can it be transformed into other blocks?
Yes. It can also be transformed into a File Block, columns, or a group. The File Block lets users download the file rather than play it through their browsers.
Can other blocks be used for audio files?
Yes. You can paste the URL into an Embed Block, but it doesn’t have the audio settings that the Audio Block has. It will give you’re an audio player on the front end, but it isn’t as elegant as the one supplied by this block. The embedded version includes the time on the tracking bar, but it doesn’t include a download option or a caption.
What are the best uses for this block?
This block can be used for music, audio tracks, album samples, podcasts, sermons, audio courses, audiobooks, etc.
What file types can the block use?
The Audio Block is compatible with .mp3, .m4a, .ogg, and .wav files. The player looks and works the same with each of the file types.
Conclusion
That’s our look at the WordPress Audio Block. It’s a simple block with a few settings. You have control over its location within your content and how it works within your visitor’s browsers. This block is an excellent choice for any type of audio file that’s compatible with WordPress.
We want to hear from you. Do you use the Audio Block? Let us know what you think about it in the comments.
Featured Image via everything bagel / shutterstock.com


This is perfect for sharing podcast-type content. And if you have a YouTube channel with tutorials you can export the audio and share it on the blog.
Great contribution!