
Managing a WordPress website is akin to spinning plates. Updates, comment management, post scheduling – WordPress as a platform helps you along and makes it all simple, but it still takes time.
That’s where the WordPress Command Line Interface (WP-CLI) comes in. This versatile tool enables you to handle your entire WordPress site, right from your server’s command line. It’s both efficient and developer friendly. In this article, we’ll introduce the plugin, show you how to install it, and offer up how to use several of its most useful commands.
Introducing the WordPress Command Line Interface

The WordPress Command Line Interface is a deceptively simple tool that simplifies the process of interacting with WordPress. While a lot of people might consider using a command line intimidating, the WP-CLI keeps the whole process simple. It includes commands for most of the WordPress the tasks you’ll encounter day to day, and dozens of parameters to fine tune them if necessary. Becoming a WP-CLI expert may take a while, but learning the basics is a walk in the park.
You don’t need to be a developer to get the most out of it either. As far as we’re concerned, WP-CLI is all about efficiency, and you don’t need to know a programming language to appreciate that. If you’re tired of jumping between dashboard tabs to manage your WordPress sites, you definitely should take a look at the WP-CLI.
Key Features:
- Lets you interact with your WordPress installation from the command line.
- Enables you to install WordPress from scratch if you haven’t done so already.
- Provides theme and plugin management options, including installation, activation, and updates.
- Supports WordPress Multisite.
How to Install and use the WordPress Command Line Interface (in 3 Steps)
As always, you should backup your WordPress site in its entirety before testing any tool that could impact its performance. The WP-CLI does exactly what you instruct it to do, but there’s a small chance you might run into a problem if you use commands haphazardly.
You’ll also be glad to know the WP-CLI works flawlessly with Divi. Since it’s not a plugin per se and more of a system-wide tool, you don’t need to worry about compatibility issues.
Let’s take a look at the steps, starting with the installation.
1. Install and Activate the WordPress Command Line Interface
Before we can run our WordPress setup from the command line, we need to make sure that our hosting environment meets WP-CLI’s requirements. These are the four boxes you’ll need to check if you want to install the tool:
- A UNIX environment.
- Version 5.3.29 of PHP or later.
- WordPress 3.7 or greater.
- Secure Shell (SSH) access to your hosting environment.
The first three requirements are easy to meet. Most hosting setups are based on UNIX environments, and you can always update your versions of PHP and WordPress. All that’s left is SSH access. If you’re unfamiliar with the term, SSH access essentially enables you to login remotely and execute tasks over the command line. It’s a must for running WP-CLI.
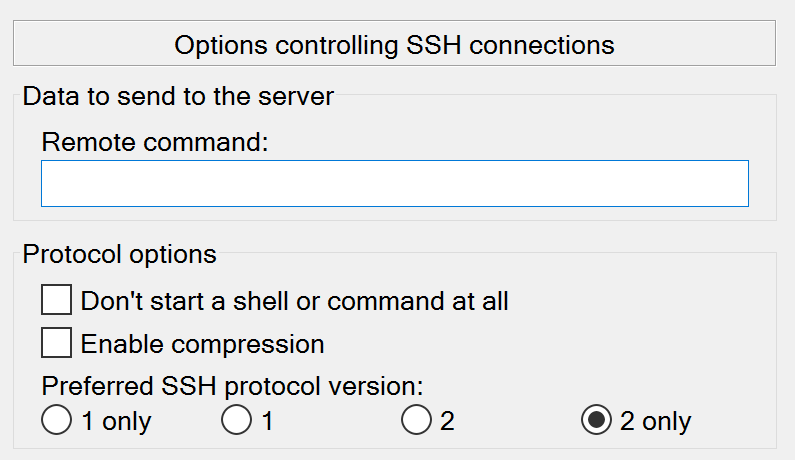
Most web hosts don’t provide SSH access to shared or managed hosting users for security reasons – you can always find out if yours does by checking the details of your plan or contacting support. However, in most cases, if you need SSH access, you’ll have to use a Virtual Private Server (VPS). If you’re using a UNIX-based system (such as Mac), you can use SSH to connect to a remote server using your native command line. Windows users, on the other hand, will need to download an SSH client, such as Putty:
Moving on, if you meet those four basic requirements, access your server’s command line via SSH and execute the following command:
curl -O https://raw.githubusercontent.com/wp-cli/builds/gh-pages/phar/wp-cli.phar
This will download the wp-cli.phar file to your root directory. Now we need to turn the file into an executable using this command:
chmod +x wp-cli.phar
Next, we’ll move the wp-cli.phar file to a new directory and call it wp. That way, we can call up the application by typing those two letters (wp) into our command line.
sudo mv wp-cli.phar /usr/local/bin/wp
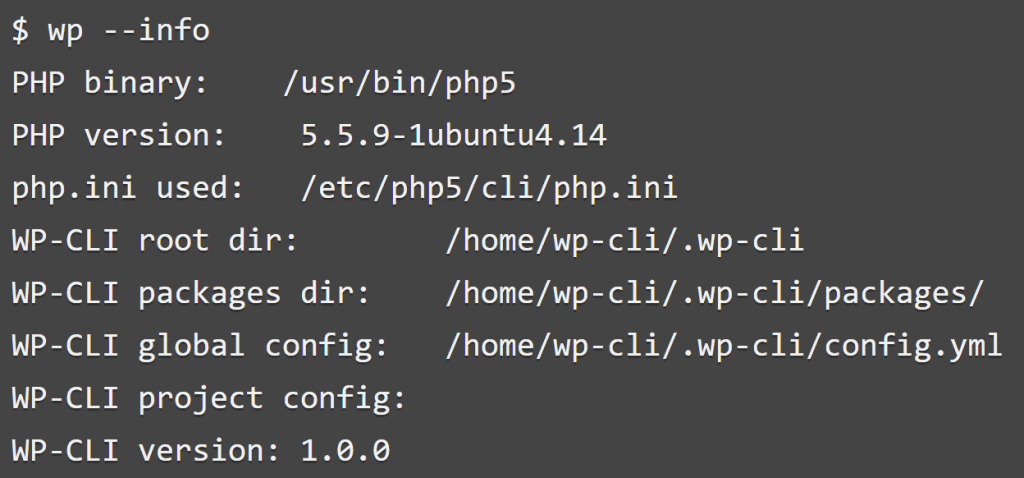
All that’s left now is to test our install to make sure it’s working properly using the wp –info command. If everything went well, it’ll return a message much like this:
Now that WP-CLI is set up and ready to go, it’s time we learned how to put it to use.
2. Manage Your Site Using the WordPress Command Line Interface
During the last section, we explained why we moved the WP-CLI install file to a different directory (i.e. in order to use the wp command). If you type wp into your command line now, you’ll receive an Error: The site you have requested is not installed. Run `wp core install` message.
The wp command enables us to interact directly with the WordPress installation on our server, but it’s useless until we get WordPress set up. Let’s do that right now.
How to Install (And Update) WordPress Using the WP-CLI
First things first. Before installing WordPress, we need to download it. Throughout this section, we’ll use the wp core command alongside a few subcommands (i.e. wp core version). Type the following into your command line:
wp core download
Wait for the Success: WordPress downloaded confirmation message. Next, we’ll use the wp core install command, alongside a few additional parameters. Take the full command below and enter your own information instead of the placeholders found throughout:
wp core install --url="your_domain" --title="Blog Title" --admin_user="admin username" --admin_password="enter_your_password" --admin_email="enter_your_email"
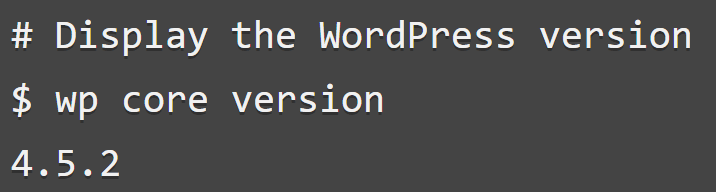
Next, let’s test whether our install went well. If so, using the wp core version command should return a single line indicating which version of WordPress we’re running:
You can update your version of WordPress to the latest release at any time using the following command:
wp core update
Finally, if you need to revert your update for any reason, WP-CLI enables you to do so using the force parameter on the update command:
wp core update --version=4.6 --force
In the example above, we’re forcing WordPress to revert back to a specific release. The same works if you’re updating from a previous version, in which case you won’t need to use the force parameter.
How to Manage Themes Using the WP-CLI
Installing and activating themes via the WP-CLI is remarkably easy. In fact, you can use a single command to do both:
wp theme install twentysixteen --activate
As you can see, we’ve used the theme install command with the added activate parameter. If you don’t want to activate a theme at once, or are just downloading it for future use, this parameter isn’t necessary. You can always activate a downloaded theme afterward using this command…
wp theme activate twentysixteen
…which will return a success message if all has gone correctly. Updating themes is just as simple as installing them, and you can use either of the following commands:
wp theme update twentysixteen
wp theme update --all
The difference between both commands is evident. One only updates a single specified theme, whereas the second updates them all thanks to the added parameter. If you want to check which themes would update before using the all parameter, you can use this command:
wp theme update --all --dry-run
Doing so will return a list of which themes have updates available. That gives you the choice of either updating them individually or simultaneously.
How to Manage Plugins Using the WP-CLI
Let’s preface this section by stating that all the commands we’ve used for themes are also valid for plugins. All you need to do is replace the word theme for plugin in each of the commands we covered earlier for installing, activating, and updating them.
With that in mind, instead of rehashing the same commands, let’s explore two additional options – deactivating and deleting plugins.
Deactivating plugins (and themes) is an essential part of troubleshooting WordPress, which means that it’ll come in handy at some point. Here’s the command you need to use to do so:
wp plugin deactivate hello-dolly
You’ll receive a success message once they’re deactivated. You can name multiple plugins simultaneously, or just use the –all parameter to nuke them all.
The above also applies for deleting plugins, all we need to do is change deactivate to delete to do so:
wp plugin delete hello-dolly
3. Use the WP-CLI’s Help Command for Further Learning
We already covered several of the most critical commands you need to know to run your WordPress site using the WP-CLI, but there are still many more to learn. It would take page upon page to explain them all, so we’ll do you one better – we’ll tell you how to make the tool itself explain them to you.
The WP-CLI includes detailed documentation for each of its parameters, and you can access it using the help command:
wp help
Typing the above will return a list of all the available top-level commands for WP-CLI and their parameters. For example, here’s what the full list of commands for themes looks like:
wp theme [activate|path|delete|status|install|update]
If you want to learn what each of them does, all you have to do is expand upon the help command like so:
wp help theme install
Doing so will return an explanation of what the command does and its options, and it’s the same with any other command you come across. In fact, it’s entirely possible to learn how to use the WP-CLI tool without ever leaving the command line itself. However, if you prefer, you can always check out the tool’s official documentation online.
Conclusion
Managing a WordPress website takes time, even for experienced users. There are plenty of things you need to take care of, and it’s a continuous cycle of work. The WordPress Command Line Interface doesn’t reduce the work, but it can make you more efficient in dealing with it. Here are the steps you need to take to become a command line master:
- Make sure your environment meets the WP-CLI requirements.
- Install the tool and check it’s working correctly.
- Test out some of the commands we mentioned earlier.
Do you consider the WordPress Command Line Interface to be a gimmick or a timesaver? Subscribe and share your thoughts with us in the comments section below!
Article thumbnail image by Art Alex / shutterstock.com.


Thanks for this publication.
No problem. 🙂
Never knew anything about this really, since we were busy using plugin’s.
WordPress Command Line is bit long process. I think simple WordPress platform is quite simple to install and manage the plugins. Thank you
It’s definitely more complex than a simple install, but for those who are used to the command line, it could be ideal. 🙂
Agreed 🙂
Long and informative tutorial. Learn many things from the post about WordPress Command Line interface. Keep writing such post regularly.
Thanks for your kind words!
What I could really use would be a cookbook of some good examples of chaining commands together to do things you can’t do directly from the dashboard.
For example, find sites in a multisite installation that have a certain plugin activated, de-activating that plugin and activating a different one.
That’s a good idea, Tom. We’ll bear it in mind!
Nice share. WP-CLI is one of the hidden and most powerful tools that one could use to manage their WordPress based properties.
It’s not meant for the average user, though. A familiarity with the command line and a slight learning curve is required before using it efficiently.
Indeed, Adame. However, given its power, it’s definitely worth learning about in our opinion. Thanks for your comment. 🙂
I honestly don’t see any benefit here unless you’re running multiple sites on the same server. Having to install this for every site would be more of a hassle than setting up a site manually.
Not to mention having a login for every site to perform maintenance… I’ll stick with setting up sites manually and using ManageWP for simultaneous maintenance of multiple sites.
Of course, the WP-CLI isn’t going to be suited to every task – but it could be ideal for those in the situation you describe. 🙂
Although “support is limited” for Windows, I’ve use WP-CLI on my Windows 10 machine to automate the installation of development sites. It is a huge timesaver. It also works on a Mac.
Thanks for the insight, David!