

Probably every web designer out there has their own set of favorite Photoshop tricks up their sleeves. For good reason. Adobe’s powerful image-editing is a staple of the web design world. Very few programs out there can rival this excellent software and its wide range of features.
However, while most web designers know their way around Photoshop, there is always more that you can learn. After all, the program is not only powerful but also complex. Plus, new stuff is added via updates on a regular basis.
For that reason, it’s a good idea to continue exploring your favorite tool. To help you do so, in this article, we will look at some of the best Photoshop tricks out there. Stuff that can improve your workflow, make work and life easier, save time and help you design the best websites possible.
Are you ready to learn more about Photoshop? Then keep reading.
-
1
Photoshop Tricks to Turn You Into a Web Design Wizard
- 1.1 1. Streamline Your Workspace
- 1.2 2. Learn Keyboard Shortcuts
- 1.3 3. Group and Name Layers
- 1.4 4. Filter Layers
- 1.5 5. Create a Grid
- 1.6 6. Import Color Swatches
- 1.7 7. Save Custom Shapes
- 1.8 8. Switch Between Background and Foreground Colors
- 1.9 9. Change Opacity via Keyboard
- 1.10 10. Draw Straight Lines
- 1.11 11. Sample Color
- 1.12 12. Add to or Remove From Selection
- 1.13 13. Undo More Than One Step
- 1.14 14. Dynamically Change Your Brush Size
- 1.15 15. Save for Web
- 1.16 16. Open Images as Layers
- 1.17 17. Copy CSS Directly Out of Photoshop
- 1.18 18. Design for Several Devices and Orientations at Once
- 1.19 19. Use Automatic Processing for Repetitive Tasks
- 1.20 20. Preview on Device
- 2 What Are Your Favorite Photoshop Tricks?
Photoshop Tricks to Turn You Into a Web Design Wizard
The following tips range from beginner level to more complex material. Each of them is chosen to help you be the best web designer you can be.
1. Streamline Your Workspace
Let’s start with the basics. The first thing to do to improve your workflow is to set up Photoshop in a way that supports the way you use it. After all, work gets easier with a sharper tool.
For that reason, our first stop is Window > Workspace > Graphic and Web. Choosing this option will change the available tools to what you are most likely to use for web design.
After that, move on to Edit > Preferences. Here, one of the most important stops is Units & Rulers. Whichever measurement you pick here (most likely pixels), it will be the default for all documents to come.
(Quick hint: To change rulers for single documents, simply right click on them and choose your desired measurement unit.)
After that, go to Preferences > Performance > History & Cache and click on Web / UI Design.
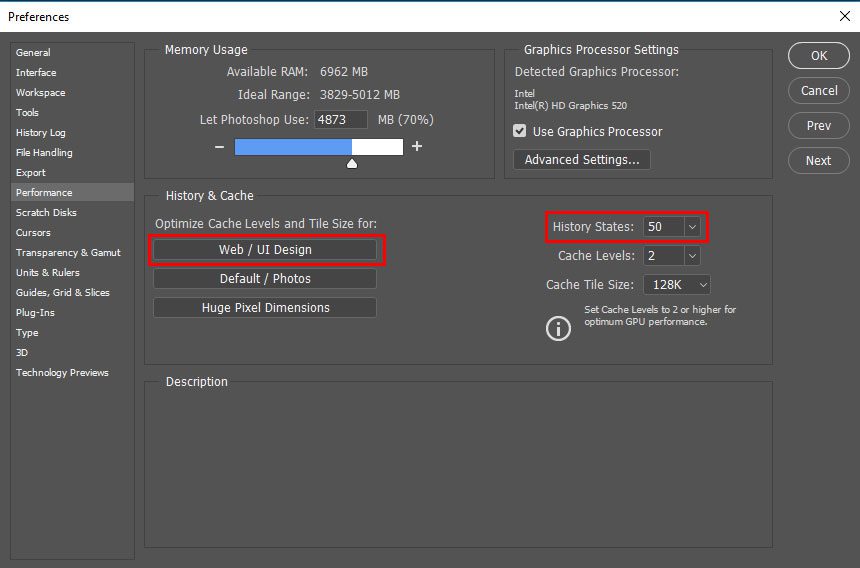
Doing so will change the cache settings to favor smaller files with lots of layers, which is what you will mostly work with.
In the same place, you can also pick the number of history states. That’s the amount of steps you can go back if you want to undo something.
Finally, exit the preferences, close all documents and press the T button on your keyboard. This will make the font menu appear at the top of the screen. Whatever you set here will from then on be standard for new documents. Because nobody really likes Myriad Pro that much.
2. Learn Keyboard Shortcuts
For any program that you use on a regular basis, learning the keyboard shortcuts is generally good advice.
For example, I use Ctrl+Alt+2/3 to create h2 and h3 headings while writing this post. It’s much faster than using the editor toolbar for it since I don’t have to take my hands off the keyboard.
The same is true for Photoshop. Knowing how to perform action with simple keystrokes is infinitely faster than clicking through the menus.
We will mention a bunch of keyboard shortcuts throughout this article. However, I also recommend this cheat sheet for learning the shortcuts to the most common Photoshop operations. Besides that, it’s also a good idea to make it a habit to look into keyboard shortcuts for things you do over and over again.
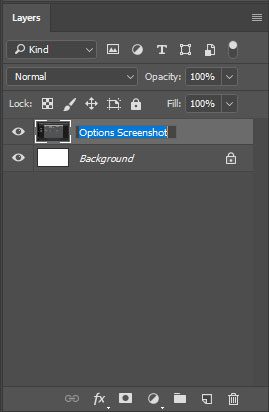
3. Group and Name Layers
When working with Photoshop, you will work with loads and loads of layers. Not only do get most element their own layer but modifications such as brightness/contrast are also added as layers.
For that reason, it can get confusing very quickly. Luckily, there are loads of options to make it less so, two of which are the ability to group and name layers.
First, by double clicking on any layer you are able to change its name to anything you like.
That way, you will easily understand whether a layer contains the background image, menu or sidebar.
Alternatively, you can also pick several layers at once, either by holding Ctrl to pick individual layers or Shift to mark a range of neighboring layers. Ctrl+G then turns them into a group.
Alternatively, right click the layers and choose the group option from there. Either way, your layers get a lot more organized. Plus, you can name the grouped layers, too!
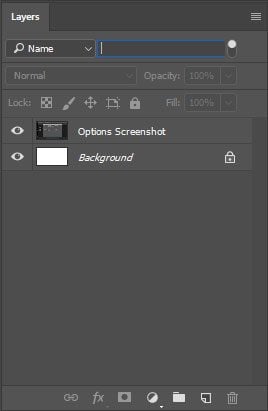
4. Filter Layers
Naming and grouping layers is a good start. However, when working with dozens or even hundreds of them, you can still get confused easily.
For those cases, you also have the option to filter your layers. To do so, simply use menu at the top of the Layers menu to filter by type, name, effect, color and more.
Alternatively, directly select a layer by using the Move tool, holding Ctrl and clicking on a layer or object.
5. Create a Grid
Image by PureSolution / shutterstock.com.
The grid is one of the most important principles in web design. It brings order to design and helps you place your objects. For that reason, it only makes sense to create a grid in Photoshop as well.
To do so, use View > New Guide Layout. Alternatively, create horizontal and vertical guides by simply clicking on a ruler and dragging into the document. Use Ctrl to move existing guides.
6. Import Color Swatches
You can load color swatches directly into Photoshop from HTML, CSS or SVG files. That way, you have a great starting point for your color scheme when working with existing assets such as a logo.
To take advantage of this Photoshop trick, just open the Swatches panel, click on the drop-down menu in the upper right corner and choose Load Swatches. Now navigate to the file in question and open it to import your new color swatch.
7. Save Custom Shapes
Especially when designing multiple pages for the same site or websites that have similar design, you will find yourself using the same objects and shapes over and over. For that reason, it makes sense to save them as custom shapes for quick reuse.
To do so, right click on the shape in question with the path selection tool (the black arrow). Then, choose Define Custom Shape. Once you have done so, you can access this shape through top bar options of the Custom Shape tool. Just click on the drop-down menu where it says Shape: and pick your saved shape.

8. Switch Between Background and Foreground Colors
Two switch back and forth between the background and foreground color without clicking on the icon, simply press X on your keyboard. Plus, if you want for the colors to go back to simple black and white, you can do so by pressing D.
9. Change Opacity via Keyboard
Another keyboard shortcut: For any tool that can change opacity, you can simply do so via the keyboard. The numbers 1 to 0 will set opacity to anything between 10% and 100%. The same thing also works with the opacity of layers.
10. Draw Straight Lines
To draw a straight line with any tool, simply hold down the Shift key. After that, you can draw a line (both horizontally and vertically) that will automatically be straight as a nail. Alternatively, click on two different points to create a straight line between them.
11. Sample Color
Next up in our bag of Photoshop tricks is the ability to sample any color. If you need the color from any object, hold the Alt button and click on the hue you desire. This works both with the Brush, Pencil, Paint Bucket and any other tools that uses colors.
12. Add to or Remove From Selection
You can add to an existing selection by holding shift and selecting the part you want to include. To subtract, do the same thing but with the Alt button.
13. Undo More Than One Step
The classic way to undo your last action is using Ctrl+Z. However, this only works for the very last thing you did. To go back several steps, use Ctrl+Alt+Z.
14. Dynamically Change Your Brush Size
To change your brush size, there’s no need to click on the drop-down menu and drag it to the right size. Instead, simply hold Alt and the right mouse button and then drag left and right to decrease and increase the size of your brush.
15. Save for Web
Using the Safe for Web function is essential, as it makes sure the image size is as small as possible. This is very important to improve site speed.
In Photoshop, you can do this via File > Export > Save for Web. However, a quicker way is to use Ctrl+Alt+Shift+S. You are welcome!
16. Open Images as Layers
Sometimes it’s necessary to import a large number of images into Photoshop at once. Yet, when you simply drag them onto your work space, you’ll be asked to place them manually.
A more practical way of doing so is File > Scripts > Load Files into Stack. Browse to the images in question, mark them and hit Ok twice. Now, each image will automatically be imported into its own layer.
17. Copy CSS Directly Out of Photoshop
One of the most comfortable Photoshop tricks for web designers is the fact that the program creates CSS that you can export. No need to type it all out by hand or use trial and error to implement it.
To take advantage of this, simply right click a layer and pick Copy CSS. Alternatively, use the Layer menu to find the same option. Now you have all the necessary styles to simply paste into your stylesheet or any other program you are using.
18. Design for Several Devices and Orientations at Once
Designing for the web nowadays means designing for a plethora of different devices. In times when mobile devices eclipse desktop computers everywhere in the world, implementing mobile design is a must.

Source: ComScore
Luckily, Photoshop has artboards and smart objects that make it very easy to scale your design to different formats.
I could describe both in detail here, however, Phlearn made an excellent tutorial on this that does a lot better job than I could ever do:
19. Use Automatic Processing for Repetitive Tasks
Another awesome Photoshop feature is automatic processing. It means you can repeat recorded tasks over and over again without having to perform them manually. This is super useful, for example if you need to save a lot of images for the web.
Here’s how it works. First, open your file. Then, open Actions (Alt+F9), find Create New Action and click it. Provide a name and, optionally, assign it a key combination and a color.
To record your actions, press Record. Then perform the operation that you want to repeat. In my case, I open an image from one folder and save it for web in another folder.
Once done, stop recording. Now you can reuse this action for all the other images, saving you heaps of time. For more information about what you can automate in Photoshop, check this article.
20. Preview on Device
Finally, along with Photoshop, Adobe also offers an app that lets you preview your work on several iOS devices. The best thing: You are able to observe changes on the device as you make them on the computer.
To do so, install the app and use Device Preview to connect Photoshop to an external device via USB or wifi. You find the option under Window > Device Preview.
What Are Your Favorite Photoshop Tricks?
Photoshop is one of the most used web design tools out there. Its powerful features make it perfect for designing high-quality websites and assets.
However, with great power also comes great complexity and especially for beginners, it can take some time to master the software.
To shorten the learning curve, above we have provided a number of useful Photoshop tricks for web designers. They make a lot of things easier from general workflow to automatic file processing.
Knowing Photoshop inside and out is a great investment in your bottom line. When you are able to do things quicker, you can take on more work, thus generate more revenue. And that can never be a bad thing.
What are some of your favorite Photoshop tricks? Please let us know in the comment section below so we can all help each other out.
Article thumbnail image by Creative Stall / shutterstock.com


I like the Video Tutorial and other tips you shared.
Great article. I already use some of these tips, but I also learned something new.
Glad to hear that, Andrej. Thanks for your comment!
My favourite Ps feature: You can name layers with a file extension like “mylayer.jpg8” and use Generator to automatically export that layer as a .jpg at 80% quality. This is the most time saving feature I have found in Ps (maybe except for super advanced actions). Not many people know about it so it seems like it’s a well hidden gem.
That’s a useful tip, Leif. Thanks a lot!
One of my favorite new Adobe Creative Cloud features — Libraries.
Window|Libraries if its not in your workspace. You can create libraries specific to project, client, etc… saving things like specific colors, image assets etc. They can be shared throughout the adobe suite…
Hey Gary, thanks for the comment. I heard about libraries but couldn’t include them in the post. Will definitely check them out for myself.
I would add: “Use smart objects” to this list(somehow covered on 18th point). Working on an older/weaker system will boost your speed dramatically using these objects.
Thanks for the input, Cornel! I didn’t know smart objects were good for older systems.
15. Save for Web – are people still using the save for web (legacy), or do you use the new export as? i think i prefer save for web (thats what im used to) but wondering what i may be missing if i dont use the export as feature which seems to be the replacement …
17. Copy CSS Directly Out of Photoshop…. i never knew this one was even possible!
The new Export As option is slow, glitchy and actually increases file size and there are limited options. I find it worthless in many cases and prefer the Legacy version. I don’t know why Adobe had to screw with something that’s not broke, but isn’t that what all developers do??
Hey Craig, I am personally still using the Save for Web feature and am always satisfied with the resulting file size. Also, glad to hear you found an unknown feature! Cheers, Nick
‘Export As’ is nice especially if you adopt the artboard concept. It allows you to export all your artboards as separate assets all at once.
Thanks for the clarification, Gary!
Hi Nick, Thanks for the post!
I use most of the tips you wrote about but did find a few new ones for me to add to my workflow, which will help a lot, awesome!
Hey Hurri, glad to hear you found something useful for yourself!
This post should have been named “20 Photoshop App Tweaks for Web Designers” — I thought I was going to get some Photoshop tips for visual effects in Divi…imagine my disappointment…just saying.
Can you guys elaborate on what kind of tips you were looking for? Maybe it would make a great topic for another article.
Hi Ed,
Same thing here. It would be great to see to see tips to accomplish tasks that are very common.
For example:
-Removing backgrounds
-Sampling different levels of overlays with different colours of text
-Creating subtle background images that leverage patterns to give sites more personality
…