
If you’re running a website with multiple contributors, it can be hard to track post changes in WordPress itself. This can become a problem if you’re trying to identify the source of an error, or keep tabs on your writers’ activity.
Finding a way to track post changes in WordPress enables you to keep logs of practically all of the activity for your posts and pages. For this article, we’ll talk about why this functionality can help you and how to implement it in three simple steps. Let’s get to it!
Why You Might Want to Track Post Changes In WordPress
Ideally, you’d be able to keep detailed tabs on your users and their actions on your website. WordPress partly enables you to do this, but the details are often sparse, and you can’t quickly sort through the information. Here’s how a more robust logging functionality can help you:
- You can track changes to any posts on your website. A good logging solution will track new posts, edits, deleted articles, and more.
- They can help you troubleshoot errors. Sometimes updating plugins and themes can cause errors on your site, and if you log when this happens, it can help you identify the source.
- It can strengthen your security. Some tracking tools also take note when someone tries to log into your website, and record their IP. This is a good way to spot brute force attacks before they get through.
As far as we’re concerned, any website can benefit from keeping detailed activity logs. However, if multiple people have access to your dashboard, that makes your site an even better candidate. Keeping track of who does what without a dedicated tool can be next to impossible, so it makes sense to find an option that enables you to do so.
Introducing the Simple History Plugin
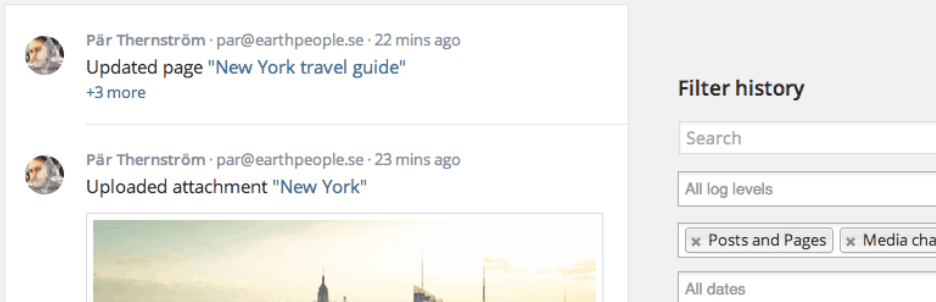
The Simple History plugin does a lot more than just enable you to track post changes in WordPress. It sets up a log of events on your dashboard’s home page that tracks new posts, displays changes to existing ones, and notifies you when content is deleted.
In addition, the plugin also notes when new attachments are uploaded, along with when taxonomies are modified, a comment is made, a widget is added, themes and plugins are installed, and more. In short, it enables you to log almost every event that takes place on your website. Plus, it enables you to sort through them using multiple criteria, meaning you don’t have to go through dozens of pages to find the information you want.
The best part is, the plugin is completely agnostic. It doesn’t care what theme or other plugins you’re running – it just keeps track of all the events that happen on your site, and it also works perfectly alongside the Divi theme.
Key Features:
- Log everything that happens on your site, including post changes.
- Keep track of which users are involved in each event.
- Sort and search through your logs using multiple criteria.
- View your logs from your dashboard or through an RSS feed.
- Export your logs as either JavaScript Object Notation (JSON) or Comma Separated Values (CSV) files.
Price: Free | More Information
How to Track Post Changes by Adding a History Feature to WordPress (In 3 Steps)
Before we go any further, you’ll want to install and activate the Simple History plugin. When you’re ready, move on to step number one.
Step #1: Configure the Plugin
One of the great things about this plugin is there aren’t a lot of complicated settings (hence its name). After activating it, you can find a new Simple History tab under Settings on your WordPress dashboard. From this tab, you can choose whether to display your logs as a widget, or give them their own page under your Dashboard tab:

We prefer the latter, but you could enable both options at once. Further down, you can choose how many events you want your logs to display per page:

You can also clear your logs manually by clicking on the Clear log now button. This can be useful for privacy purposes, but keep in mind that logs are automatically deleted every 60 days. Finally, you can tick the Enable RSS Feed option at the end of the section if you want to view your logs using a dedicated reader:

If you enable that option, the page will display a link to your log’s RSS feed once you save your changes. The plugin also includes an option to generate a different address for your feed if you think the original has been compromised. After all, you don’t want anyone to just waltz in and take a look at your site’s logs.
Step #2: Access Your History Logs and Sort Through Them
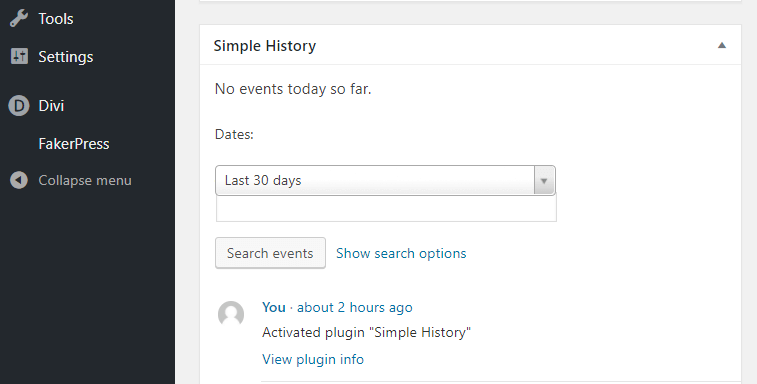
There are two ways to access your logs, depending on the settings you chose during the first step. By default, Simple History creates a widget under its own name in the Dashboard > Home tab:
The same log is also accessible if you go to Dashboard > Simple History, only in this case, you get a full page layout instead of a widget:
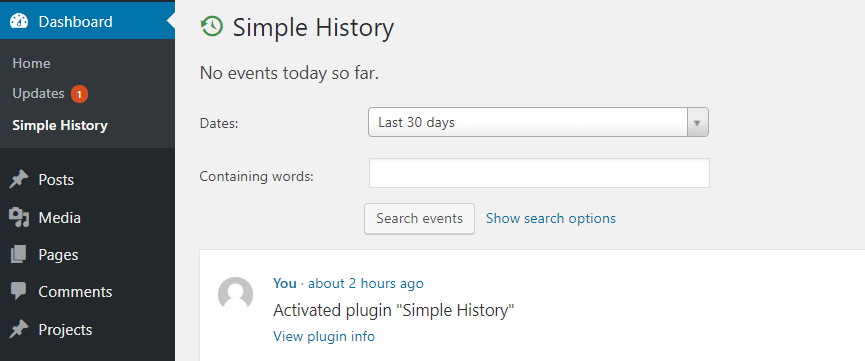
Fortunately, the functionality for both logs remains the same, so you can use either one you want. You’ll also notice there’s a search bar above your logs, which enables you to look for events that include specific words during a period of time:

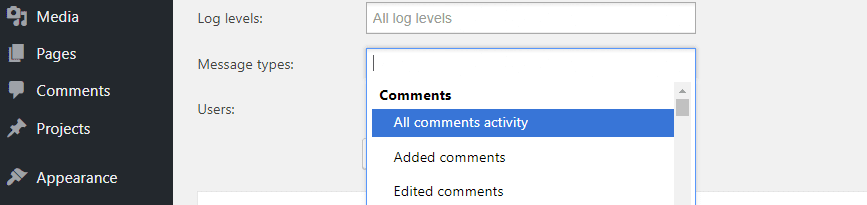
If you click on the Show search options link, you’ll also be able to look for specific types of events. Simply click on either Log Levels or Message Types, and choose the type of events you want to see:
Finally, you can also look for all of the actions particular users have taken. In this case, you’ll need to enter their usernames in the Users: field manually, instead of choosing from a list. When you’re ready to start your search, just click on the Search events button and get to work on finding the information you want.
Step #3: Learn How to Export Your History Logs as JSON or CSV Files (Optional)
As we mentioned earlier, the Simple History plugin automatically deletes your logs every 60 days. If you want to store them permanently, they can be exported as JSON or CSV files. To do this, go to Settings > Simple History and look for the Export tab:
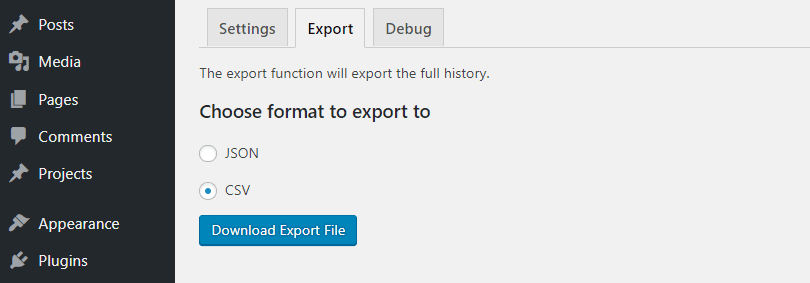
Once you’re in, choose the format you want to export your logs in, and click on the Download Export File button. We’d recommend selecting CSV files, since you’re more likely to have spreadsheet software on your computer you can use to open them, but your mileage may vary.
Conclusion
Using the right tool, you’ll not only be able to track post changes in WordPress – you’ll also get the ability to log practically all activity on your site. This gives you an easy way to see what’s happening on your website, at a glance. It’s perfect for monitoring your users’ actions, and logging changes to your posts and pages.
To set it up, just install and activate the Simple History plugin and follow these three steps:
- Configure the plugin.
- Access your history logs and sort through them.
- Learn how to export your history logs as JSON and CSV files.
Do you have any questions about how to track post changes in WordPress? Ask away in the comments section below!
Article thumbnail image by Dim Tik / shutterstock.com.


Hi,
Thanks much for the information. Simple History makes it easier to add a filter on the results.
Hi Jenny, you’re welcome! Thanks for your input. 🙂
Thanks so much! This plugin is just what we needed, and I’ve installed it on a website I manage.
You’re welcome, Kara! We’re glad this plugin worked out so well for you. 🙂
Just tried this plugin and it causes an Error 500 when I try to edit a page with the Divi Builder. Using WP 4.8.2 and Divi 3.0.76.
Hi Mike! Sorry to hear you’re having problems. It’s hard to say what the issue is without more details about your setup and what you’re trying to do. We’d suggest creating a post in the forums (https://www.elegantthemes.com/forum/) explaining what’s happening, and another user might be able to help.
you provide me such a great information
Nice article. I like the rss-option on Simple History, I might give it a try, although I’m happy with WP Security Audit Log. Looks like they are offering pretty much the same options. Perhaps Simple History makes it easier to add a filter on the results.
As sites get more complex, which might happen because of things like: more authors, more posts, more re-design, more plugins, the addition of shopping carts, more transactions, more attacks, etc. the need for backups amplifies and the usefulness of logs also increases.
With added complexity the need for monitoring, testing and staging become amplified and frankly essential. A logging plugin and access to good server logs can be a great timesaver along with a good backup strategy so that you can recover from mistakes, conflicts, corruption and attacks. We use a different plugin and we will try this one out to see if it meets our needs.
Hi Edie, thanks for your comment! You make some good points. The more complex your site is and the more pieces that have been added to it, the greater your need will likely be for logging and other security tools.