
Typography is an oft-discussed element of your website’s design that is well worth your attention. The right font can make or break a design, but finding it can be difficult. There are plenty of free and premium fonts to choose from, but you’ll often need to dig through them to find a gem.
Adobe Typekit enables you to skip some of this process thanks to their massive compilation of high-quality typefaces. In this article, we’ll go over the reasons why it makes sense to add custom fonts to WordPress in general. Then, we’ll discuss what Typekit is, how to publish a ‘font kit’, then finally how to add it to WordPress.
Why You Should Add Custom Fonts on Your WordPress Website
Custom (or ‘non-system’) fonts are typefaces that don’t ship with our computers by default. WordPress only supports system fonts out of the box (think Times New Roman and Arial), but there are plenty of other font choices available to choose from.
Adding custom fonts to your site isn’t strictly necessary, but it is an excellent way to differentiate your site from your competitors. The right font in the right role will enable your content to stand out and catch the attention of your readers. Furthermore, using custom fonts can help you enhance the style of your WordPress themes far beyond what the default typefaces offer.
If budget is an issue, the web is chock-full of free fonts, and setting them up in WordPress is easy. While Divi includes a plethora of fonts as standard, it will also play nicely with any additional typefaces you choose to add. What’s more, adding new font options takes a matter of minutes.
Now, let’s find out more about one of the best places to find fonts online – Typekit.
What Typekit Fonts Are (And Why You Should Use Them)
Typekit is a service by Adobe, where it partners with some of the best typeface foundries in the world to bring you a plethora of high-quality fonts.
The subscription-based platform also comes with a free tier, which enables you to access a limited number of fonts, as well as the option to purchase them individually. In contrast, full members can use any of the fonts from the Typekit library, including popular options such as Fira Sans and Acumin.
Using a subscription service to gain access to fonts may seem like an unnecessary expense, but it can be well worth it if you’re a designer. For starters, searching for the right font on the web can be a gigantic timesink if you’re unsure where to look. Typekit simplifies the process by providing you with direct access to a gigantic library of high-quality options.
What’s more, you can always test the service for free before committing to find out if it’s a good fit for you. For now, let’s discuss how the service works, and how to add its fonts to WordPress.
How to Create and Publish a ‘Font Kit’ on Typekit
In order to use any custom font on your WordPress website, you’ll need to load it first – and the same applies to Typekit fonts. However before that, you’ll have to sign up to the service. When you’re asked which type of account you wish to open, we recommend sticking with the free option until you’ve decided it’s something you wish to pay for.
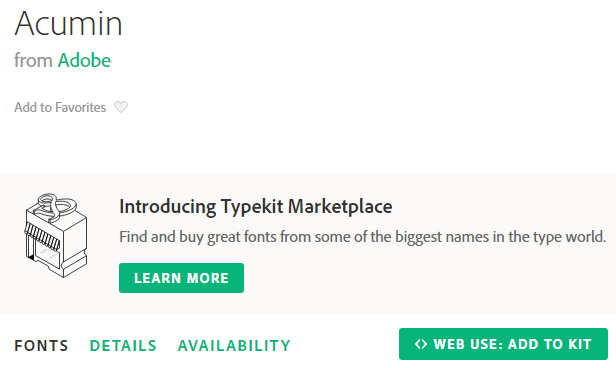
Once you’re signed up and you can begin to create a font kit – a handpicked collection of fonts – for your use. Simply browse through the library until you find an option that suits you, click on it, then choose the <> Web Use: Add to Kit option:
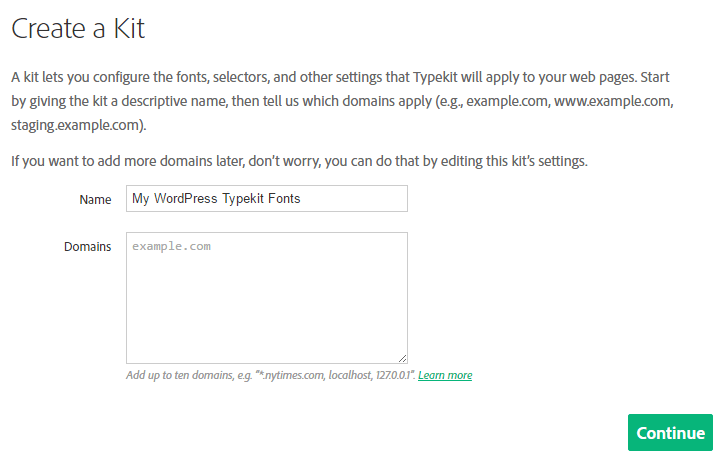
The first time you do this, the platform will ask you to pick a name for your kit and specify which domains will use it:
From here, you’ll be provided with an embeddable JavaScript code, which is how you add Typekit fonts to your WordPress website. Feel free to jot down that code now – you’ll need it later.
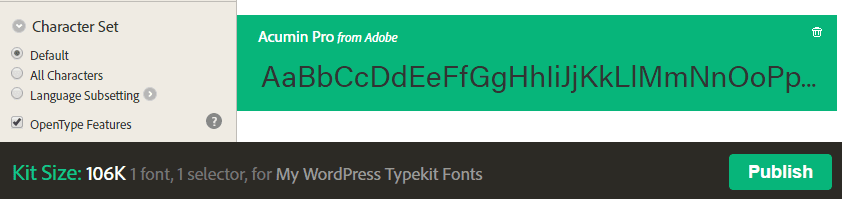
After saving the code, click on Continue and you’ll be sent to the Typekit dashboard. This will display all your kit’s fonts, and within each kit you can choose from a number of different font weights and styles depending on your selection:
Furthermore, you can also configure a ‘fallback font’. This typeface will only appear if one of your visitors is using a browser that doesn’t support the @font-face rule, and the default is set to Sans Serif.
In the next section, we’ll cover how to use your kit in WordPress. However, before proceeding, make sure you’ve added all the fonts you want to use, then click the green Publish on your dashboard. This will propagate the changes to any websites that are using the kit.
How to Add Typekit Fonts to WordPress (In 2 Ways)
There are two ways to add Typekit fonts to WordPress, and both of them require the JavaScript code you copied earlier. If you need to find it again, simply access your font kit’s dashboard, and look for the Embed Code link on the top right-hand side of the page.
Once you have it, you’ll need to follow one of the two methods below.
1. Use the Typekit Fonts to WordPress Plugin
The simplest way to add your Typekit fonts to WordPress is to use this plugin. This tool is particularly straightforward, but it does come with several useful features, such as compatibility with WordPress Multisite, and support for custom CSS rules.
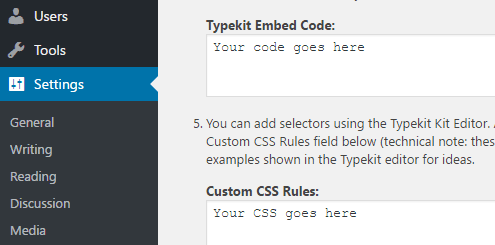
After installing and activating the plugin, a new Typekit Fonts option will appear under Settings on your WordPress dashboard. Clicking here presents you with a new section where you can paste in your kit’s embed code, and also add custom CSS rules to display your fonts:
In order for your fonts to appear on your website, you’ll need to set up specific rules using CSS, normally using the font-family and heading tags. Here’s an example where we set our H2 headings to display using a Typekit font:
h2 { font-family: "proxima-nova-1"; }
Once your rules are set up, click Save Changes and check that your new fonts display on the front end of your website.
2. Add the Typekit Embed Code to Your header.php File
If you don’t want to install another plugin on your site, you can always add your Typekit fonts to WordPress manually. To do so, you’ll need to modify your active theme’s header.php file. Of course, before you tinker with WordPress’ core files, make sure you’re using a child theme (in order to preserve your changes when your theme is updated), and back up your site in case the worst happens.
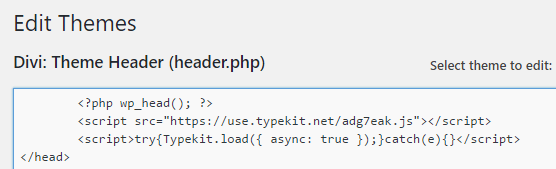
The easiest way to modify your header.php file involves going into the WordPress Appearance tab and choosing the Editor option. Once inside, locate your header.php file under the Templates section, then select the file and look for the <head> tags. Place your Typekit embed code between them, then save your changes:
You could also achieve the same result by accessing your site via FTP, locating your theme’s folder, and modifying its header.php file using a dedicated text editor (such as Atom).
In any case, you’ll also need to edit your style.css file to specify when and how your new fonts should be displayed. The method for doing so follows the same path as editing your header.php file, along with the CSS code guidelines outlined in the previous section.
Conclusion
Finding the perfect font for your designs can be like looking for a needle in a haystack. However, it doesn’t have to be. While there are plenty of resources for choosing the right font, Typekit is a fine option for adding high-quality fonts to your website. It’s essentially a proverbial box of needles sitting in your drawer – far away from the hay, and easily accessible for enhancing your site’s design.
What’s more, adding Typekit fonts to WordPress is remarkably easy – and you can do it in two ways:
- Use the Typekit Fonts to WordPress plugin.
- Add Typekit’s embed code to your WordPress header.php file.
What do you think makes Typekit stand out among other font repositories? Subscribe and share your thoughts with us in the comments section below!
Article thumbnail image by howcolour / shutterstock.com


This post is out dated for Divi5 beta
It is not working with the plugin, pls help.
Also more Images as example and more what where etc is very welcome.
Best regards Jessica
I see that this post hasn’t had much activity recently. But has Divi considered add Typekit fonts to Divi text module settings?
This post says updated March 10, 2023, but the method described above to install TypeKit (now called Adobe Fonts) fonts is completely outdated. For example, you can only copy the CSS code (there is no way to access the JavaScript code).
This post left me at a loss as to how to install Adobe Fonts on my Divi site.
Right. This bears no resemblance with the process I am going through. I get a link “stylesheet” and a href to a .css file, and then css code, “font-family…” — do I need to go into the html of the pages individually to implement this?
Agreed. Also, the plugin mentioned “Typekit Fonts for WordPress” was last updated 5 years ago—time to update or pull this post.
Is there a way to integrate TypeKit fonts into WordPress such that they can appear in the list of available fonts in the Divi theme UI?
A blog post on that would be supremely appreciated! ???
Hi Al! There may be a way to do that; try posting in the forums (https://www.elegantthemes.com/forum/) to see if another user has some advice.
Great! Useful! Thank you!
You’re welcome, Jordan. I’m glad you found the post helpful. 🙂
Thank you. I will try this!
You’re welcome. 🙂 Good luck!
Great article John. Thanks for sharing. This let others have an option whether to use readily available fonts or find better one using Typekits fonts.
I should try this soon.
Hi Rod! Thanks for your comment. 🙂
Thanks
You’re welcome. 🙂
Is there any posts available on a child theme, how to create and install one?
Hi Monica! Check out this post: https://www.elegantthemes.com/blog/resources/wordpress-child-theme-tutorial.
I use the Plugin “One Click Child Theme”, which creates a childtheme for you.
ET has a search function on their Blog page, although a bit hard to see where it is. Blog page – under the heading in light grey. …this is what I found for you 🙂
https://www.elegantthemes.com/blog/resources/wordpress-child-theme-tutorial
I use and recommend Font I Want by Openmarco, that provide also FontSquirrell without having to incorporate any script. Alberto.
Hi Alberto. Thanks for the suggestion. 🙂
I have yet to try this, but I have been thinking about the best ways to implement things like TypeKit to my sites. Thanks for the great tutorial, I believe it will be very helpful for many people!
You’re welcome, Jacob. Thanks for your comment 🙂
Great post John, really useful and I will certainly use TypeKit on my next project… many thanks…
Thanks Carl! Good luck. 🙂