Admittedly, online maps are rather straightforward. If you use a service such as Google Maps, you simply pick a location and embed the map onto your website. However, you can’t edit regular maps on the fly, and neither can your coworkers – which is often necessary for collaborative projects.
That’s where interactive maps come in. They let you place movable markers everyone on your team can edit. In this article, we’ll talk about when this type of map comes in handy. Plus, we’ll teach you two ways to add them to WordPress.
Let’s get to work!
What Interactive Maps Are (And When to Use Them)
Adding a map to a website is simple enough. Tools such as Google Maps or Divi’s Map module let you embed maps into your pages in a matter of minutes. The advantage of this approach is that visitors can move around maps, zoom in, and out, and more. These types of maps are more interactive than simple images, but they don’t enable you to make changes once you’ve added them to your website.
Interactive maps, on the other hand, enable you (and in some cases your coworkers) to add new markers, icons, text, and more to them. Imagine, for example, you’re planning a meetup for members of your website. You could set up a map with multiple pins to suggest locations.
You could also use an interactive map for your users to share their locations, or point each other toward places they might want to visit. To be fair, these are pretty niche applications. However, interactive maps can come in handy across a wide variety of situations. Plus, they’re not necessarily more difficult to add than their regular counterparts.
How to Add Interactive Maps to Your WordPress Website (In 2 Ways)
When it comes to interactive maps, you can either embed one into your website or use a plugin to help you do it. The former approach is simpler, but plugins often pack a lot more features, as you might expect. Let’s go over the plugin approach first to showcase what those features are. We’ll go through using Maps Marker Pro but there are several other excellent choices of interactive map plugins to choose from.
1. Use the Maps Marker Pro Plugin
The Maps Marker Pro plugin is a one-stop premium solution for including maps in WordPress. It includes dozens of advanced features, such as enabling you to pull maps from multiple services, and adding a practically unlimited number of markers to your maps and classifying them. Plus, visitors can filter the types of markers they want to see on your maps.
Other fun stuff you can do using the plugin includes adding distance and route information between markers. You can even share your own location in real-time through your website’s map if you’re inclined to do so. Configuring the plugin can take a little time, considering the wealth of features it offers. However, it’s not as difficult as you might imagine.
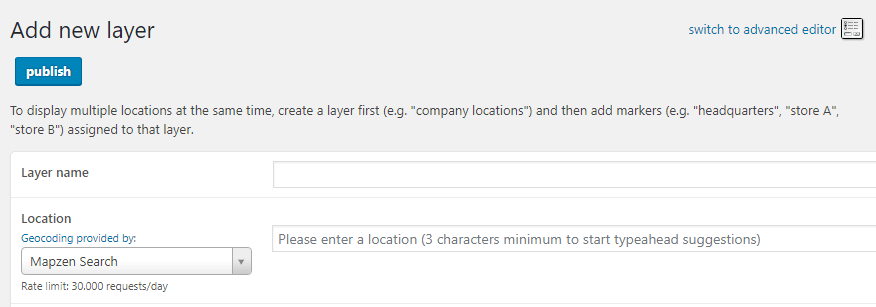
To get started, set up and activate the plugin as you would any other. Once the plugin is ready to go, you’ll need to add a new map or ‘layer’, which you can do from the Maps Marker Pro > Add new layer tab. Here, set a name you can recognize for your layer and enter the location you want it to display, just as you would with any other online map tool:
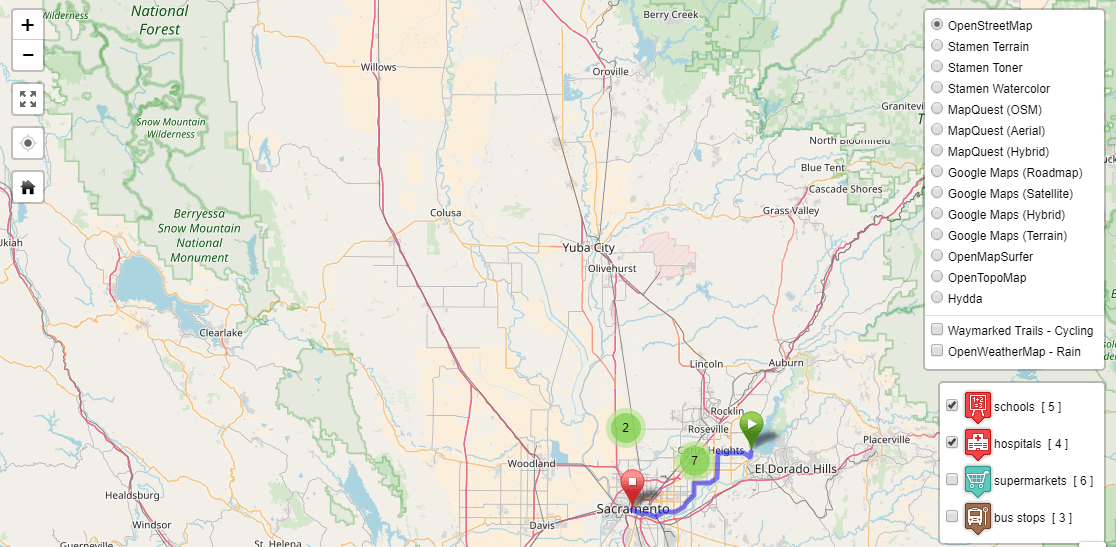
Now, you can finetune the size and zoom level you want to set by default, using the left-hand menu. There’s also an option called Marker clustering, which will show an icon with the number of markers in an area if you zoom too far out, as in the example below:

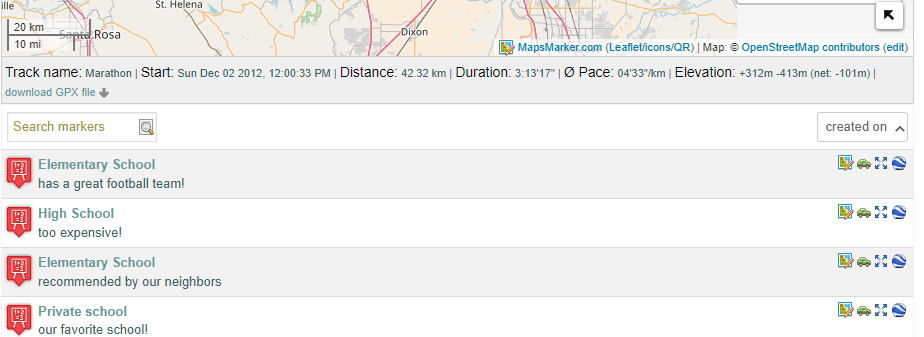
The Show list of markers below map option, on the other hand, is pretty self-explanatory. It can come in handy if you want to include additional information for your markers:
Now scroll down and look for the option that reads Add new marker to this layer. On the next screen, you’ll be able to set a name and a location for your marker, using the same map as in the previous one.
You can also choose an icon and set popup text for your marker. This will show up when people click on the marker itself, or select it from a list if you chose to include it. In any case, remember to hit the Publish button when you’re done. After adding a few markers, your initial layer should look something like this:
When you’re ready to add your new interactive map to one of your pages, you’ll need to use a shortcode. Scroll back to the top of the Edit layer tab and look for its corresponding ID:

Now, place the [mapsmarker layer=”X”] shortcode into your desired post or page. Remember to replace the X placeholder with the ID of your layer beforehand, though.
Your map should now be up and running on your website!. More importantly, you or anyone else on your team can edit it and add new markers at any time, without leaving your dashboard.
2. Through Google Map’s Built-In Embed Feature

Google Maps hardly needs an introduction – it’s a service that enables you to pull maps from all over the world so you can share locations with other people, find addresses, and even share where you are. When it comes to websites, you can embed Google Maps into your pages in a plethora of ways. However, most maps offer limited amounts of interactivity. They enable you to navigate through them, zoom in, out, and switch your view, but not much more.
The thing is, Google Maps offers a lot more features than just plain mapping. For example, you can also add multiple markers, measure distances, and include directions in your maps, similar to Maps Marker Pro. To try out these features, go to Google My Maps and click on the Create a New Map button:

On the next screen, set a title for your map and its first layer, which is the one we’ll build upon. Now find the location you want to share using Google Map’s search bar at the top of the screen:

When you’re zoomed in, you can use the marker symbol at the top of the screen to start highlighting locations on your map. Just click where you want to place your marker, then set a name and an icon for it:
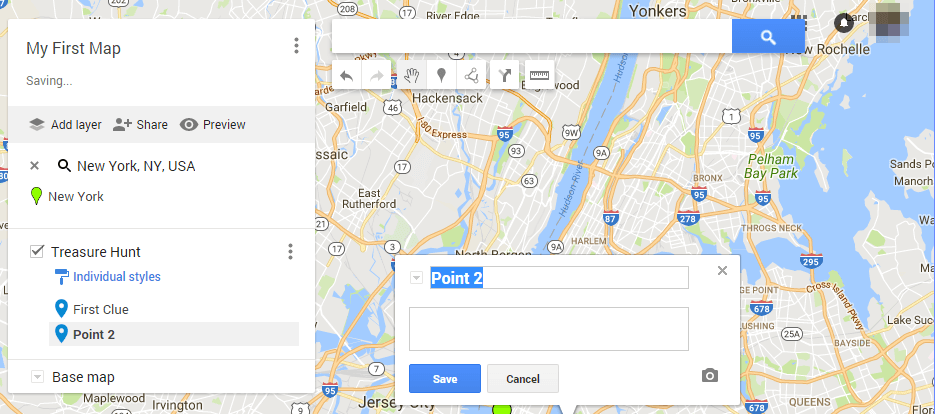
Once you have multiple markers down, you can trace lines between them to show distances:

When your map is ready, go to the Share button on the menu to the left. There, change the settings under Who has access from Private to Public:

You can also invite individual team members using their emails, so they get immediate access to edit the map:

In any case, you still have to embed your new map on your website. You can do so by clicking on the three dots icon next to your map’s title and clicking the Embed on my site option:

Now, you can copy and paste the embed code on any of your pages using Divi’s Code module, for example. Your new map will show up wherever you place it. Plus, your teammates will be able to edit it and add new markers through Google Maps as needed.
For Elegant Themes Members
If all you need is a simple map and a few markers, you can also use Divi’s Map module to add one to your website. Let’s talk about how to do it.
How to Add a Map to Your WordPress Website Using the Divi Map Module
Before you get to work, you’ll need to create a Google API Key, which Divi needs to power the map its module uses. Follow this tutorial to get your API key, and once you have it, open the Divi Builder on your desired page. Next, add a Map module and open its settings. You’ll see a button that reads ADD YOUR API KEY near the top of the screen:

Clicking this will send you to the Divi Settings page, where you can add your Google API key:
 Divi.” width=”880″ height=”163″ />
Save your key and return to the Divi Builder. If you open your Map module settings window again, you’ll see you can now choose a Map Center Address, which is the location your map will display:

Find the address you want to display, and scroll back up to where it says Add New Pin. Clicking on this button will enable you to set a title, description, and the placement of your map’s first pin:

Keep in mind – Divi’s Map module enables you to add multiple pins. This makes it a valid option if you want to highlight multiple addresses. Moreover, you can tweak your pin’s style by going into the Design settings and playing around with the options. Here’s an example of a finished map built with the Divi Map module:
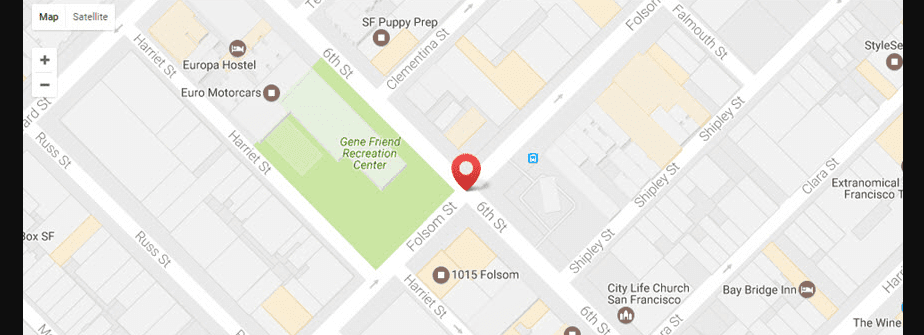
While it’s true that Google Maps and Maps Marker Pro offer more customization settings, Divi shines when it comes to ease of use. Moreover, you won’t need to use shortcodes or embed codes to place your maps. After all, the builder gives you full control over where they should go.
Conclusion
Adding maps to your WordPress website is simple, particularly if you’re using Divi, thanks to its Map module. However, regular maps are only useful if you want to showcase a single address. If you need a bit more flexibility, interactive maps are the way to go.
With WordPress, you have two way to add interactive maps to your website. Let’s recap them:
- Using the Maps Marker Pro plugin.
- Through Google Map’s built-in Embed feature.
Do you have any questions about when to use interactive maps on your WordPress website? Let’s talk about them in the comments section below!
Article image thumbnail by Hluboki Dzianis / shutterstock.com.




Hi, John! This is a great resource – thank you! Can you tell me if collaborators can share their location in real time on an embedded map on a public website? (I’ve discovered there are privacy differences between Google Maps and Google My Maps, too.)
Thanks for writing another great article.
Its very useful for WordPress beginners like Me.
Hello Somnath. You’re very welcome. Thanks for your comment.
Is it possible to have a searchable/filterable members map directory?
Hello Joseph. You may want to consider the LocateAnything WordPress plugin, which allows you to create both searchable and filterable maps. You can find it at this link:
https://wordpress.org/plugins/locateanything/
Hope this helps.
great idea for me because i am new in this field so thnx for this…
Hi Vikash. You’re very welcome 🙂
Great tutorial! Embed feature in Google Maps its ok! Thx 😉
You’re welcome, Goldweb. 🙂
Great article, do you know of any plugins that will import address info via CSV and create the map for you?
Thanks for the reviewing our plugin John, much appreciated! (v4.0 which is planned to be released soon, will even add more exciting features like GPX elevation charts and a huge performance improvement – see https://www.mapsmarker.com/2017/08/15/maps-marker-pro4/ for a preview).
@Martin: Maps Marker Pro also offers a CSV/XLSX/ODS importer (& exporter), which allows you to (bulk) create (and update) maps. See http://mapsmarker.com/import-export for details.
Hi Martin. The WP Google Maps feature does include the ability to export and import your markers to a CSV file. As for automatic map creation, it would be worth exploring this further on the plugin’s support forum, or trying it out. Hope this helps.
https://wordpress.org/support/plugin/wp-google-maps
Great! thanks for this tutorial John!
Hi Pedro. No problem. Glad you found it helpful. 🙂
https://www.elegantthemes.com/gallery/explorable/
This need to be it’s own plug-in. This is one of the best interactive map sites ever.
Big fan of explorable – would love to see them bring it back as a module or plugin
In my personal opinion, I believe adding Google Maps to WordPress themes for WordPress blog posts will definitely add to the rich content and deep interaction, does improving long-term search engine optimization objectives.
Hi DNN. Thanks for your comment. We think so as well. 🙂