
Regardless of the state of the job market, people are always looking for work. Whether it’s for freelancers, folks looking to change fields or employers, or just someone trying to grab a few side gigs, job boards are one of the most sought-after resources out there. Knowing how to create a job board on your WordPress site can make your site go from a good resource to a must-have in no time. There are multiple ways to do this, but the easiest way is to use a quality job board plugin. In this post, we’re going to walk you through how to create a job board using a powerful and easy-to-use plugin so you can start posting immediately.
WP Job Manager
If you want to create Automattic, the folks behind WordPress, have a plugin called WP Job Manager. And if you’re looking for the simplest and easiest way to create a job board, this is it. And with it having been developed by Automattic, you can expect continued solid support and updates.
The base features of the plugin include filterable job listings, WordPress admin-based UI, single job listings, and front-end job submission. Combined, these make WP Job Manager a great option for creating your first (and maybe last) job board with WordPress.
Non-Plugin Methods
Using a plugin is not the only way to go about learning how to create a job board. Divi offers a lot of customization for job boards, but it can be a bit more of a manual process than when using a plugin like WP Job Manager. With that said, you can create some fantastic job posting templates using Divi’s Theme Builder and ACF. And you can also use the dynamic content feature to create a job board page with Divi’s blog module that ties right into the post template.
Plus, if you like the designs of these posts and want to use them with WP Job Manager, you can use Divi to create the designs and apply them to the custom post types that WP Job Manager creates for you. So plugin or no, Divi’s there to make your job board beautiful and functional.
Getting Started
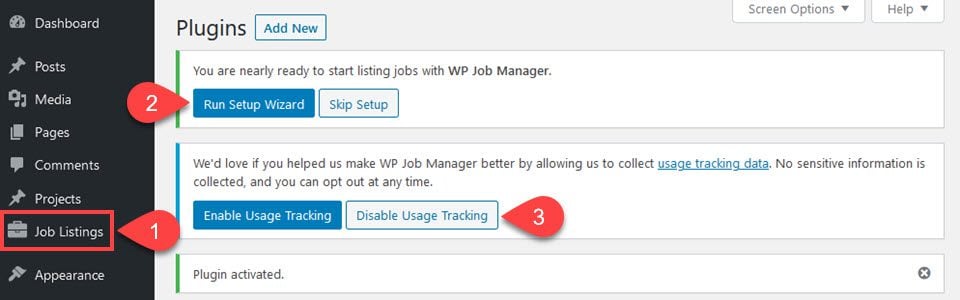
Upon installation and activation, WP Job Manager creates a new menu item in the left-hand sidebar called Job Listings. You will also notice a Run Setup Wizard and usage tracking opt-in above your list of plugins. It is entirely up to you on the usage tracking, as that in no way affects the function of the plugin. However, we do suggest that you go through the setup wizard. It can get things rolling a lot quicker than setting the options manually.
The primary goal of the setup wizard is to make sure that your website has all the pages it needs to function as a job board. If you do not take advantage of the plugin creating the pages for you, you will need to dig into the shortcode documentation to make sure things mesh if you create them yourself.
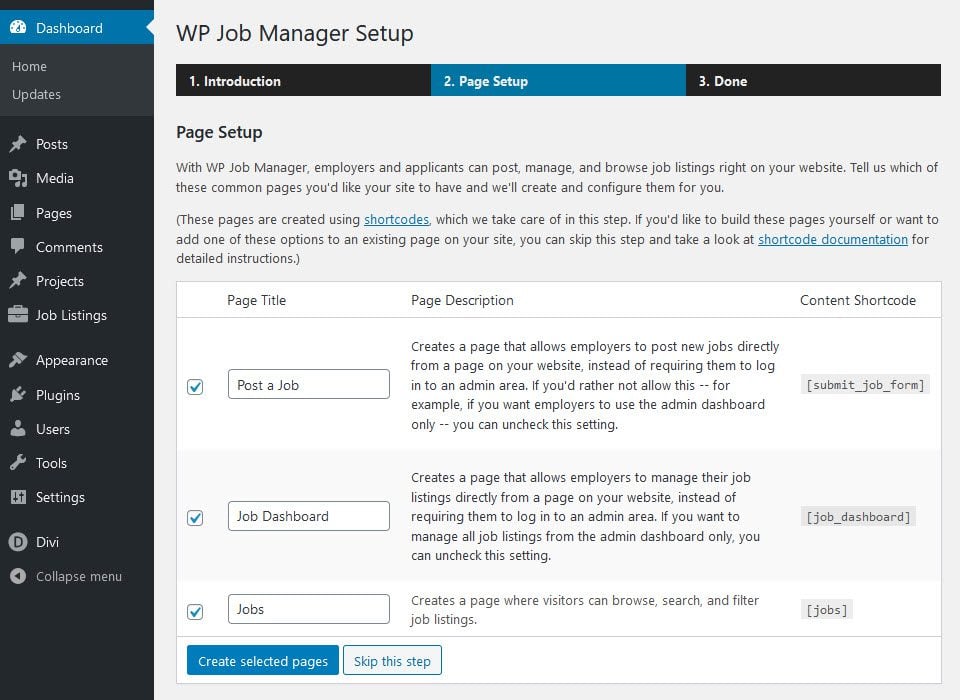
You can name them whatever you want to keep within your site’s branding, too. That won’t affect the shortcode used to render the job board.
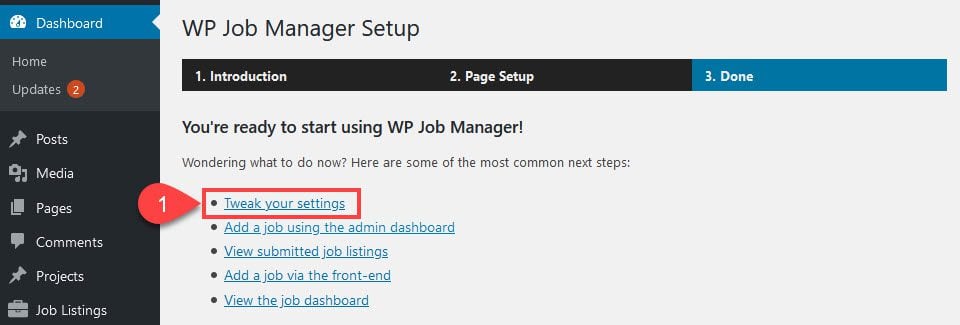
Once that’s finished, you can click on the Tweak Your Settings link to begin making sure things work the exact way you want them to. (You can also navigate to the same place via Job Listings – Settings in the admin dashboard sidebar.)
WP Job Manager Settings
The settings page for the plugin is actually very robust. You have access to 6 separate tabs of options, each controlling various aspects of the job board:
- General
- Job Listings
- Job Submission
- reCAPTCHA
- Pages
- Email Notifications
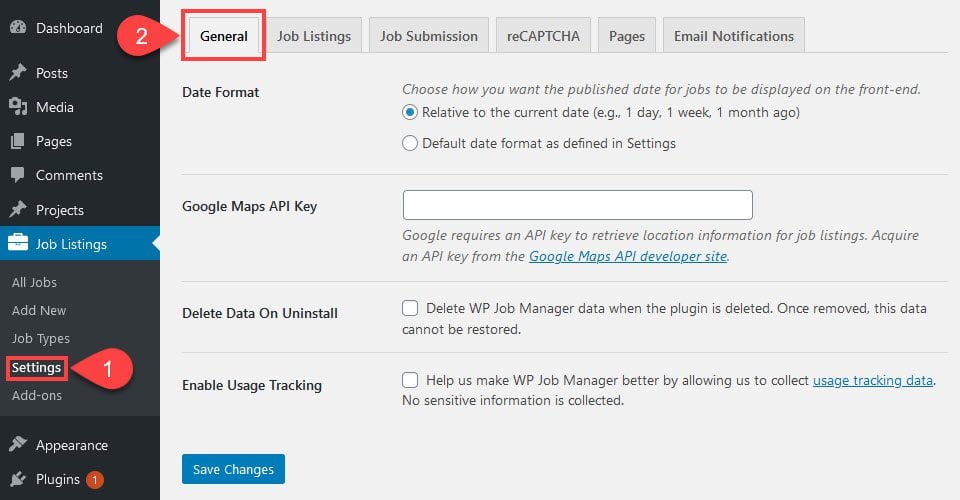
The General tab is very straightforward. Choose how dates appear and enter your Google Maps API Key (for the location field on the job posting itself). You decide if you want to keep or delete data if you delete the plugin, and again, Automattic asks for you to opt-into data gathering.
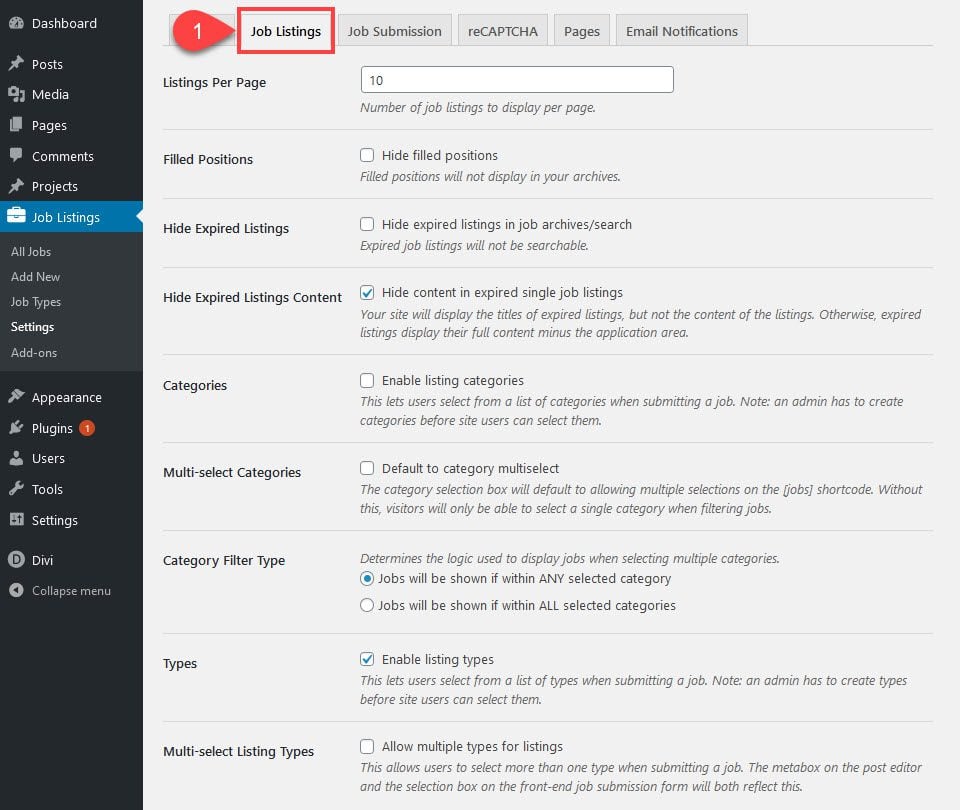
The Job Listings tab is where the nitty-gritty details are sorted out. You choose visibility and post count, as well as how the job posts are categorized and tagged, not to mention giving the user the ability to select multiple options and listing types for their jobs. No matter what you want your job board to act like, this is where the major behavior is set.
The Job Submission tab is really the user-control tab. You choose how those who submit jobs to your board are treated. Whether they need accounts or not. Whether they choose their own usernames or emails generate them. What user role do you want them to have? The plugin creates Employer. But if you want other roles with different permissions, you can do that, too. Setting edit permissions also falls under this tab.
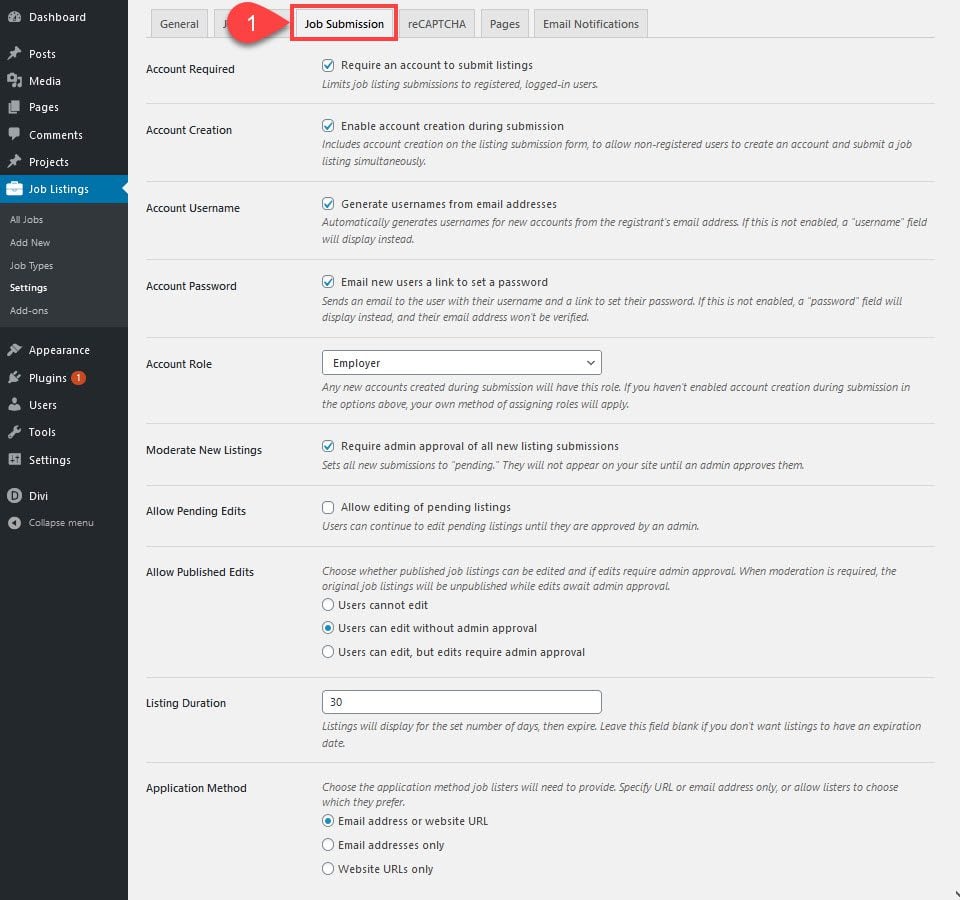
Additionally, you get to set how the job seekers interact with the postings. How they apply, how long they can see the posting, and so on.
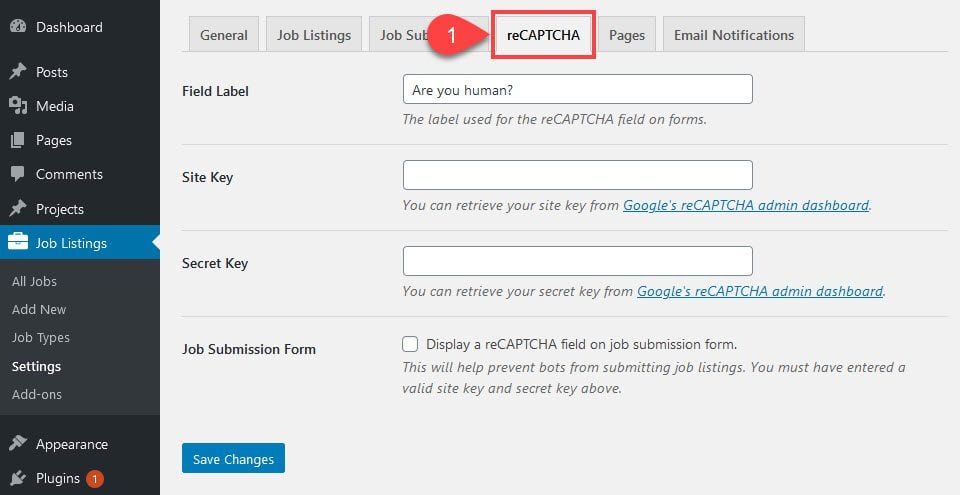
The reCAPTCHA tab is also straightforward. You simply add in your Google reCAPTCHA site keys and enter a label. Easy peasey.
The Pages tab is a mirror of the setup wizard. You choose the pages that the plugin uses to render via shortcode.
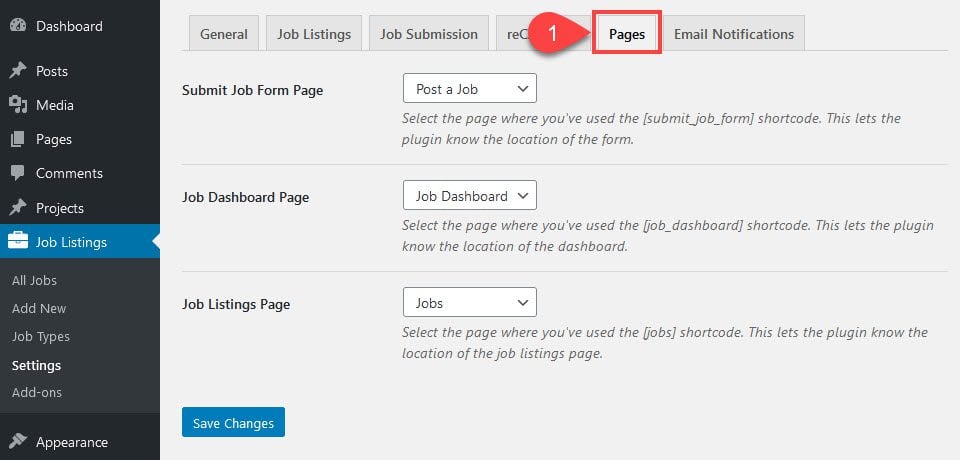
The dropdown doesn’t have an option to create a new page from this screen, so you will have to do that manually via WordPress (Pages – Add New). Any page you create for the site, however, appears in the dropdown.
Regarding the Email Notifications tab, you absolutely want to make sure that you take a look to make sure the settings are right.
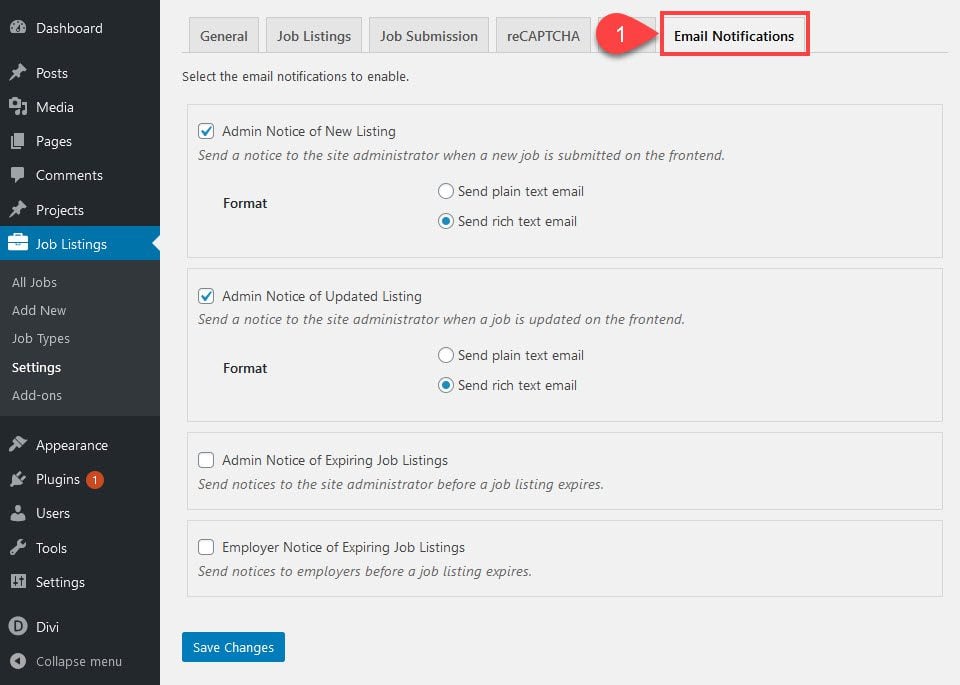
You can choose whether admins get notified for new listings (or updated listings), and whether or not there are expiry notifications as well. Depending on how you hands-on you want to be with your job board, this is a very important tab.
Creating Job Postings
The real point of creating a job board is to create job postings. So now that we’re all set up from the admin side, we can start to get those employment opportunities online. The quickest way for you to create a job posting is to navigate to Job Listings – Add New. This pulls up a familiar site: the WordPress block editor.
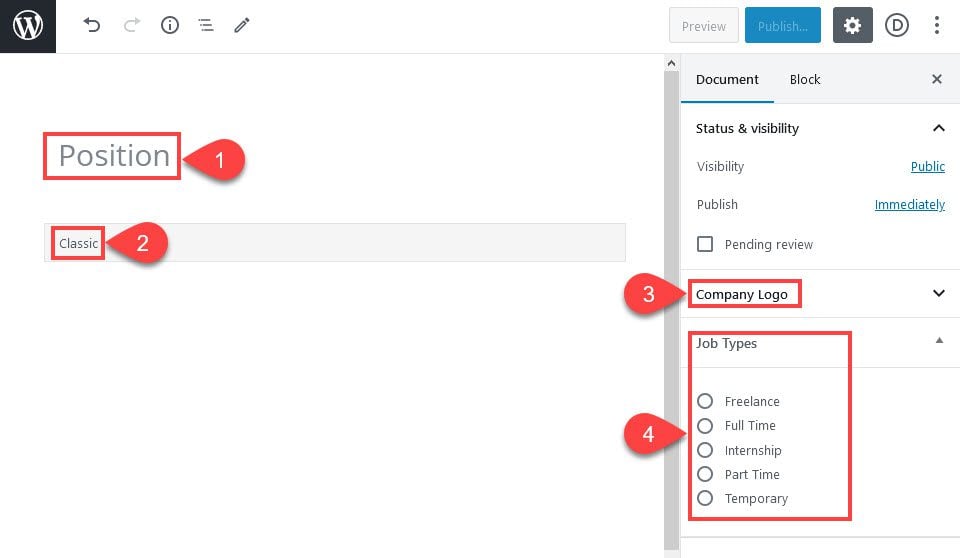
By default, the job posting has a Classic block into which you enter the description of the post. Where the title of the post would go, you enter the position’s title. You can upload a logo for the company you represent just like you would for a featured image, and the job types that apply appear as radio buttons to the right — freelance, full-time, part-time, etc.
Scrolling down to the post-content metaboxes presents the finer details of the job listing.
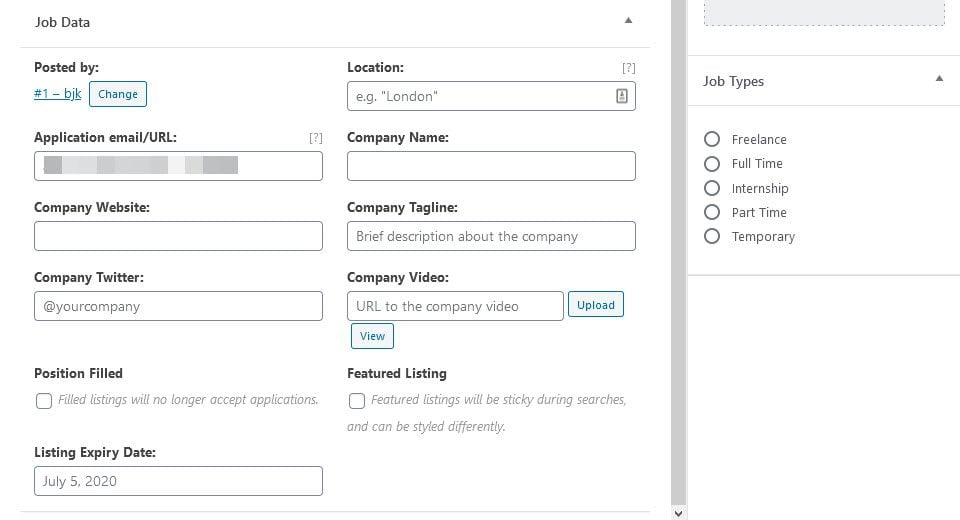
Here, you enter the application URL or email, the company’s website, Twitter handle, Location (which is why the Google Maps API comes into play in the settings), the company name, tagline, and a video if you want. You can also mark the position as filled or make it featured/sticky, as well as set an expiration date as an admin (for if you want to extend the listing or shorten based on extra criteria).
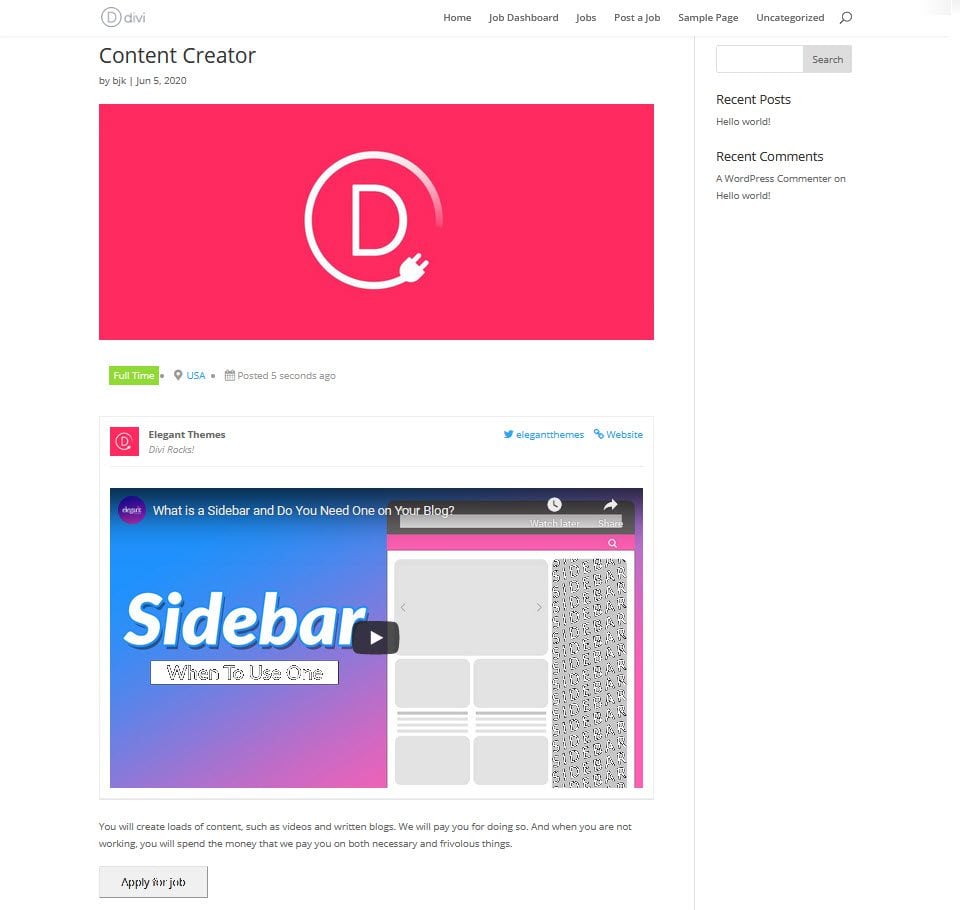
When published, the job posting will appear like this:
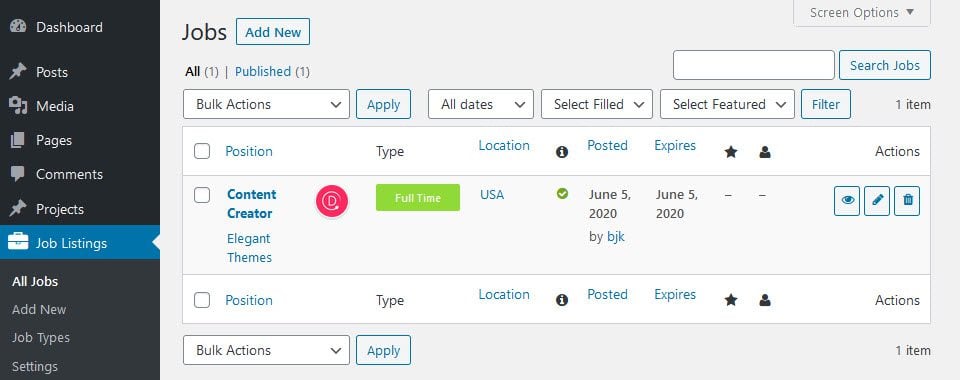
And in the backend list of posts, it appears like this:
The Job Board on the Front End
Now, the real beauty of a job board is that it can be as hands-on or hands-off as you want. Rather than have a separate form for submission to you, users can simply use the Post a Job page to edit and submit their own job as a custom post on the site.
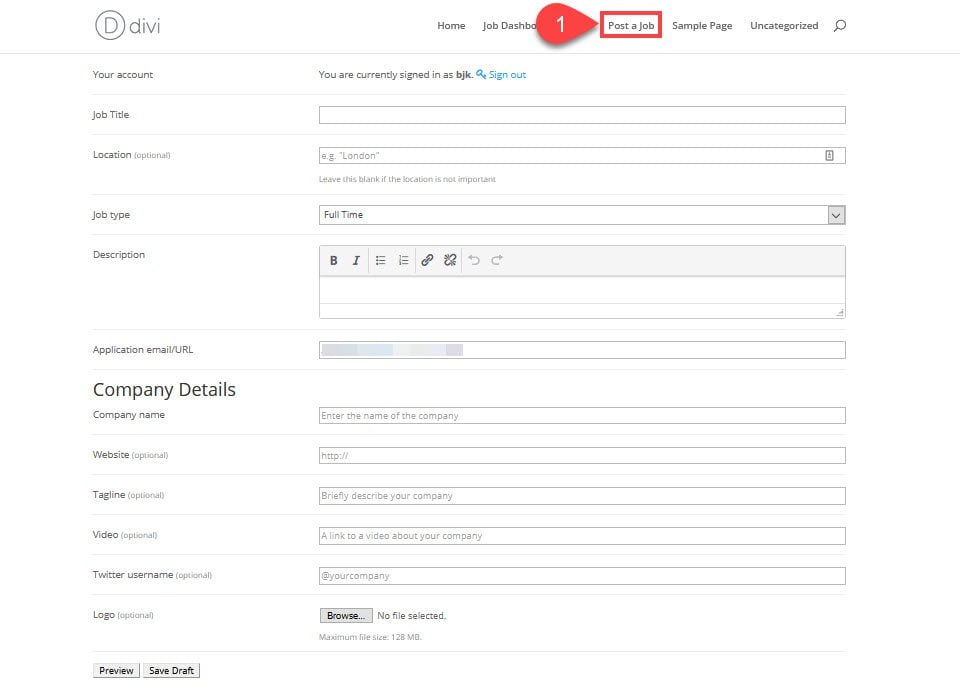
The information the form asks for is exactly the same as it was on the backend earlier. The difference is that this form is simply a rendered shortcode. Even though those pages were created by the plugin, you can design them any way you want and then render the shortcode for the job post list, the job description itself, and the submission form anywhere that fits. You’re not beholden to the plugin for that at all.
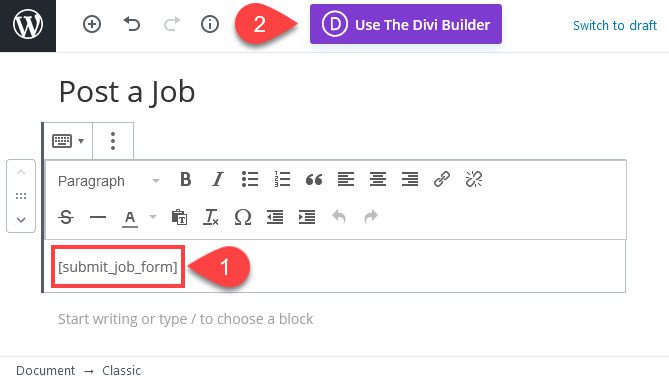
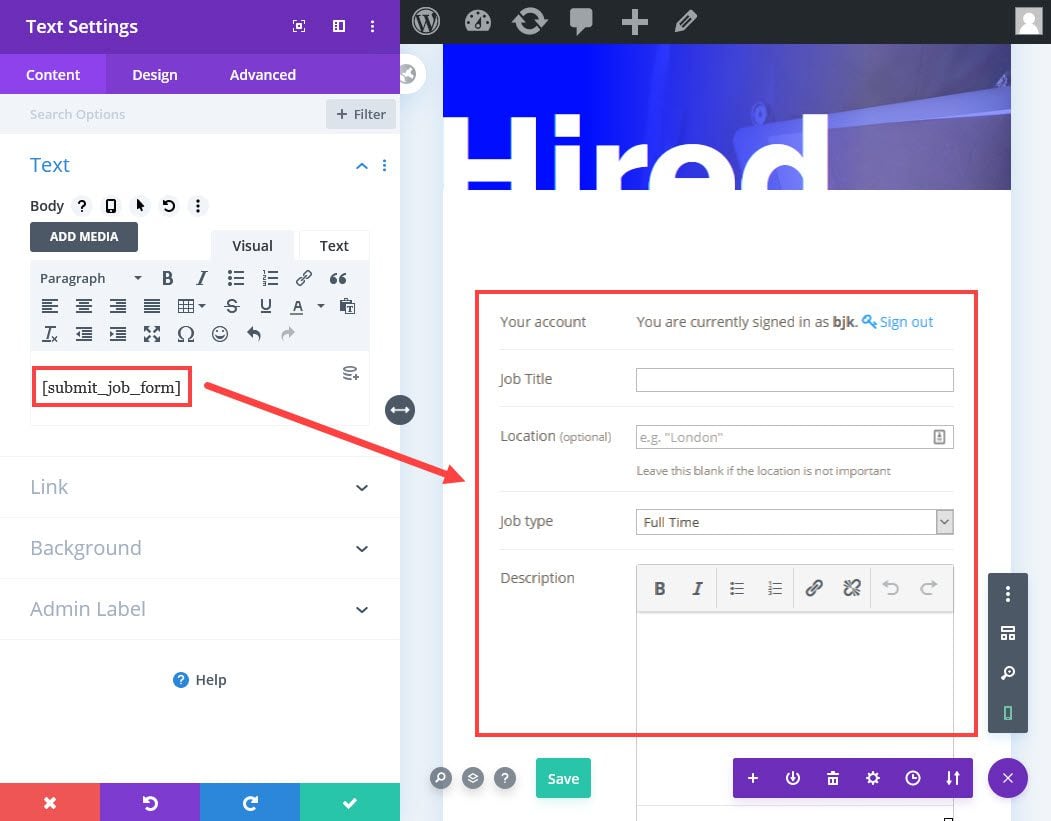
Which means that you can style the page any way you want around it using Divi or your page builder of choice. If you click Use the Divi Builder from the edit screen, you can select any layout or design that you want (or include the shortcode in any existing design that you have). If you want to show the [submit_job_form] in an existing page, you could see something like this.
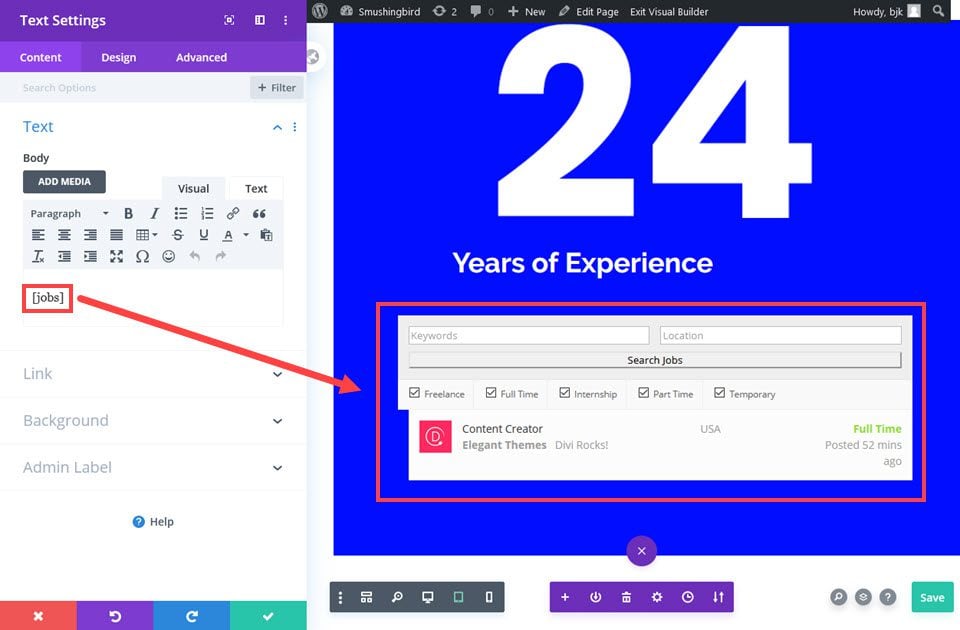
The [jobs] shortcode that lists every posting that’s live on the site is just as easy to design and insert.
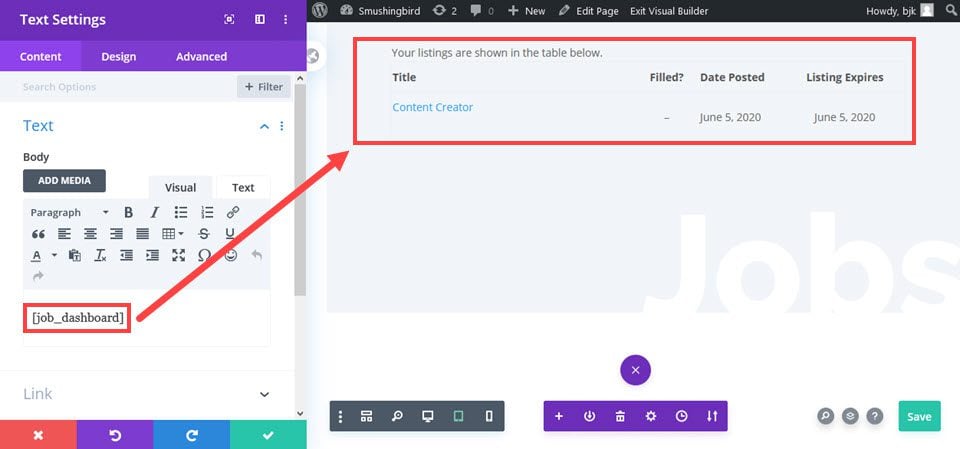
The [jobs_dashboard] shortcode is how people see their own listings and how they manage them. You can include them on any page, again, and they render well to fit into any design without seeming obtrusive. This way, you can have users return to your site to relist jobs, post new ones, or adjust what they’ve already put up.
And just like that, you’ve learned how to create a job board and get folks a much-needed resource.
Wrapping Up
Whatever the reason you want to learn how to create a job board for your WordPress site, we hope that you see it doesn’t have to be a ton of manual, trudging work. WP Job Manager is a simple-yet-powerful plugin that works without needing a lot of extra tweaking. Remember, if you’re a Divi user, you can create a job board and posting using ACF and Divi, and afterward, you can combine your design with this plugin. A solid win in both categories.
What do you look for in a job board when posting or looking for employment?
Article featured image by LanKogal / shutterstock.com


How do I combine the ACF and Divi Template with this job board plugin?
I have set up both and they are working fine individually. The question I have is, how do I access the fields of the plugin, such as job type, and display them as shown in the ACF template, because I can’t seem to find any dynamic field option of my job listing when I try to add it to a text module.
Please help!