
We first introduced two preset types: Element Presets and Option Group Presets. Then we added two additional and specific preset types: Stacked and Nested Presets. Each one focuses on different tasks during your build. When you match the right preset type and method to the job, your workflow gets faster, and your design stays consistent.
In this post, we cover all four types of presets in Divi 5. You’ll learn what each preset type does, how stacking and nesting work, when to use each one, and how they all work together to speed up your builds. Let’s break it down.
Understanding Each Preset Type
Let’s go over the different preset types and explore what you can expect from each.
What Are Option Group Presets
Option Group Presets are presets that zero in on individual design properties rather than complete elements. They are reusable settings that you can apply wherever those properties appear. Anything from typography settings, box shadows, borders, spacing values, to scroll effects.
These presets aren’t locked to a single element type. You can create a box shadow preset and apply it to a section, row, column, or module. The same goes for button styles.
Any module with button settings can share the same Button preset. This cross-element flexibility means you define a style once and deploy it anywhere that style property exists.
Divi sets itself apart here because Option Group Presets are more than CSS classes. They can include behavior and logic, not just styling. Background videos, condition options, and scroll effects all get the preset treatment. You save the configuration, name it, and reuse it across your site.
Updates happen globally. Change a preset, and every instance using it updates automatically. This modular approach reduces repetitive styling. Instead of recreating the same border treatment or typography settings repeatedly, you can pull from your preset library. Your design stays unified while you move faster through builds.
How To Create Option Group Presets
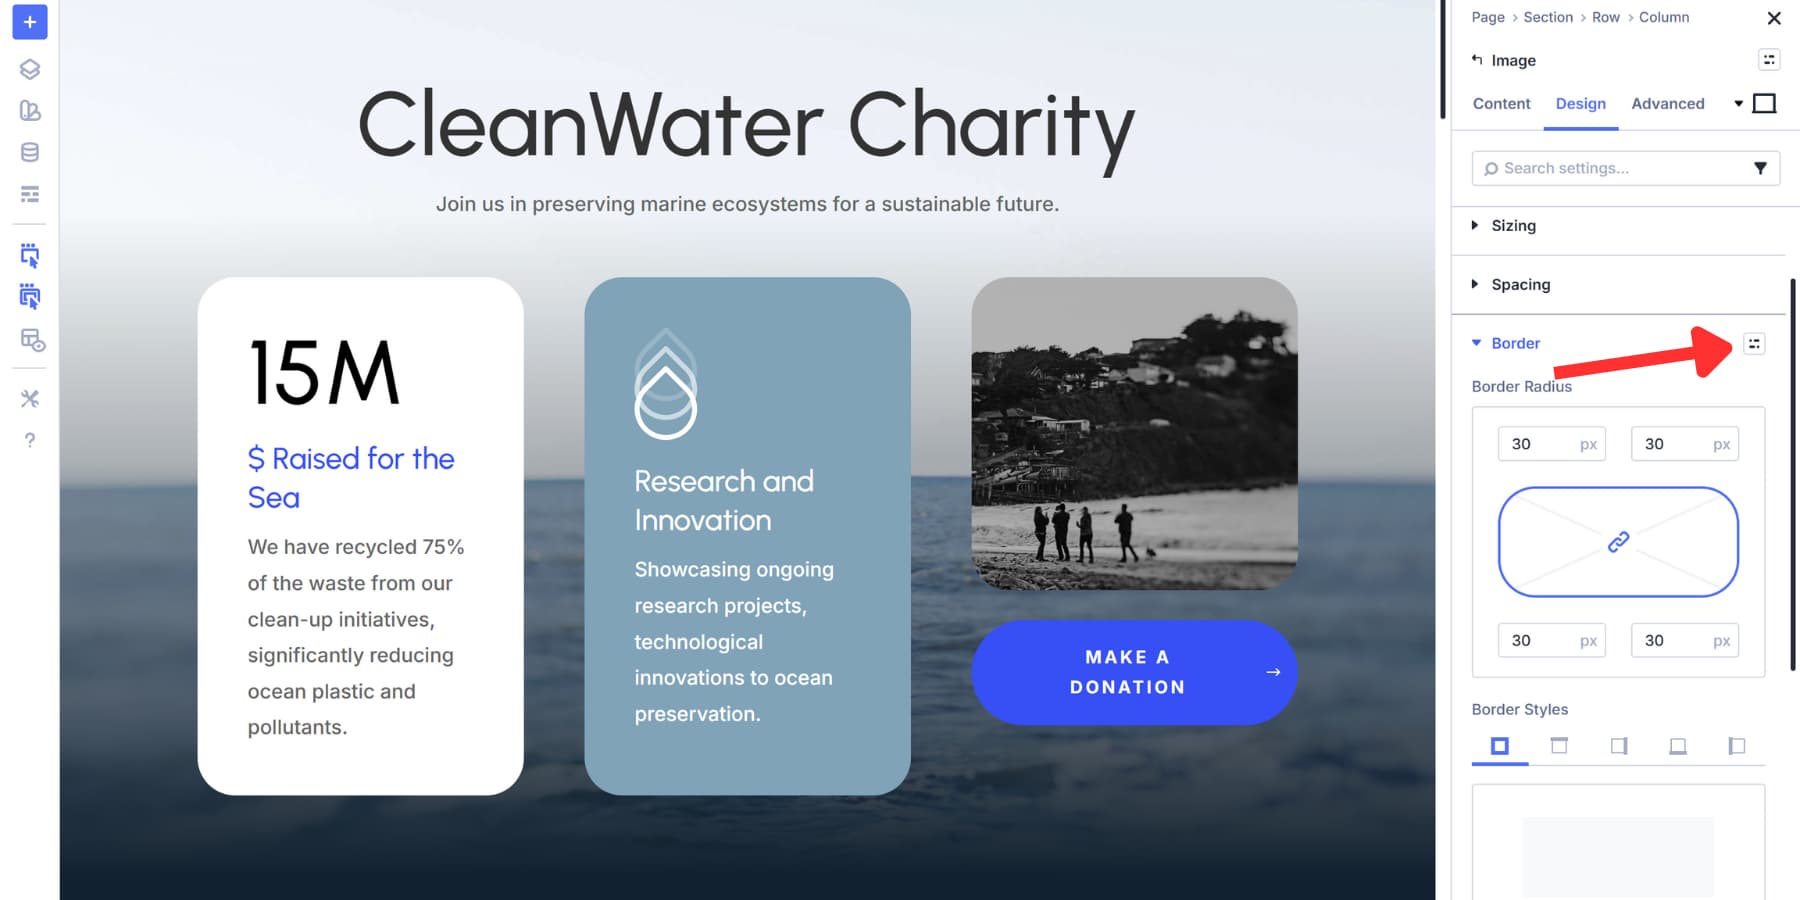
Creating an Option Group Preset takes seconds. Open any element in the Visual Builder and navigate to the Design tab. Find the style you want to save. Could be borders, typography, spacing, whatever you need to reuse.
Apply your settings to that style. Add a 30px border radius, set your spacing values, and adjust any other settings you want to tweak. Get it exactly how you want it. Once you’re done styling, look for the preset icon in the top right corner of that option group. Click it.
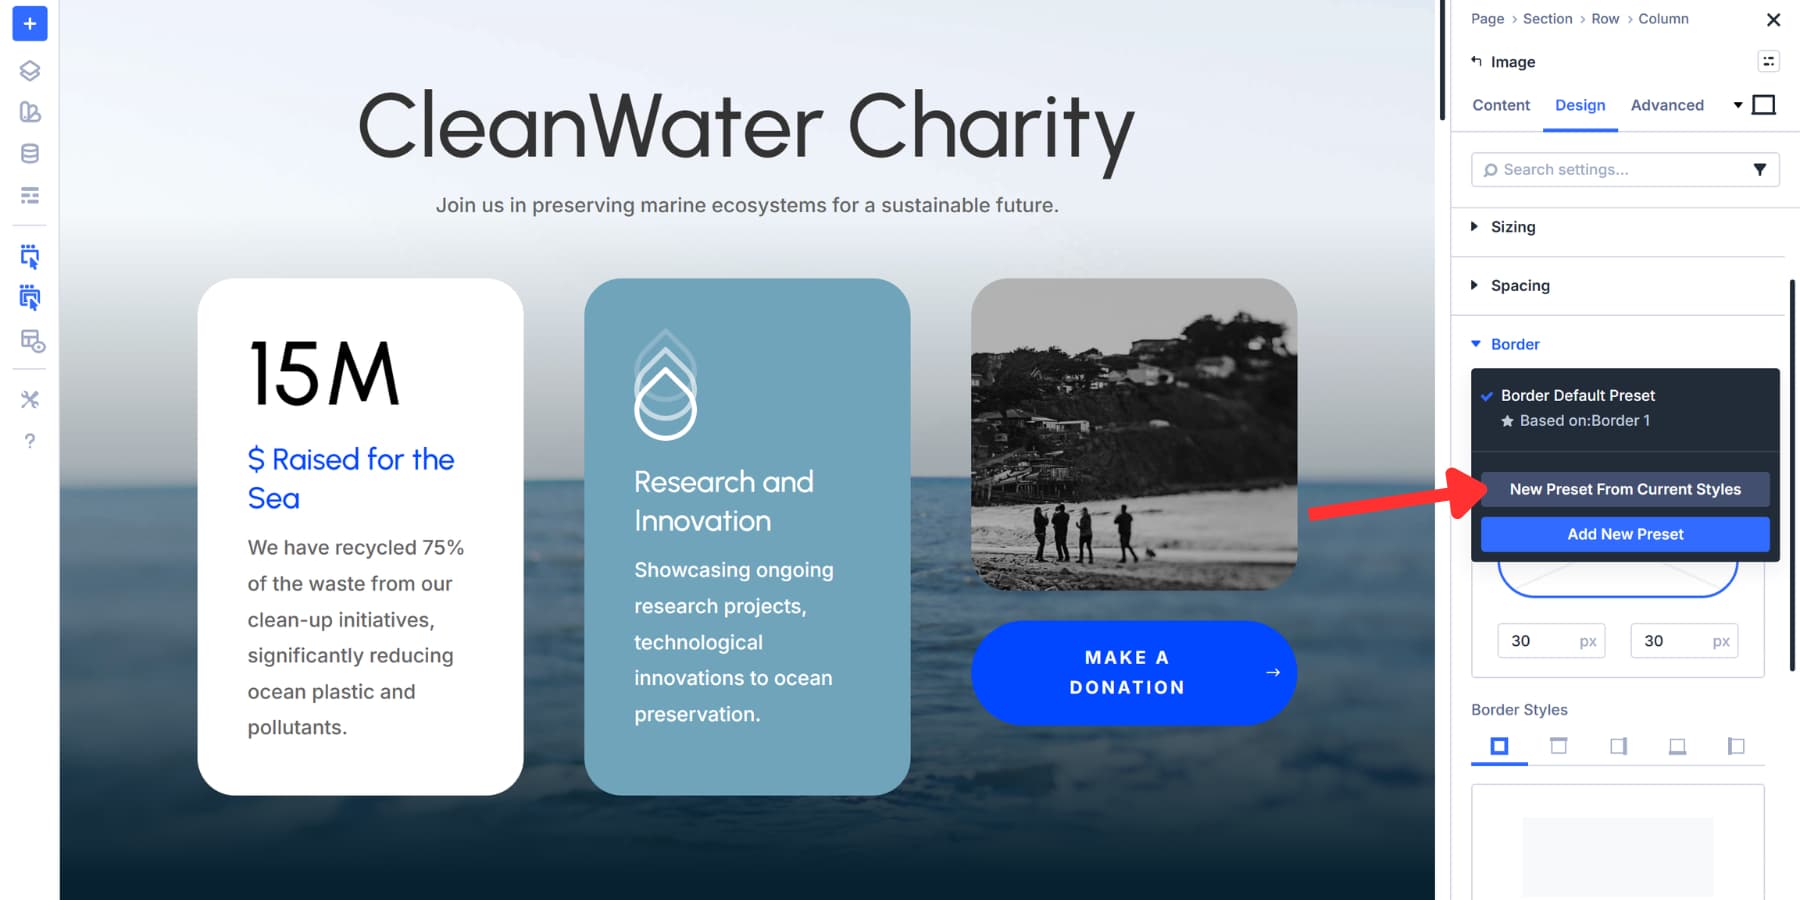
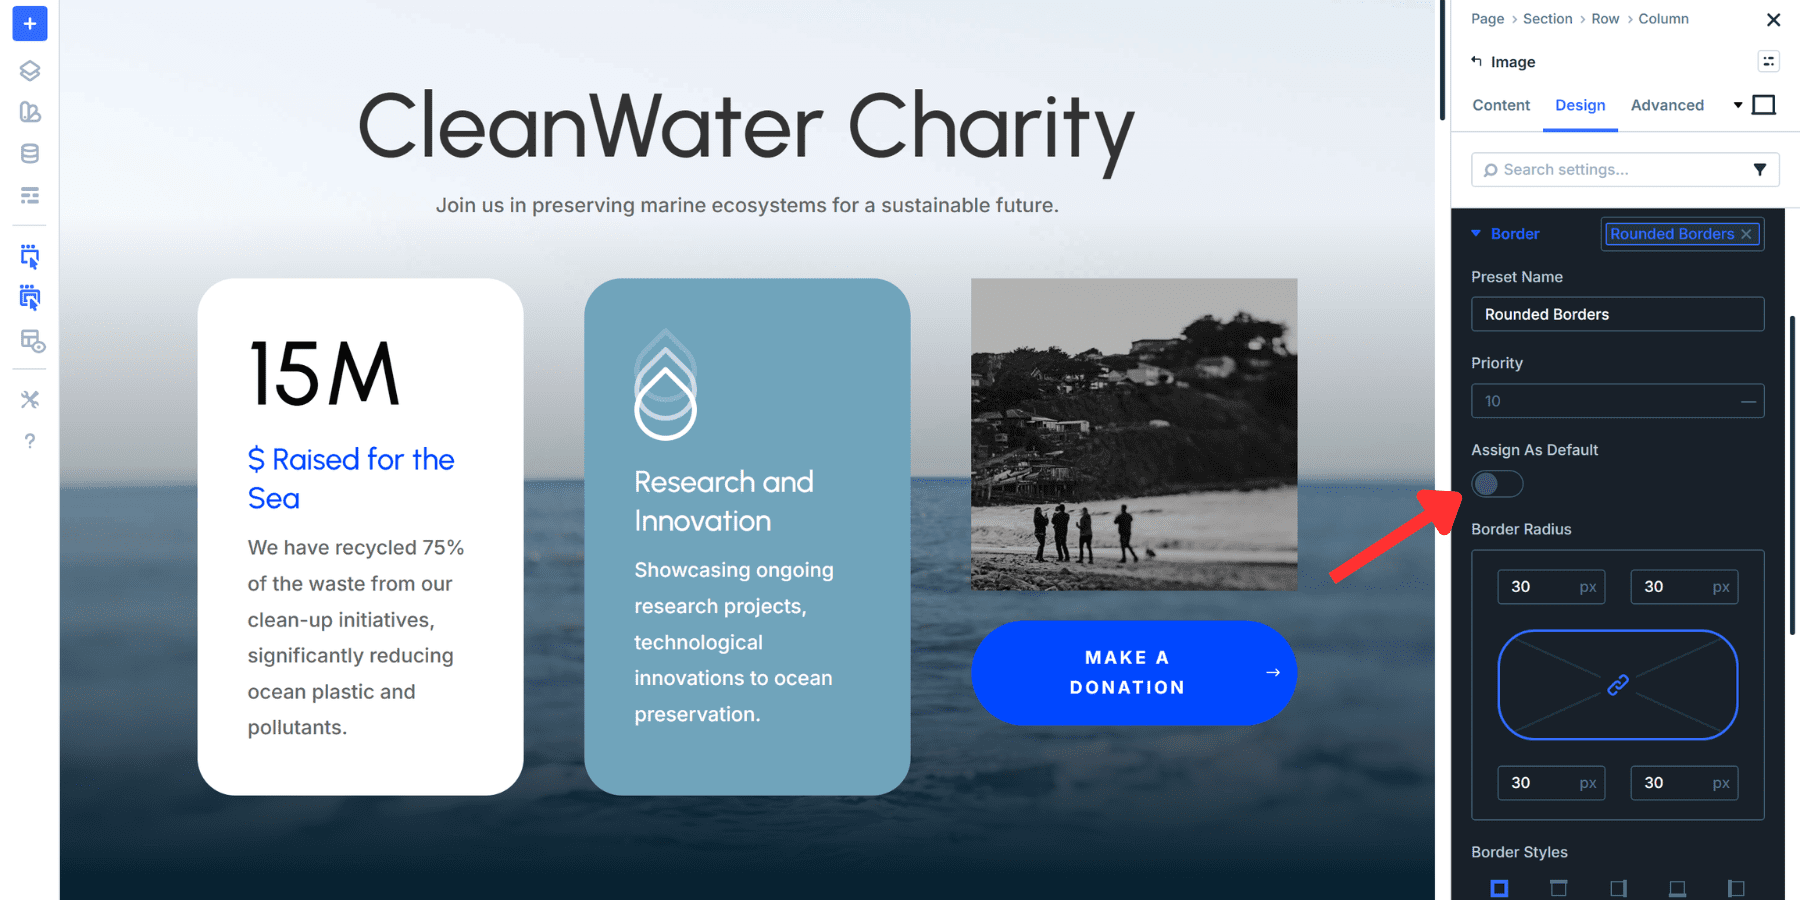
A menu appears with your available presets. Select New Preset From Current Styles. The area immediately changes color to reflect that you are making changes to global presets.
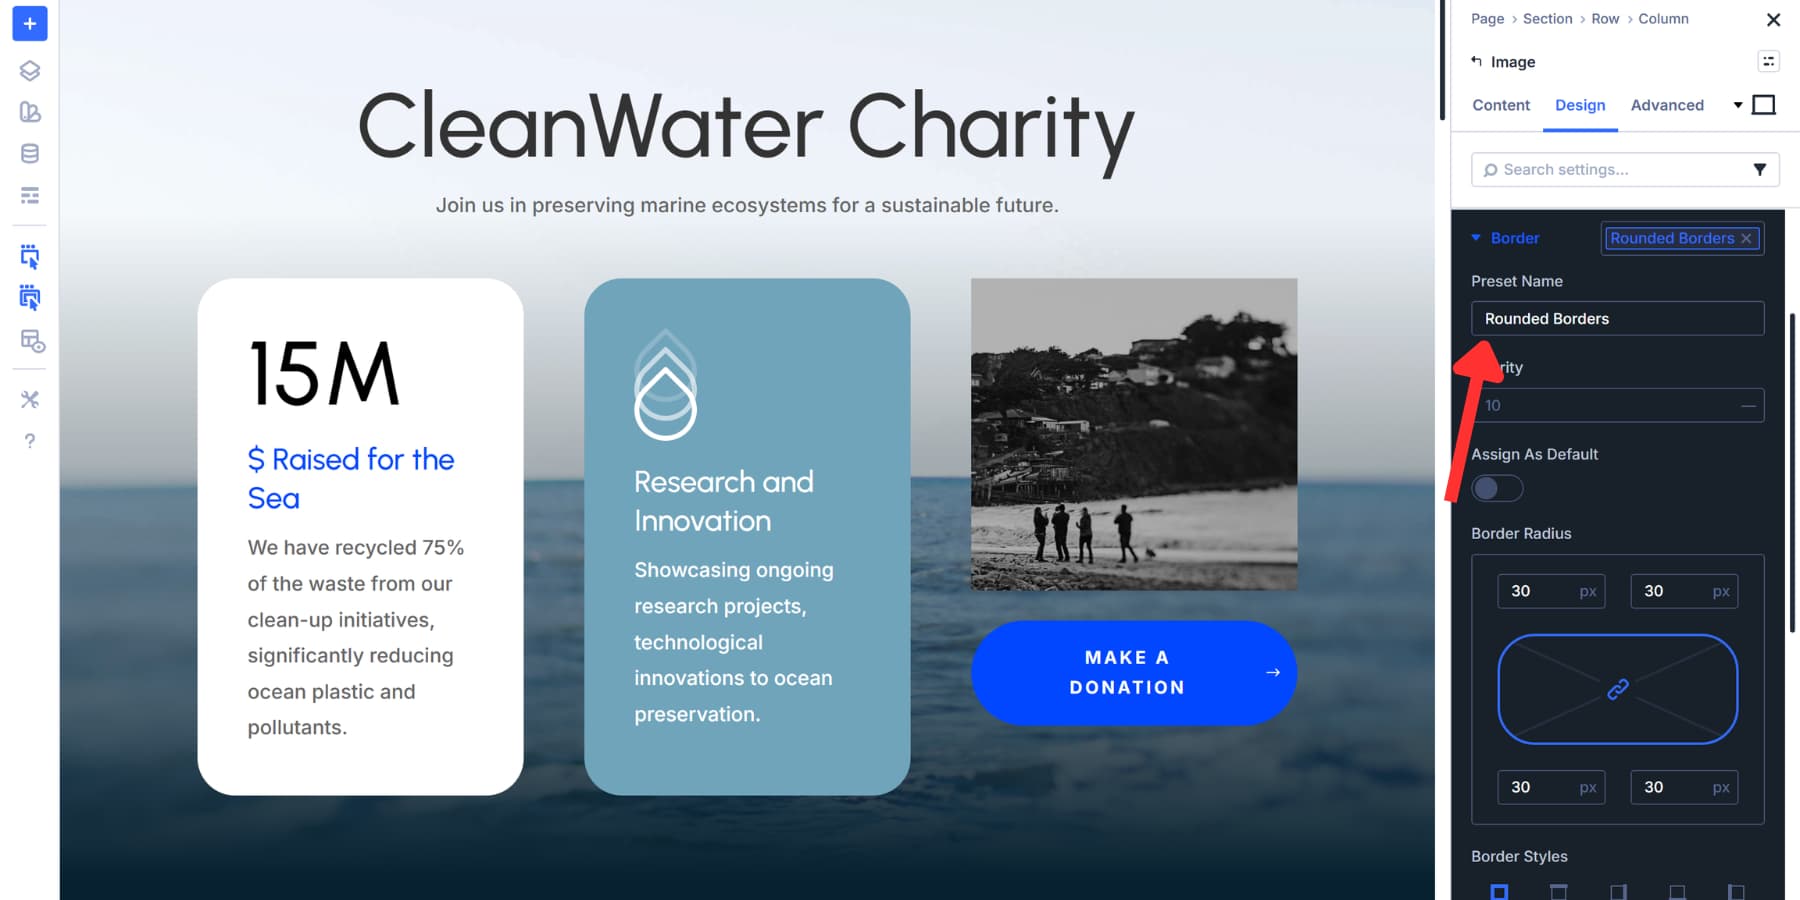
Give it a name that makes sense. Something like Rounded Borders. Names matter when you’re managing dozens of presets later.
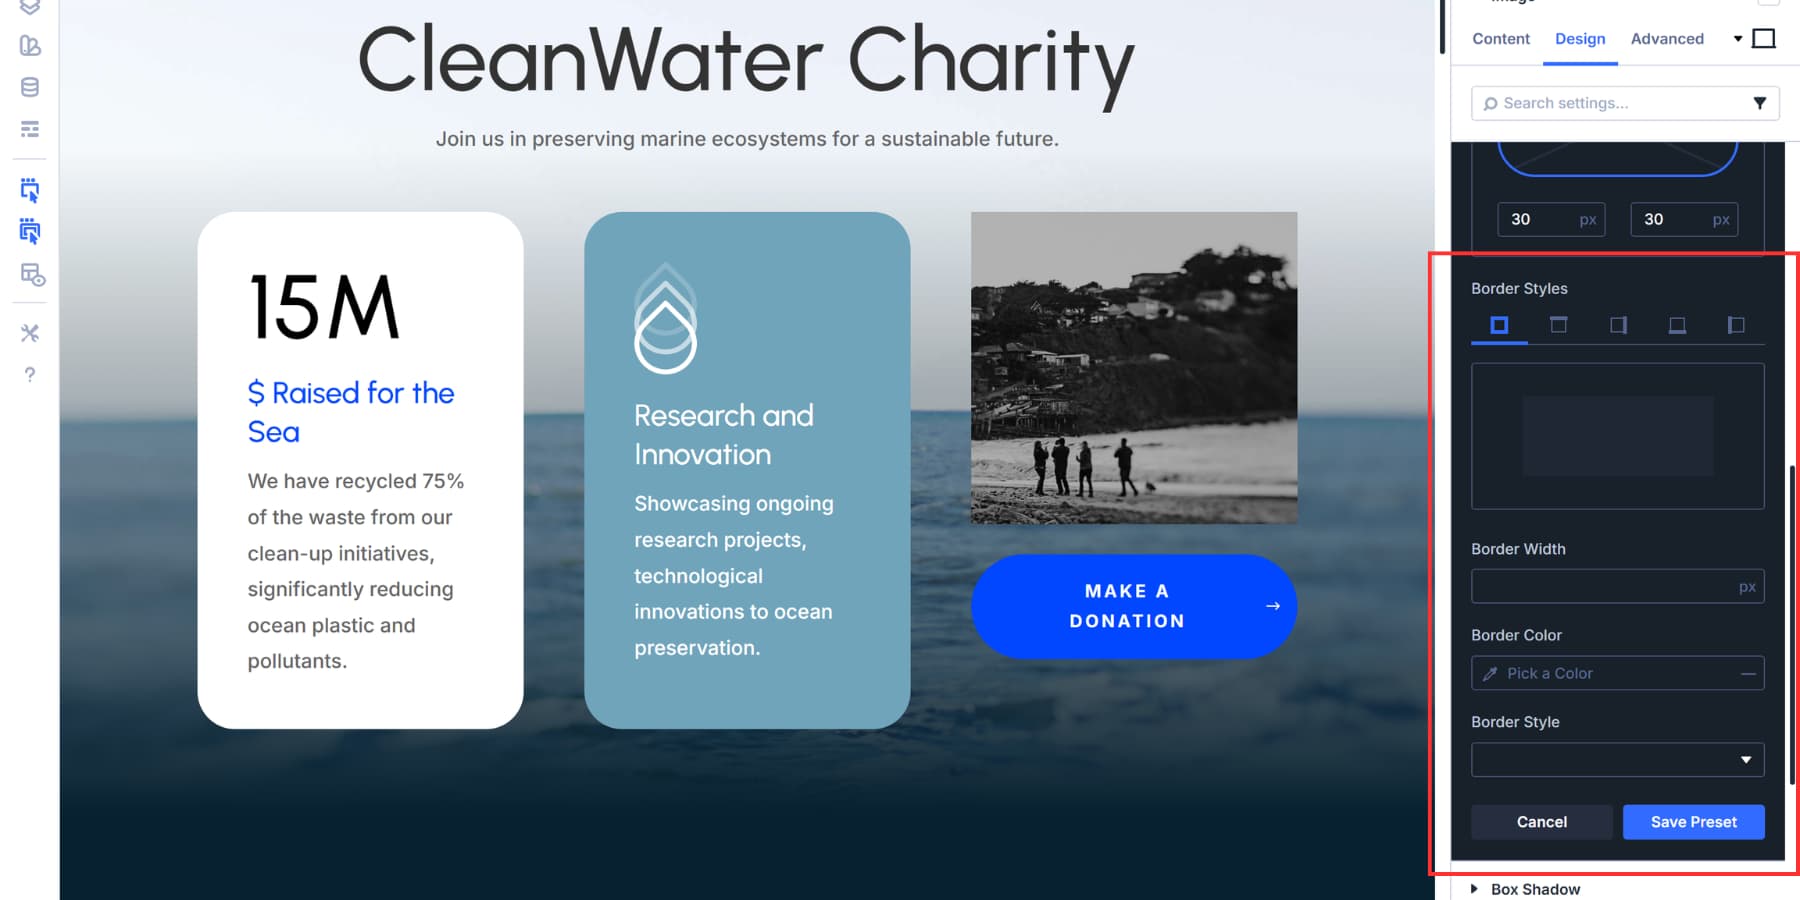
The Save dialog includes all other options related to the Option Group. For example, here, you can also adjust the border style, width, color, and other settings. These options might differ depending on the Option Group you are configuring.
There’s also an “Assign As Default” toggle at the top. Turning this on will cause every new element you add to inherit those settings automatically.
Click Save Preset, and you’re finished. That style is now in your preset library. You can apply it to any element that supports that option group by clicking on the same icon and selecting the preset you just created. Sections, rows, columns, modules. Anywhere that option groups exist.
What Are Element Presets
Element Presets bundle every setting for an entire element into one reusable package. They work across Divi’s four element types: sections, rows, columns, and modules. We first saw them in Divi 4, and they carried forward into Divi 5 because they work so well.
When you style a Blurb Module with specific typography, spacing, colors, and effects, an Element Preset captures all of it in one go. Then you can apply that exact configuration to other Blurb Modules across your site with a single click, instead of rebuilding everything from scratch.
You can set any Element Preset as the default. This causes every new instance of that element type to inherit those settings automatically. A default Blurb Preset means that every Blurb you add comes pre-styled, saving hours on larger builds.
Updates work globally too. Change a preset once, and every element using it reflects that change instantly. Element Presets excel at deploying complete, polished designs for elements you use repeatedly. Style a CTA module once, save it as a preset, and reuse it anywhere your site needs that same treatment.
Using Element Presets
Creating an Element Preset takes just a few steps and is essentially the same as creating an Option Group Preset. Style any element the way you want it. Get the typography, spacing, colors, and effects set up perfectly.
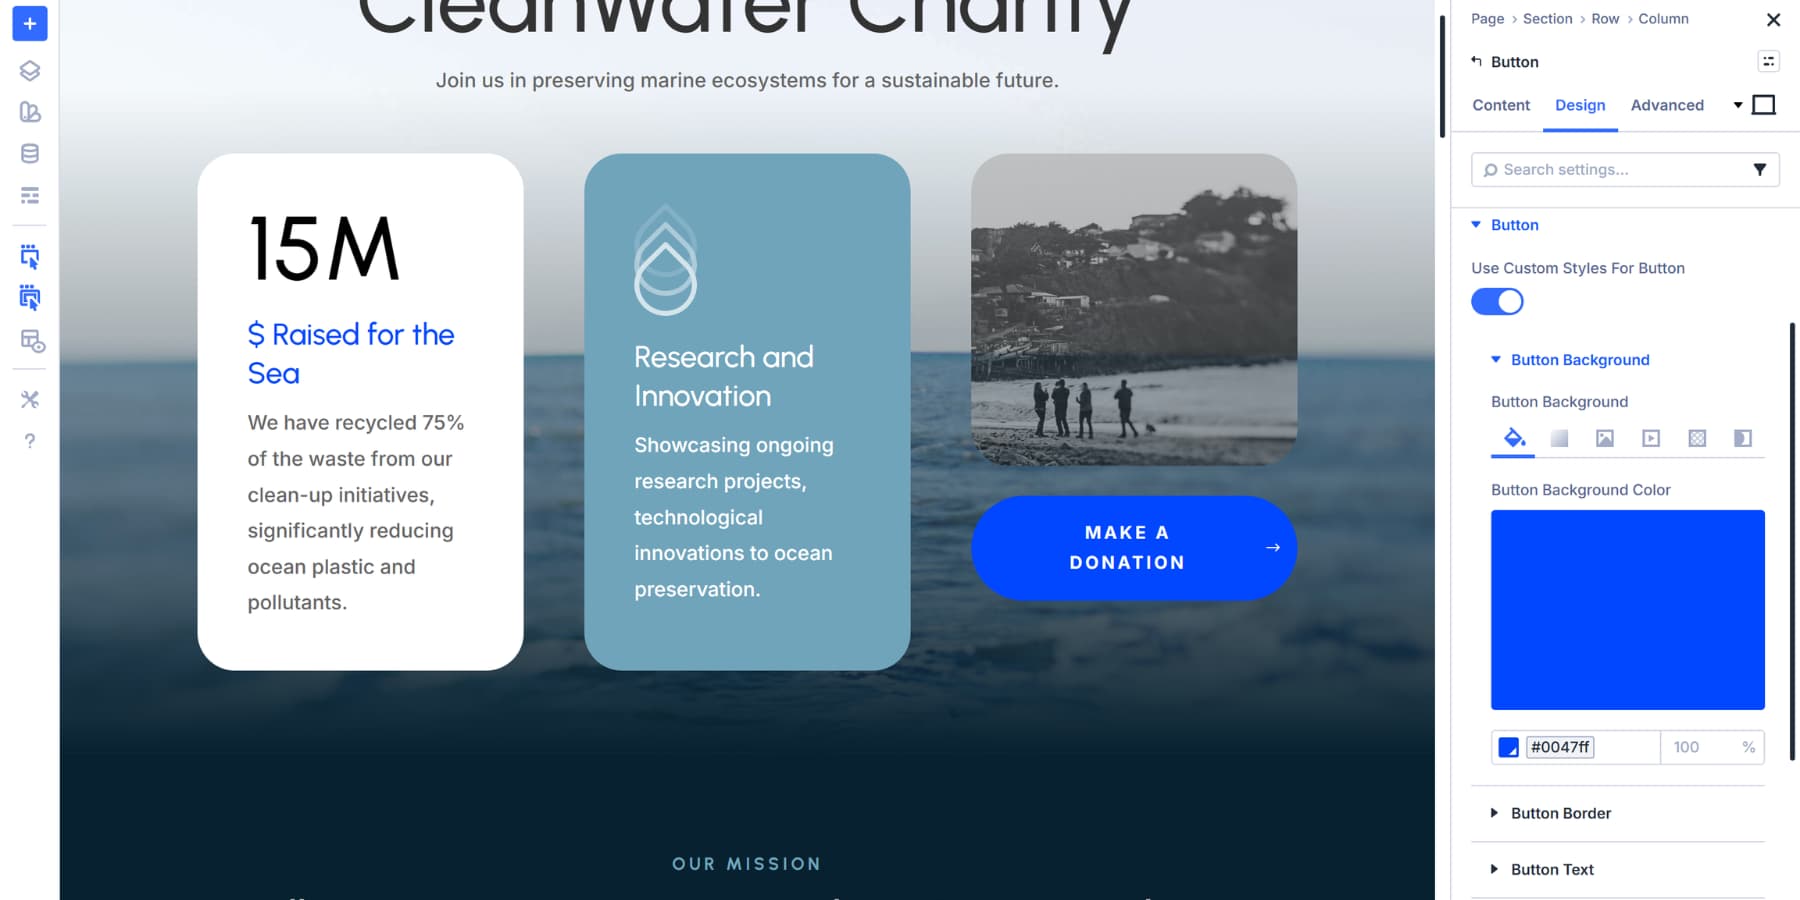
You may also apply any Option Group Presets you need, such as the border radius one we created earlier, if the element supports it. When you’re satisfied with the complete design, look for the preset menu in the top right corner of the element’s settings panel. Click it.
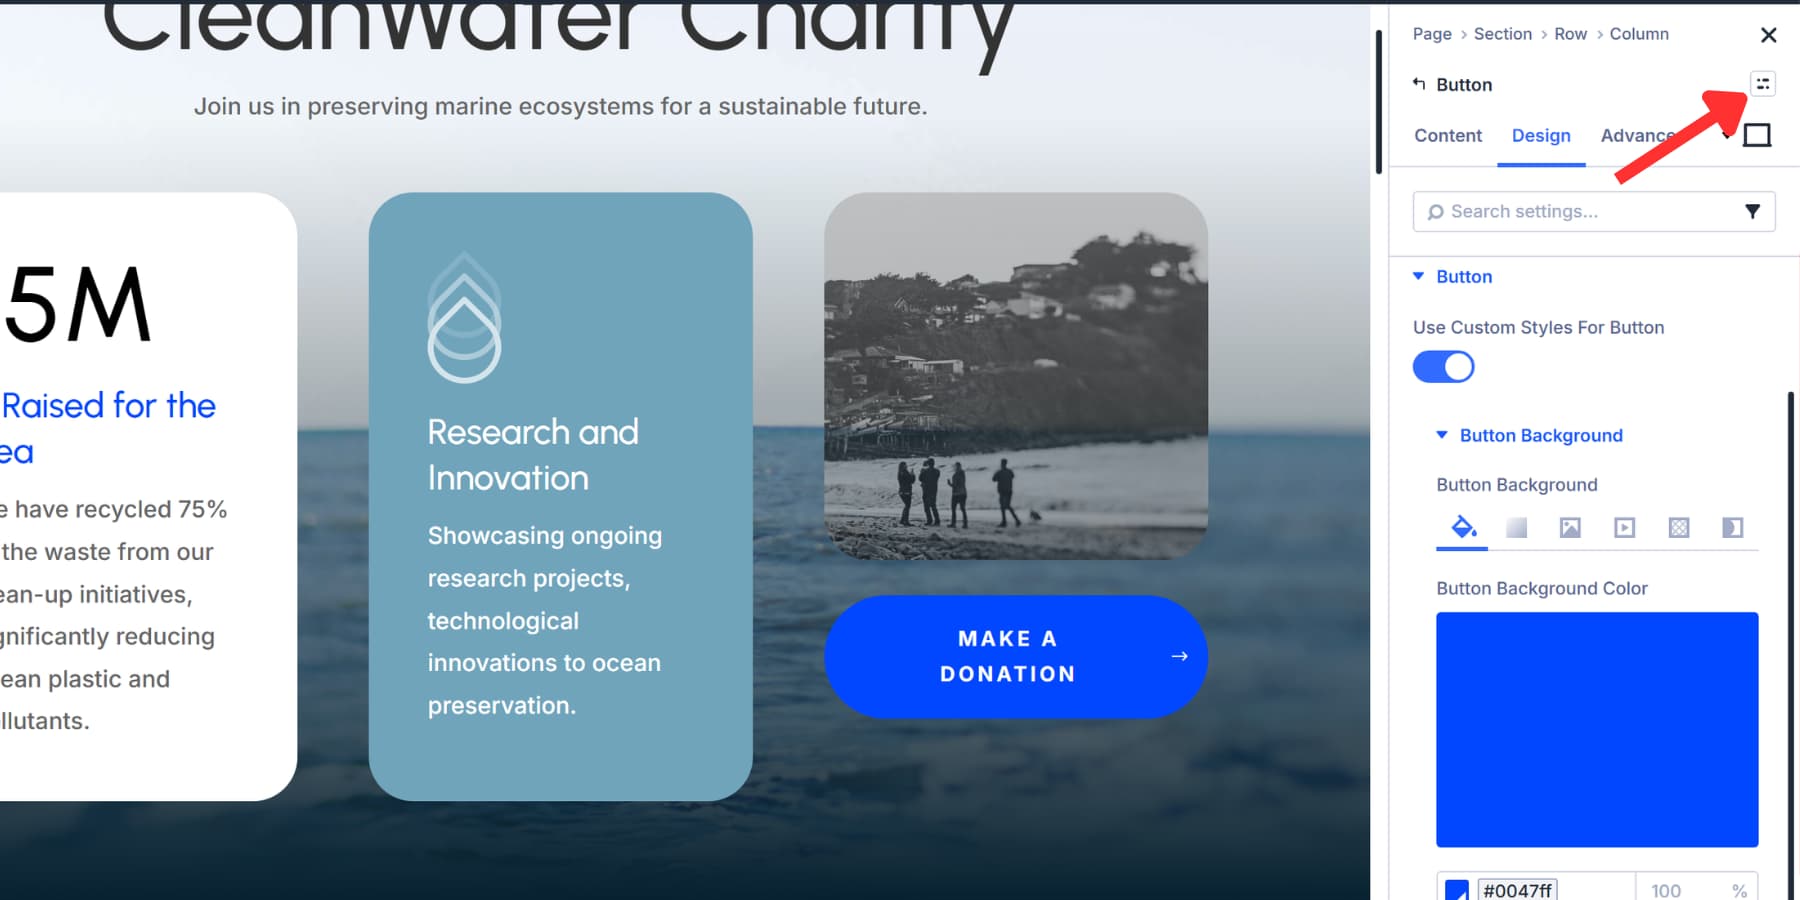
Select New Preset From Current Styles from the dropdown. A dialog appears asking for a preset name. Choose something descriptive that you’ll remember later, rather than generic labels, when managing multiple presets.
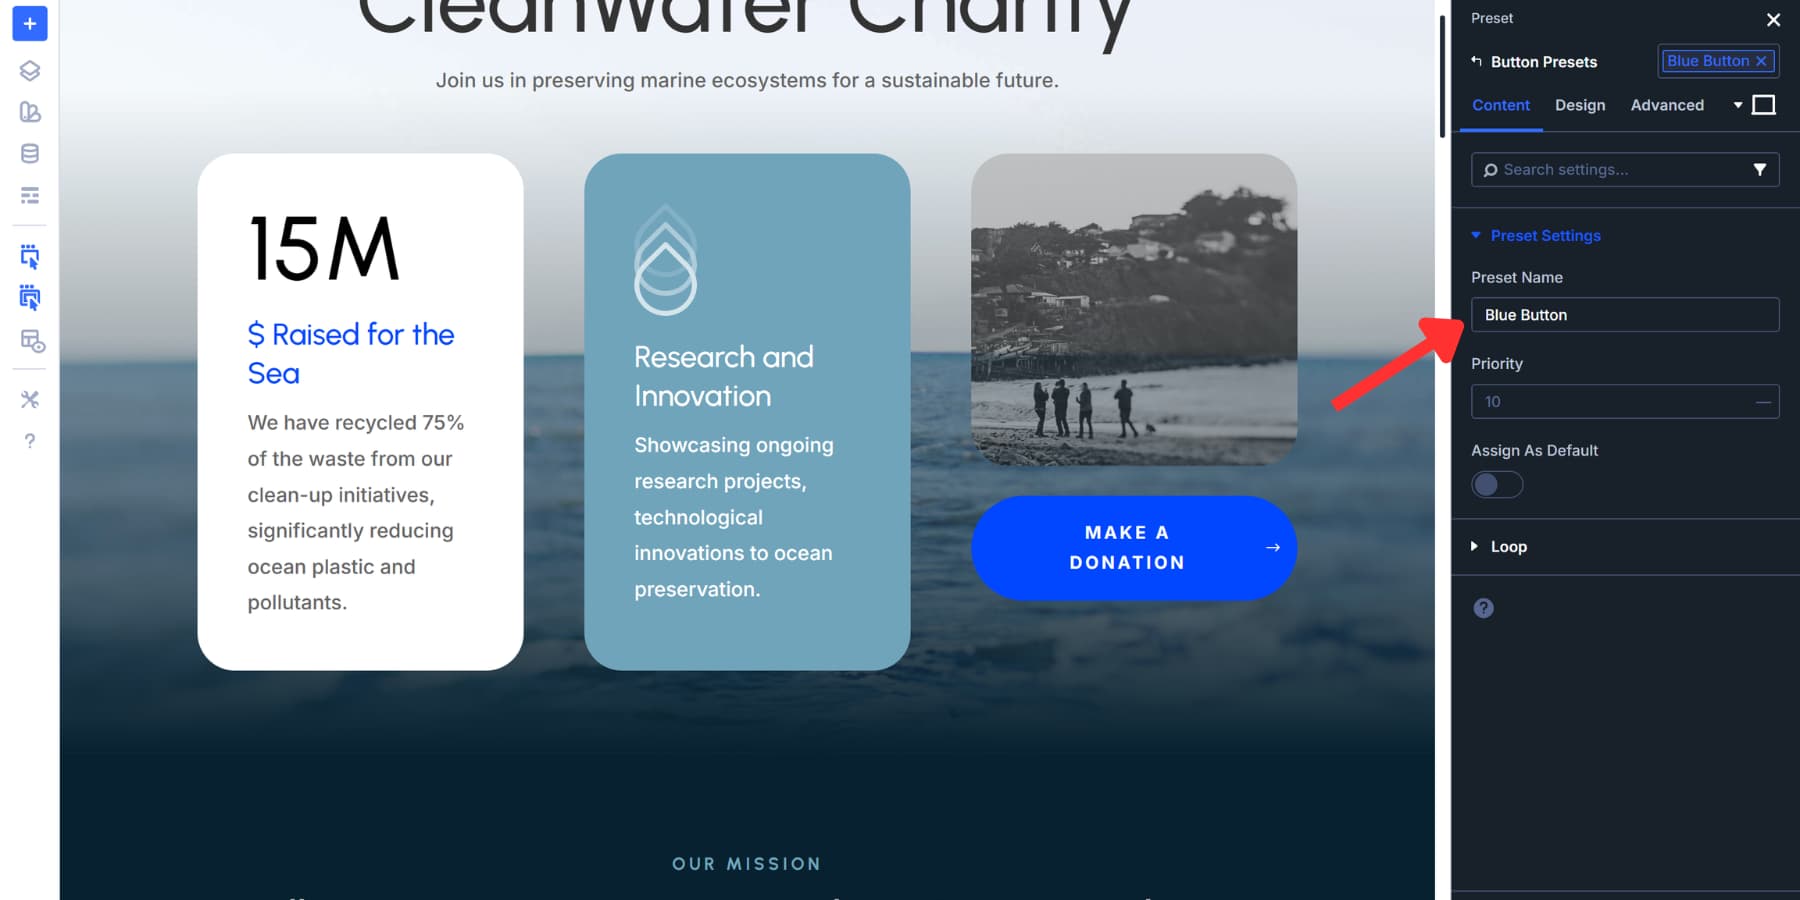
The dialog includes an Assign As Default toggle. Turn this on if you want every new instance of that element type to use these settings automatically. A default Button Preset means every Button you add inherits the styling without any extra clicks.
Click Save Preset. Done. That configuration now stays in your preset library, ready to use.
To apply this preset elsewhere, open any element of the same type. Click the preset menu and select your saved preset. The element adopts all those settings, including the nested Option Group Presets, instantly.
What Are Stacked Presets
Stacked Presets allow you to layer multiple presets on a single element. Apply a base preset, then add others on top for contextual adjustments. All of them work together without conflict.
Divi previously limited you to one preset per element. Now you can stack as many as needed. A Button Module can use a primary style preset, a dark mode preset, plus a spacing preset simultaneously. Each handles different properties, and they combine to create the final look.
This works well for pages with alternating sections. Build a light text preset that adjusts colors for dark backgrounds. Apply your standard module preset first, then stack the light text preset when that module sits in a dark section. The structure stays intact while colors adapt.
You can also stack presets controlling different properties. A border radius preset combines with a shadow preset and a spacing preset. Change one, and every element using that stack updates while the others remain unchanged.
How To Stack Presets
Open any element in the Visual Builder. Navigate to the settings panel and locate the preset dropdown. This appears in the top right corner of the element settings.
Click the dropdown and select your first preset. The element adopts those settings immediately. Then, click the same preset dropdown again. Your first preset remains active. Select a second preset from the list. Both presets now apply to the element simultaneously. The settings combine without overwriting each other.
Repeat this process to add more presets. Each additional preset layer is added onto the existing stack. The element displays the combined result of all active presets.
To remove a stacked preset, click the preset dropdown and deselect it from the list. The remaining presets stay active. To see which presets are currently stacked on an element, open the preset dropdown. Active presets show a checkmark or highlight.
What Are Nested Presets
Nesting works differently from stacking. Instead of layering presets on top of each other, you embed Option Group Presets inside Element Presets. Build a CTA Element Preset, and nest your typography preset, spacing preset, and border preset within it. Apply that CTA preset anywhere, and all nested pieces deploy together automatically.
This structure pays off during updates. Swap the nested typography preset inside your CTA Element Preset, and every CTA using it adopts the new text treatment instantly. The spacing stays the same. The borders stay the same. Only the typography changes because you replaced just that one nested component.
You still control each piece independently. Use that same typography preset on a Text Module. Apply your border preset to an Image. Nesting packages them into Element Presets while keeping each Option Group available for standalone use. You get complete assemblies and individual parts from the same library.
How To Create Nested Presets
Building nested presets takes two steps. First, create your Option Group Presets for individual properties, such as typography, spacing, and borders. Style any element, then save each design property as its own preset with a clear name. You can apply it to the Option Group, similar to stacked presets.
Next, create an Element Preset that bundles them together. Open the preset menu in the top right corner of your element settings and select New Preset From Current Styles. Divi automatically nests all the Option Group Presets you’ve applied, eliminating the need for extra work. Name it, save it, done.
Apply that Element Preset to any matching element type, and the complete design deploys with all nested pieces intact. To swap nested components later, open the Element Preset and click the settings icon. Select a different preset from your library. Every element using that parent preset updates instantly.
How Each Preset Type Works In Divi 5
All preset types and methods work beautifully in Divi 5, and choosing between them becomes natural once you see what each one handles best. This section breaks down the specific scenarios where each preset type is most useful, allowing you to work faster without second-guessing.
When To Reach For Option Group Presets
Option Group Presets work best when you need the same style to appear across different element types. They save time on repetitive styling tasks that would otherwise slow down your builds:
| Use Option Group Presets When | Example Scenario |
|---|---|
| Styling repeats across multiple element types | A box shadow that appears on sections, columns, and modules |
| Building foundational design systems | Typography settings for all H1 headings sitewide |
| Button styles appear in different modules | Contact forms, blurbs, and CTAs all need the same button treatment |
| Creating reusable spacing patterns | Consistent padding that applies to various containers |
| Setting up border treatments | A 2px radius border used on images, rows, and buttons |
| Configuring scroll effects | Fade animations that work across sections and modules |
| Defining background styles | Gradient backgrounds applied to multiple element types |
Reach for Option Group Presets whenever a single style needs to be reused in multiple places. They let you define once and deploy everywhere, keeping your design cohesive without rebuilding the same settings over and over.
When To Use Element Presets Instead
Element Presets shine when you need to deploy a fully styled element repeatedly. They capture everything about a specific element type in one package, making them perfect for complete designs that appear multiple times across your site.
| Use Element Presets When | Example Scenario |
|---|---|
| Creating complete module designs | A fully styled CTA module with typography, colors, spacing, and effects |
| Building recurring page sections | Hero sections that appear on multiple landing pages |
| Styling testimonial layouts | Testimonial modules with consistent design across your site |
| Deploying pricing tables | Pricing modules that need identical styling throughout |
| Setting up feature sections | Feature rows with specific layouts and styling patterns |
| Creating branded content blocks | Blurb modules with your company's visual identity baked in |
| Building navigation elements | Menu modules styled to match your header design |
Element Presets work best when you’re copying an entire element’s design, not just one property. They package everything together, so you can drop fully styled elements onto any page without needing to adjust the settings again.
When To Use Stacked Presets
Stacked Presets allow you to apply multiple presets to a single element simultaneously. Here’s when to find them:
| Use Stacked Presets When | Example Scenario |
|---|---|
| Combining base styles with contextual variations | A feature card with your standard Element Preset plus a Dark Background Option Group Preset for sections with dark layouts |
| Adding alignment options to existing designs | Apply your CTA Element Preset, then stack a Center Alignment Option Group Preset for hero sections |
| Layering responsive adjustments | Stack a Mobile Spacing Option Group Preset on top of your default section to adjust padding on smaller screens |
| Mixing temporary or seasonal styling | Add a Holiday Theme Option Group Preset to existing modules during promotional periods |
| Applying accessibility enhancements | Stack a High Contrast Option Group Preset over standard elements for improved readability |
| Creating layout variations quickly | Combine your base Blurb Element Preset with different Image Position Option Group Presets |
| Adding hover effects to multiple elements | Stack a Hover Animation Option Group Preset across different module types |
Reach for stacking when you need combinations without creating separate presets for every variation. Three base presets stacked in different ways can cover a wide range of scenarios.
When To Use Nested Presets
Nested Presets embed Option Group Presets inside Element Presets, making individual components swappable without rebuilding the whole thing. Here’s when they become useful:
| Use Nested Presets When | Example Scenario |
|---|---|
| Building modular design systems | Create a Blurb Element Preset with nested Typography, Spacing, and Border presets that clients can swap individually |
| Managing brand variations for clients | A parent company Element Preset contains nested Color and Logo presets that swap out for each subsidiary brand |
| Creating tiered service packages | Your Pricing Table Element Preset nests different Badge and Button presets for Basic, Pro, and Enterprise tiers |
| Handling multilingual typography | Your base Section preset nests different Font presets that swap based on language without touching layout or spacing |
| Testing design iterations | Nest multiple Typography presets inside your Hero Section preset to A/B test different heading styles quickly |
| Building white label templates | Your agency Element Presets nest swappable Brand Color and Typography presets for different client projects |
| Managing seasonal content updates | Holiday sections nest different Icon and Decoration presets that swap monthly while structure stays consistent |
Use nesting when you want Element Presets with replaceable parts. Change one nested component, and it updates everywhere that Element Preset appears.
Comparing All Four Preset Types
Divi 5 hands you two preset types: Option Group Presets and Element Presets. Then you have two techniques: Stacked and Nested. The techniques work with both preset types, not as standalone categories. This section compares the two core preset types, explains when to use each method, and shows how all four elements work together in your builds.
Option Group Presets vs Element Presets
Since Nesting and Stacking work across both Option Group and Element Presets, this comparison focuses on the two foundational preset types themselves. Understanding how these two differ helps you pick the right one before you start stacking or nesting them together:
What’s The Similarity Between Presets
Both preset types, Option Group and Element, share the same core mechanics in Divi 5. Understanding these shared traits helps you see how they complement each other rather than compete:
- Global Updates: Change a preset once, and every instance using it updates automatically across your entire site. No hunting down individual elements.
- Supports Design Variables: Both components support all Design Variables.
- Default Settings: Set any preset as default so new elements inherit those styles immediately. Saves clicks on every build.
- Individual Overrides: Tweak a single instance without breaking the global connection. The element stays linked to the preset while showing your custom adjustments.
- Stacking Capability: Apply multiple presets to the same element. Stack different Option Group Presets together, or nest Element Presets with additional styles.
- Preset Library Access: Both presets are available in their respective preset library for instant reuse. Name them well, and they become part of your design system.
These similarities mean you’re learning one system, not two. Master the workflow once, and both preset types become second nature during builds.
How Are The Presets Different
While both presets share core mechanics, they match in scope and application. These differences determine which preset fits your current task. Here’s where each one stands apart:
- Scope: Element Presets capture every setting for an entire element type. Option Group Presets focus on individual design properties like borders, typography, or spacing.
- Cross Element Flexibility: Option Group Presets work across all element types. A single border preset applies to sections, rows, columns, and modules. Element Presets stay locked to one element type. A Button Preset only works on Button Modules.
- Interactions Support: Interactions for Divi 5 currently only supports toggling Element Presets, not Option Group Presets on triggers like click or viewport enter.
- Modular vs. Complete: Option Group Presets serve as building blocks that you can mix and match. Element Presets deliver complete design packages that include everything at once.
These distinctions make each preset type more suitable for specific tasks. Element Presets deploy finished designs. Option Group Presets build design systems. Use them together, and you get both speed and flexibility in every build.
Stacked vs Nested: When To Use Each Technique
Both stacking and nesting expand the capabilities of presets, but they work differently. Stacking multiple layers of presets onto one element. Nesting embeds Option Group Presets inside Element Presets so you can swap them individually. Here’s how they compare:
| Stacked Presets | Nested Presets | |
|---|---|---|
| What It Does | Applies multiple complete presets to one element at the same time | Embeds swappable Option Group Presets inside an Element Preset |
| How It Works | Layer preset on top of preset (Dark Mode + Left Align + Shadow) | Option Group Presets become replaceable components within the Element Preset |
| Structure | Multiple separate presets applied externally | Option Group Presets built directly into the Element Preset structure |
| Example | Apply three presets to one Blurb: Dark Mode + Left Alignment + Box Shadow | A Blurb Element Preset contains Title Typography as a nested preset that can be swapped without affecting spacing or colors |
| When To Use | When you need to combine multiple style variations on a single element immediately | When you want to swap specific style components later without rebuilding the preset |
| Flexibility | Mix and match any compatible presets on the fly | Swap individual nested components while preserving the overall structure |
Stacking combines multiple presets from outside. Nesting builds presets with replaceable parts inside.
How They Work Together
All four pieces build on each other. Start by creating Option Group Presets for your foundational styles, such as typography, spacing, and borders. Build Element Presets for complete modules, such as CTAs or feature cards.
Nesting allows you to embed Option Group Presets within your Element Presets. Your CTA Element Preset now contains swappable typography and spacing components, rather than fixed values. When you need to change just the heading style across all CTAs, swap out the nested typography preset without affecting any other elements.
Stacking handles variations. Apply your base CTA Element Preset to a module, then stack a Dark Background Option Group Preset on top for sections with darker layouts. The base stays the same, but you add contextual styling without rebuilding.
The workflow becomes simpler: build your Option Group library, nest them into Element Presets for reusable components, then stack additional presets when specific instances need something extra. Each technique solves a different problem, but they all reduce the repetitive work that slows down builds.
Try Presets In Divi 5 Today!
Presets work better together than apart. Option Group Presets build modular systems. Element Presets deploy complete designs. Stacking combines them for variations. Nesting makes them swappable. All four sync globally, cutting hours from every project.
Start with the basics. Create Option Group Presets for your foundational styles. Build Element Presets for complete modules. Nest them when you need replaceable parts. Stack them when you need combinations. Your workflow speeds up naturally once you stop recreating the same styles repeatedly.
Mix these techniques throughout your builds. Use Design Variables instead of hardcoding, and consistency becomes automatic instead of tedious. Divi 5 gives you all four tools. Download it and see how quickly your builds begin to move.


Leave A Reply