

Creating unique text designs for your website can be challenging, especially if you don’t want to use a ton of CSS or resort to supplementing seo-friendly text for images you design in Photoshop. With Divi (and some “out of the box” thinking), you can create some unique text designs without any external css or custom images. The trick is to use Divi’s section dividers to overlay your text to add breaks and texture in a number of different ways. In this tutorial, I’m going to explore the power of Divi’s section dividers to create some unique text designs that will take your page headers to the next level.
Let’s get started.
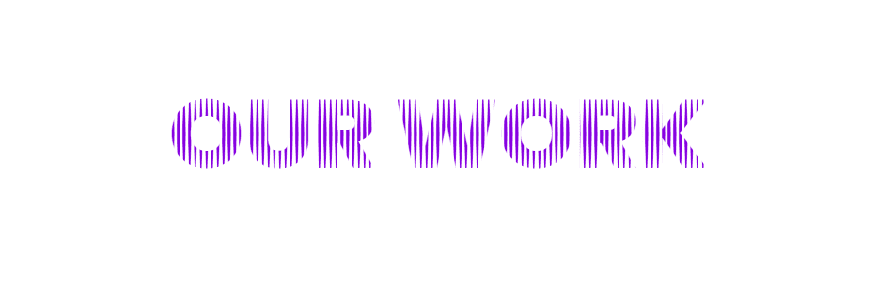
Sneak Peek
Here is just a few examples of the text designs possible using this technique:


Getting Started
For this design, you will need to create a new page using the visual builder. From your WordPress Dashboard, navigate to Pages > Add New. Then give your page a title and deploy the visual builder. Select the option “Build from Scratch”. Now you are ready to start!
Design #1: Broken Text with a Gradient Highlight
In this first text design, I’m going to use section dividers to break up the text and add a uniquely shaped highlighting element using a gradient background. Add a new section with a one column layout. You don’t need to add a module at this point. We will start with customizing the section first.
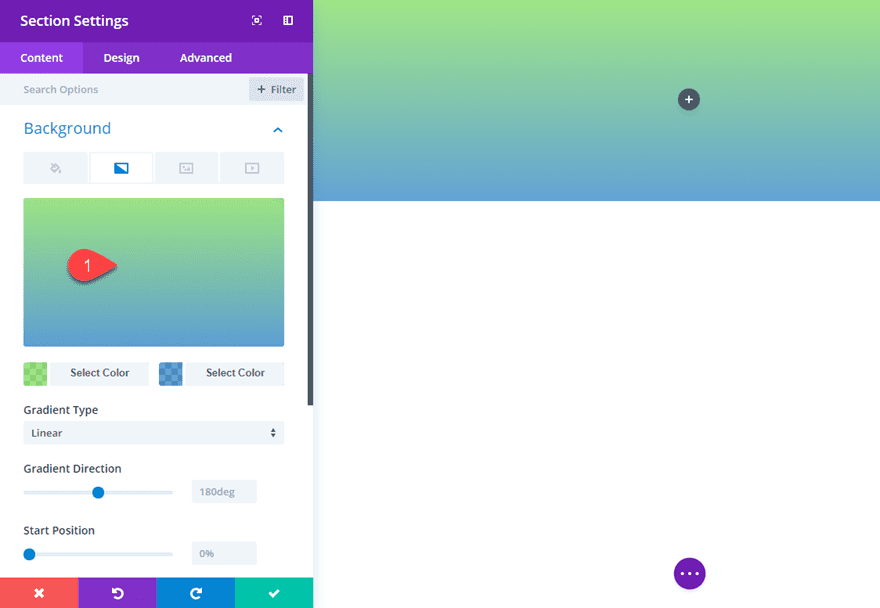
Section Settings
Open the section settings and update the following:
Background Gradient Left Color: rgba(124,218,36,0.66)
Background Gradient Right Color: rgba(0,106,193,0.61)
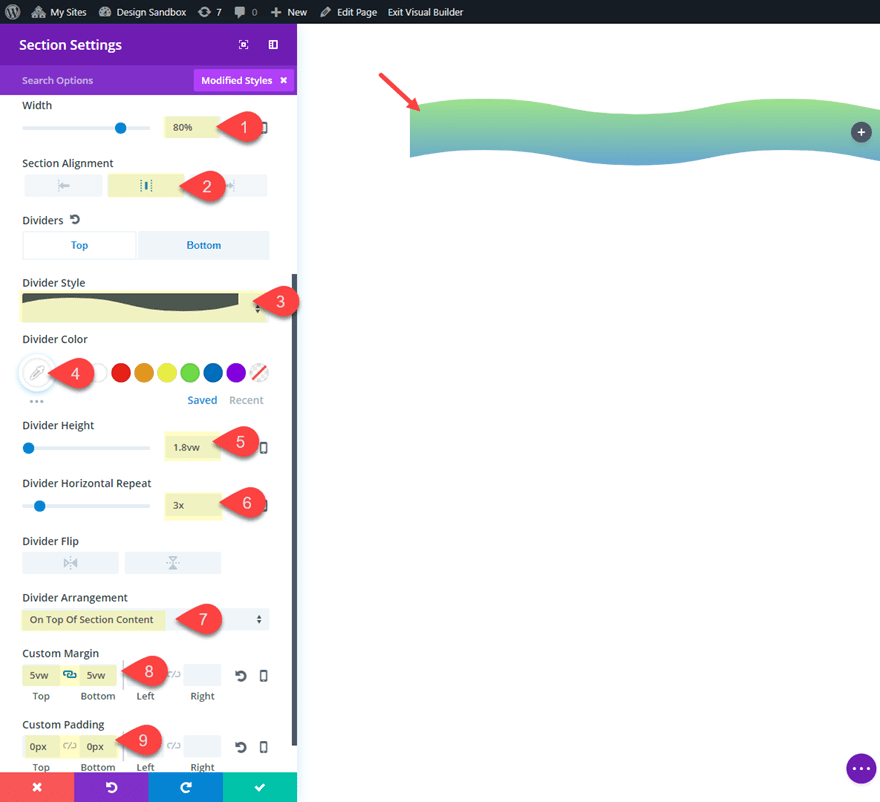
Width: 80%
Section Alignment: Center
Top Divider Style: see screenshot
Top Divider Color: #ffffff
Top Divider Height: 1.8vw
Top Divider Horizontal Repeat: 3x
Top Divider Arrangement: On Top Of Section Content
Bottom Divider Style: see screenshot
Bottom Divider Color: #ffffff
Bottom Divider Height: 1.8vw
Bottom Divider Horizontal Repeat: 3x
Bottom Divider Arrangement: On Top Of Section Content
Custom Margin: 5vw Top, 5vw Bottom
Custom Padding: 0px Top, 0px Bottom
Since the design of your text will take place using the section dividers, it is important to keep the section compact without any padding so that dividers will overlap the text with minimal divider height. Setting the divider height with a vw length unit will make sure the divider style will scale nicely for a consistent design on all screen sizes. Giving the section a custom margin is optional but also helpful for spacing since we will be using negative margins on our text module to extend it above and below our section (this should make more sense later on).
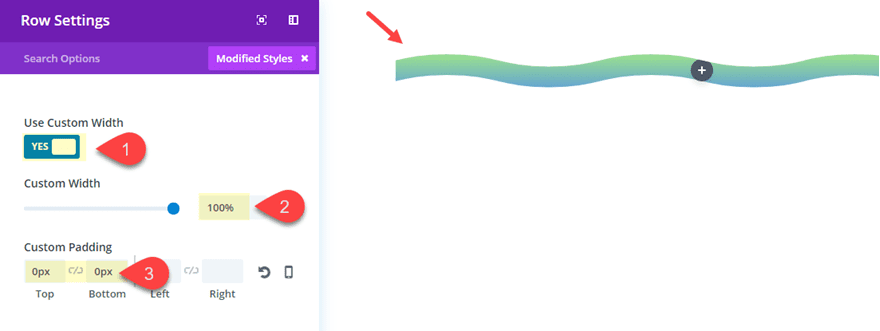
Row Settings
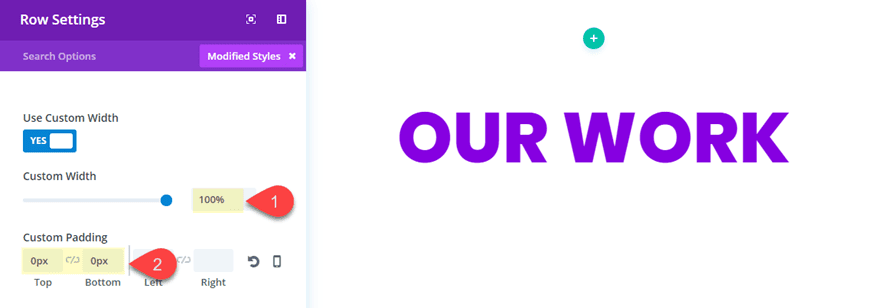
For the row, all we need to do is adjust the width and the padding. Update the following row settings:
Custom Width: 100%
Custom Padding: 0px Top, 0px Bottom
Since our text will be added to the row column, we need to get rid of the padding so that our dividers will hug the top and bottom of our text.
Text Module Settings
Now we can finally add the text module to the one column row. Inside the row, add a text module with the content “our work”. Then update the design settings as follows:
Text Font: Oswald
Text Font Style: TT
Text Text Color: #0c71c3
Text Text Size: 10vw
Text Line Height: 1em
Text Orientation: Center
Custom Margin: -5vw Top, -4vw Bottom
Custom Padding: 2vw Top, 2vw Bottom
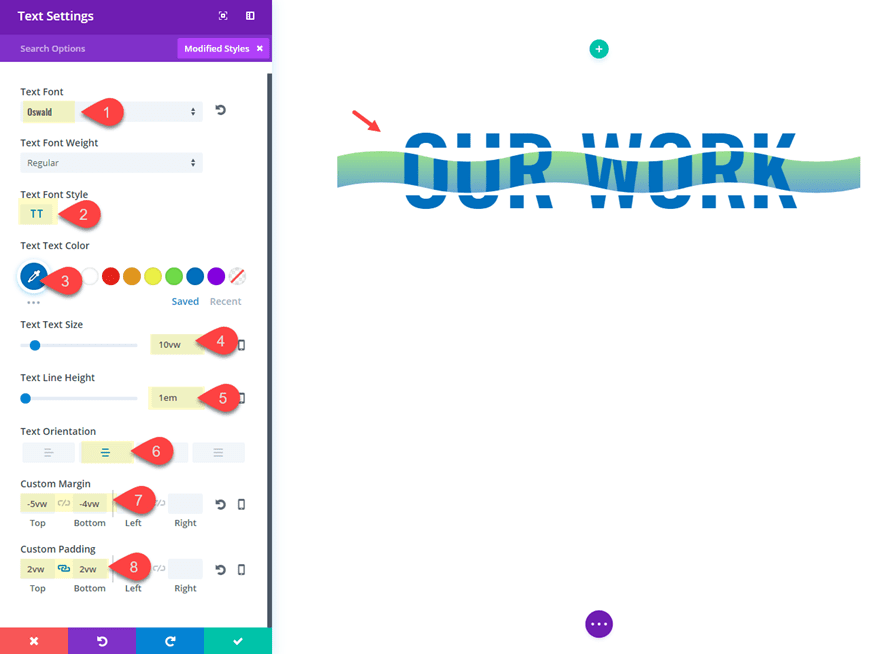
The key here is to use the custom negative margin to extend the text above and below the section. This allows the section dividers to overlap the inside of the text to create the broken design effect. And the background gradient shines through to give it a nice design touch as well. The result is perhaps one of my favorite text designs that opens the door for a ton of creative variations.
Here is the final design.
Text Design #2: Text with a Vertical Line Texture
For the second text design, go ahead and create a new section with a one column row. Then add a text module to the column. Instead of customizing the section first, I thought it best to start with the text module so you can see the design process better.
Text Settings
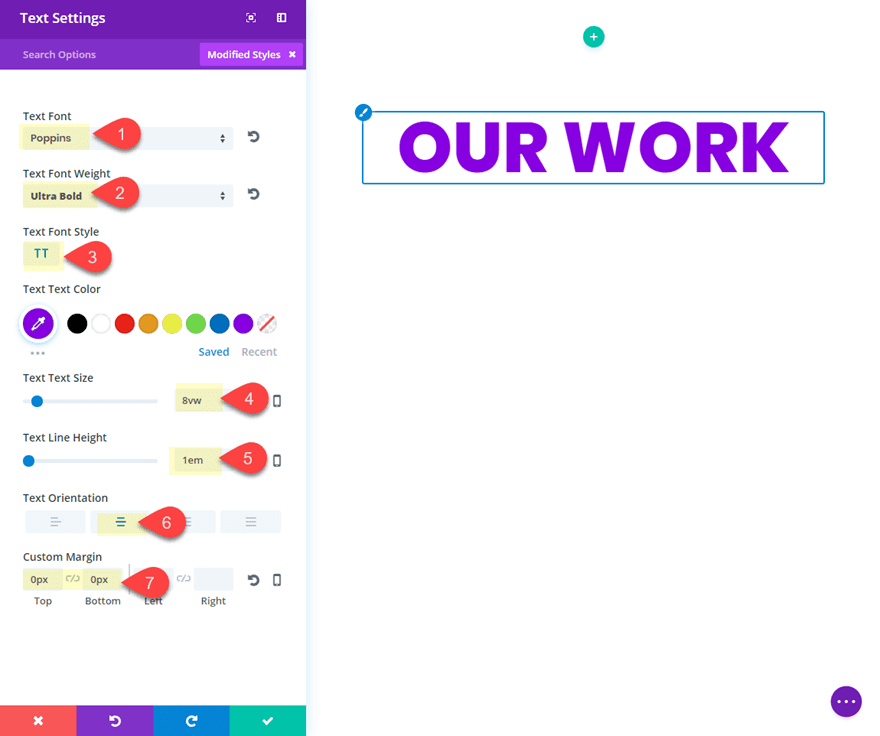
In the one-column row, add a text module with the content “our work”. Then update the design settings as follows:
Text Font: Poppins
Text Font Weight: Ultra Bold
Text Font Size: 8vw
Text Line Height: 1em
Text Orientation: Center
Custom Margin: 0px Top, 0px Bottom
Row Settings
The row settings will be the same as the first design example, so you can copy the row styles and paste them into this row. Or just update the row settings as follows:
Custom Width: 100%
Custom Padding: 0px Top, 0px Bottom
Section Settings
Update the section settings as follows:
Width: 70%
Top Divider Style: see screenshot
Top Divider Color: #ffffff
Top Divider Height: 8vw
Top Divider Horizontal Repeat: 150x
Top Divider Arrangement: On Top Of Section Content
Bottom Divider Style: see screenshot
Bottom Divider Color: #ffffff
Bottom Divider Height: 8vw
Bottom Divider Horizontal Repeat: 150x
Bottom Divider Flip: Vertical
Bottom Divider Arrangement: On Top Of Section Content
Custom Padding: 0px Top, 0px Bottom
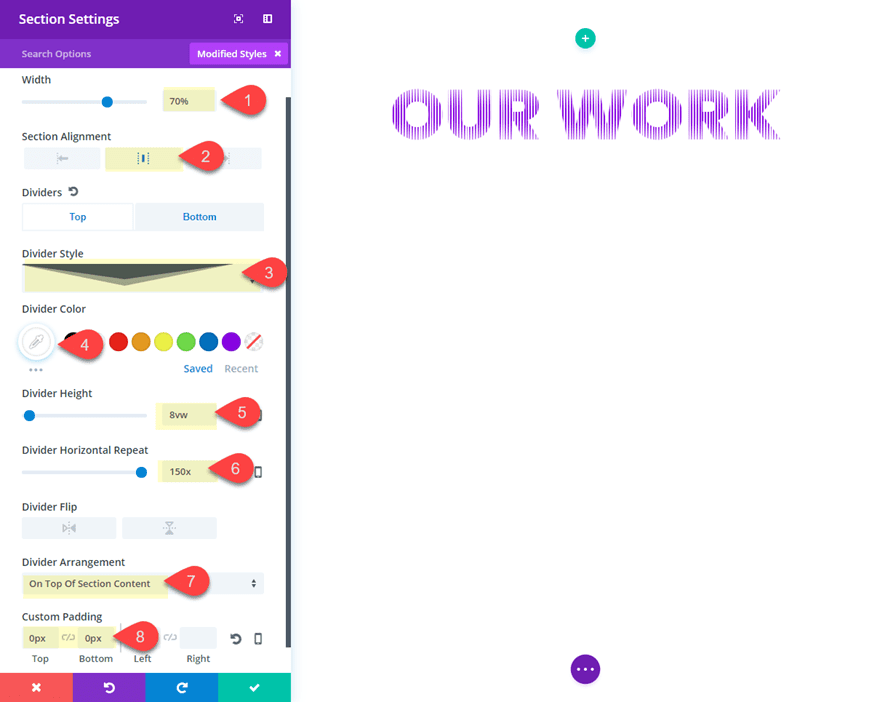
The key to this design is the Divider Horizontal Repeat option. Setting the divider horizontal repeat to 150x with a height equal to the height of the text creates a series of overlapping vertical lines that extend from the top and bottom of the section. Don’t forget to set the Bottom Divider to flip vertically so that the “lines” will extend upward.
Here is the final design.
Design #3: Text with Partial Texture on the Top and Bottom

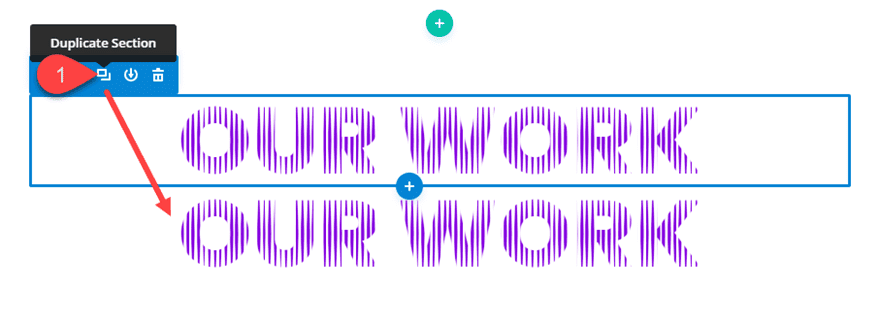
To speed up the process for this next design, go ahead and duplicate the section you just created in the second design example above.
Update Section Settings
Background Color: #e02b20
Top Divider Style: see screenshot
Top Divider Color: #e02b20
Top Divider Height: 3vw
Top Divider Horizontal Repeat: 30x
Bottom Divider Style: see screenshot
Bottom Divider Color: #e02b20
Bottom Divider Height: 3vw
Bottom Divider Horizontal Repeat: 30x
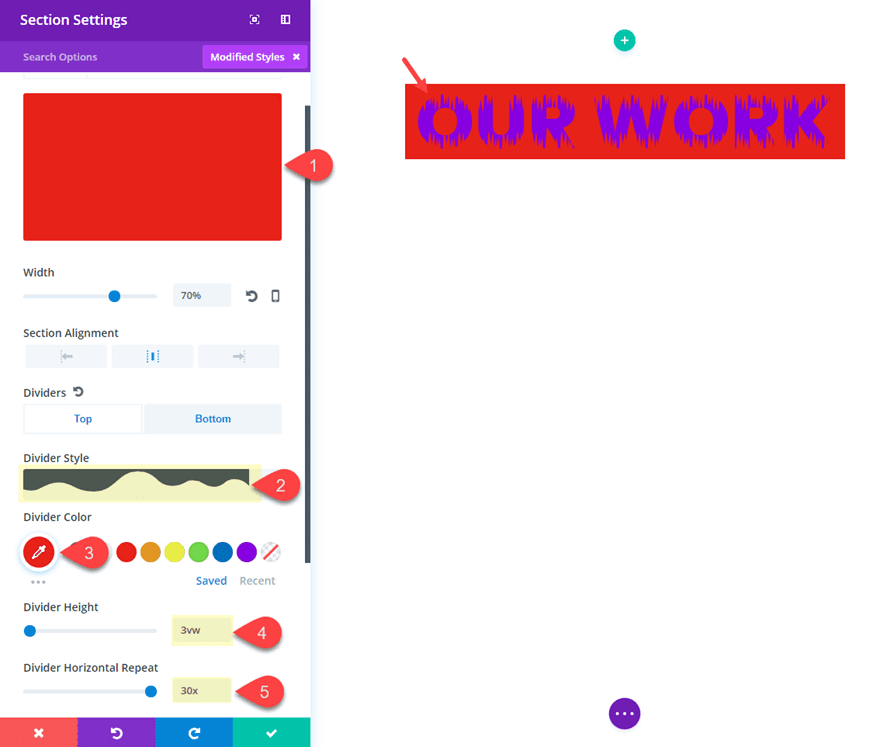
The key here is to make sure your divider color matches the section background color so that the dividers are only visible where they overlap the text.
Update Text Settings
Now all that’s left is updating the text text color:
Text Text Color: #ffffff
Here is the final design.
A Fun Design Alternative to Design #3
Before I leave this design, I thought I’d share how the bottom divider in this section can easily be turned into grass so that the text looks like it is sitting in a field. To do this, update the settings as follows:
Background Gradient Left Color: #68a4d8 (the sky)
Background Gradient Right Color: #1c7503 (the grass)
Start Position: 82%
End Position: 0%
Custom Padding: 5vw Top
Top Divider Style: Clouds (or bubbles?)
Bottom Divider Color: #1c7503
Then update the text color to #000835
Here is the result.
What About Mobile?
Because the vw length unit has been used throughout these designs, the text and divider styles will scale nicely on all browsers without the need to assign additional sizes on tablet and smartphone. However, if you run into the problem of the text scaling down too little on smartphone, you may need to increase the text size vw length unit value.
Final Thoughts
I hope you had some fun experimenting with section dividers for unique text designs. With all the different fonts, colors, and divider styles available in Divi, I’m sure you won’t have any trouble creating some awesome looking text designs of your own for your next project.
For more inspiration on how to use section dividers in creative ways, check out these background textures, navigation menu frames, and bottom footer bar backgrounds.
Until next time, I look forward to hearing from you in the comments.
Cheers!


Using viewpoint unit vw as height as in your example “Bottom Divider Height: 1.8vw” don’t work in the Firefox Browser on Win11. It used to work earlier but maybe Mozilla has changed this (135.0.1 Firefox Release February 18, 2025).
According here, firefox supports vw unit:
https://www.lambdatest.com/web-technologies/viewport-unit-variants-firefox
Can you please try checking while in Firefox Private mode and see if the problem persists? If it still does, feel free to reach out to our support team by starting a conversation on our website.
This tutorial was wonderfully clear, helpful, and easy to follow. Thank you for all of that, and for posting these for free! I’m only two weeks into using Divi (and Divi Builder) and I’m thrilled by how much I can do and the flexibility in design options.
Thank you Jason for your technique and good tutorial.
These are really cool ideas! Thank you.
Gee whiz, Enrique, Jason showed us a design technique! It’s up to us to take it to the next level. Once again Jason, thanks for the tutorial. I learned a lot.
I don’t mean to be rude, but I don’t think these text effects are stunning at all as the title reads, too old fashion and tacky instead…
Enrique,
That’s understandable. This post is primarily to show the design possibilities rather than to stand alone as “stunning” designs.
I understand that, but takes the same amount of time using better design examples and the post would look much better overall.
Feel free to share some of your own designs for inspiration.
That’s not the point at all and that’s not my job either…
I’m just suggesting that u could improve some of your posts by using better design examples because some of the ones u choose are too tacky.
U can take it as a constructive critique or get a bit defensive, but my intention is not to heart your feelings, just helping u out because I care about this blog which I read daily 😉
This was awesome Stuff Jason. These tutorials offer practical design tips while helping us become more familiar with Divi builder itself. Thank you.