
Divi and its bottom footer bar is a small but significant piece of your website. And with certain page layouts, there may be a need to add a creative final touch to that bottom bar.
In this tutorial, I’m going to show you how to add custom background designs for Divi’s bottom footer bar. By stripping out the default background color of the bottom footer bar and adding some custom margin to a section, you can harness the design settings of a section to create cool background designs.
Let’s get Started.
A Sneak Peek
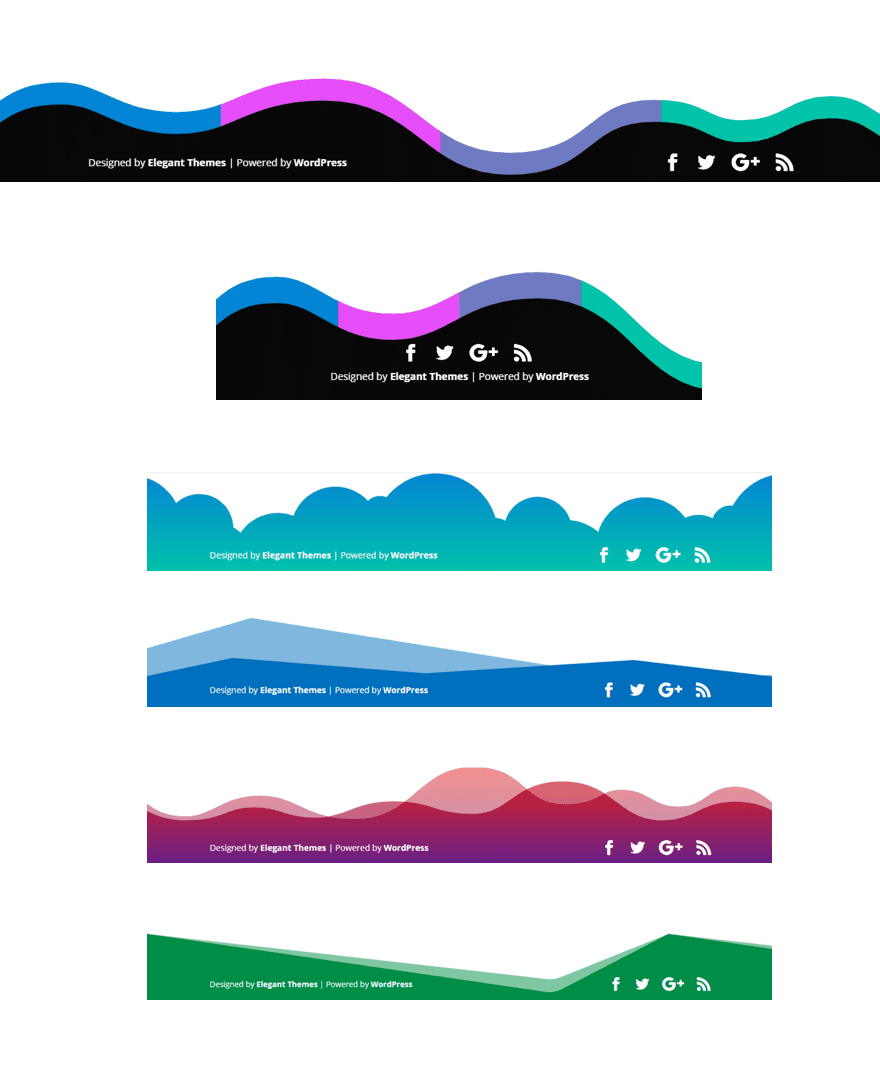
Here is a sneak peek of a few example designs you can build with this tutorial.
Before we can add custom backgrounds behind our bottom footer bar, we need to get rid of the default background color being used.
Go to the theme customizer and navigate to Footer > Bottom Bar. Then change the background color to be completely transparent.
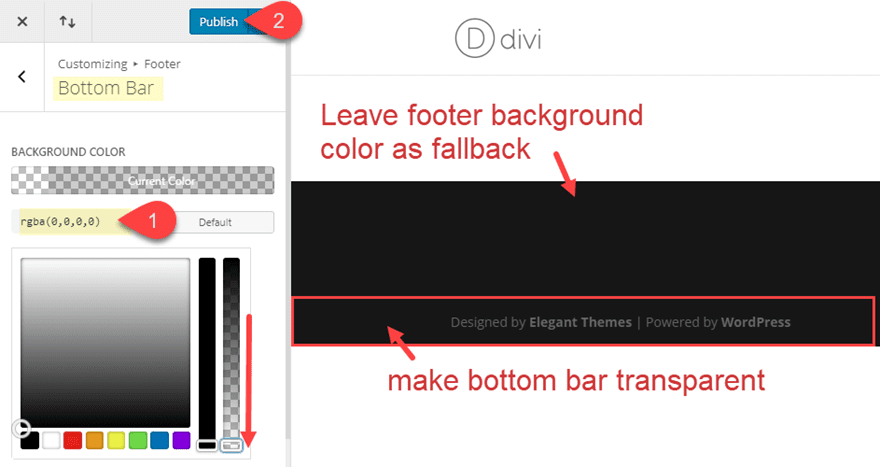
You may not notice much of a change in the preview because there is still a footer background color sitting behind the bottom bar. The footer background color can be changed under Footer > Layout, but it is a good idea to leave that background color active as a fallback. The custom background will be added to the bottom bar using a section on a page-by-page basis. So having this background will ensure your bottom bar content has a background on pages that do not have the custom background in place.
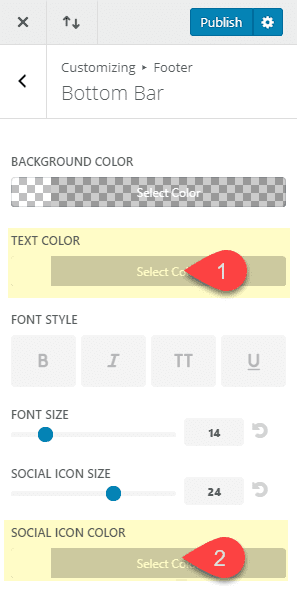
You can also change the bottom bar text color and social icon color to white if you plan to have a darker background design. This will make sure the content is more readable.
Creating the Section Background Design for the Bottom Bar
Now that the footer bottom bar has a transparent background, we are ready to design our section background and position it behind the bar.
If you haven’t already, create a new page and choose “Build from Scratch”. Then insert a one column layout for the section row.
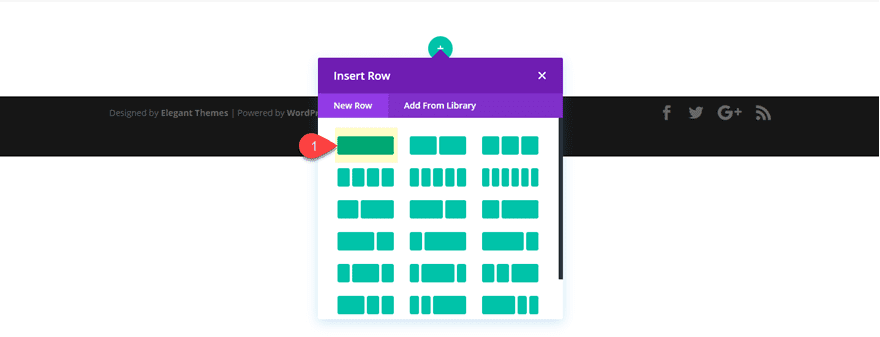
No need to add a module to the row since we are only going to need the section and row for the background designs.
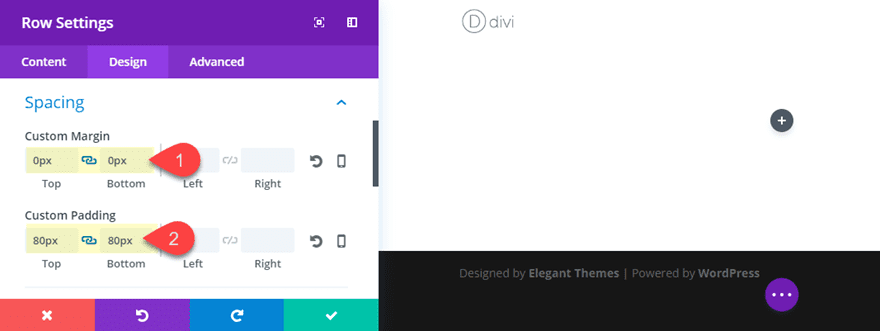
Next, go to the row settings and add some spacing as follows:
Custom Margin: 0px Top, 0px Bottom
Custom Padding (desktop): 80px Top, 80px Bottom
Custom Padding (tablet): 100px Top, 100px Bottom
This spacing is needed to give some height to our section while preserving the space needed for the section dividers we will be adding for our background design.
Now, go to the section settings and update the spacing as follows:
Custom Margin (desktop): -55px Bottom
Custom Margin (tablet): -94px Bottom
Custom Padding: 0px Top, 0px Bottom
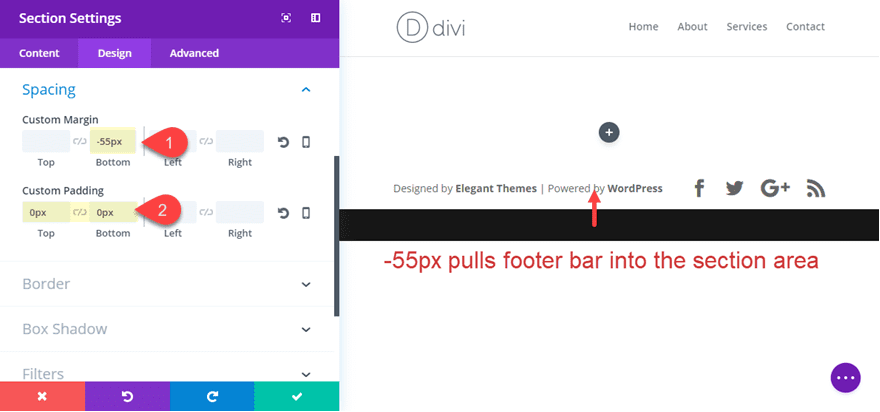
The -55px bottom margin pulls the bottom bar into the section area so that whatever design we add to our section will sit behind our bottom bar. The bottom bar by default is 54px high on desktop and about 94px high on tablet so that is why you need a greater negative margin for tablet.
Getting rid of the top and bottom padding maximizes the space needed for the section divider we will add later.
Adding the bottom divider
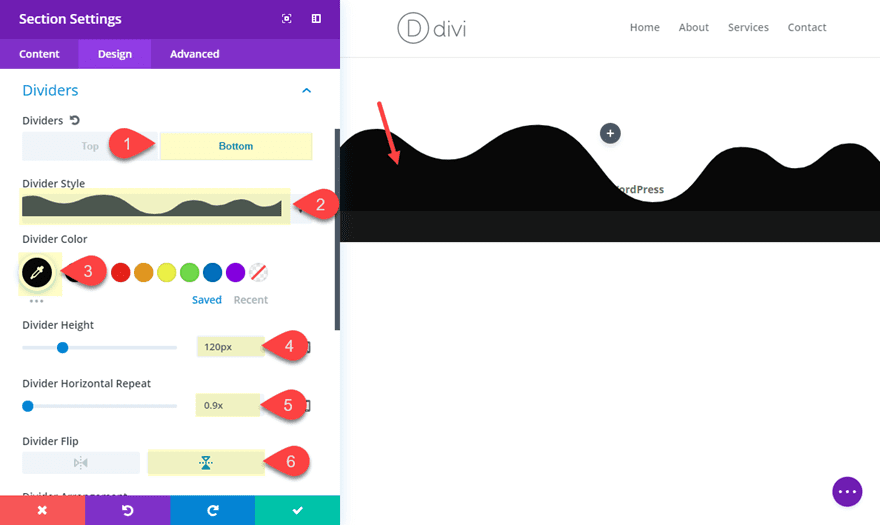
Next, add a bottom divider to the section to frame your footer content as follows:
Bottom Divider Style: see screenshot
Divider color: #121212
Divider Height: 120px (desktop), 150px (tablet), 150px (smartphone)
Divider Horizontal Repeat: 0.9x (desktop), 0.5x (tablet), 0.5x (smartphone)
Divider Flip: vertical
Right now, the bottom bar content (the text and the social icons) are being hidden behind the divider even though the divider arrangement is set to underneath section content. This is because the bottom footer isn’t technically a part of the section content. To fix this, we need to add a custom z-index to our section so that it sits behind the bottom footer.
Under the advanced tab, add the follow custom CSS snippet to the Main Element:
z-index: 0;
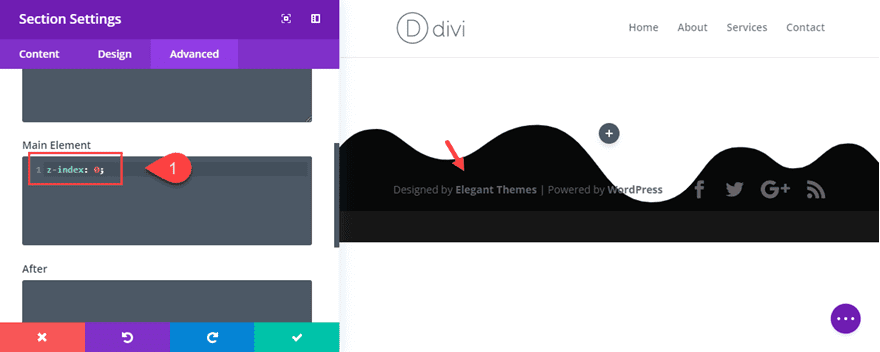
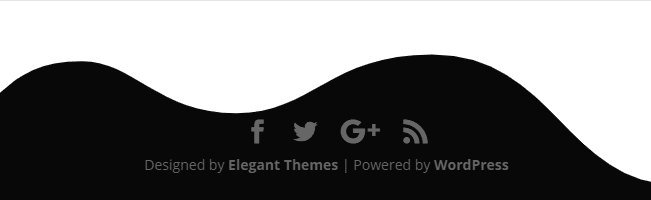
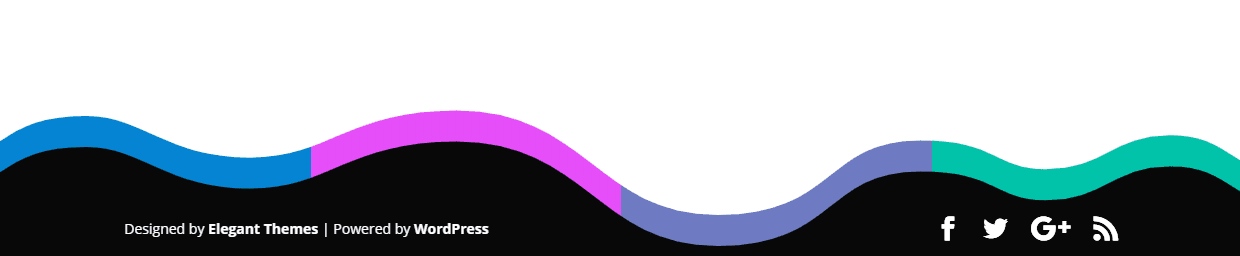
Now your footer bar content will sit above your section and you have a nice background design that frames your footer bar.

And it will adjust nicely on mobile as well.
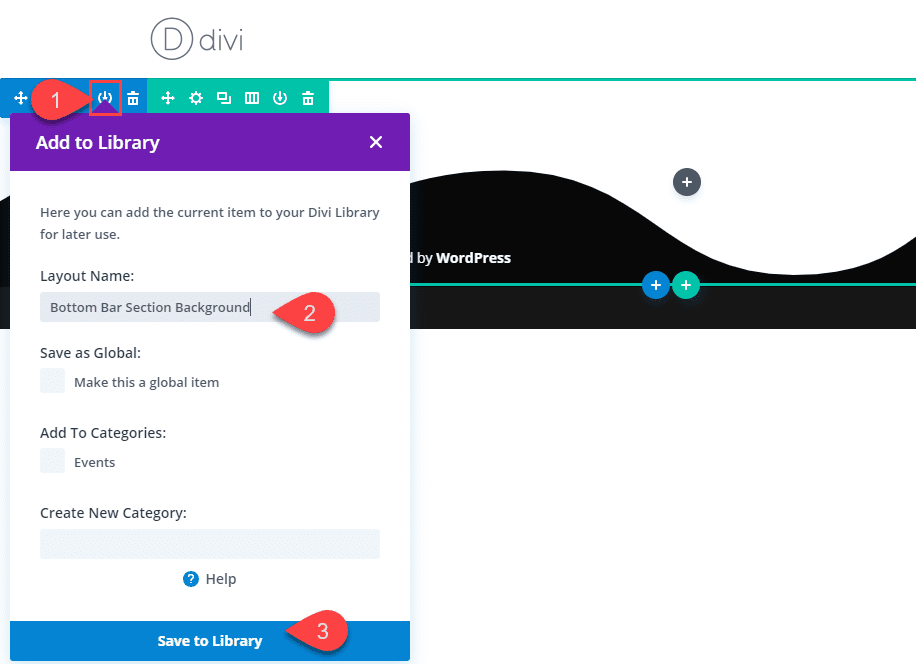
With this basic structure in place you have a nice section design to build upon. With that in mind, go ahead and save this section to your library so that you can used this structure as a starting point for exploring now designs.
Now you are ready to explore new designs. You can change the bottom divider to different styles and colors to create countless background frame designs.You may need to add adjust the divider height and horizontal repeat values depending on the divider style you choose.
Here are a few examples.


Using the Top Divider with a Custom Background Gradient
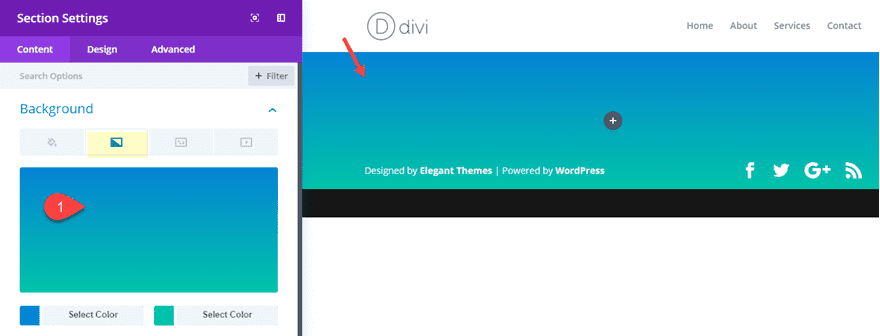
Using a single bottom divider as your background frame design for your bottom footer is somewhat limiting. But if you use a top divider as your frame design, you can use a custom background gradient for your section. This will open new doors to explore.
Go to your section settings and set your bottom divider style to none. Then add a background gradient to as your section background.
Now you can add a top divider style to your section to create a brand new look.
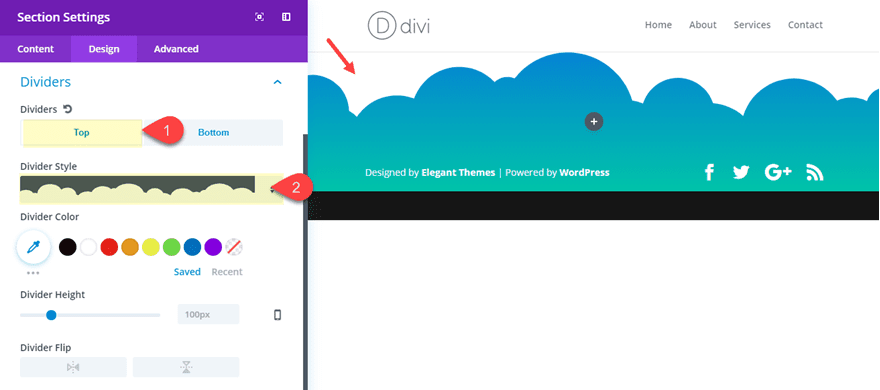
Here are a few example designs possible just by changing the gradient background and the divider style.

Combining Dividers with Background Gradients for a Multicolored Border Frame Design
Now it’s time to kick it up a notch. Remember, there are many possibilities for creating unique background designs within sections and rows. So for this last example, I’m going to show you how to combine these features to create a completely unique design.
To jumpstart this design, go ahead and use the section you saved to your library by clicking to add a new section in the visual builder, selecting the add from library tab, and choosing the section layout.
Once the section has been added to the page, we are ready to customize.
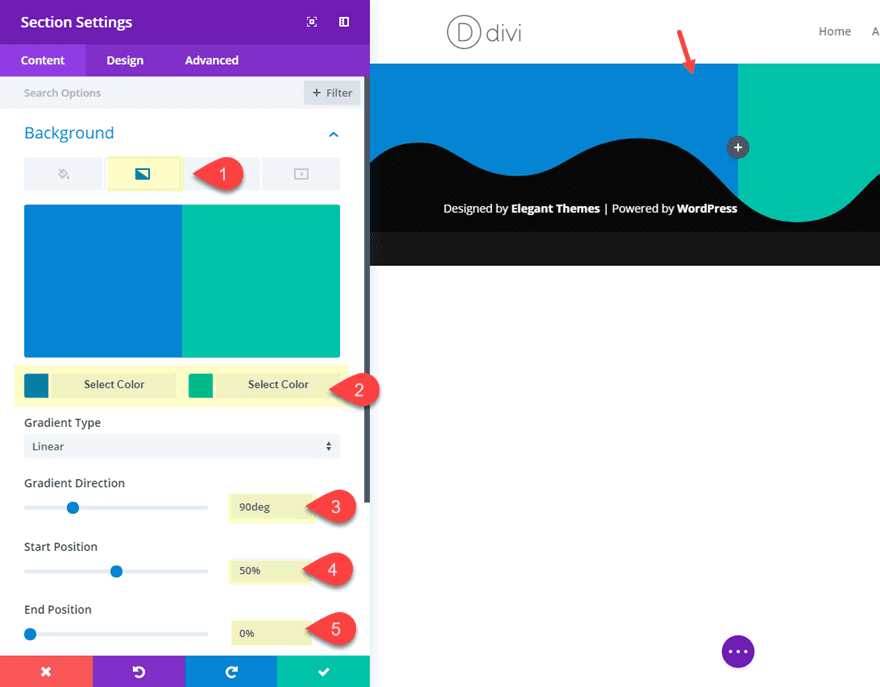
For starters, go to the section settings and update the following:
Background Gradient Left Color: #29c4a9
Background Gradient Left Color: #2b87da
Gradient Direction: 90deg
Start position: 50%
End position: 0%
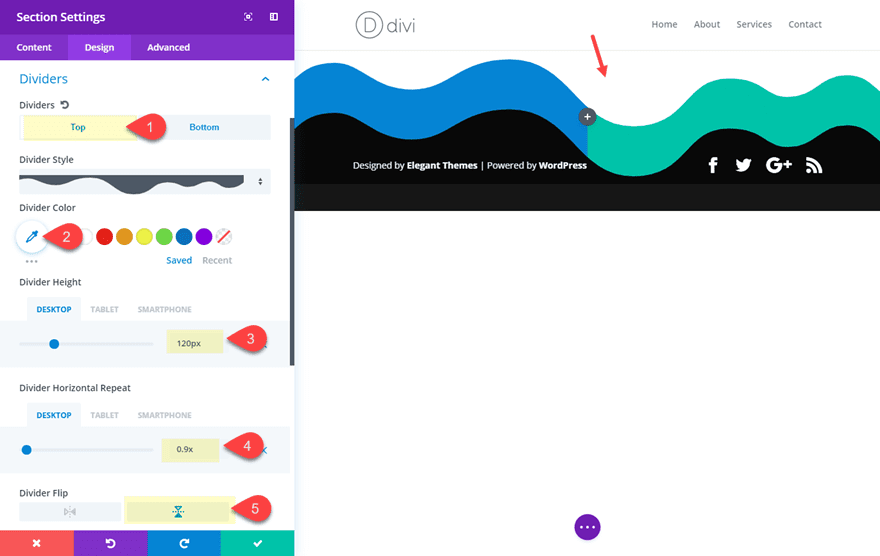
Now add a top divider as follows:
Top Divider Style: see screenshot
Divider color: #ffffff
Divider Height: 120px (desktop), 150px (tablet), 150px (smartphone)
Divider Horizontal Repeat: 0.9x (desktop), 0.5x (tablet), 0.5x (smartphone)
Divider Flip: vertical
These Divider settings completely mirror the bottom divider so that the it creates a border surrounding the bottom divider. Since the divider itself is white, this leaves the impression that the background gradient is an extension of the bottom divider.
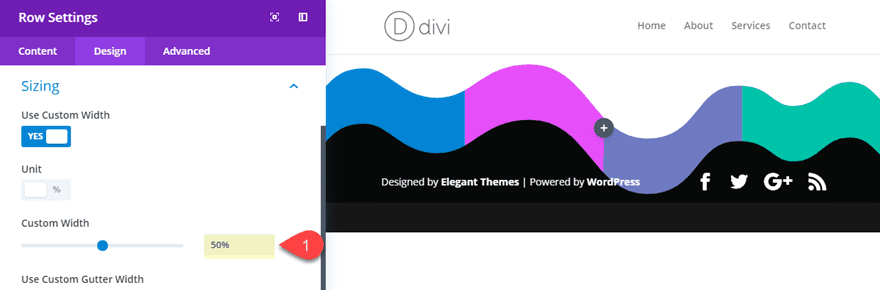
Now go the row settings and add a background gradient as follows:
Background Gradient Left Color: #df52ff
Background Gradient Left Color: #2b87da
Gradient Direction: 90deg
Start position: 50%
End position: 0%
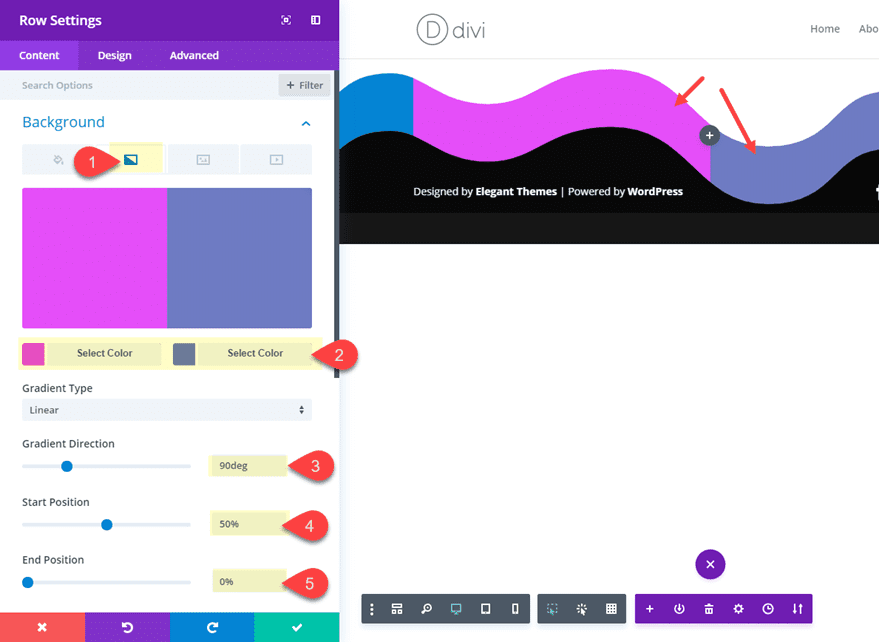
To equalize the width of each color segment for your background, give the row a custom width of 50%.
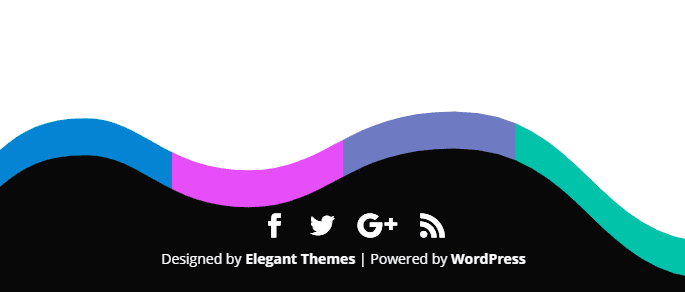
Here is the final design!
Final Thoughts
Having a custom background design for Divi’s bottom footer bar can be a refreshing addition to your page. All it takes is a few customizations to a section sitting at the bottom of the page. Unfortunately, the design is limited to a single page and would not be able to be applied sitewide. That is why the footer background color is used as a fallback. But once you save the section to your library, you can easily drop it into any page you want. You can even add to any of our premade layouts to be used in your next project. All you need to do is make sure you add the section to the very bottom of your page. Hopefully, you will find it useful!
Also, you might be interested in framing your navigation menu using a similar technique.
I look forward to hearing from you in the comments.
Cheers!


Looks cool, I like it.
I’m wondering if there’s a way to make your own divider styles?
Thanks Jason, very inspiring! Great you added a video by Mak !
Nailed it, it’s pretty cool.
Very creative going to implement this right away on our airport transfers website.
Thanks
Great to hear, Khalid. Hope it works out well.
If there is a margin of -55px applied to the bottom bar, will the move the content upwards on every page, meaning that you will need to repeat this process on each page of a website?
Donal,
The -55px bottom margin is added to the section above the bottom bar, not the bottom bar itself. So, it will not affect the bottom bars on other pages. Make sense?
Thanks.
Right now, the bottom bar content (the text and the social icons) are being hidden behind the divider even though the divider arrangement is set to underneath section content. This is because the bottom footer isn’t technically a part of the section content. To fix this, we need to add a custom z-index to our section so that it sits behind the bottom footer.
See Above
“Right now, the bottom bar content (the text and the social icons) are being hidden behind the divider even though the divider arrangement is set to underneath section content. This is because the bottom footer isn’t technically a part of the section content. To fix this, we need to add a custom z-index to our section so that it sits behind the bottom footer.”
See Above:
“Right now, the bottom bar content (the text and the social icons) are being hidden behind the divider even though the divider arrangement is set to underneath section content. This is because the bottom footer isn’t technically a part of the section content. To fix this, we need to add a custom z-index to our section so that it sits behind the bottom footer.”
Great technique, as you said : “the design is limited to a single page and would not be able to be applied sitewide”
Can we use a special shortcode and add the template section inside footer.php ?
Kind Regards
Right now if you used the DIVI layout injector plugin you could do it sitewide or you are going to have to wait for the Theme Builder update at the least for a way to do this sitewide.