
Advanced customizable sliders used to require third-party plugins or custom CSS, but with Divi 5, the game has changed. Using Nested Modules and the Slider Module together allows designers to create these experiences, all without writing code or installing plugins that can slow down your site. The result is cleaner code, fast performance, and complete design freedom.
In this post, we’ll guide you through a step-by-step process for creating a stunning nested slider. Everything you’re about to learn is available right now in the Divi 5 Public Beta. Grab it, open the Visual Builder, and let’s build it together.
- 1 Understanding The Building Blocks
-
2
Step-By-Step Guide: Building A Nested Slider
- 2.1 Step 1: Add The Slider Module
- 2.2 Step 2: Add Design Elements To The First Slide
- 2.3 Step 3: Add Elements To The First Column
- 2.4 Step 4: Adjust Column Settings
- 2.5 Step 5: Add Elements To the Second Column
- 2.6 Step 6: Adjust The Row Settings
- 2.7 Step 7: Duplicate The First Slide
- 2.8 Step 8: Making Responsive Adjustments
- 3 Download The Files
- 4 Download For Free
- 5 Build Nested Sliders In Divi 5 Today!
Understanding The Building Blocks
Creating nested sliders in Divi 5 boils down to mastering two native tools: Nested Modules and the native Slider Module. Once you understand how they work together, you’ll never look at a plain carousel the same way again.
Subscribe To Our Youtube Channel
Nested Modules In Divi 5
Nested Modules is one of the best new features in Divi 5. For the first time, Modules can act as a parent container, meaning you can place any other module inside it, with no limit to how many you can use. This infinite nestability allows you to have unlimited creative freedom to create professional layouts without sacrificing speed.
Some of the key benefits of using Nested Modules are:
- Full Flexbox and CSS Grid controls for every nested level.
- Independent responsive settings for every nested level.
- Precise column widths and gutter control that work flawlessly on mobile devices.
- Dramatically cleaner and faster code than the old Specialty section hacks.
- Perfect foundation for complex, layered slider designs.
How To Add A Nested Element
Open any module’s settings. In the Content tab, expand the new Elements settings.
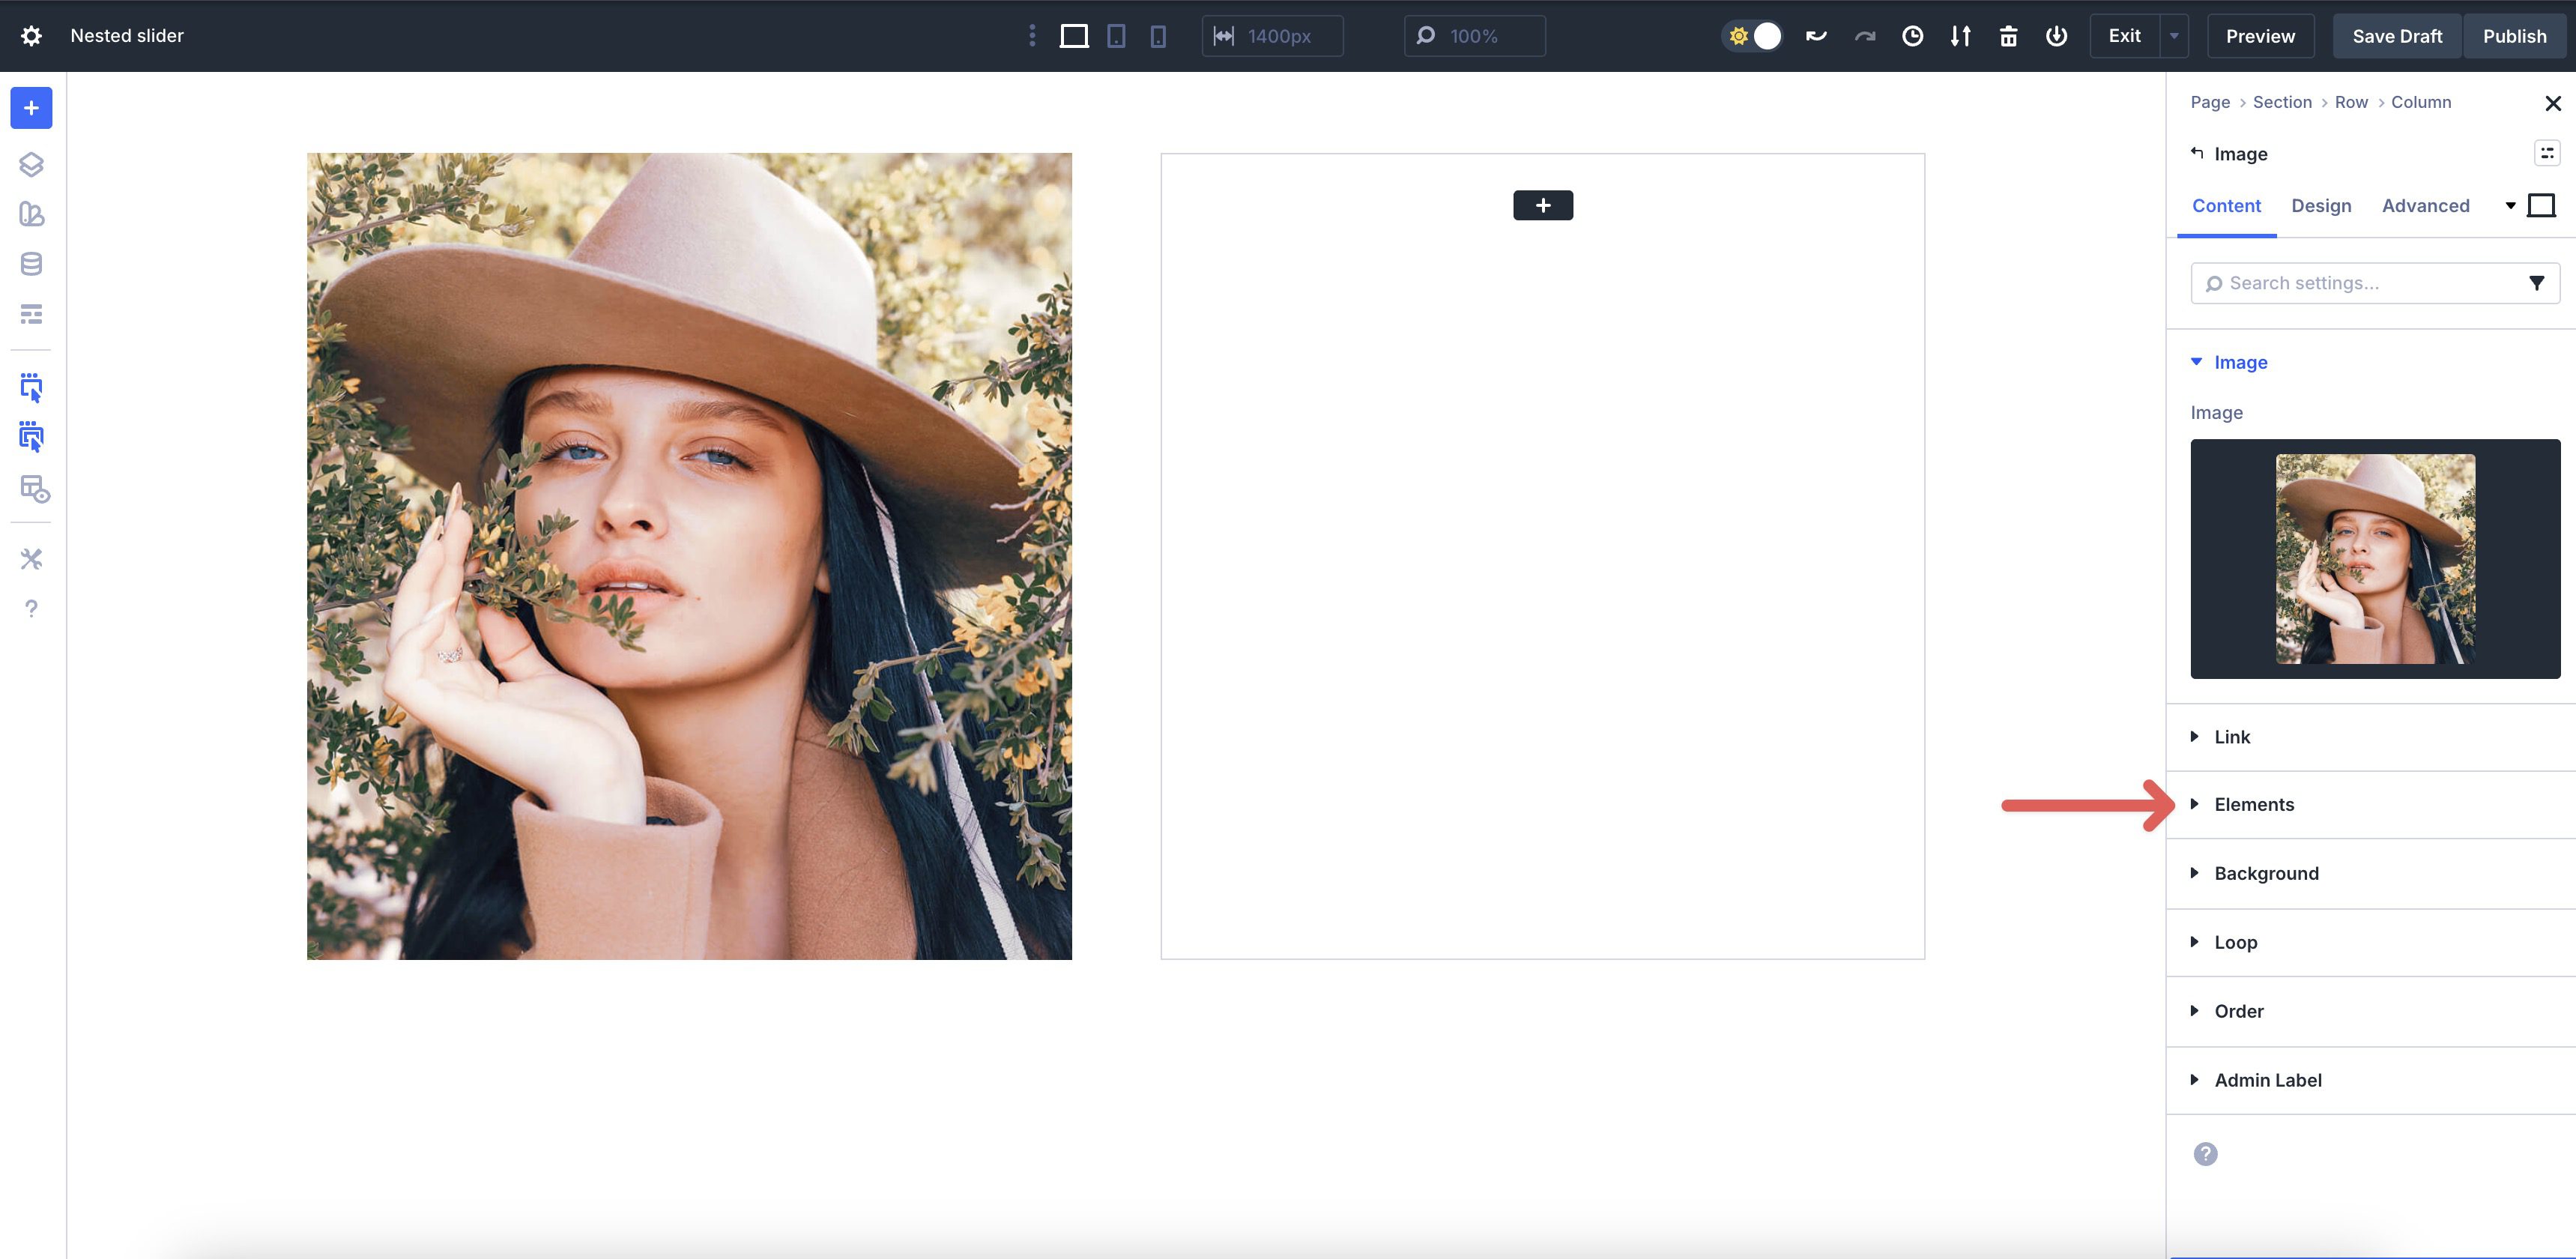
Click the + Add Element button.

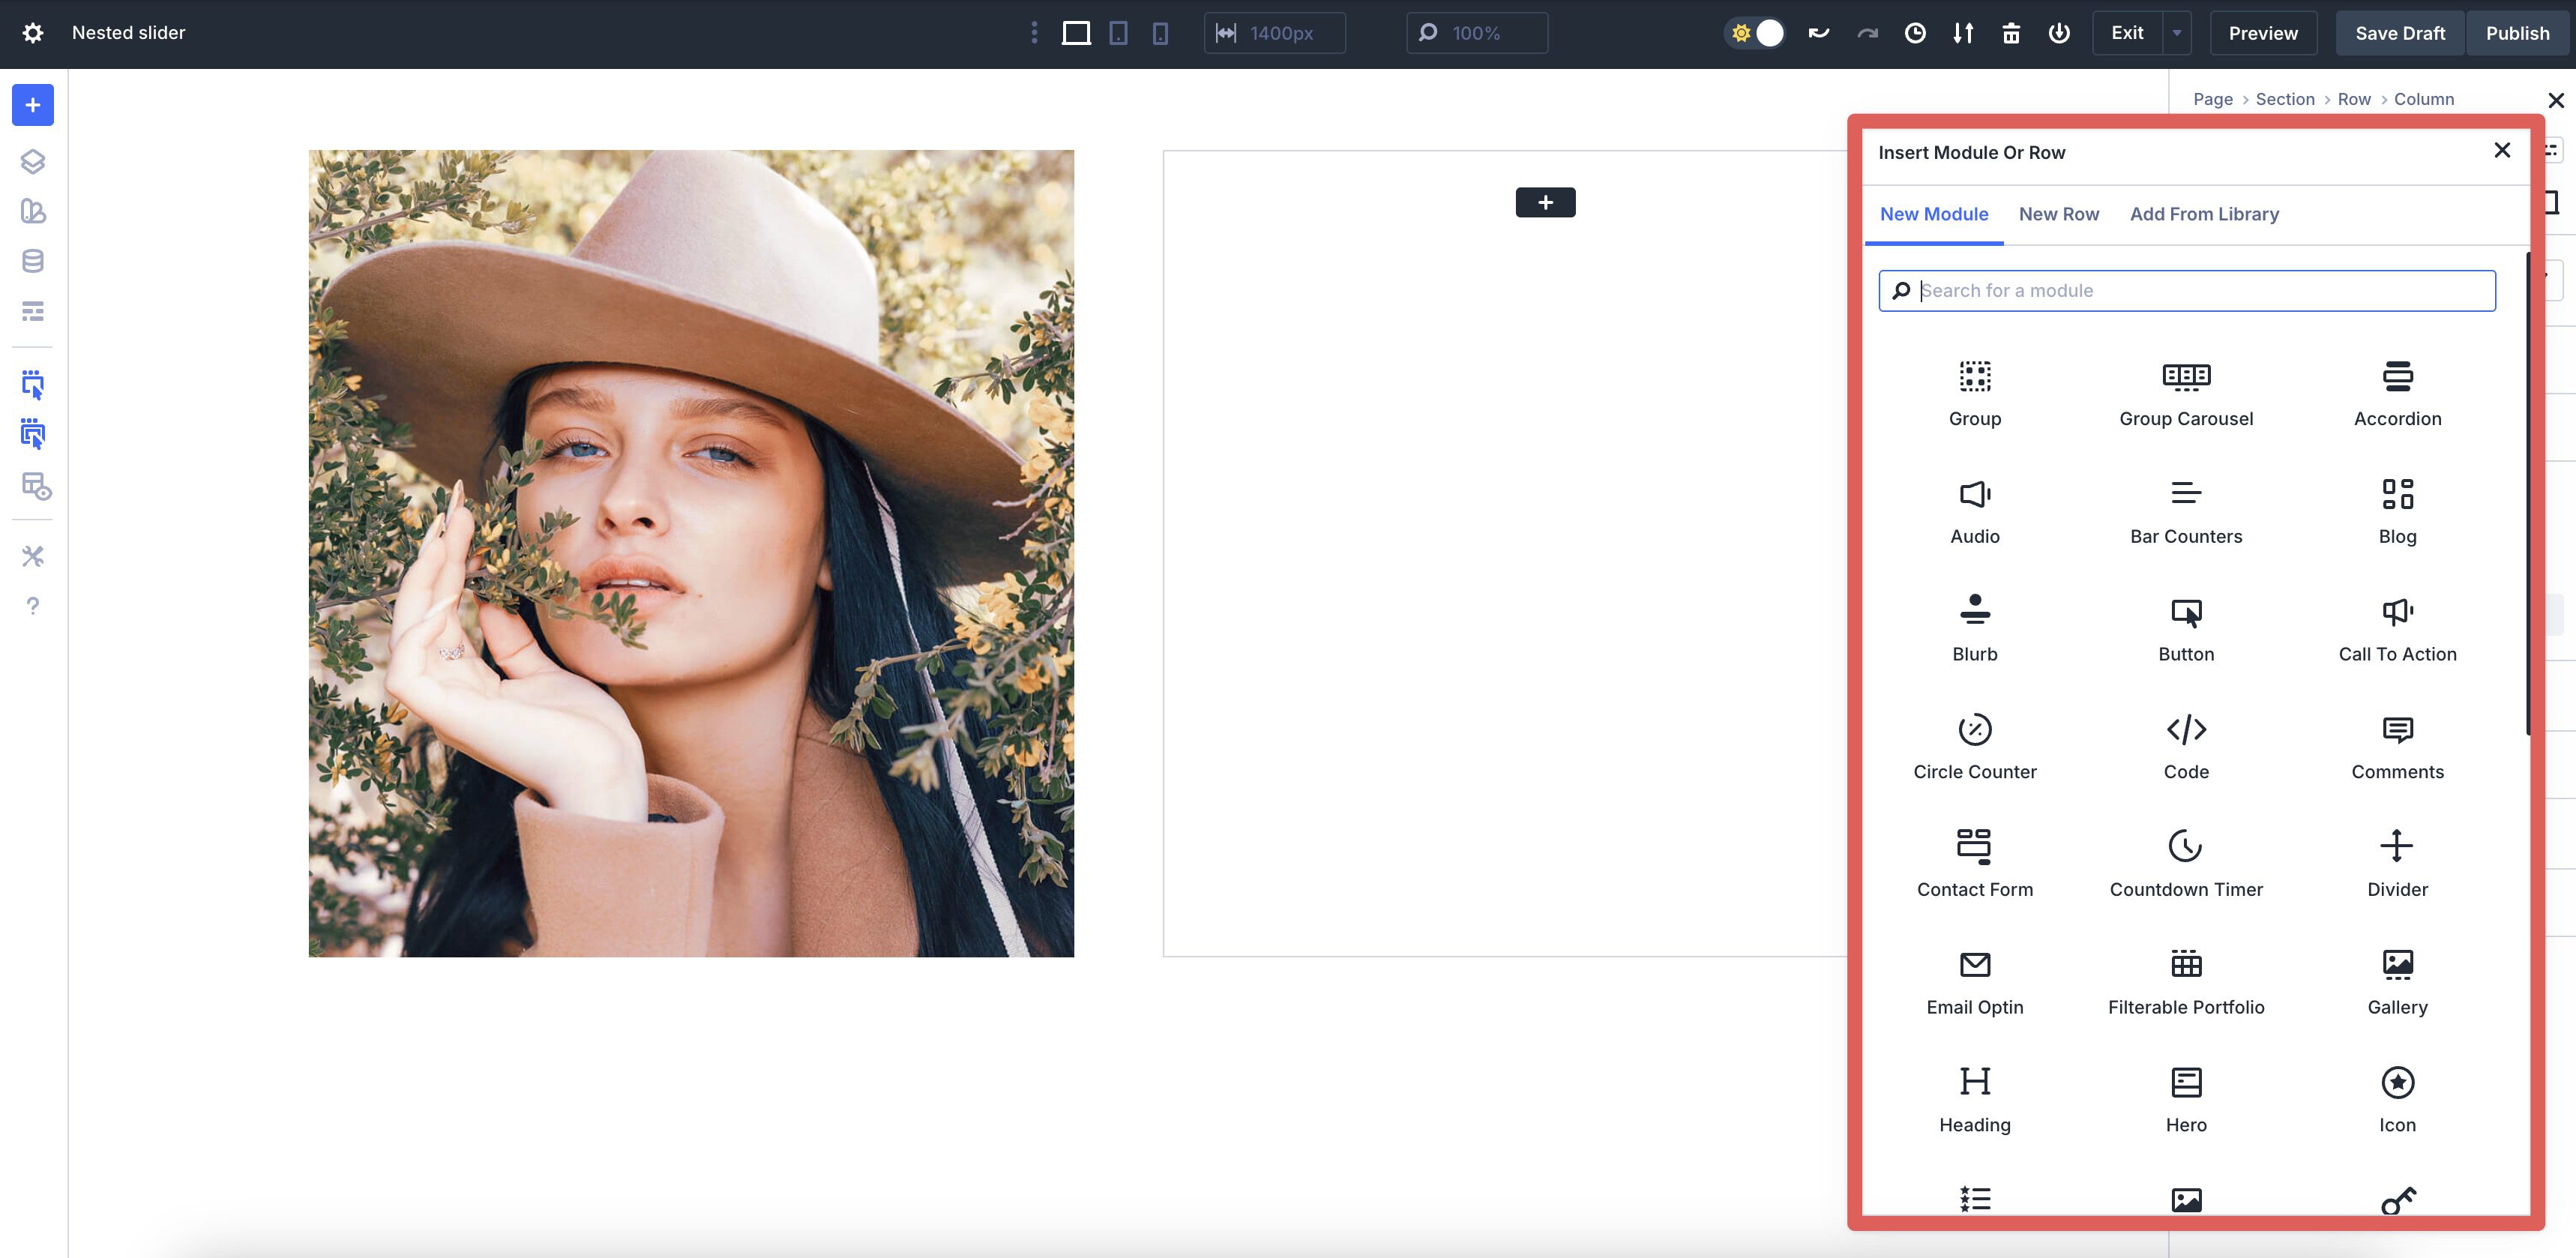
When the Insert Module or Row modal appears, scroll through the available options and add the Module of your choice.
The new element instantly becomes a child, and you can keep nesting forever.
Rows and Module Groups automatically become flex containers, so your nested children behave exactly like modern layouts should.
The Slider Module In Divi 5
The Slider Module itself still works the way you’d expect, but paired with Nested Modules, it becomes exponentially more powerful. Every single Slide serves as a parent container. That means you can treat each Slide like a mini-page. Drop in complete row and column structures, create cards, stack multiple headings and CTAs, or build an entire pricing table that lives only on that one Slide.
This combination is what unlocks sliders within slides, staggered motion, and sections that feel custom-coded, all with drag-and-drop functionality.
Core Features:
- Add multiple slides with individual backgrounds, overlays, or videos.
- Use arrow and dot navigation.
- Add transition effects using Divi 5’s Animation settings.
- Full set of responsive controls per Slide.
Now that you know the two foundational pieces, you’re ready to combine them into a nested slider. Let’s build it step by step.
Step-By-Step Guide: Building A Nested Slider
In the next section, we’ll demonstrate how to create a nested slider using the Slider Module, Nested Modules, and Flexbox. We won’t cover styling here. Instead, we’ll show you how to set up the structure, add the elements, and make responsive edits to ensure your slider looks great on every device.
Step 1: Add The Slider Module
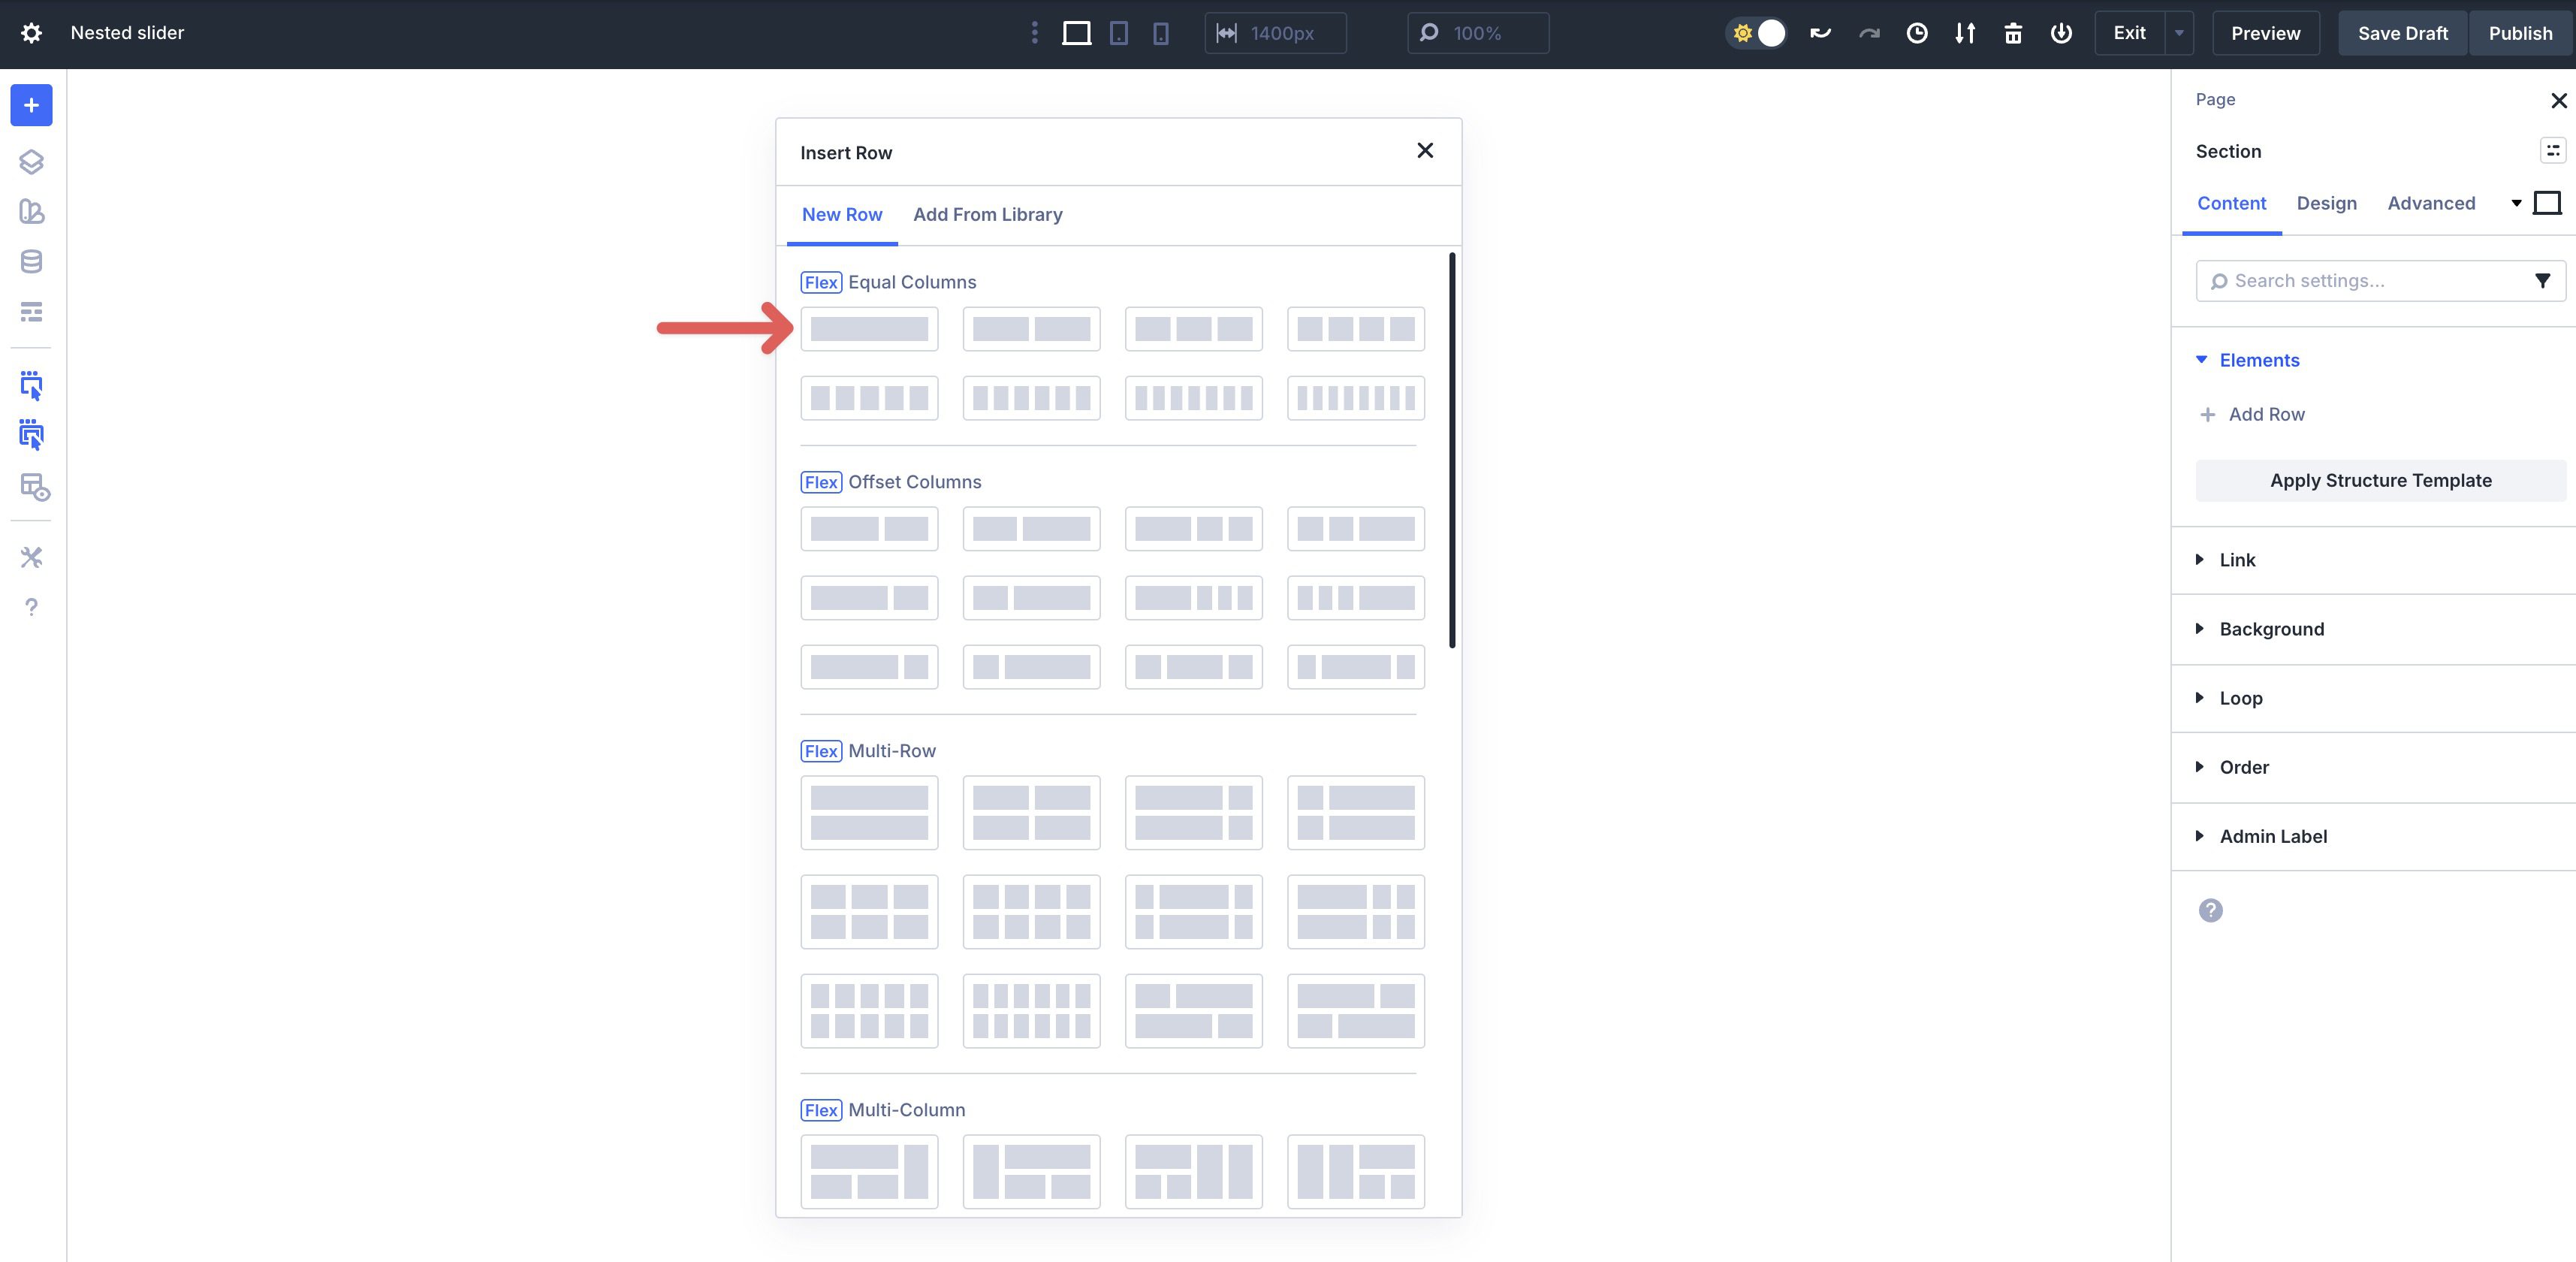
Start by adding a single-column Flex Row to a Section on the page.
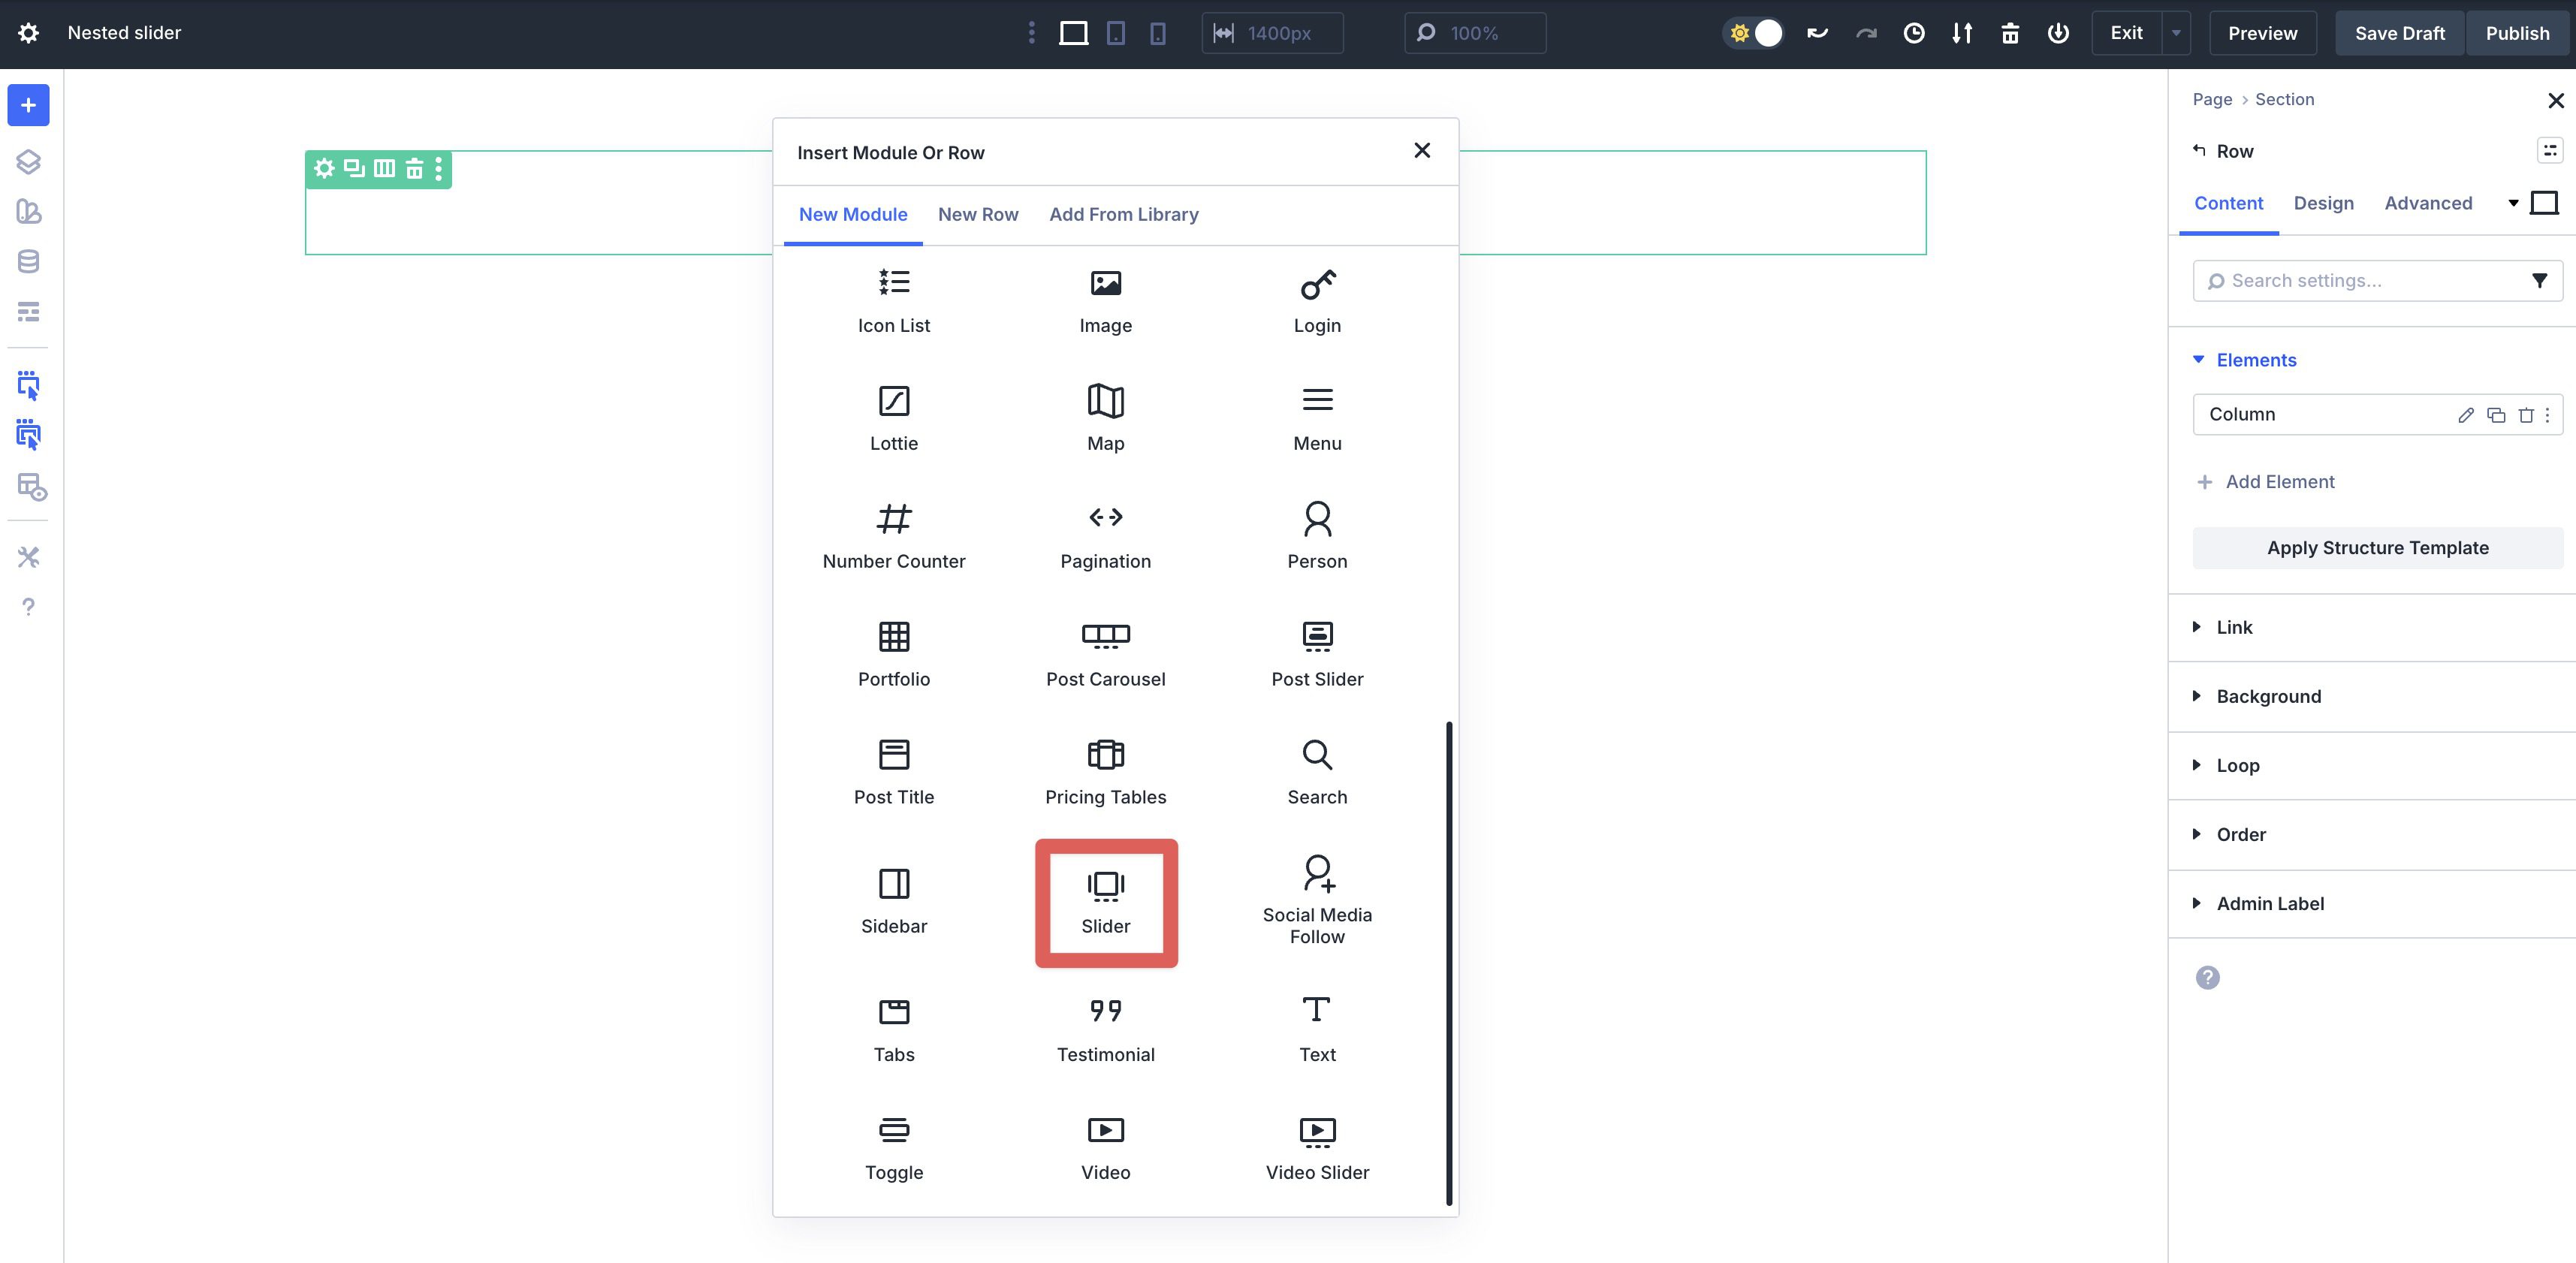
Choose the Slider Module from the available options.
By default, Divi adds two slides and a background color to the Module. Delete the second Slide and replace the Background Color with #ffffff.
In the Design tab, expand the Navigation dropdown menu. Set values for the Arrow and Dot Navigation Color.
![]()
Next, expand the Title Text dropdown menu. Set a Title Font, Font Weight, Text Alignment, Text Color, Text Size, and Line Height. It’s a good idea to set these values at the main Slider level to avoid adding extra steps in the design process.
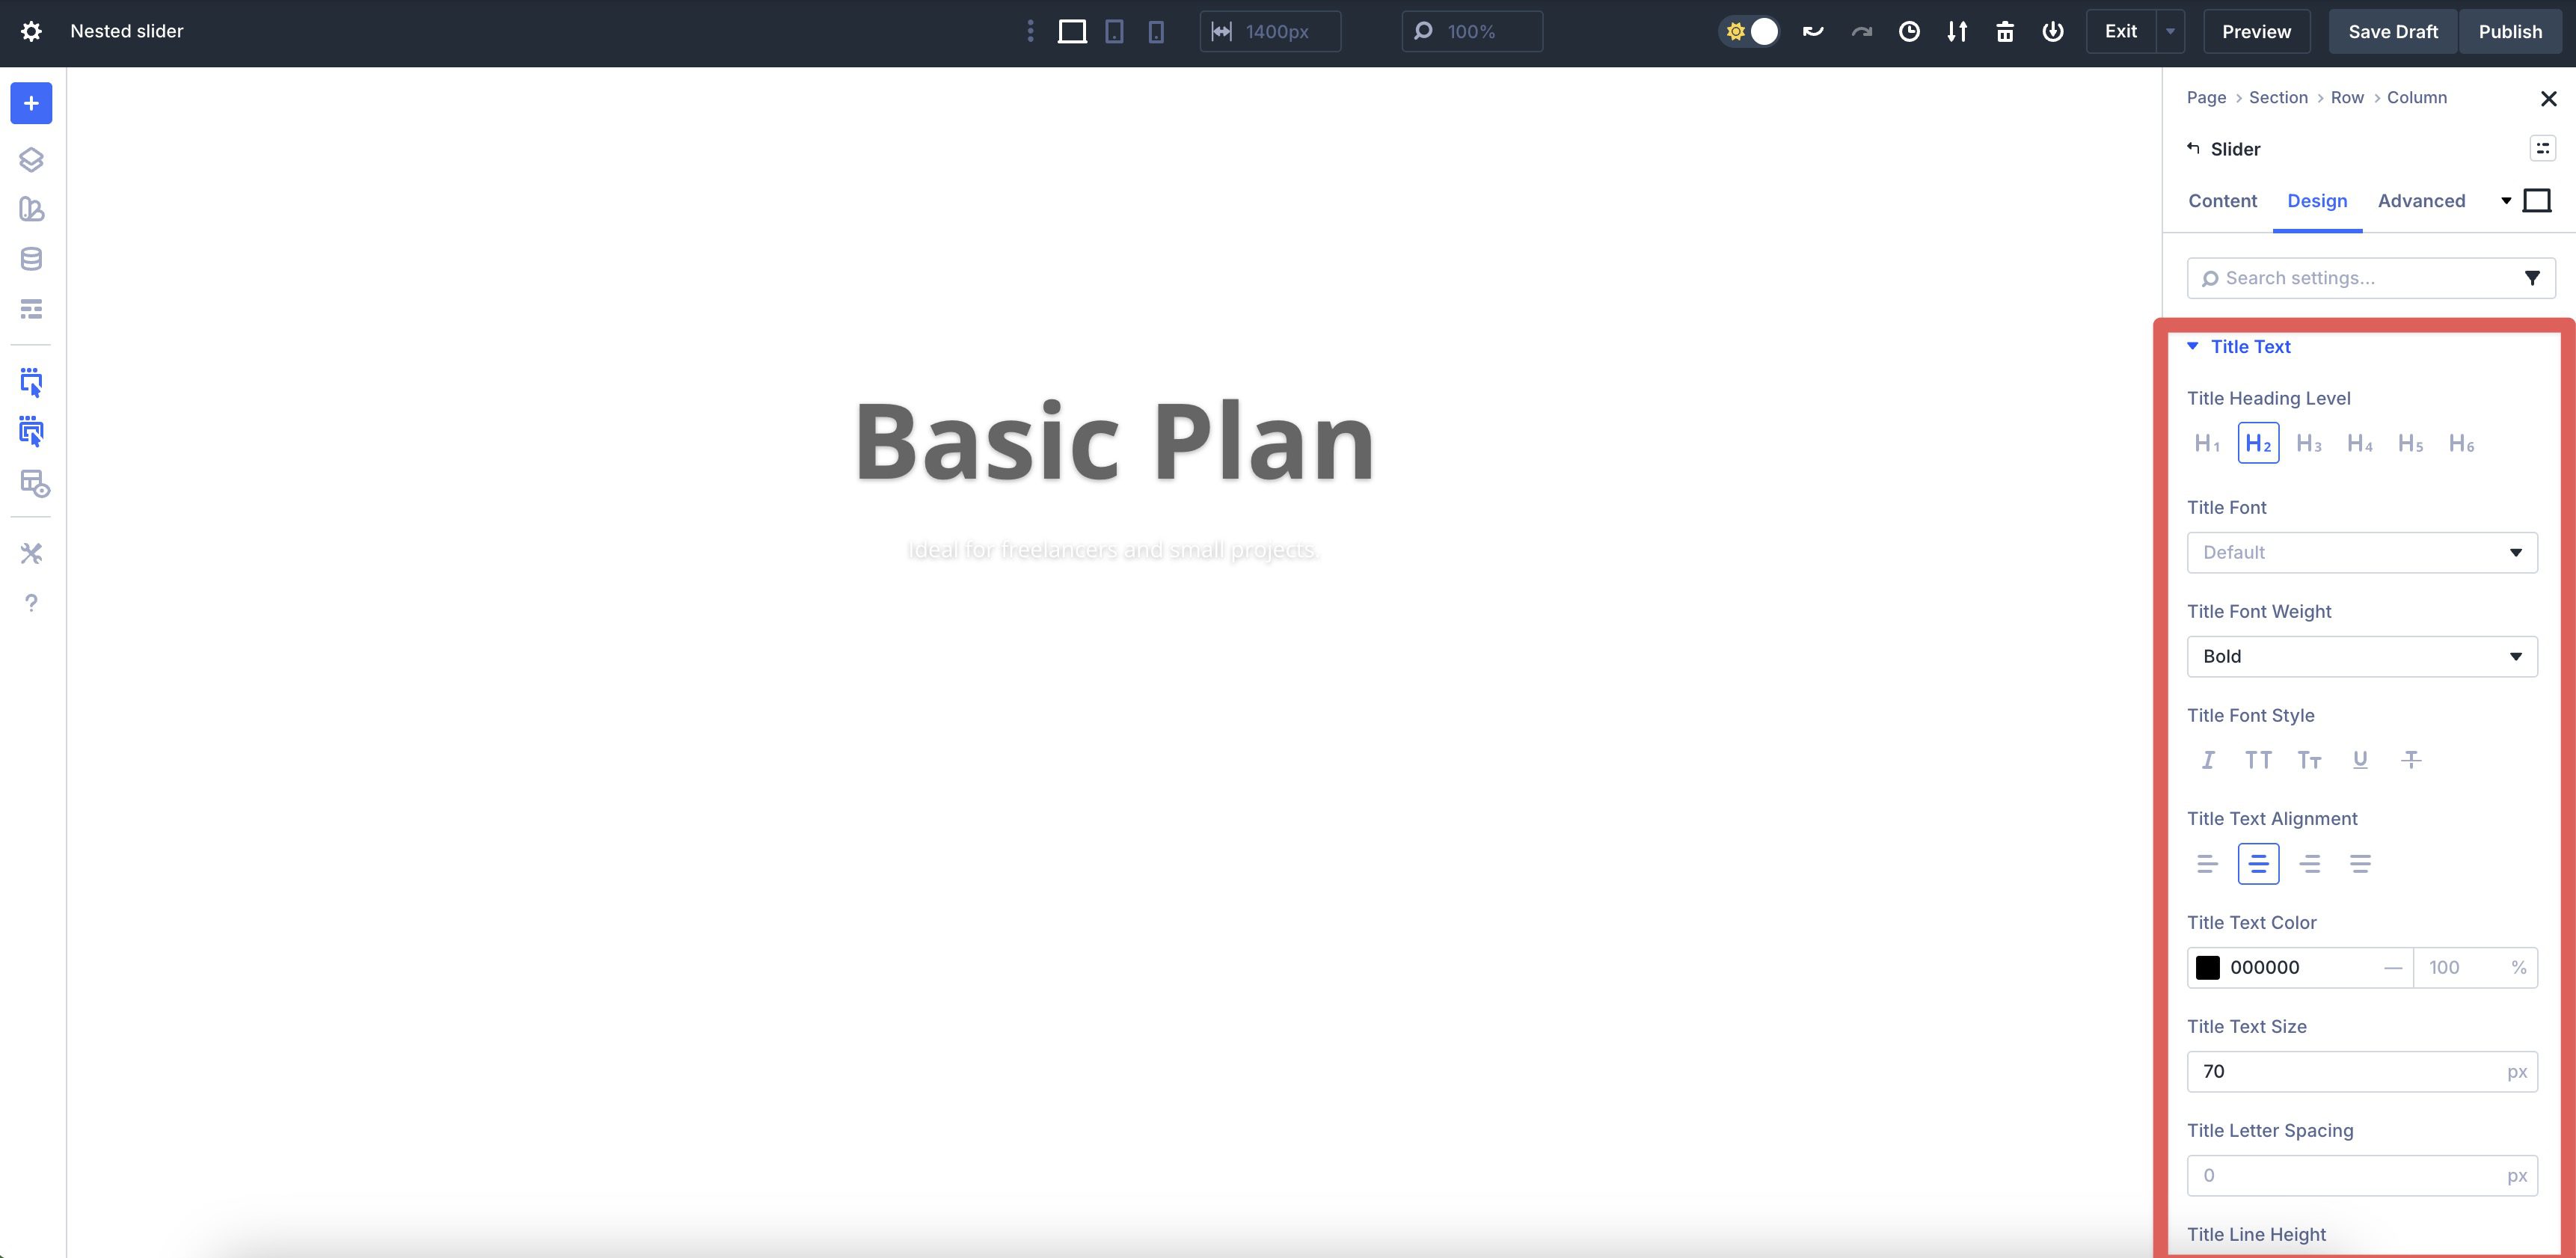
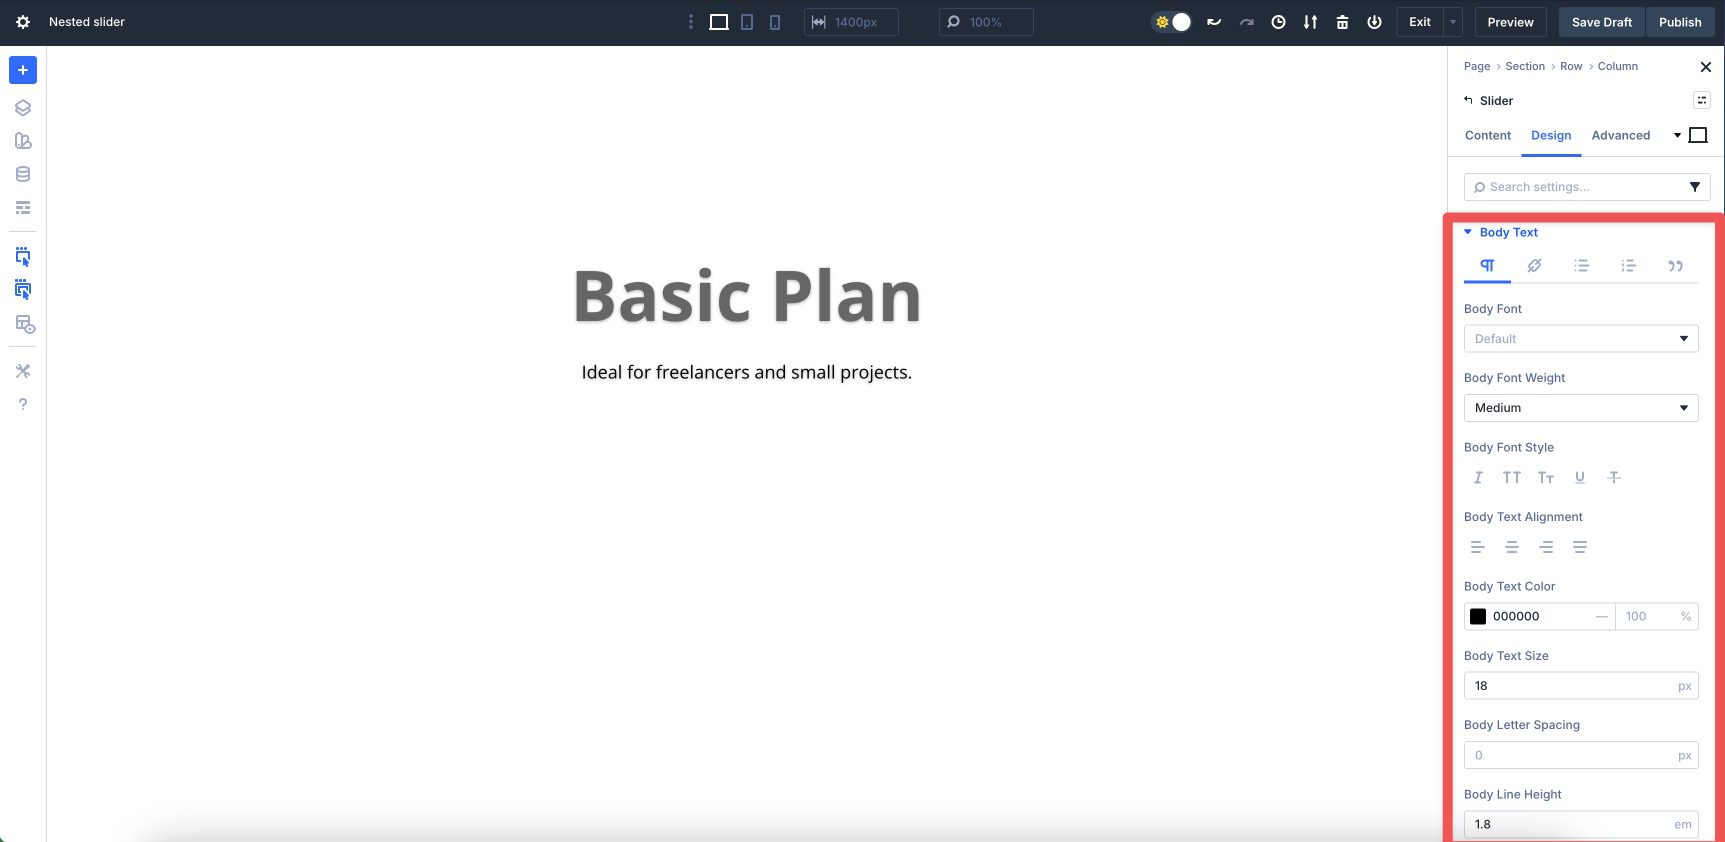
Repeat the steps for the Body Text styles.
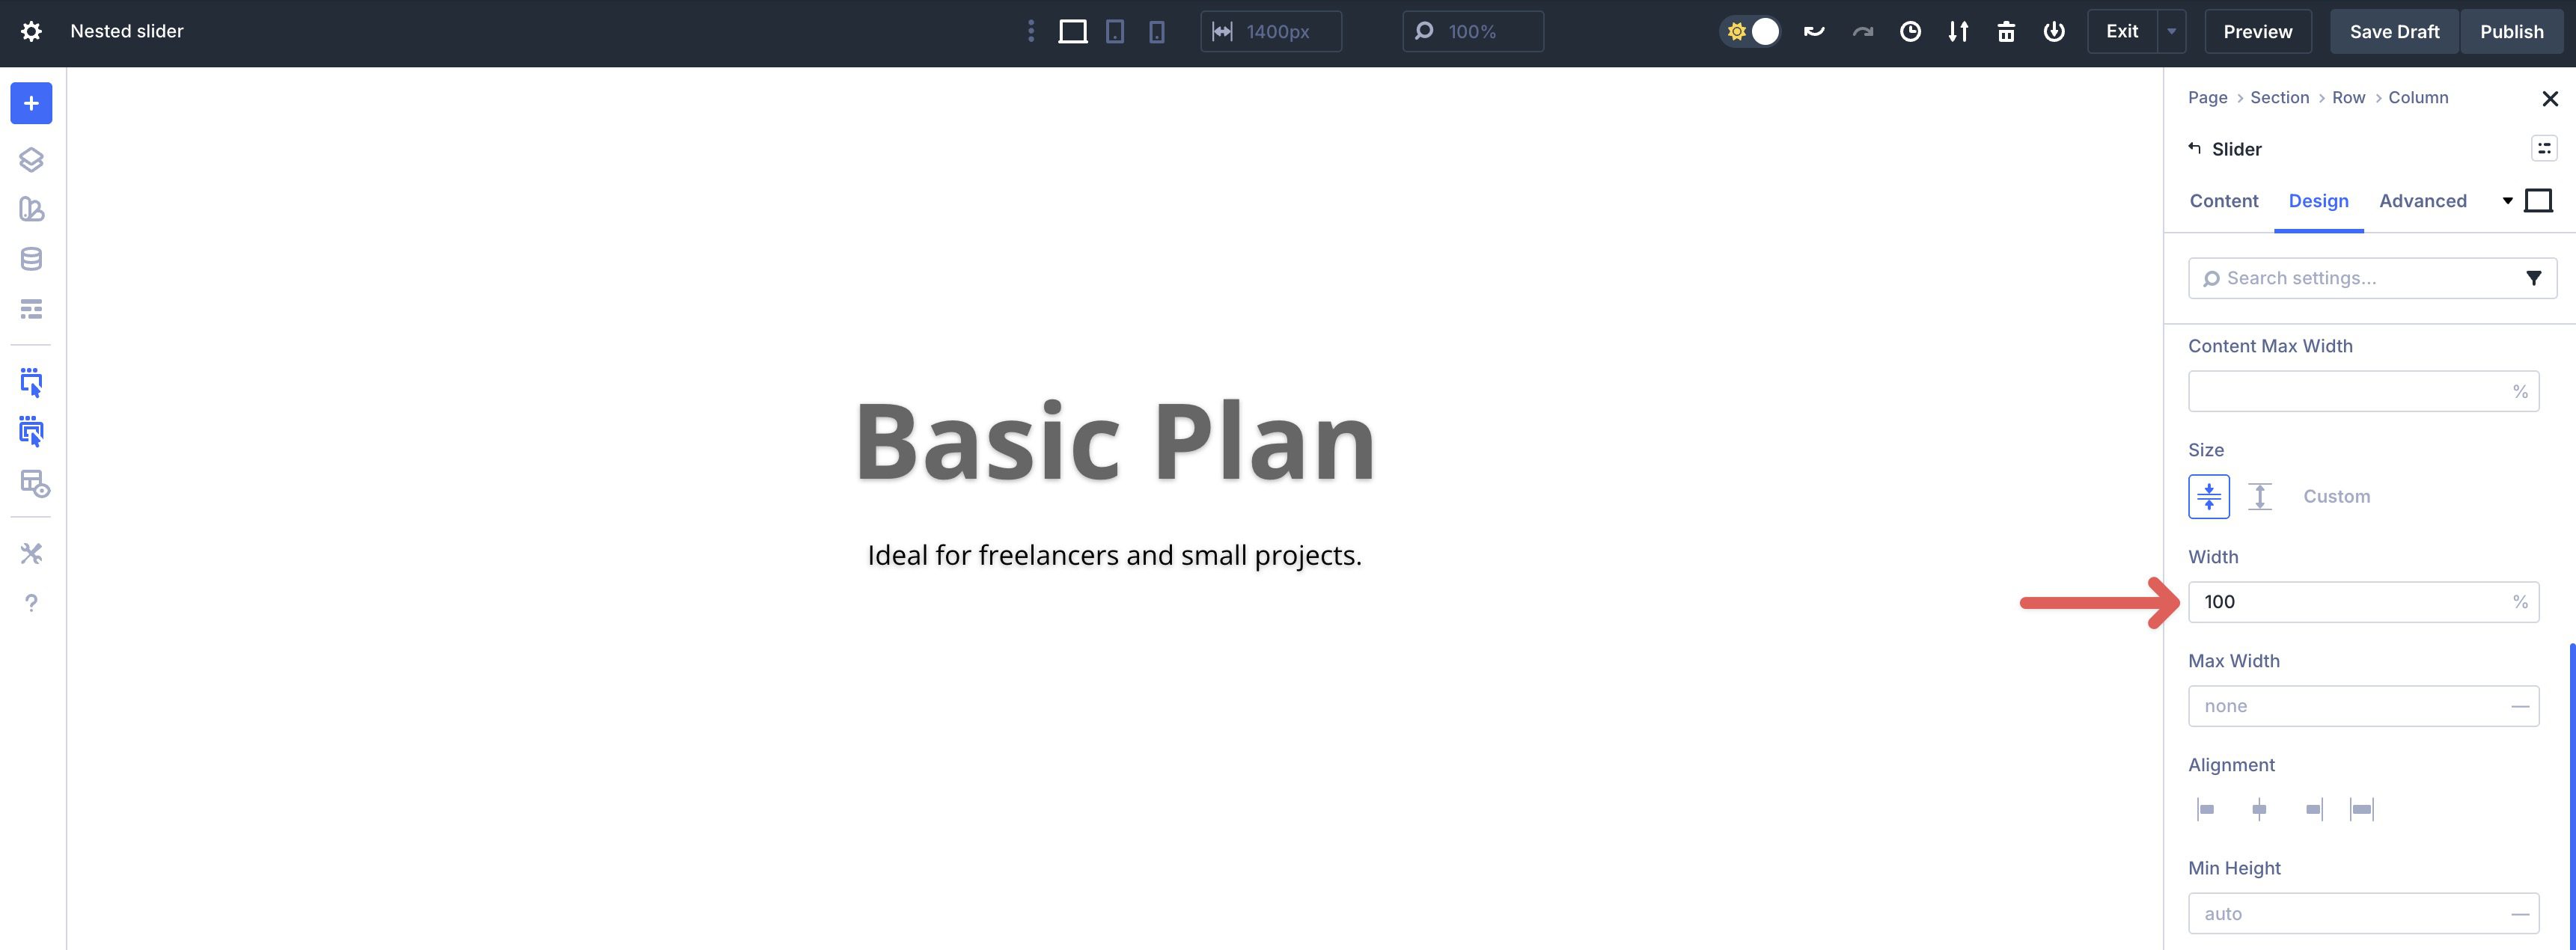
In the Sizing menu, set the Width to 100%.
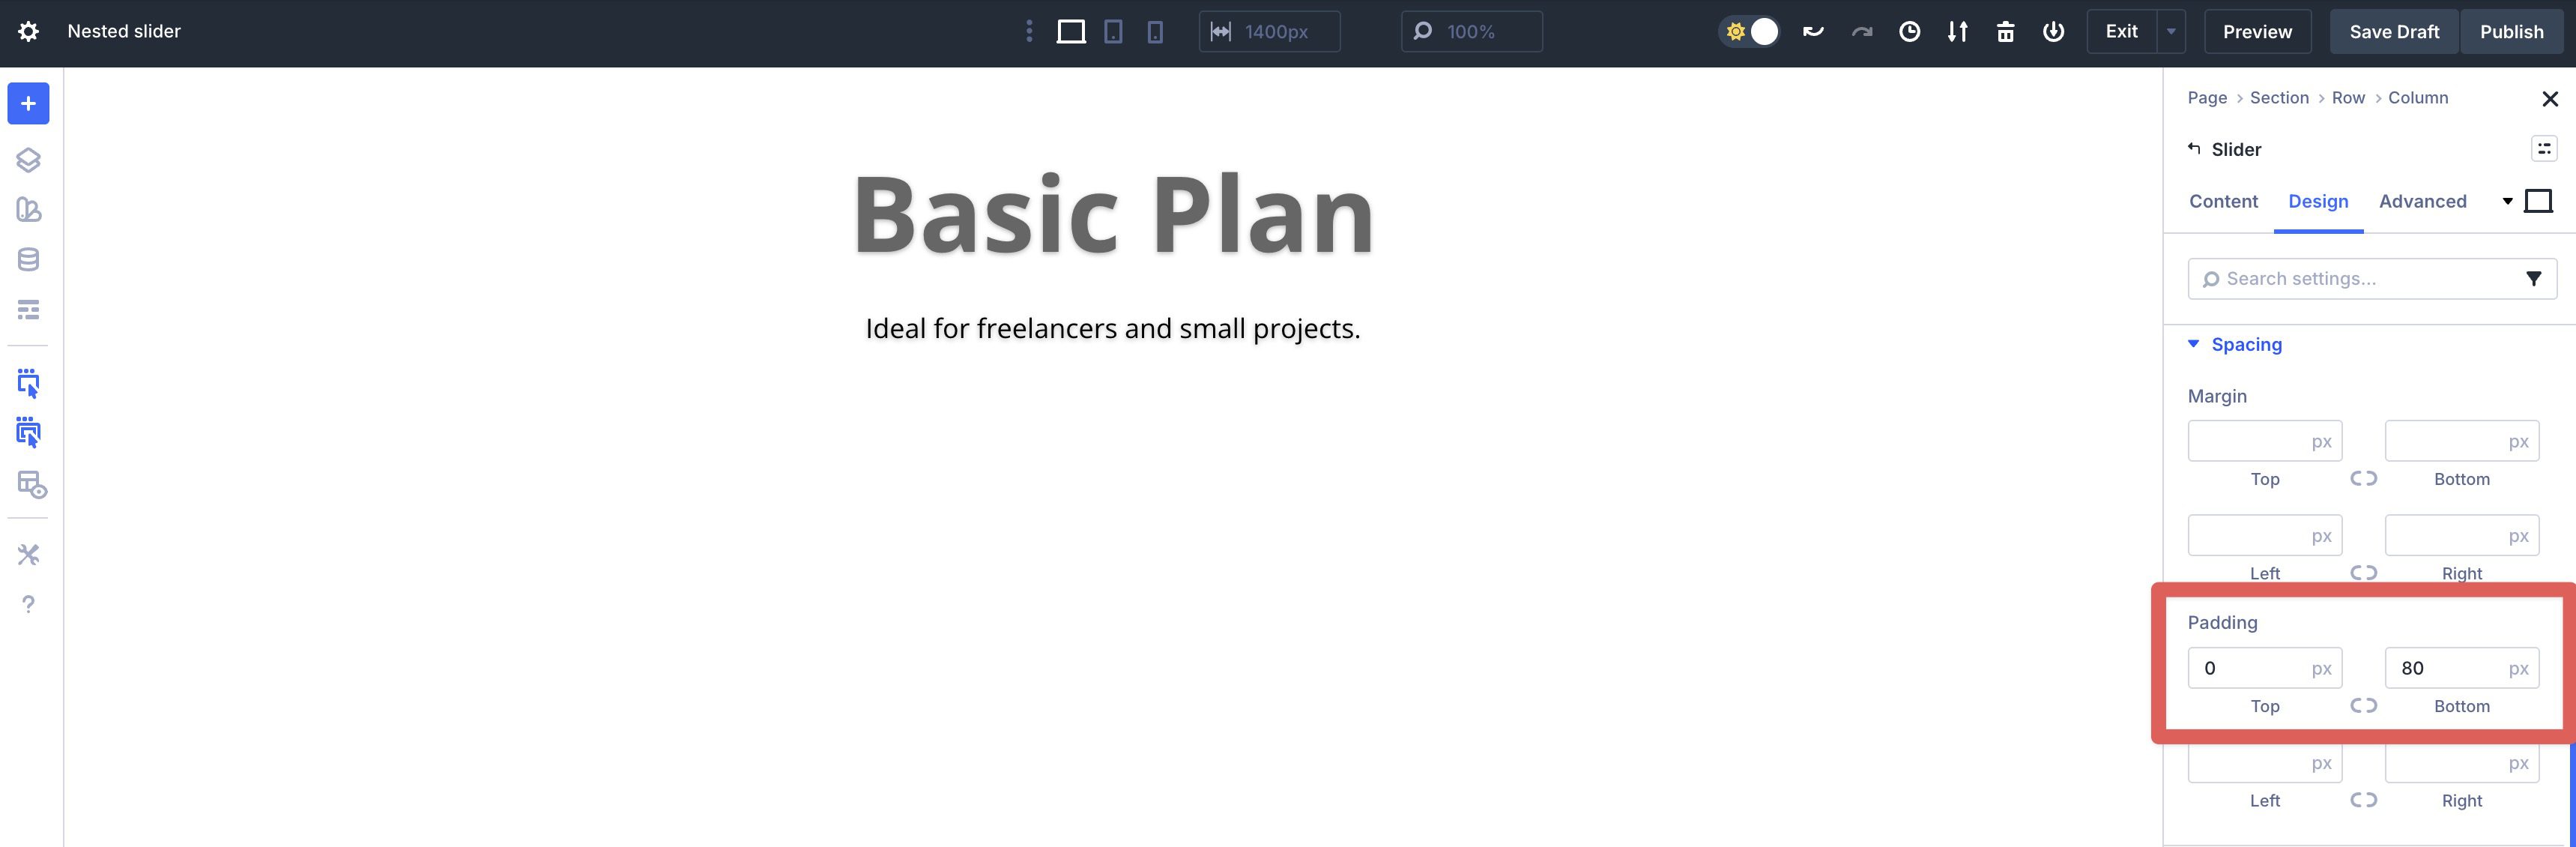
Expand the Spacing menu. Set the Top Padding to 0px and Bottom Padding to 80px.
Step 2: Add Design Elements To The First Slide
While in the Content tab of the Slider Module, click to expand the Elements settings. Click the Edit icon to make changes to the single Slide in the Module.
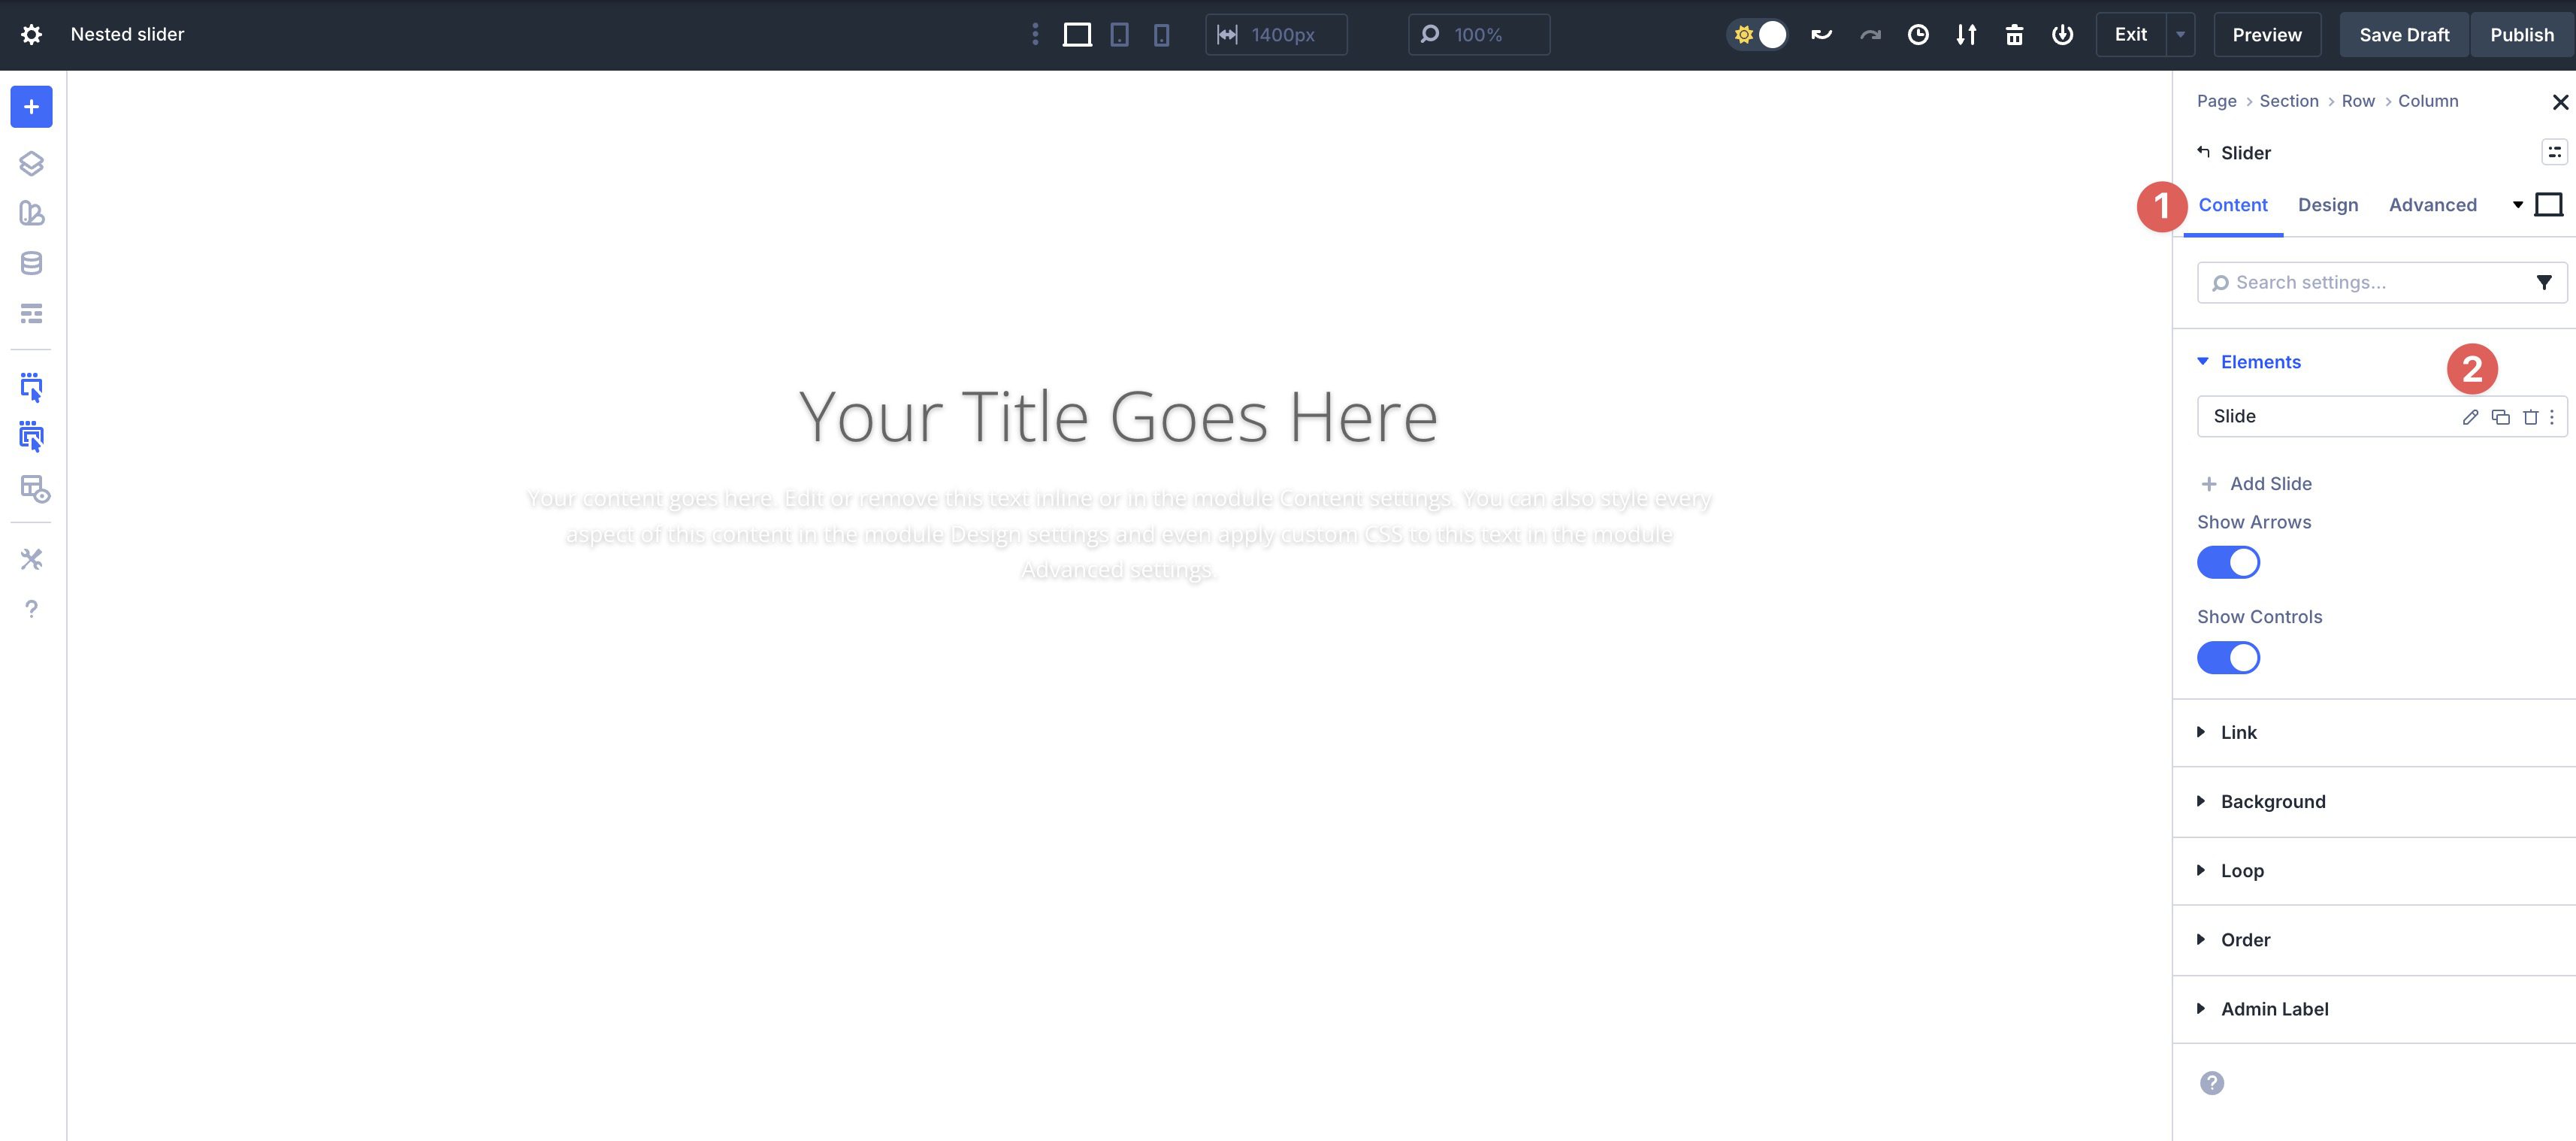
Expand the Text dropdown menu. Add a heading to the Title field. Next, remove the text in the Button field. In the Body field, enter text that will display under the heading.

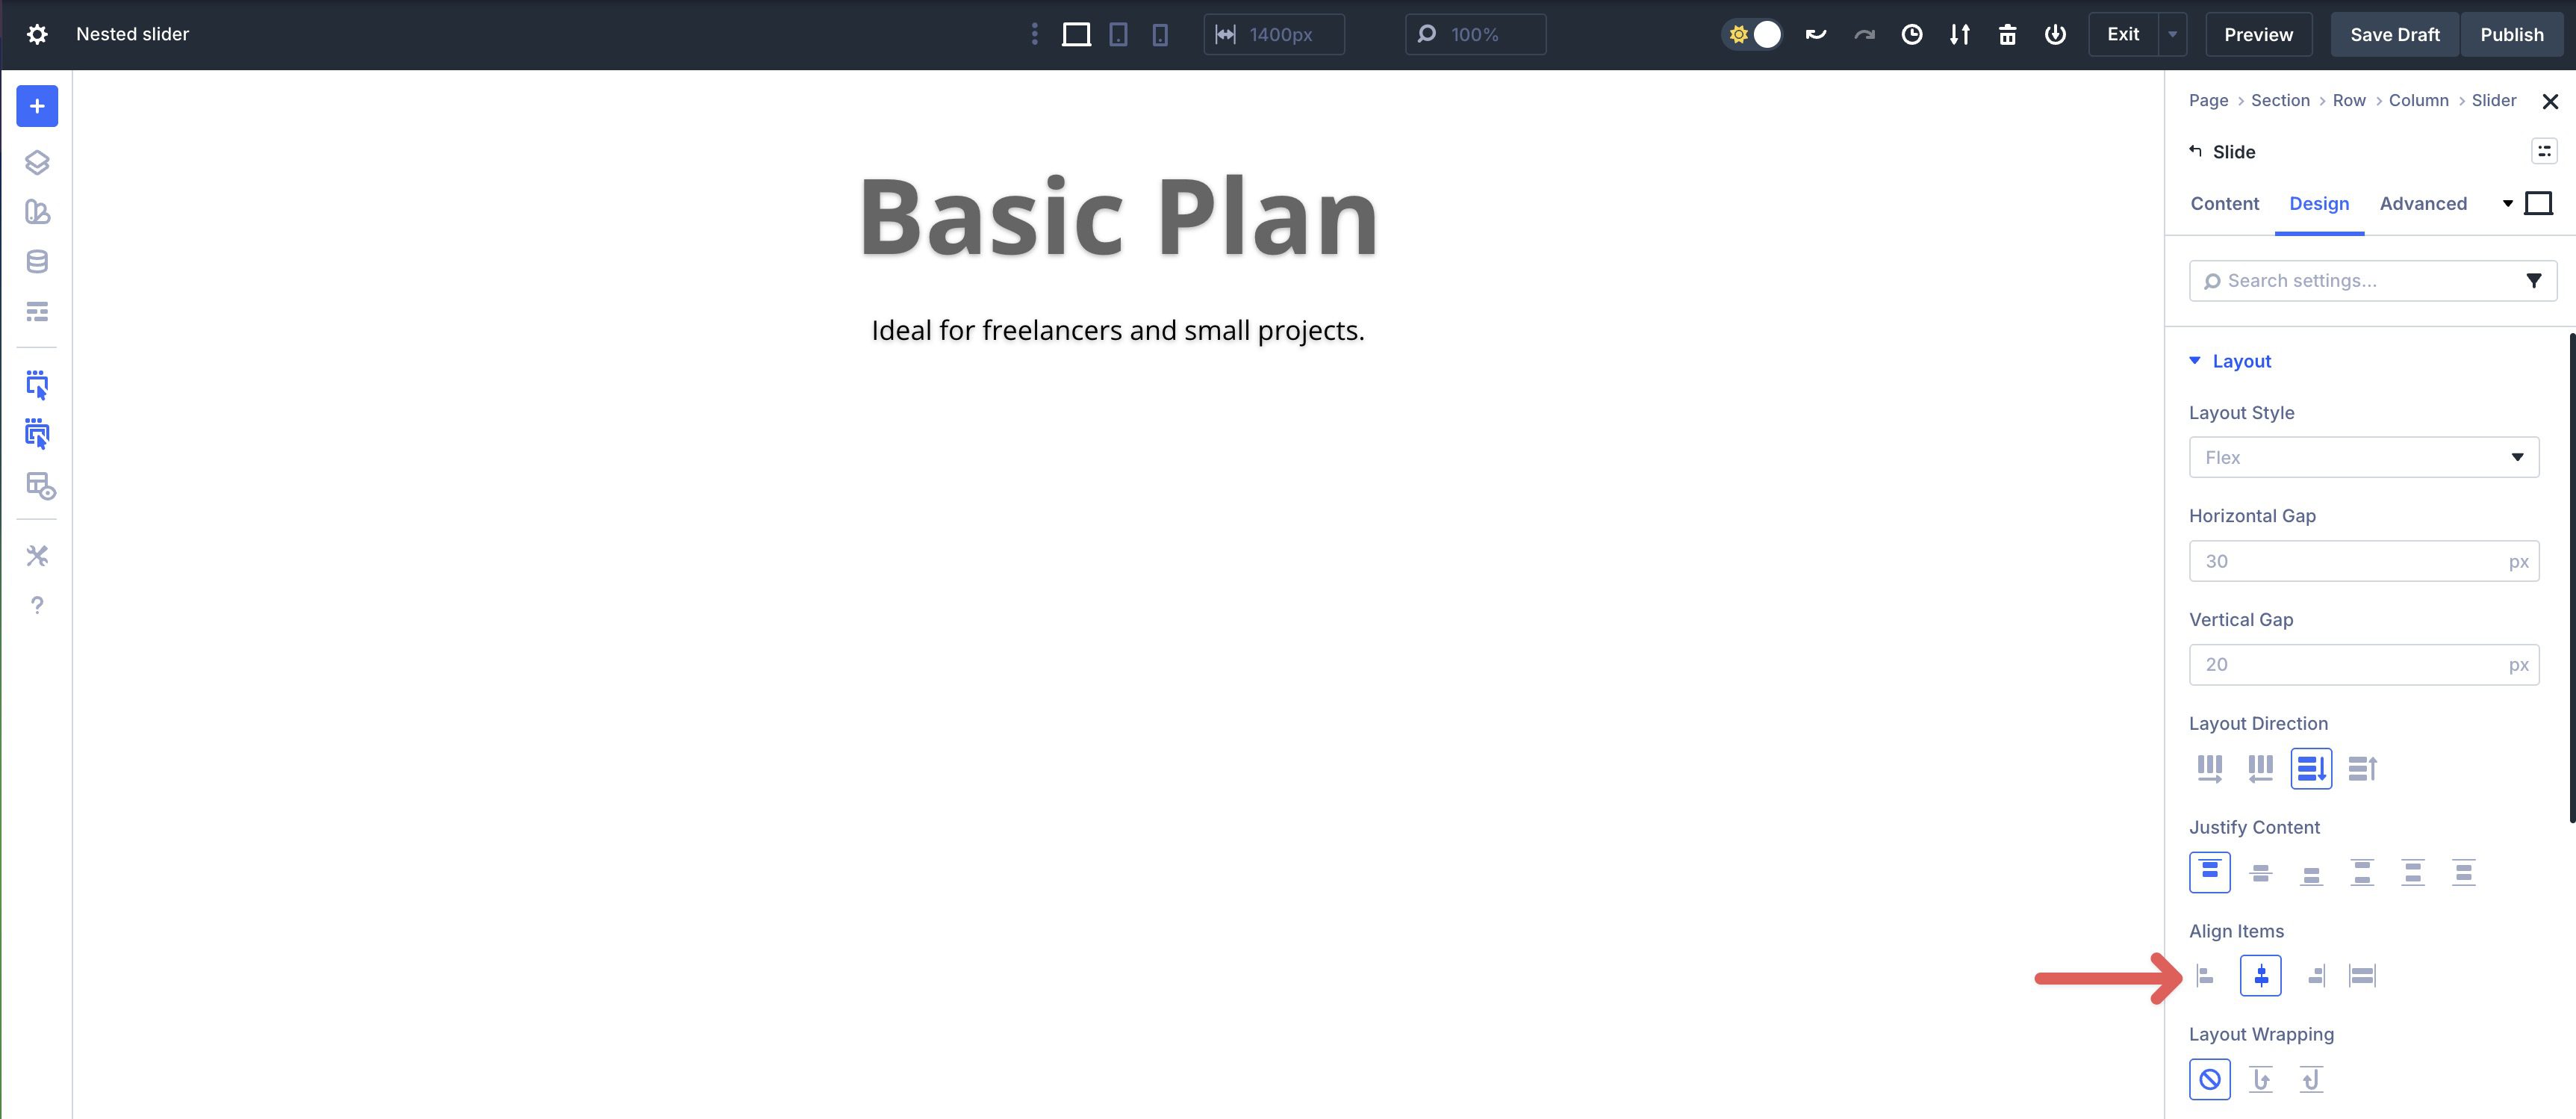
Go to the Design tab and expand the Layout dropdown menu. Set Align Items to Center.
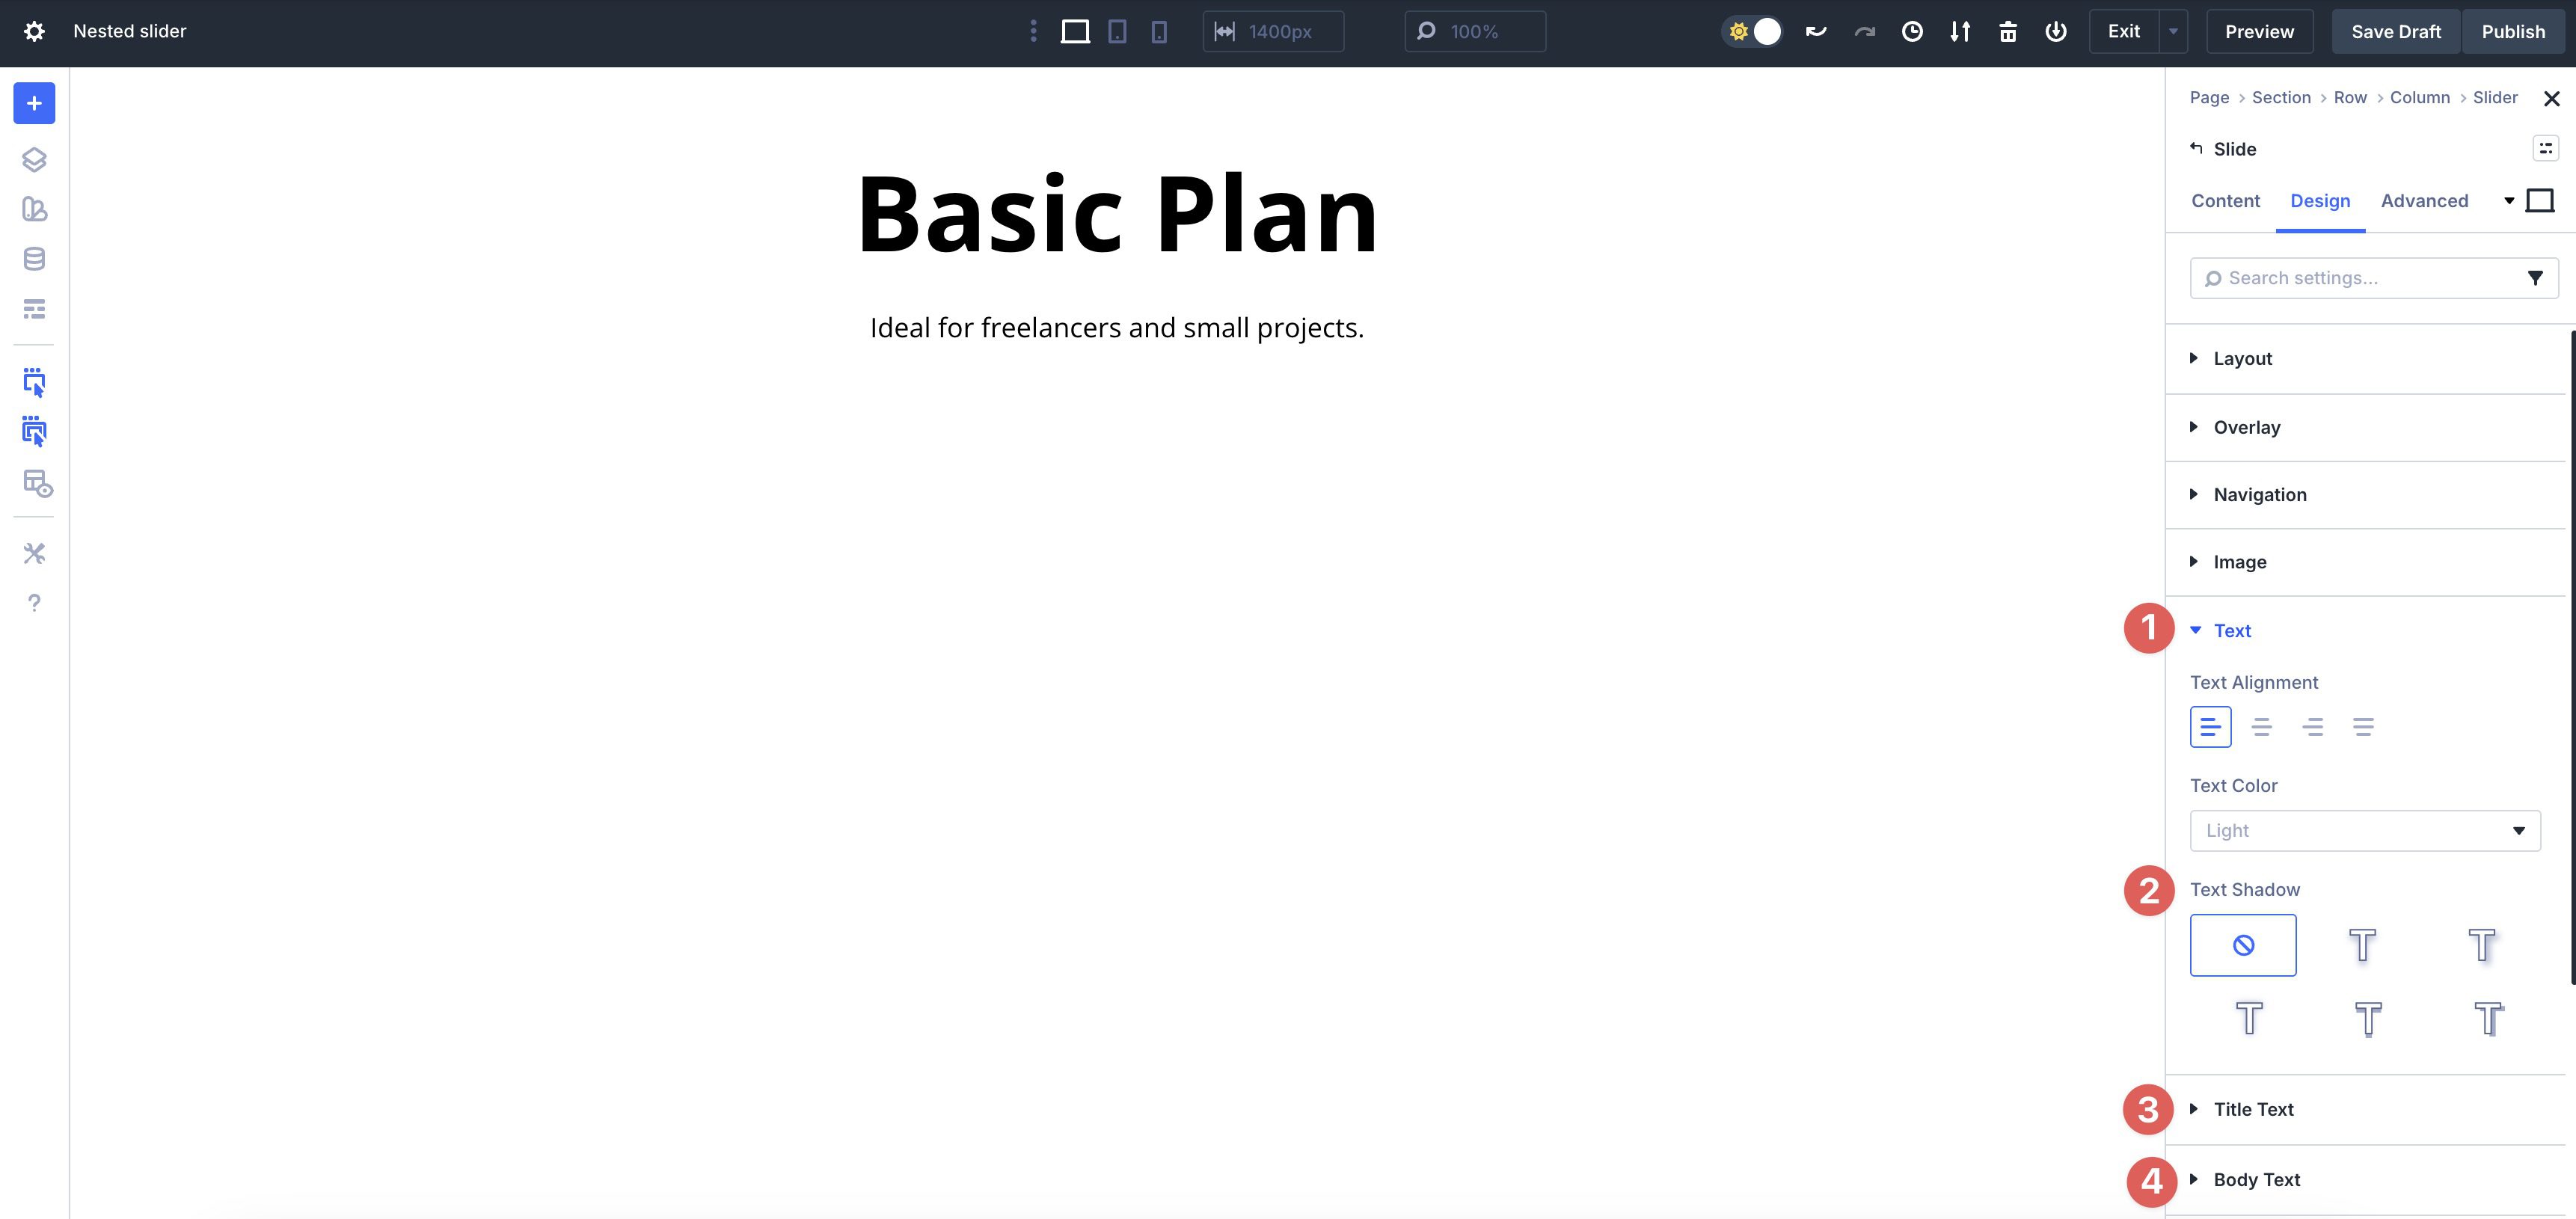
Next, expand the Text, Title Text, and Body Text dropdown menus and set the Text Shadow to None.
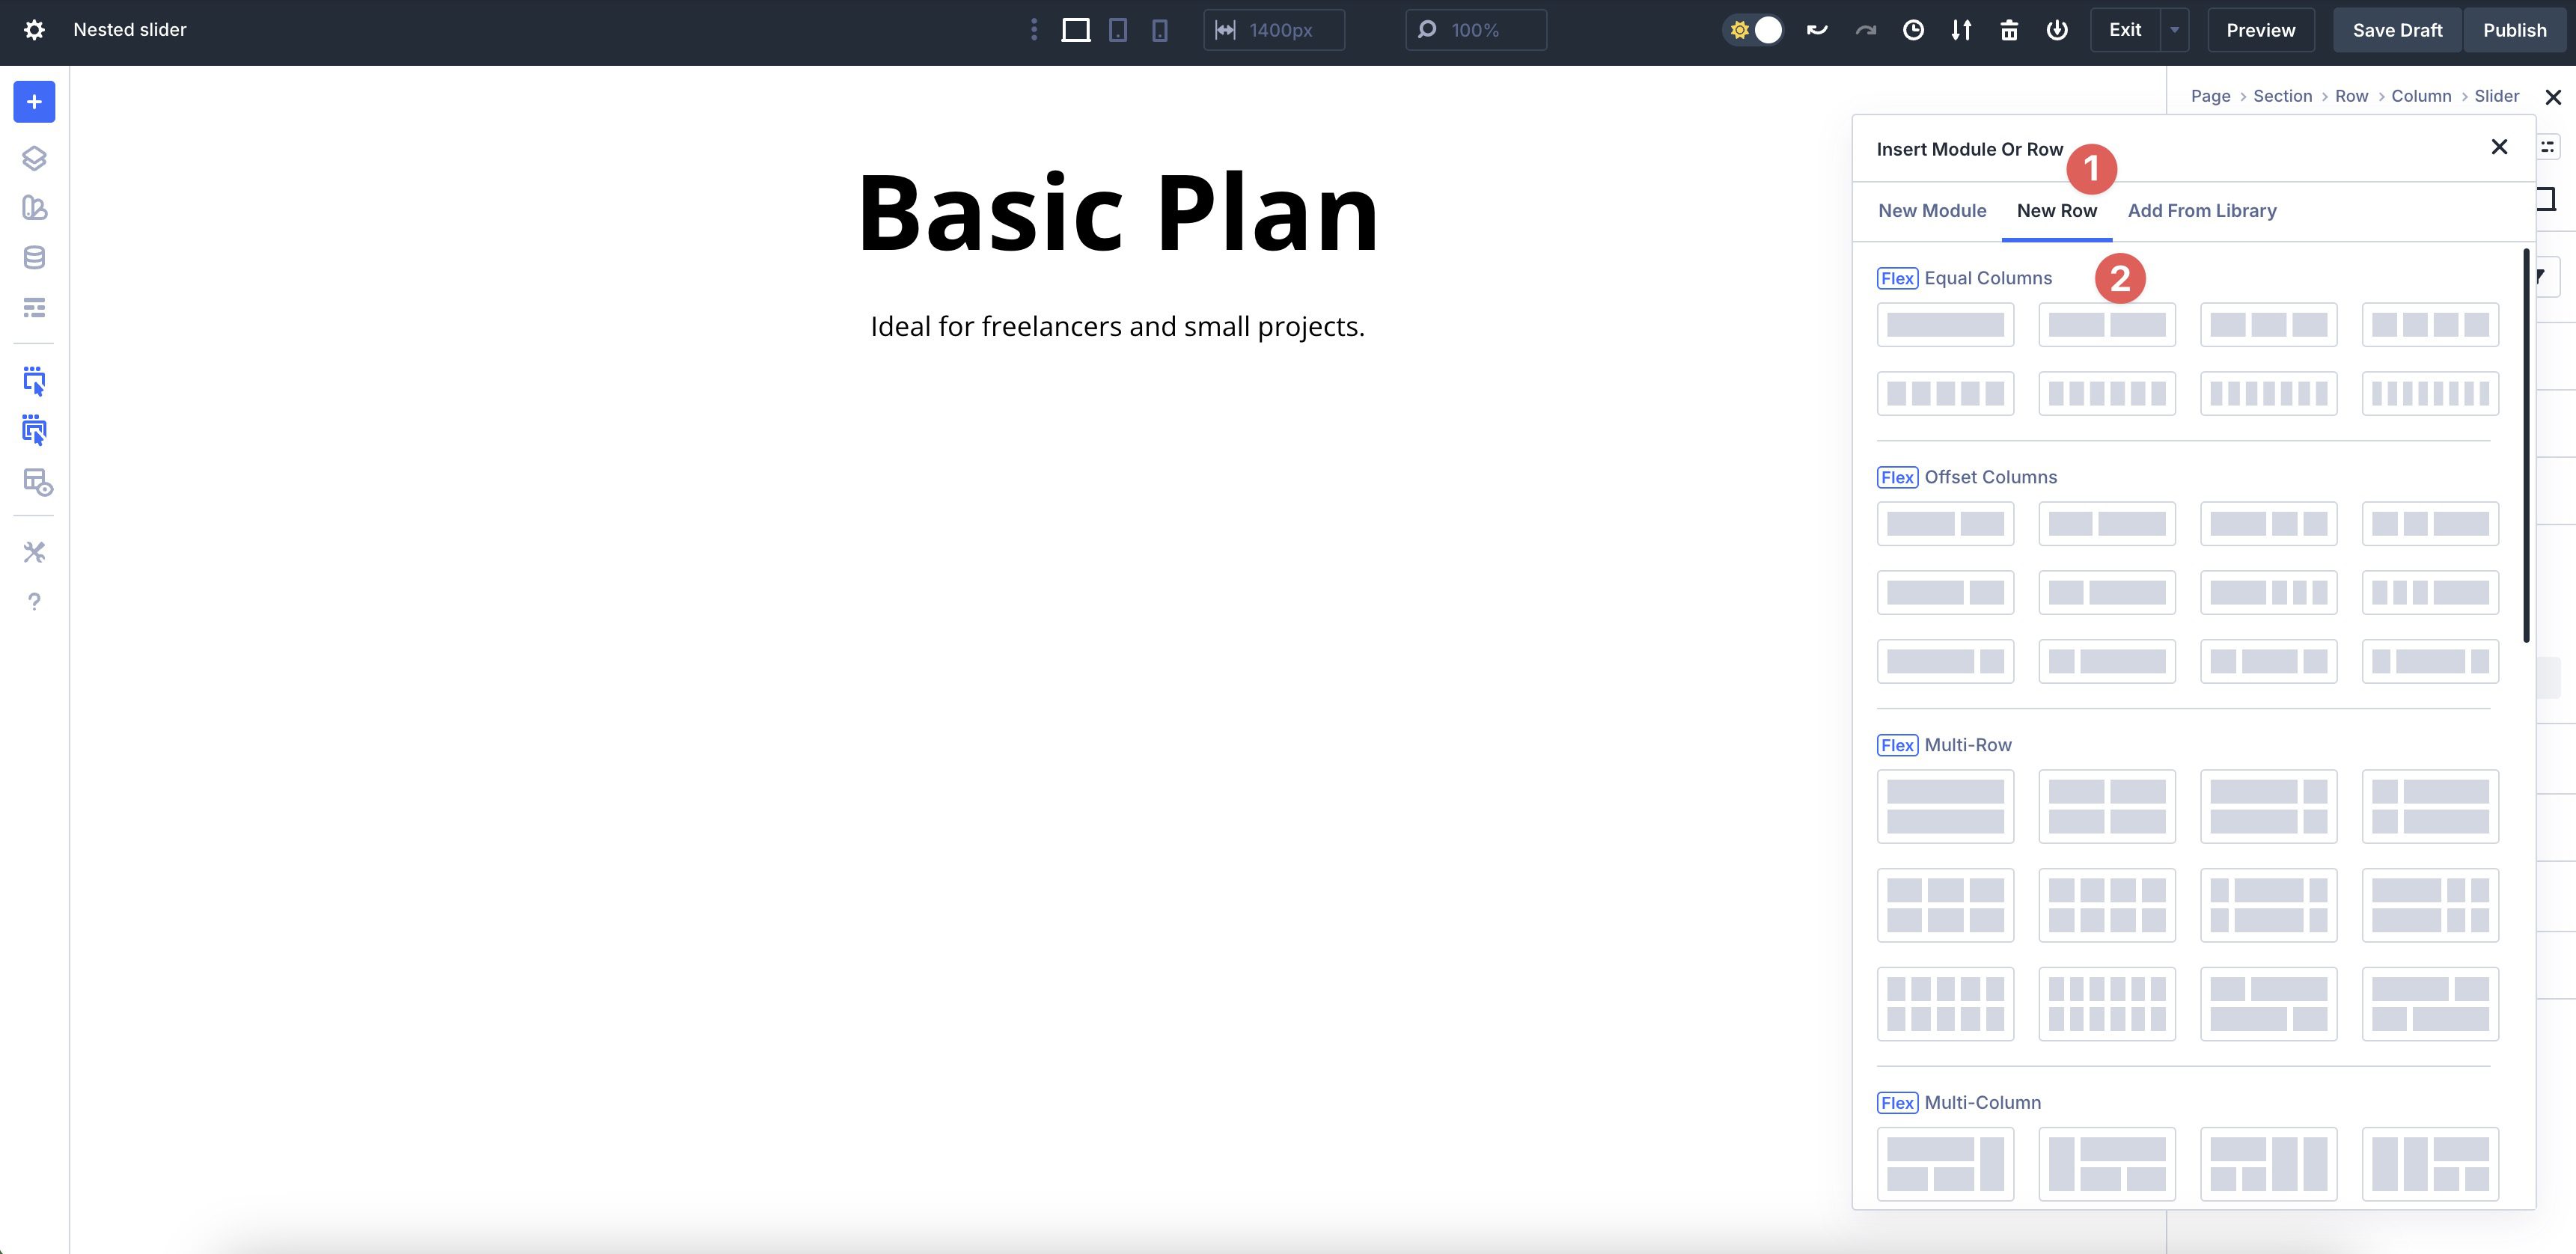
With the slide settings in place, we can start adding content. In the Content tab of the first Slide, click to expand the Elements settings. Click + Add Element to the Slide. When the Insert Module Or Row modal appears, click the New Row tab and add a two-column Row to the Slide.
Step 3: Add Elements To The First Column
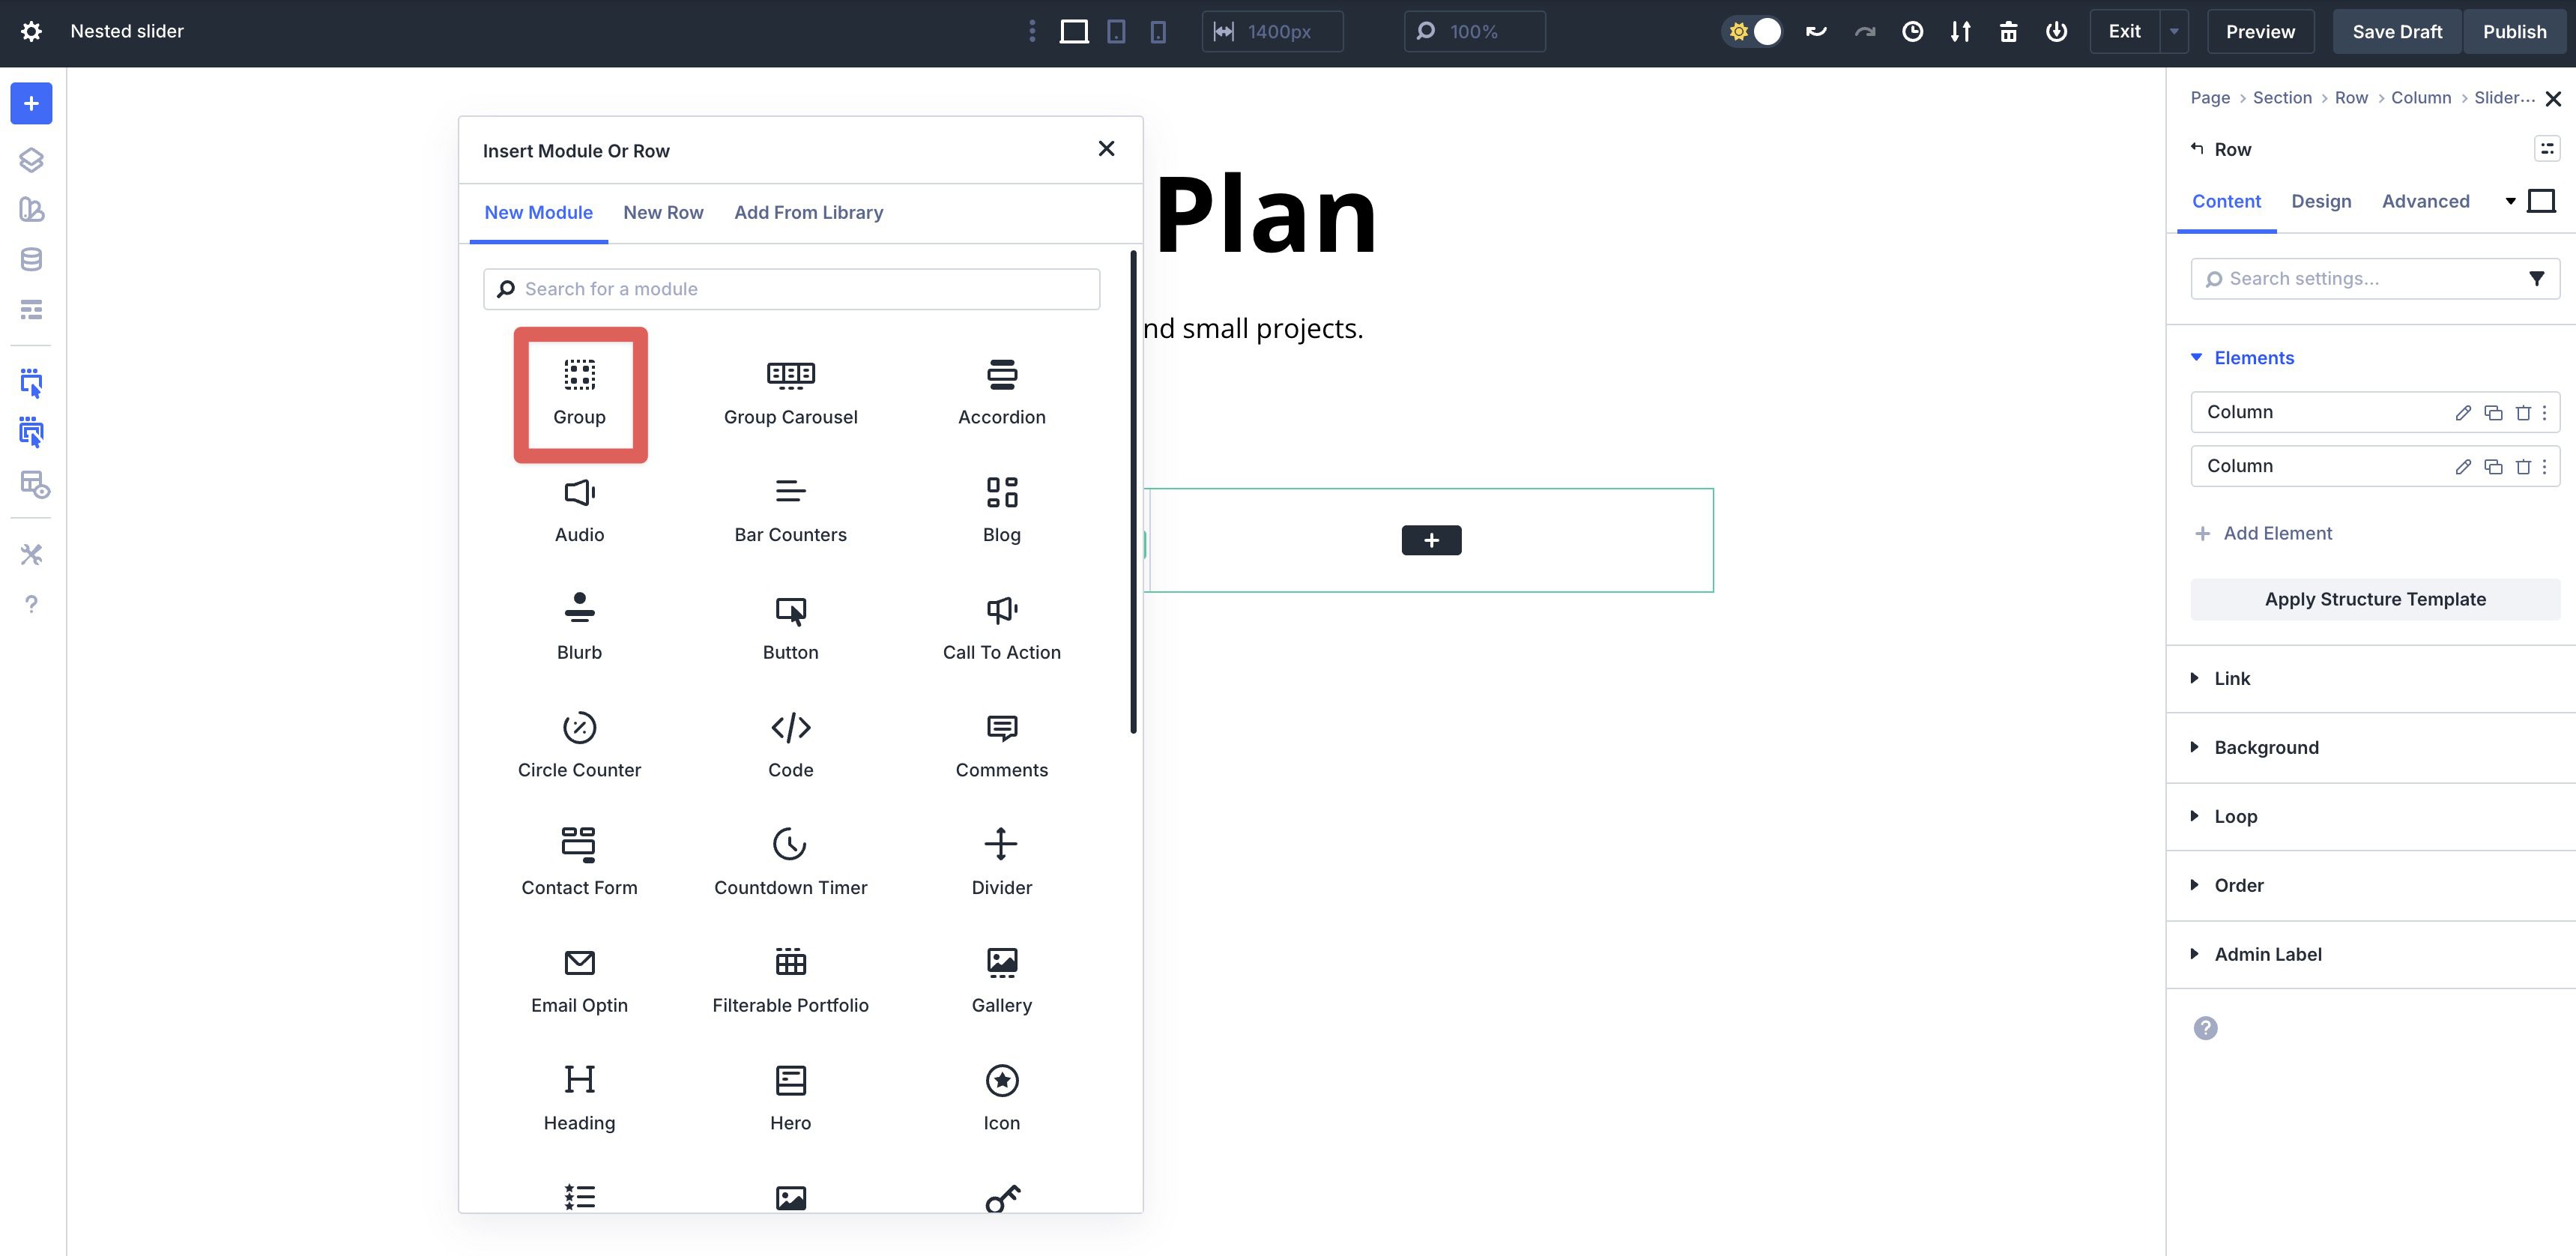
When the Insert Module Or Row modal appears, click to add a Group Module.
Next, add a Heading Module followed by a Text Module to the first Column.
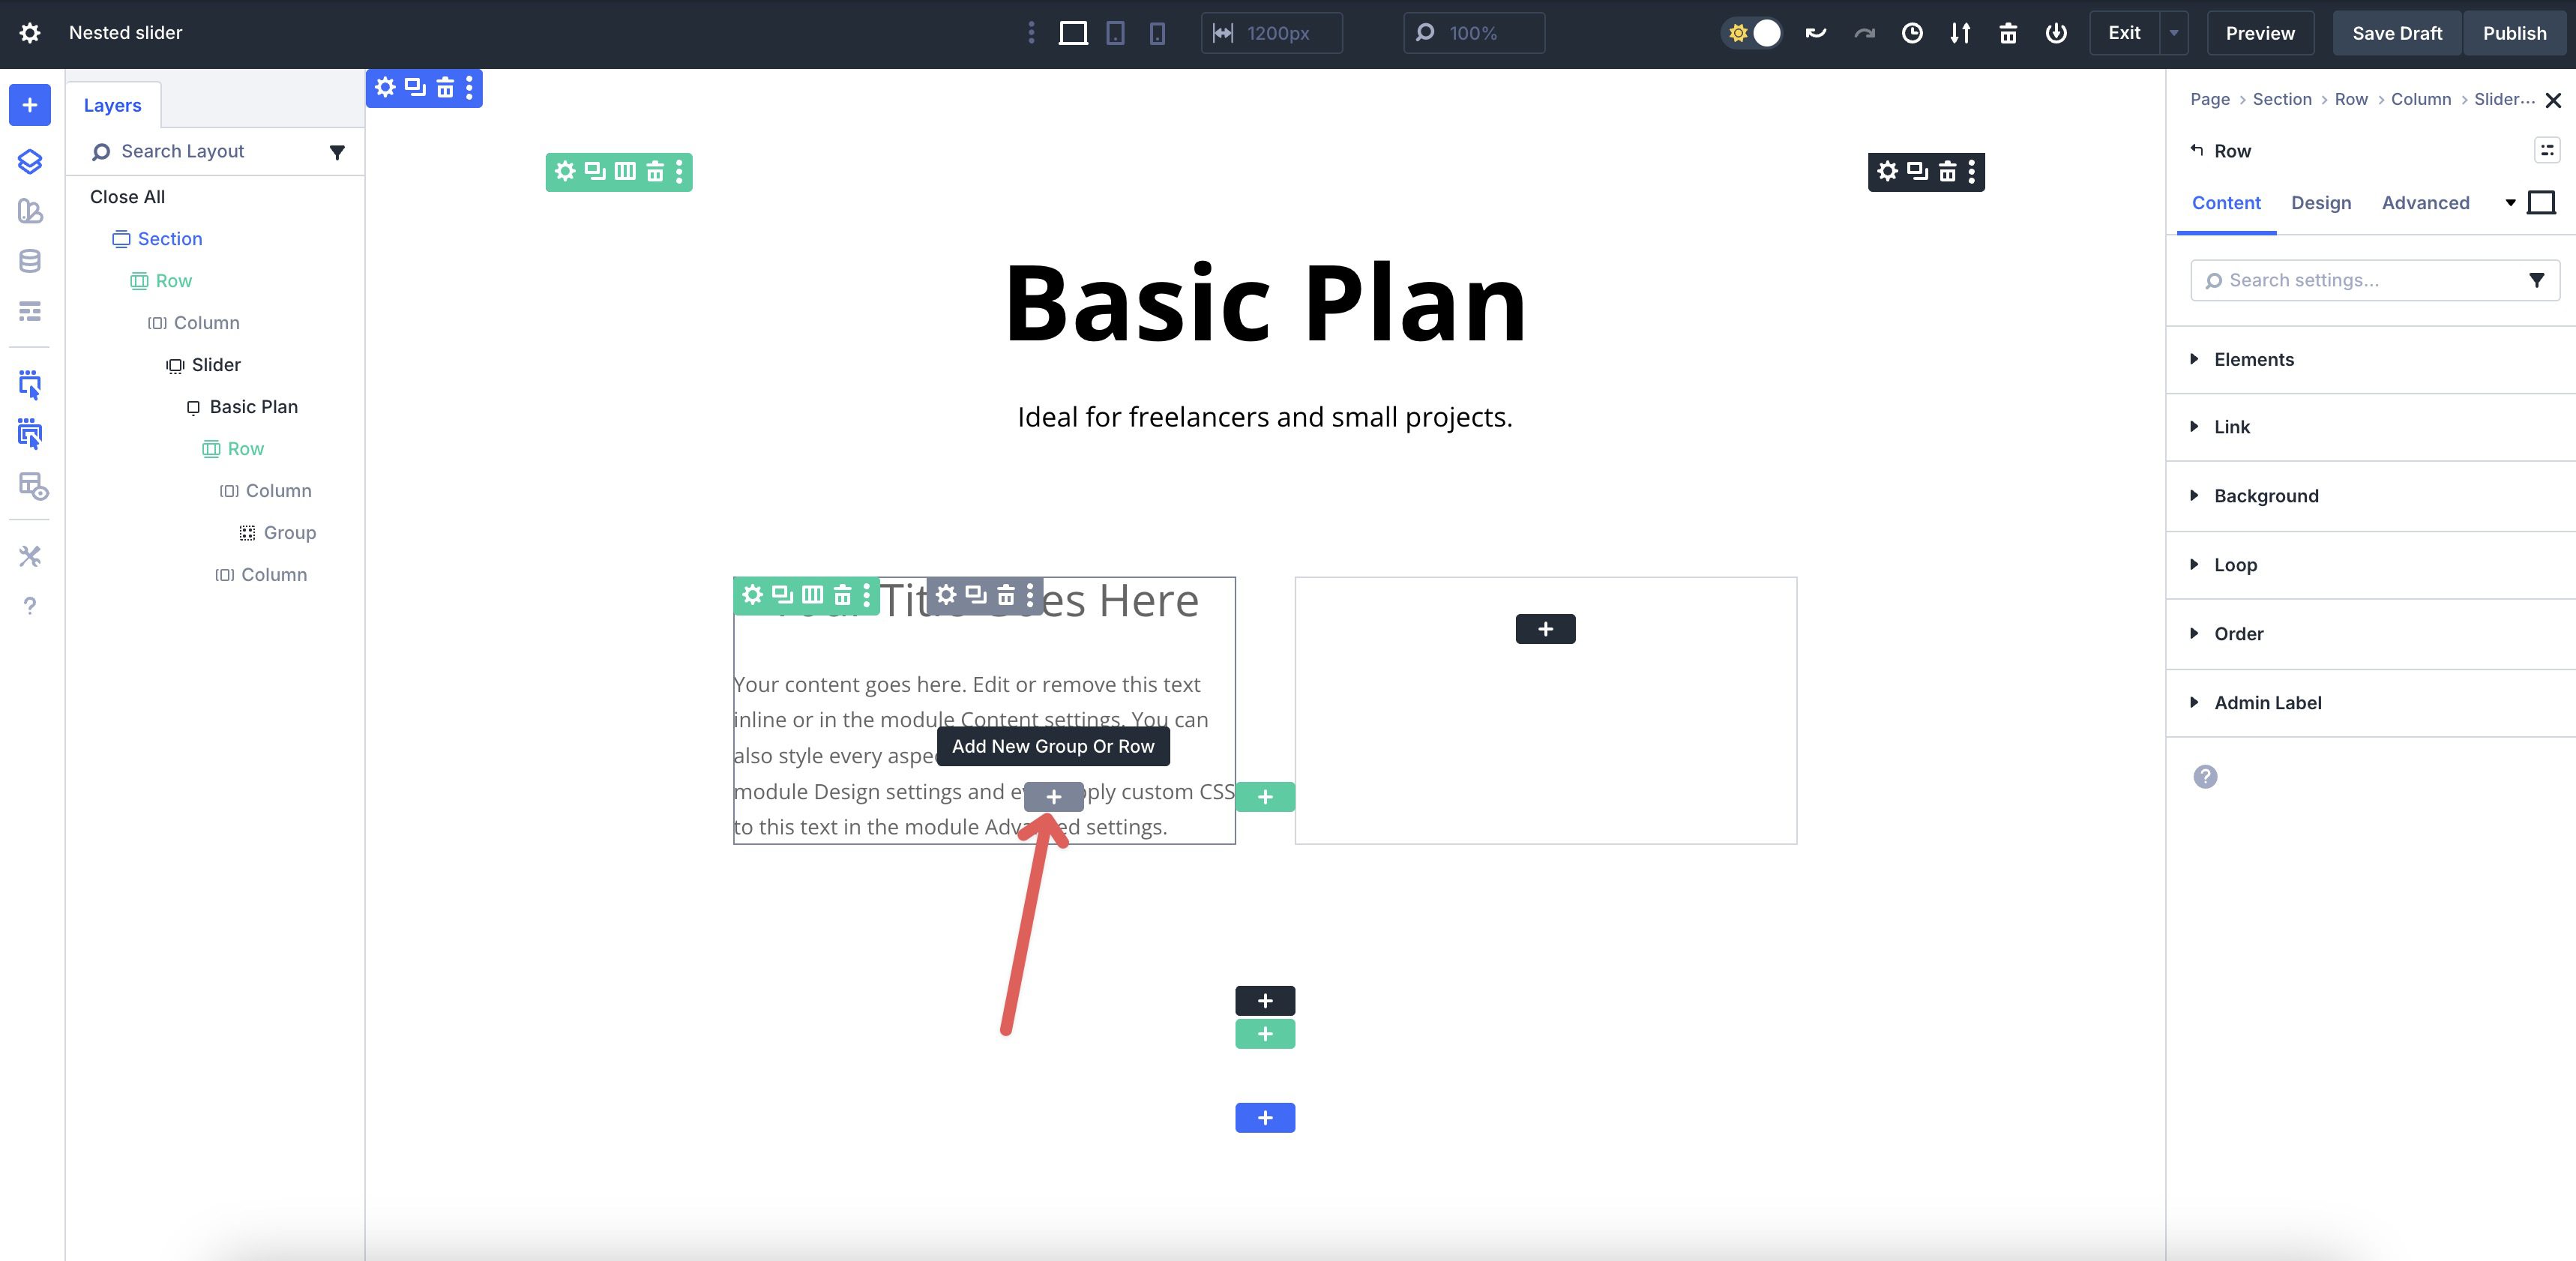
Hover your cursor within the Group Module to add another Module.
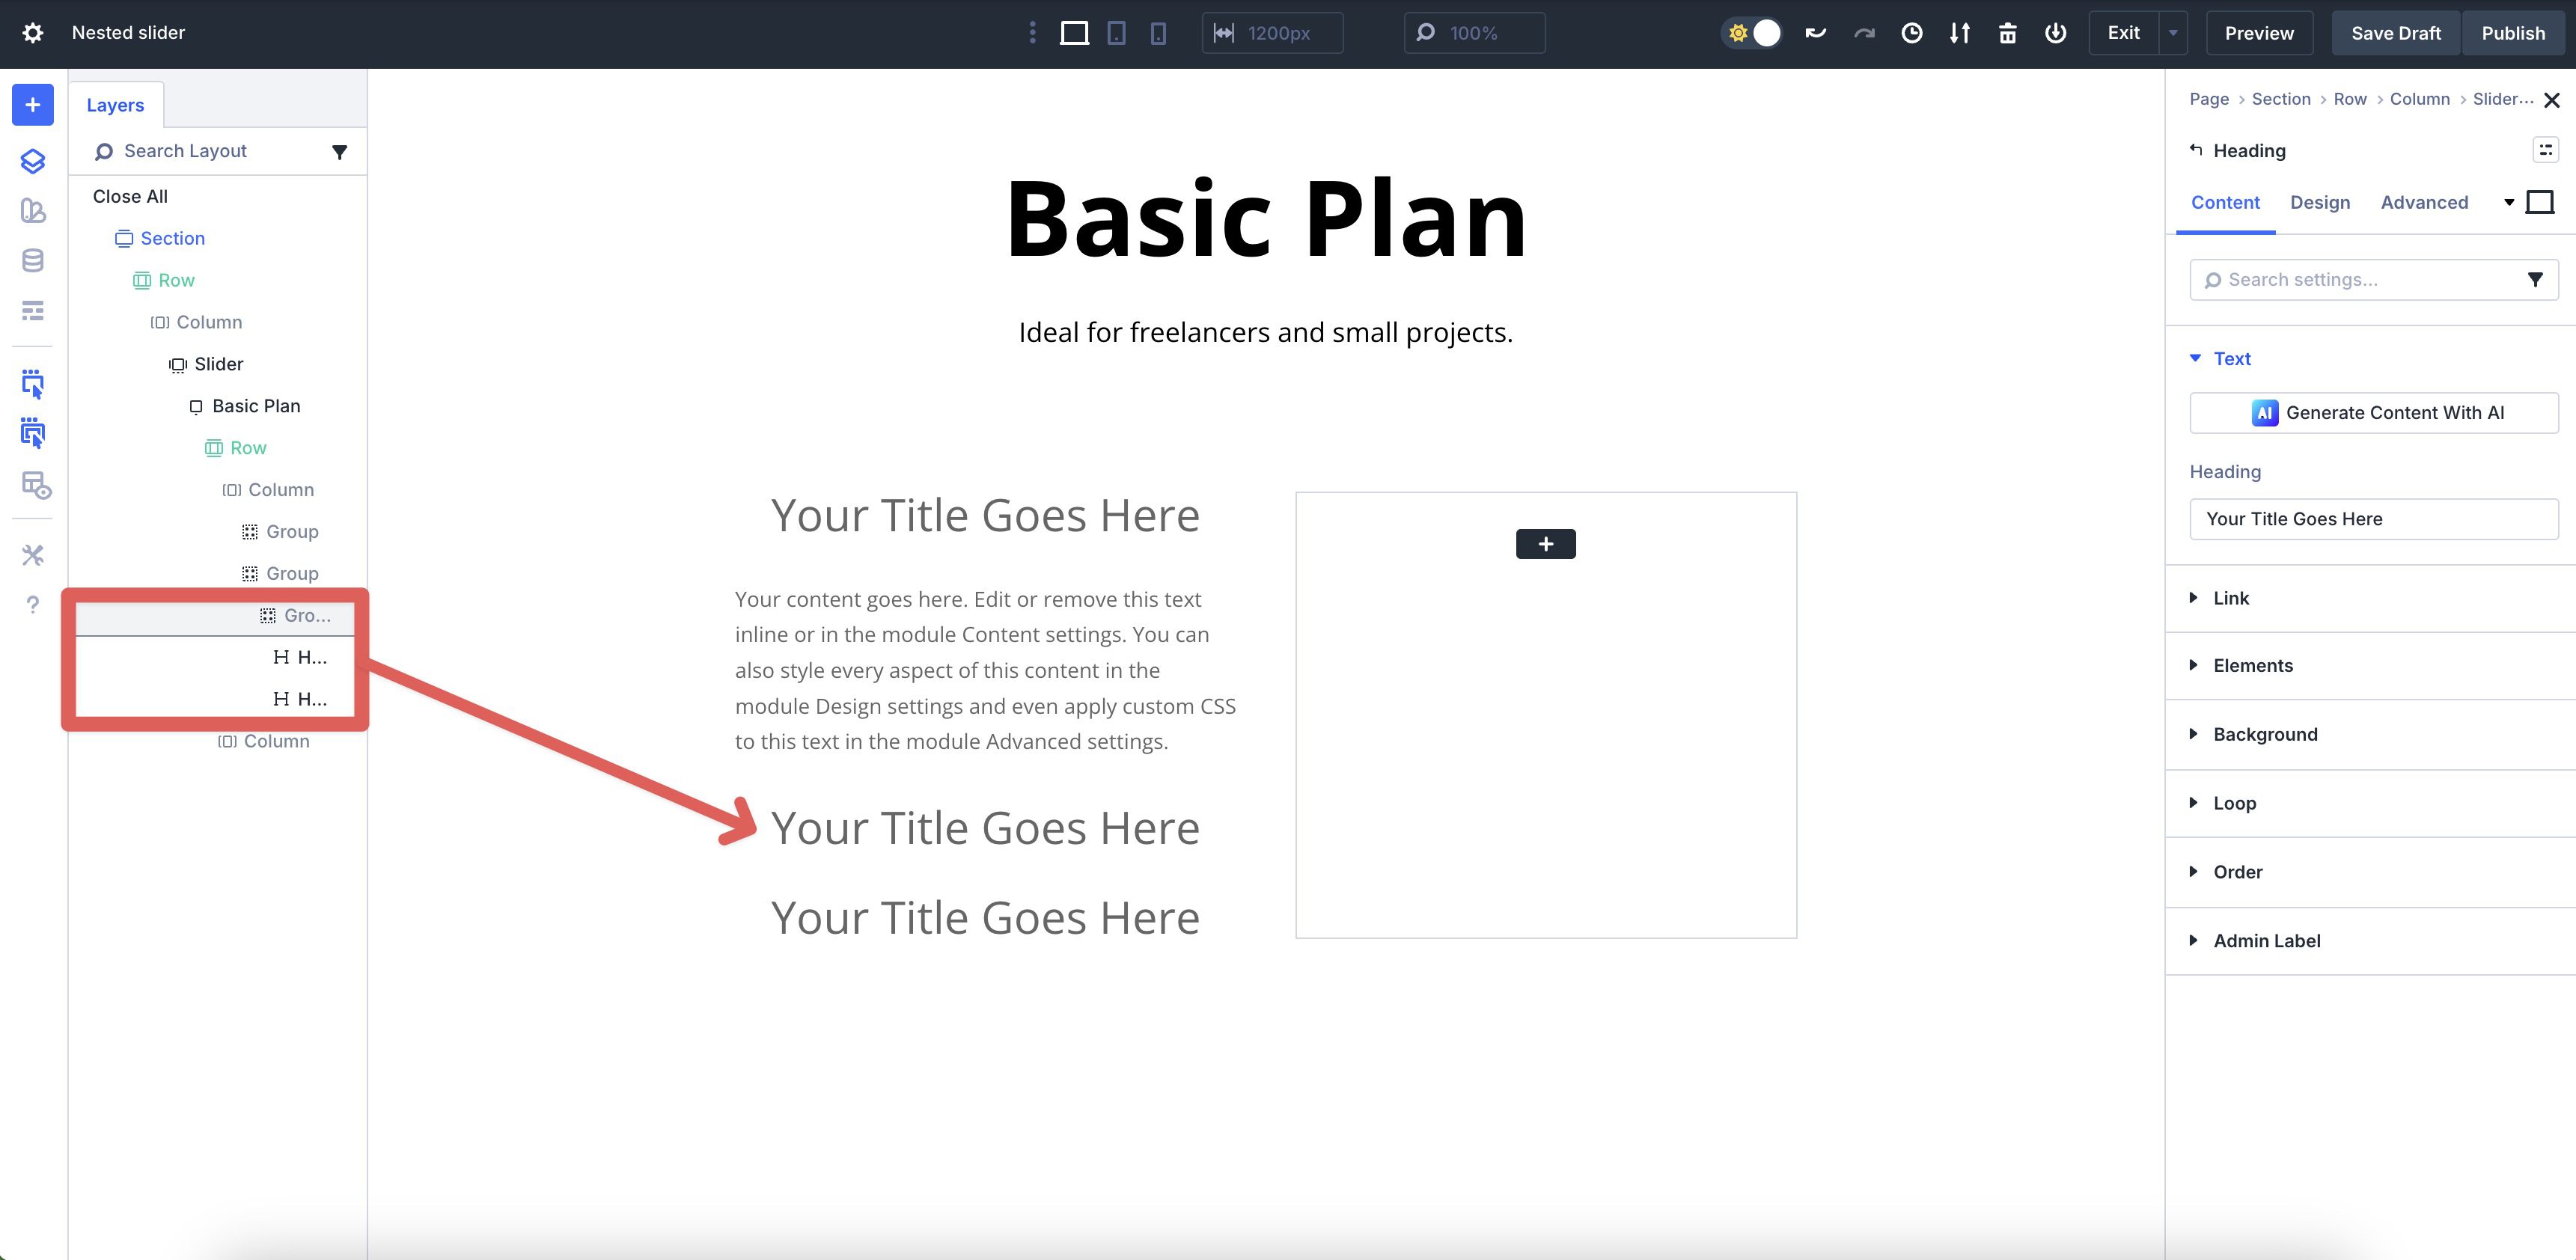
When the modal appears, add a Group, then another Nested Group. Use Divi 5’s Layers View to select the Nested Group and add two Heading Modules.
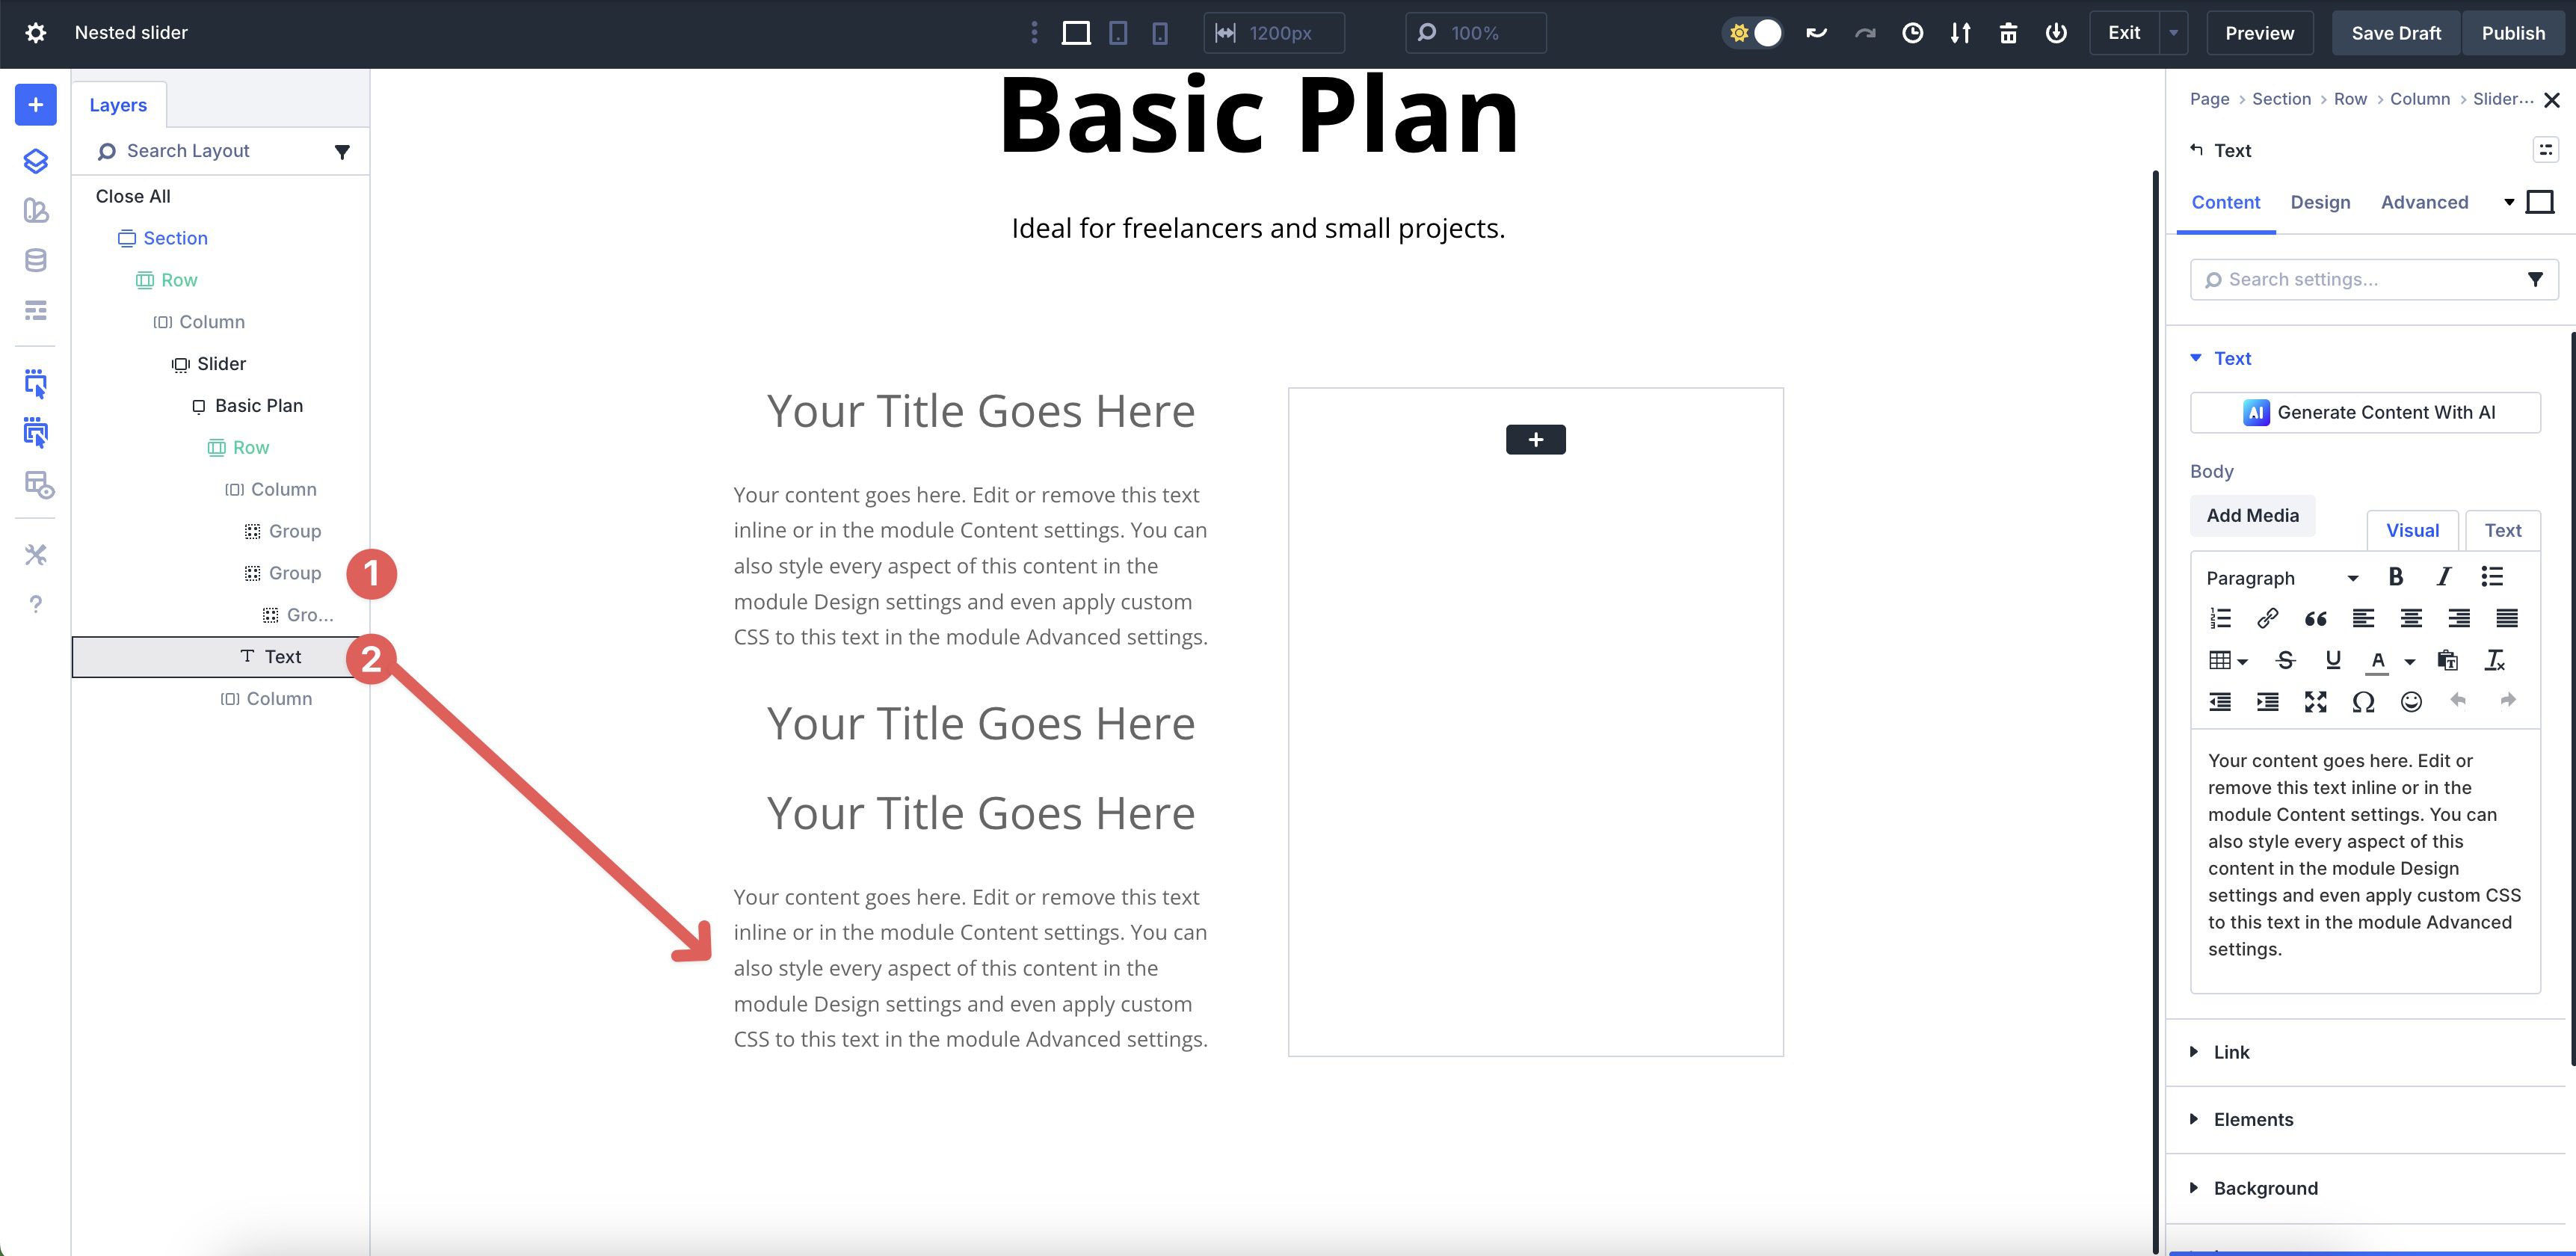
Select the 2nd Group in the 1st Column and add a Text Module.
Finally, select the 1st Group in the 1st Column and add a Button Module.

Once all Modules are in place, enter the headings and body copy, and style the modules to suit your preferences.
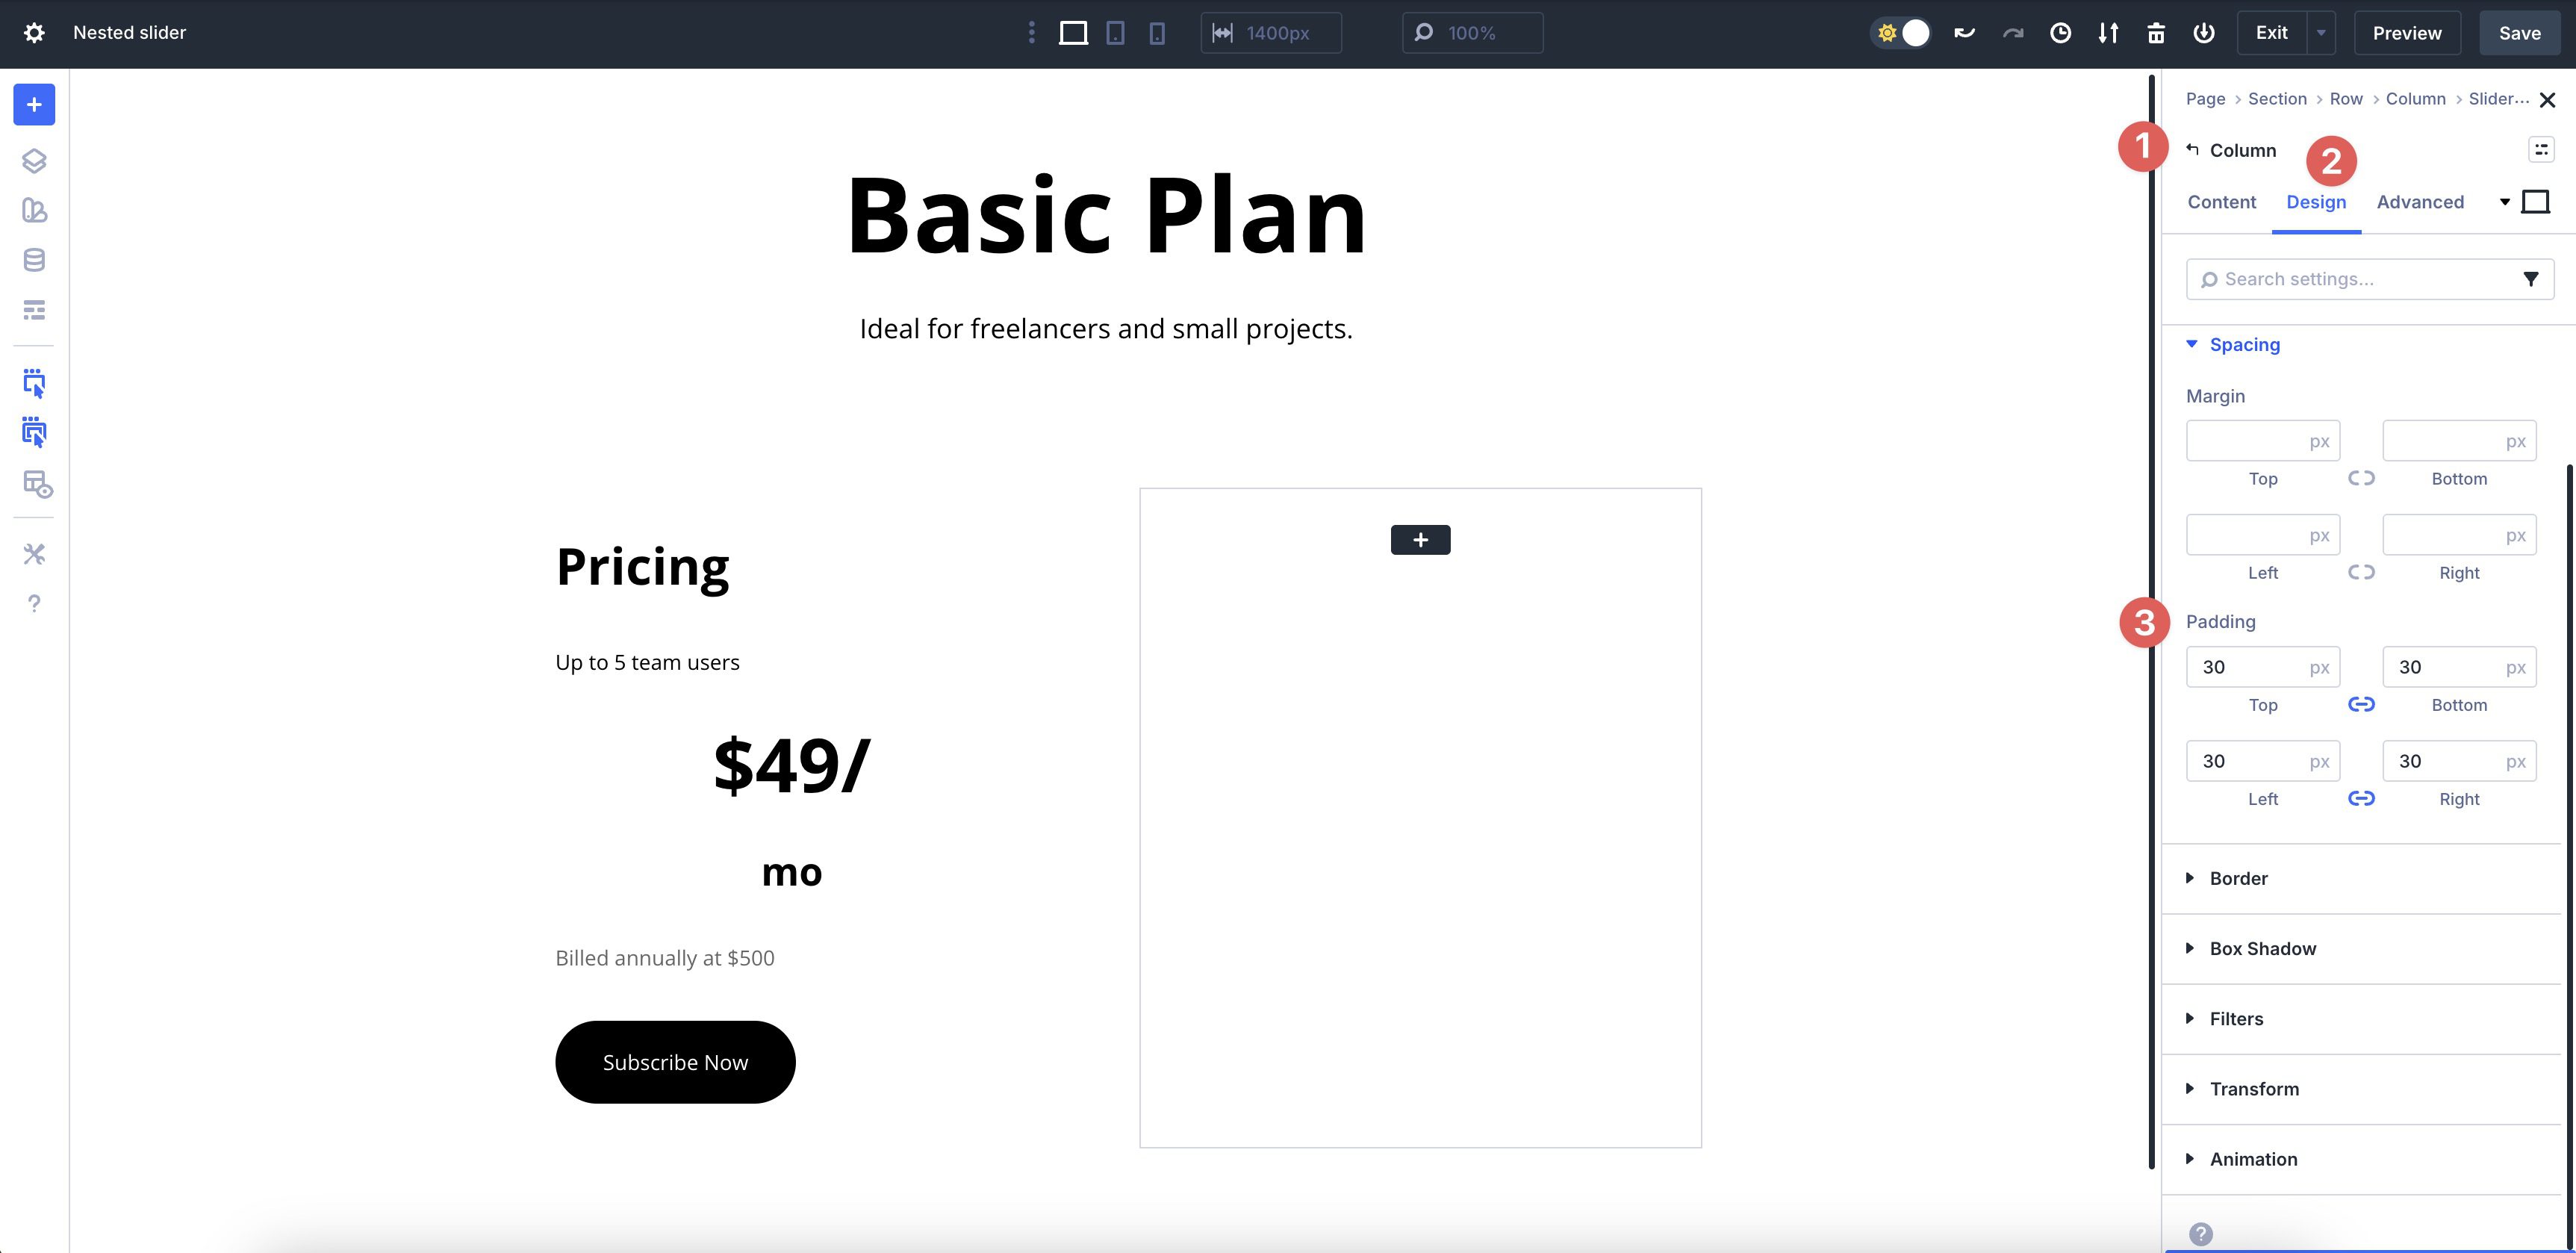
Step 4: Adjust Column Settings
With all content in place on the first Column, you’ll see that we need to make adjustments to the elements. First, we’ll adjust the Columns’ settings, and then we’ll demonstrate how to change the Flex settings on the Column’s content so that everything displays cleanly.
Go to the Design tab in the 1st Column of the Row. Expand the Spacing menu and add 30px Padding to all four sides.
Next, expand the Border dropdown menu. Add 30px Border Radius to all four sides, apply 1px Border Width, and #000000 as the Border Color.

Select the 1st Group in the 1st Column. Go to the Design tab, expand the Layout menu, and adjust the Vertical Gap to 10px.
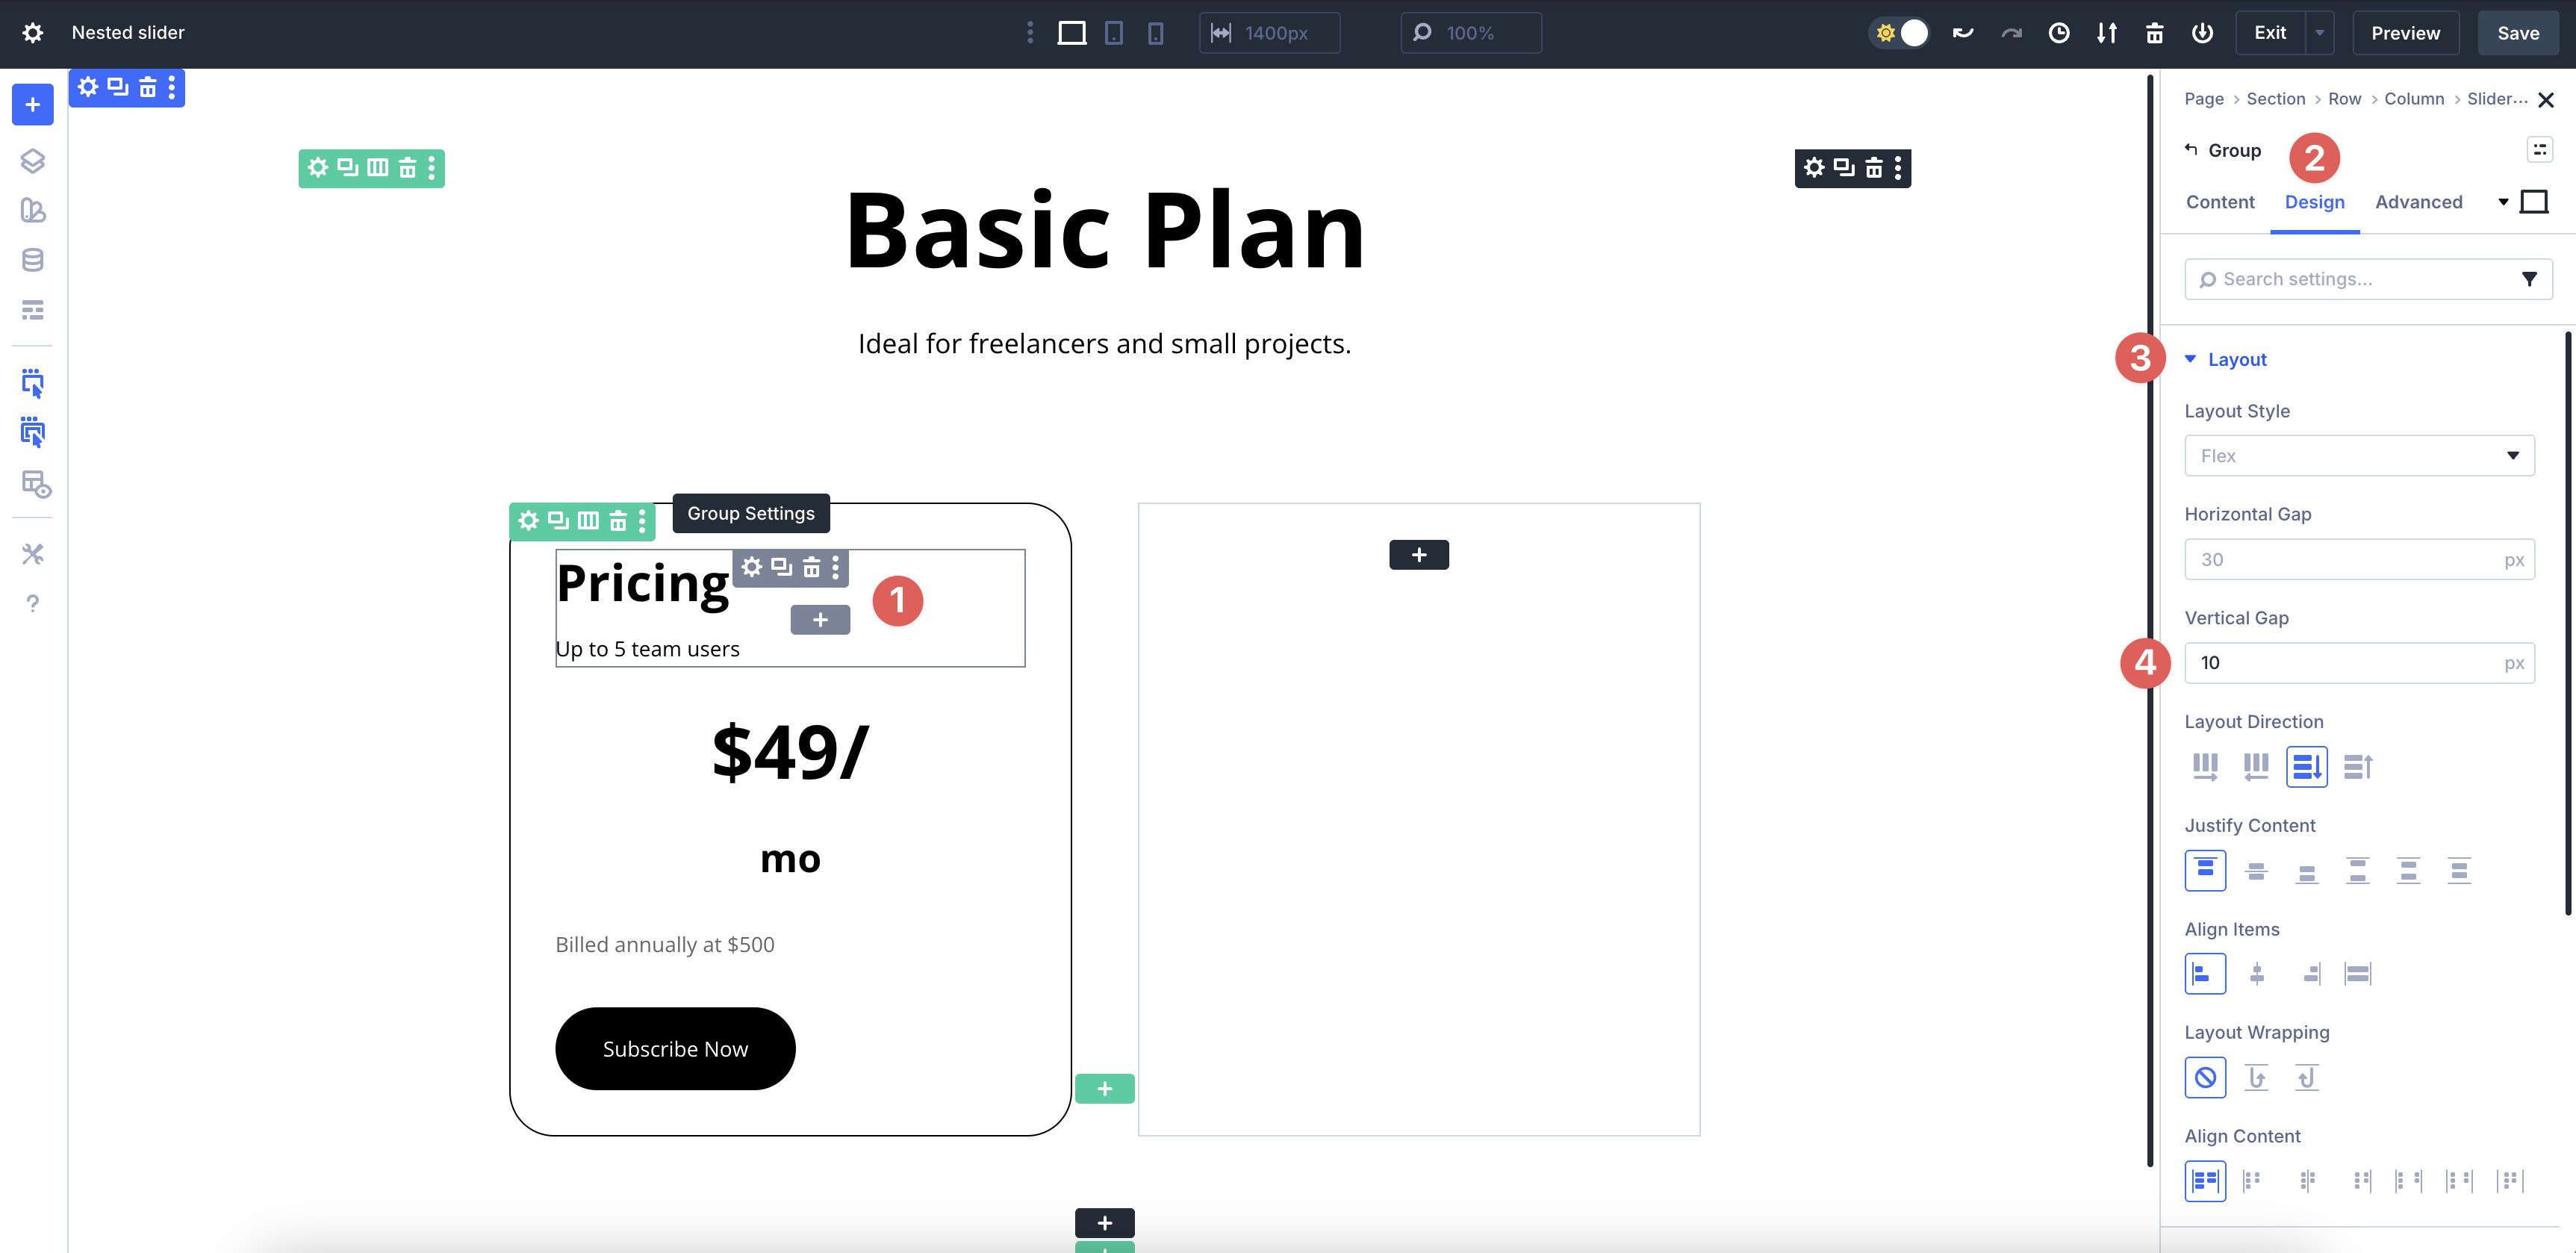
Choose the 2nd Group. Assign 10px Vertical Gap to it.
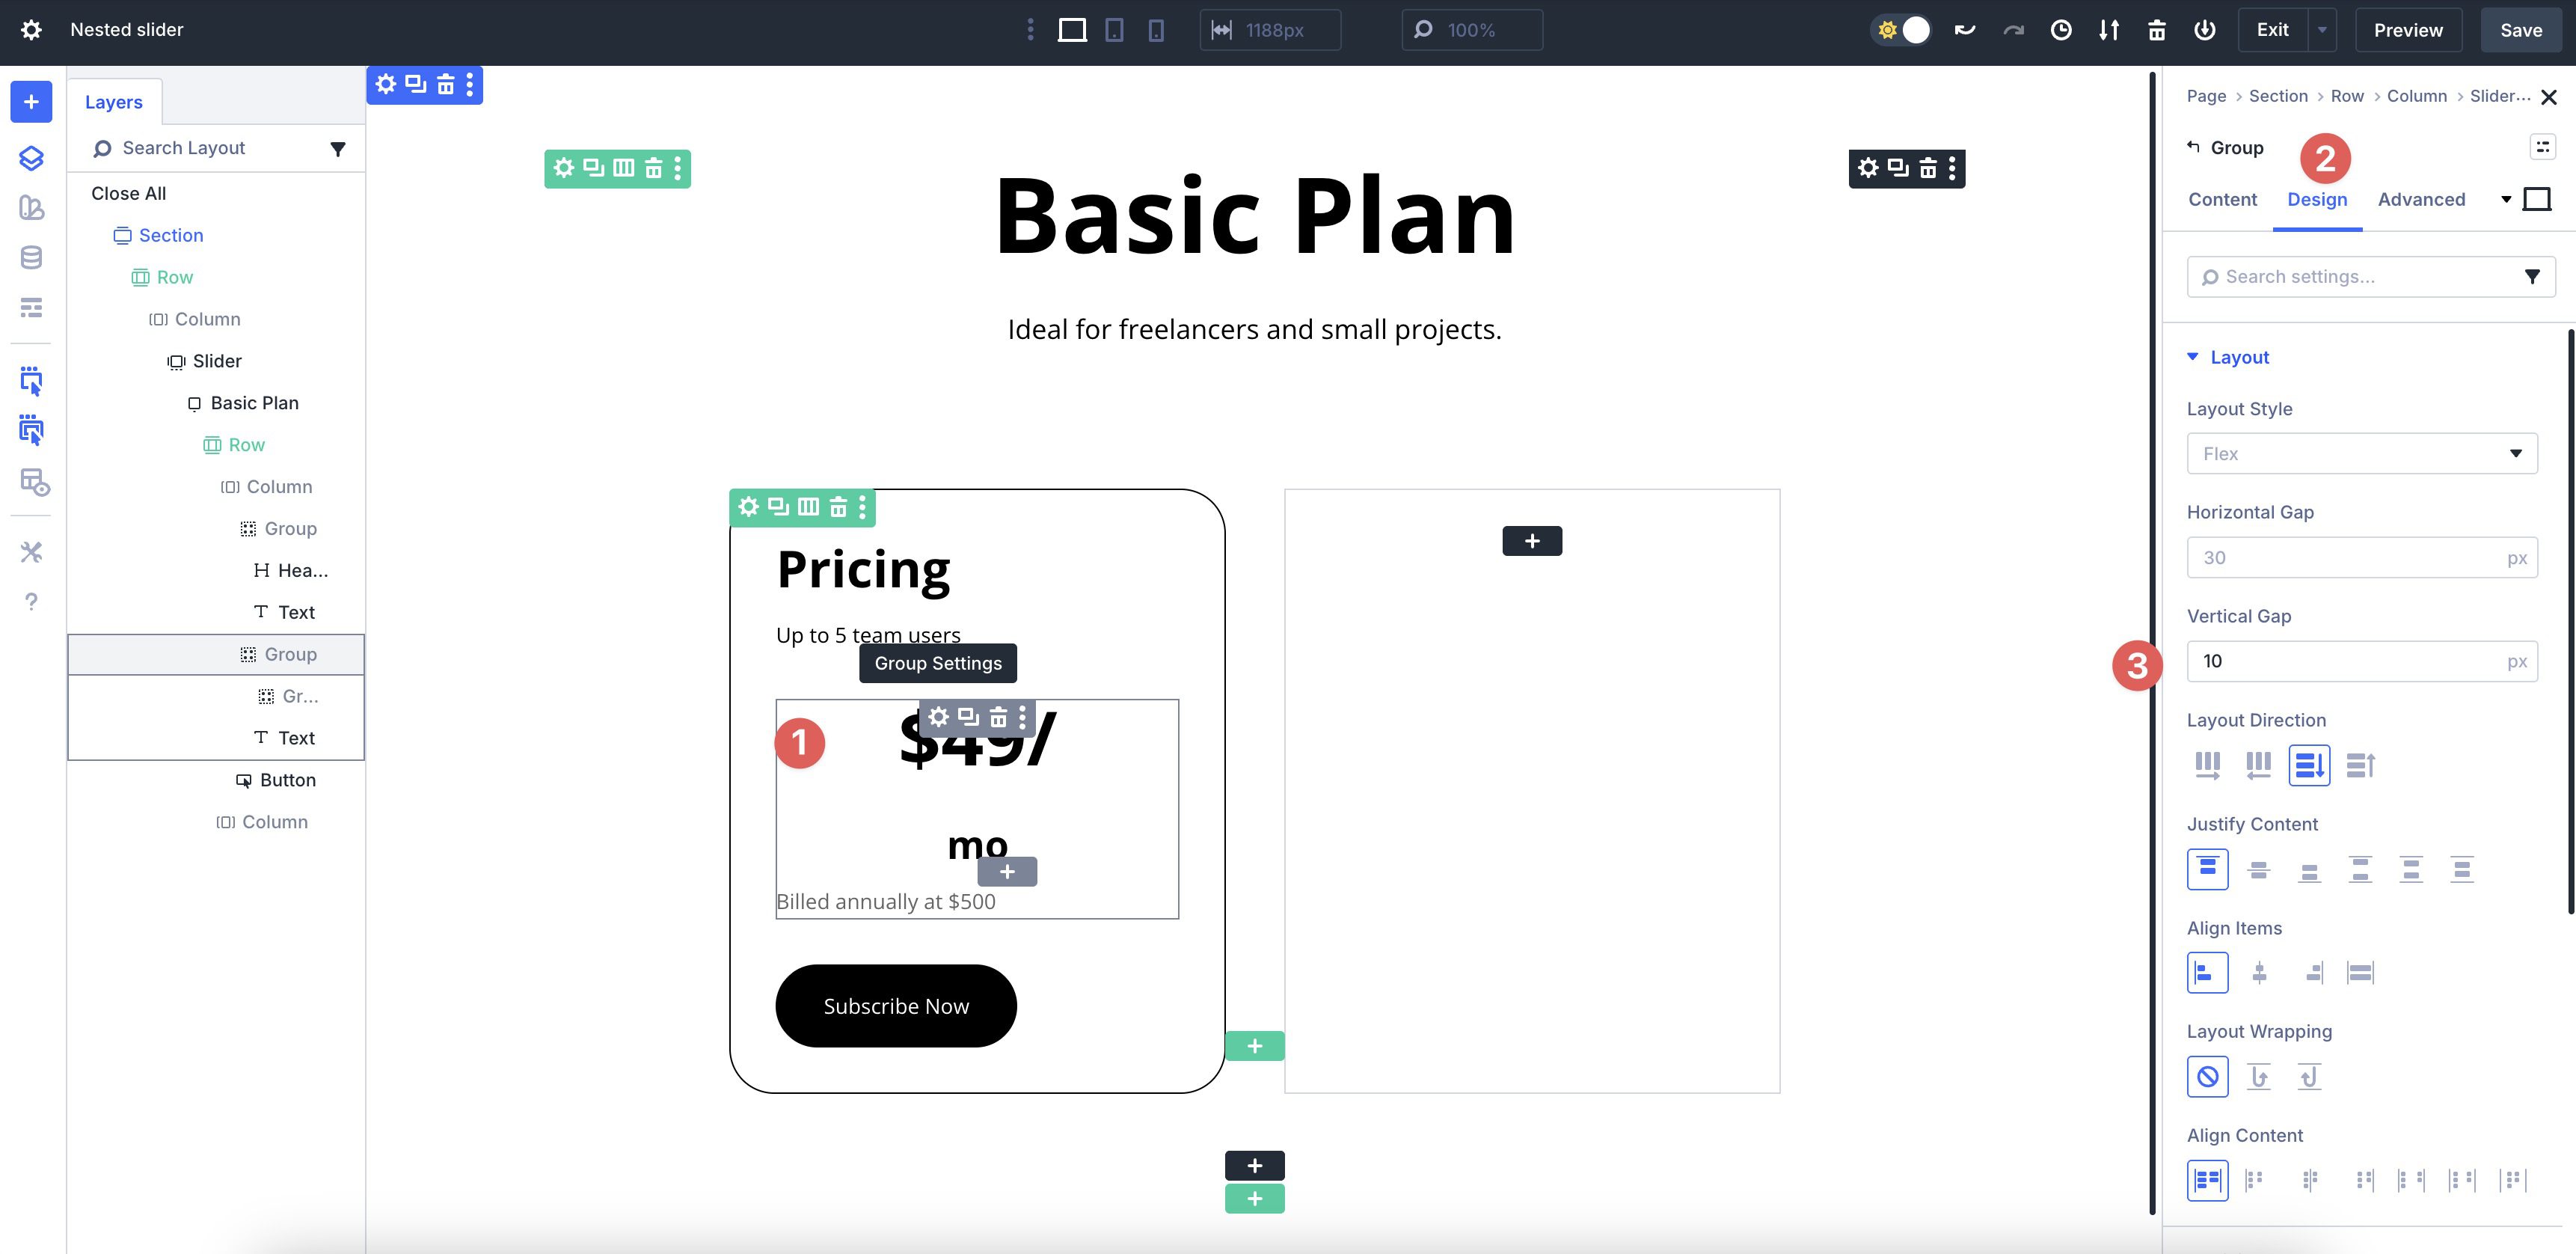
Within the 2nd Group, select the 3rd Group. In the Design tab, set the Horizontal and Vertical Gap to 0px. Set the Layout Direction to Row, and ensure the Align Items field is set to End. This will position the two Heading modules side by side within the Group.

We’ll copy the settings from the first Column and apply them to the second Column. Select the 2-Column Row within the Slider Module. Expand the Elements settings in the Content tab. Hover over the 1st Column, right-click, and select Copy Item Styles.
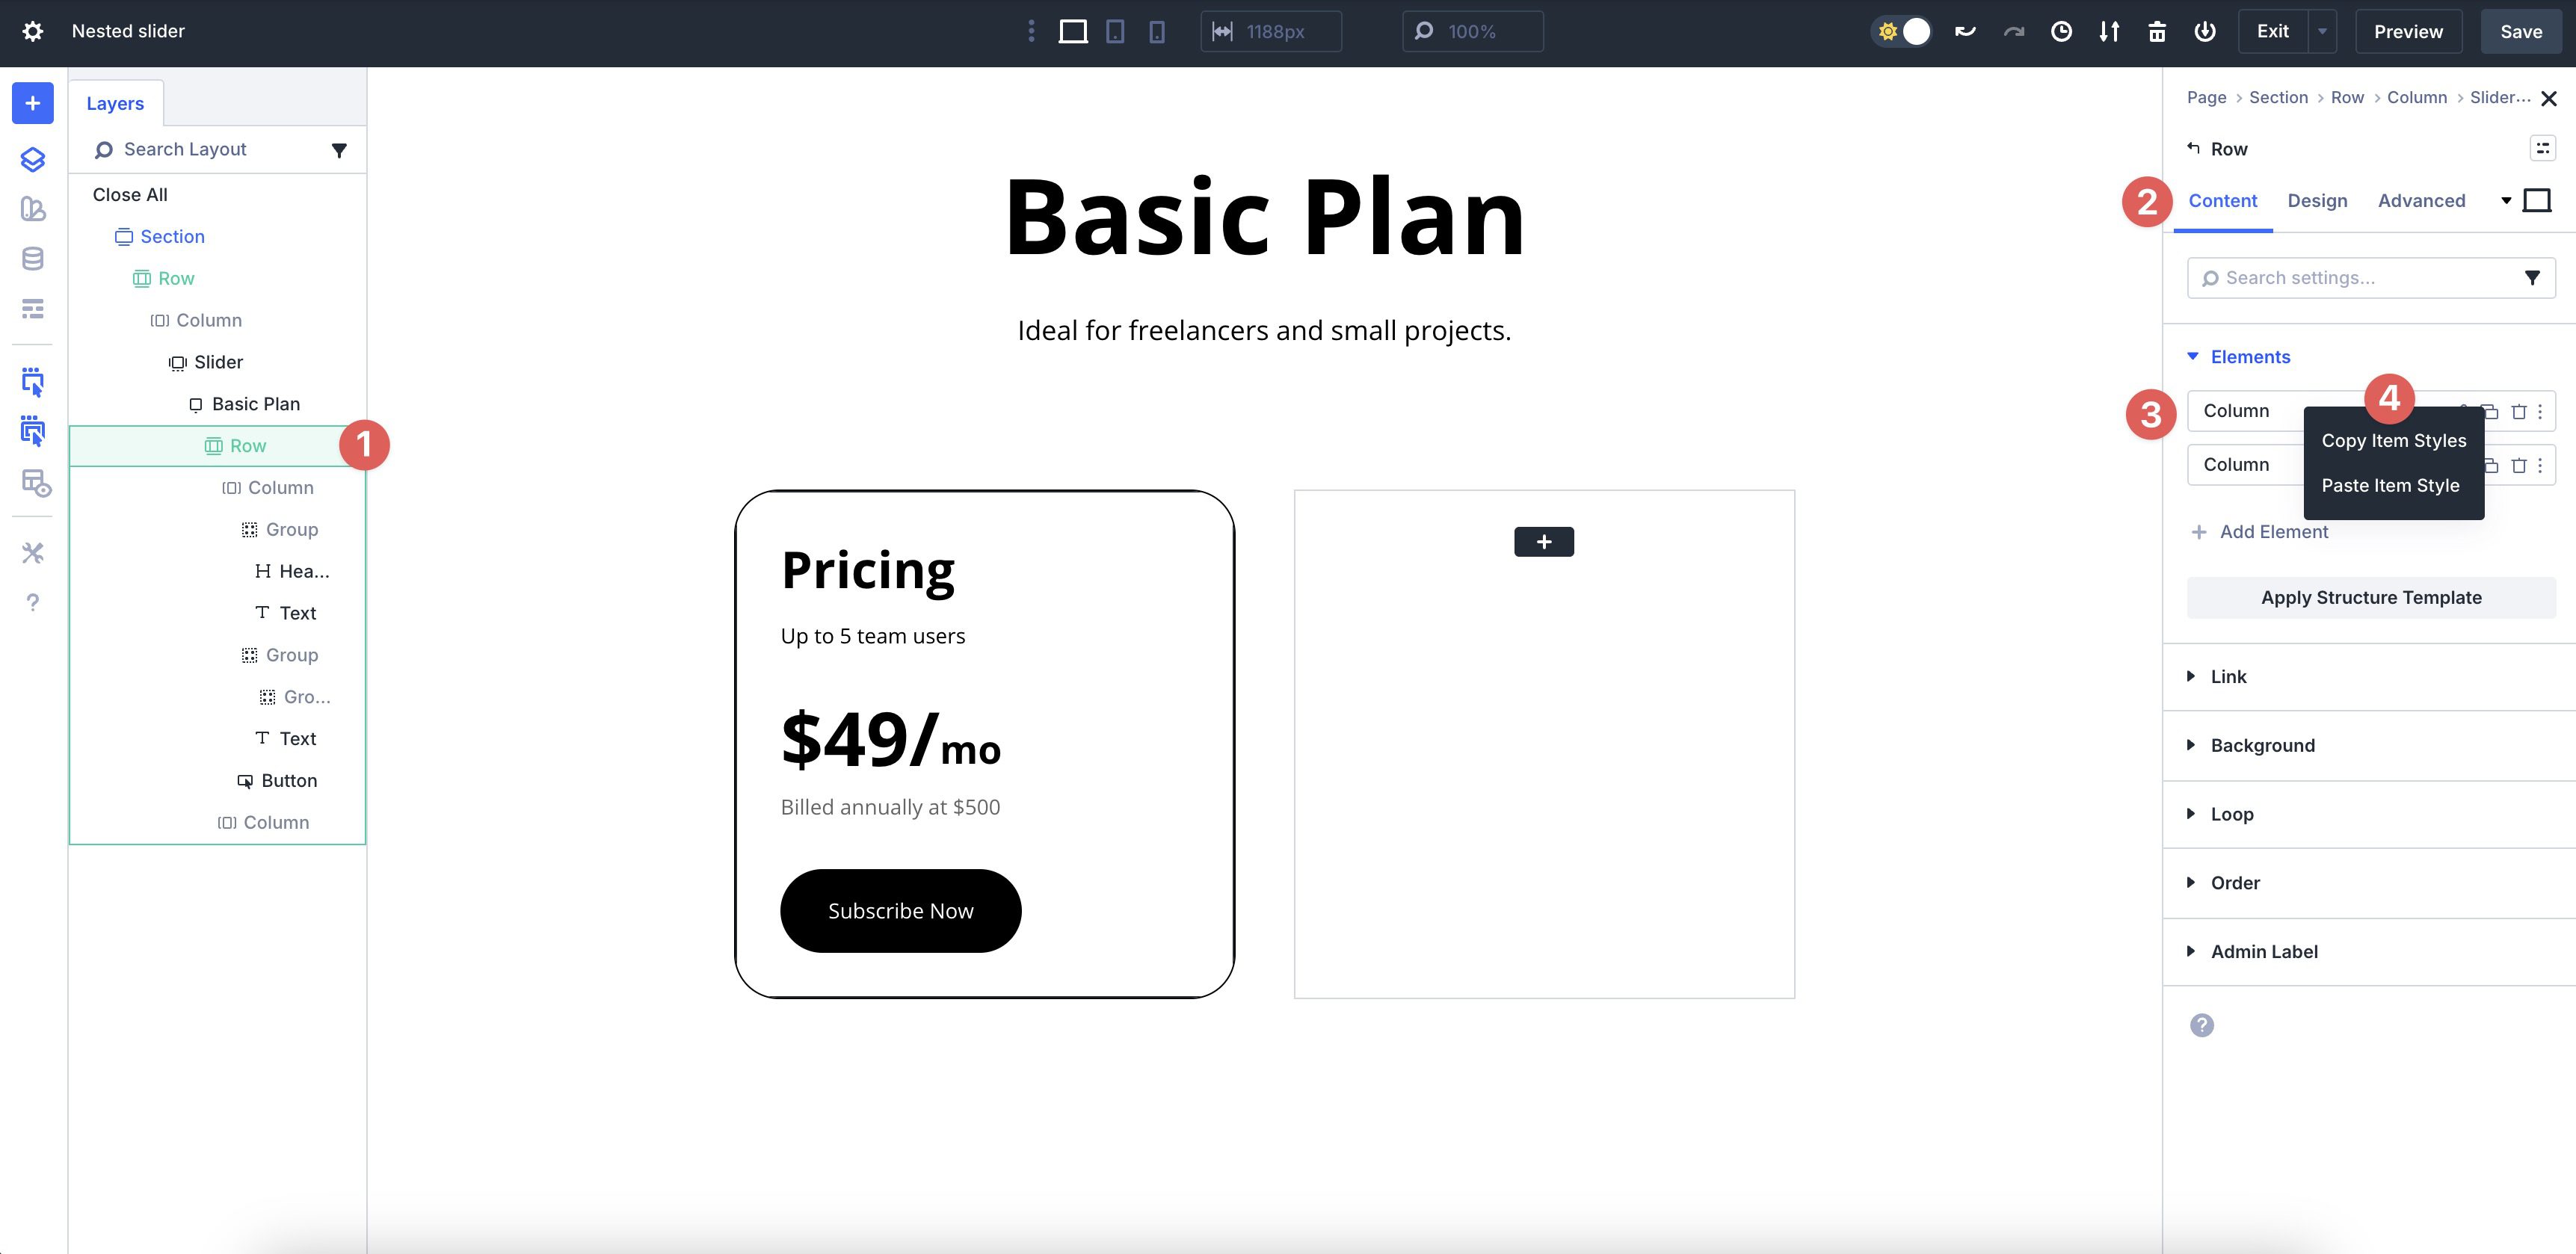
Lastly, hover over the 2nd Column, right-click, and select Paste Item Styles. The Padding and Border styles we applied to the 1st Column will be effortlessly applied to the 2nd Column.
Step 5: Add Elements To the Second Column
Next, we’ll add content to the 2nd Column of the 1st Slide. Click the black + icon in the 2nd Column.
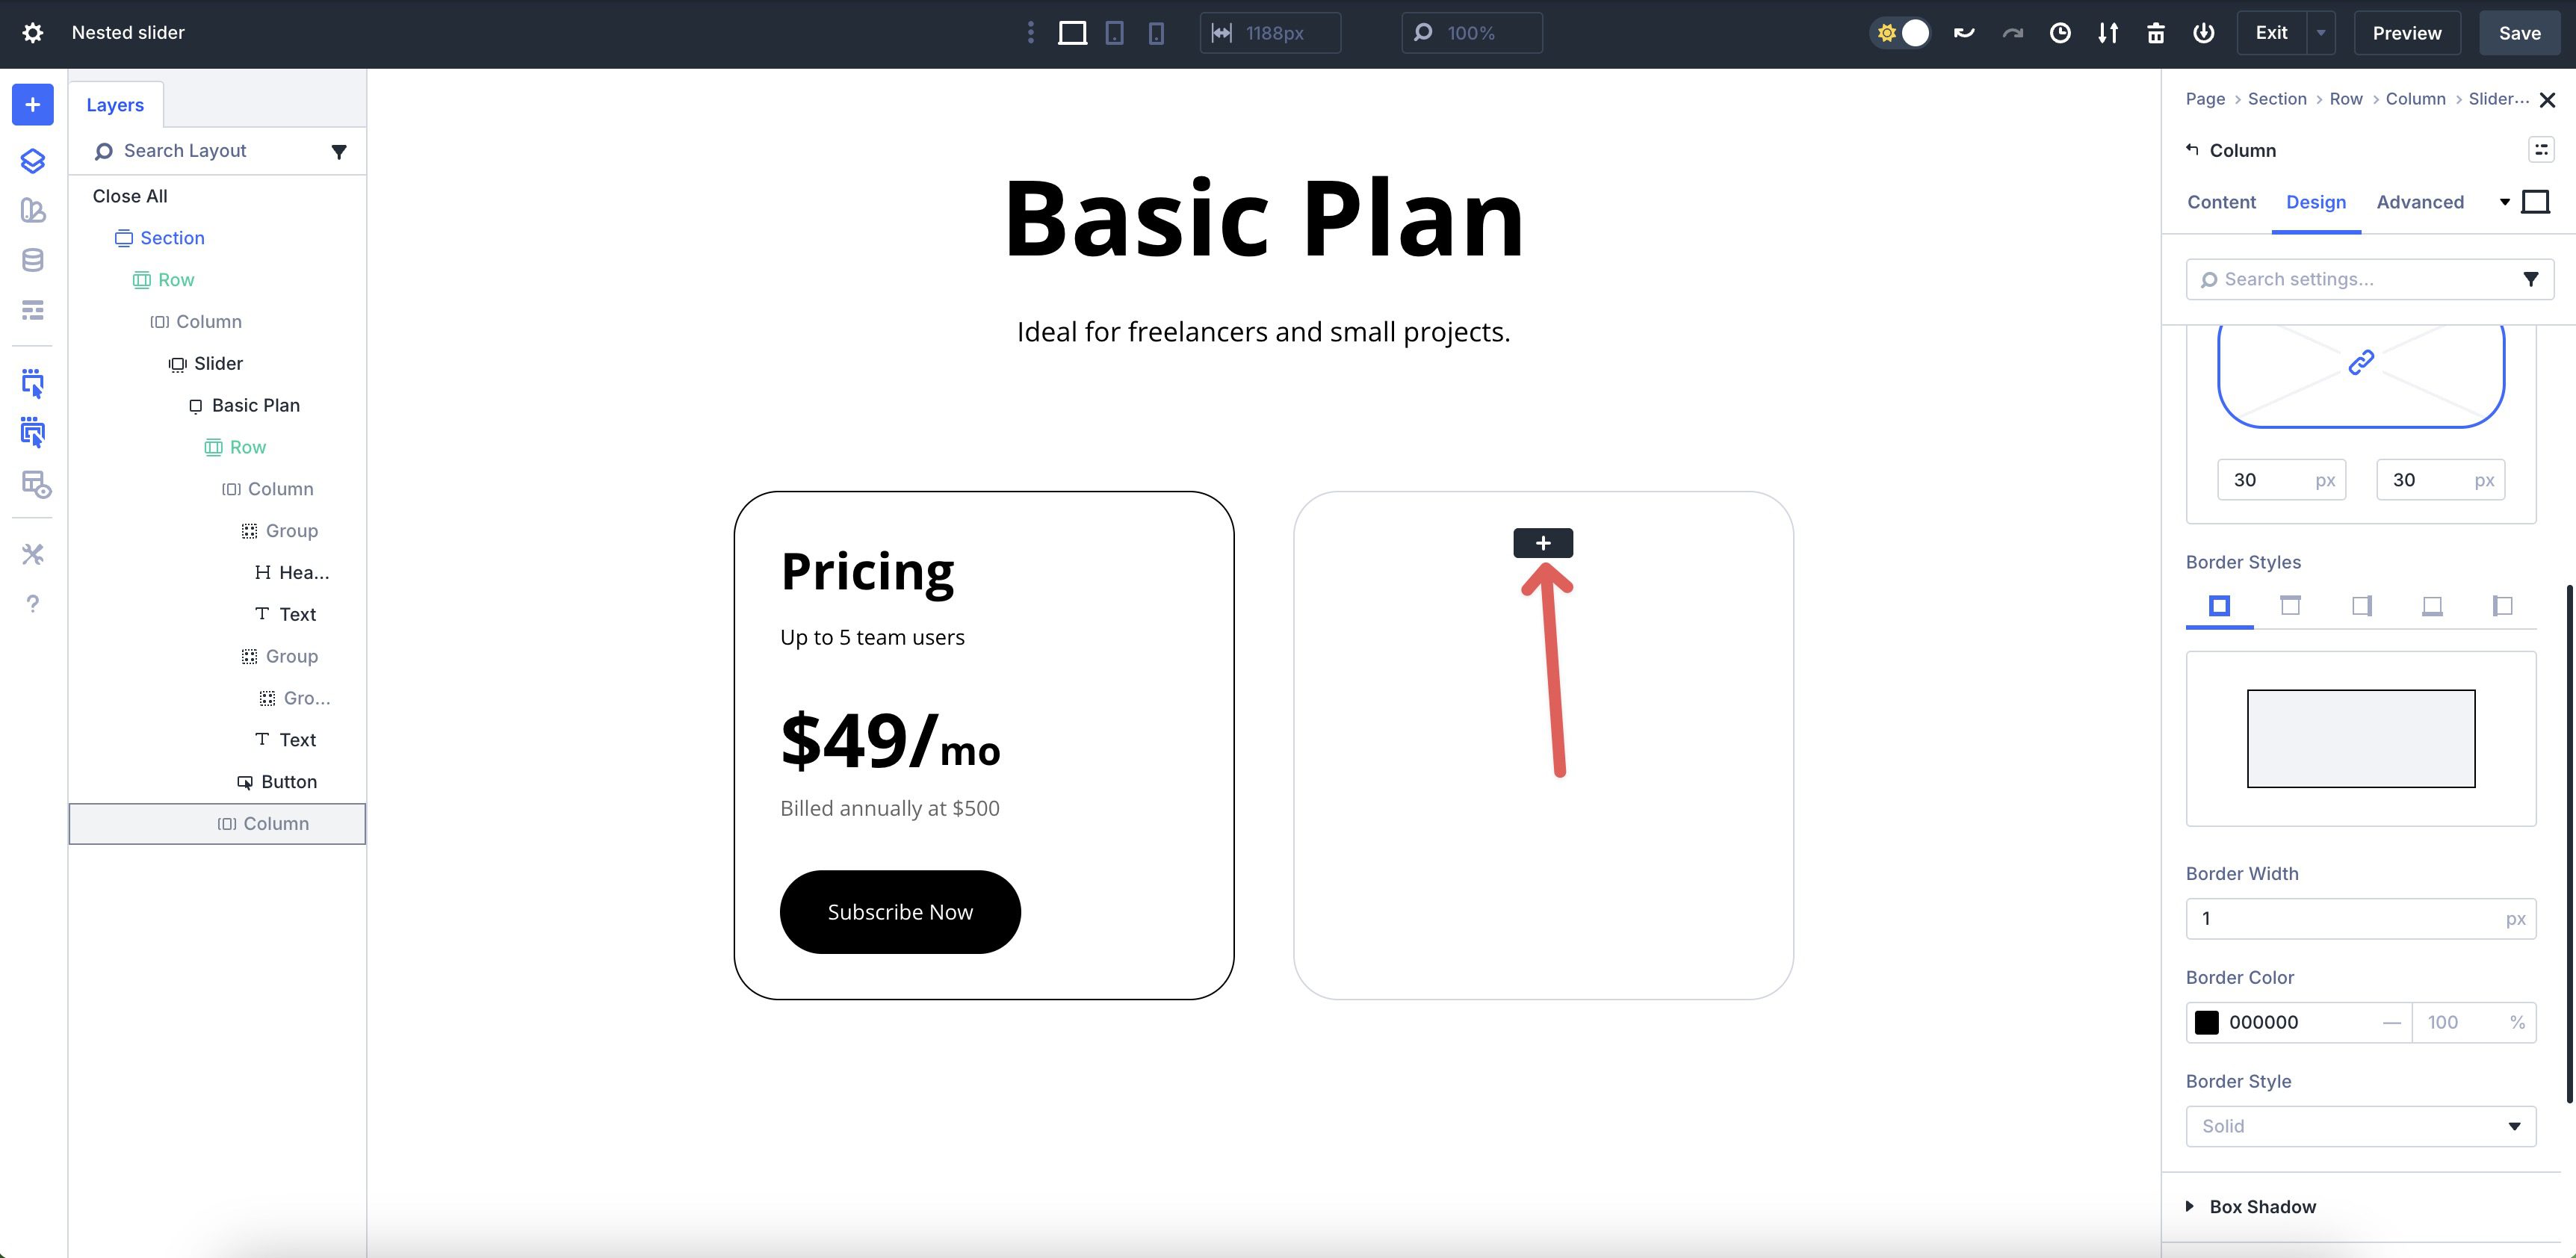
Add a Heading Module and style it to meet your preferences.
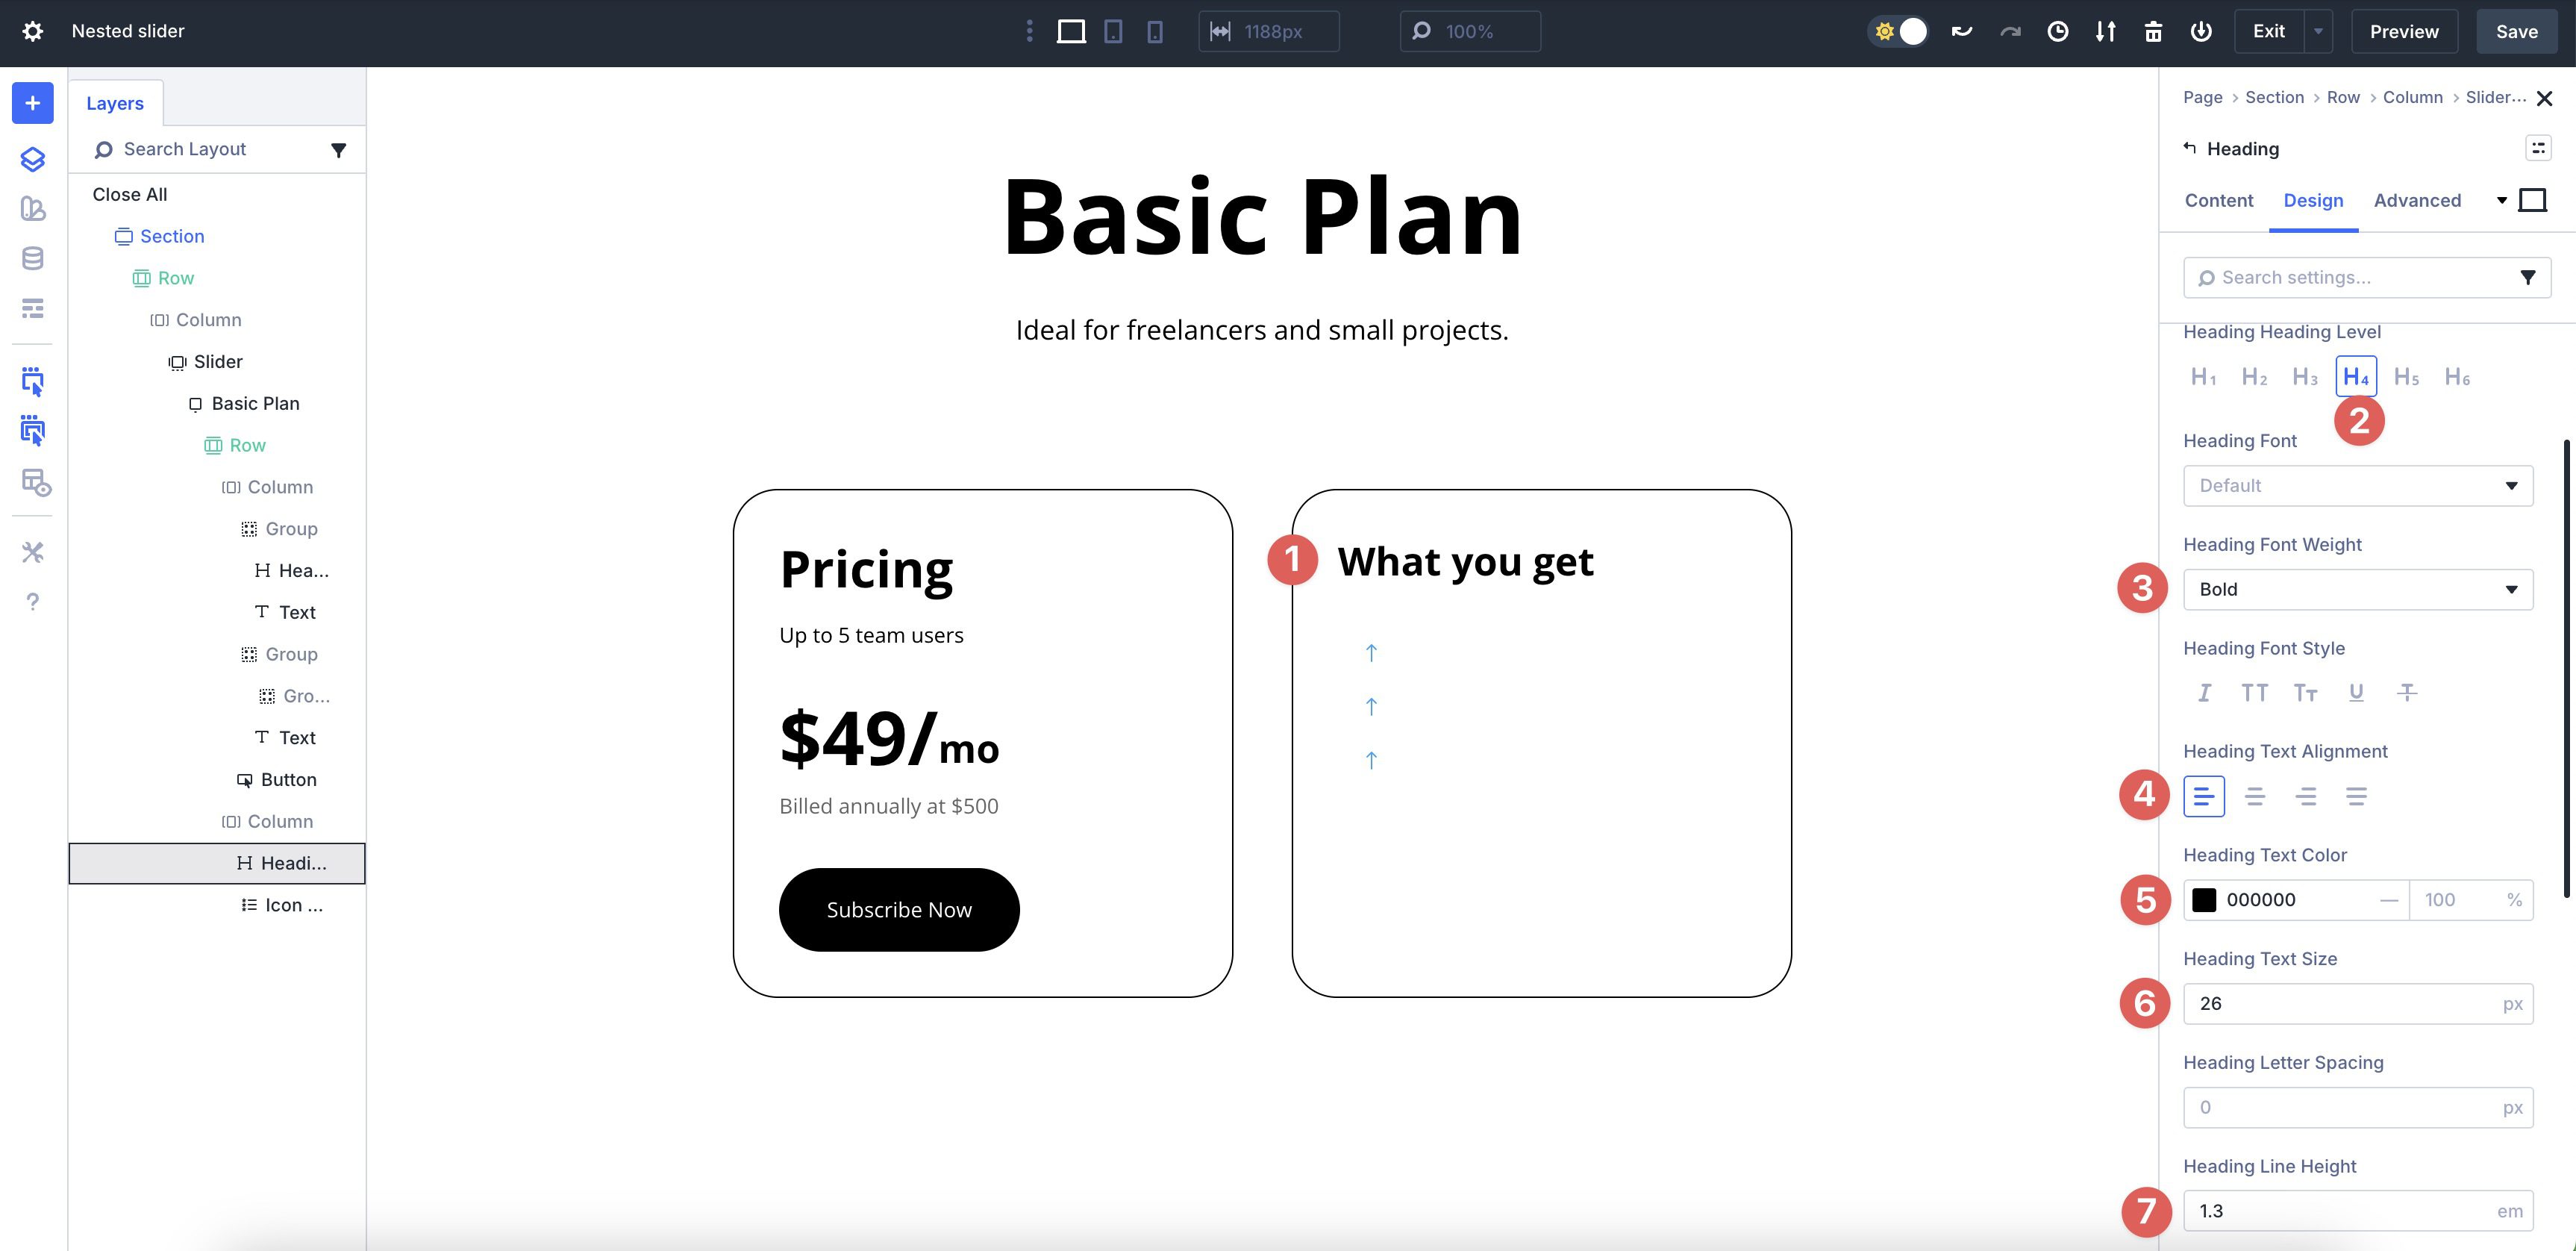
Next, add an Icon List Module. Add your List Item Text and desired Icons. To keep things easy to manage, add an Admin Label for each Item.
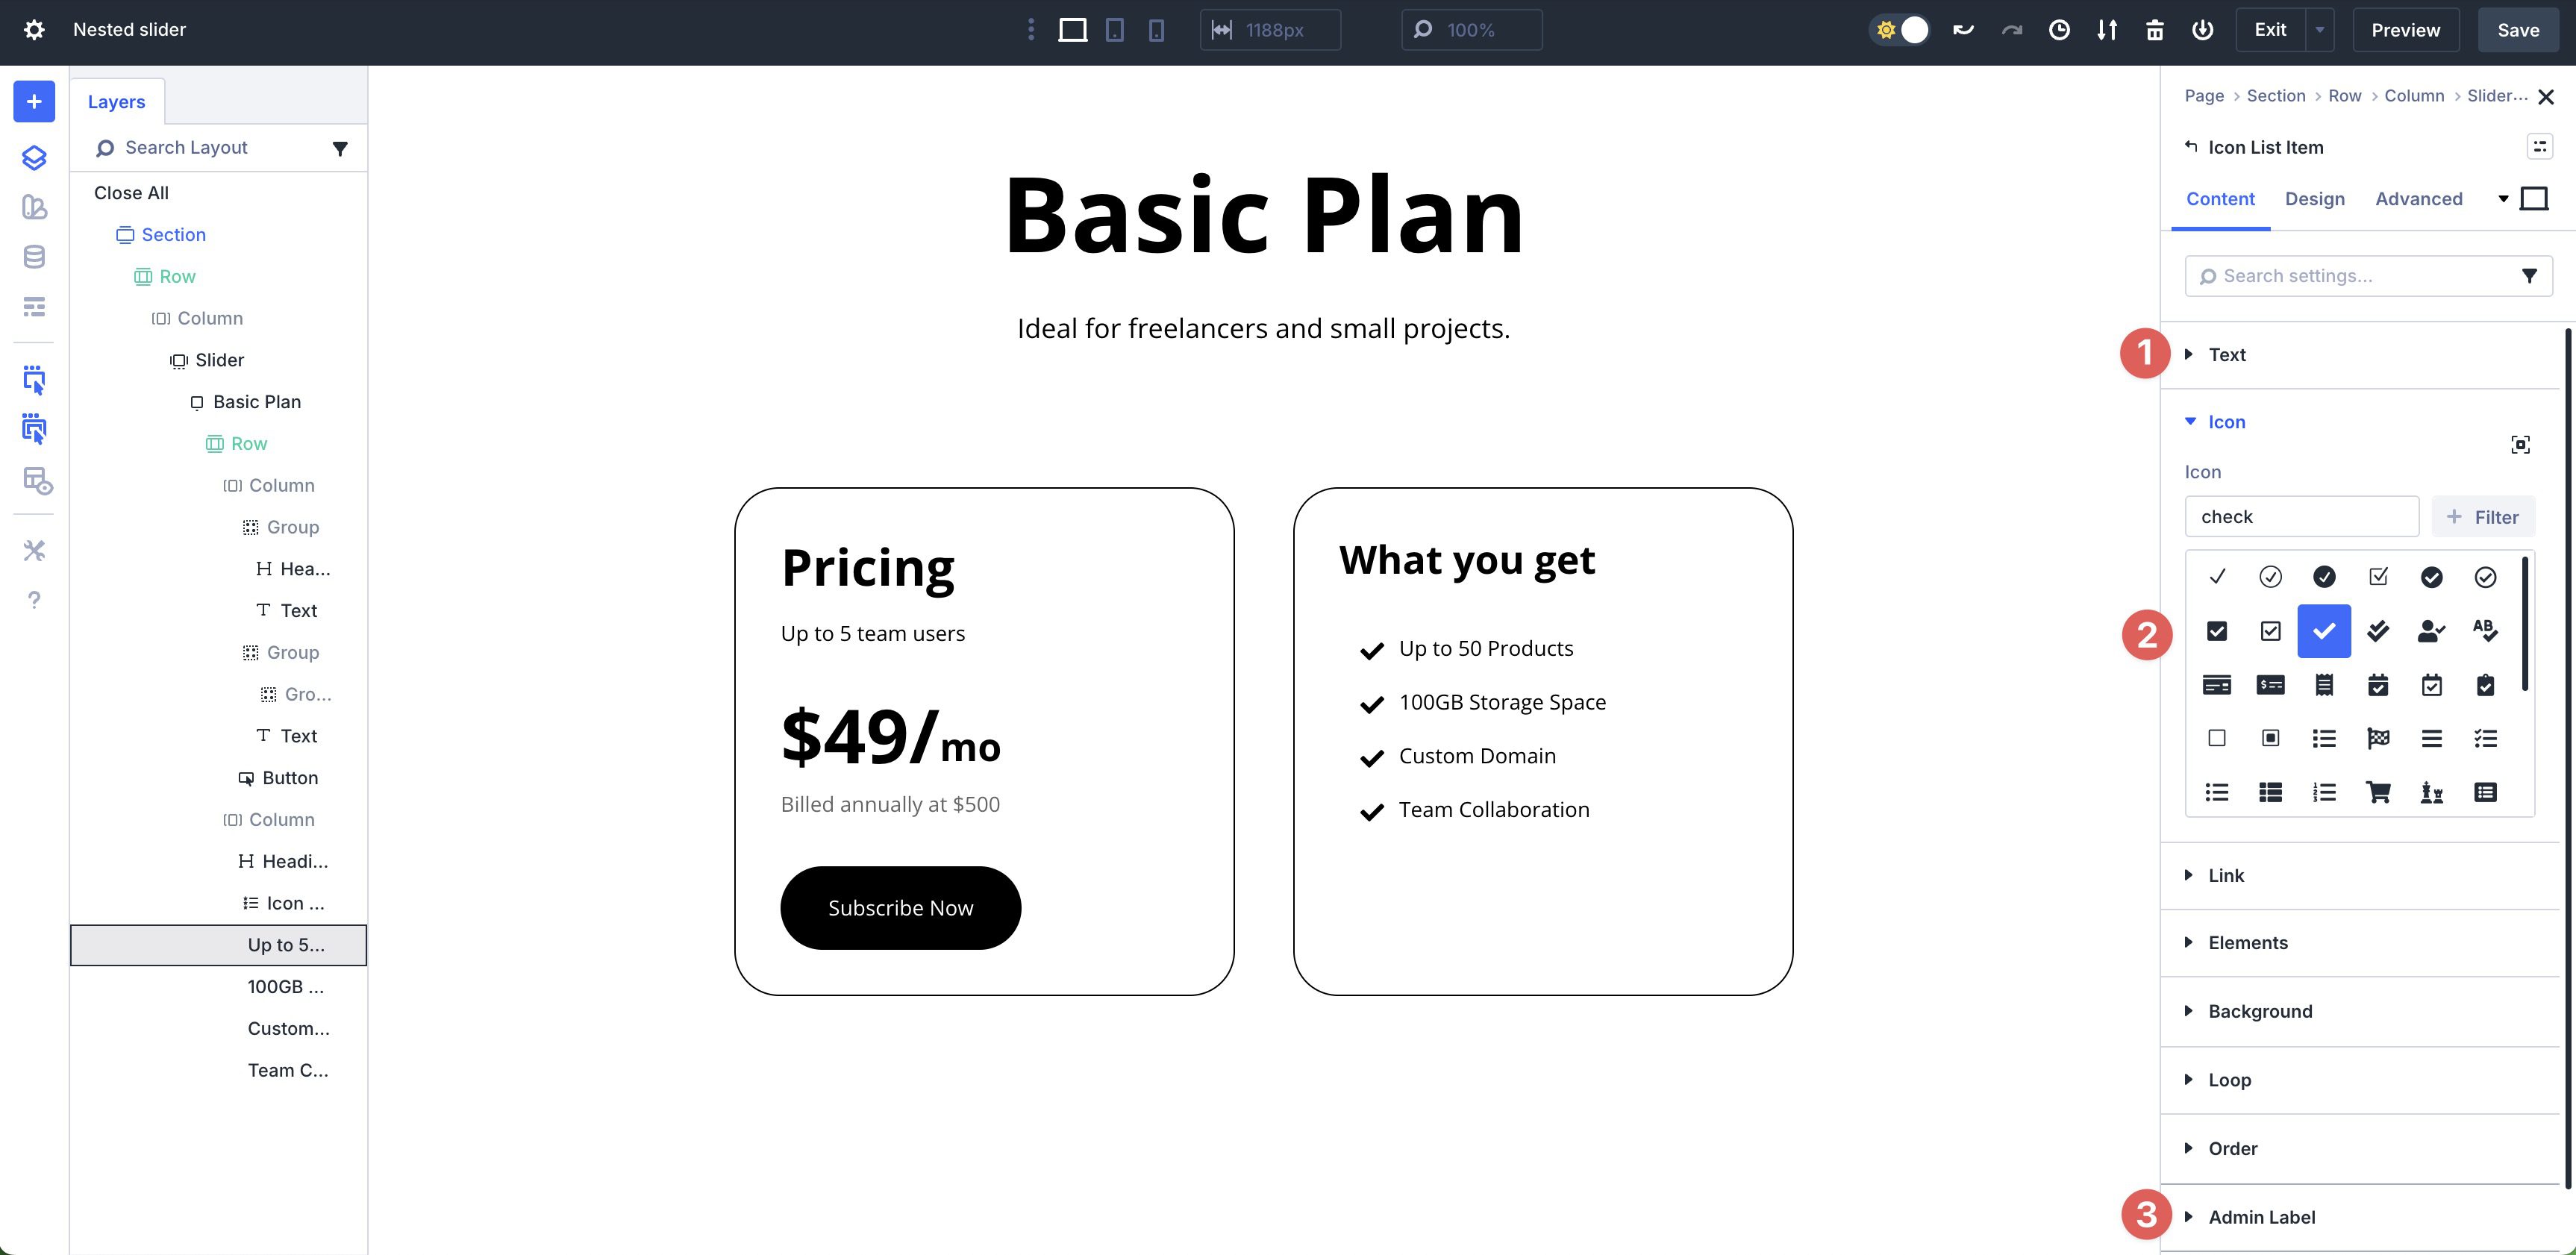
Go to the Design tab in the main Icon List settings. Assign an Icon Color and adjust the Body Text settings as desired.
Expand the Spacing menu. Add 0px Padding to the Bottom and Left.
![]()
The final Module to add is the Group Module. Add it and place two Button Modules into it.
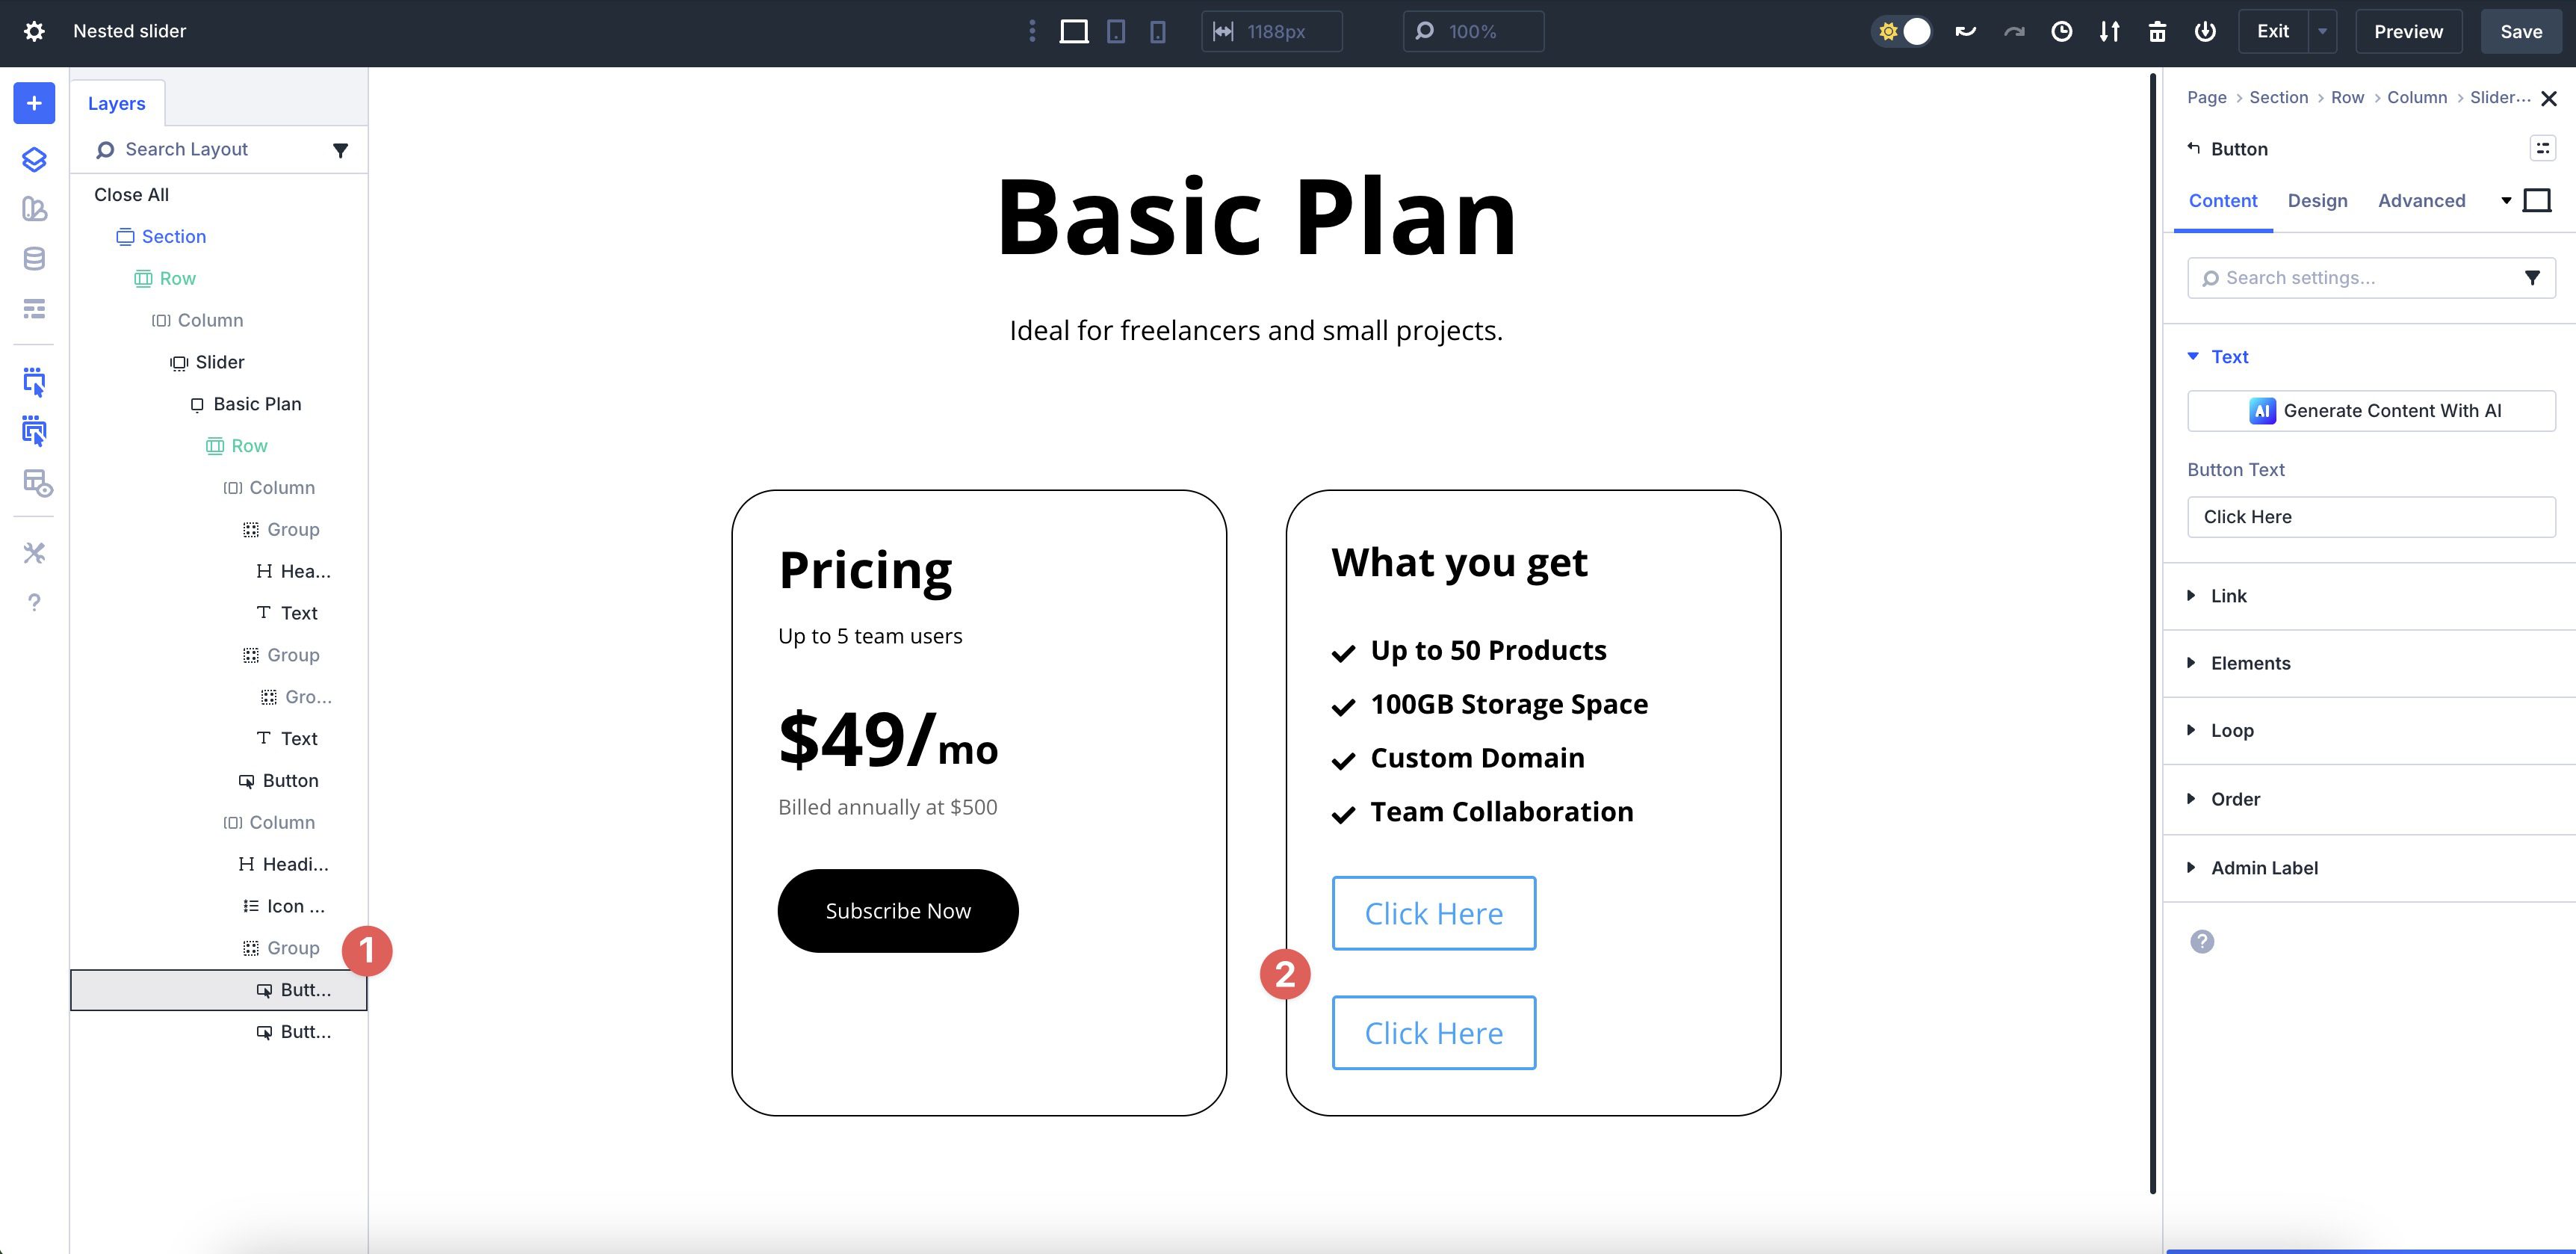
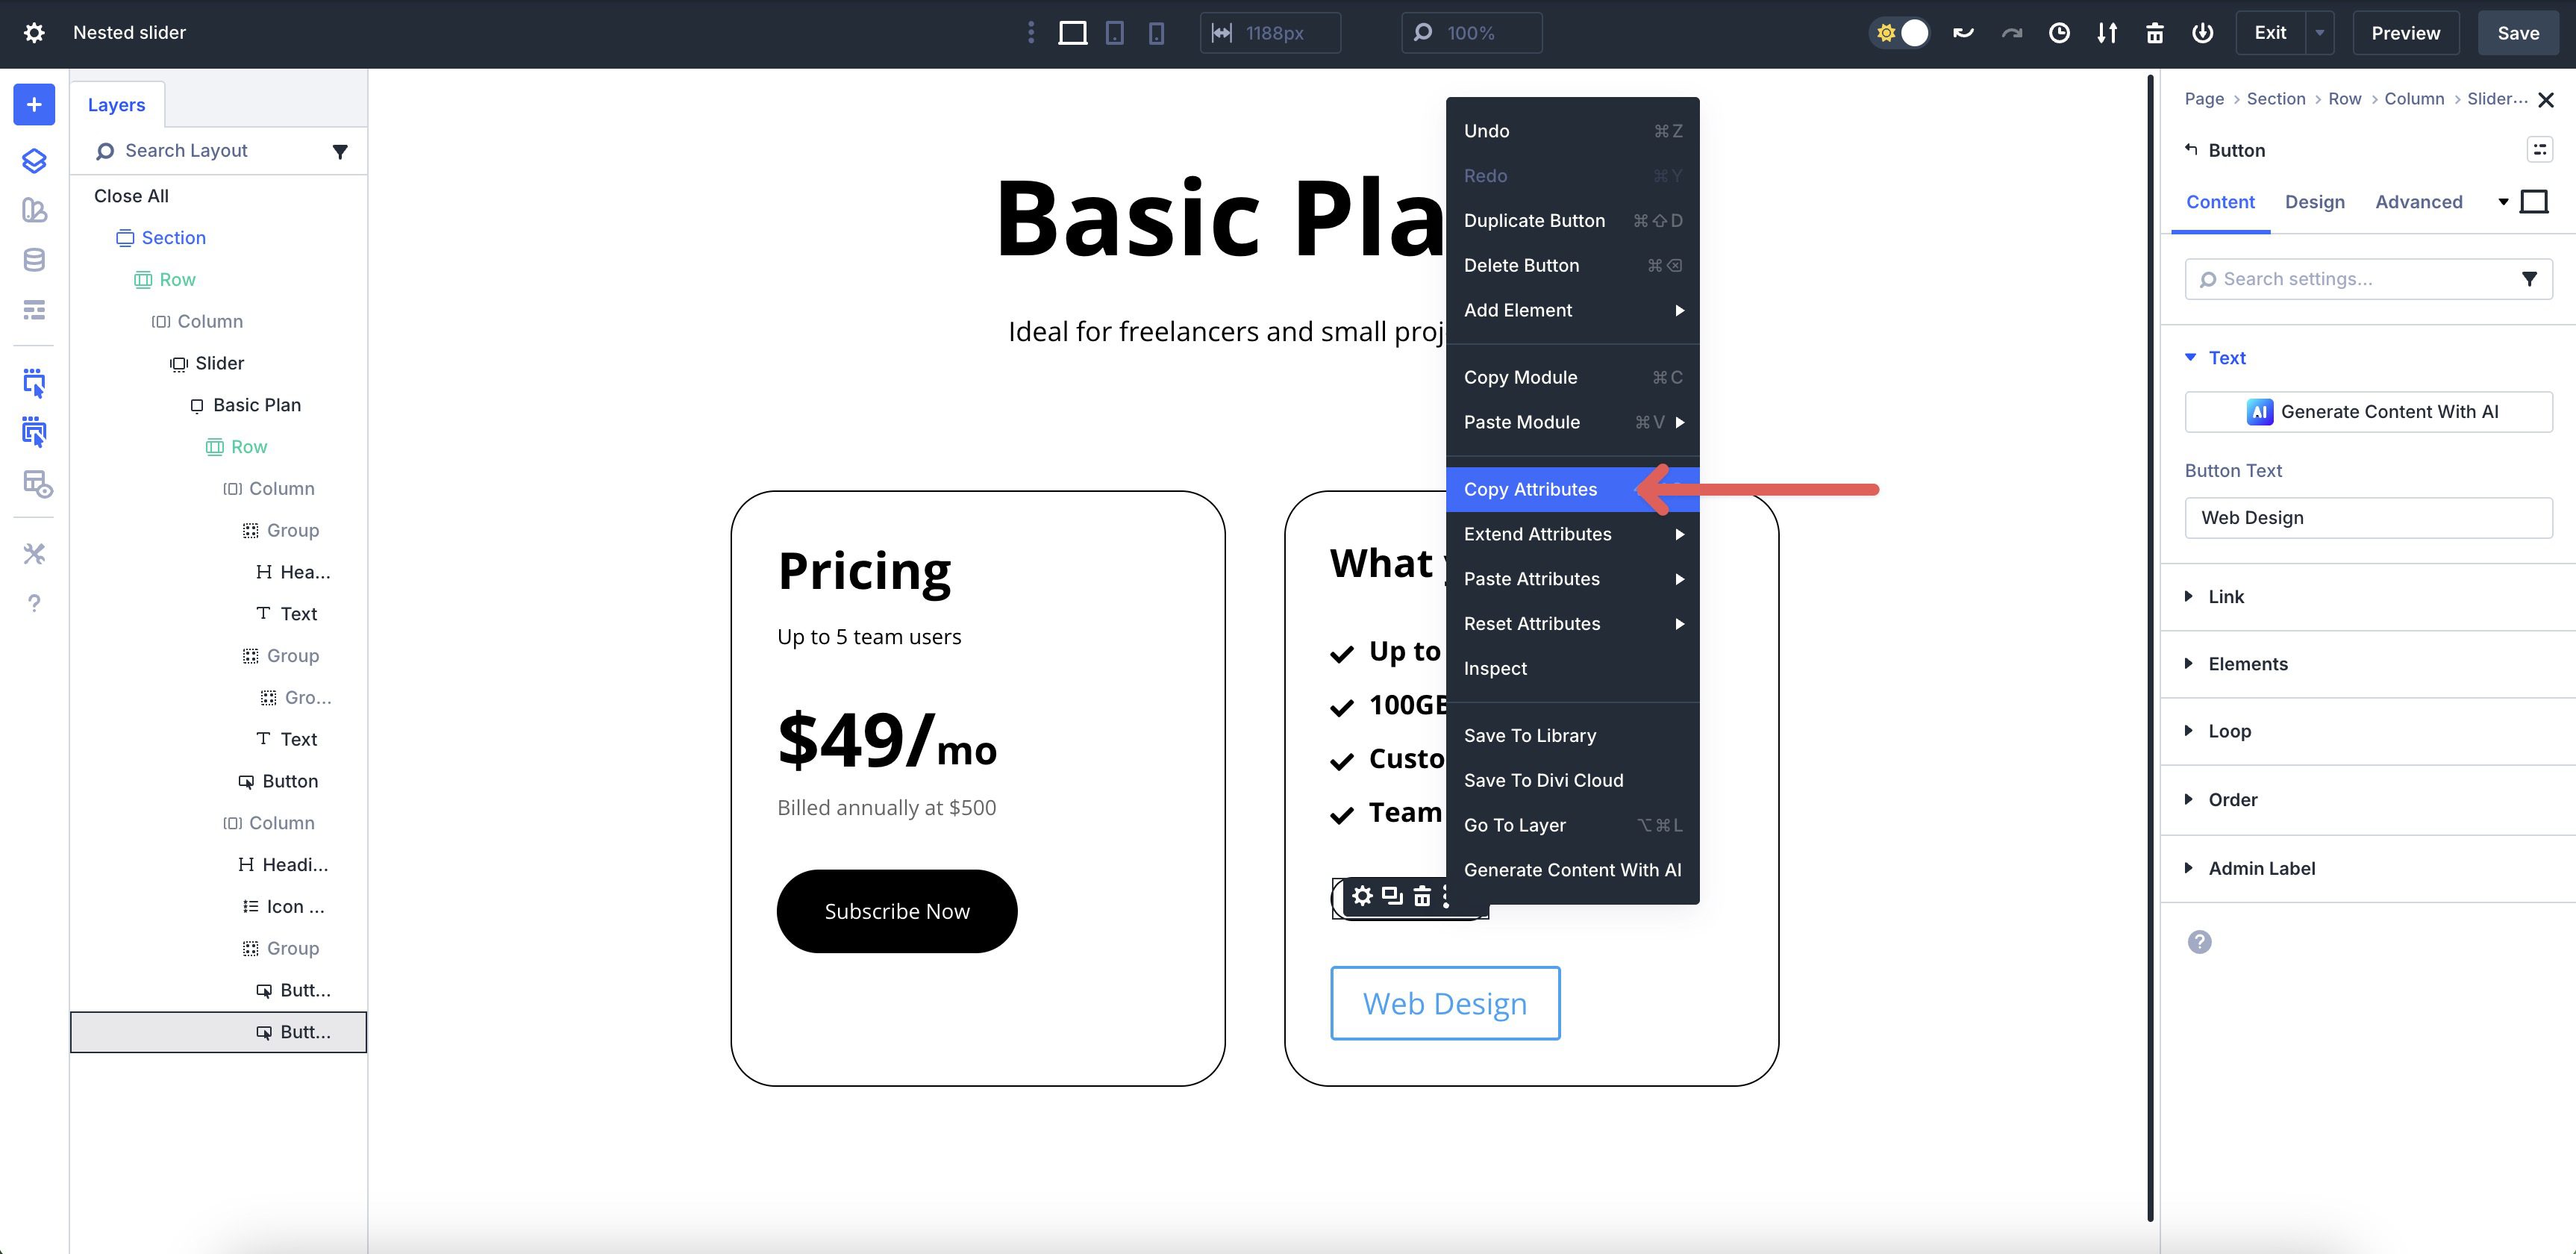
Style the 1st Button as desired and then right-click on it to copy its Attributes.
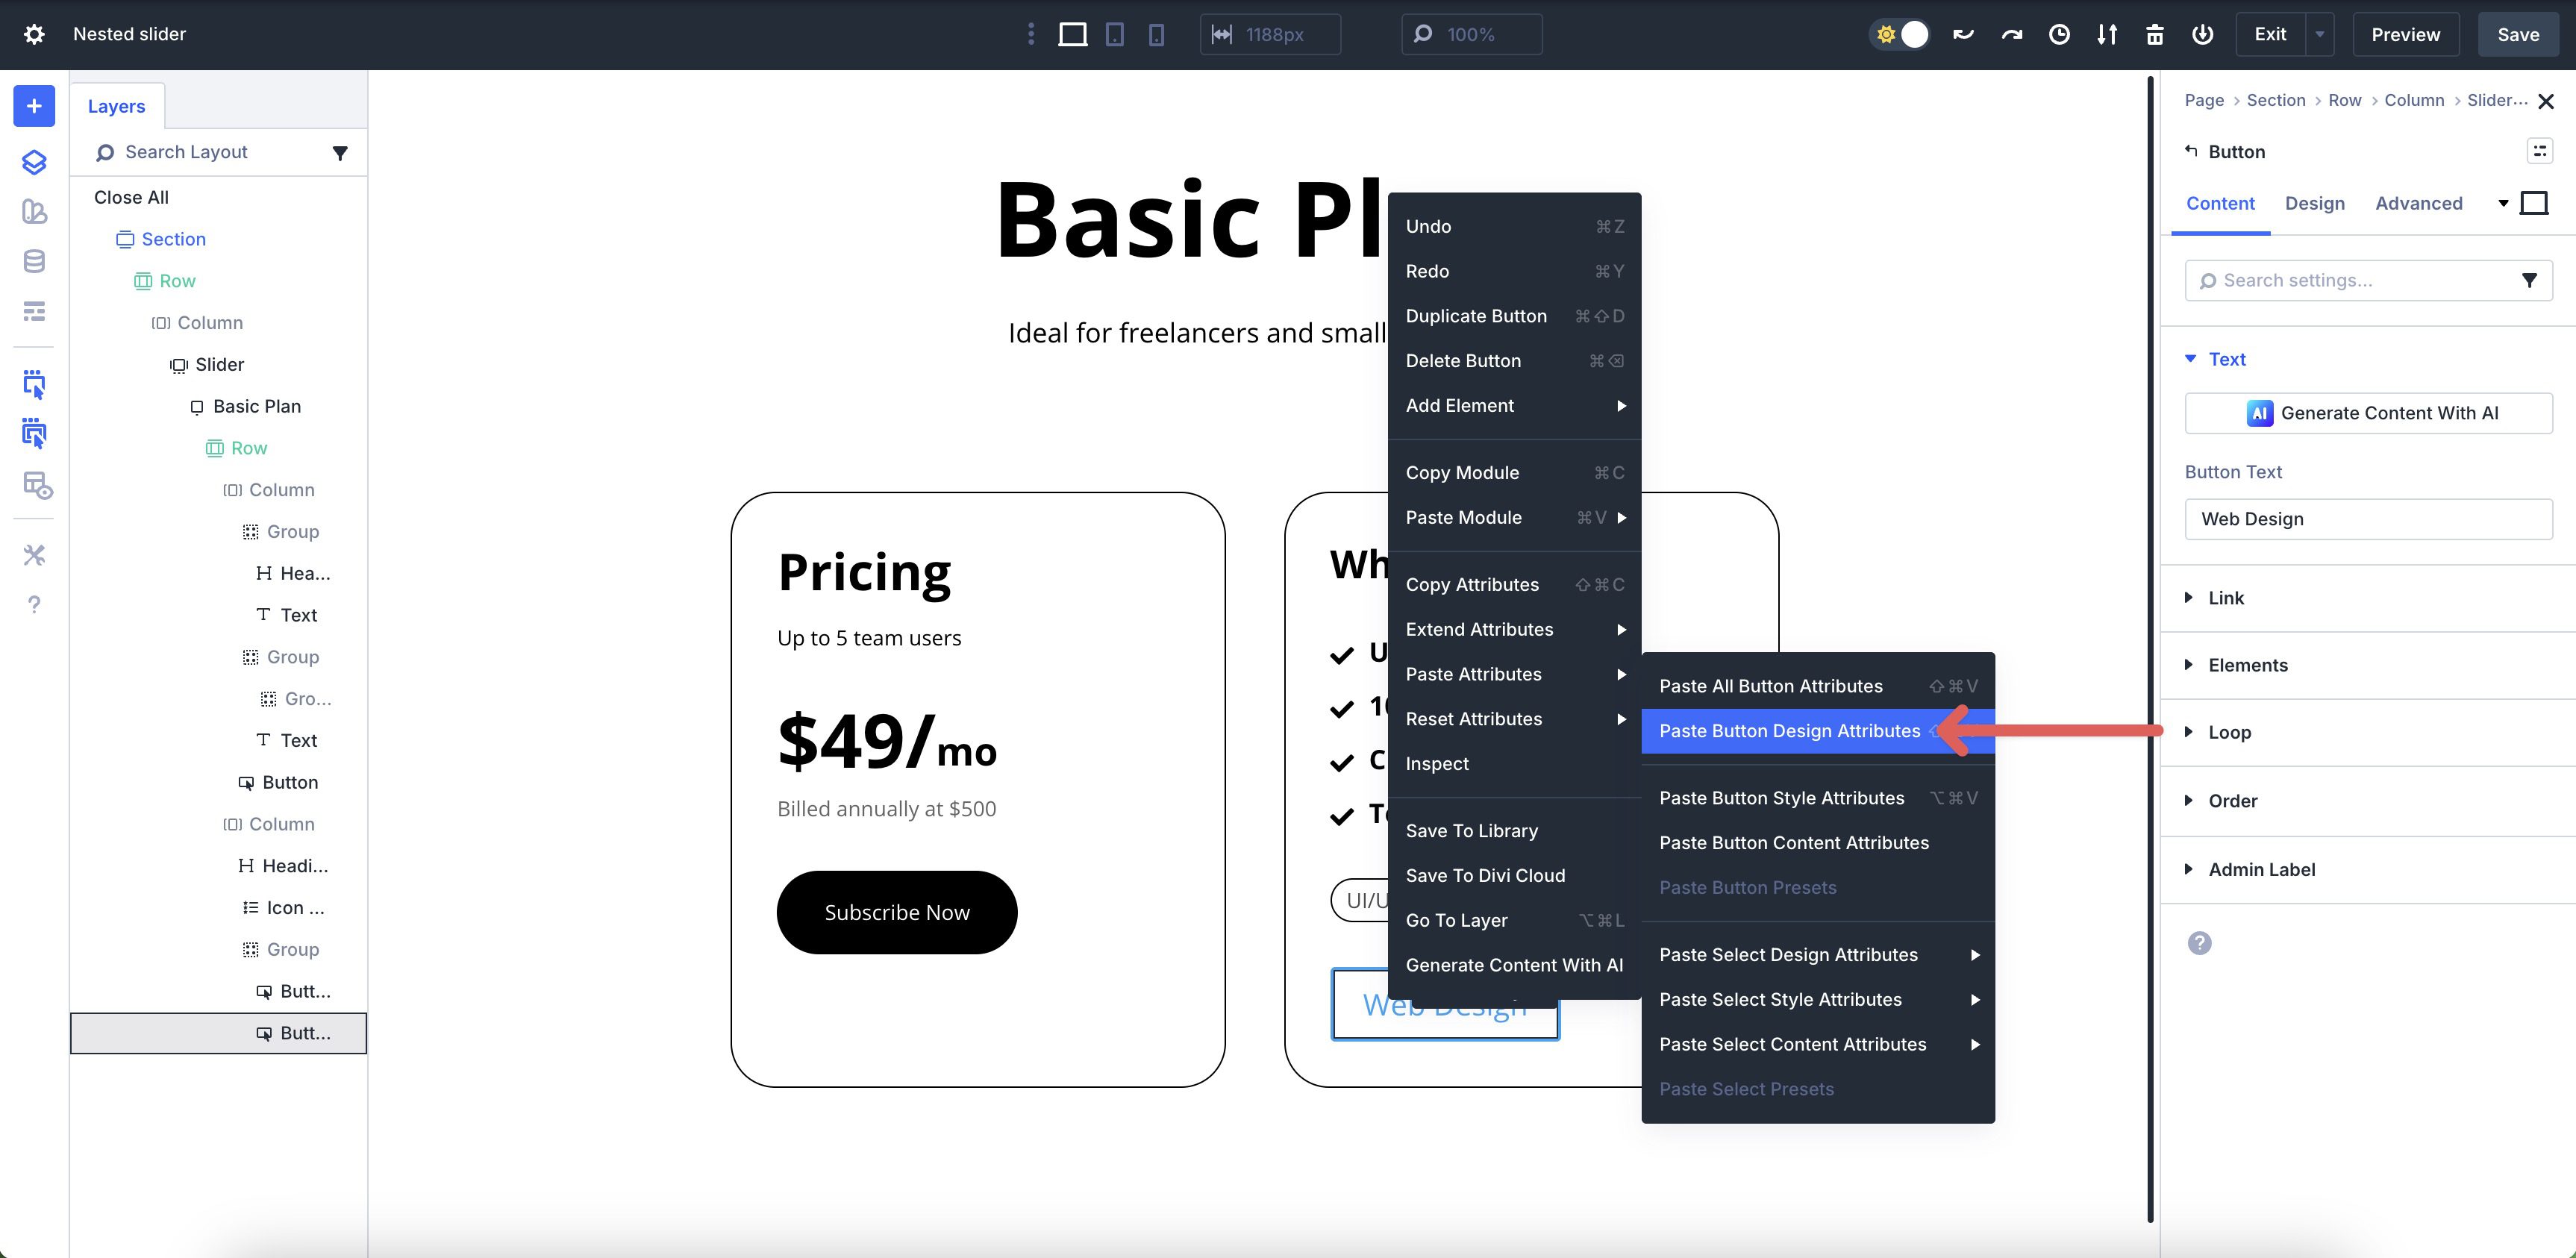
Right-click on the second Button and select Paste Button Design Attributes.
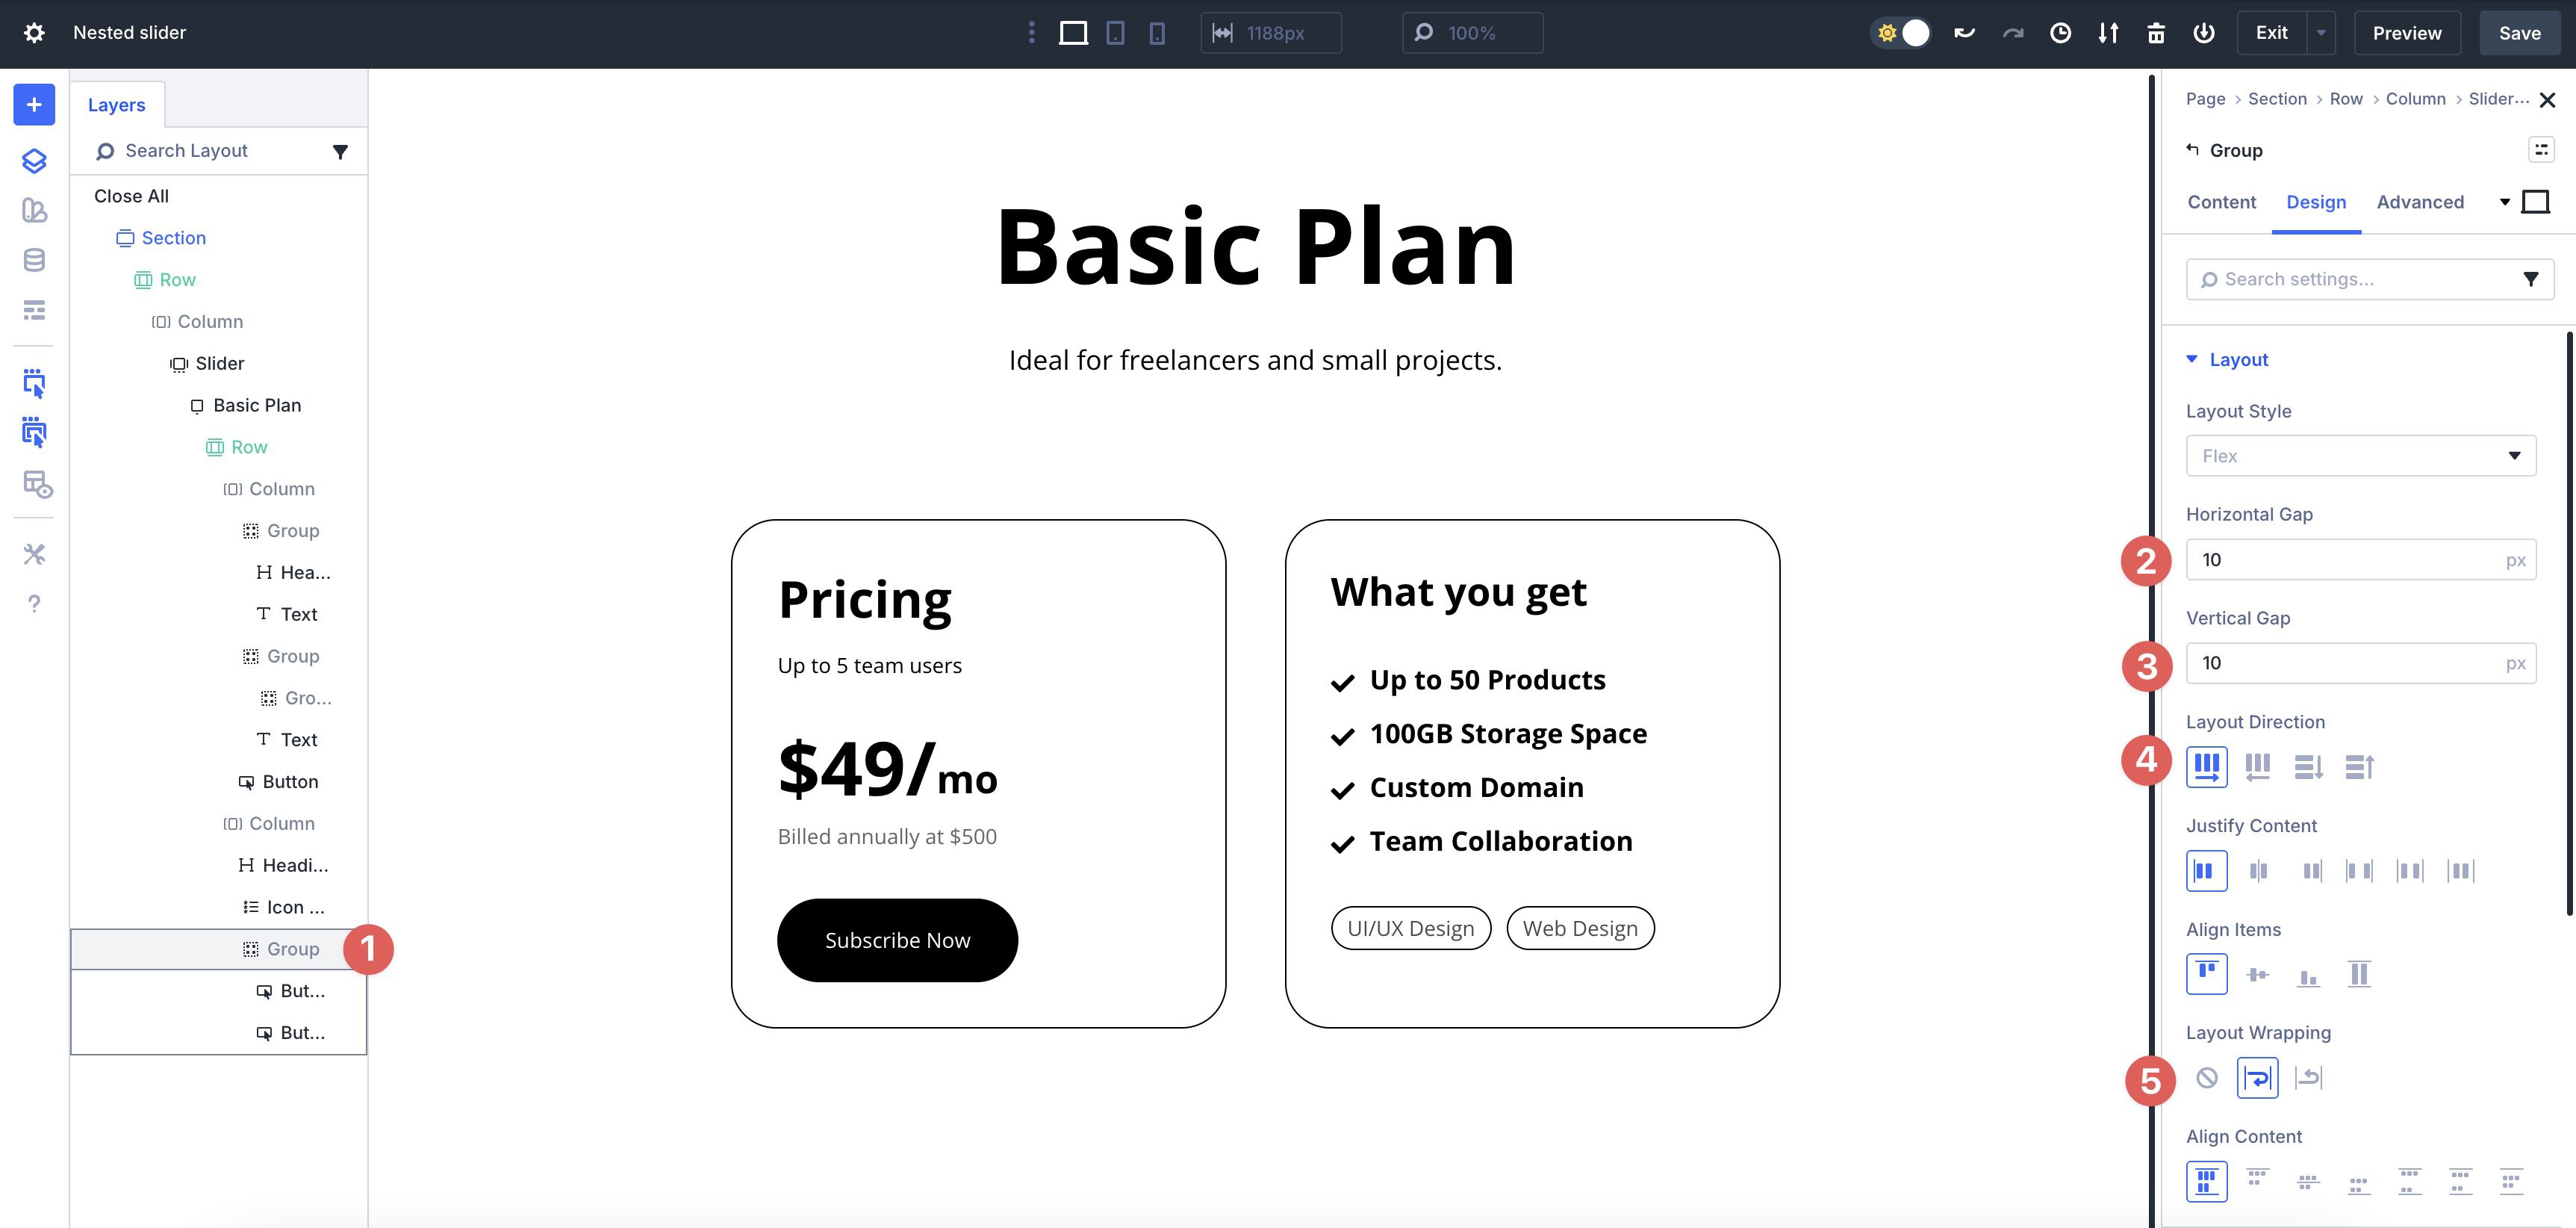
Lastly, select the Group Module and go to the Design tab. Adjust the Horizontal and Vertical Gap to 10px. Set the Layout Direction to Row and enable Layout Wrapping. This will allow the Group to display normally on smaller screens.
Step 6: Adjust The Row Settings
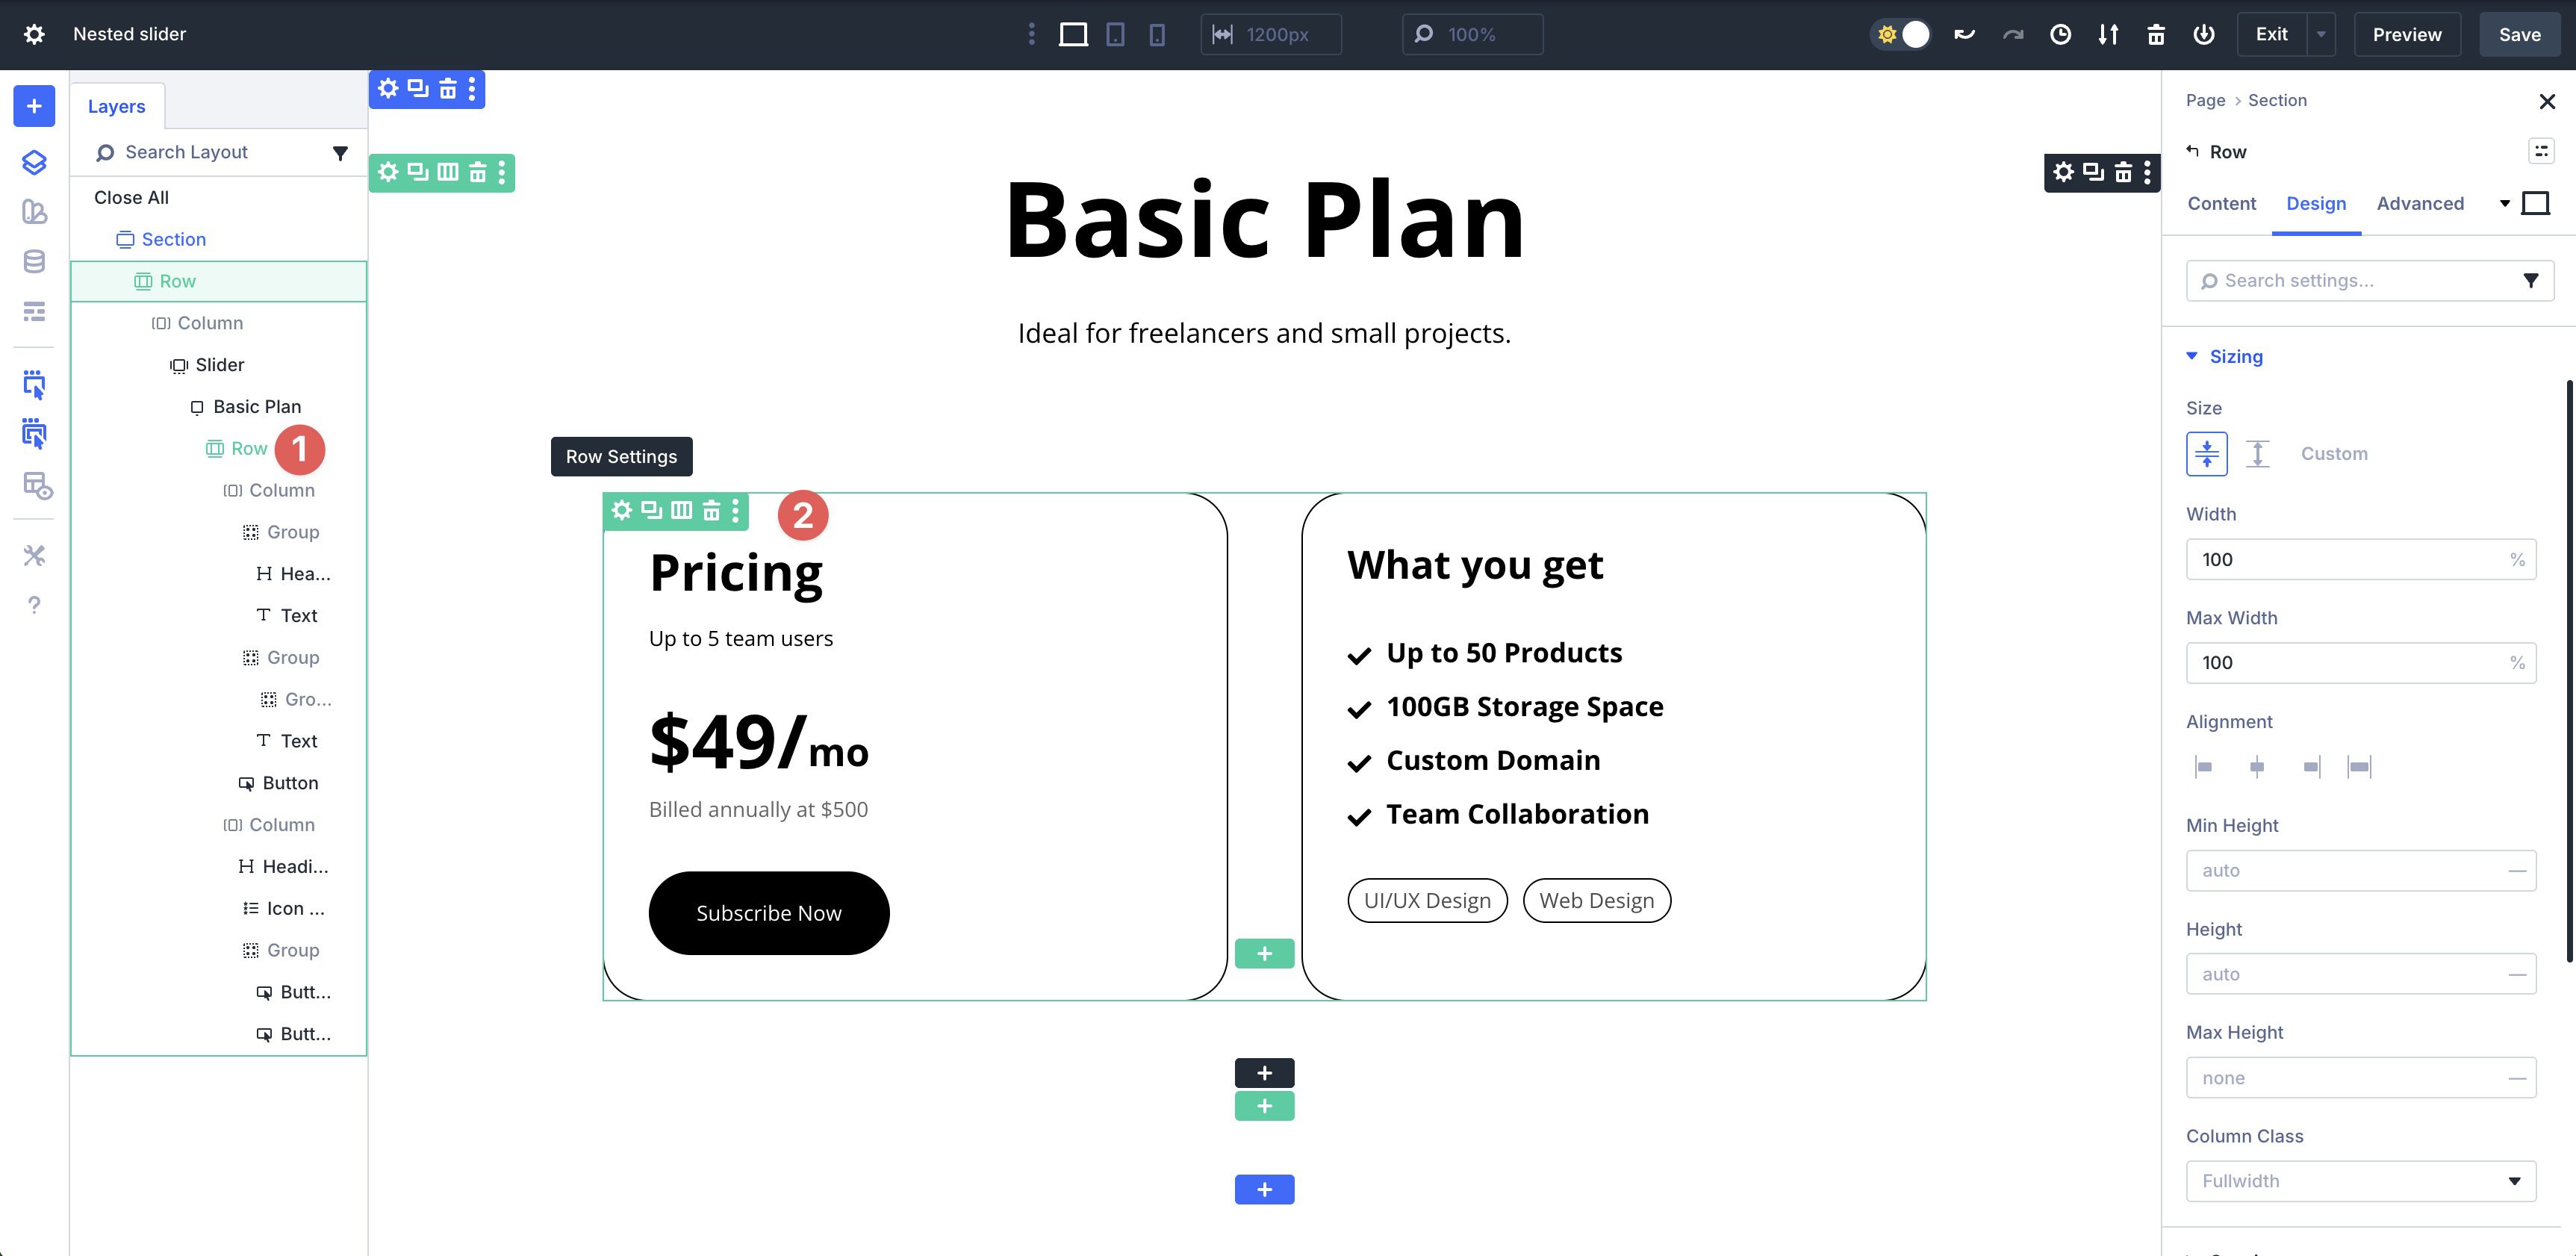
Before we add additional slides, we need to adjust the Row’s settings. Select the main Row in the Layers View or by clicking inside the Row in the Visual Builder.
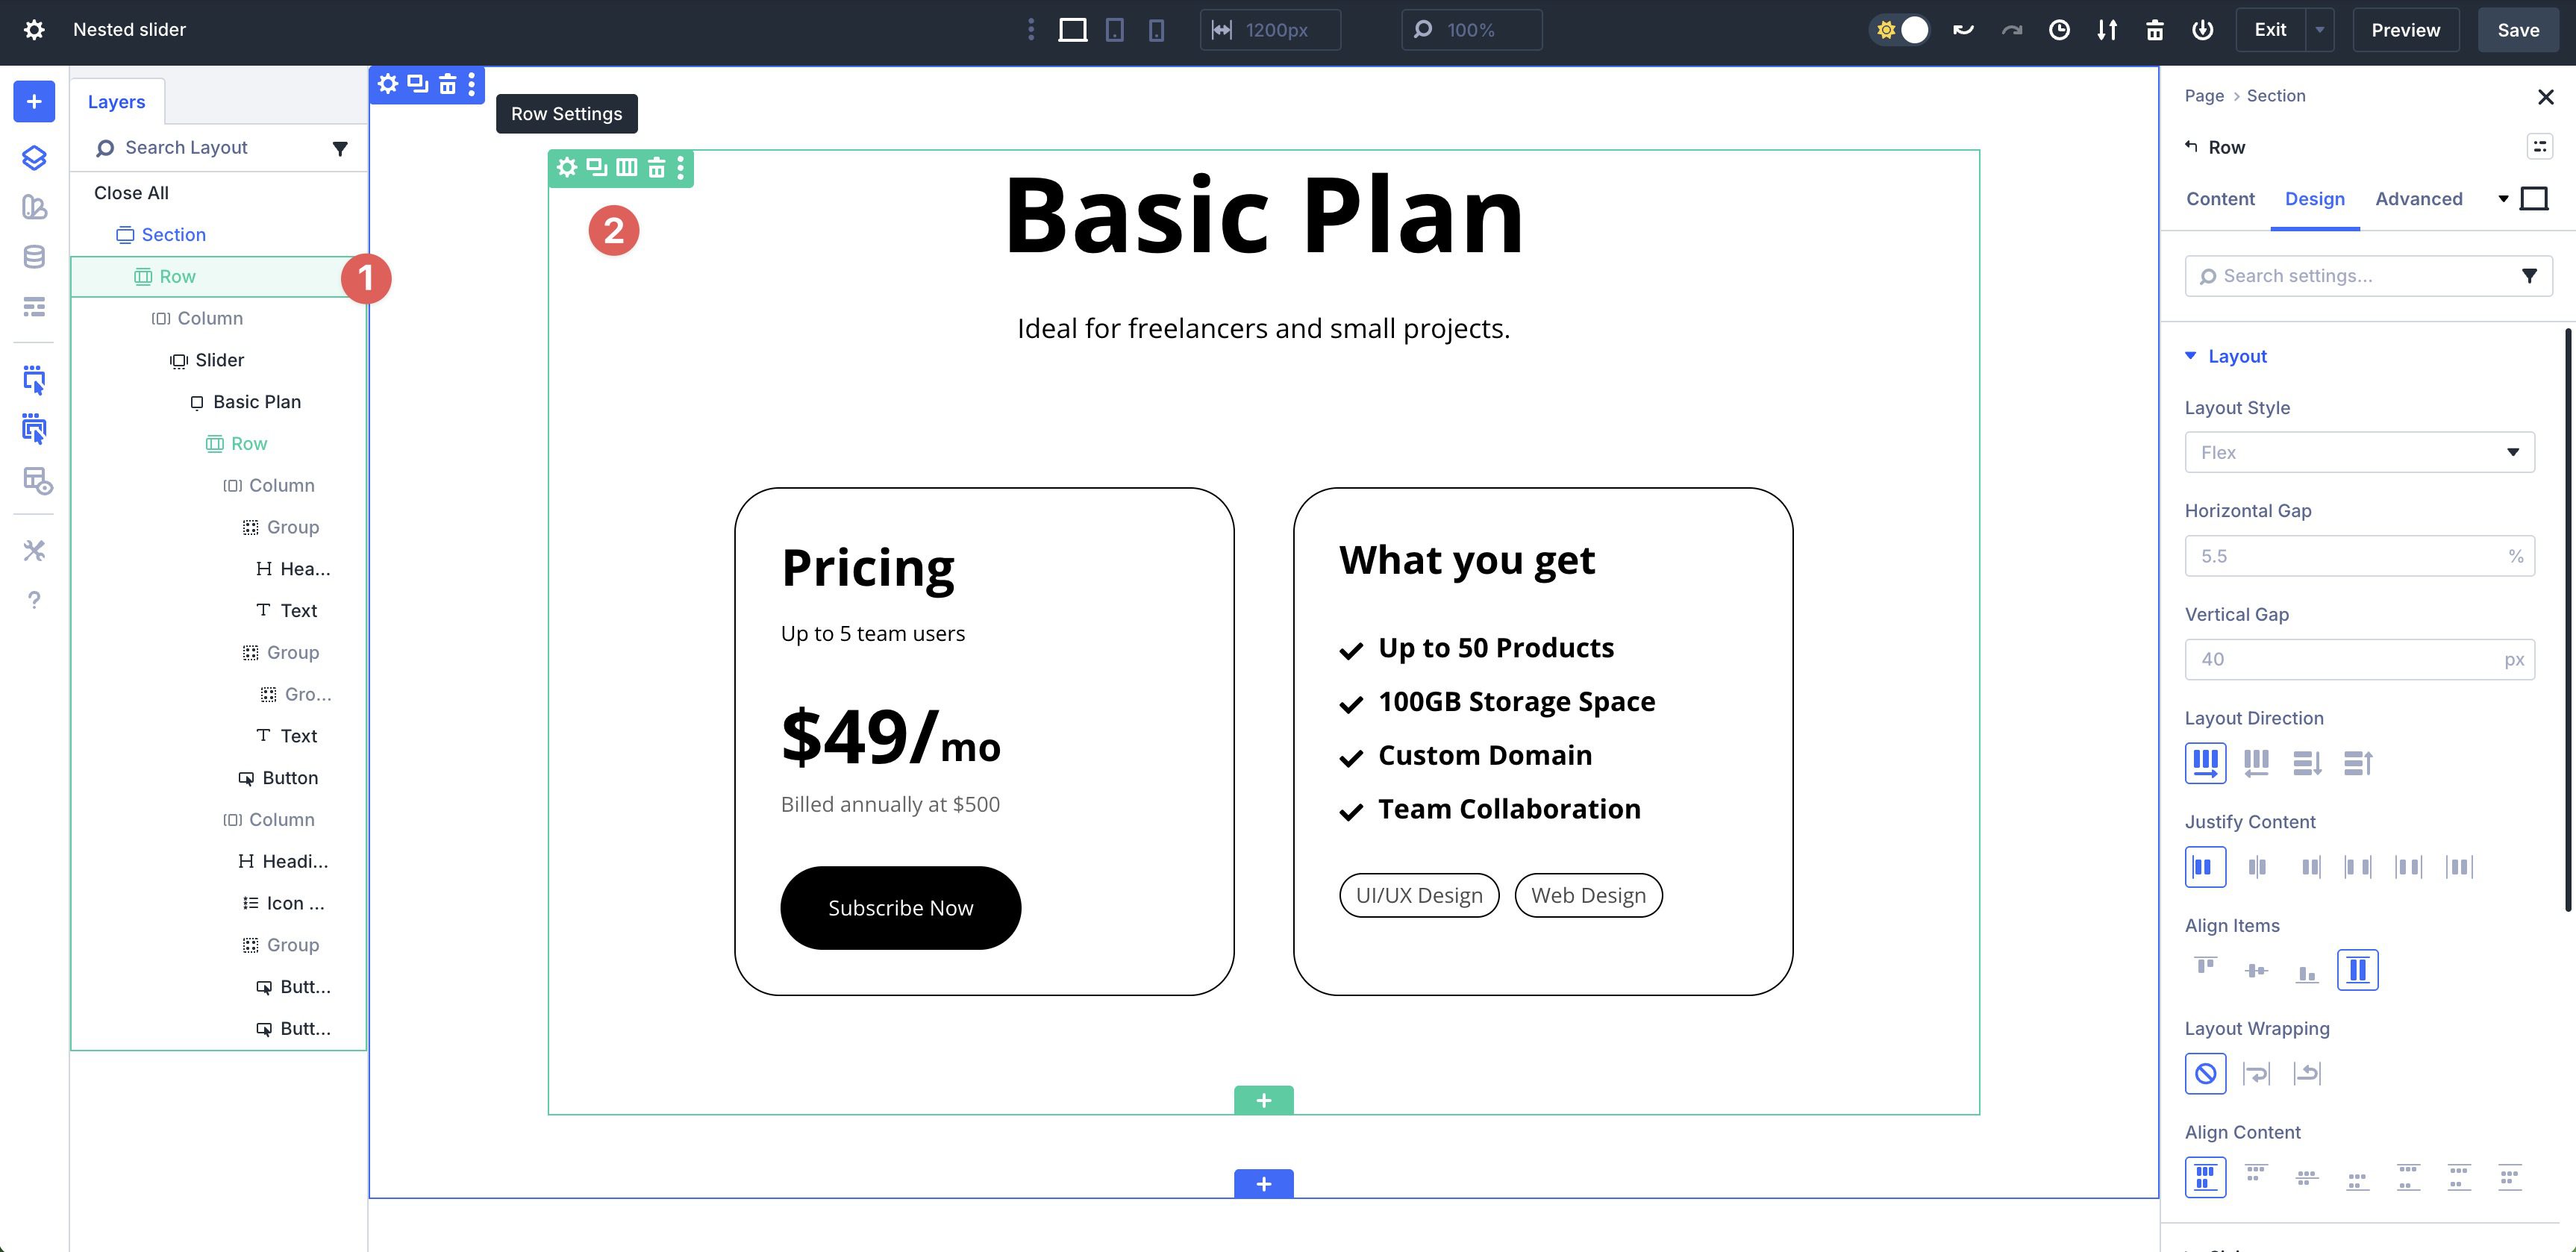
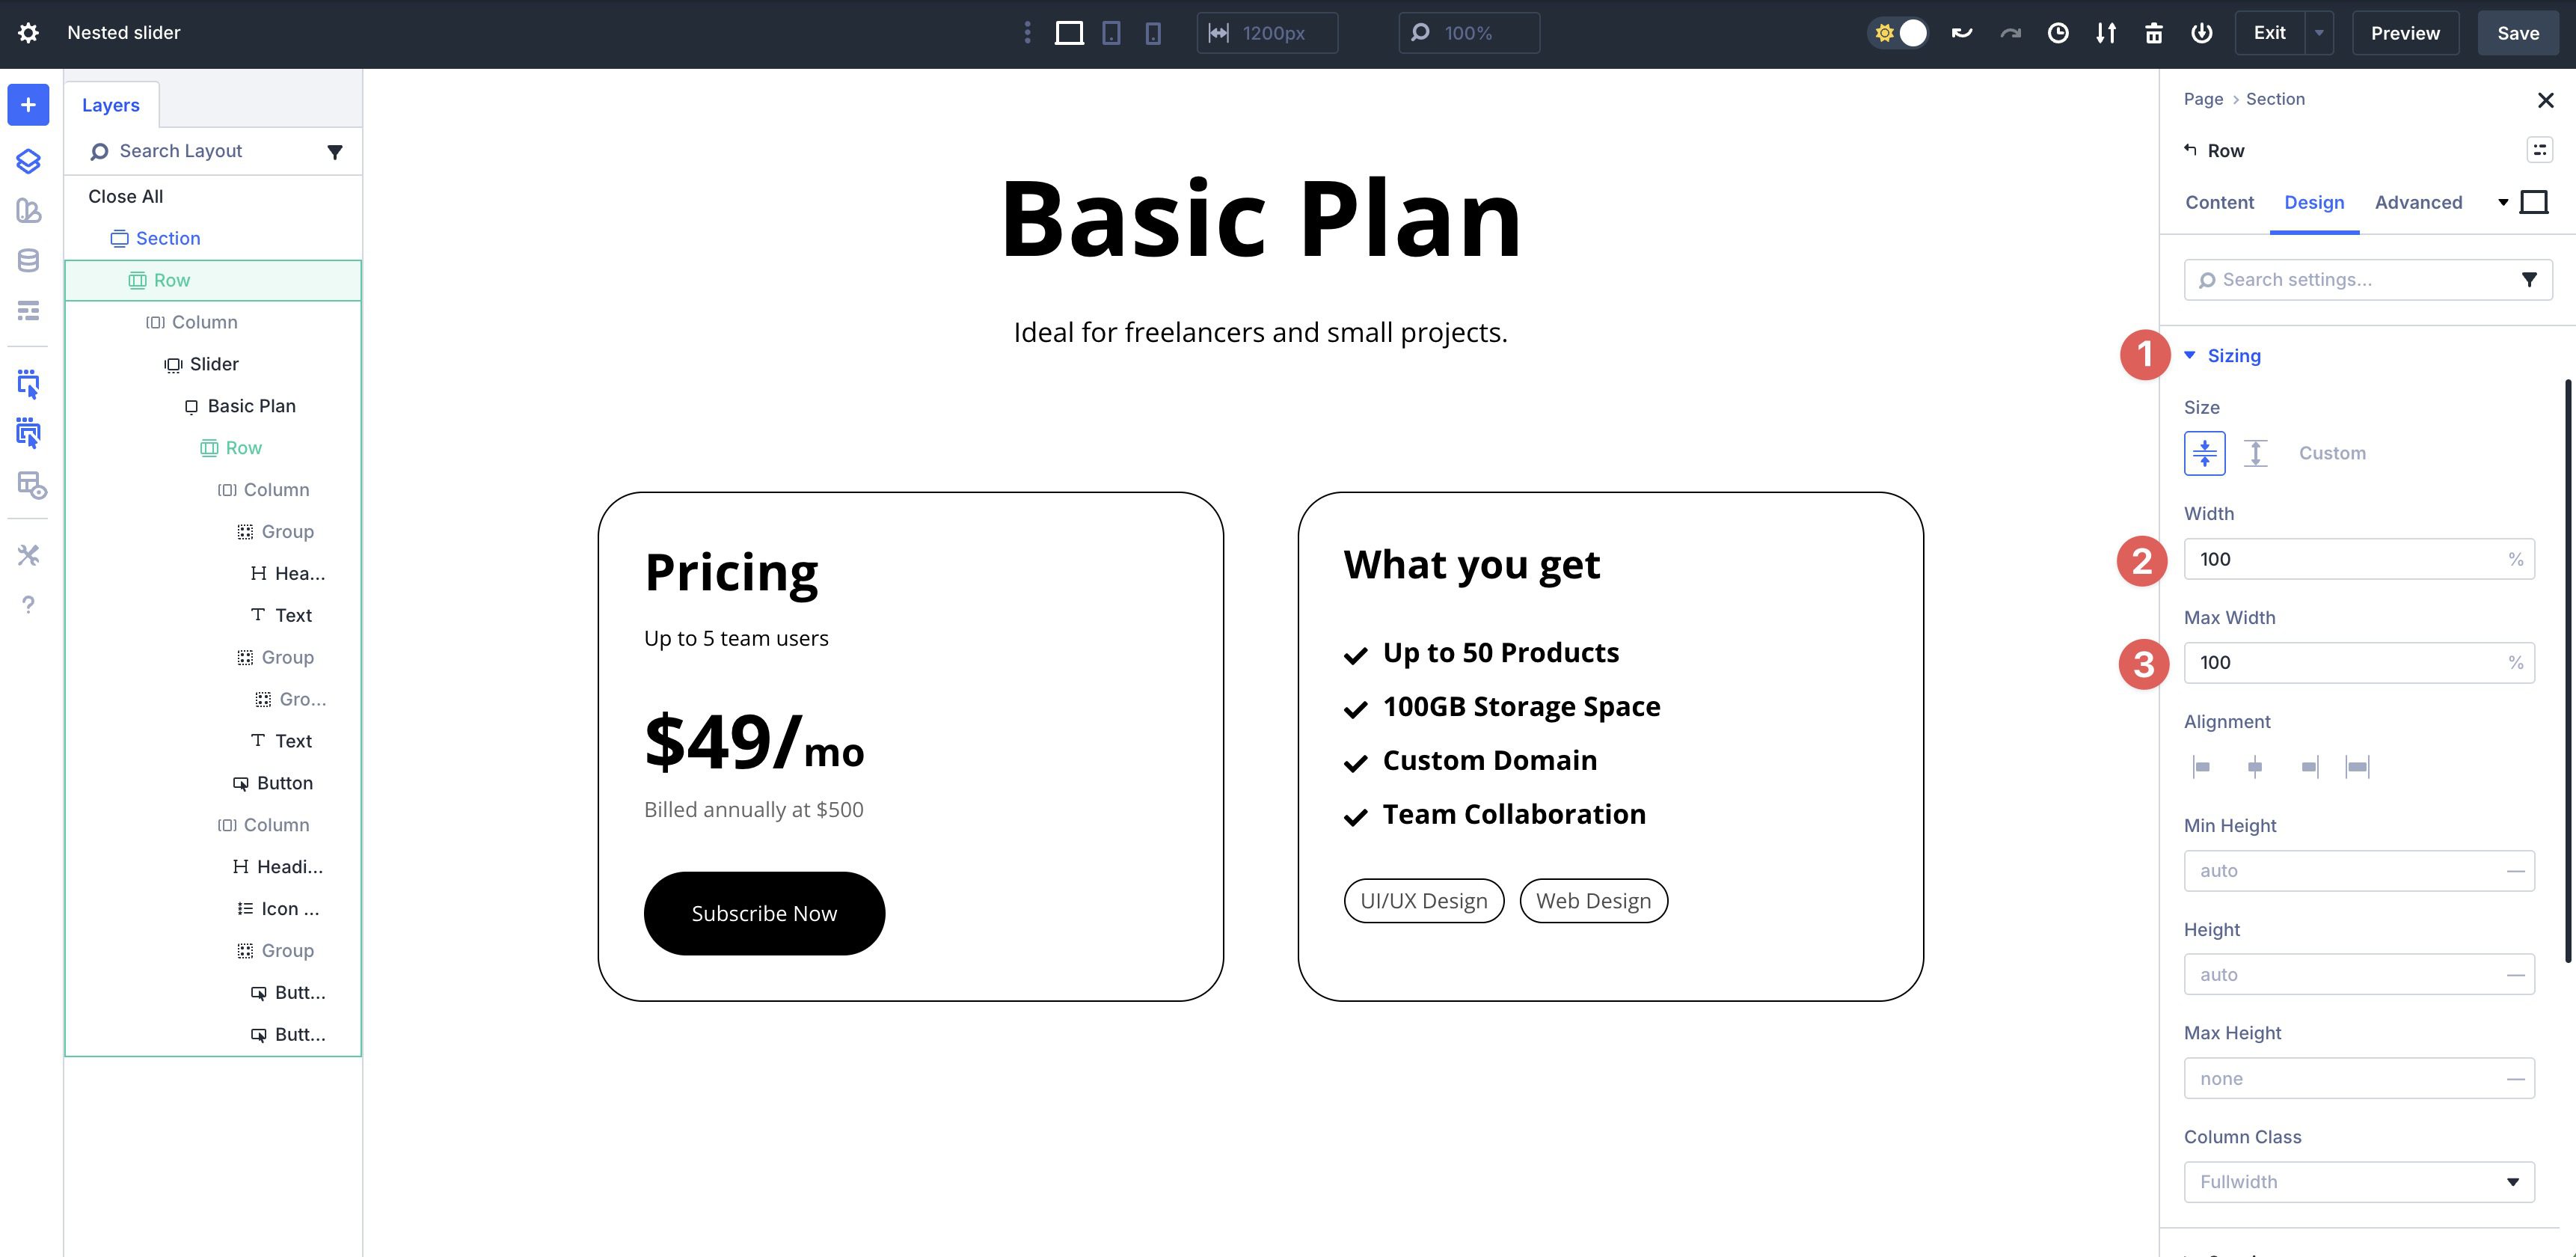
Expand the Sizing settings and set the Width and Max Width to 100%.
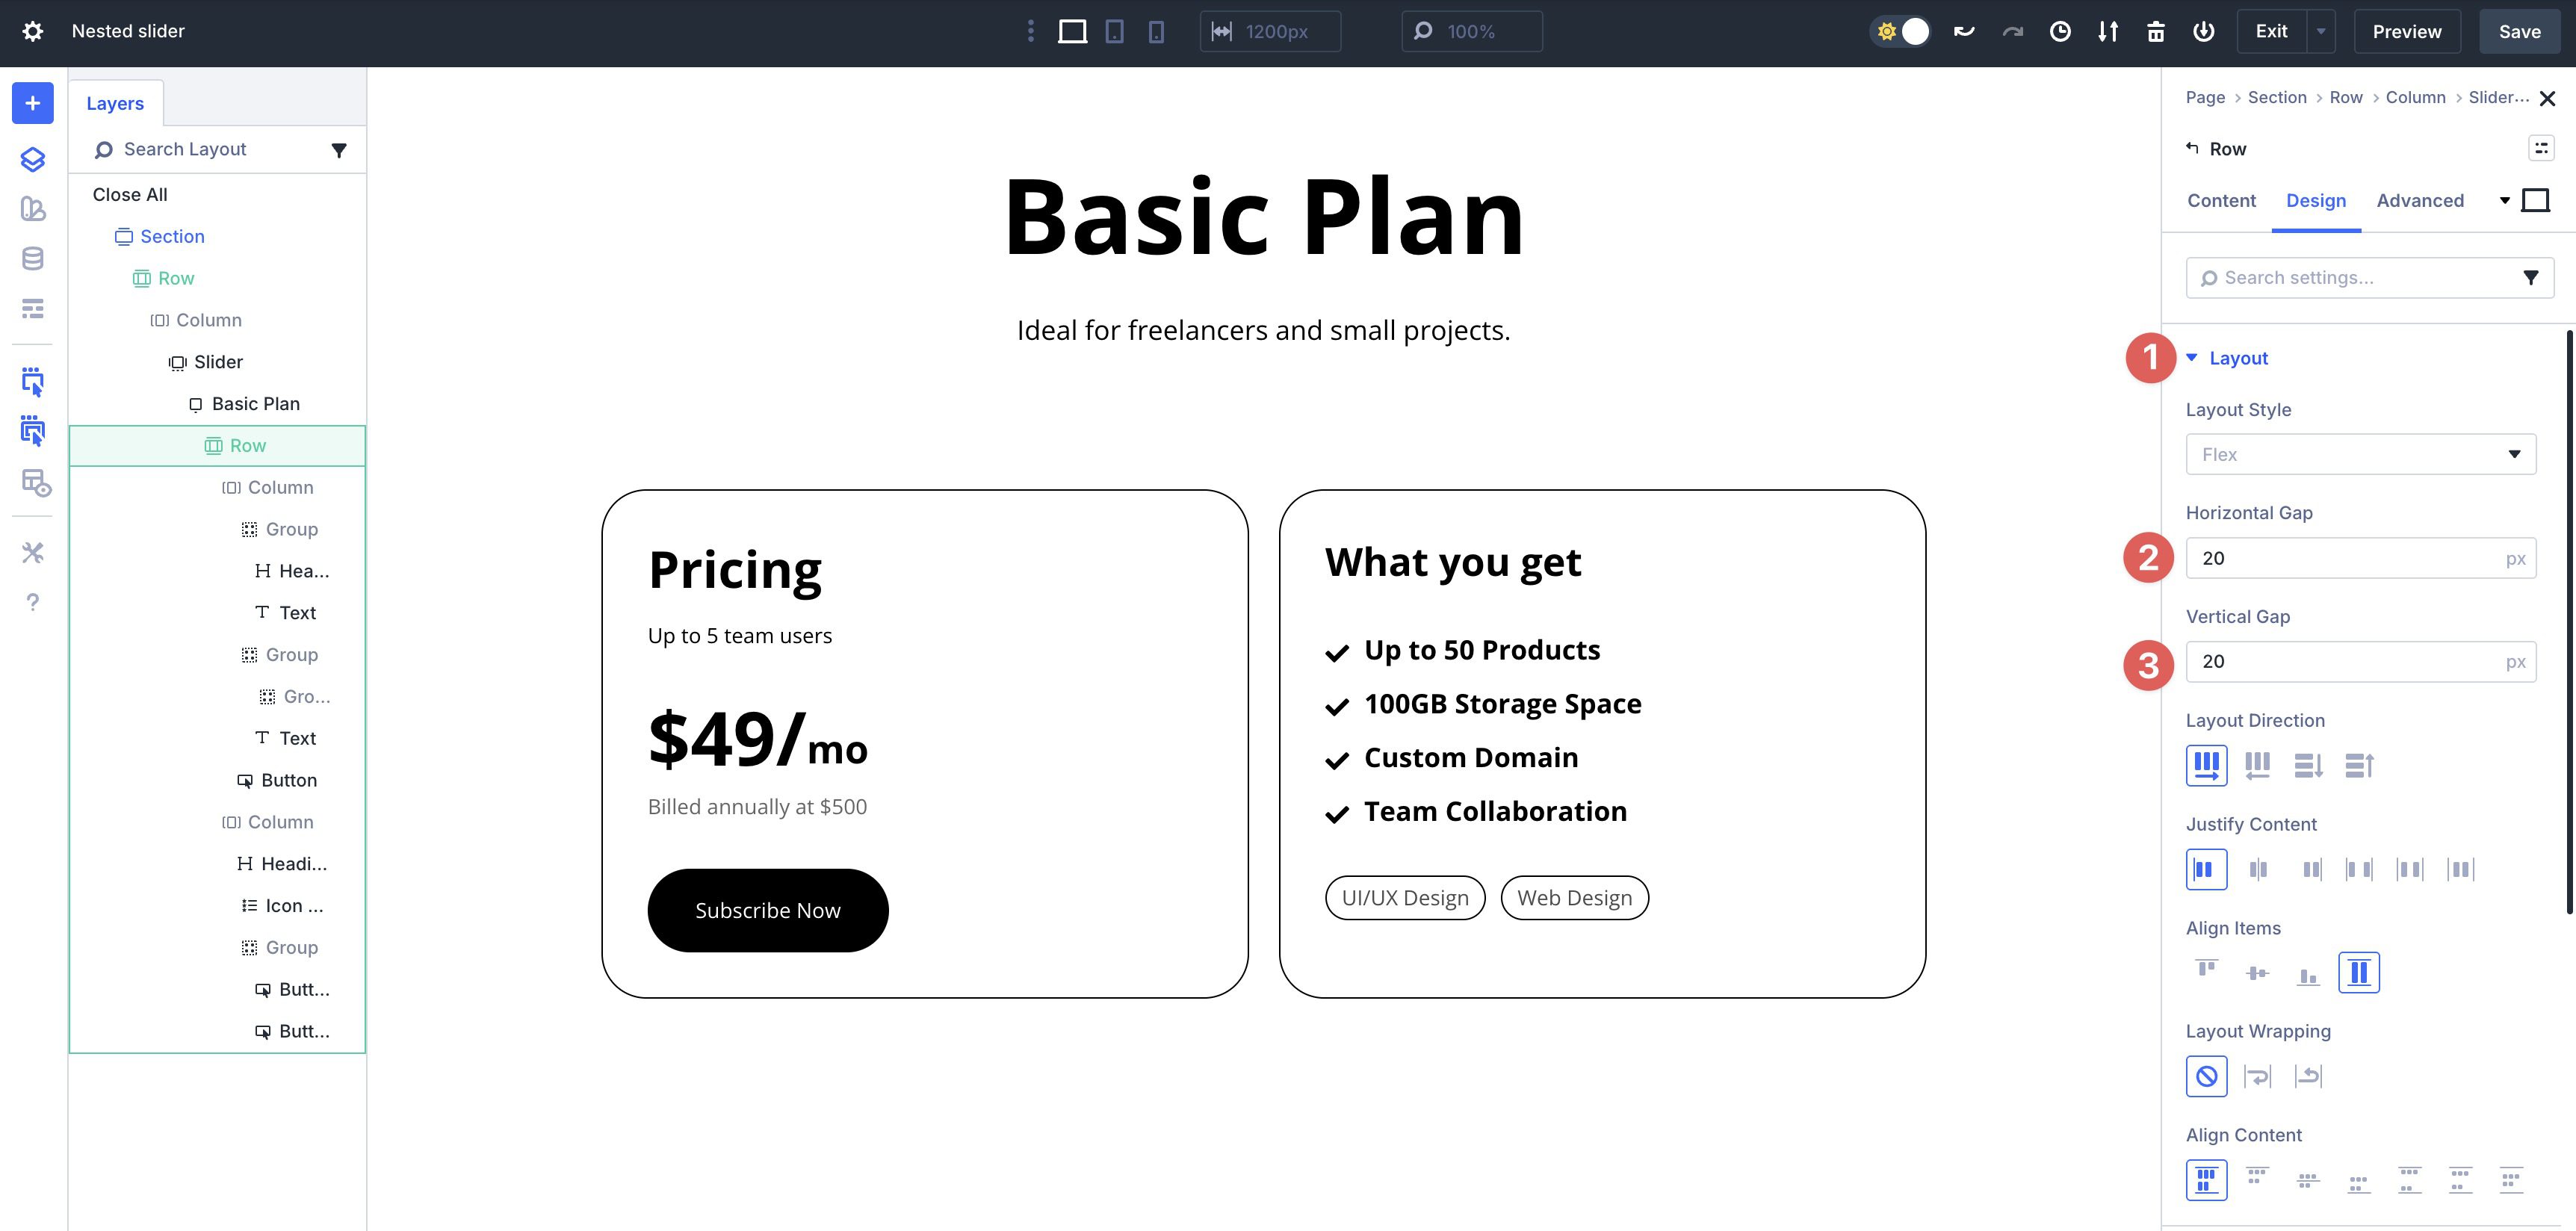
Next, select the inner Row within the 1st Slide.
Expand the Layout menu and set the Horizontal and Vertical Gap to 20px.
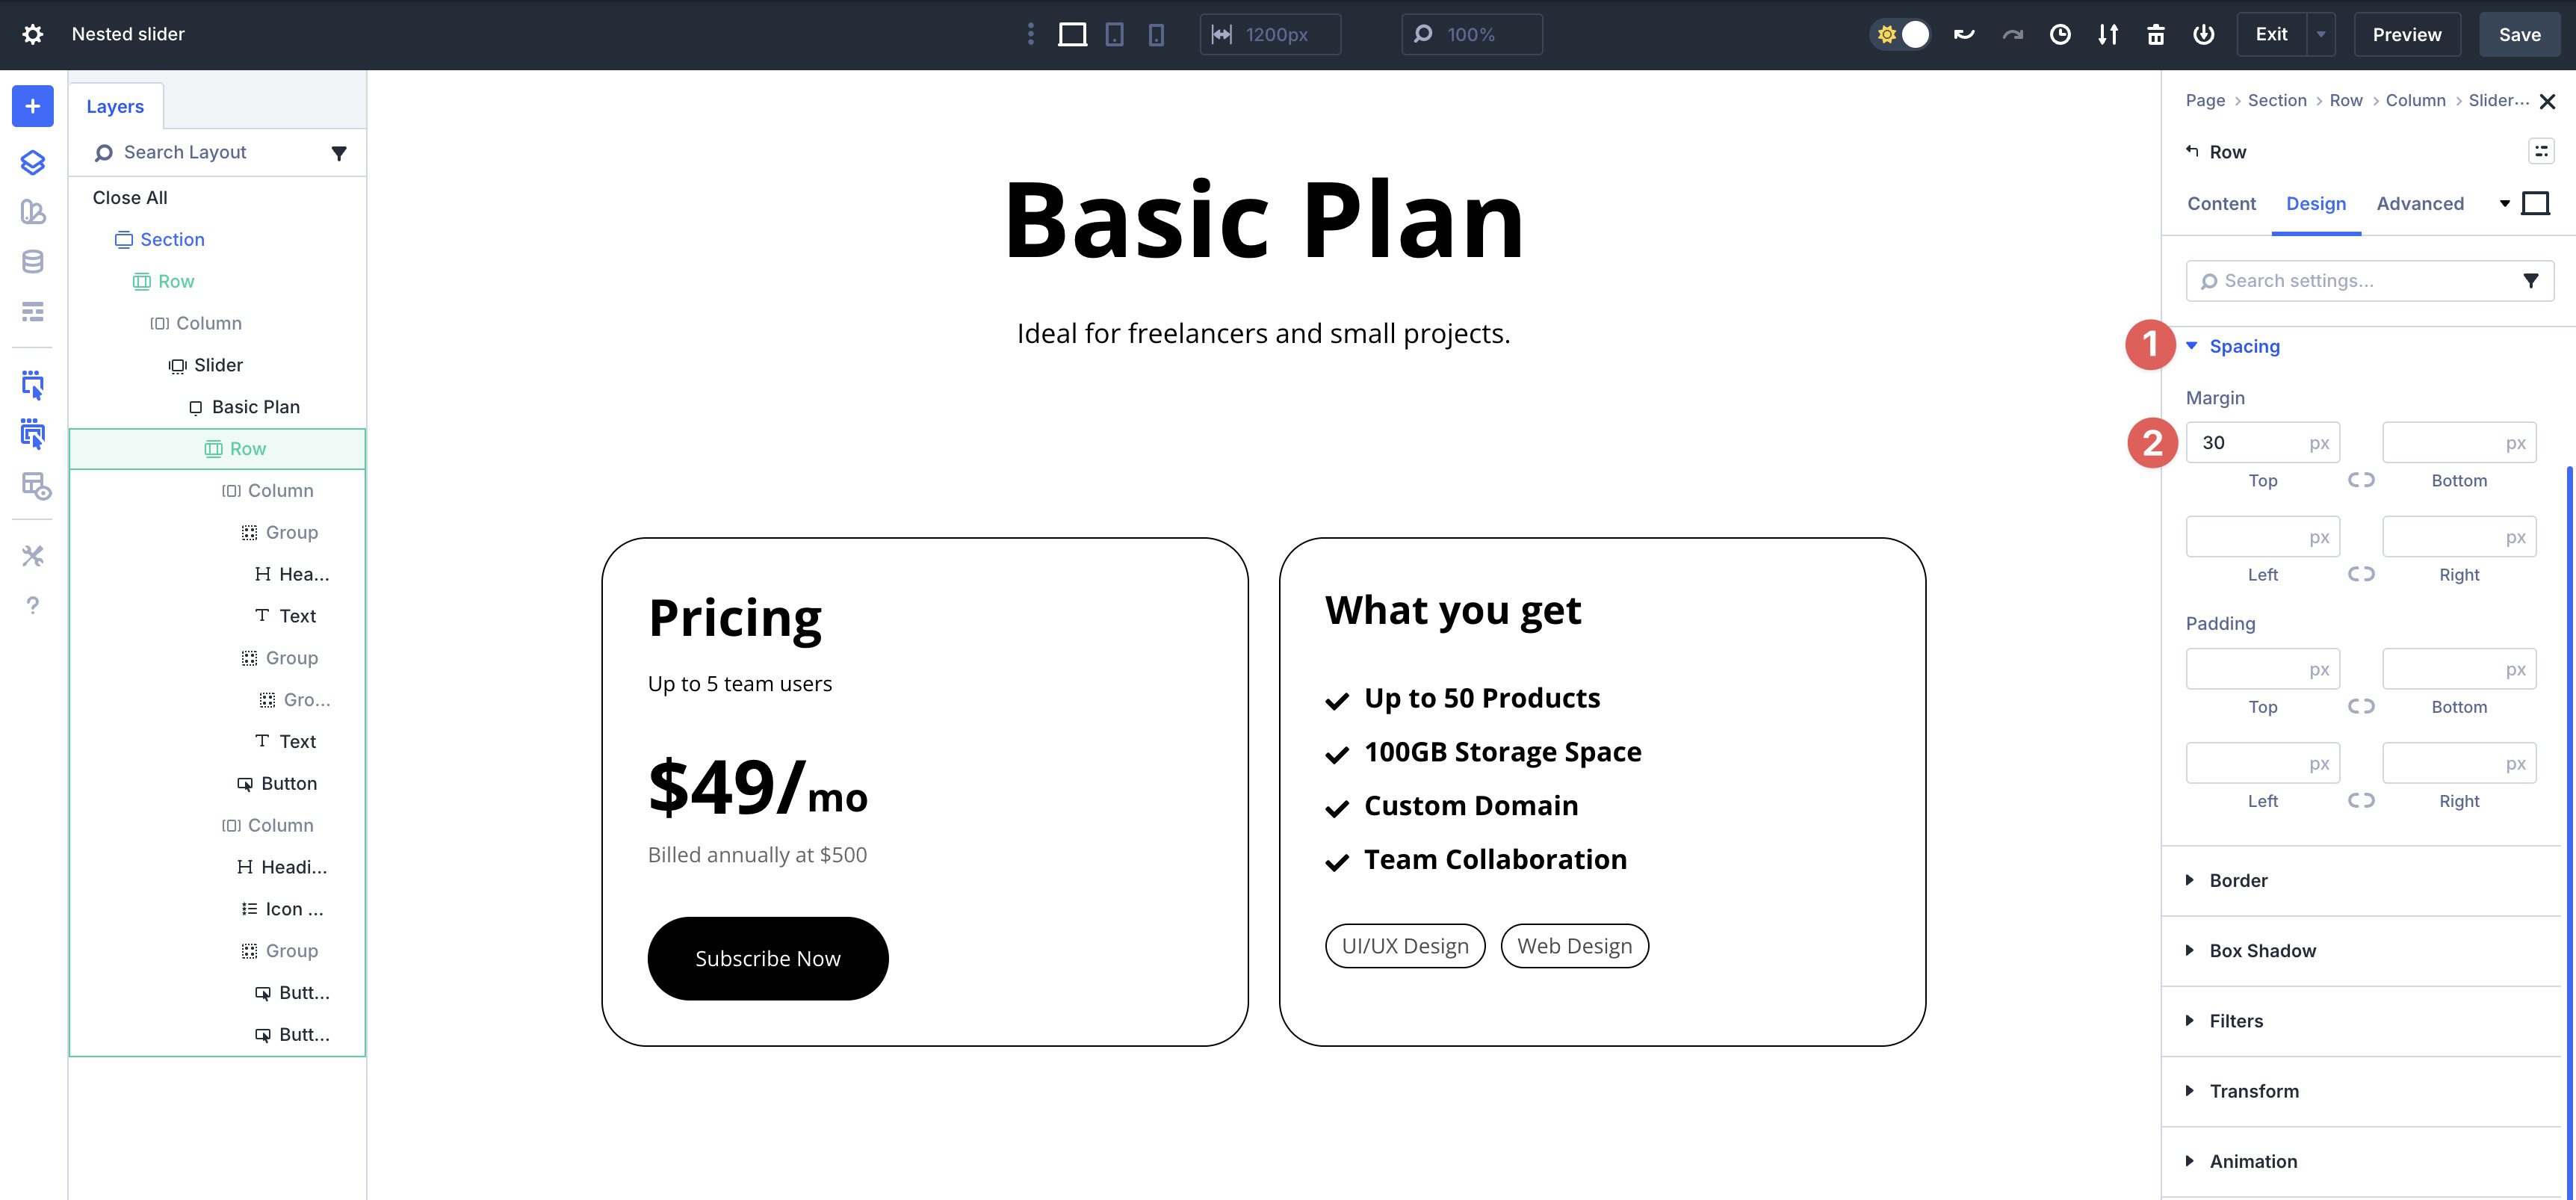
Expand the Spacing menu and add 30px Margin to the Top.
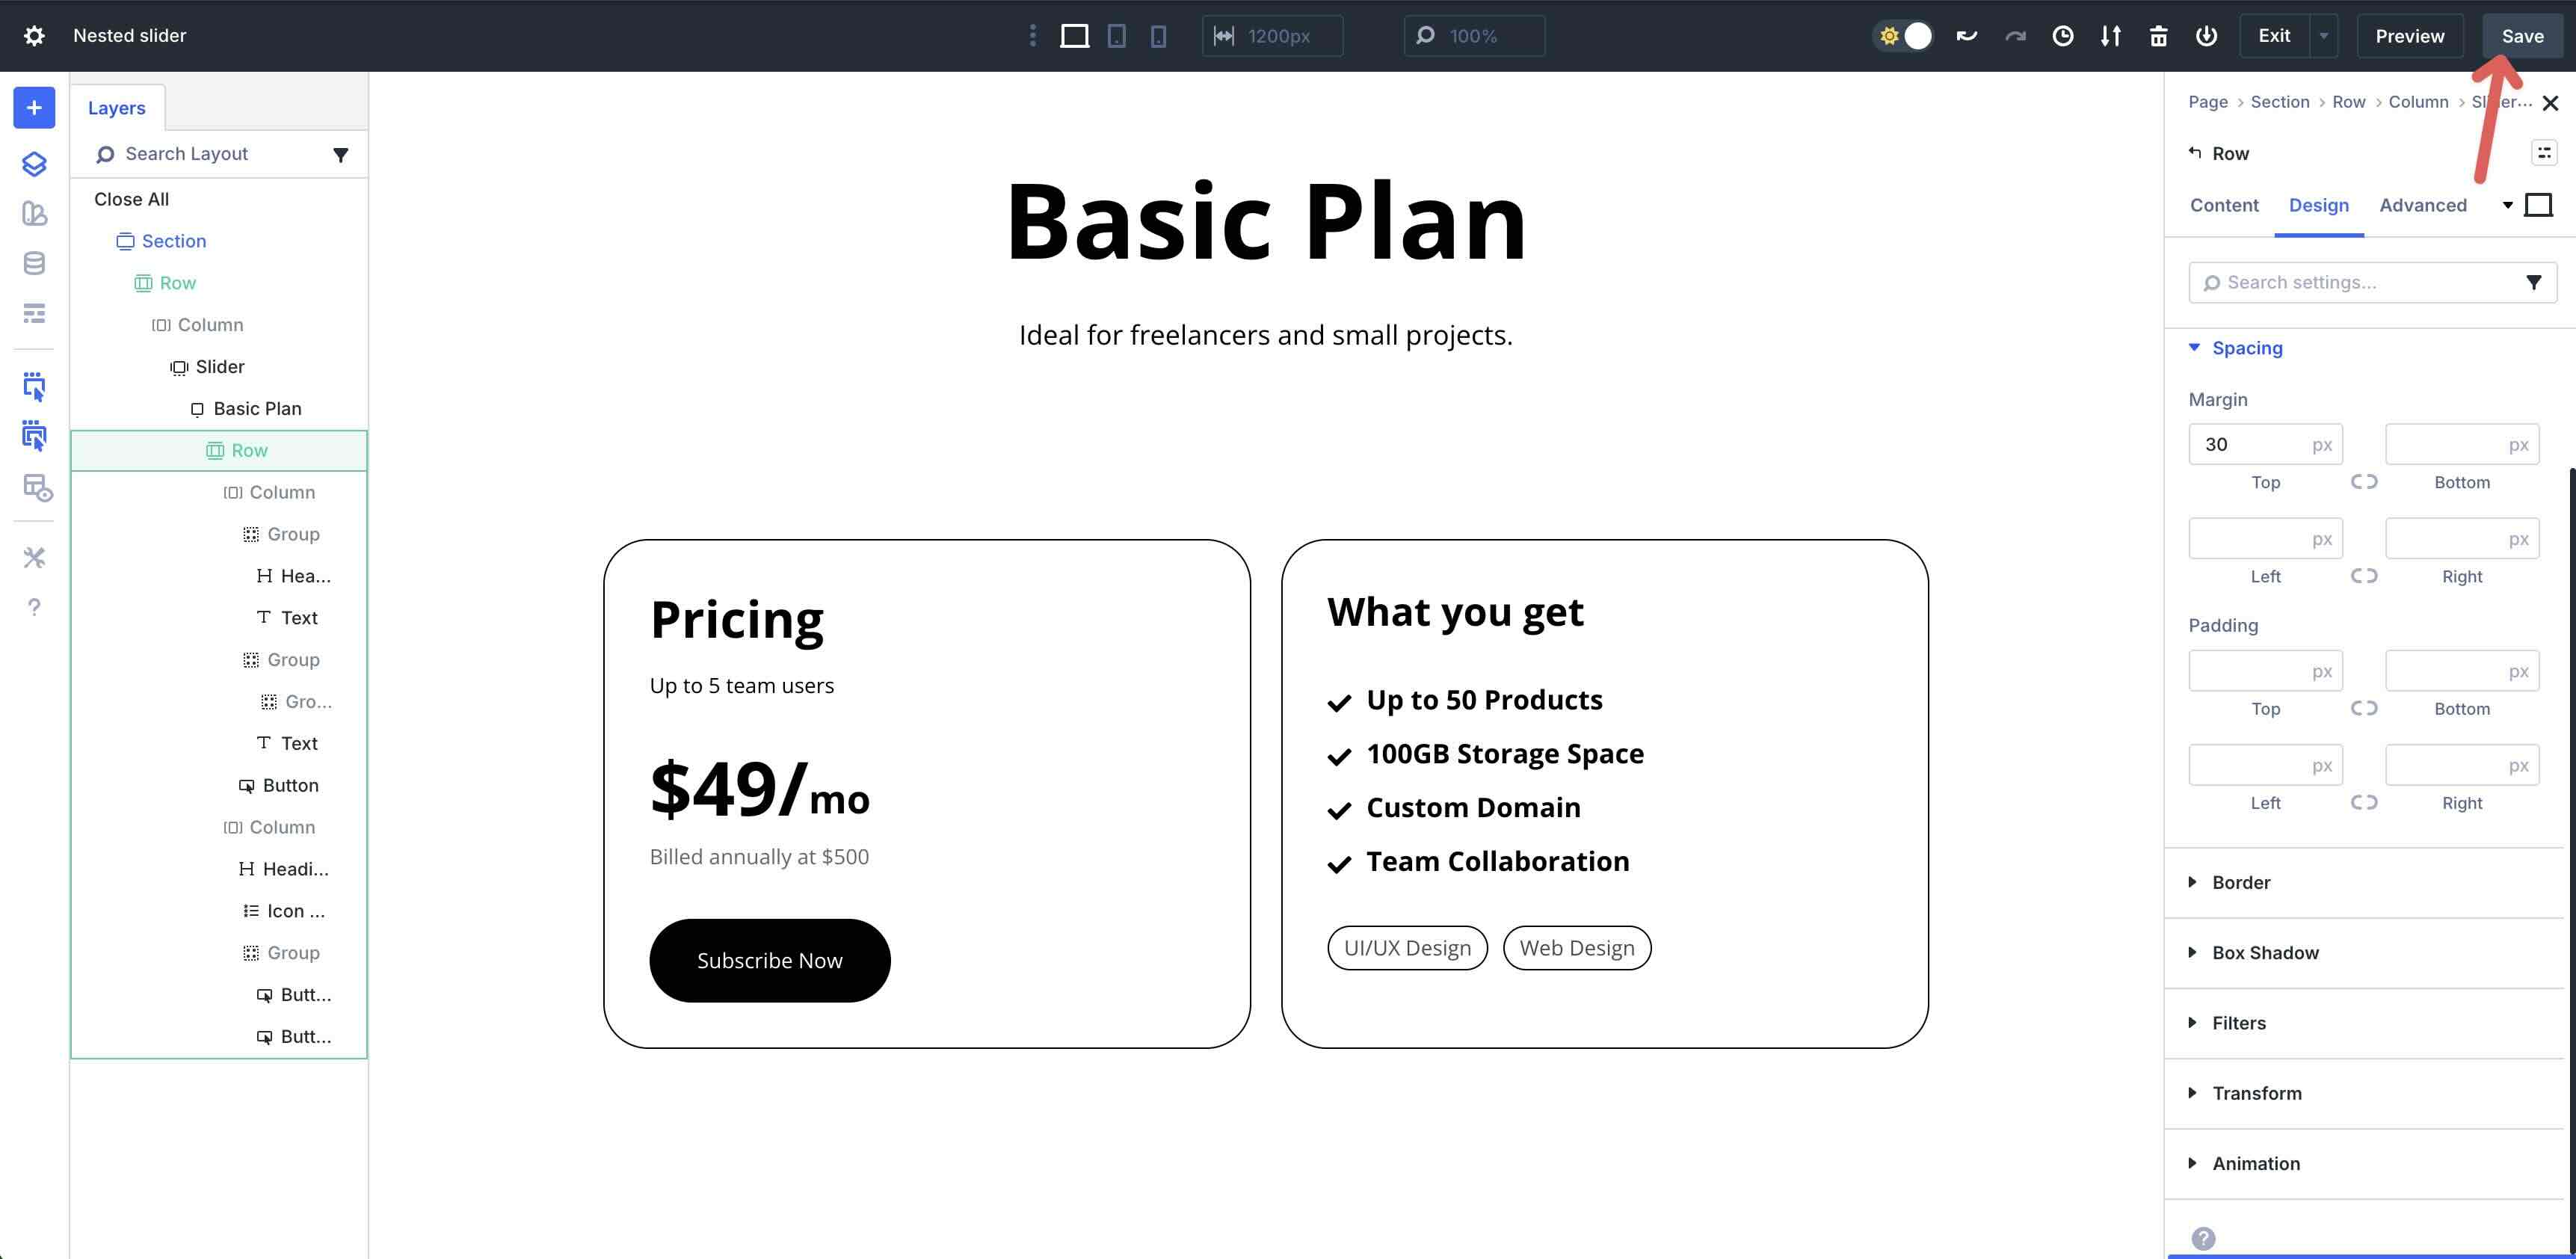
Before proceeding to the next step, click the Save button in the top right corner of the Visual Builder.
Step 7: Duplicate The First Slide
With the core layout in place, Divi 5 makes it easy to copy slides, saving a significant amount of design time. In the Slider Module’s Content tab, expand the Elements settings. Click the Duplicate Item icon to copy the 1st Slide twice.
In the Layers View, rename the second and third Slides for easy identification.
Now that your Slides are duplicated, you can easily edit the content on them, adjust styles as necessary, and save a ton of design time. You can change Headings and Text Module content with a few clicks.
Change background colors, add gradients, and more, with ease.
Step 8: Making Responsive Adjustments
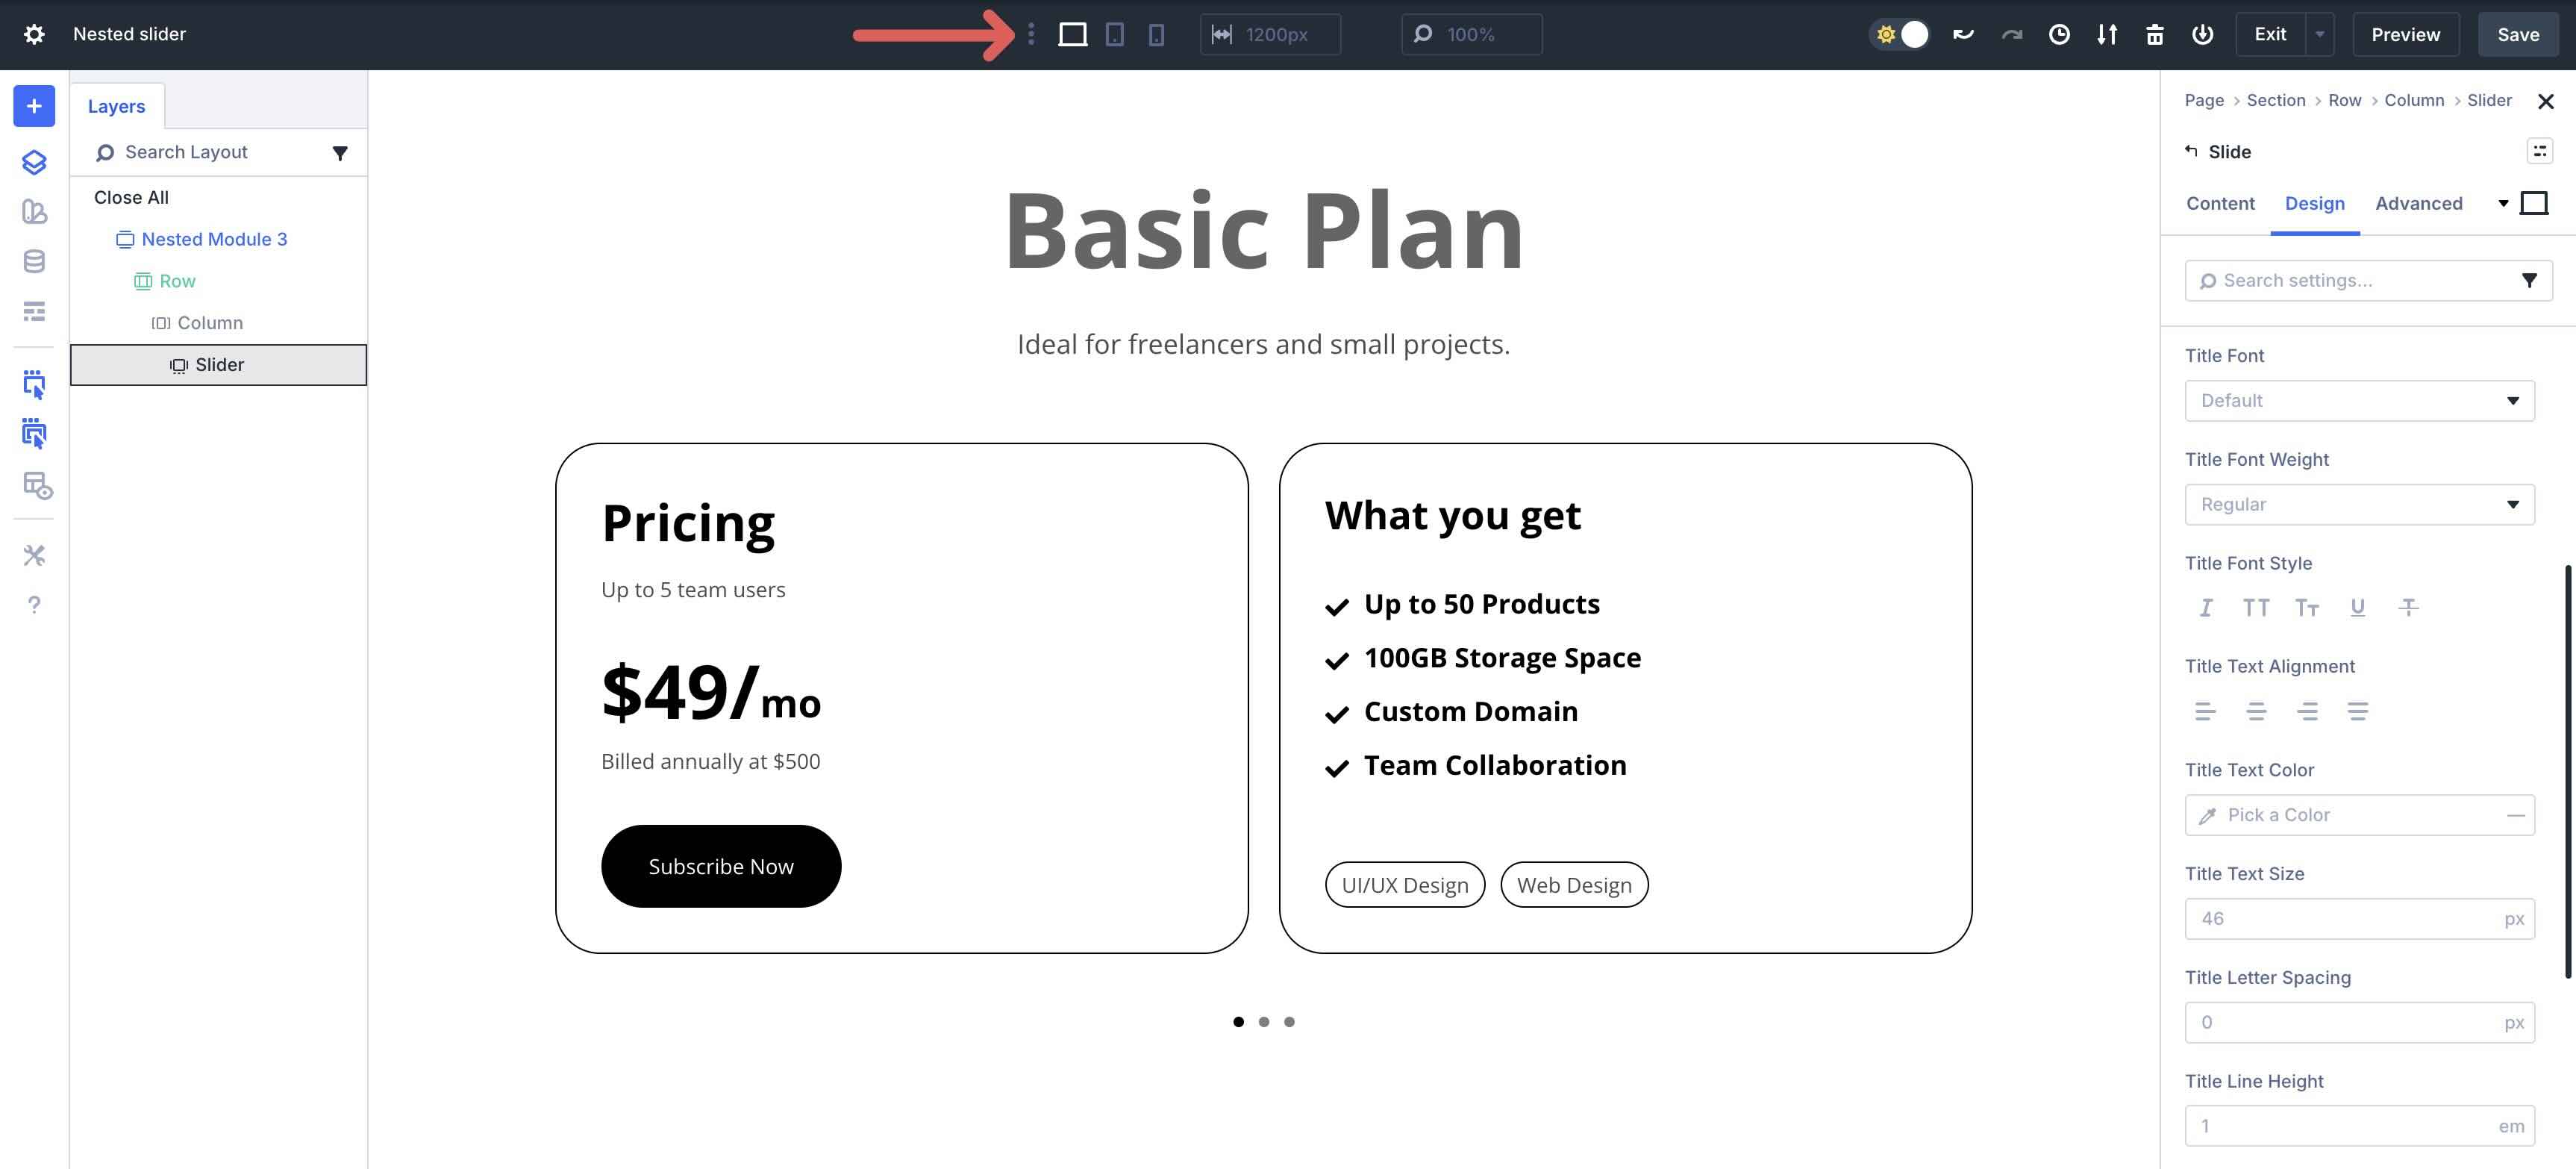
Divi 5 makes it easy to make changes to your layouts using Customizable Responsive Breakpoints. To enable all 7 breakpoints, click the ellipsis menu in the middle of the top bar in the Visual Builder.
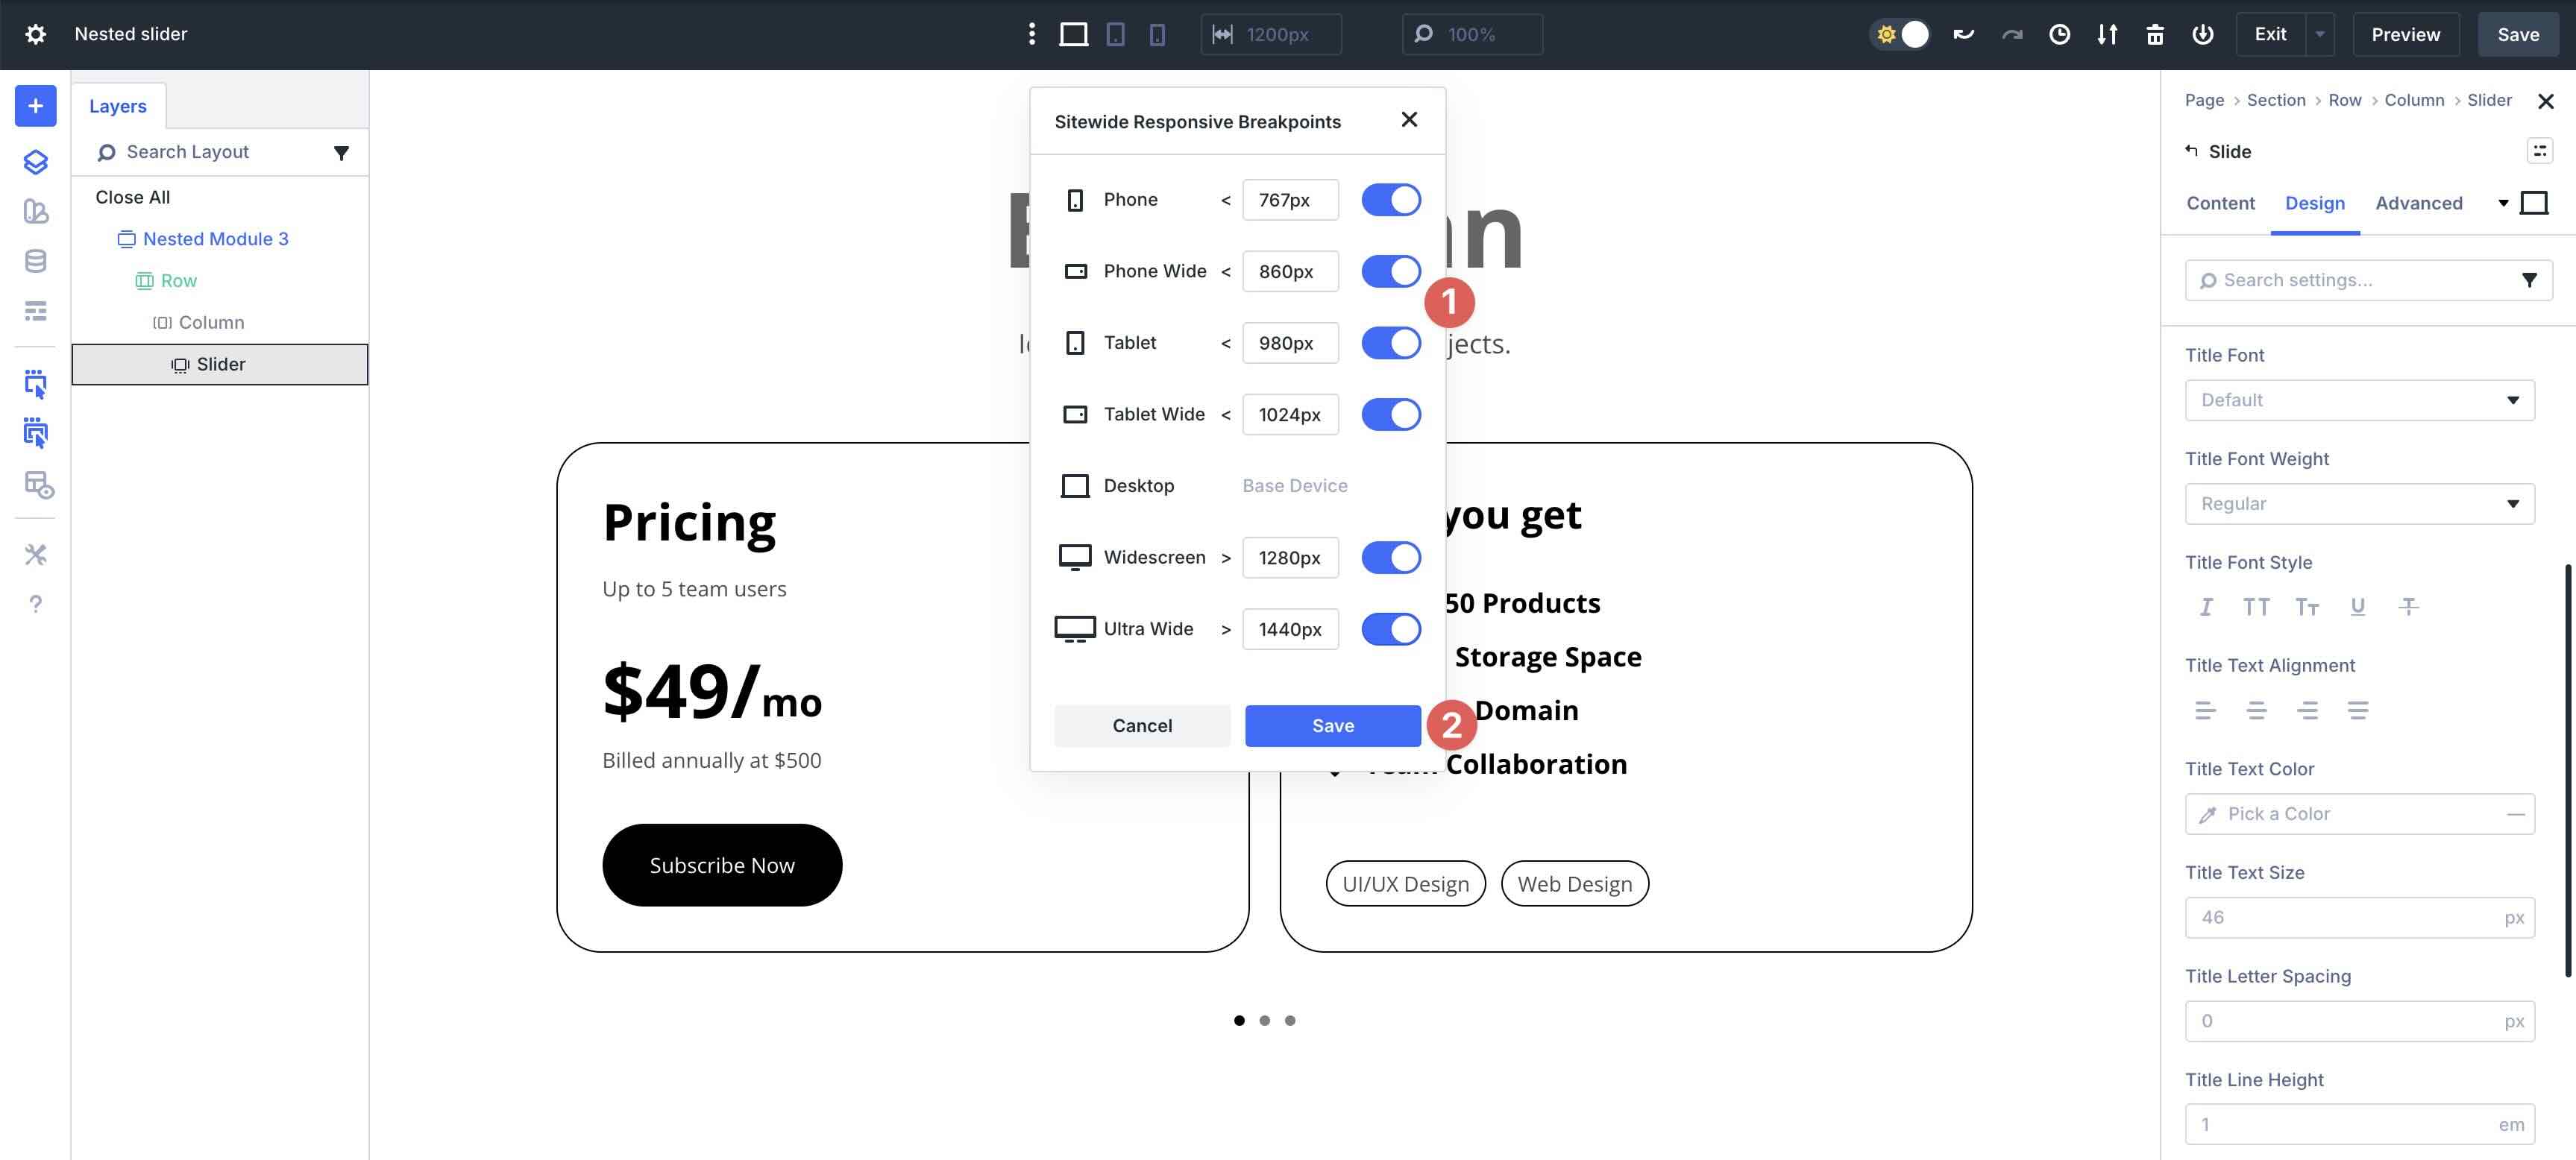
When the Sitewide Responsive Breakpoints modal appears, enable each breakpoint by toggling them on. Click the Save button to add the breakpoints to the Builder.
Cycle through each breakpoint to make changes to the layout as necessary.
Alternatively, you can use Divi 5’s Responsive Editor at the Module level to make quick changes for each breakpoint. To enable it, hover over any field in any Module to reveal the Edit Responsive Values icon.
![]()
When the Responsive Editor modal appears, you can edit values in one easy location.
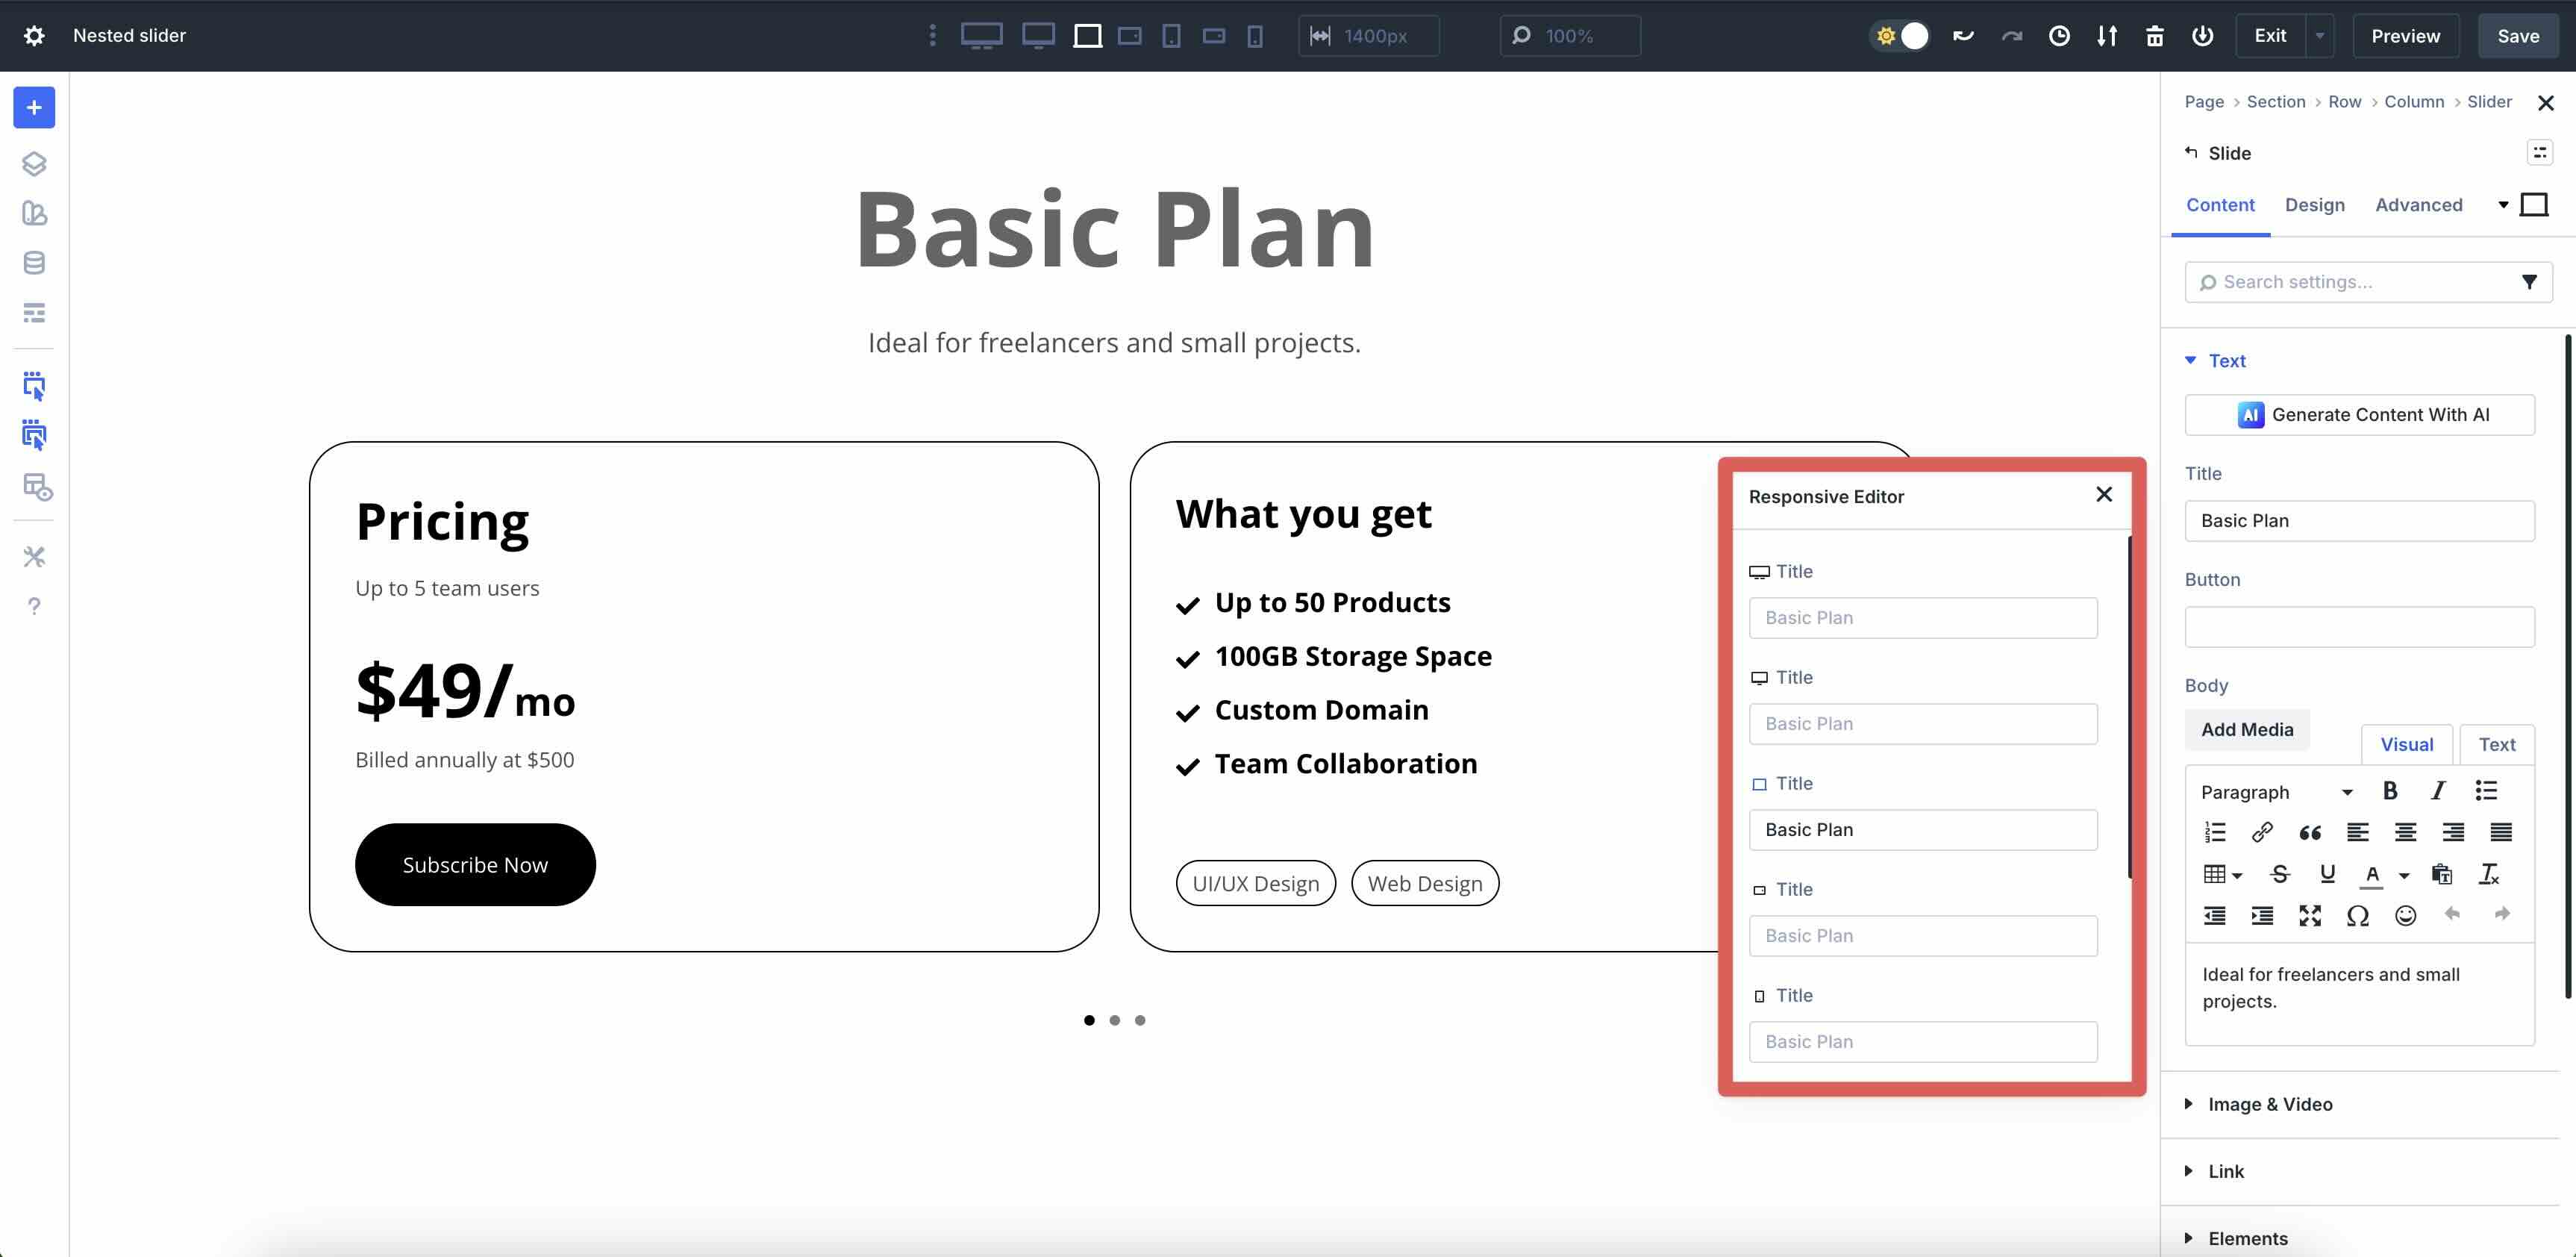
There is no limit to what you can edit, including text, images, colors, text sizes, font weights, and more.
Download The Files
Fill out the form below to download the working files from this article.

Build Nested Sliders In Divi 5 Today!
Combining the Slider Module, Module Groups, Nested Modules, and Flexbox unlocks interactivity that’s entirely native in Divi 5. This integration allows for the creation of dynamic, layered designs that engage users with depth and motion, all without relying on third-party plugins or custom CSS. The result can be adjusted across devices, giving you the tools to build websites with ease and flexibility.
Now’s the perfect time to dive in and bring these concepts to life on your projects. Download the latest Divi 5 Public Beta today and start experimenting with the Slider Module, Nested Modules, and Flexbox to see how they can elevate your design workflow.


Leave A Reply