
This post is part 4 of 5 in our miniseries How to Create an Elegant Wedding Website with Divi. In this series, we’ll guide you through the most important parts of creating a wedding website for yourself or a client with Divi.
In the first three parts of this miniseries, we showed you how to create an elegant wedding website. This website contained an announcement page, a gallery page and a gift list page.
Having an online guestbook on your website as well allows you to engage with the guests after the wedding. That’s why we searched for the easiest solution out there that works with Divi.
We want to show you how to create an online guestbook with Automatic Divi Testimonials from Noou. This plugin will help us create an automatic flow of incoming testimonials. The plugin will make your page user-friendly and easy-going, plus, it’ll save you a bunch of time.
In this tutorial, we’ll show you step by step how to integrate the Automatic Divi Testimonials into your guestbook page and customize it for that purpose. And, how to create the following Automatic Testimonial Module layout that matched the wedding website you already made.
Purchasing the Plugin
First of all, you’ll need to purchase the Automatic Automatic Divi Testimonials from Noou on their website if you don’t own the plugin yet. Once you place your order, you’ll receive a ZIP file. The ZIP file contains all the files needed to make the plugin run smoothly.
Uploading the Automatic Divi Testimonials Plugin
Before uploading the plugin on your WordPress website, you’ll have to make some modifications to one of the files included in the ZIP file.
Go to the Divi Automatic Testimonials Zip file > Divi-automatic-testimonials > Frontend> Open the Form file with a code editor.
In this example, we’ll use Notepad++ to edit the file, but feel free to use any code editor of choice.
Changing the Form Titles
The predefined form usually gets used for business purposes. The standard questions that a person needs to answer are business related, such as job title and company. We have to make the modifications in the PHP file before uploading the plugin because they use a shortcode to display the form in your website built with Divi.
We want to change these titles, but since they are currently still working on a dedicated form that you can edit within Divi, we’ll have to go back to the source to make these modifications. This is what the form looks like on the website, without the modifications:
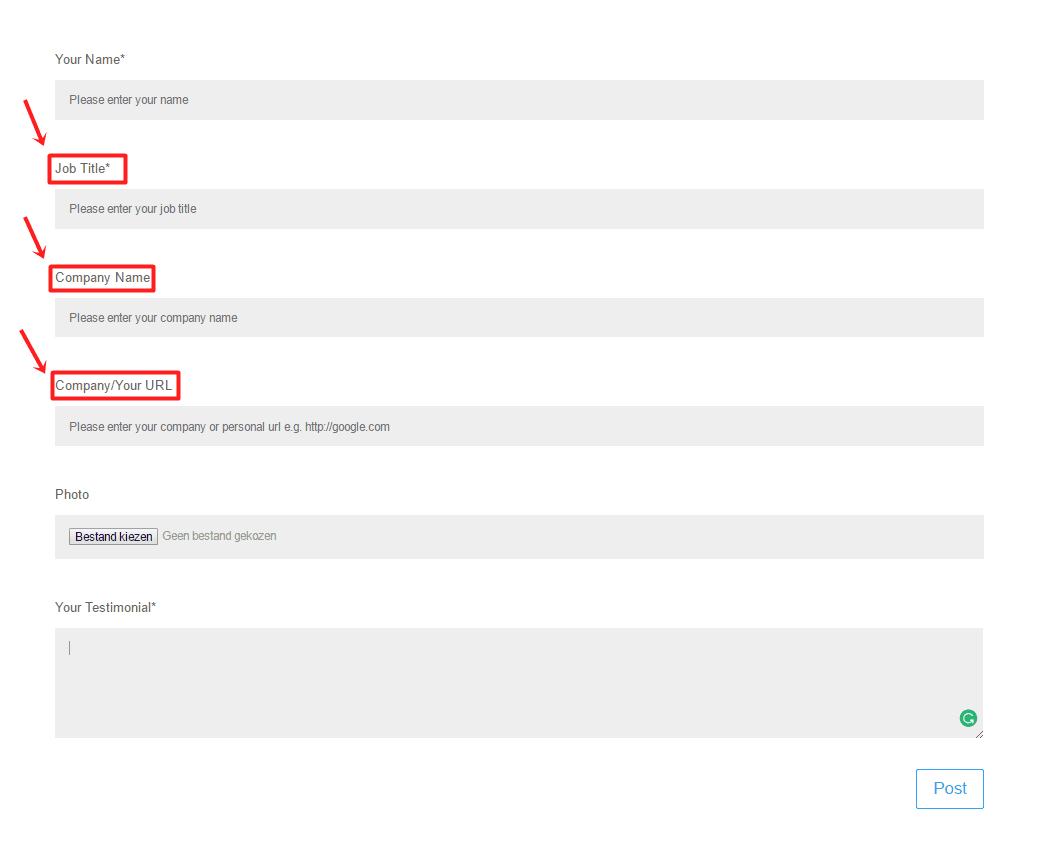
The three fields we’ll have to change is the ‘Job Title’ field, the ‘Company Name’ and the ‘Company URL’. You can change these two fields into whatever you want to know about the person. But in this example, we’re going to replace them by ‘Family/friend of’, ‘Role at the wedding’ and ‘Your own website’.
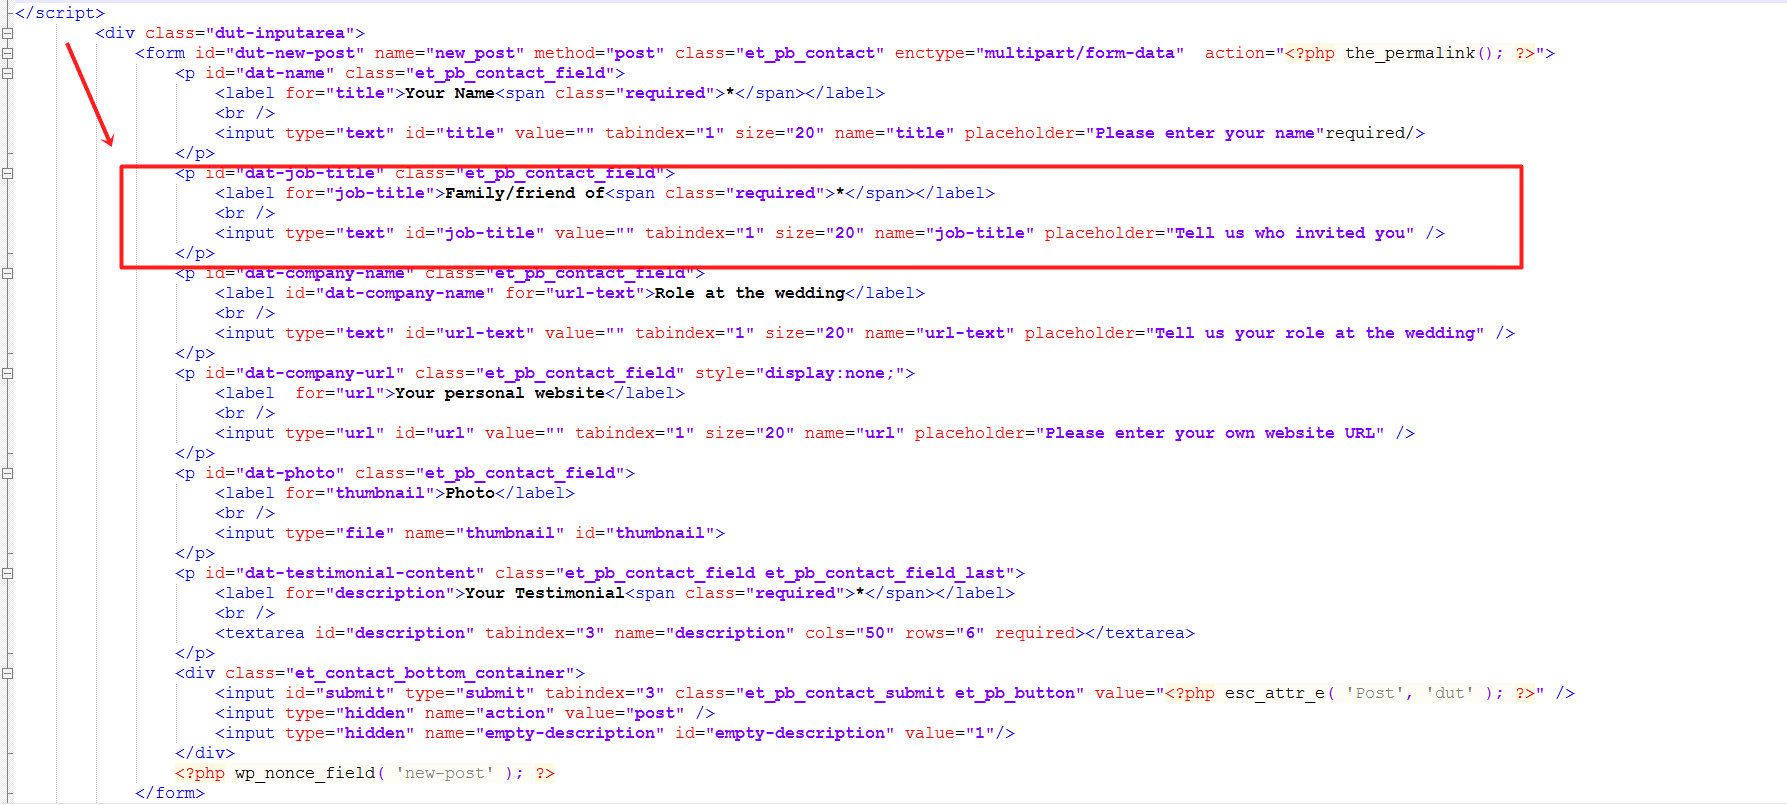
The Job Title to Family/friend of
Change the label from ‘Job Title’ to ‘Family/friend of’ and the placeholder from ‘Please enter your job title’ to ‘Tell us who invited you’.
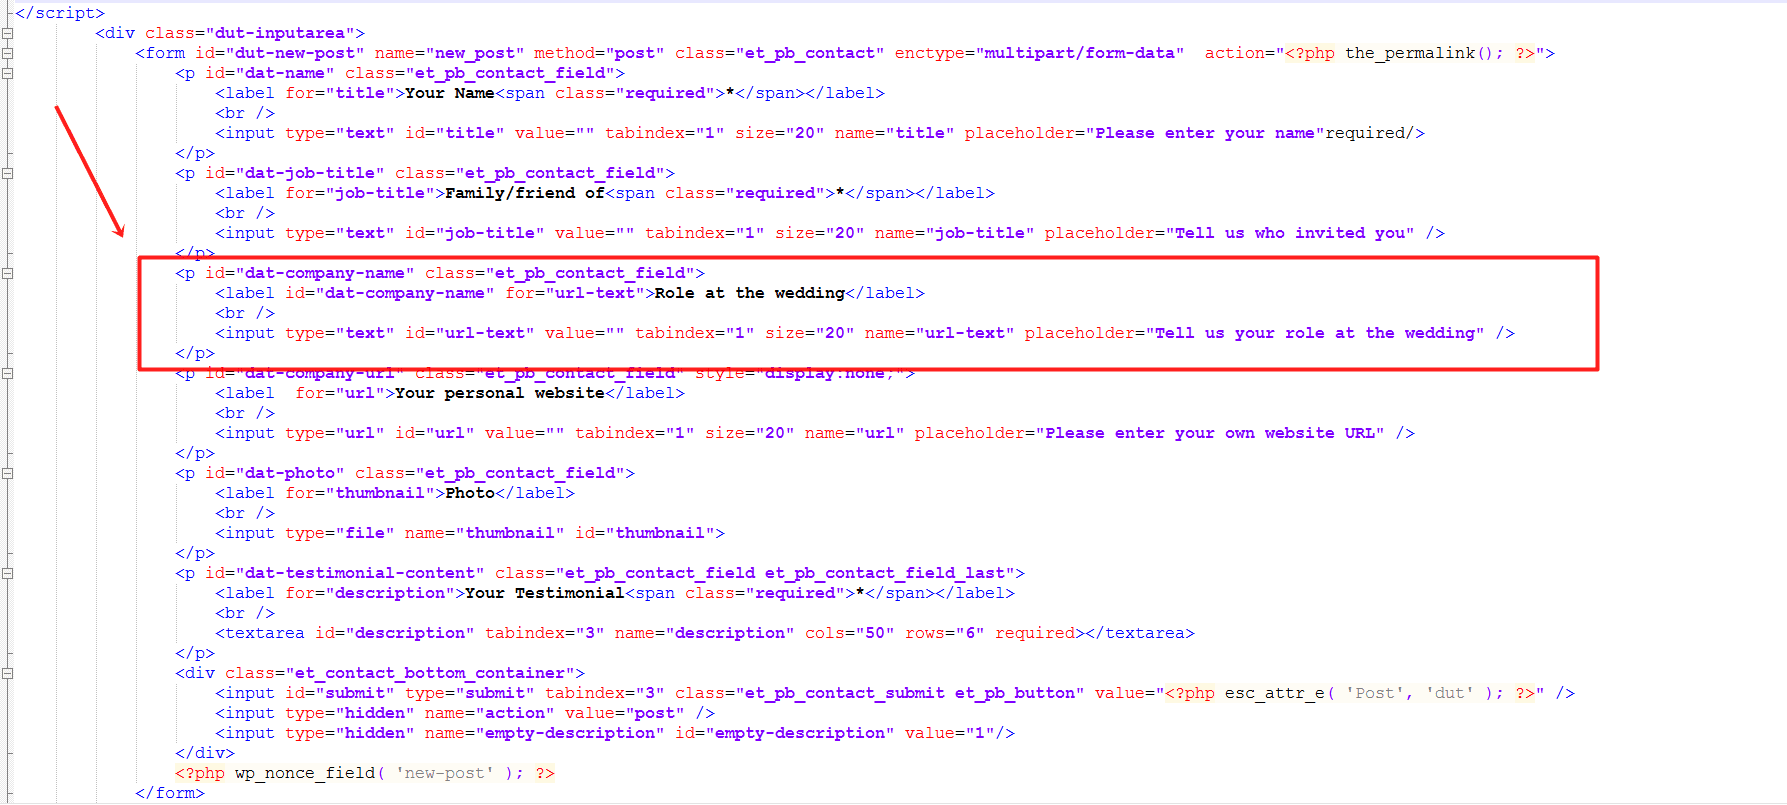
The Company Name to Role at the Wedding
Change the label from ‘Company Name’ to ‘Role at the wedding and the placeholder from ‘Please enter your company name’ to ‘Tell us what your role at the wedding was’.
The Company URL to Personal Website
Change the label from ‘Company/Your URL’ to ‘Your personal website’ and the placeholder from ‘Please enter your company or personal URL e.g. http://google.com’ to ‘Enter your personal website URL e.g. http://google.com’.

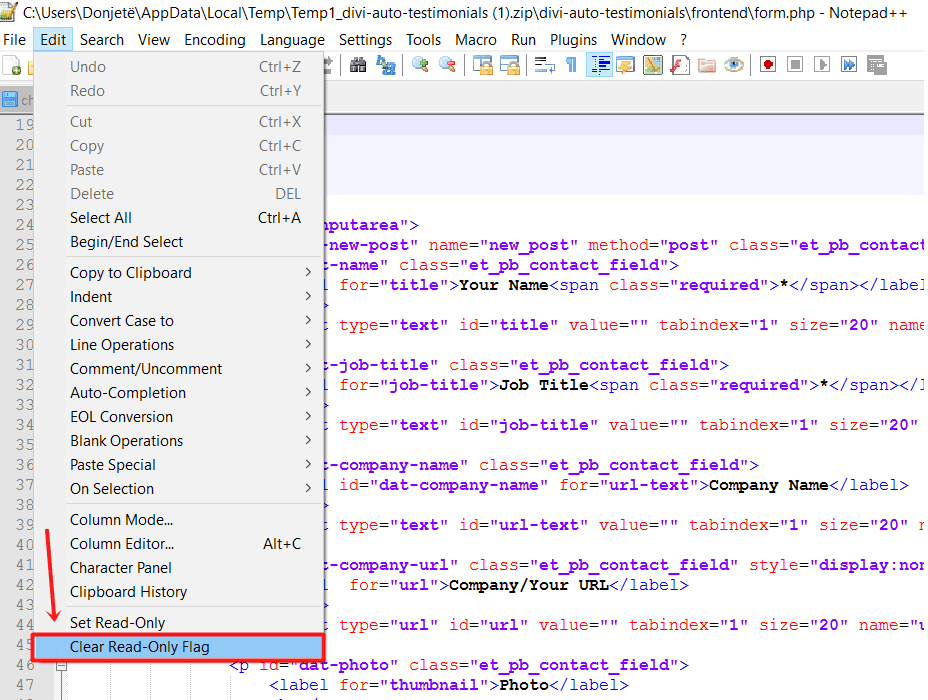
Note: it’s possible that the file is still in Read-Only modus. To start editing, go to the Edit tab and select ‘Clear Read-Only Flag’.
After changing the code, copy the entire code and create a new Notepad++ file that you replace with the current one. The changes probably won’t save on the old file, that’s why we need to replace the file with a new one. Replacing the old file with a new file, that contains the new code, will help you bridge problems.
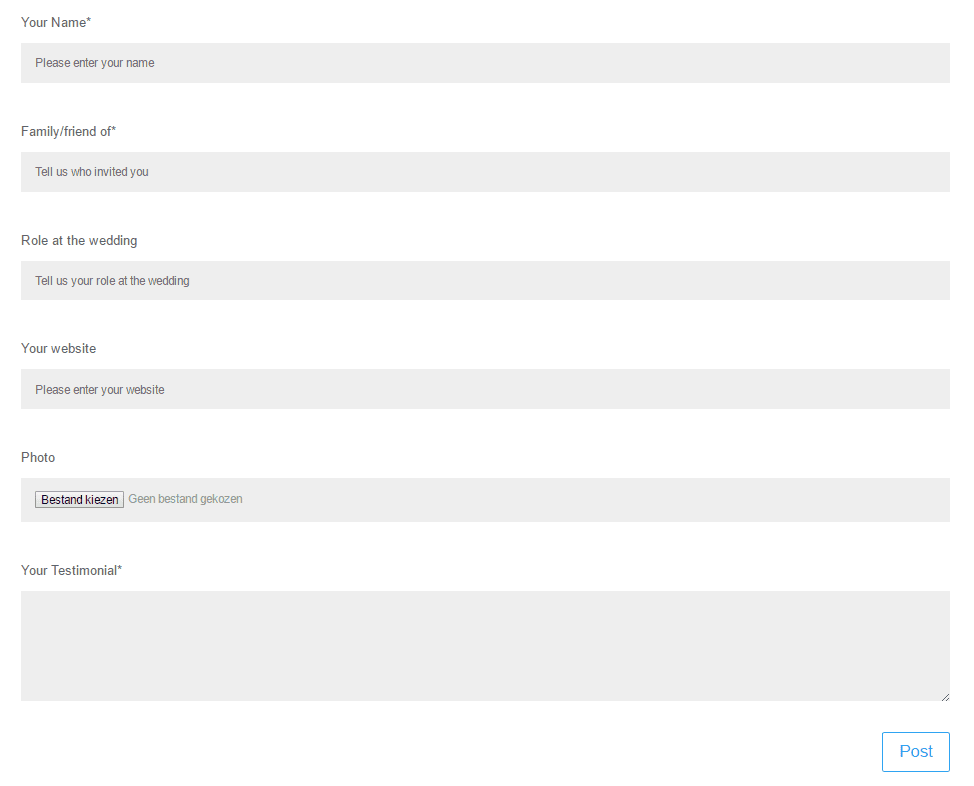
Save the file and exit. Your form will, later on, look like this:
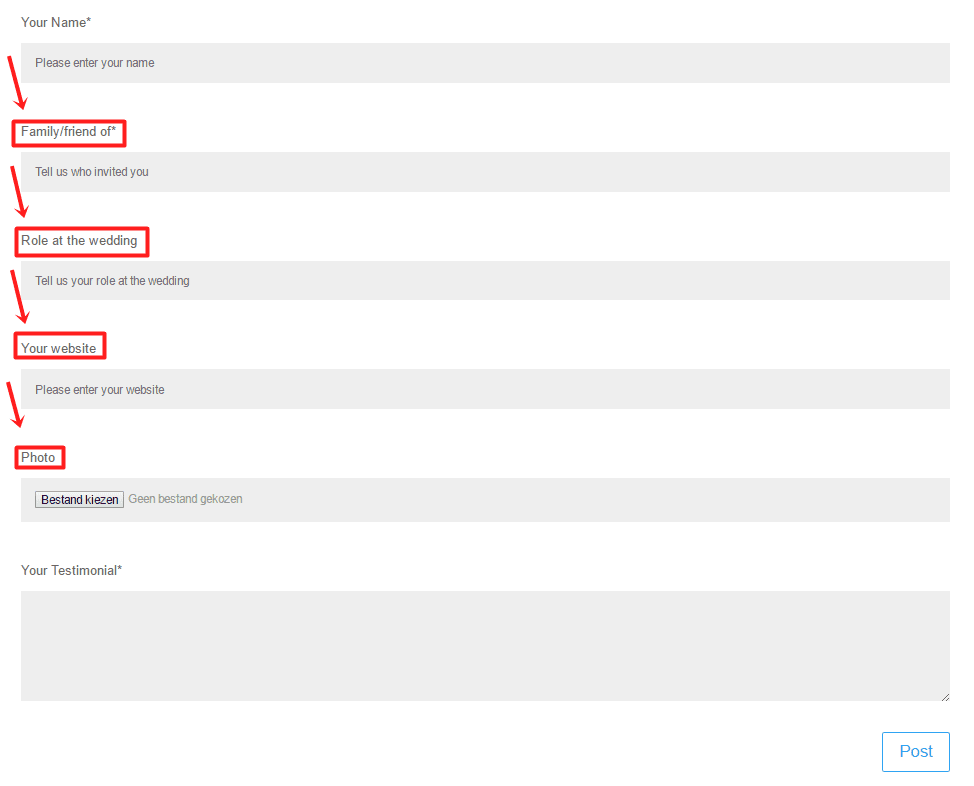
We’ve made the changes on the frontend part of the plugin only, so it doesn’t confuse the guests that are visiting the website. The modifications we made do not apply to the backend of it all.
When you manually try to add a testimonial to your WordPress site, you’ll still see the titles ‘Job title’ and ‘Company name’. However, these never show up on your website, so feel free to type down an answer to the new questions we made.
Uploading the Plugin
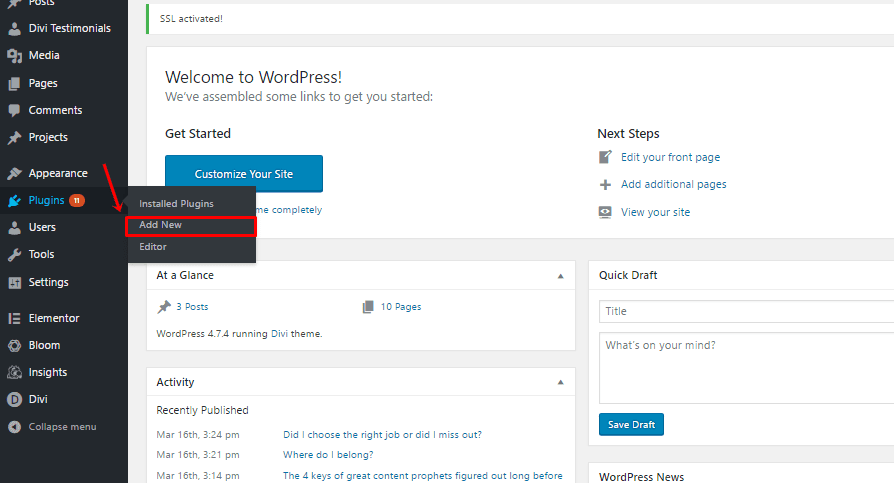
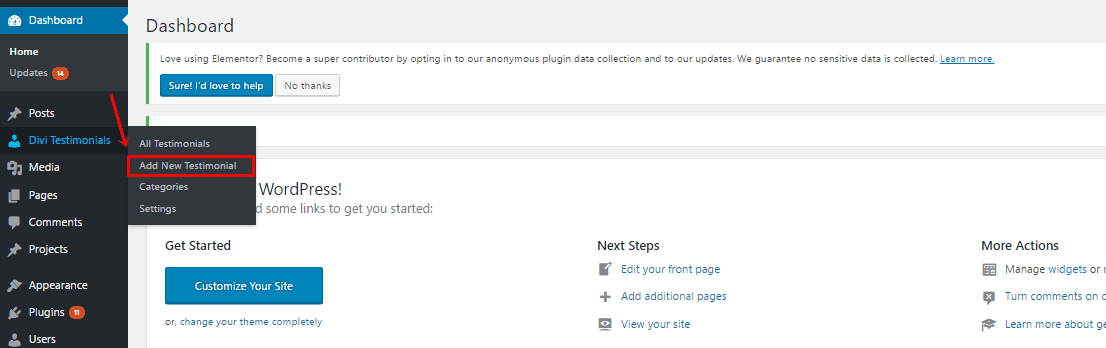
Now, to upload the plugin on to your website, go to Plugins > Add new and upload the modified plugin saved on your desktop. After having activated the Automatic Divi Testimonials plugin, it’ll appear in your WordPress menu:
Automatic Divi Testimonials settings
The Automatic Divi Testimonials plugin makes it easy for the guests to share the experience they had at the wedding. They can fill in the form on the website and an email will automatically be sent to the website owner or to any other email address you like. To make these adjustments, go to Settings and add the email address of the person you’d like to receive incoming testimonials.

Adding a New Testimonial
There are two ways to add a new testimonial to your testimonial list; manually or automatically. In certain cases, you’ll have to add a testimonial yourself. This plugin takes that into account.
Adding a New Testimonial Manually
You can manually add testimonials by going clicking on ‘Add testimonial’ in the Automatic Divi Testimonials part of your WordPress website.
Here, you’ll notice that the changes we made before didn’t apply for the backend of the plugin. The field ‘Family/friend of’ is still called ‘Job Title’. You just have to remember that that’s the place where you write how the person in question is related to the wedding couple.
Same counts for the other two fields that fit business testimonials. The ‘Company Name’ is the field where you’ll enter the ‘Role at the wedding’ and the ‘URL’ field is not company related.
The important thing is that all these titles will never show up on the website itself. We already edited the things that initially would appear (within the form) on the website. The editing we made before uploading the plugin was the fastest way to make the plugin work without having to make any radical changes to the plugin itself.
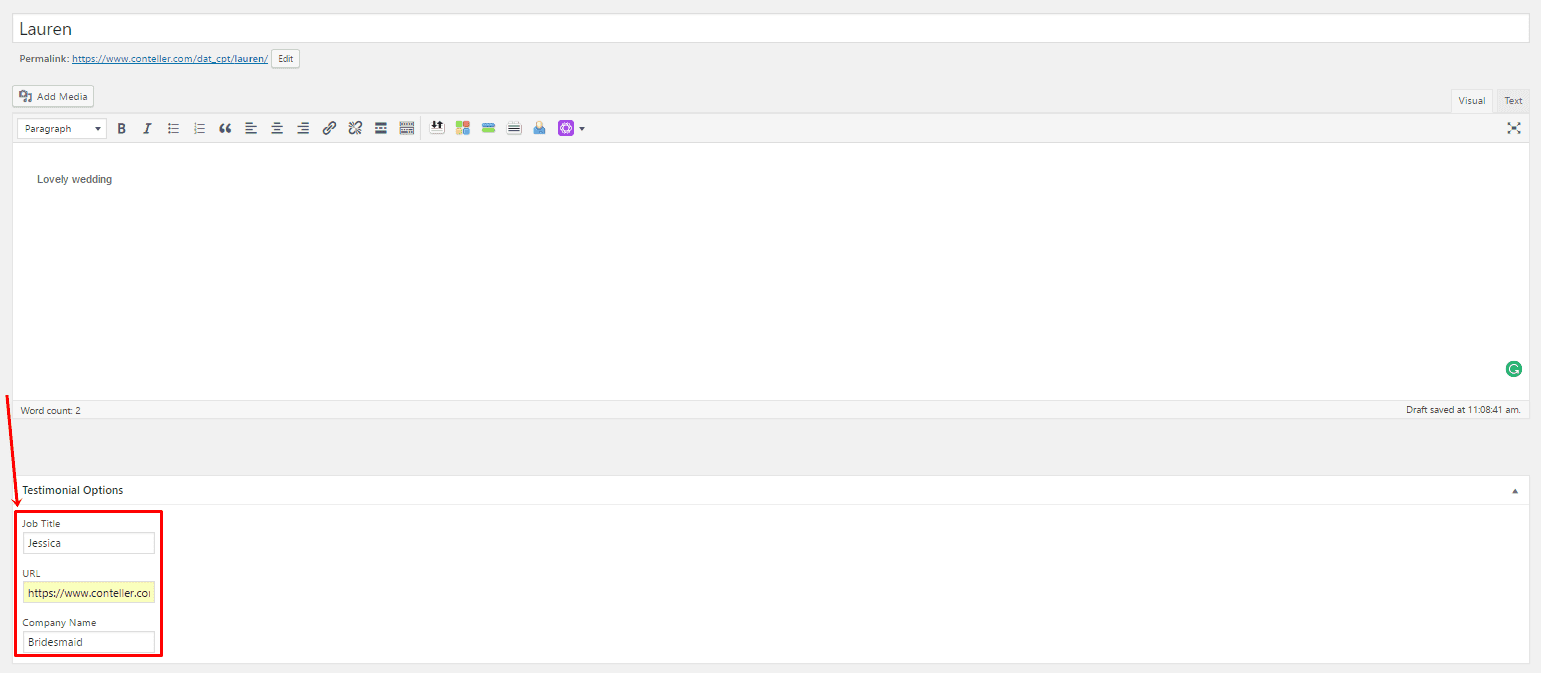
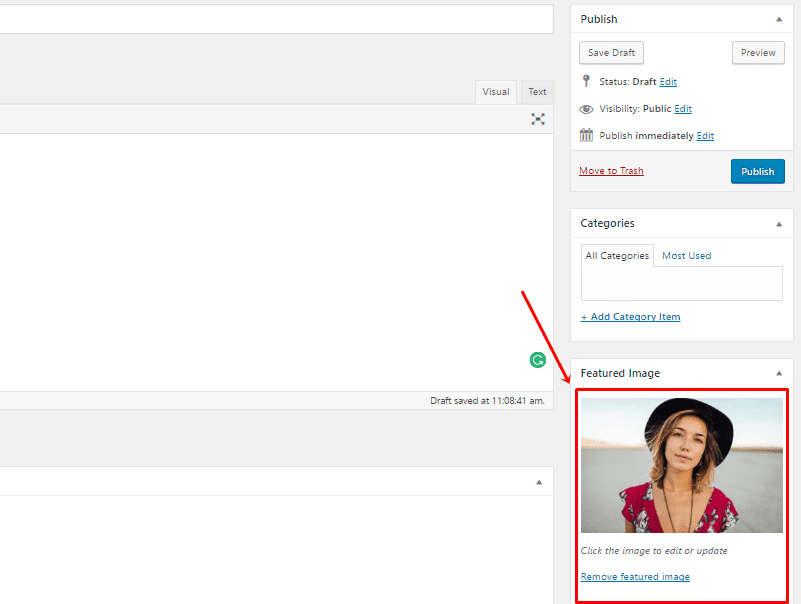
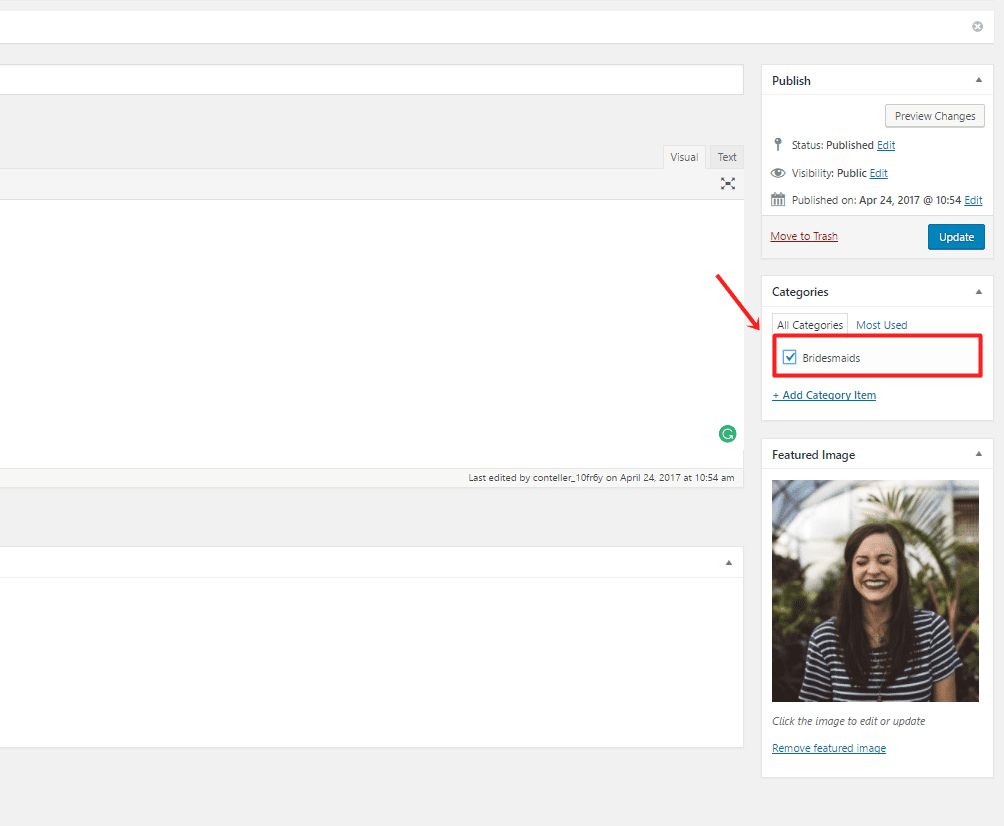
When creating a new testimonial, you can also add a featured image of the person who is testifying. This will be the image that will appear within the testimonial on your wedding website.
Adding a New Testimonial Automatically
Then we have the interesting part of this plugin which is letting the guests engage with the website and do the repetitive work for you. The guests can send you their own testimonial without any further manual work. The testimonial that your guests generate, by filling in the form on your website, will automatically be added to the list of testimonials and you will receive a notification email.
Afterwards, you can still decide what you do with the testimonials; how you display them on your website and whether you want to keep them or not. The main purpose of the Automatic Divi Testimonials plugin is to help the website owner get testimonials from guests without either one of the parties having to put in a lot of effort. The guests don’t have to communicate through anything else than the wedding website.
Get Started
Now, go to the page where you’d like to add the online guestbook. This could be a separate page but you can always add a few Automatic Testimonials to your homepage as well. The form currently doesn’t show up on the visual builder because it shows up through a shortcode. For this tutorial, we’re going to use the regular Divi builder of a page to show you how it’s done.
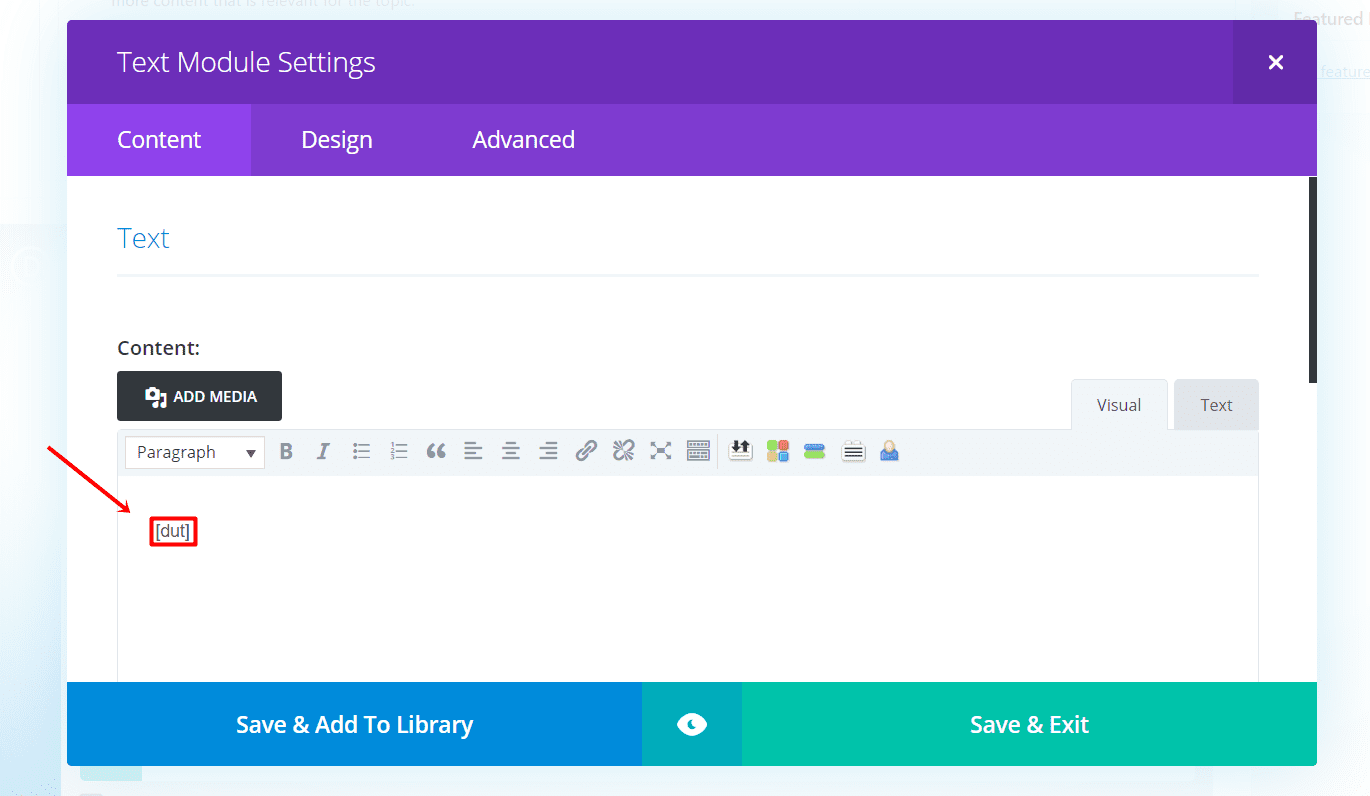
Now, start by adding a new page or open the page you want to place your testimonials in. Within that new page, we’ll need a Standard Section with a fullwidth row. Add a regular Text Module to the row. Within that Text Module type down the following shortcode [dup] within the subcategory Text of the Content tab. This shortcode will make the form appear on the website.
This is how your form should look like if you preview it:
Assigning Different Categories
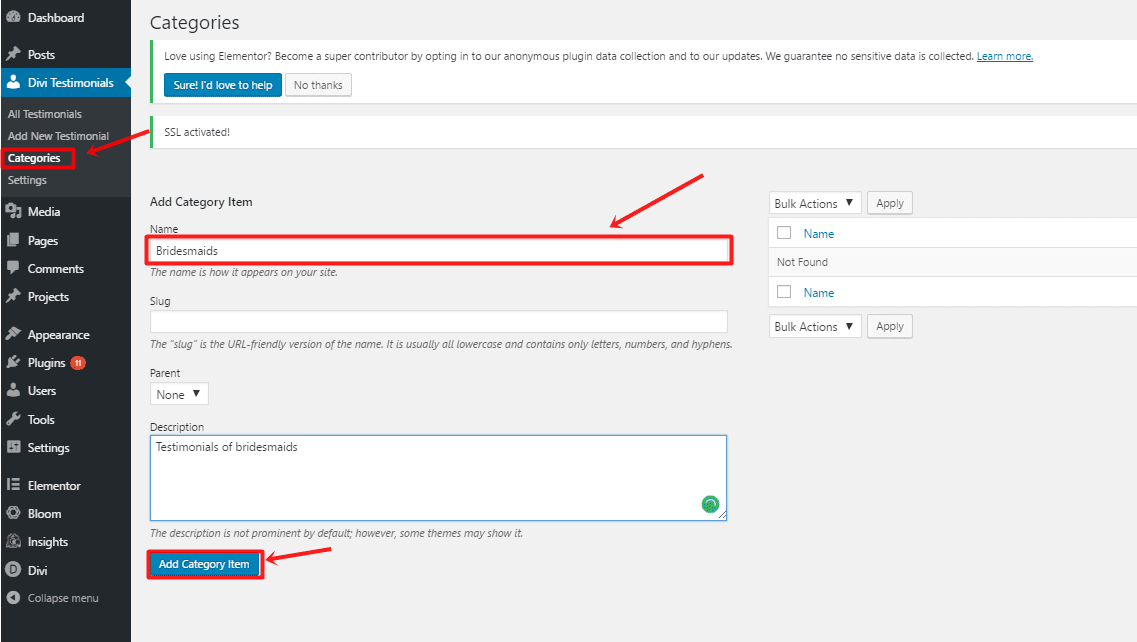
Once you add the testimonials to the list, you can put them in different categories. Just go to the ‘Categories’ section in your Automatic Divi Testimonials plugin. Here, you can make new categories to make everything behind the scenes more organized. You can, for instance, make a separate category for the bridesmaids and groomsmen.
Showcasing the Testimonials on Your Wedding Website
Using the Automatic Testimonials Module
On the first sight, the Automatic Testimonials Module looks the same as every other module in the list. Create a new section, add a fullwidth row and place the Automatic Testimonials Module in it. If you have already collected testimonials, these will show up on your website automatically.

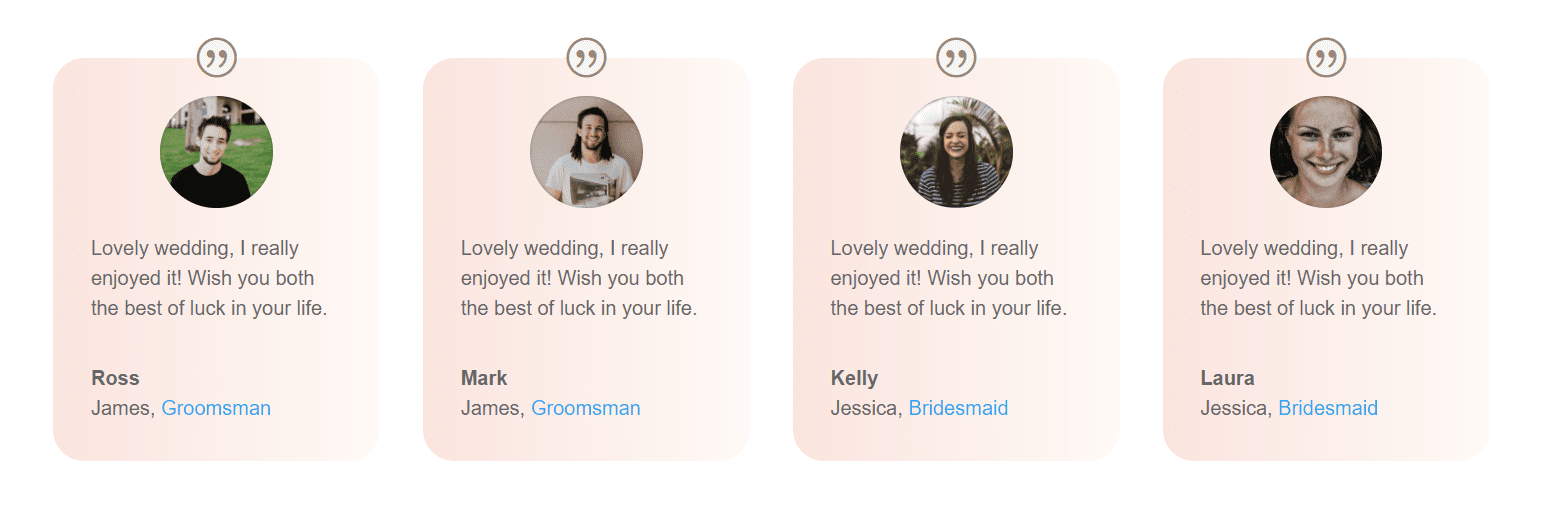
And, of course, you can adjust the style accordingly. In this example, we’re going to make your testimonials look like the image shown below. This style will fit with the style of the first three parts of these miniseries.
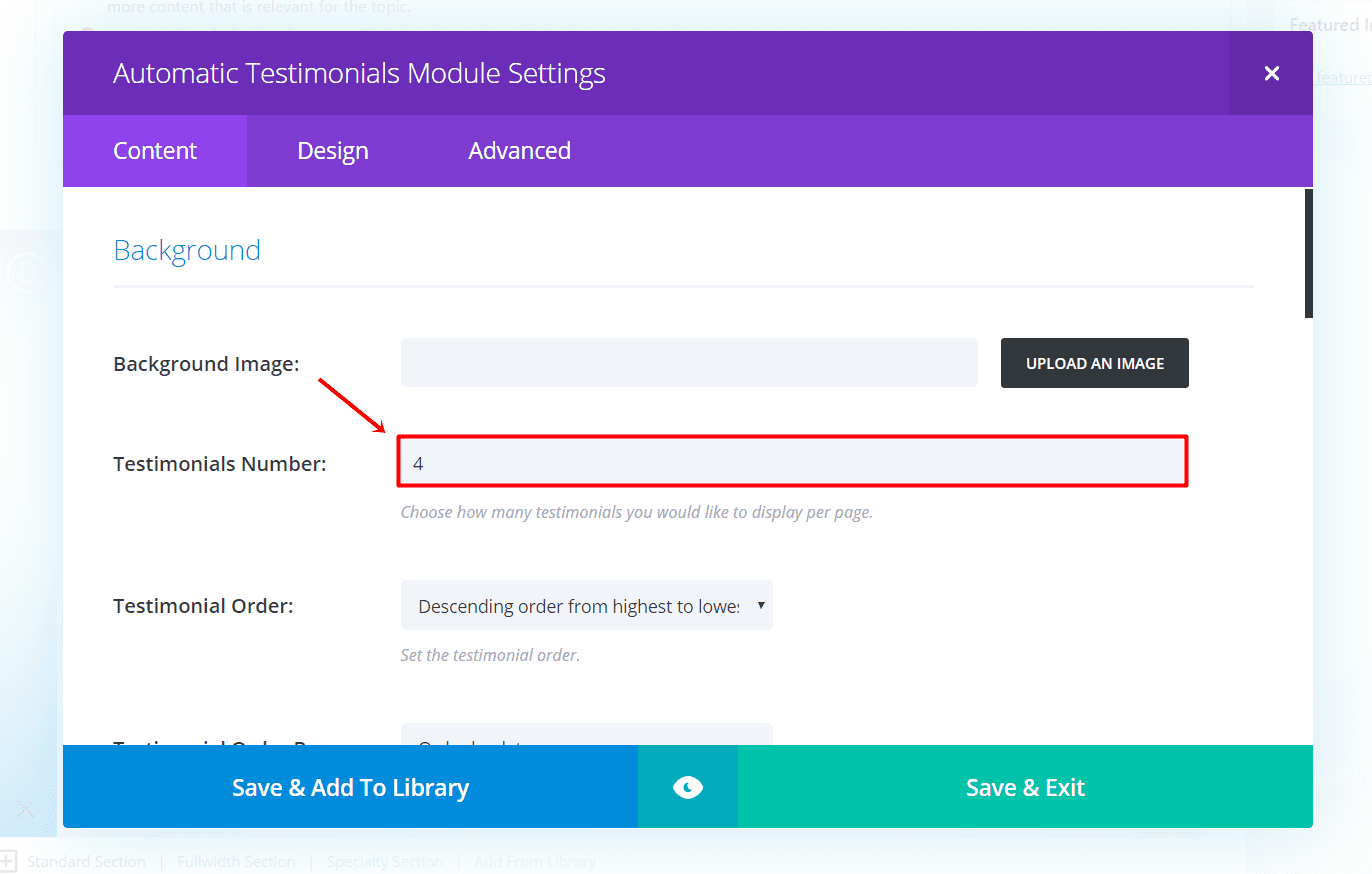
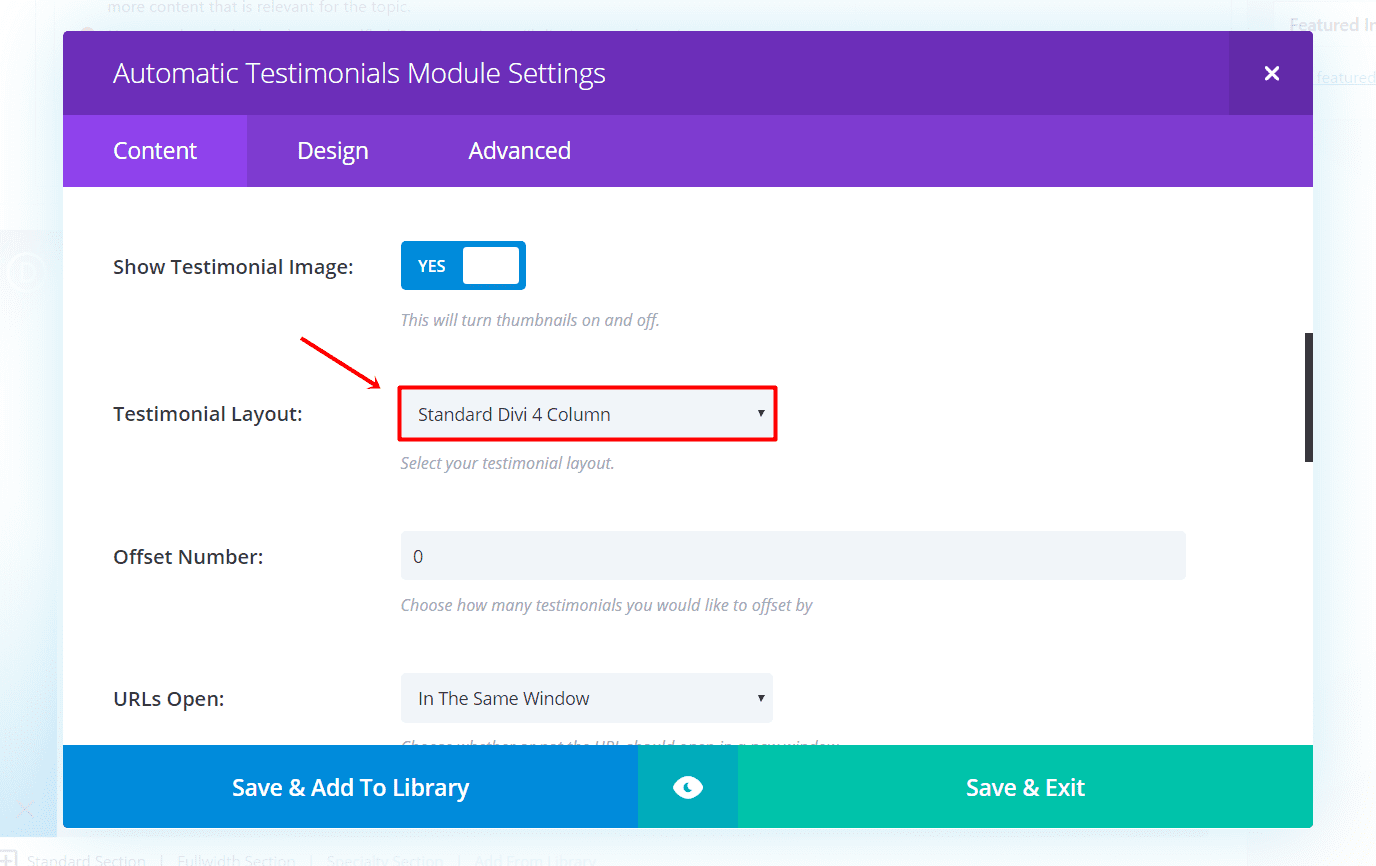
Open the settings of your Automatic Divi Testimonials Module, go to the Background subcategory of the Content tab and choose how many testimonials you’d like to showcase. Within that same tab, choose the ‘Standard Divi 4 Column’ testimonial layout.
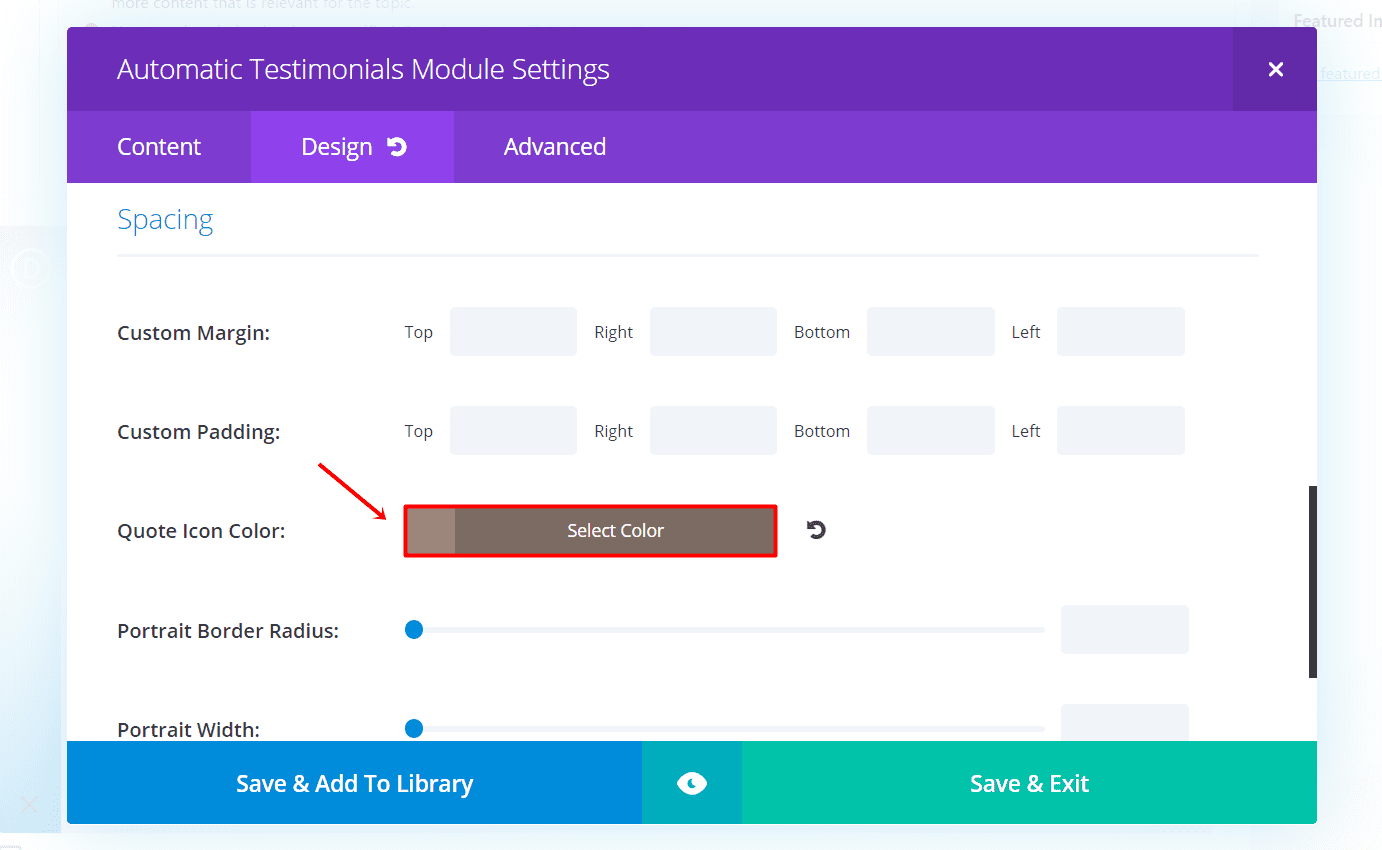
Moving on, go to the Advanced Design Settings tab and change the Quote Icon Color to ‘#9b857b’ within the Spacing subcategory.
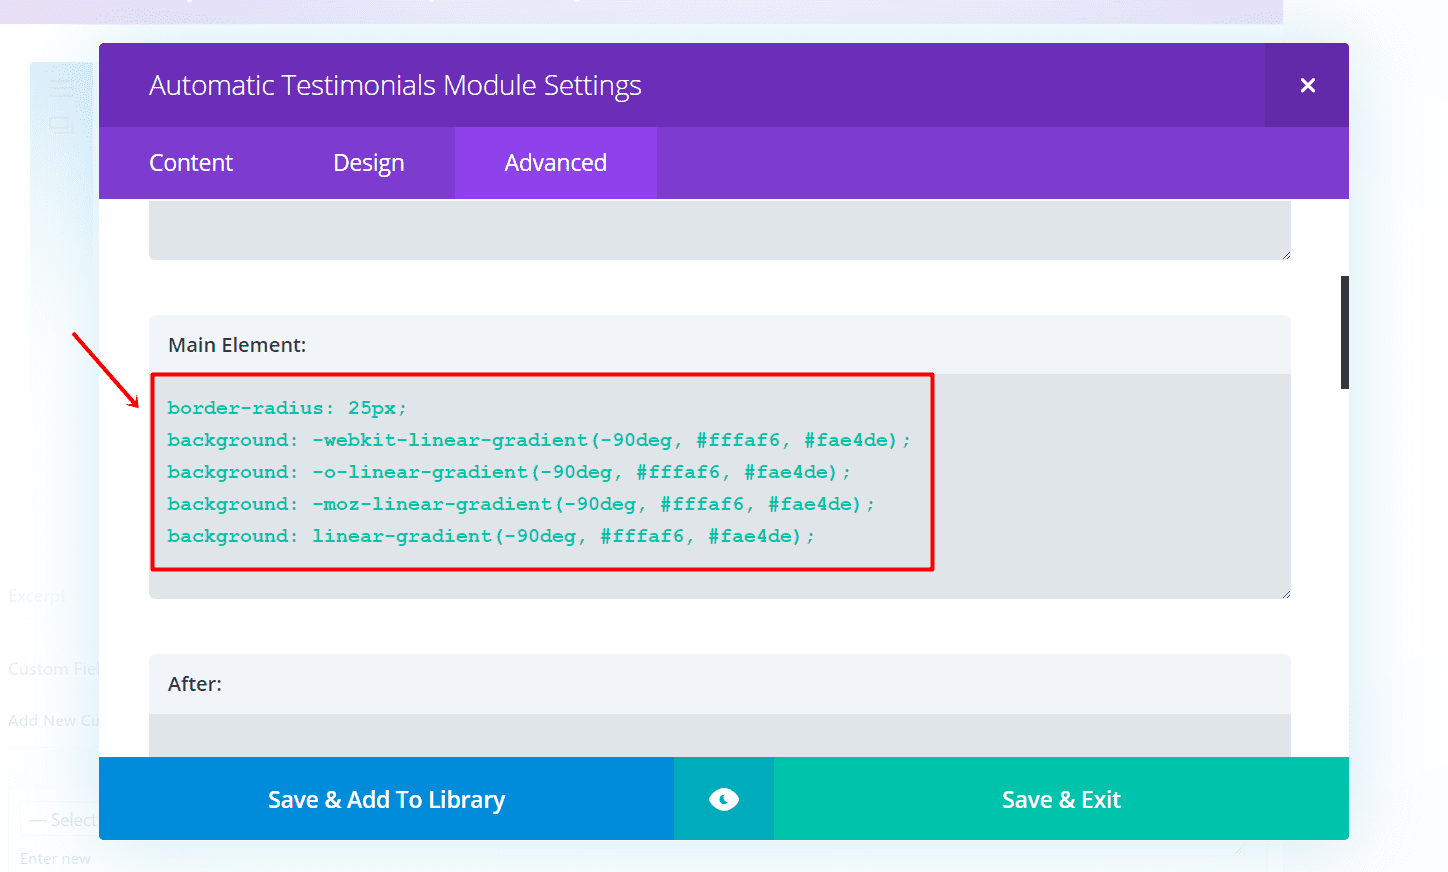
Next, go to the Advanced tab and add the following code to the Main Element within the Custom CSS tab:
border-radius: 25px;
background: -webkit-linear-gradient(-90deg, #fffaf6 , #fae4de );
background: -o-linear-gradient(-90deg, #fffaf6 , #fae4de );
background: -moz-linear-gradient((-90deg, #fffaf6 , #fae4de );
background: linear-gradient((-90deg, #fffaf6 , #fae4de );
And you’re done. The testimonials will now have a gradient background color that matches the other pages on your wedding website.
Next Up
In the last part of this mini-series, we’re going to see how you can create a timeline for your wedding website where you can show the wedding schedule. If you have any questions regarding this tutorial, or if you have any requests for future tutorials; make sure you leave a comment in the comment section of this blog post so we can get back to you with answers!
Be sure to subscribe to our email newsletter and YouTube channel so that you never miss a big announcement, useful tip, or Divi freebie!


Automatic Divi Testimonials from Noou is down
Thank you for such a great breakdown of our plugin! We are looking forward to release our new version which addresses the form fields and adds a new slider.
Hi,
Could you tell me what happens when a new version of the plugin comes available? Do you have to change the labels for the form again?
Thanks,
Ruud.
Talk about timing! Literally working on a wedding site right now! This will be great!!
Great to hear!