
Gradients can do more than add decoration. Used well, they create depth, guide attention, connect brand colors, and make backgrounds, buttons, overlays, and text feel more intentional.
Divi 5 makes gradients easier to create and manage with its new Gradient Editor, Gradient Variables, and Text Effect settings. Gradients now live inside a unified field, open in a cleaner Gradient Picker, and can be saved as reusable variables.
In this post, we’ll walk through what changed, how the new Gradient Picker works, how to create Gradient Variables, and how to use gradient fills, image fills, and text strokes on text elements.
- 1 What Changed With Gradients In Divi 5?
- 2 Understanding The New Gradient Field Type
- 3 Using The New Gradient Picker Panel
- 4 Introducing Gradient Variables
- 5 Using Gradients With Text Effects
- 6 Tips For Better Gradients In Divi 5
- 7 Download And Install The Example Layout
- 8 Download For Free
- 9 Build Better Gradients In Divi 5
What Changed With Gradients In Divi 5?
Divi 5’s gradient update focuses on three connected improvements.
- Unified Gradient Field: Gradient settings are stored together as one complete design value, making gradients easier to copy, paste, extend, inspect, and replace.
- Gradient Picker Panel: Gradient controls now live in a single panel with a live preview, color stops, gradient type, direction, position, and variable access.
- Gradient Variables: Gradients can be saved in the Variable Manager and reused across your site.
- Text Effects: Text option groups now support gradient fills, image fills, and text strokes.
Together, these updates turn gradients into reusable design-system values instead of one-off background styles.
Understanding The New Gradient Field Type
Divi 5 introduces a unified Gradient Field Type that keeps all gradient-related settings together in one field.
Instead of treating color stops, direction, gradient type, position, and other settings as separate pieces, Divi handles the full gradient as one attribute. That makes gradients easier to move between elements and easier to manage across a design.
Why The Unified Gradient Field Matters
Because the full gradient is stored as one field, it works better with Divi 5’s broader design tools.
Copy And Paste: Copy a complete gradient from one element and paste it onto another with Divi 5’s Attribute Management system.
Extend Attributes: Apply the same gradient to matching modules, rows, columns, sections, or larger areas of a page with Extend Attributes.
Inspector: Review and adjust gradient values through the Divi 5 Inspector.
Find And Replace: Replace one gradient with another using Divi’s Find And Replace workflow.
This is especially useful when a gradient appears in more than one place. A hero background, card overlay, button style, or text effect can be copied, extended, replaced, or saved without rebuilding the gradient each time.
Using The New Gradient Picker Panel
Divi 5 also introduces a consolidated Gradient Picker Panel. It brings the gradient controls into one focused interface, similar to the way Divi’s color picker centralizes color choices.
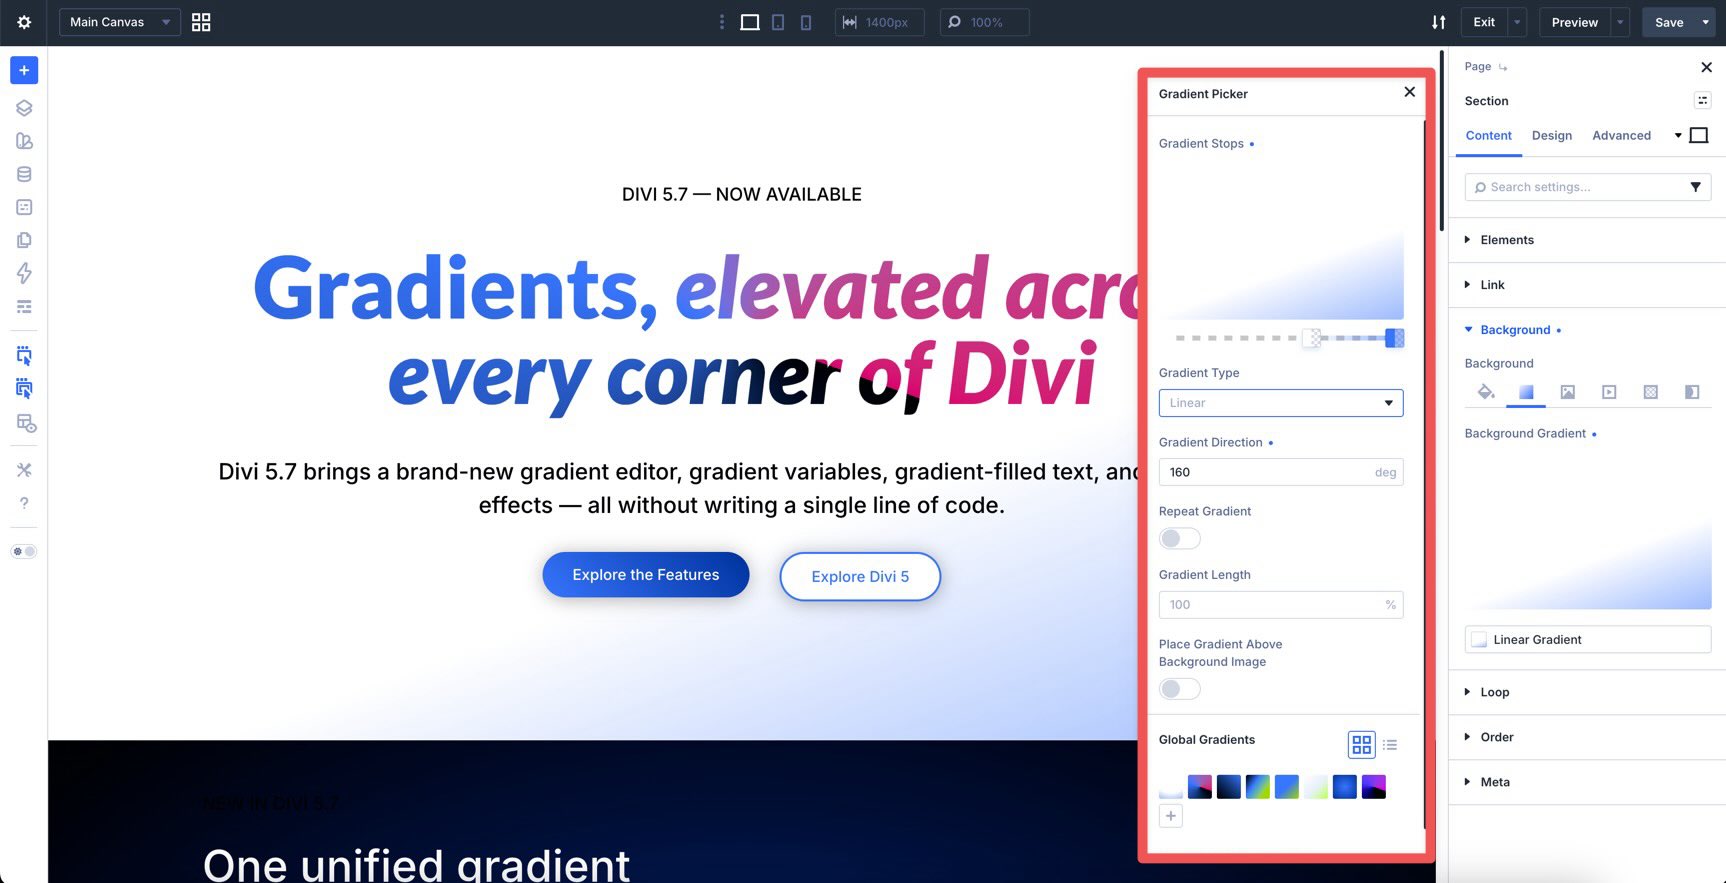
The panel gives you a larger preview and keeps the most important controls close together, so you can create and fine-tune gradients without jumping between separate settings.
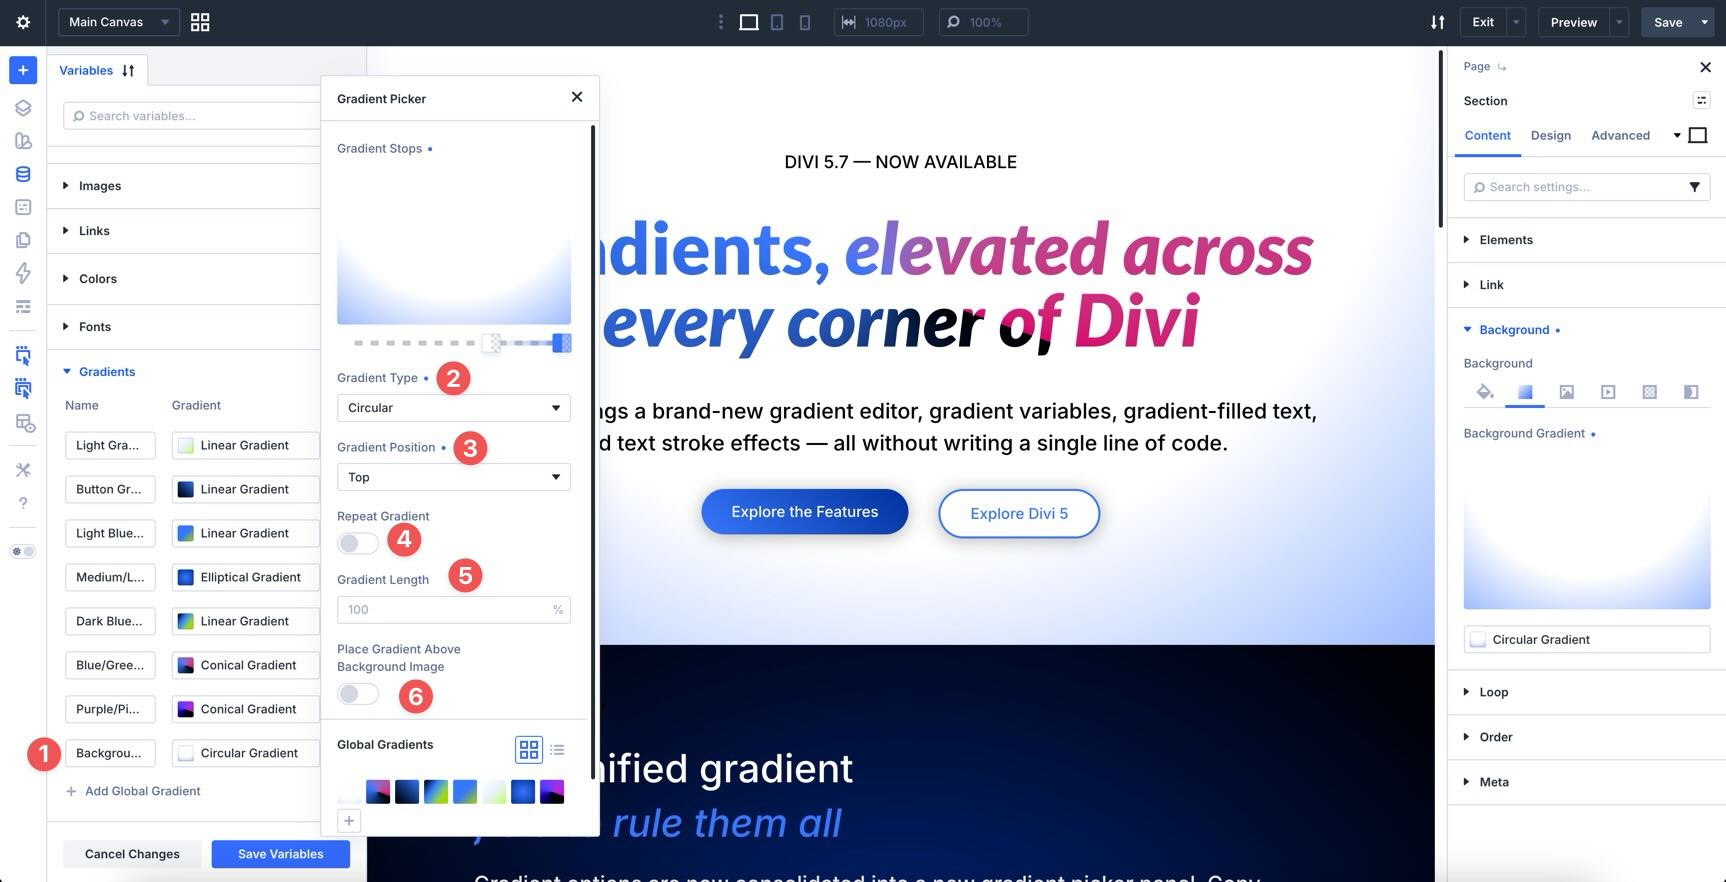
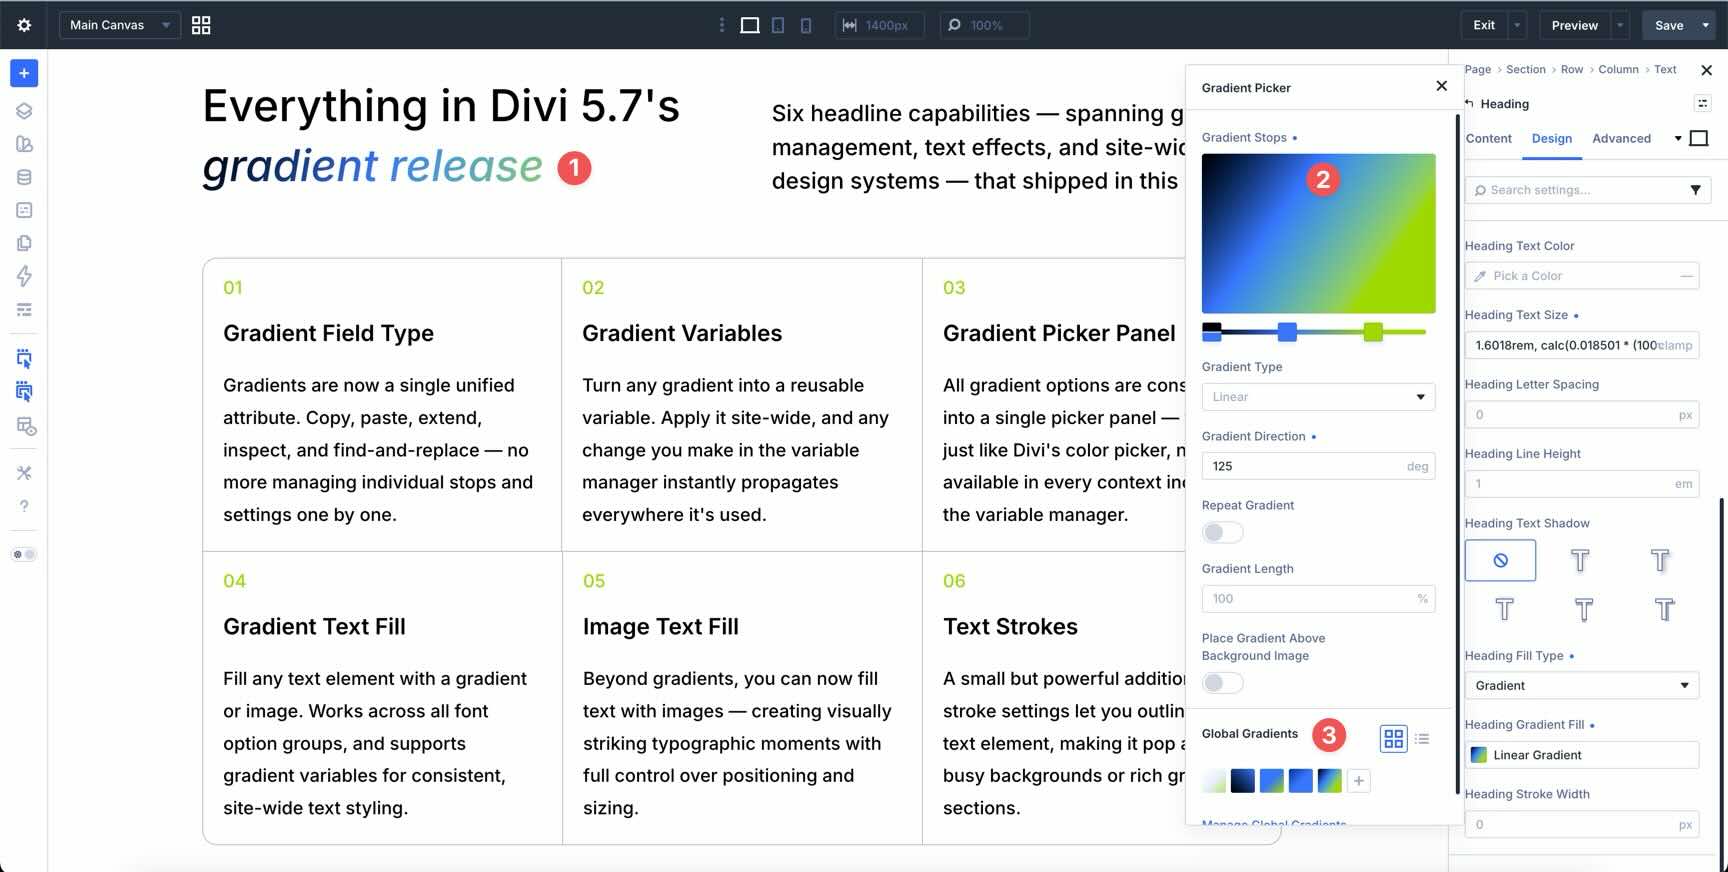
What You Can Control In The Gradient Picker
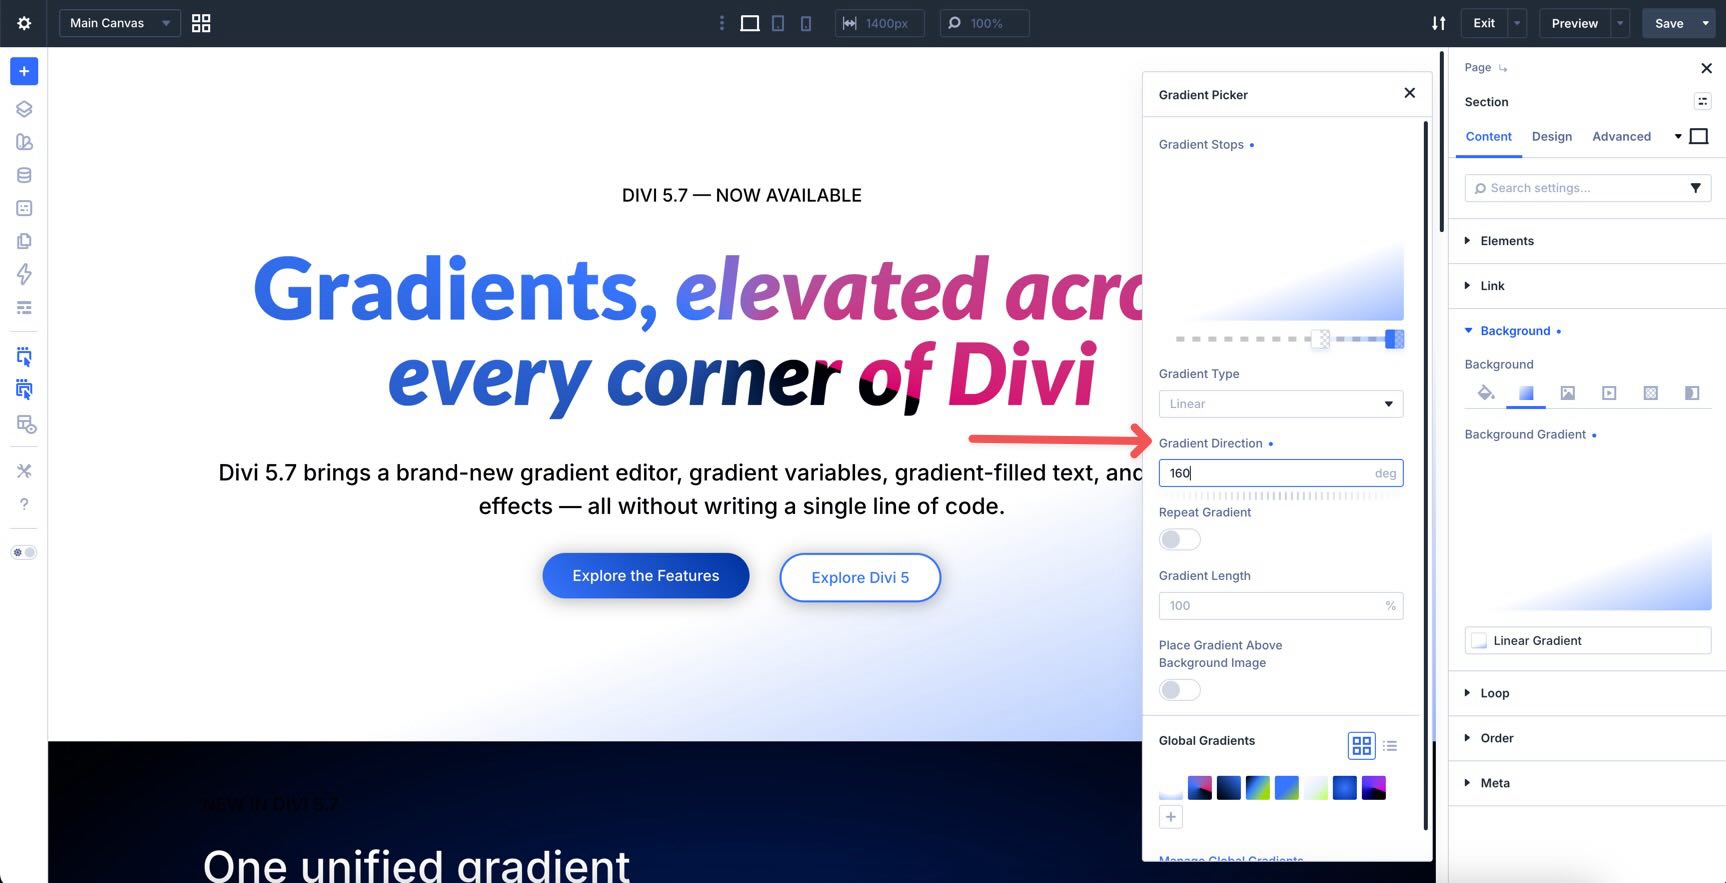
The Gradient Picker includes controls for color stops, gradient type, direction, position, repeat behavior, length, placement, and saved Gradient Variables.
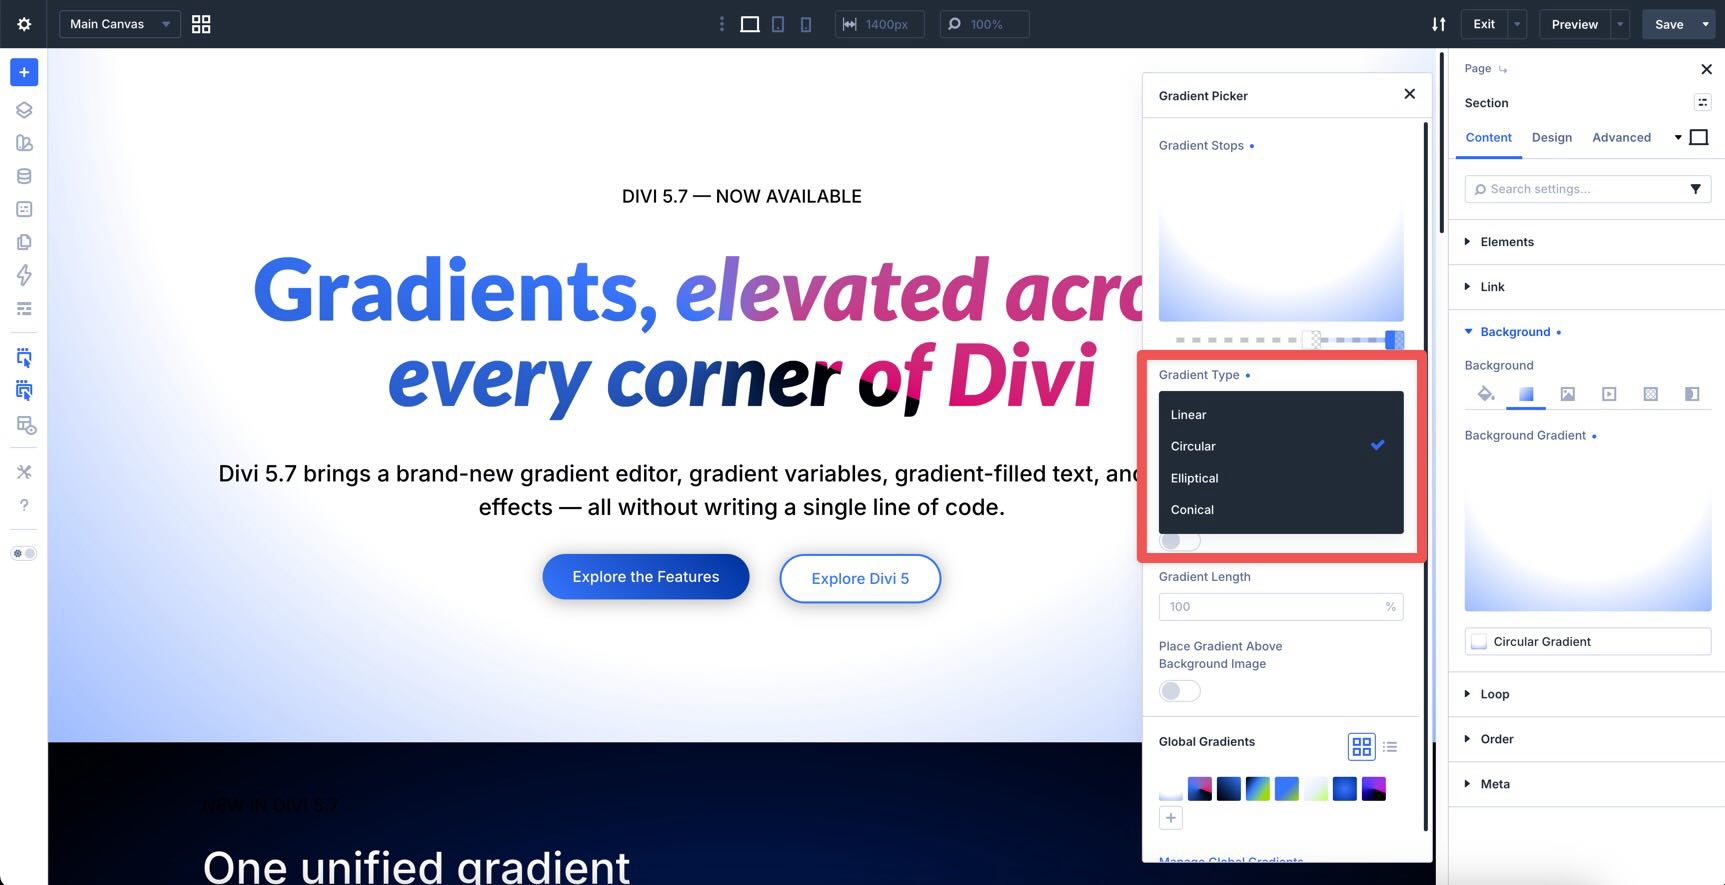
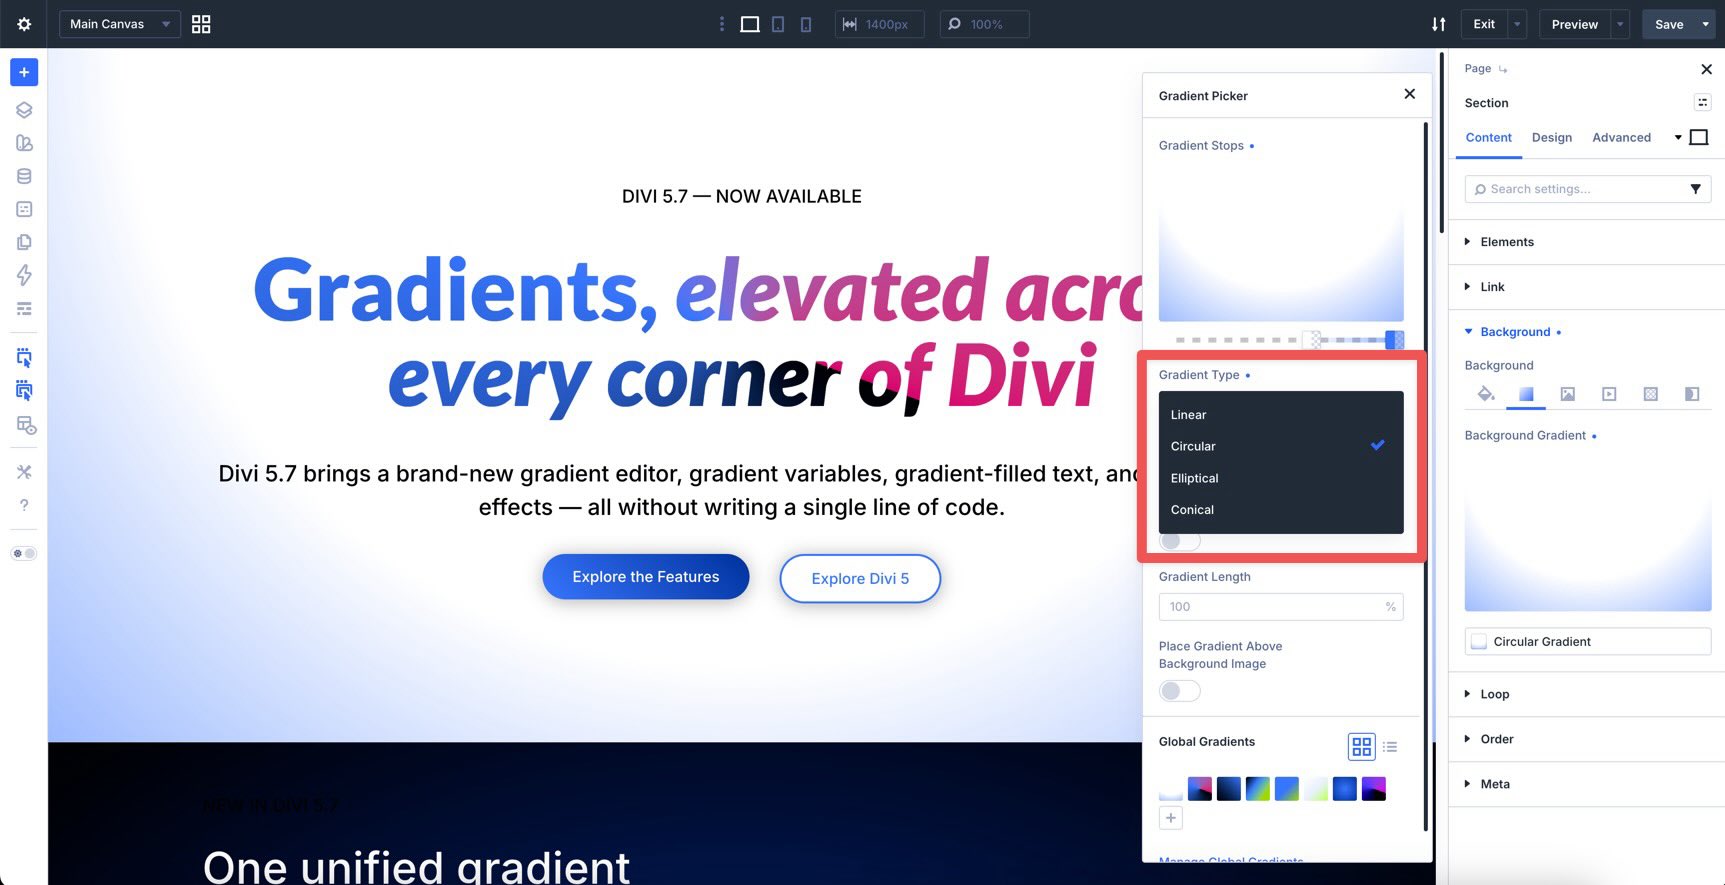
You can choose from these gradient types:
- Linear: A gradient that moves in a straight direction.
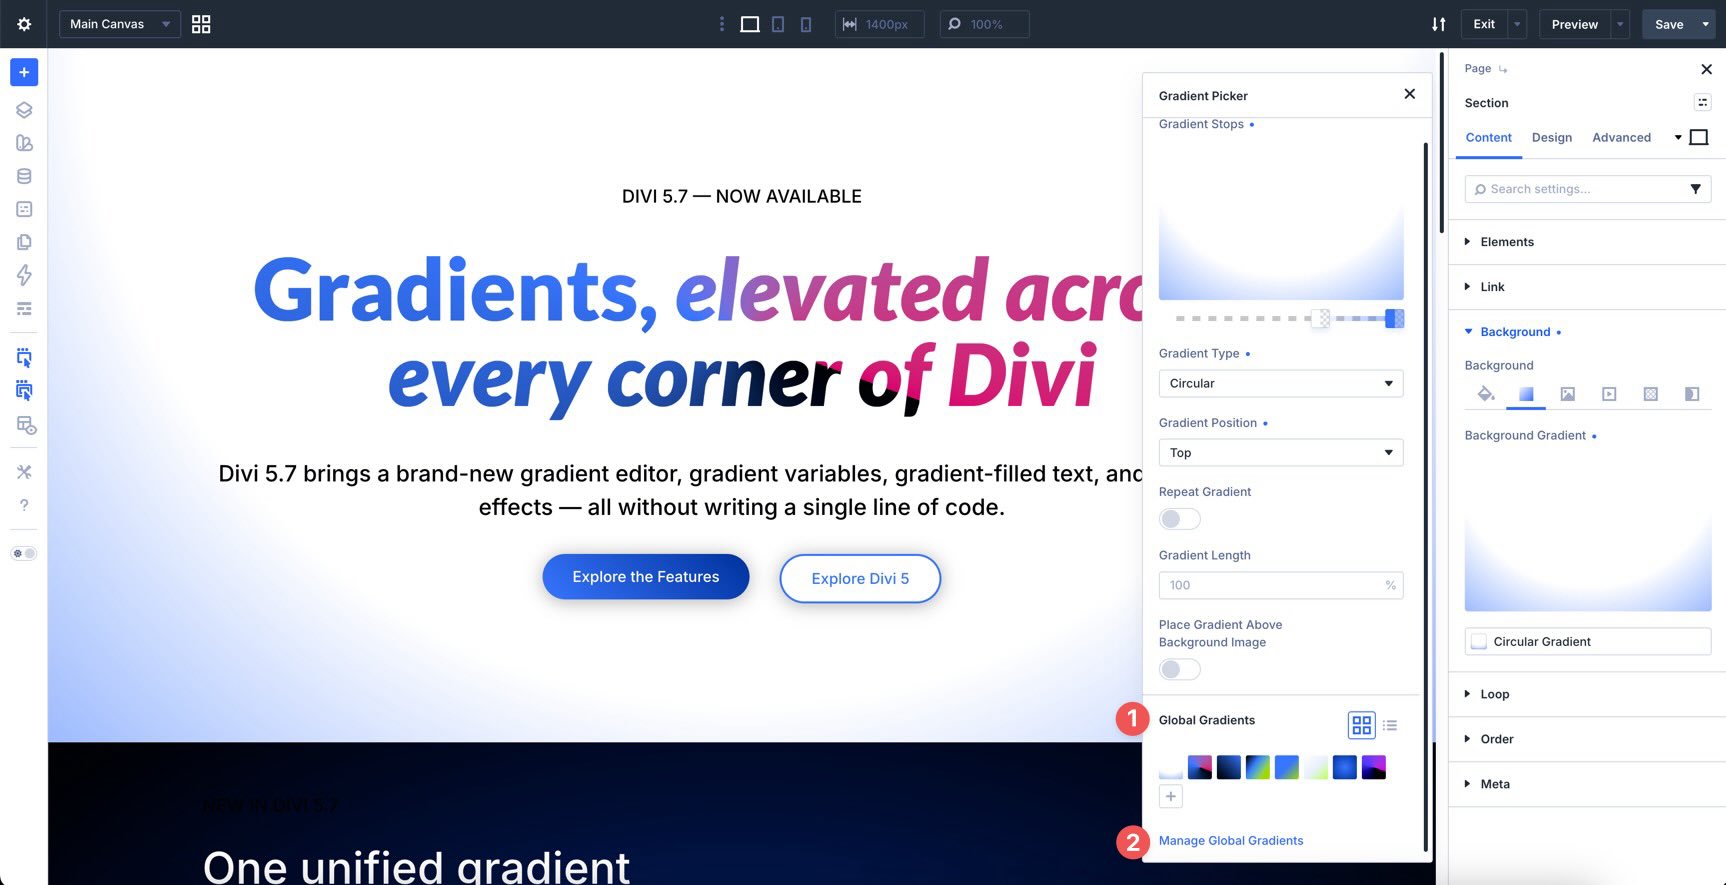
- Circular: A radial gradient that expands evenly from a point.
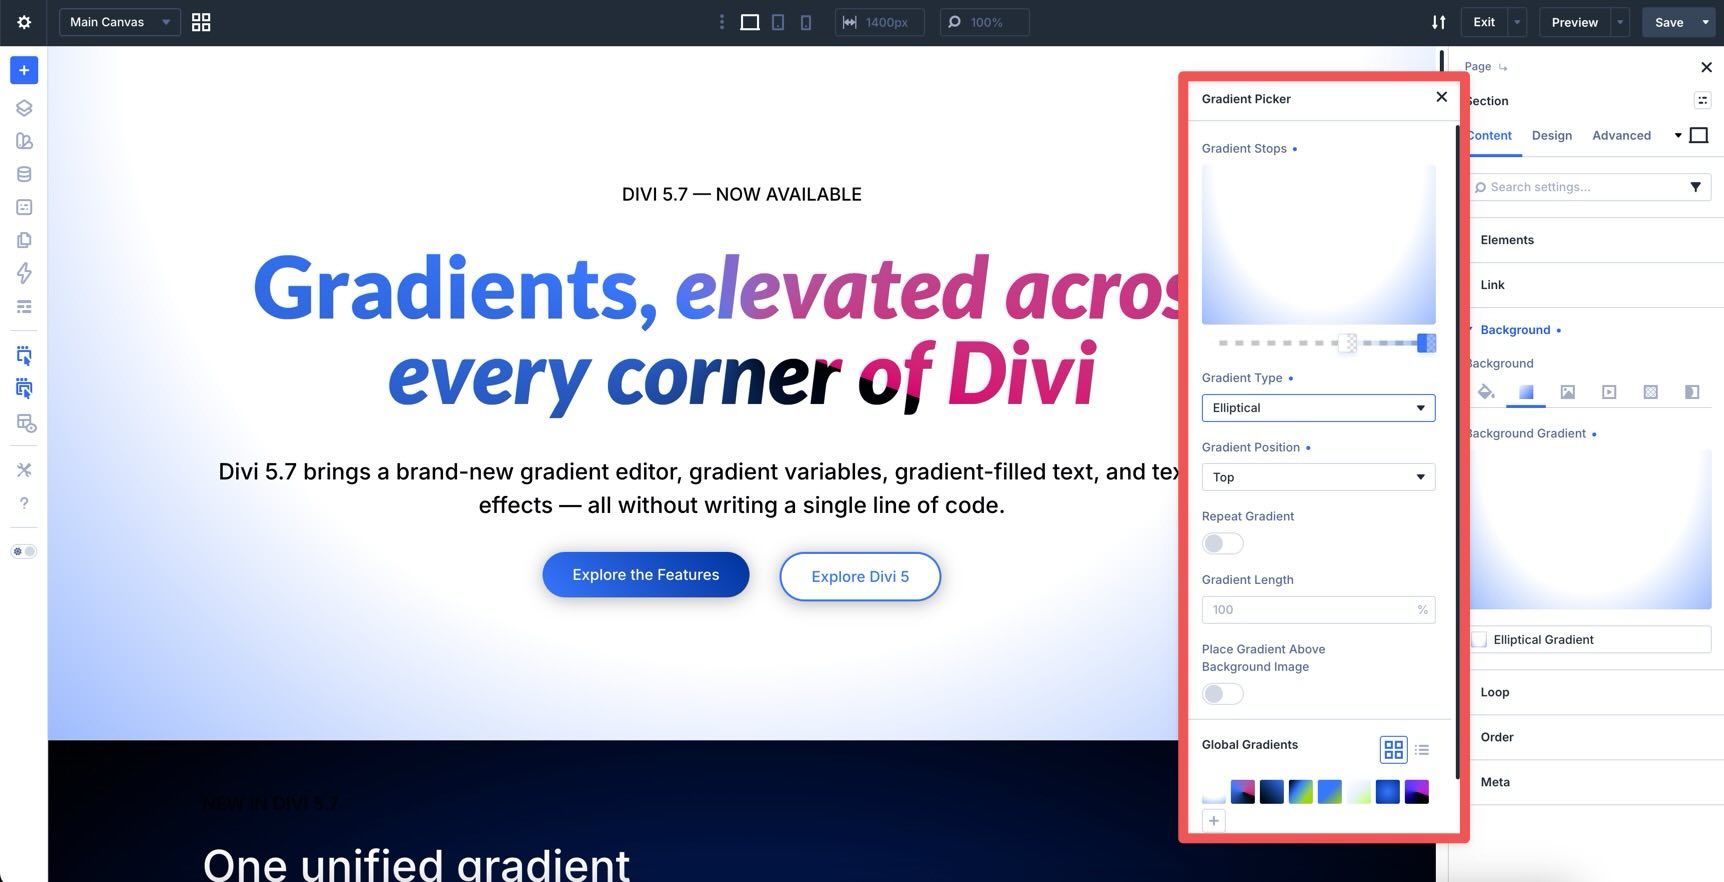
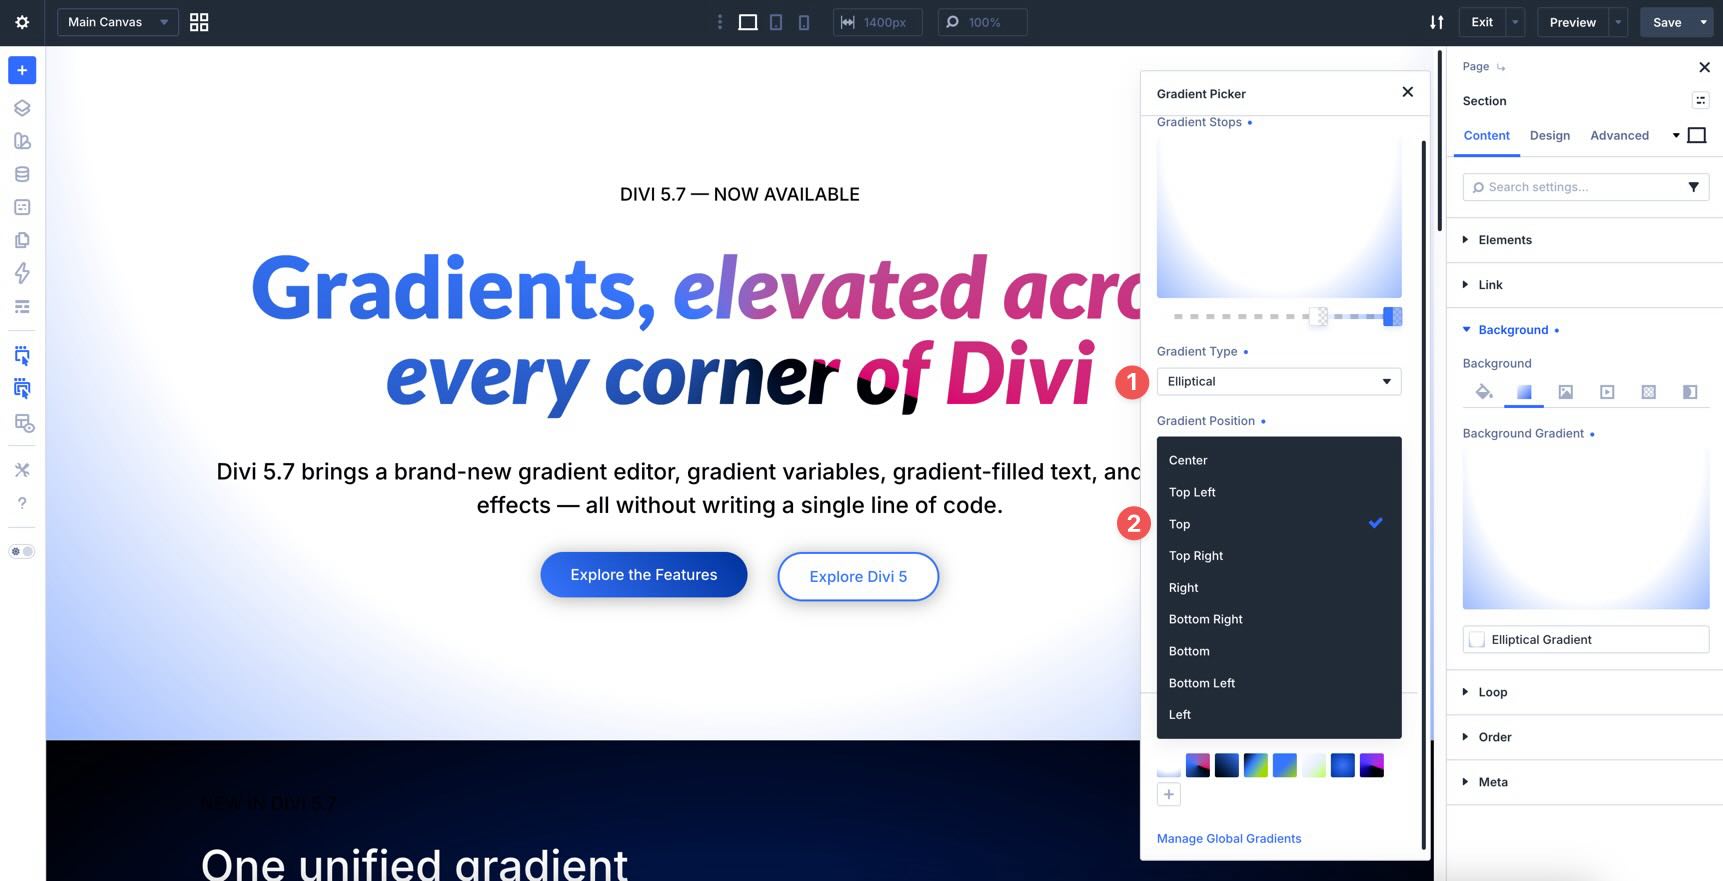
- Elliptical: A radial gradient that expands in an oval shape.
- Conical: A gradient that rotates around a center point.
All gradient types include a direction control in degrees.
Circular and Elliptical gradients also include a position selector, which lets you place the gradient from points such as center, top, bottom, left, or right.
The Gradient Picker also gives you quick access to saved Gradient Variables and a link to manage global variables in the Variable Manager.
As you adjust the gradient, the Canvas updates in real time. That makes it easier to judge color balance, contrast, direction, and placement while you design.
Where To Find The Gradient Picker
You can open the Gradient Picker anywhere Divi 5 supports gradients.
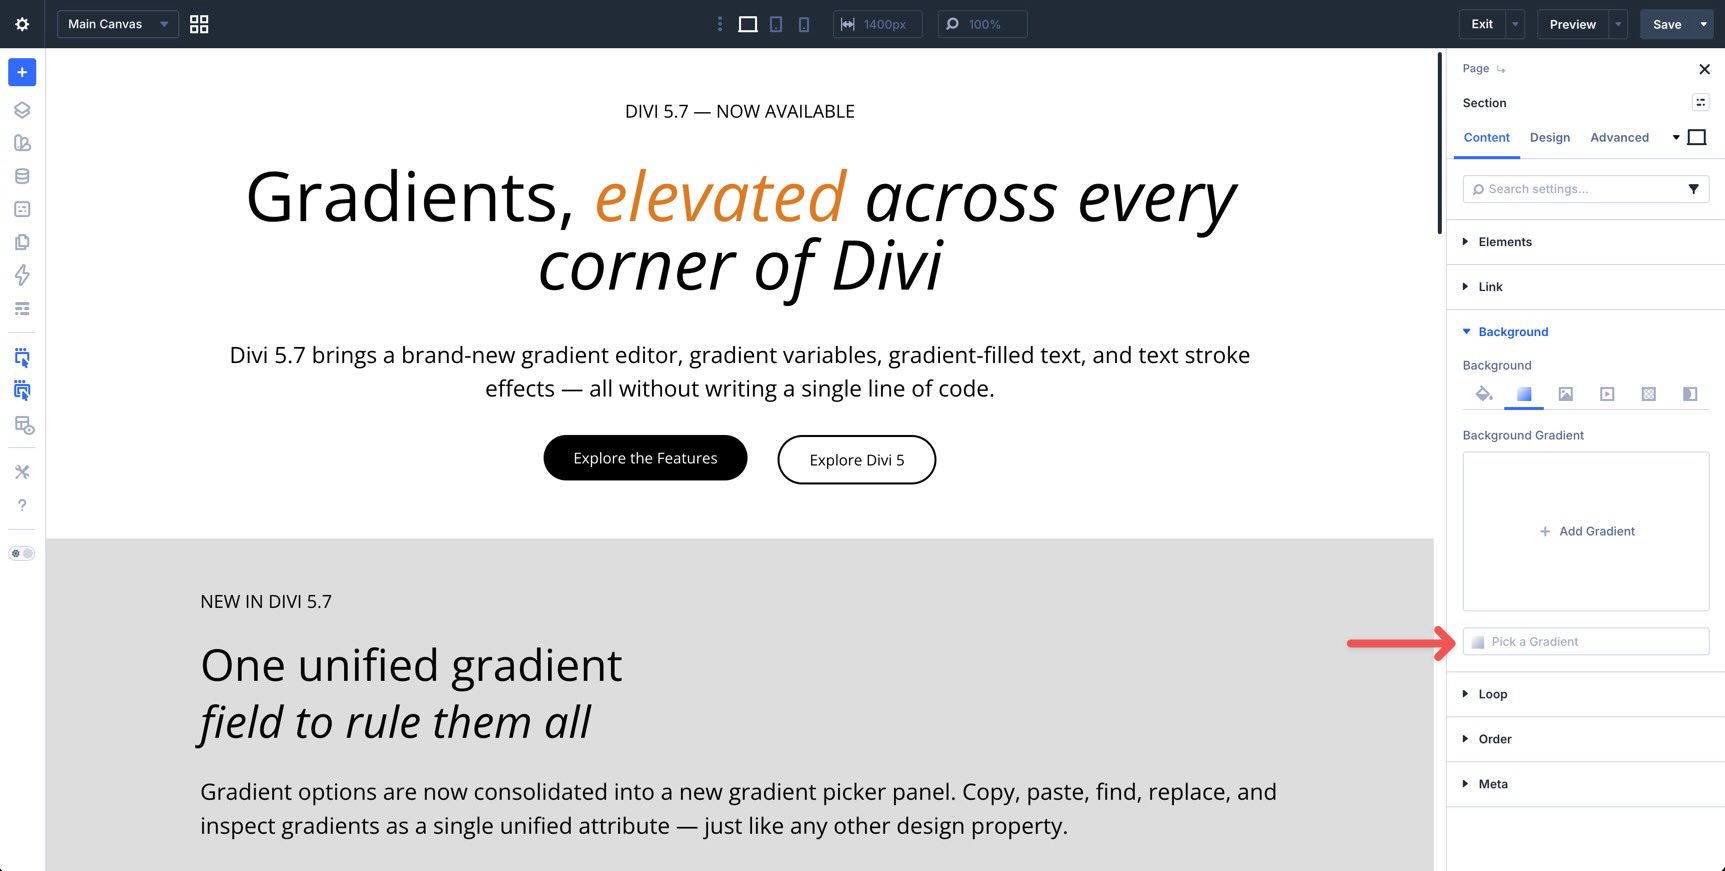
For section, row, column, and module backgrounds, go to the background settings, open the Gradient tab, and click into the gradient field.
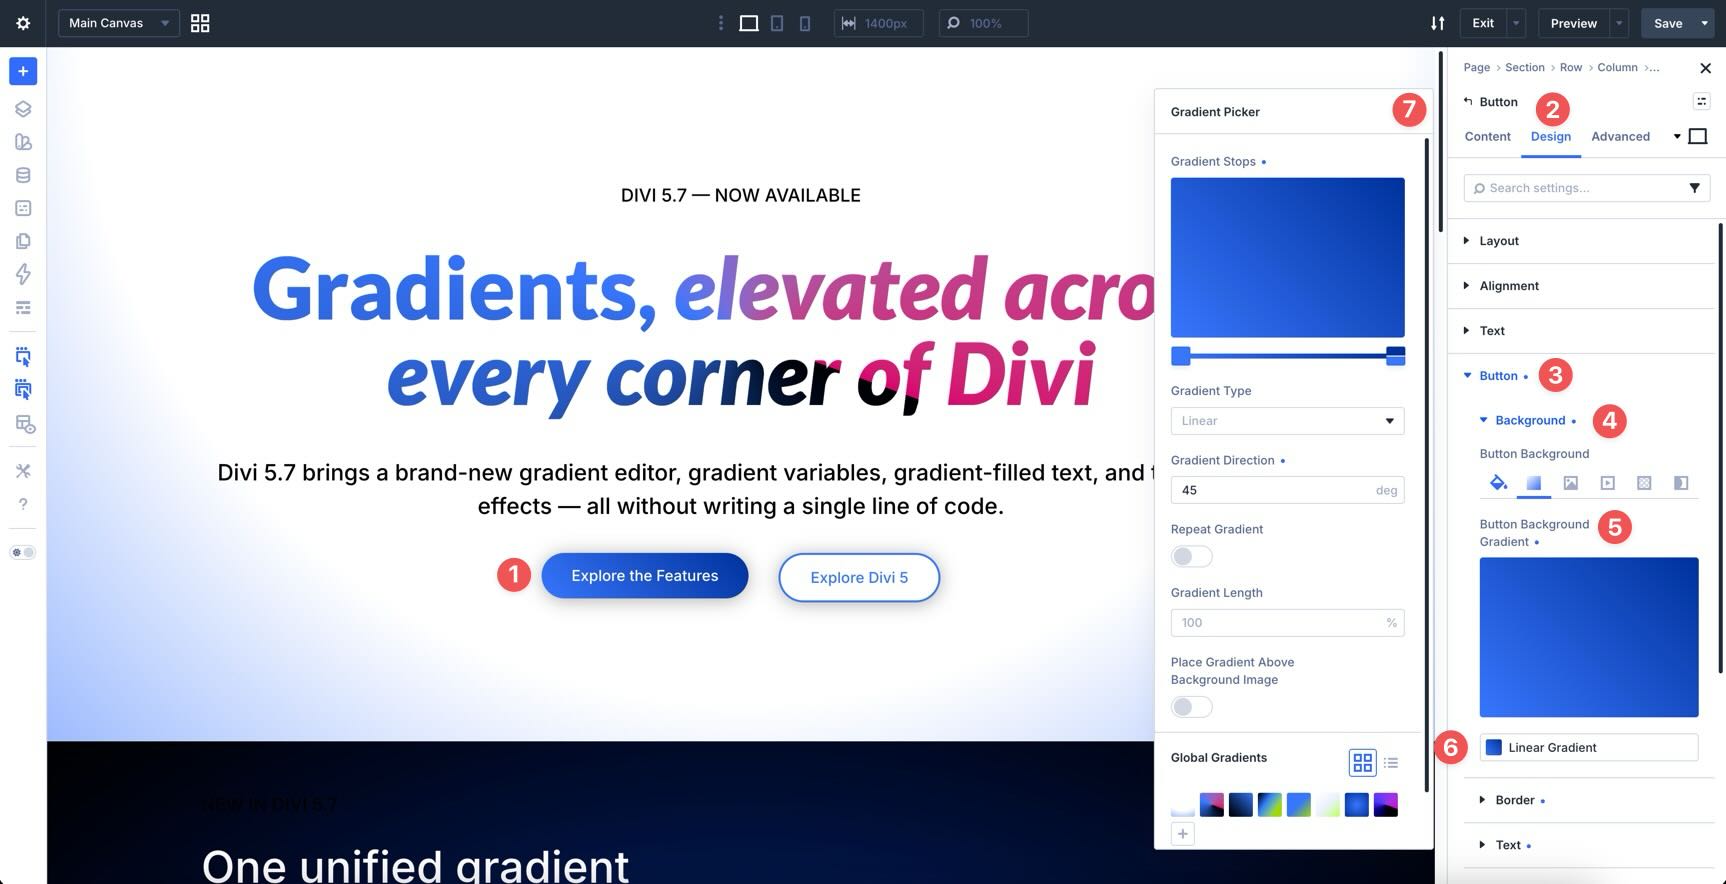
You can also use gradients in module backgrounds, including buttons, Call To Action modules, Blurbs, and other modules that include background controls.
The same picker appears when you create or edit Gradient Variables in the Variable Manager.
Introducing Gradient Variables
Gradient Variables let you save a gradient once and reuse it throughout your site. You can apply a saved gradient variable to backgrounds, buttons, text fills, and other supported gradient fields.
When you update the Gradient Variable later, elements using that variable can follow the change. That makes gradients easier to maintain across a full design system.
How Gradient Variables Work
Gradient Variables live in Divi 5’s Variable Manager alongside other Design Variables. They give gradients the same reusable structure as colors, fonts, images, links, and other saved design values.
Once a Gradient Variable is created, it appears inside the Gradient Picker for quick access.
If you update the variable, the places that reference that variable can update too.
The key is that the element needs to use the Gradient Variable, not a copied static gradient value. Variables only keep designs connected when they are actually referenced.
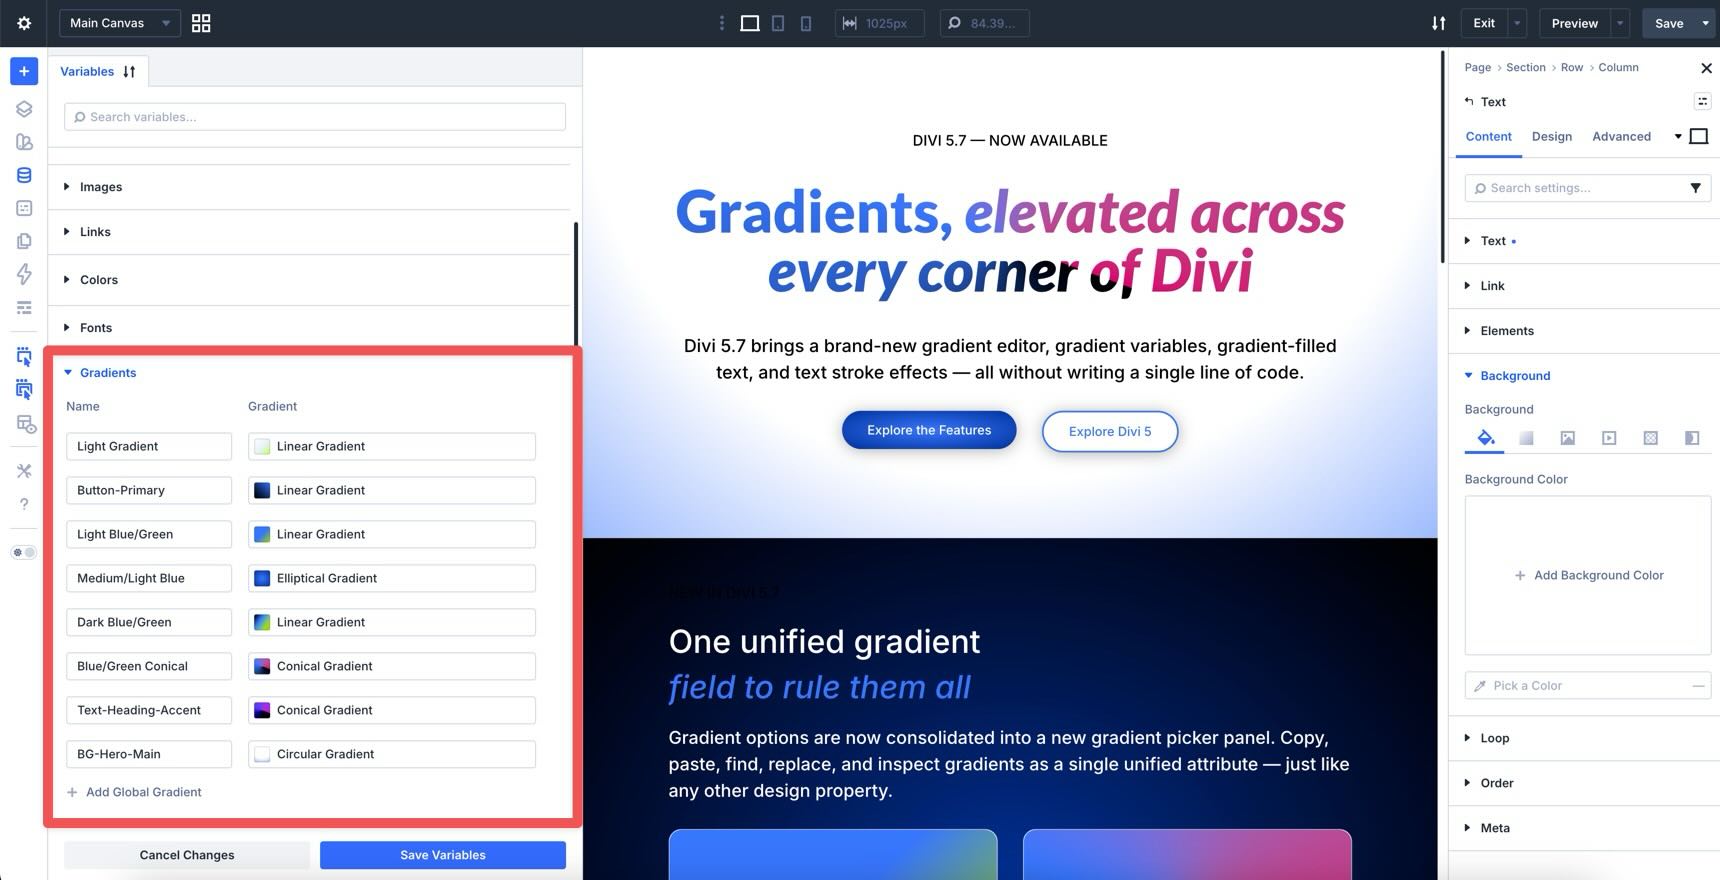
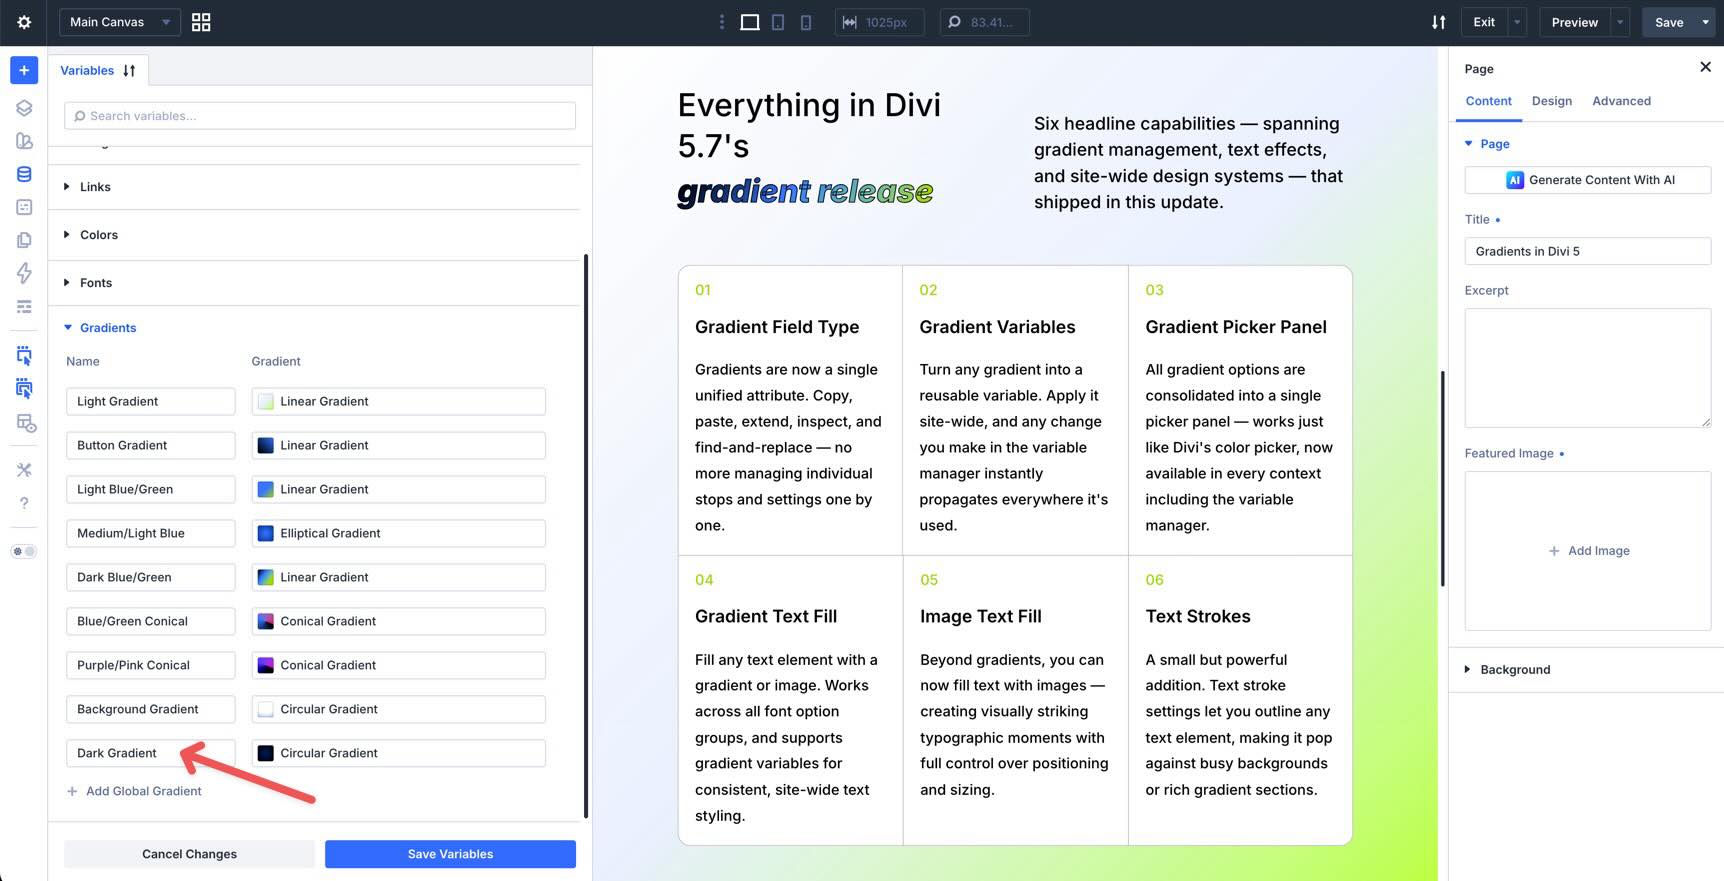
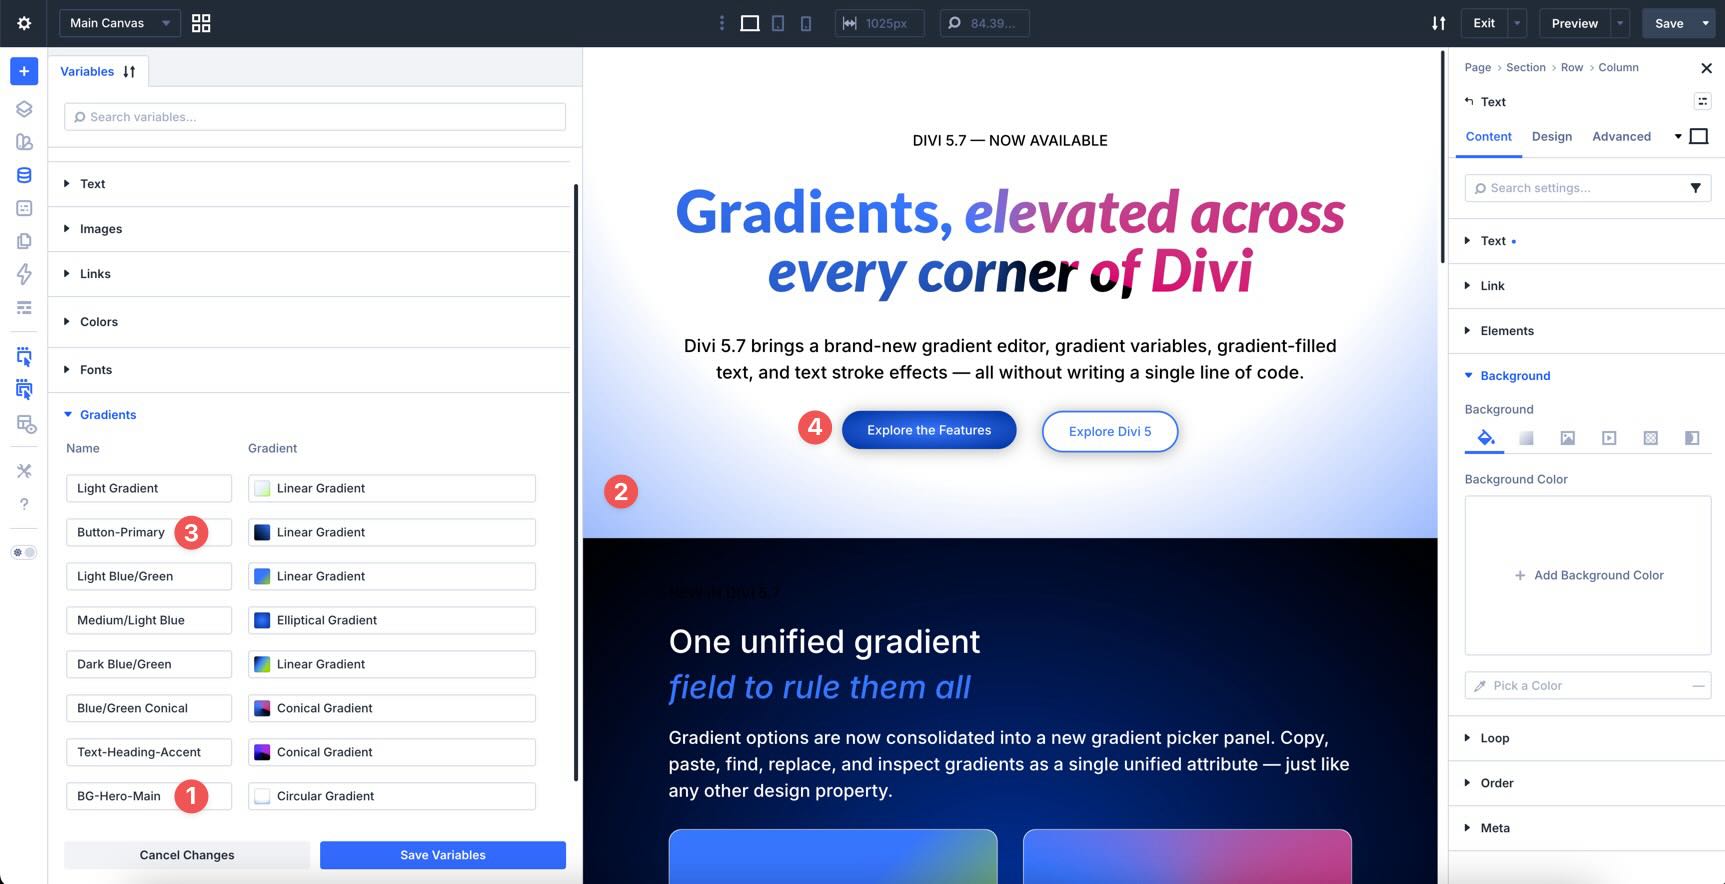
Create And Manage Gradient Variables
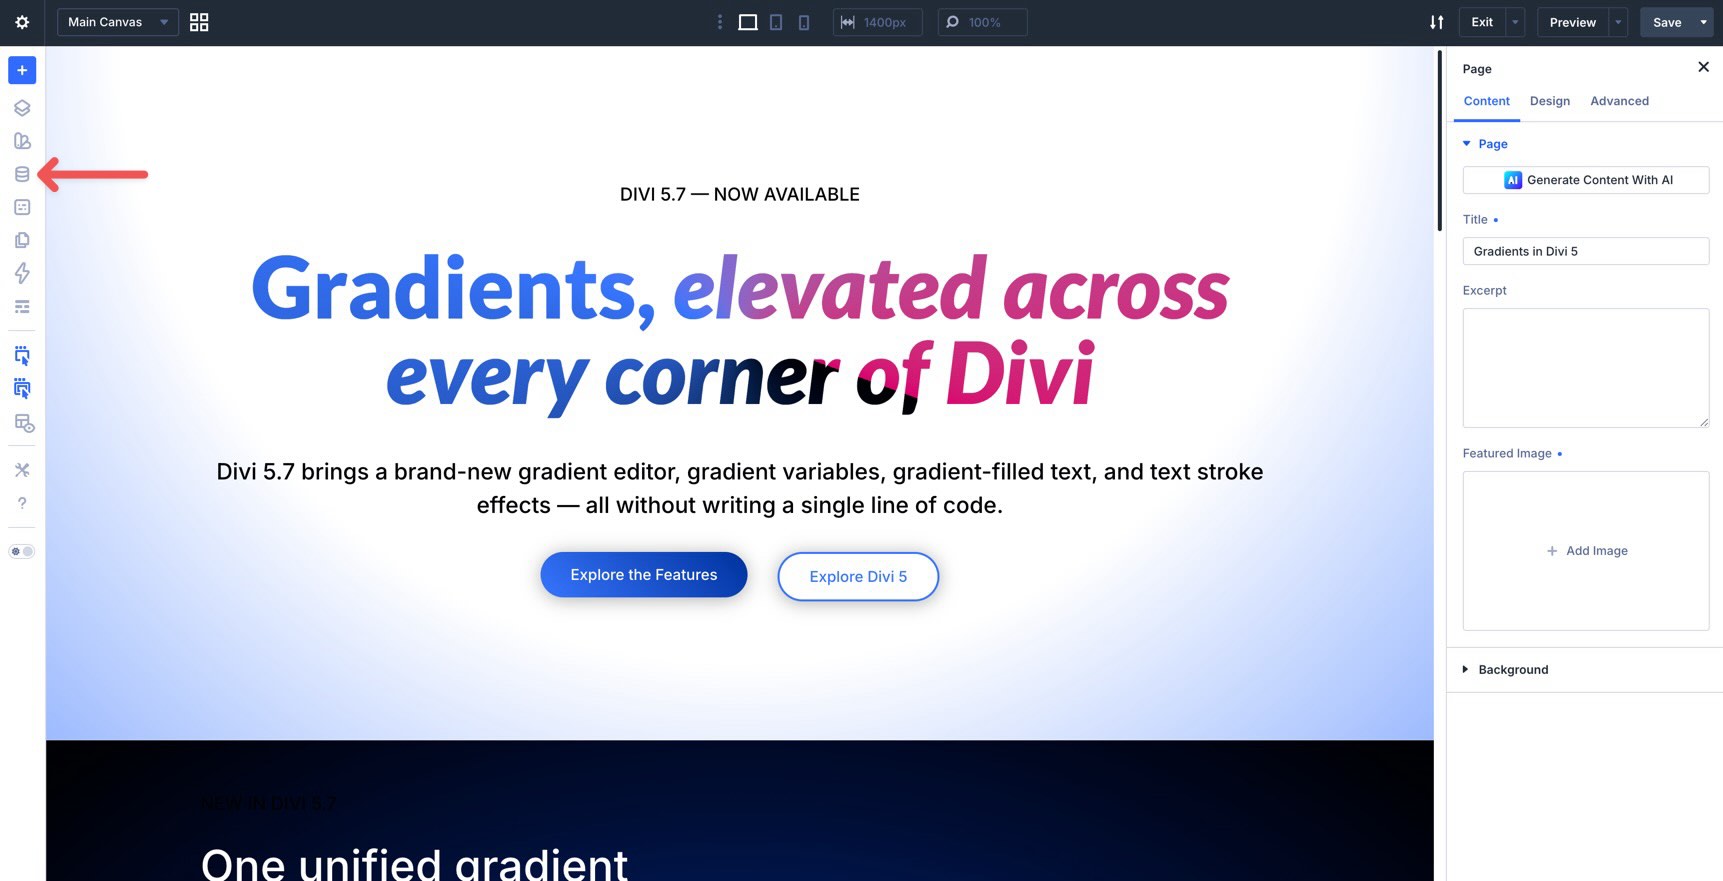
Open the Variable Manager in the Visual Builder.
Expand the Gradient group to view existing Gradient Variables or create a new one.
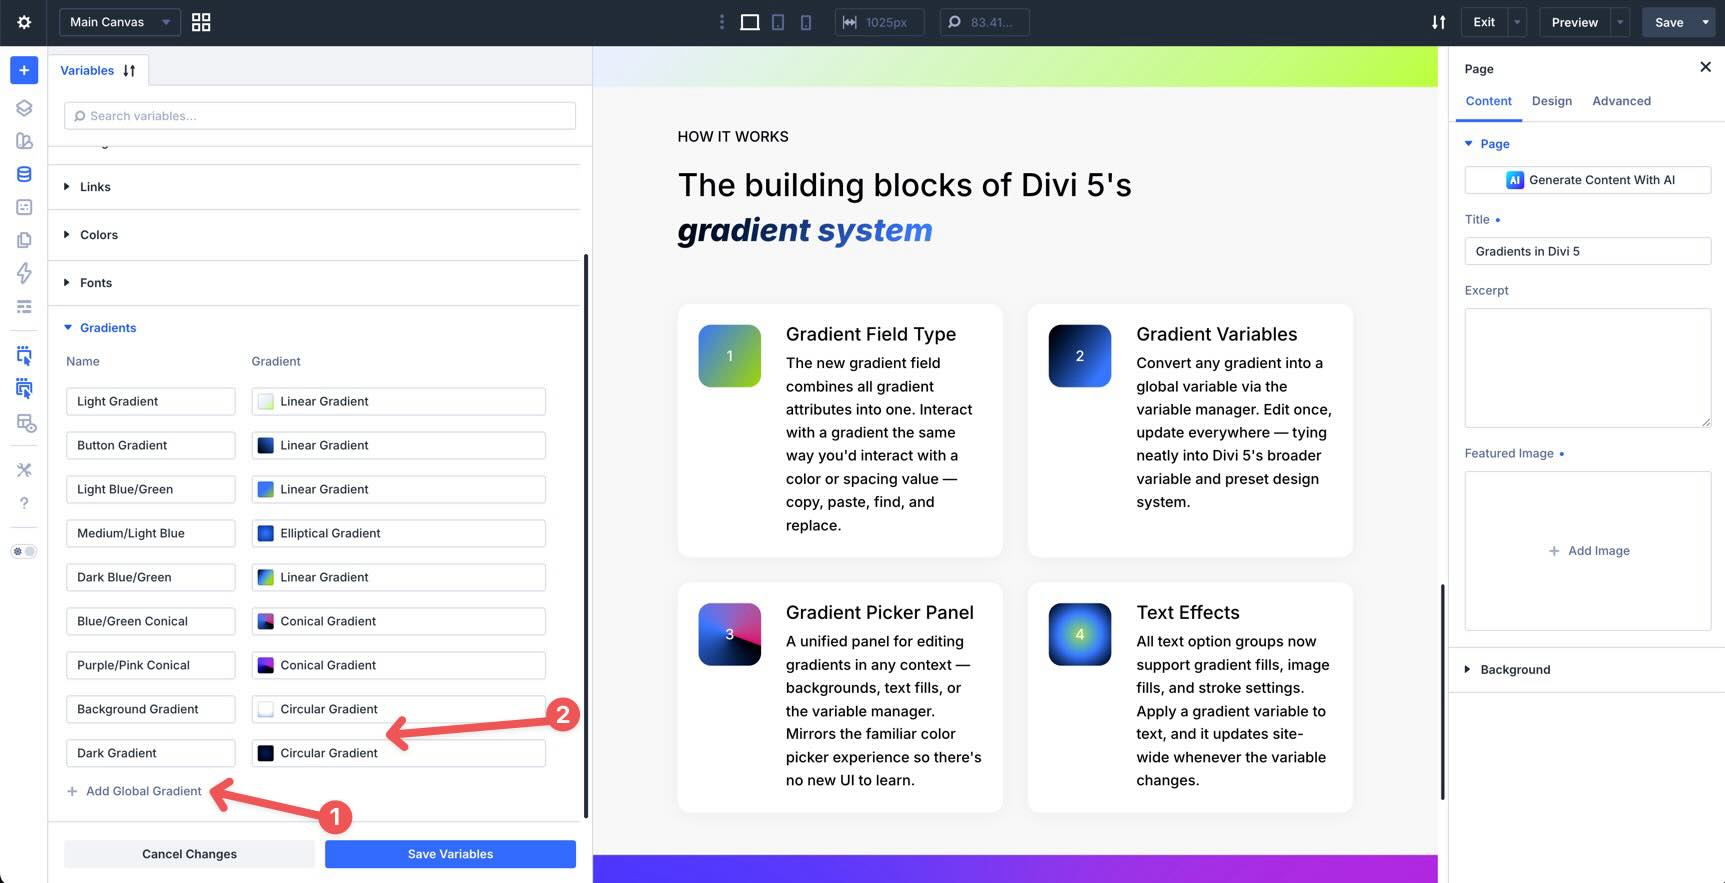
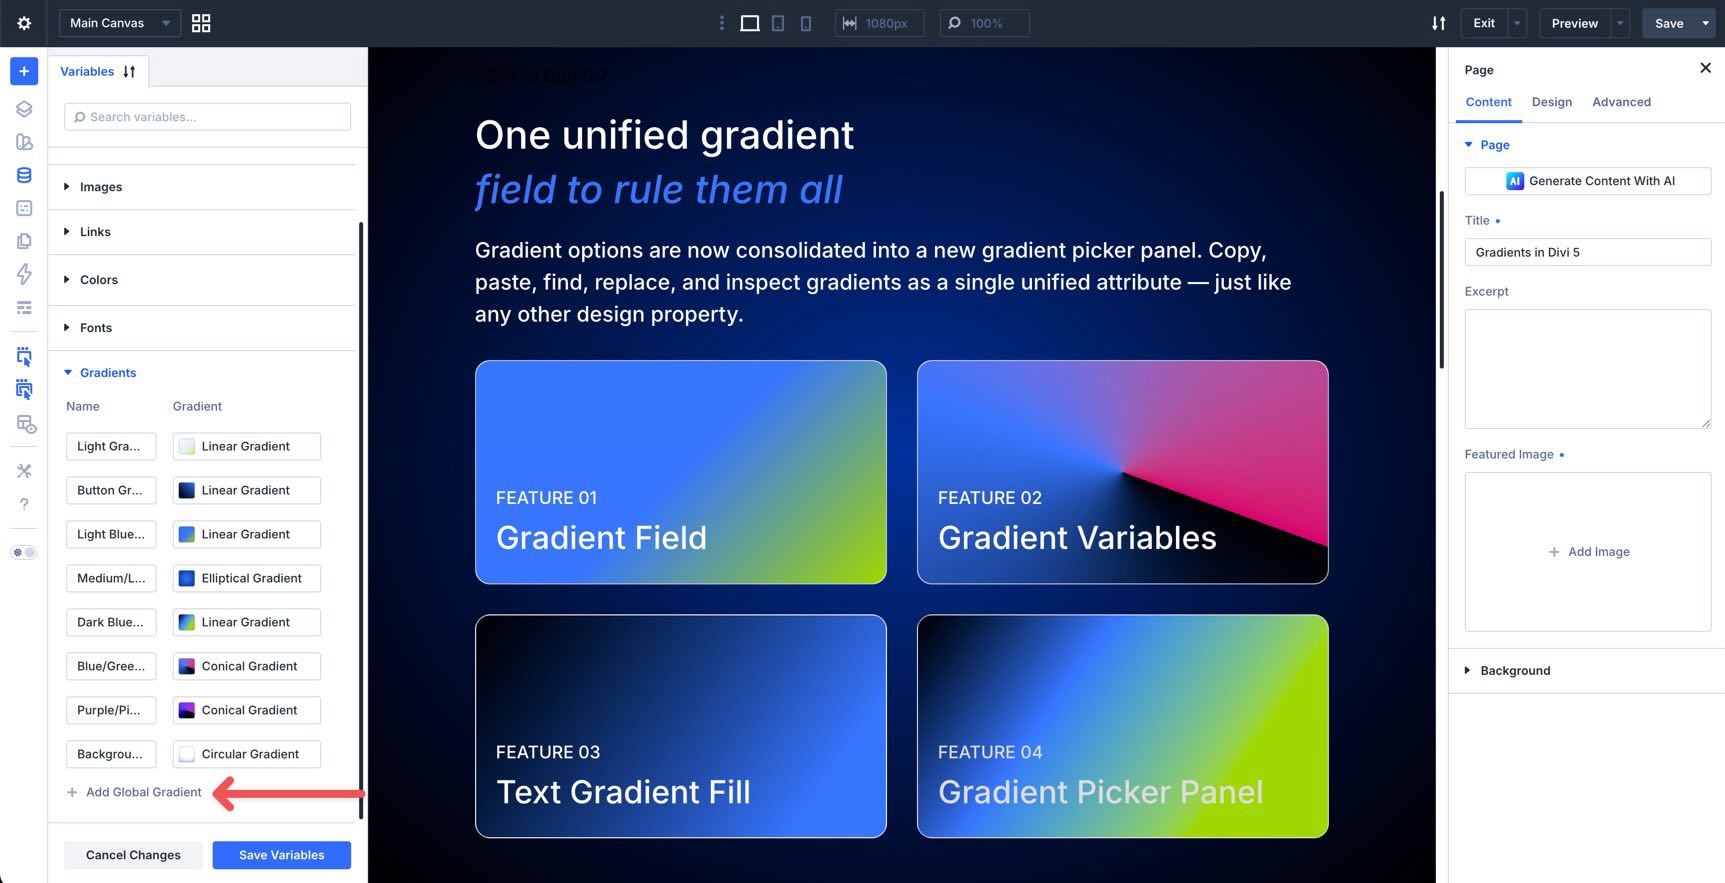
Click + Add Global Gradient.
Give the variable a clear name. Use names that describe the role of the gradient, not only its colors.
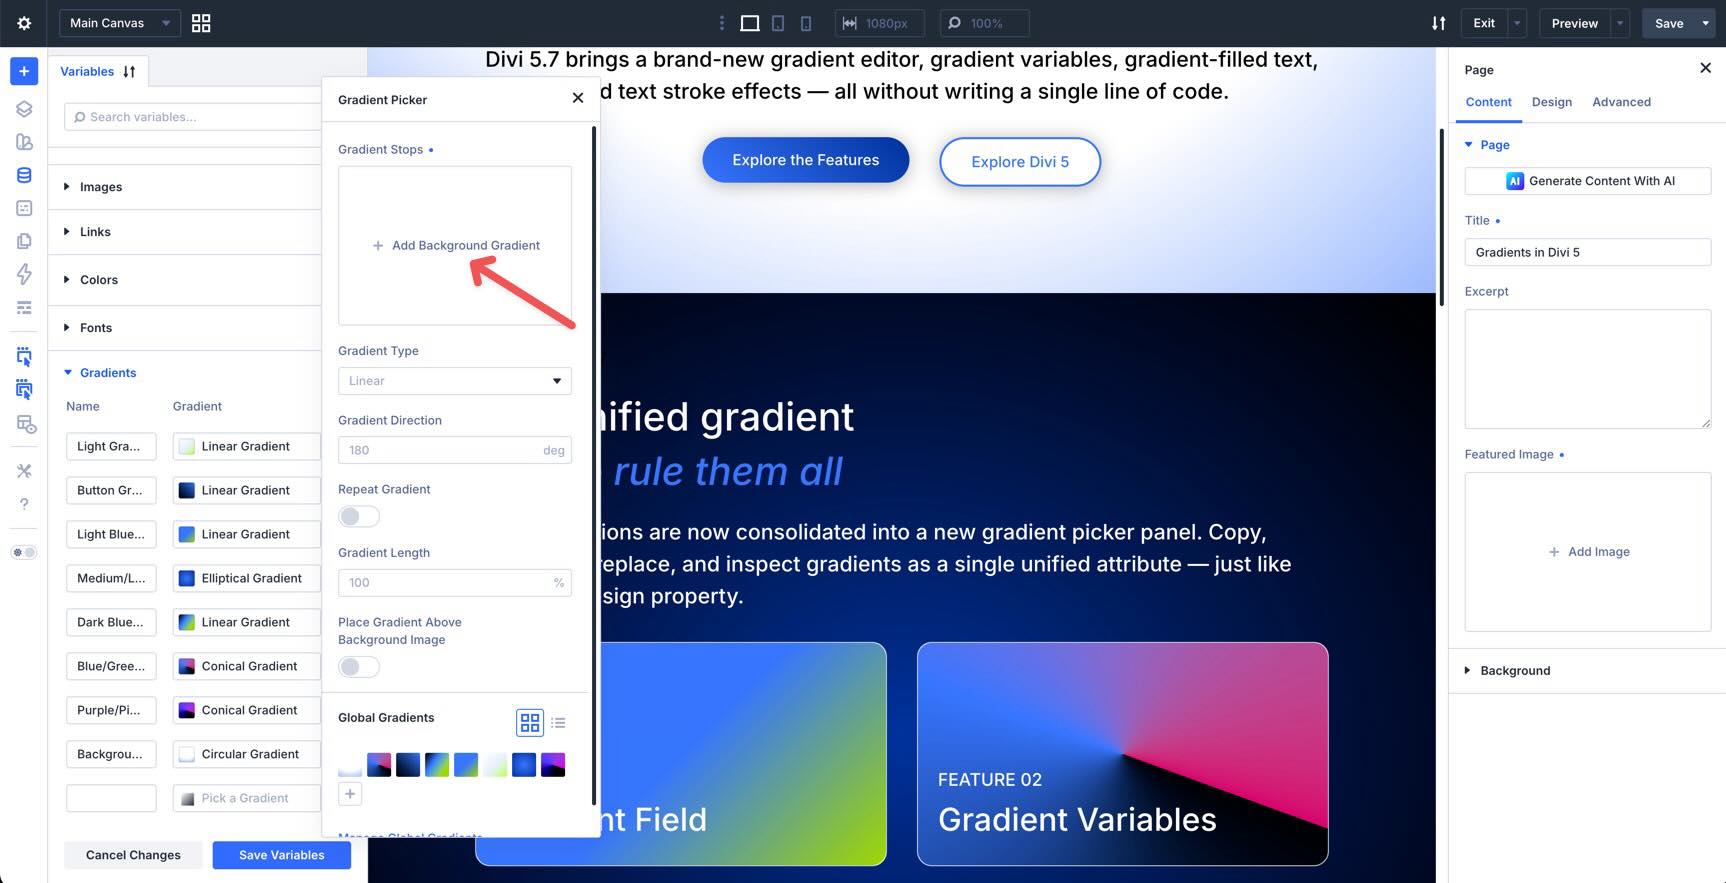
Click into the Gradient field to open the Gradient Picker.
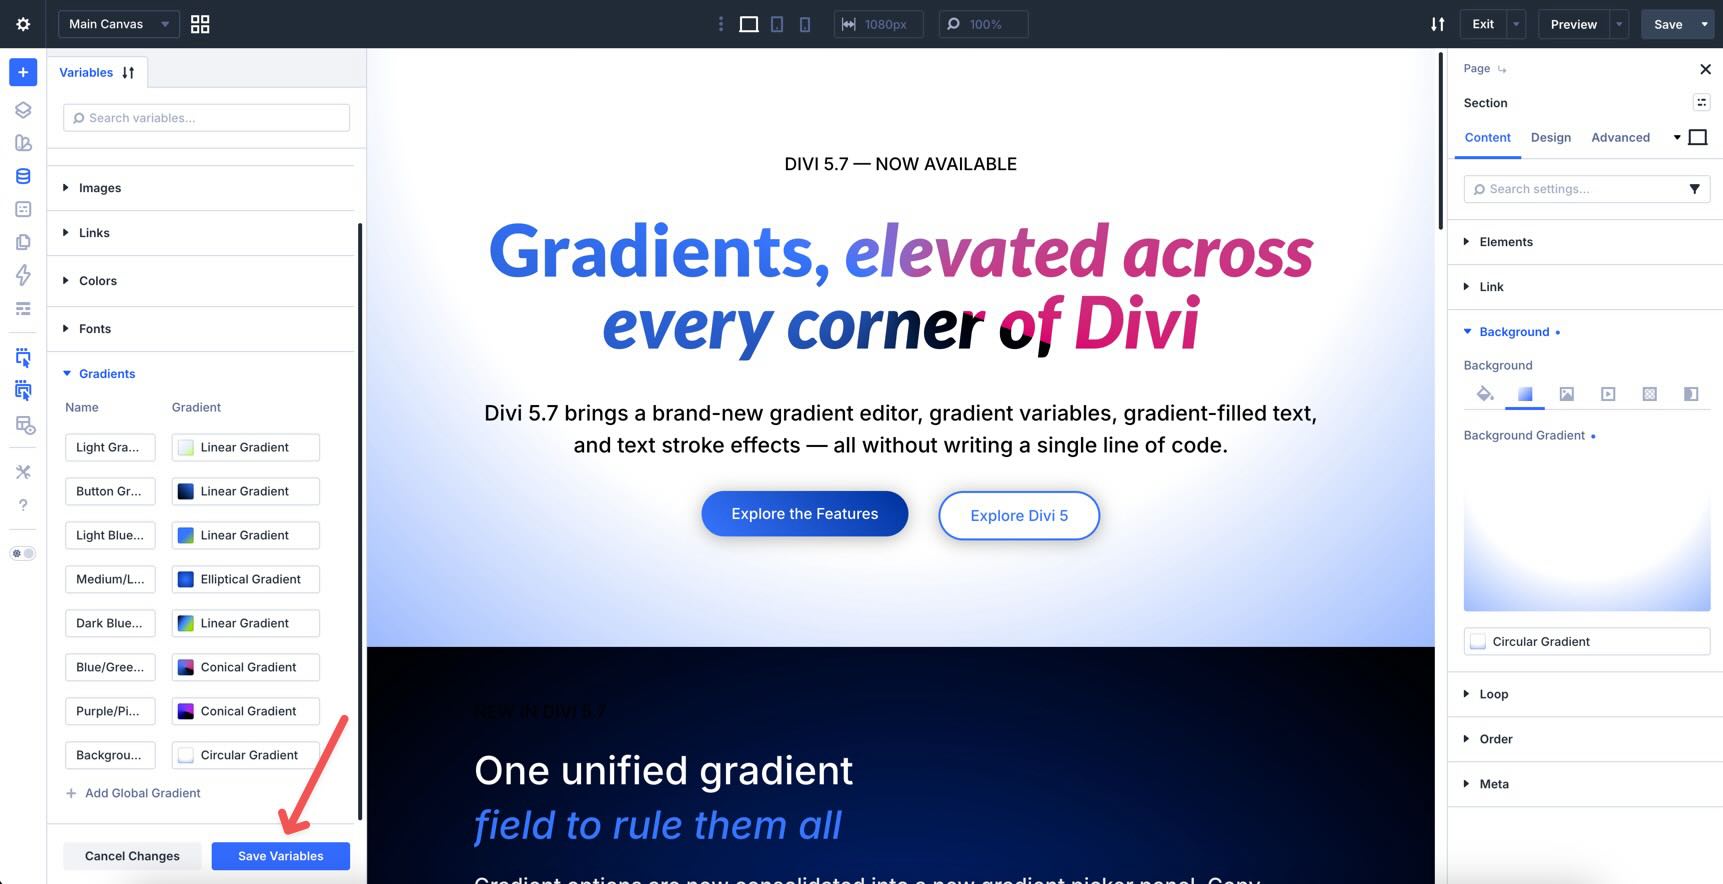
Click + Add Background Gradient, then define the colors for your gradient.
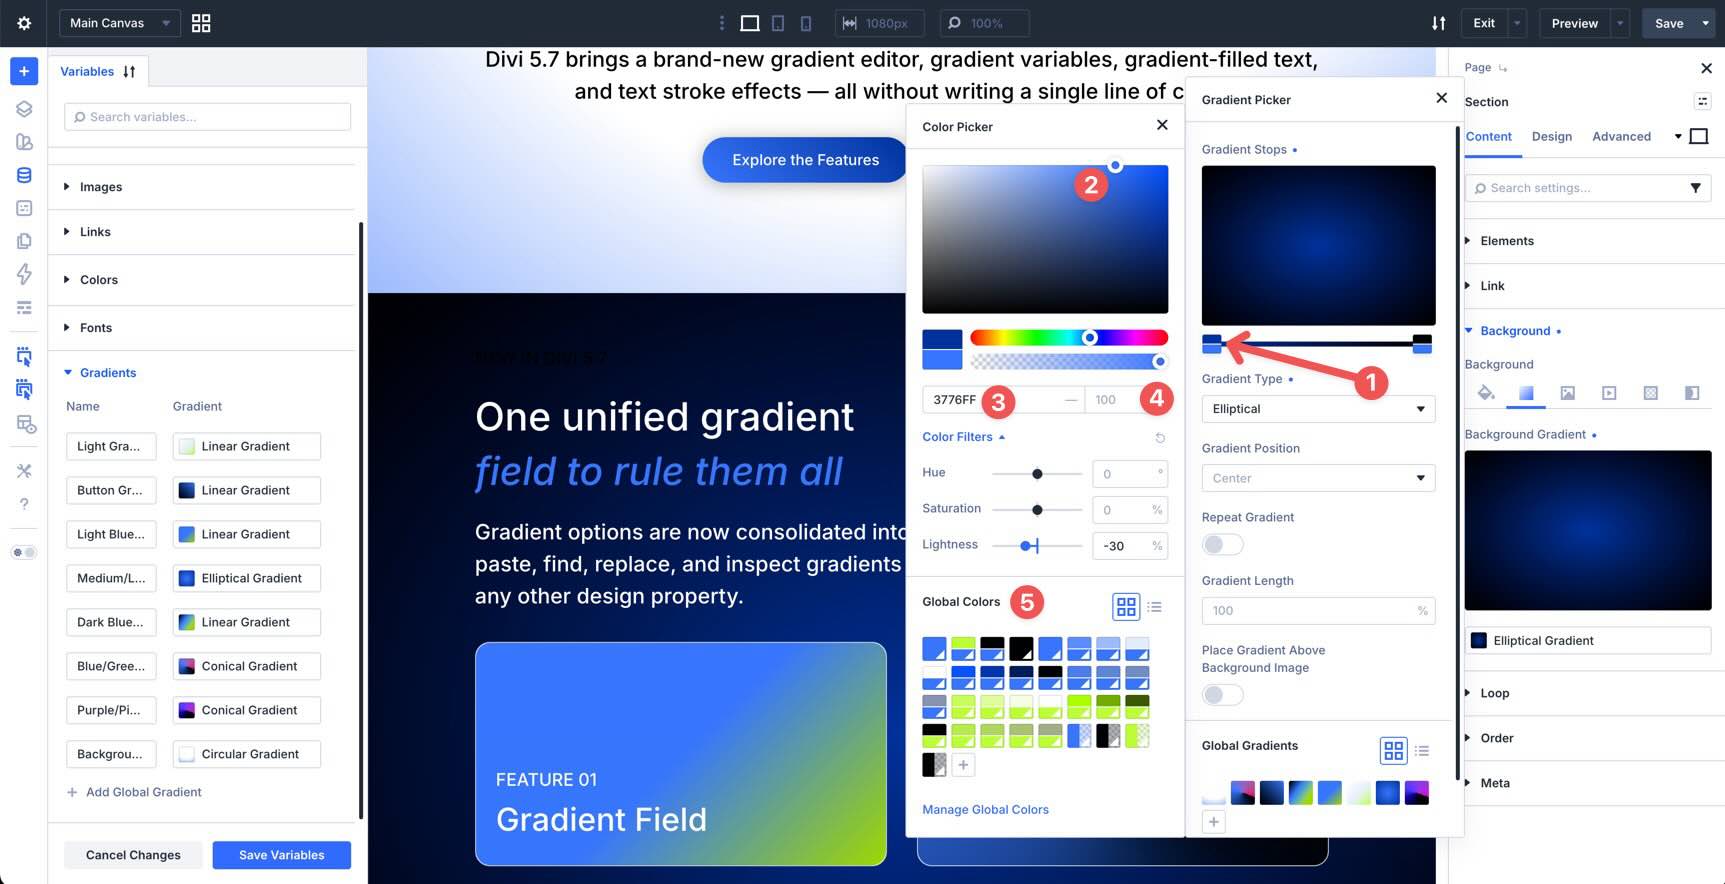
To edit a color stop, select it and choose a color. You can enter a hex value, use the color picker, adjust opacity, or select a saved Global Color.
Choose the gradient type: Linear, Circular, Elliptical, or Conical.
Then adjust the advanced settings, such as direction, repeat behavior, gradient length, and whether the gradient should appear above a background image.
When the gradient is ready, click Save Variables in the Variable Manager.
Using Gradients With Text Effects
Divi 5 also expands Text Effect settings. Text option groups now support gradient fills, image fills, and text strokes.
That means you can use gradients beyond backgrounds. You can apply them directly to headings, body text, buttons, and other text option groups that support the new Text Effect settings.
Apply A Gradient Fill To Text
To apply a gradient text fill, select a text element in the Visual Builder. In this example, we’ll use a Heading module.
Open the module settings, go to the Design tab, and expand the Heading Text option group.
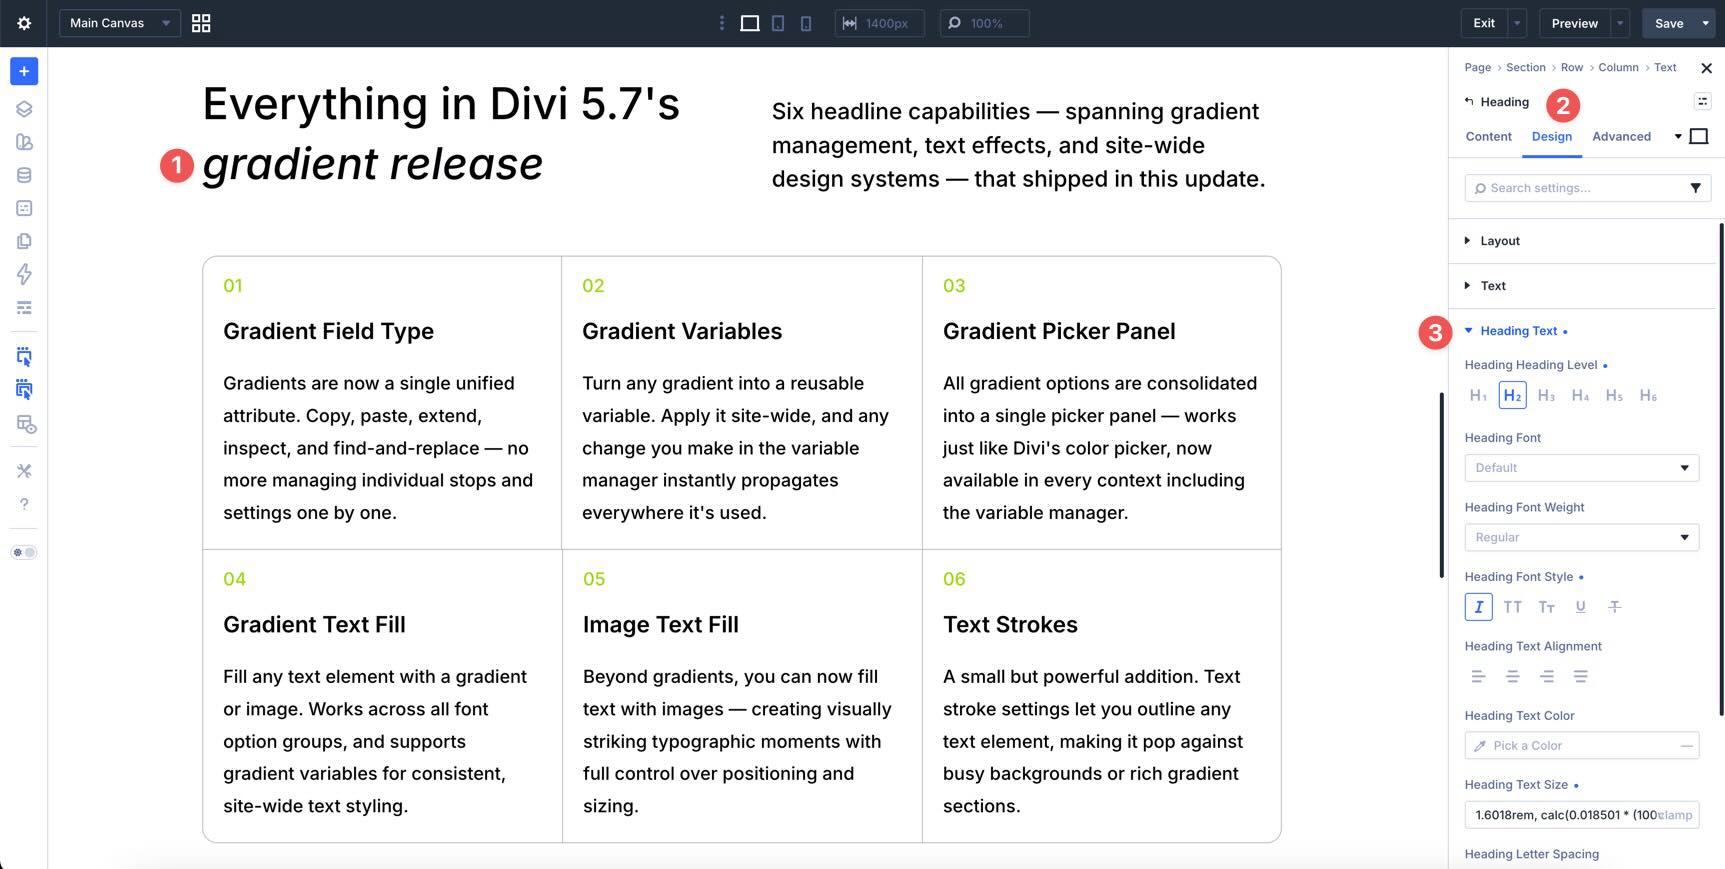
Find the Heading Fill Type field and choose Gradient.
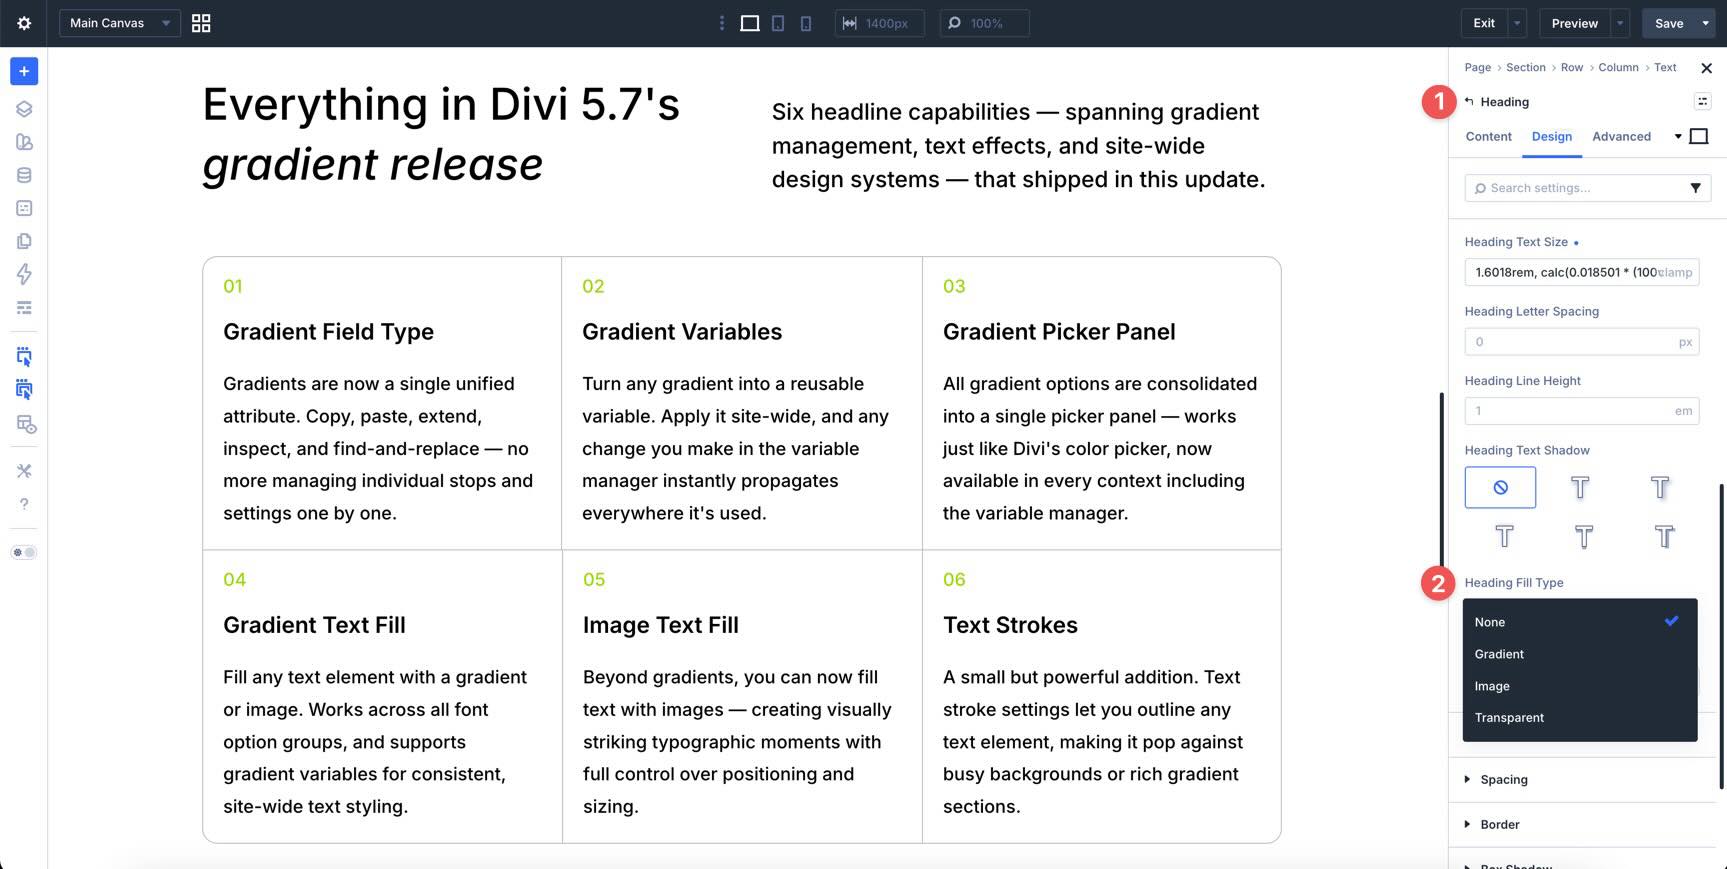
After selecting Gradient, the Heading Gradient Fill field appears. Open it to choose a saved Gradient Variable or create a new gradient.
Use this carefully. Gradient text works best for large headings, hero titles, short phrases, buttons, and decorative emphasis. Long paragraphs are usually easier to read with a solid text color.
Apply An Image Fill To Text
You can also choose Image as the fill type. This lets you create textured or photographic text effects directly inside Divi’s text option groups.
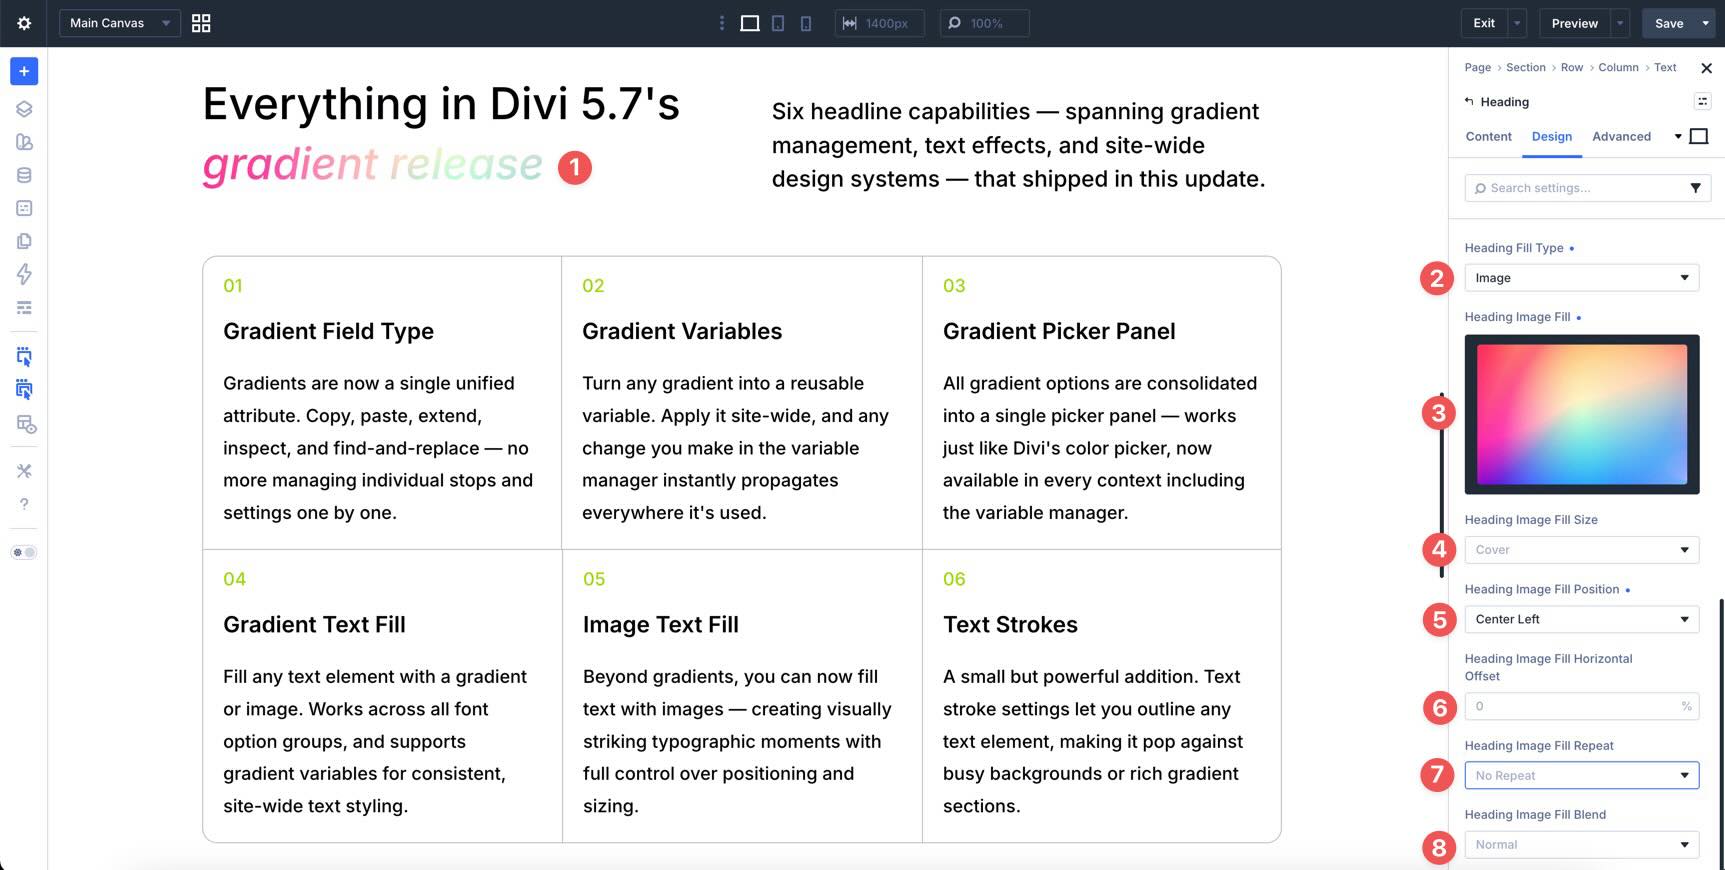
Image fills can be useful for campaign headers, portfolio titles, event landing pages, and editorial designs. Keep the image simple enough that the text remains readable.
Use Text Strokes For Contrast
Text strokes add an outline around the text. They are especially useful when a gradient or image fill needs more separation from the background.
To add a stroke, set a value in the Heading Stroke Width field.
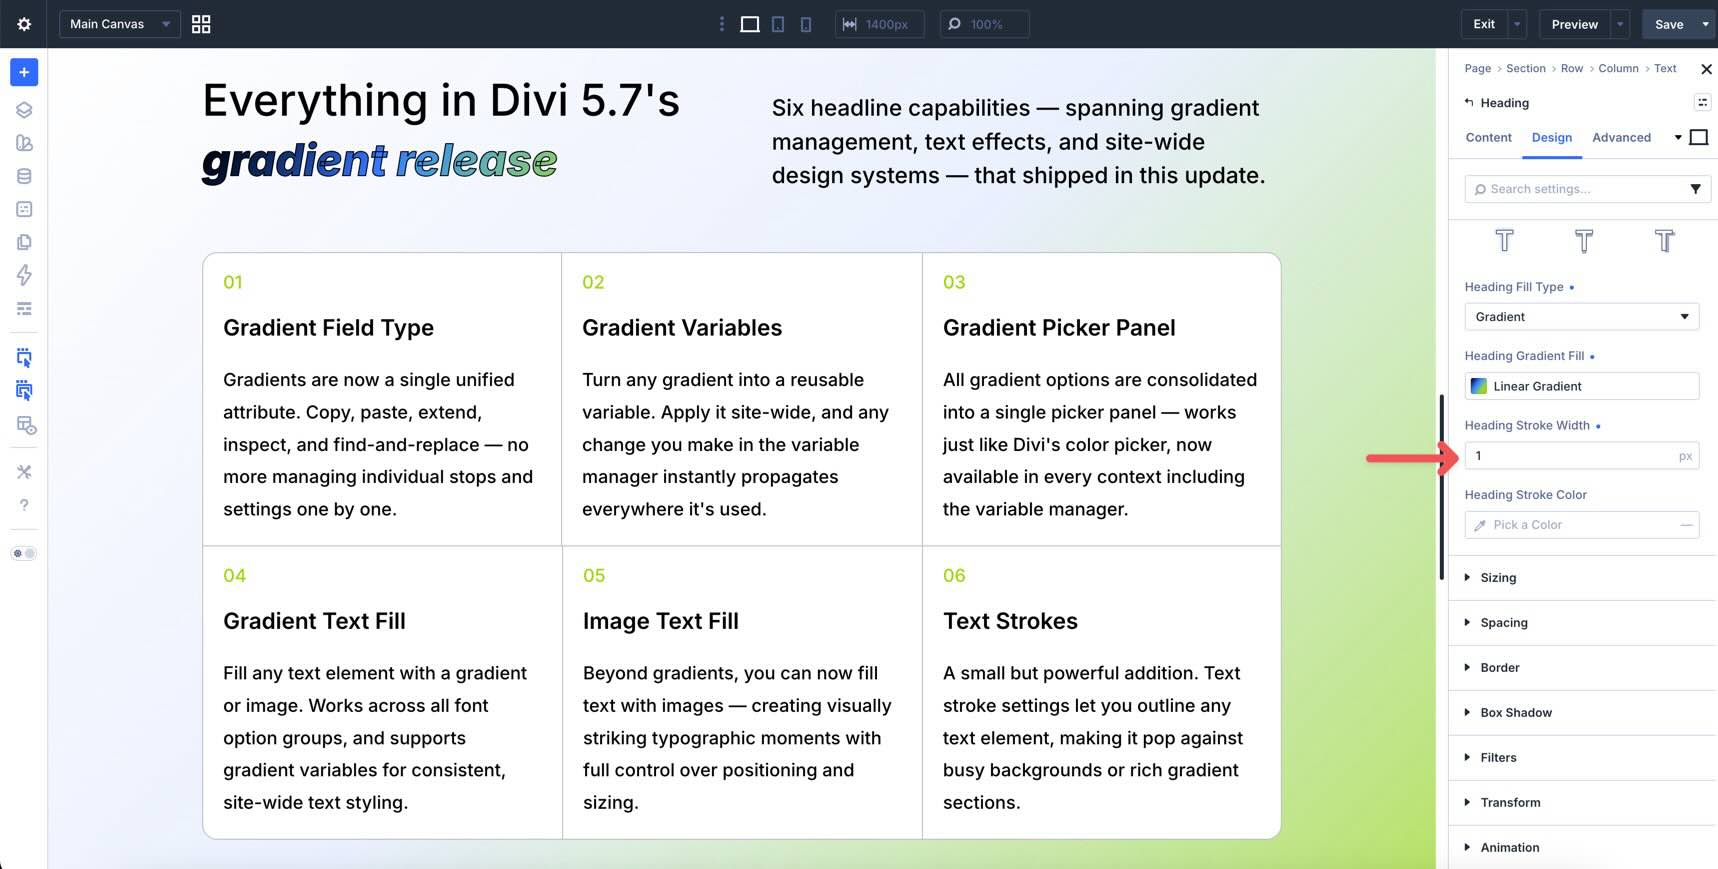
After adding a stroke width, the Heading Stroke Color field appears. Choose a solid color or saved color variable.
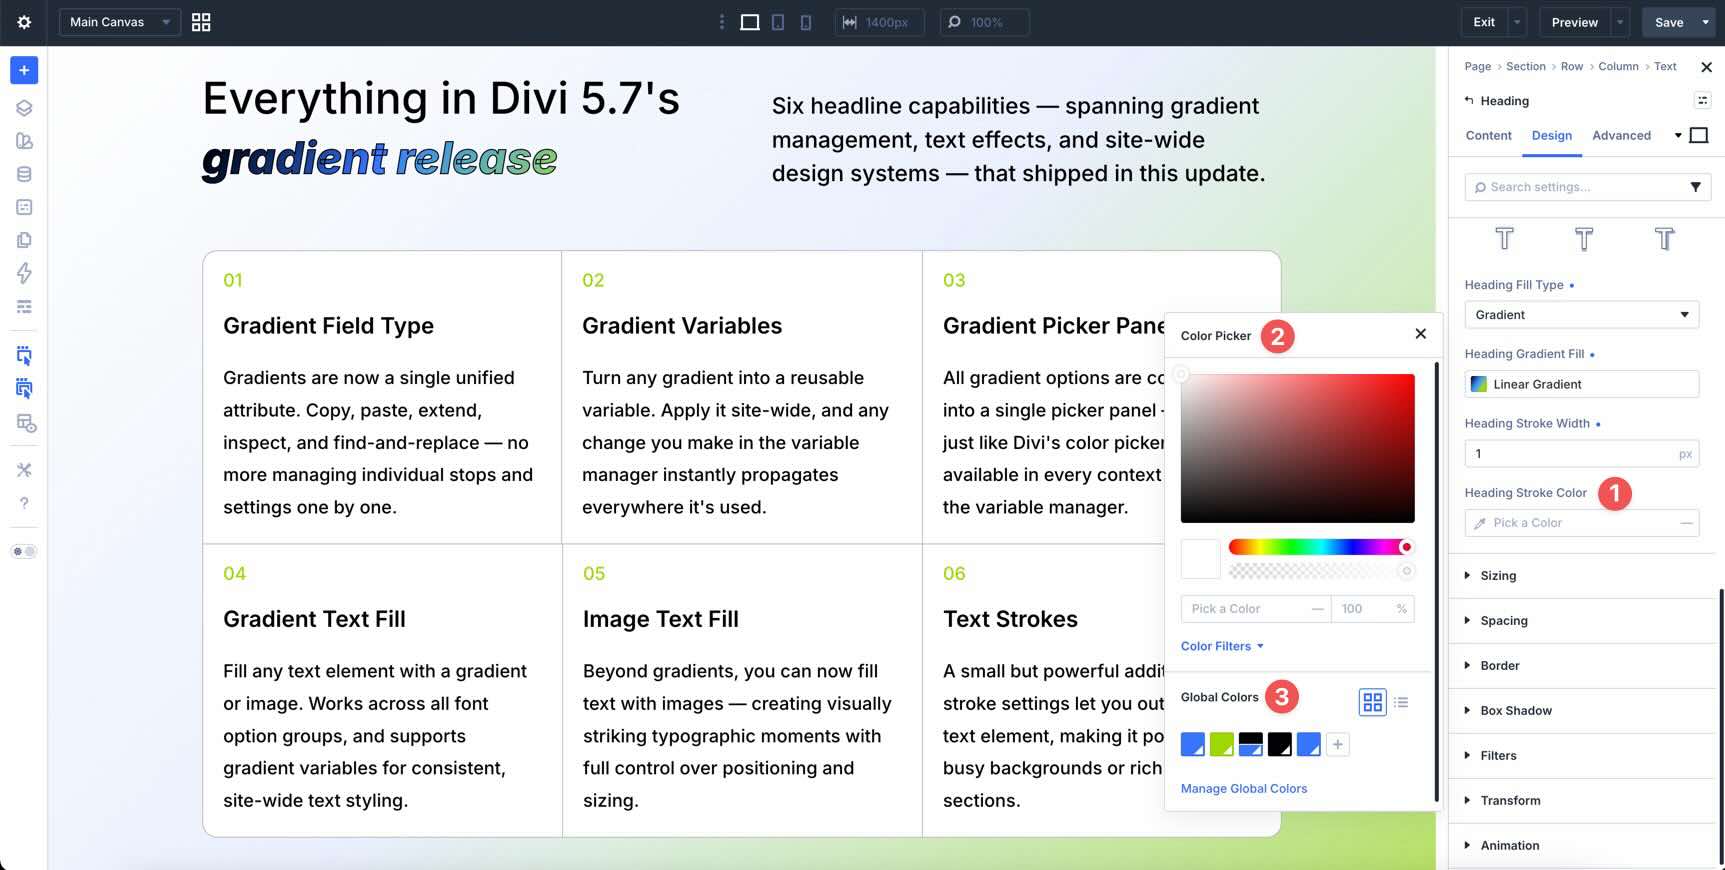
A subtle stroke is usually enough. The goal is better contrast and separation, not a heavy outline unless the design intentionally calls for it.
Tips For Better Gradients In Divi 5
Save Reusable Gradients As Variables
If you plan to use a gradient more than once, save it as a Gradient Variable. This is useful for hero backgrounds, button styles, overlays, text fills, section dividers, and card treatments.
When a brand direction changes, updating the variable is faster than hunting through individual modules.
Use Attribute Tools For One-Off Reuse
Not every gradient needs to become a variable. If you only need to reuse a gradient once or twice, copy and paste the gradient attribute or use Extend Attributes.
Use Gradient Variables for long-term design-system values. Use attribute workflows for quick page-level styling.
Keep Gradient Stops Intentional
More color stops do not always make a better gradient. Start with two colors, then add more stops only when the design needs a smoother transition or a more complex effect.
Too many stops can make a gradient feel muddy, especially in small areas like buttons or cards.
Check Contrast Before Using Gradient Text
Gradient and image text fills can look great, but readability matters first. Test the text over the actual background where it will appear.
Use a text stroke, darker stop, lighter stop, or simpler background if the text becomes hard to read.
Use Relative Colors For Connected Gradients
Divi 5’s Relative Colors and HSL tools can help you create gradients that stay connected to your brand palette.
Instead of choosing unrelated fixed colors, base gradient stops on a primary color variable and adjust hue, saturation, lightness, or opacity. This can make the gradient easier to maintain when brand colors change.
Name Gradient Variables By Role
Use names that describe where or why the gradient is used. Role-based names are easier to maintain than names based only on color.
Good examples include:
- Gradient Hero Primary
- Gradient Button Accent
- Gradient Text Highlight
- Gradient Card Overlay
- Gradient Section Soft
Clear names make variables easier to find later, especially on larger sites.
Download And Install The Example Layout
To help you explore the new gradient tools, we created a downloadable Divi layout with gradients applied to backgrounds, buttons, and text effects.
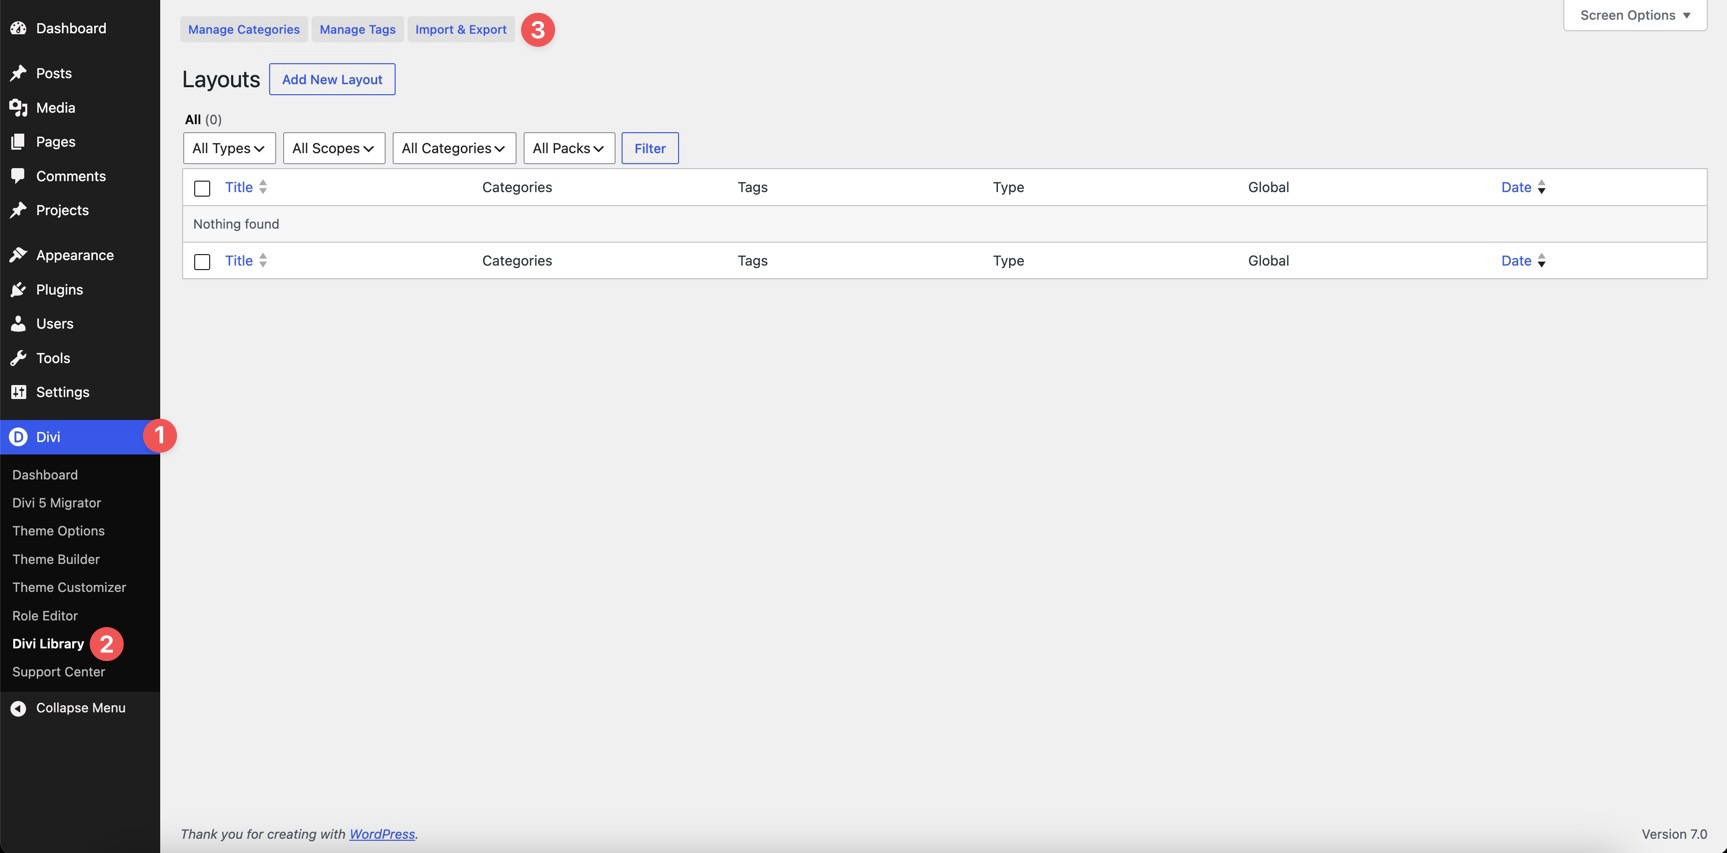
After downloading the zip file, go to Divi > Divi Library > Import & Export.
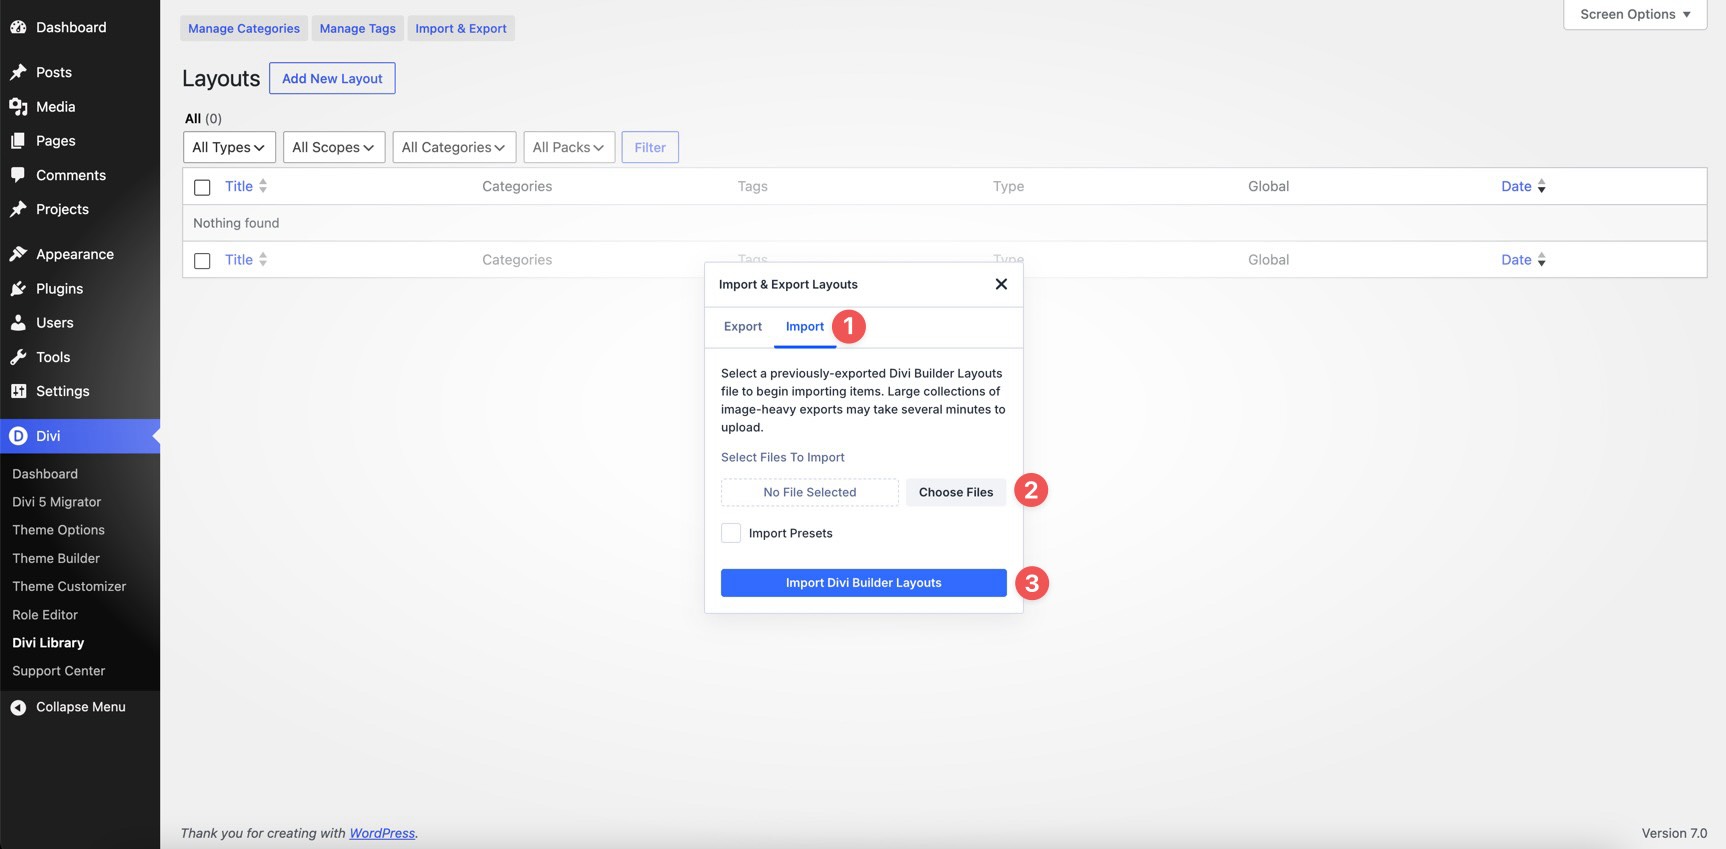
Open the Import tab, choose the JSON file from your computer, and click Import Divi Builder Layouts.
Once the layout is imported, create a new page and open the Visual Builder. Click the blue plus icon in the Builder Bar.
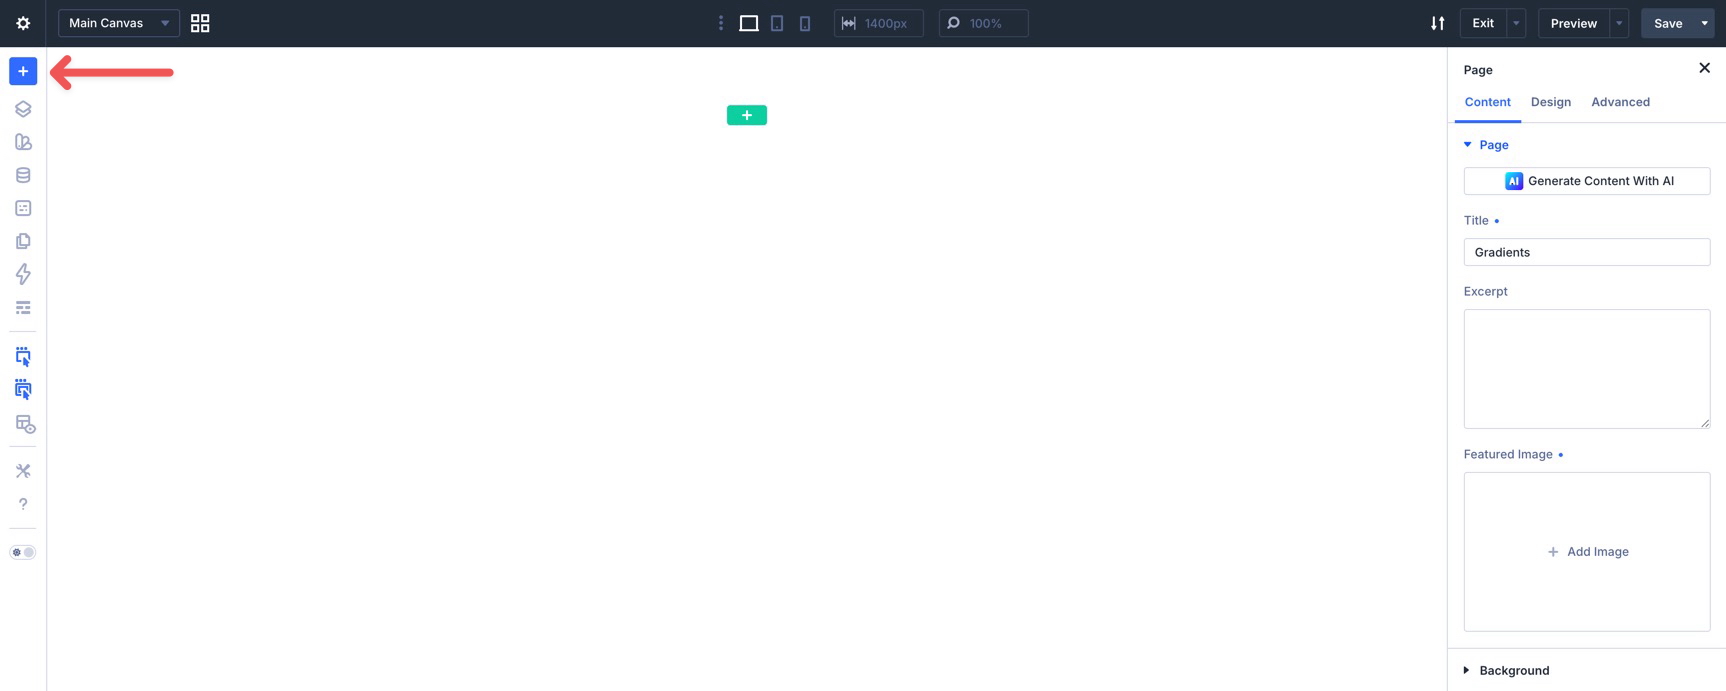
Select Saved Layout from the Insert Layout modal.
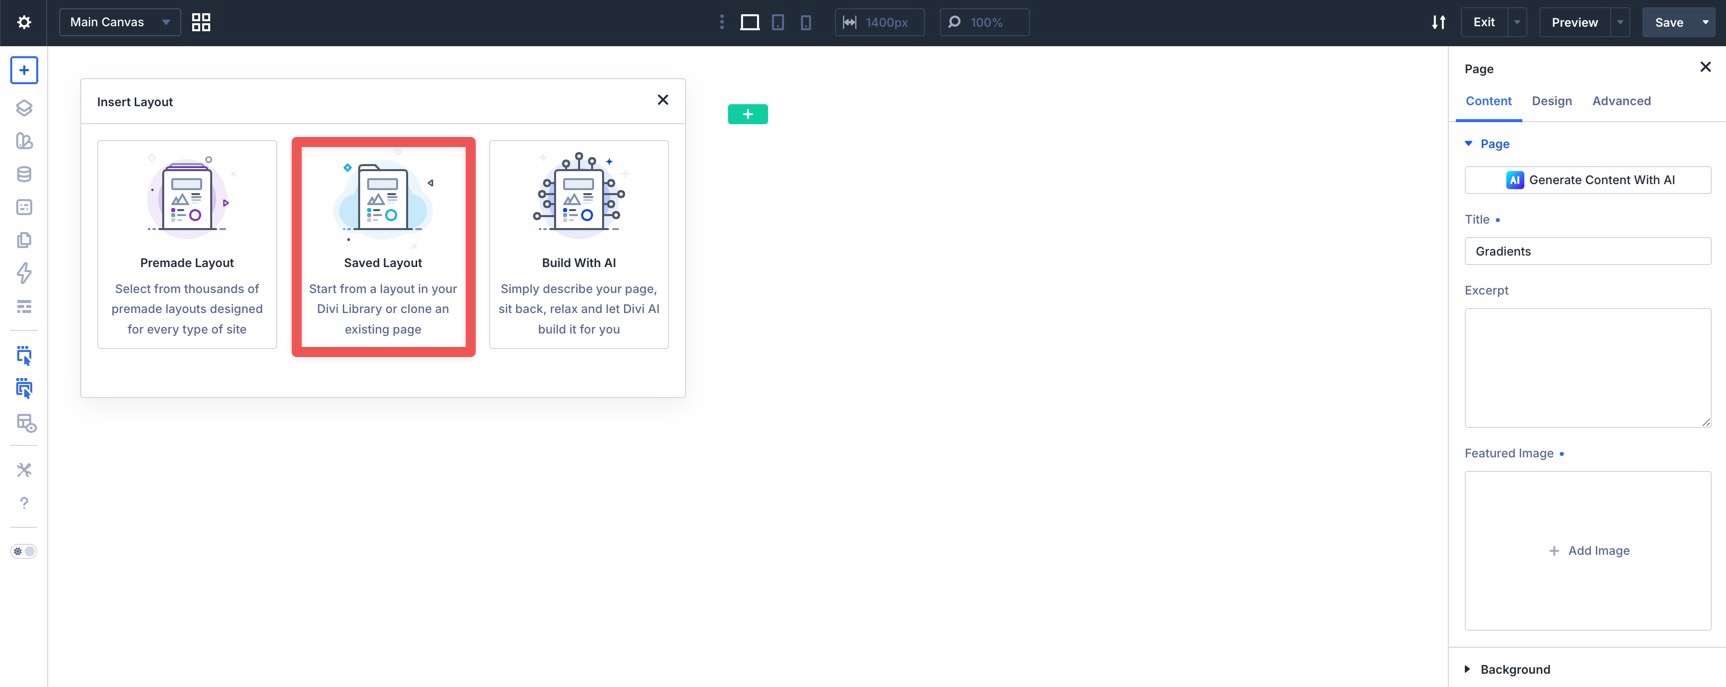
Choose the imported layout, then click Use This Layout to add it to the page.

Build Better Gradients In Divi 5
Divi 5’s new Gradient Picker, Gradient Variables, and Text Effect settings make gradients easier to create, reuse, and maintain.
Use the Gradient Picker when you need a clean interface for building gradients. Use Gradient Variables when a gradient should stay consistent across your site. Use text fills and strokes when you want headings, buttons, or short text elements to feel more expressive.
The best workflow is simple: create the gradient, save reusable gradients as variables, apply them through supported design fields, and use text effects where they improve the design without hurting readability.


Leave A Reply