
If you’ve ever worked with CSS frameworks like Bootstrap, you get why it’s so popular. A design framework gives you a reusable foundation to design fast and consistent layouts, so you’re not building from scratch every time you style a page.
Although most frameworks rely on prewritten classes, they still expect you to write custom CSS for deeper customization, which makes them tricky for non-coders. That’s where Divi 5 differs.
It takes a visual-first approach, replacing CSS with tools like Design Variables, Option Group Presets, and Element Presets. You get all the power of a framework, without writing a single line of CSS. In this post, we’ll show you how to build a no-code design framework visually using Divi 5.
👉 Divi 5 is ready to be used on new websites, but we don’t recommend migrating existing ones yet.
How Divi 5 Lets You Build A No-Code Design Framework
Divi 5 is rebuilt from scratch to make advanced web design accessible to everyone. No matter your coding level, it lets you build modern, custom layouts visually. Building a design framework is no different.
Subscribe To Our Youtube Channel
Design Variables Let You Define Global Design Values
Design Variables let you define repeatable values like your brand’s colors, fonts, spacing, and more in one central place. Once saved, you can reuse these values throughout your website to give it a consistent, branded visual appearance.
Inside the Visual Builder, find the Variable Manager to define and store different variable types (Numbers, Text, Images, Links, Colors, and Fonts) in an organized way.
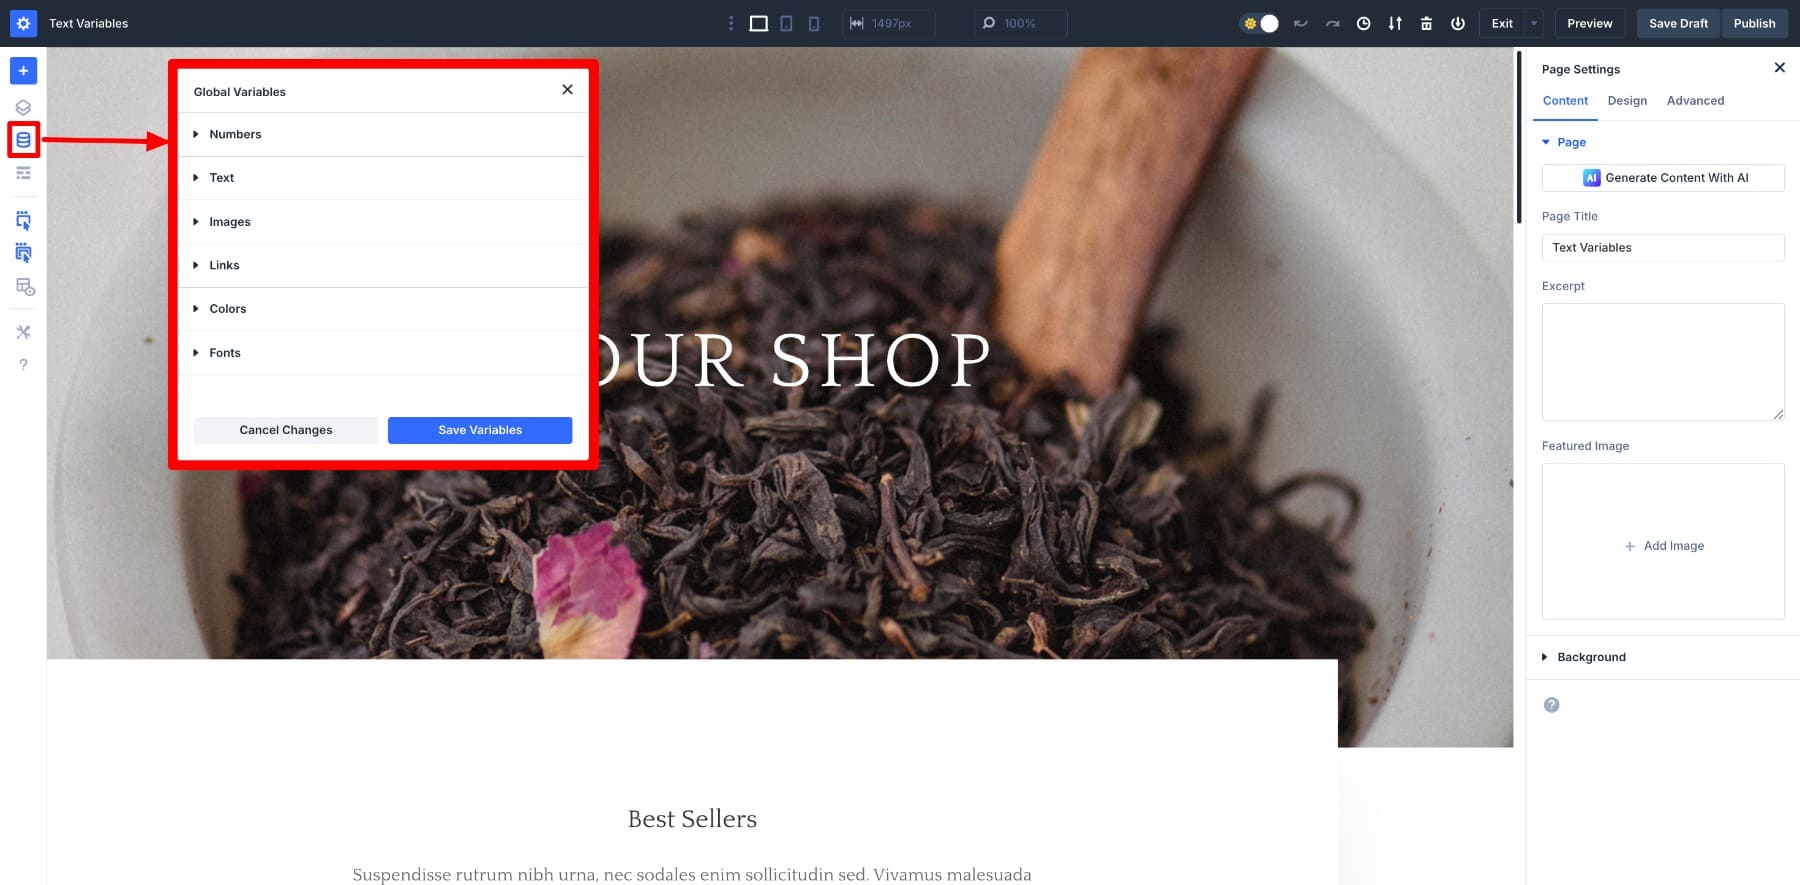
Design Variables are like a no-code version of CSS custom properties, but have far more flexibility. For example, you generally declare CSS variables such as :root { –primary-color: #1a73e8; }, but with Divi’s design variables, you only save the color as a Primary Color.
You’ll see their true power while making updates. There is no need to go through your stylesheet; just modify the saved variable value once in Variable Manager to update every instance throughout the website. They let you quickly visualize your ideas without hunting through several style rules.
Also, you can define commonly repeated content elements such as address, email, links, background motifs, etc., as content variables. You don’t have to manually insert them multiple times; one click and these elements appear on your page. For example, save and use your company address as a Text Variable.
To apply a design variable, hover the option and look for the dynamic content icon.
Learn Everything about Design Variables
Save Common Style Combinations With Option Group Presets
Option Group Presets let you save and reuse frequently used design settings, such as spacing, borders, shadows, text styles, and backgrounds, without having to rebuild them every time. They focus on one specific group of options inside a module, so you can style just that part and apply it anywhere with one click.
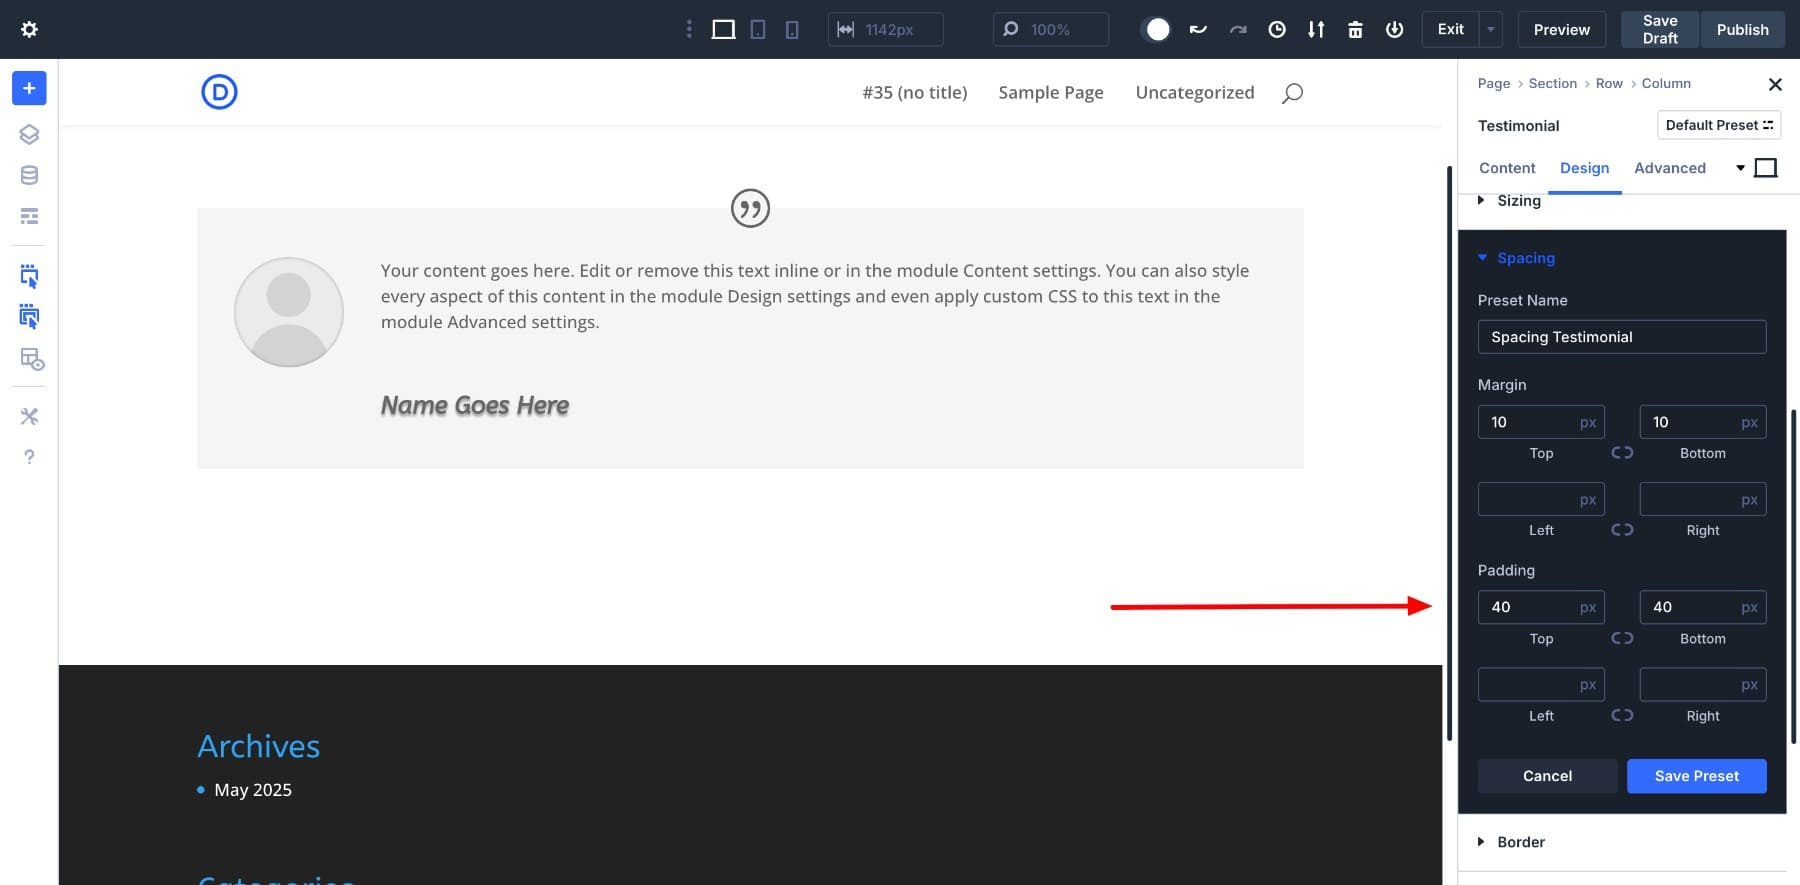
For example, let’s say you always use the same 40px padding and 10px margin on all your testimonial sections. Save those settings as a Spacing Preset. When you add a new testimonial module, select the preset and it’s done.
What makes Option Group Presets powerful is that you can mix them with Design Variables. If your primary color is saved as a variable, you can use it inside a Background Preset, so if the brand color ever changes, the entire preset updates with it. The backgrounds across all your pages change with a single click.
Option Group Presets don’t override your entire module, they only apply to the style group you choose. But you can always override presets with module-specific settings to customize specific modules. This allows you to keep your layout and content unique while still ensuring consistent visual styling across your site.
Learn Everything about Option Group Presets
Save Fully Designed Elements With Element Presets
If you’ve been a Divi user, you’re already familiar with Element Presets. They let you save all the custom styles of a module, including text, spacing, colors, icons, hover effects, as an element preset, so you can reuse it anywhere without building from scratch. You’re basically creating a ready-to-go version of your most-used modules.
Here’s a quick use case: Customize and save a blurb preset, then apply it to other unstyled blurbs to style them quickly.
How These Tools Reflect In The Frontend HTML
Divi 5 may look like a no-code tool, but it’s actually writing clean, structured code in the background. When you adjust settings visually, like choosing a spacing preset or applying your brand colors from the Variable Manager, you’re not just styling a module. You’re also writing the code.
Every design decision you make gets translated into proper frontend output. Divi handles the coding part while you focus on the design.
To show you how powerful this is, we’ll compare the visual-first workflow in Divi 5 with a manual approach using a traditional CSS framework like Bootstrap.
First Bootstrap:
Building A Design System Manually With Code In Bootstrap
For our example, I’ve used a WordPress setup with the Understrap theme installed.
In a typical code-based workflow, you’d start by defining your global design values as CSS variables. Here are ours:
:root {
 --primary-color: #e91e63;
 --border-radius: 6px;
 --box-shadow: 0 4px 10px rgba(0, 0, 0, 0.1);
}
Let’s say we’re building a simple contact page layout with a contact form and a custom-styled button. To keep everything consistent and reusable, we’ll use a mix of Bootstrap’s utility classes and our own CSS variables.
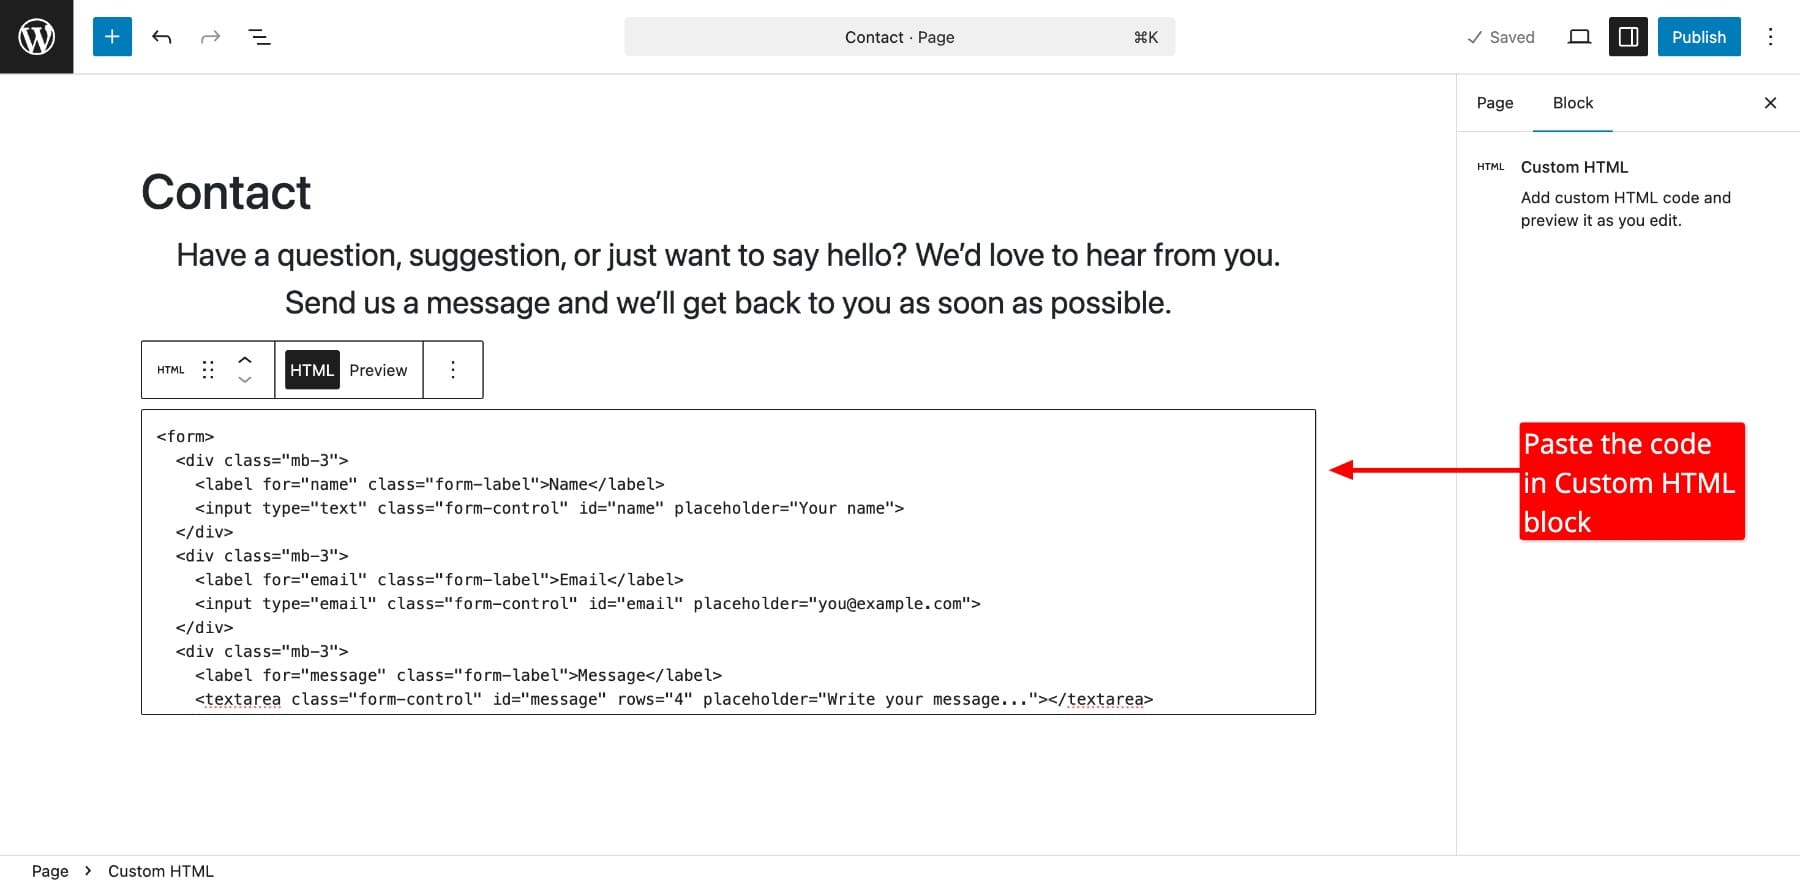
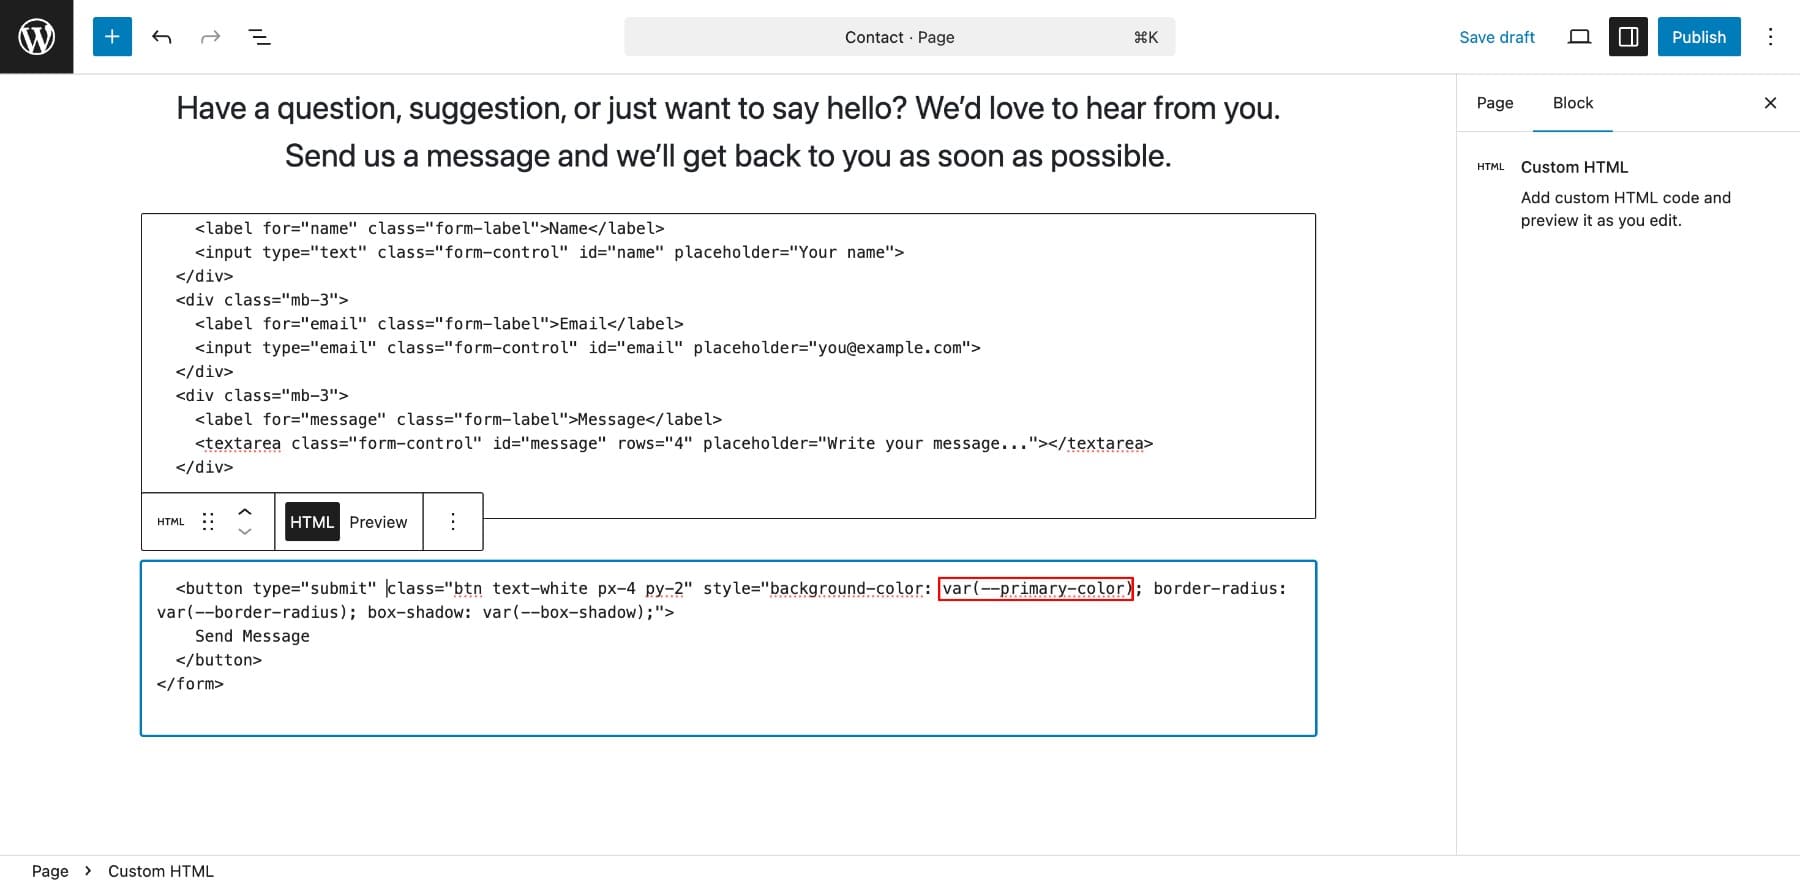
First, we add custom code for a contact form using Bootstrap’s built-in form classes to handle layout and input styling.
Then we add the code for our styled button. Here, we combined Bootstrap utility classes with our custom CSS variables for background, border radius, and shadow. This gives us full control over the look and feel. If we want to make changes, we can update our variables.
As you can see, it’s great and efficient, but everything is built manually. We defined the variables, applied the classes, and wrote the entire code all by ourselves. And this is a simple layout, imagine building complex pages using this approach!
Now, let’s build the same page using Divi 5 without coding.
Recreating The Same Page Visually With Divi 5
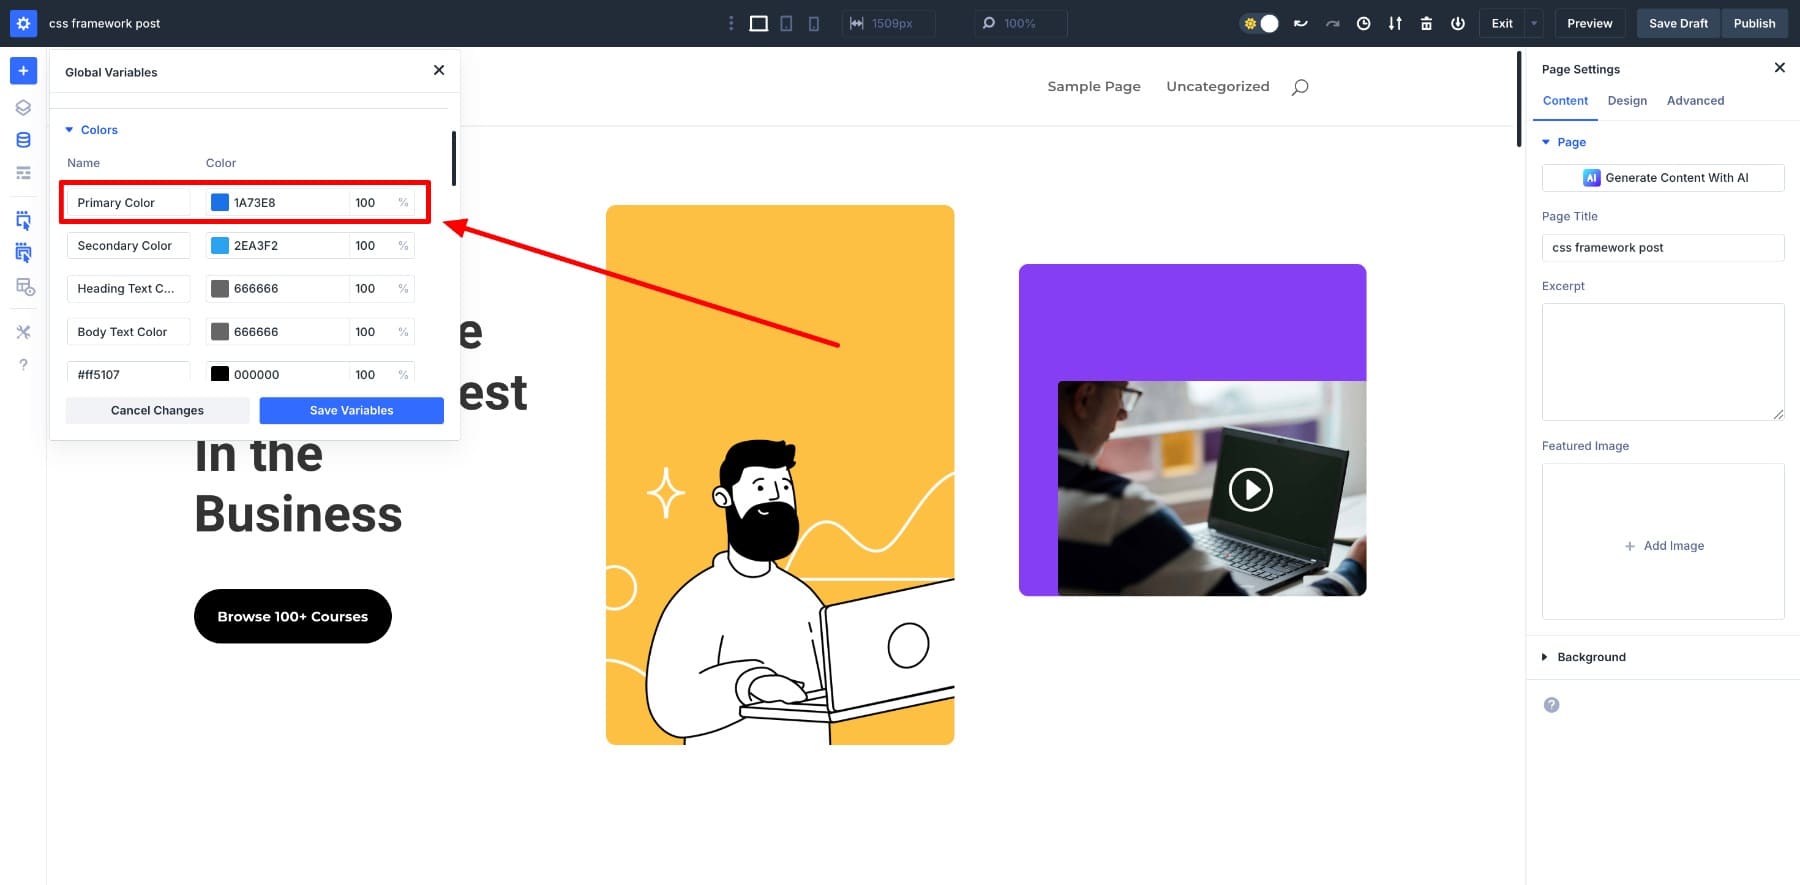
We start by defining our global Design Variables that become part of our site-wide design system. First, you go to Variable Manager > Colors. Then, write the hex code for the primary color (#e91e63) and save.
Similarly, you can also save number variables for border radius {6px} and spacing. Next, I add the contact form module and customize the submit button to my preferred style:
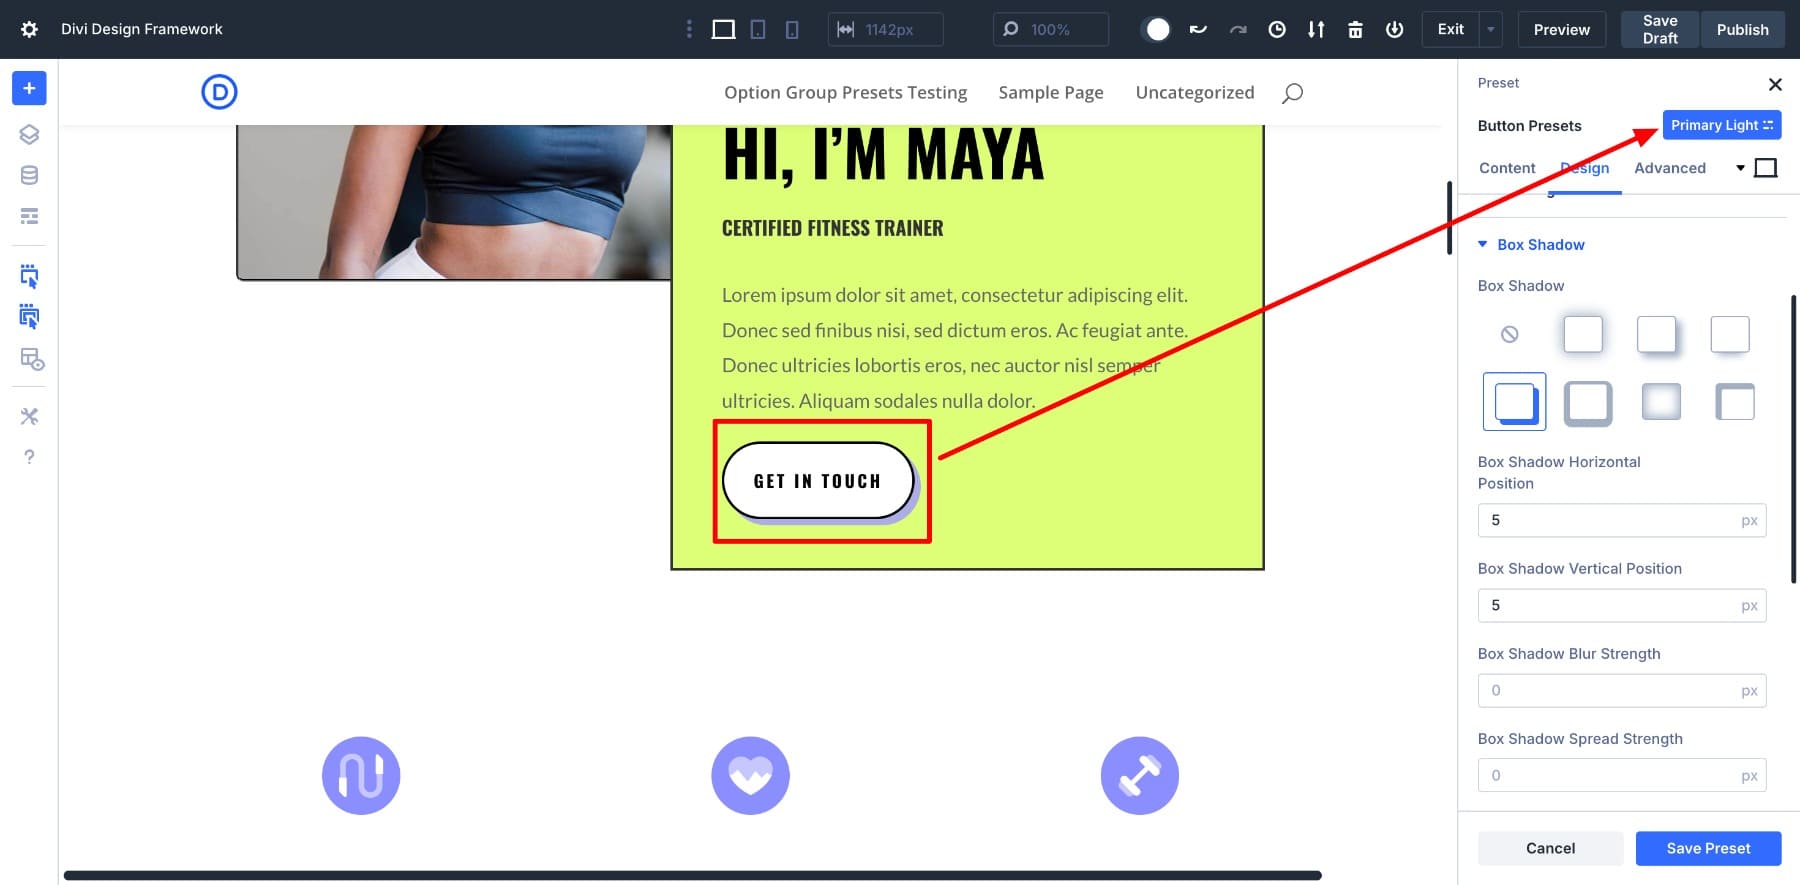
Now I save these button settings as a Button preset for later use.
If I add another button and select the Button Preset, see what happens? It gets styled automatically.
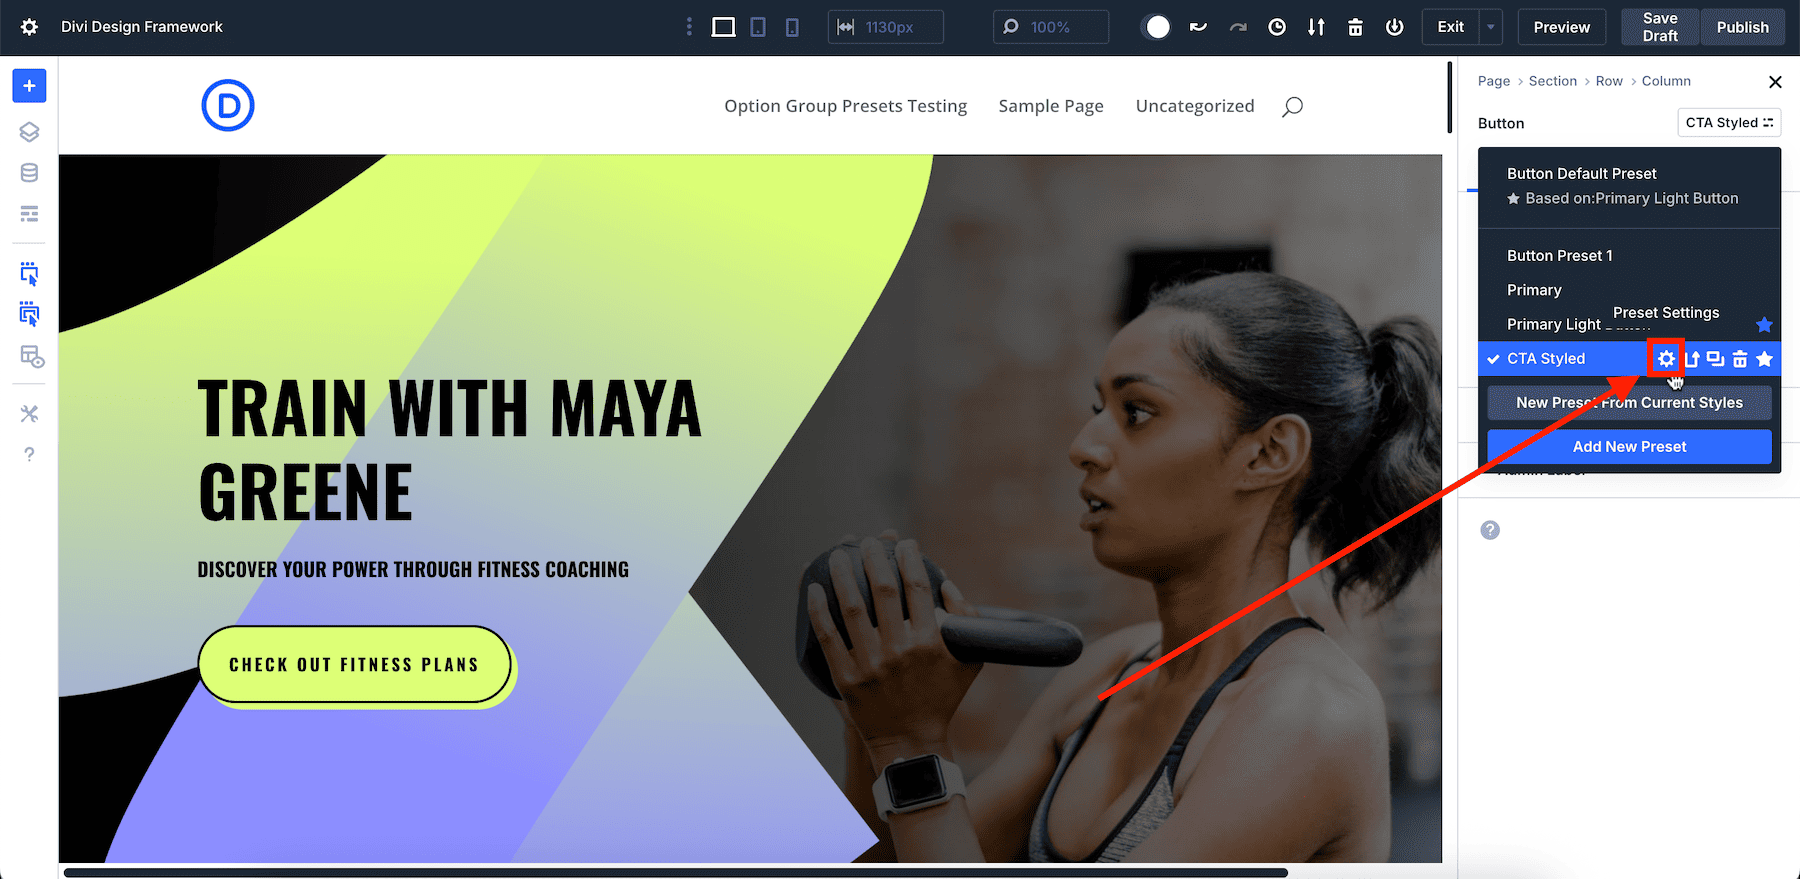
To apply an option group preset, hover over the setting and look for the settings icon.
Also, did you notice how we applied multiple custom styles to a button in one click without touching a single line of code? This is what we mean when we say you save your design preferences visually. It’s the kind of workflow Divi 5 is built for. It’s fast, consistent, and fully visual.
What happens behind the scenes is magical. Divi isn’t just stacking styles blindly. Every design variable, preset, and setting you apply is organized into clean, efficient code rendered on the front end.
The page source of the above Divi-designed page shows that the primary color is saved in the root section, just like the CSS variables:
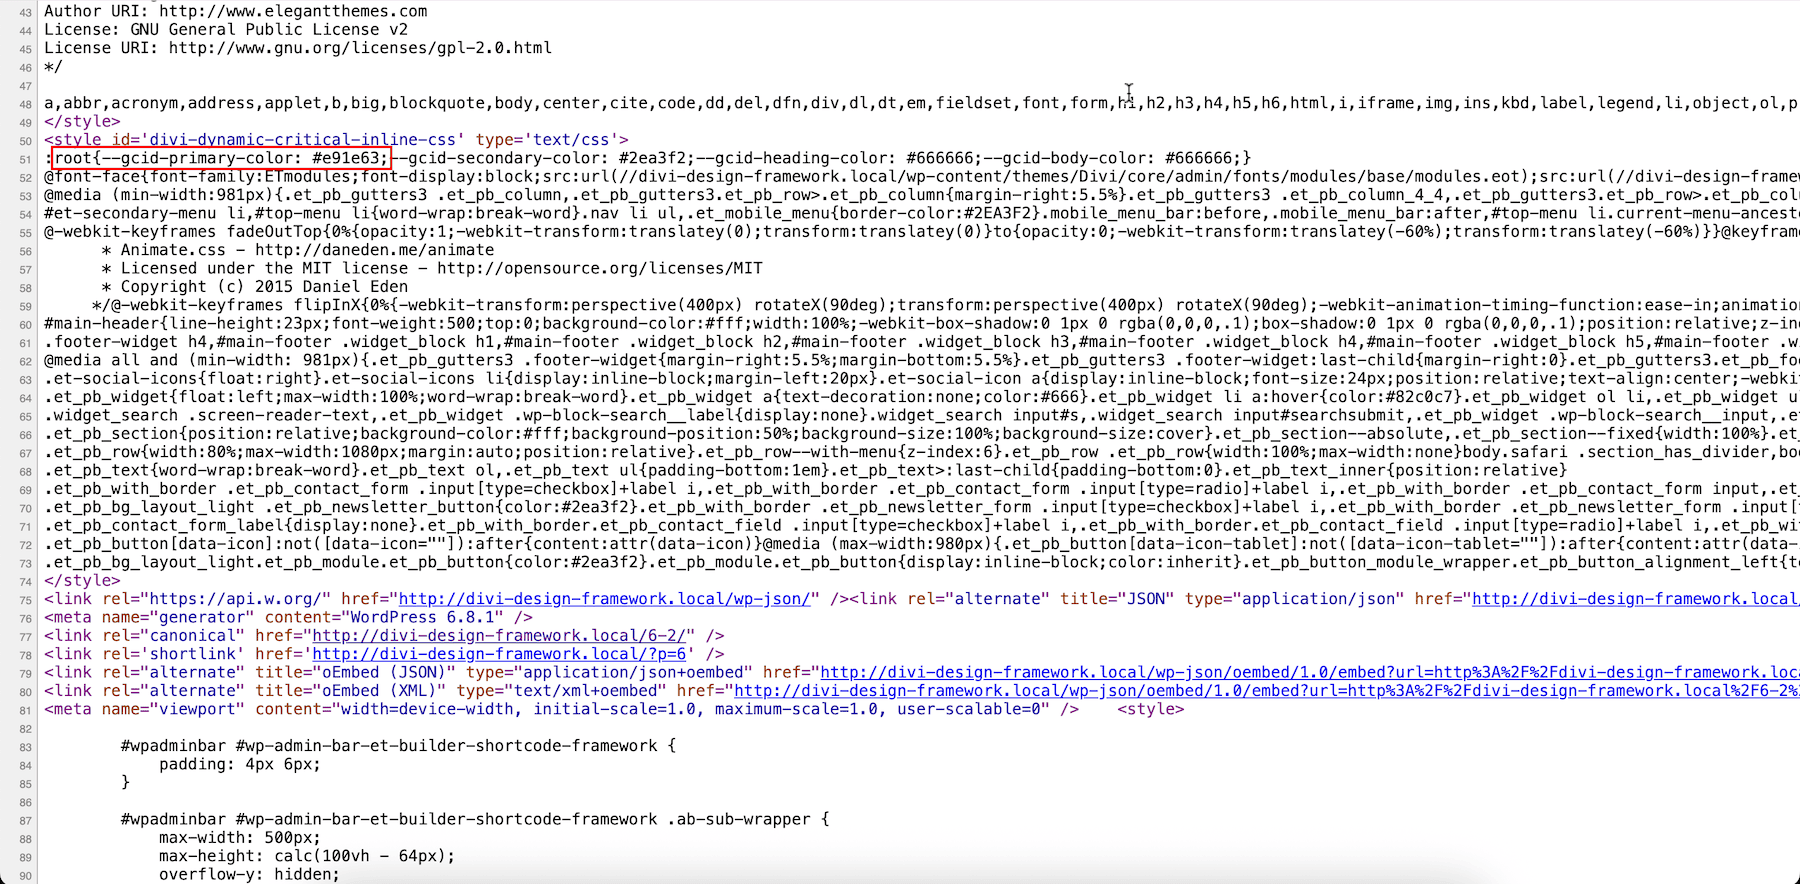
And on the frontend, your option group presets are automatically saved and output as clean CSS targeting the appropriate classes (.et_pb_button, .et_pb_contact_submit).

Both pages look the same, but how they were built and maintained is completely different.
In Bootstrap, we benefited from its utility classes but still had to write code. But with Divi 5, we achieved the same result without touching a line of code, only by using its powerful features like Design Variables and Option Group Presets.
Each change was applied in a few clicks, with no risk of inconsistencies, and yet the frontend code remained clean. Divi stores your styles in a structured, reusable format without adding unnecessary markup or inline styling.
How To Build Your Design Framework With Divi 5
Divi 5 gives you all the tools to build a scalable design system, but just like in traditional development, the order in which you use these tools matters. Let’s walk through the steps and, more importantly, understand why:
1. Define Your Global Design Variables
Before you design a page, start by defining your global Design Variables. These are the core values your entire site will rely on, such as your colors, fonts, sizes, spacing units, etc. Once you define your site’s building blocks, you can reuse them everywhere to keep everything consistent, clean, and easy to manage.
In Divi 5, you have the Variable Manager to create and organize them.
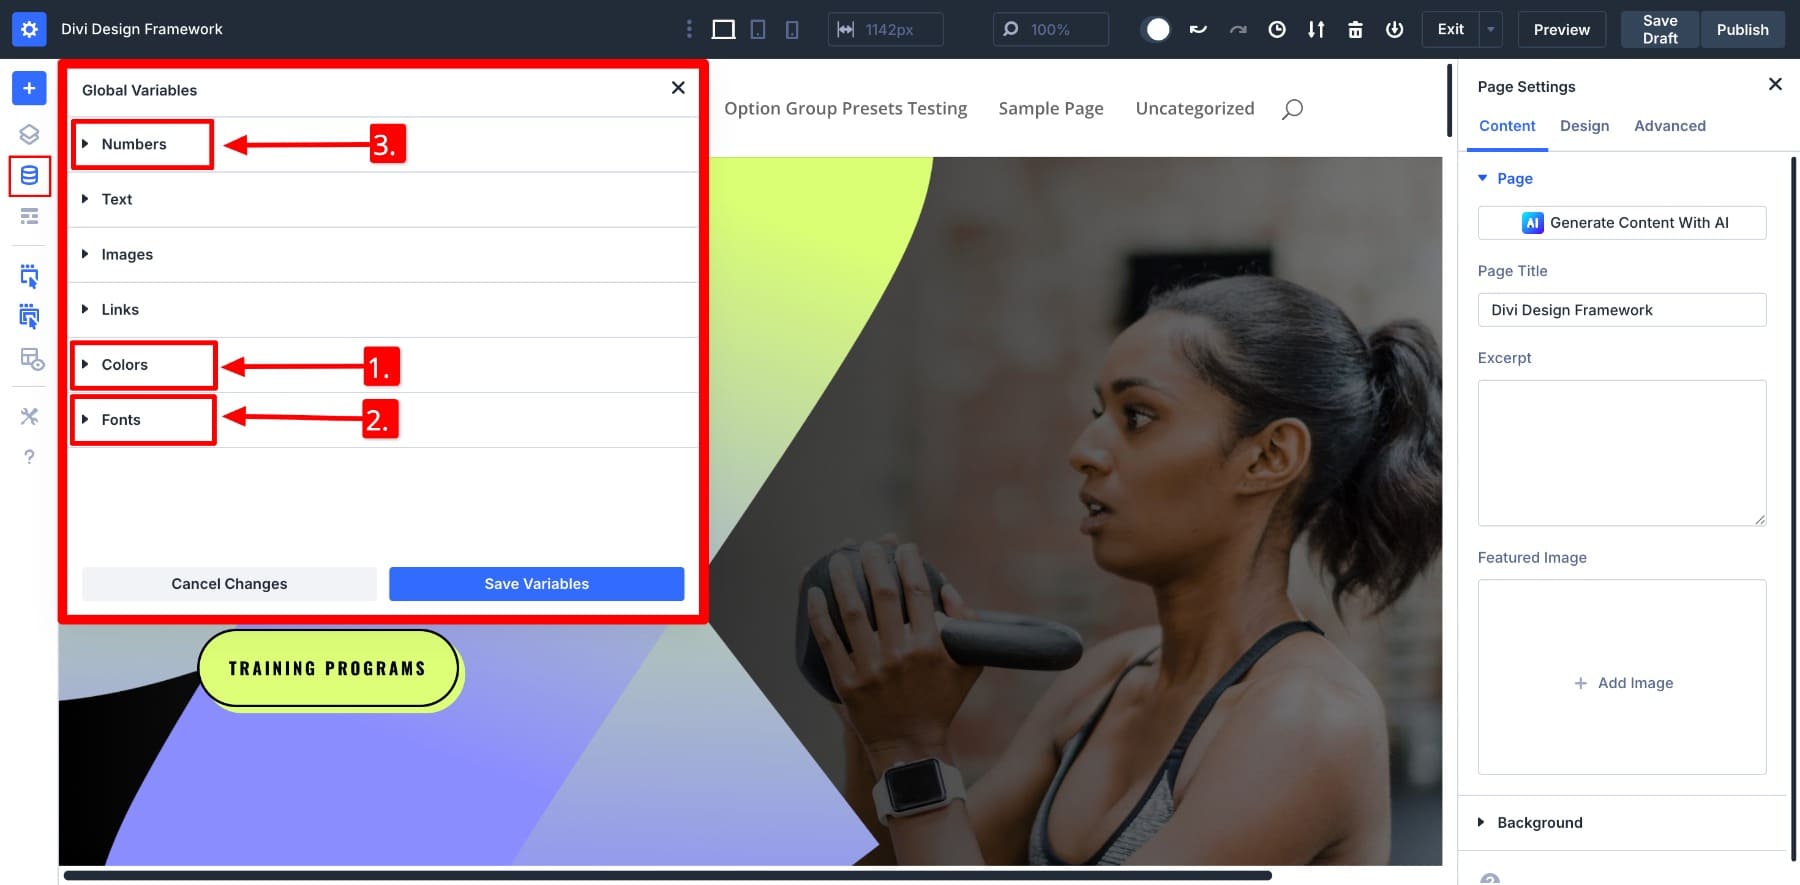
Here’s how the highlighted variable types play a role:
- Colors: Save your brand’s primary, secondary, and accent colors so you don’t have to type hex codes or match shades. Save your Color Variables and apply them with one click.
- Fonts: Define the exact fonts you use for headings, body text, or testimonials. Instead of re-selecting Poppins Bold every time you create an H2, save it as a Font Variable. You’ll be able to reuse that same style across modules easily.
- Numbers: Store your go-to design values, such as an 8px border radius for cards or 32px padding for image modules, as Number Variables. You can also use advanced units inside number variables to make dynamic designs.
Once your core variables are set, every preset and page you build will rely on them. And if your design direction changes later (say, you want to adjust your base spacing), you only need to update the variable in one place.
After you’ve defined your design variables correctly, no need to hunt and modify every instance. Just change the value once in the Variable Manager itself.
2. Save Globally Recurring Content
Using Variable Manager, you can also save content values like links, text, and images that often repeat across your site. You would normally copy and paste these values every time, but Divi 5 lets you define them once and reuse them anywhere.
This is especially helpful for saving social media links, your company’s contact details, and other recurring content that needs to be added manually.
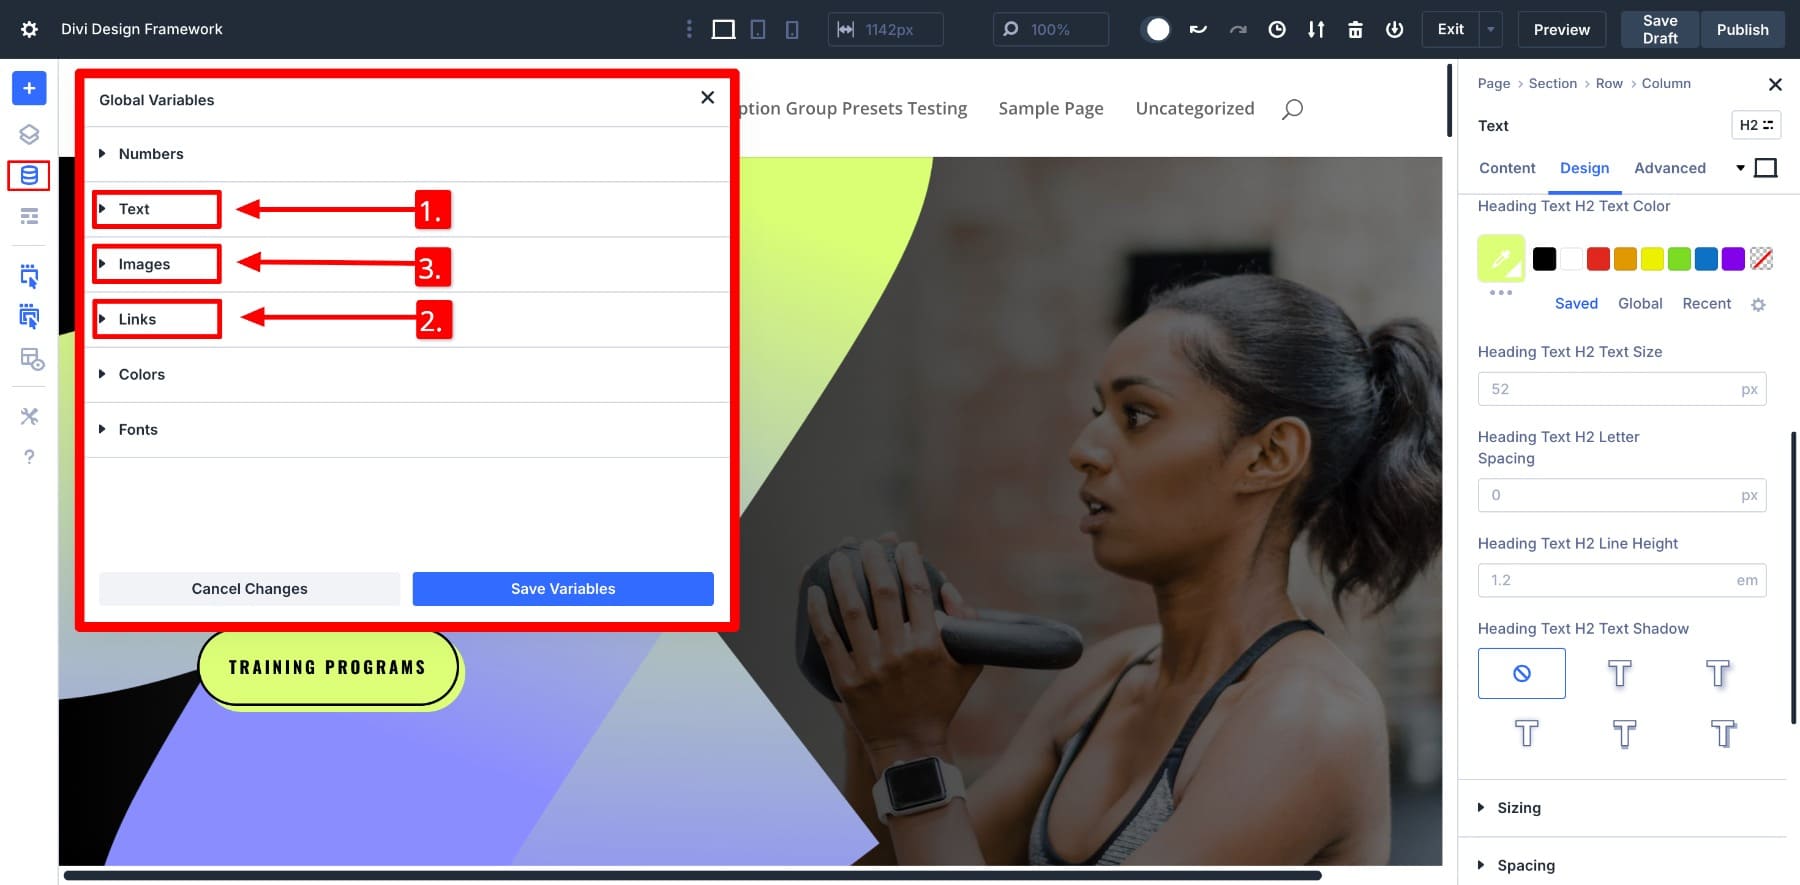
You can save content through the remaining three variables:
- Text: Let’s say your company address appears in the footer, on the contact page, and in the hero section of your homepage. Save it as a Text Variable and select it wherever you want the address to appear.
- Links: Save URLs to your About page, product collections, social profiles, or terms and conditions as Link Variables.
- Images: If you use your brand logo or a background image across multiple pages, save it as an Image Variable. Imagine replacing placeholder images across templates in clicks!
Divi 5 lets you treat text, links, and images as reusable building blocks. These content variables may feel small, but greatly impact speed, accuracy, and long-term maintenance. You save time, reduce errors, and keep your site consistently updated.
3. Create & Save Core Styles With Option Group Presets
Once your Design Variables are in place, your next step is to define your site’s core styling patterns using Option Group Presets. Save commonly used design settings as presets and reuse them across any module.
Here’s how to make the most out of option group presets:
1. Save Presets For Common Styles
Start by saving presets for the settings you use most often, like border radius, background colors, or spacing. Let’s say I always use 40px top padding and 10px bottom margin for testimonials, so I saved those values as a Spacing Preset.
I can instantly apply that spacing to my testimonials (and other modules if I want). Do this for every setting group you consistently reuse: borders, box shadows, button backgrounds, etc., so you can reuse them when building pages.
2. Combine Design Variables With Presets
Next, strengthen your framework by combining Design Variables with Option Group Presets. Let’s say you saved a 6px border radius as a Number Variable and used it while creating your option group preset. If you change the variable later, your presets will also update across the site automatically.
Similarly, you can create fluid typography with a clamp() value for responsive text. Save that inside an H1 Preset and apply it consistently to headings throughout your layout. This combination of presets and variables is where your visual framework really starts to become modular, scalable, and easy to maintain.
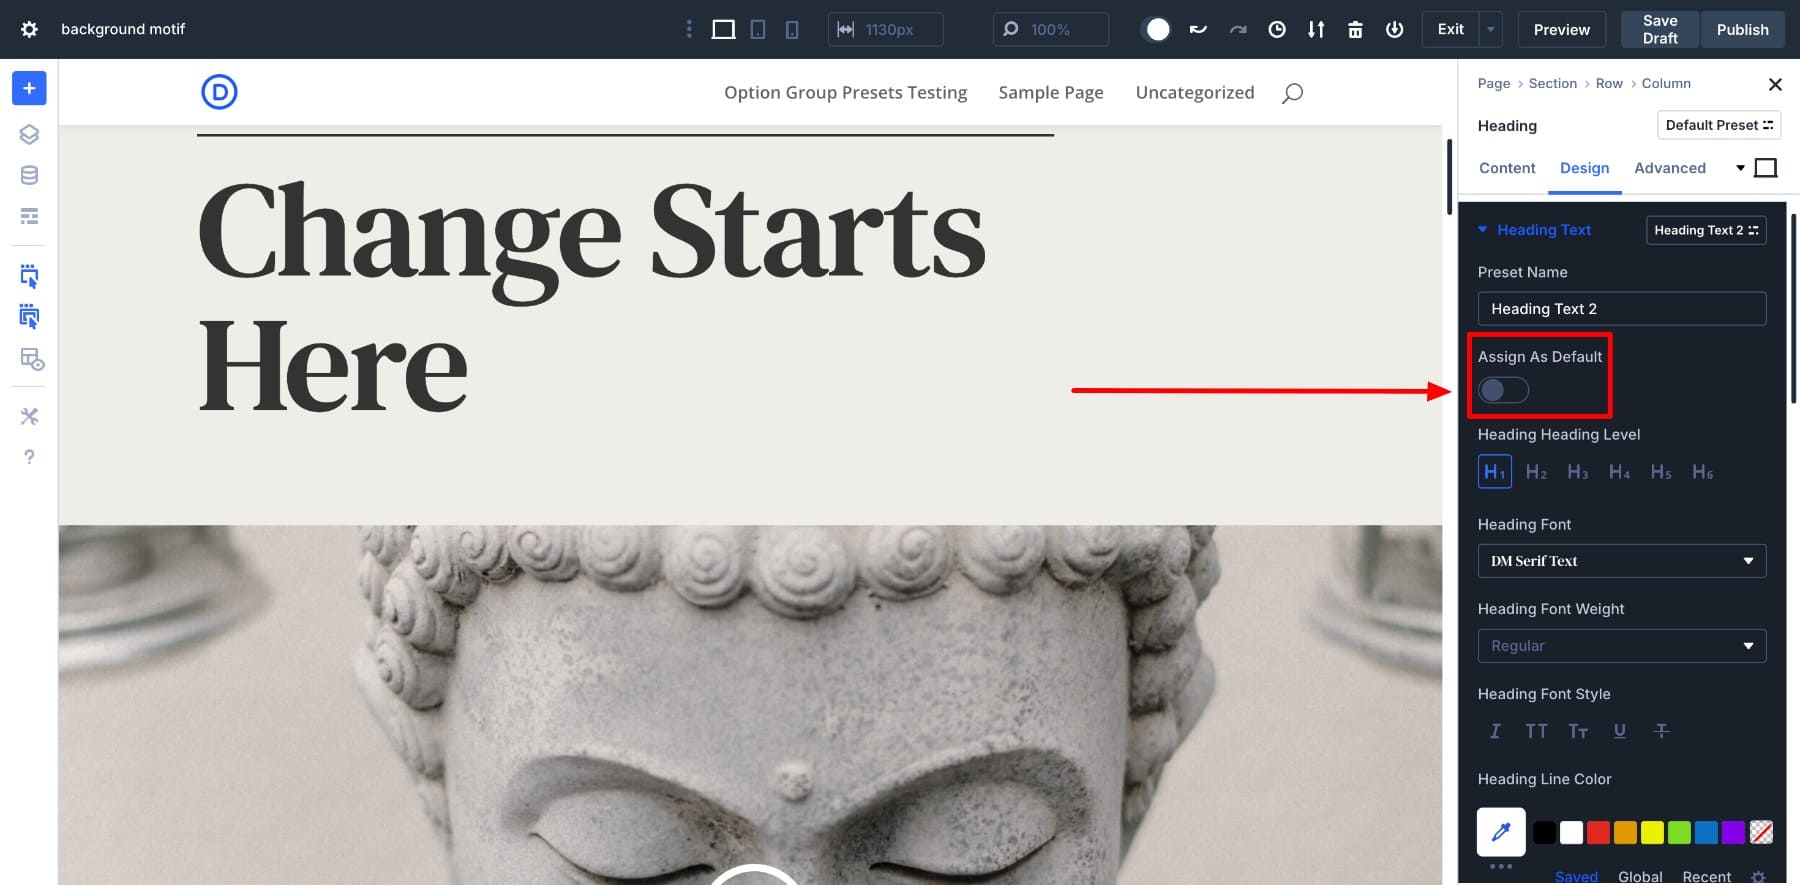
You can also save option group presets as defaults, which means the styles are applied automatically to new modules as well. Apply defaults in your common presets so you don’t even have to select a preset every time 😉.
4. Create Element Presets
Element presets complete your design framework. After saving your preferred styles as presets, you should also save module styles as element presets.
This is especially helpful for modules you use often, such as CTAs, testimonials, blurbs, and contact forms. For example, if you’ve styled a CTA button with your brand color, a soft shadow, and specific padding, you can save that entire design as a preset called Primary Light. Later, apply it instantly to any new button with one click.
Set Element Presets As Defaults
You can also set any Element Preset as the default, so every new module of that type automatically follows the saved design styles. Saving the above Primary Light button preset as default, you’ll see the new button inheriting its style:
Defaults speed up your workflow, and you can still override them if needed. But in most cases, having well-defined presets reduces repetitive work and removes design guesswork. With these three features combined, you follow a preset-based design framework that makes website building completely no-code.
Designing New Pages Based On Your Design Framework
Now that I’ve saved all my preferred design variables, option group presets, and element presets, let’s test our framework.
Building new pages has become a much faster and easier experience. I don’t need to start from scratch or manually restyle every module. Everything I need is already set up.
As you can see, I’ve applied multiple design changes in just a few clicks. Yes, I imported a pre-made Divi layout, but I customized it in seconds with my saved framework in place.
Instead of selecting fonts, adjusting spacing, or tweaking colors manually, I simply applied my saved presets. The button design, text sizes, background styles, and image borders all followed the framework settings I built earlier.
Applying those styles manually to one module might not be a big deal. But when you’re customizing an entire page, the difference is clear. You can notice the ease and speed with which I made all those changes. This is the real benefit of creating a design framework: it speeds up your workflow without sacrificing quality or consistency.
The best part comes while making updates. If my global values ever change, I only need to modify my saved design variables via the Variable Manager. I can also modify my option group and element presets by clicking on the small settings icon.
This is the power Divi 5 brings to you. It lets you create, save, and customize your entire design framework without touching a single line of code.
Building Your No-Code Design Framework Visually
Creating a design framework is no longer just for developers. With the right tools, anyone can do it, even if you’ve never touched code before. As you’ve seen throughout this post, all it takes is a few smart steps to create your very own design system. How? By using Divi 5.
Divi 5 Gives You The Tools To Make It Happen
Divi 5 handles complexity and gives you full control through its advanced features. You can build faster, stay consistent, and make global updates without ever leaving the Visual Builder. Cool, right? But that’s only the tip of the iceberg, and we’re just getting started!
We have many more amazing features lined up for release, and we can’t wait for you to try them. Download the Public Alpha today and build your own design framework without coding restrictions.
👉 Divi 5 is ready to be used on new websites, but we don’t recommend migrating existing ones yet.


I don’t know if this has been addressed in previous posts about Divi 5. I haven’t found an answer to the following question yet: What’s the best way to transfer defined variables, object presets, and element presets to a new WordPress project?
BR Klaus.
… sorry I didn’t mean object but option presets.
Klaus.
The variable manager is fantastic and saves a lot of time. But… How can I export all the variables I’ve defined within the variable manager so I can import and use them in a new DIVI 5 project?
Hey, Luis!
Currently, there is no way to import/export Global Variables, but if your exported layout contains global variables, those in use will be included into the exported JSON file and imported into a new Divi 5 website on JSON import.
How about when you want to remove a preset? It gives an error. I have loads of presets on my test-site since I have tried pages from the library. And they also came in with presets although I said they shouldn’t. So there’s still some bug in importing and in deleting presets.